When you click on links to various merchants on this site and make a purchase, this can result in this site earning a commission. Affiliate programs and affiliations include, but are not limited to, the eBay Partner Network.
followed all the same steps. I did use my pneumatic angle grinder on a soft blue disc to remove and smooth all the tabs off.
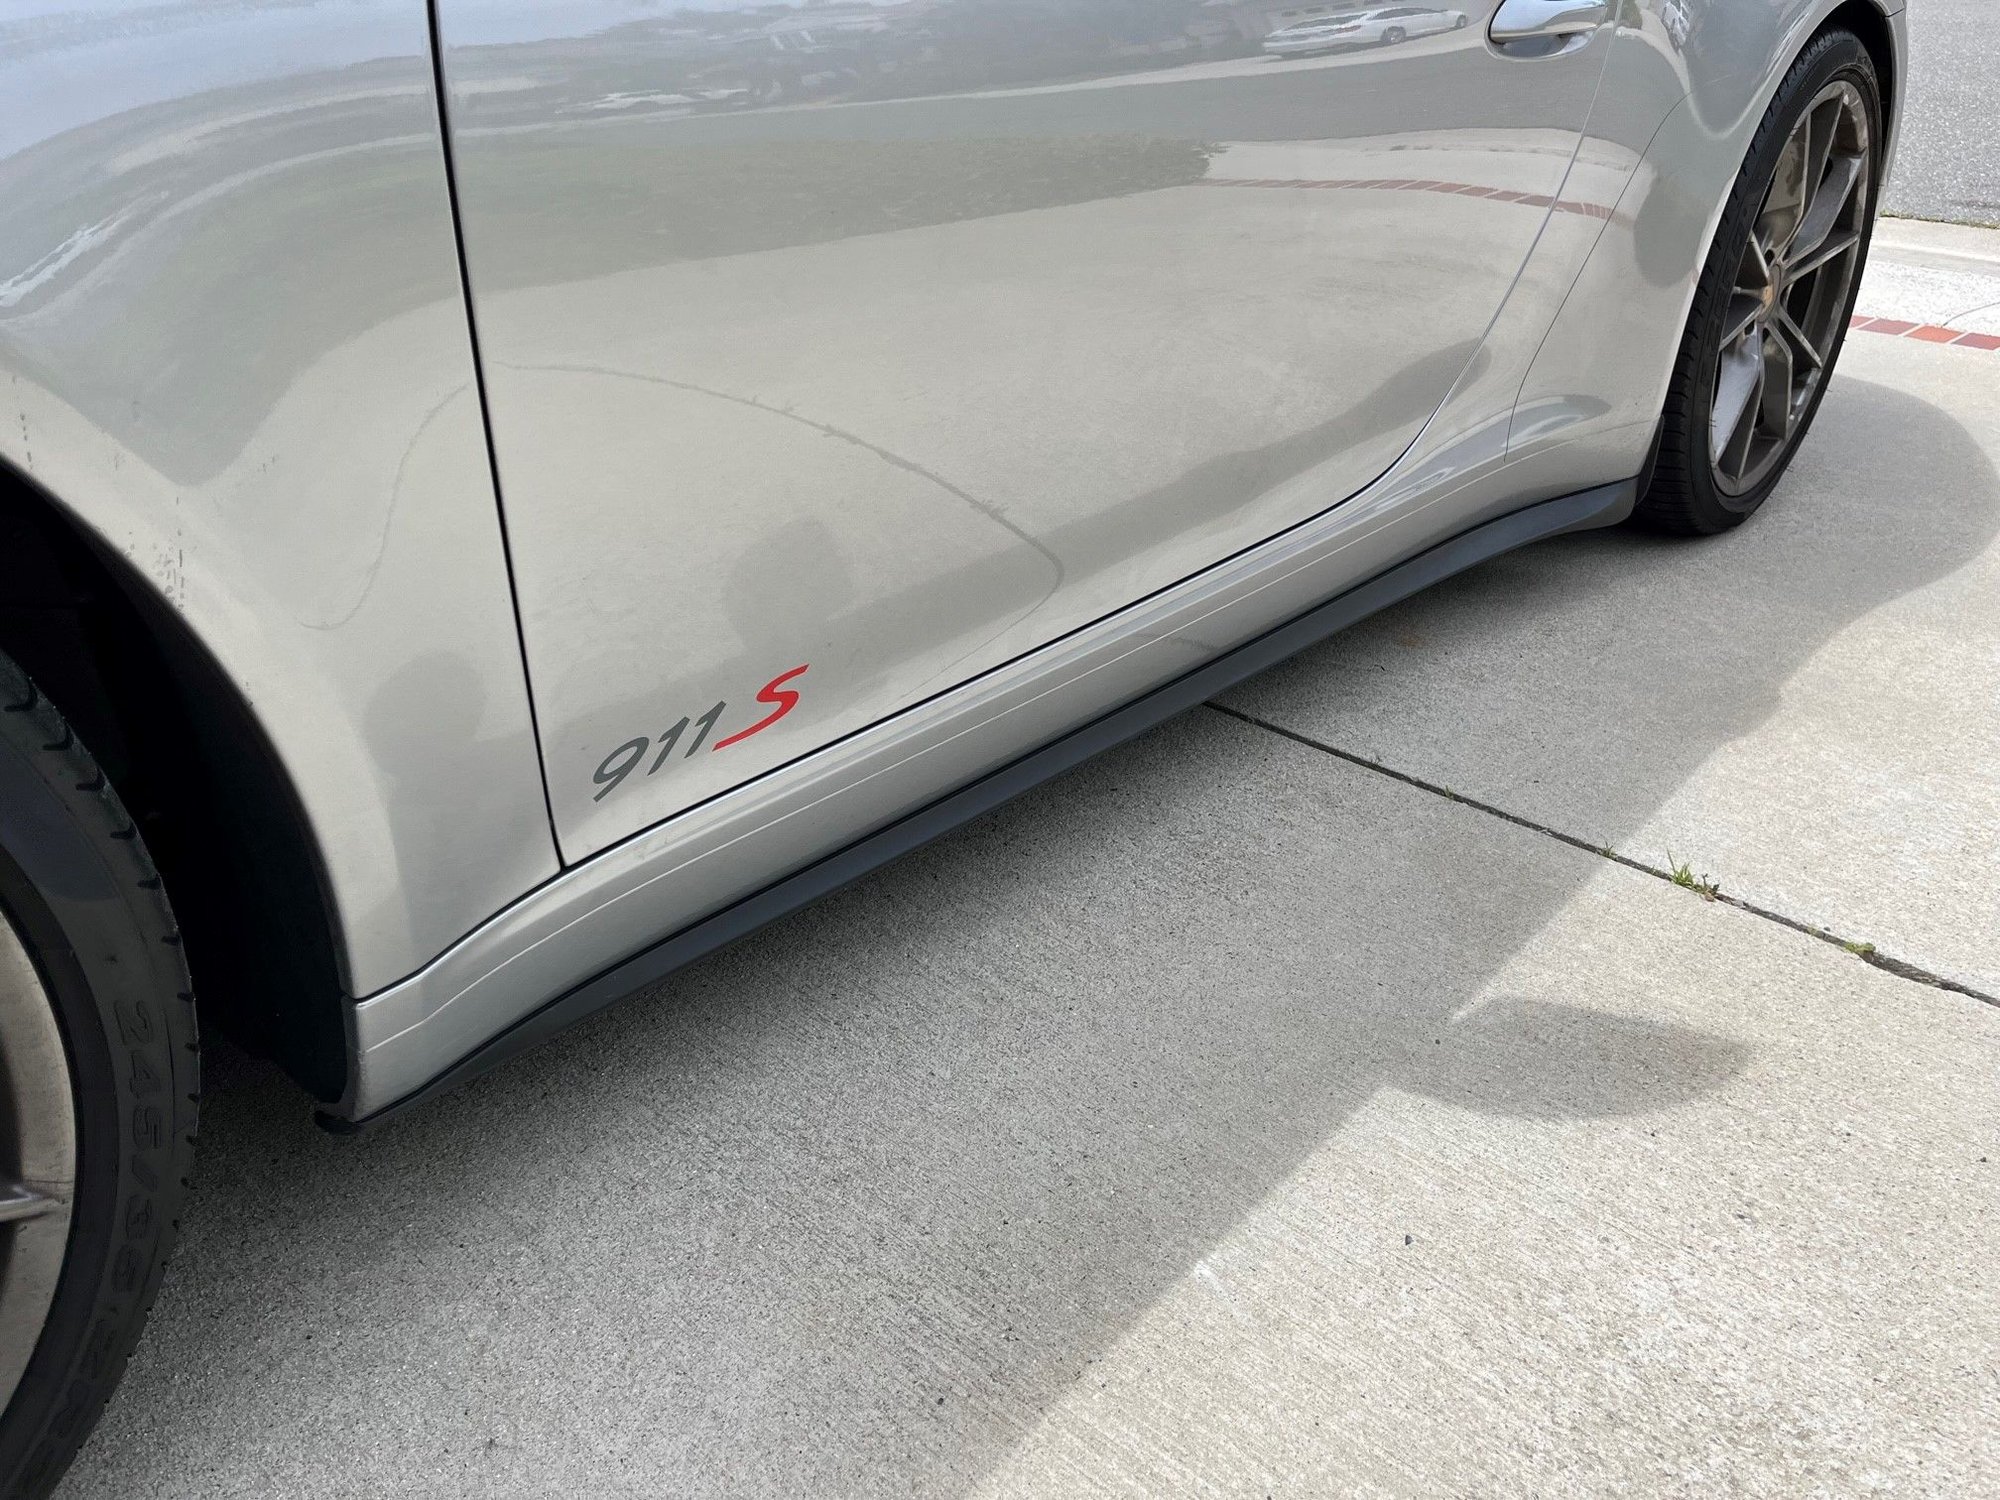
if you want a solution to the �gap� here it is.
I went on Amazon and got this
L Trimmed the skirts all down smooth so it would have good even contact on the back. Started at one end with adhesive stuck on. Once you get it started just get the rest pressed on smooth and even with the red tape on still.
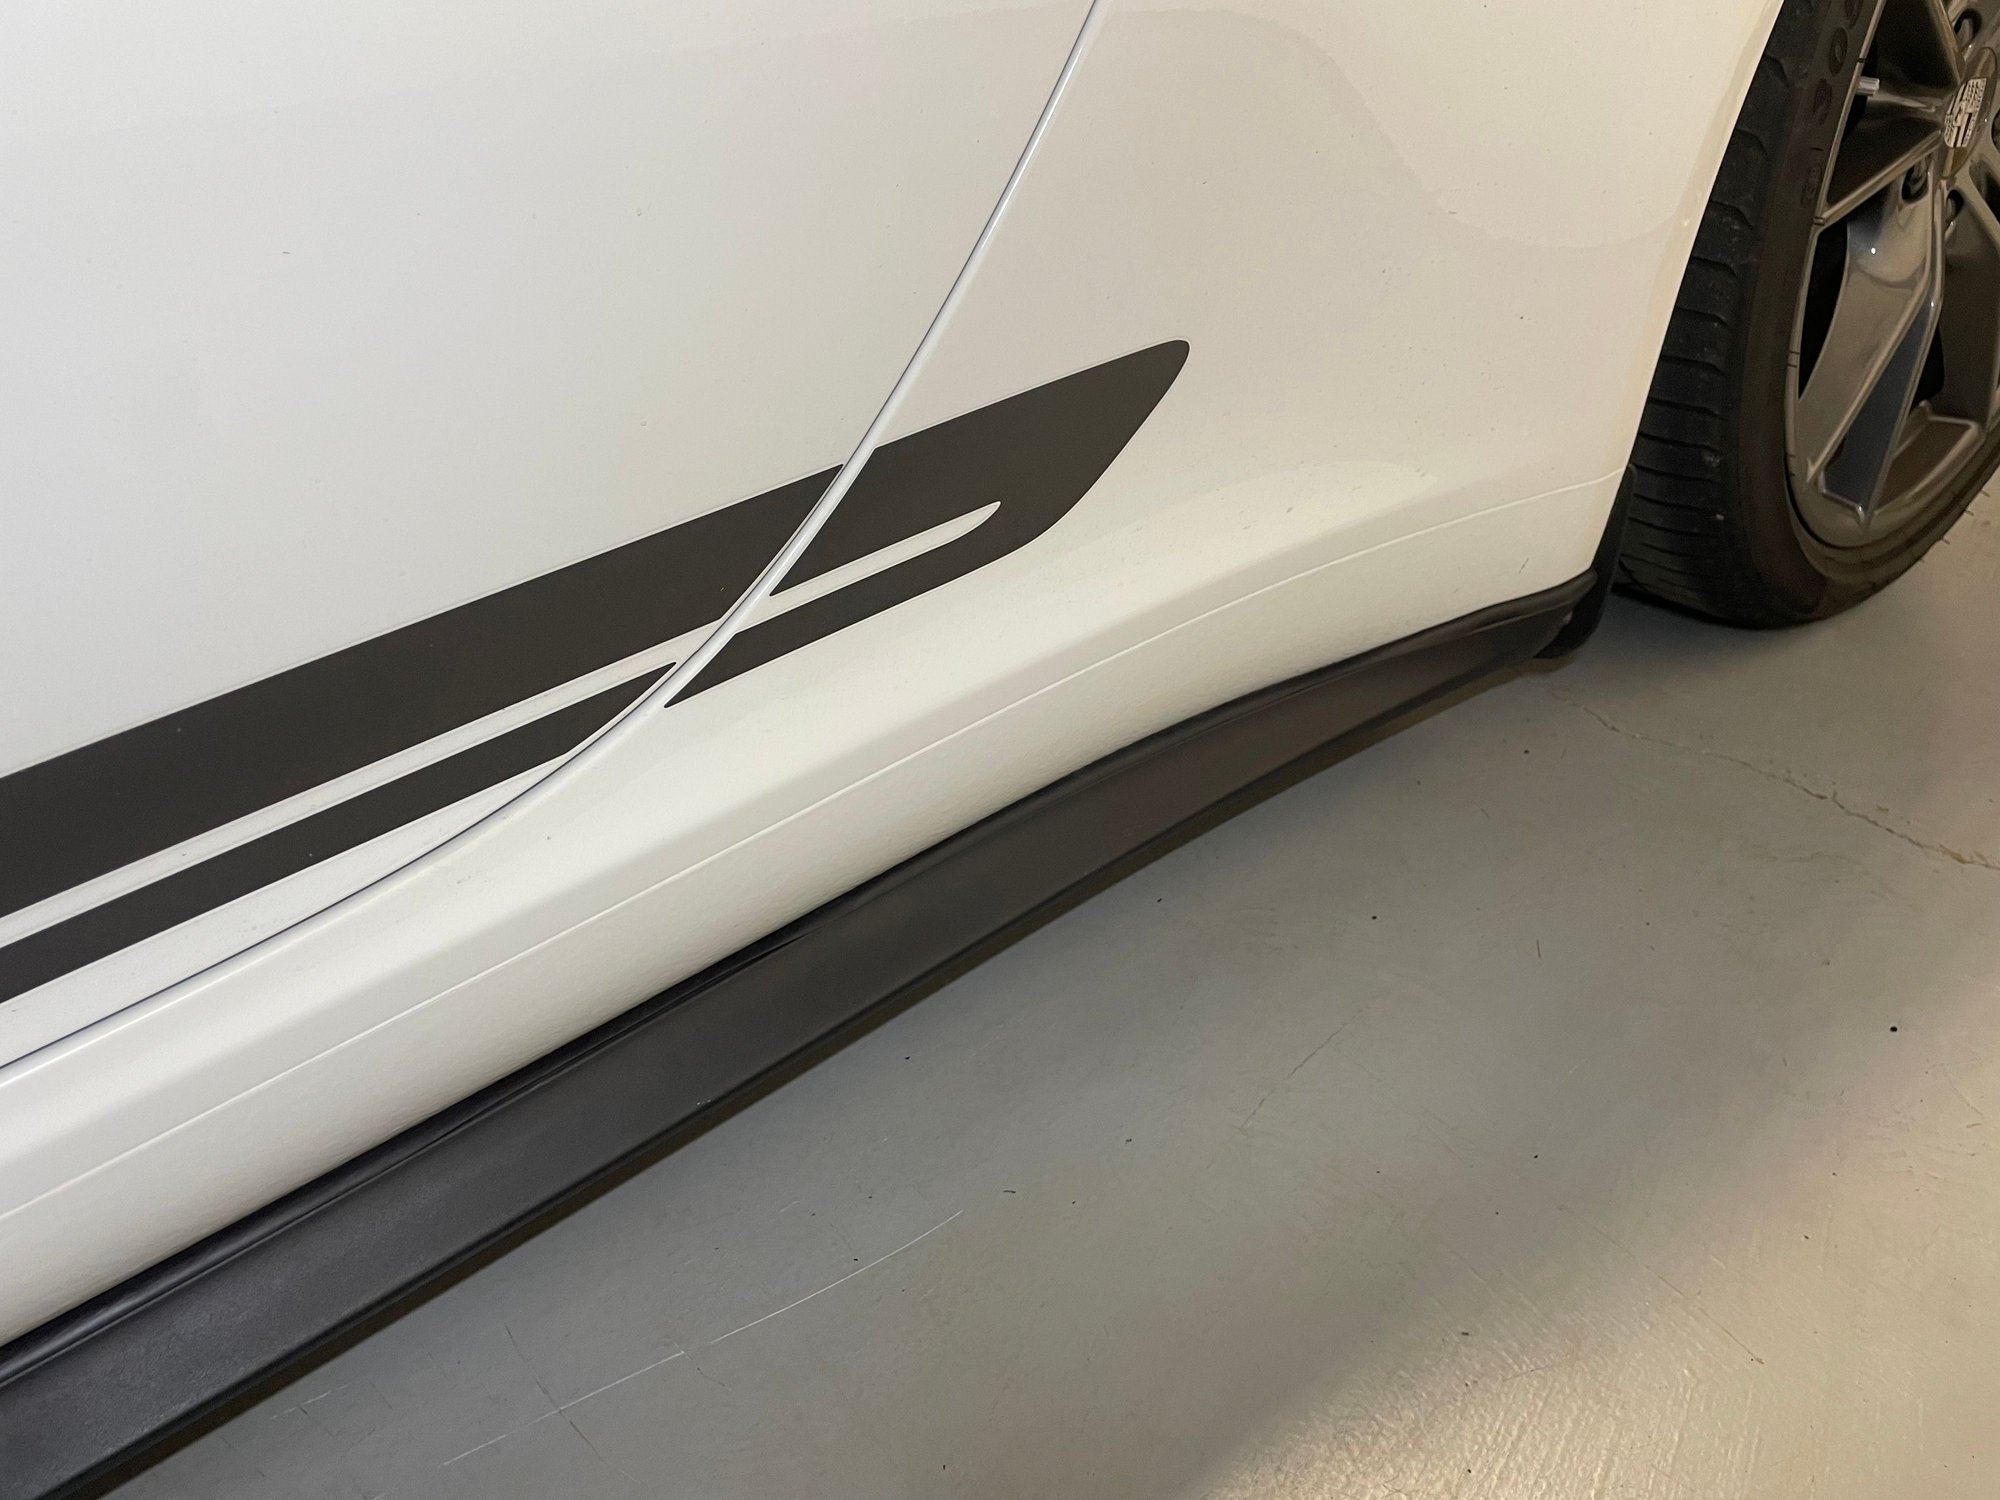
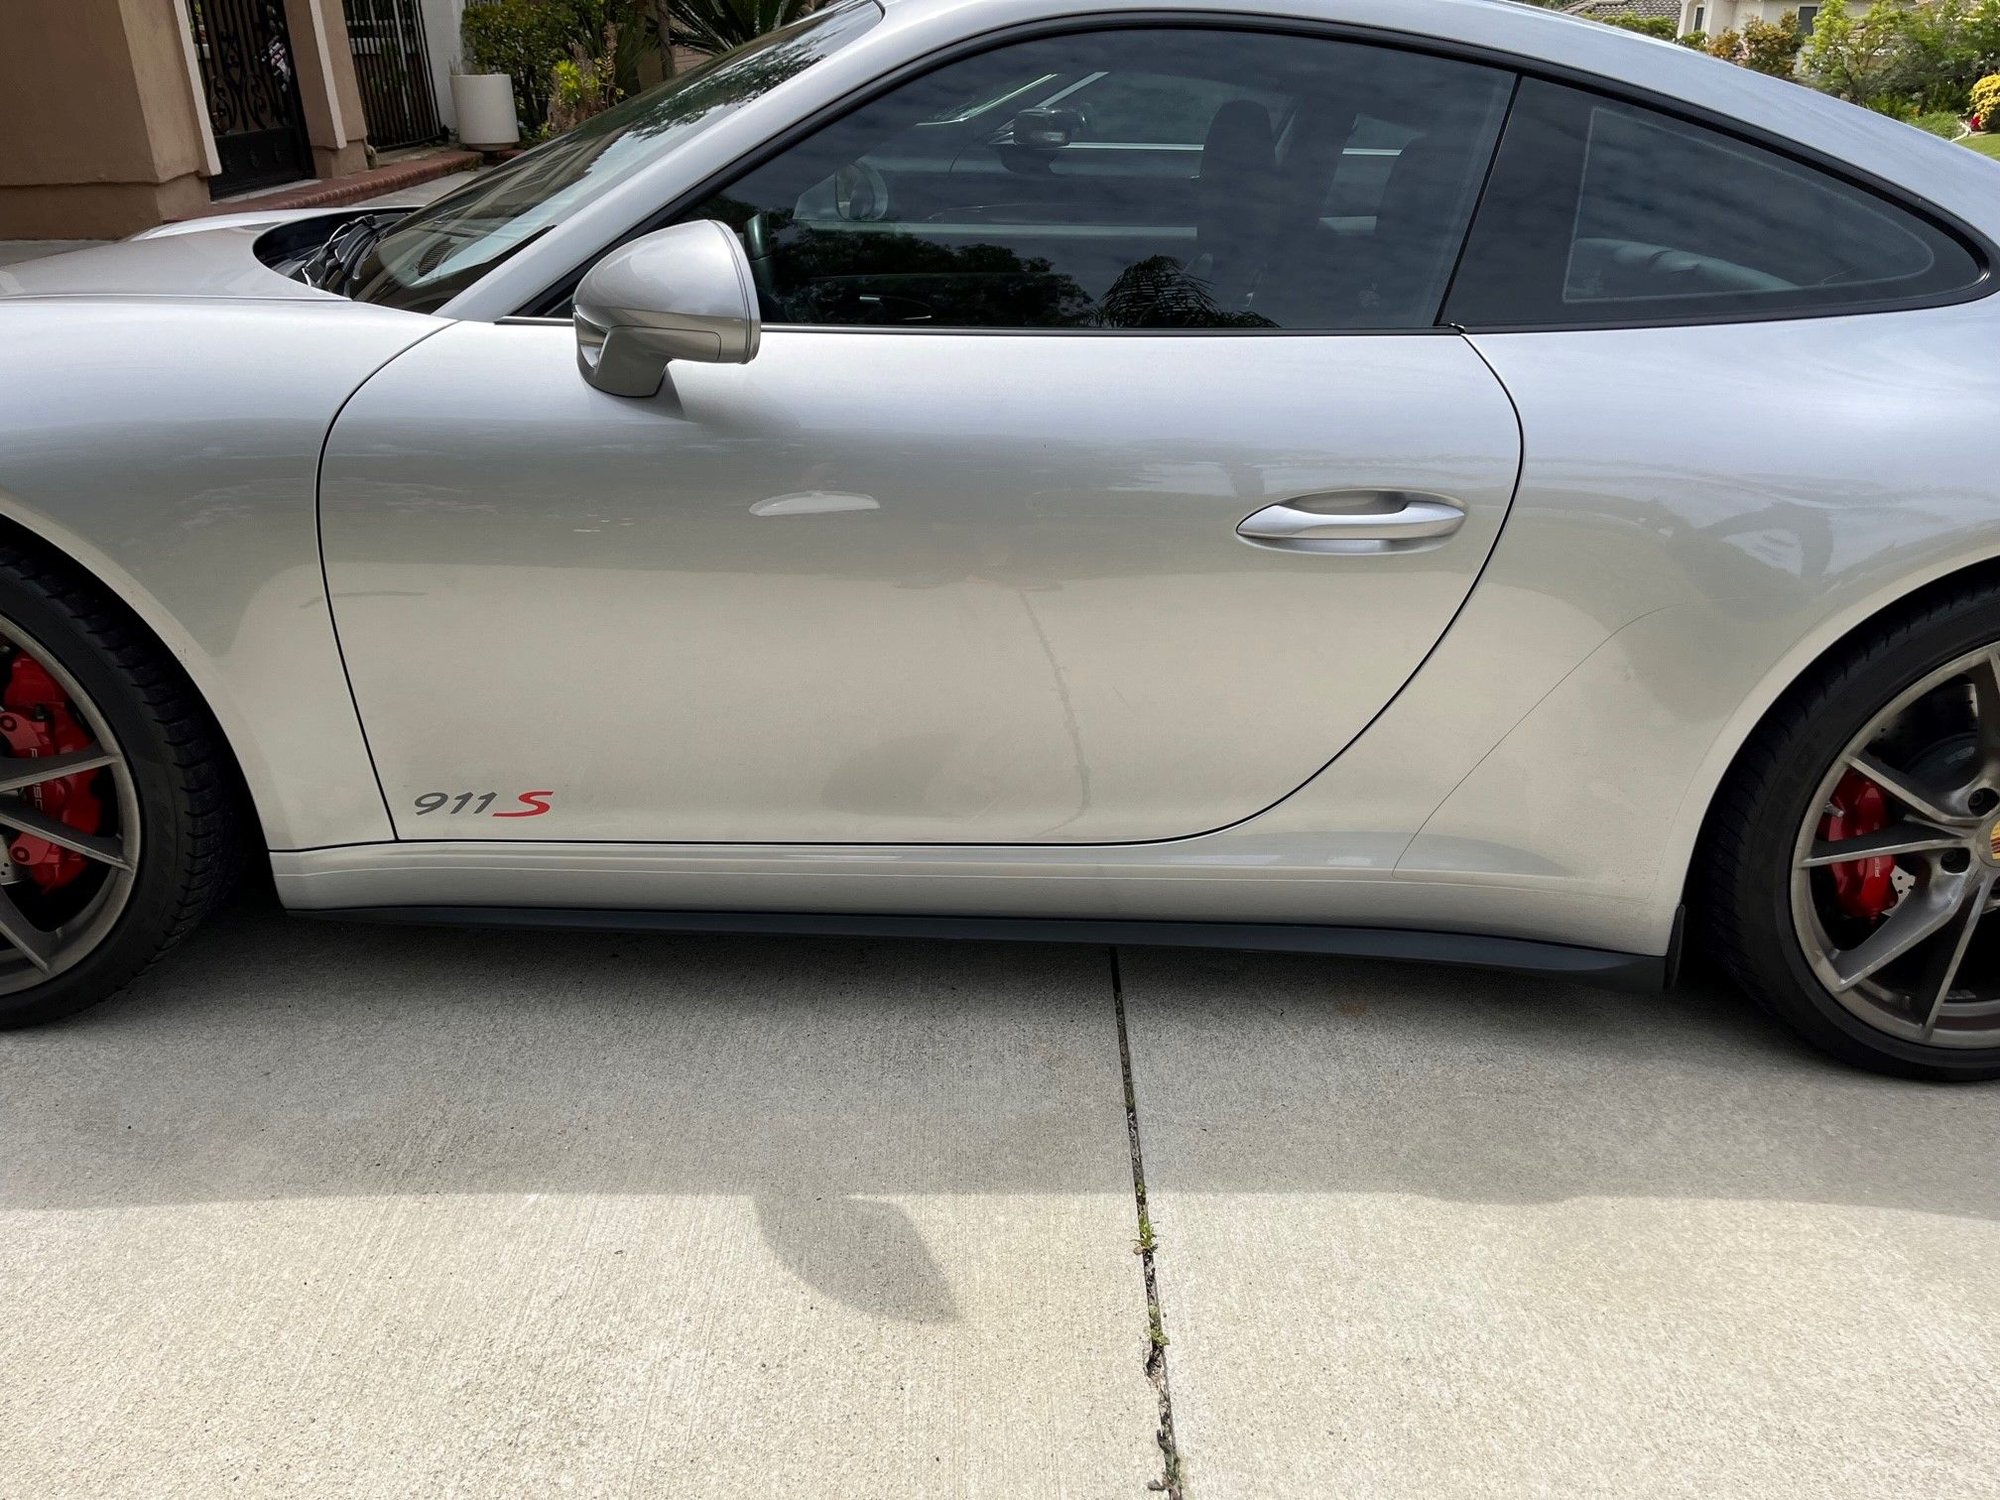
Once it�s on, pull the tape to secure it. All applied ready to remove tape Back on the car, completely eliminated the gap Very happy with the results now
looks really good. This is convincing me to go this direction with my white T.
I actually prefer the look of the targa one, a little more subtle, fits the lines of the Carrera a little better, but if you like the aggressiveness, 991.1 gt3rs is pretty good. There is a slight gap towards the rear as stated and I can get a close up that shows that.
Is that 991.1 Targa or 991.2 Targa? Or do they share the same part numbers?
Can anyone provide the part number for the 991.1/991.2 Targa 4S or the GTS? I am assuming they all use the same part number. Want to go settle vs the GT3RS one.
Can anyone provide the part number for the 991.1/991.2 Targa 4S or the GTS? I am assuming they all use the same part number. Want to go settle vs the GT3RS one.
Thanks.
991-504-595-03-1E0, left and 991-504-596-03-1E0 for right side. They are linked to where I ordered mine from as it was little better deal than suncoast at the time.
991-504-595-03-1E0, left and 991-504-596-03-1E0 for right side. They are linked to where I ordered mine from as it was little better deal than suncoast at the time.
Thanks. Can you confirm this is the less aggressive option compared to the one OP initially started the thread with? Thanks a lot for your help.
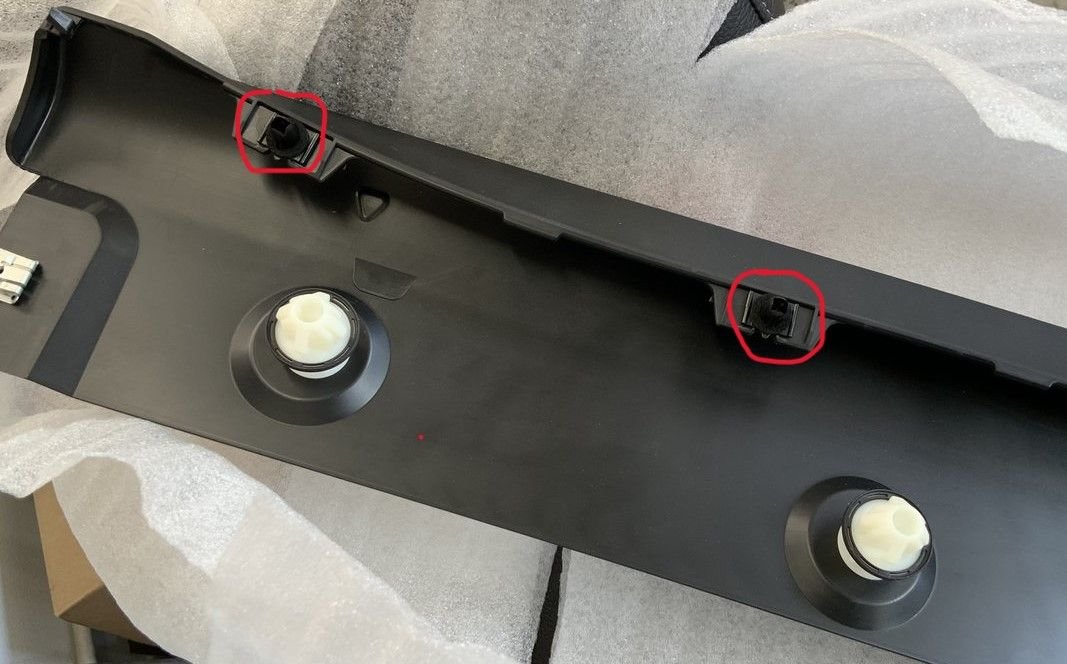
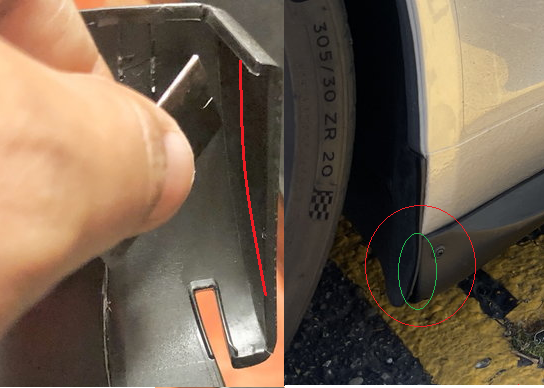
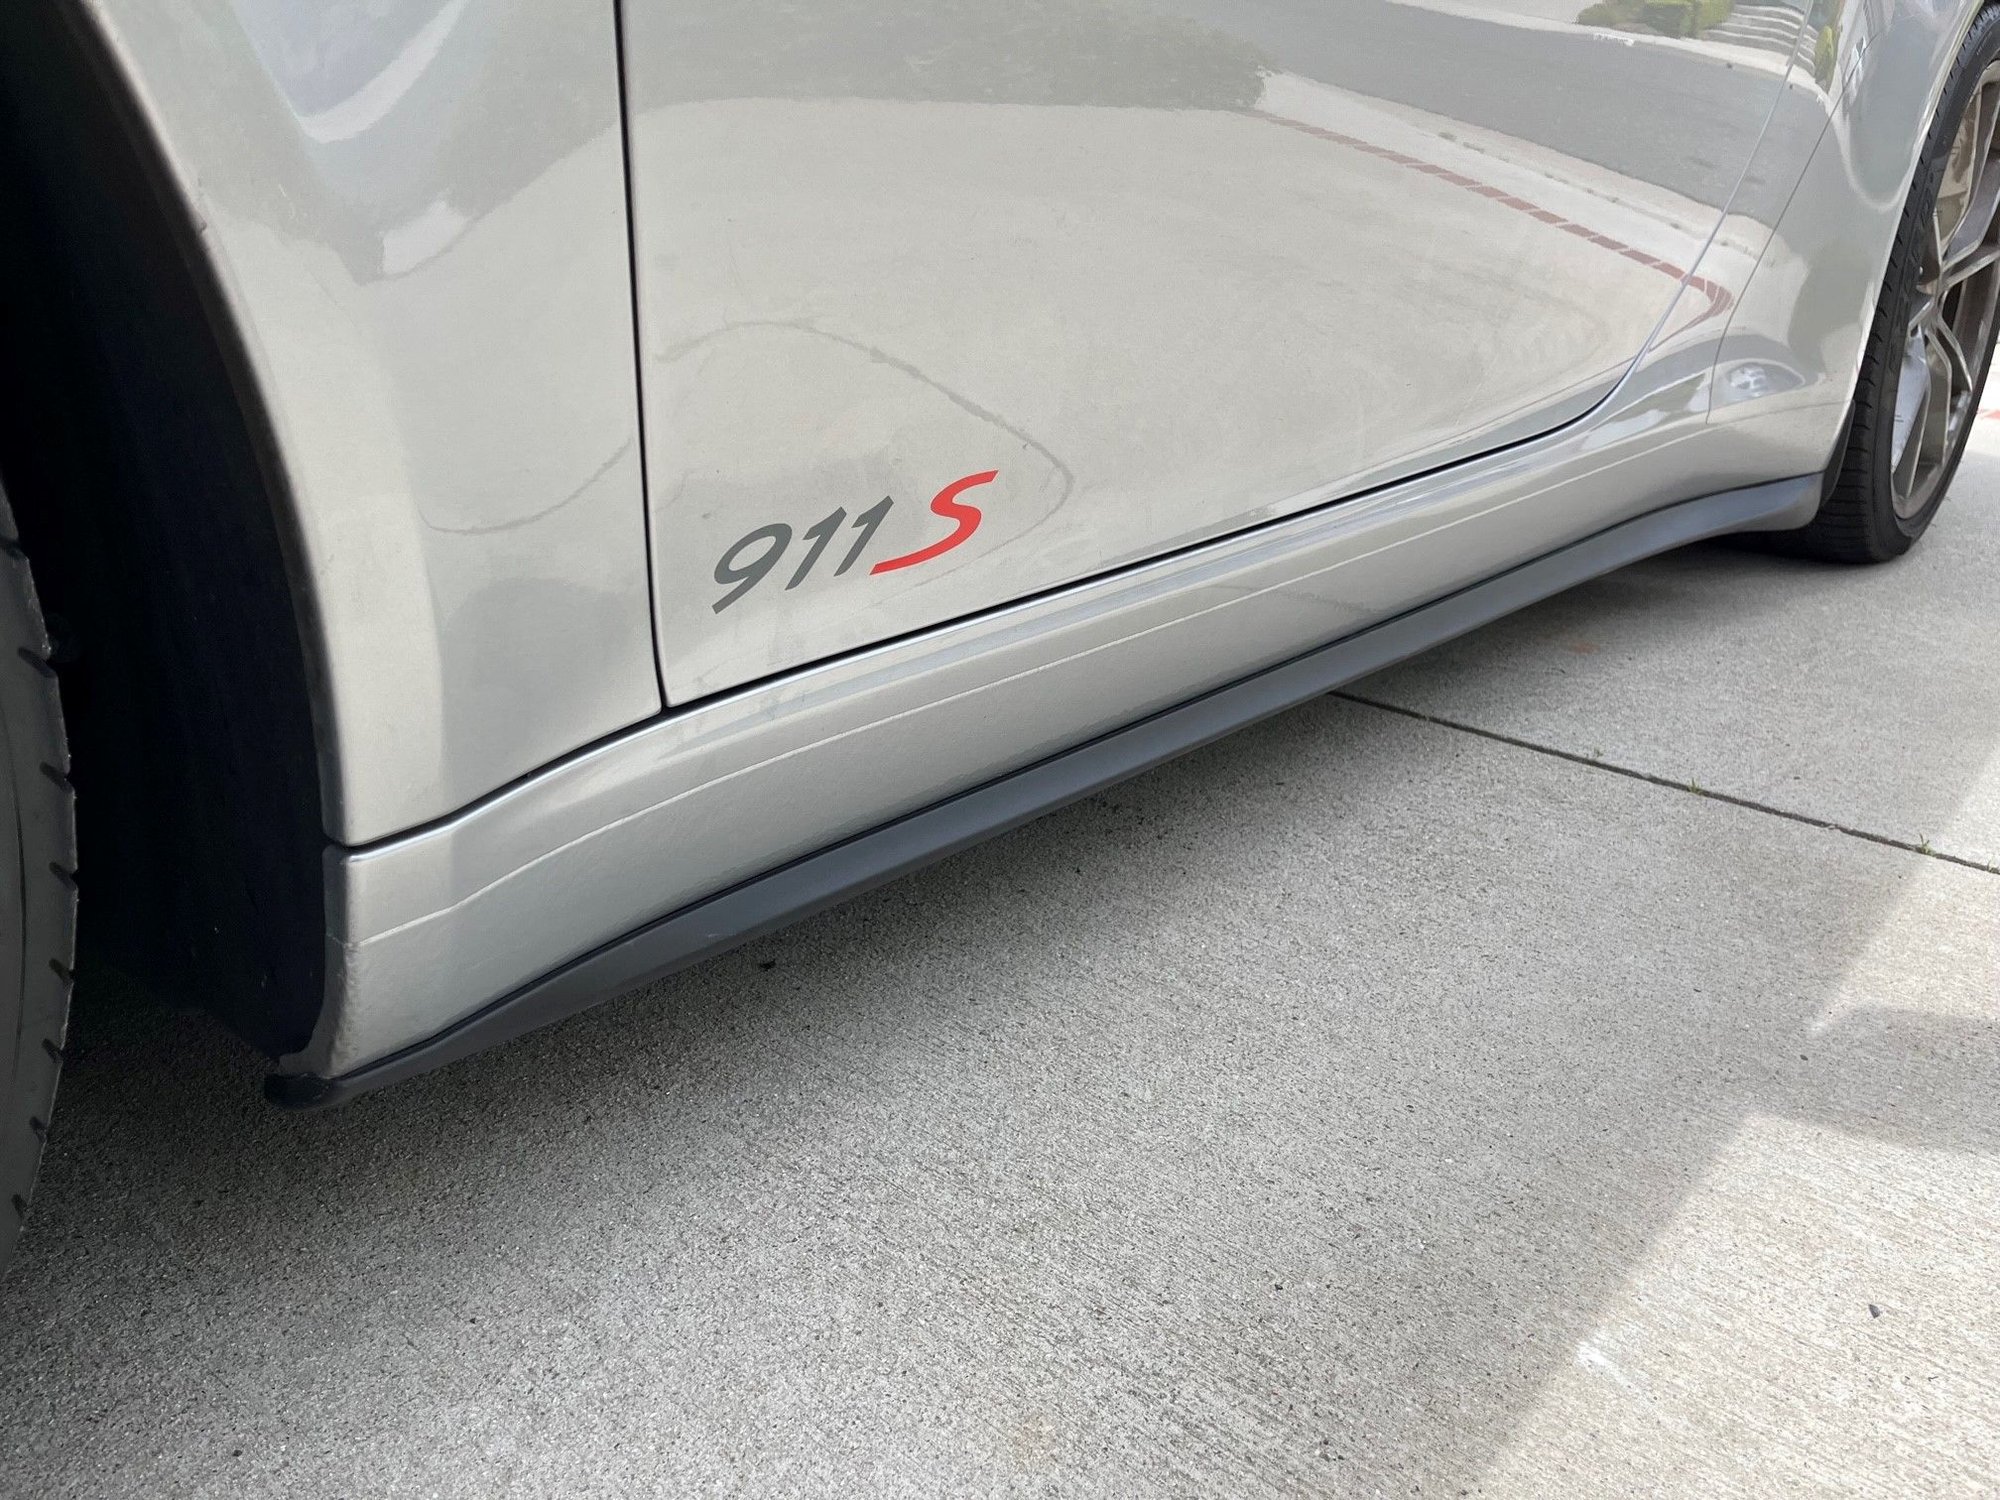
Before I start, question I have for all of you. Looking at the GTS sideskirts and seeing how it installs on the GTS, other than not wanting to create holes on the car, was there a reason not to just use the outer push clips (see red circles below) that seem to be designed to secure the outside of the skirt tightly with the body? It seems like they would line by on the underside of the rocker panel (see area marked in green below) and why would it matter just making holes there so it clips in as I assume it's the same on the GTS and 4S. In your DIy everyone trimmed these off but I think their main purpose is to tightly secure the outer edges of the skirt where it meets the underbody. Would you agree?
Before I start, question I have for all of you. Looking at the GTS sideskirts and seeing how it installs on the GTS, other than not wanting to create holes on the car, was there a reason not to just use the outer push clips (see red circles below) that seem to be designed to secure the outside of the skirt tightly with the body? It seems like they would line by on the underside of the rocker panel (see area marked in green below) and why would it matter just making holes there so it clips in as I assume it's the same on the GTS and 4S. In your DIy everyone trimmed these off but I think their main purpose is to tightly secure the outer edges of the skirt where it meets the underbody. Would you agree?
Sorry about using some of your pictures
Look forward to your answers. Thanks.
So couple things, the part of the car in the green circle is complete different on the widebody cars these skirts are designed for. The lower rocker panel of wide body cars are completely different and do not curve around like shown in your pic, take a look at this video below from a wide body to see how different the body is there
So on the narrow body cars, those tabs are trimmed off because that edge is just going to rest on side of body in the area you circled in green. Here is a very crude image showing a cross section to try and explain how they are different. The blue part is the skirt, the area in the red circle is where you are talking about with those tabs that get cut off.
When I did mine, on first go around I used a Dremel tool to remove the tabs, and found that my cuts were not as clean/straight. So after the first one I switched to using a sharp box cutter blade and was able to make nice smooth cuts. I ended up buying another left side skirt after installing them because you could tell the difference in the one that i cut with the dremel vs the blade and redoing it. You want that cut line to be as smooth and straight as possible.
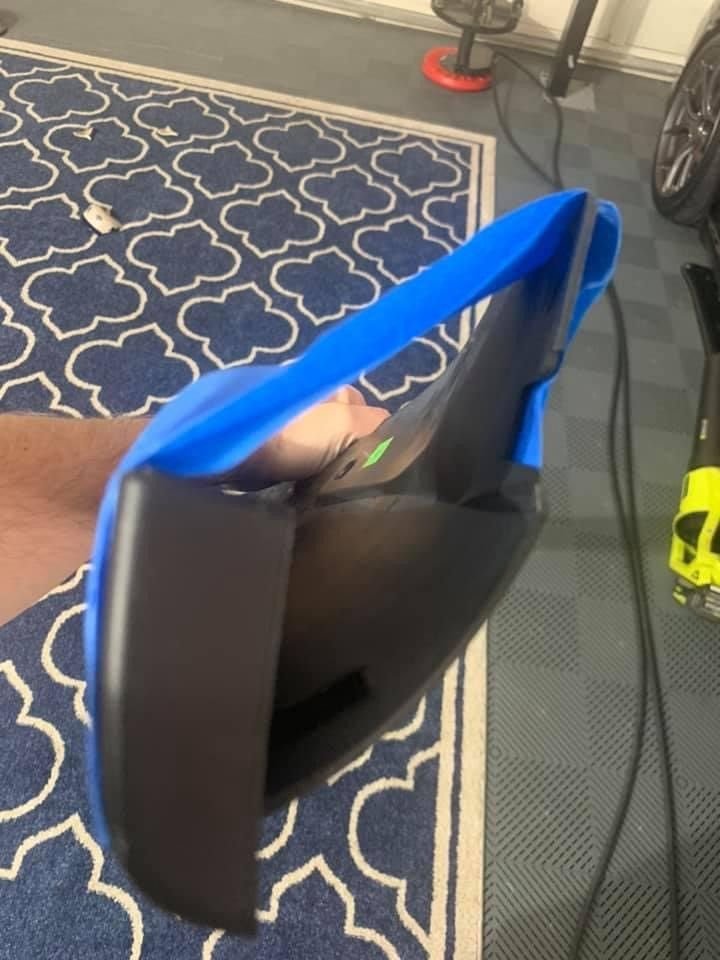
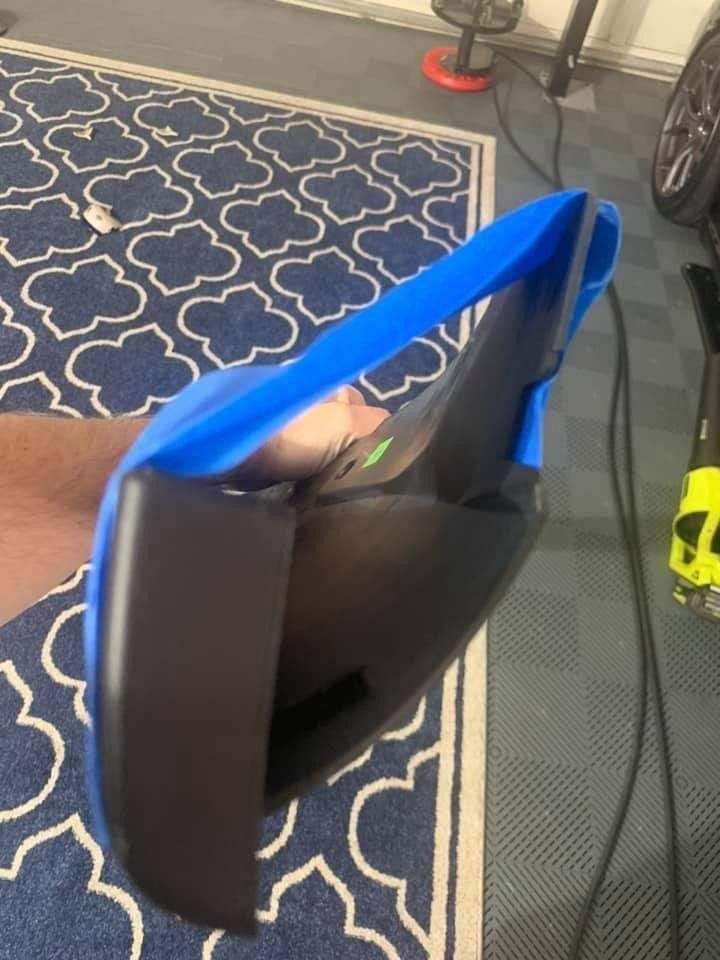
One tip that I found when doing mine from a facebook group user who had did this that I had never seen mentioned before here was to run hot water over the skirts for a while to make them softer and pliable. Dry it off and while its still pliable, take some painters tape and pull the ends of it together like in this image from the OP i saw this from. Leave it this way for 24hrs or so and when you remove the tape it will have more of a bend than it did before, this will help it stay formed to the body and keep the gap minimal. The 2nd image is after you take the tape off it will relax back a bit but still have more curve to it than it did out of box.
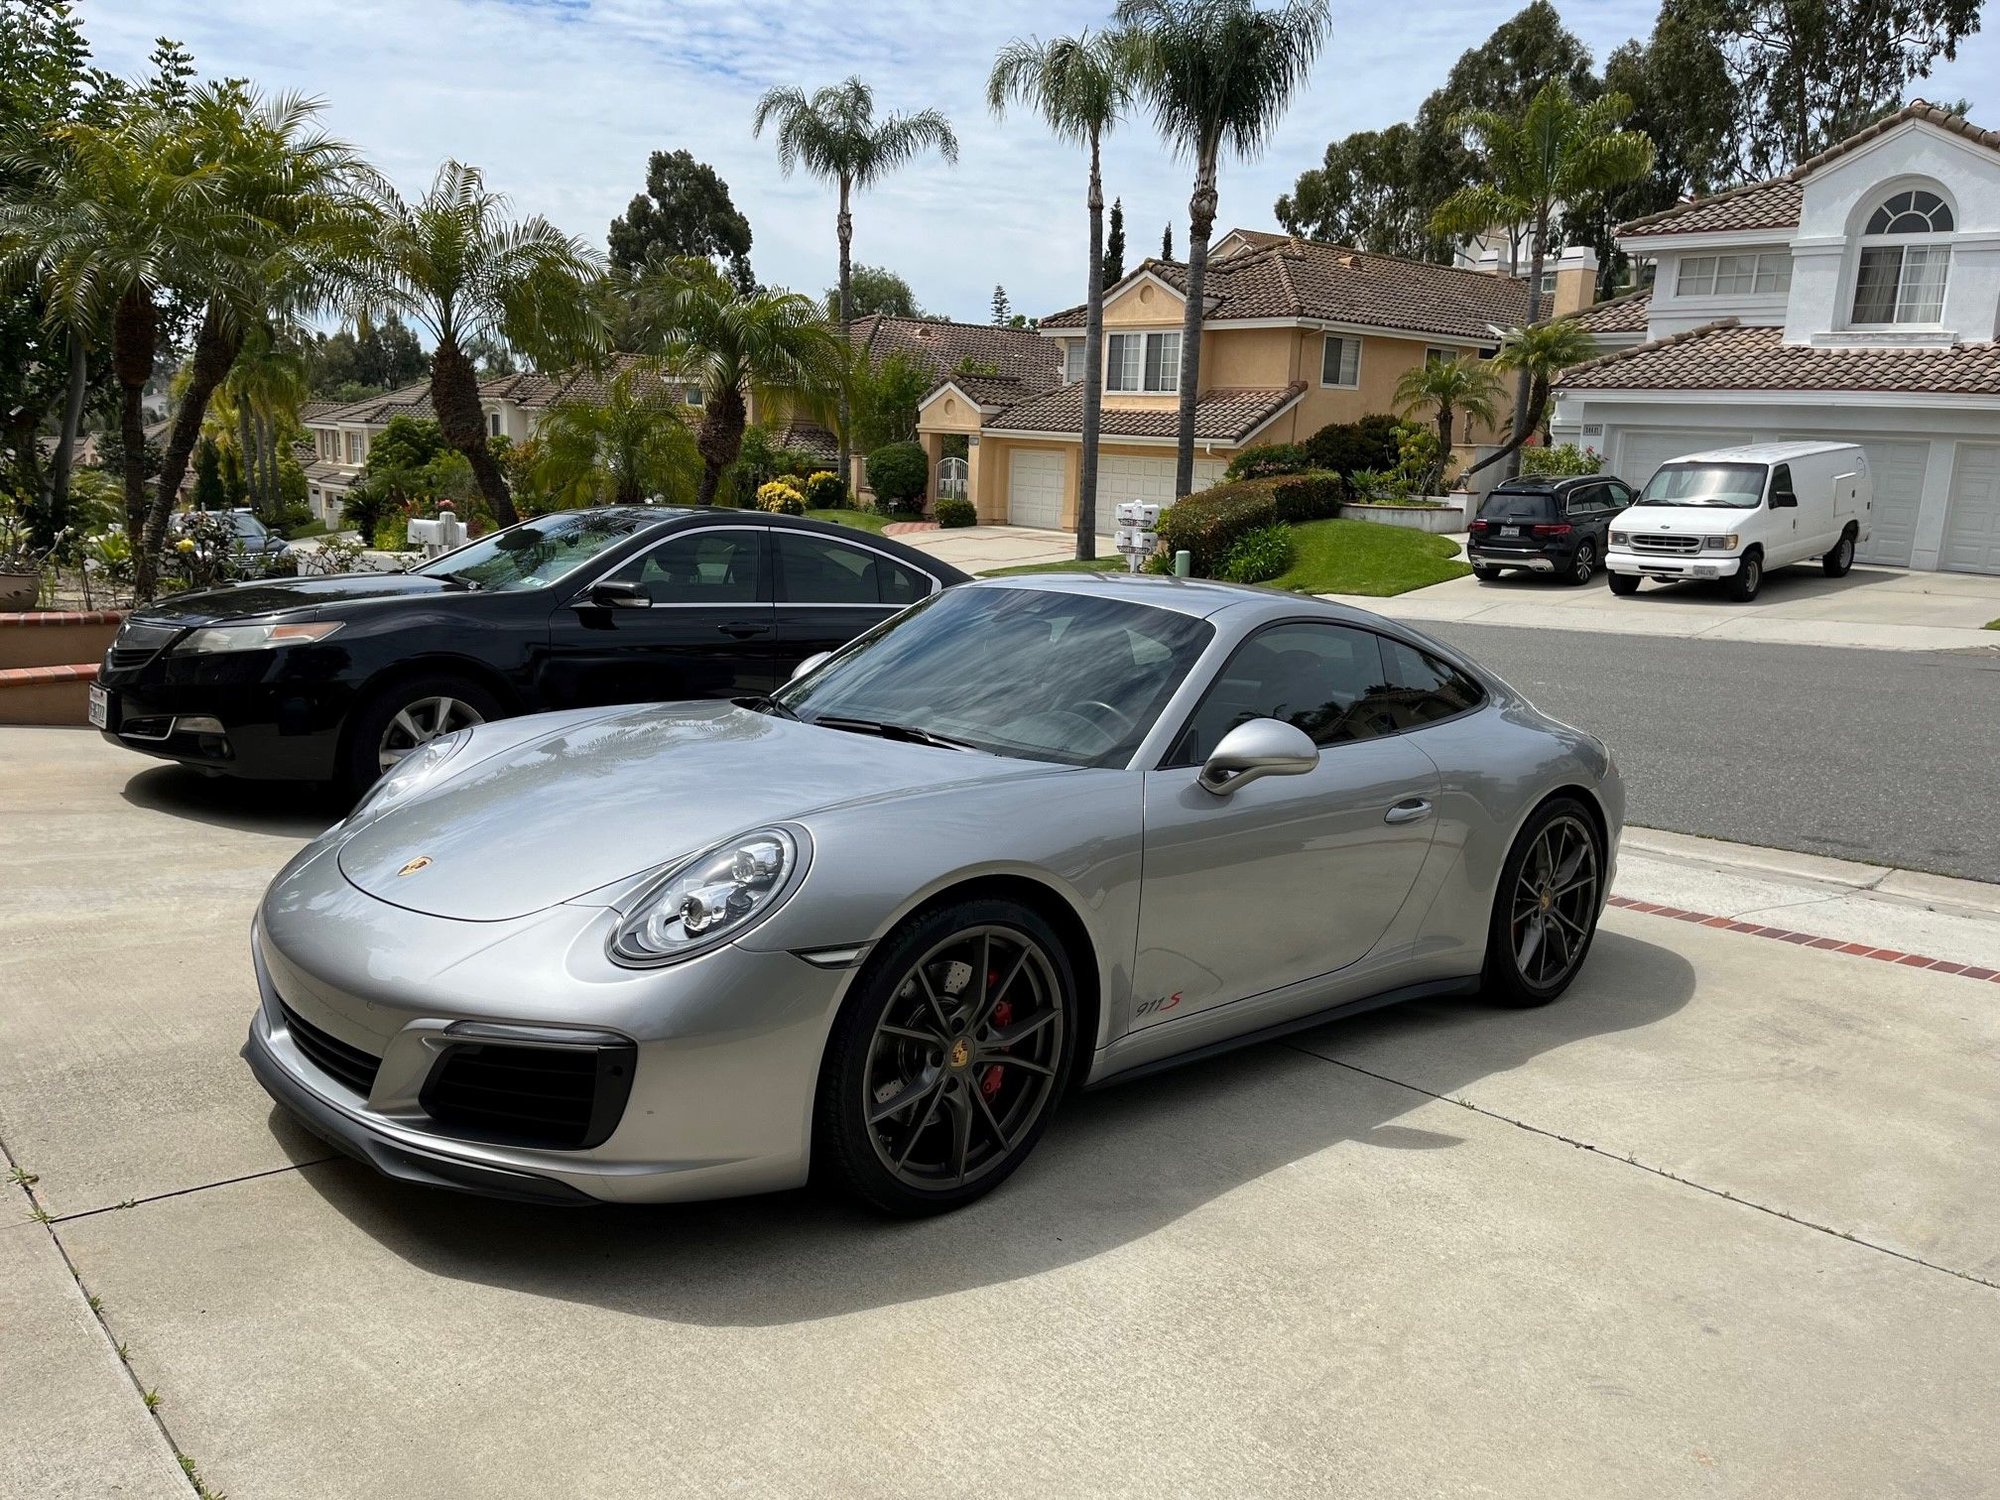
Take your time, early in the process of mine I got frustrated thinking there is no way this is going to come out good and that it was way harder than people made it out to be, but it really isn't. Just keep making small adjustments until it fits the way you link. I also ended up buying new mud flaps because the old ones were not sitting tight to the body which made for a visible gap. But I love them and you could hardly tell they are not OEM and it totally transformed how the car looks. It's been almost one year now since I did it and you can see it still looks great.
Last edited by Ahmad310; 04-10-2024 at 10:38 AM.
Reason: update
Thanks for taking the time for such a detailed response. Much appreciated.
After seeing the video it makes total sense. That section for the tabs to go in on the widebody is flat and protruding out more than the narrow body which is curved in that section so no way it will clip on there. My assumption was that the widebody has the same profile but with holes. The video totally clears that up. The tabs have to go. Thanks.
Thanks for the tip on using a blade vs dremel. What did you use for widening the holes on the skirt as some folks have shown? Would need a dremel or some sort of a rounded tool for that and it's on the underside anyways so doesn't matter how it looks.
Interesting tip on making it softer and curved in a direction. I assume this is the last step before install, after all the cuts have been made and the skirt is ready to go on the car?
By the way, did you go with the less aggressive GTS ones or the GT3 RS? I prefer the GTS one.
Looking at the profile of the narrow vs wide body on the skirt mounting section, I am surprised it fits on the narrow body given that going from the rocker panel side to underside is rounded compared to the wide body where it�s almost a right angled edge which is a lot easier to get flush with no gap.
Thanks again.
Originally Posted by Ahmad310
So couple things, the part of the car in the green circle is complete different on the widebody cars these skirts are designed for. The lower rocker panel of wide body cars are completely different and do not curve around like shown in your pic, take a look at this video below from a wide body to see how different the body is there https://youtu.be/m-4ZlTX89RE?t=213
So on the narrow body cars, those tabs are trimmed off because that edge is just going to rest on side of body in the area you circled in green. Here is a very crude image showing a cross section to try and explain how they are different. The blue part is the skirt, the area in the red circle is where you are talking about with those tabs that get cut off.
When I did mine, on first go around I used a Dremel tool to remove the tabs, and found that my cuts were not as clean/straight. So after the first one I switched to using a sharp box cutter blade and was able to make nice smooth cuts. I ended up buying another left side skirt after installing them because you could tell the difference in the one that i cut with the dremel vs the blade and redoing it. You want that cut line to be as smooth and straight as possible.
One tip that I found when doing mine from a facebook group user who had did this that I had never seen mentioned before here was to run hot water over the skirts for a while to make them softer and pliable. Dry it off and while its still pliable, take some painters tape and pull the ends of it together like in this image from the OP i saw this from. Leave it this way for 24hrs or so and when you remove the tape it will have more of a bend than it did before, this will help it stay formed to the body and keep the gap minimal. The 2nd image is after you take the tape off it will relax back a bit but still have more curve to it than it did out of box.
Take your time, early in the process of mine I got frustrated thinking there is no way this is going to come out good and that it was way harder than people made it out to be, but it really isn't. Just keep making small adjustments until it fits the way you link. I also ended up buying new mud flaps because the old ones were not sitting tight to the body which made for a visible gap. But I love them and you could hardly tell they are not OEM and it totally transformed how the car looks. It's been almost one year now since I did it and you can see it still looks great.
Thanks for taking the time for such a detailed response. Much appreciated.
After seeing the video it makes total sense. That section for the tabs to go in on the widebody is flat and protruding out more than the narrow body which is curved in that section so no way it will clip on there. My assumption was that the widebody has the same profile but with holes. The video totally clears that up. The tabs have to go. Thanks.
Thanks for the tip on using a blade vs dremel. What did you use for widening the holes on the skirt as some folks have shown? Would need a dremel or some sort of a rounded tool for that and it's on the underside anyways so doesn't matter how it looks.
Interesting tip on making it softer and curved in a direction. I assume this is the last step before install, after all the cuts have been made and the skirt is ready to go on the car?
By the way, did you go with the less aggressive GTS ones or the GT3 RS? I prefer the GTS one.
Thanks again.
Mine are the GTS skirts.
For my install I pretty much followed exactly as @devtec excellently posted in this post. I put them on where they did line up and then using a silver marker to mark where they needed to be enlarged. I did use the dremel for that part as its fast and easy. Better to take of little at a time and test fit and enlarge more if needed.
I did the hot water molding before I cut anything but it would not hurt anything to do it later, it will give you the same result. For that, all i did was was put the wide end of the skirt (the rear) in the sink and ran hot tap water on the inside of it for about 5min then wrapped tape all around it. Once you get to test fitting it, you will be able to see how the little bit of added curve from the water will help keep it close to the car.
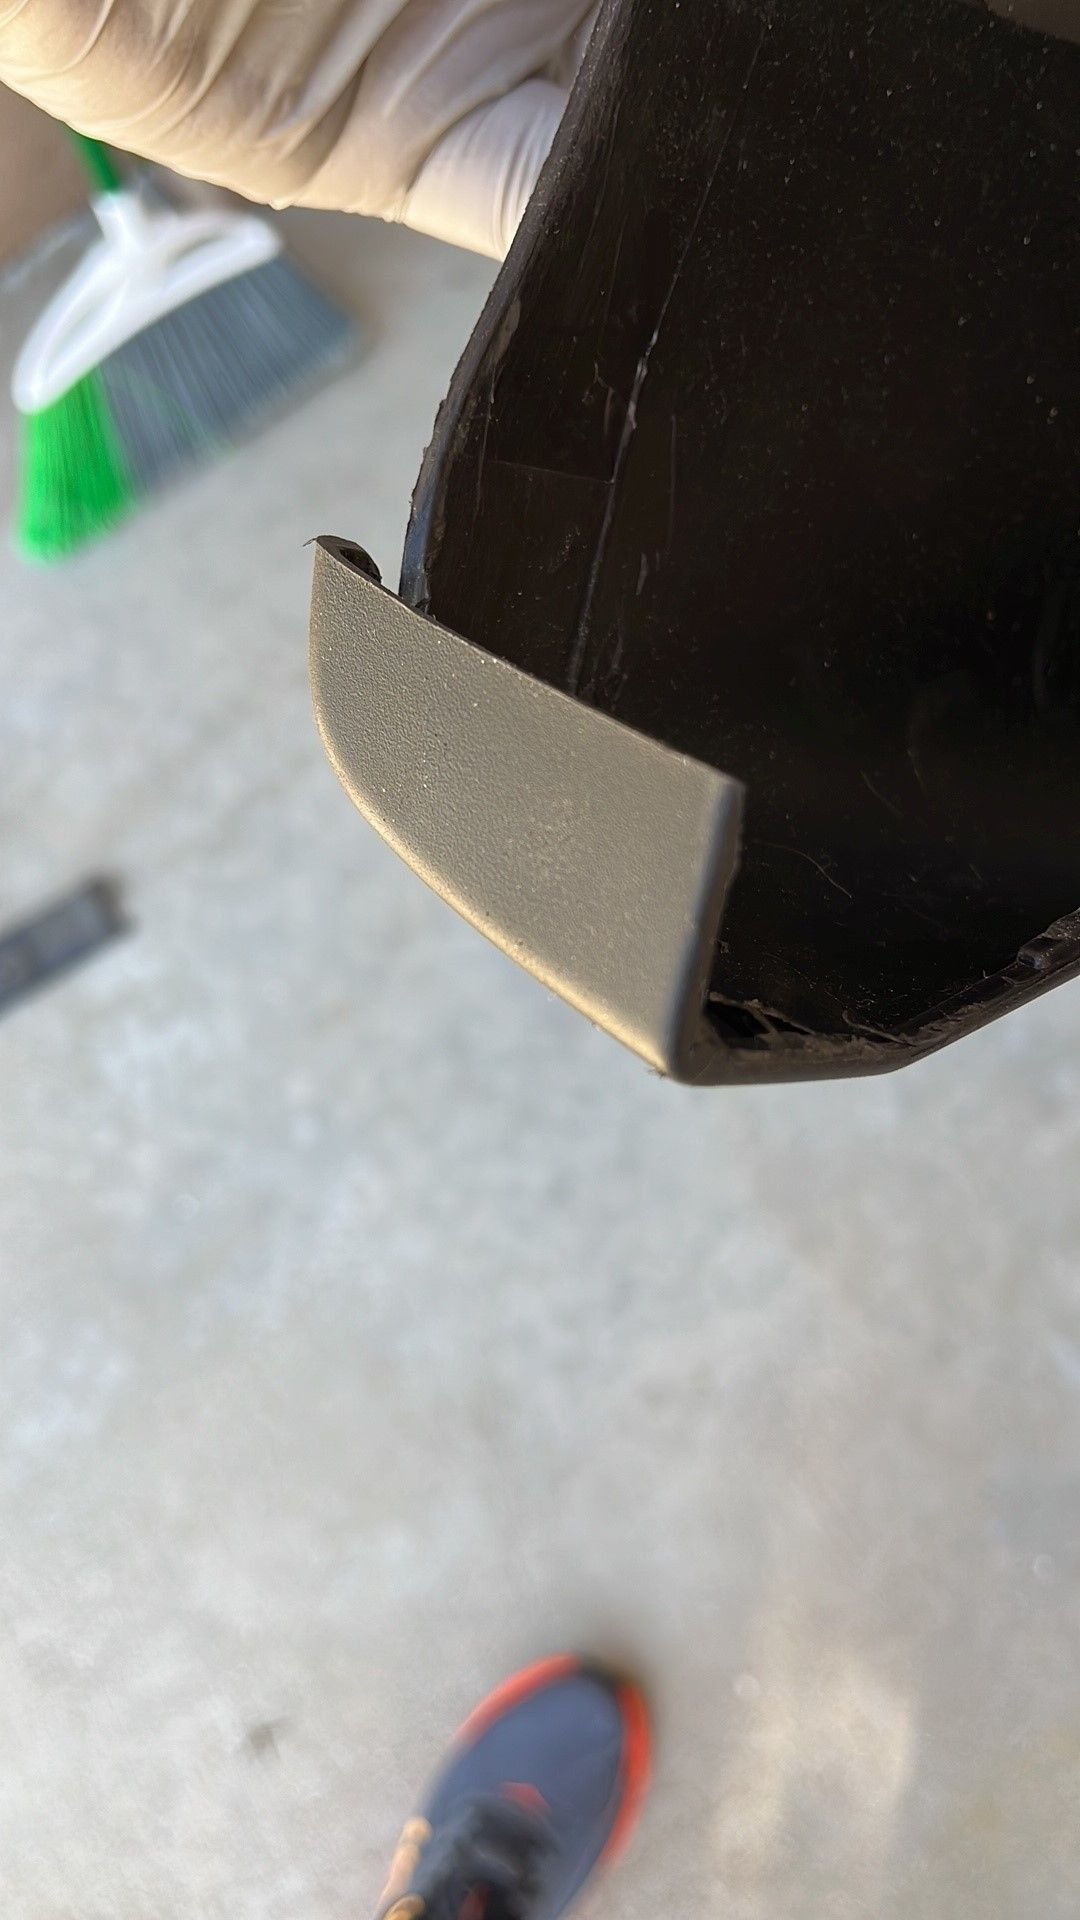
Another thing I thought of after going back and looking at the earlier post in this thread. On the first skirt I did I followed the OP's image below in cutting the entire tab off at the seam at the end as shown on the left of the image below. Once it was installed, my mudflap which fhad a slight back bend in it like in the image on the right, because of this it created an opening that you could see right up inside the skirt between it and the flap. Replacing the mud flaps helped but when I did the other side and then the redo on the 1st side, I only trimmed part of it as shown by the curved red line. This allows it to keep part of the "wall" but still hug up against the bottom of the mud flap. I would suggest removing a little at a time until your happy with how it looks.
Just remember this isn't going to be perfect and it takes some messing around with and you will probably have small gaps along it. I did also use a heat gun carefully (you can melt the ABS very easy) after they were installed to try and shape to have minimal gap. All that being said, at local PCA events no one has ever noticed until I tell them and they get down and look closely it. Don't hesitate to reach out directly if you have any question during the install.
For my install I pretty much followed exactly as @devtec excellently posted in this post. I put them on where they did line up and then using a silver marker to mark where they needed to be enlarged. I did use the dremel for that part as its fast and easy. Better to take of little at a time and test fit and enlarge more if needed.
I did the hot water molding before I cut anything but it would not hurt anything to do it later, it will give you the same result. For that, all i did was was put the wide end of the skirt (the rear) in the sink and ran hot tap water on the inside of it for about 5min then wrapped tape all around it. Once you get to test fitting it, you will be able to see how the little bit of added curve from the water will help keep it close to the car.
Another thing I thought of after going back and looking at the earlier post in this thread. On the first skirt I did I followed the OP's image below in cutting the entire tab off at the seam at the end as shown on the left of the image below. Once it was installed, my mudflap which fhad a slight back bend in it like in the image on the right, because of this it created an opening that you could see right up inside the skirt between it and the flap. Replacing the mud flaps helped but when I did the other side and then the redo on the 1st side, I only trimmed part of it as shown by the curved red line. This allows it to keep part of the "wall" but still hug up against the bottom of the mud flap. I would suggest removing a little at a time until your happy with how it looks.
Just remember this isn't going to be perfect and it takes some messing around with and you will probably have small gaps along it. I did also use a heat gun carefully (you can melt the ABS very easy) after they were installed to try and shape to have minimal gap. All that being said, at local PCA events no one has ever noticed until I tell them and they get down and look closely it. Don't hesitate to reach out directly if you have any question during the install.
Thanks. Extremely helpful tips. Yes I am following his post as well because of how well he explains it with pictures. Am going to take this slow and do it over a period of time. Will reach out to you as and when questions come. Appreciate the help and the tips.
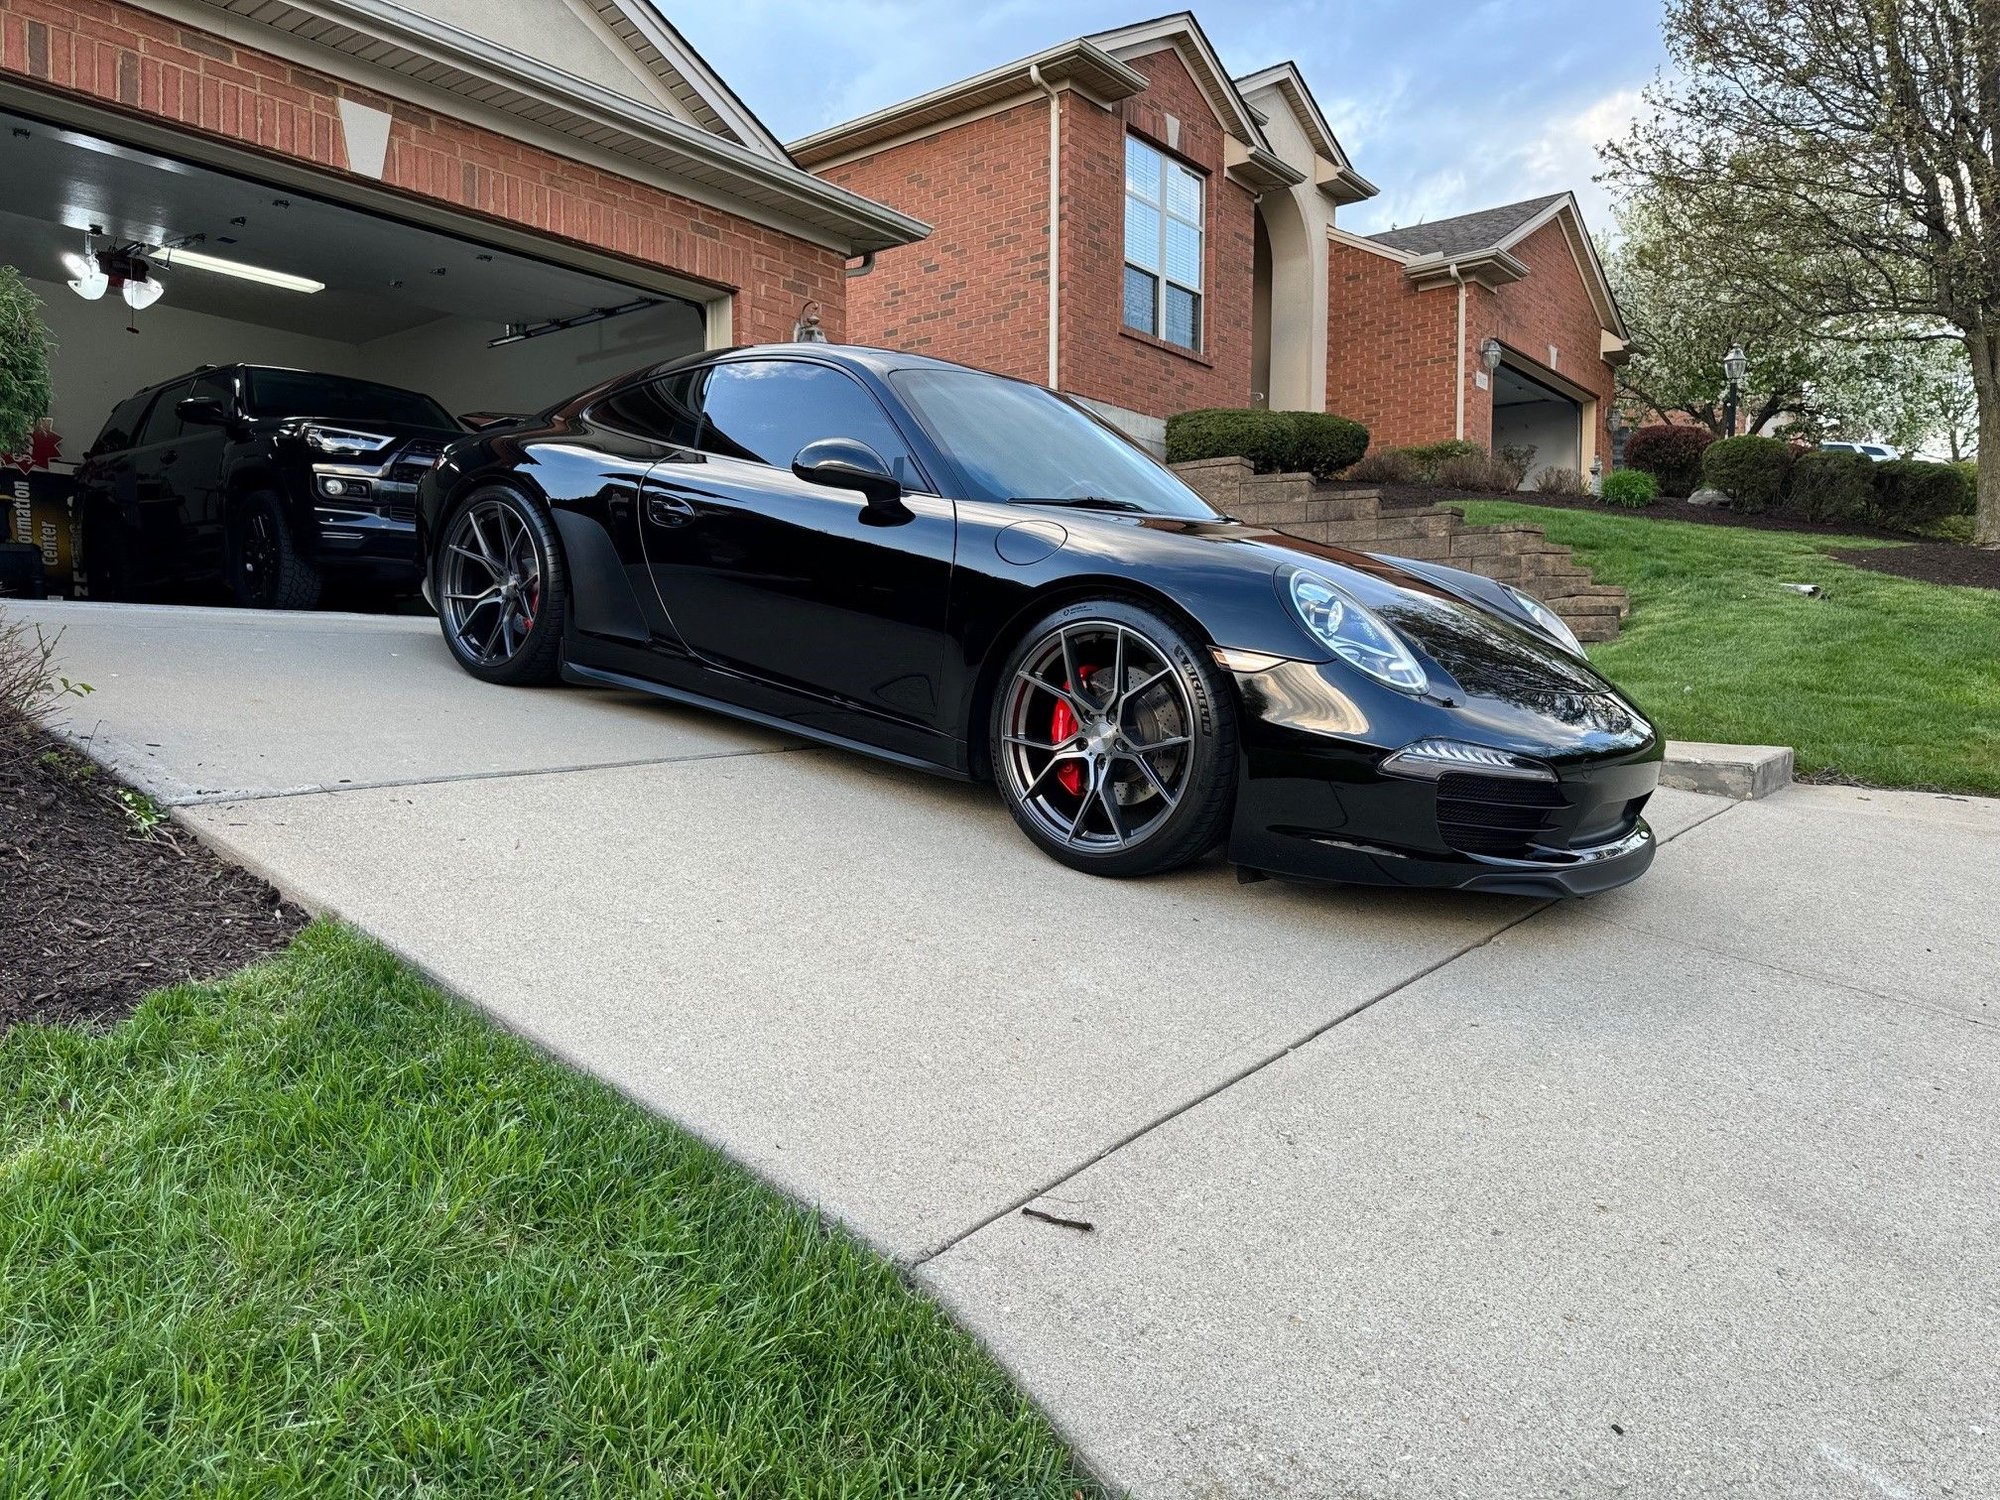
So firstly thank you to all who attempted this and posted their DIY's to help others. Special thanks to @Ahmad310 who really helped out a lot with pointers along the way. I feel that every new DIY should be an improvement over the last, as in a better and easier way of doing the install.
I am not going to post a full DIY as plenty have posted that before me. Instead I will post what NOT to do and what I did different to achieve a similar or perhaps better result.
From the get go, I was not in favor of the visible screw from the side to hold the rear of the side skirt. That makes it look aftermarket and I was shooting for an OEM look.
I'll start with the most important pointers first:
1.Perhaps the most important tip @Ahmad310 gave me was to heat and bend the complete side skirt, blue tape it and leave it overnight. He did it using hot water but I found a hair dryer worked better for me. I basically heated the surface using a hair dryer and it bent easily as Iwrpapped it in blue making tape. This really helps because the next day it literally stayed in that position and when you install it, the side skirt will always keep pushing against the body thereby eliminating any gap. This was a game changer. Infact, it was so deformed that while installing it to click in the push buttons I had o really push hard and that's what you want.
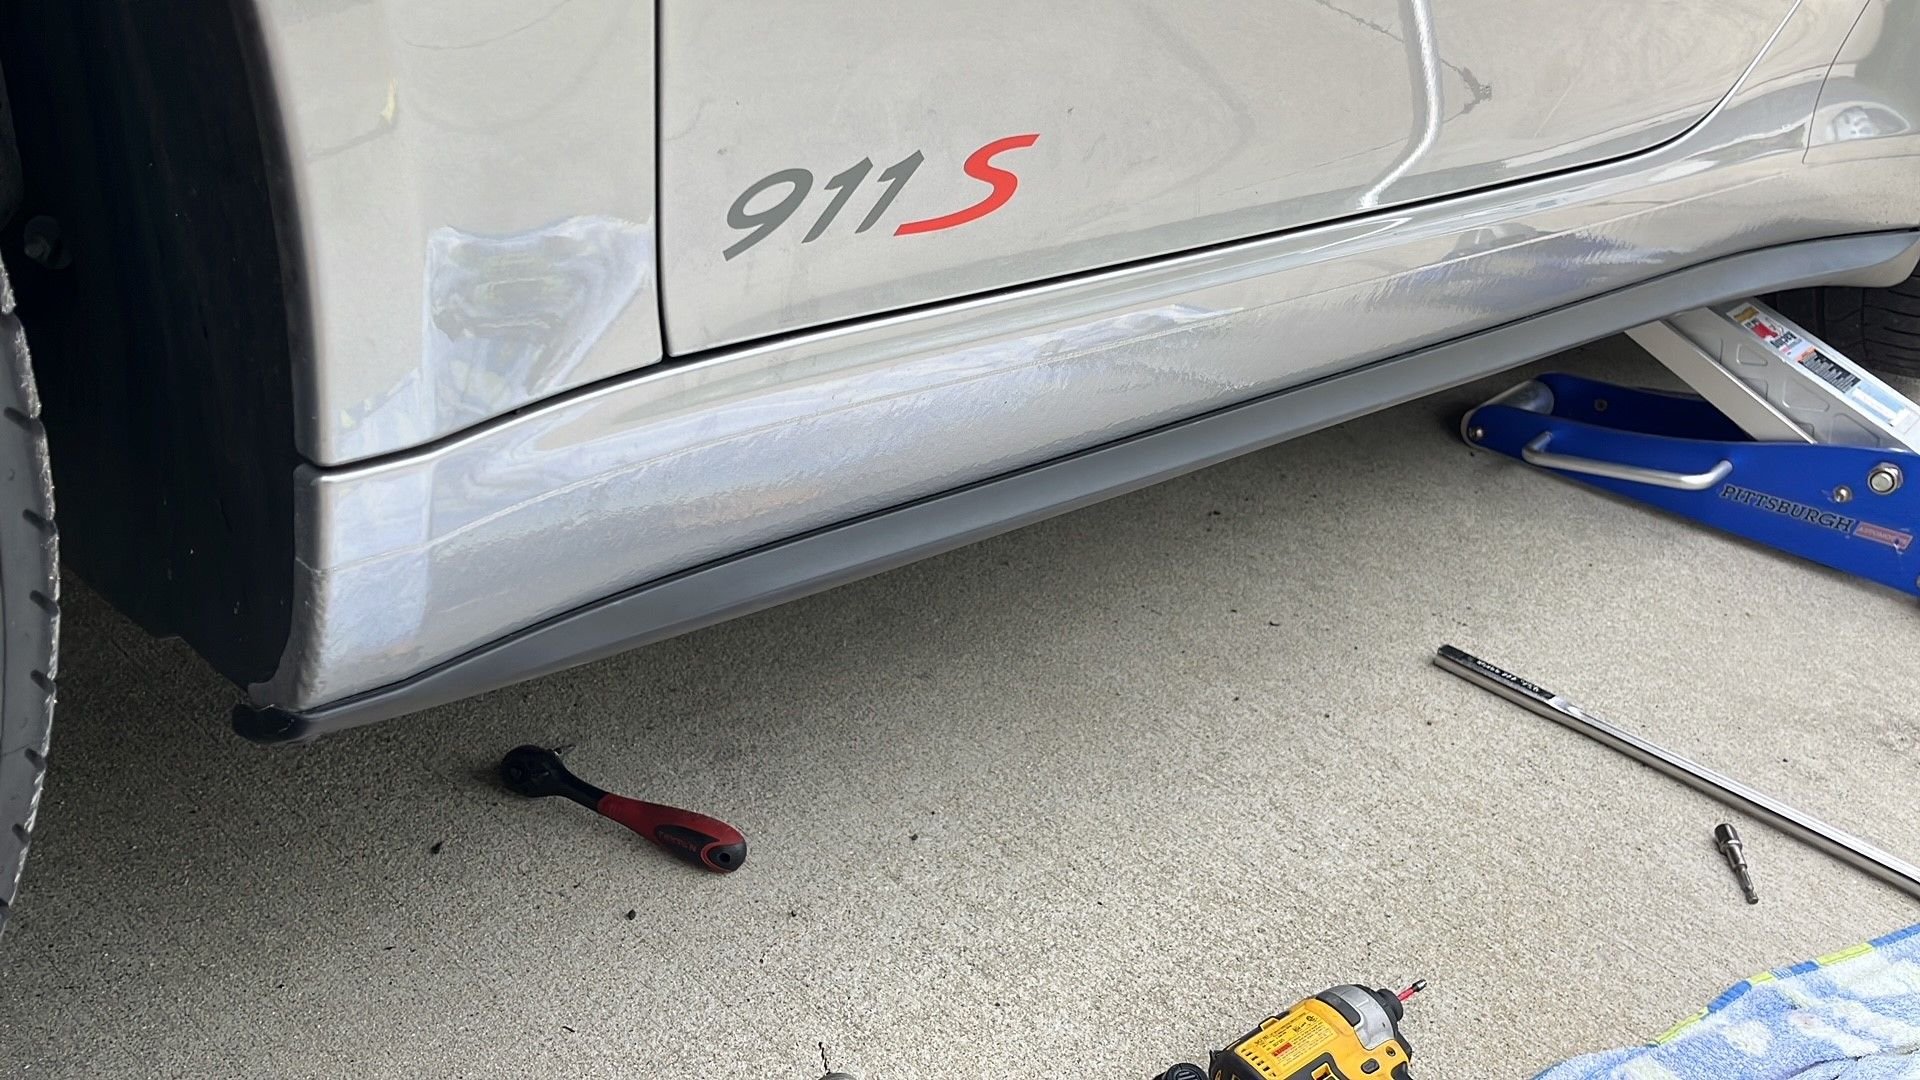
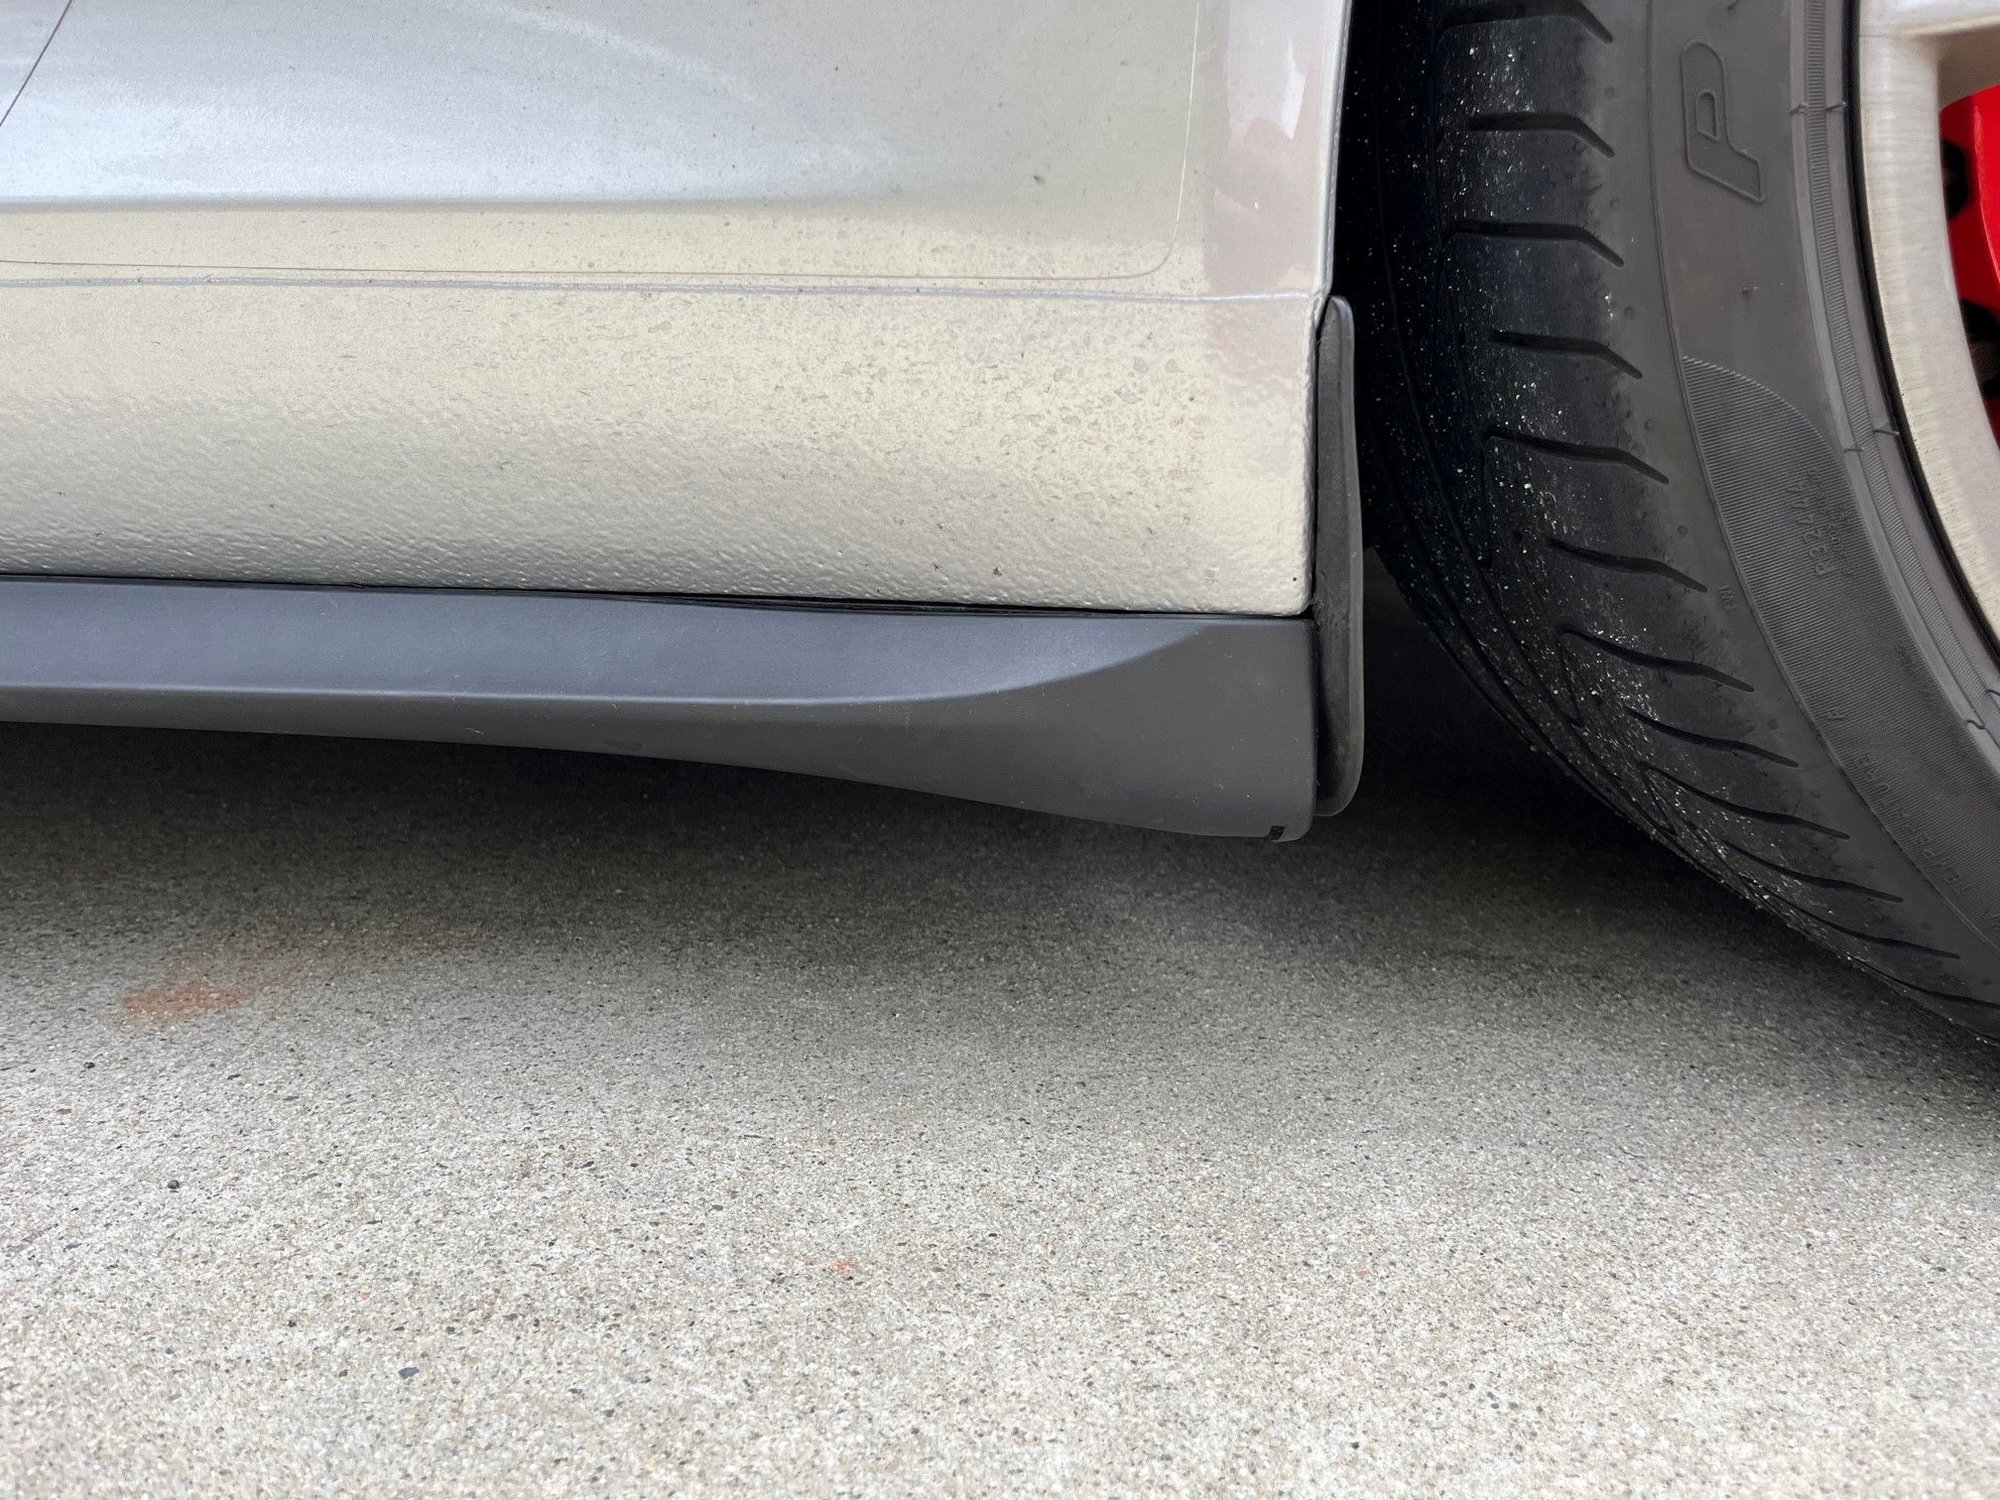
2. Donot cut the angles in the front or the back as others have said. This is needed especially in the rear to secure. See pictures below.
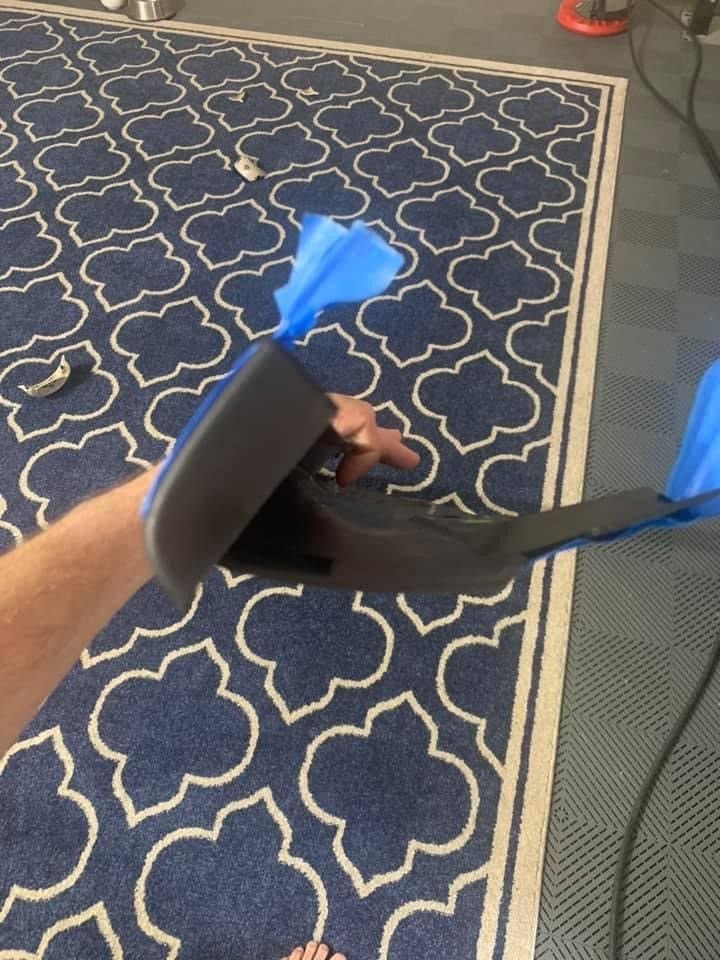
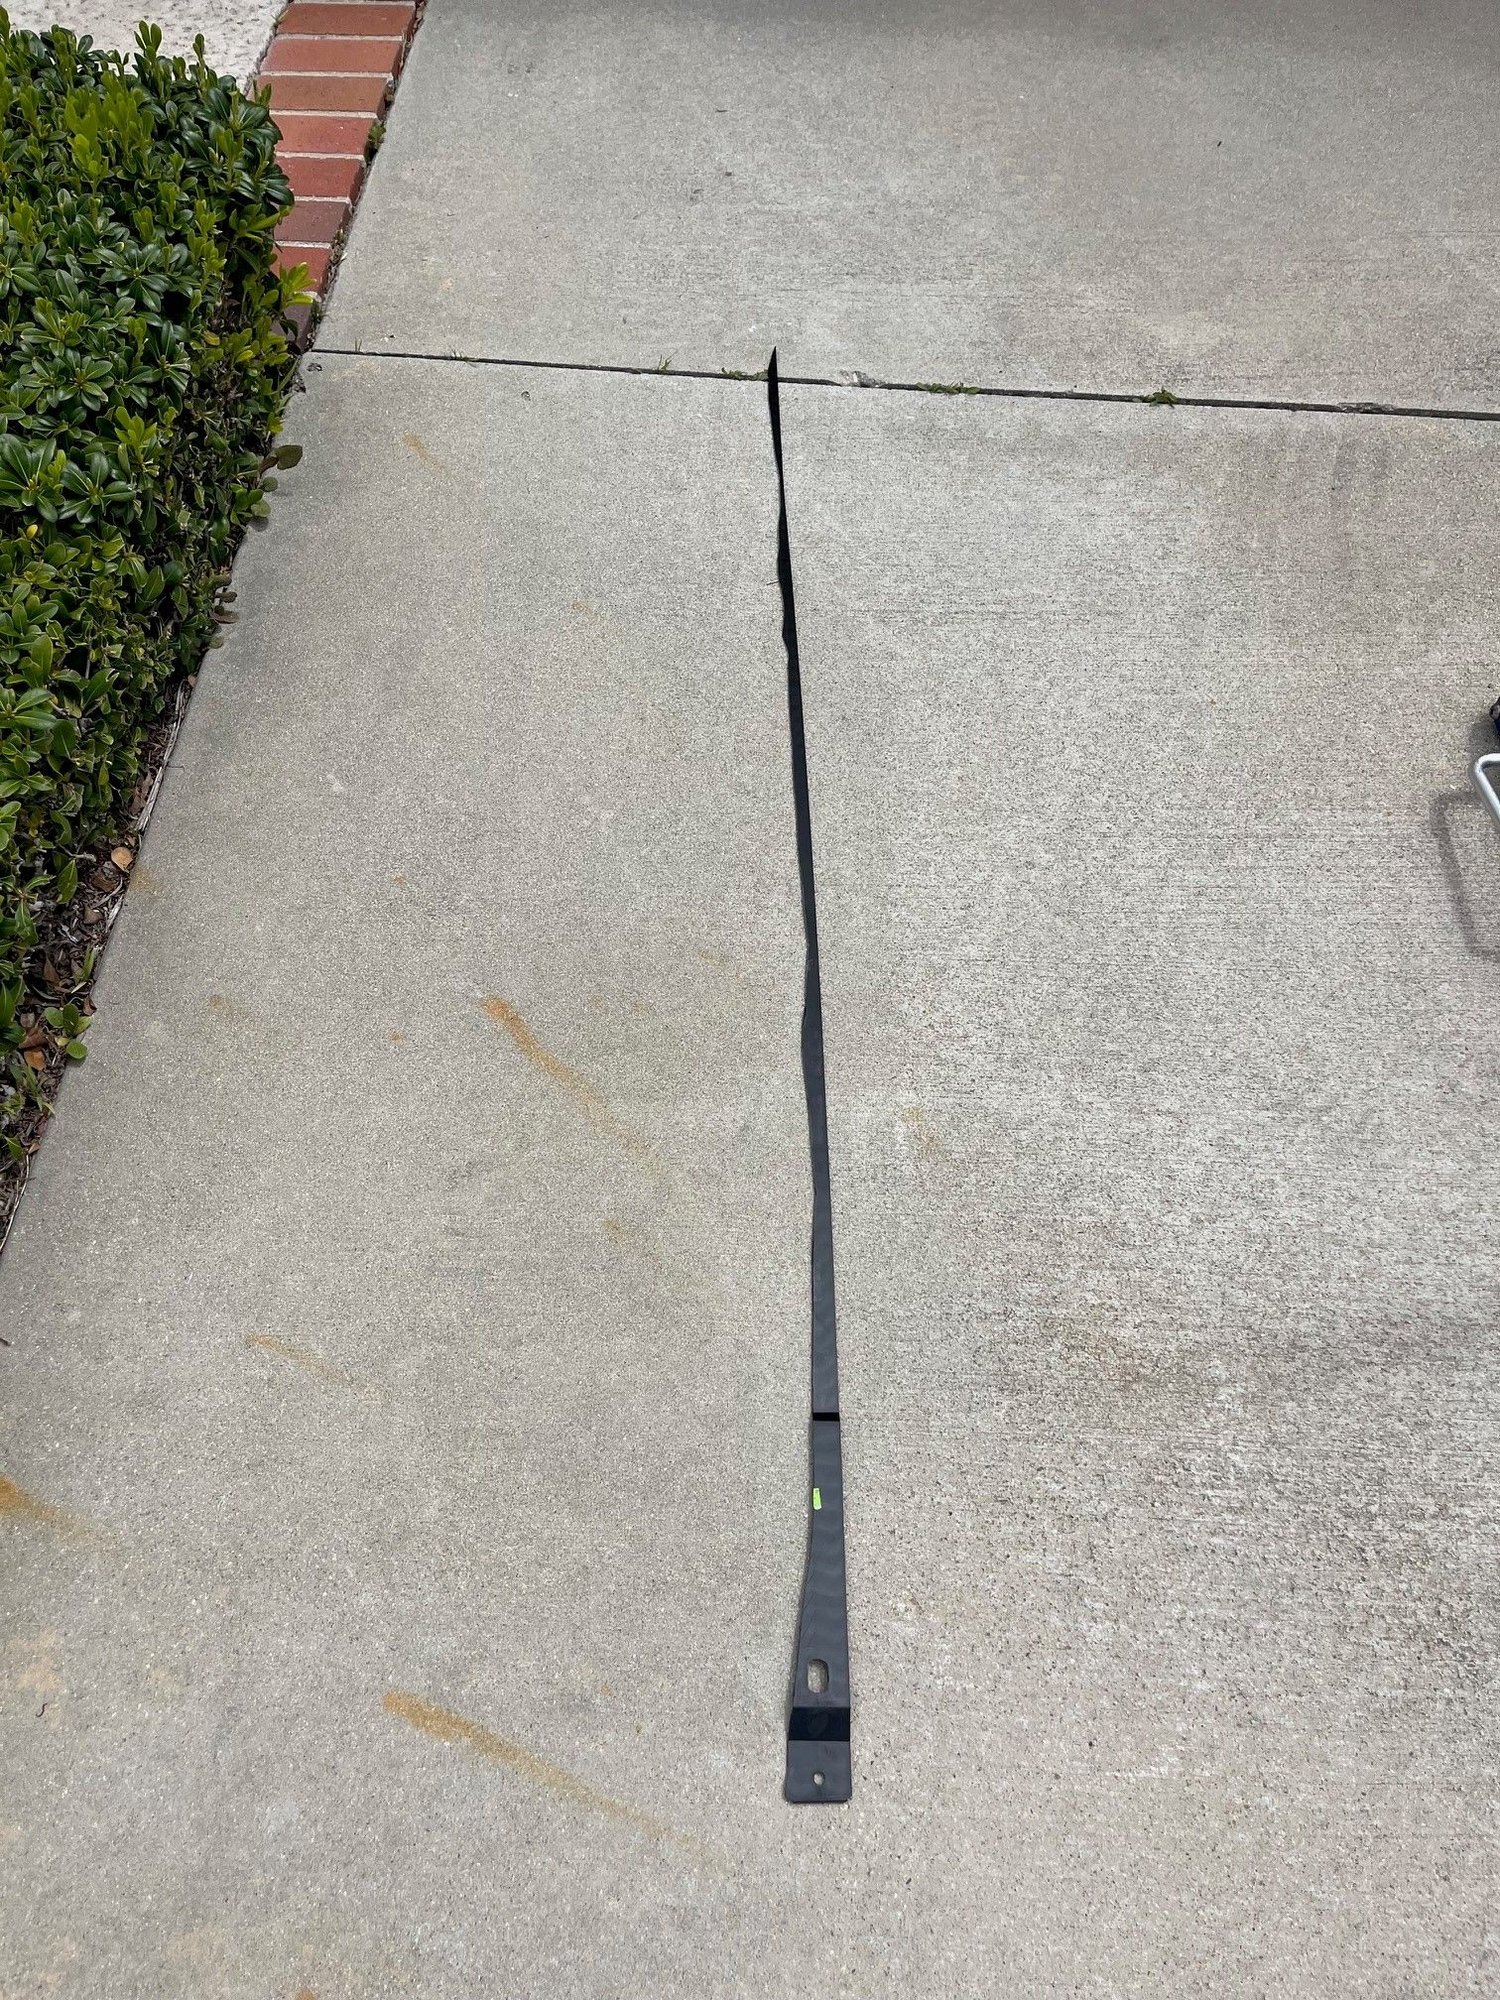
3. Just cut off the entire length of the sideskirt instead of trying to take of sections at a time. No one is gonna put their head down there to look at your cut. See picture below for how much I cut. This made it so much easier vs getting under time and again to see if more needed to be cut. Basically any material inboard of the mounting holes can be cut as it doesn't do anything.
4. Use the mounting hardware that comes with the Sideskirts. You will need 7 for each side.
On the drivers side surprisingly 6 of the 7 holes lined up perfectly. Only the first one from the front needed some adjustment on the hole.
On the passenger side 4 of the 7 lined up. I think it was 2,5,6,7 from the front
5. Before you start to do a test fit, always attach the sideskirt using the first screw hole right up front. Basically open the torx screw holding the mudflap and attach the sideskirt using the same screw to the same hole and loosely tighten. I say to do this because this is your fixed reference as this hole lines up perfectly to the side skirt screw hole (don't confuse this hole with the 7 large push button holes. This is just a screw hole right at the front of the Sideskirt)
6. Cut/modify the with the sideskirt on the car vs removing and trying to dremel. It's a lot easier on the car with a sharp blade. You won't damage anything
REAR - DON'T CUT THIS FRONT - DON'T CUT THIS This is the full length I cut off without measuring. I don't care if it's not straight This is the blue tape method @Ahmad310 dexcribed. This is a must do to eliminate all gaps. This is literally the first step before any cutting or modification of the SideSkirt.
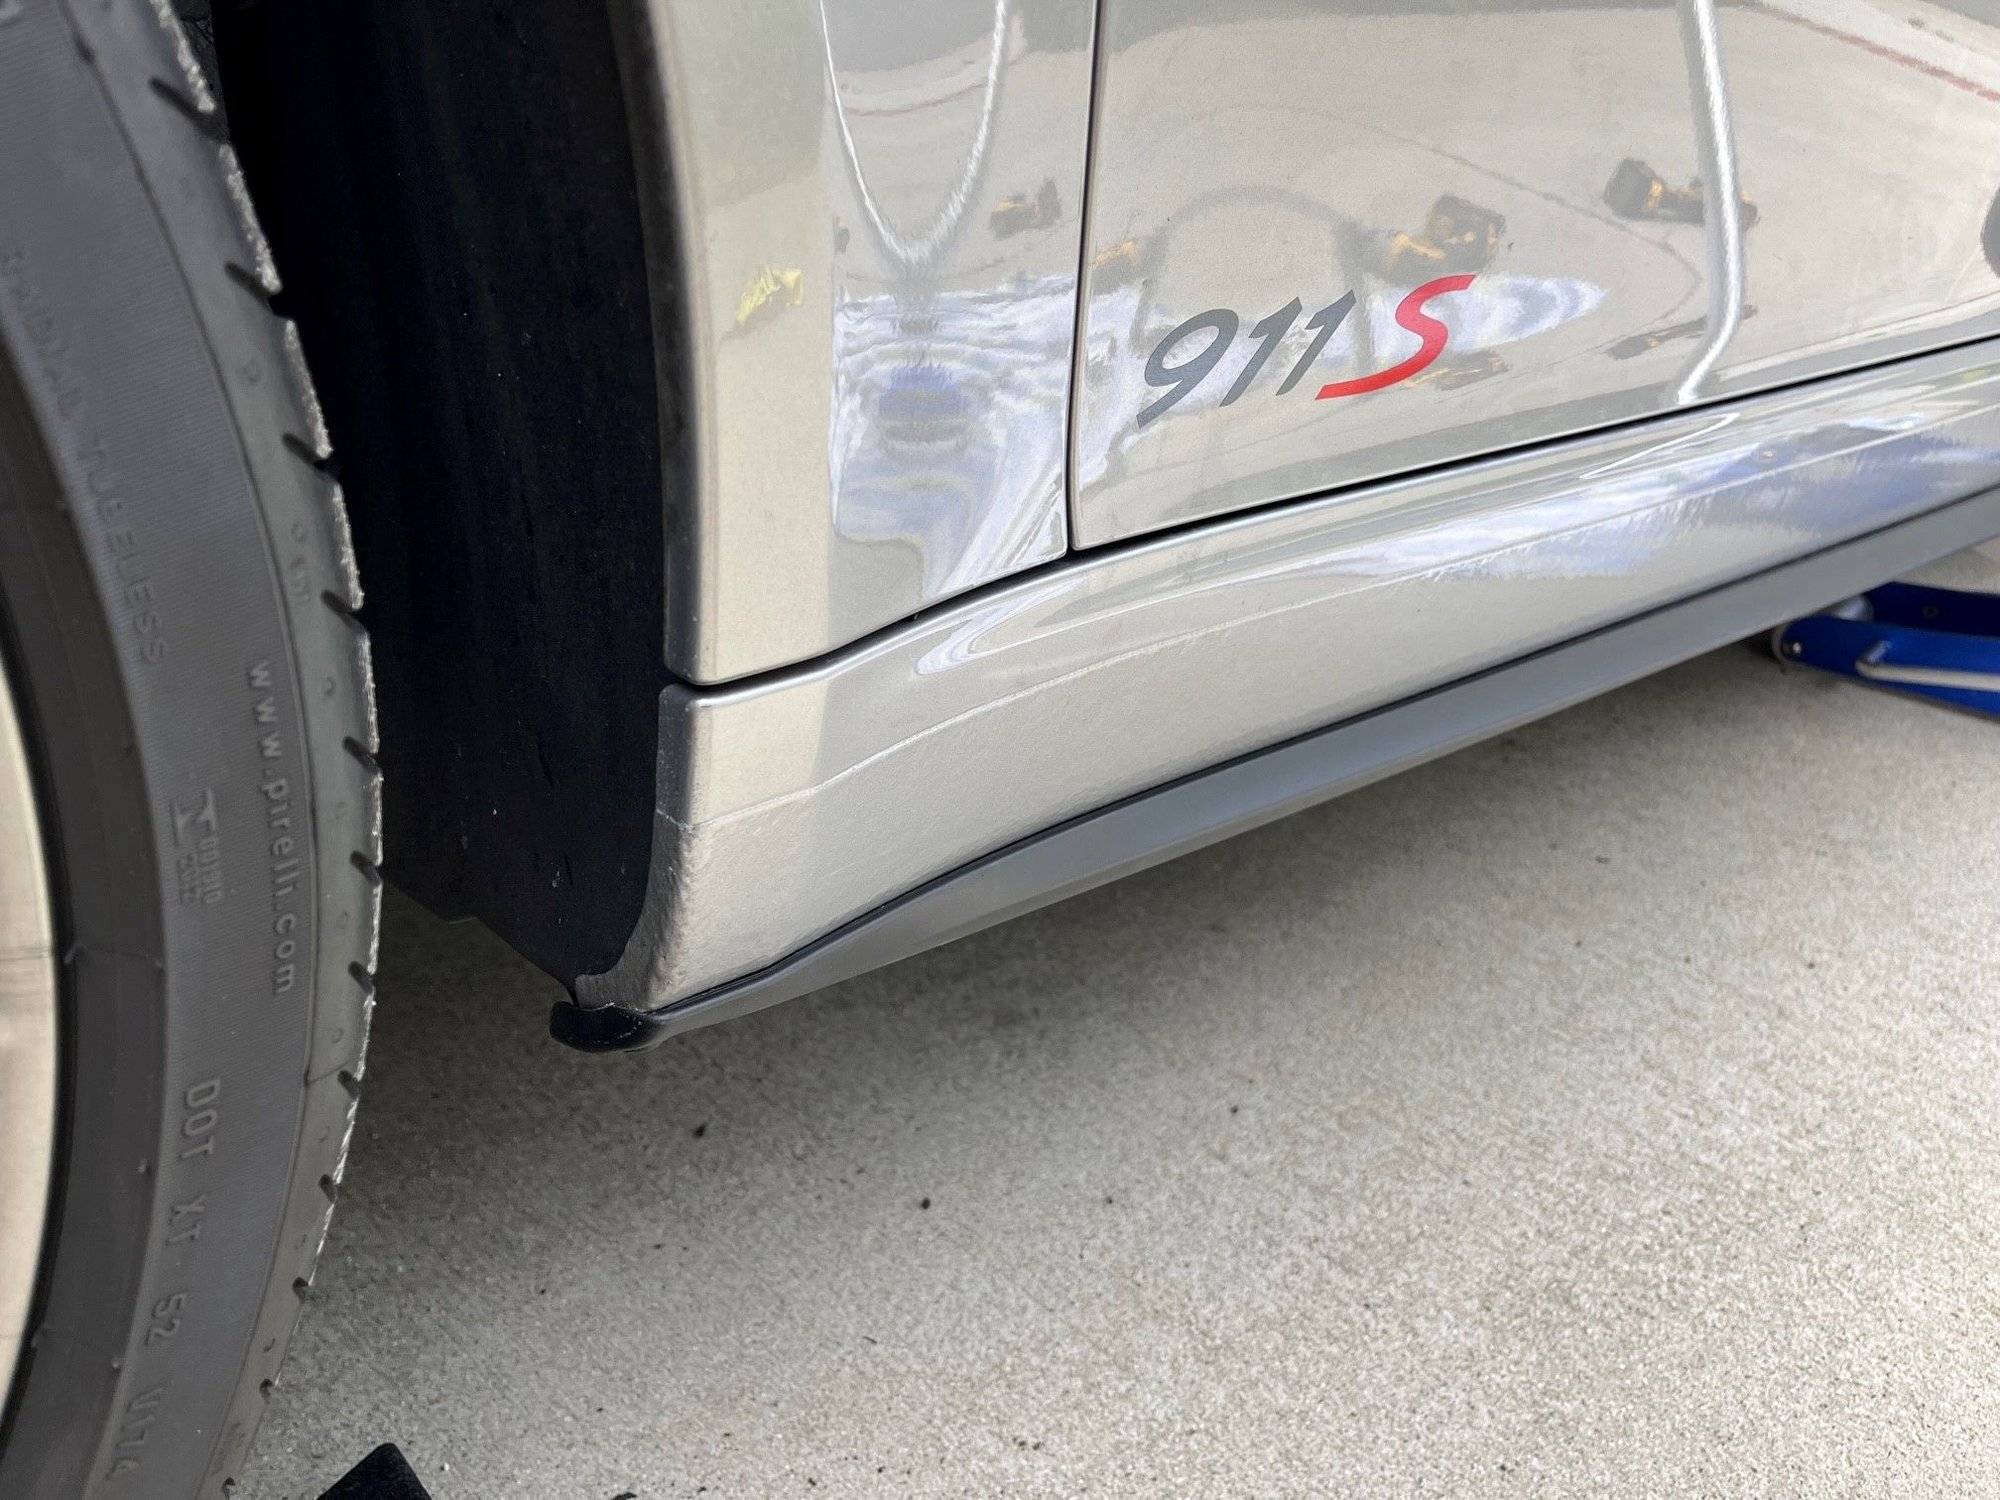
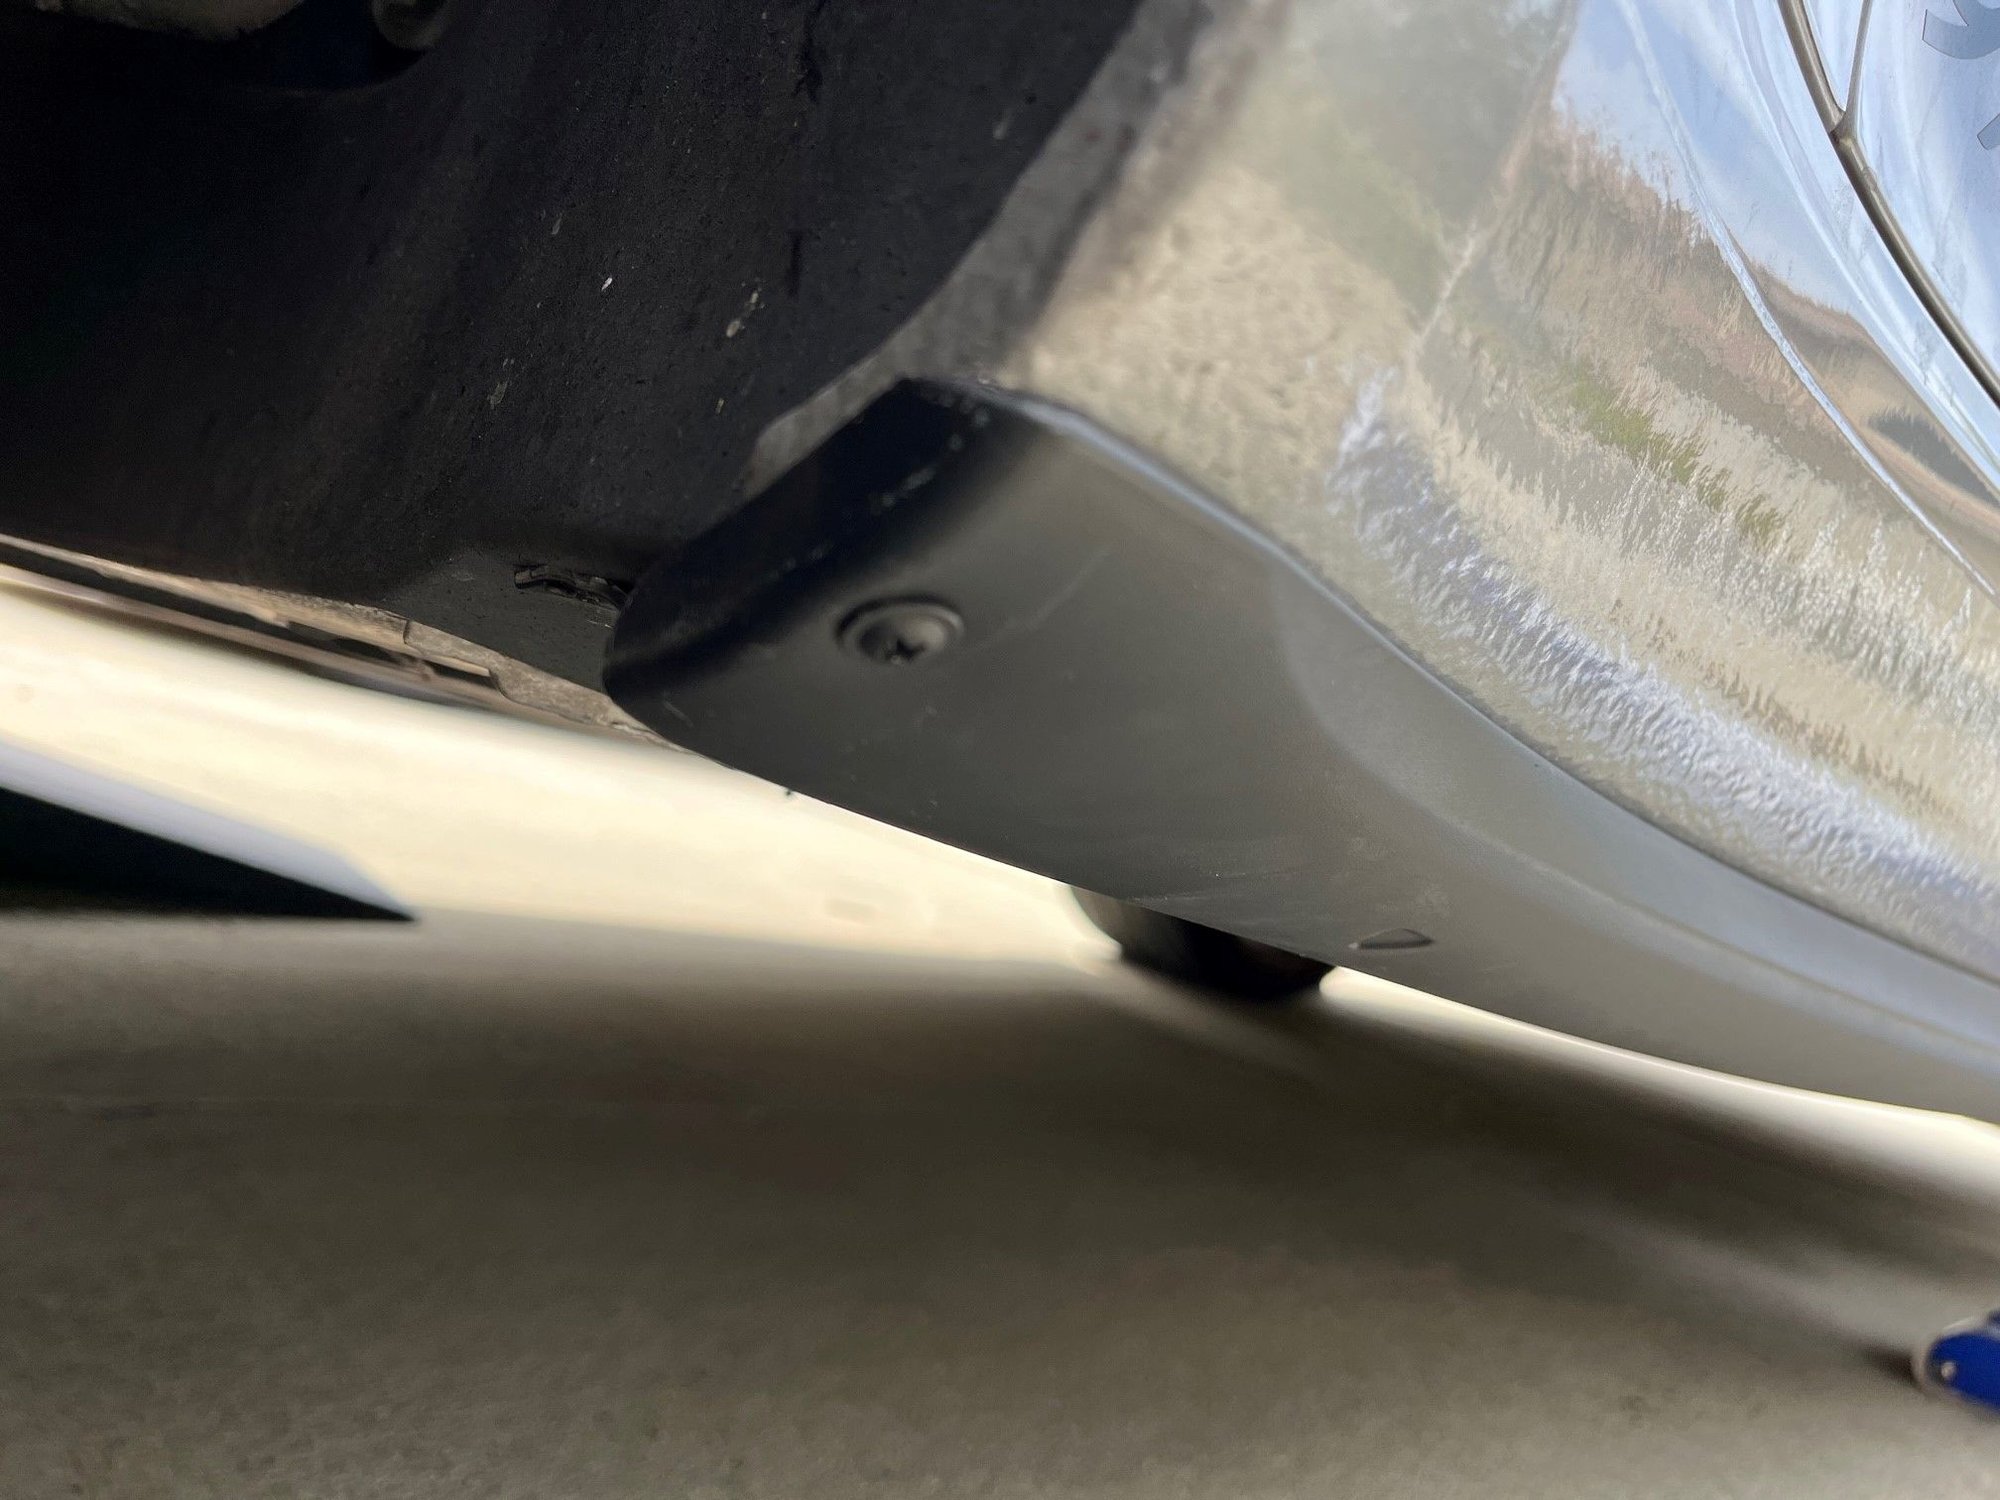
For the rear what you want to do is make a hole using a sharp blade. it's super easy as the mudflap is soft. You don't need to open the mudflap Just use a blade and go vertically and take out a thick enough piece so the end of the sideskirt can fit in there Do a few test fits and keep widening it accordingly. It should go in and out with little effort Here is another look at the section that upu push in Here it is pushed in all the way. See how flush it is. I was initially going to just screw into the plastic sideskirt but then I got the idea of using that retainer clip in there for a more secure attachment. I used a metal cutter to cut off some of clip so it is not visible at all once the mudflap is secured to the sideskirt. Push the sideskirt all the way in and using a small push pin or dental tool pierce through the mudflap to find the perfect spot where the hole in the mudflap lines up with the retainer clip hole behind it. In the previous picture make sure the hole is perfectly aligned and with the sideskirt pushed in all the way and perfectly flush. I say this is important because this is what decides where your sideskirt will end up once the screw goes on. Here it is finished and perfectly flush. looks OEM Looking great Side view Another view Another side view. loving the OEM look
Now that the rear is secure and the front is attached to the torx screw up front you can go ahead and start attaching the 7 push tabs. You will need to press hard to bend it back, flatten it and get the push button to click. Modify the holes that don't match and and secure. You are done! I used one screw to make the front fully flush. I don't care that it's a small hole under the rocker on the underside of the car. Lol! Not sure why folks get so worried about it. The screw is not visible till you lay down and look under. Don't worry this won't affect the resale of your car. Haha.

 01-07-2024, 12:00 AM