Centerlock Wheel Installation Comments
#16
#17
Nordschleife Master
#19
Race Director
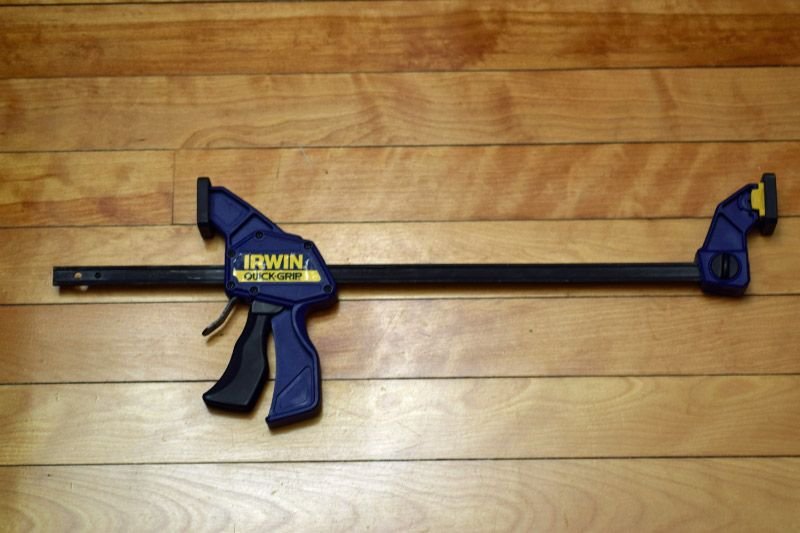
Ivan, exactly what part of the seat is the spreader braced against? The front edge of the cushion? Something underneath the seat? Is there any risk of damaging the seat by placing the spreader incorrectly or is the force required to depress the brake with the spreader not enough to cause a problem? If it's not too much trouble, a pic from someone of the spreader in position would be great.
#20
Nordschleife Master
Ivan, exactly what part of the seat is the spreader braced against? The front edge of the cushion? Something underneath the seat? Is there any risk of damaging the seat by placing the spreader incorrectly or is the force required to depress the brake with the spreader not enough to cause a problem? If it's not too much trouble, a pic from someone of the spreader in position would be great.
#21
Race Director
Thanks Nick, I'd forgotten about that. The vid isn't loading for me right now (getting error message) but I'll try later and see if it shows what I'm looking for.
Edit: Ok so I watched again. The crucial bit of info I'm looking for is just out of the video frame. It's hard to tell whether the spreader is braced against the seat cushion itself or a more solid piece of the seat under the cushion. I suppose this might become obvious once I try it for myself, but I was curious in advance...
Edit: Ok so I watched again. The crucial bit of info I'm looking for is just out of the video frame. It's hard to tell whether the spreader is braced against the seat cushion itself or a more solid piece of the seat under the cushion. I suppose this might become obvious once I try it for myself, but I was curious in advance...
Last edited by Mike in CA; 11-20-2014 at 03:12 PM.
#22
Nordschleife Master
Edit: Ok so I watched again. The crucial bit of info I'm looking for is just out of the video frame. It's hard to tell whether the spreader is braced against the seat cushion itself or a more solid piece of the seat under the cushion. I suppose this might become obvious once I try it for myself, but I was curious in advance...
Hope it helps...
#23
Three Wheelin'
Ryan
#24
Rennlist Member
I haven't use the Irwin tool. I just use a piece of 1 1/2" PVC tubing with a dense piece of rubber on the end against the seat. Slide the seat forward until you have pressure on the brake pedal. I find it is much easier with the engine running for the fronts. Not required for the rears.
#25
Lisle truck brake pedal depressor also works well. Used it on the `11.
#26
Racer
Thread Starter
I got my 12 year old son to help with the brake so no need for depressors. He loves working on cars with me, and I am training him early so I get to depress the brake in the very near future instead!
So who is next to do a centerlock tire change? Please share your experience/tips. I want to be able to perform in 5-wheel change time minus 20 mins.;-)
So who is next to do a centerlock tire change? Please share your experience/tips. I want to be able to perform in 5-wheel change time minus 20 mins.;-)
#28
Race Director
Another question: Is there any reason to favor a particular wheel centering tool? It's something I really feel I need with the PCCB's.
A version from Rennline includes a protective cap for the threads and a cap removal tool for $350. The Porsche version is $425. It has a threaded rod down the center with a hex head on one end that the Rennline version doesn't have. What's that for? Getting close to buying all the stuff I need for wheel removal so appreciate the input.
A version from Rennline includes a protective cap for the threads and a cap removal tool for $350. The Porsche version is $425. It has a threaded rod down the center with a hex head on one end that the Rennline version doesn't have. What's that for? Getting close to buying all the stuff I need for wheel removal so appreciate the input.
#29
Rennlist Member
Awesome thread guys! Thanks for the info. Looking forward to my first 5 wheel center lock tire change. 

#30
Racer
Thread Starter
My guess is that the HEX nut is to set the centerlock inner locking mechanism. I used the tool that came with the car which serves to remove the cap and set the inner locking mechanism.
I opted to do without the guide, and just be extra careful when removing and re-installing the wheel. If I did have it, I would probably be too lazy next time since it is an extra step if I am trying to cut down the extra 20 mins. ;-)
I opted to do without the guide, and just be extra careful when removing and re-installing the wheel. If I did have it, I would probably be too lazy next time since it is an extra step if I am trying to cut down the extra 20 mins. ;-)


