When you click on links to various merchants on this site and make a purchase, this can result in this site earning a commission. Affiliate programs and affiliations include, but are not limited to, the eBay Partner Network.
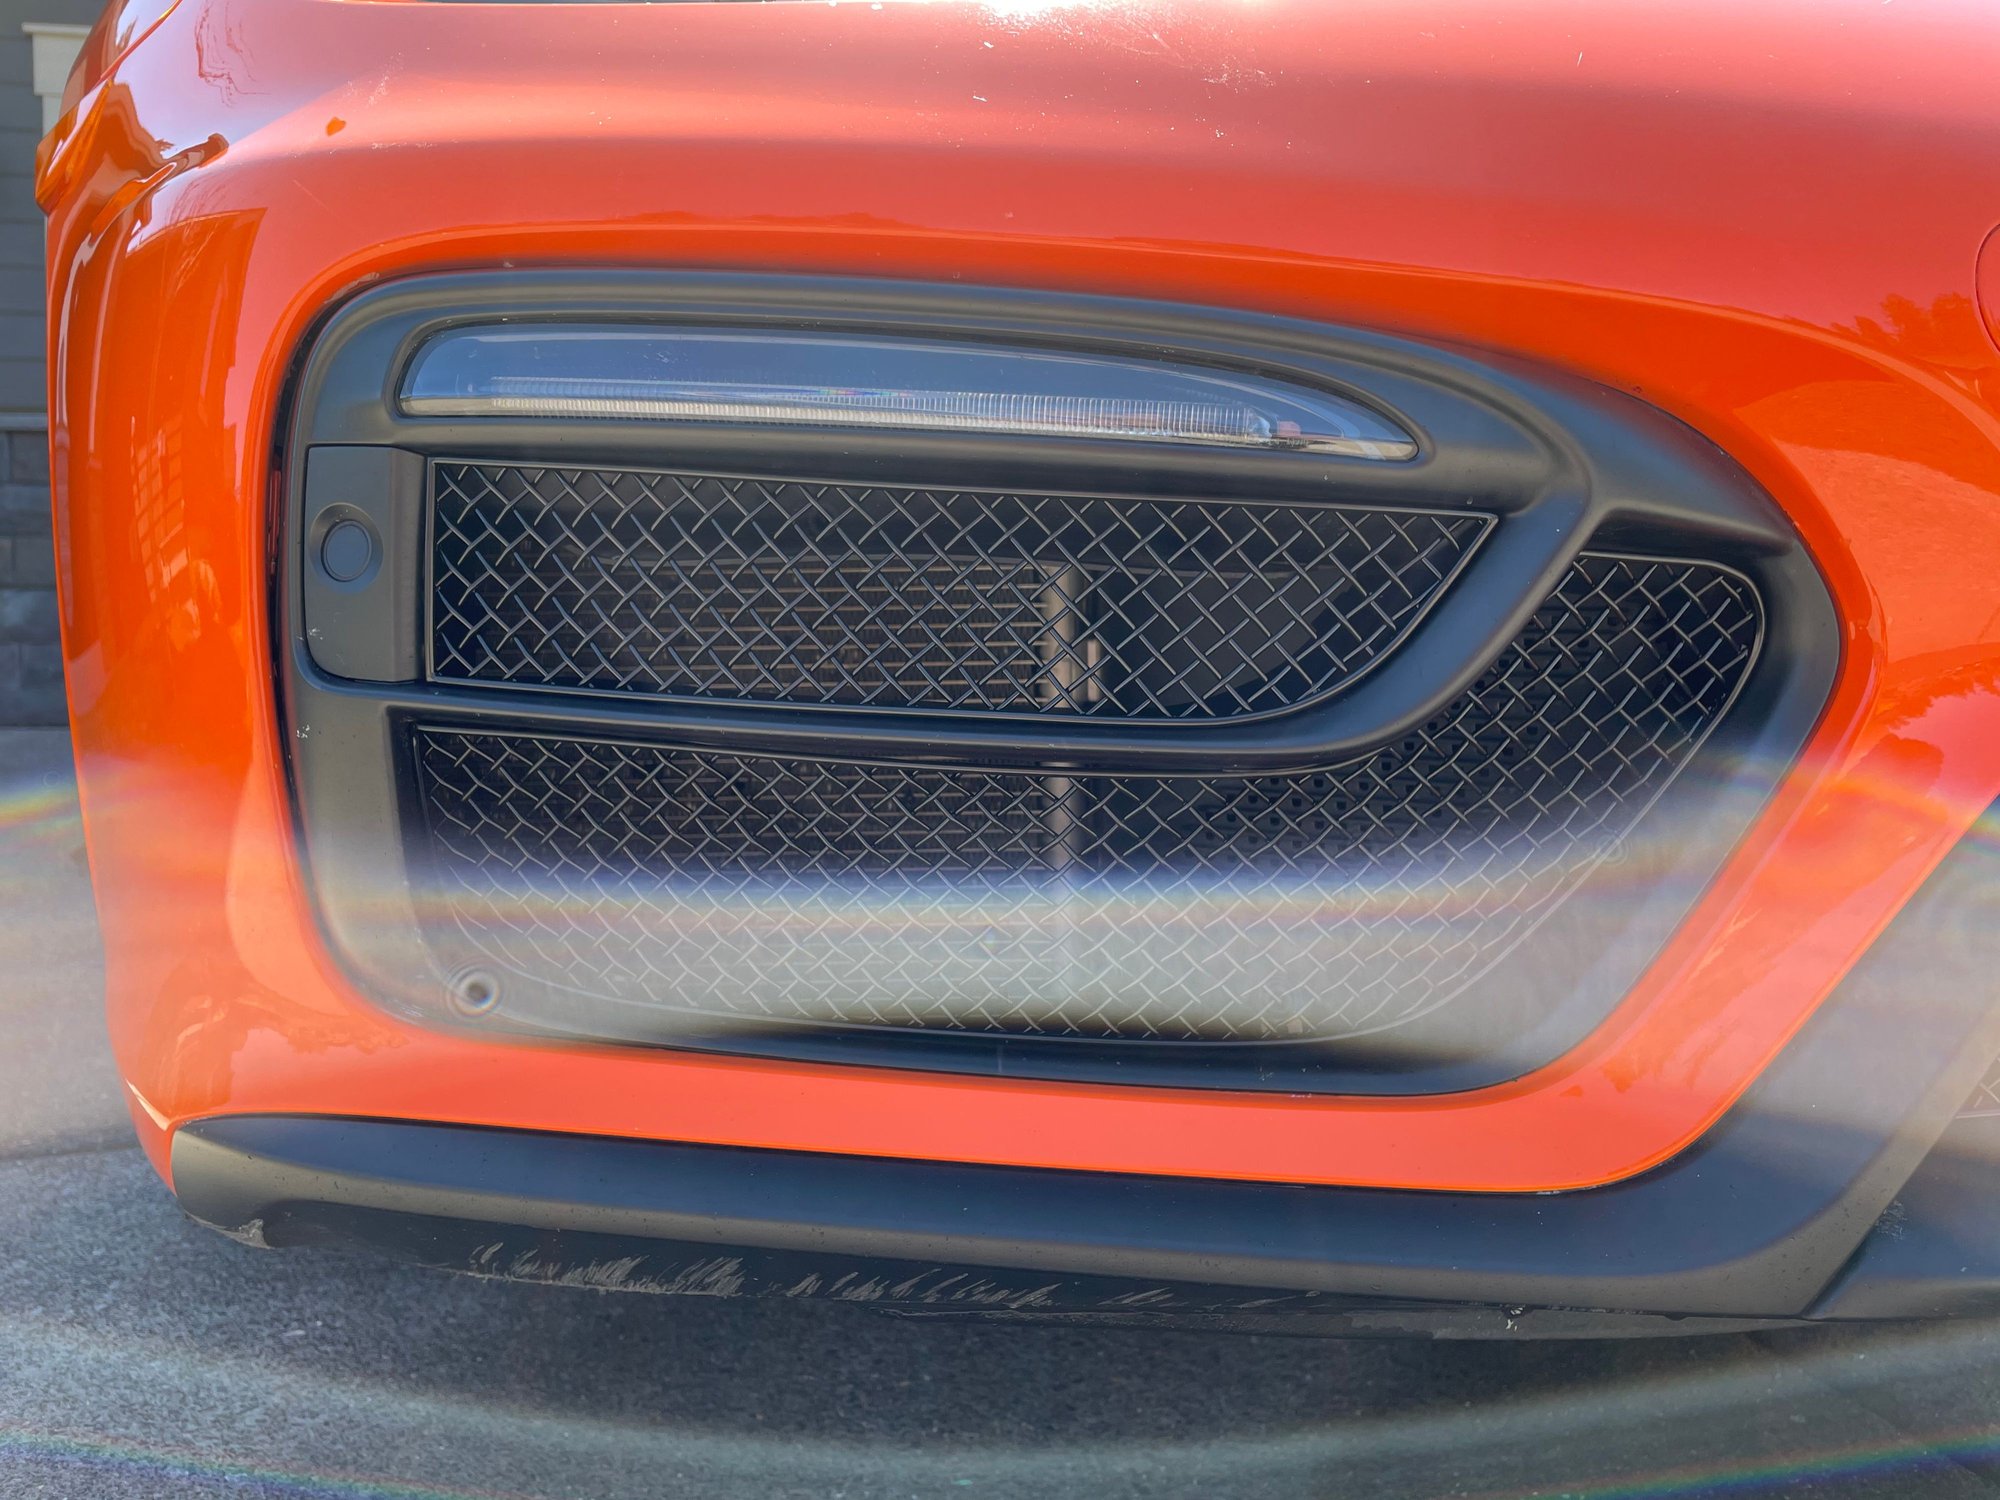
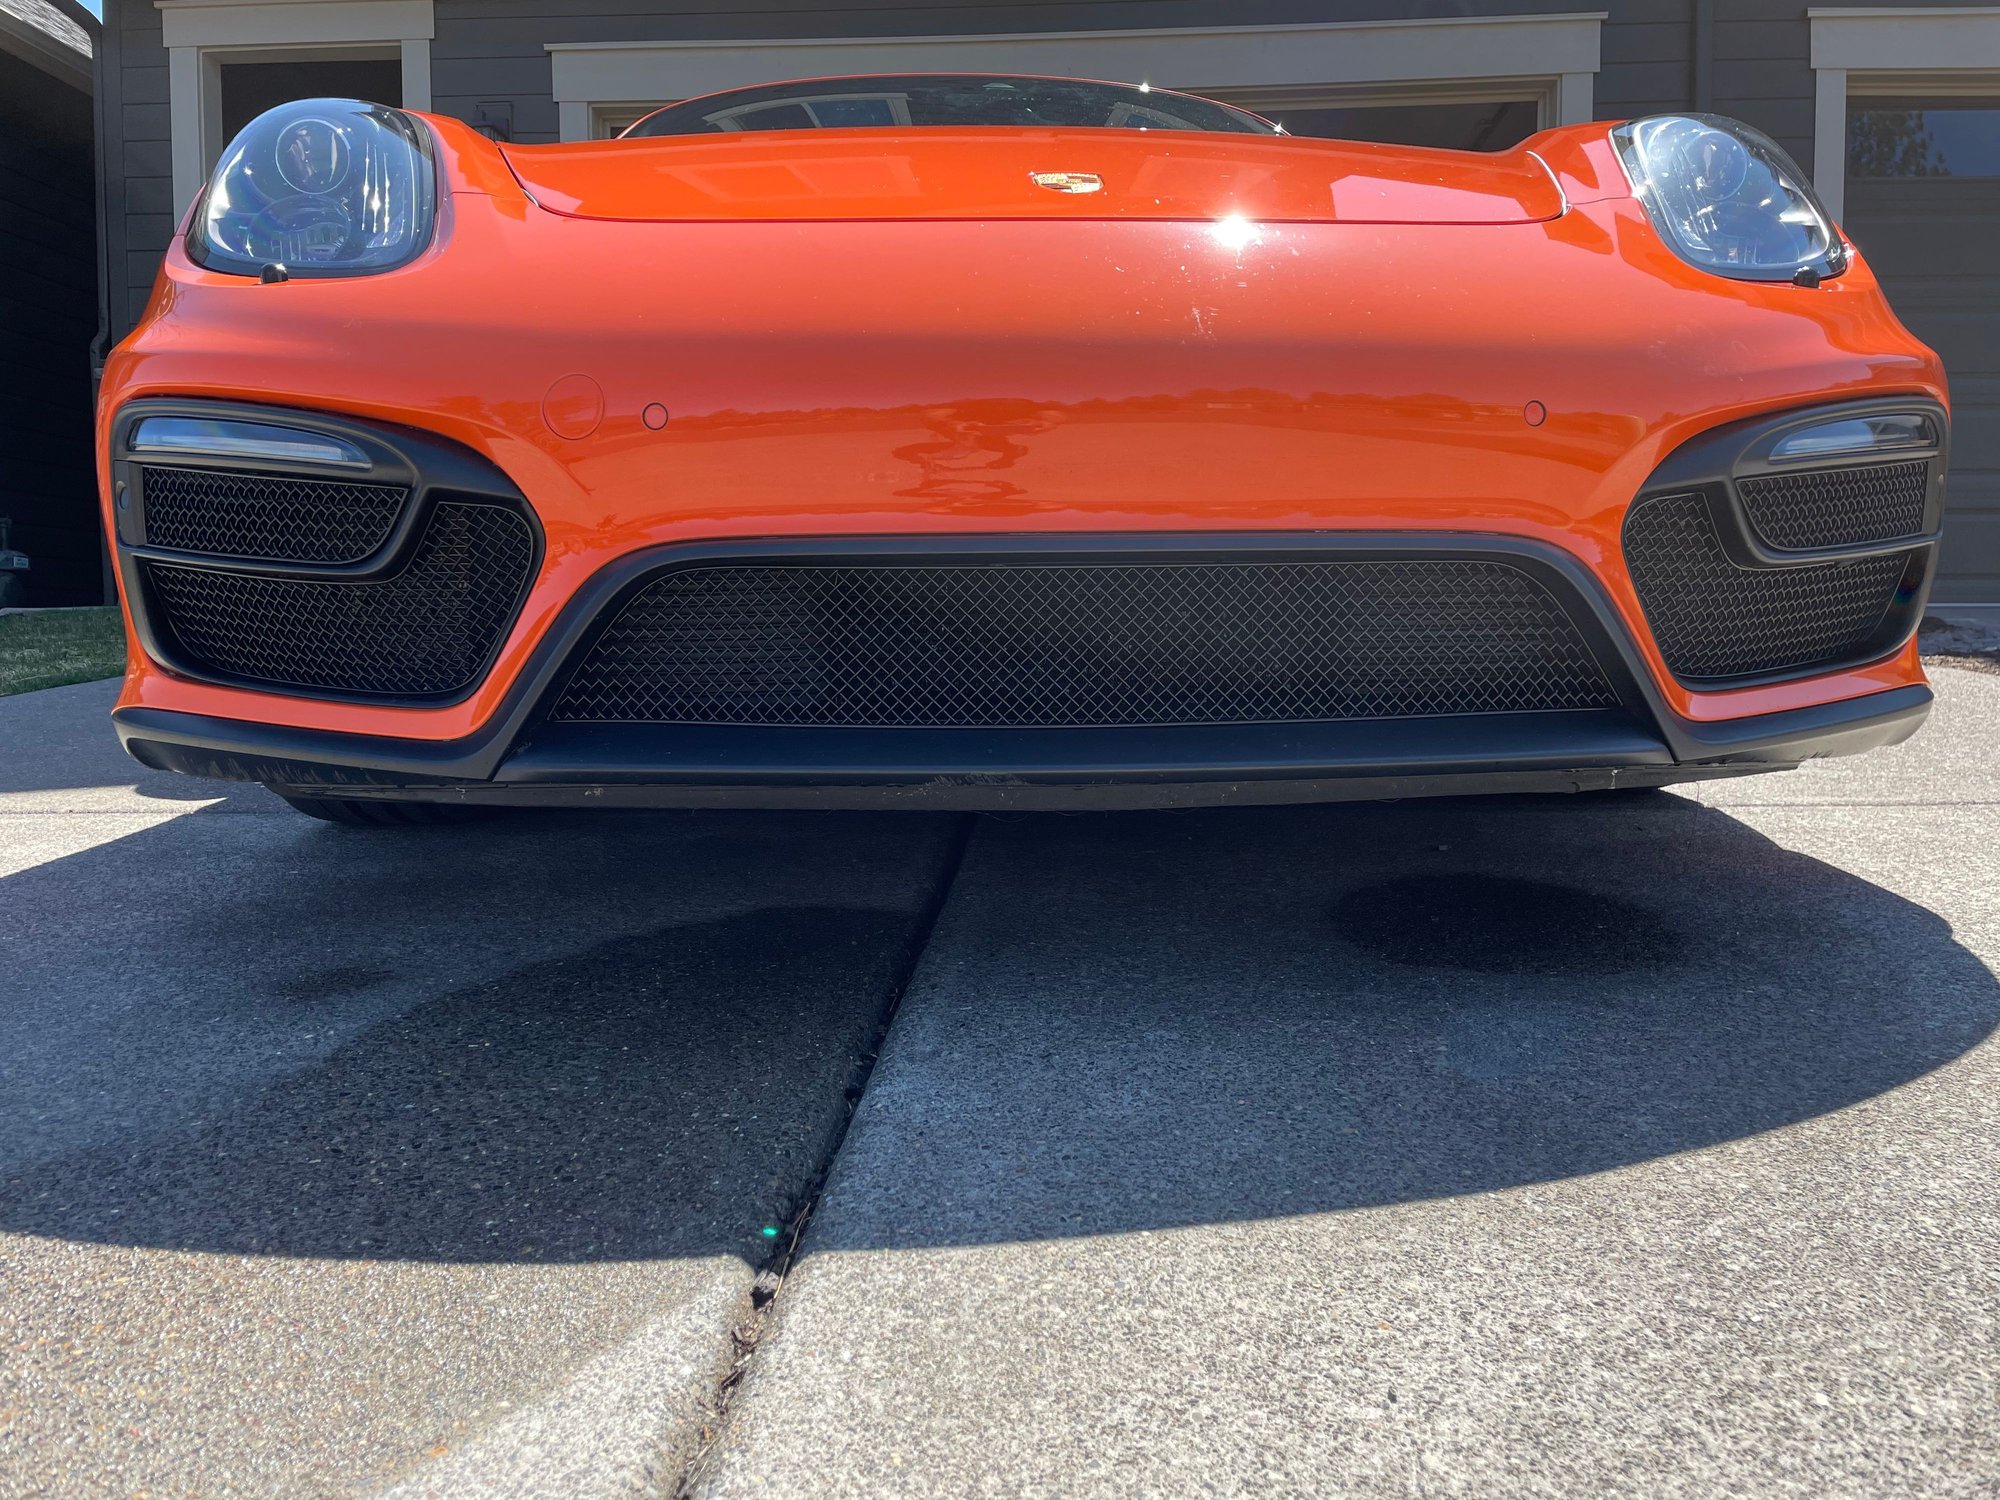
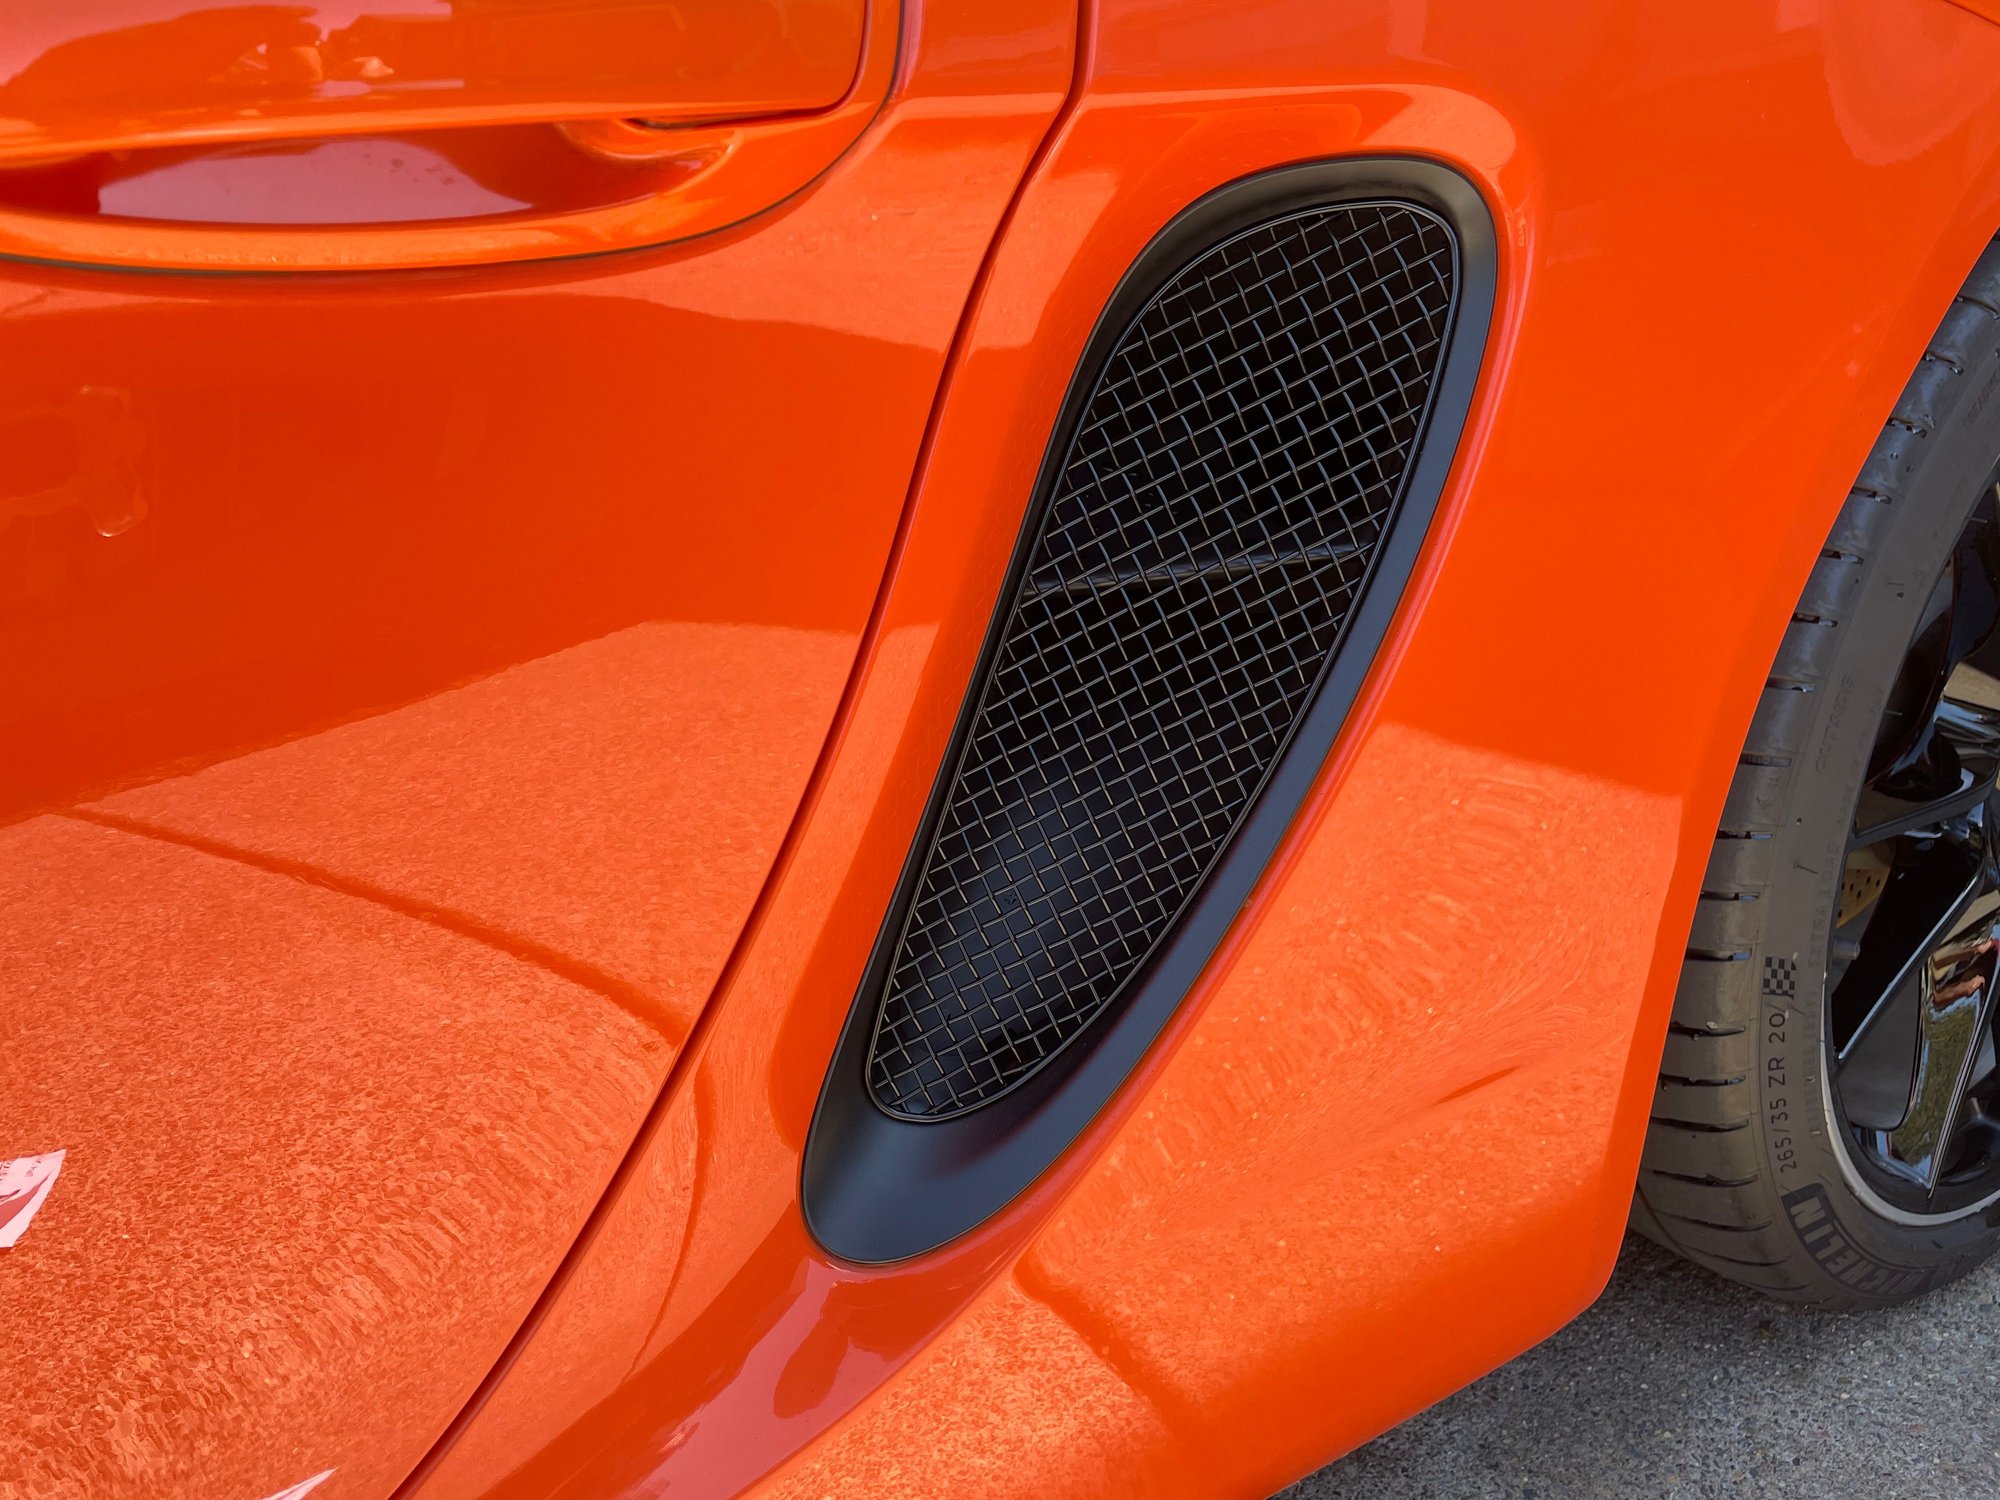
I installed my Zunsport grilles today. It was pretty fast delivery and only took about 3-4 business days to arrive. I ordered the front grille set and the side intake grilles. In retrospect, I think the side intake grilles are overkill and I would not bother ordering those since there is already a plastic grille in the intake to prevent large objects from entering.
Overall, it took about 30 min to install everything. The front side intake grilles are the most difficult to install, specifically the lower grilles. If you have large hands, it is challenging to maneuver your hand behind the grille to seat their grip clip properly. It is a tight fit and awkward. The rest are fairly straightforward. Make sure you use a thin screwdriver or tool to ensure the clips engage and are fully seated behind the plastic liners of the intakes. You will see them click into place. Tug on the grilles to make sure they are seated properly. Take your time and follow the instructions. Zunsport also provides links to installation videos to help. Also, make sure to clean out your intake cavities before installing the grilles. It is a pain to remove the grilles once installed.
This happened to me once when the dealer removed the panel to replace due to sticky buttons. I took it back and they enabled it again for me. Must be some coding option.
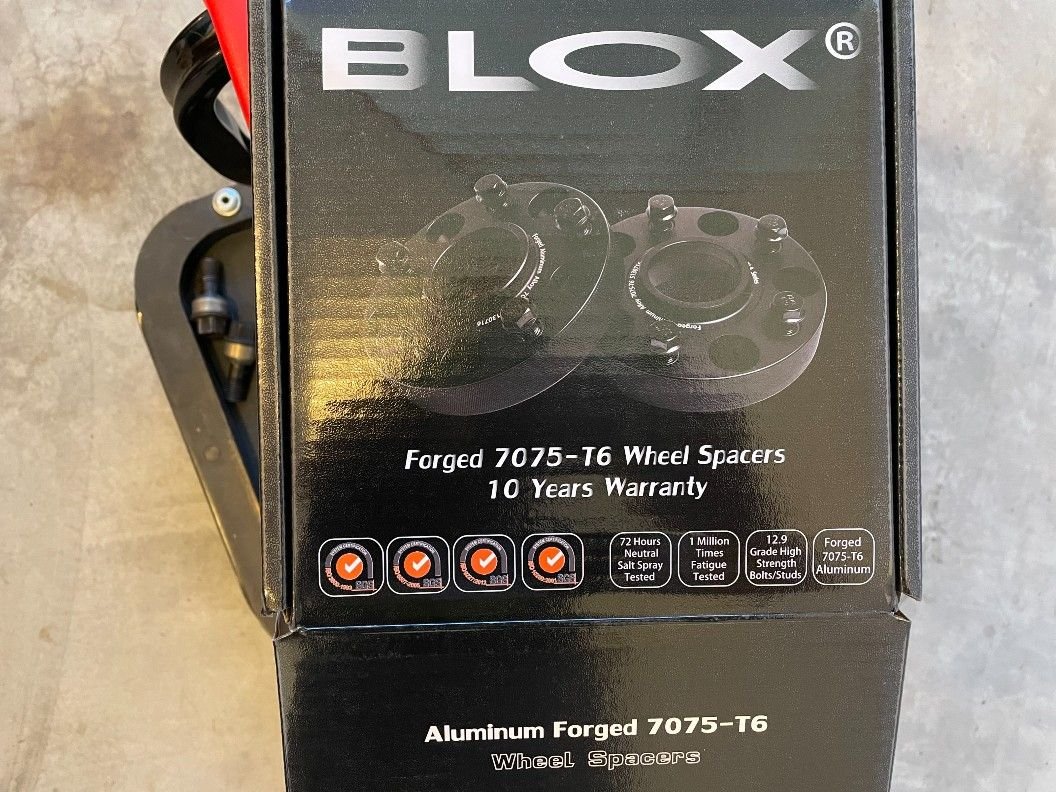
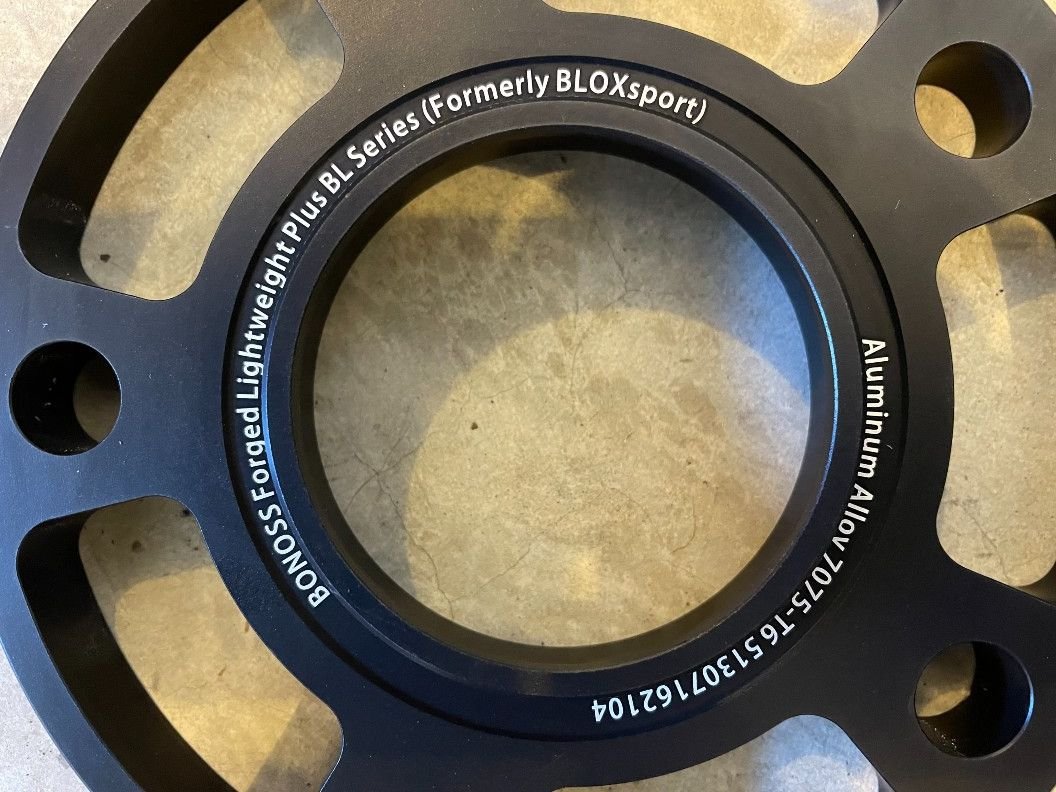
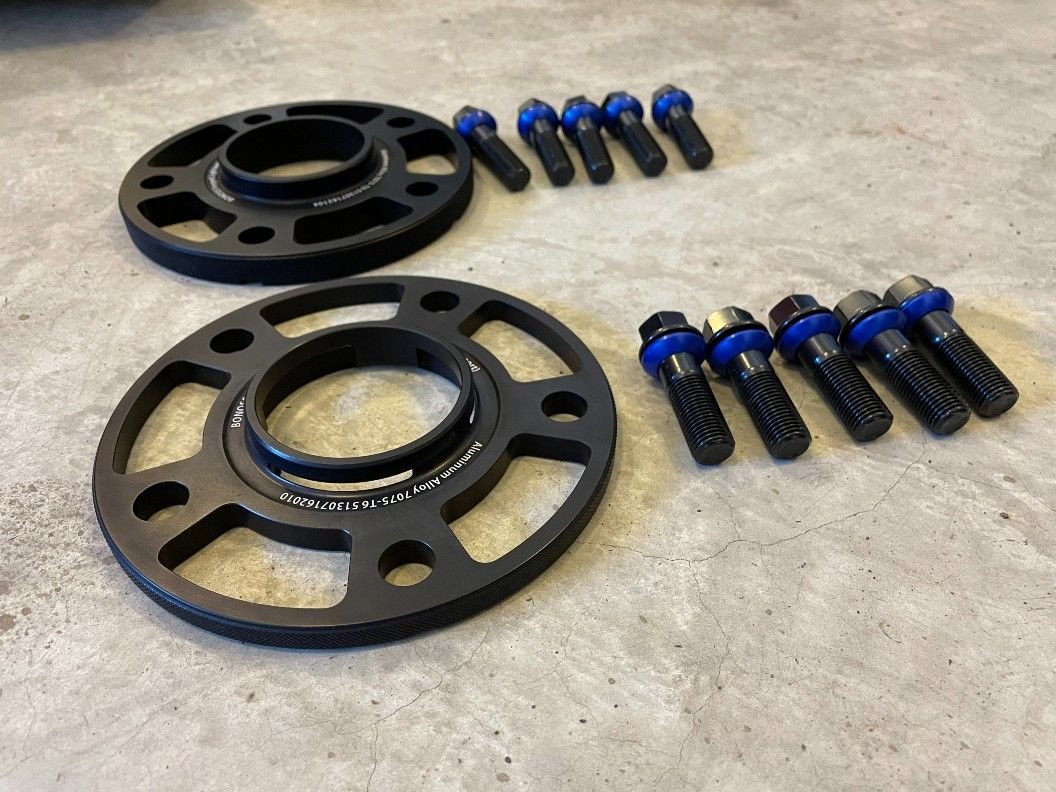
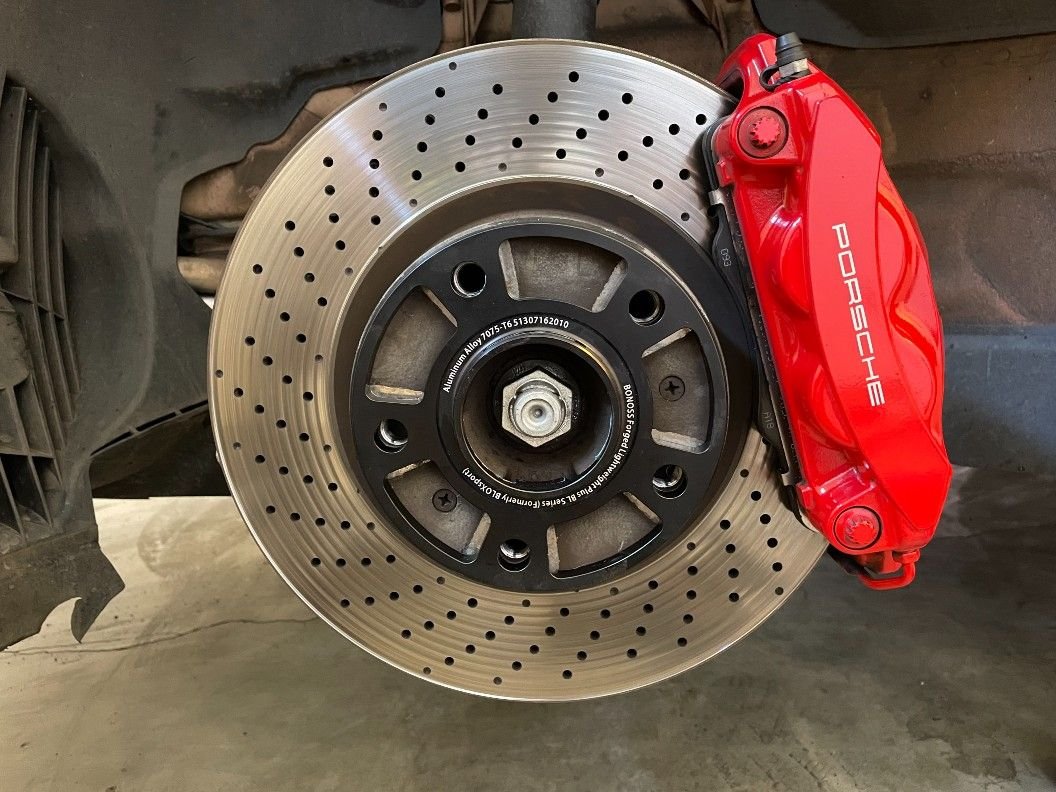
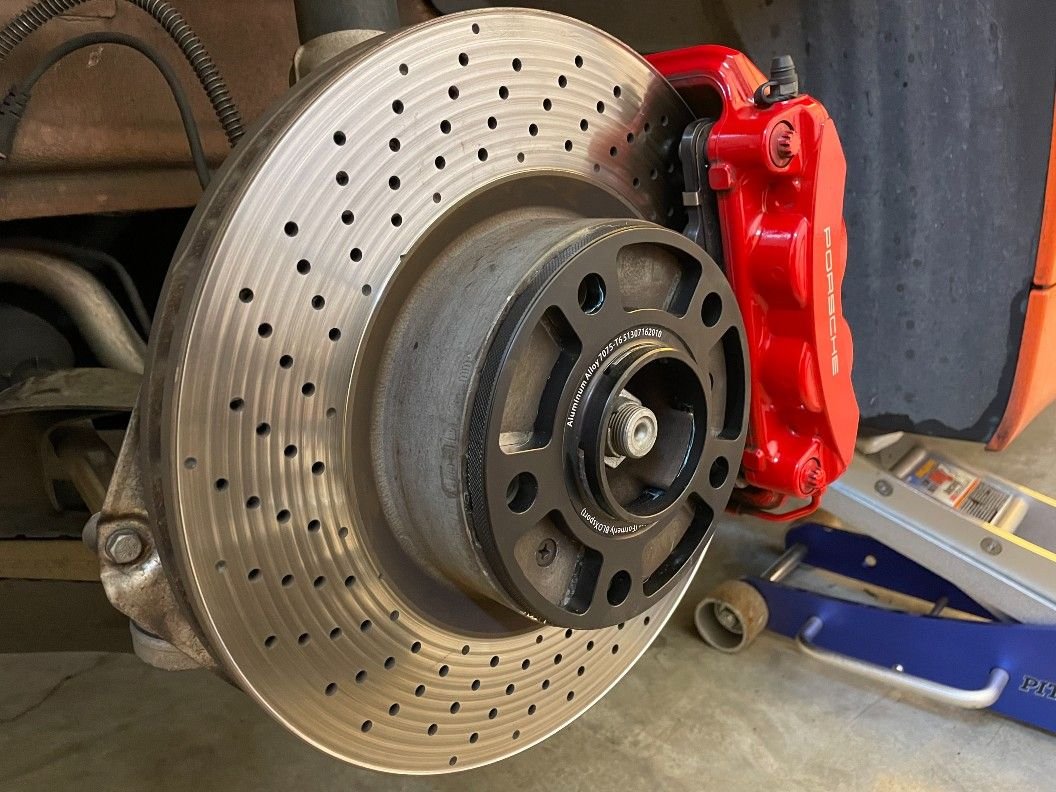
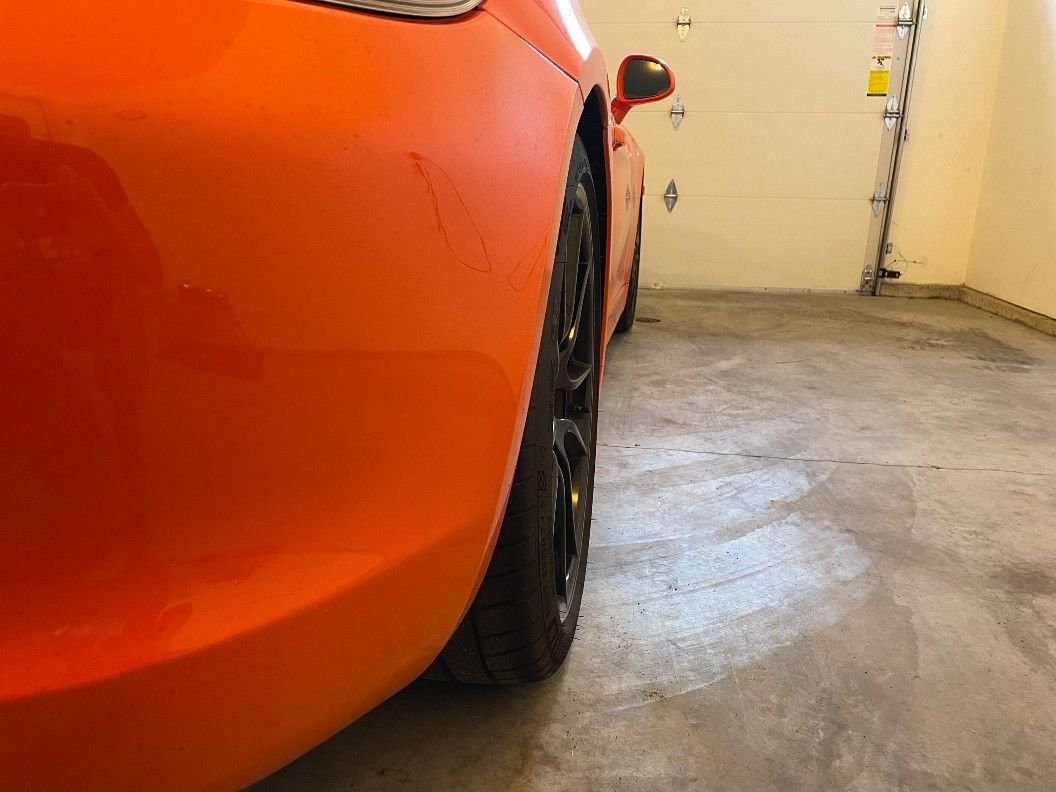
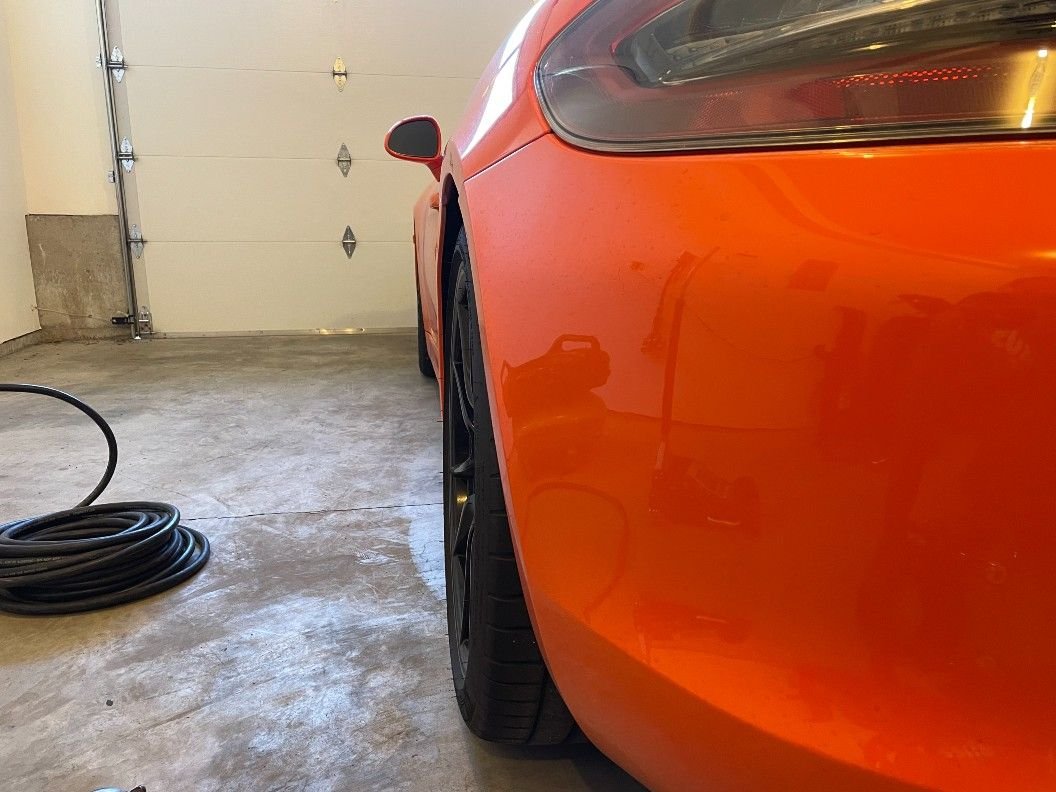
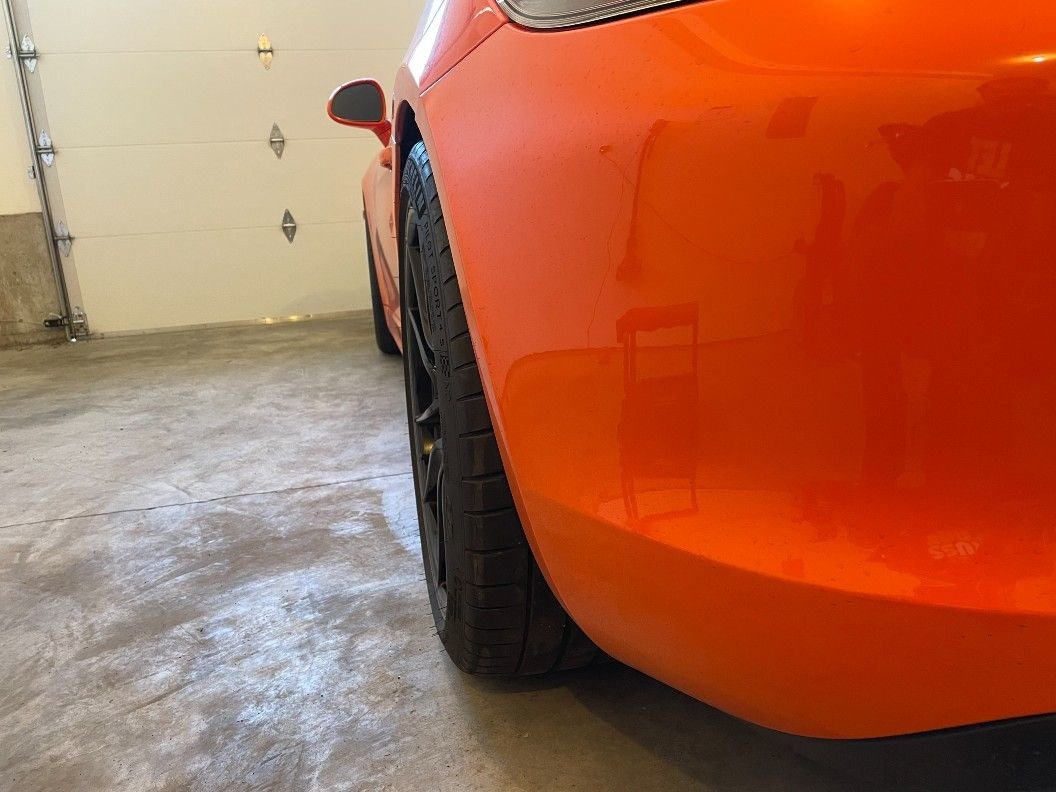
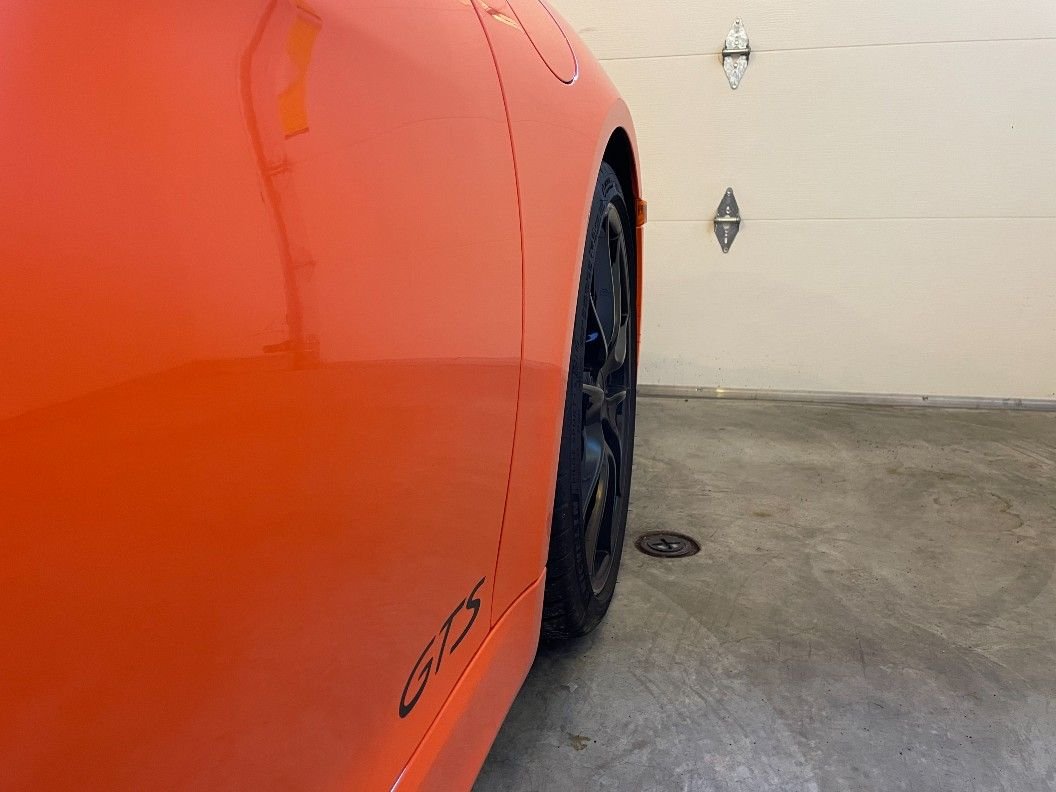
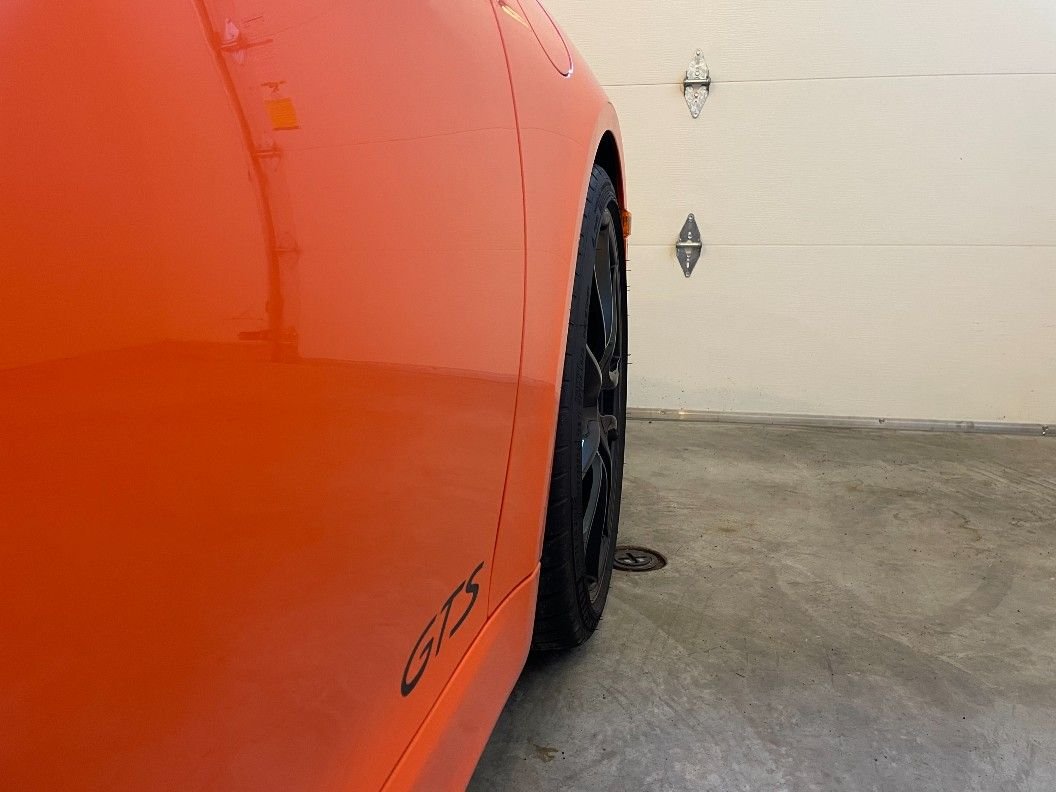
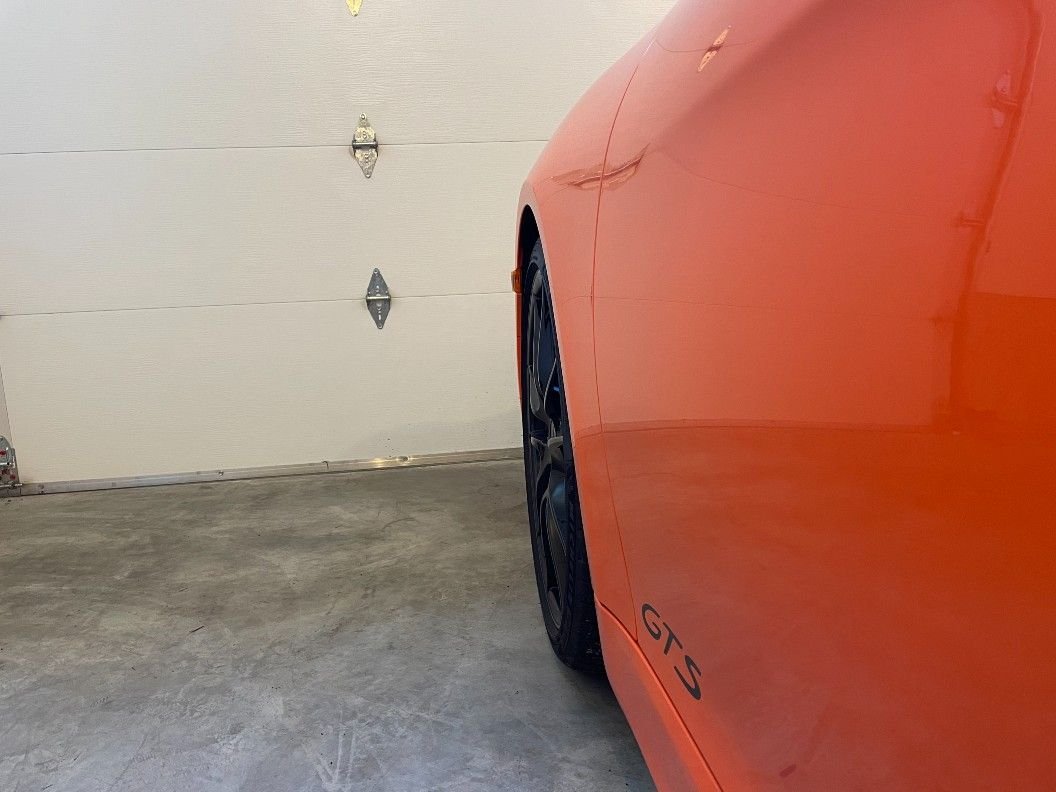
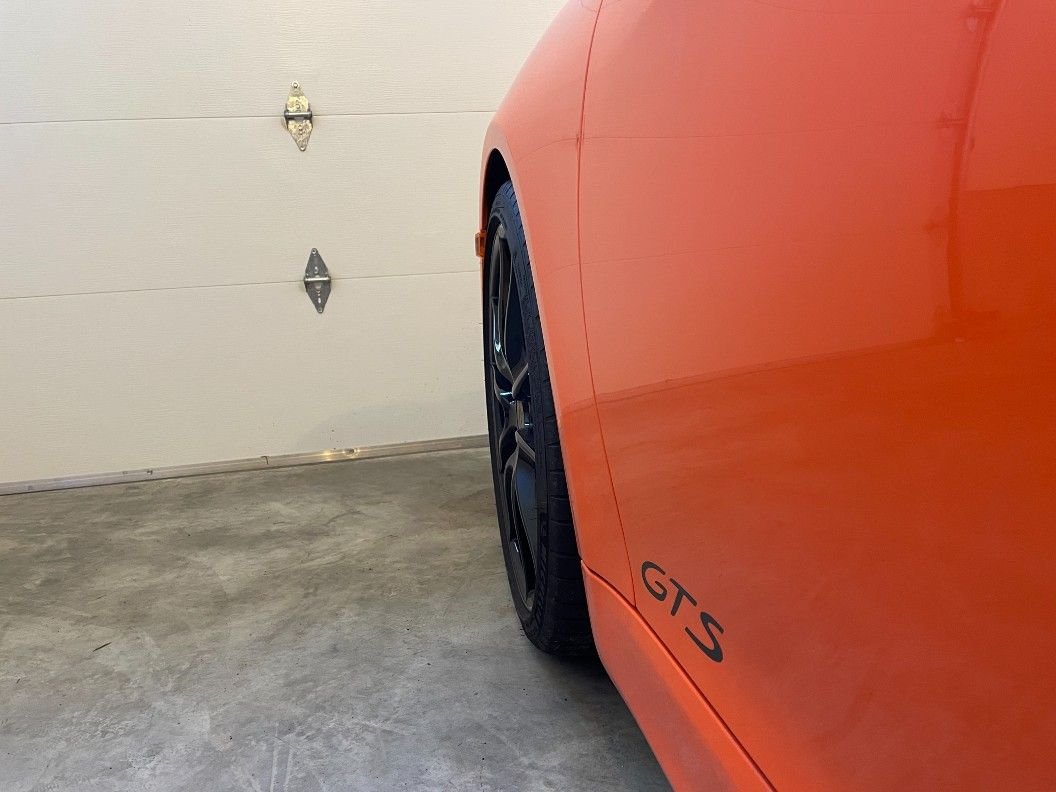
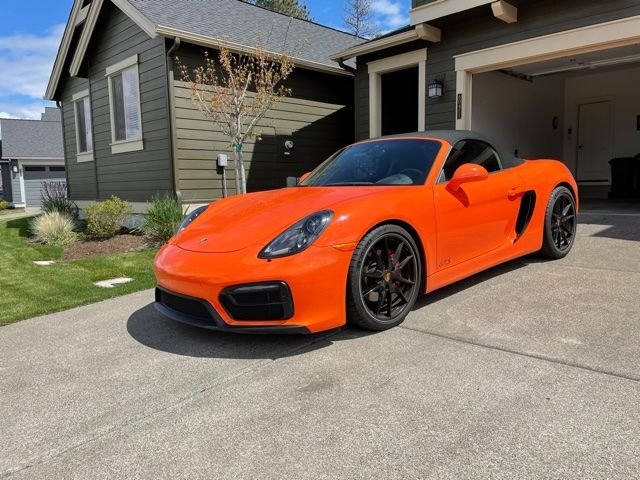
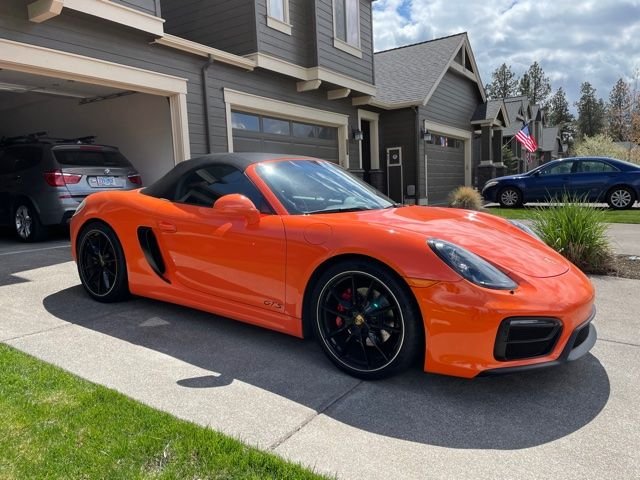
One of the few things I wasn't happy about with my GTS is how the wheels fit in the wheel arches. The offsets are too high for my taste so I recently installed wheel spacers: 10mm front and 15mm rear. I purchased aluminum hubcentric spacers on eBay. The brand is called BloxSport. I had never purchased this brand before and have no affiliation with them. They seem to be well-made/machined and came with a black anodized finish. I was able to buy a package deal that included both front and rear spacers including the extended bolts. Total cost was about $209. Overall, I am happy with the fitment and look. So far, no rubbing over bumps or lock-to-lock on the front wheels, but I've only driven about 25 miles and haven't gone over any big bumps. But my eye test tells me it should be fine.
Install tips:
Apply a thin film of anti-seize on the back of the spacers before installing. This will make it a little easier to remove in the future.
While you have your wheels off, take the time to clean your brake calipers. I spent about 10 minutes per caliper dry wiping them with a clean rag. Not concours-quality, but good enough for a couple months.
Front spacer installed
Cons:
Both front and rear spacers required a little "encouragement" with my rubber mallet to fit over the hub flanges. It is snug but not too tight that you can't remove them easily in the future.
My biggest gripe is that the extended bolts have heads that are 17mm, which are smaller than the stock 19mm head size. For the engineers out there, do you think there is any mechanical risk in using these bolts with a smaller head size? I was able to torque them down to 120 lb-ft easily. Factory spec is 118 lb-ft. I might end up buying proper extended bolts with 19mm heads.
The front (10mm) spacers can only fit the front hub and flanges in one specific orientation due to the way the cut-outs on the back of the spacer are oriented. Test fit before pressing them over the flanges. The rear 15mm spacers had no such issue.
Here are some before and after photos for comparison.
Congrats again Jim. Looking forward to seeing what you do with the car and already like the mods that you've done.
Also, glad that you made the move over to a car that works better for your lifestyle. As a 997 GT3 owner, I can attest to what a great car it is for my purposes, but it definitely isn't the best choice for everyone, especially if you want to use it all the time, use it around town (heavier clutch and lower car). Glad that you were able to recognize that and move into a better car for you.
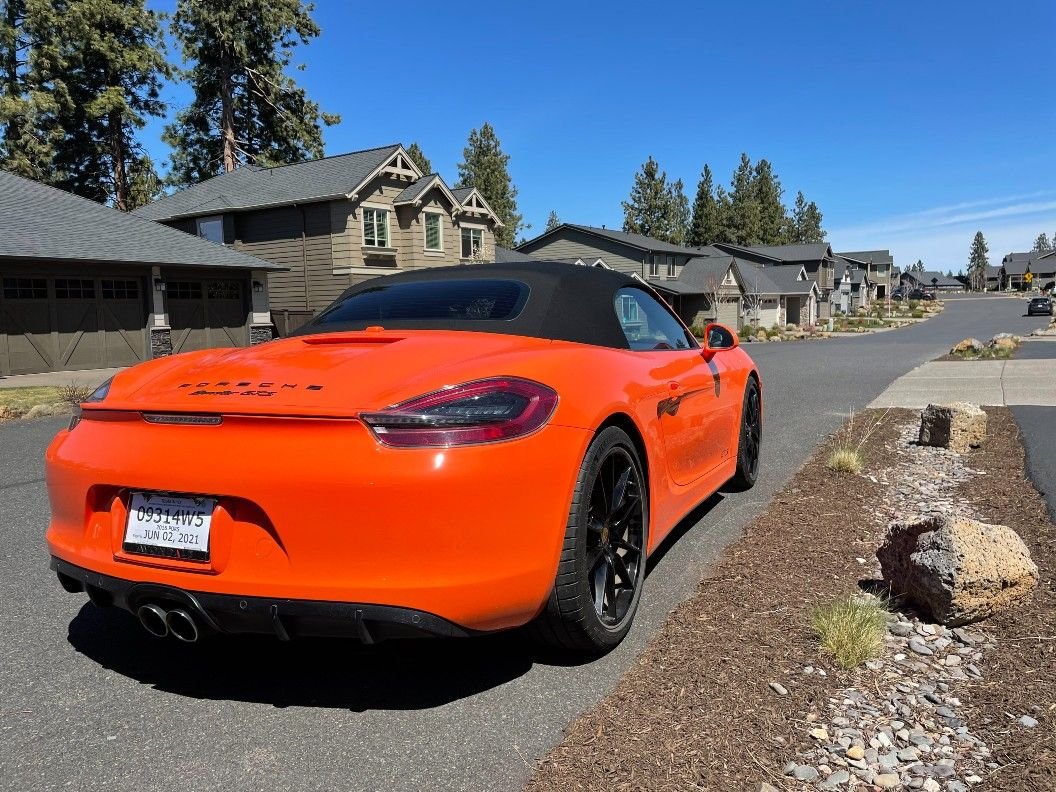
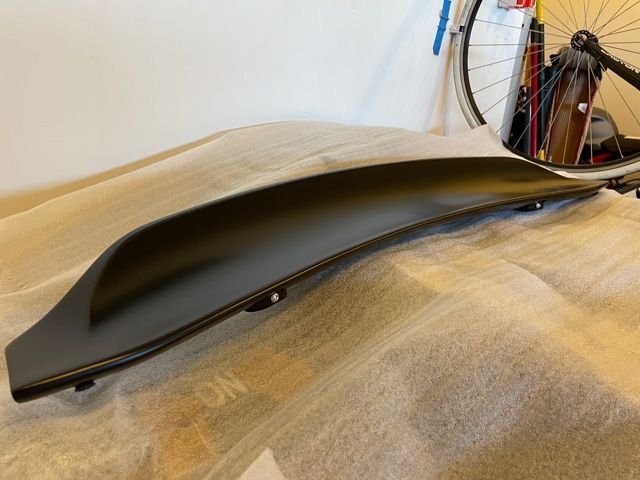
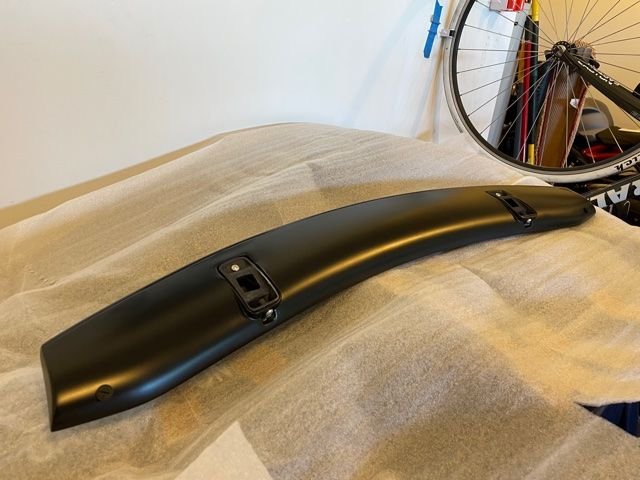
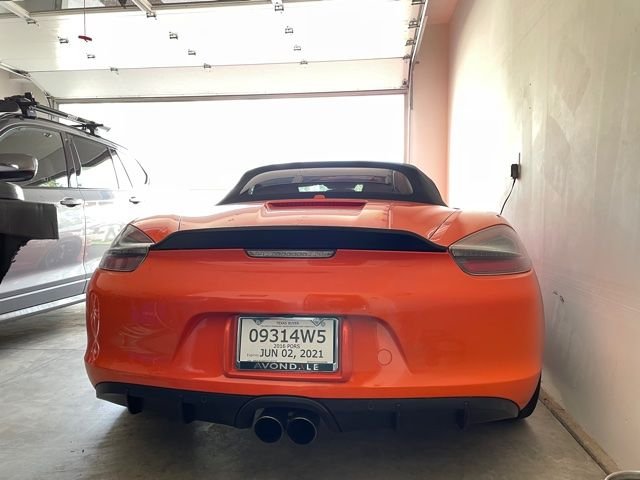
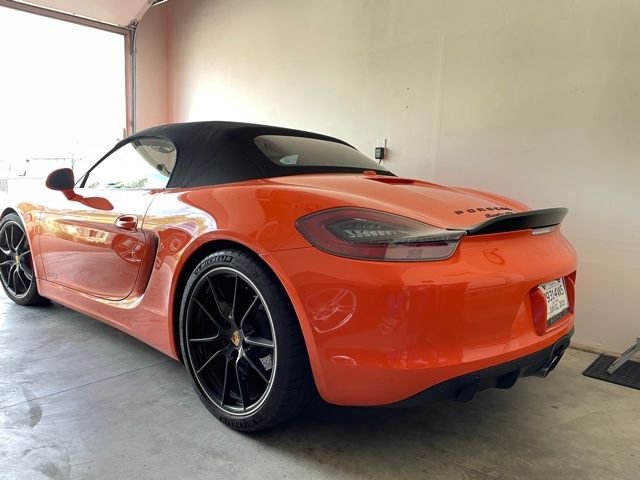
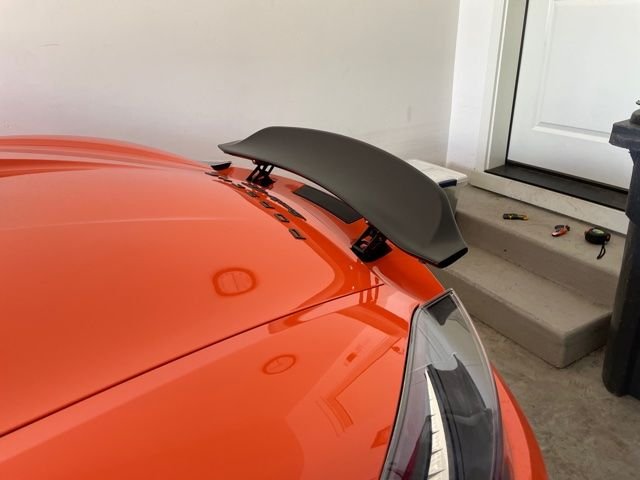
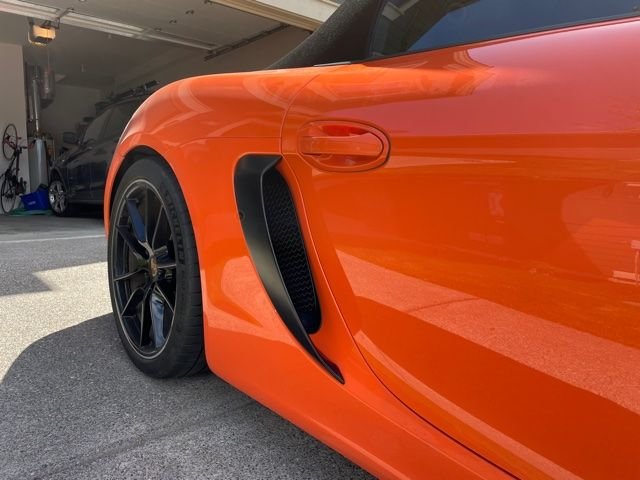
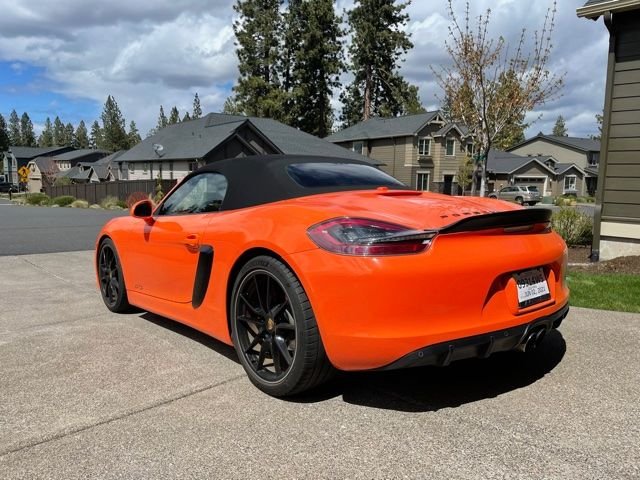
I've had a duck tail on all of my aircooled 911s and decided to emulate the look on the GTS and install the Spyder duck tail. I bought mine from Direct Car Toys (https://directcartoys.com/2013-2016-...g-spoiler.html). I have no affiliation with DCT other than being a customer. I wanted the ability to order one painted and Omar was able to accommodate and can paint the part any Porsche color. I decided to go with satin black for some contrast. Cost is $595 painted + tax and shipping. I also ordered their GT4 side ducts, which I will detail the install in another post.
The parts came well-packaged and overall the quality and fit is terrific. The duck tail includes the necessary mounting brackets and hardware, including rubber feet for the corners.
I watched this YouTube video for the DIY on how to remove the stock spoiler and install the duck tail.
The new spoiler also comes with instructions from DCT but there are some modifications required (at least with my install) that I will point out. Removing the stock spoiler is very easy and only takes about 5 minutes. Total install time for me was about 2 hours, but that included running to the hardware store to buy some hardware, which I will explain below. Overall, this install requires a lot of fiddling and making adjustments to the new spoiler across all axes, which requires making small adjustments to the brackets, raising and lowering the spoiler, tightening and removing the fastening bolts multiple times, etc. This install will require trial and error to dial in the fitment you want. It takes patience and time.
Here are some tips for anyone thinking about doing this install:
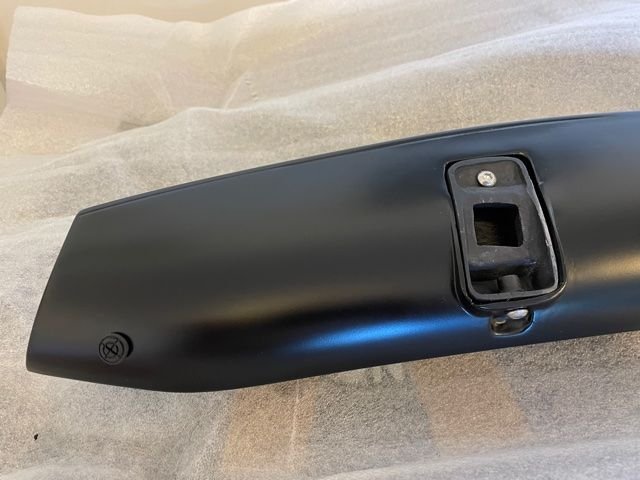
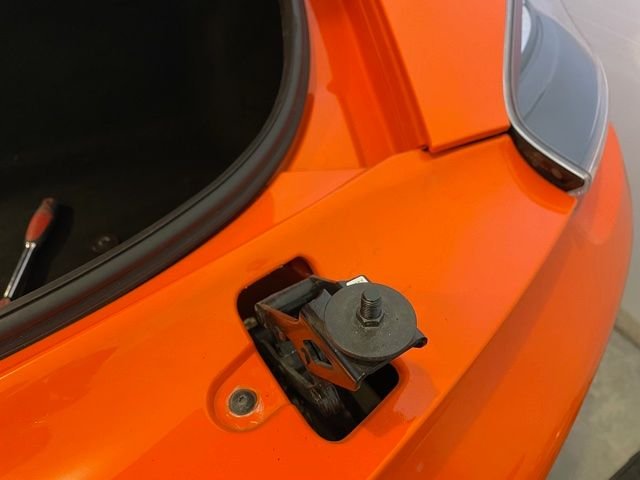
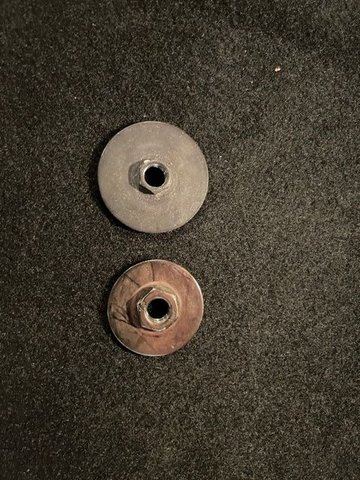
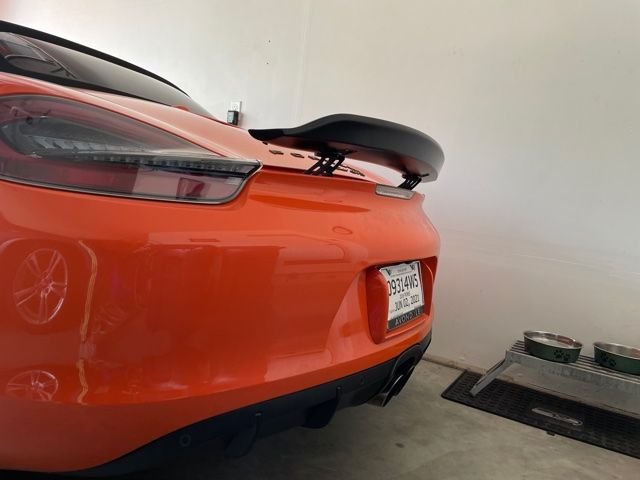
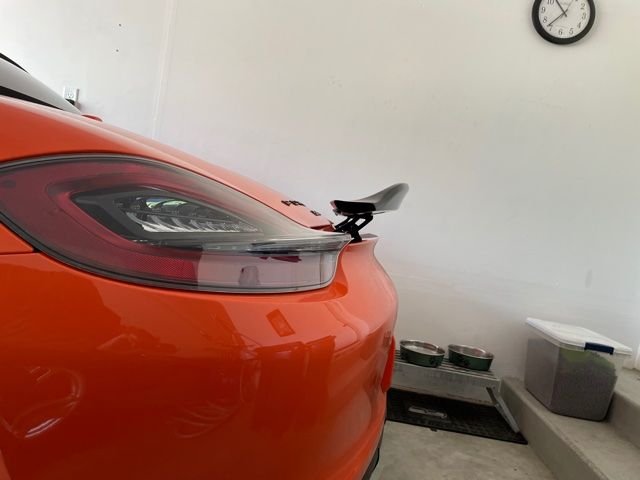
First, you need to raise the wing in order to remove the stock wing. There are five torx bolts (although mine only had three) and two retaining nut/washers that hold the stock wing in place. Remove the torx bolts first in order to access the retaining washers that sit on top of the stock wing on either side. Once the stock wing is removed, you will see a second retaining nut/washer beneath the first one. You will need to remove the second nut/washers as well. These are tightened/loosened with a 10mm nut that is attached to the washer and is normally used to adjust the height of the wing. It is slightly bigger than the one that secures the wing to the stanchions (see pics below). DCT instructions imply you can do the install with these washers in place but when I did this, the duck tail sat too high, even when I tightened the washers down to their lowest setting.
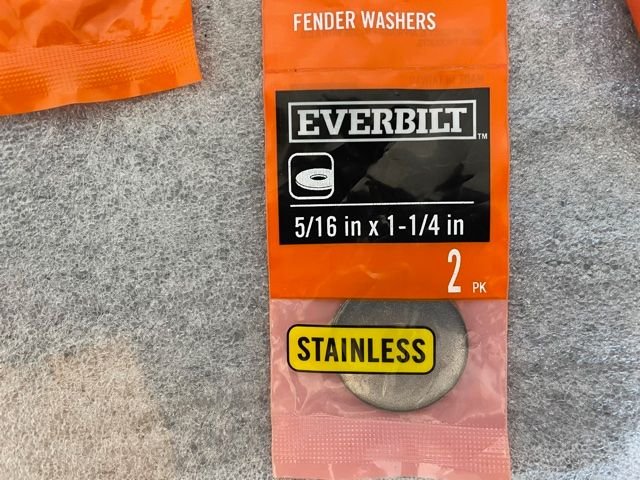
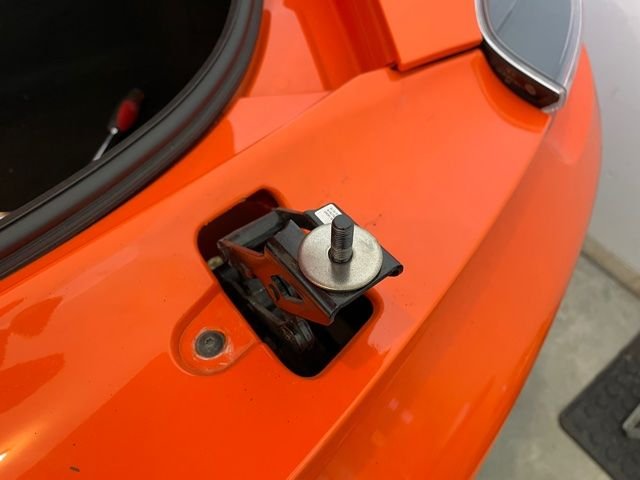
After removing the second washer, I used stainless steel washers (5/16" x 1-1/4") I bought from Home Depot to function as a spacer for the new duck tail (one per side). The spacer prevents the new wing from bottoming out when the wing is fully retracted. WARNING: if you don't install the spacer, you will risk damaging/cracking the wing when fully retracted. It is fragile and made of fiberglass!!
With the spacer installed you can place the provided bracket on top of each stanchion. You will have to eyeball it the first time before tightening down the brackets. Tighten each bracket enough so that it doesn't move but you can still move it laterally and forward/back. Place the duck tail on top of the brackets and test that you can easily thread the supplied 6mm bolts to secure the duck tail to the stanchions. If you can't easily hand-thread the 6mm bolts on both sides, you will need to adjust each bracket accordingly. Only Hand-tighten the 6mm bolts while testing fitment/positioning. Once you have done this, lower the spoiler to test for fitment. Be prepared to do this many times! WARNING: place rags over the holes that the stanchions rise out from the rear bumper. If you don't, you risk losing hardware. Ask me how I know!
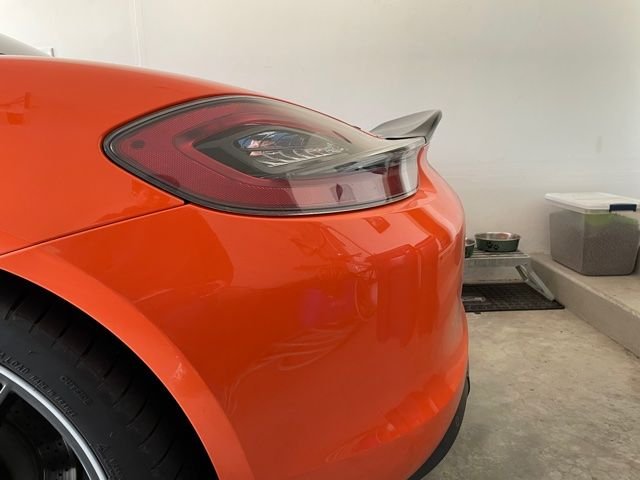
Once you have made all the necessary adjustments and have the duck tail in the desired position, remove the 6mm bolts and apply blue thread locker before final tightening. Do not over-tighten these bolts at risk of cracking the wing! Here are pics of the duck tail installed. I will get better pics the next time I get the car out. Overall, I dig the new look!
wow i have also considered all of your mods. well done! i did the zunsport front center grille, about to be going on my third one now after losing two.
my first grille held on through two roundtrip snowbirds on the east coast, but then i think i bumped a parking kerb. the second one i just dont think i secured well enough.
spacers and ducktail i have thought about both; all these mods bring out more of the exotic touch of the 981 body.
i have the same carrera S wheels with the silver lip. i agree a hearty spacer enhances them. Q: safe to do just the rears?
everything looks great on your vehicle with that amazing color. cheers.
Thanks, John. Next time you do the install for the Zunsport grille, use a thin flathead screwdriver to poke through the grille and press on the clip to ensure it seats behind the plastic lip. You will see and hear it click into place. The way it is designed, once it is seated, it is very difficult to remove. Yes, it is safe to only install rear spacers as long as they are hubcentric and the center bore is correct. Good luck with the install and let me know if I can help. Post pics when you have them installed.
Originally Posted by jago
wow i have also considered all of your mods. well done! i did the zunsport front center grille, about to be going on my third one now after losing two.
my first grille held on through two roundtrip snowbirds on the east coast, but then i think i bumped a parking kerb. the second one i just dont think i secured well enough.
spacers and ducktail i have thought about both; all these mods bring out more of the exotic touch of the 981 body.
i have the same carrera S wheels with the silver lip. i agree a hearty spacer enhances them. Q: safe to do just the rears?
everything looks great on your vehicle with that amazing color. cheers.
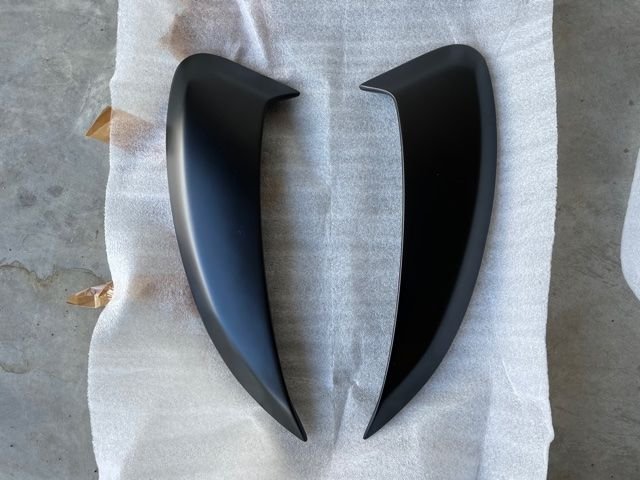
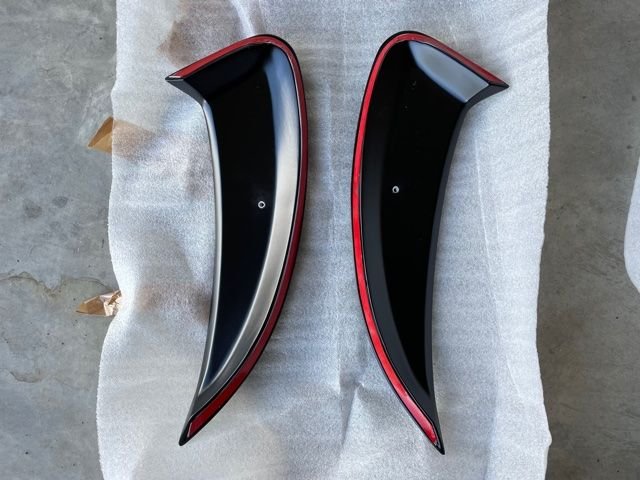
Today's project was installing GT4 side ducts. I bought mine from Direct Car Toys (https://directcartoys.com/2013-2016-...oop-vents.html), the same vendor I purchased the Spyder duck tail from. Cost is $350 painted. I got mine painted satin black, the same color and finish as the duck tail. Overall, I am pleased with the quality, fit and finish. The ducts come with double-sided tape already installed on the parts, adhesion promoter, and black RTV sealant (more on this later). This is what they look like out of the box:
Install instructions are pretty straightforward so I won't go into detail here. Some things to note:
Clean the surface area well prior to install and use the included adhesion promoter or rubbing alcohol.
Mock up the position using painters tape before removing the backing from the double-sided tape.
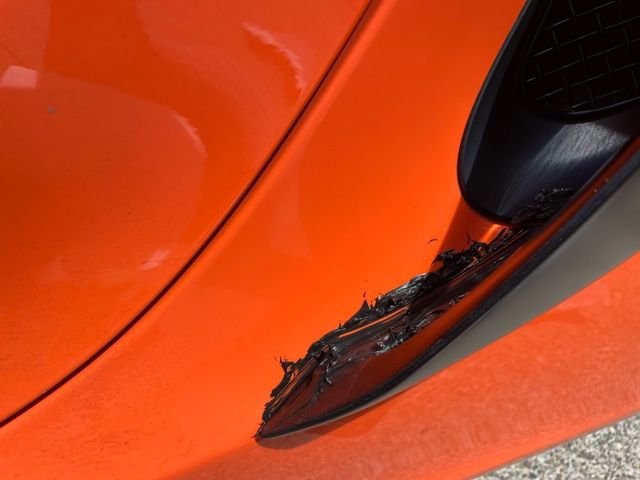
This install is not for the faint of heart and takes commitment due to the use of the RTV sealant. DCT recommends using a bead of RTV on the inside edge of the ducts for best results. I was reluctant to do this at first because if/when the time comes to remove the ducts, there will be residual silicone adhesive to deal with. But I decided to throw caution to the wind and go for it and assume I can remove the silicone down the road. After you adhere the ducts to the car, you will need to liberally apply the RTV to the inside edge of each duct in order to get a good bead. This is where the commitment comes in because initially it looks really disgusting (see below pic). I overcame my reluctance and went for it. If you act quickly enough, you can wipe away the excess RTV very easily and it looks as good as new. Have a full roll of paper towels or many disposable cloths on hand, Q-tips, and rubbing alcohol. Be diligent about wiping away excess RTV to minimize cleaning any unwanted adhesive in the future when you remove the ducts.
Here is the finished look. This pretty much completes all the aesthetic mods I have in mind (for now). Thanks for looking.
wow i have also considered all of your mods. well done! i did the zunsport front center grille, about to be going on my third one now after losing two.
my first grille held on through two roundtrip snowbirds on the east coast, but then i think i bumped a parking kerb. the second one i just dont think i secured well enough.
spacers and ducktail i have thought about both; all these mods bring out more of the exotic touch of the 981 body.
i have the same carrera S wheels with the silver lip. i agree a hearty spacer enhances them. Q: safe to do just the rears?
everything looks great on your vehicle with that amazing color. cheers.
Similar to my experience when I installed Zunsport grilles on a 2015 BGTS, regarding the center grille. Did the installation and the clips/anchors were firmly seated but whenever the front end touched (i.e. steep driveway, curb, parking lot bumper, etc.) the center grille would pop out. Got to the point where I was almost paranoid when I parked the car. Inevitably, I forgot or failed to notice once when the center grille popped out and it was gone. Didn't bother to replace. The side grilles worked fine. I didn't do the air intake grilles.
I got the "Euro" clear LED front turn signals and replaced the "USA" style orange ones but with an orange exterior color, the "USA" style lights look good.
Original owner on mine chose to delete model designation on the rear trunk lid (i.e. there was no "Boxster GTS" on the trunk lid). I chose to get some "GTS" letters and had them installed on the rear, between the spoiler and the license plate and the result was pretty good. Was more appealing to me than with letters mounted on trunk lid.
Nice looking buggy. Seeing the results of the side intake scoops has me thinking I might look into getting some for my Spyder (the successor to the 2015 BGTS). The orange accents of the interior look good and I can only imagine how much Porsche gouged the original owner for it; on my Spyder, the original owner chose the option where the ventilation louvers are Guards Red instead of the standard black and the window sticker lists that as costing $1200.00. I've looked into getting the seat belts changed from standard black to Guards Red. Strangely (to me at least), it costs about $300 to do that as an ordered option when buying new whereas dealer wanted close to $2K to do it aftermarket. Hard to think of another manufacturer that plays the option game as much as Porsche.

 04-18-2021, 07:36 PM