When you click on links to various merchants on this site and make a purchase, this can result in this site earning a commission. Affiliate programs and affiliations include, but are not limited to, the eBay Partner Network.
I'll get back to you all on the other thread, but I thought I would separate this question so others might find it later easily. I'm surprised this sort of thing can't be found easier, but I didn't see good pictures of CV joint wear.
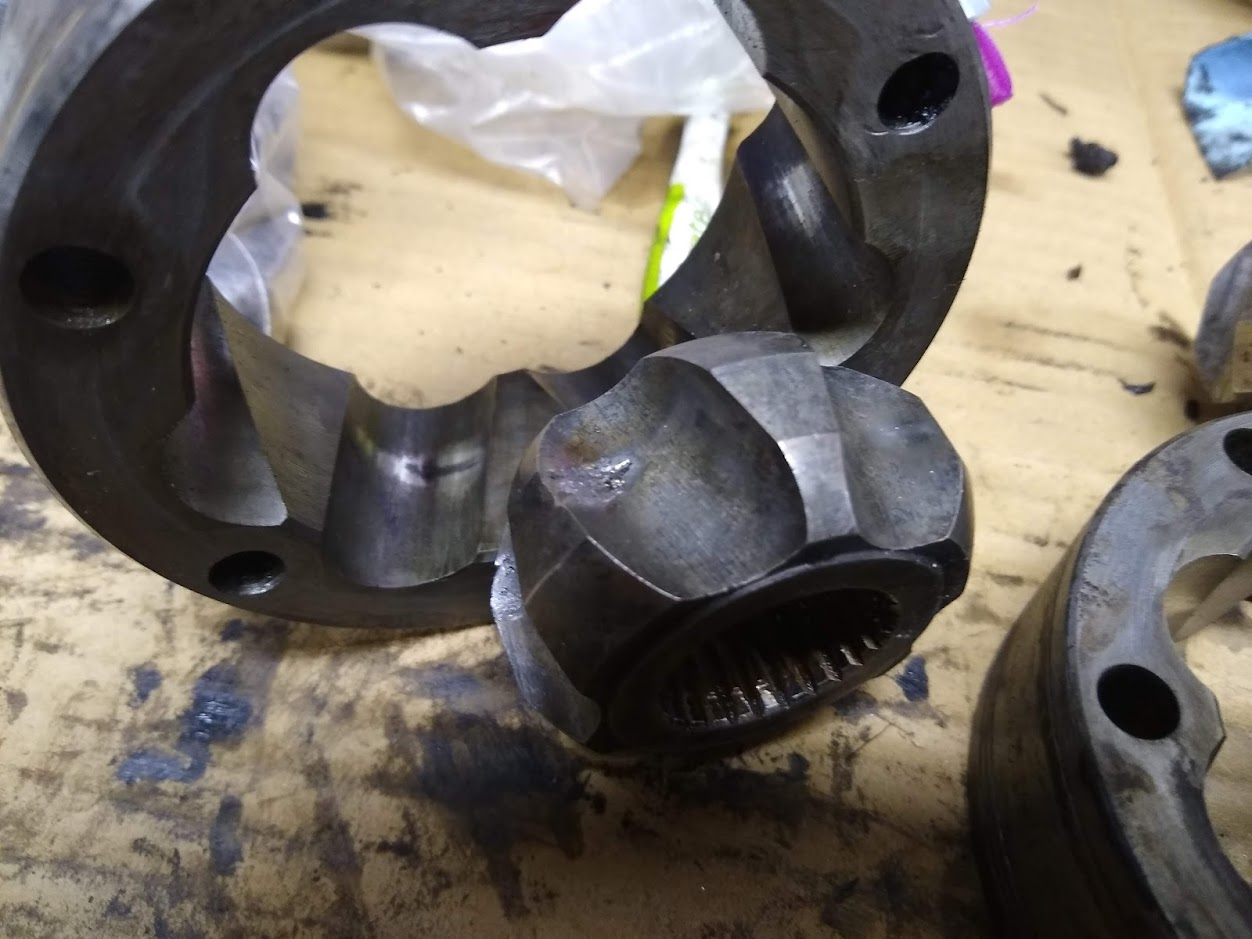
In reading, I see that you worry about CV Joints if they make, or they have up and down play. Mine seemed fine when I removed them from the car.
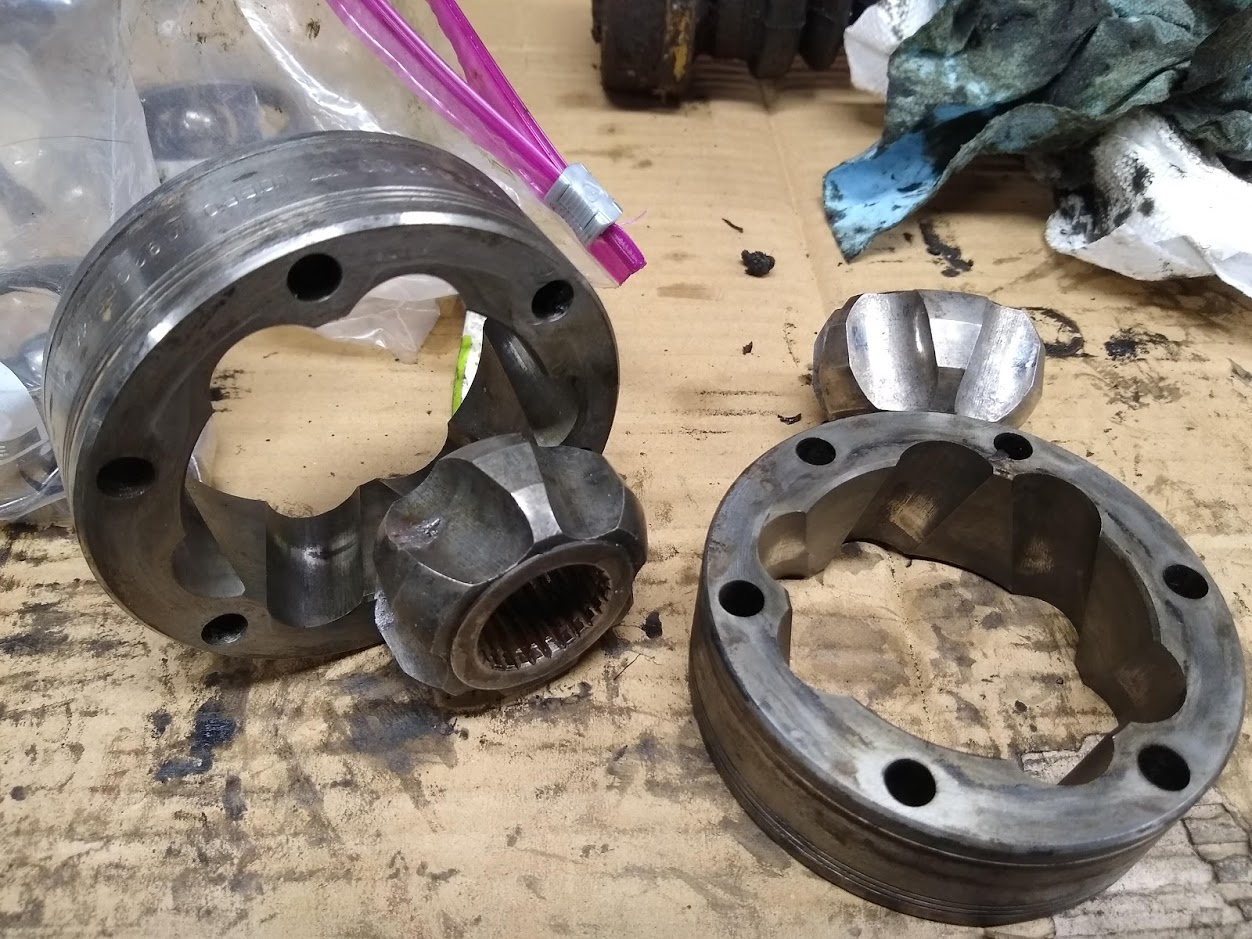
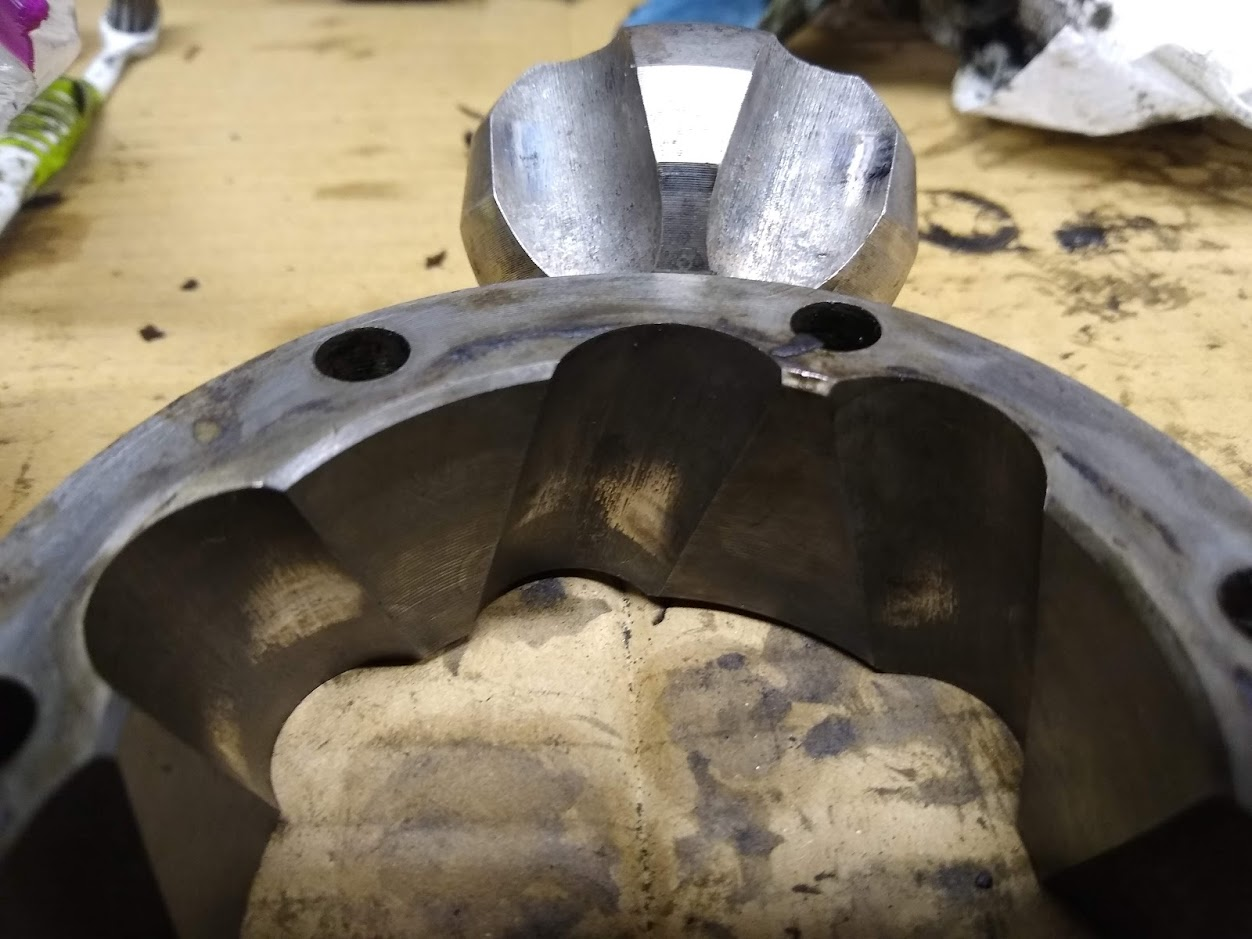
You experts out there, please chime in. I've just taken apart one axle tonight and here are the pictures. There's one wear spot that is very visible. All the ball bearings look good as do the cages. Thoughts? Are these useable?
That little spot is the worst one.
Here's another sot of the same one.
This is mostly color change, but it feels and looks smooth.
Each inner and outer cv race and hub has a thrust and decel side, naturally, the thrust/accel side gets more duty, that's why it's a good idea to rotate cvs generally.
For a track car, the tire leaves the ground over bumps, fast/hard cornering, etc while on heavy throttle so when it hits the ground the drive surface can take a beating not really seen on a street driven car, multiplying the wear rate and reducing the cv usable life. Bigger wheel/tires make this effect worse.
One single cv consisting of outer race, inner hub, cage and ***** is available separately but what I would do in your spot is source another in rebuildable condition, put it in the place of this one. The worn one, if just greased and reassembled, while not the best option, can serve as a spare in the event you have a complete cv failure to get you through 1 last day of a weekend.
I would rather replace them than to spend the time cleaning them. If you shop, you should still be able to source the joints for less than a Benjamin each.
Imho, the inner drivers goes first due to the heat off the exhaust. The Q7s have a sexy heat sheild that coddles the joint but wrapping the exhaust in that area might prolong that position.
All good advice and easily understood.
I have two complete extra axles, so I will dismantle more and see what the condition of those are. If I do need to buy some, looking EMPI, I don't think they make the same CV joint as it doesn't show in their catalog this year.
Do any of you know if the GKN Loebro CV Joint is German made? Quality?
Thanks,
John
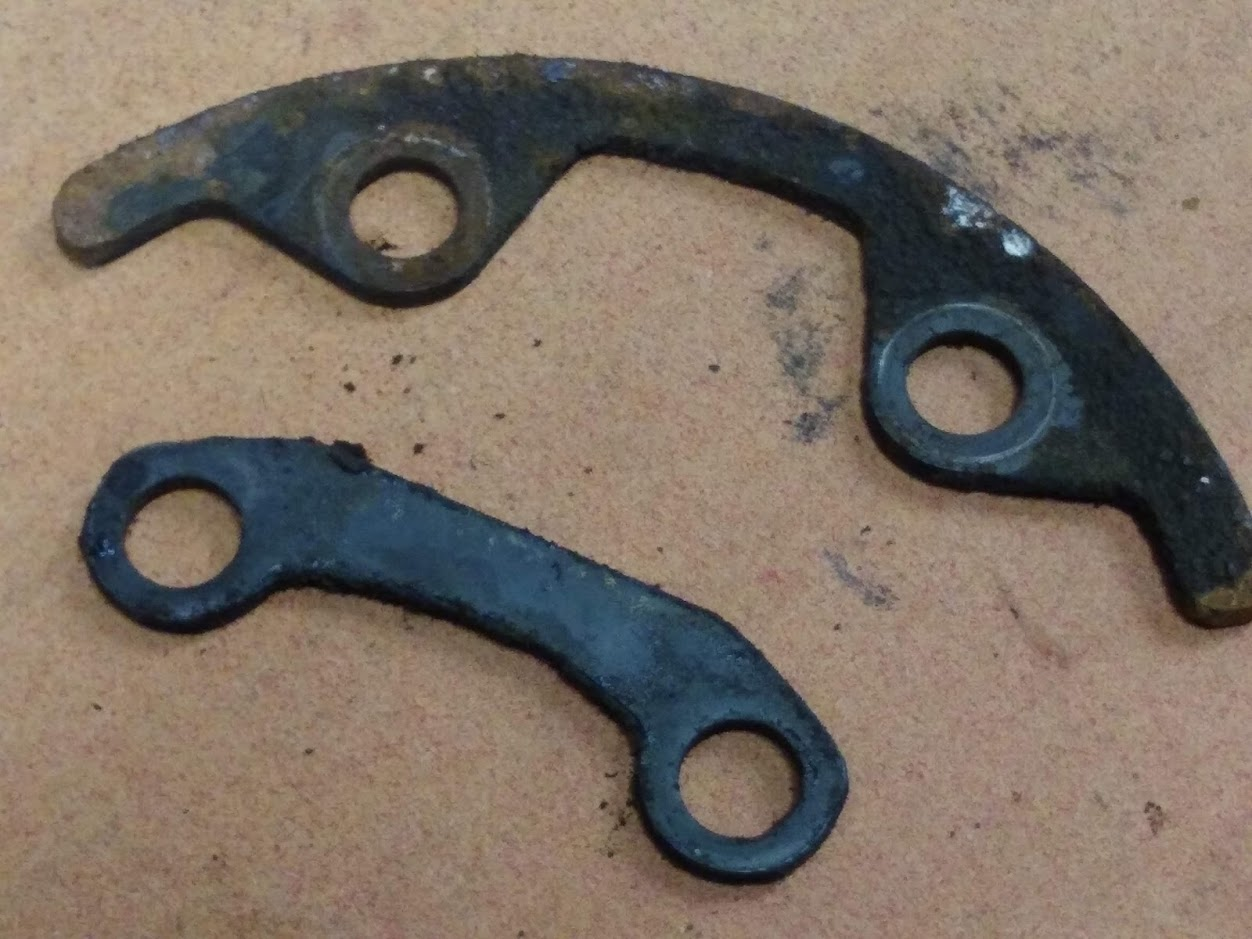
I wasn't careful with the washer~plates, and I installed the larger plates on the boots against the Transmission and the smaller ones against the wheel. It's such a time-consuming process also because I'm continuing to use Stage 8 Hardware, which is great stuff, but in this case, slow going.
Pictures show the mistake.
Do I need to change both so that there are the smaller hardware pieces are on the transmission side and the full-size hardware pieces on the wheel side? I have another set, so if the larger pieces are OK everywhere, that would be easier to just remove the smaller one and put on the larger one, instead of removing everything for a swap. Do you know why Porsche decided on the two different plate designs? I'm not sure I see a big advantage to one over another. The bigger plates might keep the wheel bearing cleaner. They didn't use the smaller ones to save weight! Someone must know the right solution here?? Can I just leave them the wrong way?
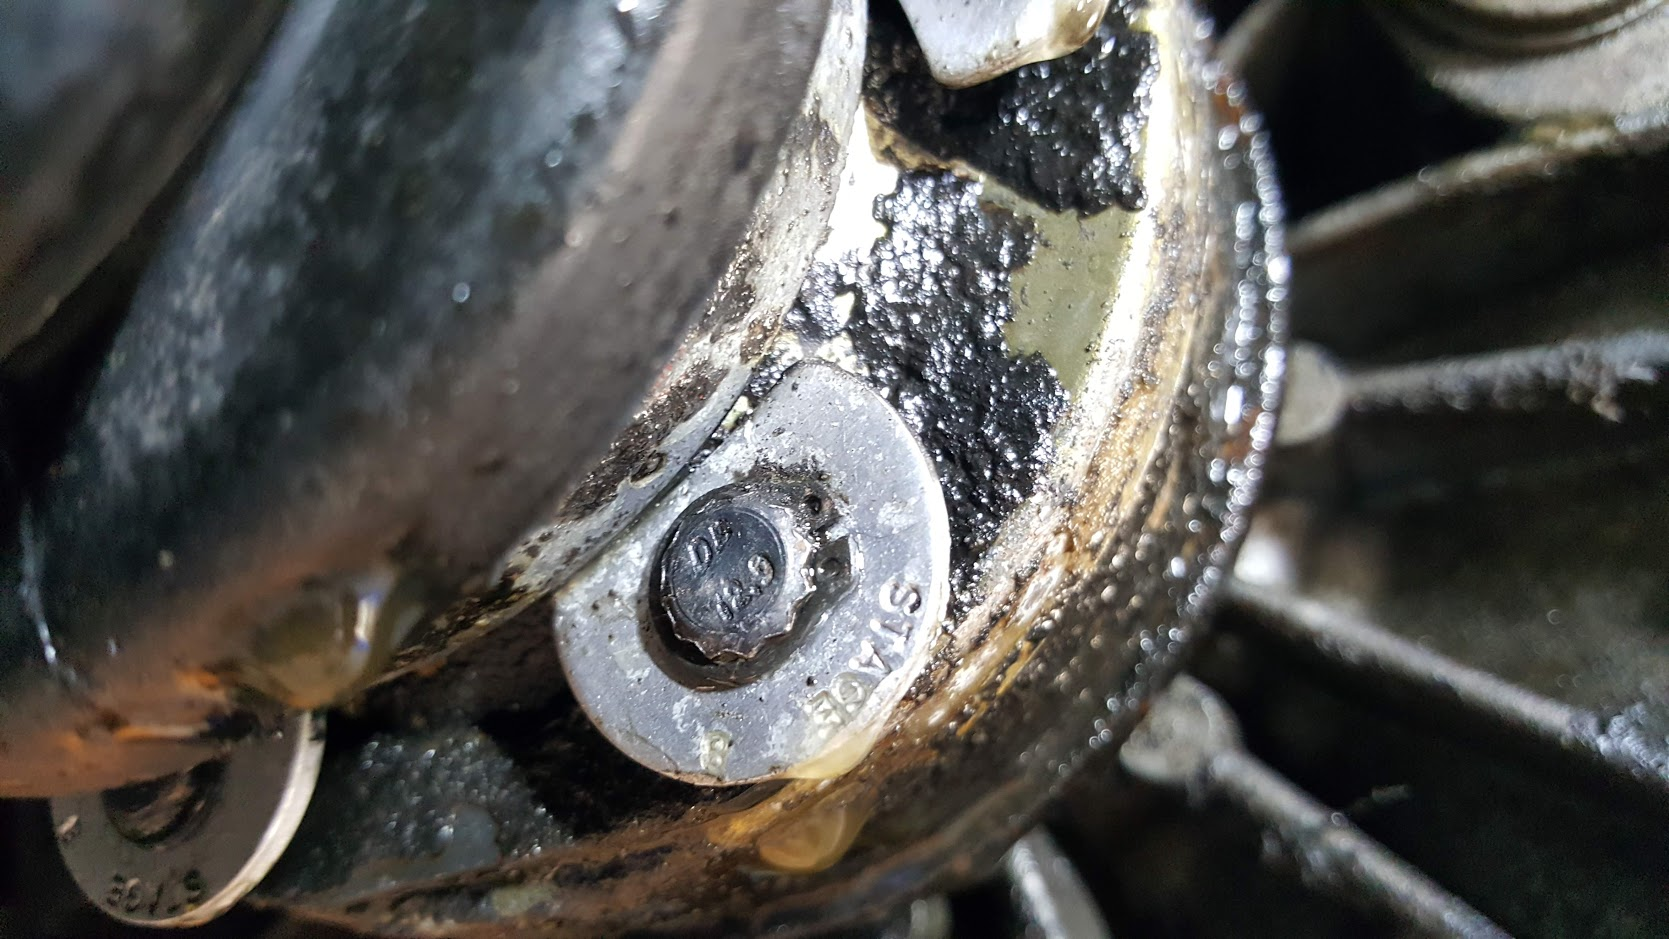
Here's the story in pictures: This is the "small" and "large" hardware that I'm referring to. These act as pressure plates that the bolt tightens against to keep the boot and ultimately the entire axle secure.
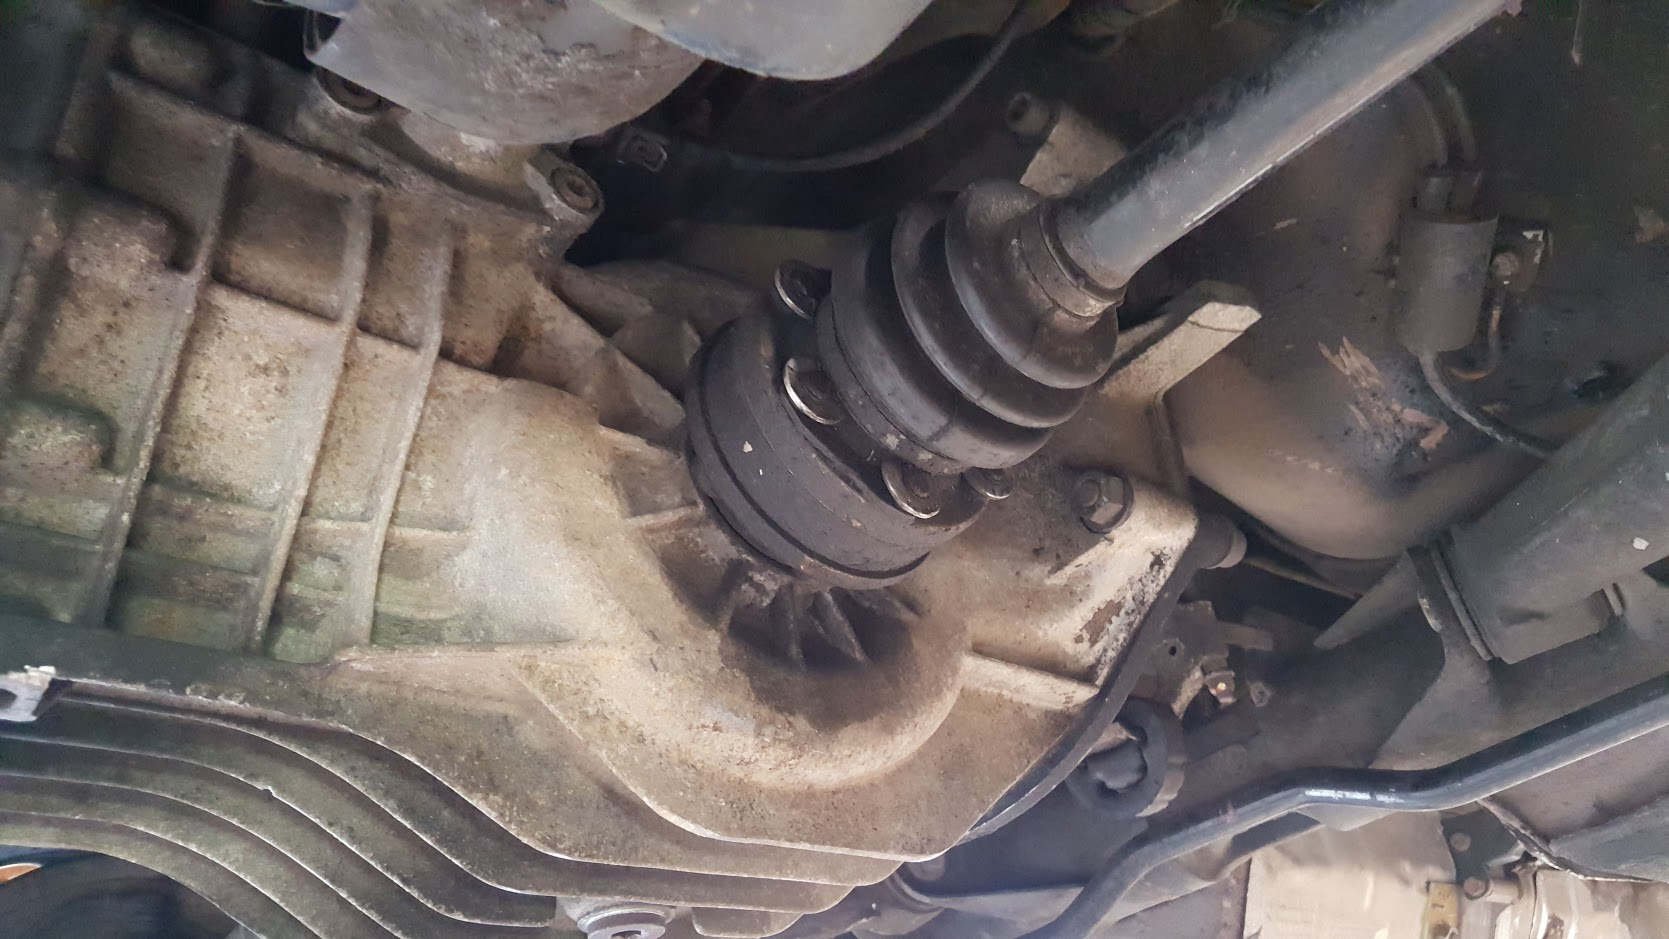
This is a "before" shot showing the smaller hardware with the transmission in the background.
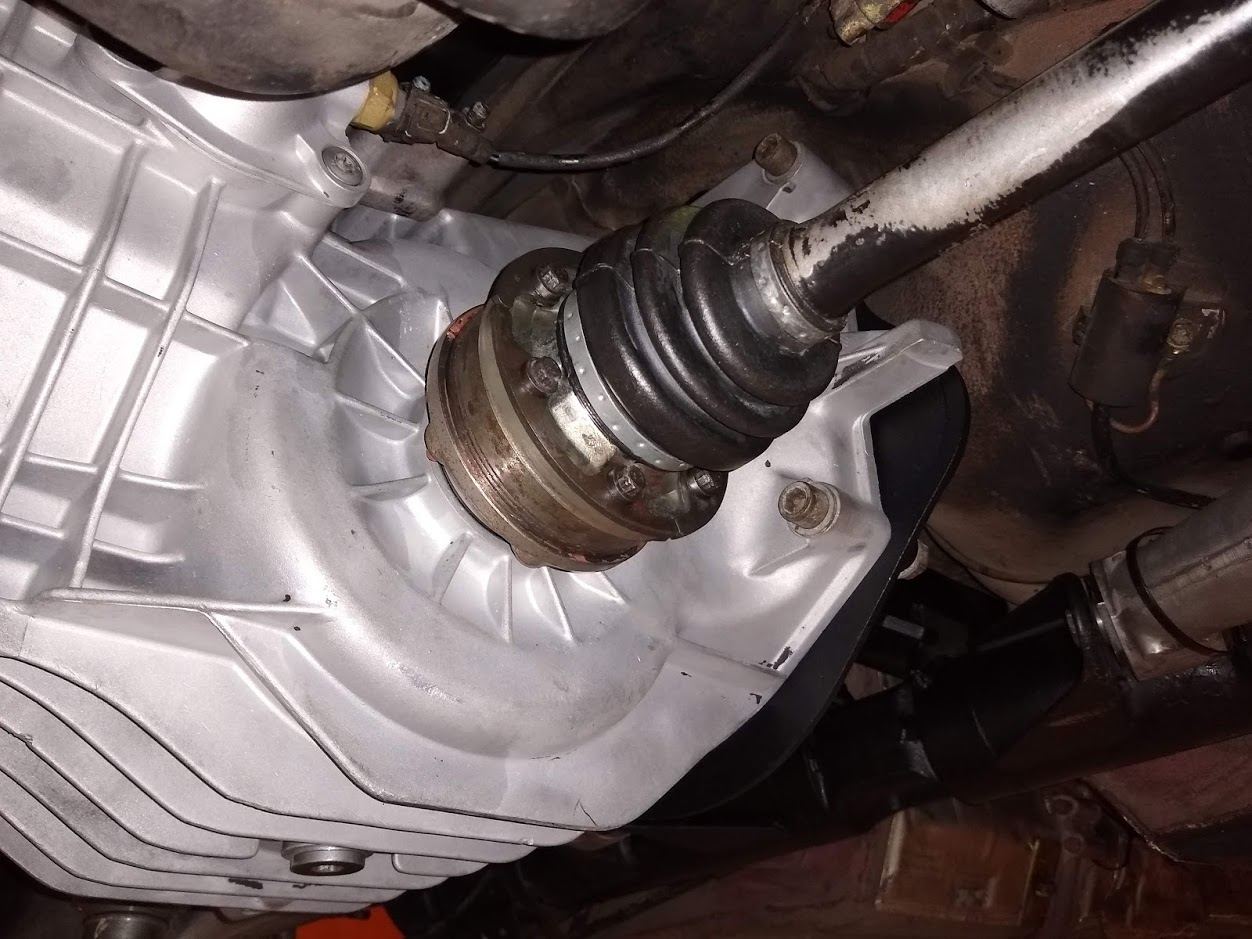
Another "before" shot. Smaller hardware and the transmission. Here's what I just installed incorrectly. The bigger hardware on the transmission side.
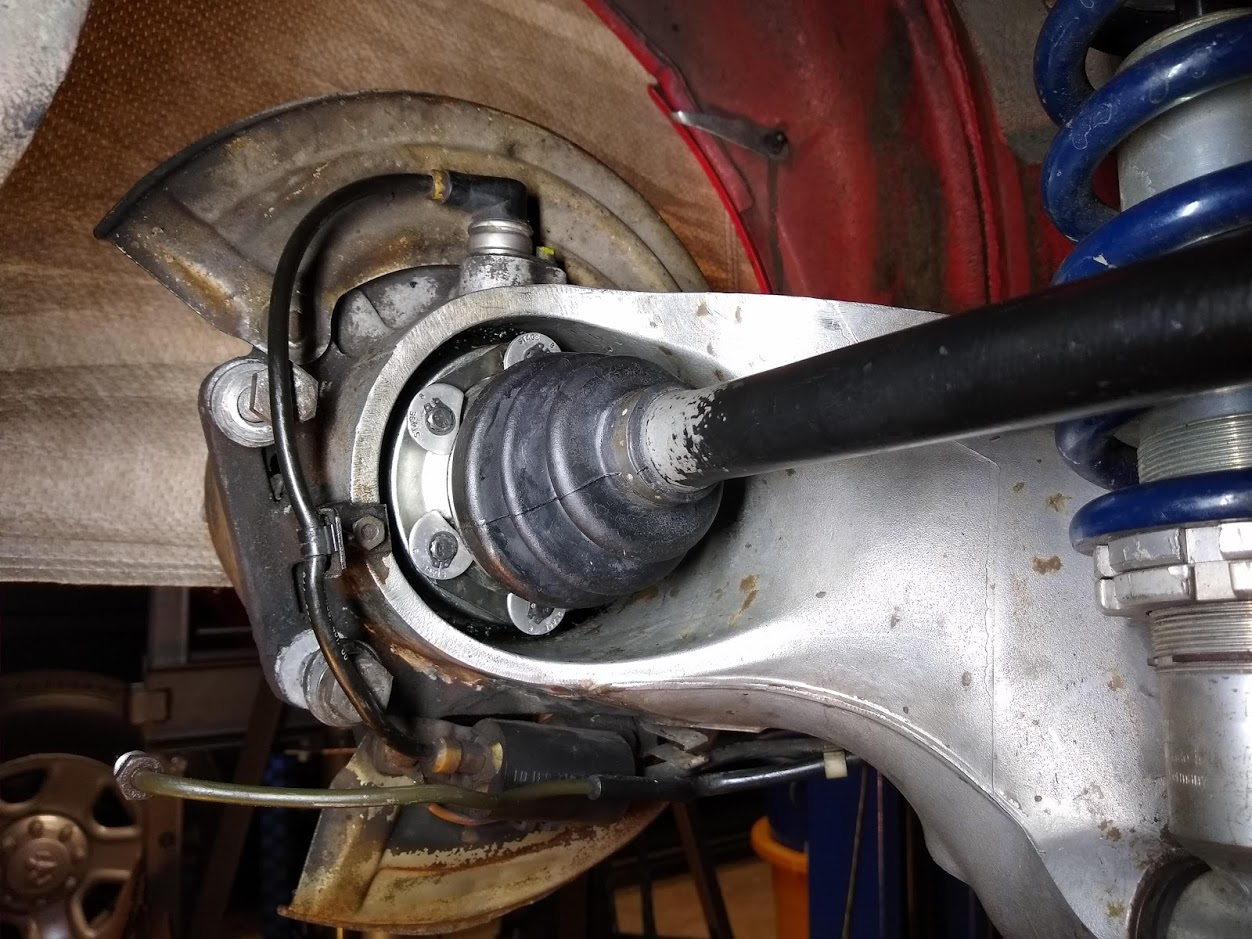
Also wrong here. I put the smaller hardware on the wheel side. The Stage 8 washers and locking clips are already installed in this picture.
Here's a shot of the all the hardware, if anyone is curious about the Stage 8 bolts, washers and locking clips.
Do I need to change both so that there are the smaller hardware pieces are on the transmission side and the full-size hardware pieces on the wheel side? I have another set, so if the larger pieces are OK everywhere, that would be easier to just remove the smaller one and put on the larger one, instead of removing everything for a swap. Do you know why Porsche decided on the two different plate designs? I'm not sure I see a big advantage to one over another. The bigger plates might keep the wheel bearing cleaner. They didn't use the smaller ones to save weight! Someone must know the right solution here?? Can I just leave them the wrong way?
Last edited by Isaacsracing; 02-12-2019 at 11:16 PM.
Reason: duplicate entry
The workshop manuals and PET do not specify which of the two types of washers (plates) goes towards the transmission side vs wheel side. In fact the workshop manual only shows the smaller of the plates in their drawing but it's an isolated diagram of the half shaft and does not show it in relation to anything else. They clearly identify two different part numbers for the plates however.
I believe you are correct in that the larger plates go at the wheels and the smaller on the transmission side. I'm not sure if the smaller ones are for weight savings or is a balancing issue for the assembly?
When I replaced my CV's I did put them back as they came off...and I feel your reluctance as I use the same Stage 8 Locking Bolts and those tiny snap rings are fun.
If it were me, I would take the time to put them back the way they came off. I suspect Porsche designed them this way for a reason otherwise they would have only made one part to fit both locations.
smaller plates go inboard. imho, the hardened plates distribute the clamping load on the boot cone stamping to keep the grease contained. the cone is pretty soft metal in comparison.
one of your pictures shows some red on the flange which I assume is grease. both surfaces need to be clean or the bolts get loaded in shear instead of tension.
I had the Stage 8 lockers and found them to be too big of a pain in the ***. The c-clips are too fiddly, especially if having to do a quick axle change between sessions. I use M8 Nord-Lock washers. No extra work involved and I haven't had a cv bolt come loose.
I had the Stage 8 lockers and found them to be too big of a pain in the ***. The c-clips are too fiddly, especially if having to do a quick axle change between sessions. I use M8 Nord-Lock washers. No extra work involved and I haven't had a cv bolt come loose.
Given that I'll be taking everything off, those Nord-Lock washers look like a great answer. And I'll clean the grease to make a pinch bond.
I love Stainless, but is it really needed in this application or is the zinc coated fine?
This time I have it right (I hope!). I stuck with the Stage 8 hardware. I used a grinder on an 8mm wrench to make a "thin walled" version, which made the job pretty easy. The actual clips aren't that come consuming.
I removed both axles, cleaned excess grease off all the mating surfaces. Removed all the bolts and cleaned them. Then put it all back together. Totally time about 2.5 hours. The hardest part for me was getting the holes of the cv joint to line up with the holes of the wheel hub which is a blind job.
Thanks for all the knowledge to help get this done right.

 01-31-2019, 12:02 AM