When you click on links to various merchants on this site and make a purchase, this can result in this site earning a commission. Affiliate programs and affiliations include, but are not limited to, the eBay Partner Network.
I think your only option, like Fritz says, is to remove the rest of the exhaust system so that you can then pull the turbo out to the left, instead of removing the L bracket to the right. And you can only do that by dropping the rest of the exhaust.
Does your exhaust system still use an OEM-style J pipe, or are the headers feeding the hot side of the turbo directly? If it's OEM type, then you may be lucky enough to remove just that pipe... otherwise if you have the more common aftermarket solution of short headers, then you'll have to drop them.
Thanks, that heIps as a lot, best not use a sliding hammer any more, risk of damaging the block.
I think the spacer has welded itself to the bolt via rust, any ideas
Any ideas how far the this bolt and the 4 studs in the turbo go in so i dont drill in to far
I have a oil leak just where the two lower bolts go in, i bet the crank pulley seal is leaking, is the crank pulley covered with a metal cover
I've just measured the threaded part of the hole at 35mm depth. Then you've got the thickness of the crankshaft steel cover, then the spacer tube, then the thickness of the L bracket itself.
Edit: the steel crankshaft cover tube is 25mm depth. Then your spacer tube on the back of the L bracket, then the L bracket thickness itself.
Sorry I can't provide the L-bracket spacer tube depth - I removed mine when fitting aftermarket headers about 16-17 years ago, as they put the turbo ever so slightly out of alignment, and I couldn't get the top bolt hole lined up.
Last edited by Megatron-UK; 07-01-2023 at 01:34 PM.
I have a oil leak just where the two lower bolts go in, i bet the crank pulley seal is leaking, is the crank pulley covered with a metal cover
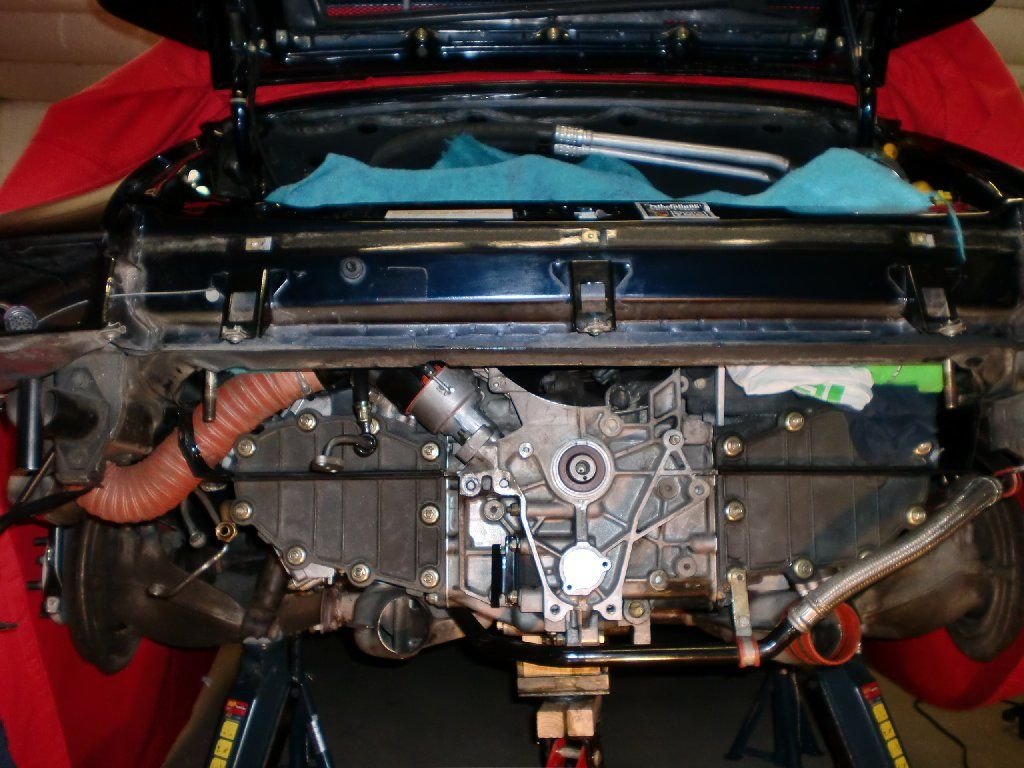
Yes, that's the crank pulley behind that black steel cover.
My guess is that it isn't the crank pulley leaking, but the intermediate shaft behind the small two-bolt cover plate beneath the pulley. But you still have to take the loads of stuff off to get to it... oh, and almost the entire back of the engine, and engine cradle to get to the pulley. You can't take off the black cover without removing almost all of the ancillaries (including the air con compressor and the alloy a/c support tower). I had a lot of choice words to say when I found that out.
This is what mine looked like after the cover was removed:
Initial state after removing crankshaft cover After cleaning, and seeing the drip from the cover plate Cleaned, and new seals for both crank and intermediate shaft.
Loads of 'while you are on' things to do, if you decide to fix that leak; idler for the a/c belt, main fan belt, etc, etc. It's a right swine to get to though - I can understand why people do a lot of this 'simple' engine work with the entire lump out of the car.
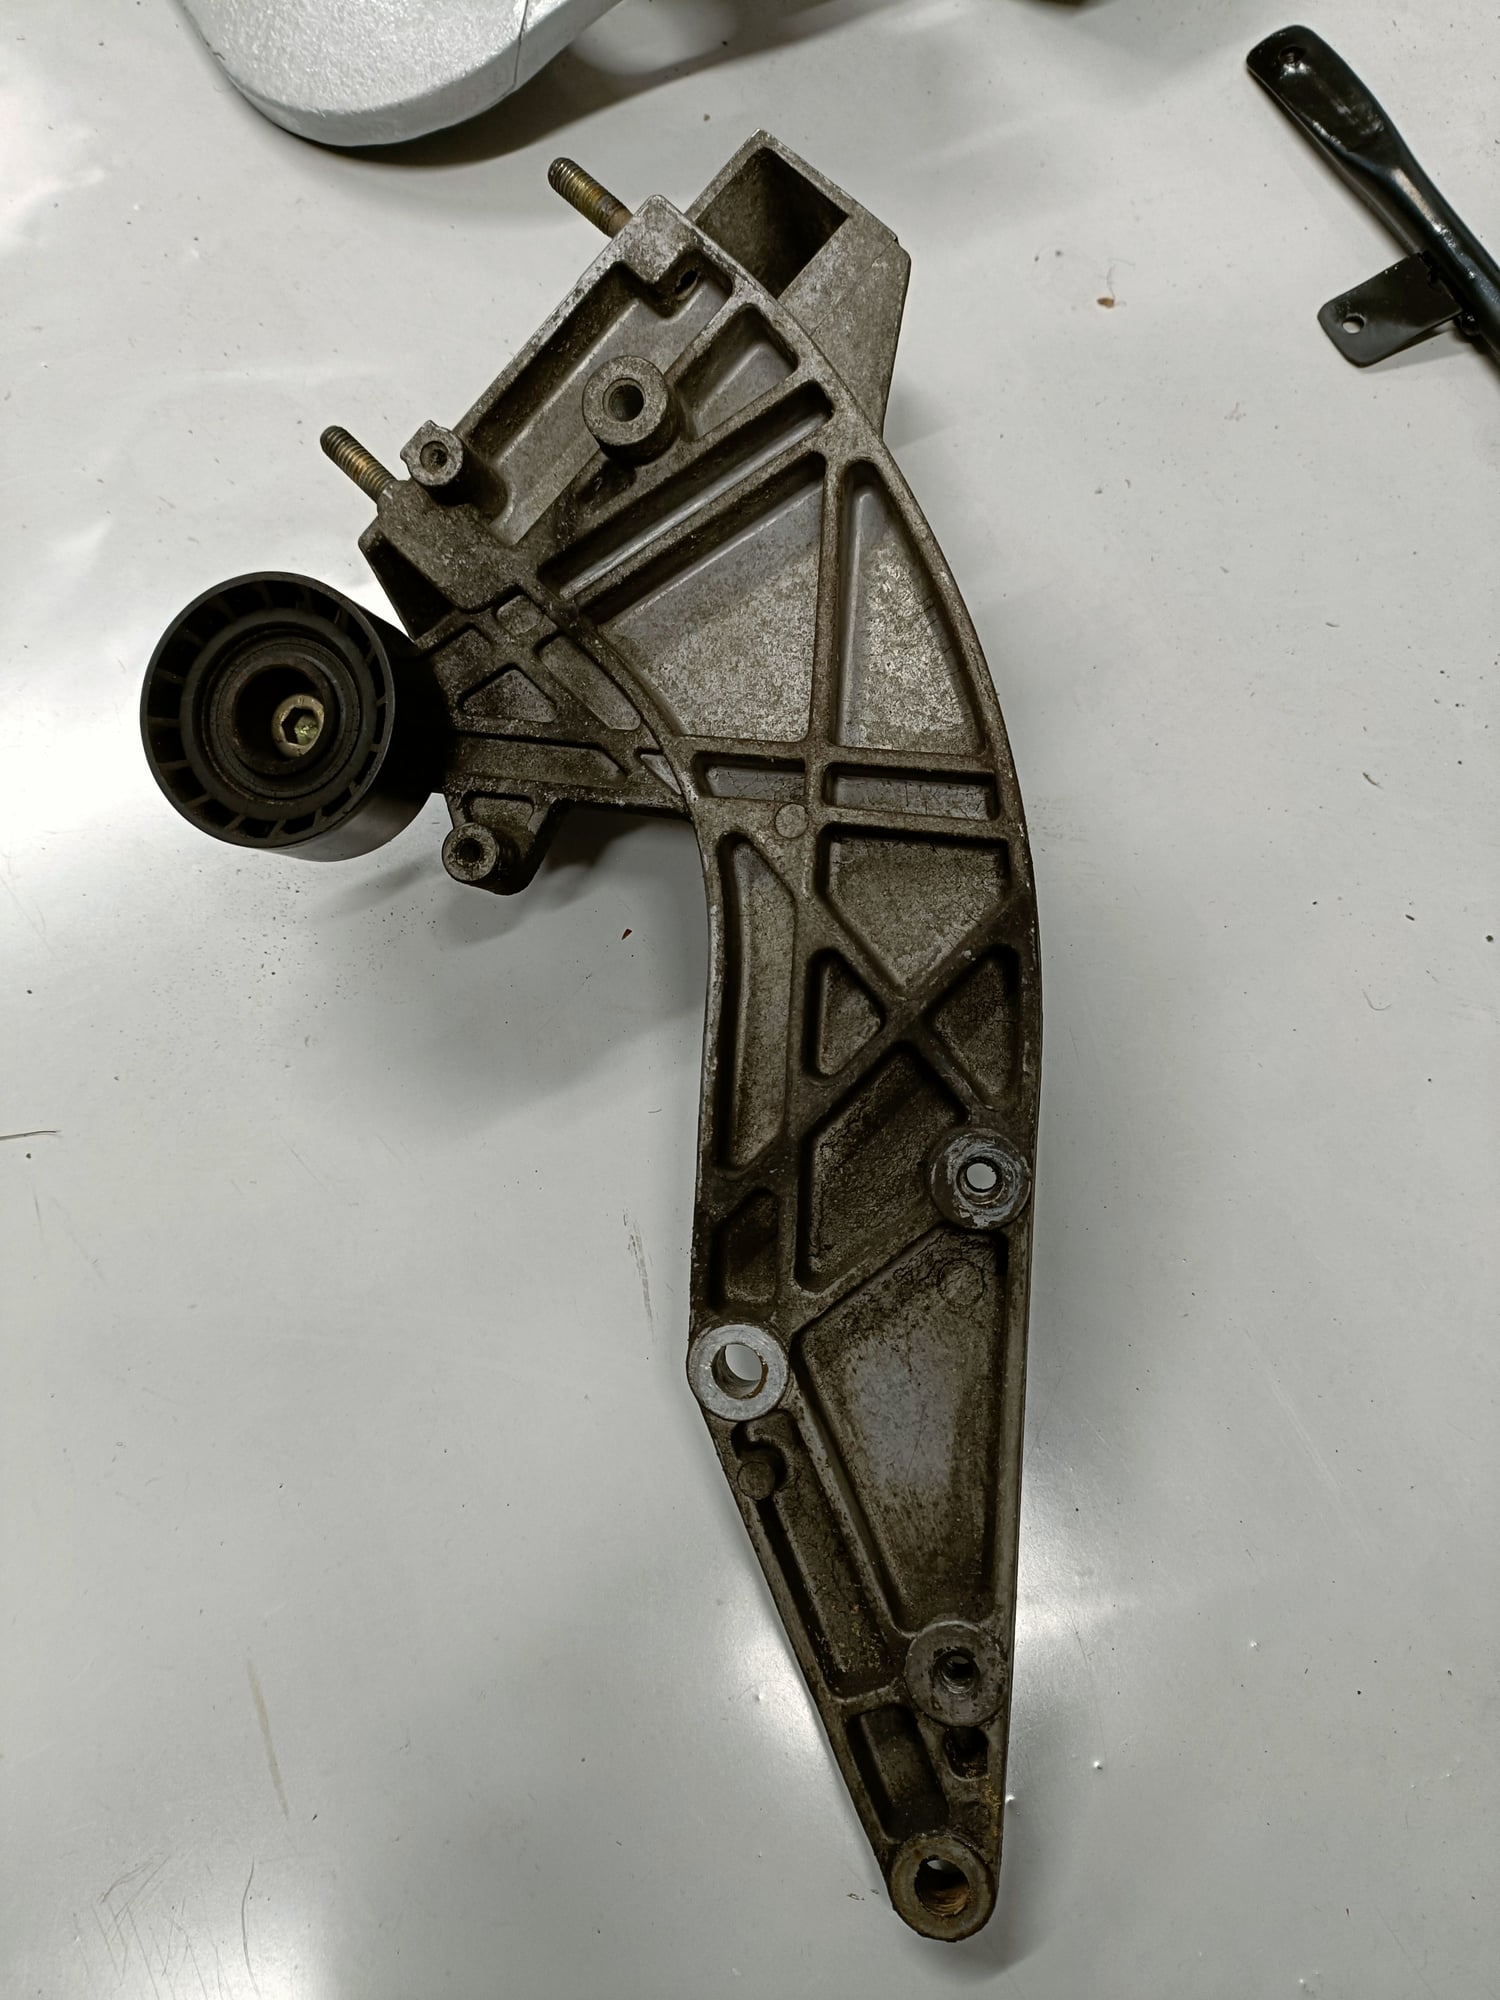
You can't remove the black steel crankshaft pulley cover without removing this first, as the bottom two bolts pass through the holes at the bottom of the bracket, then into the crankshaft cover.... so the above needs removal first. And before that you need to unbolt the a/c compressor at the top, and support the engine on stands/cradle while you remove the engine support bracket from the back, which the crankshaft cover also bolts to. It's a big long puzzle of 'what needs to come off next'!
My garage floor is currently covered by most of the parts that came off late last year... as it turned into a "while I am here I may as well replace that... and clean and repaint that... oh, and that airhose is frayed, so I'll need one of those as well...." ... and I'm still finding stuff to do....
Last edited by Megatron-UK; 07-01-2023 at 01:57 PM.
so did you do all this work with the engine in or removed,
The part that was leaking , the cover plate with what looks like 2 10mm bolts, was it just removal and replace with a new gasket
I left the engine in, but jacked up on several stands on rubber blocks (it's still there now). I don't have a proper engine lift and only a set of low quickjack ramps, and I didn't want to have to leave the car for weeks/months at someone else's place (it's a 'when things are quiet and the kids aren't running about destroying the place' job... which means it doesn't often get much time allocated to it!)
Yes, replacement of the seal was easy - it's a simple rubber gasket behind that cover plate.
I think i may end up doing this,
I have never dropped or removed the engine, do you have a pic of how the engne currently sits,
Do any of the gear linkages, driveshafts etc need to be removed before dropping the engine
Yes, it's pretty much as Megatron says, I did the same thing once to change the o-ring on the idler shaft cover. Everything remains assembled, but because the rear engine mount is missing, the engine has to be supported from below.
The engine is removed with the transmission as a unit. To do this, it is necessary to unscrew drive shafts and remove the stabilizer bar, and a variety of cables and oil hoses. This is a bit more effort and only worth it if e.g. the clutch should be done.
Is the engine actually dropped or does it stay in the same position minus the engine mounts and brace removed
Good time to do the chain cover gaskets to be replaced
In your pic the axle stands ait under the rear arms and the engine is sitting on the wood blocks
It all stays attached to box, driveshafts, etc. But you need to support it properly and ease it down enough to get the rear support brace off. I'd say you can easily drop it a good 6" as long as you are careful that nothing is snagged, caught etc
Good support for the crank case is a must. It's a heavy old beast. And you don't want to risk it coming off your stands but still being attached to various things.
It's a good opportunity to do cam cover gaskets, valve adjustment etc, as it is way easier with the engine lower than the normal mounting position.
+1.
Actually I used a U-shaped block of wood to support the engine. I didn't want to support it directly on the middle seam, but rather on the right and left of the seam for better force distribution.
Any close up pics guys for us beginners as to where to best place to put the support,
I assume the remainder of the car is supported at the sills and not the trailing arms, currently the wheels sit on wood blocks
will the engine start dropping with just the two rear mounts removed
Any close up pics guys for us beginners as to where to best place to put the support,
I assume the remainder of the car is supported at the sills and not the trailing arms, currently the wheels sit on wood blocks
I use a quickjack (got it on offer from the local Costco, which was the cheapest option in the UK), so the entire car is in the air (sills/jacking points are about 50cm off the ground). It is lifted by the proper jacking points; two in front of the rear trailing arms, two just behind the front wheel arches.
will the engine start dropping with just the two rear mounts removed
Yes. So your supports need to be in place as you are unbolting the rear engine mounts. In fact you probably should pre-lift the engine from underneath a touch to take the load off the nuts of the engine mounts/cradle.
Like Fritz, I'm supporting the engine just slightly either side of the centre-line of the crankcase (and closer to the crank pulley end - there's more 'meat' to get stands/jacks under) as it is less likely to want to tip to either side if you don't have the centre exactly right.
Last edited by Megatron-UK; 07-02-2023 at 07:46 AM.
 07-01-2023, 01:23 PM