

Drip, Drip - Go Away / BigMike's reseal thread
 04-09-2013 | 09:27 PM
#76

Burning Brakes
Joined: Jun 2011
Posts: 977
Likes: 1
From: Sydney Australia

 04-10-2013 | 06:37 PM
#78
Thread Starter
Burning Brakes
Joined: Jan 2008
Posts: 1,077
Likes: 3
From: Roswell, GA
I made progress today:
-Installed new Power Steering suction hose
-Installed firewall cover
-Installed both intake manifolds and the throttle body
Left to do:
-Chain case gaskets
-Engine mounts
-Valve cover gaskets
-Install Oil Lines (old ones and tank is out)
-Install new aluminum sealing rings on all oil fittings
-Clean thermostat
-Install Fan
-Install AFM and air filter
-Install new exhaust studs
I'm trying to decide if I should clean the oil tank out. I was thinking of using Kerosene.
04-16-2013 | 08:33 AM
#79
Thread Starter
Burning Brakes
Joined: Jan 2008
Posts: 1,077
Likes: 3
From: Roswell, GA
Over the weekend I got the oil tank and thermostat removed, cleaned, and reinstalled. I also got the new oil lines and hoses installed so that the oil system is buttoned up except for the oil cooler lines. I'm going to go ahead and replace one and get the other one rebuilt (long story).
Progress is slow but I'm enjoying the work without killing myself.
Progress is slow but I'm enjoying the work without killing myself.
04-16-2013 | 08:37 AM
#80
Thread Starter
Burning Brakes
Joined: Jan 2008
Posts: 1,077
Likes: 3
From: Roswell, GA
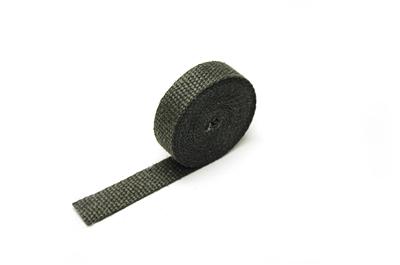
At $60 I think I'll use exhaust wrap on the hose.
http://www.summitracing.com/parts/dei-010120/overview/
http://www.summitracing.com/parts/dei-010120/overview/
04-16-2013 | 10:13 AM
#81
Burning Brakes
Joined: Jun 2011
Posts: 977
Likes: 1
From: Sydney Australia
At $60 I think I'll use exhaust wrap on the hose.
http://www.summitracing.com/parts/dei-010120/overview/
http://www.summitracing.com/parts/dei-010120/overview/
 04-29-2013 | 10:33 AM
#84
Thread Starter
Burning Brakes
Joined: Jan 2008
Posts: 1,077
Likes: 3
From: Roswell, GA
Ricardo, yes, the 993 mounts are just drop in like the originals.
I started this project on 3/13 and have been taking it pretty slow as motivation hits me. But now I want to get the car back on the road so progress should be swift.
I got back from Cabo San Lucas Friday evening and started working on the car again Saturday around noon. I got a lot of tasks check off my To Do list (that I created prior to leaving and left on the front seat of the car in case tragedy struck and I didn't make it back home).
I spend much of yesterday replacing one of the front oil cooler lines. From the looks of things in the wheel well, I suspect they have been replaced before and there wasn't even a hint of them leaking. The one that I replaced was the inside (@ thermostat) because last year, I parked next to a high curb and forgot about it when I was leaving. There wasn't any damage (so I thought) except for needing new clips on the rocker panel. To my horror when I removed the rocker for this project, the inside line is the one that sticks down the furthest at the front wheel and was almost smashed shut. The other line was undamaged. (never had a cooling issue)
Replacing the line wasn't difficult at all but did require patience. The reason that I say I believe that the lines were replaced in the past is because all of the nuts on the clamps that hold the lines in the wheel well were loose and two nuts were missing on the horn bracket. I was happy to see a very dry oil cooler though. I was able to shine a light at the steering rack and was also happy to see that it was also bone dry.
If I get some work done in the evenings this week and two solid days in the garage this weekend, I should be on the road by Sunday evening.
I'll post some more pictures this week.

 05-01-2013 | 10:17 PM
#86
Thread Starter
Burning Brakes
Joined: Jan 2008
Posts: 1,077
Likes: 3
From: Roswell, GA
Here is the valve cover that I started. I'll get them all finished tomorrow after work. I only spent about 5 minutes on it so it isn't that great of a job. Just wanted to see how difficult it was going to be to get that crap off.


 05-02-2013 | 08:50 PM
#87
Thread Starter
Burning Brakes
Joined: Jan 2008
Posts: 1,077
Likes: 3
From: Roswell, GA
I finished one valve cover tonight and it took 1.5 hours total. That old coating is pretty tough. I'm going to use aircraft stripper on the other 3 and then glass bead the little bit of residual coating.
Here is a comparison.


Here is a comparison.
05-02-2013 | 09:31 PM
#88
Racer
Joined: Mar 2012
Posts: 437
Likes: 0
From: Davis, CA (NorCal)
Looking good Mike!
Start the HE studs yet? I haven't and am curious how tough or easy it will be - I think it should be cake but ...
My 964 is a 92 and they switched covers that year so mine needed no blasting or paint! Lucky me!
Start the HE studs yet? I haven't and am curious how tough or easy it will be - I think it should be cake but ...
My 964 is a 92 and they switched covers that year so mine needed no blasting or paint! Lucky me!
05-02-2013 | 09:59 PM
#89
Thread Starter
Burning Brakes
Joined: Jan 2008
Posts: 1,077
Likes: 3
From: Roswell, GA
Do the 92 and up covers not have any coating on them?
