
Floorboard DIY
 01-21-2011, 09:29 AM
#1
Nordschleife Master
Thread Starter
A while ago I did a temporary fix on the driver's footwell when I found the wet, rotten soundproofing under the carpet, by filling it with some light weight foam and putting a board on top. Last summer I finally got round to doing a proper job by making some wooden floorboards like those found in the cup cars. So, following a request I received from another Rennlister, I thought I would write up my DIY.
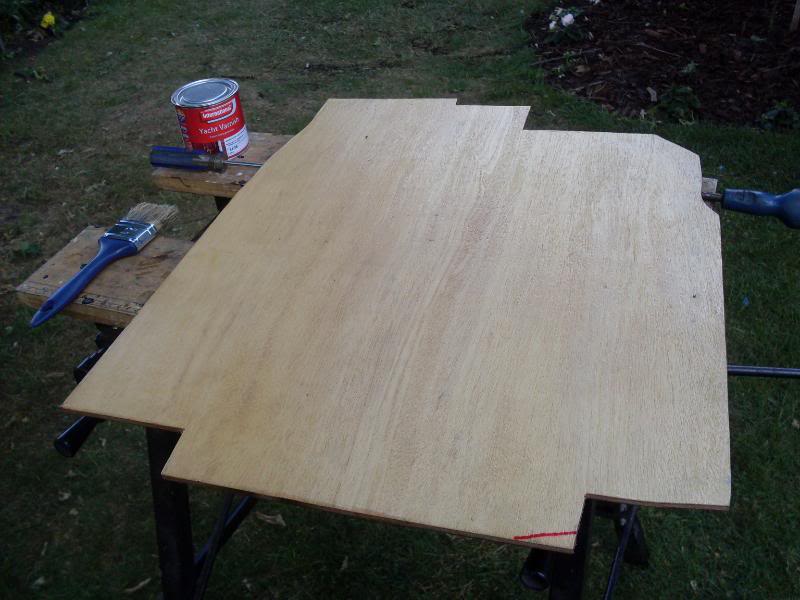
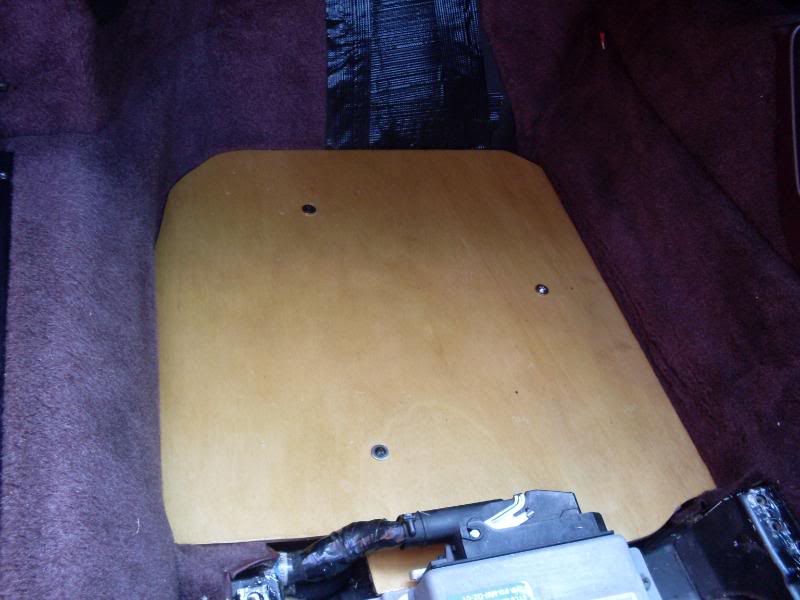
First job was to get the seats out, remove the carpet and everything else in the foot wells. I could then get to work on making a template from cardboard before breaking out the jigsaw on some 6 mm plywood. That was followed by a good coating of yacht varnish:
Here's a piece of the old soundproofing next to one of the new floorboards. The sound proofing pieces weighed 3.5 Kg each and the replacement boards just 2 Kg each:

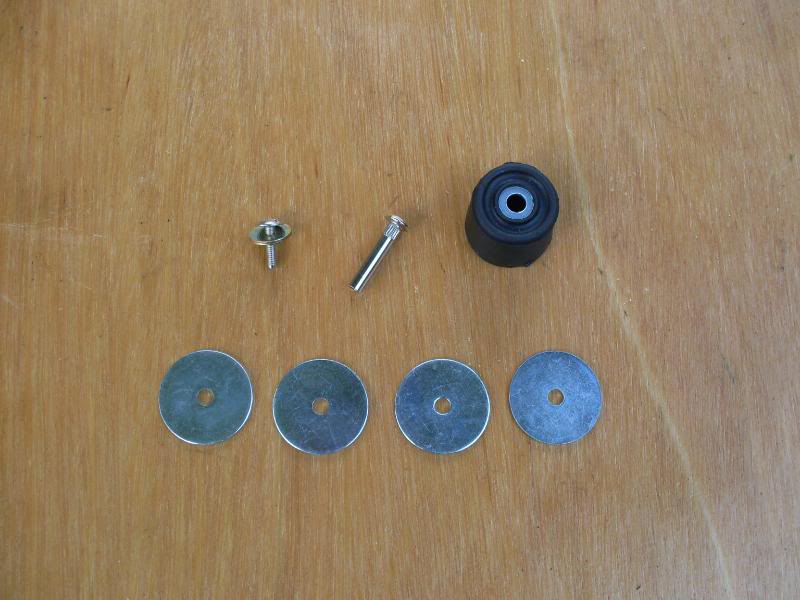
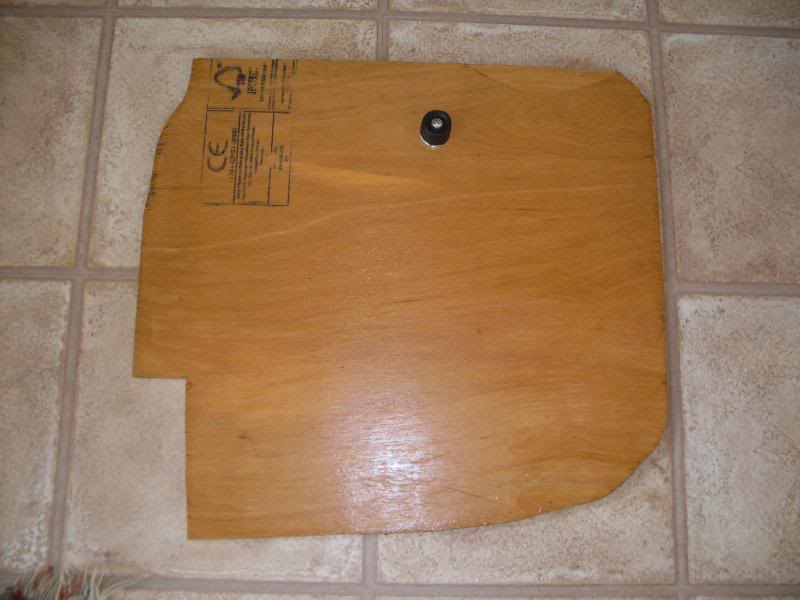
Whilst the boards would be screwed onto the raised beams in the footwell, they also needed to have a support in the deep part. So I came up with a door stop, some repair washers as spacers and bolted these to the boards using one of those two piece bolts that are used to join kitchen units together:
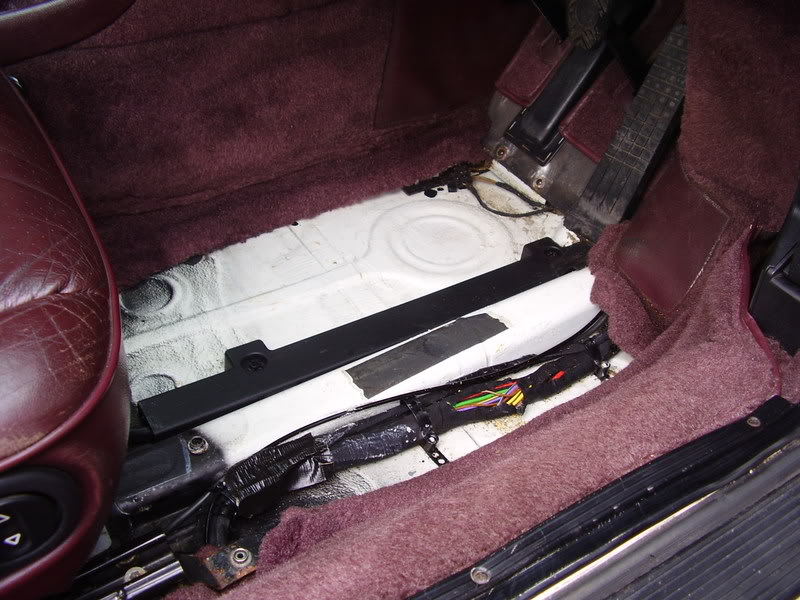
To fit the boards I simply unscrewed the press stud (you can see it just forward of the seat) and then drilled another hole in that same floor beam nearer the pedal box. Then I just used a couple of self-tapping screws and washers to fix the boards in place. Nb. The door stop was located on each board so that it settled on the slightly raised part of the floor (again see pic below).
Passenger floor board fitted:
Driver's side:

Here's my new co-driver checking out one of the seats while it was out of the car

Of course, it's possible to buy even lighter ready made floor boards (Rennline make them) but since they're optimized for LHD cars, I wasn't sure if they would fit my RHD car. Besides which, the total cost of making my own was less than 20 quid.
First job was to get the seats out, remove the carpet and everything else in the foot wells. I could then get to work on making a template from cardboard before breaking out the jigsaw on some 6 mm plywood. That was followed by a good coating of yacht varnish:
Here's a piece of the old soundproofing next to one of the new floorboards. The sound proofing pieces weighed 3.5 Kg each and the replacement boards just 2 Kg each:
Whilst the boards would be screwed onto the raised beams in the footwell, they also needed to have a support in the deep part. So I came up with a door stop, some repair washers as spacers and bolted these to the boards using one of those two piece bolts that are used to join kitchen units together:
To fit the boards I simply unscrewed the press stud (you can see it just forward of the seat) and then drilled another hole in that same floor beam nearer the pedal box. Then I just used a couple of self-tapping screws and washers to fix the boards in place. Nb. The door stop was located on each board so that it settled on the slightly raised part of the floor (again see pic below).
Passenger floor board fitted:
Driver's side:
Here's my new co-driver checking out one of the seats while it was out of the car
Of course, it's possible to buy even lighter ready made floor boards (Rennline make them) but since they're optimized for LHD cars, I wasn't sure if they would fit my RHD car. Besides which, the total cost of making my own was less than 20 quid.

 01-21-2011, 09:57 AM
#3
Three Wheelin'
Absoulutely brilliant Steve. Thanks for posting this.
I hadn't though about using wood. I was considering getting some aluminum sheet cut to size, then fettling it to fit. But this - this is a much more economical and dare I say, authentic solution. I like having a little Cup Car in my C4.
Cheers,
Cliff
I hadn't though about using wood. I was considering getting some aluminum sheet cut to size, then fettling it to fit. But this - this is a much more economical and dare I say, authentic solution. I like having a little Cup Car in my C4.
Cheers,
Cliff
Last edited by The Stig; 01-21-2011 at 11:08 AM.
01-21-2011, 10:24 AM
#4
Rennlist Member

I am considering removing the carpet on the driver side to avoid occassional CEL due to carpet interference with the accelarator pedal and placing a florboard there. Can you describe how you removed the carpet? My goal is to ensure that I can remove the carpet without damage, so I can re-install later, if needed.
Thanks
Thanks
 01-21-2011, 10:54 AM
#6
Nordschleife Master
Thread Starter
Absoulutely brilliant Steve. Thanks for posting this.
I hadn't though about using wood. I was considering getting some aluminum sheet cut to size, then fettling it to fit. But this - this is a much more economical and dare I say, authentic solution. I like having a Cup Car in my C4.
Cheers,
Cliff
I hadn't though about using wood. I was considering getting some aluminum sheet cut to size, then fettling it to fit. But this - this is a much more economical and dare I say, authentic solution. I like having a Cup Car in my C4.
Cheers,
Cliff
01-21-2011, 11:00 AM
#7
Nordschleife Master
Thread Starter
I am considering removing the carpet on the driver side to avoid occassional CEL due to carpet interference with the accelarator pedal and placing a florboard there. Can you describe how you removed the carpet? My goal is to ensure that I can remove the carpet without damage, so I can re-install later, if needed.
Thanks
Thanks
Trending Topics
01-21-2011, 12:46 PM
#10
Nordschleife Master
Thread Starter
Yes the Al board would be much thinner and lighter. About 1.5 mm I think. I've seen some photos on this forum of those. I went for the 6 mm plywood because the thinner board (about 3 mm) looked like it could give way if someone put their full weight on it.
01-23-2011, 06:51 PM
#14
Thought i would add this in here to save opening another thread, i hope you don't mind Boxsey.
I started this at the weekend after this DIY (and Boxseys Blog) and thought about the fixings a little more. If the fixing from the cup aren't available the 964 pedal board fixing might be? (see below) A little smaller perhaps but should do the job to allow the recess of the bolt heads.
Can anyone confirm i have selected the right parts?
Katalog Illustration 807-01
999 507 020 02 Speed Nut B (not sure ???)
999 507 020 01 Speed Nut (not sure ???)
N 015 392 2 Washer (think this is all i need)
01-23-2011, 07:23 PM
#15
Nordschleife Master
Thread Starter
Good try mate  I went through the same thought process and bought some N 015 392 2 but they turned out to be just nice flat washers. I still used them though
  . The dished washers that we really want seem to be unobtainable but saying that....Rennline supply them as part of their track mat kit. You can see them in Marc Shaw's thread here:
https://rennlist.com/forums/964-foru...ight-loss.html
but buying them separately seems to be the difficult part.
I went through the same thought process and bought some N 015 392 2 but they turned out to be just nice flat washers. I still used them though . The dished washers that we really want seem to be unobtainable but saying that....Rennline supply them as part of their track mat kit. You can see them in Marc Shaw's thread here:https://rennlist.com/forums/964-foru...ight-loss.html
but buying them separately seems to be the difficult part.