
RS Interior Install
 11-22-2010, 09:32 PM
#1
Instructor
Thread Starter
Join Date: Jun 2007
Location: Cosby, TN
Posts: 141
Likes: 0
Received 0 Likes
on
0 Posts
I pulled the trigger and am installing an Appbiz Dark Perlon RS Carpet Set in the 92 964 C2. Appbiz was easy to deal with and the kit was delivered 4 days after I placed the order.
I have read about every post on the install process on Rennlist and everybody complains about the lack of instructions so I am going to post a picture of the process with each piece as it gets installed. Plus everybody can jump in and tell me the piece is installed in the wrong place...before I to far ahead of myself.
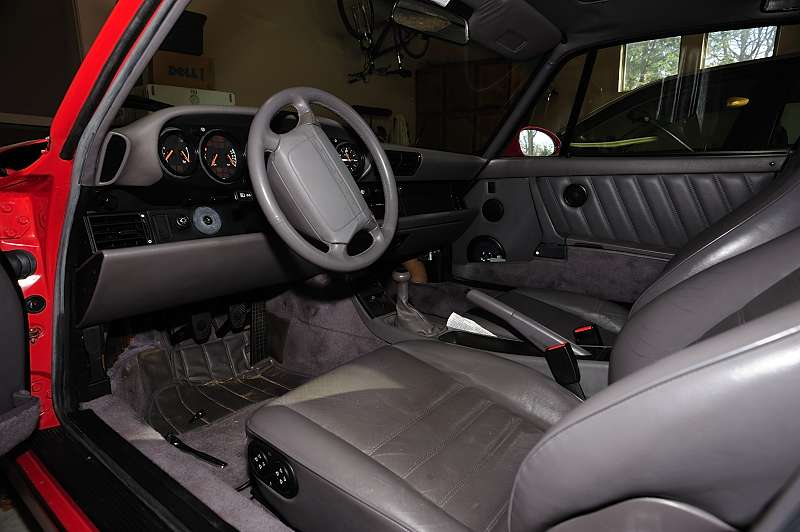
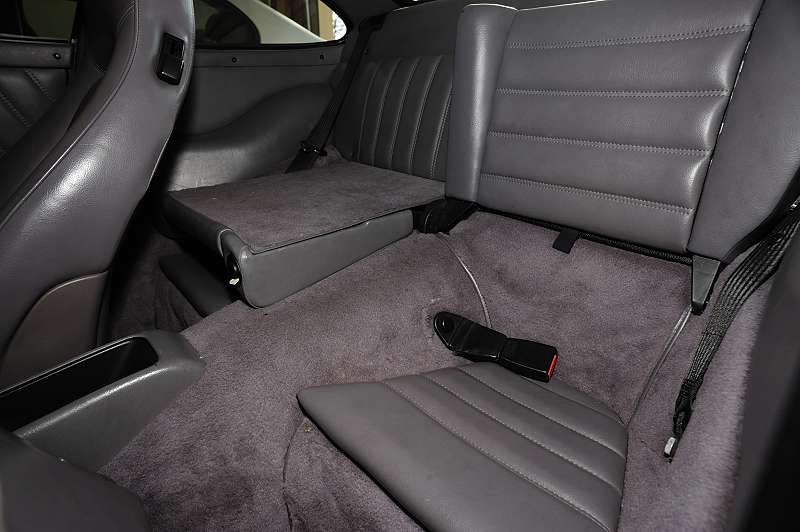
First some pictures of the car before the install:
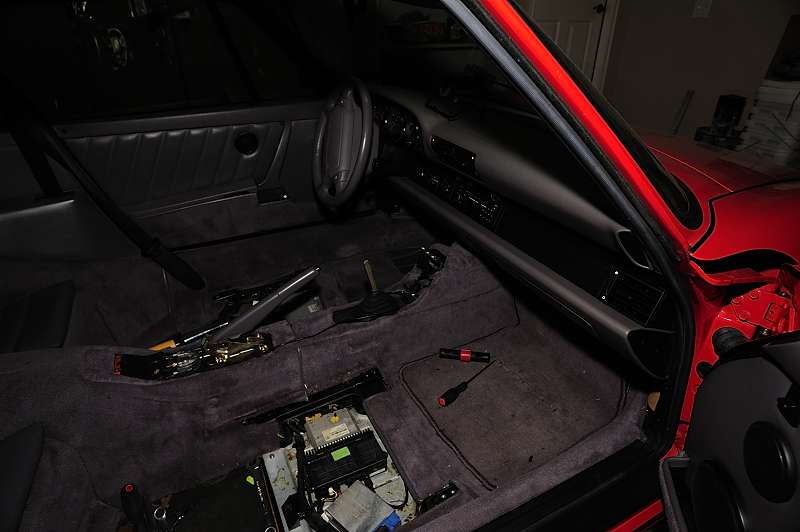
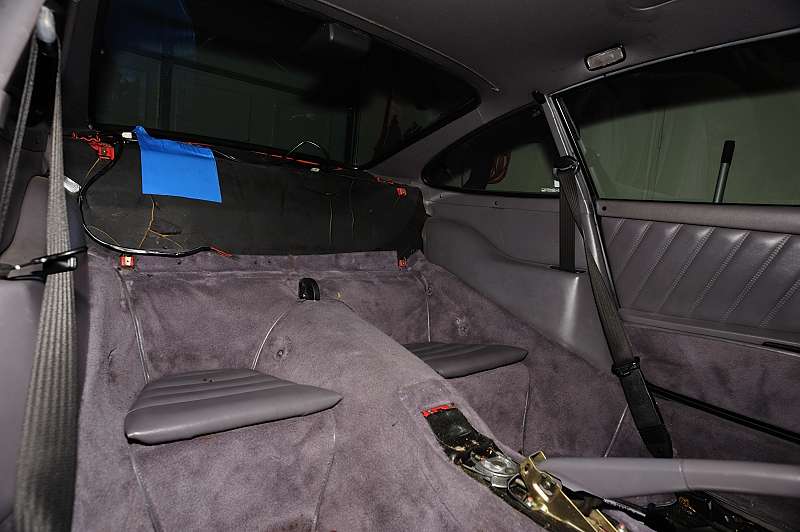
Current state of the tear down:
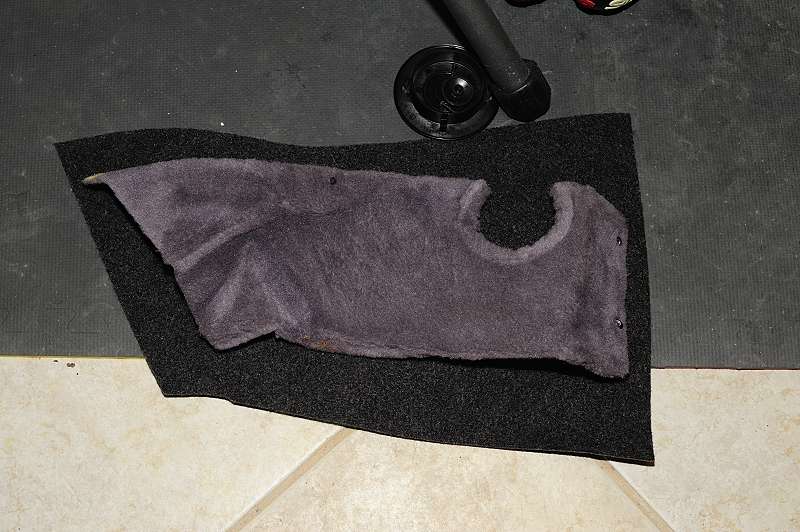
The first two pieces of carpet I used are for the left and right front kick panels that hide the air vent tubes and control valves:

I have read about every post on the install process on Rennlist and everybody complains about the lack of instructions so I am going to post a picture of the process with each piece as it gets installed. Plus everybody can jump in and tell me the piece is installed in the wrong place...before I to far ahead of myself.
First some pictures of the car before the install:
Current state of the tear down:
The first two pieces of carpet I used are for the left and right front kick panels that hide the air vent tubes and control valves:

 11-23-2010, 09:34 AM
#3
Rennlist Member

...I have read about every post on the install process on Rennlist and everybody complains about the lack of instructions so I am going to post a picture of the process with each piece as it gets installed. Plus everybody can jump in and tell me the piece is installed in the wrong place...before I to far ahead of myself.
11-23-2010, 01:53 PM
#6
Pro
Join Date: May 2009
Location: Raeford, North Carolina
Posts: 510
Likes: 0
Received 0 Likes
on
0 Posts
Subscribed!!
I am planning on pulling all the carpet as you are doing and removing all of the really heavy and bulky sound deadening material. Also going to try and make wood floor boards like on the 3.8 RSR (at least I think it had them) but we will see how it goes.
Keep the pics coming, I will probably be following you step by step
thank you!
Trending Topics
11-24-2010, 09:32 PM
#8
Instructor
Thread Starter
Join Date: Jun 2007
Location: Cosby, TN
Posts: 141
Likes: 0
Received 0 Likes
on
0 Posts
Lots of great knowledge on the topic. I have two questions for people that have made the conversion:
1. Did anybody use Thermozite as the carpet pad? Did you like the result?
2. How do the cloth Sparco or Recaro seats hold up. I am thinking of going with cloth if I decide to take the AC out of the car, might be more comfortable than leather. How do the cloth seats wear? I am 6 feet tall so I will always be rubbing on the seats while getting in and out.
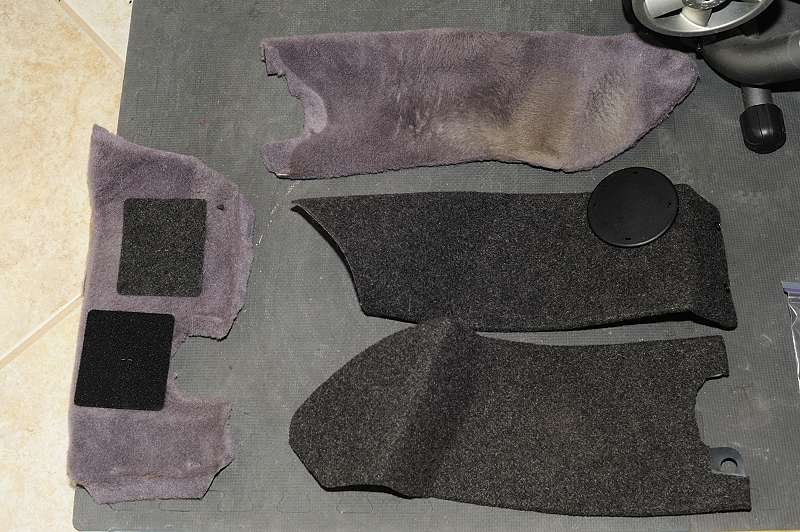
I did the center console piece in front of the shifter over the last two days.
This was a difficult piece because the factory piece is in 3 parts, the top, bottom, and side. It is impossible to separate the top and bottom piece w/o breaking the tabs and the AppBiz kit only supplies 2 pieces, not three. The next photo shows the top and bottom piece I could not separate.
The final result is good... the only problem was I measured wrong so I will have some of the plastic showing behind the gas pedal, lucked out this time.
1. Did anybody use Thermozite as the carpet pad? Did you like the result?
2. How do the cloth Sparco or Recaro seats hold up. I am thinking of going with cloth if I decide to take the AC out of the car, might be more comfortable than leather. How do the cloth seats wear? I am 6 feet tall so I will always be rubbing on the seats while getting in and out.
I did the center console piece in front of the shifter over the last two days.
This was a difficult piece because the factory piece is in 3 parts, the top, bottom, and side. It is impossible to separate the top and bottom piece w/o breaking the tabs and the AppBiz kit only supplies 2 pieces, not three. The next photo shows the top and bottom piece I could not separate.
The final result is good... the only problem was I measured wrong so I will have some of the plastic showing behind the gas pedal, lucked out this time.
11-25-2010, 04:42 AM
#9
Nordschleife Master
2. How do the cloth Sparco or Recaro seats hold up. I am thinking of going with cloth if I decide to take the AC out of the car, might be more comfortable than leather. How do the cloth seats wear? I am 6 feet tall so I will always be rubbing on the seats while getting in and out.
 11-25-2010, 05:20 AM
#10
Advanced

Join Date: Oct 2009
Posts: 70
Likes: 0
Received 0 Likes
on
0 Posts
 11-25-2010, 08:57 AM
#11
Drifting
I did this exact project over the spring with the AppBiz kit. The key is to have alot of binder clips to hold the carpeting agains the pieces you are recovering. You end up having alot of extra material, so going back and covering up some mistakes is easy.

The following users liked this post:
Westers (08-01-2022)
11-25-2010, 11:09 PM
#14
Instructor
Thread Starter
Join Date: Jun 2007
Location: Cosby, TN
Posts: 141
Likes: 0
Received 0 Likes
on
0 Posts
I think it is a weekend job if you have all the materials ready to go...carpet, replacement padding, glue and you do not break any thing. I had to use a Dremel grinder to slot the front mounting bolts on the front driver side seat to get them out, took an additional 1.5 hours plus I will have to order replacement bolts. This was after soaking all the mounting bolts with penetrating oil 48 hours before I started.
With that said and my skill level, I plan about 6-10 weeks to do the project..... carpet, RS door cards, probable stereo delete, and seats. I think one of the hardest parts will be sourcing the carpet padding to get the RS carpet to look smooth.
I am fortunate that I also have a 97 993 C2 and most of what I learn on the 964 applies to the 993. Projects like this are way to relax and learn more about 911's for me. Half of the fun is staring a post like this and getting feedback from the community. Once I finish this car I will start with the 993 suspension and the lessons learned from the 964 suspension.