

Perlon interior redux: son of LA RS wannabe
 12-31-2008, 01:25 AM
#31
Three Wheelin'
Join Date: Dec 2003
Location: Rancho Palos Verdes CA
Posts: 1,569
Likes: 0
Received 2 Likes
on
2 Posts
Gotta love that factory glue !
I havent found any solvent that really works well removing it. I found gasoline of all things sorta worked, but not even that great.
I havent found any solvent that really works well removing it. I found gasoline of all things sorta worked, but not even that great.
 12-31-2008, 09:45 AM
#32
Racer
Thread Starter
Join Date: Sep 2004
Location: Farmington, MI
Posts: 310
Likes: 0
Received 0 Likes
on
0 Posts
Ag02M5:
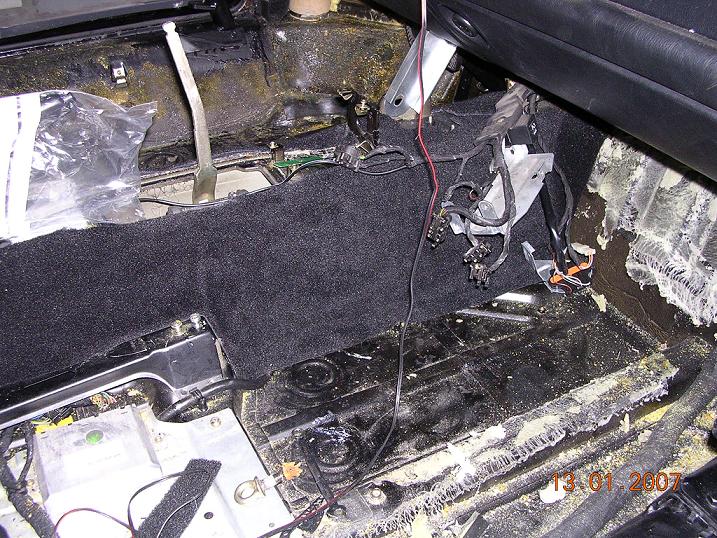
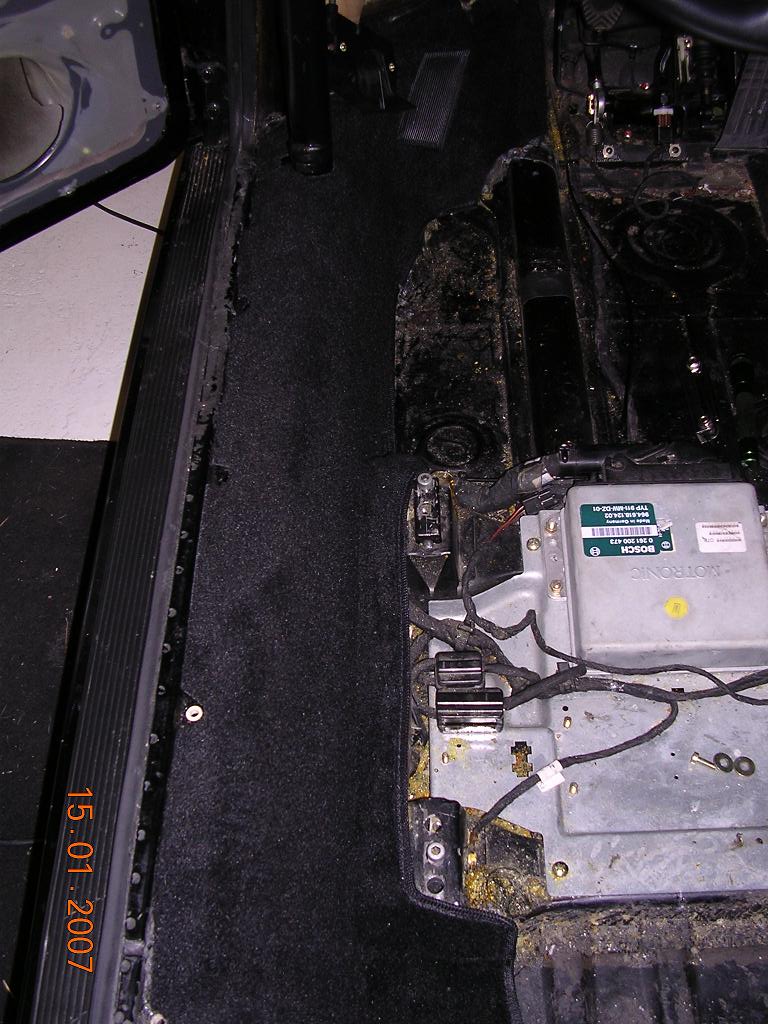
For the rear deck with its' wiring and irregular surface, I used an automotive underlayment felt material that is ultra lightweight and ~ 1/2" thick. I found the material at an auto interior resto shop. I used that material in the places where, like the under console area, you need to "build up". In that under console area and the rear deck area I cut pieces and glued them into the recessed areas to build them up such that the Perlon then would lie flat over the underlayment material. From inside the car looking back, the center obviously needs to be built up because of the recess and the left side needs to compensate for the big honkin' wiring bundle routed there. I can't seem to recall the right side issues, if any. But, when looking at the inside body structure below the rear window when all foam is binned, it's easy to understand where to build up but material and approach to compensating for the irregularities/recesses is personal I suppose.
For the rear deck with its' wiring and irregular surface, I used an automotive underlayment felt material that is ultra lightweight and ~ 1/2" thick. I found the material at an auto interior resto shop. I used that material in the places where, like the under console area, you need to "build up". In that under console area and the rear deck area I cut pieces and glued them into the recessed areas to build them up such that the Perlon then would lie flat over the underlayment material. From inside the car looking back, the center obviously needs to be built up because of the recess and the left side needs to compensate for the big honkin' wiring bundle routed there. I can't seem to recall the right side issues, if any. But, when looking at the inside body structure below the rear window when all foam is binned, it's easy to understand where to build up but material and approach to compensating for the irregularities/recesses is personal I suppose.
12-31-2008, 12:44 PM
#33
Professor of Pending Projects
Rennlist Member
Rennlist Member
Isn't it a nice feeling when you start to glue in the new pieces?! When everything was out of my car i thought "what have I done..." But when the new carpet set got in there piece by piece the smile on my face just got bigger and bigger!
Wachuko: I have photos, step-by-step that I've e-mailed to a bunch of guys here. Just let me know if I can help out!
Wachuko: I have photos, step-by-step that I've e-mailed to a bunch of guys here. Just let me know if I can help out!

 12-31-2008, 01:42 PM
#35
Addict
Rennlist Member
Rennlist
Site Sponsor
Rennlist Member
Rennlist
Site Sponsor
Great Looking Car...Well Done.
__________________
__________________
FVD Brombacher - USA
Contact me directly to get the latest FVD forum member discount!
Rhonda Roxburgh
+1-954-571-2050 x 1
rhonda.roxburgh@fvd.net
Want to learn more about us? Click here...

__________________
FVD Brombacher - USA
Contact me directly to get the latest FVD forum member discount!
Rhonda Roxburgh
+1-954-571-2050 x 1
rhonda.roxburgh@fvd.net
Want to learn more about us? Click here...
04-01-2009, 11:29 AM
#36
Professor of Pending Projects
Rennlist Member
Rennlist Member
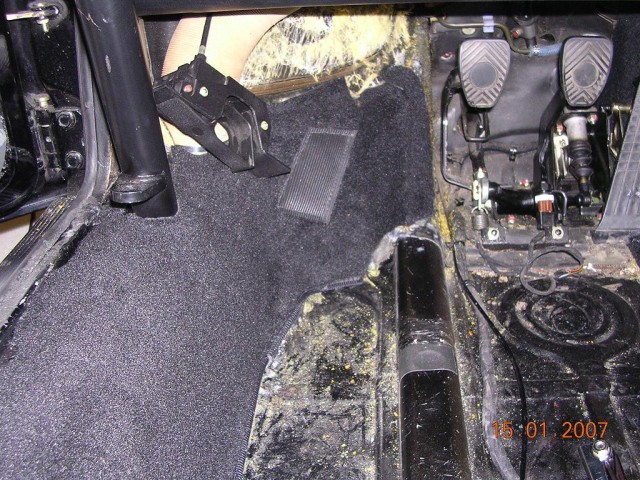
ThomasC2 sent me these photos back in Jan and I simply forgot to follow up on uploading them to this thread... sorry Thomas 
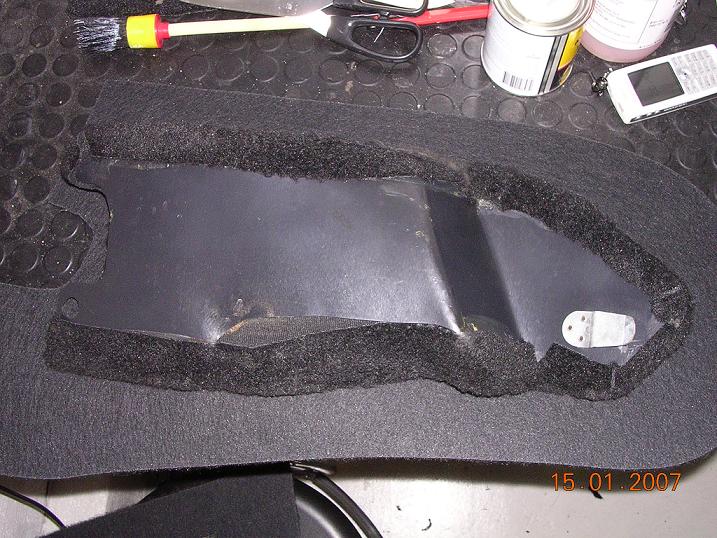
Here you go (comments/instructions by ThomasC2):
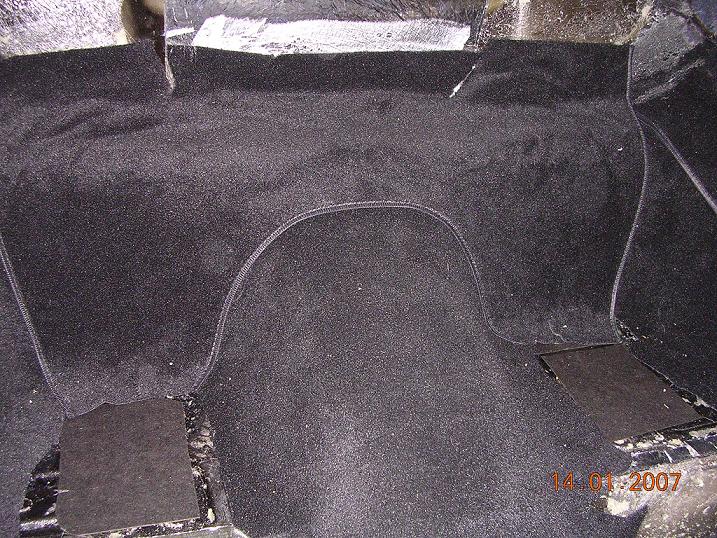
Pic of every piece of the carpet set. Just do it in the same order and you’ll be fine.
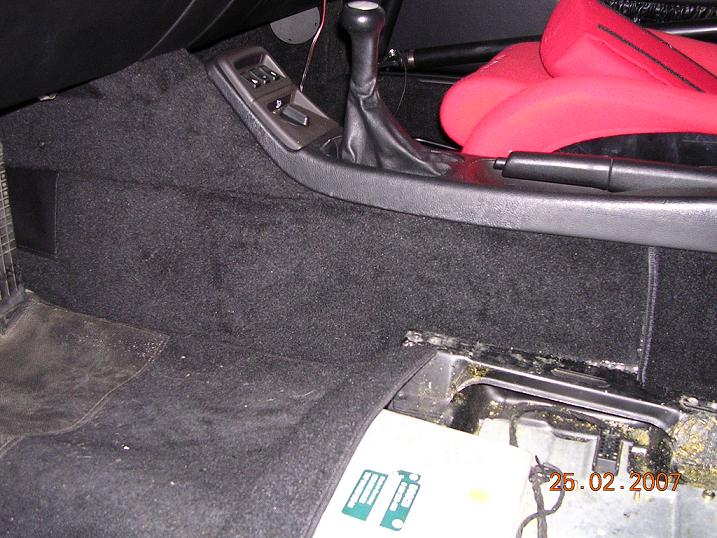
Start on the tunnel with the big piece. It’s easier if you cut in half instead of trying to fold it over the tunnel.
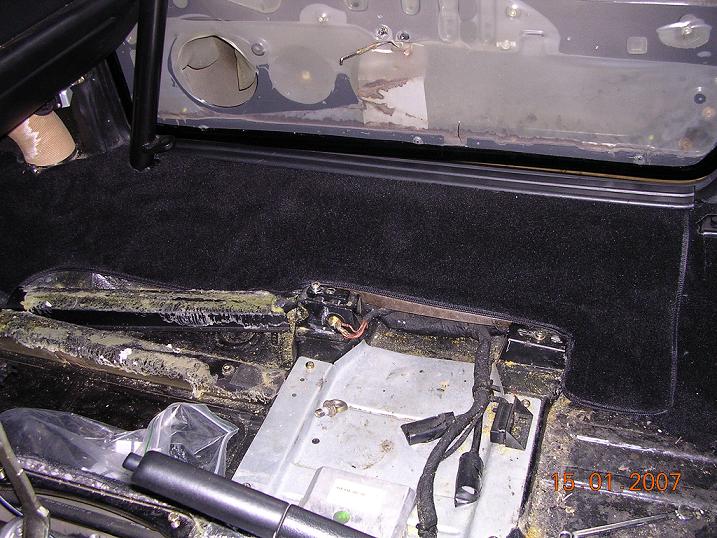
On the tunnel I also used a 10 mm padding to narrow the gap between the centre console and the carpet, see pic 18.
The stock padding is so thick here so it will give you a big gap if you don’t do something.
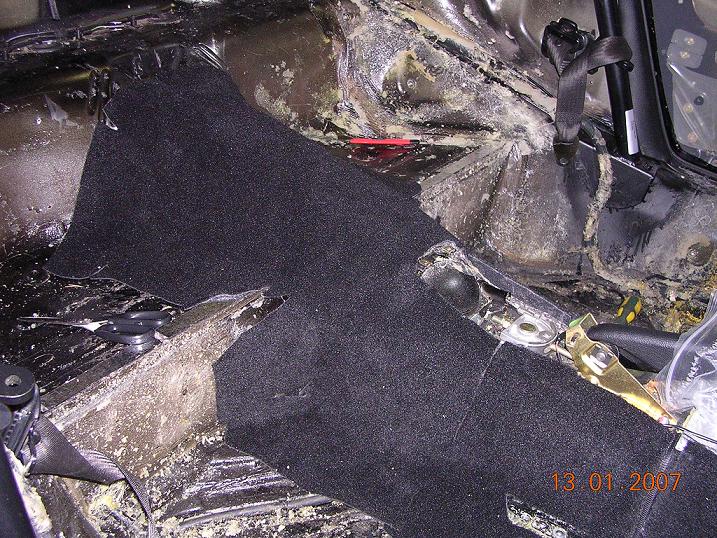
Always match the part you want to glue with the following one so you are sure there is an over lap, in some places it is a bit tight.
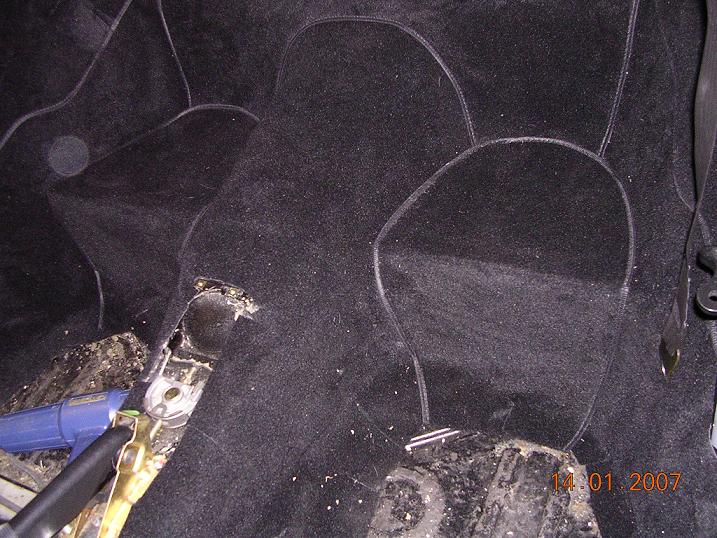
In the corners you can cut slots in the carpet to bend it and you can also stretch it slightly.
I used the spray glue from 3M (think the part no is 8080) on most parts. It doesn’t stick at once so you can move around the parts if you need to.
In some corners or on smaller parts I used a stronger “contact glue”.
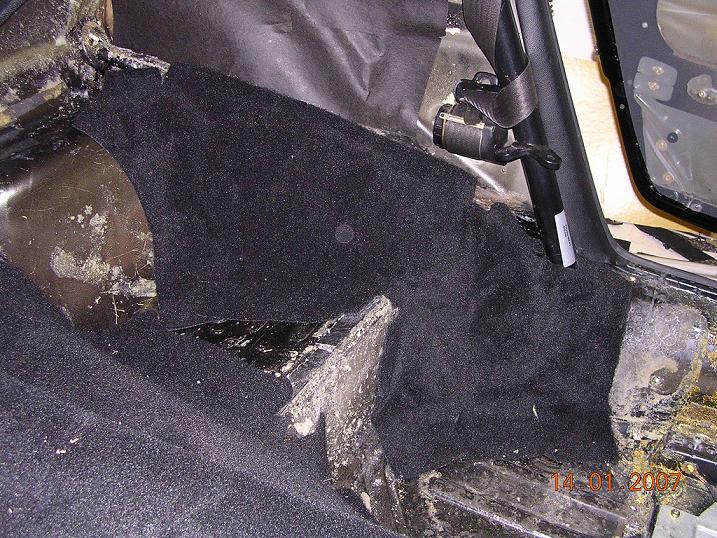
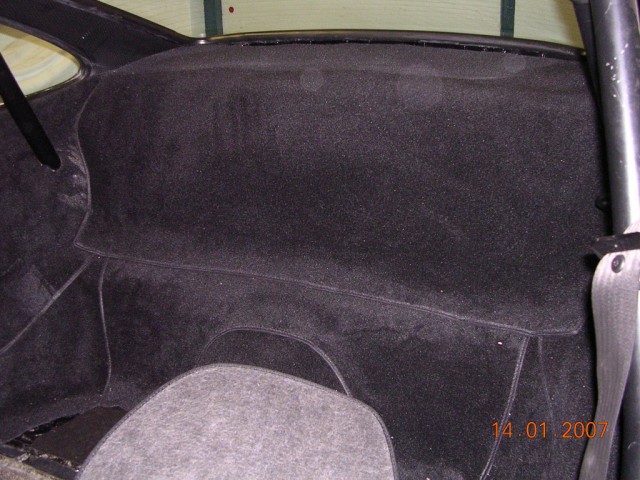
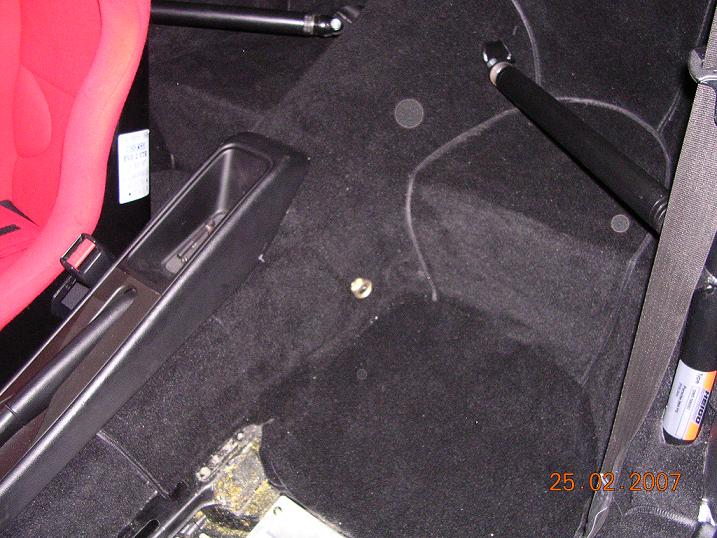
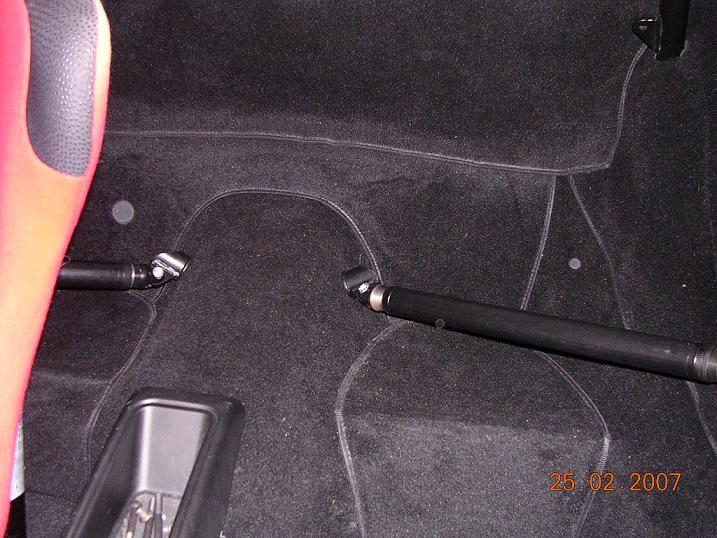
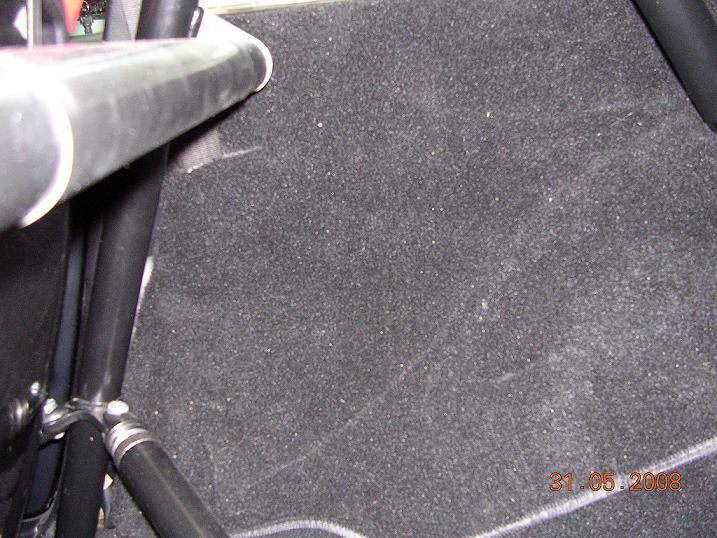
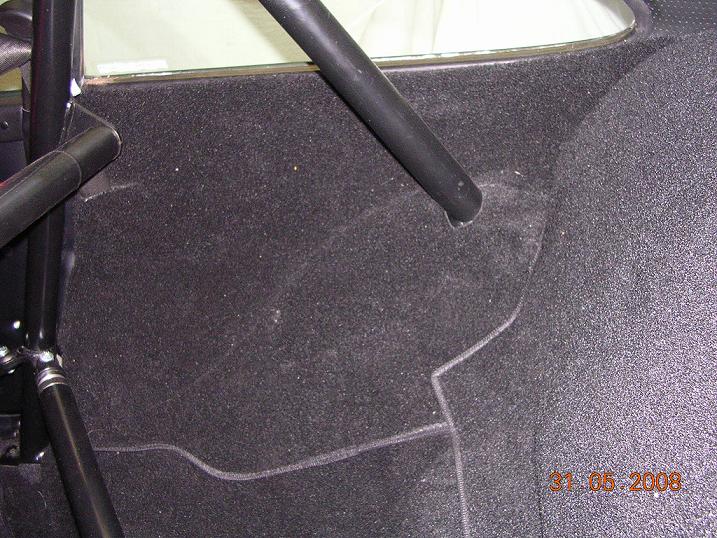
In the rear shelf you also have to use a thicker padding to even it out, but you’ll see where. Another tip is also to use a piece of 10 mm padding on the rear wheel housings. The carpet pieces here has a seam and this will fold more nicely if you use some padding beneath it.
The vinyl strips on some pieces are meant to be glued and folded backwards.
If you to a miss somewhere, the carpet don’t cover something etc, the carpet is pretty forgiving. Just cut a piece and glue it in there to cover the hole. It will look alright.
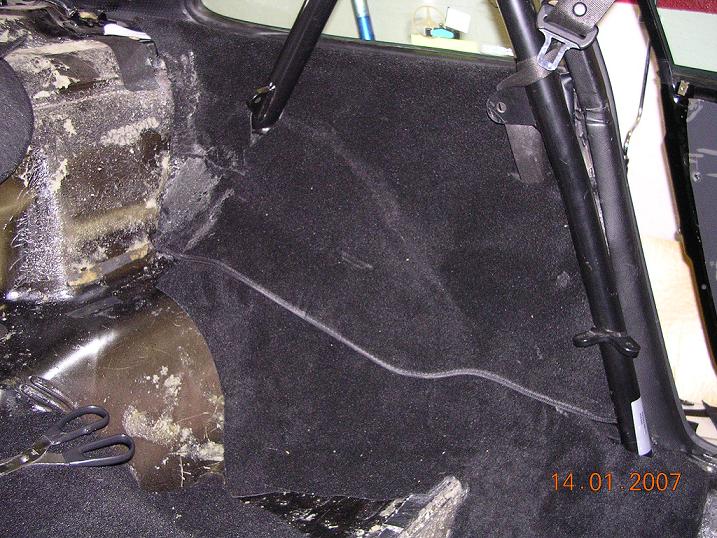
So follow the pics, take your time and think twice….and you’ll be just fine!

Here you go (comments/instructions by ThomasC2):
Pic of every piece of the carpet set. Just do it in the same order and you’ll be fine.
Start on the tunnel with the big piece. It’s easier if you cut in half instead of trying to fold it over the tunnel.
On the tunnel I also used a 10 mm padding to narrow the gap between the centre console and the carpet, see pic 18.
The stock padding is so thick here so it will give you a big gap if you don’t do something.
Always match the part you want to glue with the following one so you are sure there is an over lap, in some places it is a bit tight.
In the corners you can cut slots in the carpet to bend it and you can also stretch it slightly.
I used the spray glue from 3M (think the part no is 8080) on most parts. It doesn’t stick at once so you can move around the parts if you need to.
In some corners or on smaller parts I used a stronger “contact glue”.
In the rear shelf you also have to use a thicker padding to even it out, but you’ll see where. Another tip is also to use a piece of 10 mm padding on the rear wheel housings. The carpet pieces here has a seam and this will fold more nicely if you use some padding beneath it.
The vinyl strips on some pieces are meant to be glued and folded backwards.
If you to a miss somewhere, the carpet don’t cover something etc, the carpet is pretty forgiving. Just cut a piece and glue it in there to cover the hole. It will look alright.
So follow the pics, take your time and think twice….and you’ll be just fine!
Last edited by Wachuko; 04-01-2009 at 12:58 PM.
04-01-2009, 11:30 AM
#37
Professor of Pending Projects
Rennlist Member
Rennlist Member
More:


The folks of the 964 forum in Rennlist are great or what!? Thank you again ThomasC2 for the write up and photos. And apologies it took sooooooo long to update with what you sent me back in January.
The folks of the 964 forum in Rennlist are great or what!? Thank you again ThomasC2 for the write up and photos. And apologies it took sooooooo long to update with what you sent me back in January.

 04-01-2009, 02:09 PM
#40
Drifting
"ThomasC2 sent me these photos back in Jan and I simply forgot to follow up on uploading them to this thread... sorry Thomas "
No problem Jamie, but I wondered what took you so long ;-)
I'm just happy if these pics can help people with the appbiz carpet quizz!
No problem Jamie, but I wondered what took you so long ;-)
I'm just happy if these pics can help people with the appbiz carpet quizz!
04-01-2009, 05:27 PM
#41
Professor of Pending Projects
Rennlist Member
Rennlist Member

 04-01-2009, 05:28 PM
#42
I've heard you dump a bunch of lighter fluid in there, let it soak for a bit then the carpet pulls right up....obviously, no smoking during this process. I personally did it the hard way, in the dead of winter (SoCal winter so 50's)...it was the worst part of the whole project. What a PITA.....that glue is monster stuff....
12-23-2012, 08:41 AM
#43
Nordschleife Master
Digging up this old thread because I'll soon be embarking on he RS carpet install. This thread has almost everything I need to know (thanks Wachuko and ThomasC2) are there is also good info in this thread:
https://rennlist.com/forums/964-foru...r-install.html
And Appbiz's own guide which is for an early 911:
http://www.original911.com/docs/rs_carpet_guide.pdf
However, the question I have for those of you have done the install, is what sort of padding should I be looking for to use around the centre console and rear shelf? Most of the self adhesive car sound proofing material I've found seems to be bitumen based and too thin to use as a padding.
12-23-2012, 10:12 AM
#45
Nordschleife Master