

Rear reflector/tailight tint: testimonial
 05-03-2013, 05:29 AM
#181
Instructor
Join Date: May 2012
Location: Epsom, England
Posts: 207
Likes: 0
Received 0 Likes
on
0 Posts
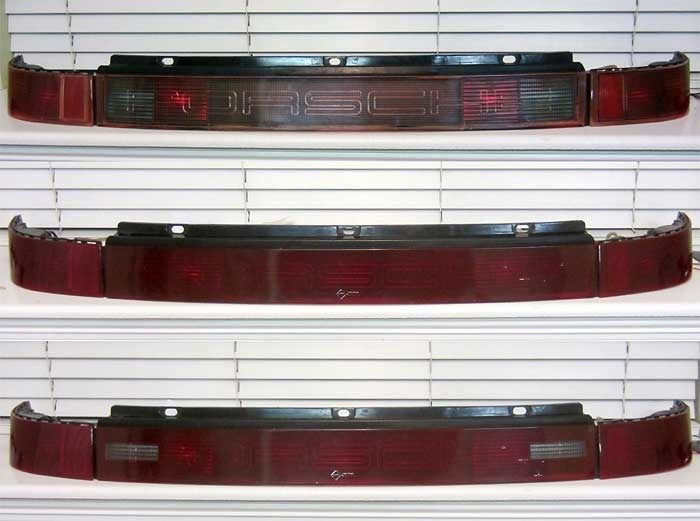
Chaps, here's the pic. Gus's rich sheen red on the centre panel and fly eyes on the light. Perhaps this could look good in grey, be a nice contrast against the blue?

 06-24-2013, 11:34 AM
#183
Rennlist Member
Join Date: Jul 2003
Location: Peachtree City, Ga
Posts: 1,951
Likes: 0
Received 64 Likes
on
54 Posts
Iverheul, thank you for the order - please make sure I have your email to enter in US Post information. Shipment to Europe is usually around ten days. Will cut your kit out this evening and ship out tomorrow.
07-02-2013, 04:22 PM
#184
Advanced
Thanks Gus for the prompt dispatch. Package arrived here in Europe from the US within 5 days! Now all I have to do is wait until I actually get the car...
Will post pics when done
Will post pics when done
07-02-2013, 05:19 PM
#185
Rennlist Member
I ordered this from Gus last fall thinking it would be a good fall project. Well things got in the way and it became a summer project. I Definately recommend this kit. Was a little tough at first, but after working with, became easy. It looks much better the next day after everything dries. Very happy I did this, easy fix for the old faded reflectors.
09-07-2013, 05:14 PM
#186
Race Car
Gus thanks! And to all the tips on the thread ... mucho gracias .. all helpful.
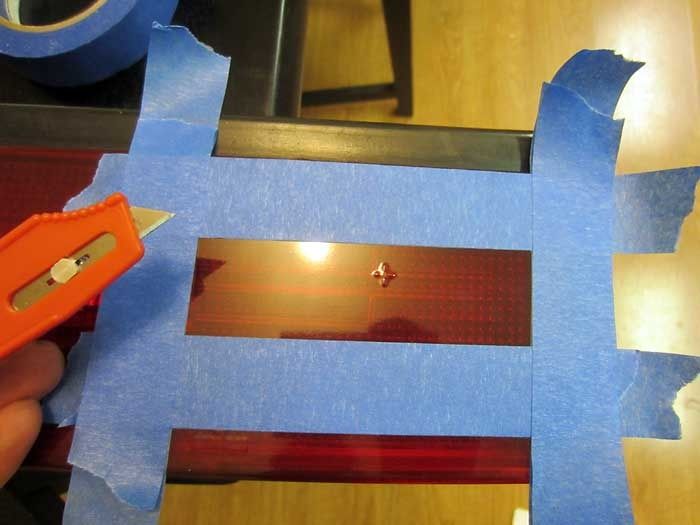
I hate reading instructions and was slightly dismayed at the 2 pages or type with no pics, so here goes
a few shots with some learnings ... will complete fitment tomorrow as once I decide to remove
the lights (Gus does it in situ) I got a major case of scope creep and had to clean out some major gunk
as well as remove the old yellow Tetktyl (waxy oily stuff to retard rust, water ingress etc..)
scrape off and treat some minor rust on one of the light brackets
and patch up the chips with some GP white (all to be done tomorrow)
Car will definitely be faster - about 7 oz of dirt came out!

 11-10-2013, 01:20 PM
#192
Intermediate
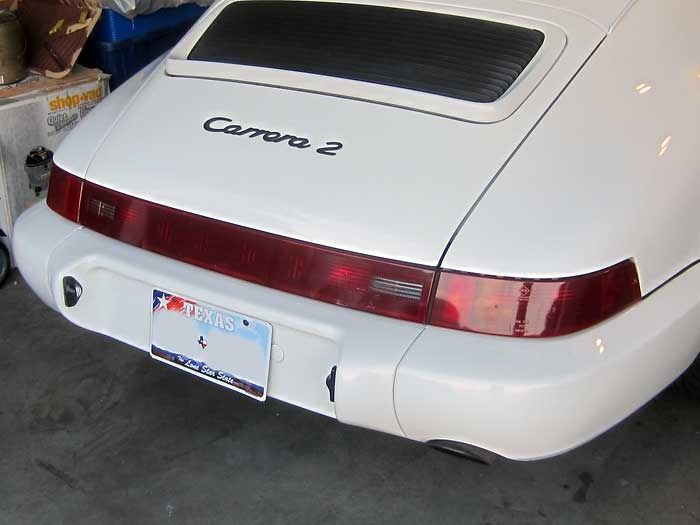
Here is a before/after pic of my attempt at fitting Gus's kit a few weeks ago, it was really good fun to fit, nice to try something new, and the kit arrived very quickly considering it travelled from the US to the UK. The instructions were real easy to follow and in my opinion it is good value for money.
Unfortunately it won't be staying on the car, for a couple of reasons:
I have the legality issues to tackle with the red versus amber turn light and I don't want to get into playing with bulb colours. I knew this before purchase but I still wanted to try the kit.
After installation, and following a repair I was making to the rubber seals, I managed to accidentally get some glue on the vinyl, just under the 'P' - duh! I was really happy with my work and then screwed it up!
Great job Gus.
Steve
11-10-2013, 02:04 PM
#193
Nordschleife Master

Regarding the amber indicator, before ditching the whole kit, instead try to cut a slit in the area of the indicator. I did this with the reverse lights.
Do something like that^, but on the indicator area, I bet it'll be sufficient to show through as amber. Make the slit vertical w/ a bit of a angle on the indicator area.
Do something like that^, but on the indicator area, I bet it'll be sufficient to show through as amber. Make the slit vertical w/ a bit of a angle on the indicator area.
11-11-2013, 12:40 PM
#194
Rennlist Member
Join Date: Jul 2003
Location: Peachtree City, Ga
Posts: 1,951
Likes: 0
Received 64 Likes
on
54 Posts
Vandit -
Nice job - looks good and i like the cut out appears to work OK - For the directional signal I think your idea would work as well but you certainly should be able to use a much smaller cut out area for the light color to work -
Nice job - looks good and i like the cut out appears to work OK - For the directional signal I think your idea would work as well but you certainly should be able to use a much smaller cut out area for the light color to work -


