

964 engine mounts
 11-11-2008, 08:16 AM
#46
Racer
Thread Starter
Join Date: May 2006
Location: Altamonte Springs, Florida
Posts: 423
Likes: 0
Received 0 Likes
on
0 Posts
RS mounts are $167 each and use bolts while a left hydraulic is $238 at Sunset. I just got a quote. Right is more expensive for some reason.
 11-11-2008, 10:18 AM
#47
Professor of Pending Projects
Rennlist Member
Rennlist Member
Great!  I am afraid to even look... pretty sure mine will need replacement after 17 years and 60K miles of use
Where did you get that price Fred? For the RS? Pelican has the RS part for 204
I am afraid to even look... pretty sure mine will need replacement after 17 years and 60K miles of use Where did you get that price Fred? For the RS? Pelican has the RS part for 204
11-11-2008, 11:25 AM
#48
Addict
Rennlist Member
Rennlist Member
Over on the 993 board, there's a dicussion on jacking the car from the engine and its possible affect on the motor mounts. I mentioned that I had done this to my track for years and when the original mounts finally let go, it was on a conventional two post lift. I replaced the originals with RS mounts and three years later, they let go at a track event. As opposed to the orignal mounts, the right side mount that failed, dropped the engine to within an inch of the ground. The only thing holding it in was the AC compressor that had wedged itself against the engine mount/frame of the body. Where the original mount lost its fluid, it didn't move the engine much at all, but when the RS mount failed, the rubber piece just disintegrated itself. I've now installed solid mounts on the car and have had no problems at all. My street C2 still has the original mounts and when it comes time to replace, I'll remain with the oem models. Figure if they've lasted 18 years, there a good choice.
11-11-2008, 01:54 PM
#49
Addict
Rennlist
Site Sponsor
Rennlist
Site Sponsor
I'm not sure how your RS mount failed Manny, because if the RS mounts are installed correctly with the large diameter plate steel plate washer on the top side of the mount followed by the thick washer, it is impossible for the bolt to pull through it and dump the engine on the floor. I've been working on 964 & 993RS's since they were built and never seen a mount that had failed in the way you describe nomatter what state the rubber was in .....??
11-11-2008, 04:50 PM
#50
Nordschleife Master
 11-11-2008, 05:33 PM
#51
Addict
Rennlist Member
Rennlist Member
I'm not sure how your RS mount failed Manny, because if the RS mounts are installed correctly with the large diameter plate steel plate washer on the top side of the mount followed by the thick washer, it is impossible for the bolt to pull through it and dump the engine on the floor. I've been working on 964 & 993RS's since they were built and never seen a mount that had failed in the way you describe nomatter what state the rubber was in .....??
 11-11-2008, 07:39 PM
#52
Racer
Thread Starter
Join Date: May 2006
Location: Altamonte Springs, Florida
Posts: 423
Likes: 0
Received 0 Likes
on
0 Posts
Jaime, the price I got was from Sunset Porsche. That price may include the hardware required, I'll have to check. Porsche of Orlando (Aaron) will usually come close to Sunset's price, so I support the local economy on a most items.
11-12-2008, 11:27 PM
#53
Instructor
Join Date: Nov 2005
Location: Tucson, AZ
Posts: 196
Likes: 0
Received 0 Likes
on
0 Posts
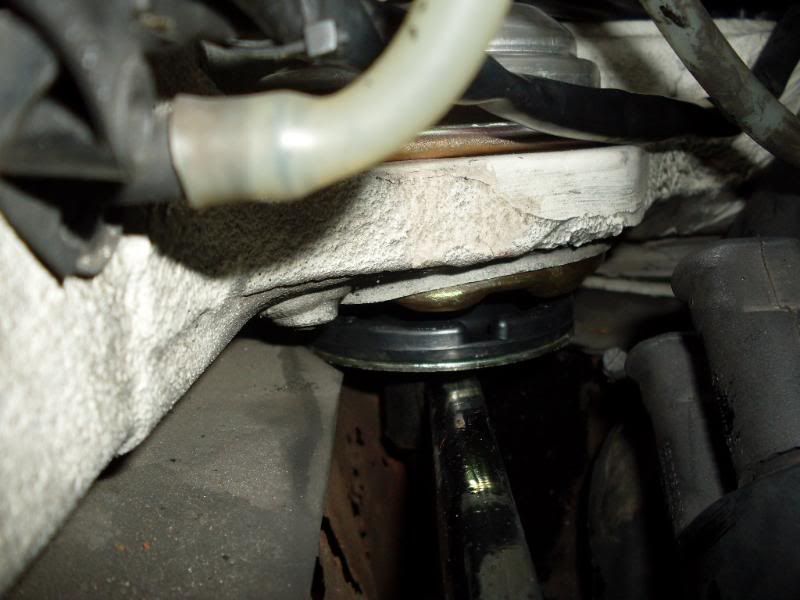
Sorry to ask boxsey's question again, but do we know how much extension is normal on an installed mount in good condition? Could anyone with new-ish hydraulic mounts have a look. I've just checked mine and they look like boxey's (see below). I made my dad check the mounts in his 993 and the look the same... Are all 4 of them bad, or am I missing something?
Maybe there is going to be a run on RS mounts.
Thanks Guys,
James
Maybe there is going to be a run on RS mounts.
Thanks Guys,
James
Last edited by james944; 10-29-2013 at 08:40 PM.
11-13-2008, 07:17 AM
#54
Nordschleife Master
James, I'll be putting my new (standard) mounts on the car this weekend and will take some photos so that we can compare how the new ones look compared to the old ones (when they are on the car).
11-15-2008, 12:40 PM
#55
Nordschleife Master
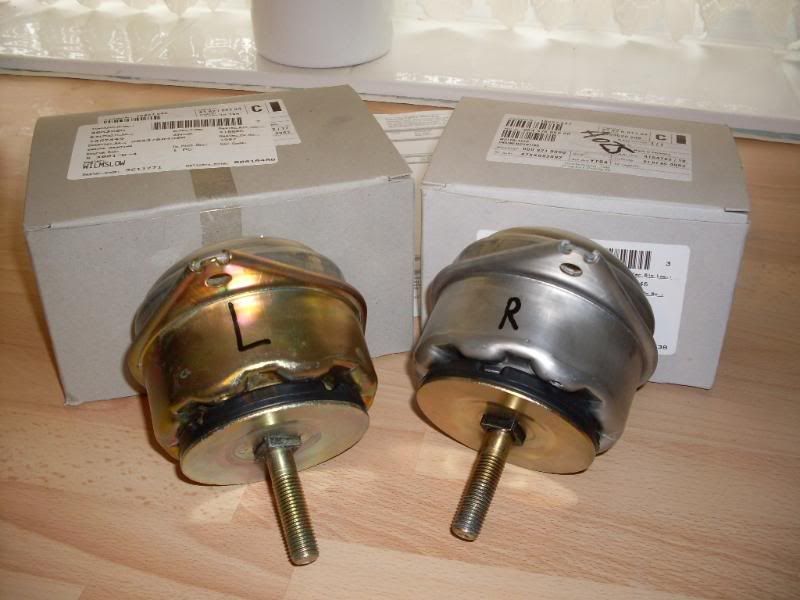
New factory mounts. The L and R had been simply written on at the factory:
Old left mount:

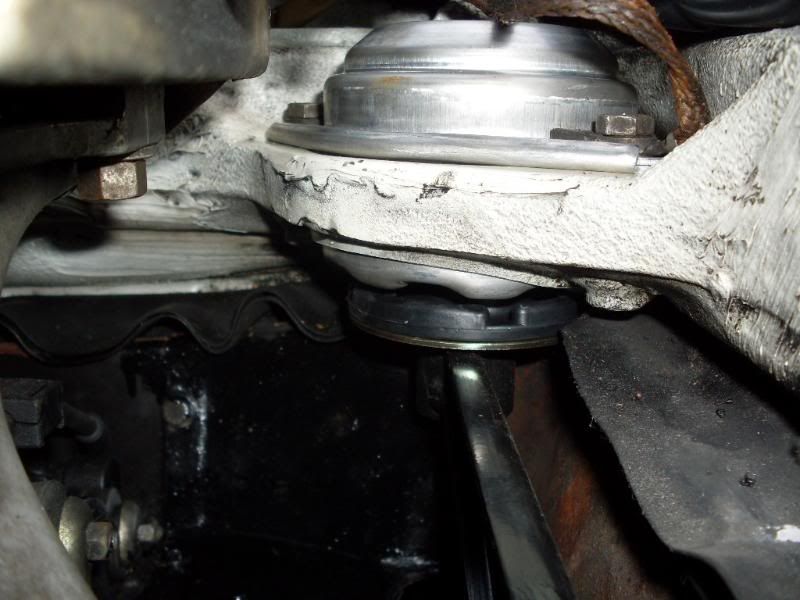
New left mount:
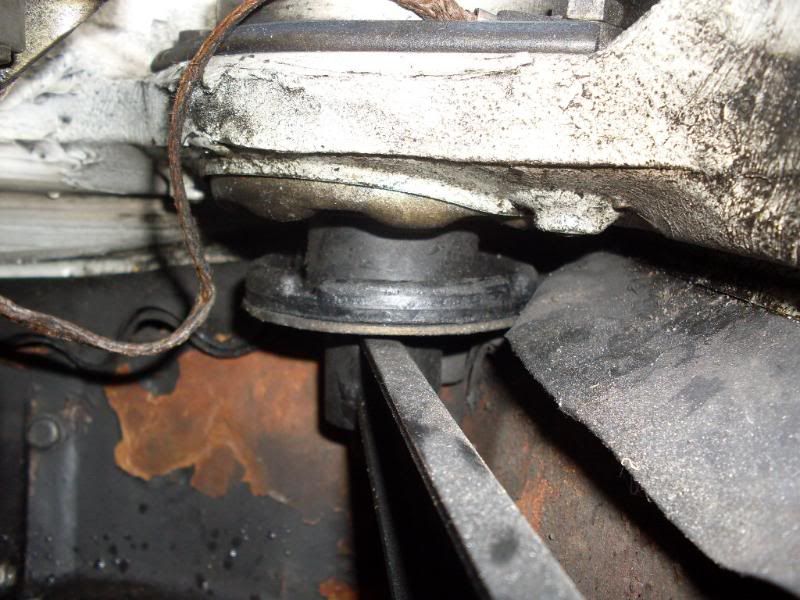
Old right mount:
New right mount:
The old ones didn't look too bad on the work bench but when given a shake I could hear the hydraulic fluid sloshing around:

Old left mount:
New left mount:
Old right mount:
New right mount:
The old ones didn't look too bad on the work bench but when given a shake I could hear the hydraulic fluid sloshing around:
11-15-2008, 01:27 PM
#58
Nordschleife Master
hmmm...
[kindling thoughts to add to the thread fire]
engine crank turns CW....
therefore, block's reaction on acceleration would be CCW... (down load on left, up on right)
and decelerating (engine braking), it would be CW... (down right, up left)
(it's a crap shoot whether abusive clutch pops /missed down shifts would be the more abusive)
jacking by engine case -- obviously a major 'up' load, simultaneous left and right.
11-15-2008, 01:44 PM
#59
Nordschleife Master
Hey James and James,
I've left the test ride until tomorrow so will report back with my thoughts. I don't know if it's an optical illusion but the car looks like it's sitting slightly higher at the back.
The installation went well on the whole. It took longer because I took time to clean out all the grime in the frame holes where the mounts sit and to clean away rust on the rear heat shield and apply high temperature engine paint.
Installation involved jacking up the engine to take up the sag in the old mounts (wheels remained on the ground). Then I had to undo the nuts underneath. This was done with a 19mm hexagonal socket. I needed a breaker bar to get them undone! The left one was a bit tricky because the lower heat shield on the cat gets in the way - a universal joint on the wrench helped me get round this. The 13 mm bolts that secure the top of the mounts were easy to undo and the mounts wiggled out pretty easy. I did one mount at a time. I torqued up the main nuts underneath to 85 nm (info for this came from the engine mount DIY on http://p-car.com/diy/diy.html)
I've also bought another engine carrier from a breakers yard and the Rennline gusset plate to strengthen it. I'll get these welded together, painted and will swap this for my existing carrier. But that's for another day.