
964RS replacement trailing arm bushes

 05-05-2010, 06:59 AM
#107

I've installed these bushes a while ago but had to wait a while to get my car booked in for alignment and corner balance last week.
What I didn't like at all before was the fact that in fast corners (autobahn connecting ramps and such taken at 120-160km/h) the car's rear axle seemed to instantly sidestep big time.....although it actually didn't.
This happened in the blink of the eye i.e. not progressive at all. I found the way around this was leaning into a corner really gently at first to allow for the bushes to settle....still I like my cars to communicate honestly to build confidence.
The latter is what the bushes definitely do for me, the car now communicates in a very straight manner and corners exactly like I would like it to do.
Rgds,
Harald
05-05-2010, 02:23 PM
#108
Hi Anto,
I've installed these bushes a while ago but had to wait a while to get my car booked in for alignment and corner balance last week.
What I didn't like at all before was the fact that in fast corners (autobahn connecting ramps and such taken at 120-160km/h) the car's rear axle seemed to instantly sidestep big time.....although it actually didn't.
This happened in the blink of the eye i.e. not progressive at all. I found the way around this was leaning into a corner really gently at first to allow for the bushes to settle....still I like my cars to communicate honestly to build confidence.
The latter is what the bushes definitely do for me, the car now communicates in a very straight manner and corners exactly like I would like it to do.
Rgds,
Harald
thanks a lot for your feedback!
Your feeling is exactly what I'm looking for...
Was the job difficult?
I've ordered the bushings a while ago, but not received yet... they told me some Powerflex factory/deposit went on fire...
ciao
05-06-2010, 04:59 AM
#109
Hi Anto,
I've ordered mine through Ninemeister who have them in stock. Fitting is more time consuming than complicated....especially when you're like me and decide to clean/restore every part that comes off including sanding the trailing arms themselves to reveal their bare aluminum corrosion free look :-)
Most of the bolts in the rear suspension are tightened to 200Nm and I found the bolt that connects the trailing arm to the chassis especially challenging since it has a very small socket head (17 or 18mm). My fancy Facom multi faceted socket started slipping right over them when trying to undo them! In the end I used a much cheaper six faceted socket to the rescue....phew!!!
All the other bolts came off relatively easily since they have much bigger heads providing way better grip. Then you have the brake pipework to disconnect, as well as the handbrake cables. I disconnected the latter from the interior handle which is a bit fiddly, but afterwards the cables slide out nicely.
With the arms now completely disconnected from the car, taking the OE bushes out is relatively easily achieved with the help of a good butane torch (about 20 euro at the hardware store). I just aimed at the metal collar until the rubber starts to smoke, after which the metal part pops out quite easily.
With a large screw driver I pried out the metal rings, after which I used the torch again to weaken the inner rubber a bit more. I found a 41 socket fits nicely to tap out the inner bush.
Ok so you think you're almost done? Try cleaning up the rubber mess that is left on the outer rings that are supposed to stay in the arm! ;-) I've tried everything from stanley knives, and paint remover....man this takes a lot of time! In the end I found that a small Dremel type electric motor powering an 80grit sandpaper drum works perfectly....very fast, very clean and controlled. Wish I came to that idea 1.5 hours earlier :-)
Cheers,
Harald
05-06-2010, 10:52 AM
#110
Hi Anto,
I've ordered mine through Ninemeister who have them in stock. Fitting is more time consuming than complicated....especially when you're like me and decide to clean/restore every part that comes off including sanding the trailing arms themselves to reveal their bare aluminum corrosion free look :-)
Most of the bolts in the rear suspension are tightened to 200Nm and I found the bolt that connects the trailing arm to the chassis especially challenging since it has a very small socket head (17 or 18mm). My fancy Facom multi faceted socket started slipping right over them when trying to undo them! In the end I used a much cheaper six faceted socket to the rescue....phew!!!
All the other bolts came off relatively easily since they have much bigger heads providing way better grip. Then you have the brake pipework to disconnect, as well as the handbrake cables. I disconnected the latter from the interior handle which is a bit fiddly, but afterwards the cables slide out nicely.
With the arms now completely disconnected from the car, taking the OE bushes out is relatively easily achieved with the help of a good butane torch (about 20 euro at the hardware store). I just aimed at the metal collar until the rubber starts to smoke, after which the metal part pops out quite easily.
With a large screw driver I pried out the metal rings, after which I used the torch again to weaken the inner rubber a bit more. I found a 41 socket fits nicely to tap out the inner bush.
Ok so you think you're almost done? Try cleaning up the rubber mess that is left on the outer rings that are supposed to stay in the arm! ;-) I've tried everything from stanley knives, and paint remover....man this takes a lot of time! In the end I found that a small Dremel type electric motor powering an 80grit sandpaper drum works perfectly....very fast, very clean and controlled. Wish I came to that idea 1.5 hours earlier :-)
Cheers,
Harald
I've ordered mine through Ninemeister who have them in stock. Fitting is more time consuming than complicated....especially when you're like me and decide to clean/restore every part that comes off including sanding the trailing arms themselves to reveal their bare aluminum corrosion free look :-)
Most of the bolts in the rear suspension are tightened to 200Nm and I found the bolt that connects the trailing arm to the chassis especially challenging since it has a very small socket head (17 or 18mm). My fancy Facom multi faceted socket started slipping right over them when trying to undo them! In the end I used a much cheaper six faceted socket to the rescue....phew!!!
All the other bolts came off relatively easily since they have much bigger heads providing way better grip. Then you have the brake pipework to disconnect, as well as the handbrake cables. I disconnected the latter from the interior handle which is a bit fiddly, but afterwards the cables slide out nicely.
With the arms now completely disconnected from the car, taking the OE bushes out is relatively easily achieved with the help of a good butane torch (about 20 euro at the hardware store). I just aimed at the metal collar until the rubber starts to smoke, after which the metal part pops out quite easily.
With a large screw driver I pried out the metal rings, after which I used the torch again to weaken the inner rubber a bit more. I found a 41 socket fits nicely to tap out the inner bush.
Ok so you think you're almost done? Try cleaning up the rubber mess that is left on the outer rings that are supposed to stay in the arm! ;-) I've tried everything from stanley knives, and paint remover....man this takes a lot of time! In the end I found that a small Dremel type electric motor powering an 80grit sandpaper drum works perfectly....very fast, very clean and controlled. Wish I came to that idea 1.5 hours earlier :-)
Cheers,
Harald
your suggestions are very precious and apreciated! Thank you VERY MUCH!!!
I hope to receive them early... I'll let you know how the job will go...
ciao
 12-19-2012, 10:01 PM
#112
Nordschleife Master

Can't say anything on performance gains yet. But installation was no big deal. For me the hard part was getting the trailing arms of the car. Had to get a special tool from Porsche (9299) to get the right trailing arm off  . The allenhead bolt is so close to the gearbox on the right side.
The tool goes from 12mm allenhead to regular 22mm head, like this:
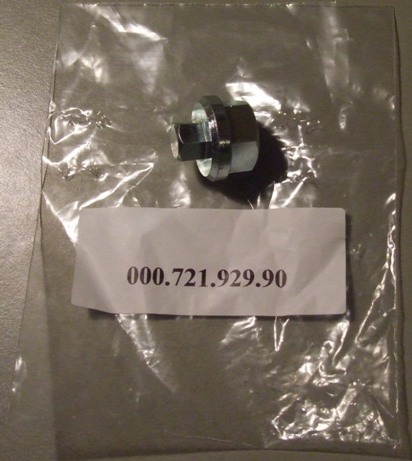
. The allenhead bolt is so close to the gearbox on the right side. The tool goes from 12mm allenhead to regular 22mm head, like this:
This tool alone is $65 from Pelican! There's gotta be a more reasonable alternative, right???
12-20-2012, 03:21 AM
#113
Three Wheelin'
http://www.powertoolworld.co.uk/drap...FUOK4AodzgwAYA
??
Or is the bit we're trying to remove 22mm?
If so
http://www.uktools.com/22mm-1234driv...s-p-11518.html
Or am I missing something?
??
Or is the bit we're trying to remove 22mm?
If so
http://www.uktools.com/22mm-1234driv...s-p-11518.html
Or am I missing something?
 12-20-2012, 11:19 AM
#115
Nordschleife Master
http://www.powertoolworld.co.uk/drap...FUOK4AodzgwAYA
??
Or is the bit we're trying to remove 22mm?
If so
http://www.uktools.com/22mm-1234driv...s-p-11518.html
Or am I missing something?
??
Or is the bit we're trying to remove 22mm?
If so
http://www.uktools.com/22mm-1234driv...s-p-11518.html
Or am I missing something?
Looks like the adapter sold by Porsche converts the 12mm hex head to a 22mm nut head, so you can attack it w/ a normal 22mm spanner or maybe a 22mm crowfoot w/ a wrench.
Others have had to have encountered this. What did you all do?
12-27-2012, 04:43 PM
#118
Racer
Join Date: Feb 2011
Location: Chester County, PA
Posts: 434
Likes: 0
Received 0 Likes
on
0 Posts
Anyone can point me to a DIY for trailing arm removal? Cant find any, and I have a set of power flex bushing to install over the holiday break.
Anyone in the Philly (Chester County area) wants to lend a hand?
I have beer, and a good garage heater,...
Thanks
Anyone in the Philly (Chester County area) wants to lend a hand?
I have beer, and a good garage heater,...
Thanks

 12-27-2012, 05:43 PM
#120
Nordschleife Master
I was talking to my dad about that 12mm hex fastener w/ limited clearance and Porsche's $65 solution and he said he could weld something together for me that would serve the same purpose using a sacrificial 12mm hex key and large nut.
Slightly Off-topic, but did the front subframe really have to come out to do the front arms? I wasn't planning on dropping it.
Are those pieces just cleaned/blasted, or did you paint/coat them too?
Slightly Off-topic, but did the front subframe really have to come out to do the front arms? I wasn't planning on dropping it.
Are those pieces just cleaned/blasted, or did you paint/coat them too?