

How hard is it to replace the rear CV boots?


 11-11-2006, 11:47 PM
#33
Drifting
Thread Starter
Join Date: Jun 2006
Location: Dallas/FortWorth Texas
Posts: 3,438
Likes: 0
Received 1 Like
on
1 Post
Ok, what is the secret with those boot clamps that came in the new kit? What kind of tool do you use to cinch them tight? I went nuts today messing with those until I gave up. Which brings me to another question... What's the consensus on using plastic zip ties to cinch up the boots? 
11-12-2006, 11:05 AM
#34
Addict
Rennlist Member
Rennlist Member
Originally Posted by TR6
Ok, what is the secret with those boot clamps that came in the new kit? What kind of tool do you use to cinch them tight? I went nuts today messing with those until I gave up. Which brings me to another question... What's the consensus on using plastic zip ties to cinch up the boots?
When I did mine, I reused the originals
 Heaven forbid!
 Zip ties are used by some of us on the Forum, search for the specific users. Really, the plastic used in zip ties should take the temperature, the boot does!
11-12-2006, 01:12 PM
#35
Drifting
Thread Starter
Join Date: Jun 2006
Location: Dallas/FortWorth Texas
Posts: 3,438
Likes: 0
Received 1 Like
on
1 Post
Originally Posted by LouZ
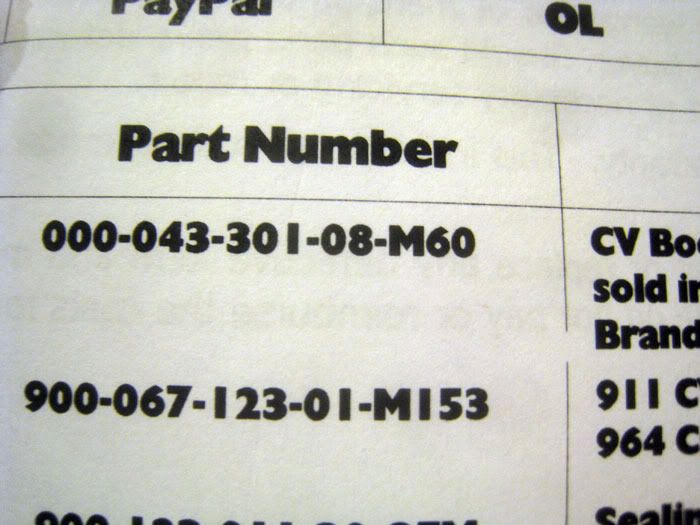
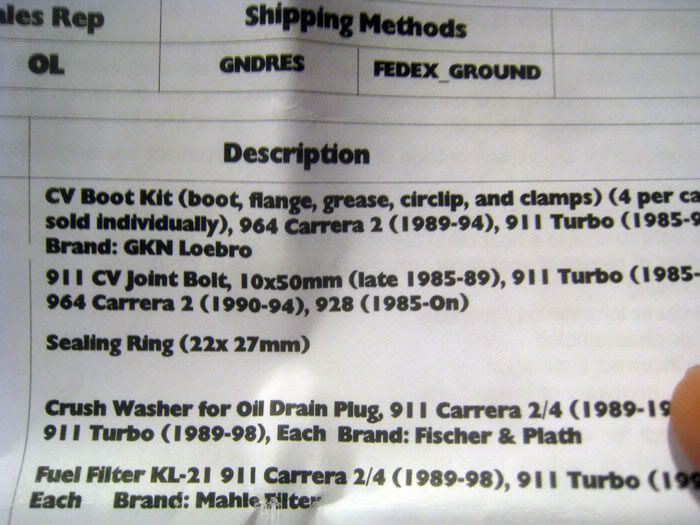
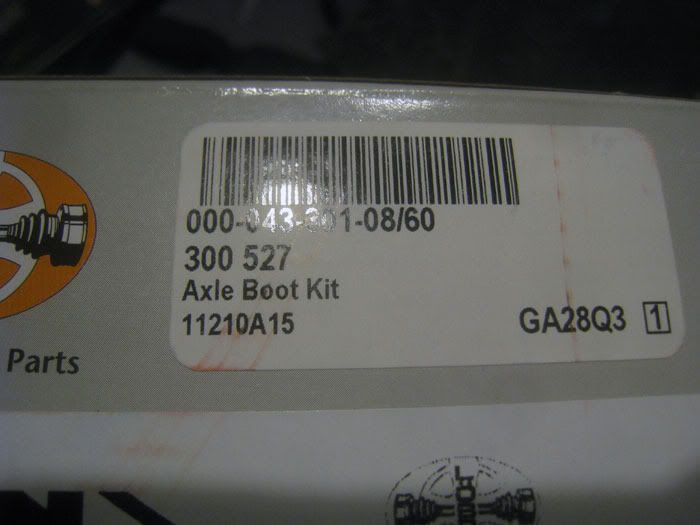
I'm not sure which type came in your kit, post a pix please.
http://forums.pelicanparts.com/showt...hreadid=181361
In fact, I bought exactly the same kit as the one shown in that thread.
11-12-2006, 01:27 PM
#36
Addict
Rennlist Member
Rennlist Member
Originally Posted by TR6
I don't have a photo, but they are the same ones as in the kit pictured in this DIY:
http://forums.pelicanparts.com/showt...hreadid=181361
In fact, I bought exactly the same kit as the one shown in that thread.
http://forums.pelicanparts.com/showt...hreadid=181361
In fact, I bought exactly the same kit as the one shown in that thread.
11-13-2006, 12:12 AM
#37
Drifting
Thread Starter
Join Date: Jun 2006
Location: Dallas/FortWorth Texas
Posts: 3,438
Likes: 0
Received 1 Like
on
1 Post
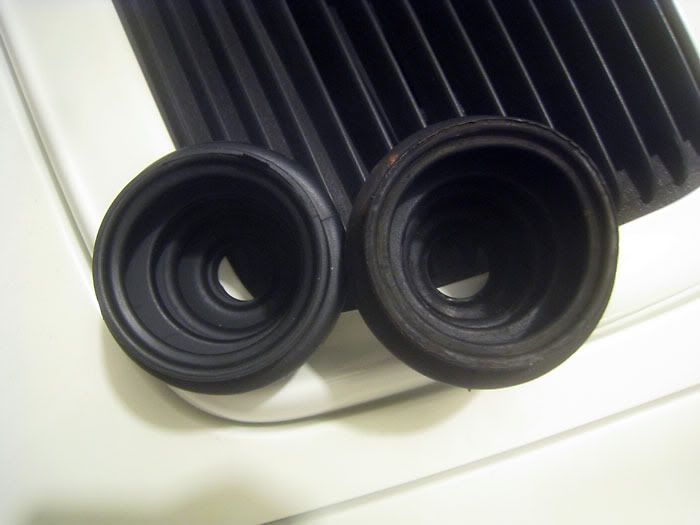
Good news... I finished. I replaced all four CV boots and repacked the joints with fresh grease. One inner joint I actually disassembled (see photo) because the grease in that one was clumped and old looking. I had a bit of a time figuring out how to get the ball bearings back together. Its like a puzzle. But, its all back together and I took it for a road test and the axles didn't fall off.  I also took the opportunity to replace the two rubber sleeves on the heat exchangers. The old ones were cracked.
By the way, I noticed that it looks like the outer boots have more tendency to crack than the inners. At least on mine, the outers were more stressed. I guess the outer joints go through more of an angle of rotation than the inners.
All in all, it was a messy, messy messy (did I say messy?) job. Glad its done. It took me a while just to clean all of my tools after I finished. And I went through two full rolls of paper towels.
Edit: ps. I used plastic zip ties instead of the metal clamps.
I also took the opportunity to replace the two rubber sleeves on the heat exchangers. The old ones were cracked. By the way, I noticed that it looks like the outer boots have more tendency to crack than the inners. At least on mine, the outers were more stressed. I guess the outer joints go through more of an angle of rotation than the inners.
All in all, it was a messy, messy messy (did I say messy?) job. Glad its done. It took me a while just to clean all of my tools after I finished. And I went through two full rolls of paper towels.
Edit: ps. I used plastic zip ties instead of the metal clamps.
Last edited by TR6; 11-13-2006 at 12:29 AM.
04-30-2011, 10:41 AM
#38
Nordschleife Master

I need some advice as i've got the car in piece in the garage right now.
I've removed the axle on the inboard side, removed the outboard nut, got the axle nearly pulled out, but it's hitting up against the rear shock and not letting me pull the assembly out of the hub.
This is on a 964.
Do I have to undo the shock from the trailing arm in order to pull the axle out?
EDIT/UPDATE: Got the pass. side axle out. Had to really persuade the boot to go past the shock then the axle end to go past the e-brake line.
How hard is it to remove the ebrake line to make reinstallation a bit less painful?
Last edited by Vandit; 04-30-2011 at 11:16 AM. Reason: UPDATE
05-01-2011, 10:01 PM
#39
Nordschleife Master
Any advice for getting the boots back onto the joint? I am in the process of reassembly, put the supplied grease in the joint, but now can't get the damn boot over the joint. Half the grease I put in there is now on my damn hands instead of the joint. Help!
05-02-2011, 11:41 AM
#41
Nordschleife Master
It seemed impossible last night, so I gave up. I'll try it again tonight.
My dad suggested getting a heat gun and using it to warm the boot, making temporarily more pliable.
My dad suggested getting a heat gun and using it to warm the boot, making temporarily more pliable.
05-02-2011, 09:17 PM
#42
Nordschleife Master
I just tried it again for another 20 mins and once again, bunch of grease everywhere and the boot no where closer to being installed.
Pics.
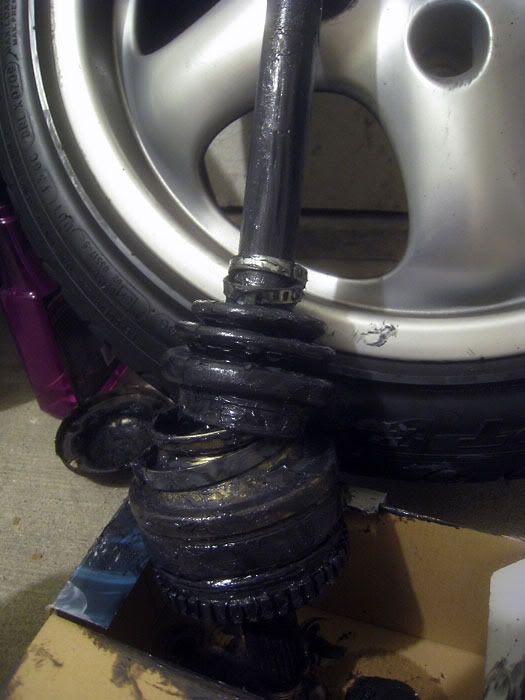
Can you believe this was super nice and clean before I started attempting to put that boot back on?
Pics.
Can you believe this was super nice and clean before I started attempting to put that boot back on?
05-02-2011, 09:59 PM
#43
Nordschleife Master
Went back out there and did another round with the boots and great success!
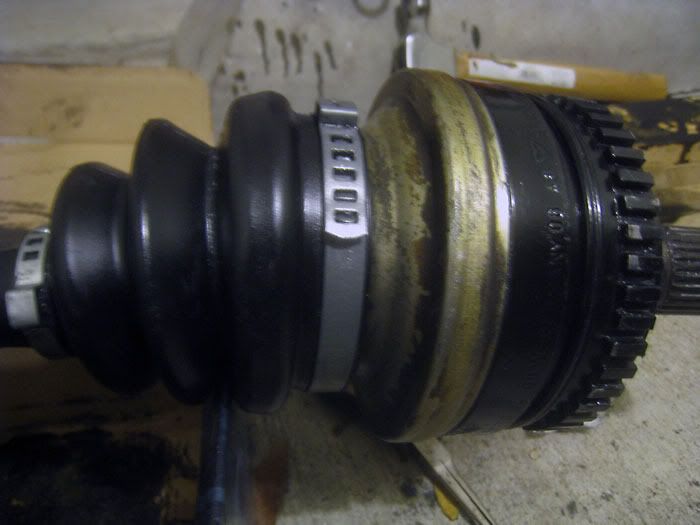
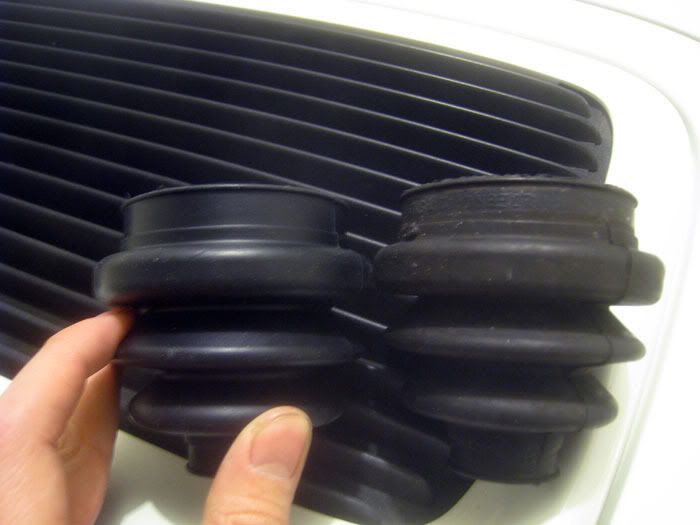
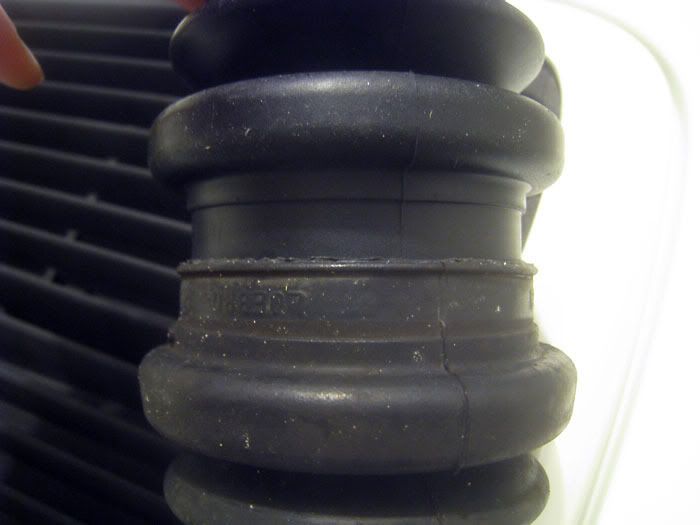
Is there a secret to getting the included clamps (pictured) tight, or do they not have to be tight? The way they're on there right now, they're just sitting closed, not putting much, if any, pressure on the boot.
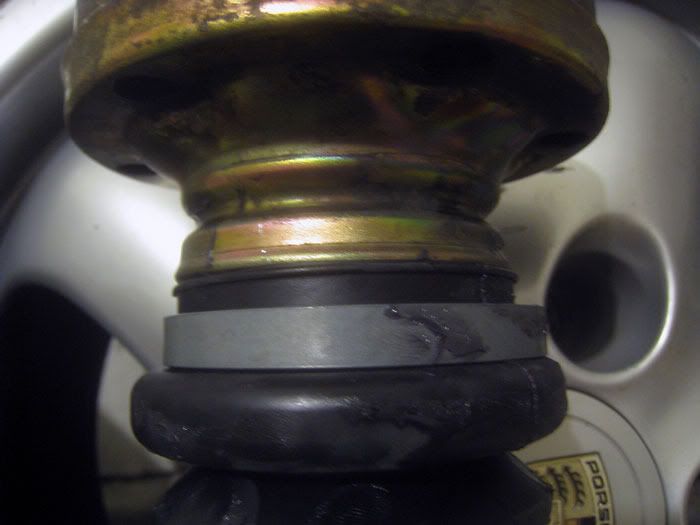
Also, those teeth on the end of the axle, i'm assuming those drive some type of speed sensor at the wheel? Notice how some of the black paint has chipped off mine. Is that going to cause a problem? Should I address that?
Is there a secret to getting the included clamps (pictured) tight, or do they not have to be tight? The way they're on there right now, they're just sitting closed, not putting much, if any, pressure on the boot.
Also, those teeth on the end of the axle, i'm assuming those drive some type of speed sensor at the wheel? Notice how some of the black paint has chipped off mine. Is that going to cause a problem? Should I address that?
05-02-2011, 10:05 PM
#44
Those clamps are not special. Mine were a bit different and I did not have the proper tool to tighten them so I just used zip-ties instead. I know, sacrilege, but they've held just fine for several years.
Congrats on getting them mounted!
That job is unpleasant, for sure. And, my after market boots on the front have now torn open so I get to do it again. Ugh.
Congrats on getting them mounted!
That job is unpleasant, for sure. And, my after market boots on the front have now torn open so I get to do it again. Ugh.