
Replacing your front hood shocks in 15 minutes (each)
 01-01-2012, 02:34 PM
#31
Nordschleife Master

Alright, I just walked in from the garage where I successfully installed my new hood shocks. It took me way longer than 15 mins tho. My hood now flies up w/ comparable ferocity to when it would previously fly down onto my head.
Some things to note.
I think my flat screwdriver was not big enough to successfully pry the lower socket off the car. I ended up using a big flat metal file, covered in tape to prevent abrasion. I would stick it between the car and socket and then use a plier at the top to twist the file and that popped them off.
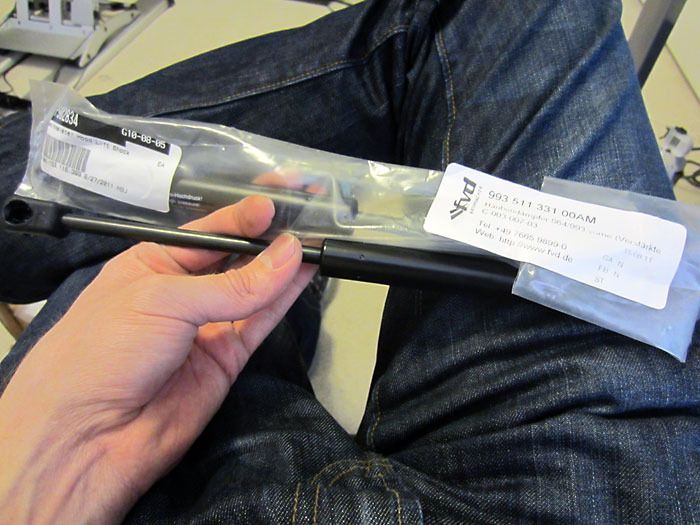
Another thing to note, and very key. I used the same Weltmeister Hood Lift Shock from AutoMotion.com that Marc used, Part # P902834, $29.99/each, however, the construction of the socket end of the shock differed from what is pictured in Marc's original post and differed from the old shocks I removed from the car.
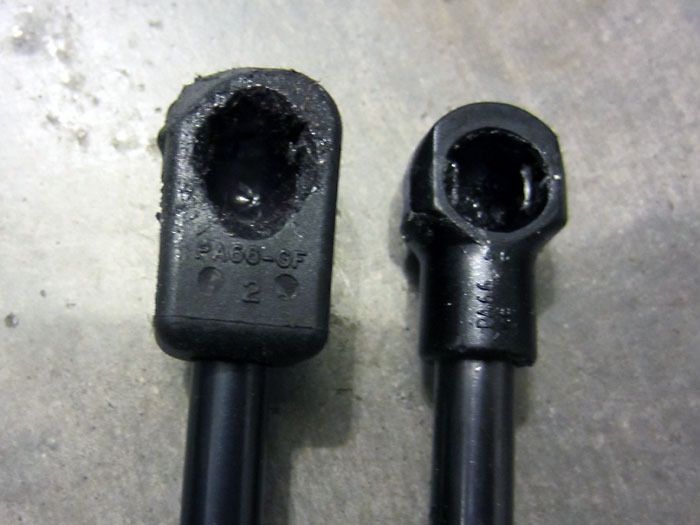
The socked end is noticeably bigger and more squared off. On the pass. side (right) I did not notice the socket size difference create any installation complications. I didn't even note the difference at all. On the driver's side (left) however, I kept trying to pop the socket in and it would not entirely pop in, which meant the metal clip would never budge w/ the wire hanger method (great technique!). I kept messing with it, thinking I was doing it wrong till I realized it was the same side (side facing the firewall) that wouldn't go into the socket properly. That's when I realized the size difference was causing the socket to bottom out against the car before it was fully inserted. A little grinding with the Dremel to remove extra material and bam, it all worked out perfectly.
So yea, just note the size of the socket end when you get your replacement shocks.
Some things to note.
I think my flat screwdriver was not big enough to successfully pry the lower socket off the car. I ended up using a big flat metal file, covered in tape to prevent abrasion. I would stick it between the car and socket and then use a plier at the top to twist the file and that popped them off.
Another thing to note, and very key. I used the same Weltmeister Hood Lift Shock from AutoMotion.com that Marc used, Part # P902834, $29.99/each, however, the construction of the socket end of the shock differed from what is pictured in Marc's original post and differed from the old shocks I removed from the car.
The socked end is noticeably bigger and more squared off. On the pass. side (right) I did not notice the socket size difference create any installation complications. I didn't even note the difference at all. On the driver's side (left) however, I kept trying to pop the socket in and it would not entirely pop in, which meant the metal clip would never budge w/ the wire hanger method (great technique!). I kept messing with it, thinking I was doing it wrong till I realized it was the same side (side facing the firewall) that wouldn't go into the socket properly. That's when I realized the size difference was causing the socket to bottom out against the car before it was fully inserted. A little grinding with the Dremel to remove extra material and bam, it all worked out perfectly.
So yea, just note the size of the socket end when you get your replacement shocks.
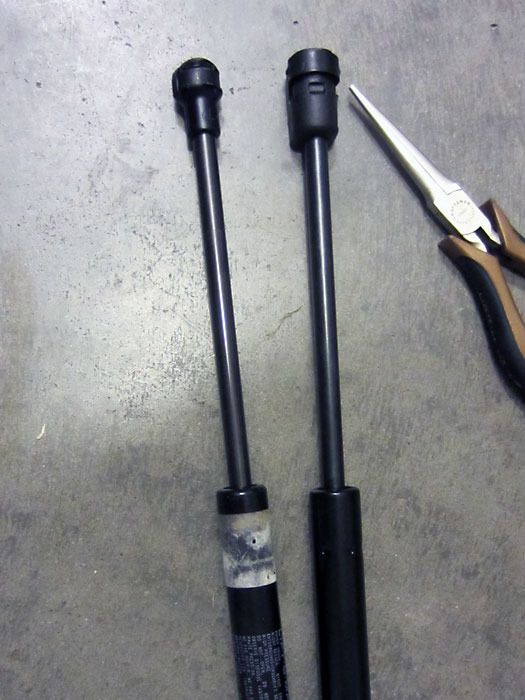
Old vs New, new are noticeably bulkier at the socket end, creating fitment problems.
I used a Dremel to grind away material so that they would fit properly.

 02-19-2013, 02:14 AM
#33
Race Car
My hood and decklid shocks just arrived. Are they supposed to be too hard to compress
by hand? I don't seem to be able to make them shorten at all. How much force needed?
Or must they be unlocked/twisted open? Don't seem to want to do that either.
It may be too early in the am for this one lol.
by hand? I don't seem to be able to make them shorten at all. How much force needed?
Or must they be unlocked/twisted open? Don't seem to want to do that either.
It may be too early in the am for this one lol.
02-19-2013, 02:38 AM
#34
Burning Brakes

Yes, they are impossible to compress by hand, and at first you think that maybe they're seized, and that you'll bend the frunklid when you try to close it 
This is normal You have to remember that they have to be super-strong to be able to overcome the leverage effect, due to their location so close to the hinge.
This is normal
You have to remember that they have to be super-strong to be able to overcome the leverage effect, due to their location so close to the hinge.
02-19-2013, 07:18 AM
#36
Instructor
I installed new front shocks recently and they were so strong they pushed the hood so it stood proud of the body. I've had that happen before with a longhood and was told that the lifetime shocks were too strong. I'd appreciate input as I put the old ones back on and the hood crashes on my head once again (unless it's hot outside, which happens about every five years here in Bend).
John
John
02-19-2013, 08:13 AM
#37
Rennlist Member
I've replaced my front trunk shocks 2x in the last 5 years. I first went with the cheap ones(from performance), then the lifetime ones. I have a hood liner/protector, that weighs 3-4 lbs. My hood will stay up in warm weather, but not in the cold. Does anyone know of a shock that really works? Or else, I'll just continue to use a stick.
02-19-2013, 09:09 AM
#38
Rennlist Member
Join Date: Aug 2012
Location: Stockport uk
Posts: 182
Likes: 0
Received 0 Likes
on
0 Posts
I did mine last weekend! Must be catchy!
I bought the stock struts for both the front and rear, and although they've not been on long, they do the job perfectly. Standard bonnet weight though so no higher weights.
Once I took a look on here as to how to get the ball onto the socket and keep it there, it took 5minute either side... Just a sore neck holding up the bonnet (no one to help or long enough stick!)
James.
02-19-2013, 09:35 AM
#39
Nordschleife Master
I installed new front shocks recently and they were so strong they pushed the hood so it stood proud of the body. I've had that happen before with a longhood and was told that the lifetime shocks were too strong. I'd appreciate input as I put the old ones back on and the hood crashes on my head once again (unless it's hot outside, which happens about every five years here in Bend).
John
John
p.s. Second time around I managed to do them within Marc's time limit.
 02-19-2013, 02:50 PM
#40
Super Duper Moderator
Lifetime Rennlist
Member
Lifetime Rennlist
Member
Thread Starter
05-05-2013, 12:36 AM
#42
Rennlist Member
Yet another thread that saved my ***. I replaced mine with Stabilus from Pelican Parts. I didn't need to loosen the baffle. I have small hands.
I love Rennlist.
I love Rennlist.
05-05-2013, 03:33 PM
#43
Race Car
just a quick note to say that it is much easier to place the 'spring' loaded end of the shock
onto the balll joint than it is to remove the old one. Getting the old on off is a little mission
but with the right prong type tool as mark describes quite easy.
But the break thru (for me - I struggled with this a couple times until I just tried something else ... which worked ... I might just have misread the direction above!)
... when putting in the new shock, its unnecessary to even move the spring back or prep the spring loaded end
.. just place the female end over the ball joint and gently add pressure and it pops on! Hey presto.
05-15-2013, 03:50 PM
#44
Instructor
Join Date: Dec 2012
Location: Denver Colorado
Posts: 102
Likes: 0
Received 0 Likes
on
0 Posts
Just replaced all 4. Fronts took about 20min. 1st, driver's side front. Followed these instructions but had a little difficulty finding the clip at the bottom with the hanger device. 2nd, passenger's side front. Used dental floss around bottom clip and just pulled up on it after the socket was placed over the ball. Found this technique much easier. Rears took 1.5 hours. Driver's side rear is tight but reasonable. Passenger's side rear is really tight unless you're Manute Bol. Used white rag under work area to catch falling parts. Dropped front pin 5 times. Missed the rag once and took 25 minutes to find it. Getting past all the oil and air conditioning lines and intercooler is a pain but eventually doable. Rear would be easier if fore went into bottom hole and aft went into top hole but that's not the way it is. This write-up is definitely helpful for fronts. Wondering if anybody has tricks for rear on turbo or it just "is what it is"?