When you click on links to various merchants on this site and make a purchase, this can result in this site earning a commission. Affiliate programs and affiliations include, but are not limited to, the eBay Partner Network.
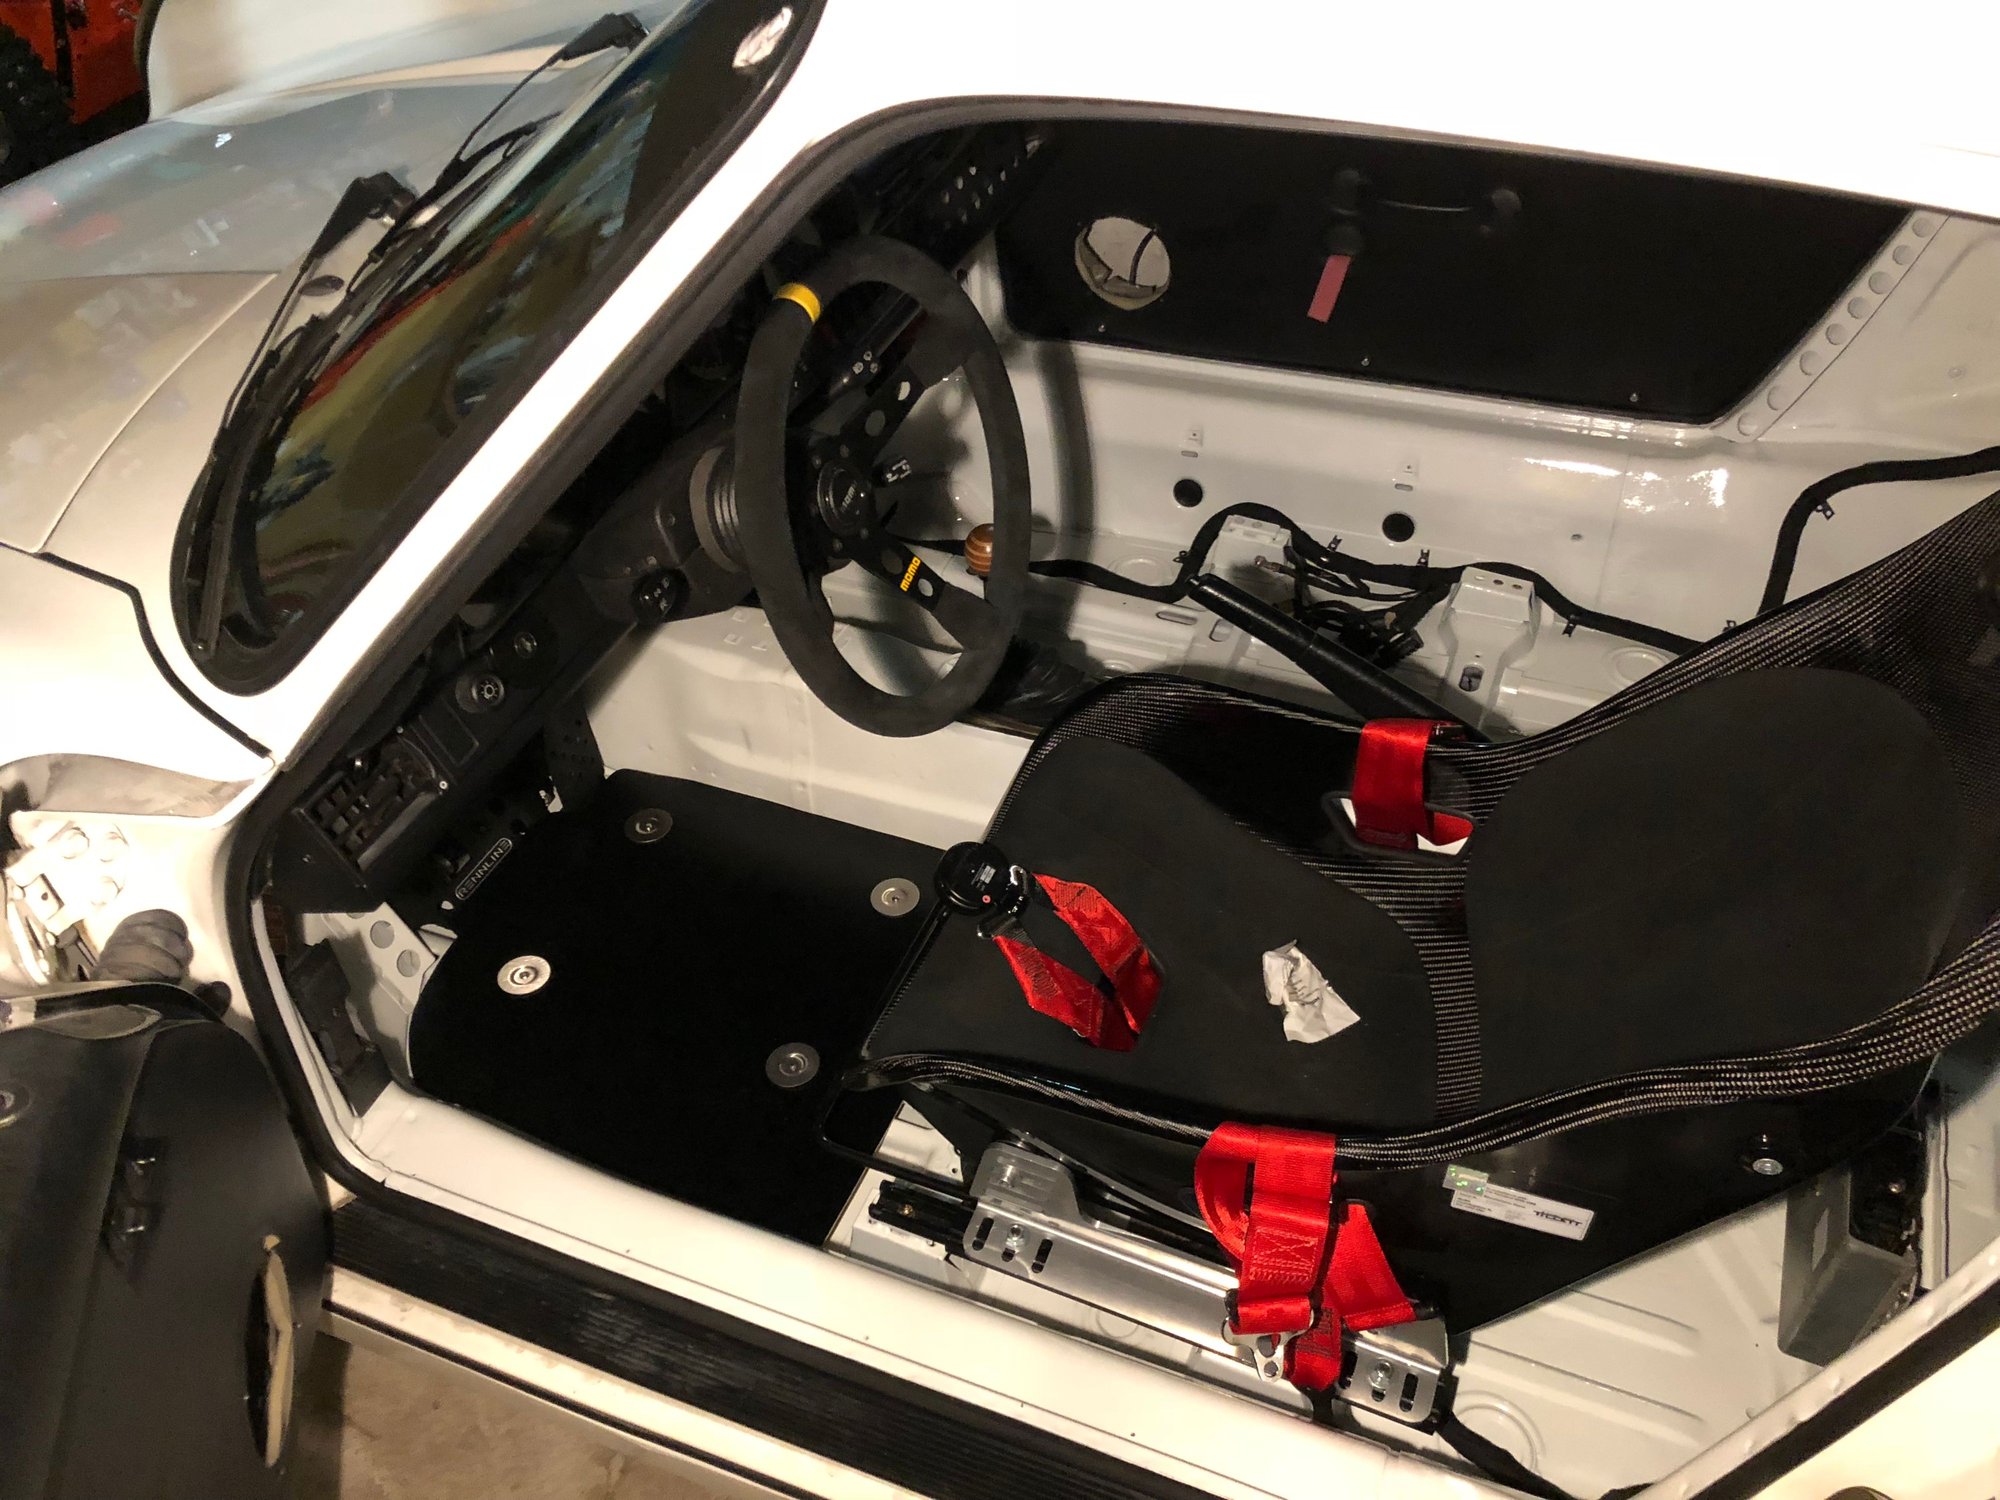
Yup, and heated too! Cobra takes pride in customizing their seats. The Nogaros have been around for a few years, but I expect that their newly designed base is going to make this a very populat seat for older 911�s. I�m looking forward to installing them in the 993, and will post a few pics up on the board.
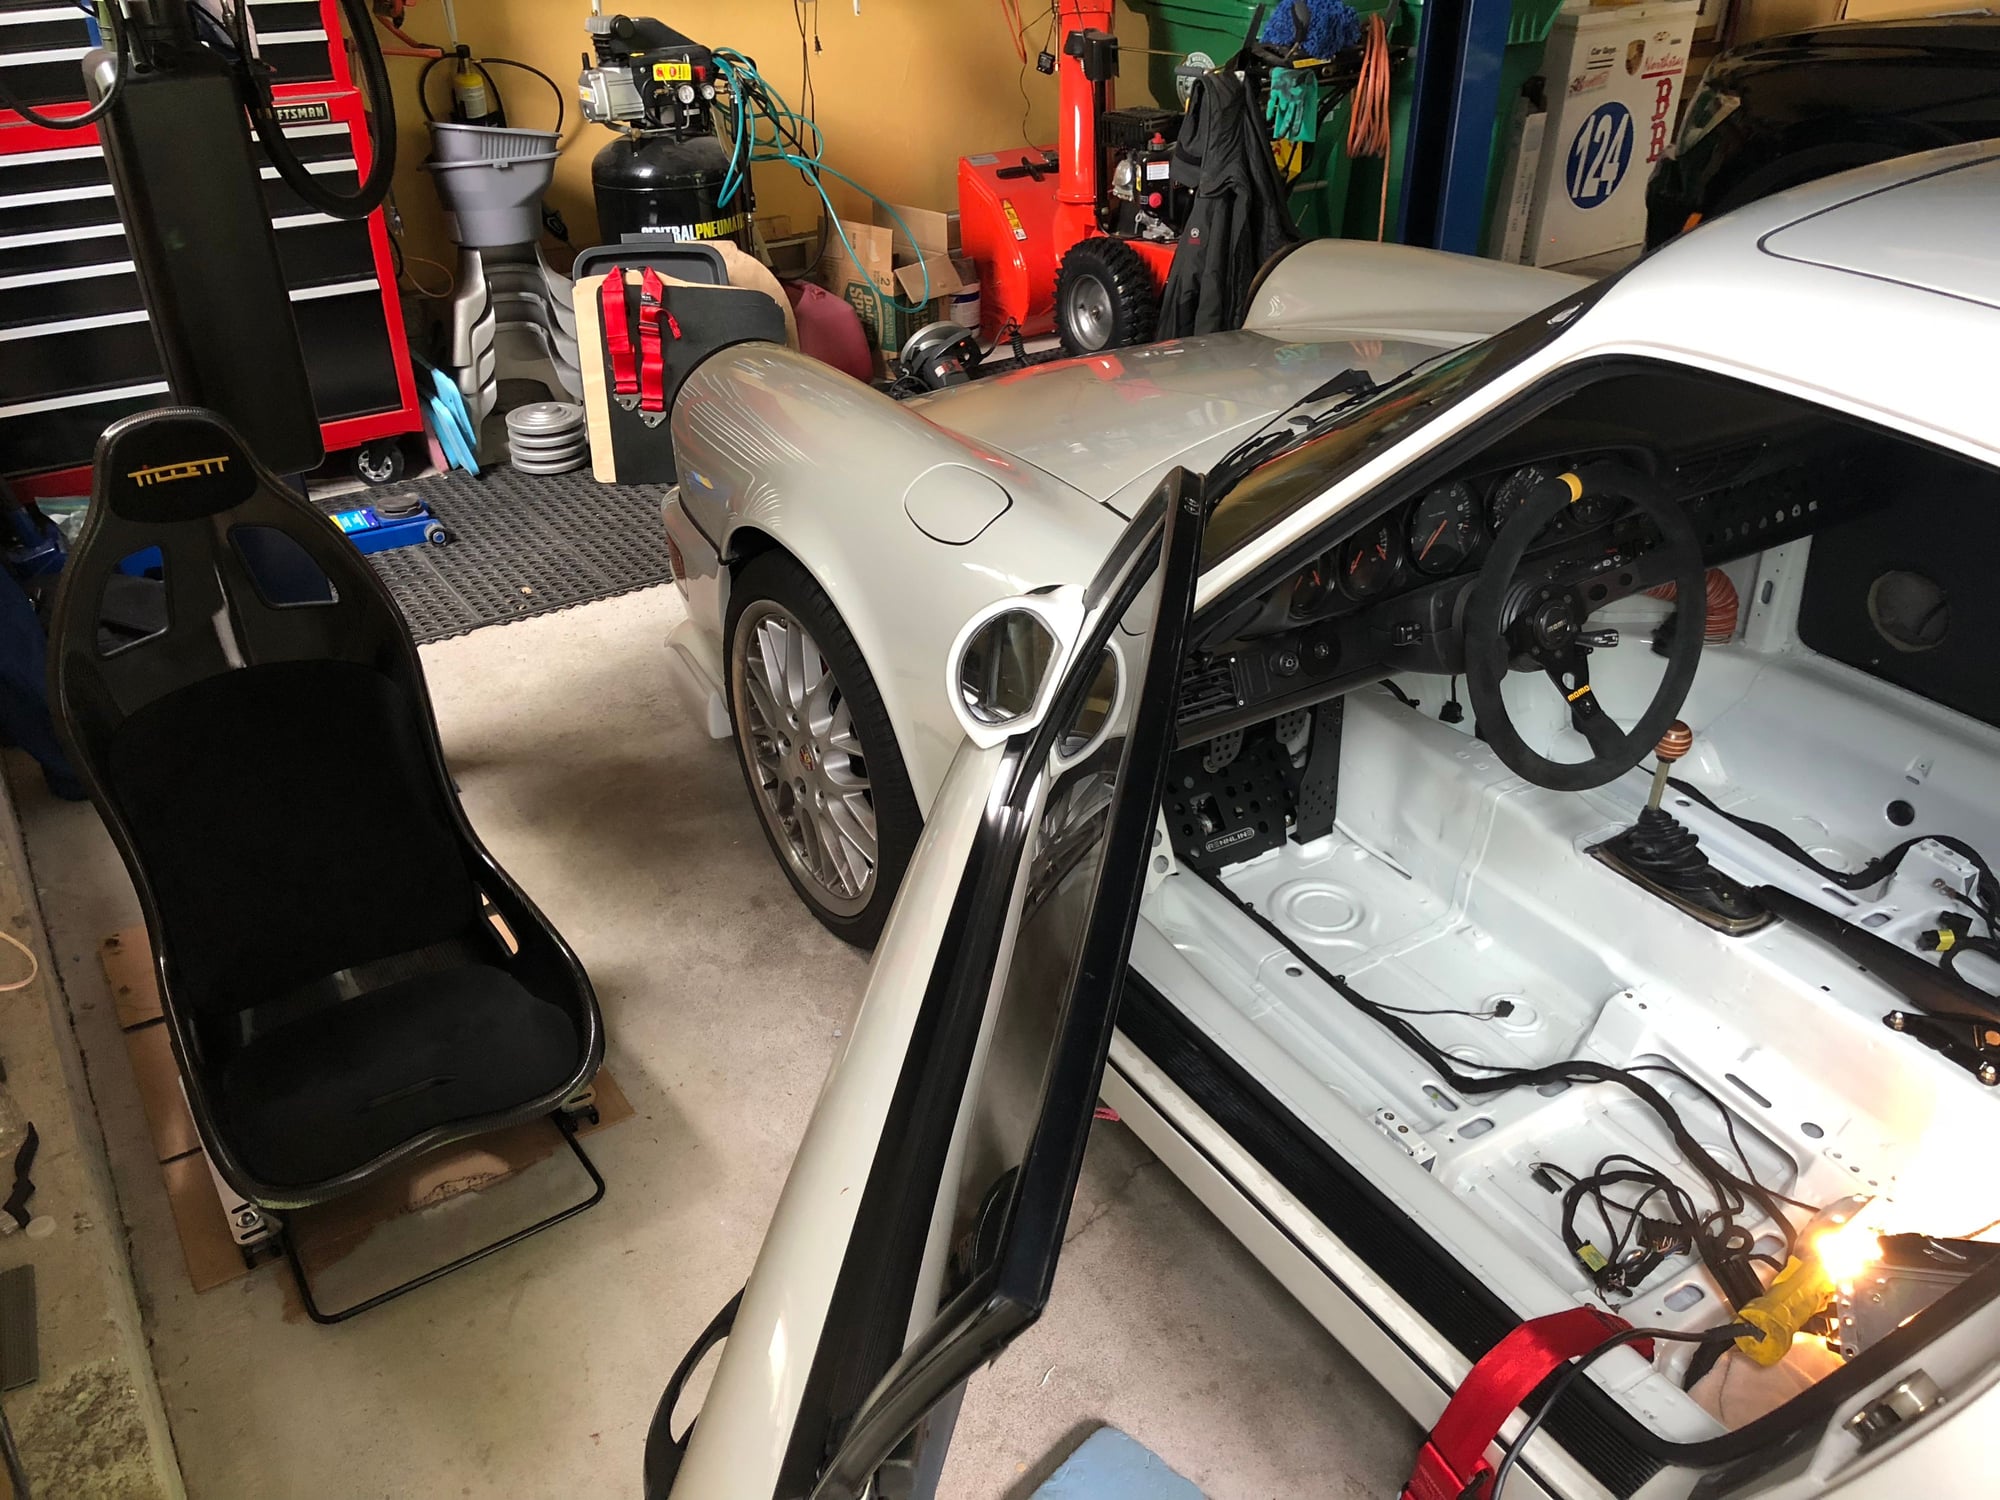
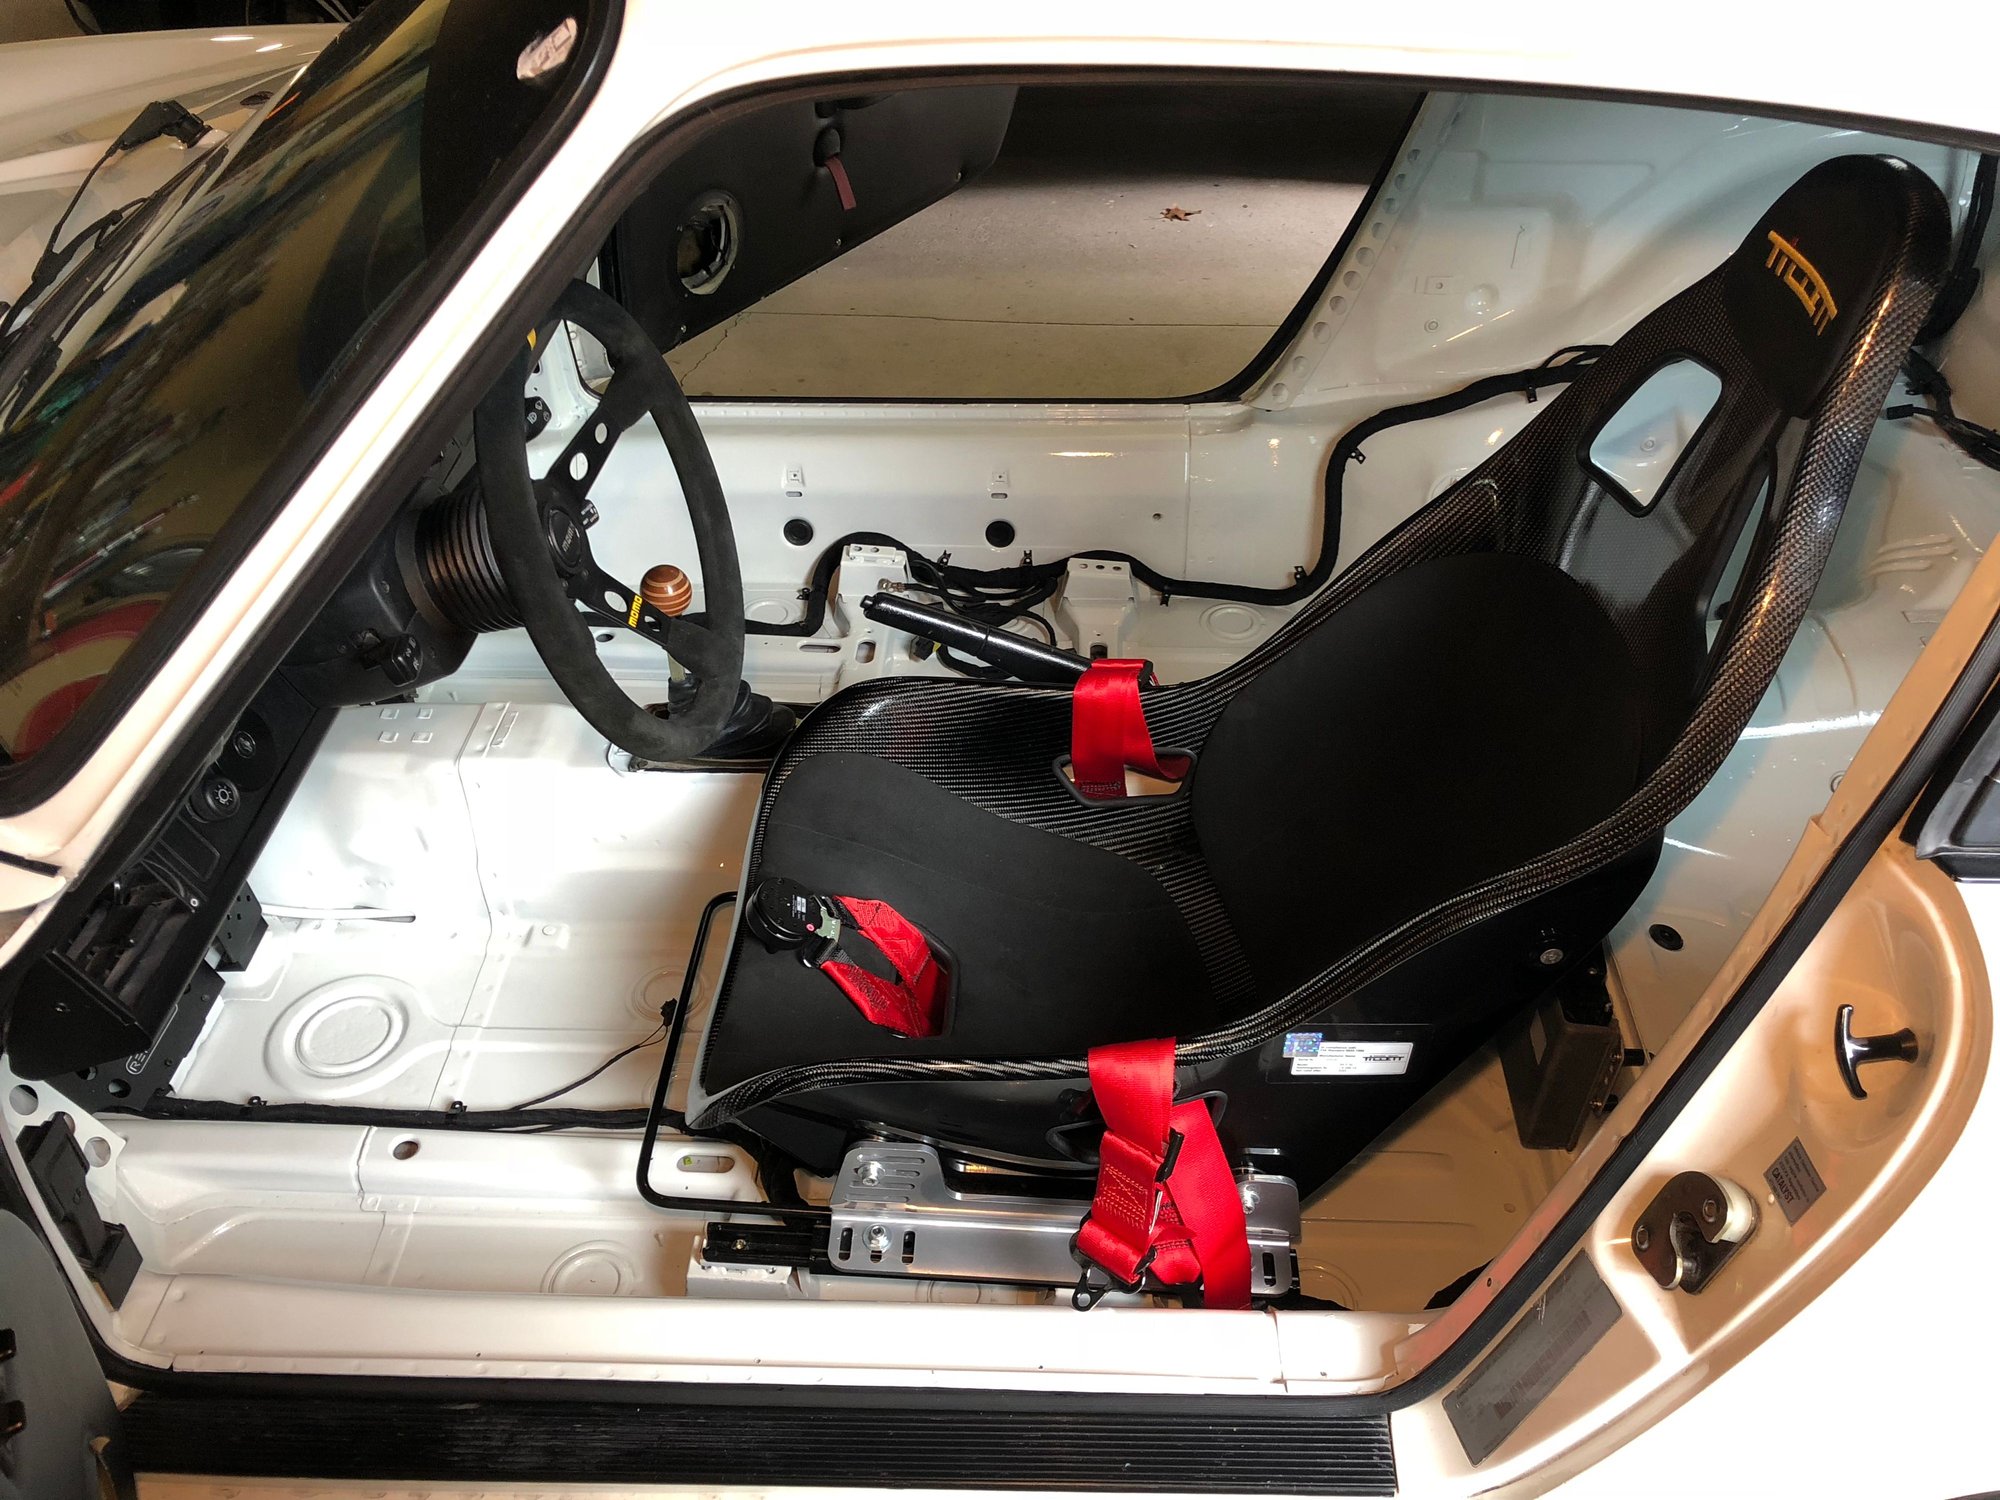
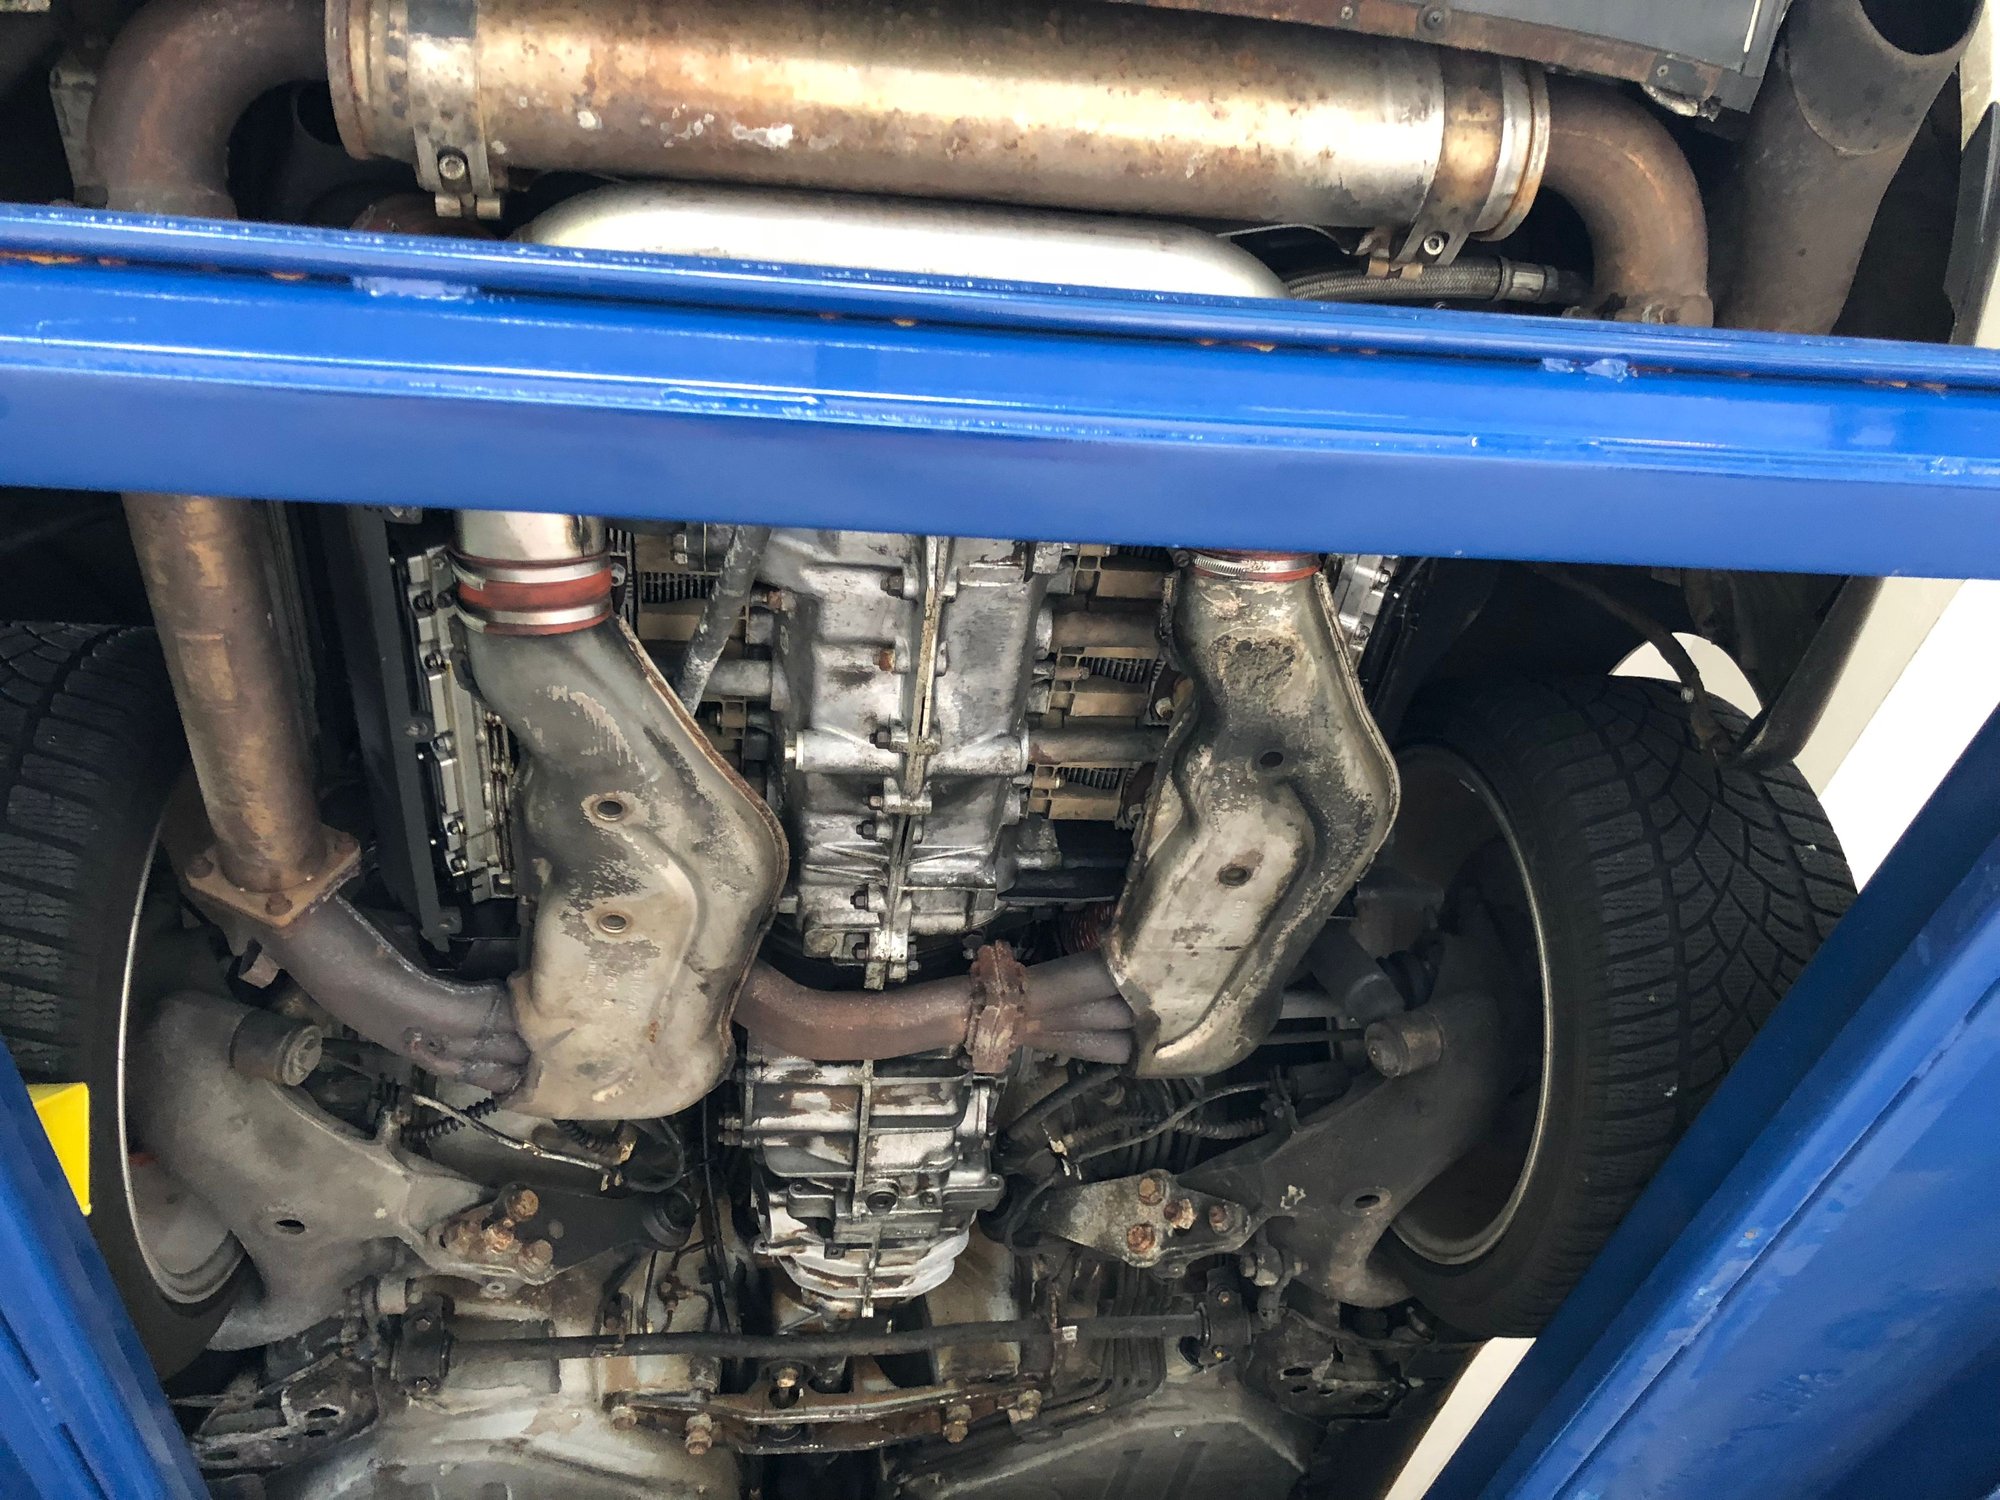
Had to take a step backward today and pull the seat out to relocate the Motronic. I recently took a few photos of a 964 cup car at the shop, and made note of the location of the Motronic against the back seat footwell. I had contemplated making a similar securing bracket like the cup car, but it seemed like overkill so I secured the Motronic directly to the rear seat.
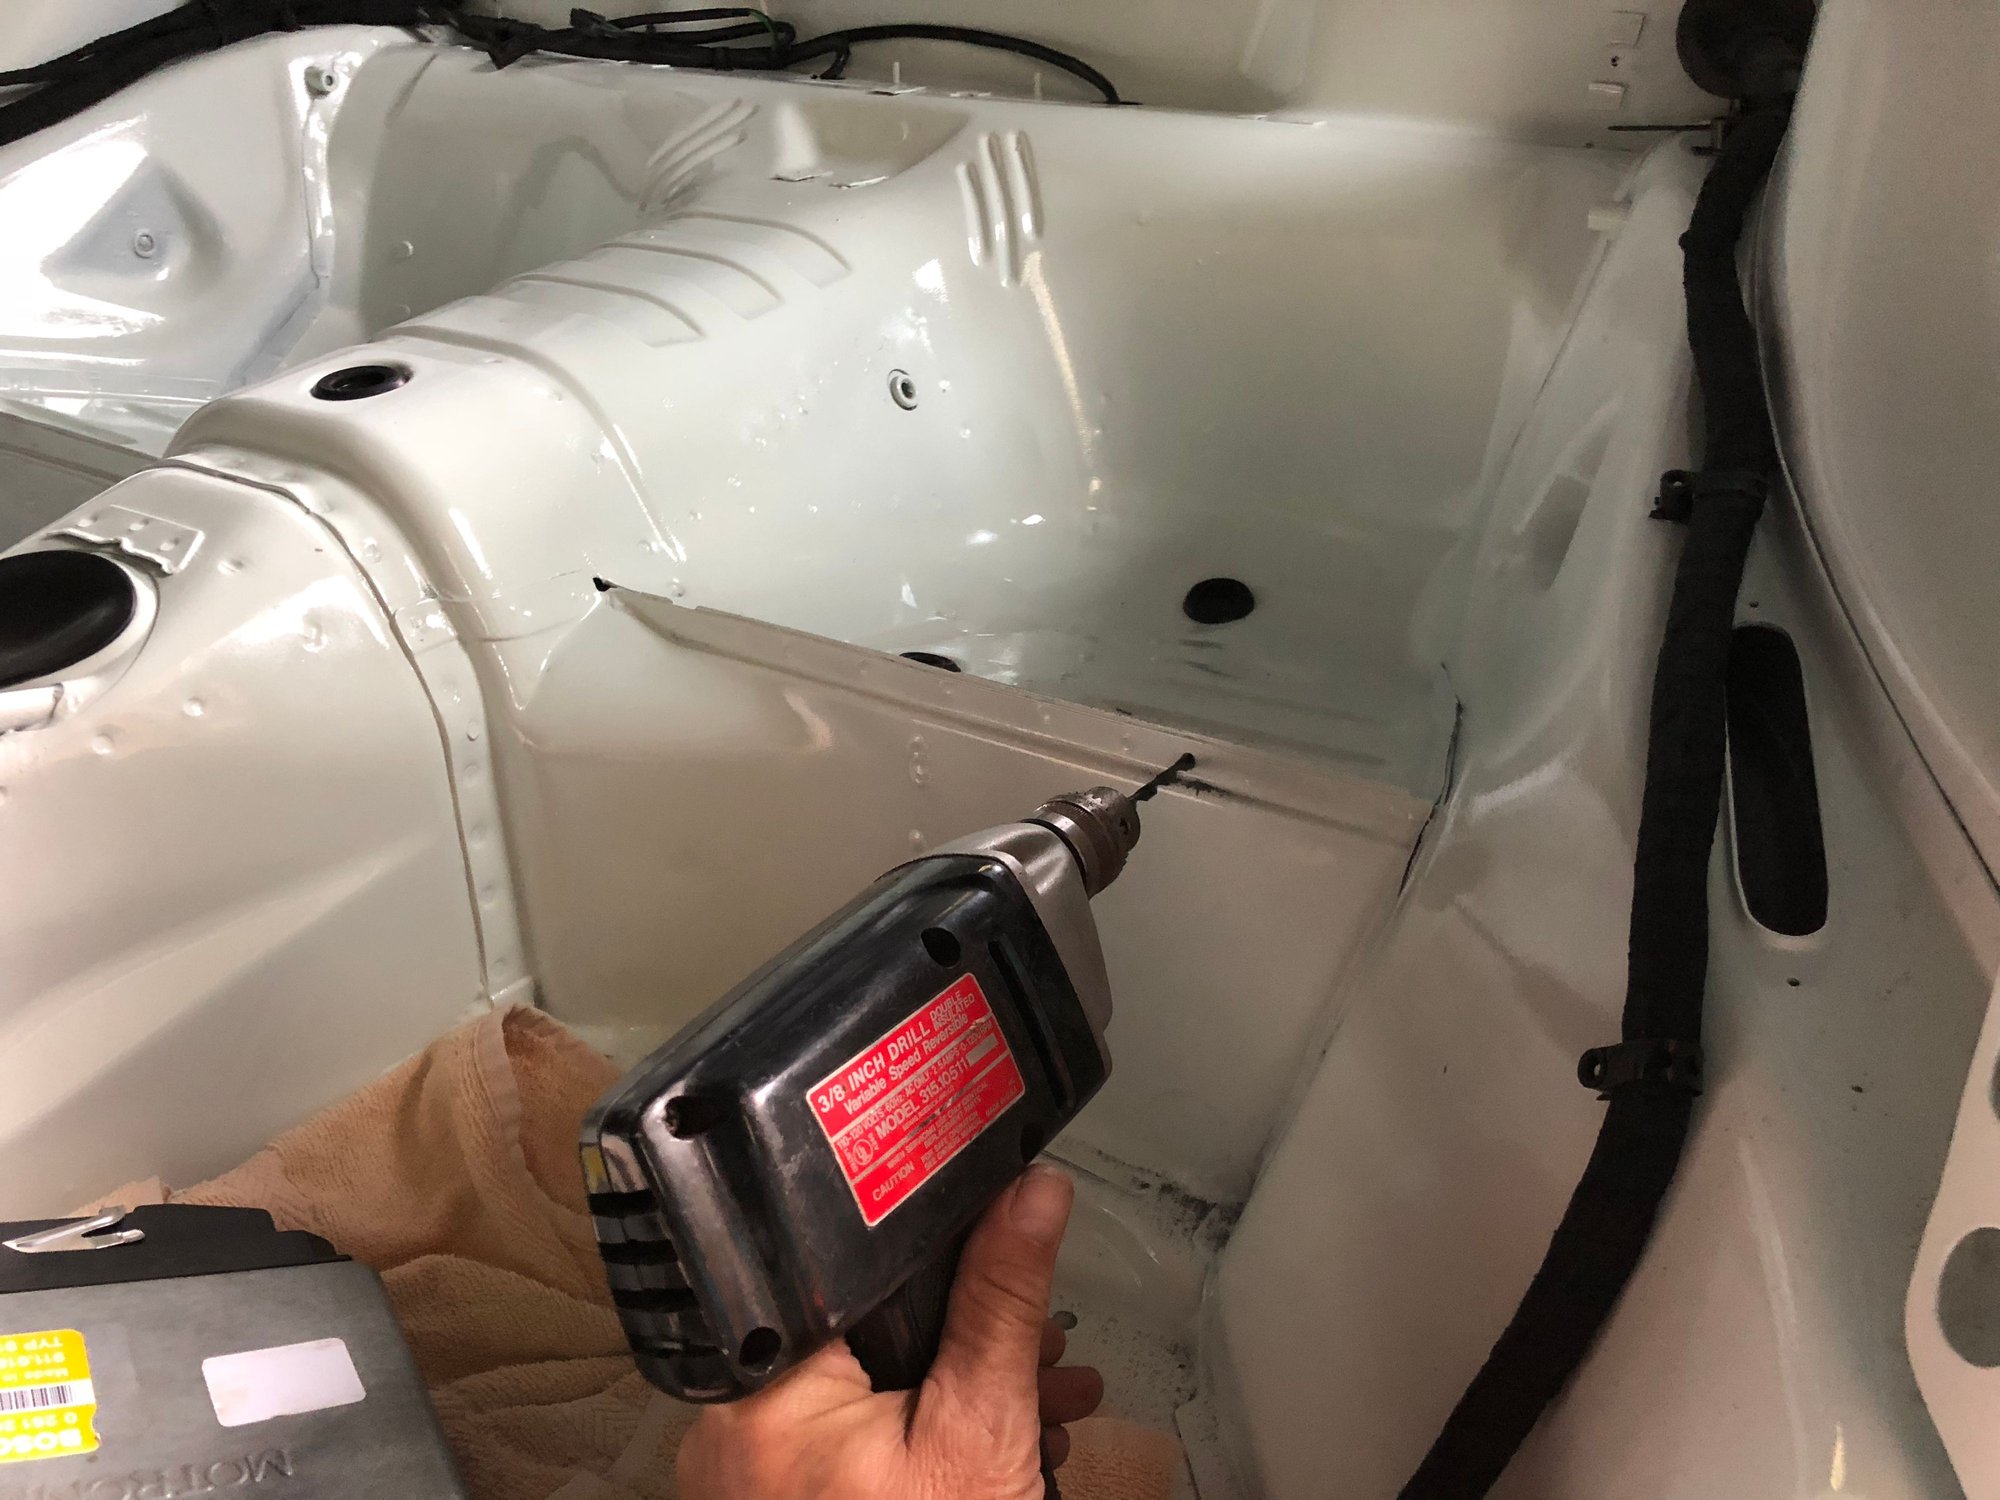
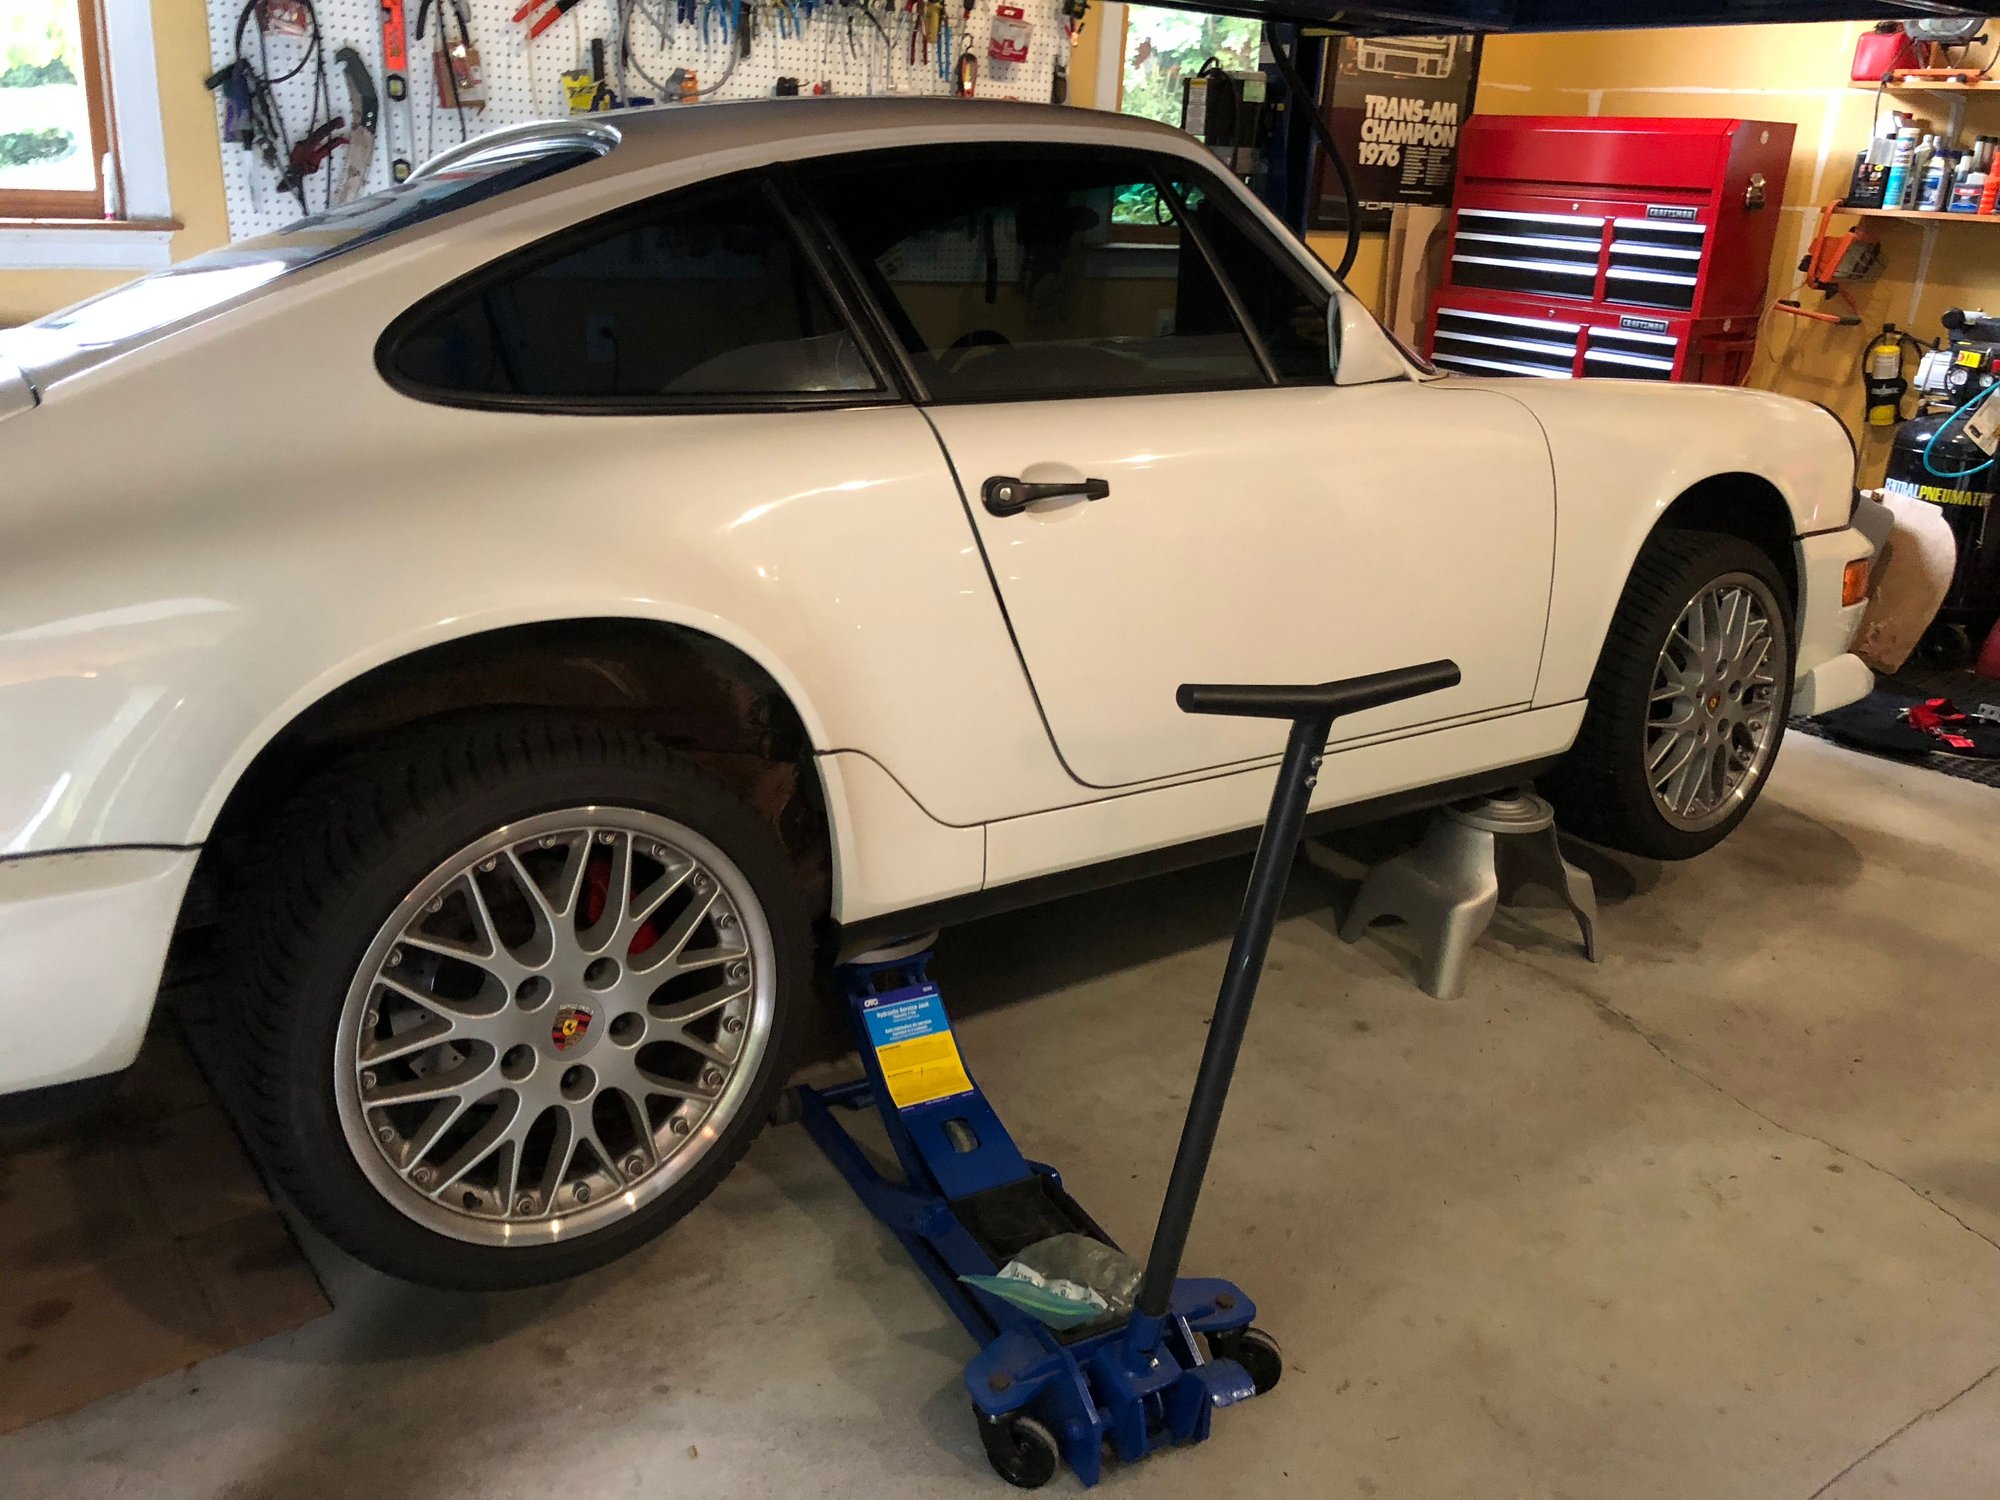
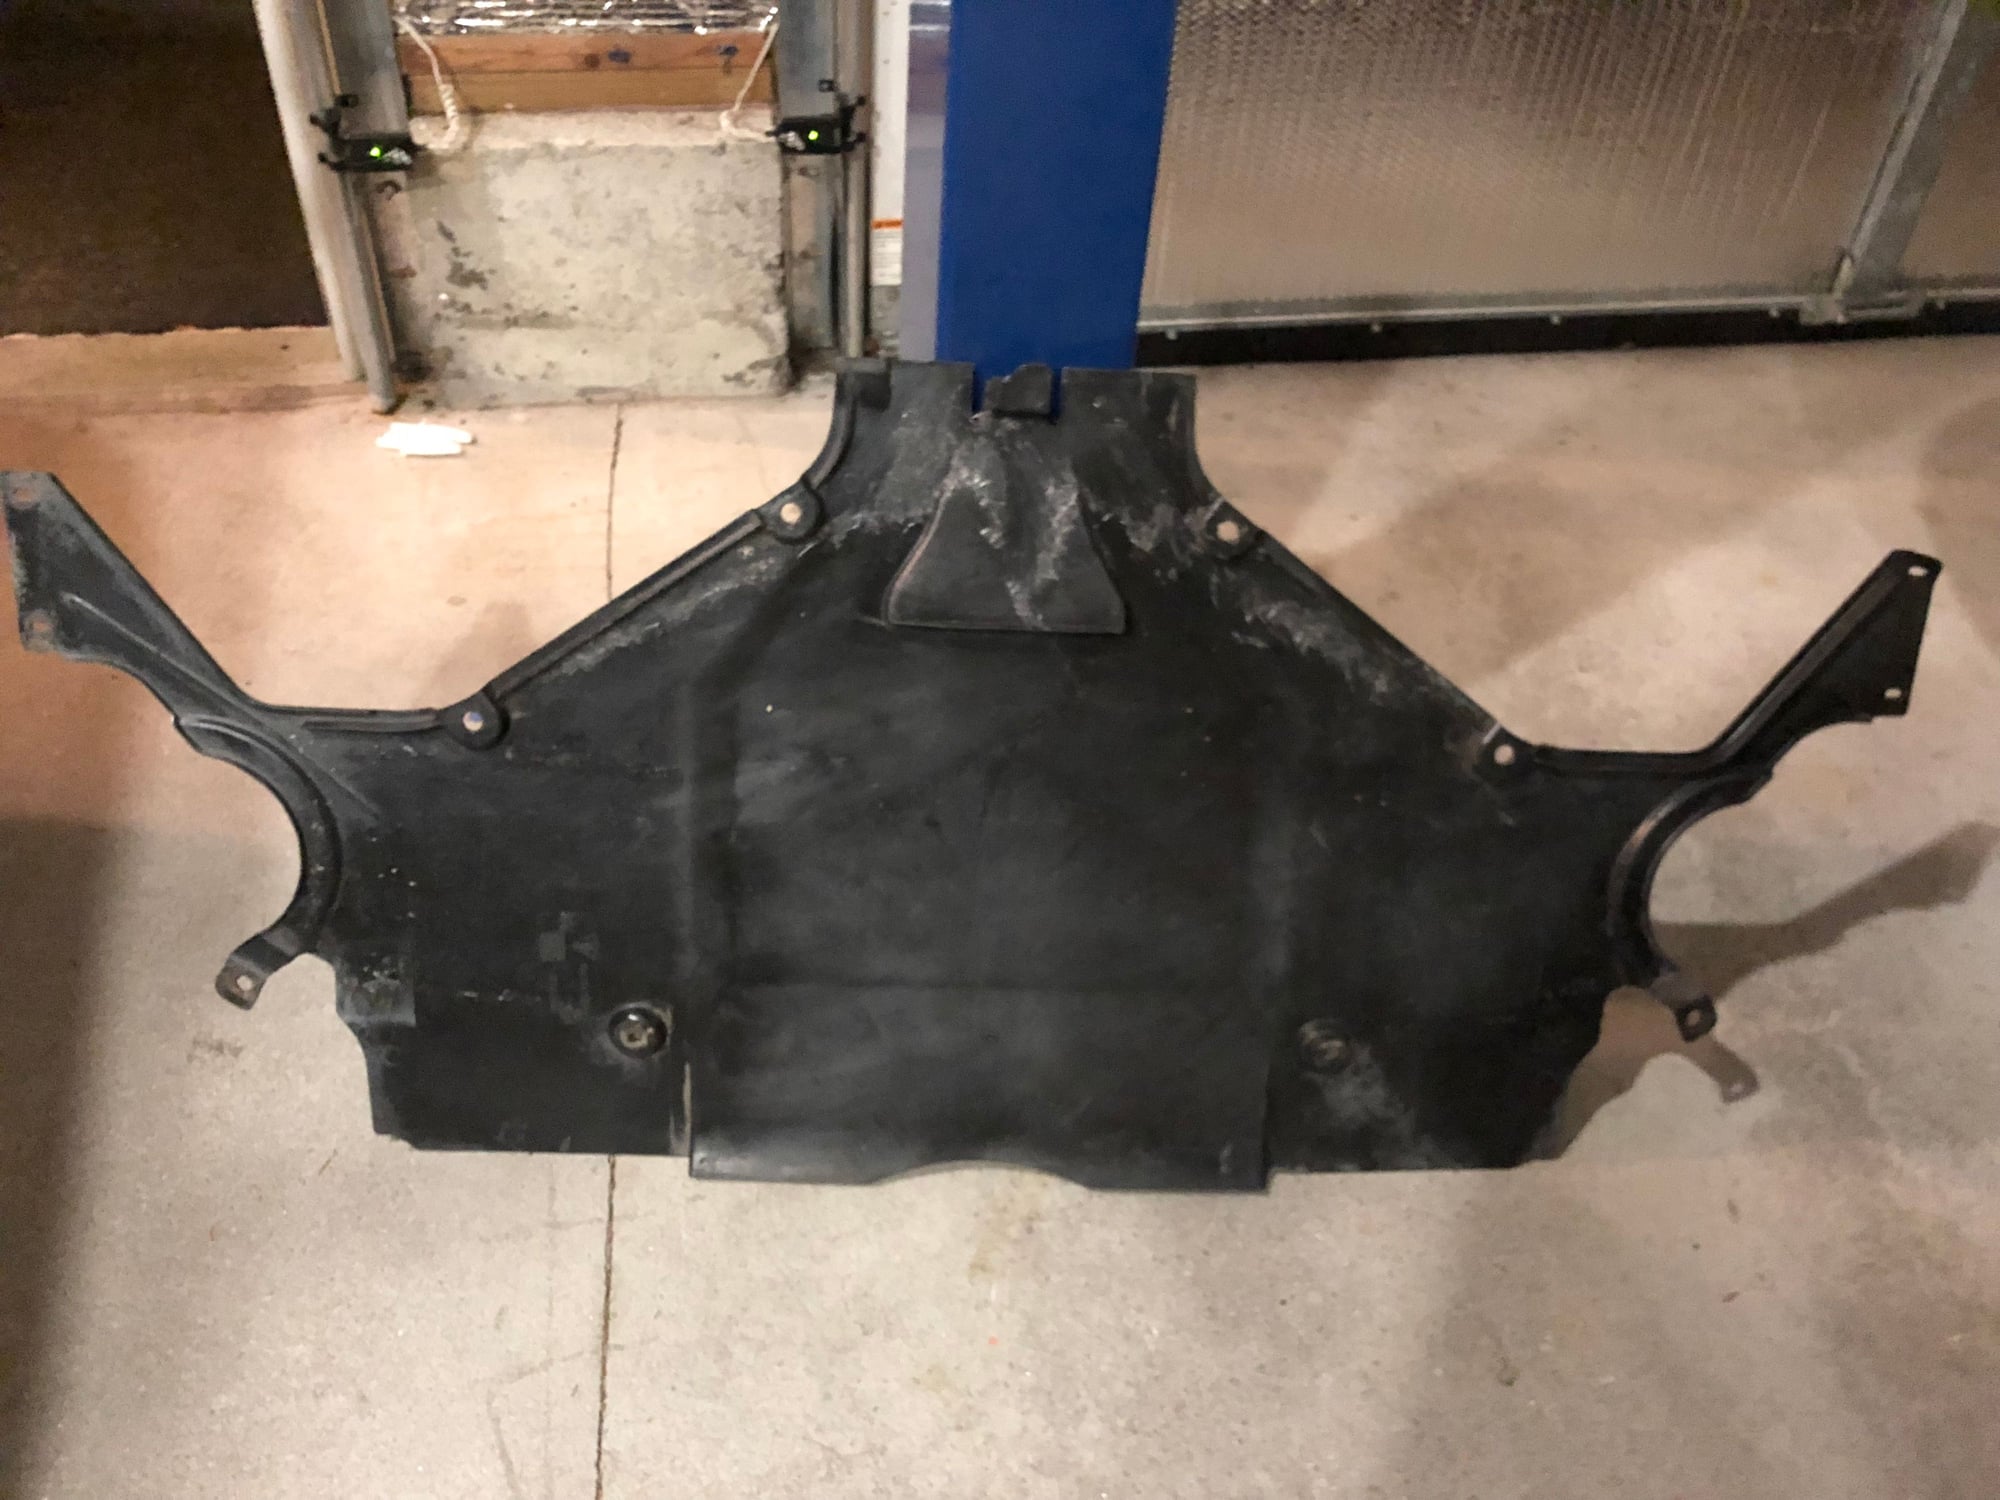
It was smooth sailing securing the top two bolts. But the bottom bolts require access from underneath the car, and removal of the center under-tray. Not a clean job, and it was a bit tight working under the jack stands. I could have just used the lift, but the jack point jack stands are quick and easy to work with. Pulled sea out to relocate the Motronic Drilling again... Touch up all four drill holes
Jack up right rear corner and slide jacks under front and rear, repeat for left side and you�re done Removed and cleaned under-tray The work pays to off as I can now reach my hand up and hold the bolt steady from behind the seat.
Foxman are you going to put a roll bar in? If so which one?
CBA, perhaps you had the same thought I did after installing the Motronic. That�s not an ideal location for a DAS roll bar. The transverse mount bar would definitely come close. The DAS roll bar is too heavy for this build. The plan is for Bill Pfister fabricate a bar using narrower tubing like the 964 cup car. A lighter, yet stronger bar that doesn�t rely on a transverse bar. Mounting points will be welded, so the bar can be removed.
But there�s a logical progression, and the next step is deleting the sunroof. I�m really tempted to just do this on my own, but I want the roof properly welded for DE events.
Jim - tell me more about the cup car cage tube sizing and what idea you and Bill have to make it strong but light? Where will the cage bolt to? Thanks!
Any chance you'll be driving this to the event at Palmer next month? We need to get a few together and do a headlight shootout inside one of the garage bays.
Jim - tell me more about the cup car cage tube sizing and what idea you and Bill have to make it strong but light? Where will the cage bolt to? Thanks!
I watched Bill bending pipe for a half cage for a Cayman S last winter. The car had been gutted and repainted inside, and was inspirational for the bare bones 964. Instead of welding the bar in permanently, Bill welded mounting plates on the sills aft of the doors. Very clever and unobtrusive. Eliminating the transverse bar saves weight. Bill also uses a narrower diameter bar, and a thinner gauge steel. The DAS roll bar has a 1.75� diameter bar with a .120� wall thickness. It�s weighs 57 lbs. By reducing the diameter and gauge of the steel, and eliminating the transverse mount bar, I�m hoping to keep the weight down to 35-40 lbs.
Mounting plates get welded here, just aft of the doors and over a portion of the vents.
Any chance you'll be driving this to the event at Palmer next month? We need to get a few together and do a headlight shootout inside one of the garage bays.
Yes Sir, looking forward to Porsche on the Mountain at Palmer this Fall. And yes, I�m planning on taking the 964.
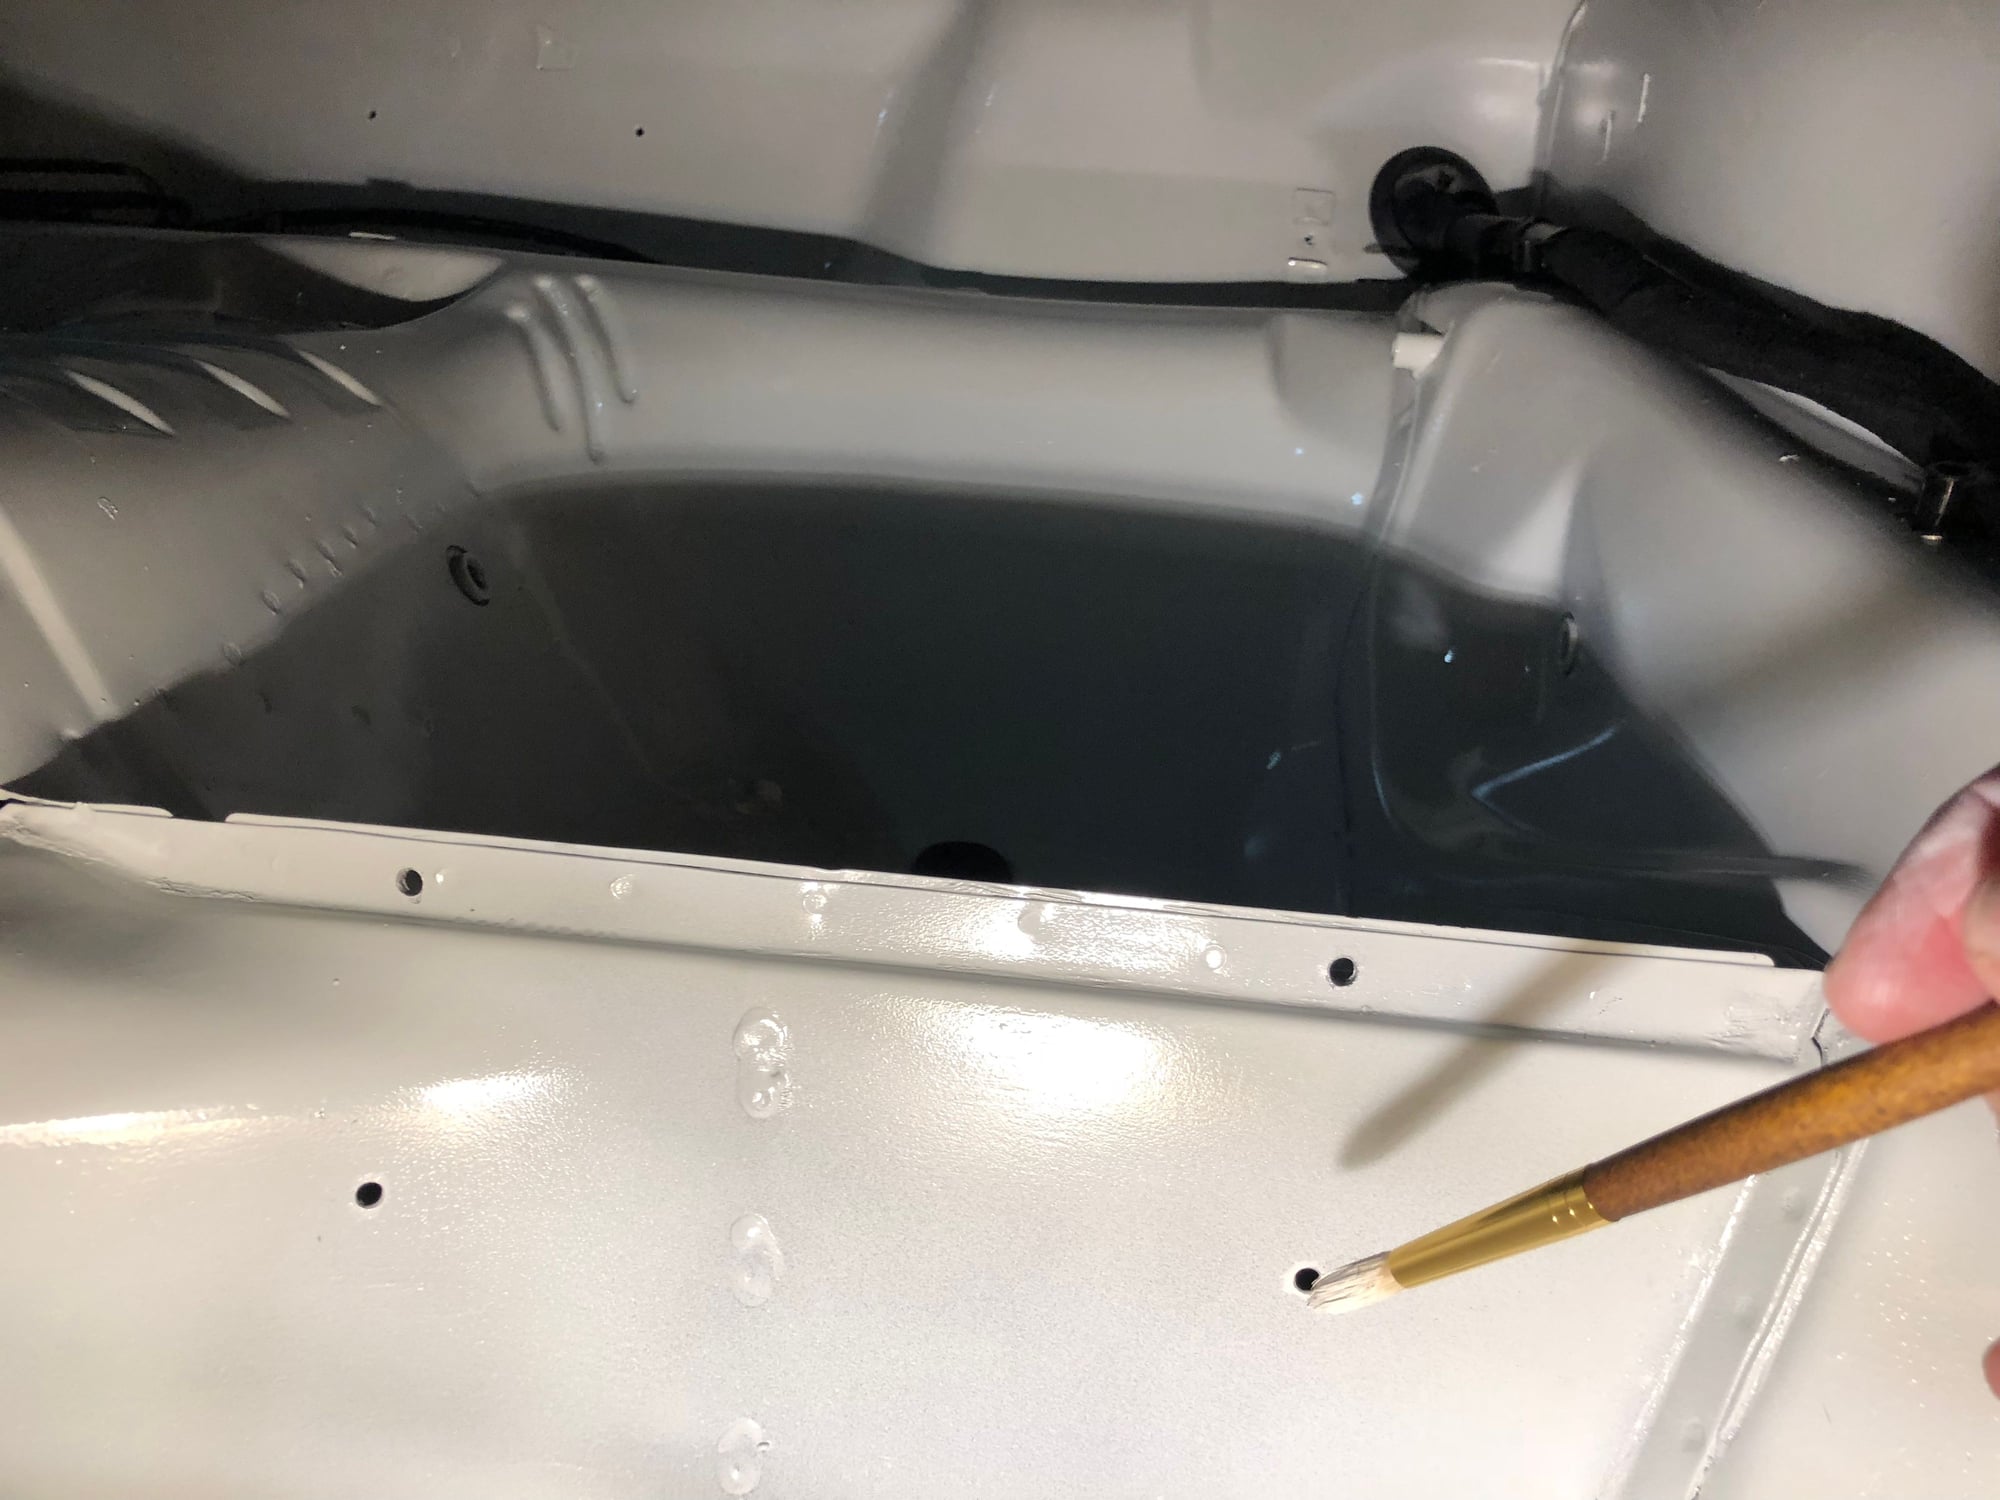
I tossed the seat back in the car this morning, and threw the car up on the lift. It was much easier replacing the under-tray on the lift, and it gave me a chance to slap some paint the Schroth reinforcement brackets. Then I took a break with the family and went apple picking.
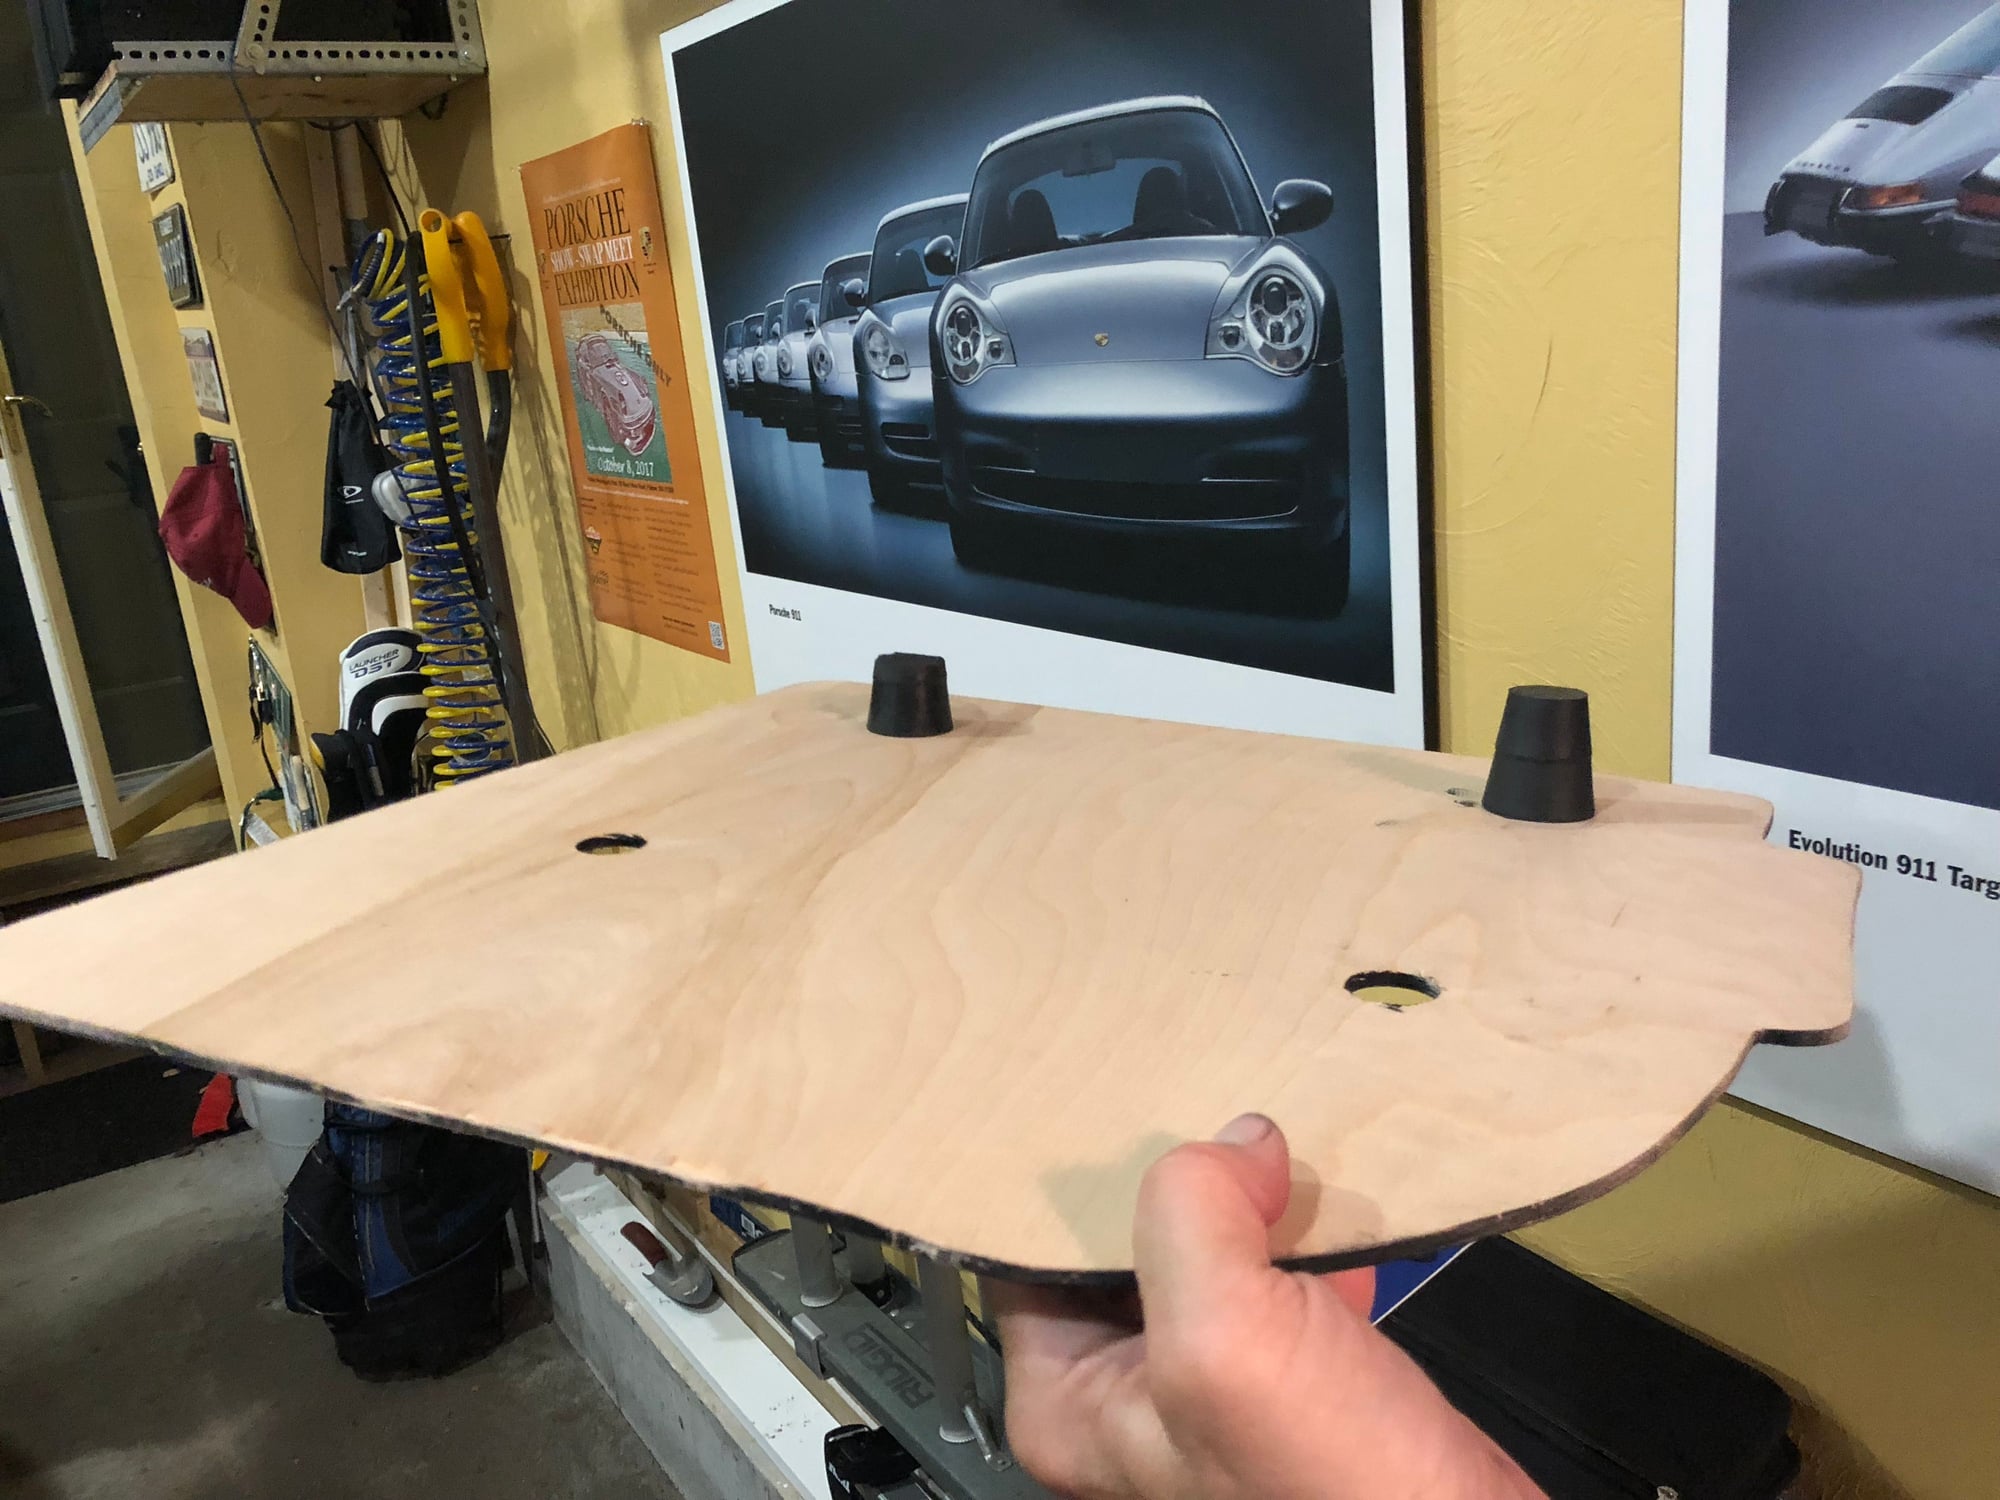
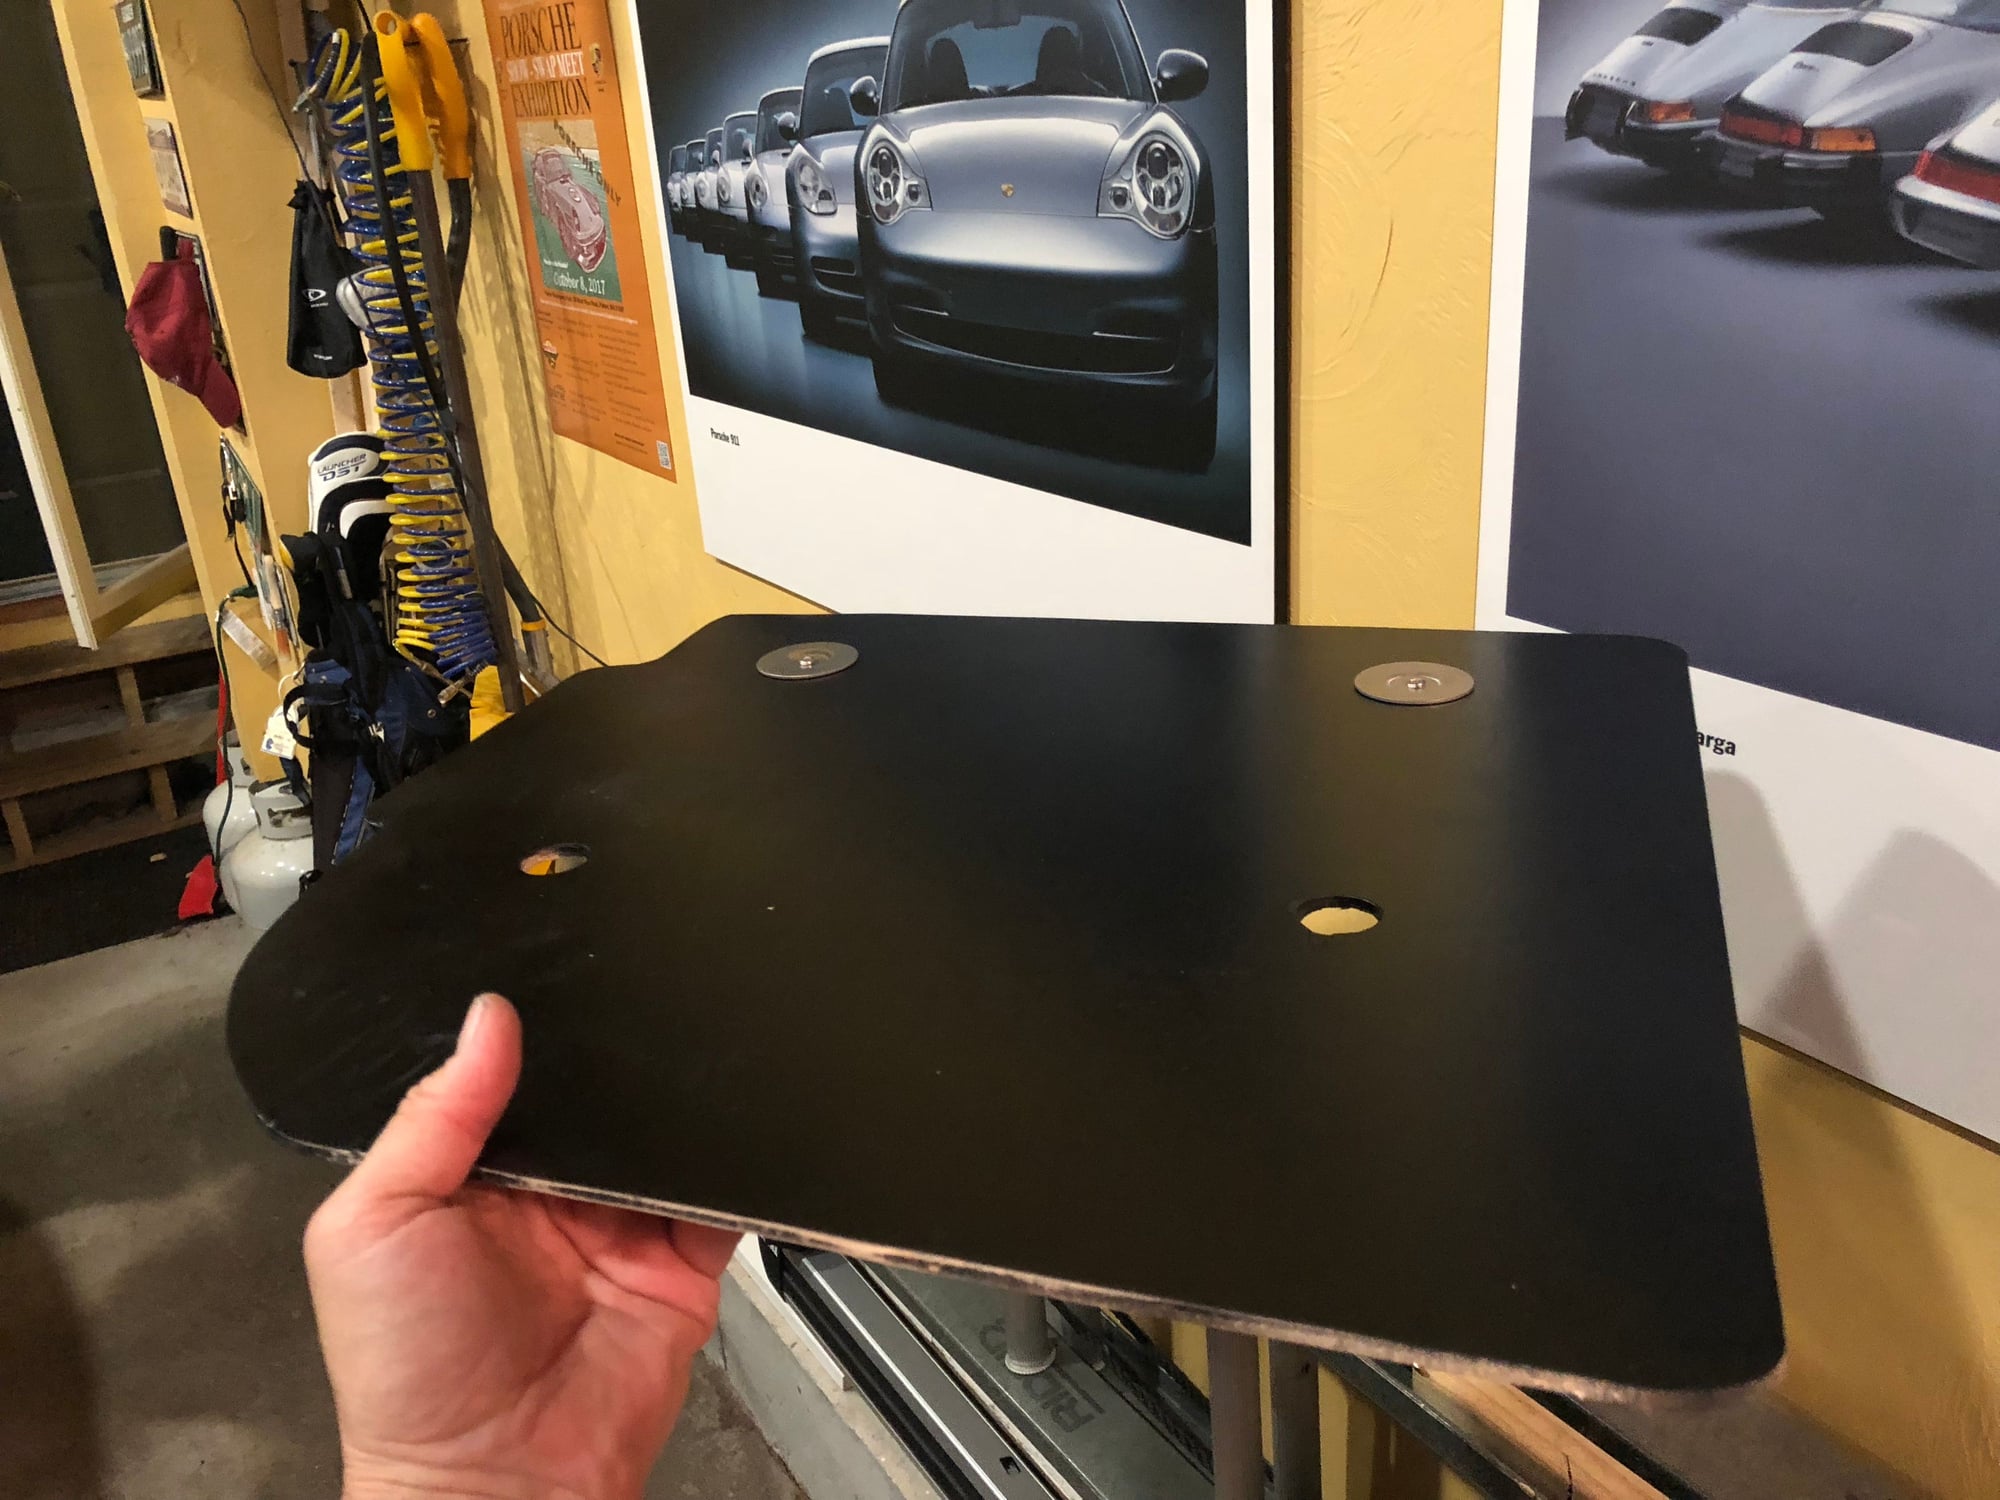
I squeezed in a little more work this evening and finished the driver side floor board. Drilled a few holes for the counter sunk washers, painted the board at black with a rattle can, and inserted a pair of riv nuts. Just waiting for the paint to dry for the final install.
There the Tillet seat back in the car Drove the car onto the lift to replace the under-tray Then took a break with the family to go apple picking
Painted Schroth reinforcement plates Drilled holes for driver floor board (I place a few pieces of gum where I want to locate the riv nuts, and then press the board down) Using countersunk washes to mark where to drill for riv nuts See riv nut in lower hole Painted the floor board black, and just waiting for it to dry.
Finished installIng the driver side floor board and making ready for an Autocross event this Saturday. The roll bar wont be installed for a while, but my mechanic offered to loan me a Bray Krause bar to mount the shoulder harnesses. Would your mechanic do that? Bill also looks at this thread from time to time, and will reach out to me whenever I screw up. Prrry much daily. The MDS cone filter, for example with the attendant heat soak. Or my failure to use true rubber isolators for the Motronic install. All of these items will rectified under Bill�s watchful eye.
The suspension is shot, and the car still needs a lot of work. But I�m looking forward to getting out on the frack, and putting the car through the paces!
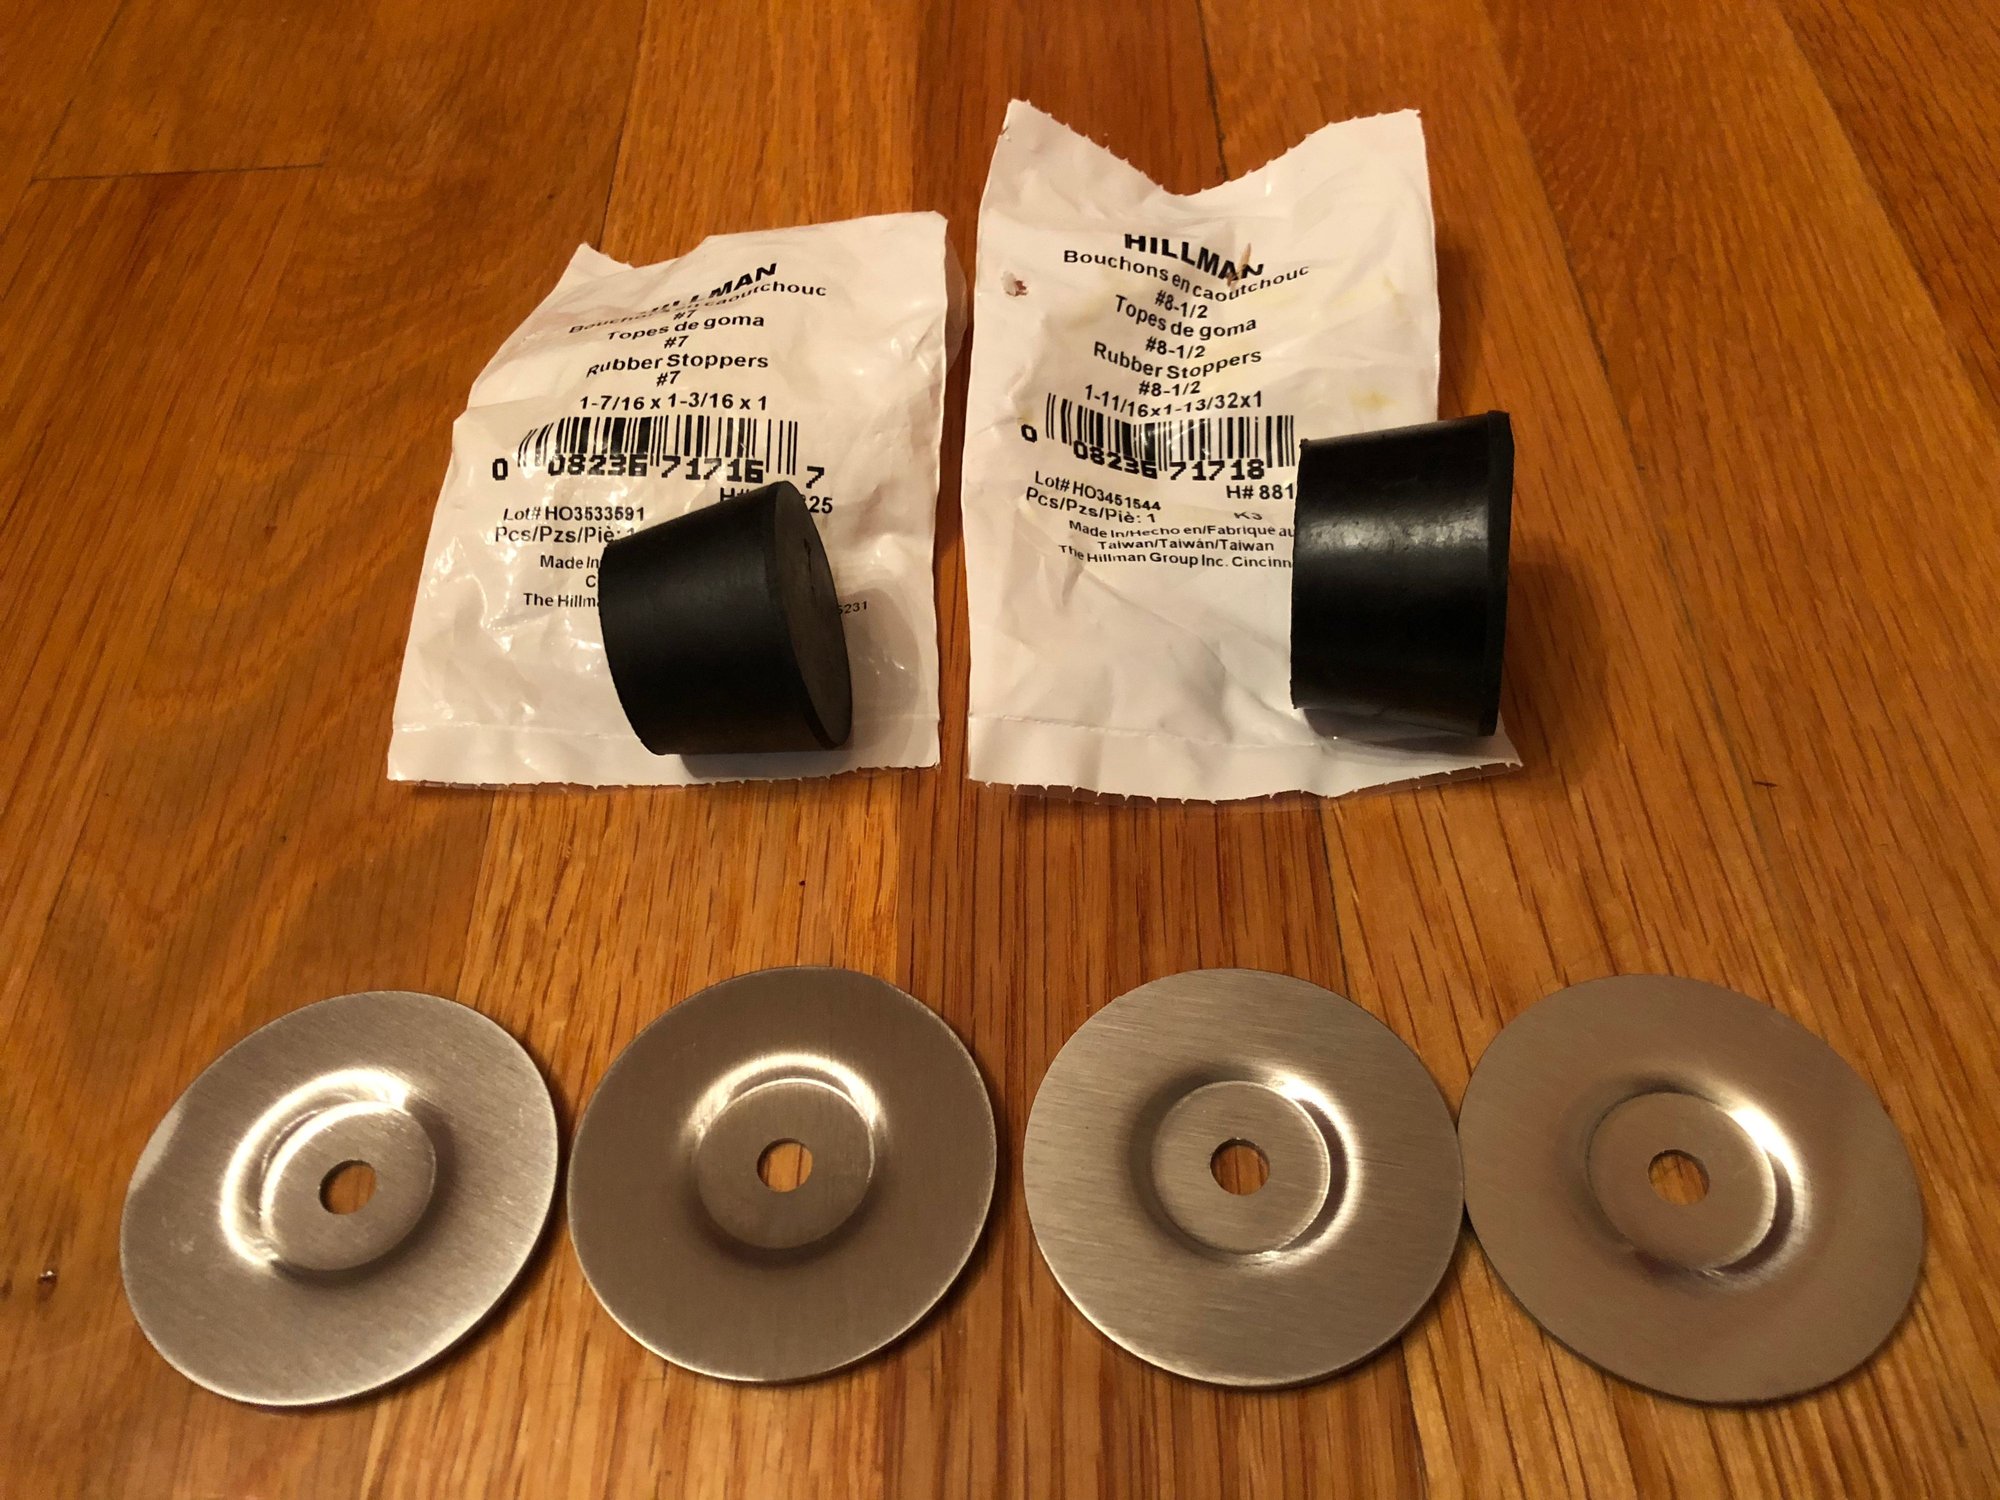
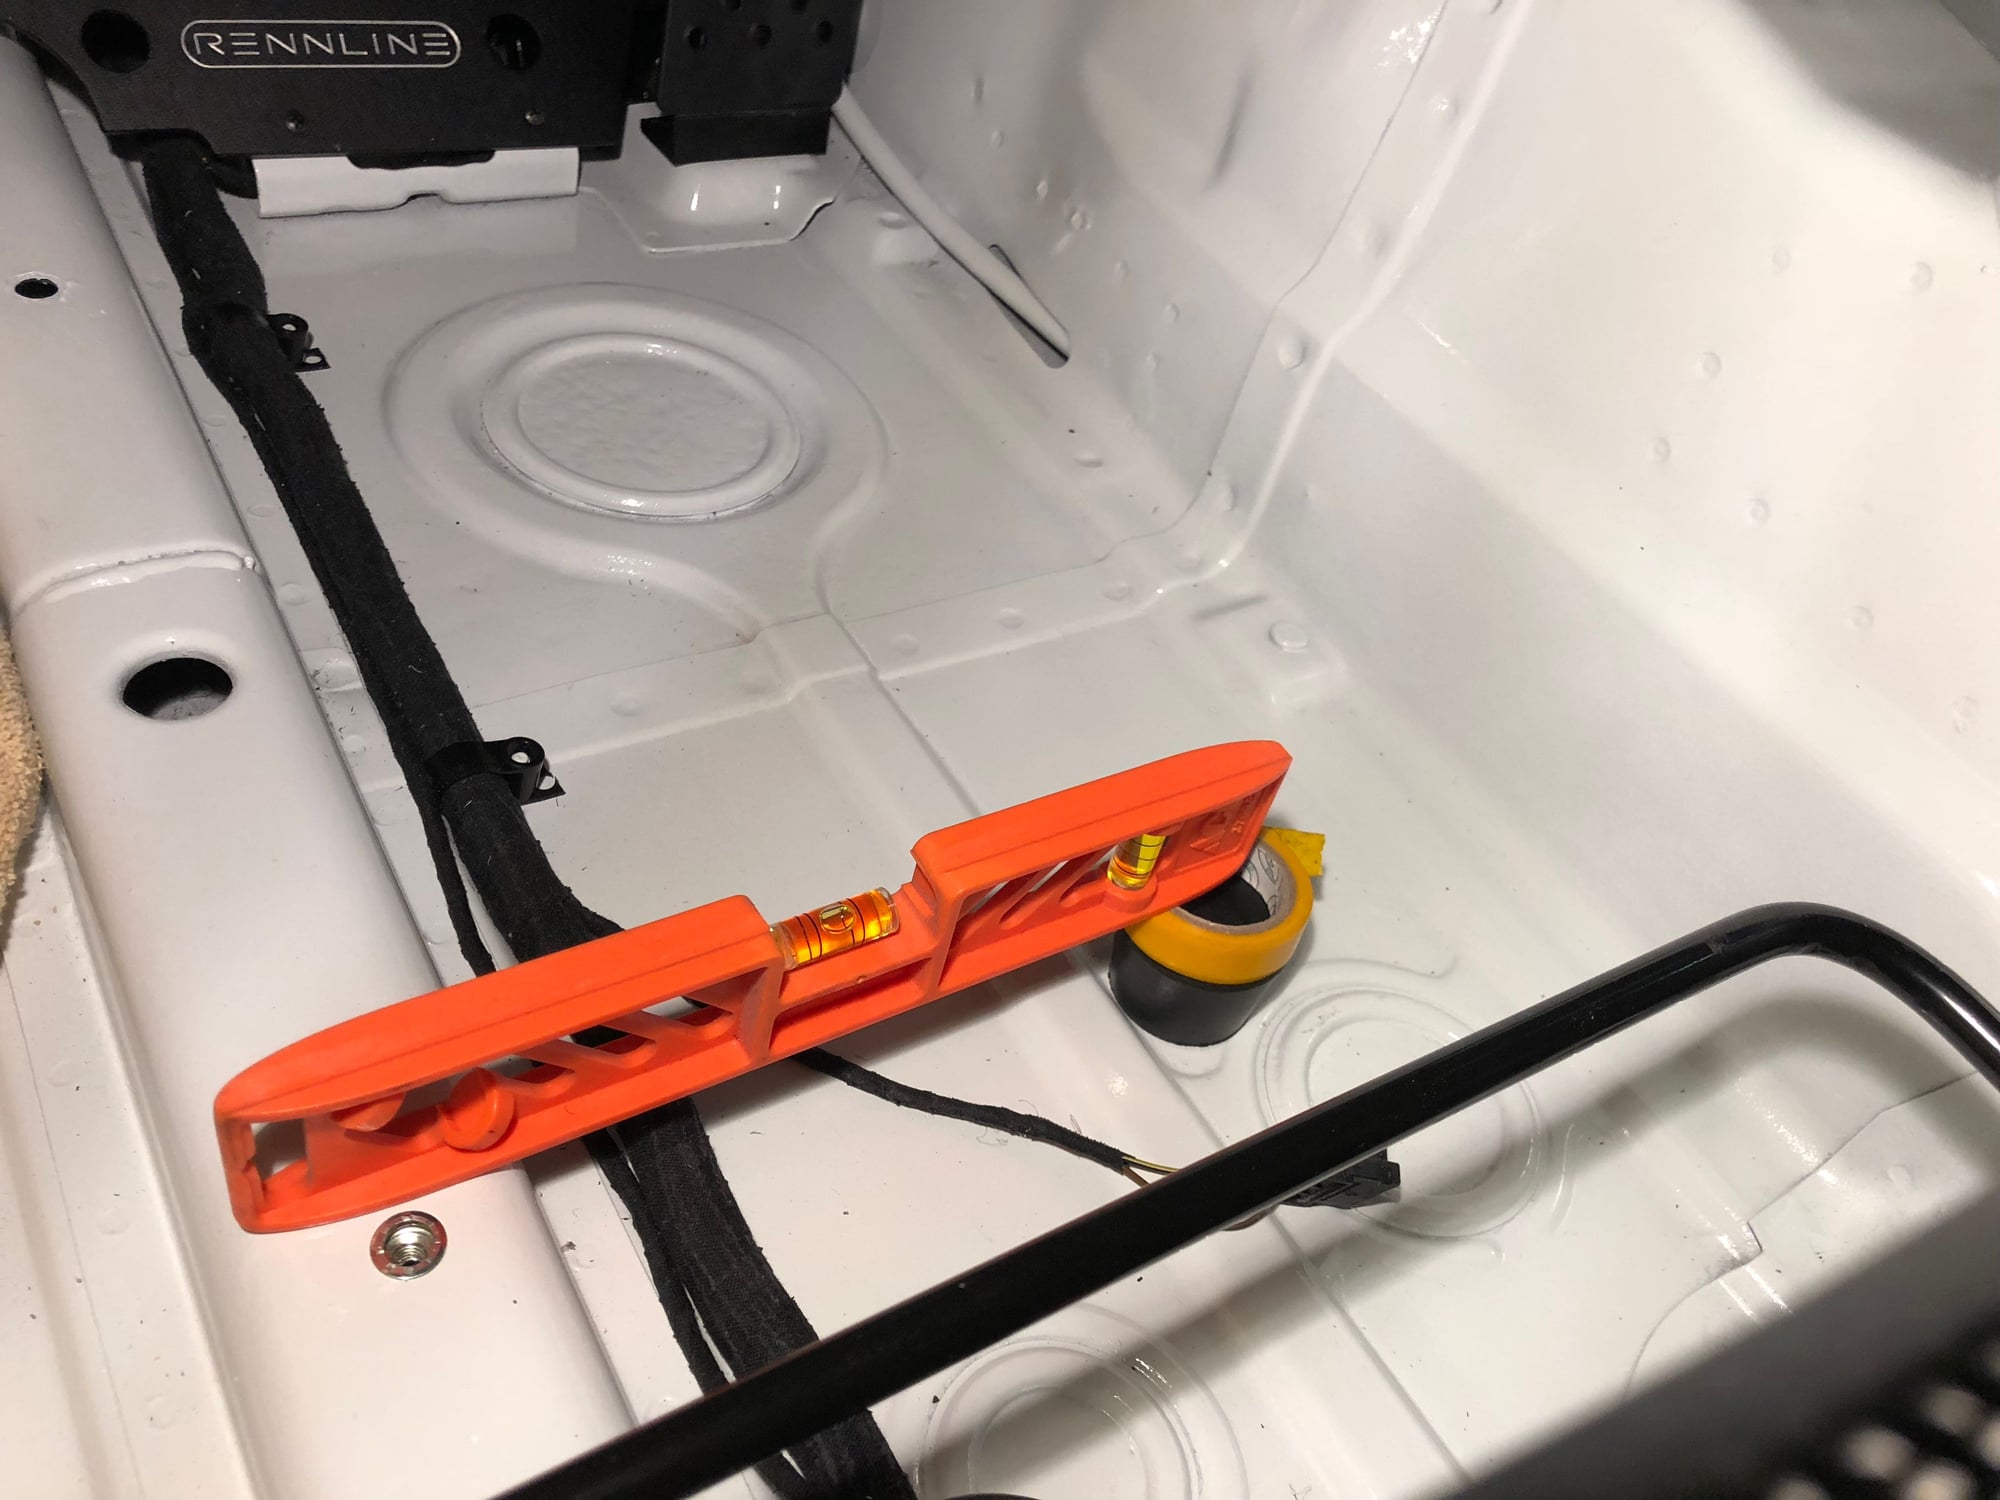
Countersunk washers and rubber stoppers Use a level to help determine height for rubber plugs Rubber stoppers on right half of floor board Floor board with rubber stoppers installed
Great stuff as always! Love reading your posts. So please explain more about the cone filter, and where did you get the washers for the floorboards? Are they the rennline ones? Looking forward to seeing photos from your driving event


 09-22-2018, 07:52 PM


 The MDS cone filter, for example with the attendant heat soak. Or my failure to use true rubber isolators for the Motronic install. All of these items will rectified under Bill�s watchful eye.