

DIY Short Shifter
 06-03-2009, 02:28 AM
#1
Three Wheelin'
Thread Starter
Ok, here's a quick easy project that (I think) improves the look of the console and provides a little performance advantage in shifting. I've always thought the shift lever on our cars stood too high and I've always wanted to figure out a way to shorten it...so here it is, very easy to do and better yet, no expense incurred.
You can use clark's to guide you through the procedures of removing the shifter. http://www.clarks-garage.com/
Warning: before you do this make sure on how much you want to shorten the lever. I cut mine about as short as it can go while still maintaining all parts and not interfering with the mid bend in the lever.
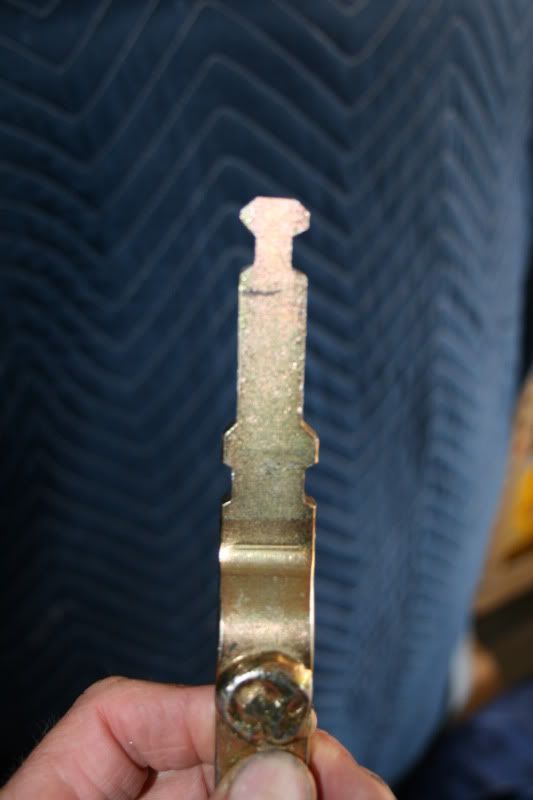
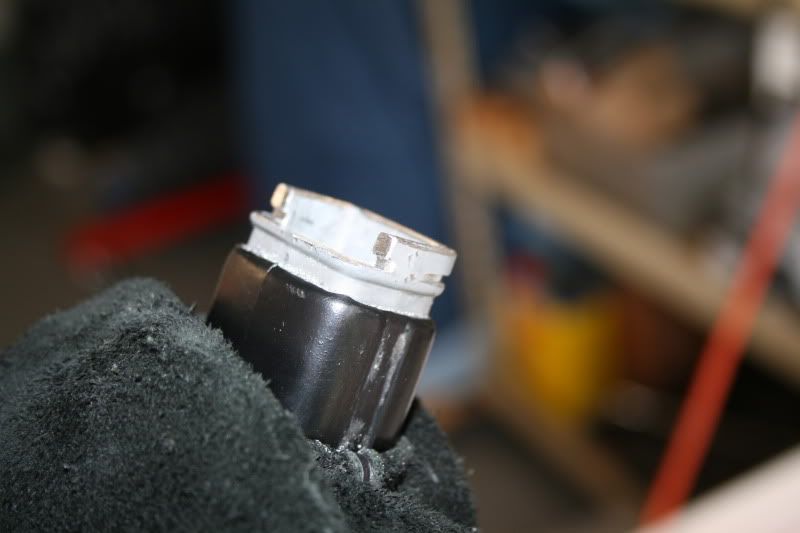
Step 1: Once you have the shifter out scribe where you want to cut the tip off (I cut off 1 1/4") and used a sawsall to do this. Save the tip as it will be used as a template later.
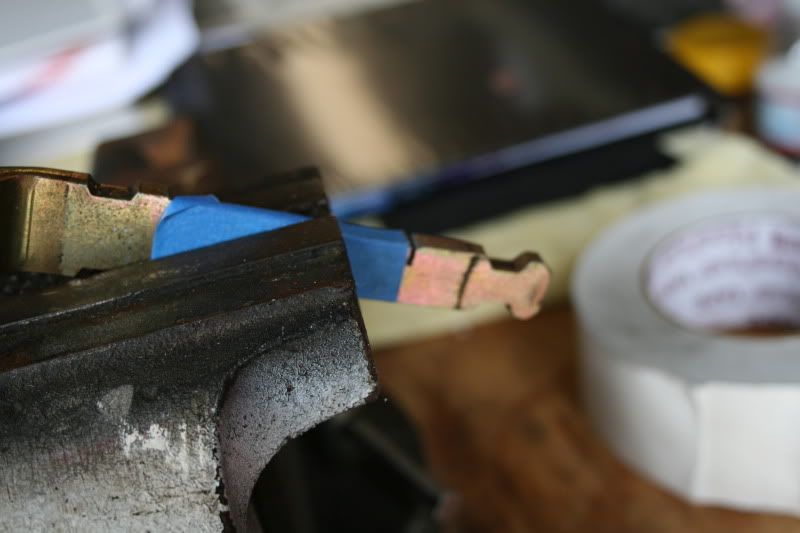
File or grind a bevel to match the original, then place the tip that you cut off aligned with your new bevels as a template to grind the beveled cuts in the side for the rubber vibration piece.

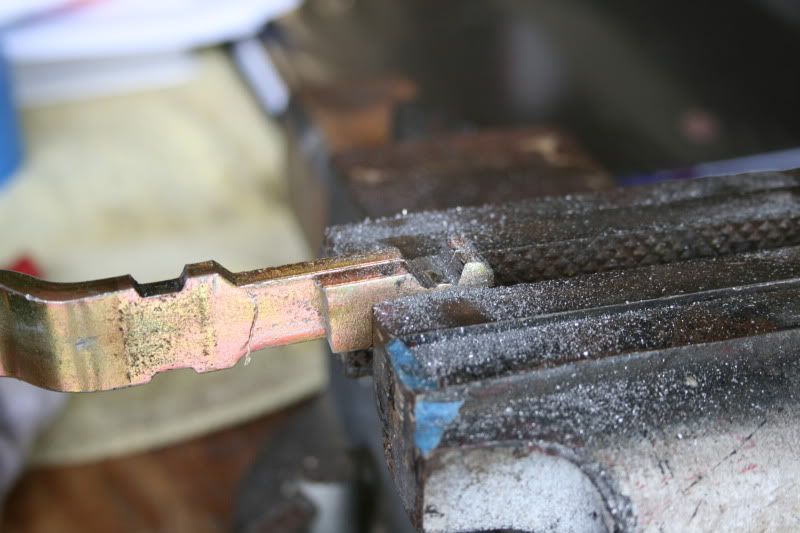
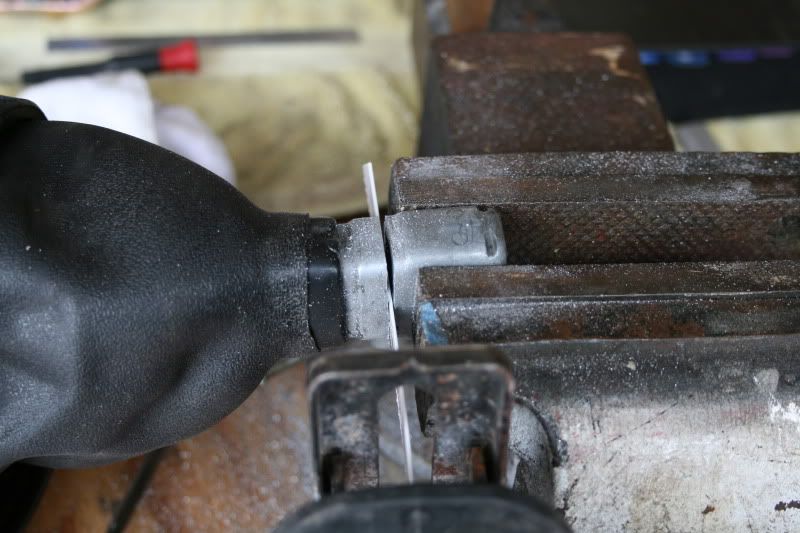
Step 2: Now comes the fun part...you need to cut down the actual shift lever **** the same amount (in my case 1 1/4") to match your overall drop in height. There's no turning back once you make this cut.
Now cut the the 3/16 x 3/16 step cut to except the spring clip to secure the shift lever **** on to the shift lever and file in the grooves that allow the spring to stay set in place.
Step 3: Install the rubber vibration pieces on the shift lever and slide back into the shift lever ****. BTW - you'll need to trim the lower rubber piece length wise to fit, apologize for no pic on this, but it'll be obvious when you get to this step. It's really not that much. I did it with a razor blade. Now install shift lever assembly back in the console as per Clark's and you're done. (Aprrox. time 2 hrs)
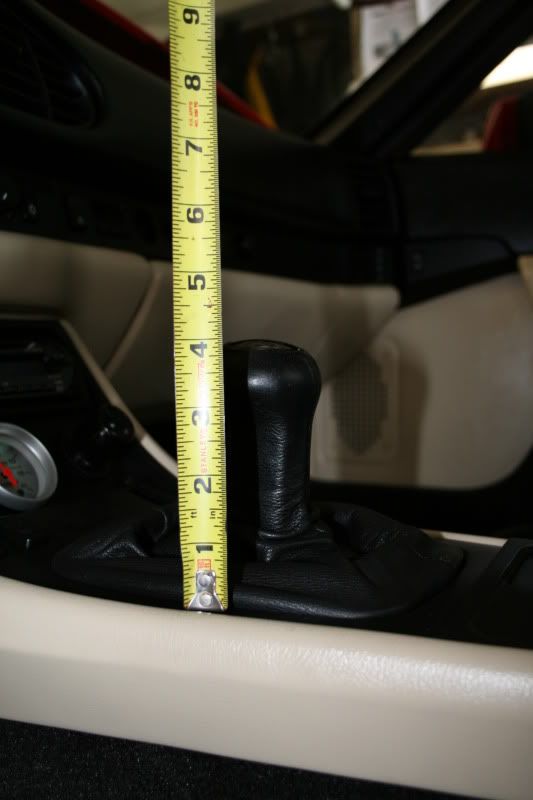
Personally, I like the look and feel...and from my calculations reduced the throw by 20% by dropping it down 1 1/4". Opinions will vary. The new height of the shifter is 4".
Enjoy!!
You can use clark's to guide you through the procedures of removing the shifter. http://www.clarks-garage.com/
Warning: before you do this make sure on how much you want to shorten the lever. I cut mine about as short as it can go while still maintaining all parts and not interfering with the mid bend in the lever.
Step 1: Once you have the shifter out scribe where you want to cut the tip off (I cut off 1 1/4") and used a sawsall to do this. Save the tip as it will be used as a template later.
File or grind a bevel to match the original, then place the tip that you cut off aligned with your new bevels as a template to grind the beveled cuts in the side for the rubber vibration piece.
Step 2: Now comes the fun part...you need to cut down the actual shift lever **** the same amount (in my case 1 1/4") to match your overall drop in height. There's no turning back once you make this cut.
Now cut the the 3/16 x 3/16 step cut to except the spring clip to secure the shift lever **** on to the shift lever and file in the grooves that allow the spring to stay set in place.
Step 3: Install the rubber vibration pieces on the shift lever and slide back into the shift lever ****. BTW - you'll need to trim the lower rubber piece length wise to fit, apologize for no pic on this, but it'll be obvious when you get to this step. It's really not that much. I did it with a razor blade. Now install shift lever assembly back in the console as per Clark's and you're done. (Aprrox. time 2 hrs)
Personally, I like the look and feel...and from my calculations reduced the throw by 20% by dropping it down 1 1/4". Opinions will vary. The new height of the shifter is 4".
Enjoy!!
 06-03-2009, 11:23 AM
#4
Three Wheelin'
Thread Starter
Balistic, not to date. Everything is painted and ready. Have been upgrading suspension parts as of late. Just did the control arms last weekend and installed 968 castors & Delrin bushings.
06-03-2009, 02:38 PM
#6
Burning Brakes
hehe...I wasn't going to comment on that. But now that the door's open...
I haven't seen one of those since we sold our old '72 Ford F250 pickup about 20 years ago....
I haven't seen one of those since we sold our old '72 Ford F250 pickup about 20 years ago....
Trending Topics
06-03-2009, 06:13 PM
#8
Three Wheelin'
Thread Starter
 no...no joke LOL, I feel the same way. Replacing the wheel is definitely on the list of to do's, just not a priority at the moment. The wheel is literally falling apart. The wrap is basically holding it together. Although, I'm glad I can share a little levity in our day !
 06-03-2009, 10:43 PM
#9
Nordschleife Master
no...no joke LOL, I feel the same way. Replacing the wheel is definitely on the list of to do's, just not a priority at the moment. The wheel is literally falling apart. The wrap is basically holding it together. Although, I'm glad I can share a little levity in our day !
06-07-2009, 11:00 AM
#10
Burning Brakes
no...no joke LOL, I feel the same way. Replacing the wheel is definitely on the list of to do's, just not a priority at the moment. The wheel is literally falling apart. The wrap is basically holding it together. Although, I'm glad I can share a little levity in our day !
06-07-2009, 01:57 PM
#12
Rennlist Member
no...no joke LOL, I feel the same way. Replacing the wheel is definitely on the list of to do's, just not a priority at the moment. The wheel is literally falling apart. The wrap is basically holding it together. Although, I'm glad I can share a little levity in our day !
06-07-2009, 02:00 PM
#13
Burning Brakes
Well, I just did a rough eBay assessment. $60 shipped? Or we could see if you've got anything I'd be interested in.
Stuff I need (I'll address any value disparity):
Batwing
Lindsey boost enhancer -or- Joe P MBC
Cap+Rotor in good condition
Exhaust manifolds (they're cracking all over, so anything helps)
Koni front inserts (modern multi-way; existing factory M474)
Koni front bump stops
Front factory '86 rotors with in-spec run out
Fuel dampener
3.0bar FPR
OEM O2 sensor
TPS
DME temp sensor
The last two I really need to do some additional testing of, but it usually doesn't hurt to replace stuff with known working pieces.
 06-08-2009, 11:54 PM
#15
Three Wheelin'
Thread Starter
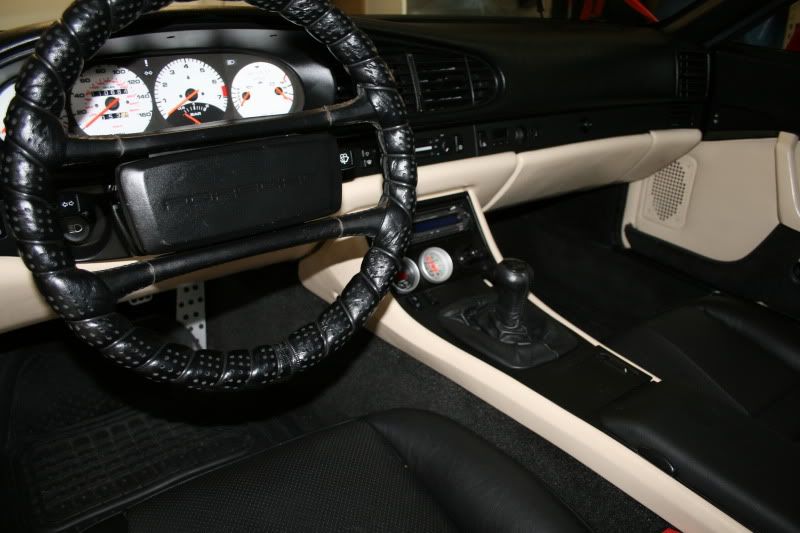
Thanks for the compliments on the interior.
The gauges were purchased off e-bay http://cgi.ebay.com/ebaymotors/PORSC...Q5fAccessories and I re-mirrored the plastic blub covers a la (http://www.clarks-garage.com/) 3 years ago. I f I were to do it again, I would go LED.
The gauges were purchased off e-bay http://cgi.ebay.com/ebaymotors/PORSC...Q5fAccessories and I re-mirrored the plastic blub covers a la (http://www.clarks-garage.com/) 3 years ago. I f I were to do it again, I would go LED.