When you click on links to various merchants on this site and make a purchase, this can result in this site earning a commission. Affiliate programs and affiliations include, but are not limited to, the eBay Partner Network.
ALL pistons have to have their ring gaps fitted. I have never gotten an aftermarket set of pistons / rings that did not require a lot of filing to get them to spec. with out the special powered ring gapper its a long and tedious process.
i believe this part was done. I asked for the rings to be gapped, and installed on the pistons, and paid for it accordingly. However… Rings are in 4 individual baggies, not on pistons, but the cylinders, pistons and ring baggies are all labeled 1-4. Because of the numbered labelling, I believe they were gapped, but will need to call them tomorrow to confirm.
Alright… confirmed that the rings were gapped by Millennium.
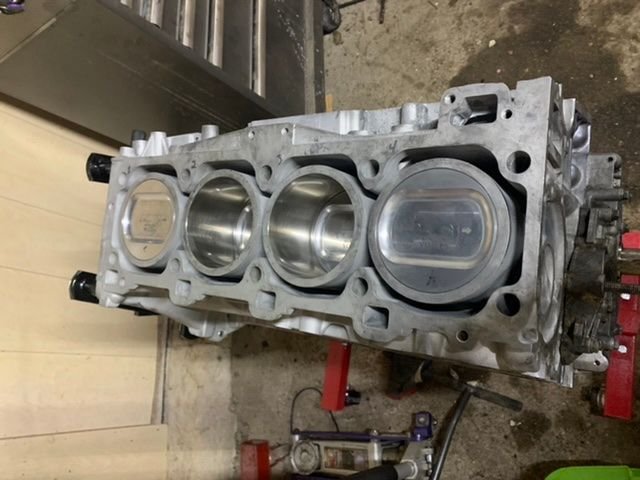
have since installed the rings, and tonight installed the new Wossner pistons with 951 forged rods, new pins and rod bearings along with the new mains and rear main seal that were installed a few days ago.
New head studs, water pump studs and oil pump bolts coming from Ian this weekend. Next step install the oil pump, then head and oil tubes and the finally the oil pan which now has the Lindsey baffle welded in. Am I missing anything?
Not sure where you are in your process but FWIW when the main girdle is installed it is always a good idea to fit the oil pump (dry)housing on and draw it in.. (dont lock it down hard) then torque down the mains.. then you can take the oil pump back off.. this little trick insures that the two mating surfaces are absolutely flush with each other..
Keep up the good work!
thank you! Yes, I did this. So many of these little best practices out there for these cars. I’m researching each step of the process along the way. Have to pull the oil pump back off and do the oil pump install with loctite and the correct and new bolts over the weekend, after the pack from 944online shows up.
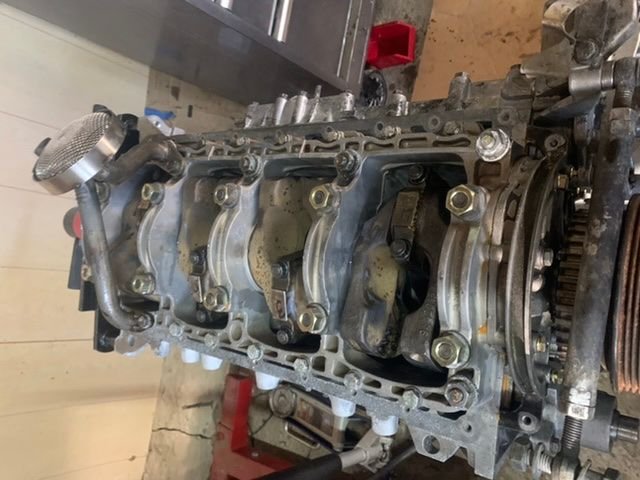
Head went on last night, along with the oil pump with Loctite. Used wide fire head gasket, new studs, nuts and washers. 15#, followed by two 90 degree turns in 30 minute intervals.
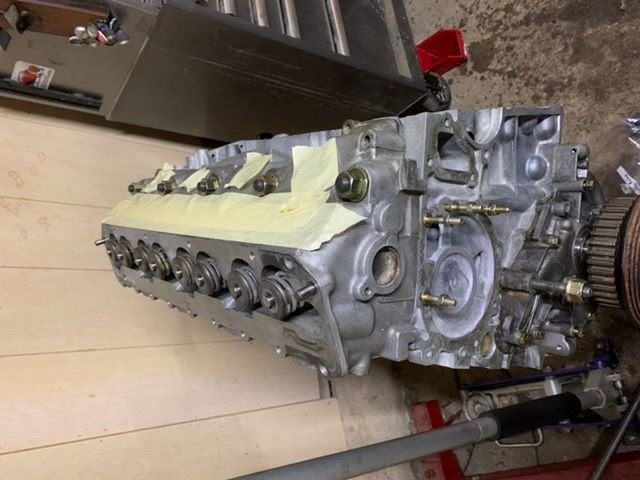
Balance shafts and covers installed and torqued to spec. New seals and 2 piece bearings. Moving as they should after install.
also installed interior oil tubes and the oil pan with the Lindsey baffles and new seals. Here we are just before the oil pan and seal went on tonight…
back to the 9-5 tomorrow, but plan to reinstall the rear belt cover, pulleys and rollers over the next couple days as time allows.
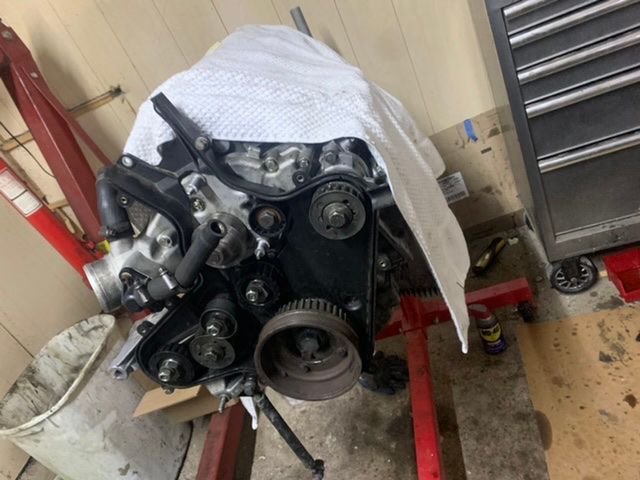
Modified the rear cover from a donor block, as it was in a little better shape than the original. Got this and the rollers in place this afternoon. Decided to leave off the PS pulley, as that system was deleted.
will likely go after the oil filter housing next and possibly the flywheel after that, with a new pilot bearing to be pressed in.
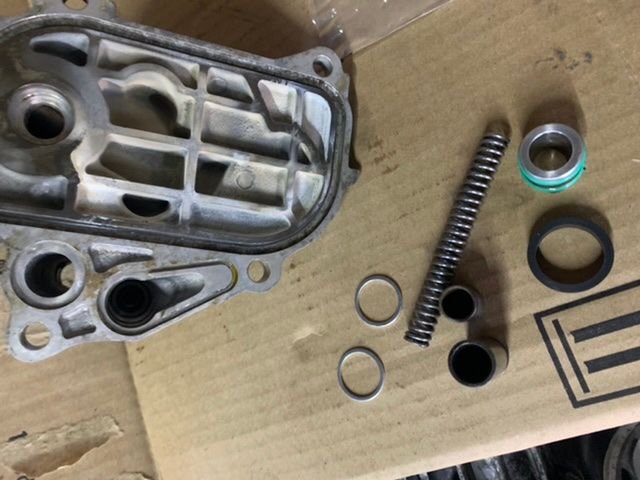
Need a little help. I’m having trouble figuring out what all I’m dealing with here.
I believe the tube with two orings goes into a hole by itself to seal the gaps in that passage. Does the small tube go inside it? It does fit tightly inside.
also… Seems I have an old style oil pressure relief valve. Should that groove have an oring on it? How does it all fit together?
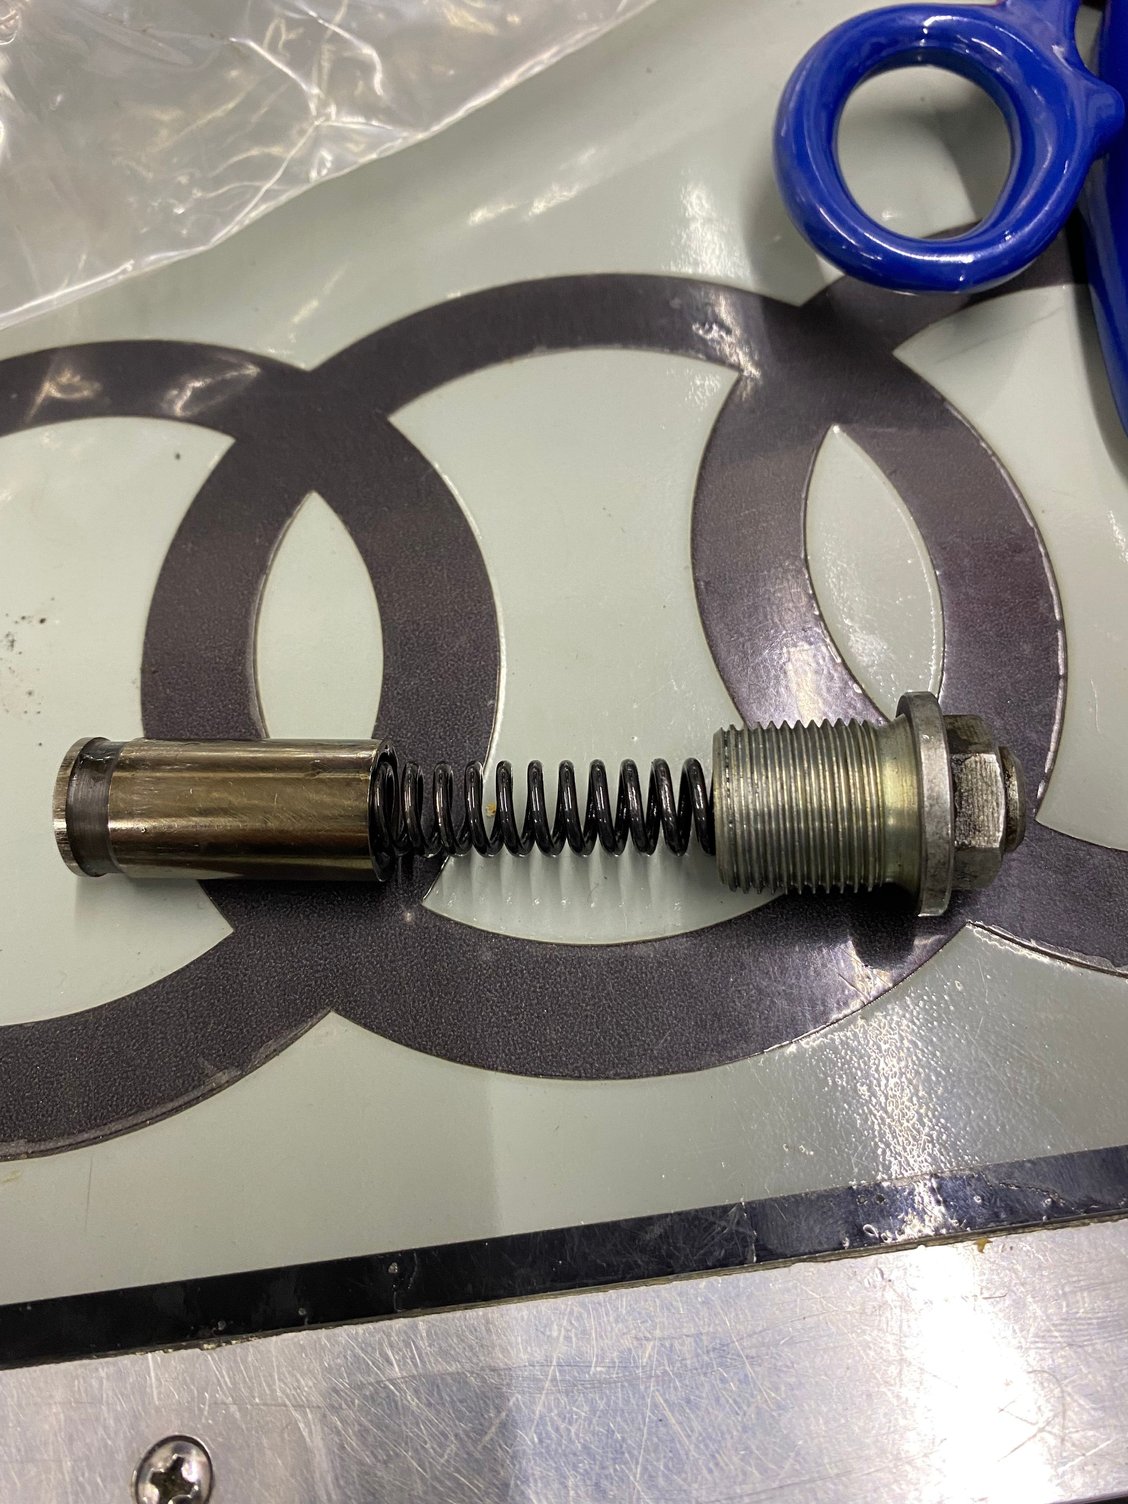
There should be an o ring on the block side with a sleeve that sticks out.
there is no o ring on the plunger
just goes like this
i ended up taking this out of my track car.. i even used the alignment tool and noticed too high of oil pressure. The plunger just gets hung up.. and at high rpm doesn't “ relive” and bypass like it should.. worst case.. the high oil pressure blows out the gasket on the oil filter and sprays oil all over your header and your car turns into a rolling torch.. and theres nothing left but to call the insurance company. You've come this far.. get the updated one. Even with a slight mis- alignment of the cooler it wont hang up.. yes they are expensive but cheap compared to what you could lose… not money-wise but the satisfaction and pride in being able to enjoy the car you built with your own hands.
If you can find a used one.. i dont see any issues.. The part that i put in my track car was out of another engine i had laying around… i was pretty happy it had the updated valve in it… 😬
I’m seeing conflicting info on the updated valve. Haynes doesn’t mention it, and Clarks is recommending against it. Then several sources talking about the update.
Knocking on wood. since I haven’t had any pressure issues, I’m thinking just use the existing valve and keep an eye on it.
I’m seeing conflicting info on the updated valve. Haynes doesn’t mention it, and Clarks is recommending against it. Then several sources talking about the update.
Knocking on wood. since I haven’t had any pressure issues, I’m thinking just use the existing valve and keep an eye on it.
I have a 944-107-035-01 I recently pulled from my 1990 S2. The only reason I did so was the newest 02 revision was supposed to quiet noise in the S2 oil system. Not sure it actually did anything however, so $375 wasted? All you'd need with my old valve is a new o-ring for the "tip" and sealing ring, N-043-815-3 for the threads.
Ive put engines together and used the old style with no issues.. if it were strictly on the street, no problem but make sure its working properly, confirm with mechanical gauge.. on the track? I wont chance it..
as far as “ conflicting info” This is my take on the subject of advice/ info/ opinions of things. People share info based off experience, and no two experiences are the same. There is ALWAYS variables to any story/ experience. So i think about things with respect to design and “ what makes sense to me” a plunger that rides in a bore that has a “ parting line” OR a valve that doesn't move and has everything precision machined internally?
ultimately the the choice is yours, i made my decision based off these things.
1) updated design makes sense
2) even with the tool, there was a tiny tiny bit of movement
3) the Porsche engineers are pretty smart.
4) I dont want to die in a horrible fireball on track.

 12-05-2021, 05:32 PM