When you click on links to various merchants on this site and make a purchase, this can result in this site earning a commission. Affiliate programs and affiliations include, but are not limited to, the eBay Partner Network.
Too true!
I had an engineering lecturer who used to say "Hope is NOT a method"
Sure it is.
Just not a very good one.
Not sure if it's workable, but can you run an emergency release cable to somewhere reasonably accessible?
For example, the Cayenne has an electric fuel door release. There's an emergency cable release in the back, inside the CD changer cubby (removable interior panel).
Not sure if it's workable, but can you run an emergency release cable to somewhere reasonably accessible?
For example, the Cayenne has an electric fuel door release. There's an emergency cable release in the back, inside the CD changer cubby (removable interior panel).
I'm sure that could be done but I want to be rid of all pull cables. Me thinks it might be easier, in an 'won't open' situation, to just put power to the rear external jump points.
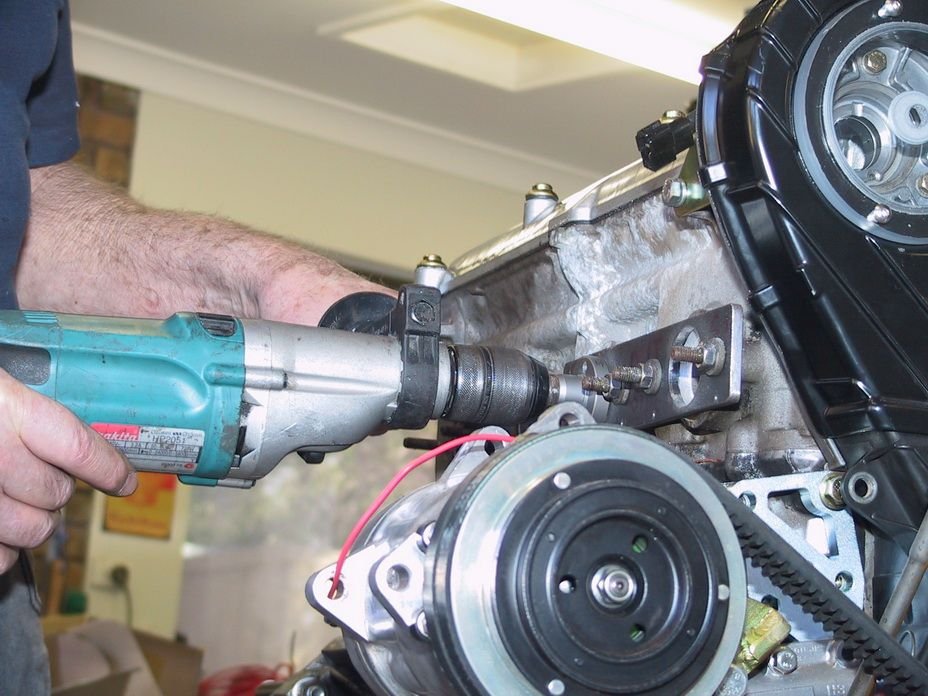
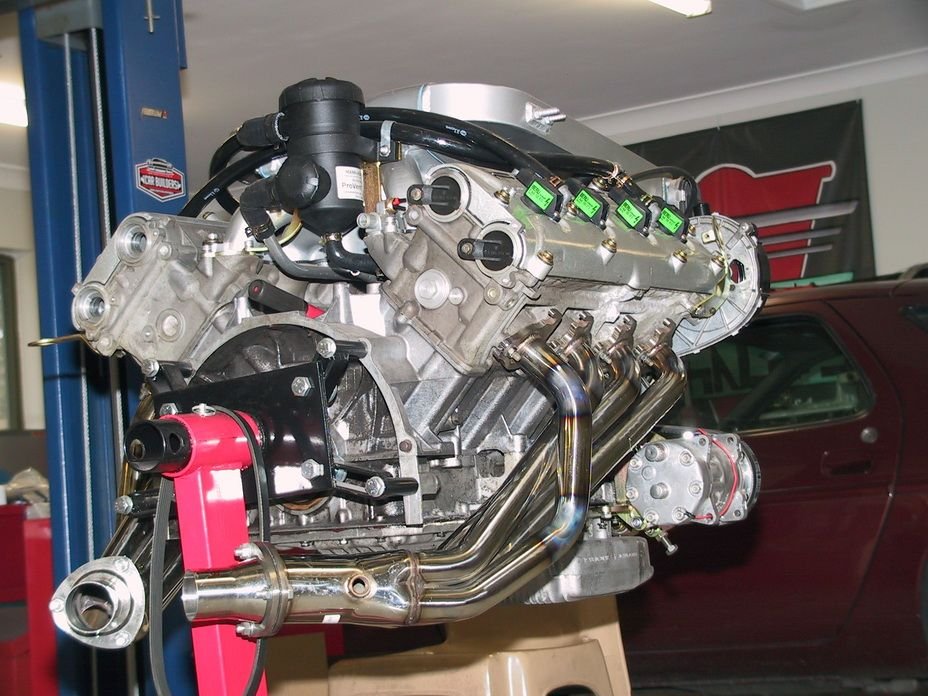
Sick of wiring, so we started mods to headers.
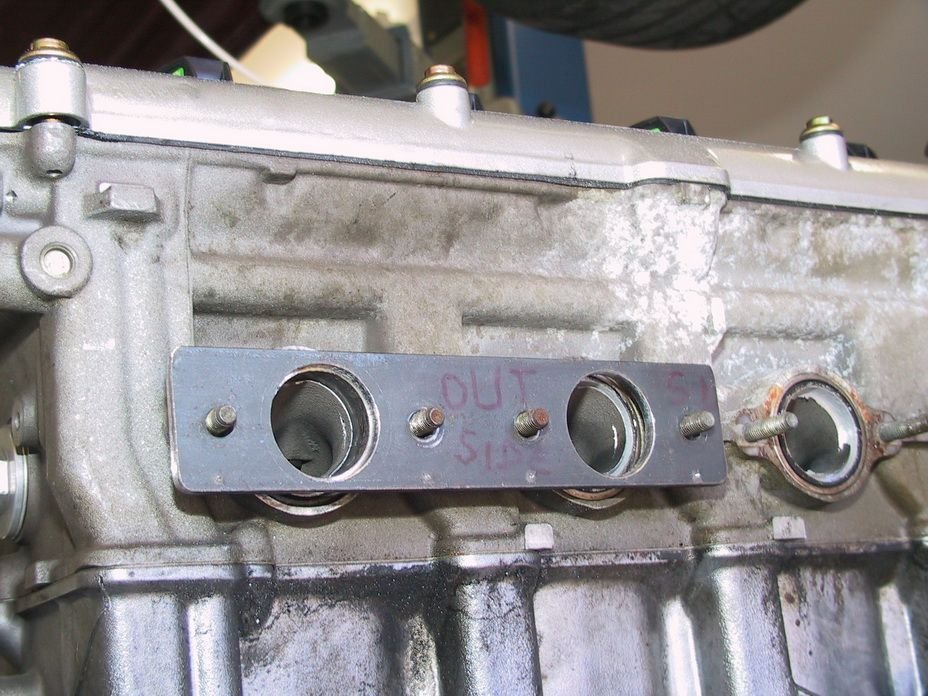
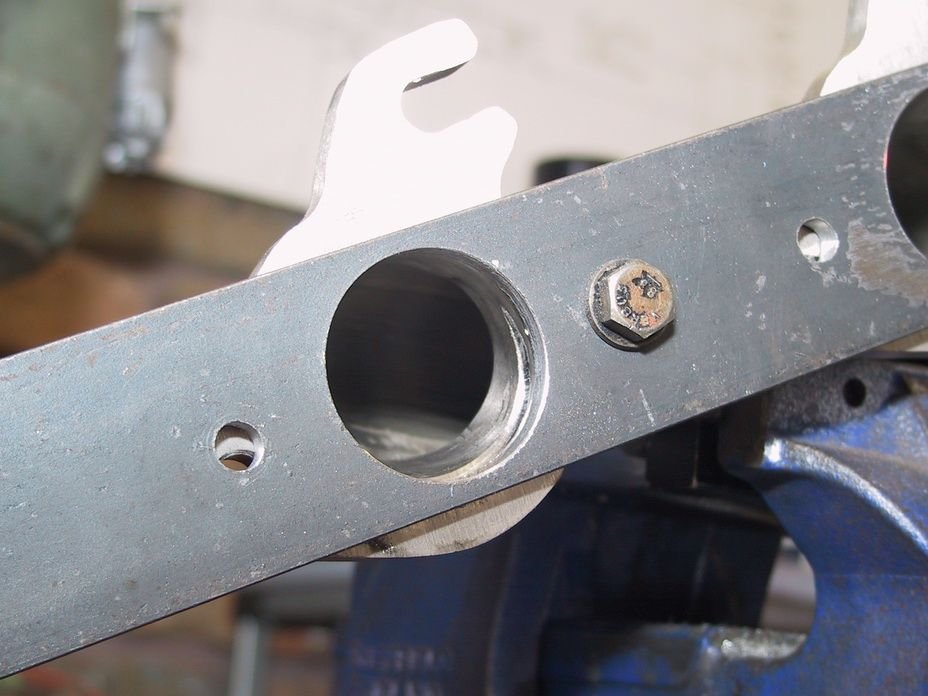
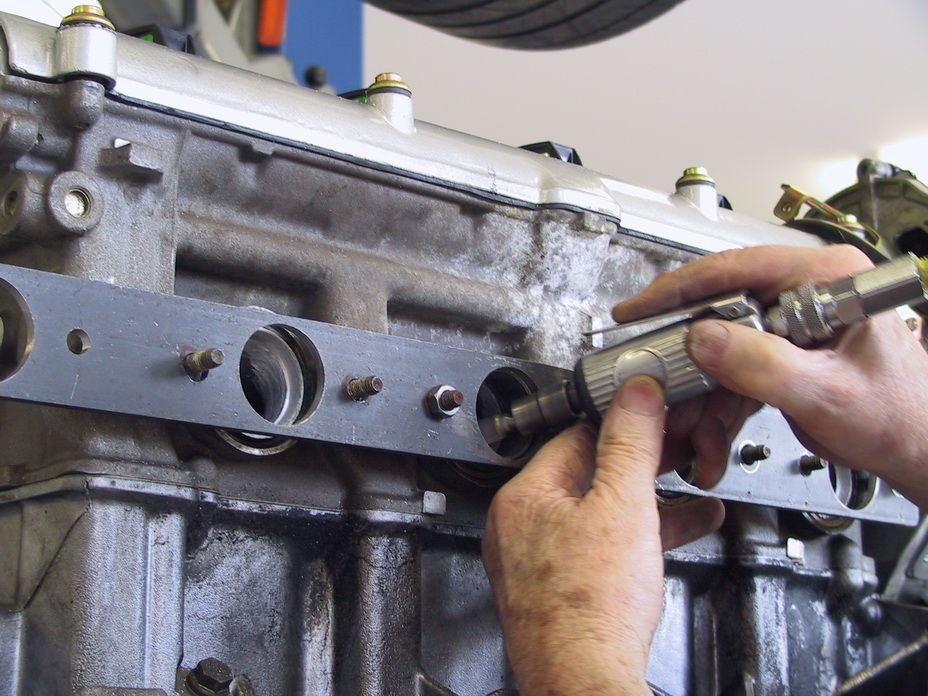
Made a jig plate to bolt to the exhaust manifold bolts.
Bored with a 1-5/8" hole saw to a depth of 8mm [the shoulder on the cutter].
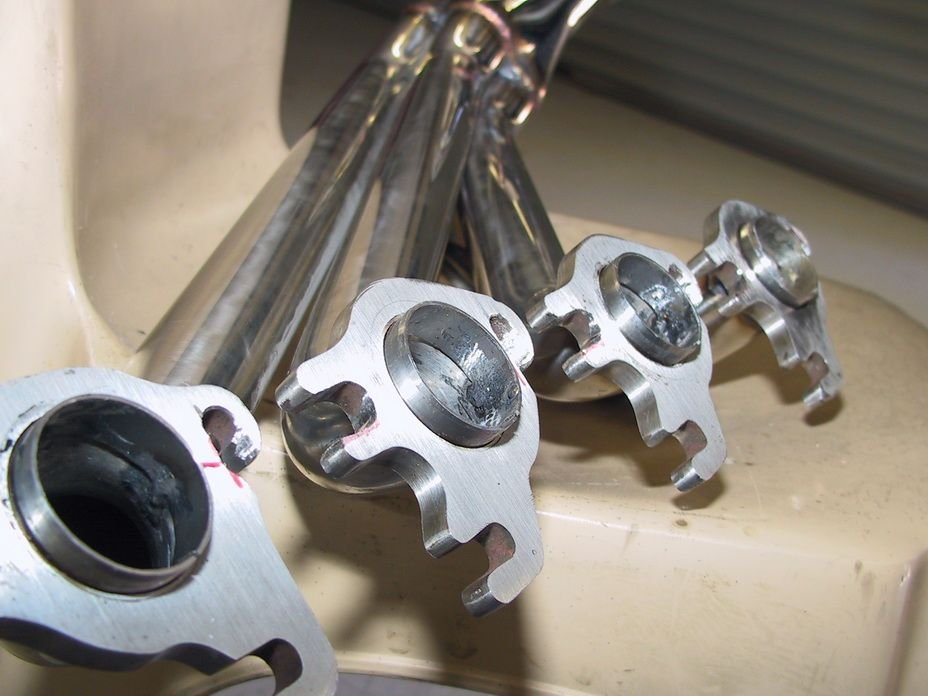
Cut 'egg rings' from 1-5/8" ss tube, machined to length with a lead in chamfer.
Bored the headers out the same as the heads.
Tapped in the 'egg rings' and tack welded them into the headers. Cut a slit in each one to cope with expansion.
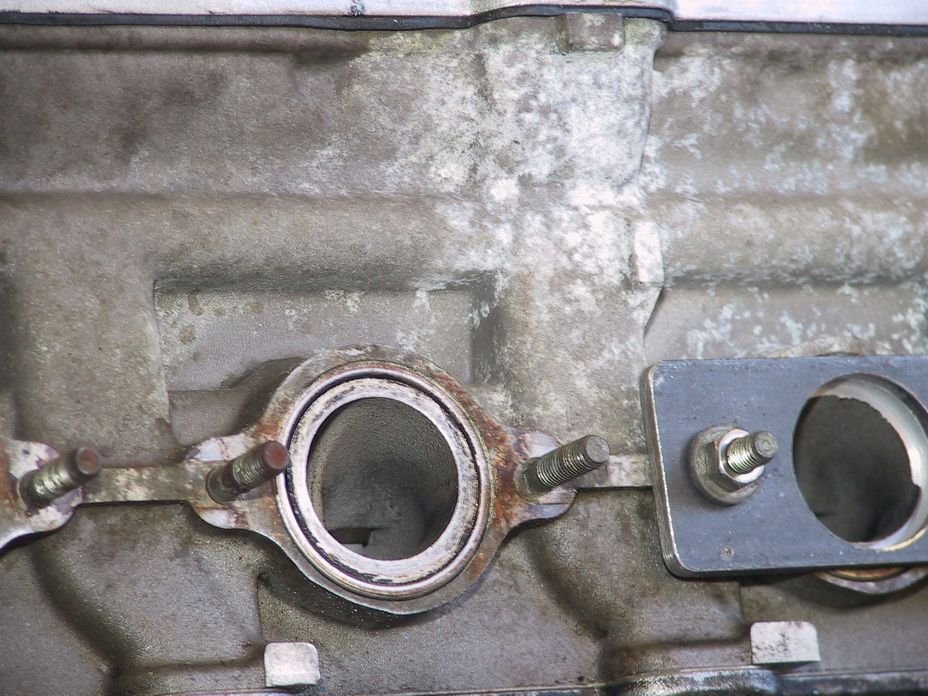
Clamped a dummy egg ring into each exhaust port, as a diameter gauge, and cut out [rotary file] the excess head material so that all ports match the headers for position and size.
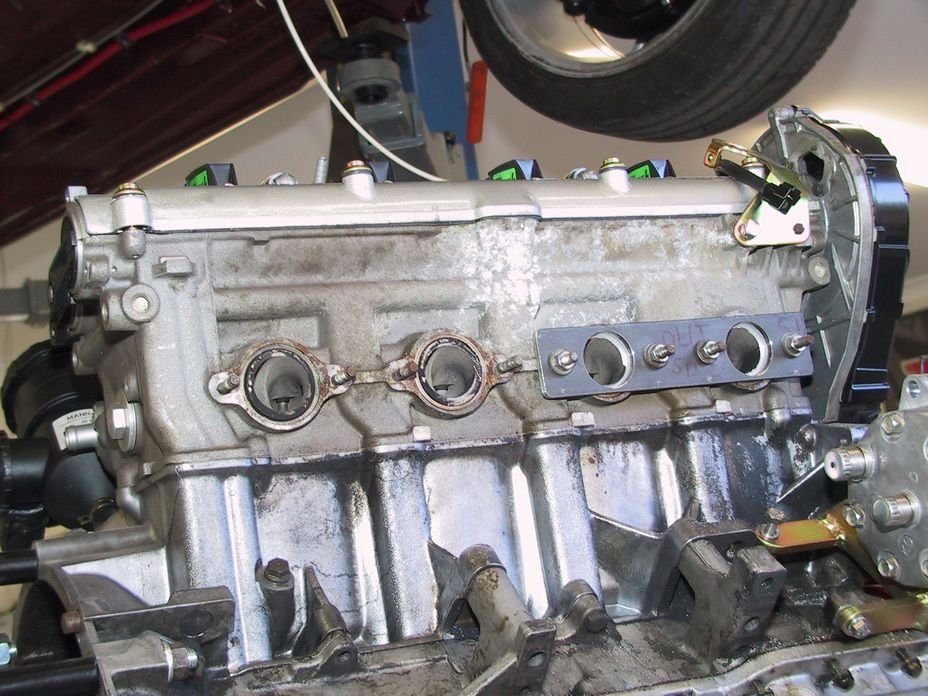
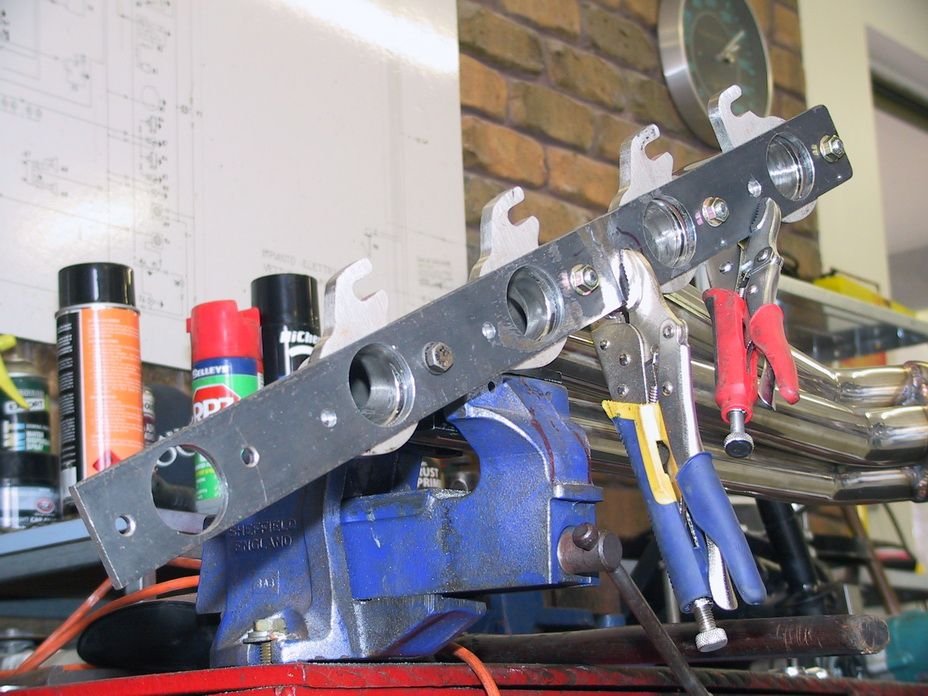
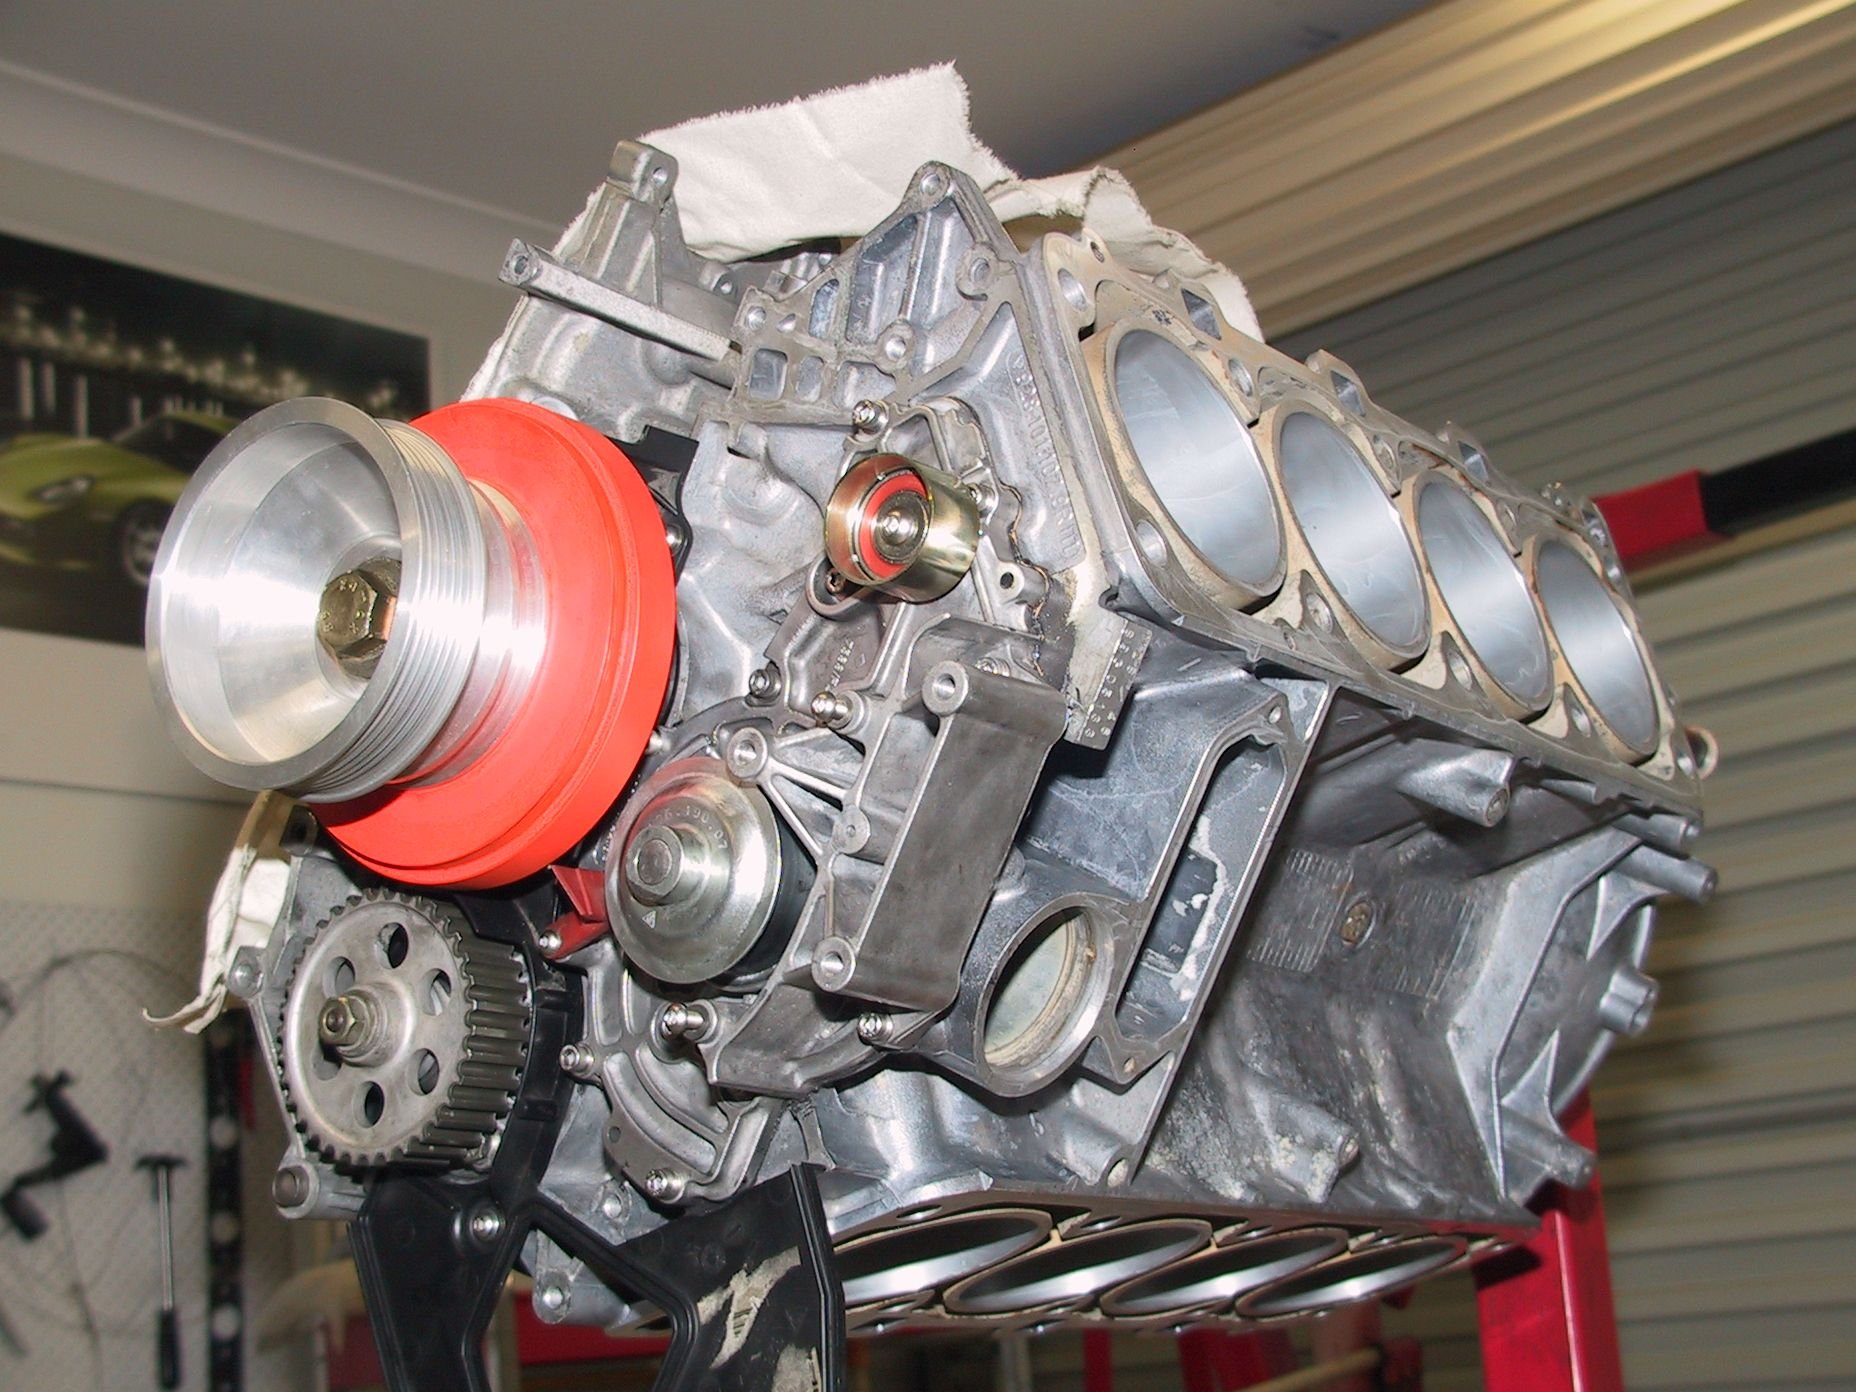
Making S4 headers fit on an '86 ROW 5.0L head is not too bad a job. The top bolt hole [slot] just hangs in the breeze, as a heat sink! The front slots line up fine but the rear holes are about 8mm too low and had to be slotted vertically, plenty of 'meat' though for the fat washers to clamp onto.
Now to make them fit the RHD chassis, which just seems to be a dent to clear the steering shaft.
Jig plate to locate port counter bore Port bored Port boring to rotary cutter shoulder Modified headers 'Egg rings' set in counter bored hole Drilling head Dummy egg ring to rotary file out port to match header bore
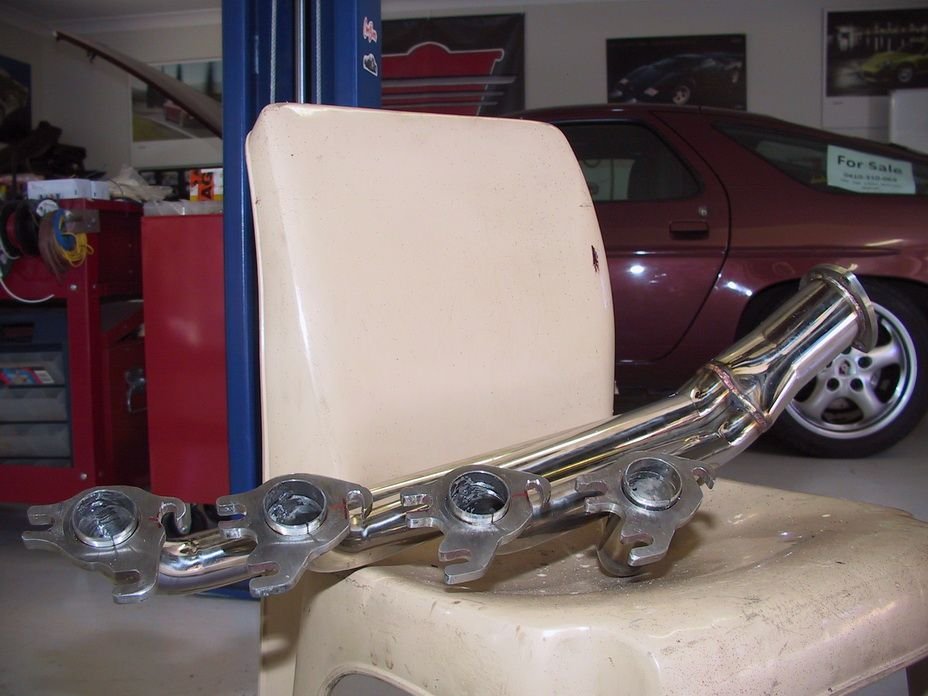
Finally got the headers fitted nicely.
Knowing the work to get the header/port alignment accurate, I'm sure glad I didn't just bolt them to the heads!
Having said that, the '86 exhaust ports are quite a bit smaller [were] than the header inlet, so they 'probably' would have just dumped into the pipe. Not so sure about the S4 heads they were meant for.
Had to do some heating on the bends to get the flanges to line up and sit nicely on the heads.
Now, were to go from here???
How does the exhaust port and header pipe cross-sectional area evolve as you get further away from the exhaust valves?
Sorry I seem to have missed this!
As these are S4 headers, they are a bit larger ID than my 86 ports.I used SS tube the same size as the headers for my 'egg rings', which meant I had some head material to cut away after I had cut [bored] out the port to fit the egg rings.
The 86 exhaust port ID at the manifold flange seems quite small to me. They open up, obviously, as they head inward to the 2 valves but are a bit oval shaped.
As I tried to show in the photo, there is a dummy egg ring clamped in the port so it can be ground out to match the headers. I also ground the outer radii of each port [left/right] a bit hoping the gas leaving the valves will have less of a corner to negotiate on its way out.
Keeping in mind of course that the engine capacity has risen by 1.5 Litres requiring a larger exhale.
My challenge now is getting pipe 4 to clear the steering 'U' joint! So far I've just cut it off and bent the collector section in 20mm. It now clears ok but I've yet to reconnect the flange section.
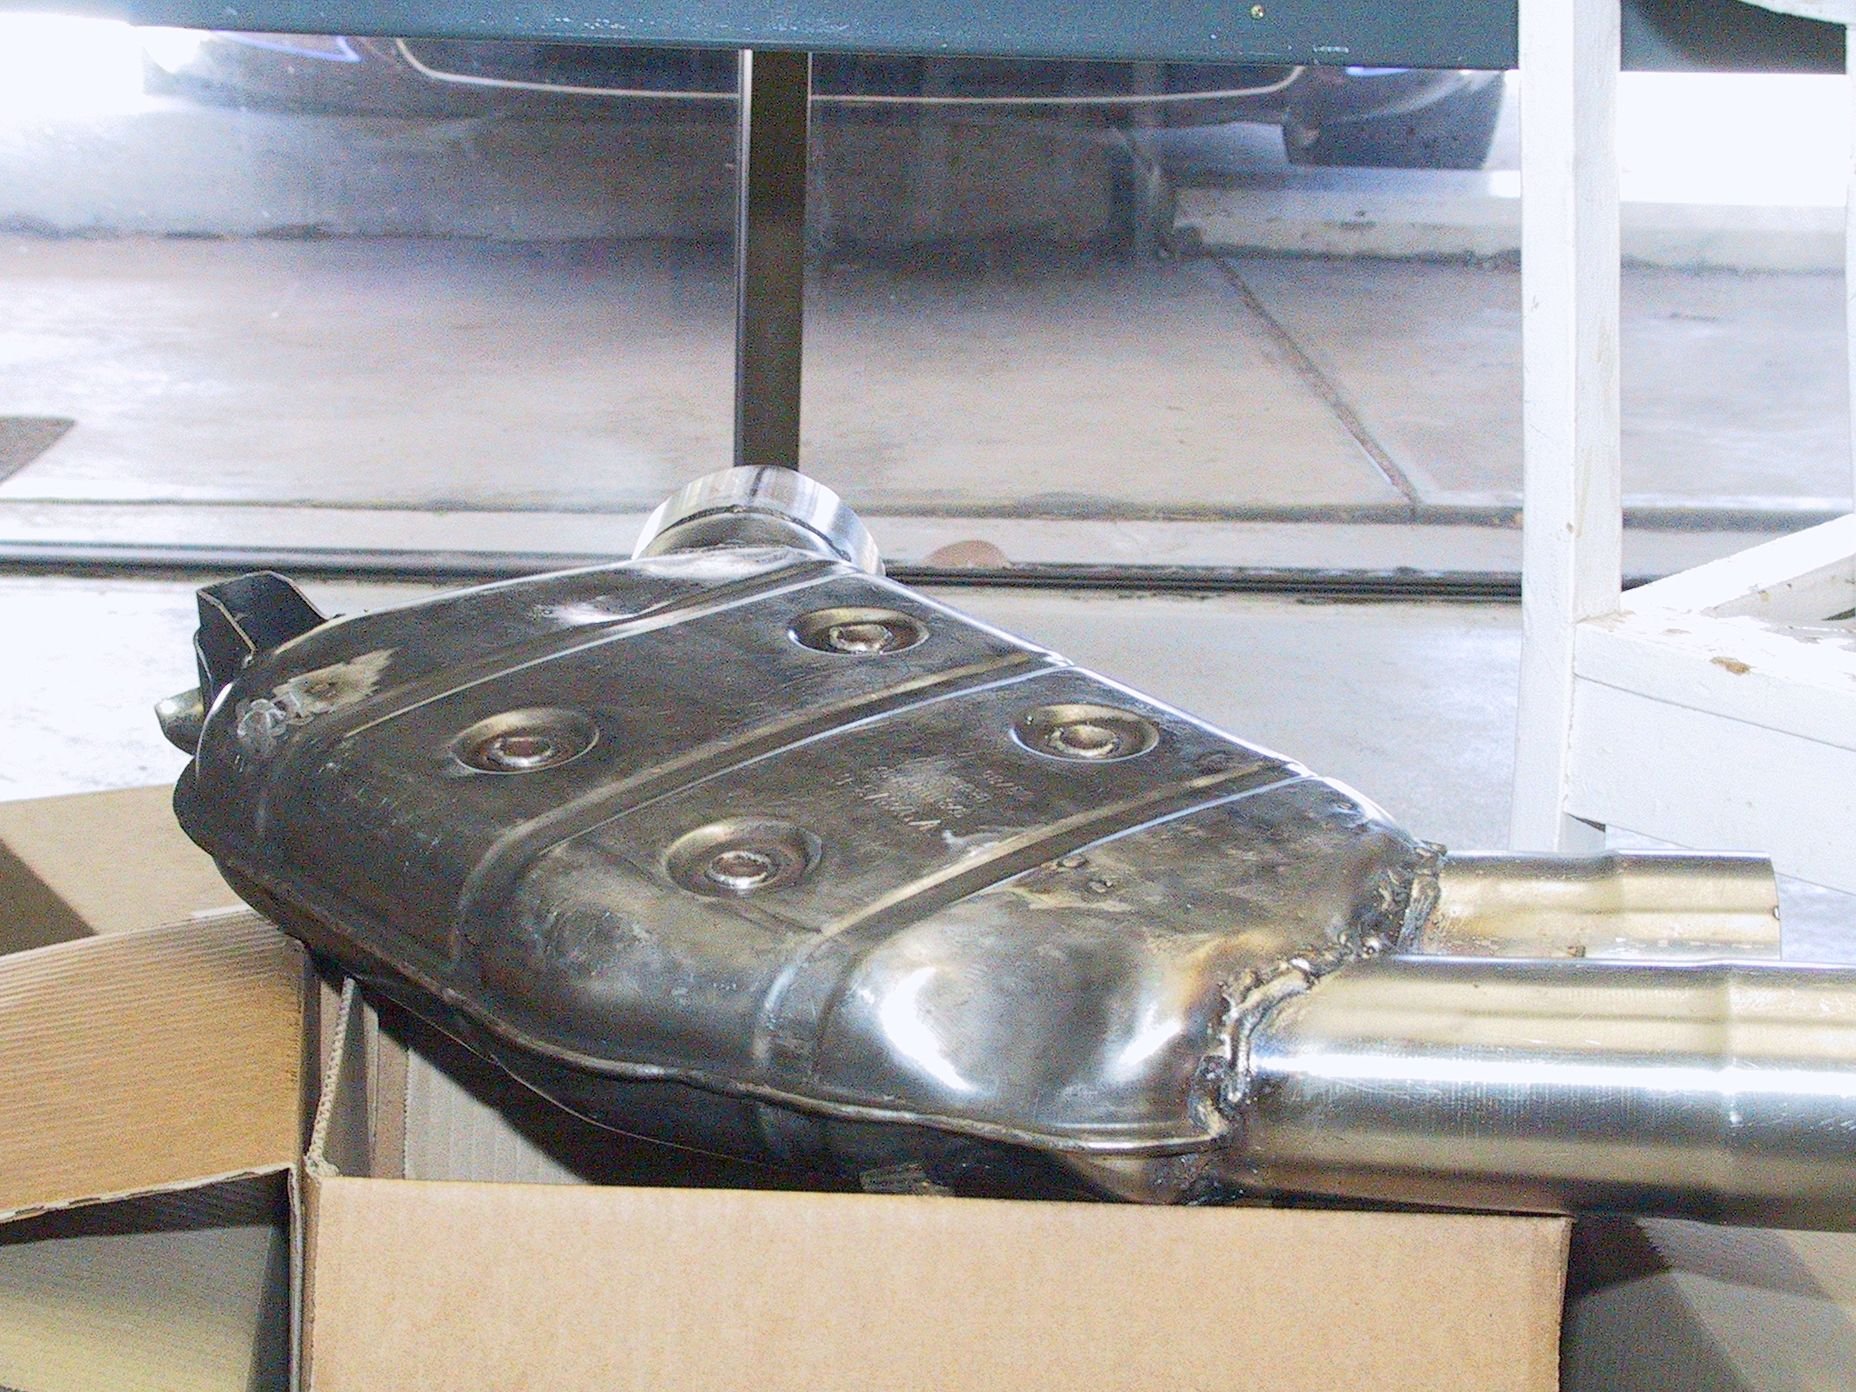
Have made the collector to 'X' pipe and 2 cats in 3" SS. Now to 'convert' the lh side muffler [under the rear seat] to 2 x 3" in and 1 x 4" out.
The plan is to open it up [already done] and replace the original perforated tube with 2 pieces of 3" perforated tube [purchased] that go into a 2x3" to 1x4" merge collector that's welded into the rear of the old box. Re-wrap it in fibre glass and weld the top back on. One 4" tube 90 degree bend goes around under the rear cross member into a 4" in/out muffler through another merge collector and 2 x 3" outlet pipes.
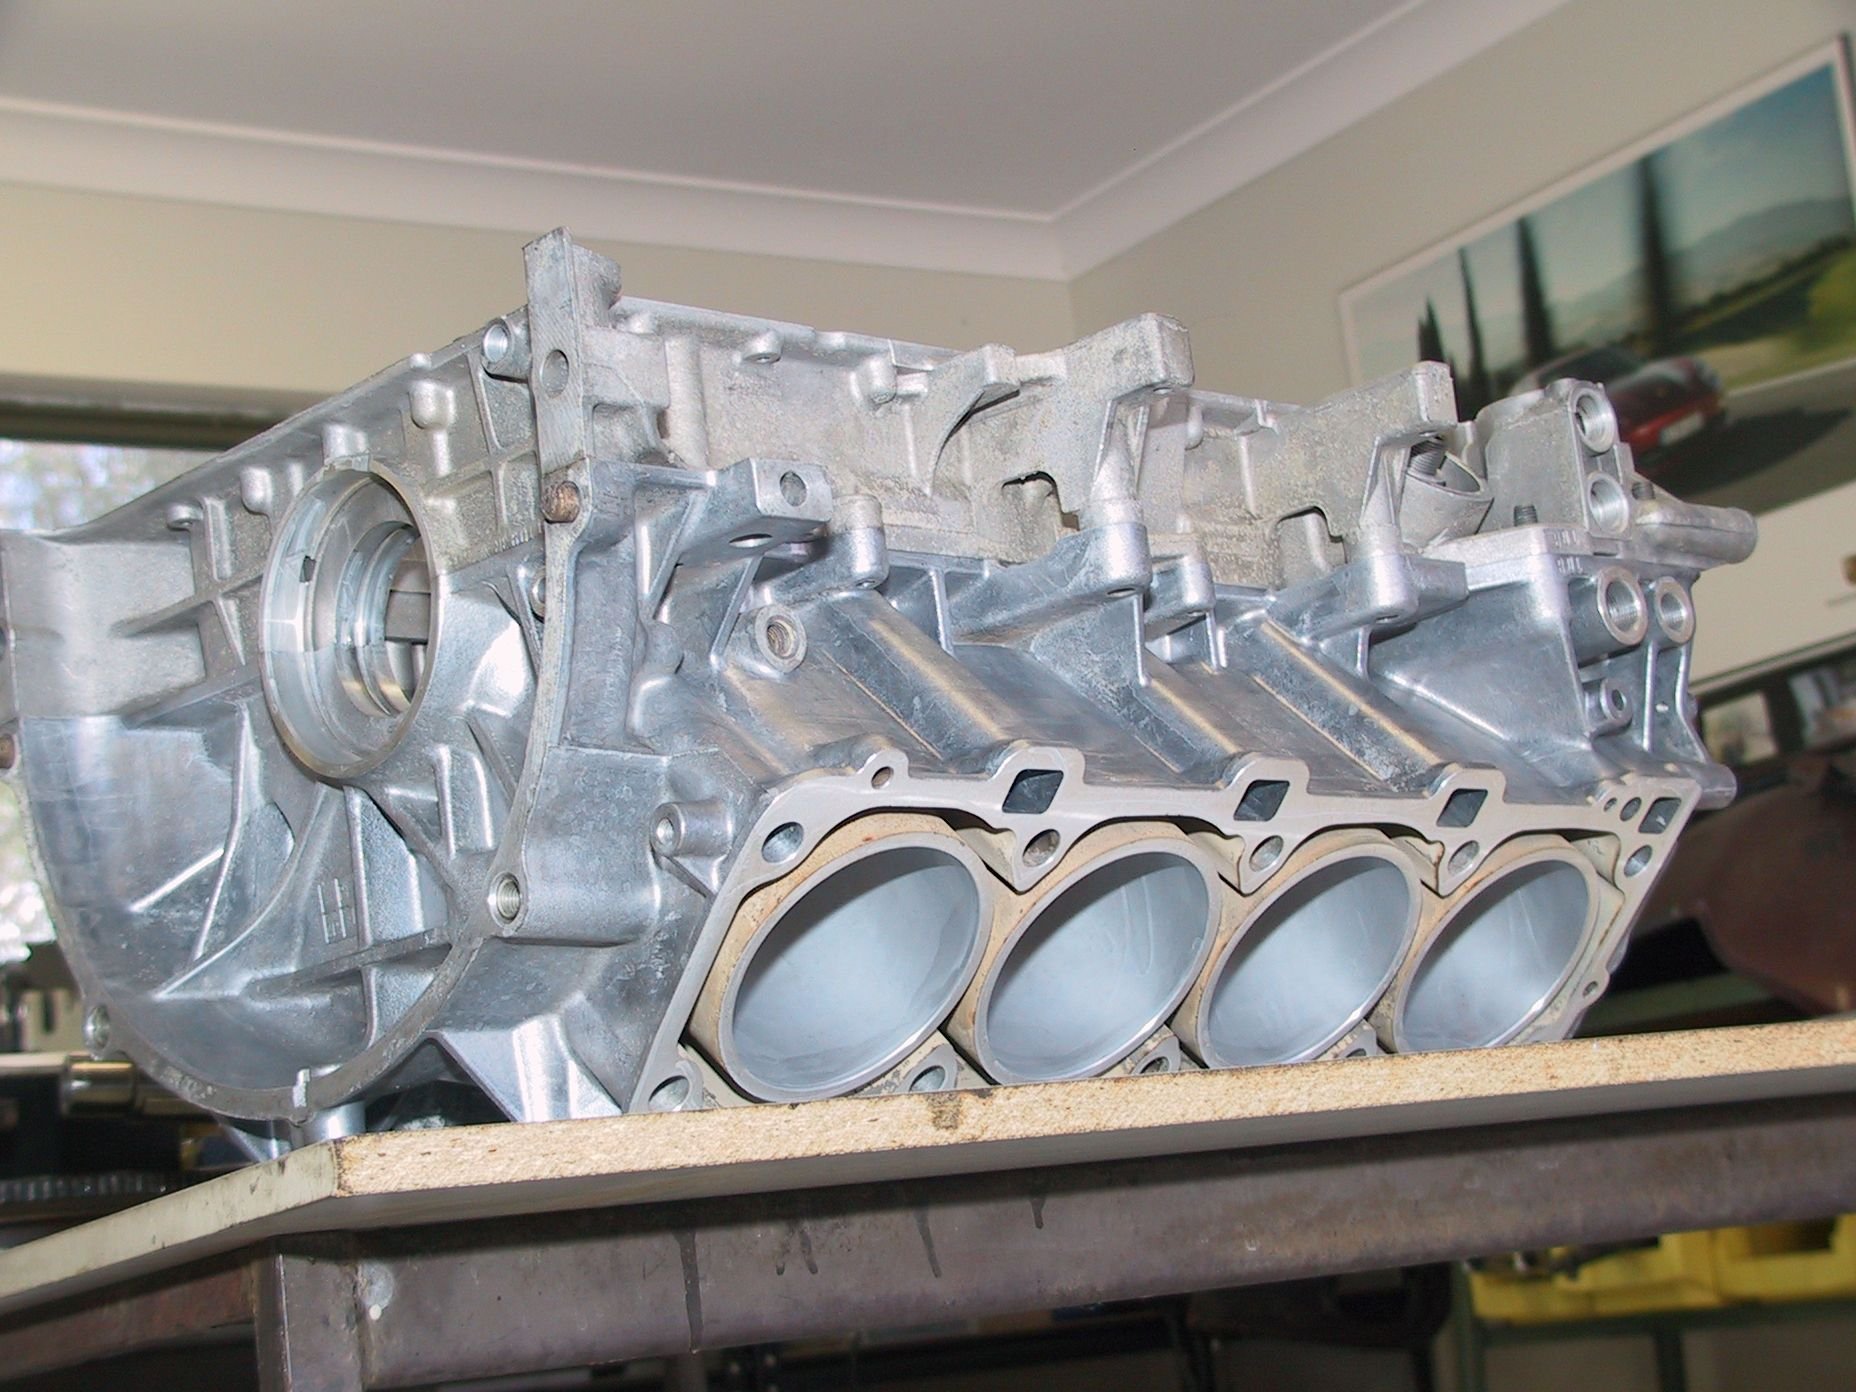
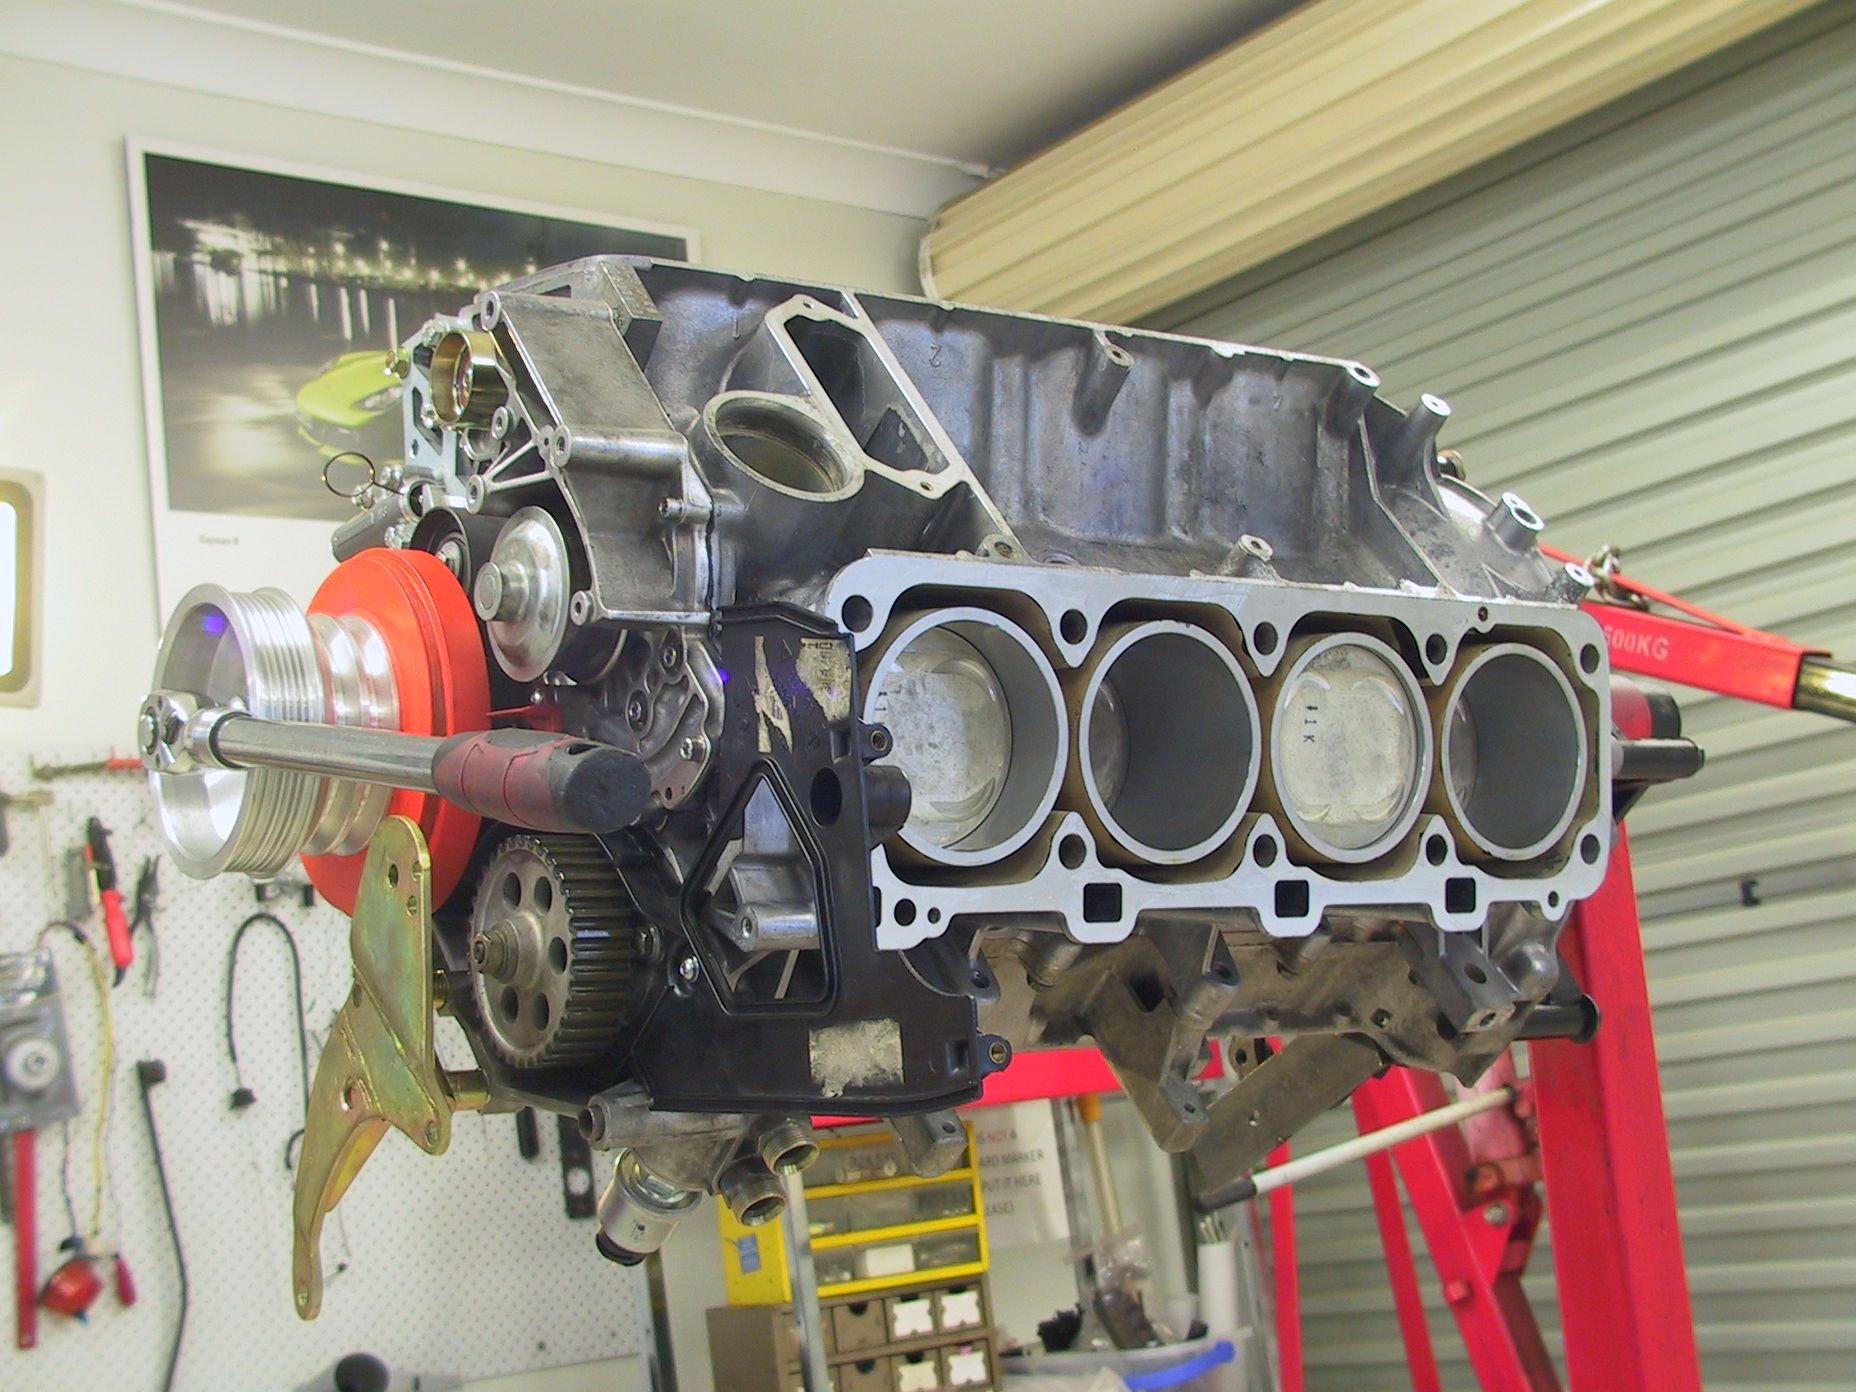
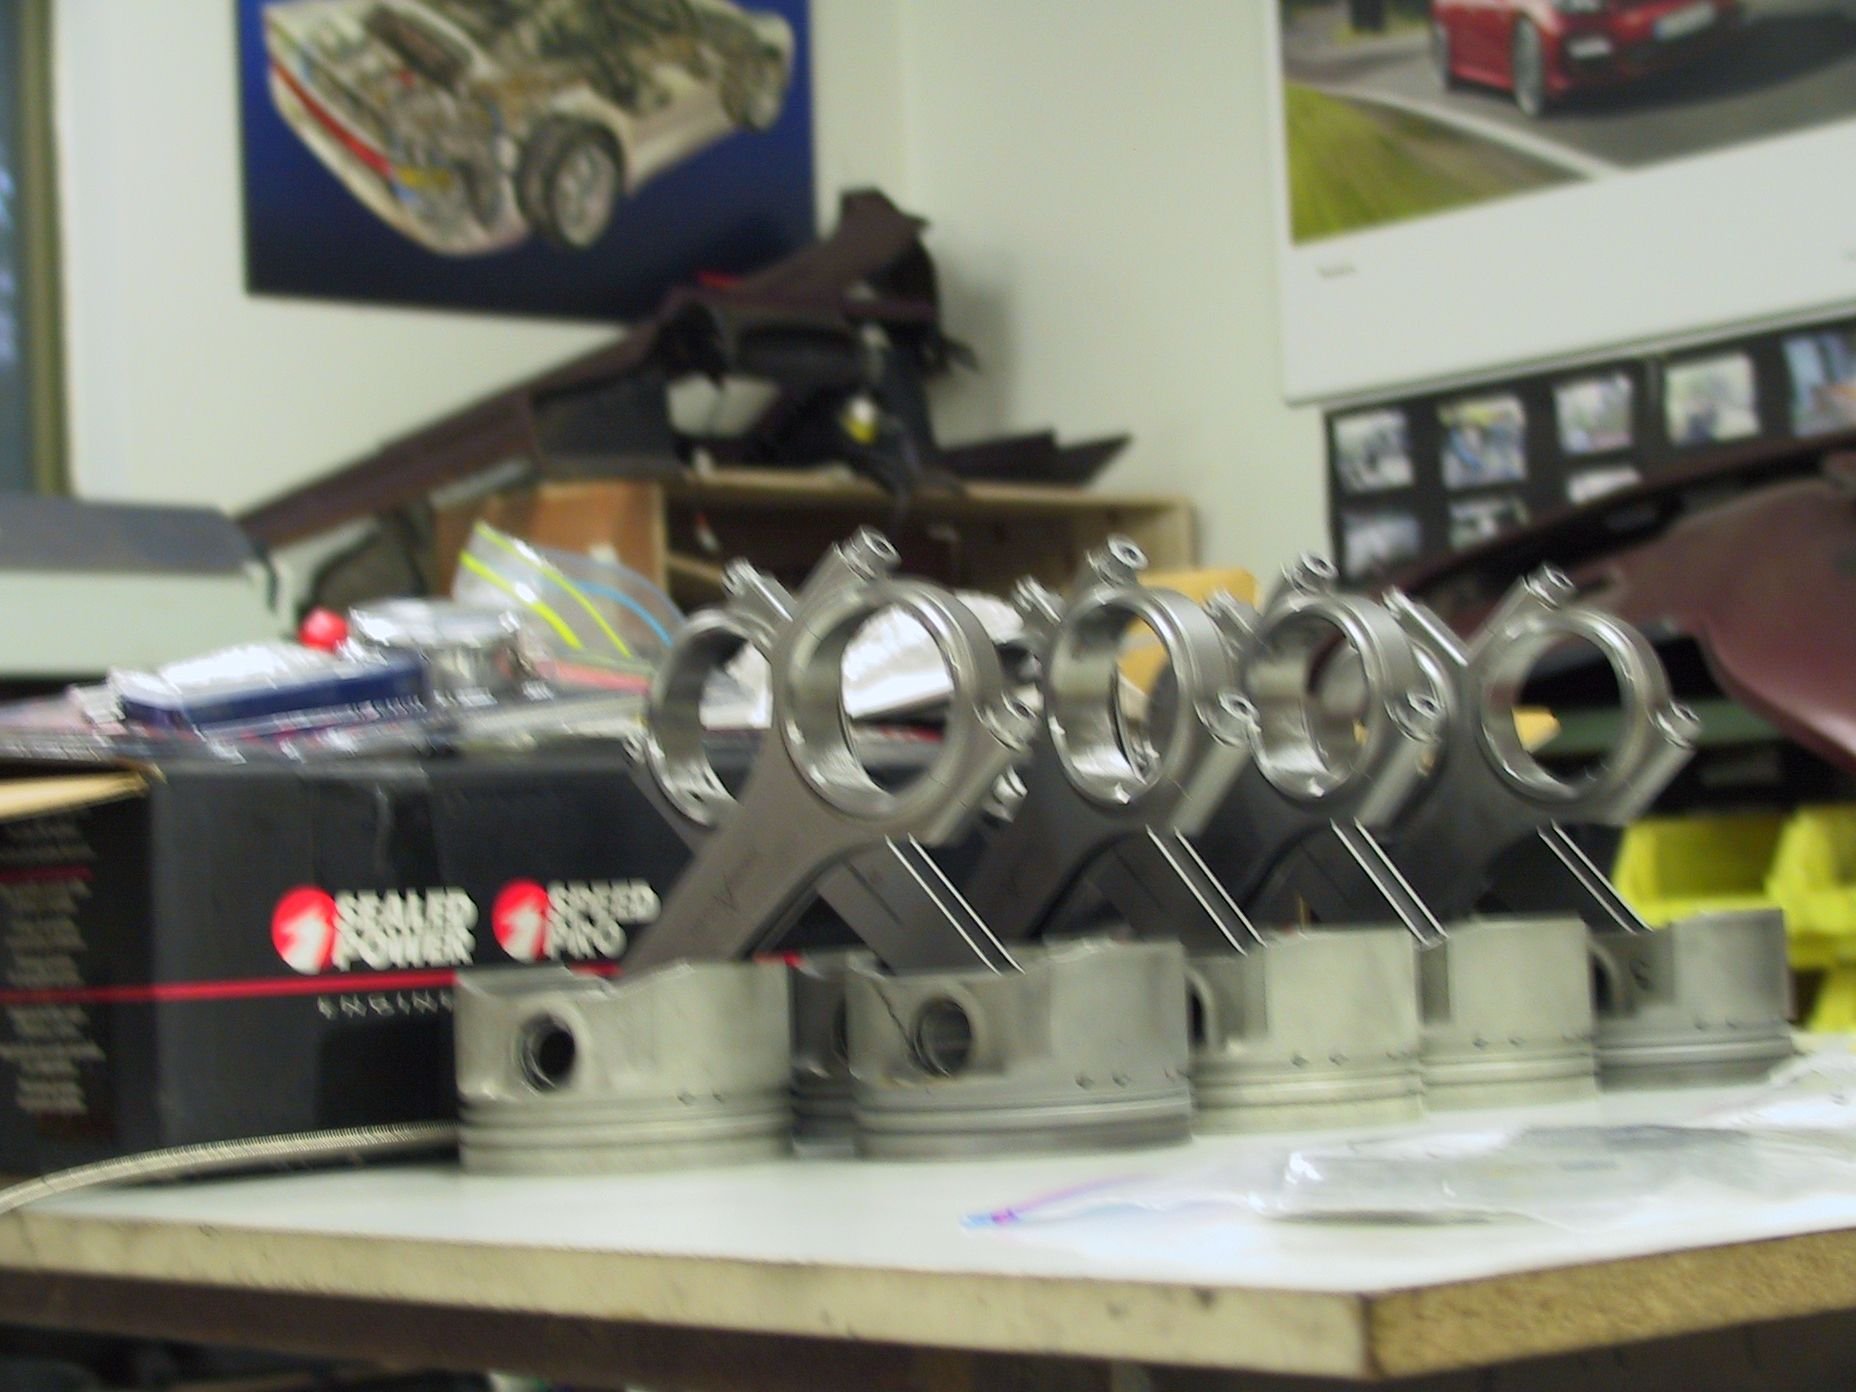
I have just got my engine parts back from the machine shop and they look lovely!
Block bored and honed for the 968 pistons and everything balanced.
I have to leave them for 3 days [quarantine] before my wife will let me touch them but the block looks like it has just come from the Porsche factory.
I have been thinking of max rpm for this motor. I had thought I would set the rev limit at 6500 rpm, because I don't need a race car. Then I started reading/watching stuff on 'piston speed'.
The consensus seems to be that average piston speed of 25m/sec for street vehicles is a sensible max. Formula one cars push this into the upper 26m/sec range but they have a stroke of about 50mm and they only have to last a day!
My bore/stroke ratio has changed from 100:78.9 = 1.27 to 104:95.25 = 1.09. Not much I suppose but using 25m/sec as my guide, my theoretical max safe rpm could be 7874 rpm.
[rpm=ave piston speed / 2 x stroke x 60]
So based on this theory, Could I safely set my red line at, say, 7500 rpm?
Anyway, very excited about starting the engine build now I have ALL the bits. I got the stroker bits from Greg a couple years ago! Can't believe it can take this long to get this far.
Got everything back from the machine shop, all bored and balanced. All looks pretty good.
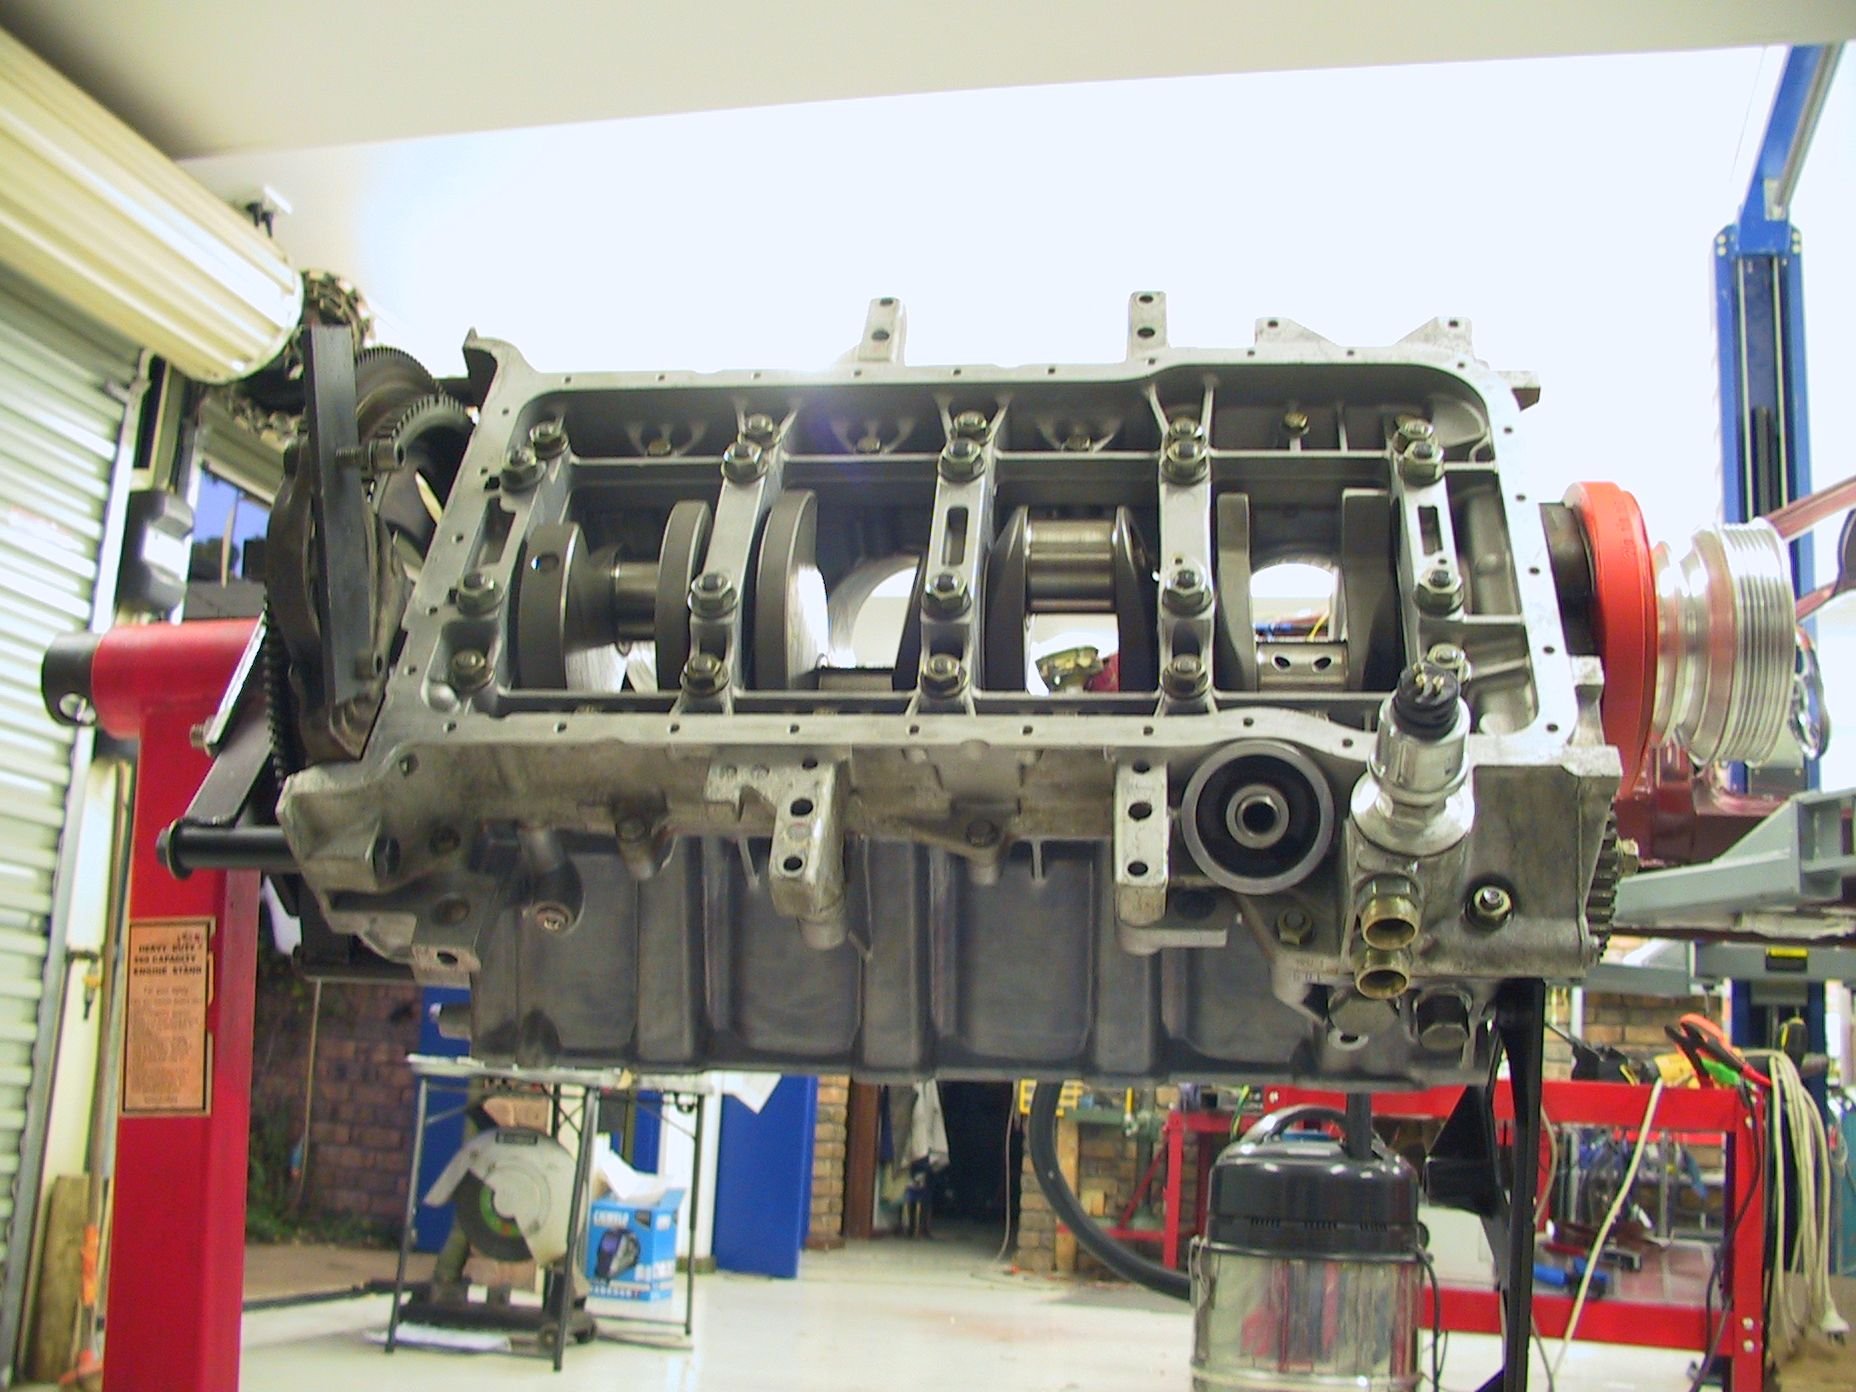
Mouldex 95.25mm crank is in the block, flywheel back on. Flywheel has a few new holes in it after balancing! Pistons got a bit sanded off the base. I can't remember what their weight but it's etched on the side along with the cylider number.
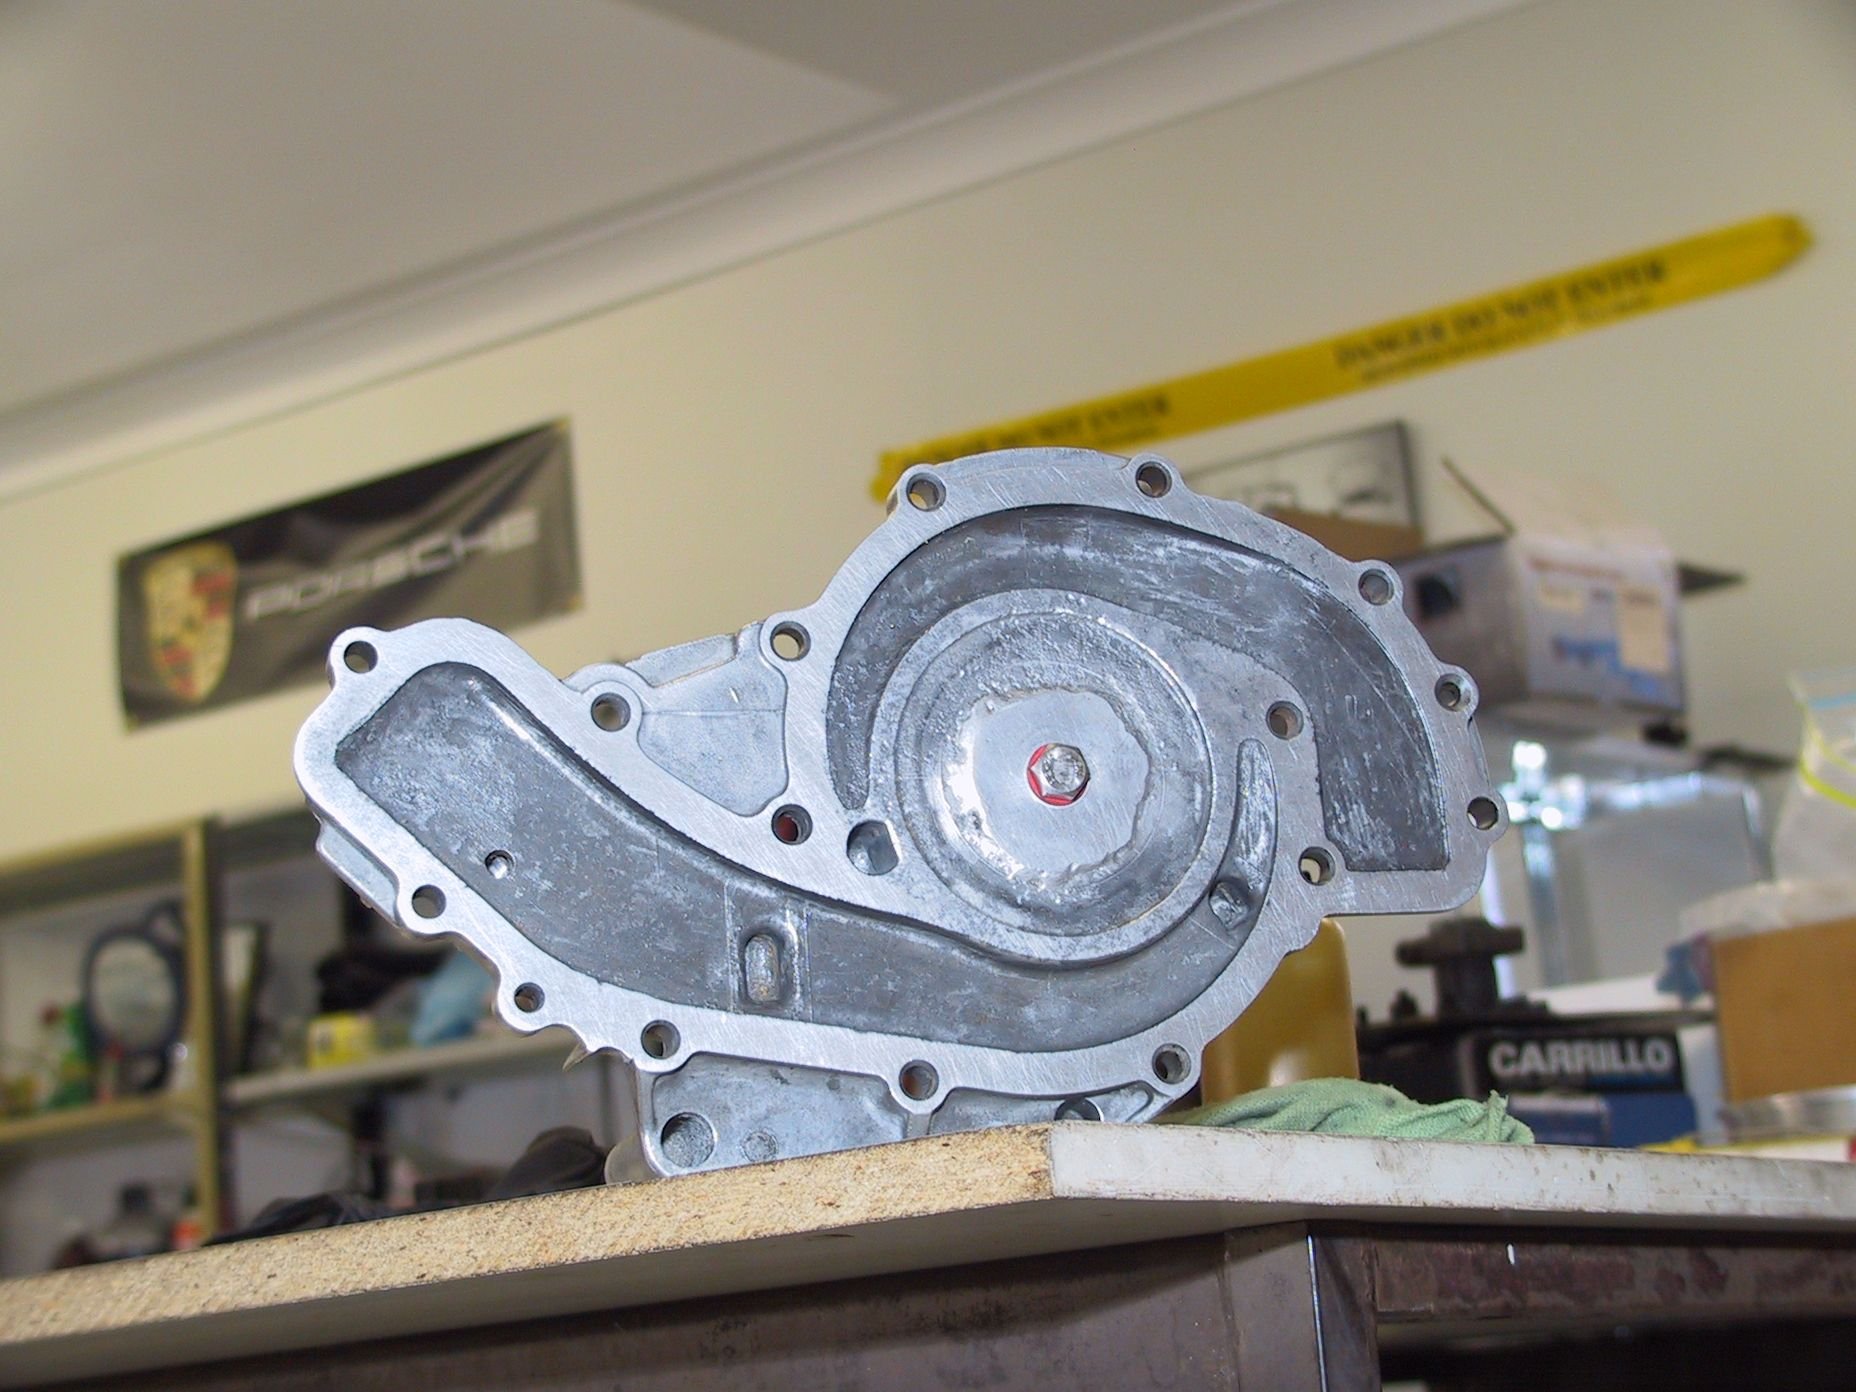
Blanked water pump back on.
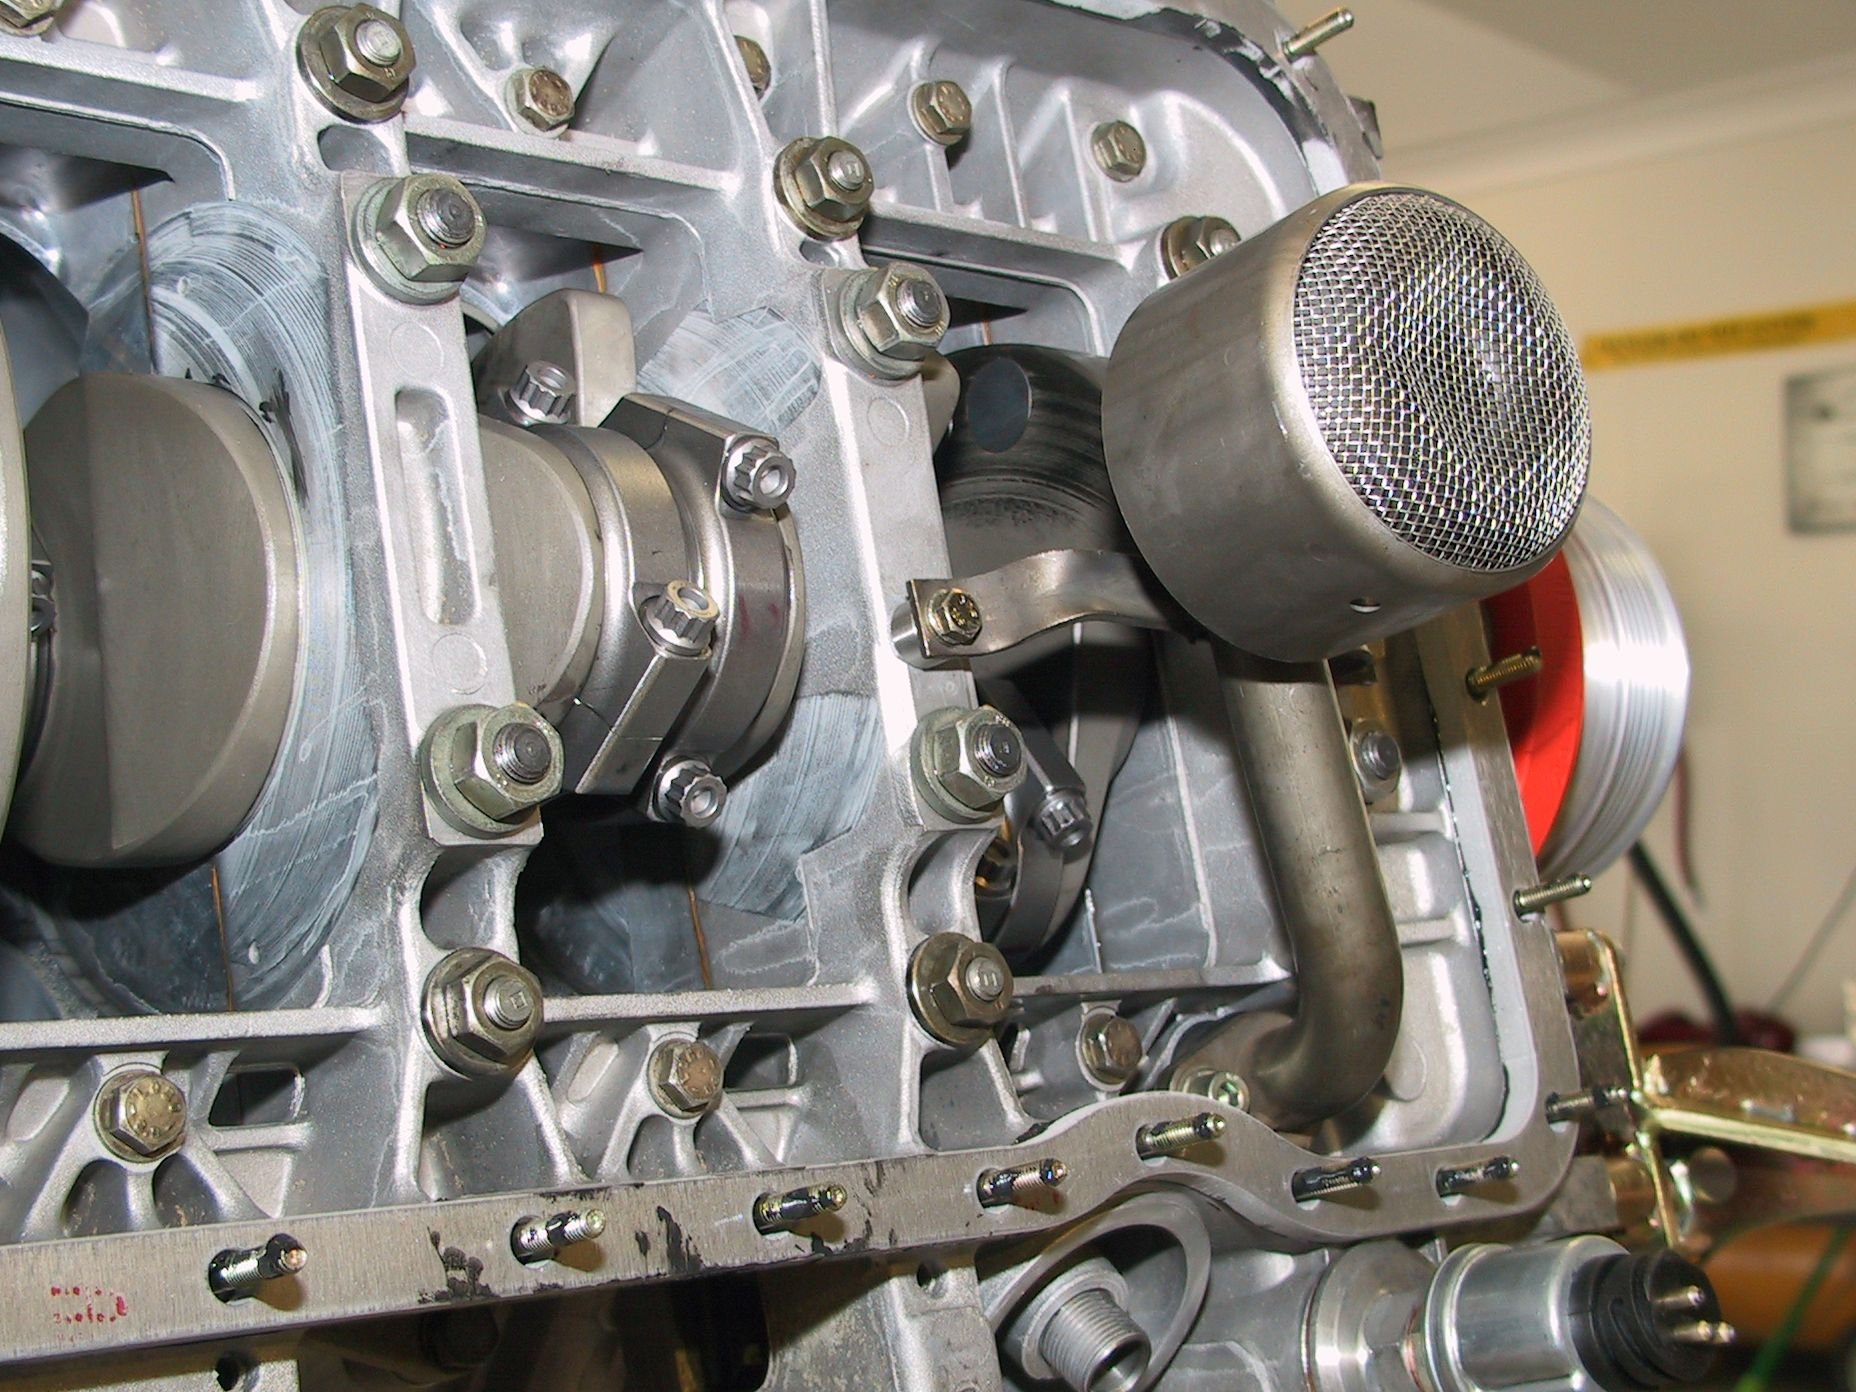
Finally have my 6.5 litre engine assembled to sump on status, 3 years after I got most of the components from Greg Brown.
Fairly straight forward, though a little nerve wracking at times.
#1 piston/rod assembly went in smoothly but I noticed the small end was not central in the piston. Odd??
#5 piston/rod assembly slipped down the bore but the big ends were 'uncomfortable'. So I stopped for the day to reflect.
I thought I must have read the WSM incorrectly but it clearly says in 2 sections that the big ends must have the wide shoulder, with the larger chamfer face the crank and the narrow shoulder with the smaller chamfer face the other rod.
Checking the Carrillo rods and the large shoulder has the small chamfer and vice versa. So fit 2 piston rod assemblies without rings with the rods reversed and behold the beauty.
Now pull the #1 & #5 pistons out again, remove all the rods and reassemble.
The moral here is that the Porsche WSM is not necessarily the bible when using aftermarket components!
All 8 cylinders are moving as they should and it's a great feeling. All bores full 8 rods the wrong way around The beautiful Precision Motorwerks spacer kit in place
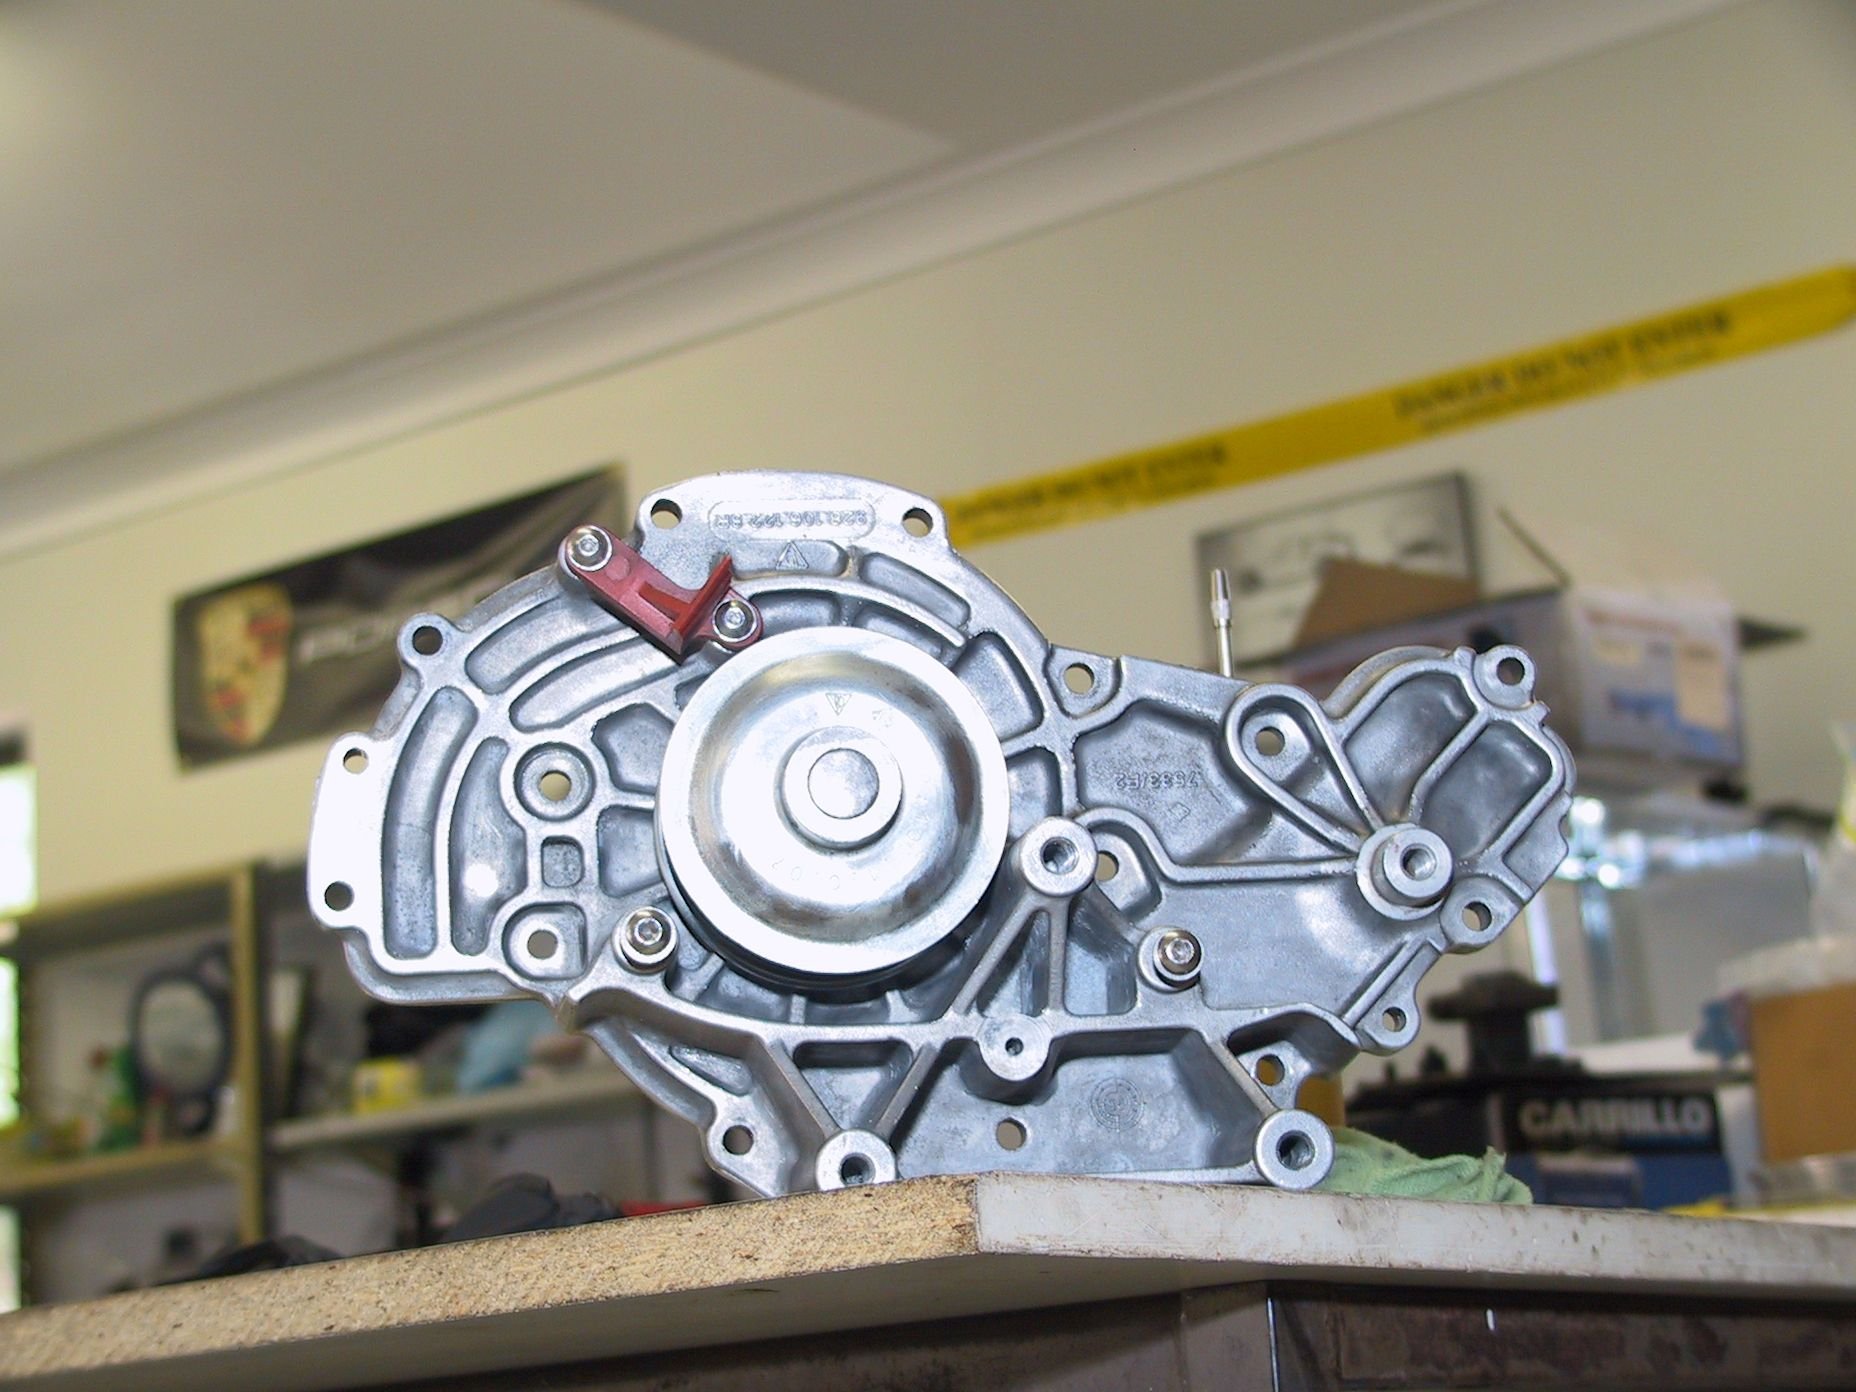
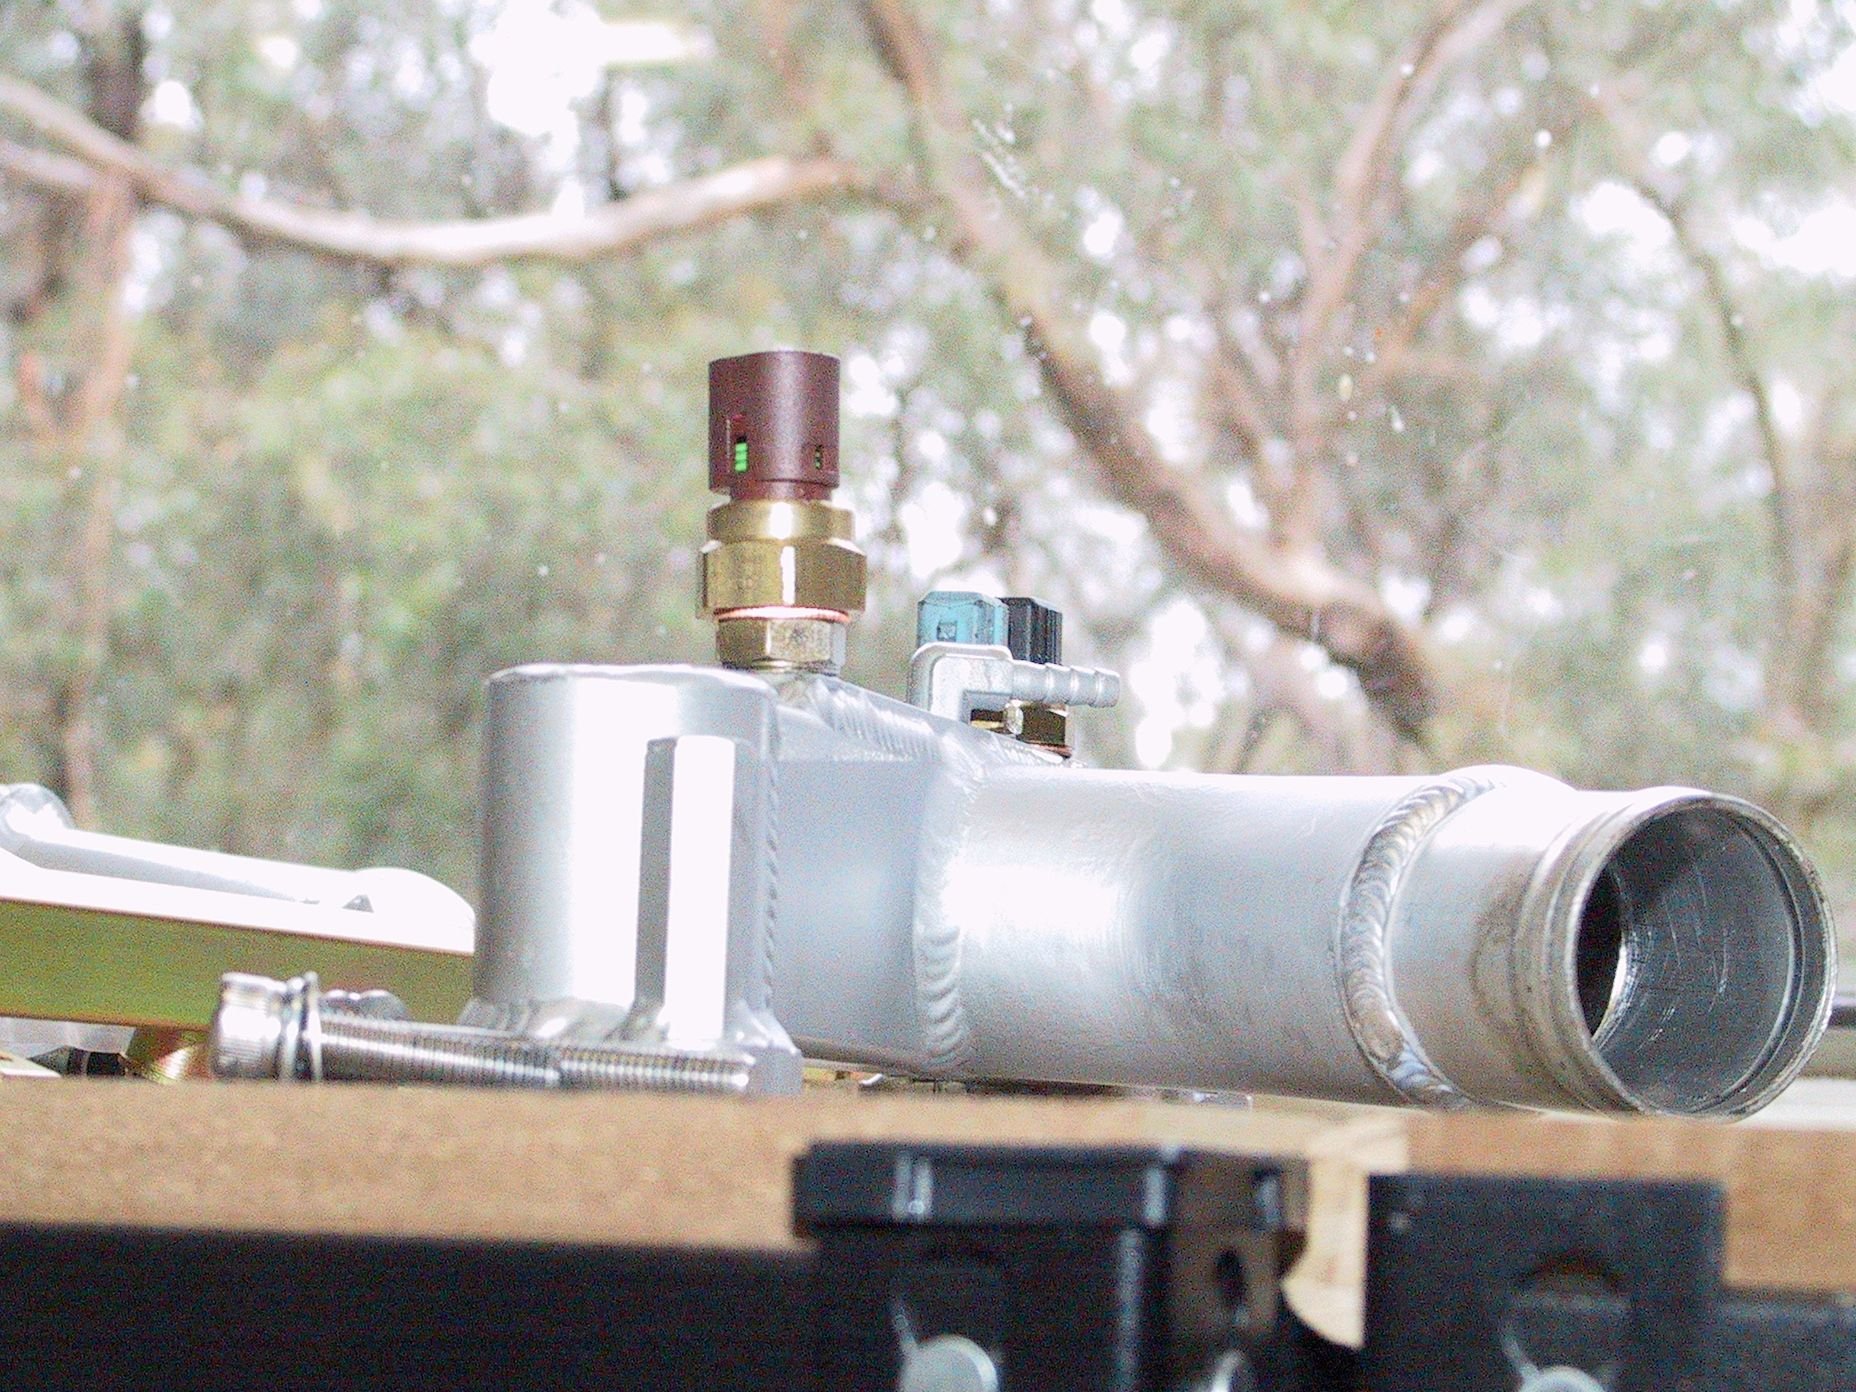
I made my new water bridge with a 50mm outlet the same as the stock one, silly.
Then I realized that Porsche, in their wisdom, have a 45mm radiator inlet, so you need a stepped hose to connect the to.
So I rolled a bead on some 45mm tube and had my trusty welder glue it to my 50mm outlet. Now [if it had to] it will work with either.
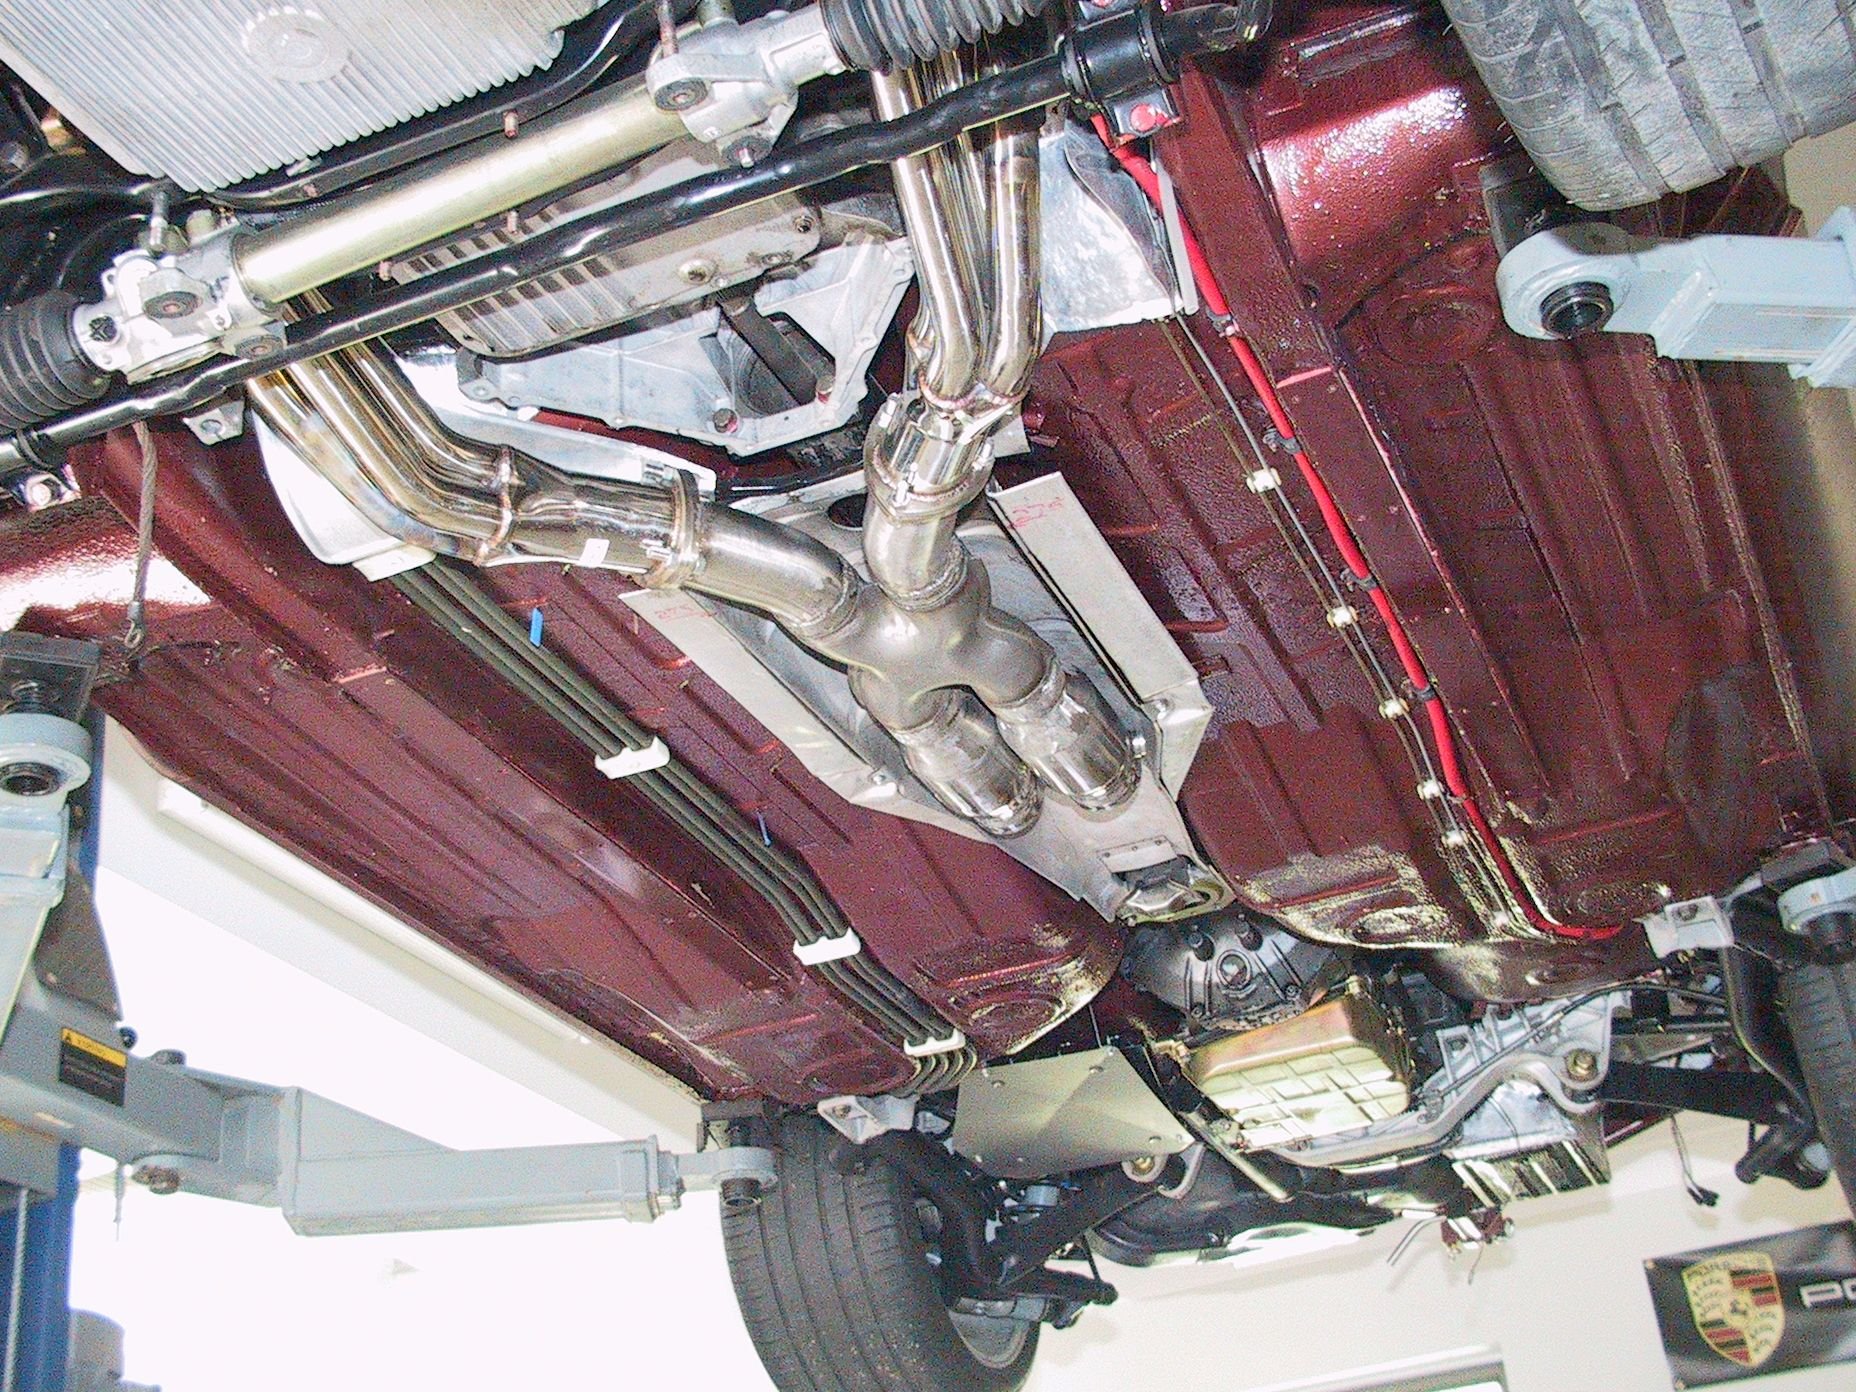
A bit more progress with my exhaust. It has changed dramatically from my first thoughts. Mostly because I got a set of cheap stainless steel headers.
As previously posted, it took a lot of work to get them to match my '86 2 bolt heads, with confidence that they actually lined up with the head's ports.
I still have the issue of RHD to complete. Currently they are attached to a dummy engine in the chassis with #4 pipe cut off and the collector end bent in about 40mm, so it clears the steering U-J.
Based on a friend with an exhaust shop who tried various exhaust setups on his S/C '89 model, running each one around to his favorite dyno shop, I settled on 2x3" [same size as the collector outlet] through an X, then 2 x new high flow cats. It got complicated then as I've put my trans cooler where the RH muffler went, planning 2 x 2.5" down the LH side like the 4.7 S models.
Now space is tight back there with an auto trans, so in a moment of madness I decided to convert my original LH muffler to 2x3" in and 1x4" out. This is the combination my friend got significantly more hp from, though he wasn't 'brave' enough to do a muffler convert!
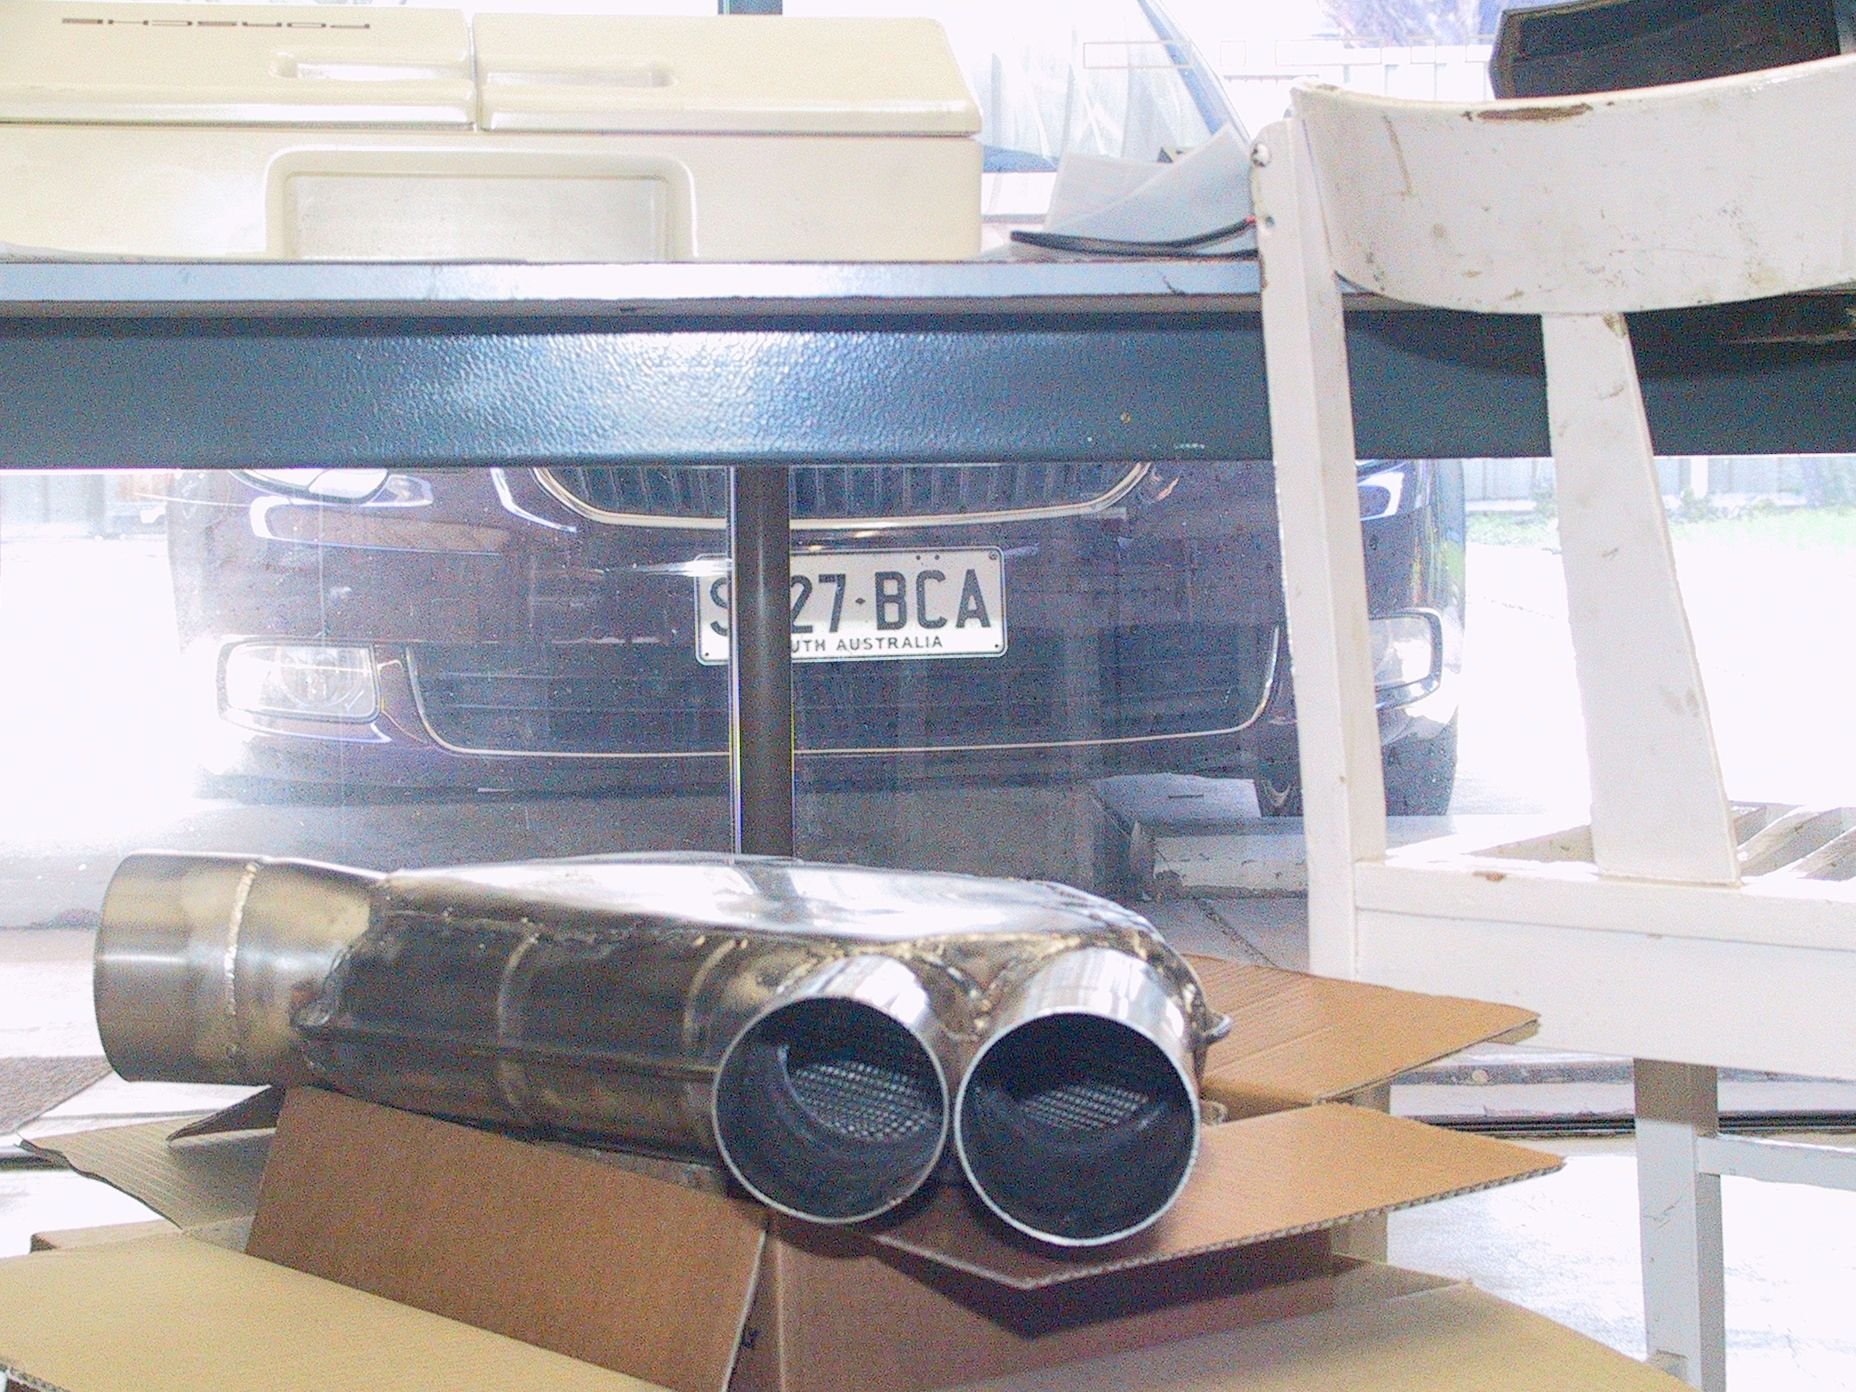
4" fits under the rear cross member better than 2x3" for my taste, as I want to keep it all tucked up as much as I can.
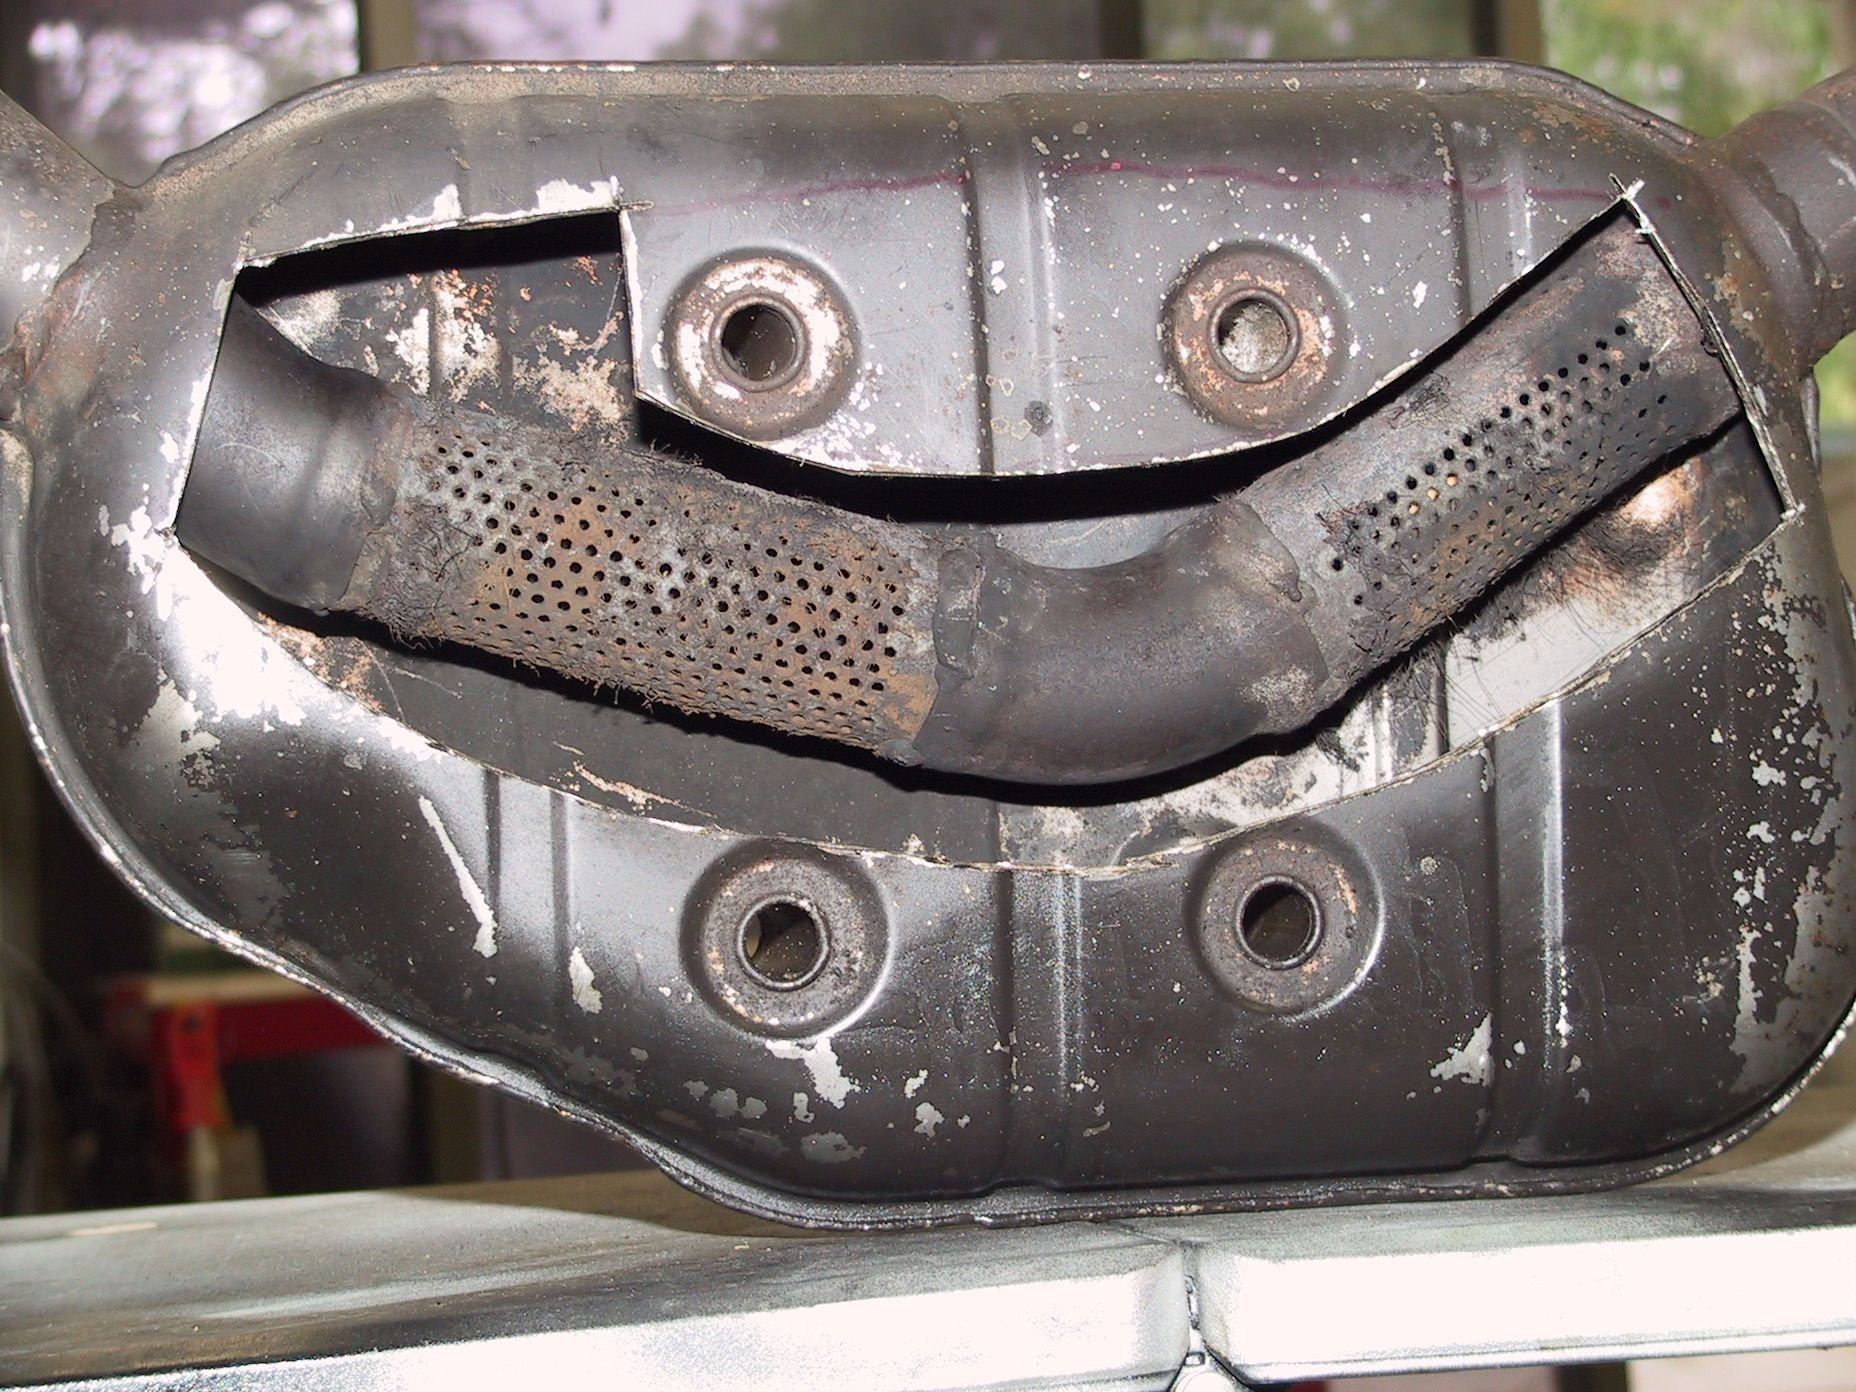
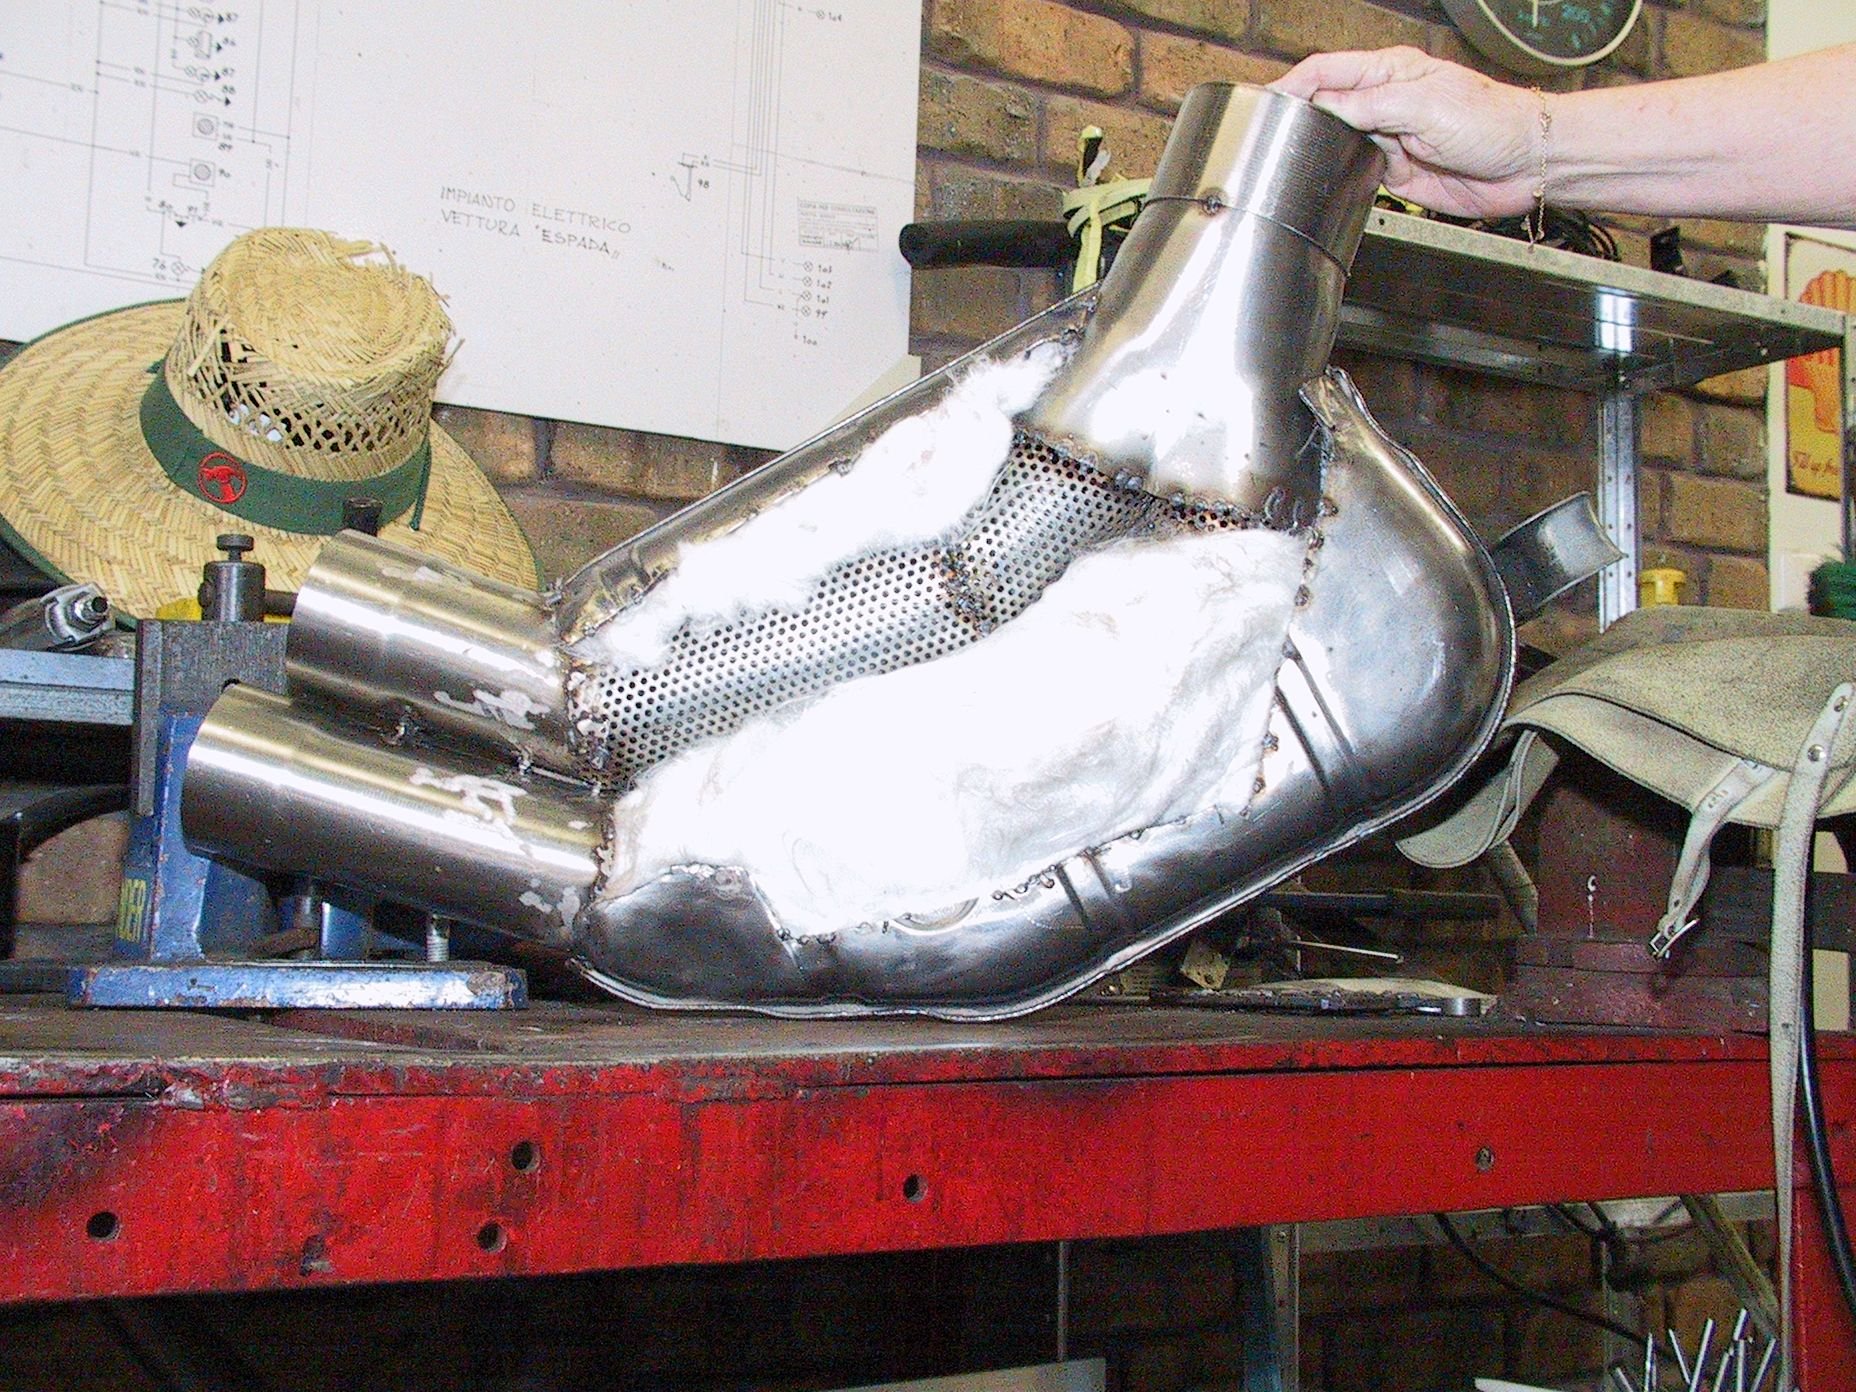
I have a 4" in/out muffler for the rear and $" to 2x3" merge collector to give me 2 3" outlets from the rear. Inside the stock box Wild cat getting stuffed front half finished top finished bottom, almost stock looking!
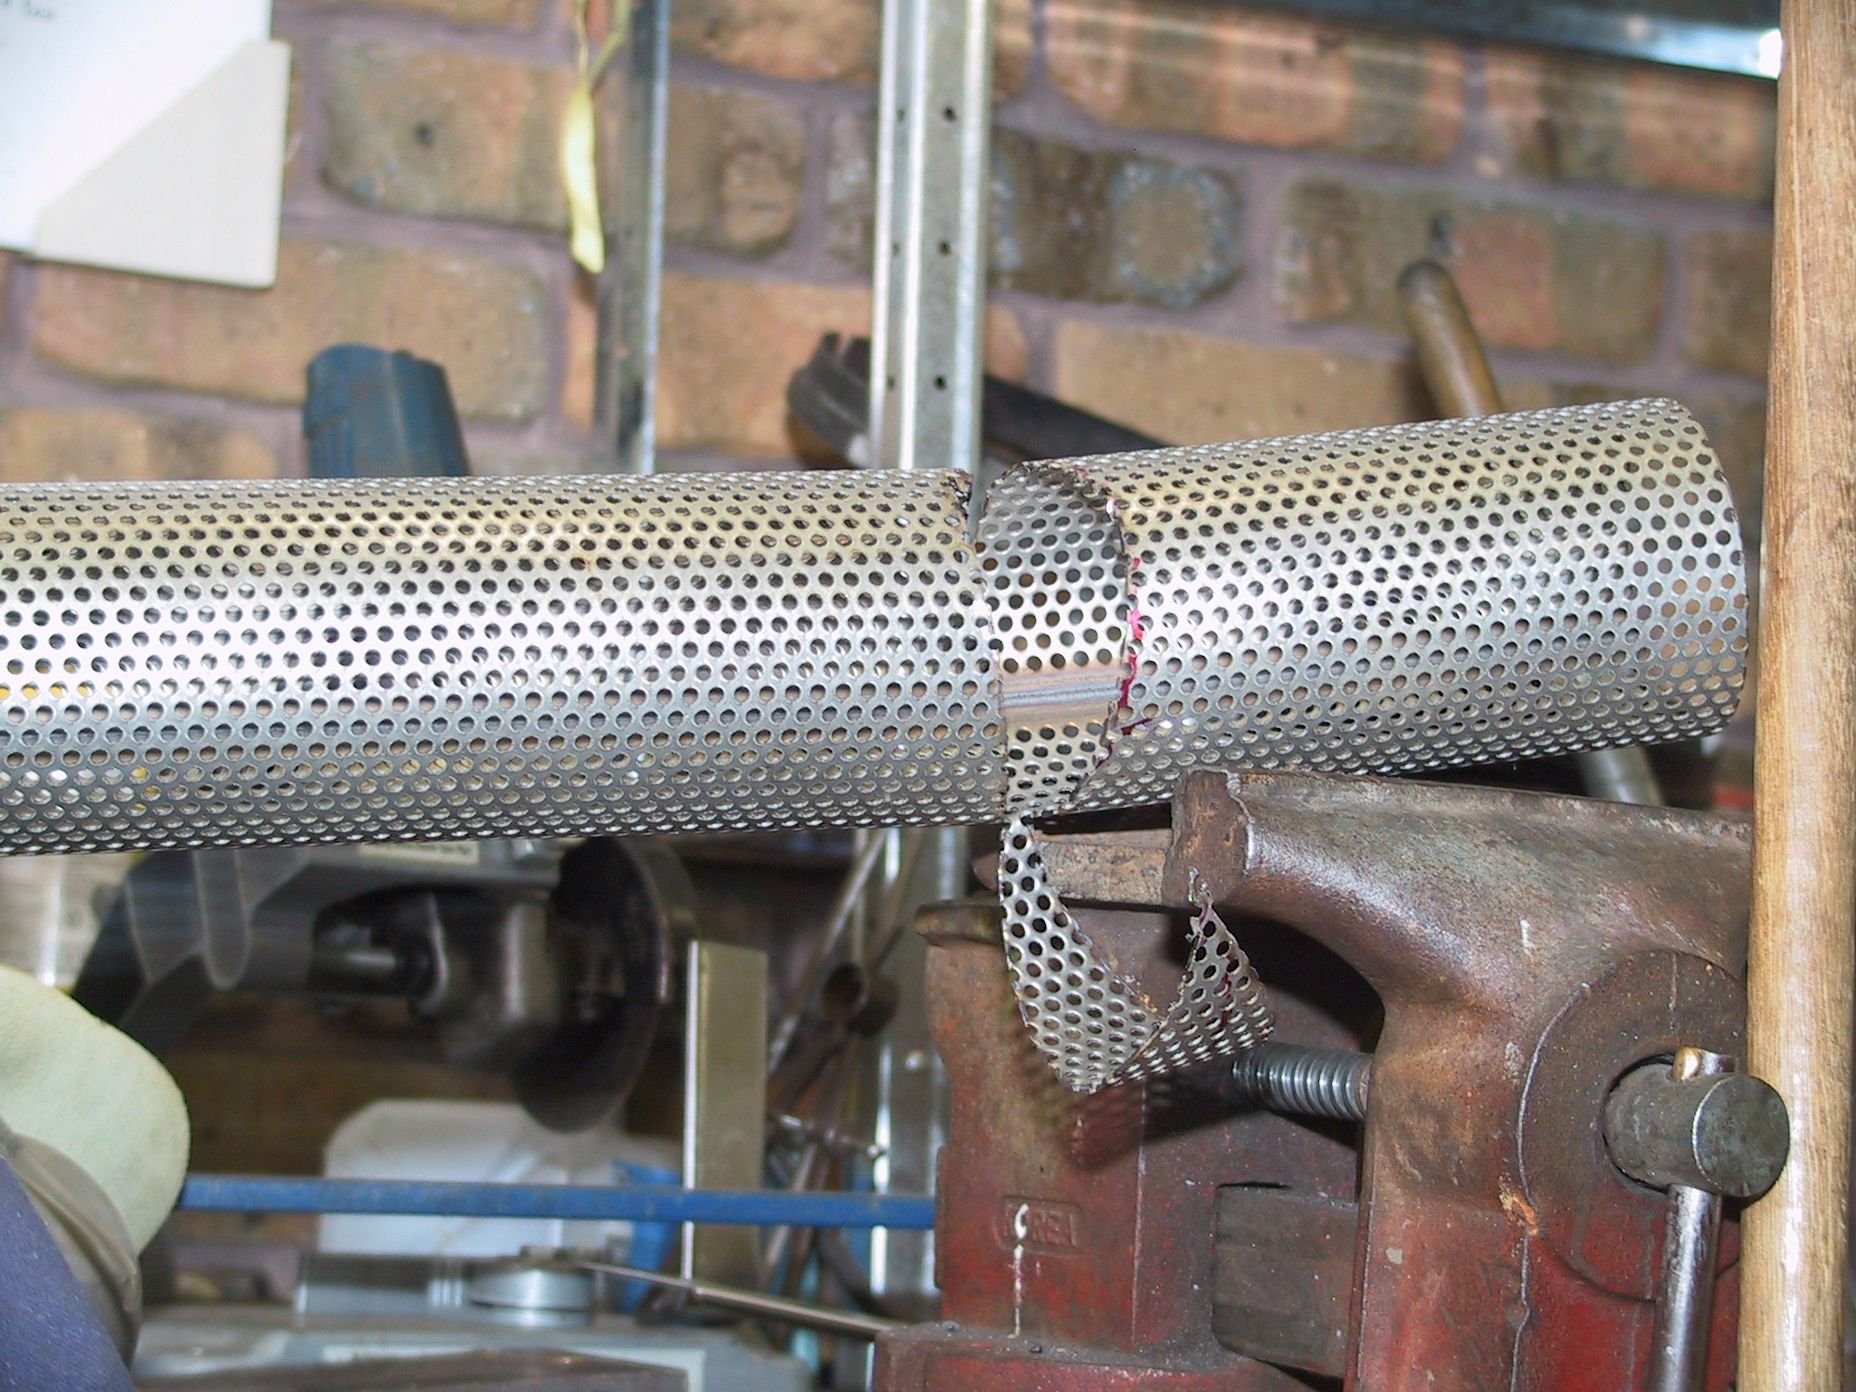
Opening up the original muffler found a bit of black dust and some cracked internal pipe. This is a 117K km car and all the packing had gone. The case is made of 3 layers of about 0.9mm ss sheet, with some sort of sound deadening between the outer 2 sheets. The 4 vertical support tubes had to go, so the remaining holes in the bottom were capped, the top ones replaced with the new lid.
I had to keep a 90 degree angle between the inlet and outlet and keep them right on the corners so the box wold still fit up under the rear floor.
The new ss perforated pipe is a real bitch to work with, like trying to put a wild cat into a Xmas stocking and even worse to weld to solid pipe. It's in though and it won't come out.

 01-17-2020, 10:17 PM

 I've used that a bunch of (too many) times. Sounds like you have it under control though. Nice build.