When you click on links to various merchants on this site and make a purchase, this can result in this site earning a commission. Affiliate programs and affiliations include, but are not limited to, the eBay Partner Network.
Here is what I am taking away from all your ideas and advice:
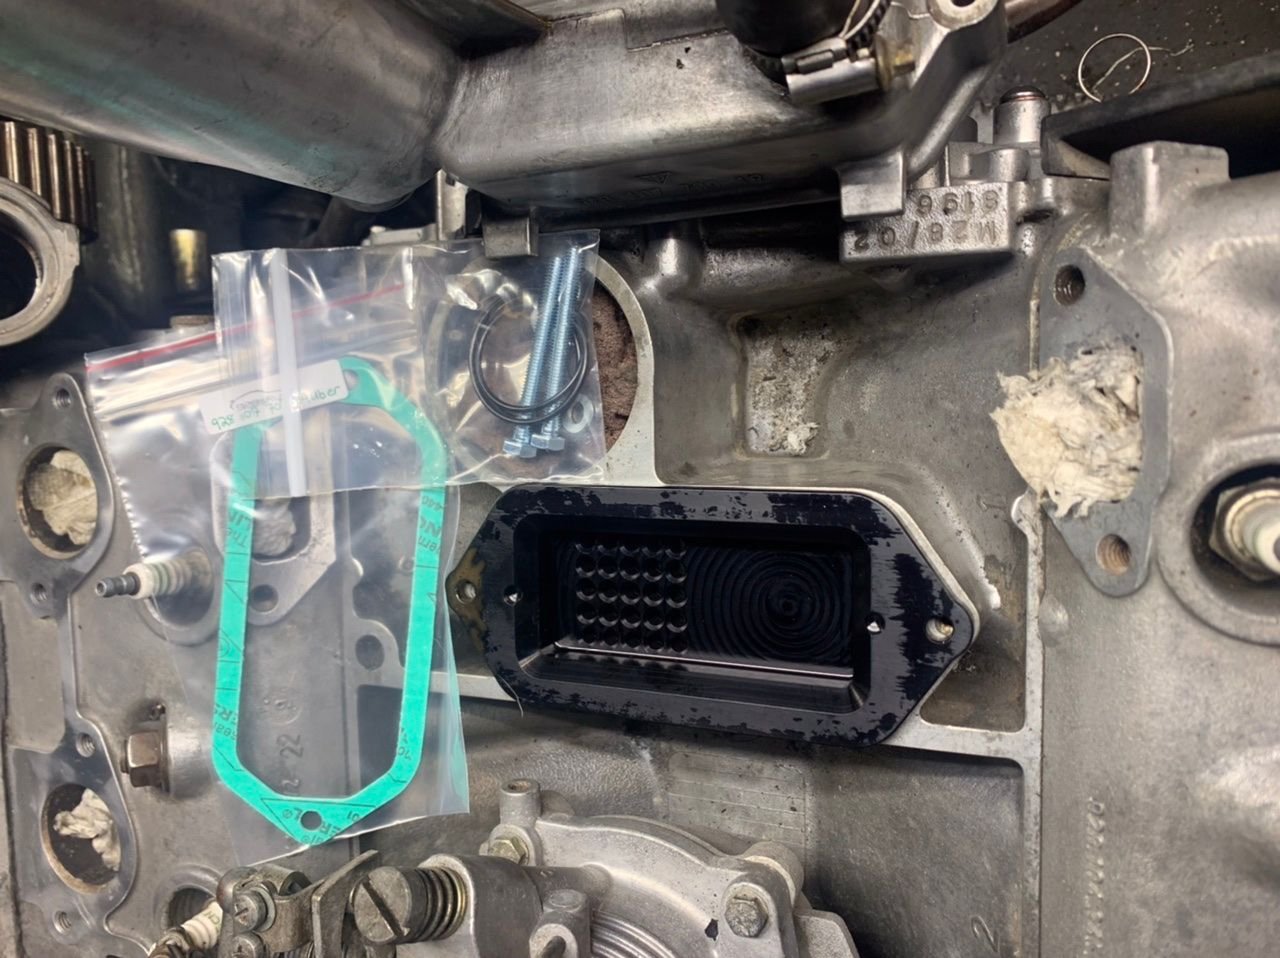
-leave the thick gasket out
-dry fit the filler neck/baffle sandwich with the water bridge and front intake pipes
-get longer bolts if necessary, trim as required
-ensure the bottom of the metal filler neck is flat
-use Drei Bond to seal all the pieces
-install Greg Brown's baffle BEFORE I install the water bridge
-install the Devek baffle and filler neck AFTER I install the water bridge
I do have the check valve, it is still in the old hose removed from the filler neck. I will transfer it to the new hose to go back on the filler neck.
928NOOBIE: You are correct, these baffles are an attempt to arrest the oil from being whipped up into the oil filler neck and picked up by the intake hoses, then onto the outer plenums. The S3's are especially bad about that.
KenRudd: Thanks for that video, it clarified things!
FredR: Greg did not intend for his baffle to be used specifically with the Devek baffle. He intended it to be used with the factory baffle on 85-86, and S4. I think I will be able to get away with using it. I hope.
I must disagree with you, S3's are abysmal at oil control. The outer plenums usually have pools of oil in them.
Greg: This Devek baffle has been on the Red Witch for almost 20 years. I initially mistook it for a factory baffle. Until I found a photo of the factory baffle. Not it.
OK, to be blunt, are you saying I should NOT use the Devek baffle and I should search for the NLA 85-86 factory baffle?
Whichever one I use, should I drill a hole in it to match the drain hole opposite the rectangular opening on the top of your baffle?
Thanks again for all your help guys!
Use the Devek piece. Looks functionally the same as the stock baffle. No need to drill the hole, for this application.
Make sure the filler neck is flat....and the gasket surface is bare metal.
You shouldn't need longer bolts.
Because Drei Bond cures relatively quickly, you are going to want to have everything sitting there and ready to assemble...including the water crossover.
I tried to use the paper gaskets in between the bits, using some Honda Bond with longer bolts. That disaster resulted in an oil leak so bad my valley filled up with oil and it ran down the back on to my X-pipe. Pulled the intake and cleaned it all up, replaced the oil soaked knock sensors and used Reinzosil between all the bits and it's all nice and clean now. I didn't have the version of Dreibond that Greg uses until a couple weeks ago and am going to use that going forward.
I tried to use the paper gaskets in between the bits, using some Honda Bond with longer bolts. That disaster resulted in an oil leak so bad my valley filled up with oil and it ran down the back on to my X-pipe. Pulled the intake and cleaned it all up, replaced the oil soaked knock sensors and used Reinzosil between all the bits and it's all nice and clean now. I didn't have the version of Dreibond that Greg uses until a couple weeks ago and am going to use that going forward.
Well crap that's what I did. Did you also apply Honda Bond on all of the mating surfaces? Why do you think this leaked so bad?
In my case I have Dreibond on the mating surfaces. I have yet to reinstall the intake so I could remove the paper gaskets, clean it all up and and re-peanut butter everything again.
skpyle.....yes...our girls love their oil don't they
Oh yeah. There was a pool of oil in each of the outer plenums when I took them off.
Originally Posted by GregBBRD
Use the Devek piece. Looks functionally the same as the stock baffle. No need to drill the hole, for this application.
Make sure the filler neck is flat....and the gasket surface is bare metal.
You shouldn't need longer bolts.
Because Drei Bond cures relatively quickly, you are going to want to have everything sitting there and ready to assemble...including the water crossover.
Will do on all. Thanks for the heads-up on the quick drying time of Drei Bond. I will have everything on hand and do it all in one shebang.
Thanks!
Originally Posted by SeanR
I tried to use the paper gaskets in between the bits, using some Honda Bond with longer bolts. That disaster resulted in an oil leak so bad my valley filled up with oil and it ran down the back on to my X-pipe. Pulled the intake and cleaned it all up, replaced the oil soaked knock sensors and used Reinzosil between all the bits and it's all nice and clean now. I didn't have the version of Dreibond that Greg uses until a couple weeks ago and am going to use that going forward.
Yikes! That had to be fun. I'm trying to get this right the first time so I don't have to go back in there again. But, I have said foolish things like that before in the past...
Originally Posted by GT6ixer
Well crap that's what I did. Did you also apply Honda Bond on all of the mating surfaces? Why do you think this leaked so bad?
In my case I have Dreibond on the mating surfaces. I have yet to reinstall the intake so I could remove the paper gaskets, clean it all up and and re-peanut butter everything again.
I would suggest you do just that. Go ahead and fix it now.
Good Luck!
Hey asking the same question in this thread...is there any way to get the Greg Brown baffle in without removing the water bridge? I don't want to mess with it..there's nothing wrong with it...no leaking, etc....would like to not have to remove...
Any ideas or ways it can be done are welcome, thanks
Matt, to my understanding, the water bridge has to come off. There are rare instances of people sneaking the oil filler neck out from under the water bridge. That is all well and good. But...the GB baffle is too deep to fit under the water bridge for installation.
It has to come off.
Thanks bud...Greg replied to me via PM that's pretty much the case. Roger & Co. already have the water bridge parts on the way...wish us (me and Cruella) luck!
79
Reading this post I have the HS baffle with longer bolts, rubber HS bottom gasket and factory gasket.
I cannot find a picture for its correct orientation any advice the instructions are not clear at least for me.
Install Orientation - It was designed to be installed with the windows/lower section to be oriented to the left (above the opening into the crankcase)..
maybe getting to old to read instructions but I�m confused!
Not to burst your bubble, but that "baffle" is useless. There's no oil/air separation offered there. The oil slinging off the crankshaft and mixing with air blows up into the "chimney" area and will blow right through those drilled holes.
A "baffle" needs to separate oil from the air and allow the air to keep moving,, while the oil is returned. (Even the stock baffle in an S3 and an S4 did some of that....the version you are trying to install does none of those things.)
Thread /post some 4 years ago Google neat oil neck baffle .


 03-23-2017, 11:43 AM