When you click on links to various merchants on this site and make a purchase, this can result in this site earning a commission. Affiliate programs and affiliations include, but are not limited to, the eBay Partner Network.
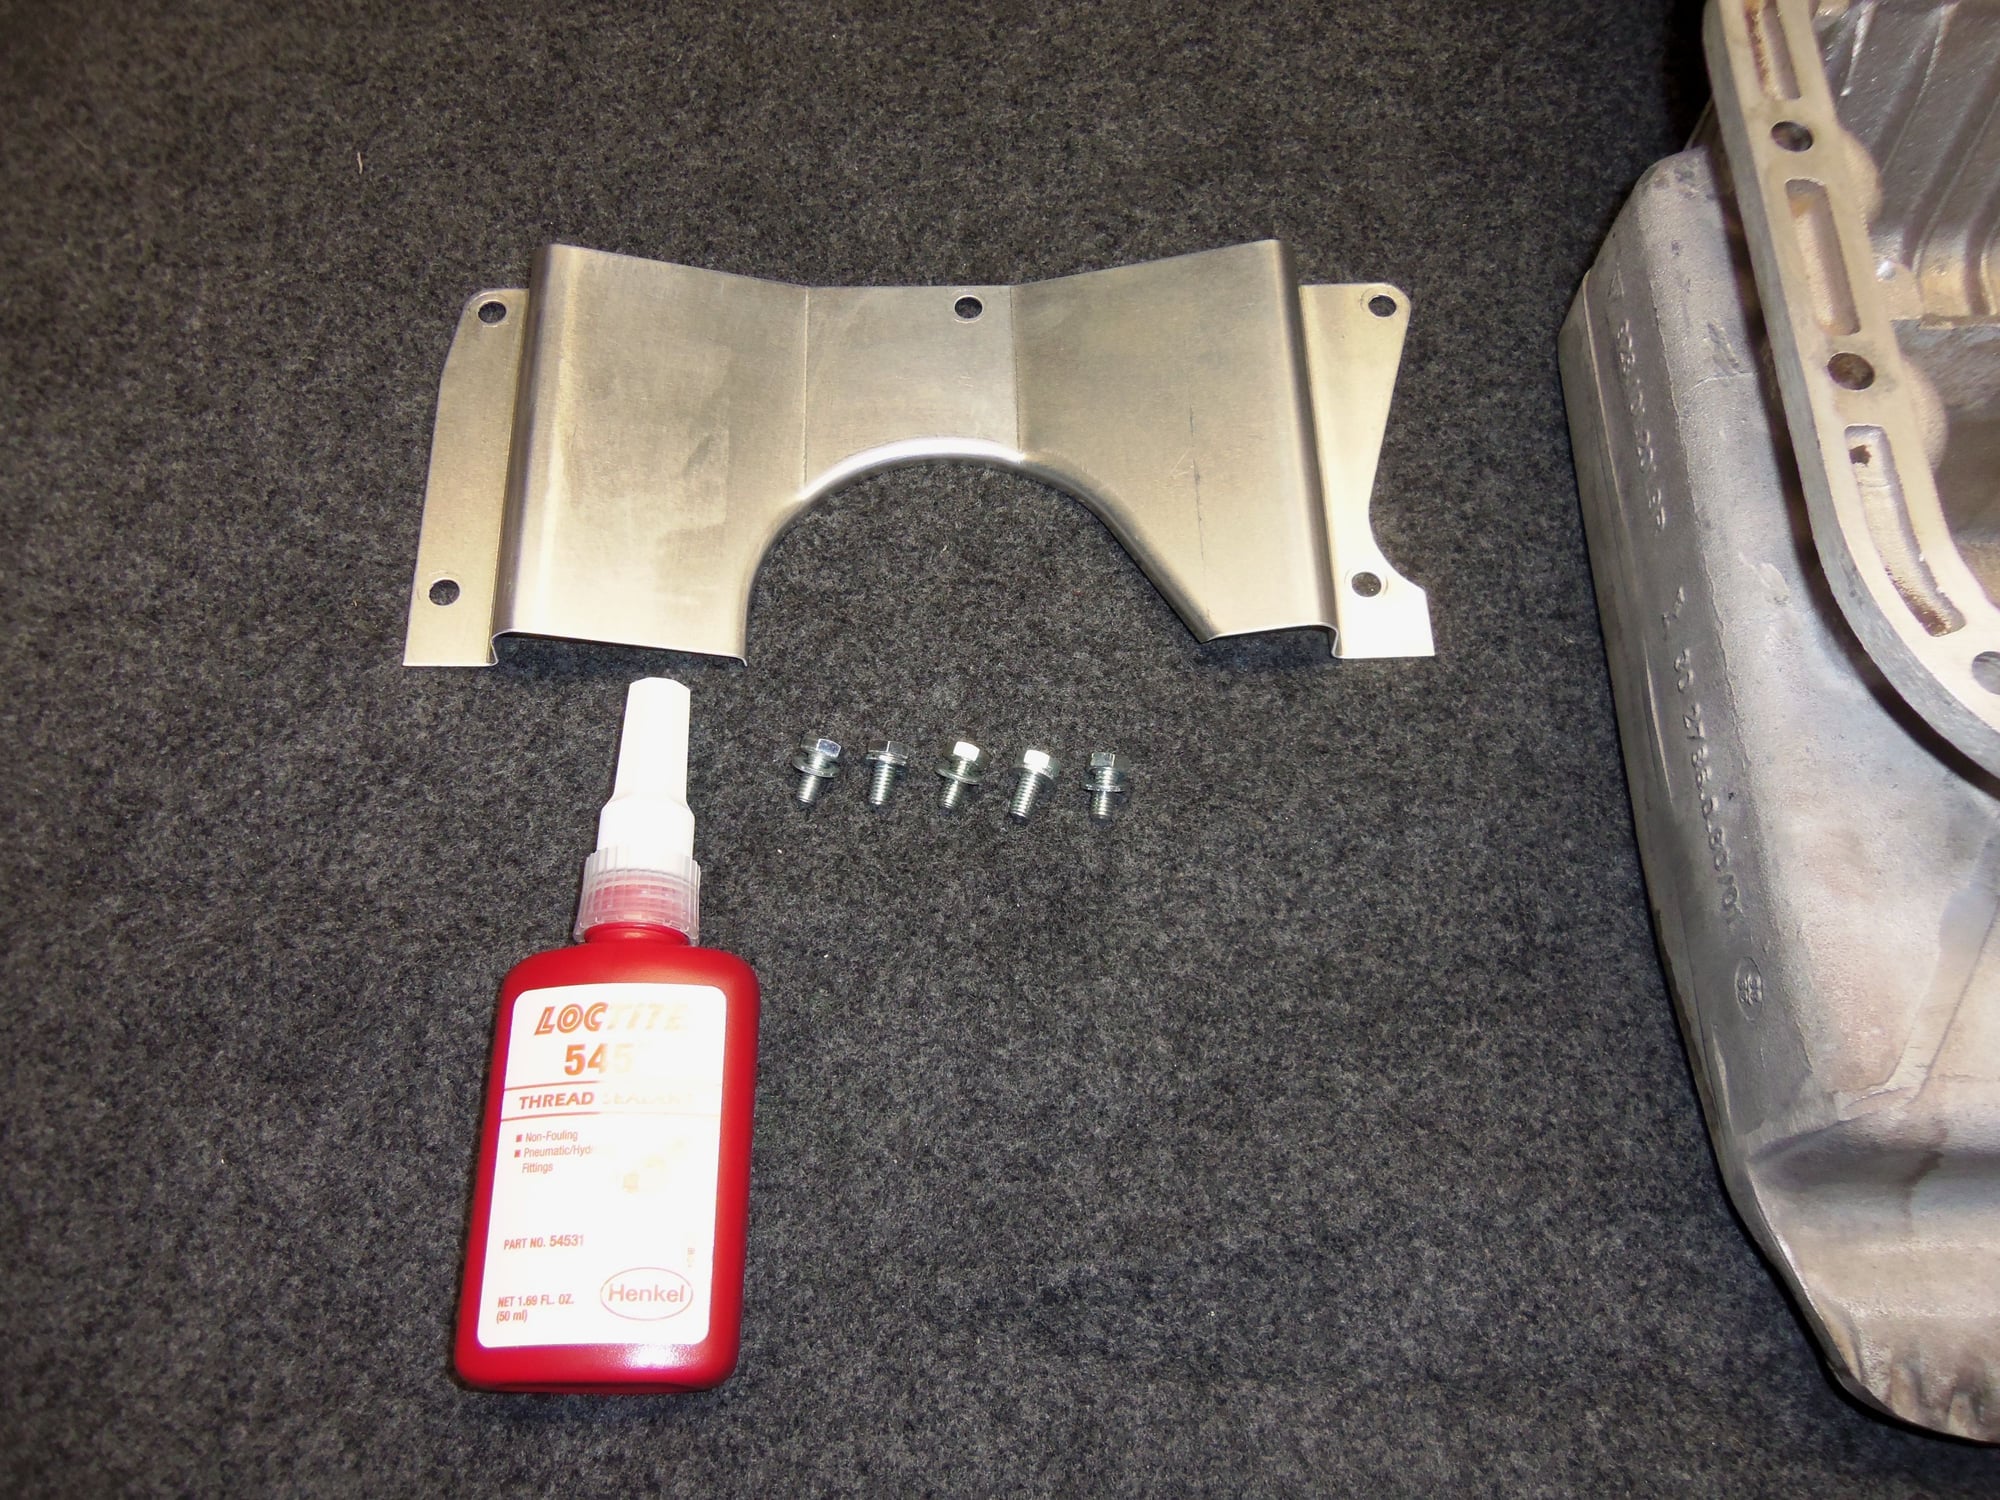
1. Oil pan stud kit.
2. GTS windage tray.
3. Deburr the cradle/crankcase return galleries down to the sump. If you decide to do this, clean up after with a can of varsol and a spray cleaner pneumatic gun. You'll spray varsol up into the bottom of the engine, with the engine correct side up so the varsol + scarf runs down on the ground. Messy.
If you know a machinist well, have him mic the journals and the bearings on the rods. Get your clearance numbers. If you've ever used plasti-gage that's another method to get a real reading of your bearing clearance. Follow label directions.
Thanks, docmirror!
1. Stud kit is onhand with the silicone gasket.
2. GTS windage tray, is that the same as the GTS oil pan baffle? If so, it is on order.
3. Will do on deburring. Thanks for the suggestion and guidance.
I have an excellent relationship with my machinist. However, he does not make house calls. I am familiar with Plastigage. I have picked up a package of green Plastigage and intend on checking the rod bearing clearance with it.
So...I might have found the source of the slight metallic sheen in the drained oil. If the preload has been pushing the crank against the thrust bearing for awhile, that could be where the particles are coming from.
I will inspect the thrust bearing as best as I can when I have the oil pan off.
I am still inspecting all sixteen rod bearing shells.
I got the oil pan off tonight. No horror stories in the pan.
I did have a slight mishap. I bought a VW rubber donut for the steering shaft rag joint. I laboriously loosened and removed the upward facing nuts on the joint. Then, as I loosened the first downward facing nut, it got easy quick. Because the stud broke away from the casting and was turning.
Back together it went. I will get another lower steering shaft in the future when I replace the rack.
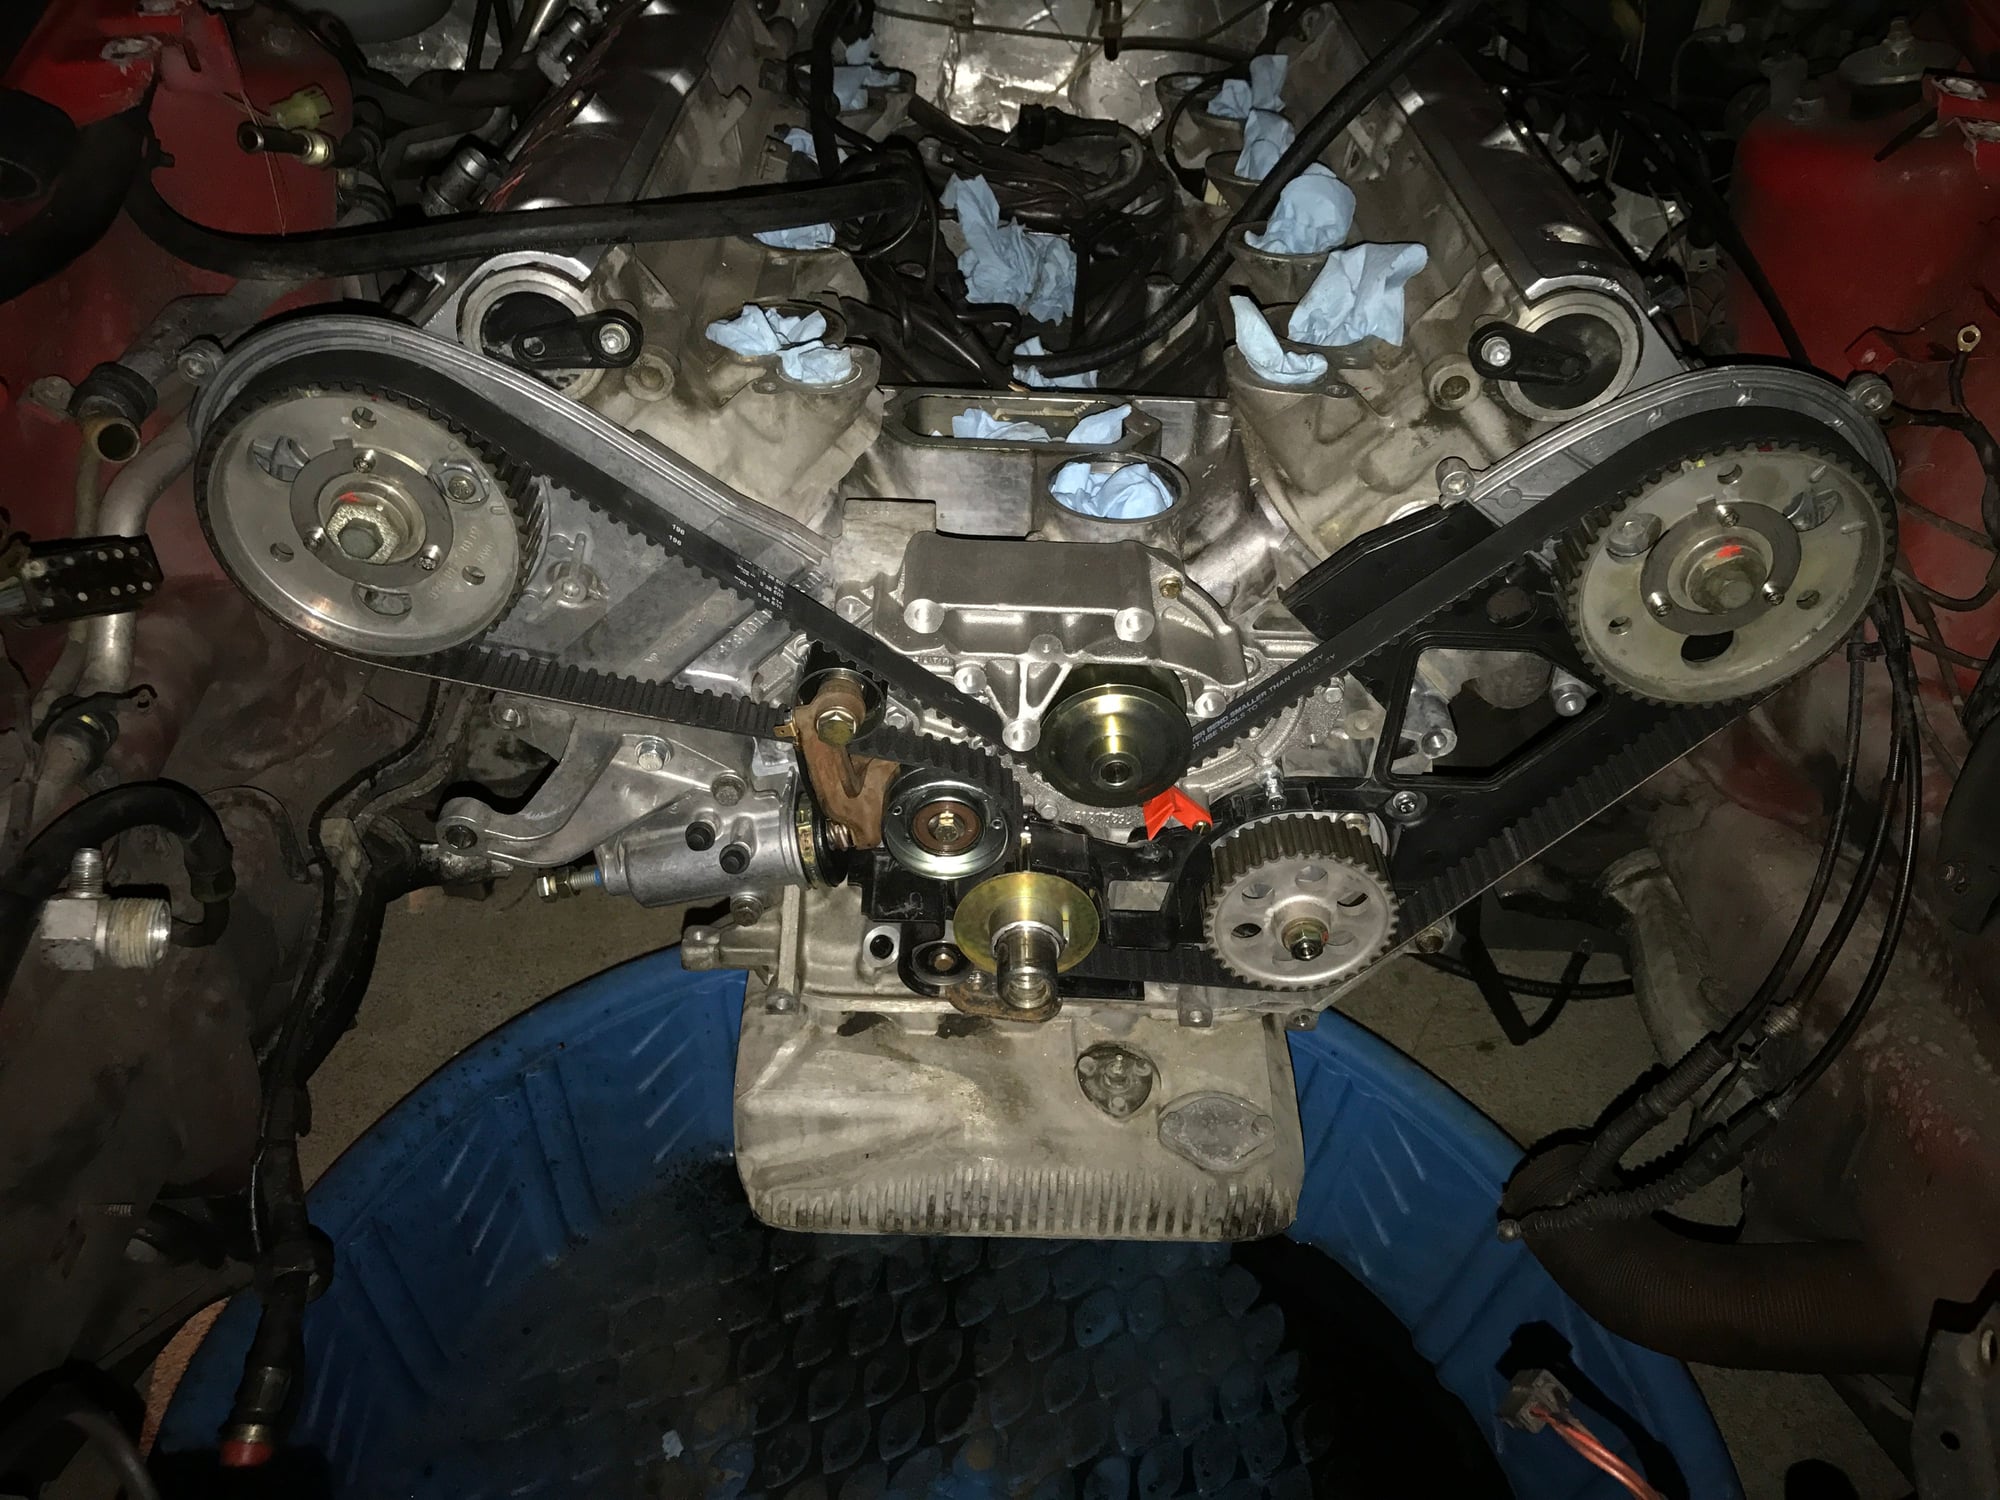
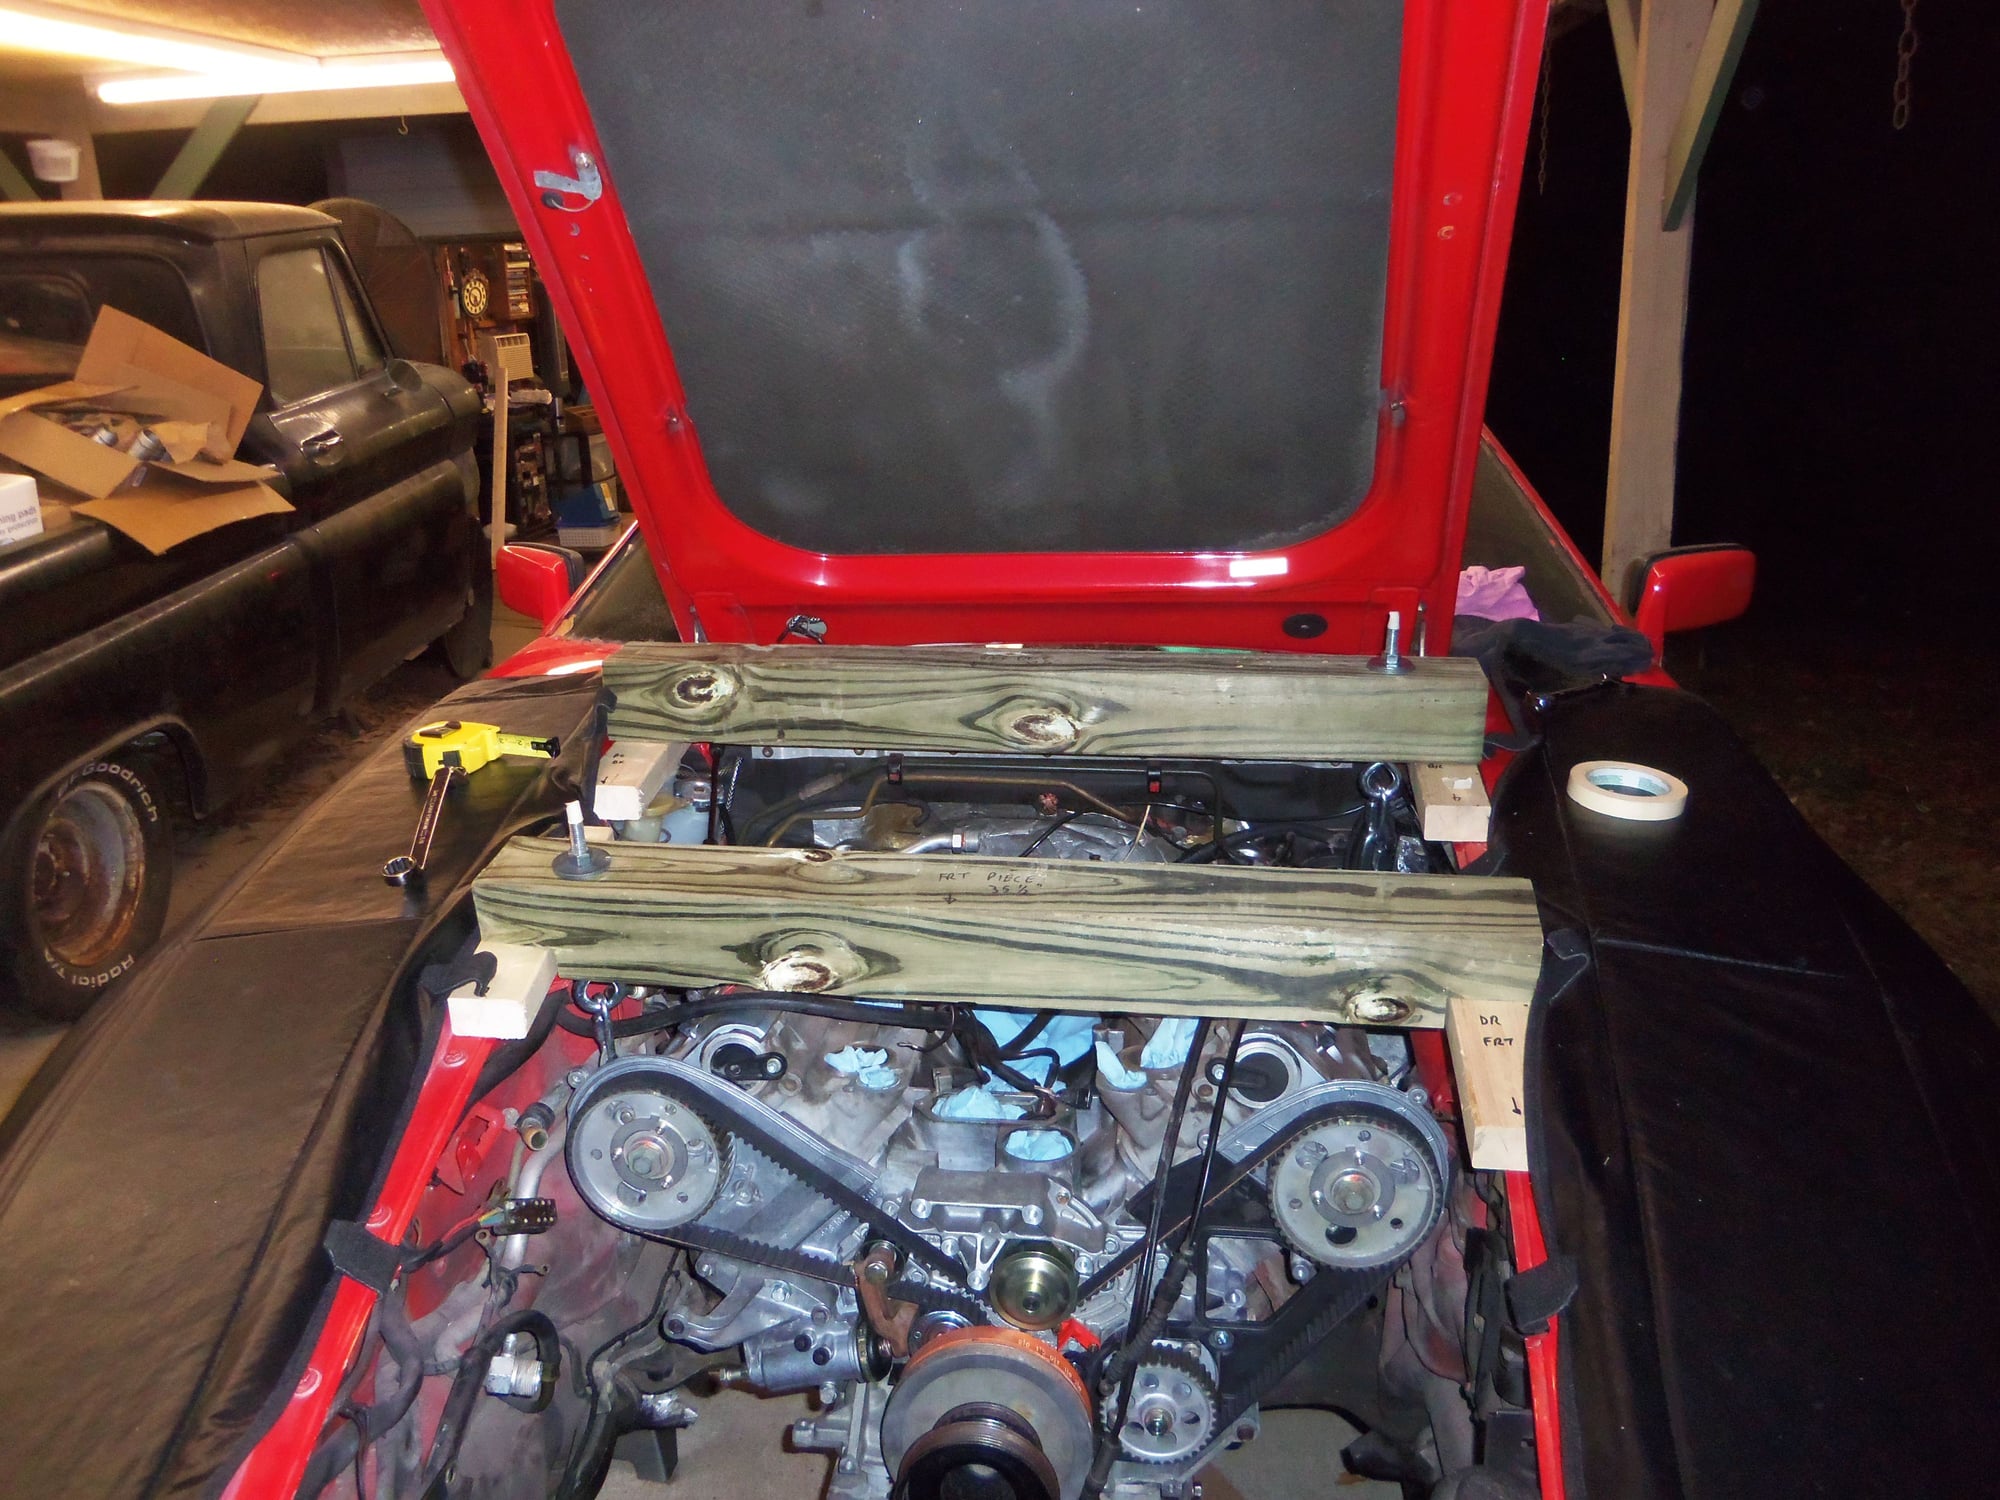
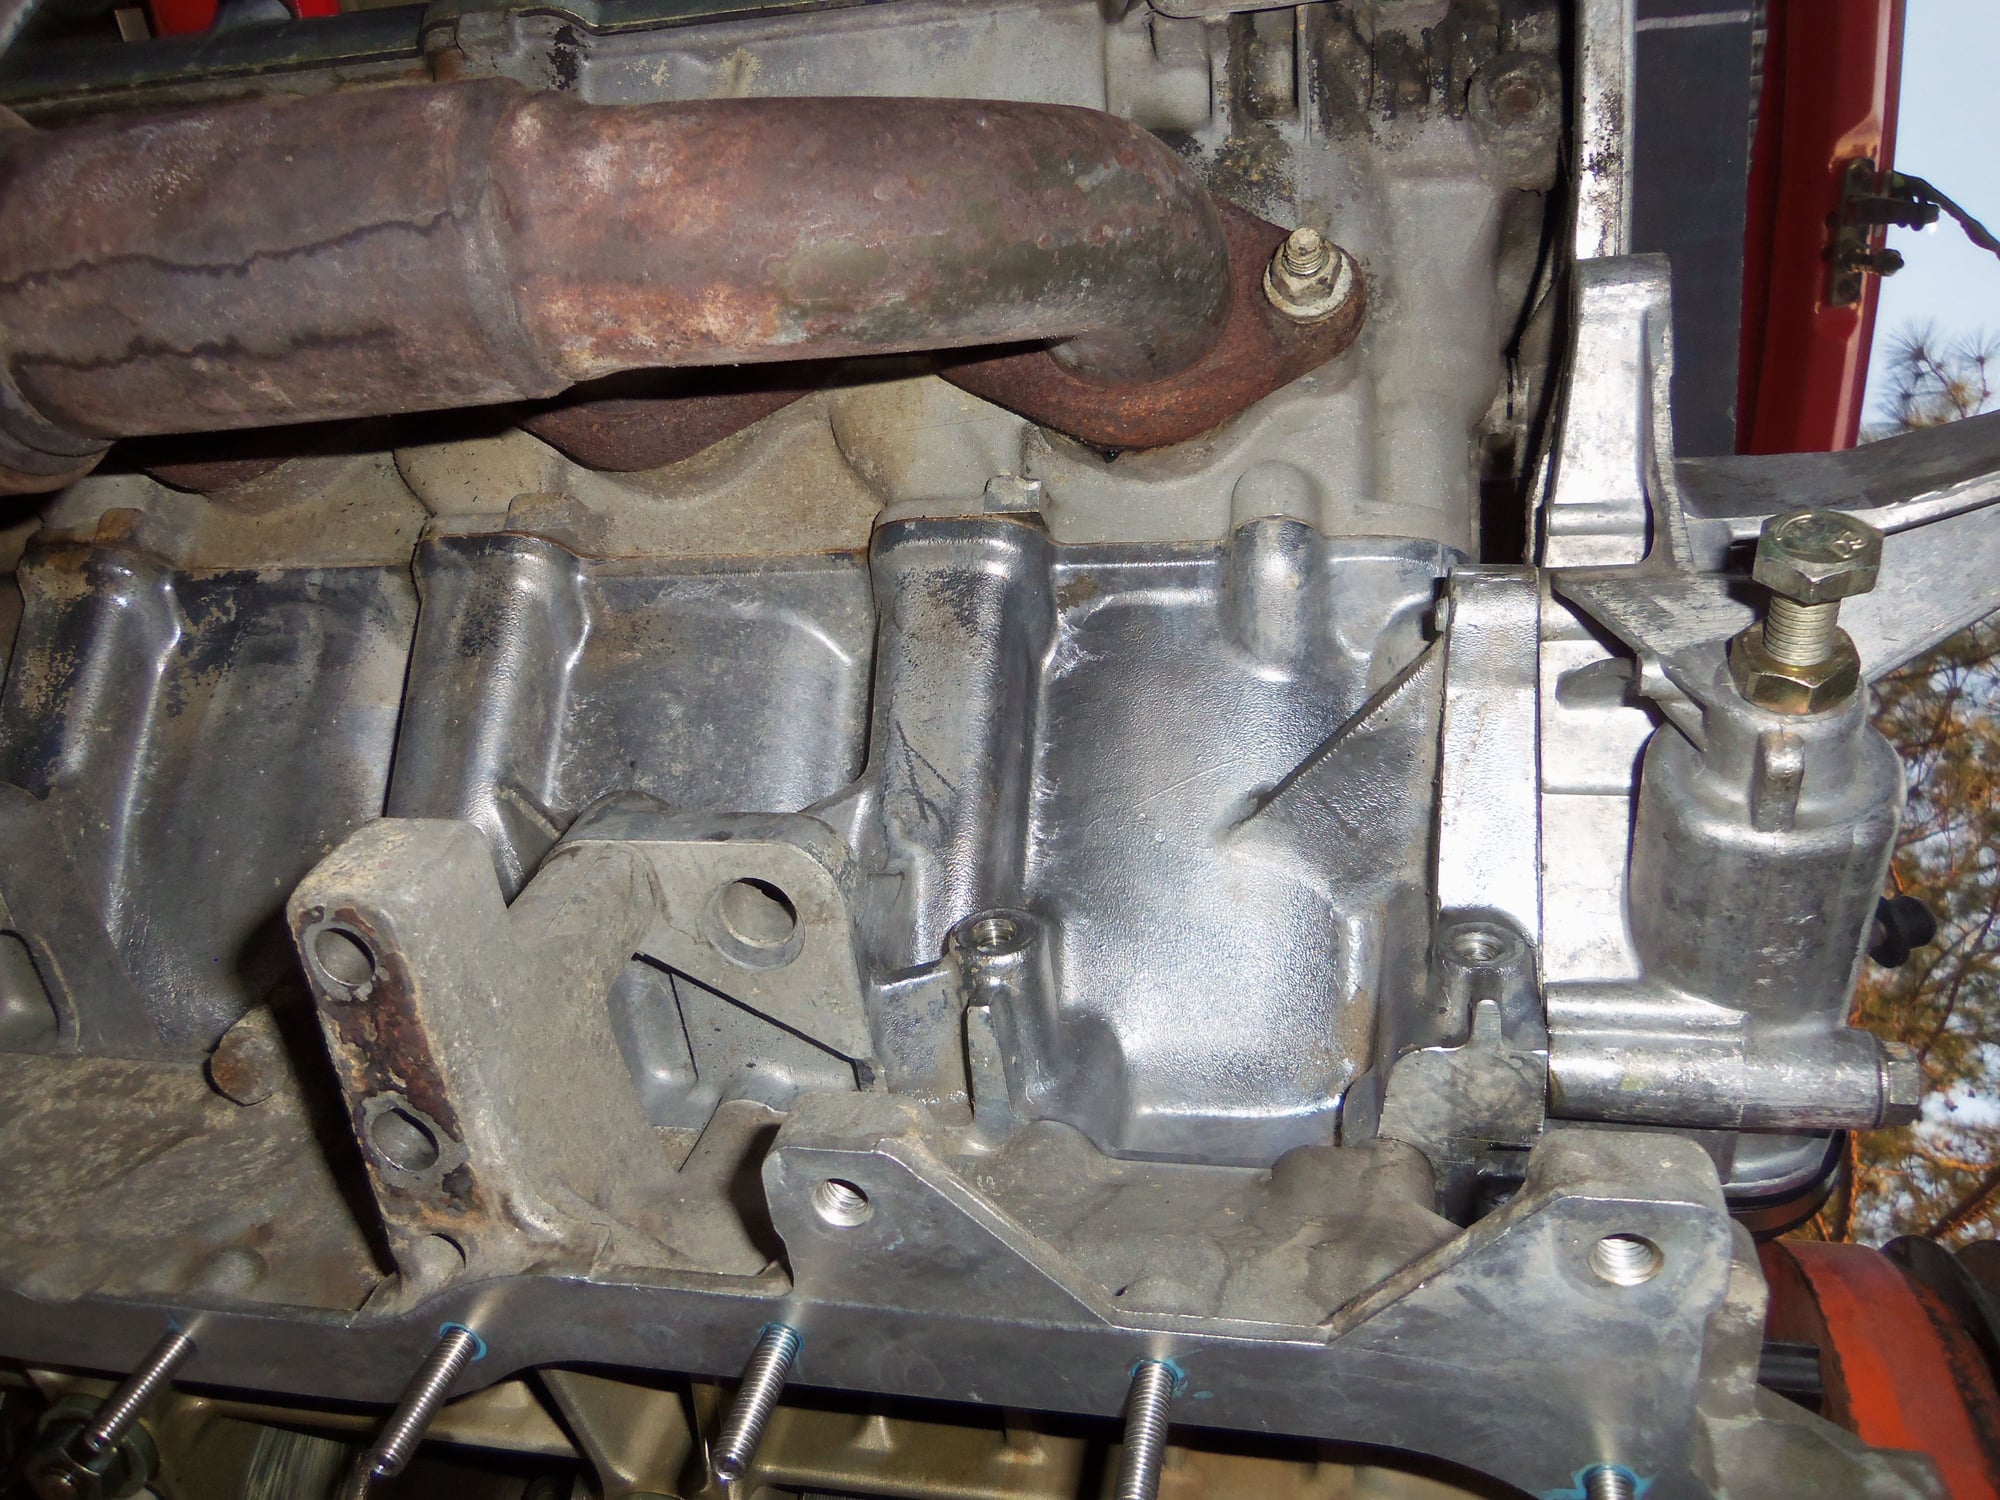
I followed Dwayne's awesome motor mount replacement guide to disassemble everything.
His instructions for building a lumber rig were just what I needed. By proxy, Thanks to AO for his idea.
Everything more or less came apart with little drama. Just had to do it.
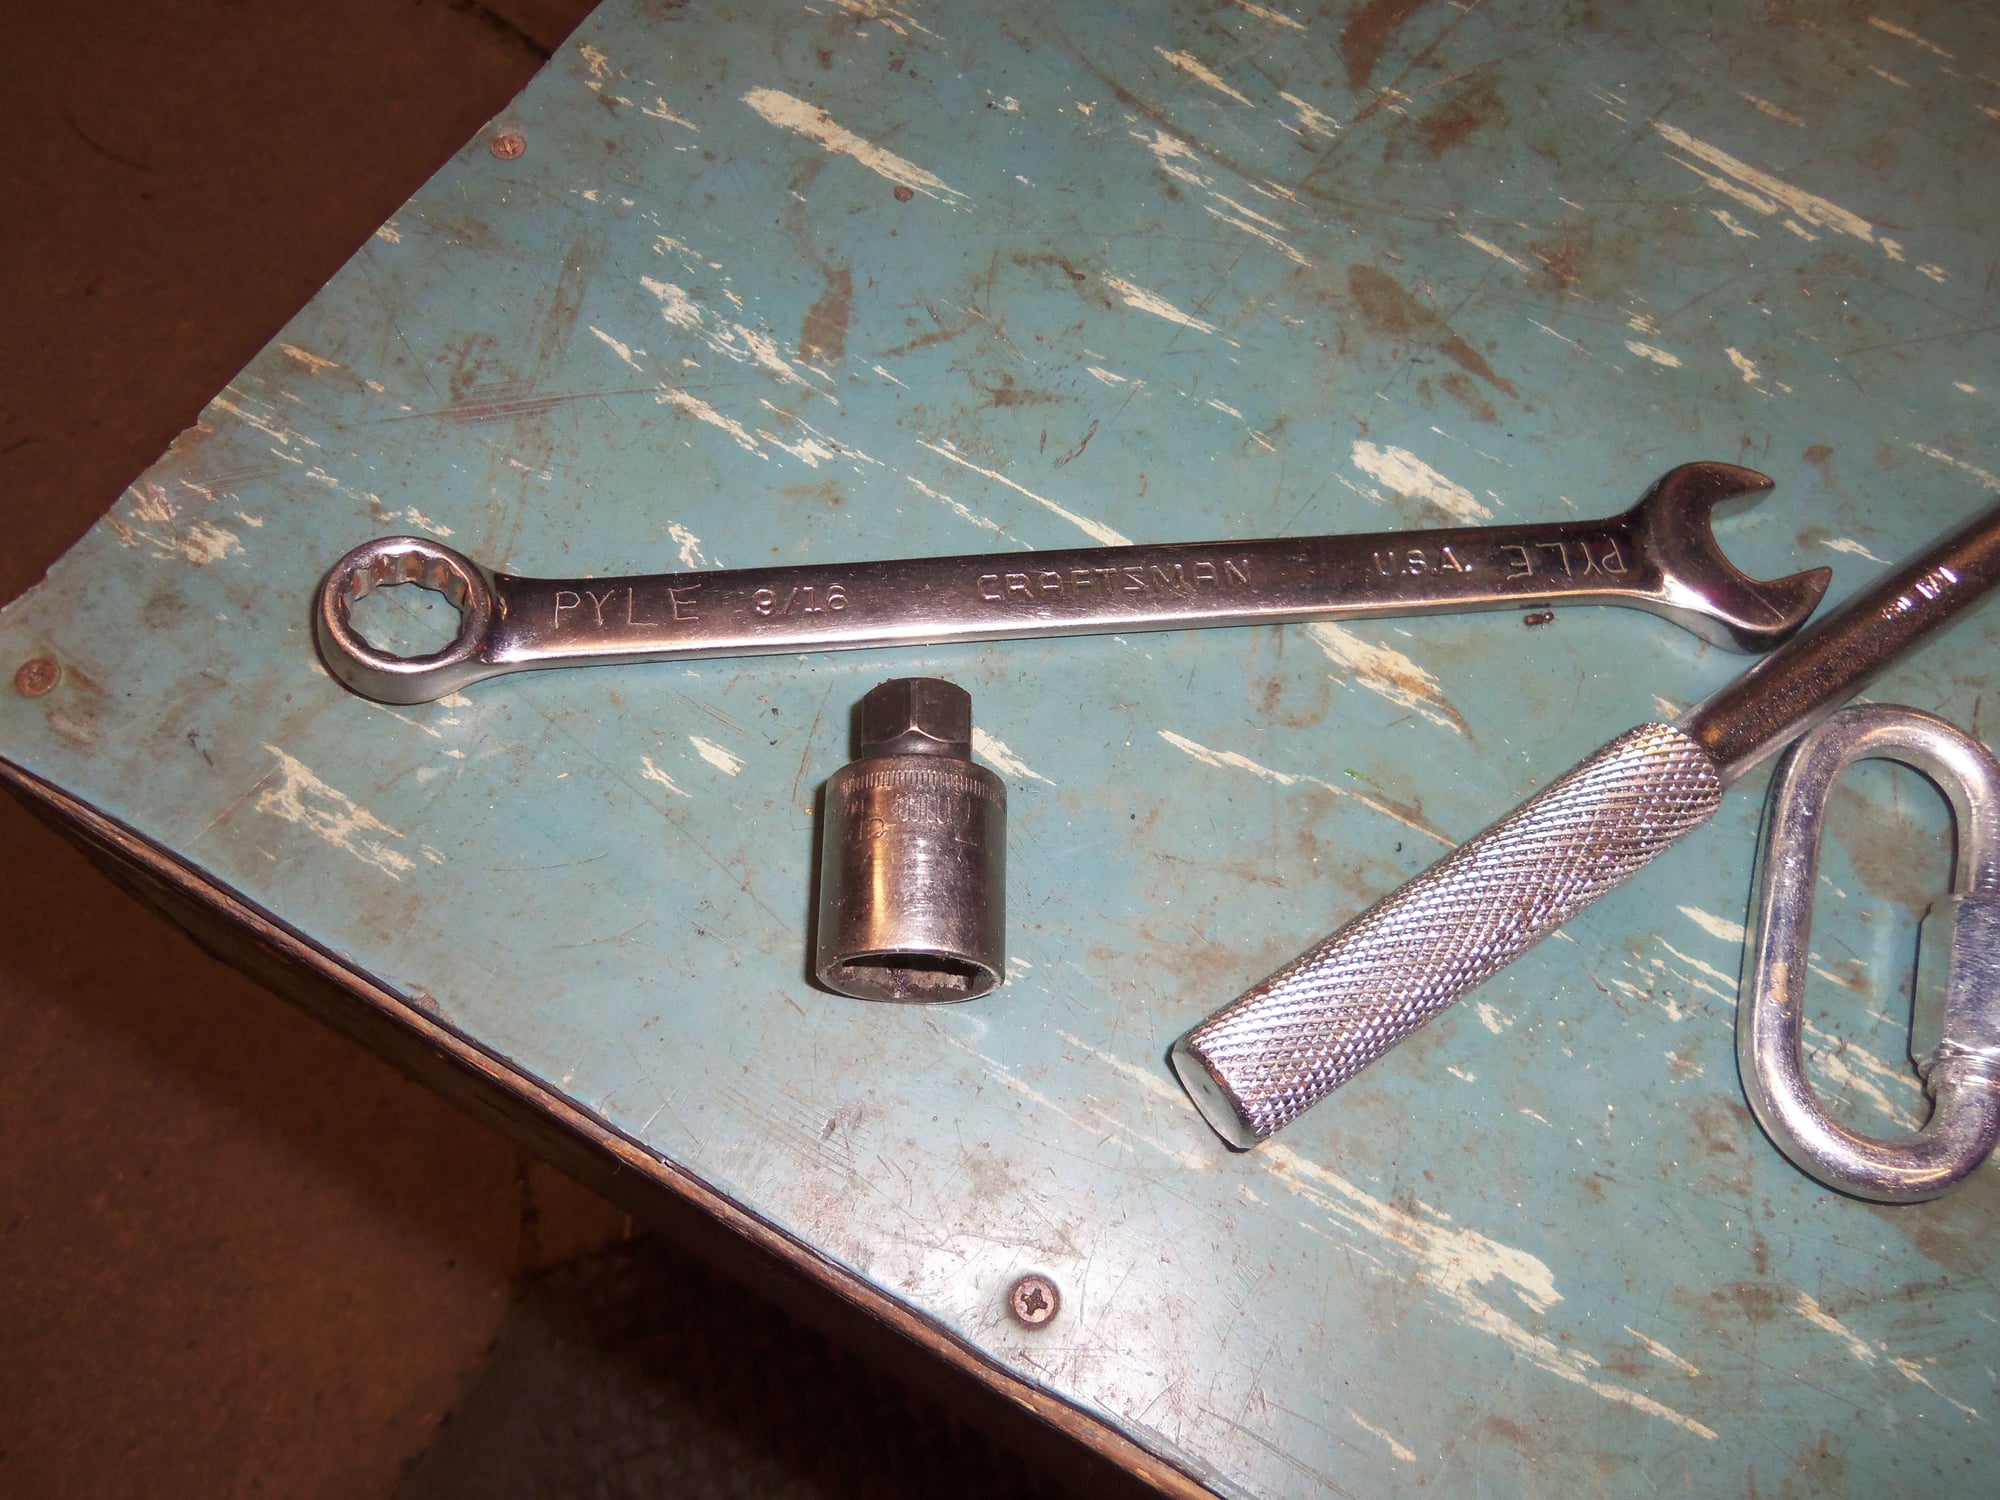
I used an insert into a 17mm 3/8 drive socket that let me hold the socket with a 9/16 wrench. That let me get the steering rack mounting bolts out.
9/16 hex on top, 3/8 drive into the socket.
I went ahead and completely removed the lower control arms. I will clean them and fit the new ball joint boots on the work bench.
The motor mounts are original Porsche, and they are SHOT! Very glad I bought new ones.
Steering rack out for cleaning and boot replacement.
Lots of parts to be cleaned.
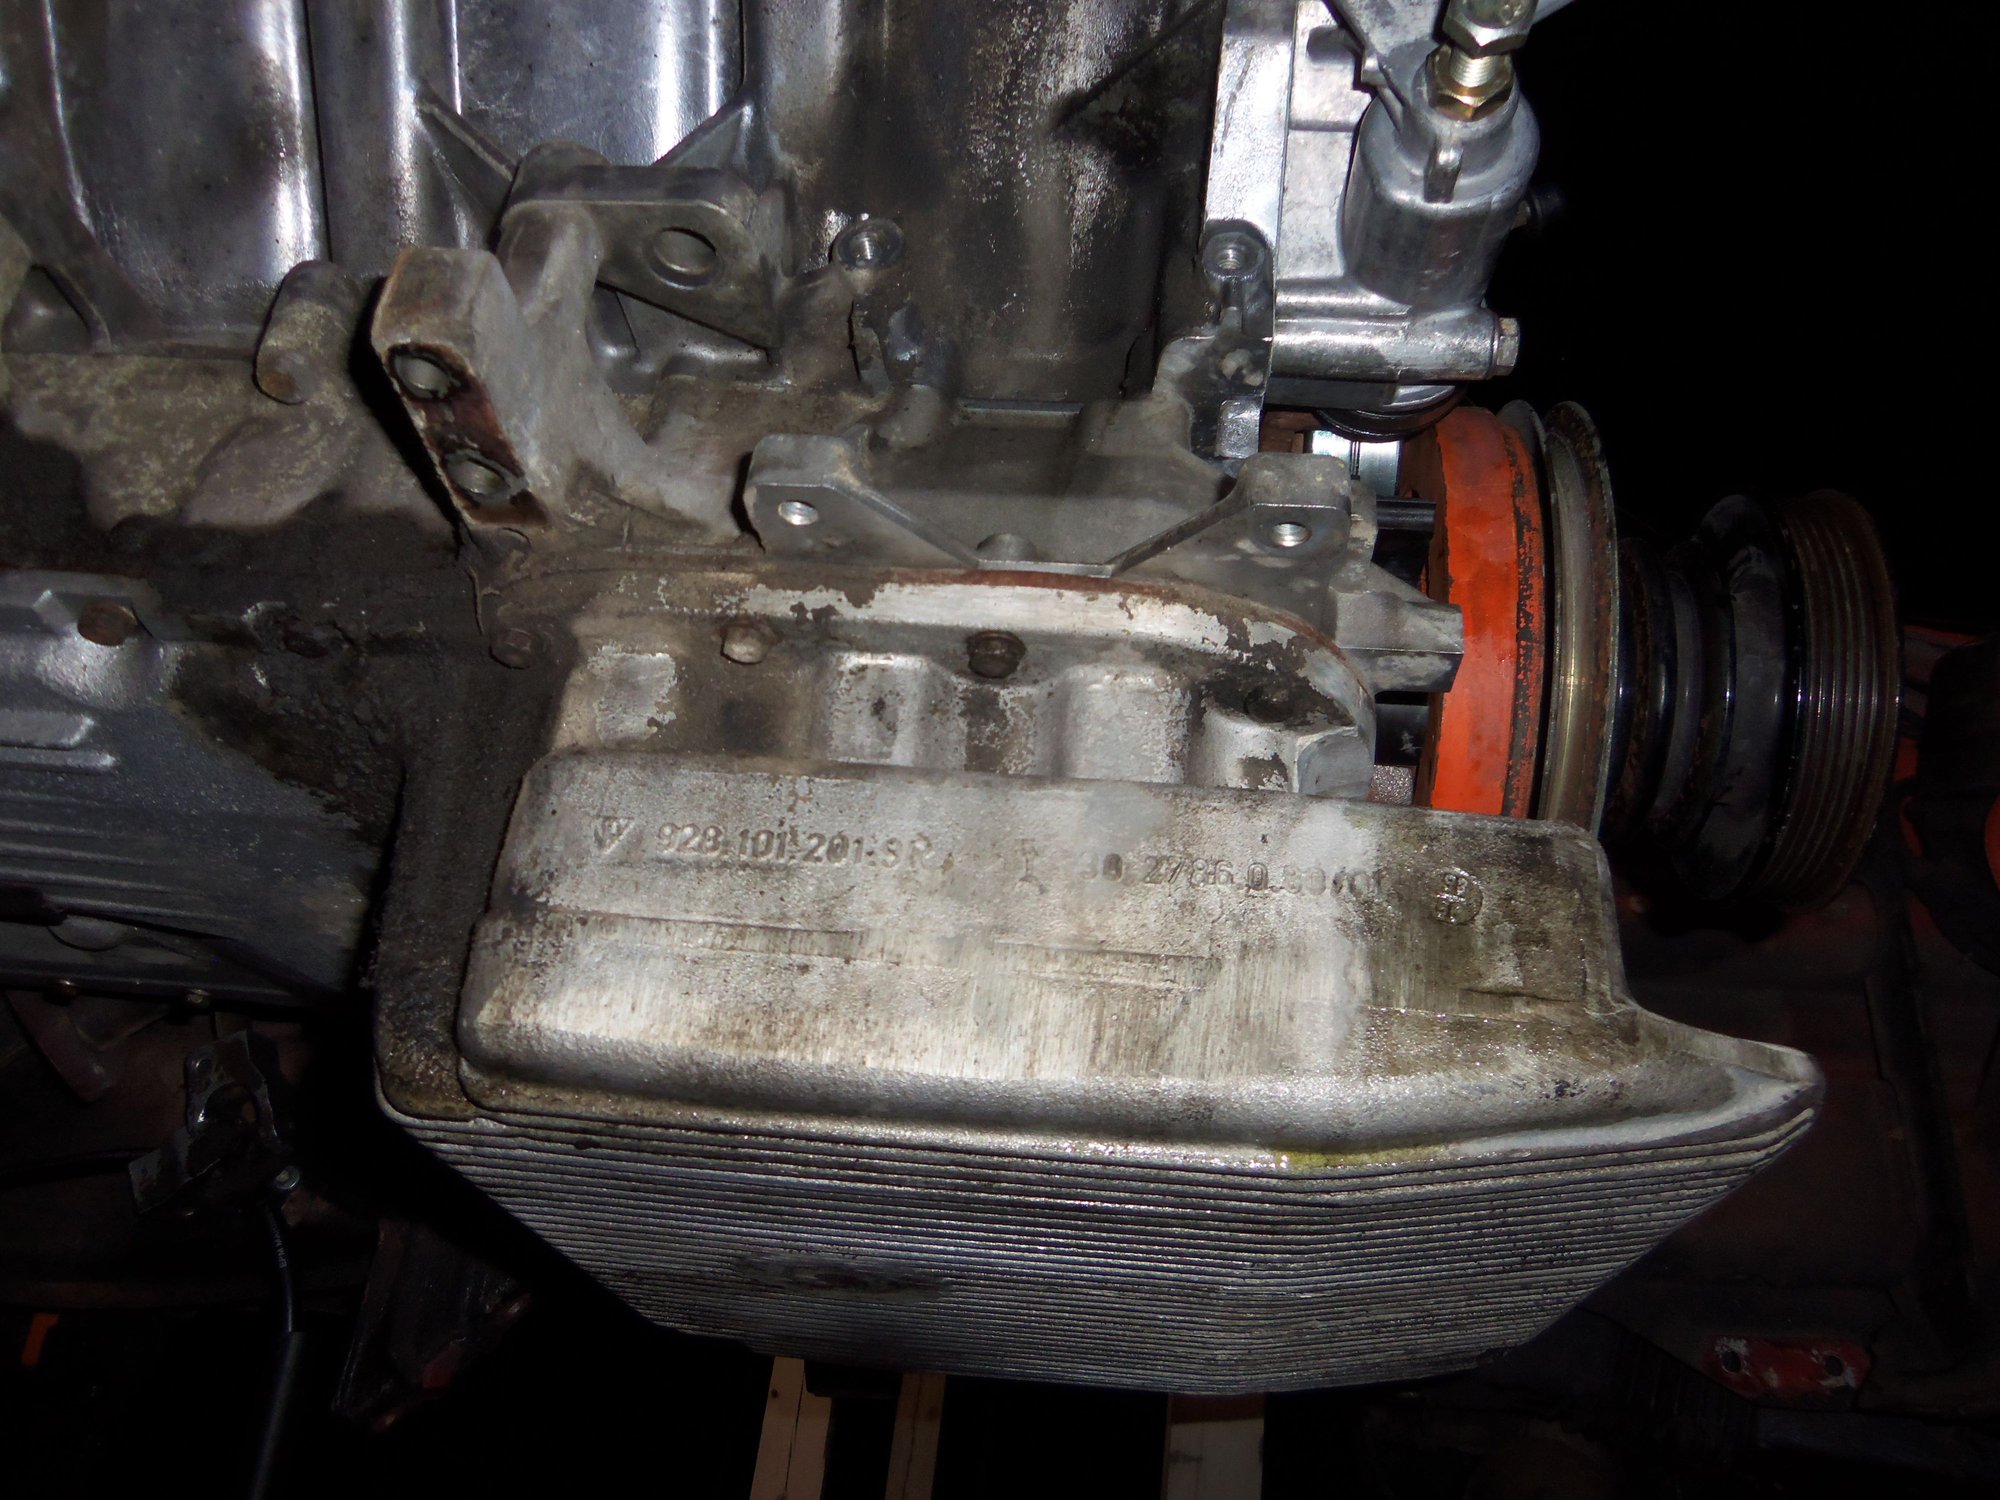
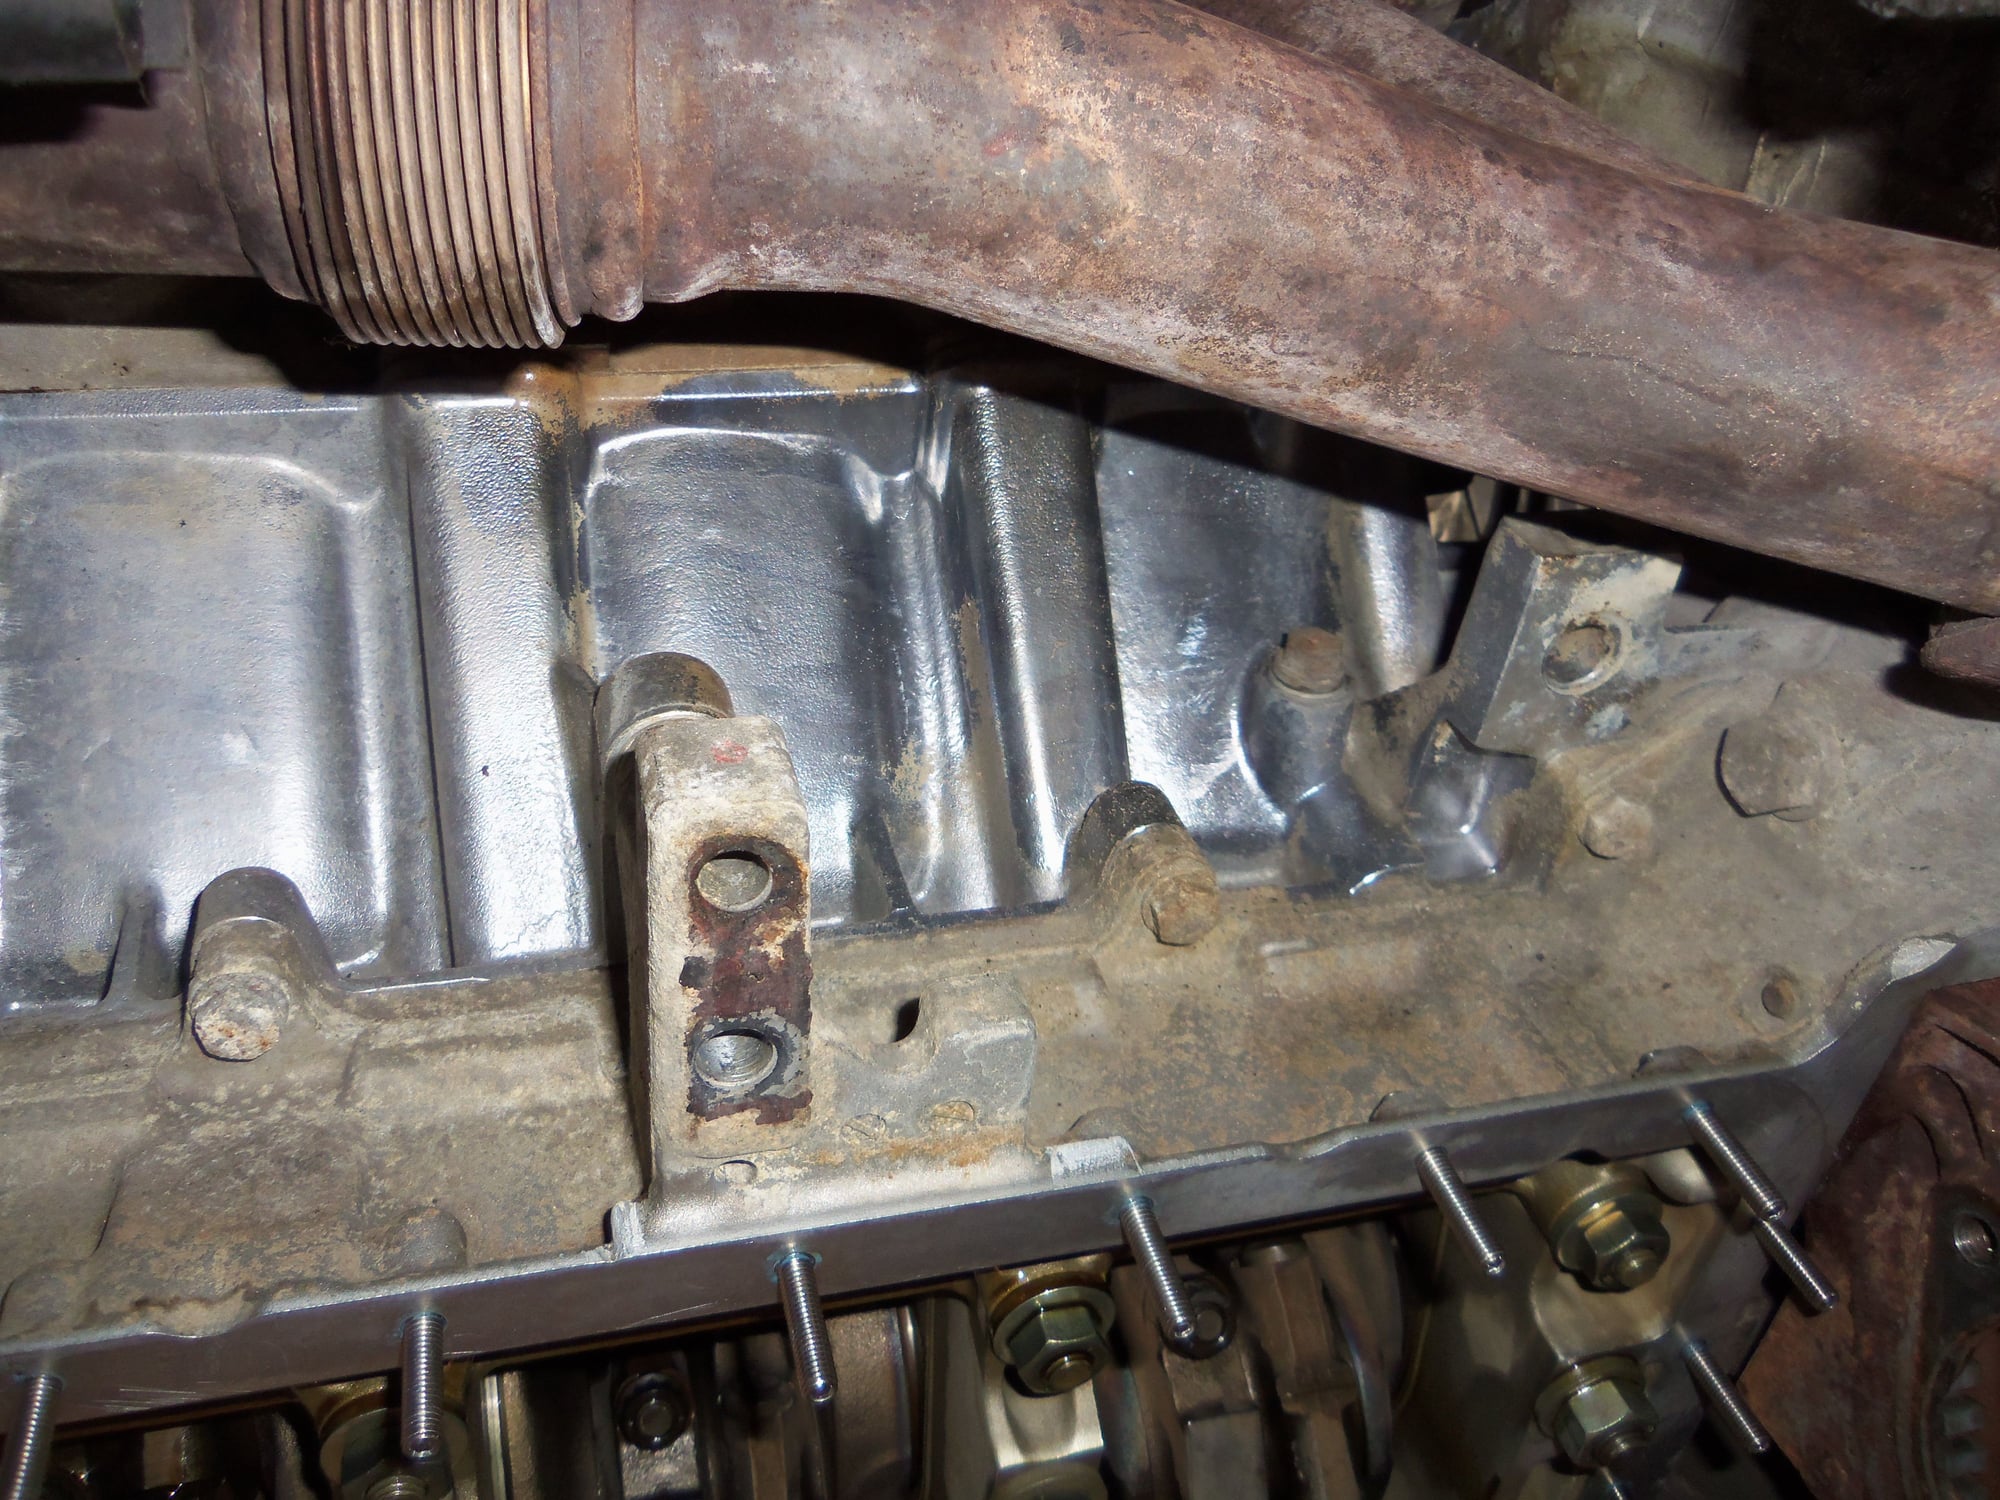
The oil pan bolts ended up being more of a b*tch than I expected. My little 1/4" impact driver made short work of removing the bolts it could reach. The ones on the side were not terrible. The ones on the front were terrible.
I was surprised that I had to whack the oil pan with a rubber mallet to get it to break free from the gasket. As bad as the gasket was leaking, I didn't think it would hold on that tight.
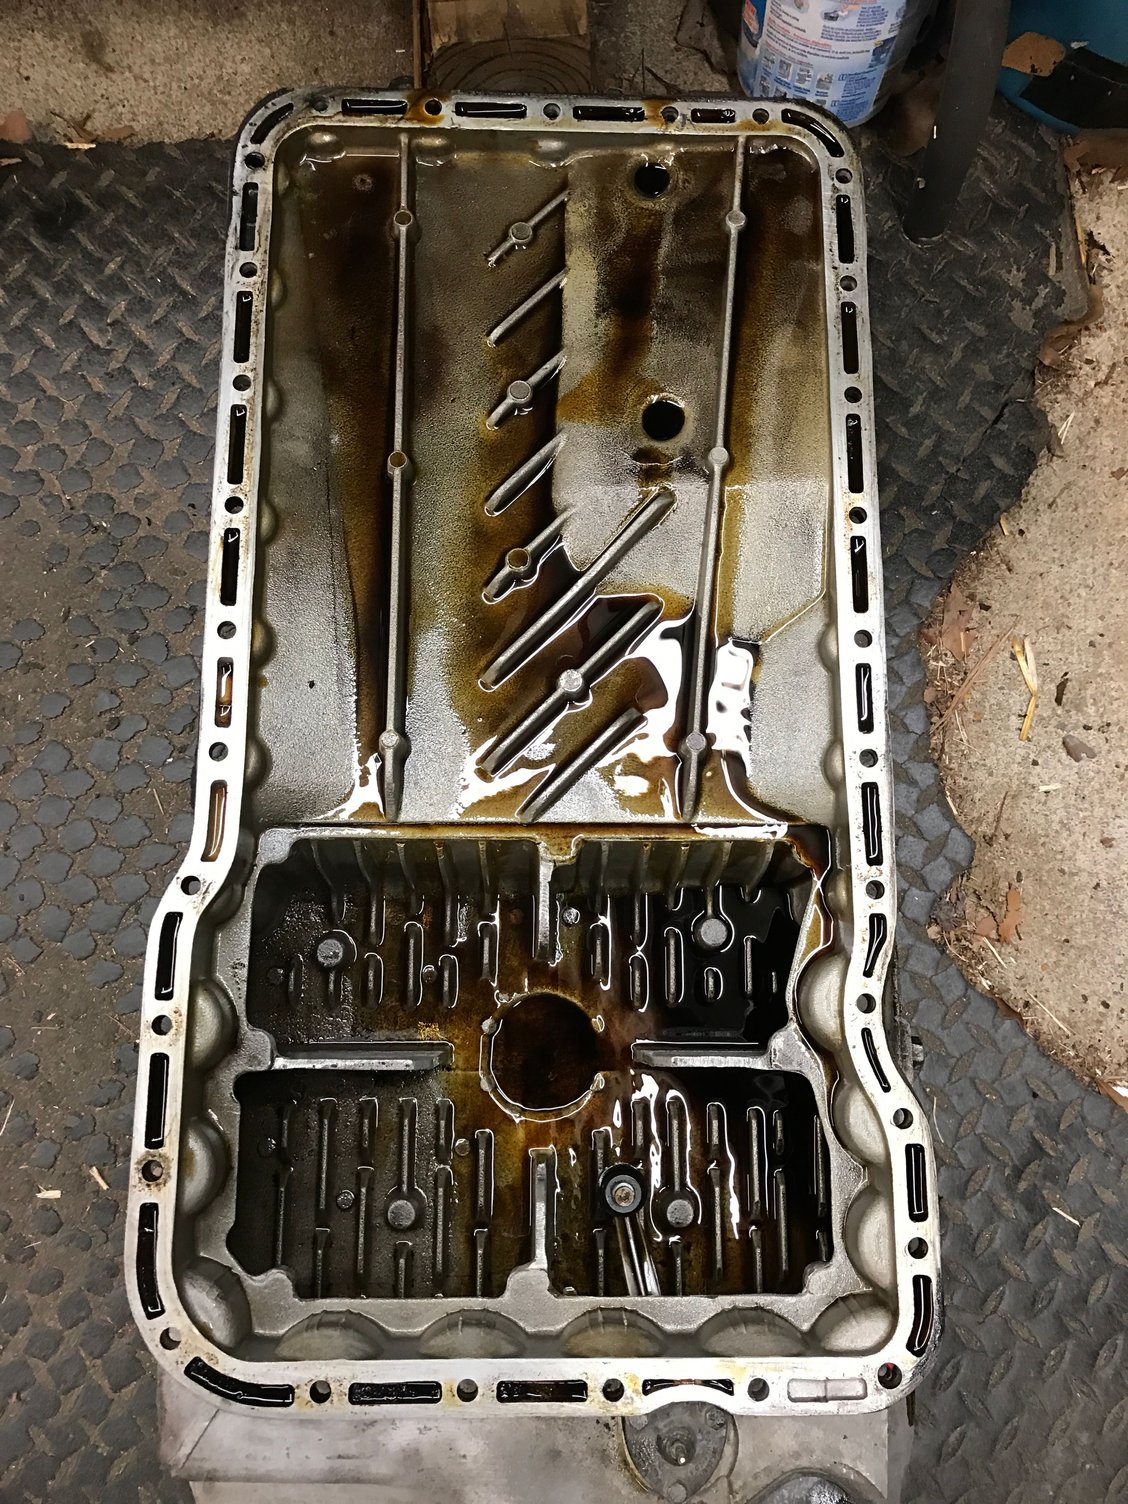
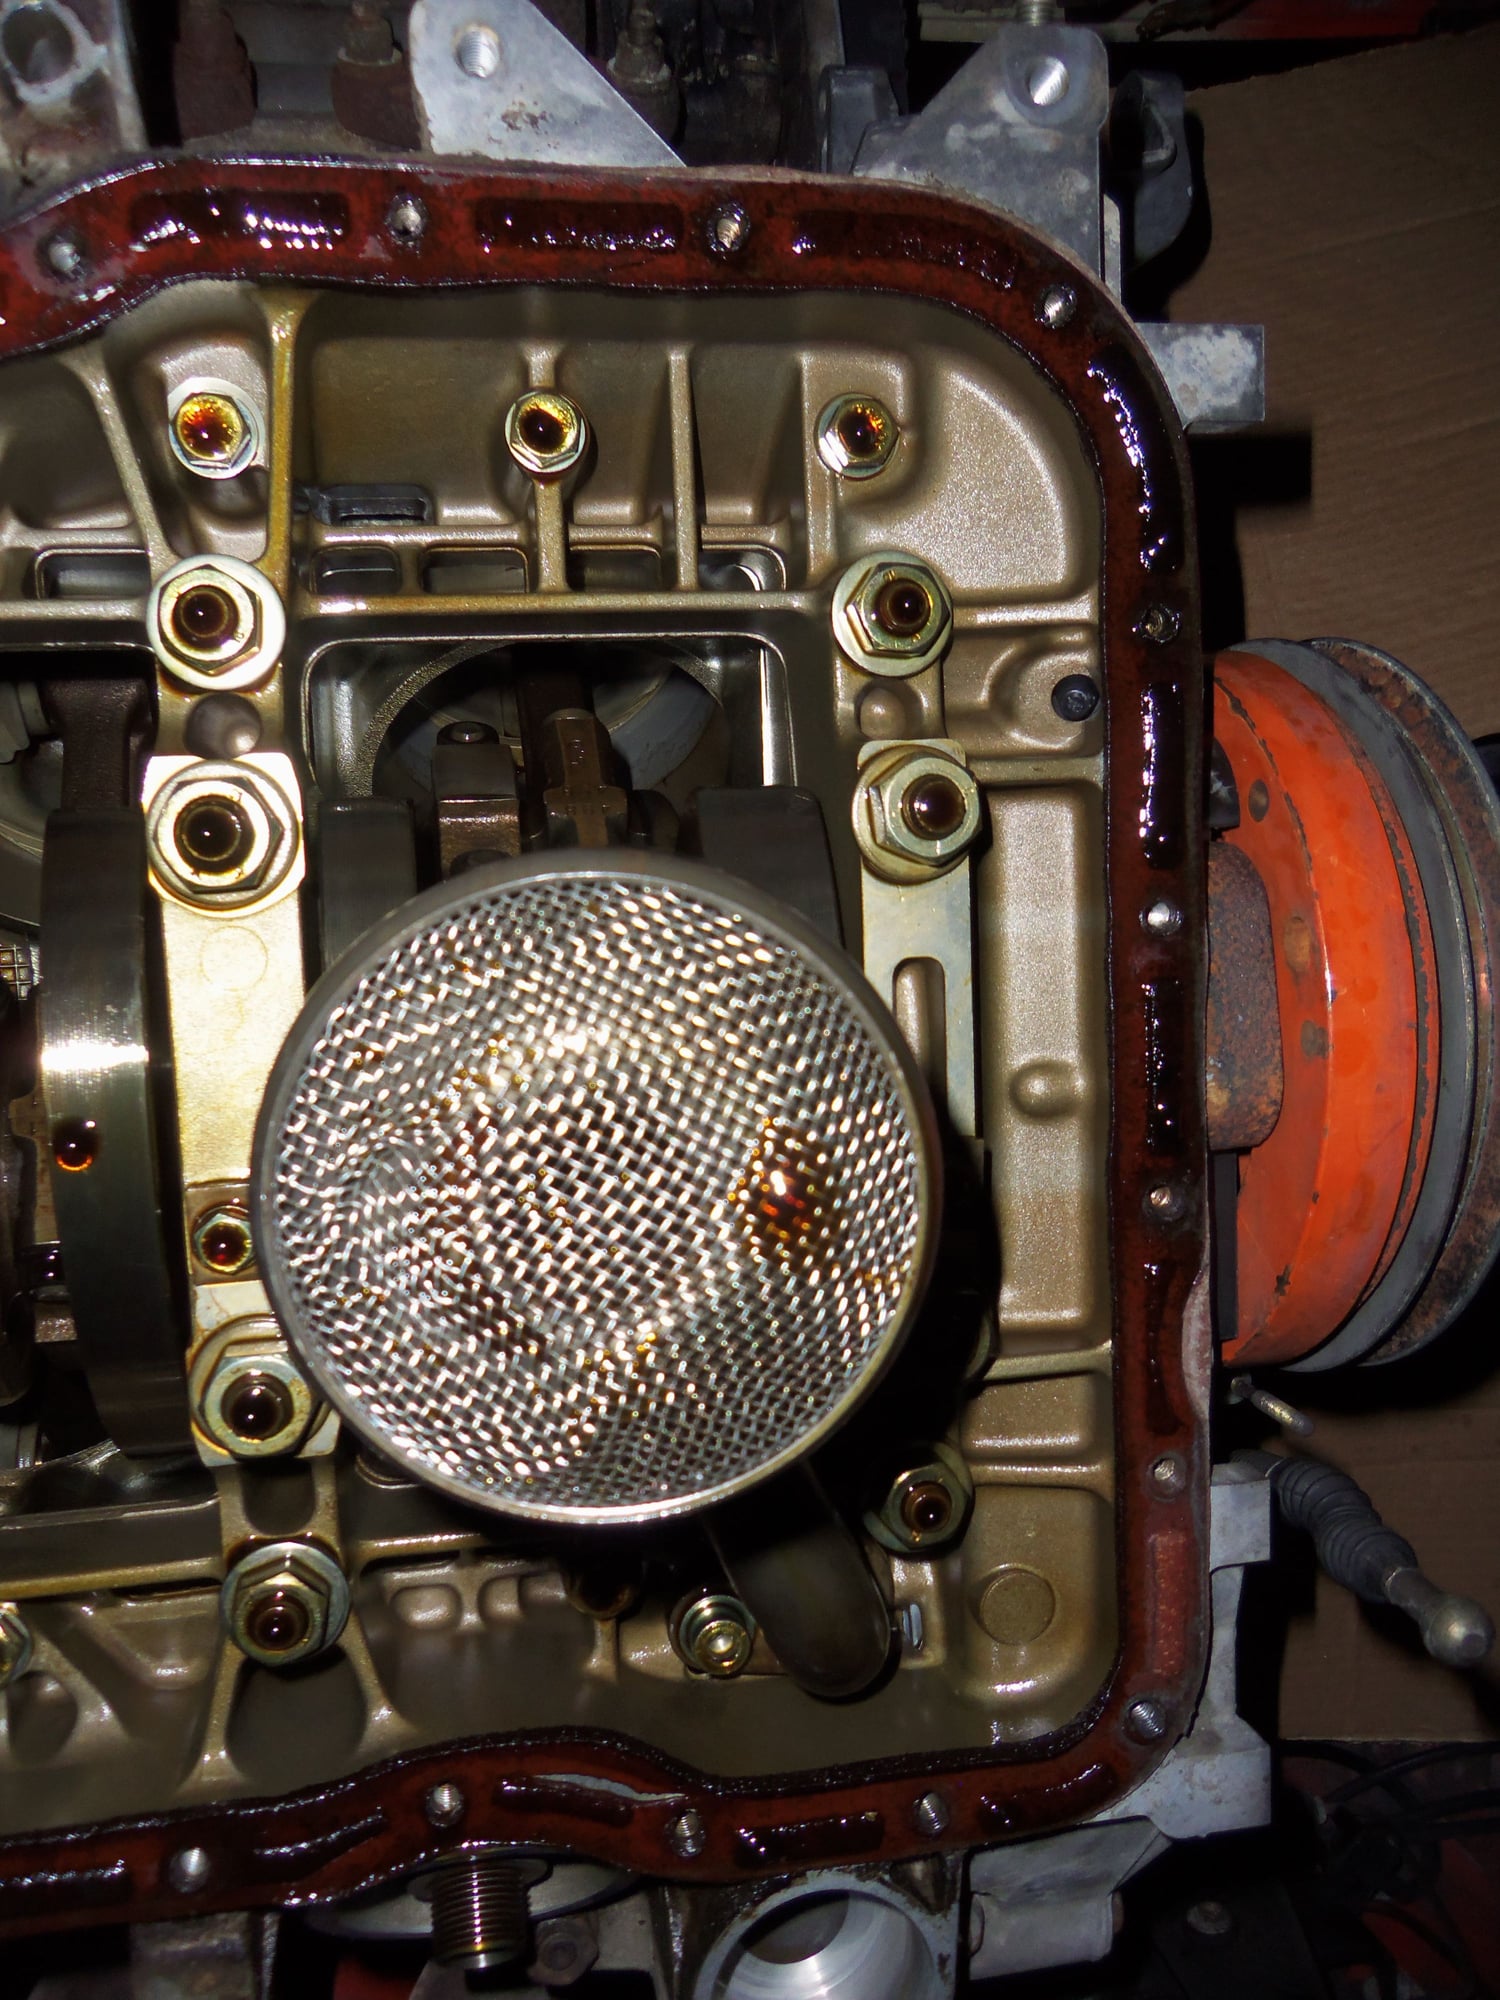
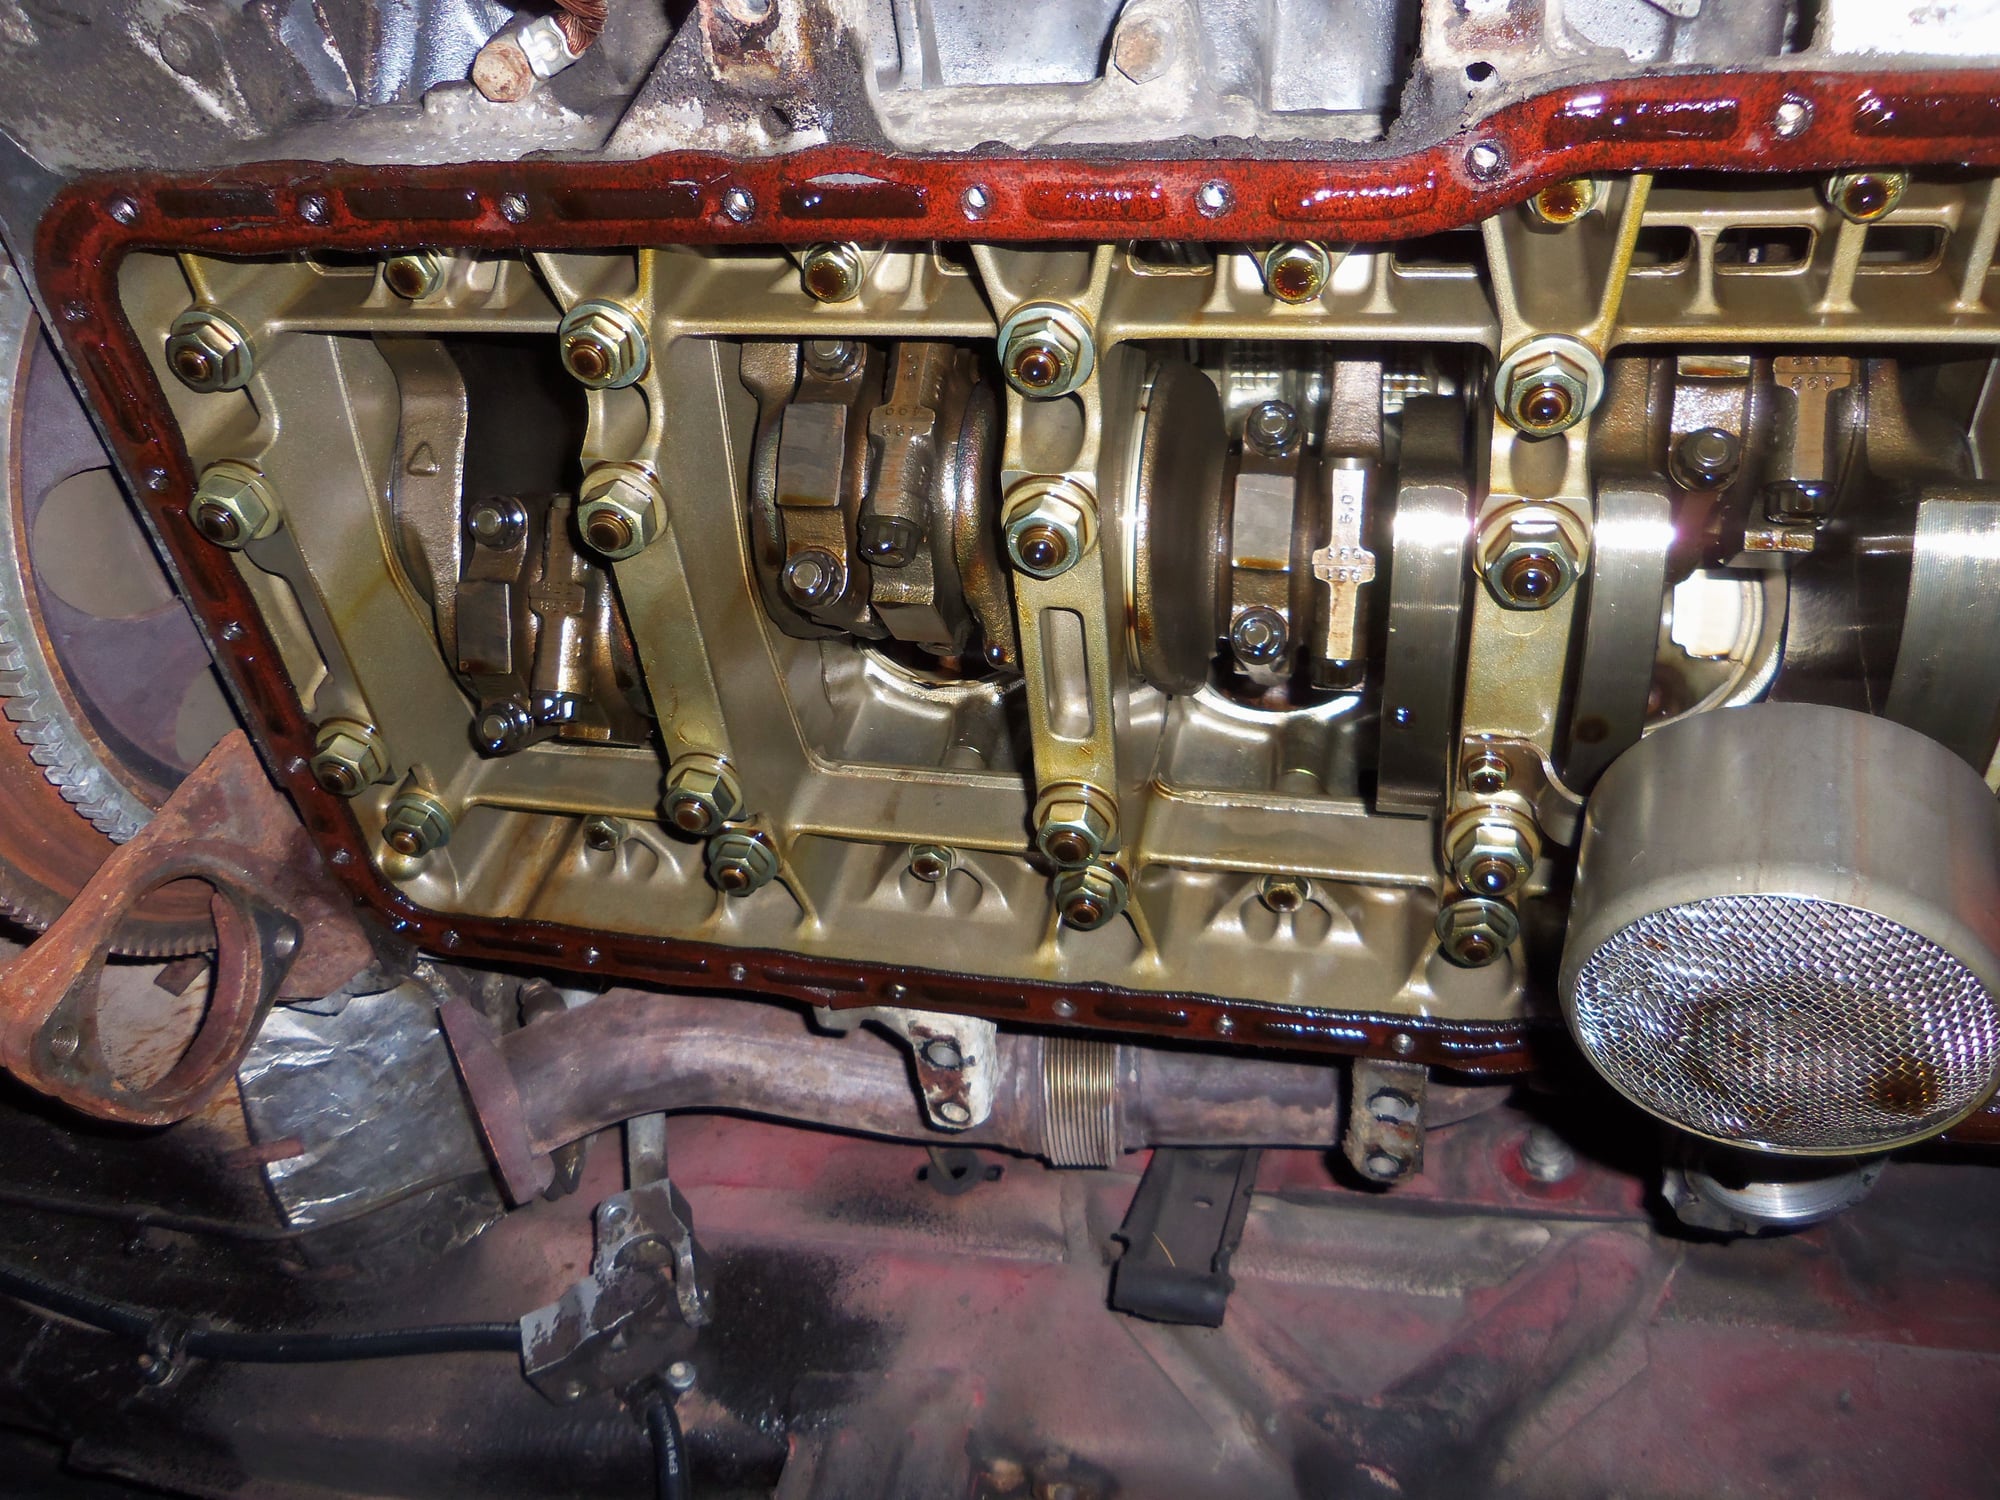
I am very pleased that the inside of the oil pan looked better than I expected. I found no sludge or debris. It actually looks quite clean.
Same with the strainer on the oil pump pick up, and up in the crank case.
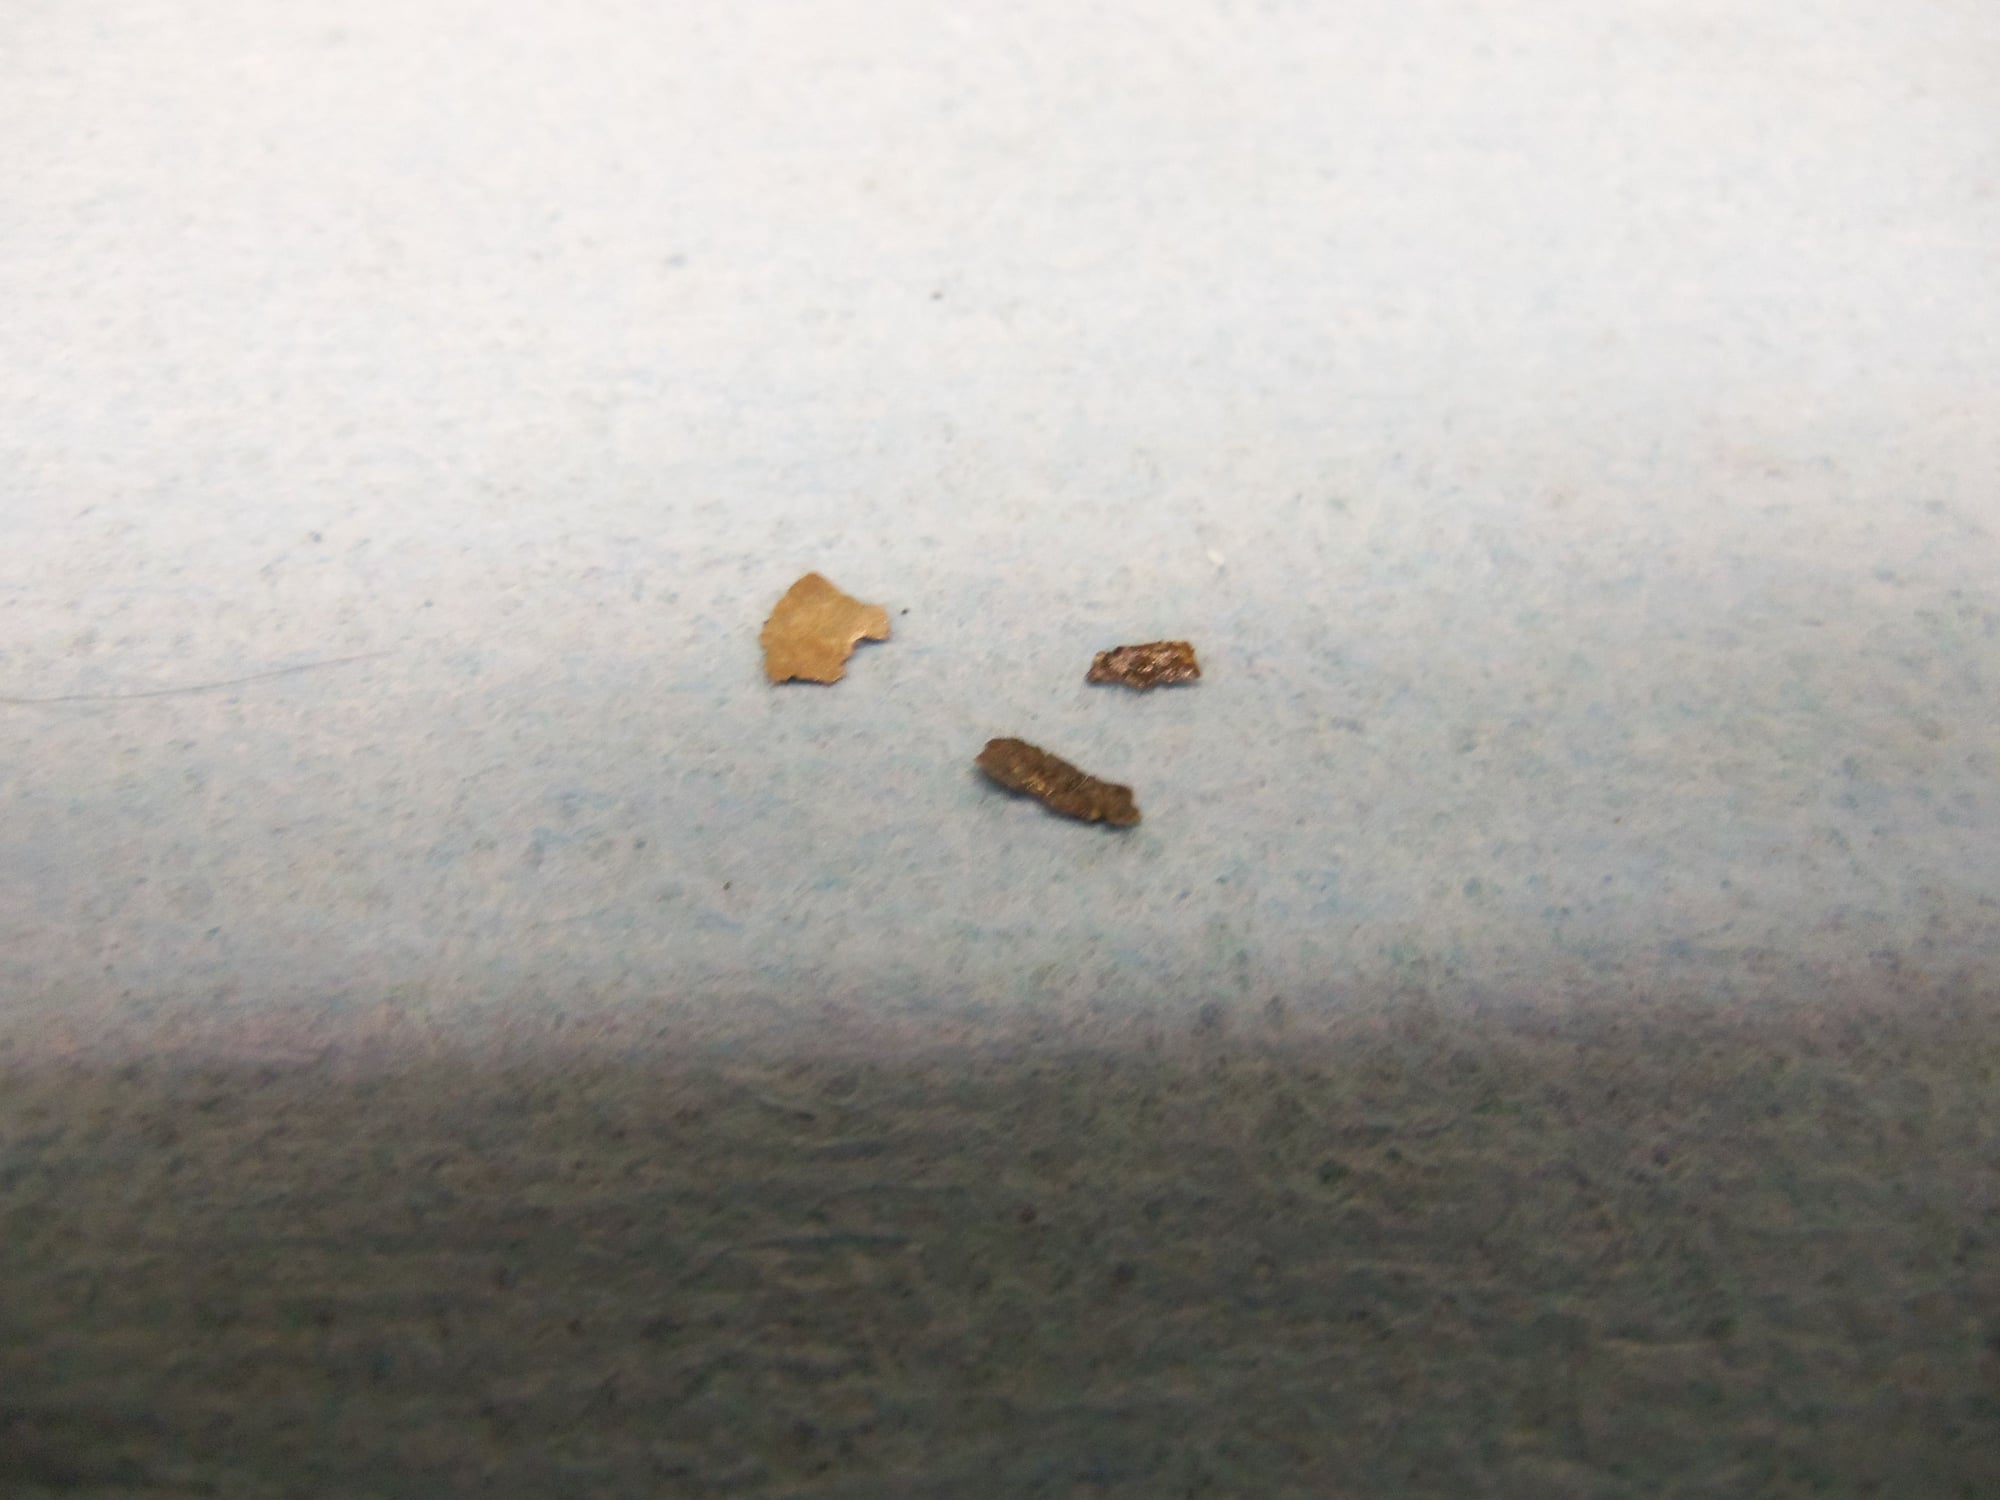
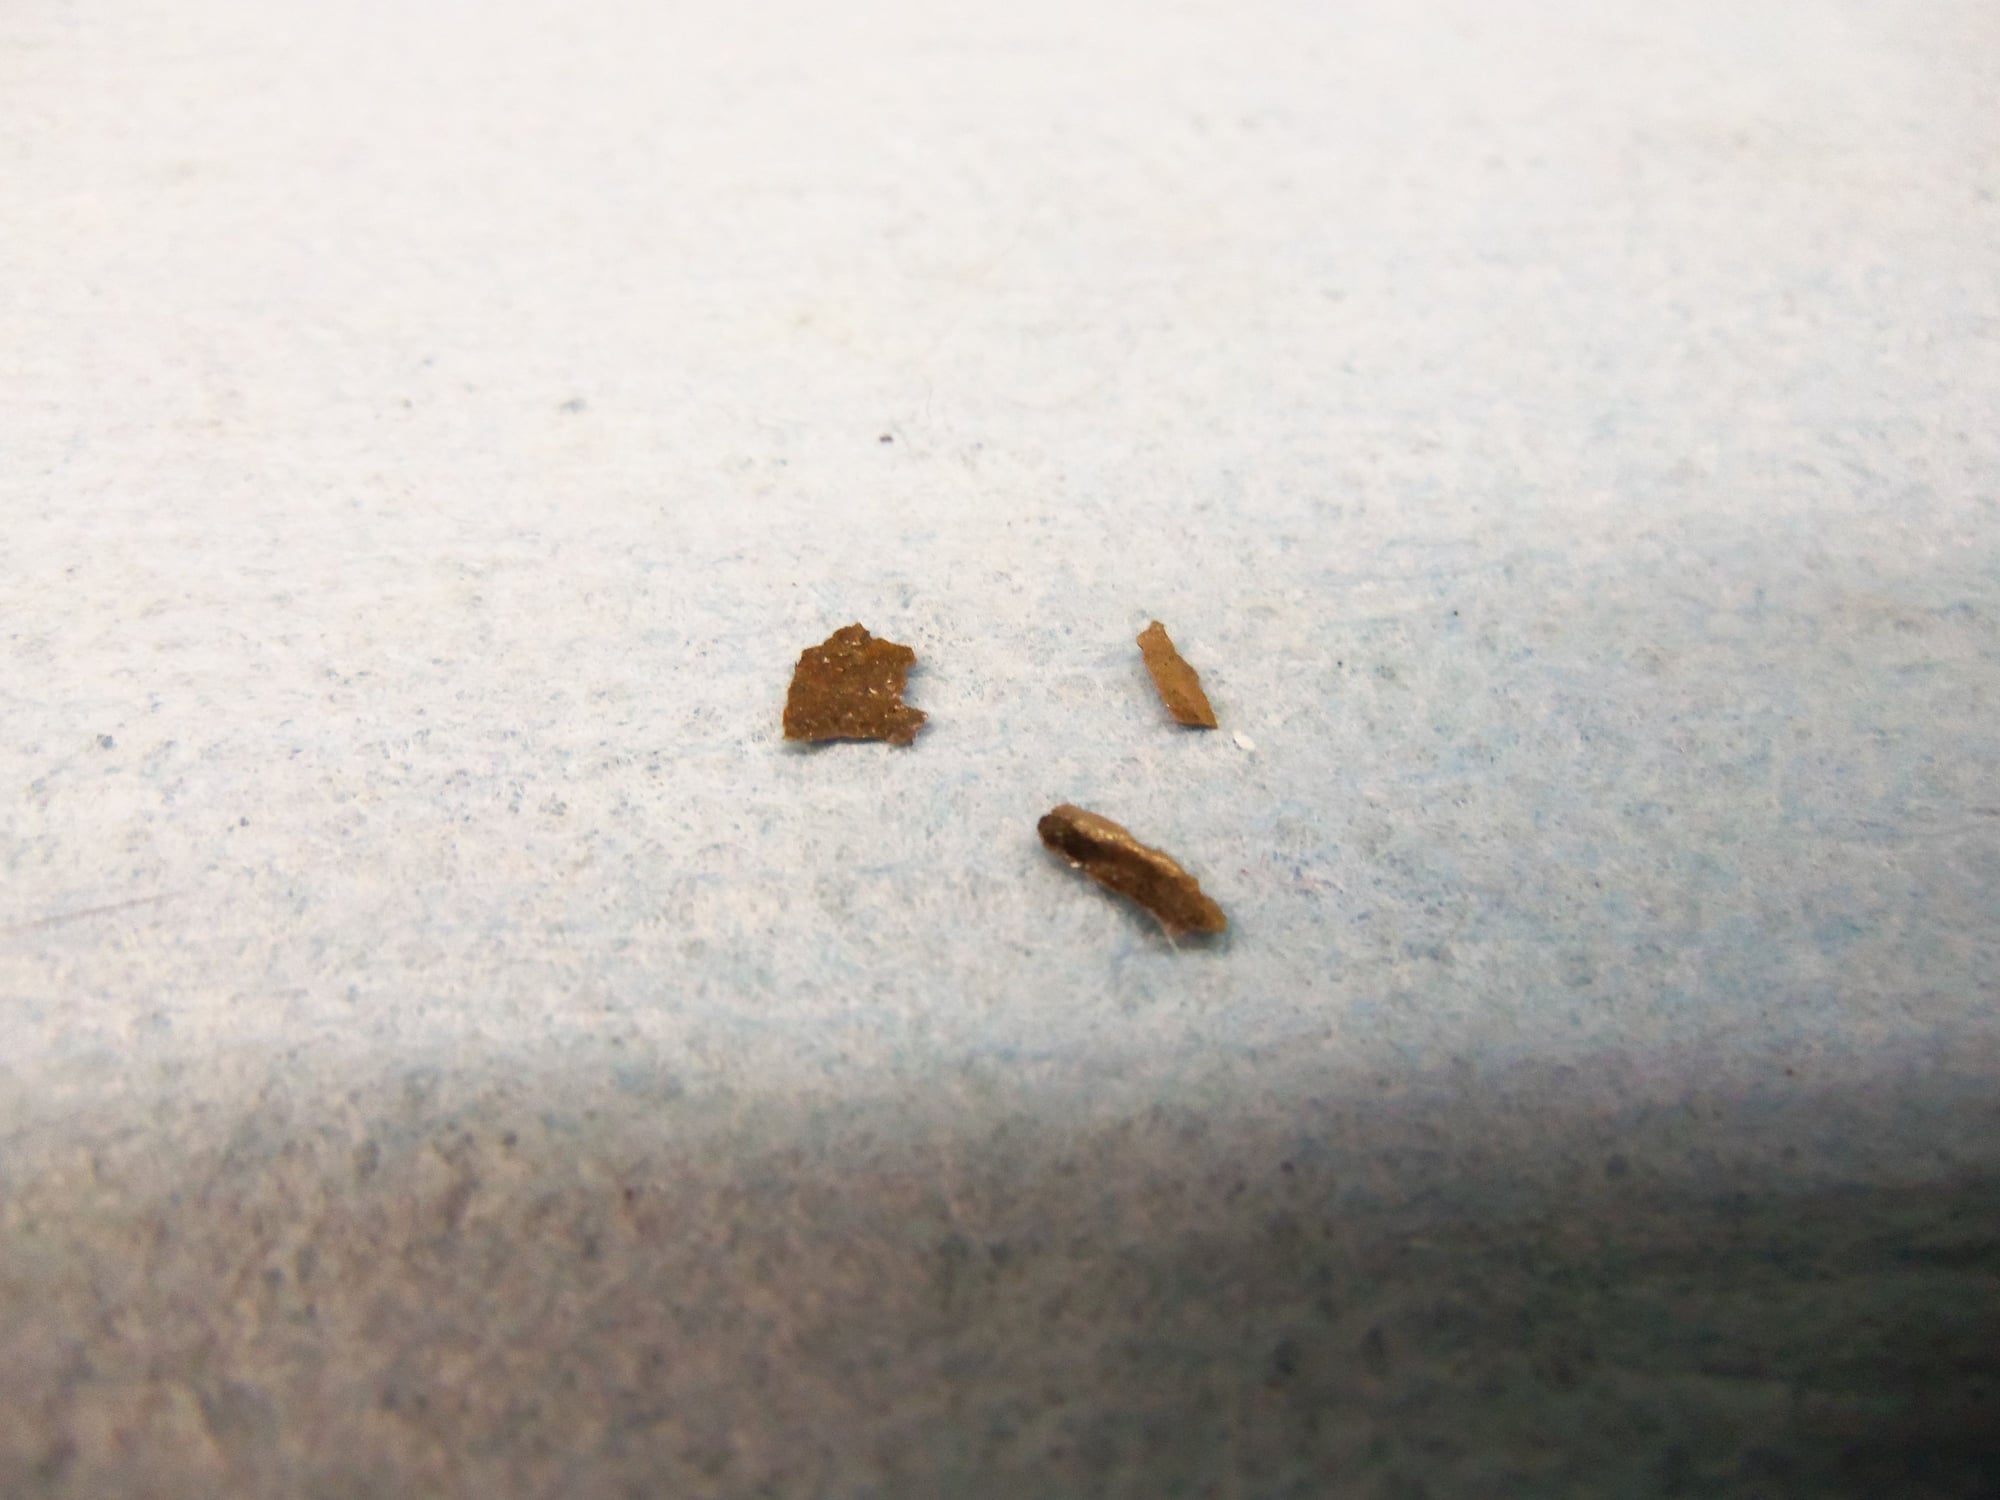
All I found were two tiny flakes of something, down in the little round well at the very bottom of the front sump. They were not magnetic. One of them broke into two pieces as I placed it on the paper towel. They look like flakes of bearing to me.
No obvious burnt oil or sludge.
No appreciable sludge or debris in the sump.
No sludge or debris on strainer
Crankcase looks good, other than the fossilized oil pan gasket.
Tiny flakes of what may bearing.
Back side of tiny flakes.
Other than that, it looks good. I have the pan propped up on an angle right now. Once the residual oil drains down into the sump, I will drain and inspect it.
Next is a thorough cleaning of the oil pan, followed by the installation of the GTS oil pan baffle. The fossilized stock oil pan gasket needs to be dynamited off the crank case.
Then, the all important connecting rod bearing inspection.
First of all congrats on the excellent photos you are taking- what do you use for a camera?
Good to see you are really getting on top of things and hopefully you will get the result you so richly deserve. Just make sure the wood does not rot!
It would be interesting to know whether this effort is optimal compared to pulling the motor but an interesting approach nonetheless. That you have not seen any negative indications must be a good thing and you should feel heartened by that.
You've greatly impressed us all with your talent and drive for taking things apart. Those shiny bolts in the crankcase must be tempting you, but start a new thread if you go at 'em - in another forum where you can get the professional help you need.
Check carefully for sump bugs before re-installing - they are masters of disguise.
First of all congrats on the excellent photos you are taking- what do you use for a camera?
Good to see you are really getting on top of things and hopefully you will get the result you so richly deserve. Just make sure the wood does not rot!
It would be interesting to know whether this effort is optimal compared to pulling the motor but an interesting approach nonetheless. That you have not seen any negative indications must be a good thing and you should feel heartened by that.
Looking forward to the next installment.
Rgds
Fred
Hi Fred!
Thanks! Most of the photos are taken with my elderly Kodak EasyShare M5370. It does most of the work for me. The rest are taken with my iPhone 7.
At the point I am at in terms of all that has been removed, it is a short hop to completely pulling the engine. However, I don't see the benefit in that, as the engine doesn't have to be pulled for the MM/OPG job.
Besides, if I pull the engine, the WYAIT Pandora's Box will well and surely be opened. No.
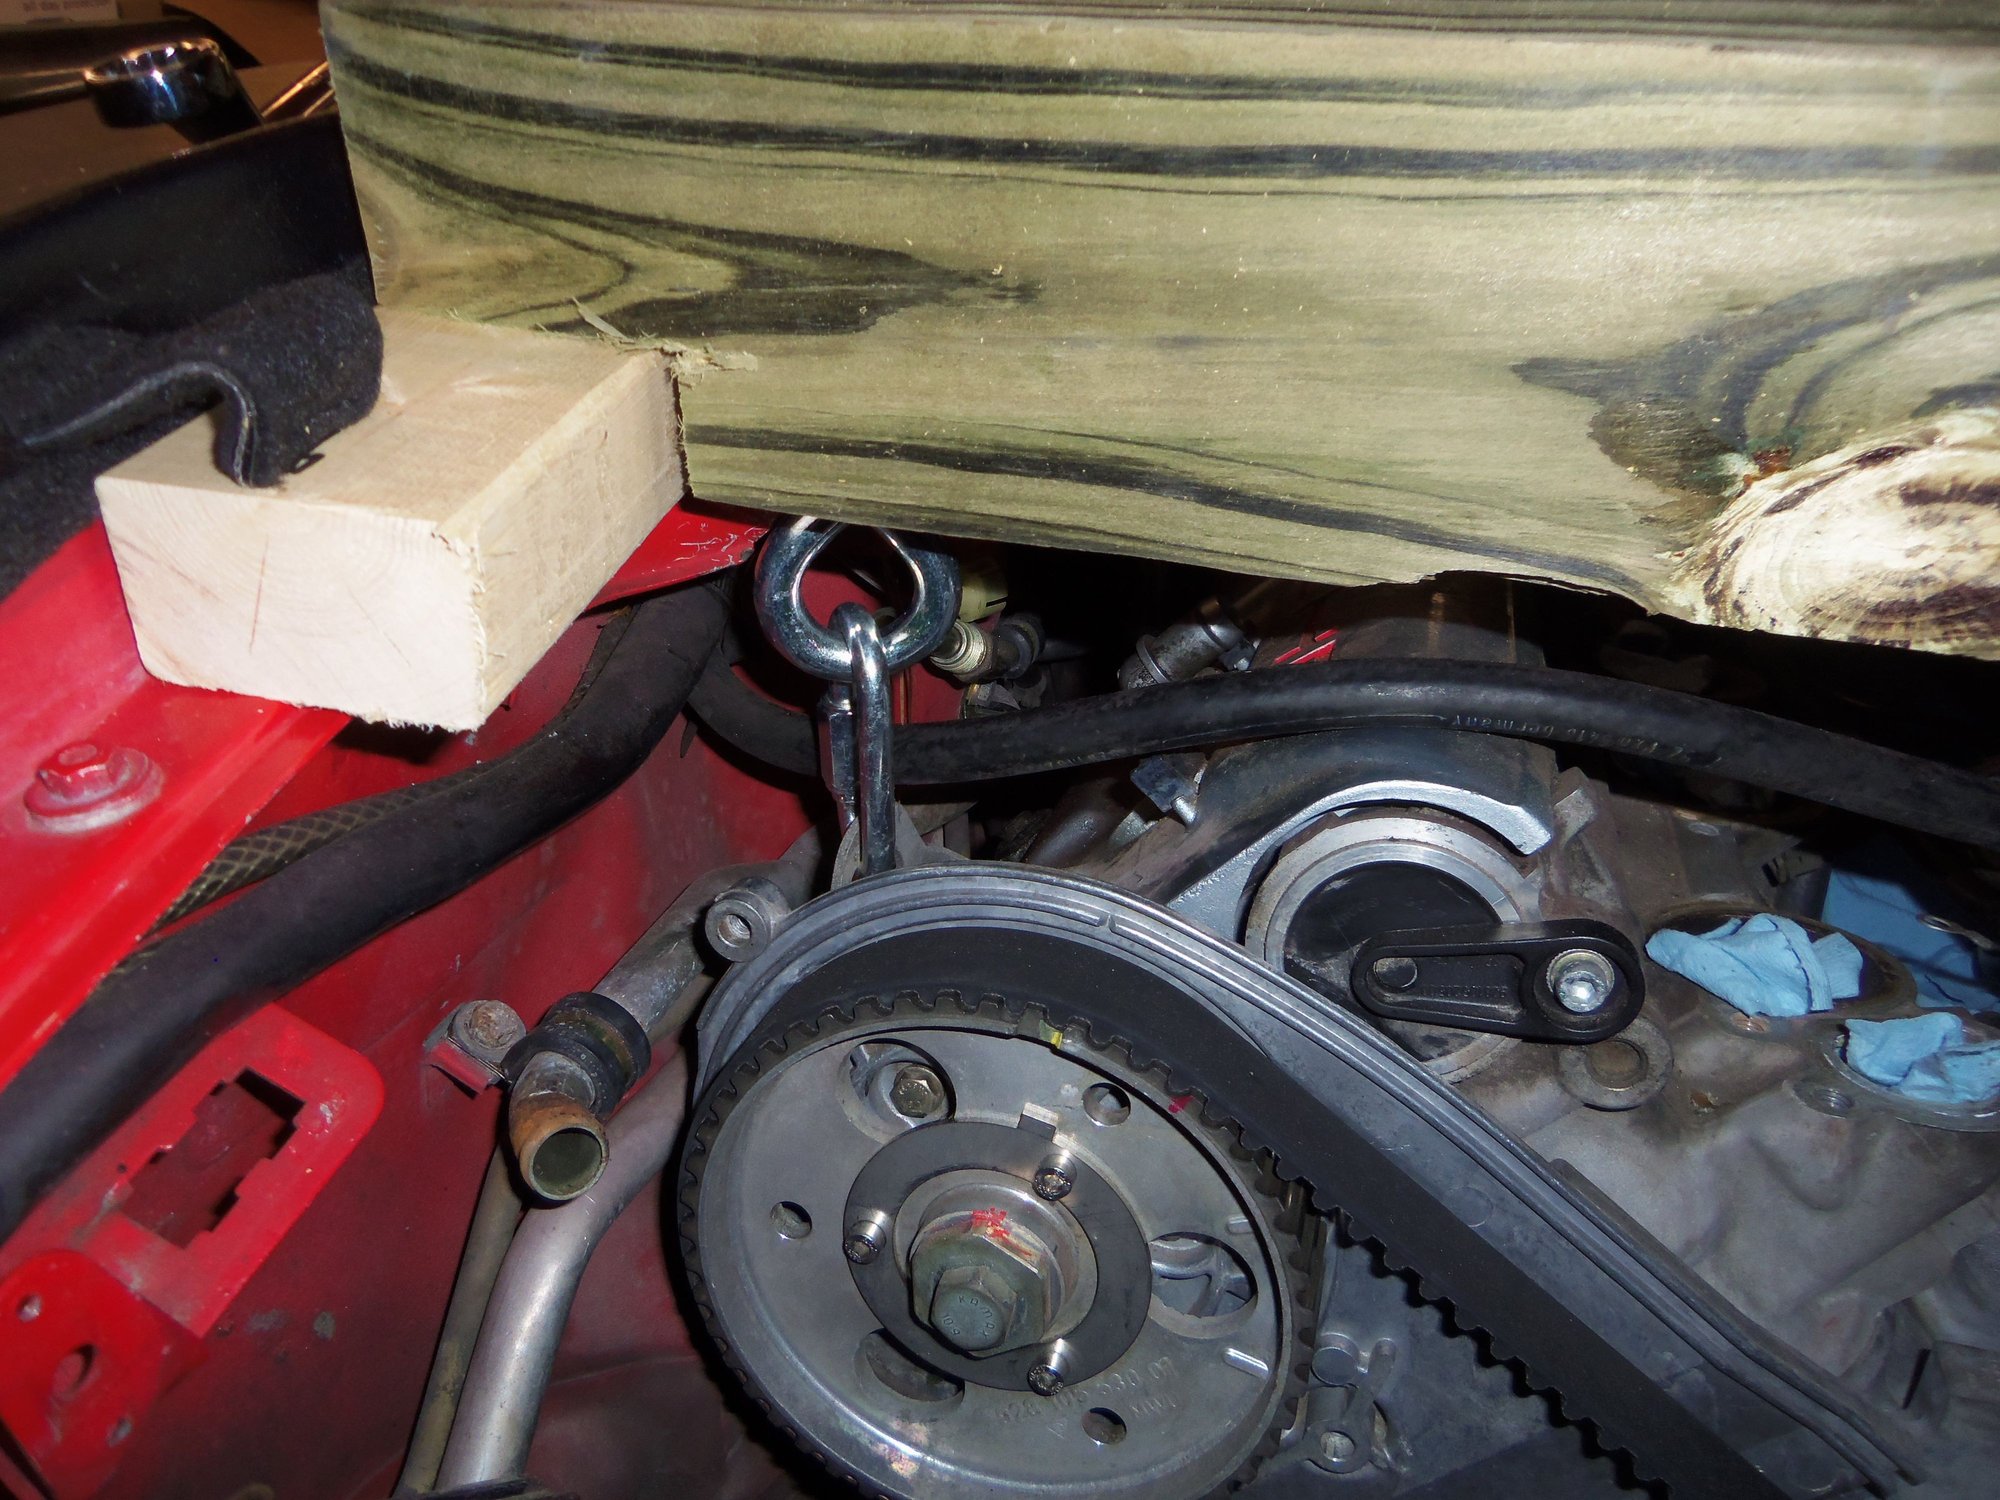
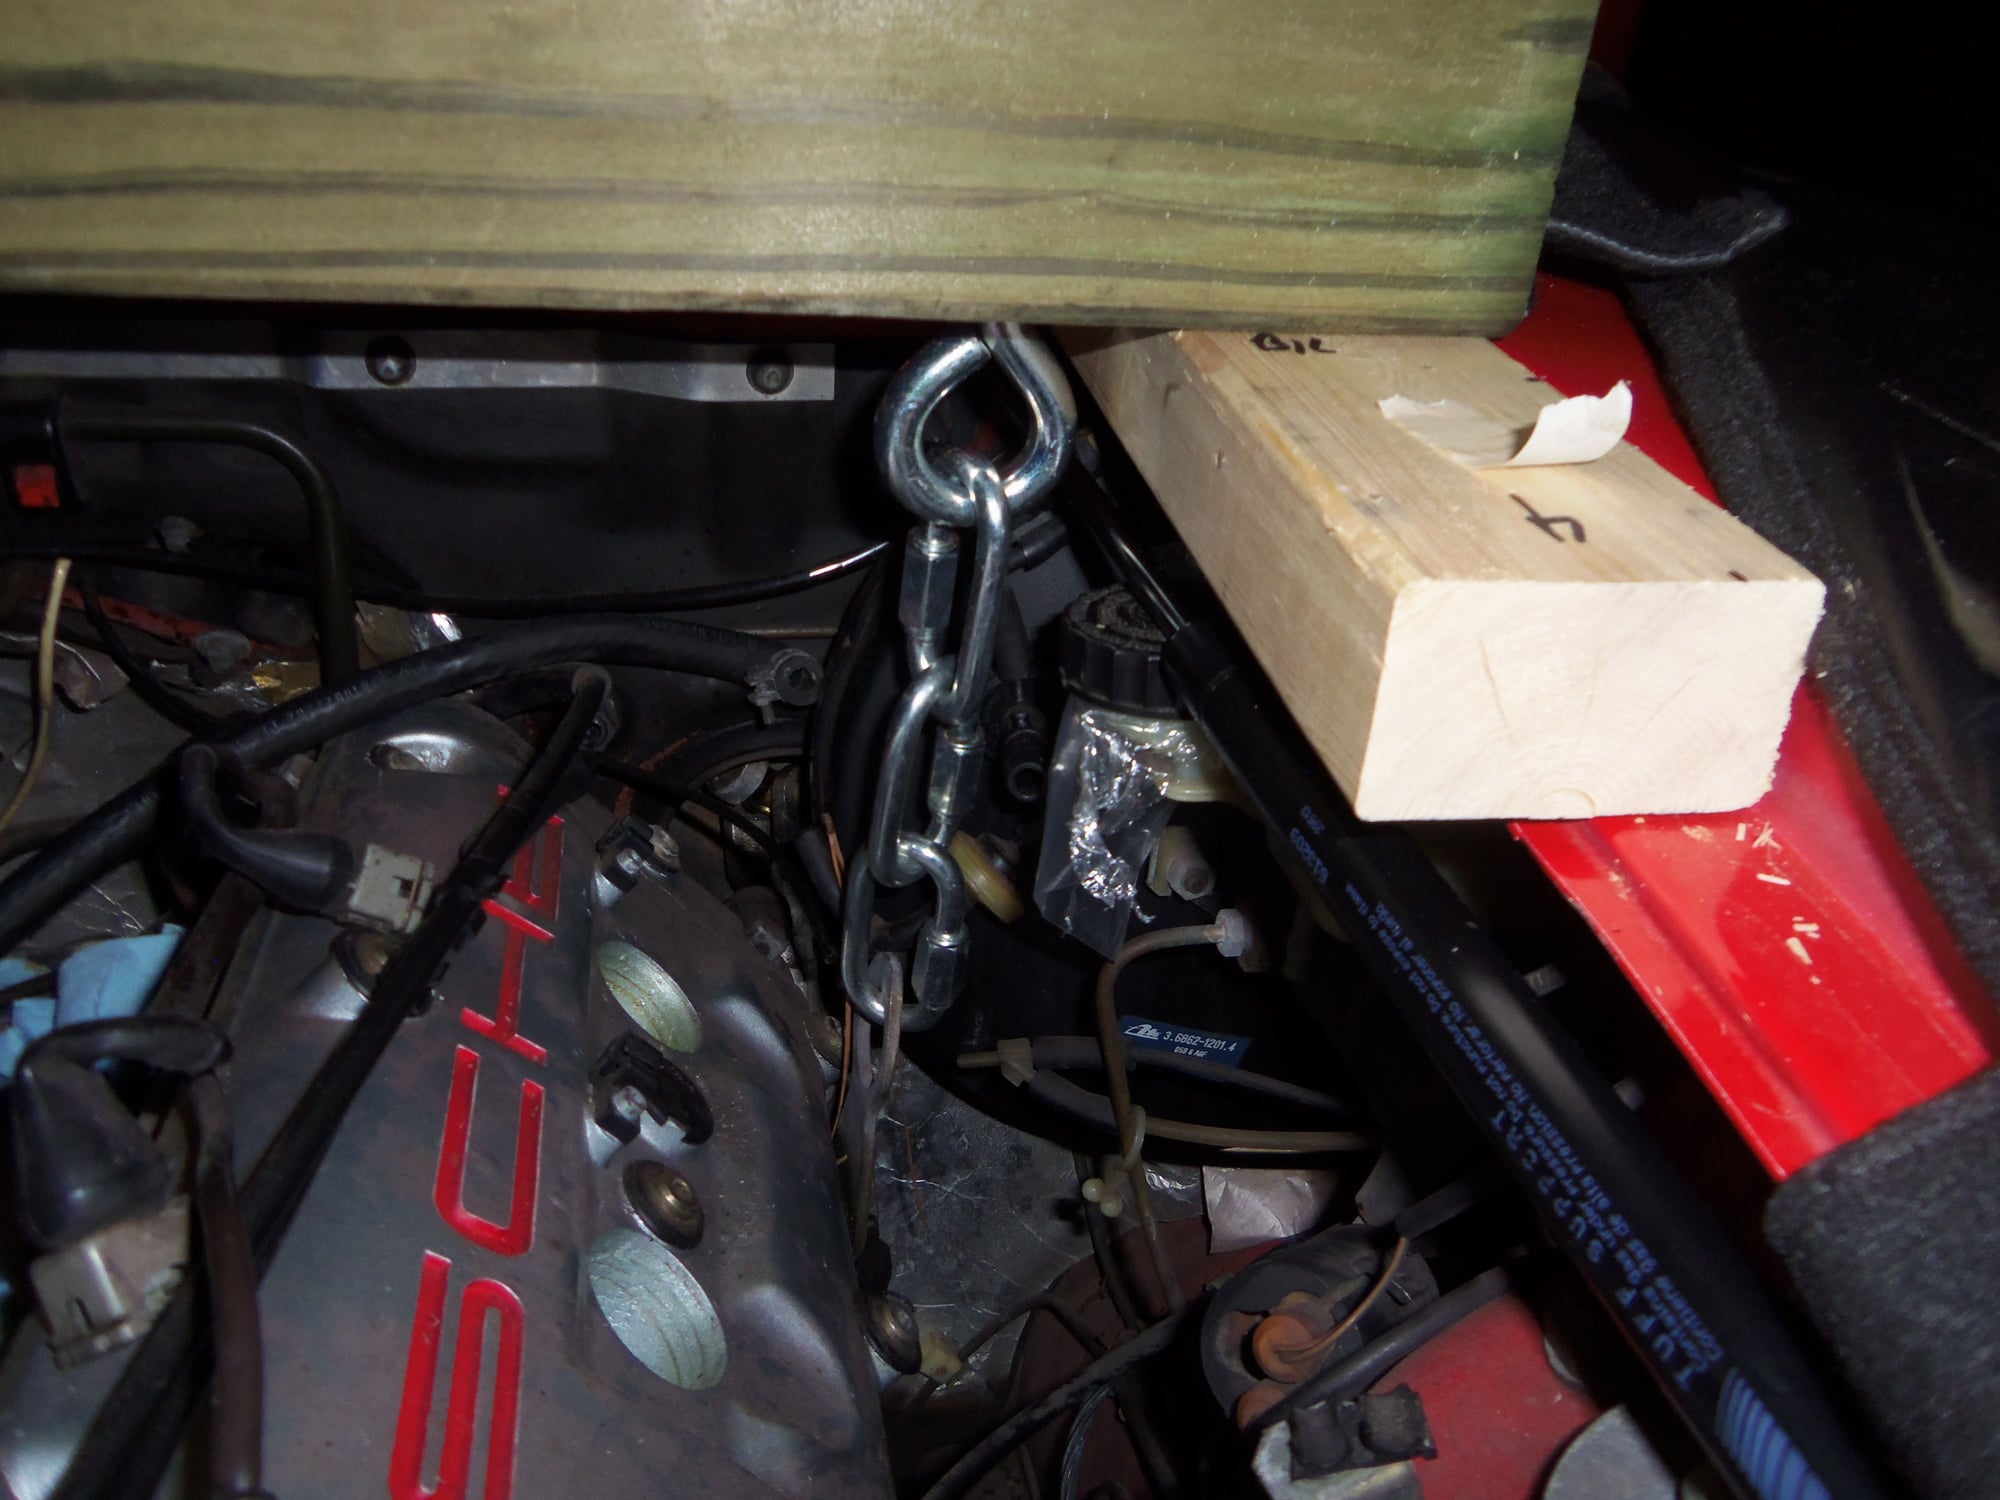
This lumber rig worked quite well. I drew up evenly on both eye bolts to lift the engine smoothly. Granted, I drew up the rear bolt a hair less due to the angle. I was concerend that the lifting eyes at opposite corners would cause instability lifting. It didn't.
The wood won't rot any time soon. Besides, I have taken the rig down and am supporting the engine with a 4x4 across the crankcase oil pan rails on a jack stand. I don't want the hood to be open while I'm not working on it.
Friday, when I start again, I will rerig the lumber and go to work.
Thanks!
Originally Posted by Adk46
You've greatly impressed us all with your talent and drive for taking things apart. Those shiny bolts in the crankcase must be tempting you, but start a new thread if you go at 'em - in another forum where you can get the professional help you need.
Check carefully for sump bugs before re-installing - they are masters of disguise.
Hi Curt!
Thanks for the compliment! However, I am not removing the girdle nuts for love or money. No way in h*ll. The only way I would ever remove the girdle was upside down. On an engine stand. In my shop.
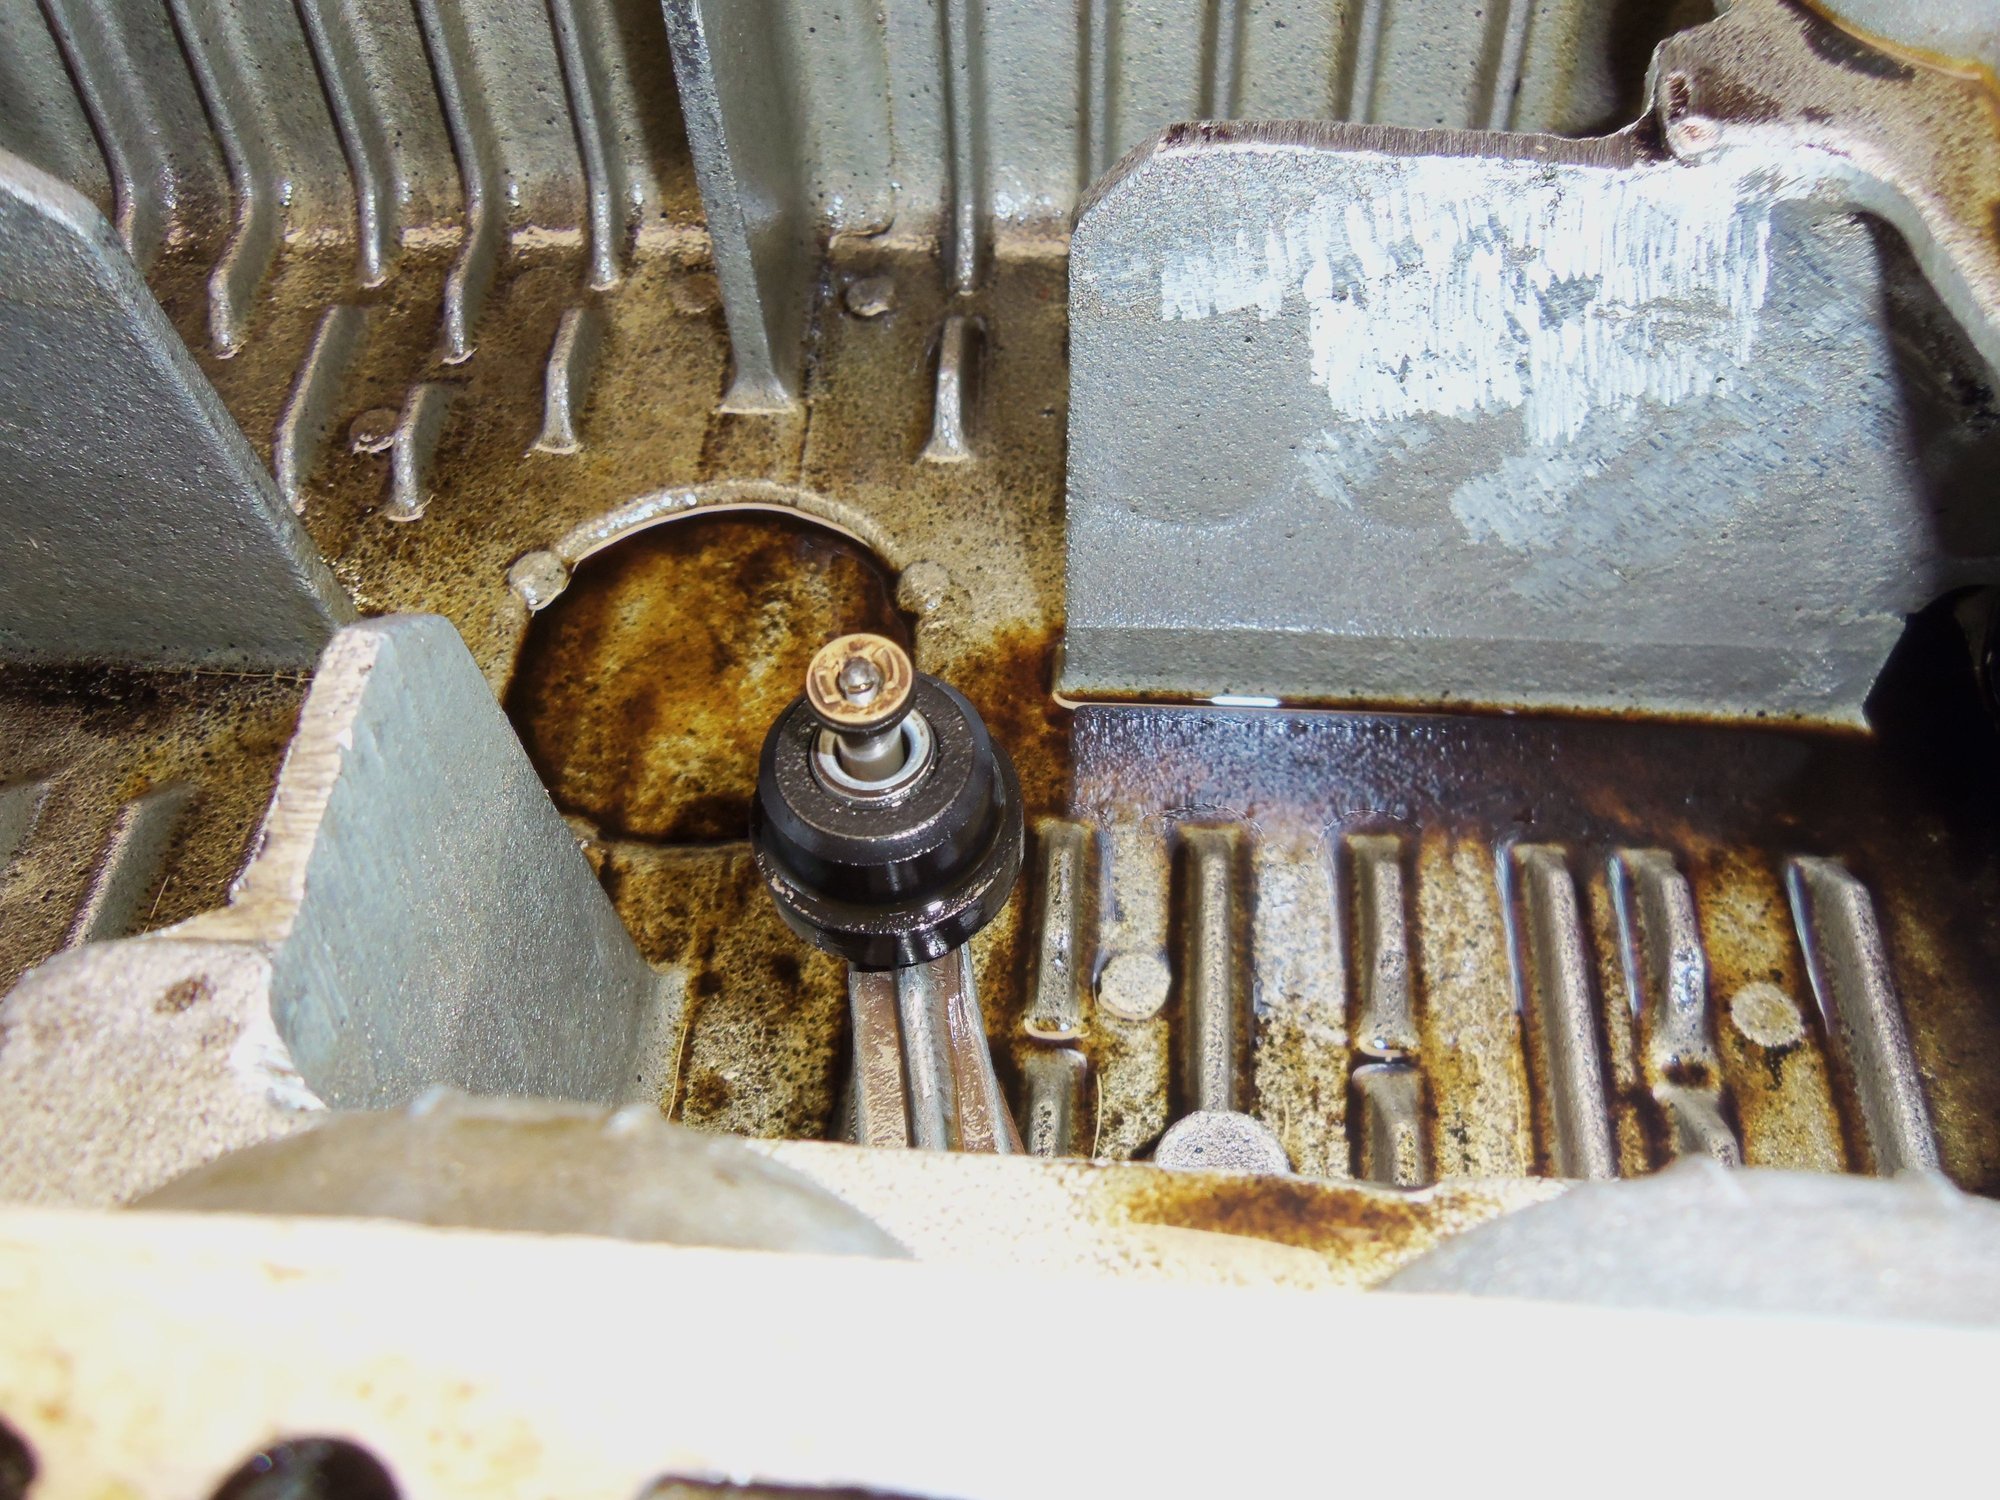
Oil suction strainer comes off, rod caps come off. Thats it!
Good point about the bugs. Stink bugs are quite prevalent around here, and get into everything! The oil pan is going to work with me for a bath in the heated parts washer. Then wrapped in a trash bag until installation time.
Then, after cleaning and such, it all starts to go back together.
Seth, you must have a pair of big brass ones to go at it like this; I'm still afraid to attempt the timing belt and fuel hoses on my '85 (drooman, that's your cue to offer your services!) and here you are disassembling even more parts. Hope it all goes back together and thanks for the great documentation. Looking forward to seeing some GoPro footage of the Red Witch melting the tires sometime soon
Thanks for the compliment! I won't quite say brass clackers, but I do what I gotta do... I am a low class slob who got his dream car. Well, she is a little tarnished around the edges. I do my own work, so this is what I get. If I don't jump in there and do it, it doesn't get fixed.
My goal is to drive the Red Witch to SITM 2017. There will be tire smoke...
Dude, fear not. After doing my first TB/WP job and all the fuel lines, I realized there is no voodoo, no magic to it. Just do it. There are many, many good write ups here on anything you need. Just research and plan the job, then take your time. Nothing to it.
More work done, though I didn't get as far as I wanted. Oil pan is clean and ready to install. I finally got one rod bearing set inspected. All looked good.
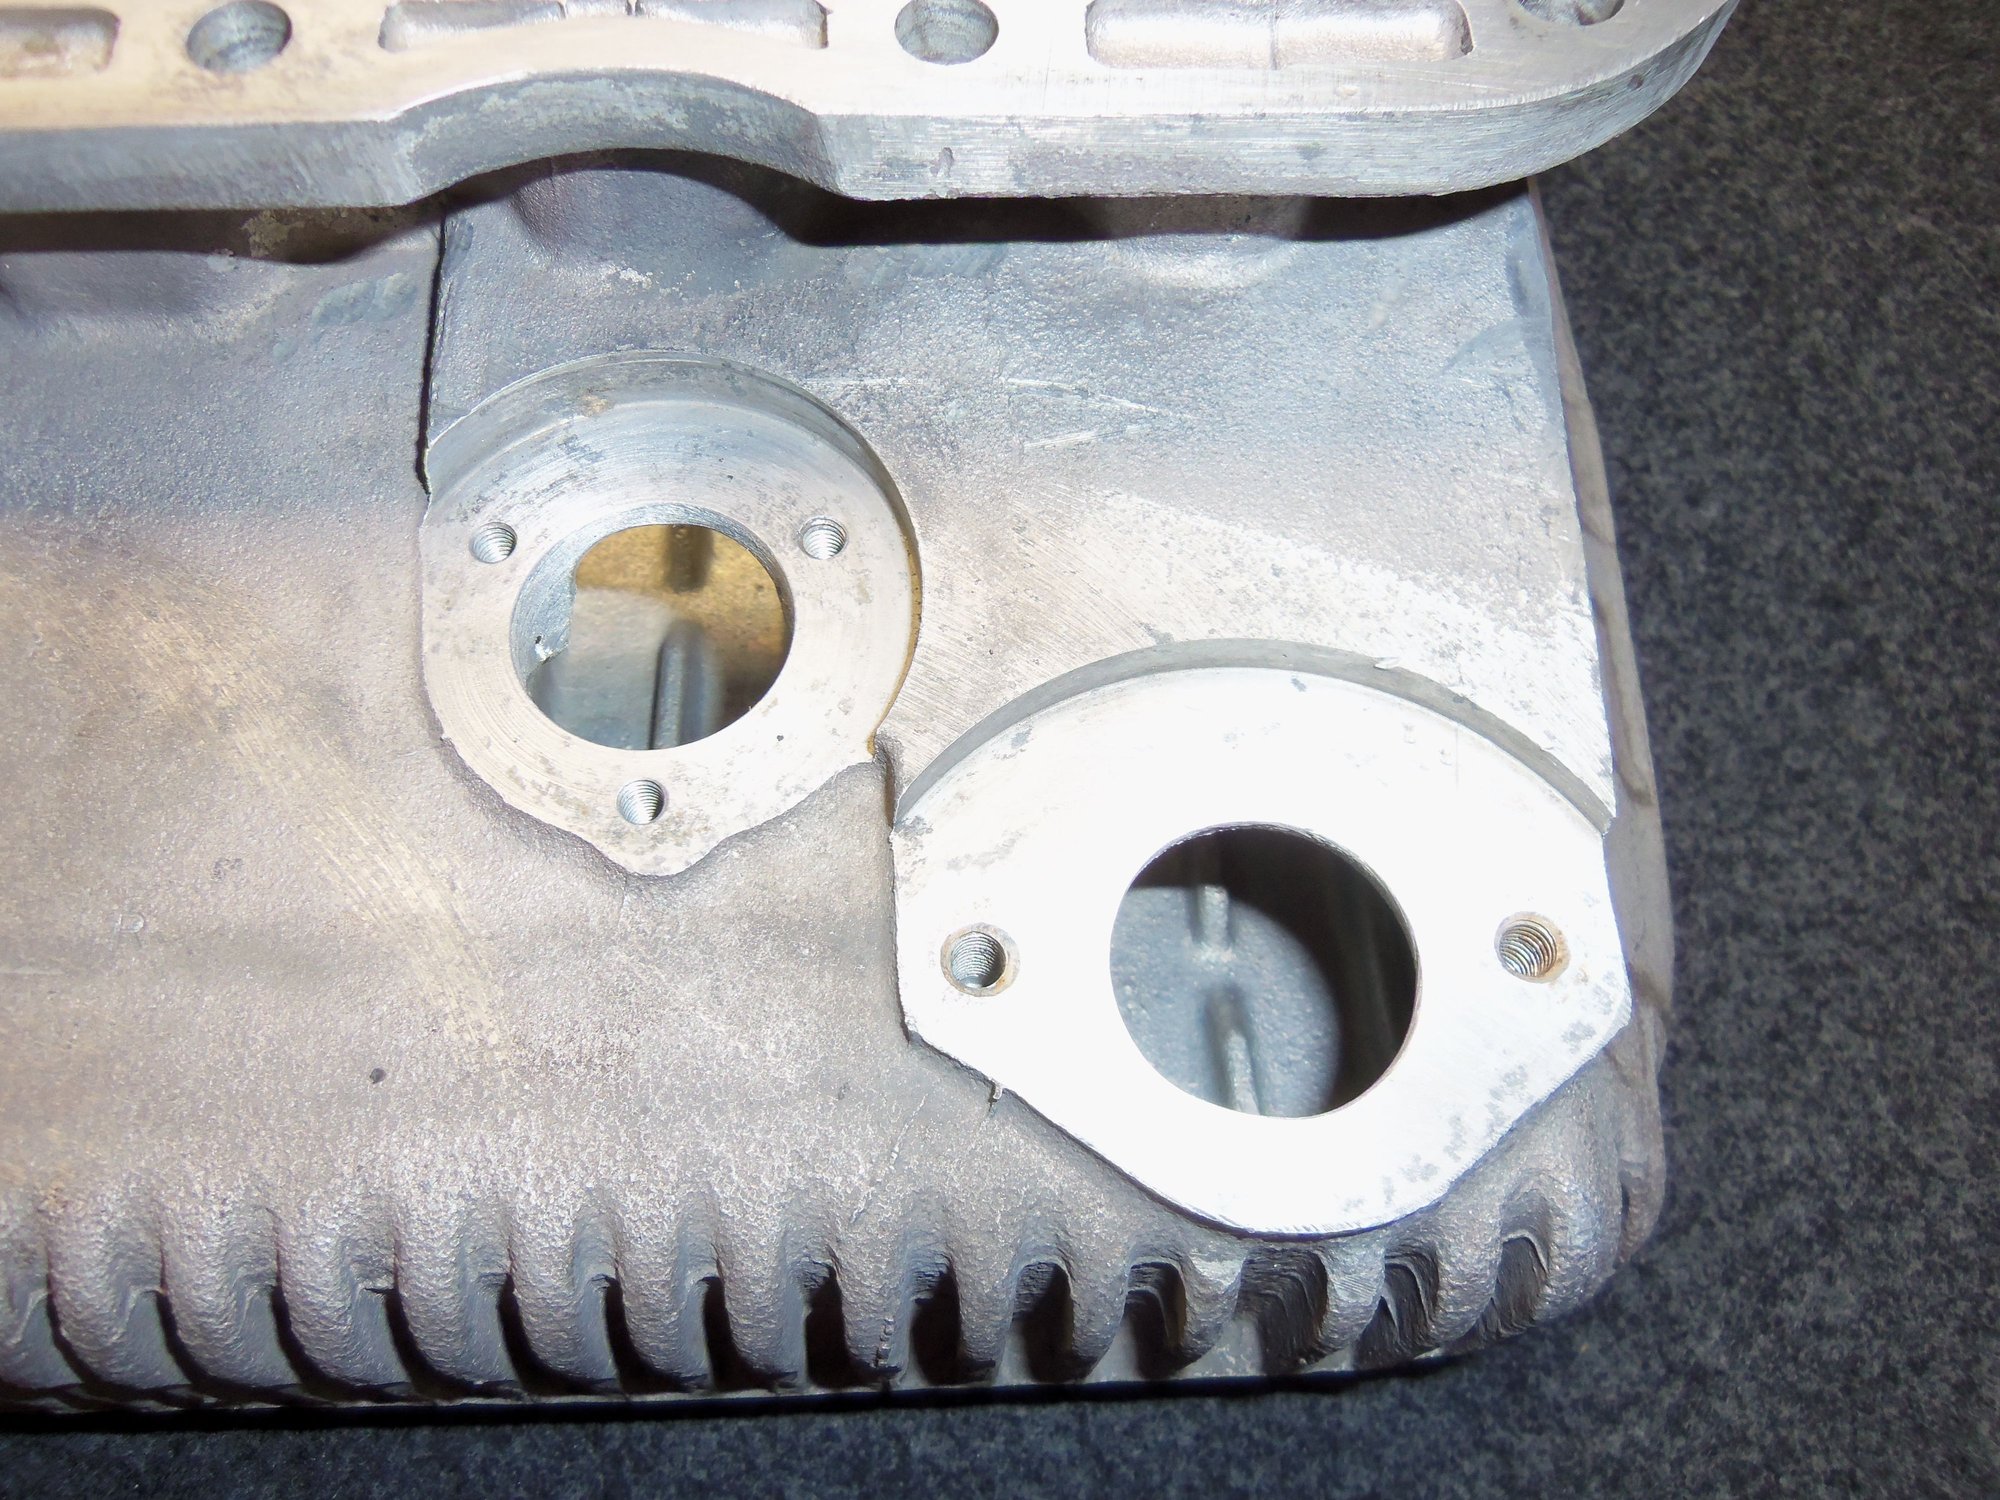
Got the oil pan cleaned and the GTS baffle mounted a few nights ago at work.
I drained a few ounces of oil out of the sump before cleaning it. In strong sunlight, I could see a slight metallic sheen. But I already knew that. For a moment, I kicked around the idea of sending that to Blackstone Labs for analysis. However, I don't think oil clinging to the inside of the oil pan is a representative sample of the 9qts of engine oil from a 928. I will wait until the next oil change and send a sample off.
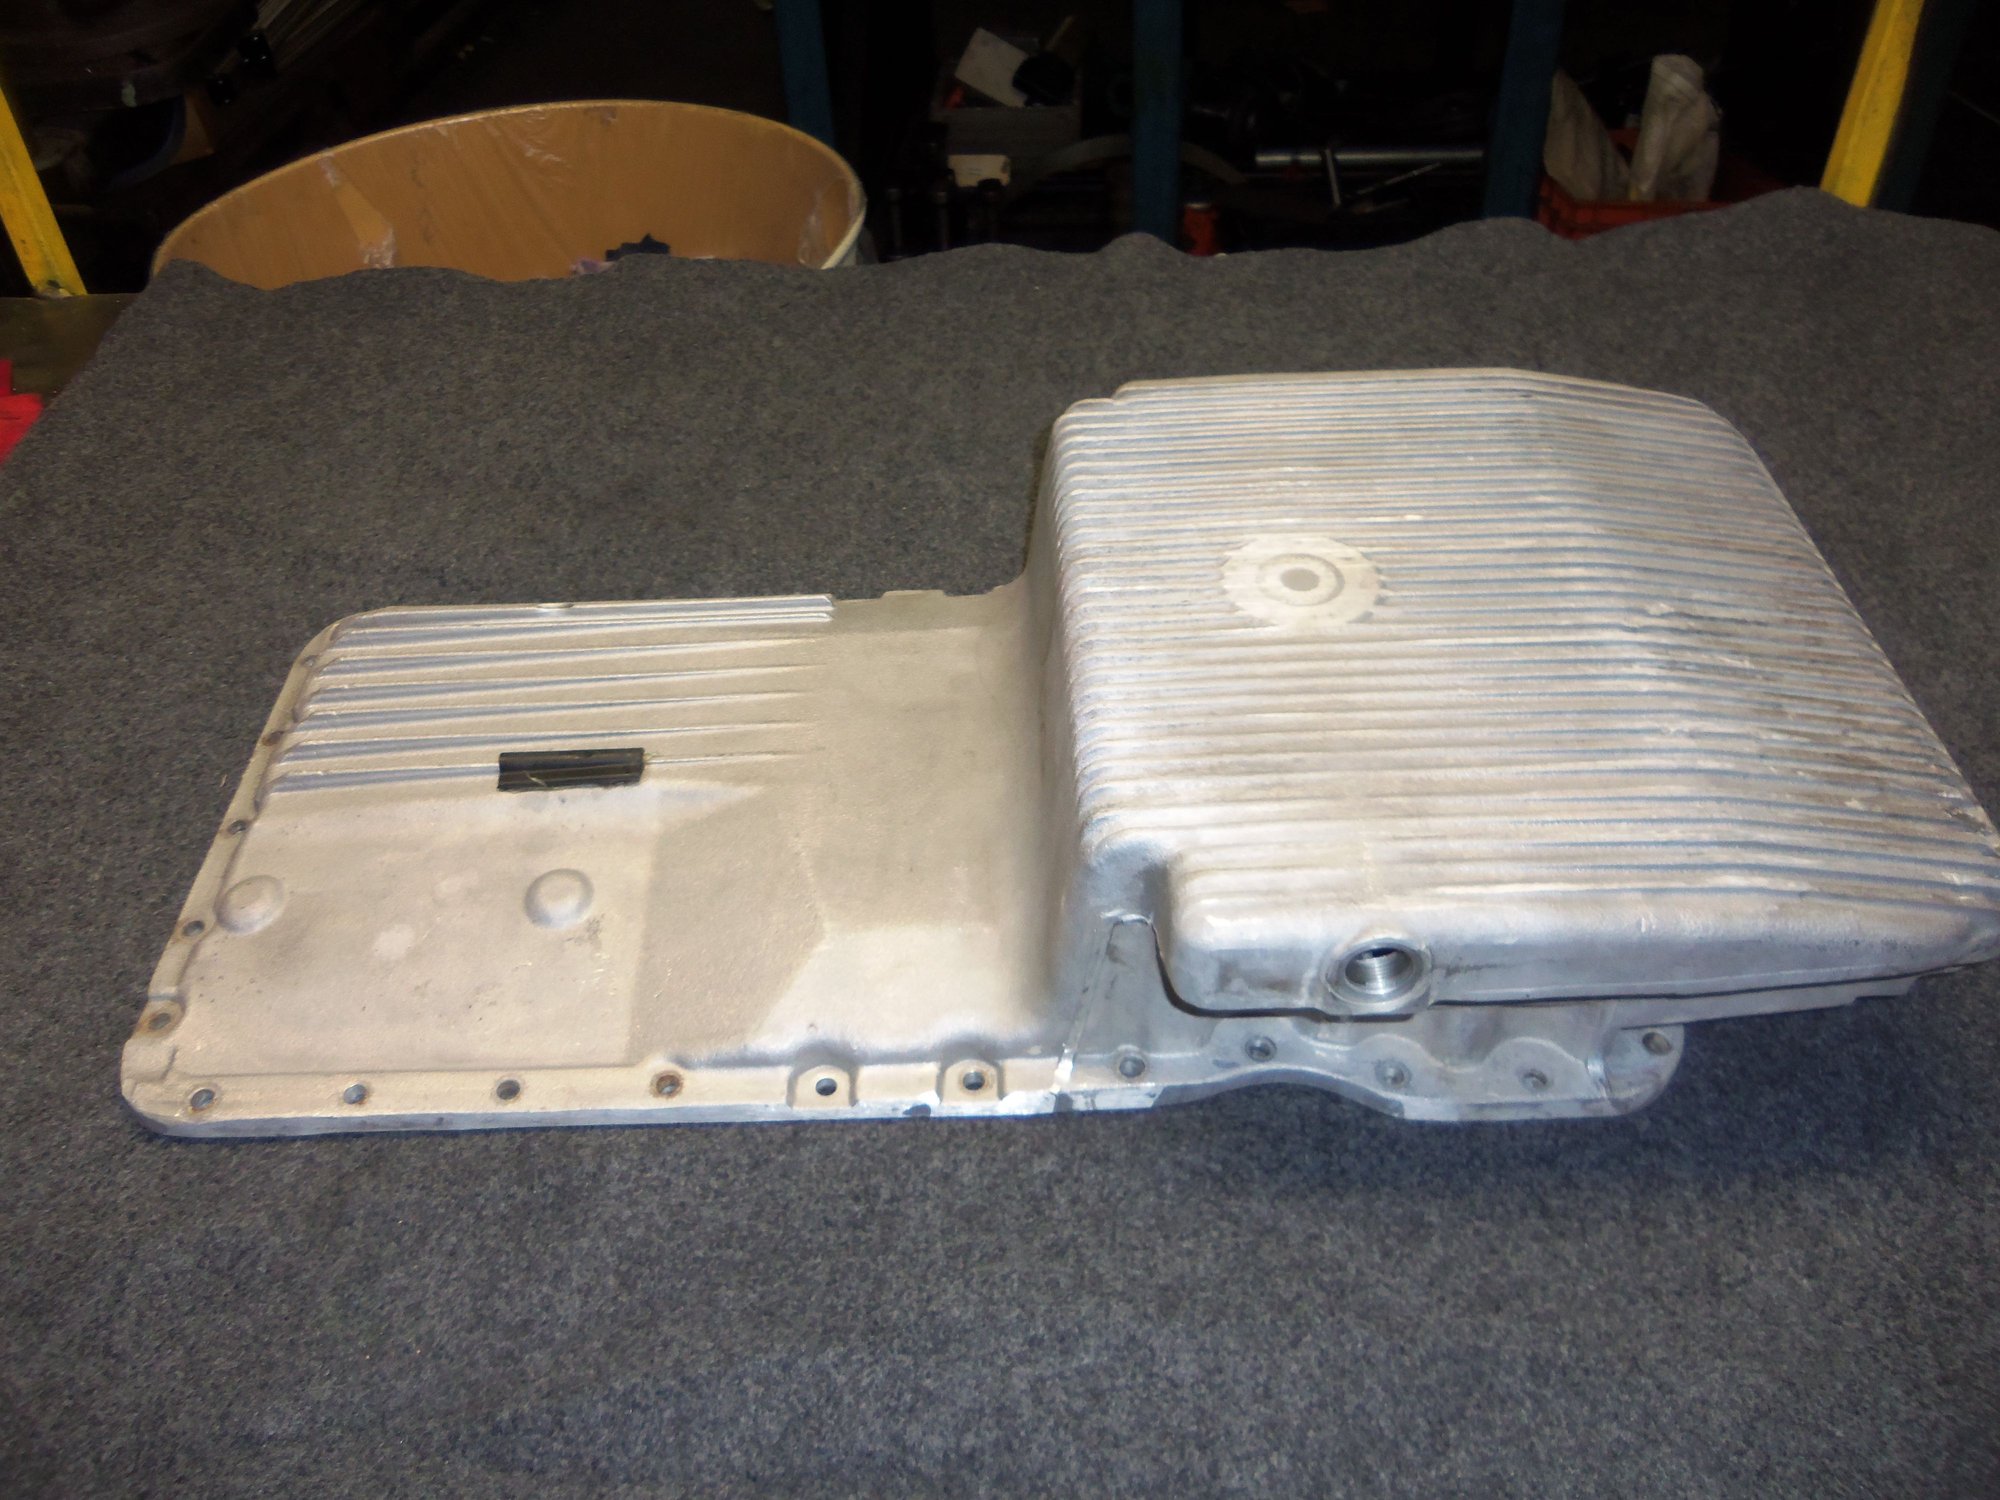
Before soaking the oil pan in the heated parts washer at work, I removed the block off plate and the oil level sensor. That oil level sensor was really stuck on there! I didn't pry on the arm for fear of breaking it. I wedged a razor blade in and around the gasket. Finally got it to break free.
Lots of scrubbing, rinsing, and blowing dry later, the oil pan was quite clean. Not pristine, but serviceable.
I checked PET for the size of the screws that hold the GTS baffle to the oil pan. M6 x 12mm, flange head. I replicated that with hex head M6 x 12 screws and flat washers. I positioned the baffle as far back as it would go. Center punch, pilot drill, finish drill, tap, clean the hole. Repeat four more times.
I let the baffle soak in the parts washer to loosen the label on it. Learned that from Nicole's post way back when.
I installed the M6 screws with two drops of Loctite 545. We use it at work on hydraulic fittings. I chose it because it resists oil. I don't want those little screws backing out. I torqued the screws to 75 in/lbs in two stages.
The completed oil pan has been wrapped up in a trash bag, and will not come out until installation time.
Slight metallic sheen in the oil drained from the sump.
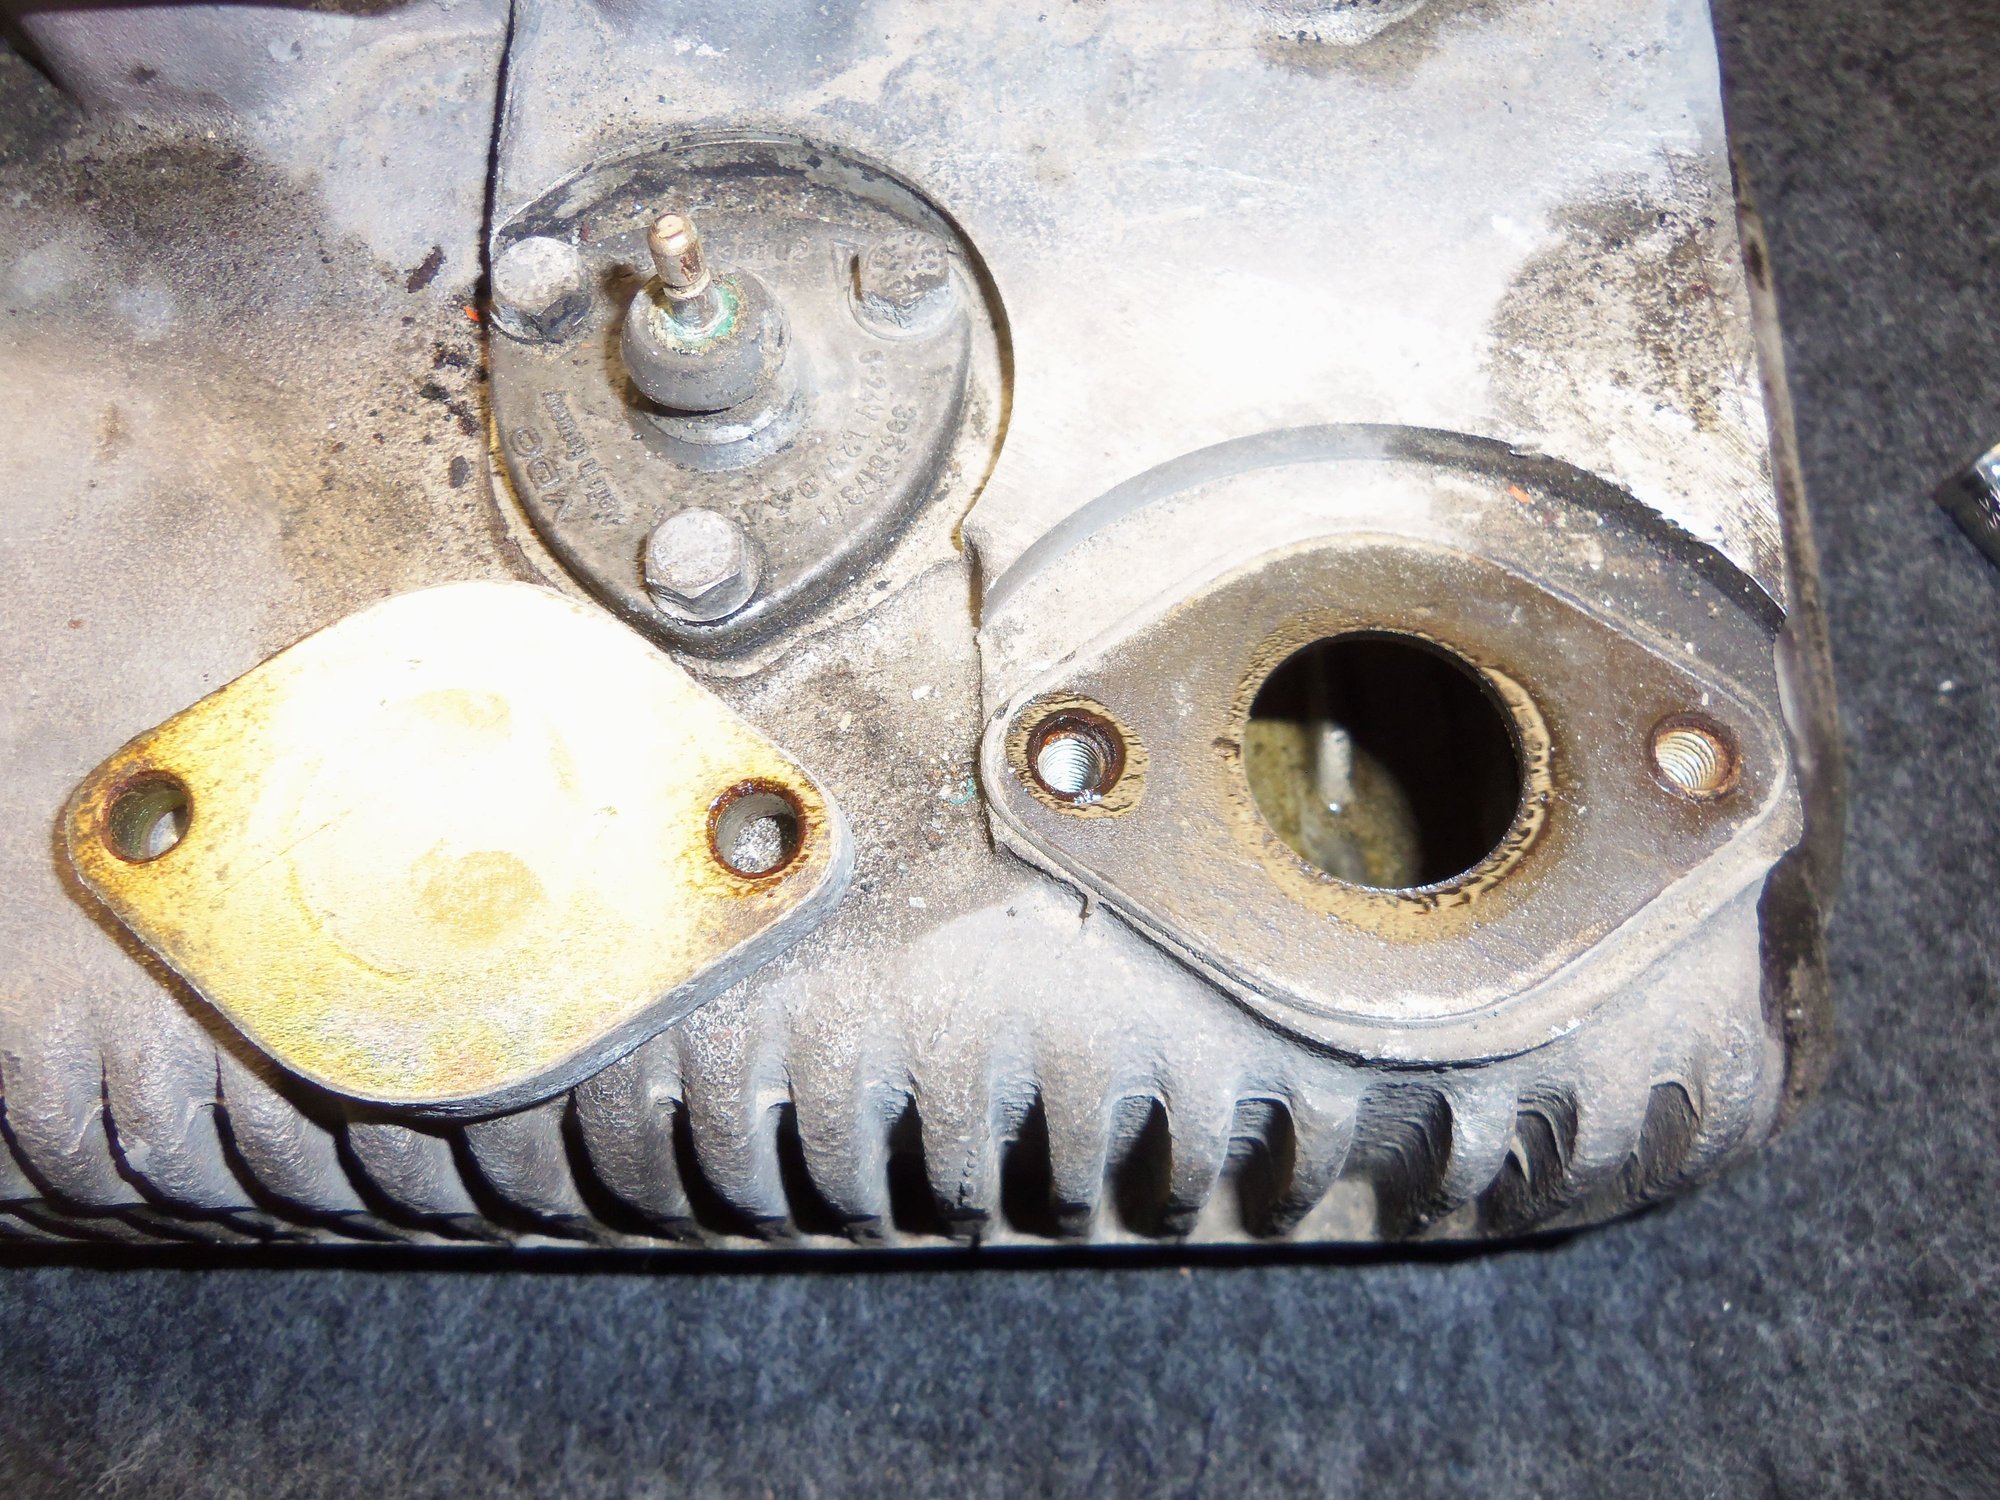
OIl level sensor flange and pre-S3 oil fill block off plate.
Oil level sensor float.
Oil level sensor arm seems too fragile to pry on.
Plate is thicker than I expected.
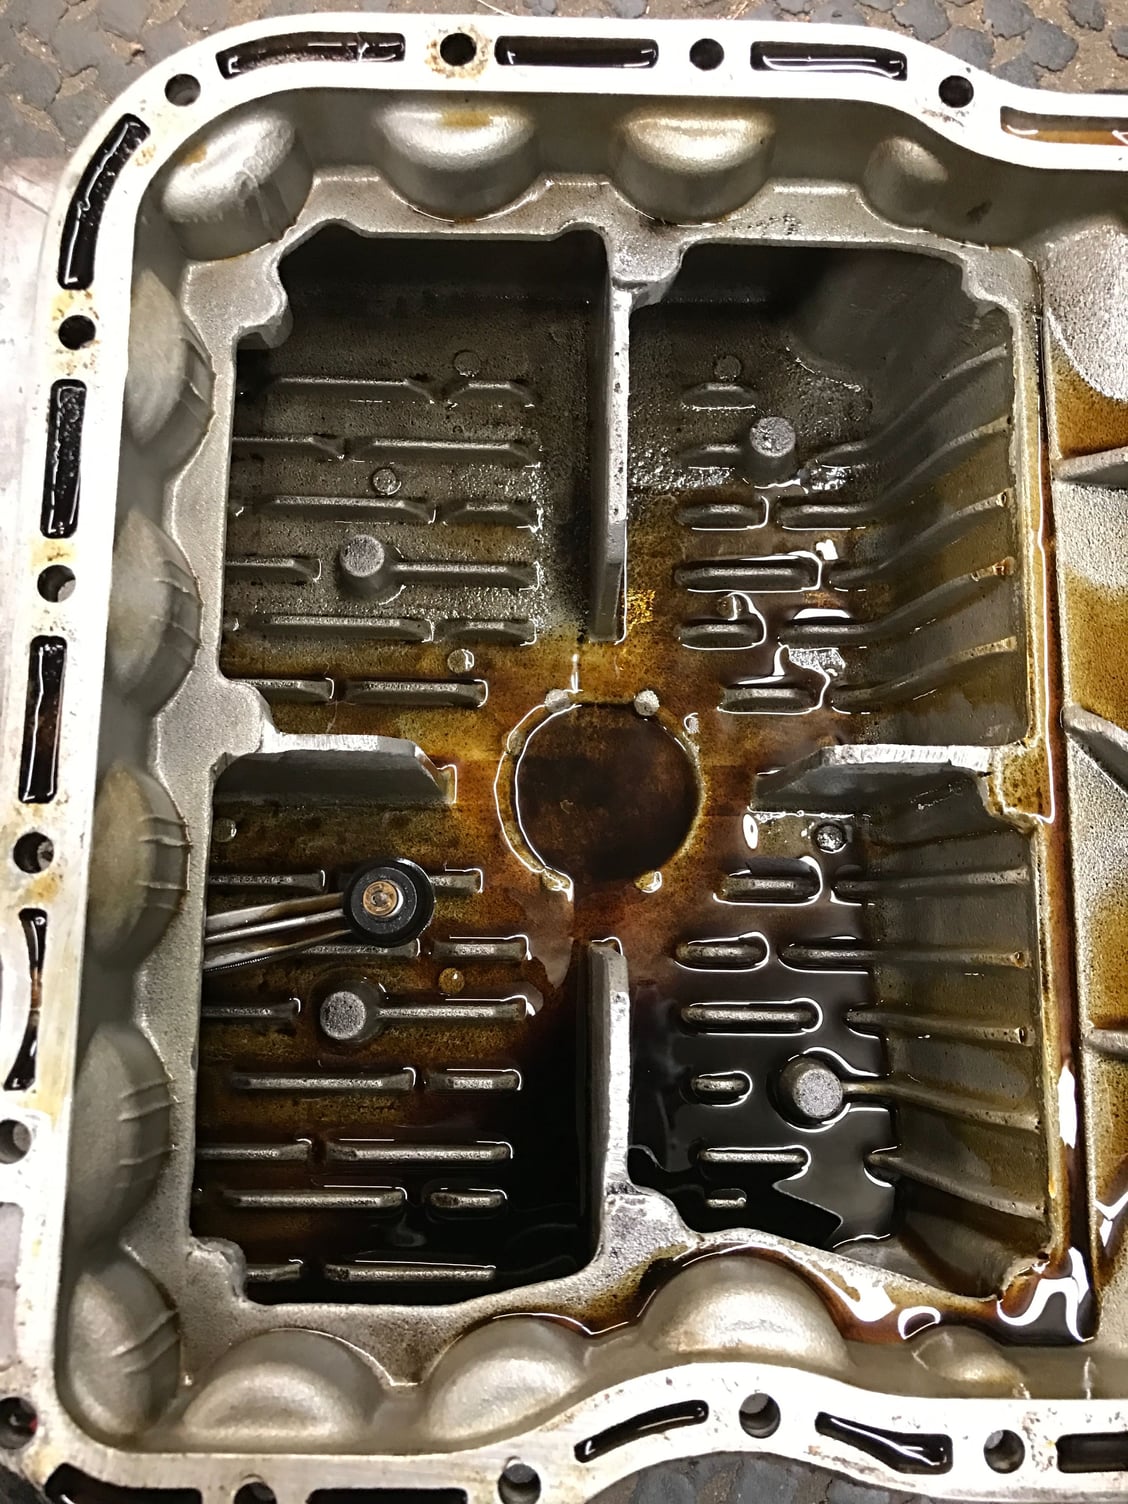
Oil pan cleaned up nicely.
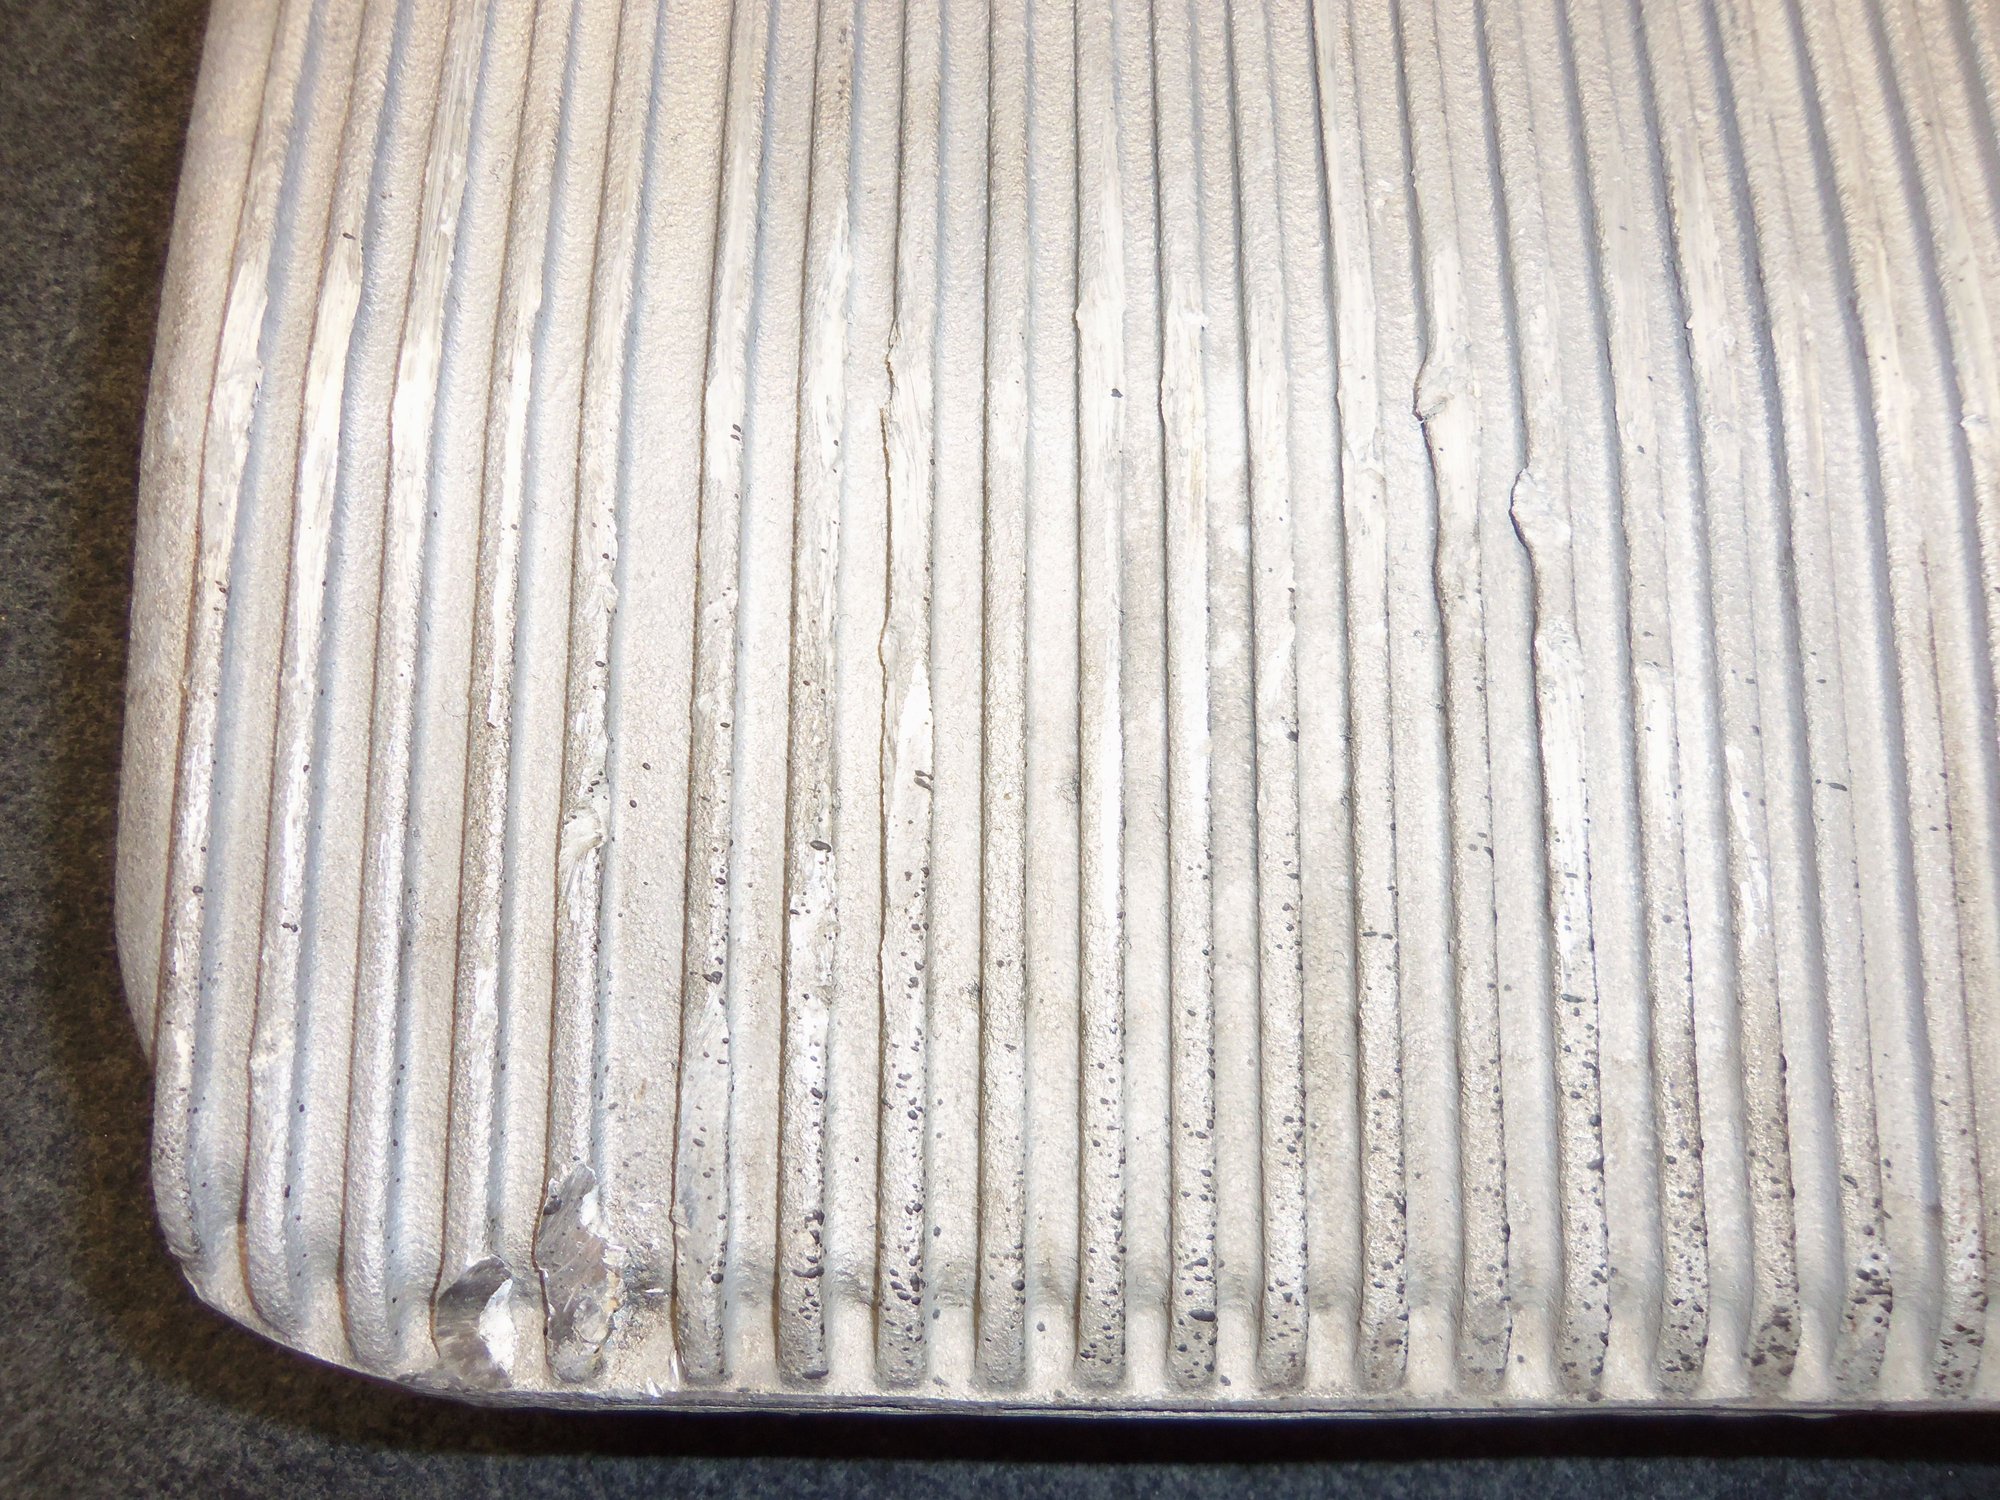
This oil pan has had a hit or two...
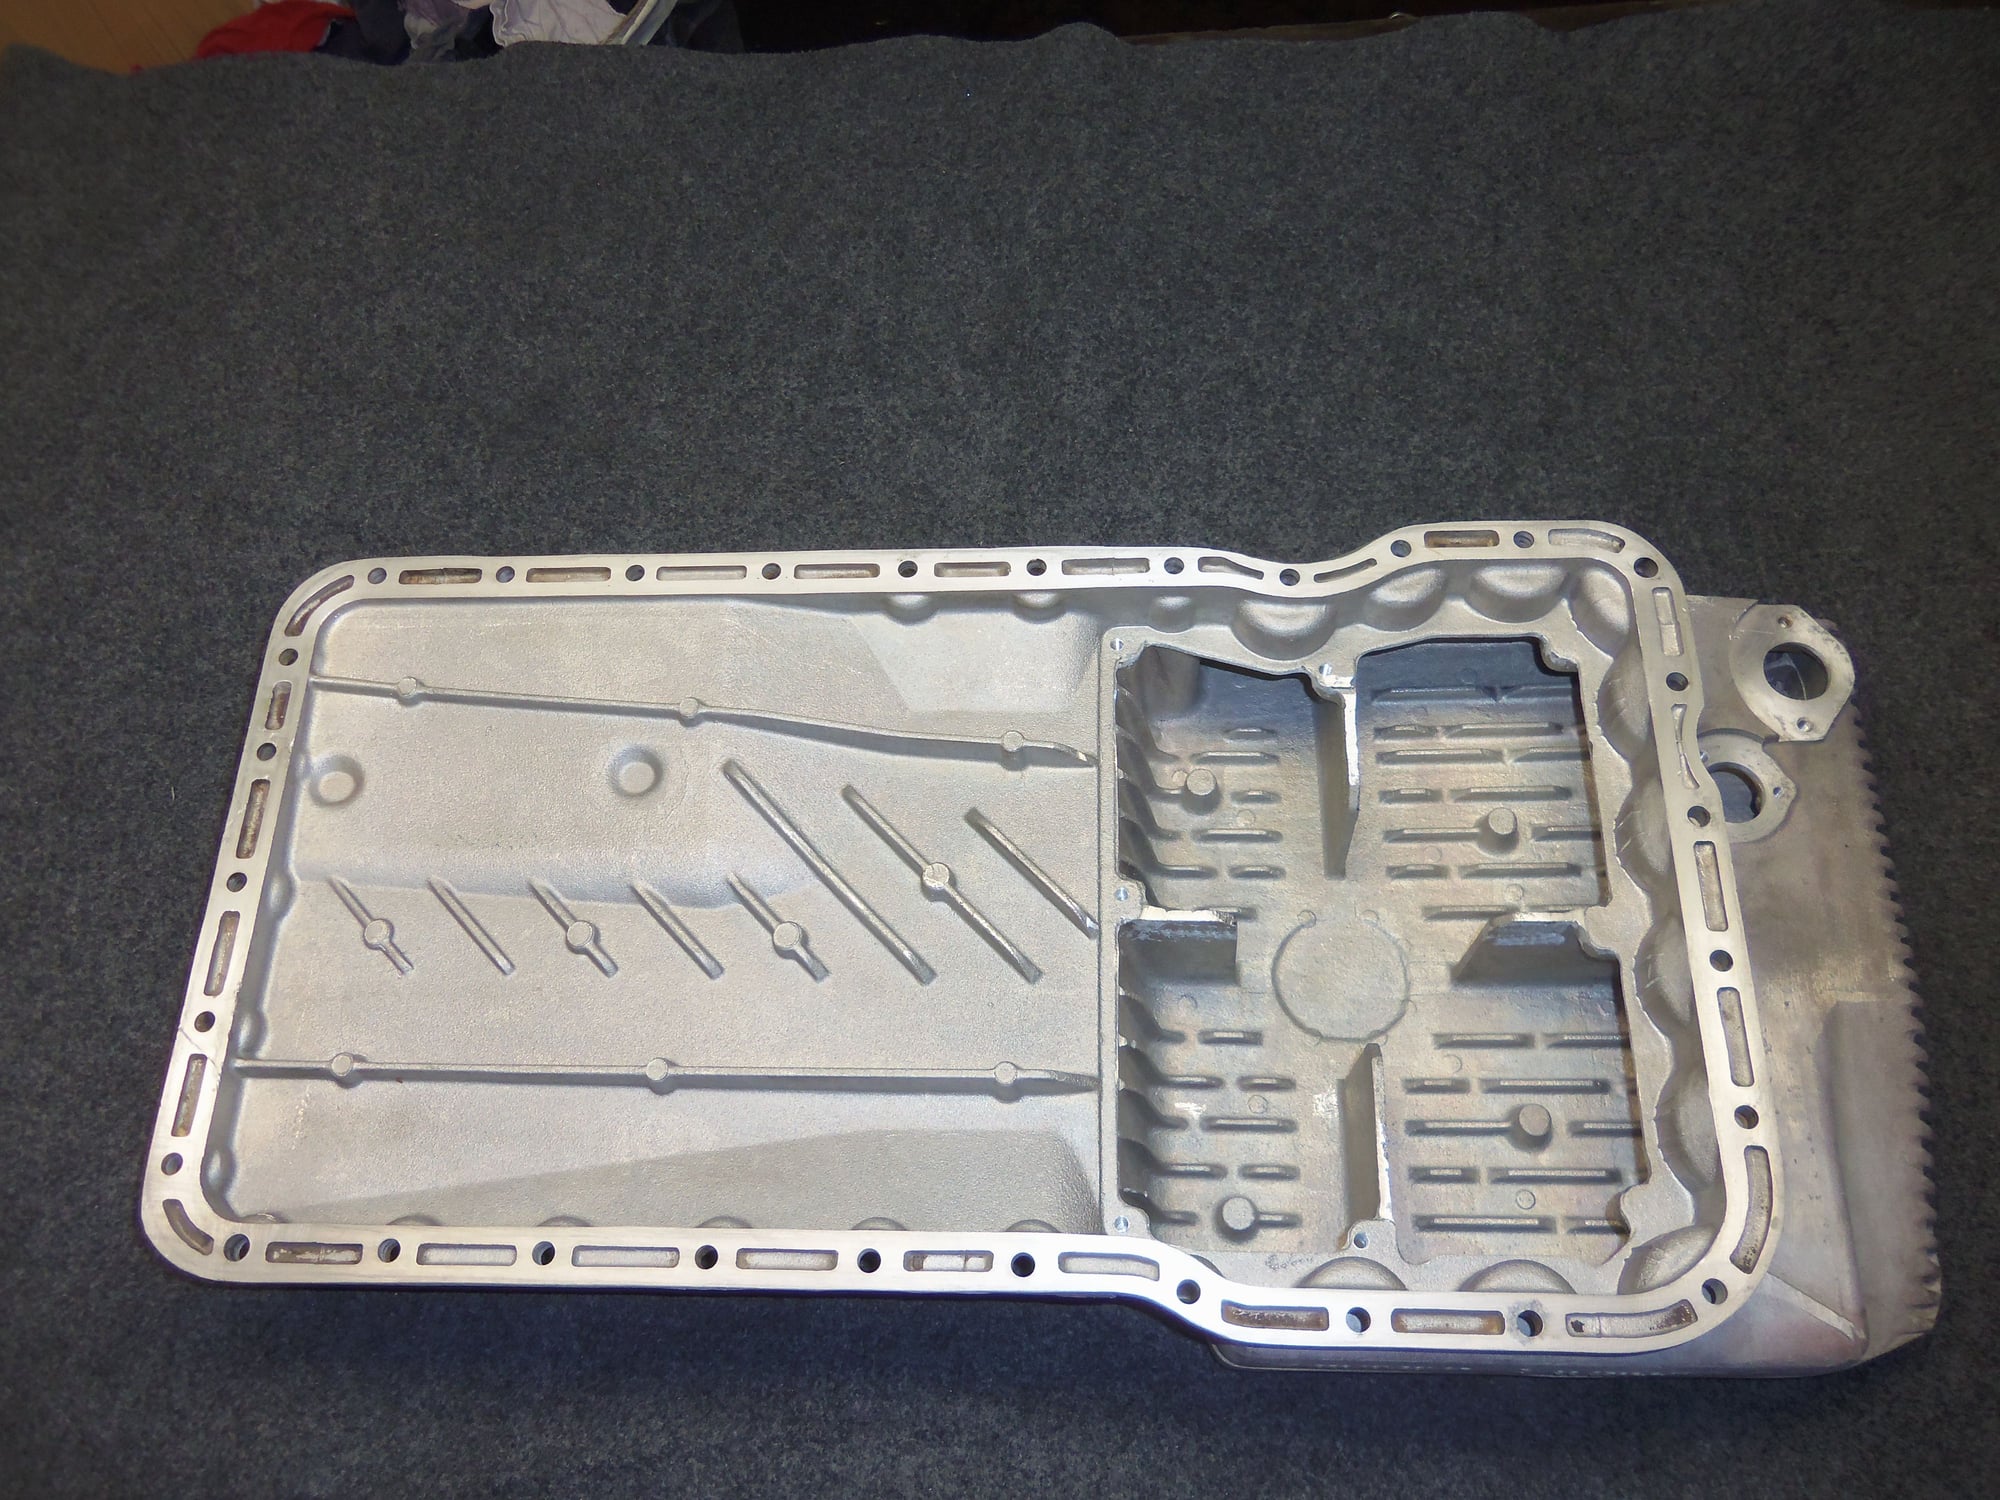
Inside of the oil pan cleaned up very well.
Much cleaner than it was before.
Had to scrape gaskets here with many razor blades.
New GTS baffle with the label removed, Loctite 545, and M6 hardware.
Completed GTS baffle installation.
I should have gone straight on to the connecting rod bearings. Instead I got side tracked fitting the oil pan studs.
Removing the fossilized old cork gasket was much harder than I expected. The gasket was fiercely stuck to the pan rail in between the bolts. I ended up using many razor blades to break it loose. Then, more razor blades to remove all traces of the old gasket.
I did some remedial cleaning of the sides of the engine block. For giggles, I filled a little water spray bottle with mineral spirits. It worked great! I sprayed the mineral spirits on the block, and scrubbed with a toothbrush. Labor intensive, not perfect, but it is good enough for now.
I followed up by spraying the inner sides of the crankcase above the pan rails, the pan rails, and all the oil pan bolt holes with brake cleaner. I wanted to remove all the oily residue before I started to set the studs in place with blue Loctite.
Not perfect, but cleaner than it was.
Yeah, I know, I cracked the sealing flange for the upper oil cooler line fitting. I will be doing the 'seal it with JB Weld' trick.
Reading through a few threads on the silicone oil pan gasket and the stud kit, I decided to follow suit and shorten some of the studs.
Most posters shortened five studs: the one above the starter and the four above the crossmember.
I only shortened four studs. The hole above the starter on my block was open. So, I just ran that stud in until it was around 21mm out from the pan rail.
After determining the depressions in the oil pan for the short bolts were 3mm deep, I removed 3mm from four of the new studs. I had to be very careful in dressing the cut off ends so they would thread smoothly into the pan rails. I ended up chasing them with a proper thread die. My normal trick of using a thread chaser still left a tiny burr that got hung up in the pan rail threads.
Before installing the studs, I cleaned the bolt holes and pan rail one last time. I used a lint free cloth on the pan rail. I will do so again just before I actually install the oil pan.
I ran those four short studs in until they were around 22mm from the pan rail. The rest of the studs got installed until they bottomed out, or were around 24mm from the pan rail. All studs were installed by hand with blue Loctite. Since it will be a few days until I install the oil pan, the Loctite will have plenty of time to cure.
Oil pan studs installed and Loctite is curing.
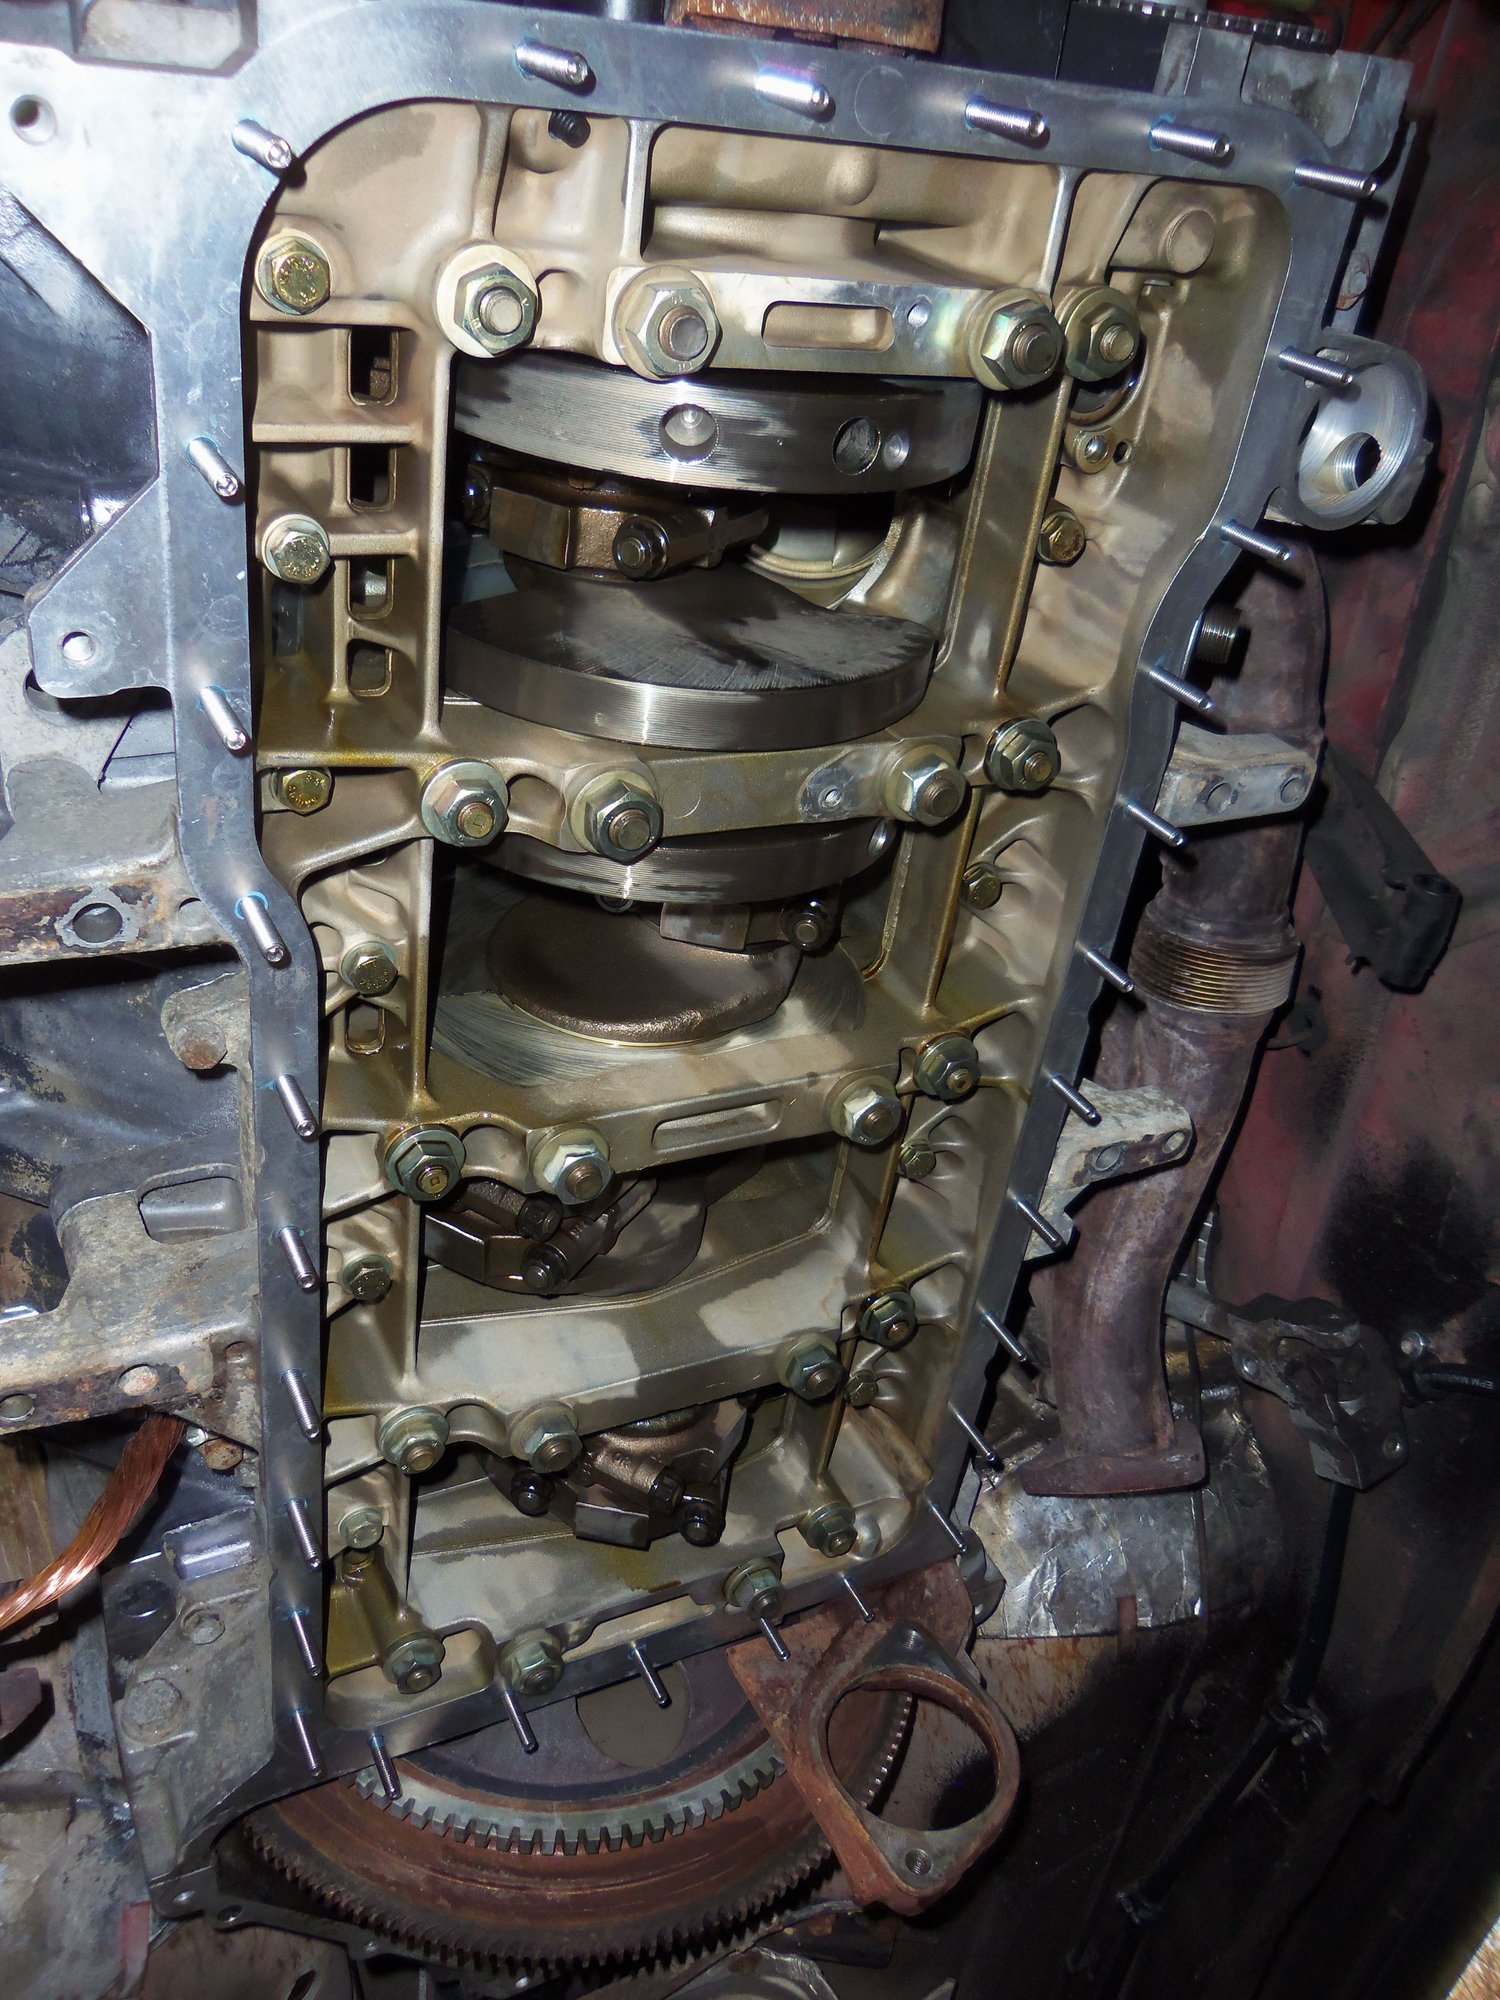
Finally, onto the rod bearings. Due to lack of time, I only got to #1 rod bearing set.
I have disassembled several engines, and built a few. However, I have never pulled rod bearings in situ. It was an experience...
Of course the rod cap didn't want to come loose. I nervously tapped it with a little brass hammer. It came loose. Too bad the bearing shell stayed with the crank. I removed the shell to find a pristine rod journal on the crank.
I kinda expected that. Most of the posts I have read imply you have to do something really stupid and/or try really hard to damage a 928 crankshaft.
I put protective hose on the rod bolts and started the push the rod/piston up away from the crank. And the upper bearing shell fell out of the rod. It took me a few tries to wiggle the shell out.
I forgot that you could gently push the piston/rod high enough that the rod journal would rotate clear.
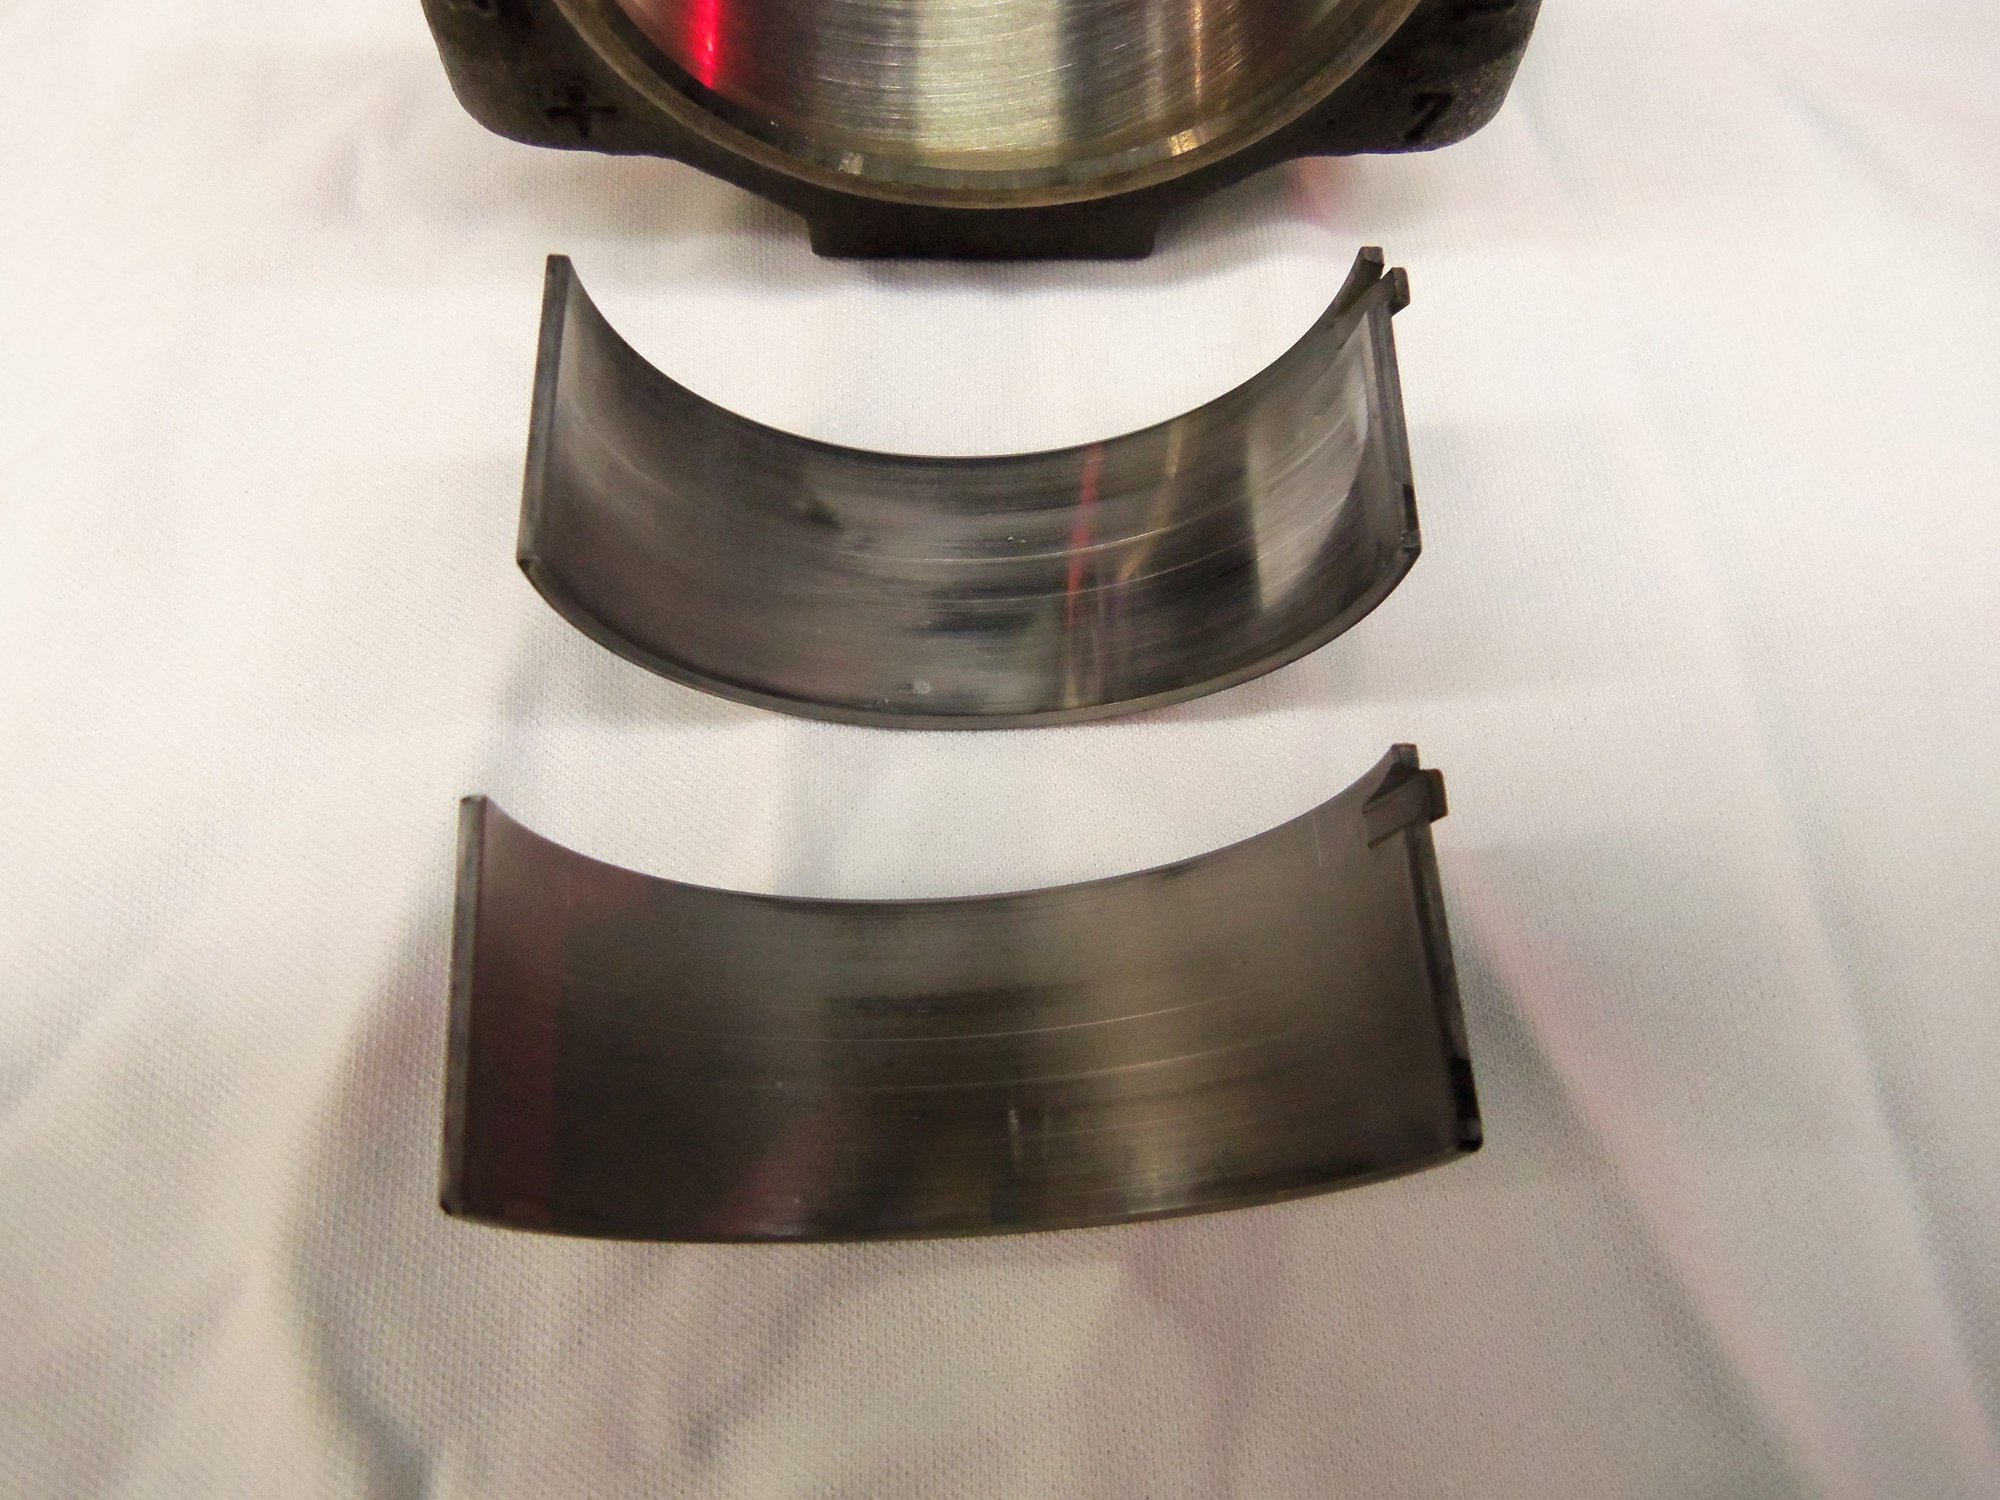
On a lint free cloth, I inspected the rod bearings. Both show wear, but not horrible. I gently cleaned them with brake cleaner and a lint free rag.
back at the engine, I cleaned the rod journal and the bottom of the rod with another lint free rag and brake cleaner.
Moment of truth: clearance. It took me a couple of tries to get the upper rod bearing shell back up seated in the rod. Then, I put a piece of green plastigage on the lower bearing shell. I reinstalled the rod cap and torqued the old nuts to 55 ft/lbs in a few steps.
Removed the cap and measured the smashed plastigage. 0.038mm.
Section 13, page 16 of the WSM calls for 0.02 - 0.07mm clearance for a new rod bearing, and 0.10mm wear limit.
Rod #1 is good!
Cleaned the smashed plastigage off the rod journal and bearing with a lint free rag and brake cleaner. Back on with the rod bolt protectors and back up with the piston/rod. Once again I cleaned the upper bearing shell with a lint free rag and brake cleaner, then lubricated it with Permatex engine assembly lubricant. Same thing for the lower bearing shell.
I know the standard procedure is to just oil the bearings. However, the oiling system on the Red Witch is completely dry. I want a little extra insurance for the rod bearings until oil pressure builds.
Reinstalled the rod cap with new nuts, torqued to 55 ft/lbs in a few steps.
One down, seven more to go.
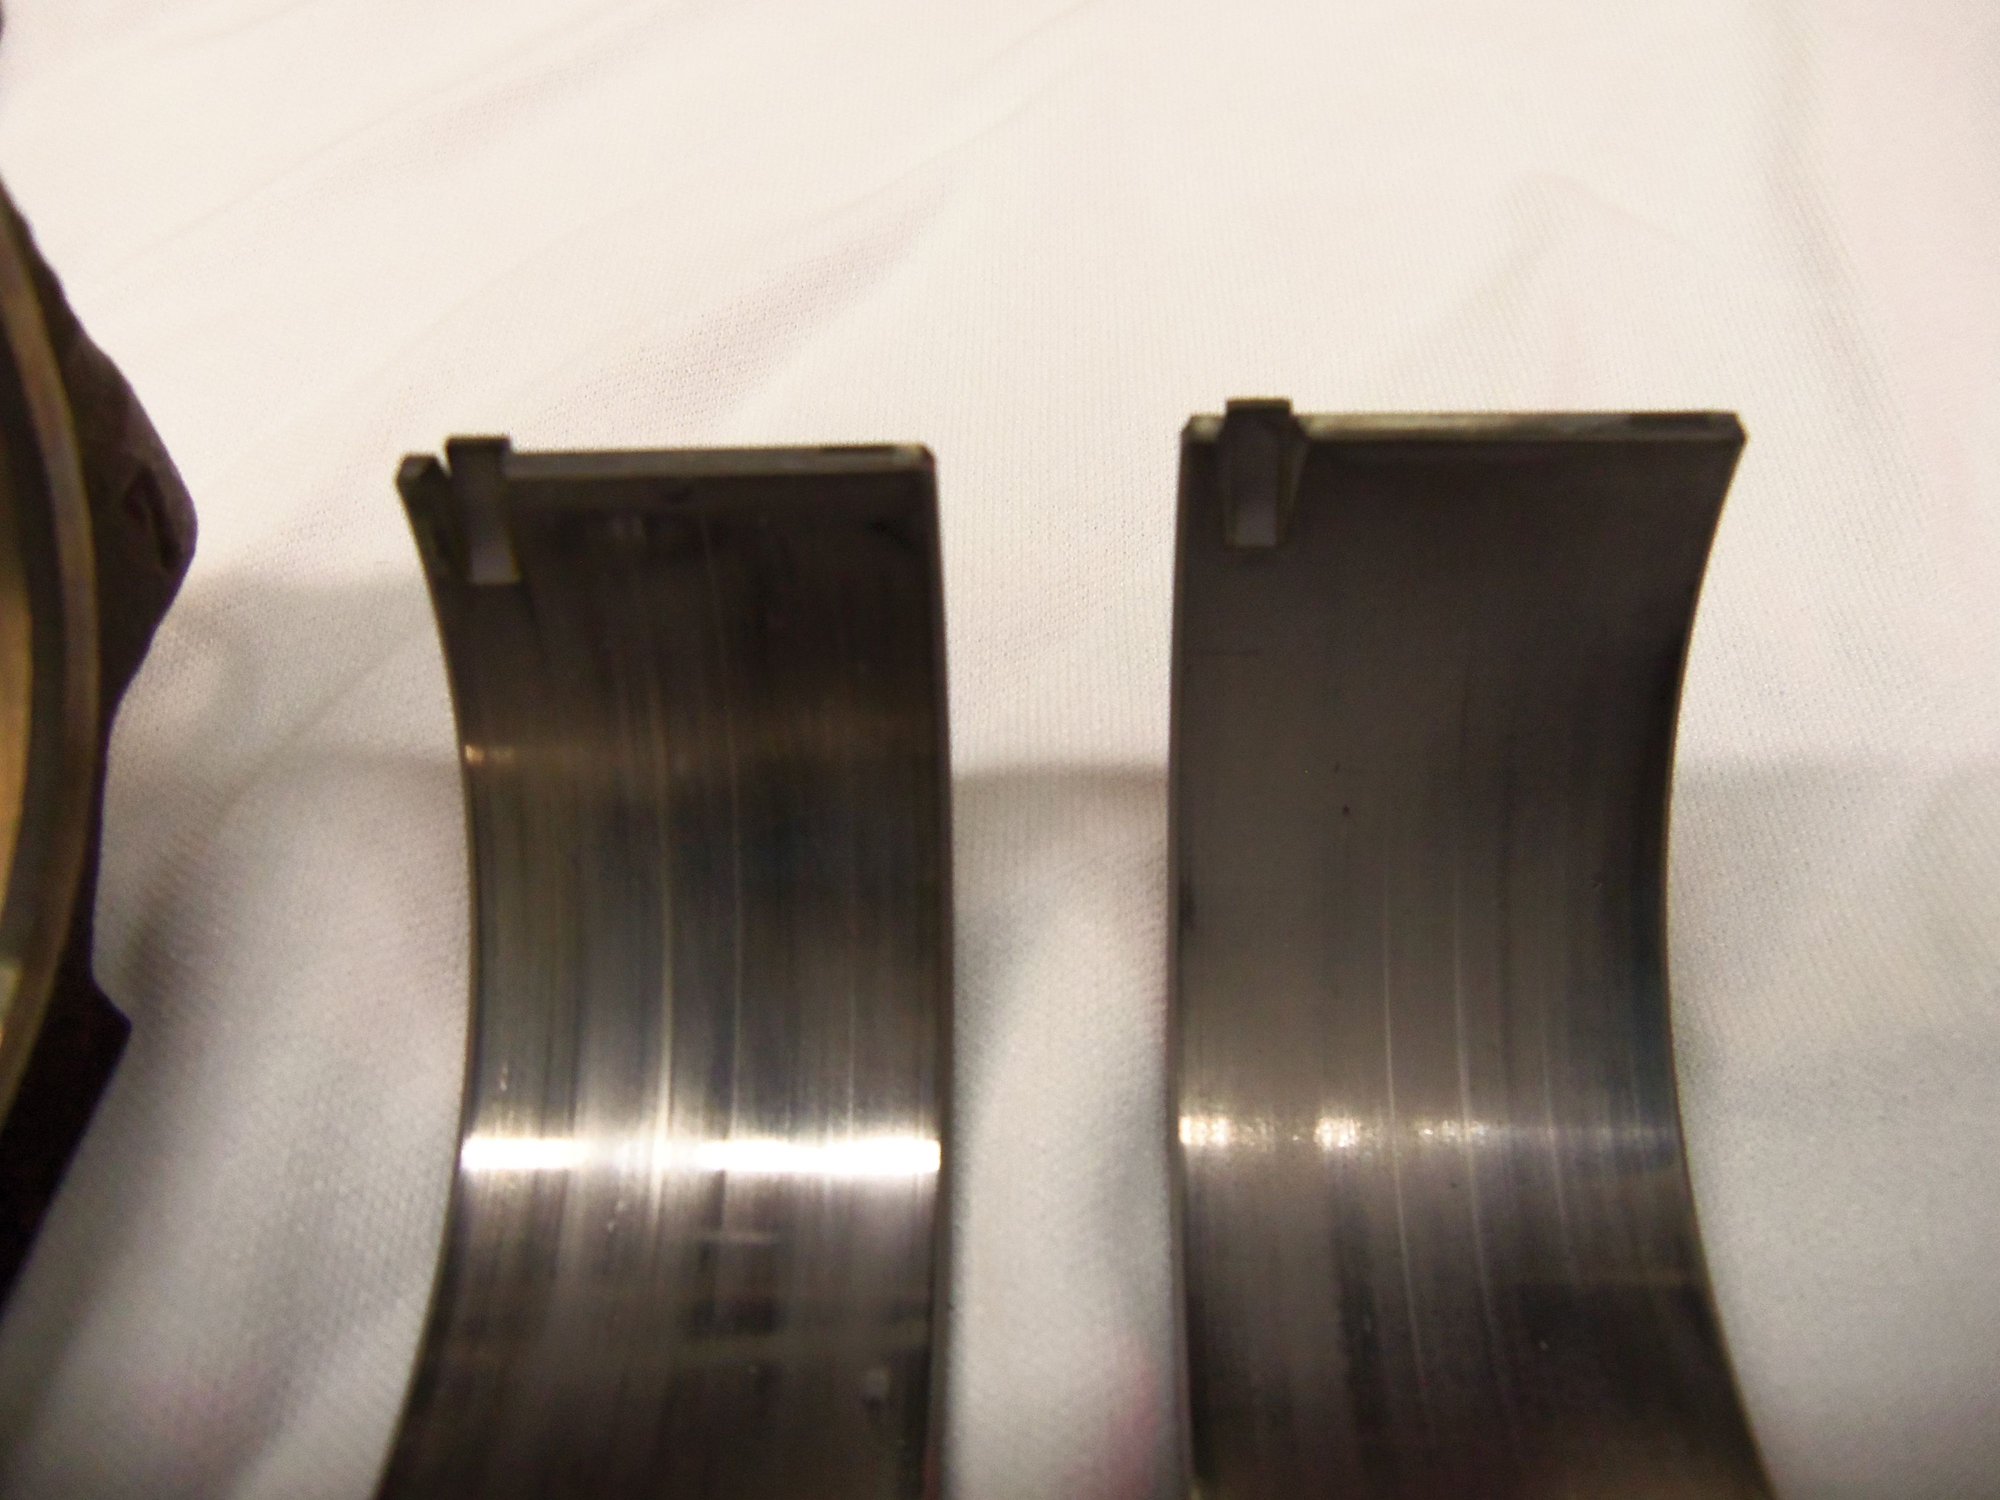
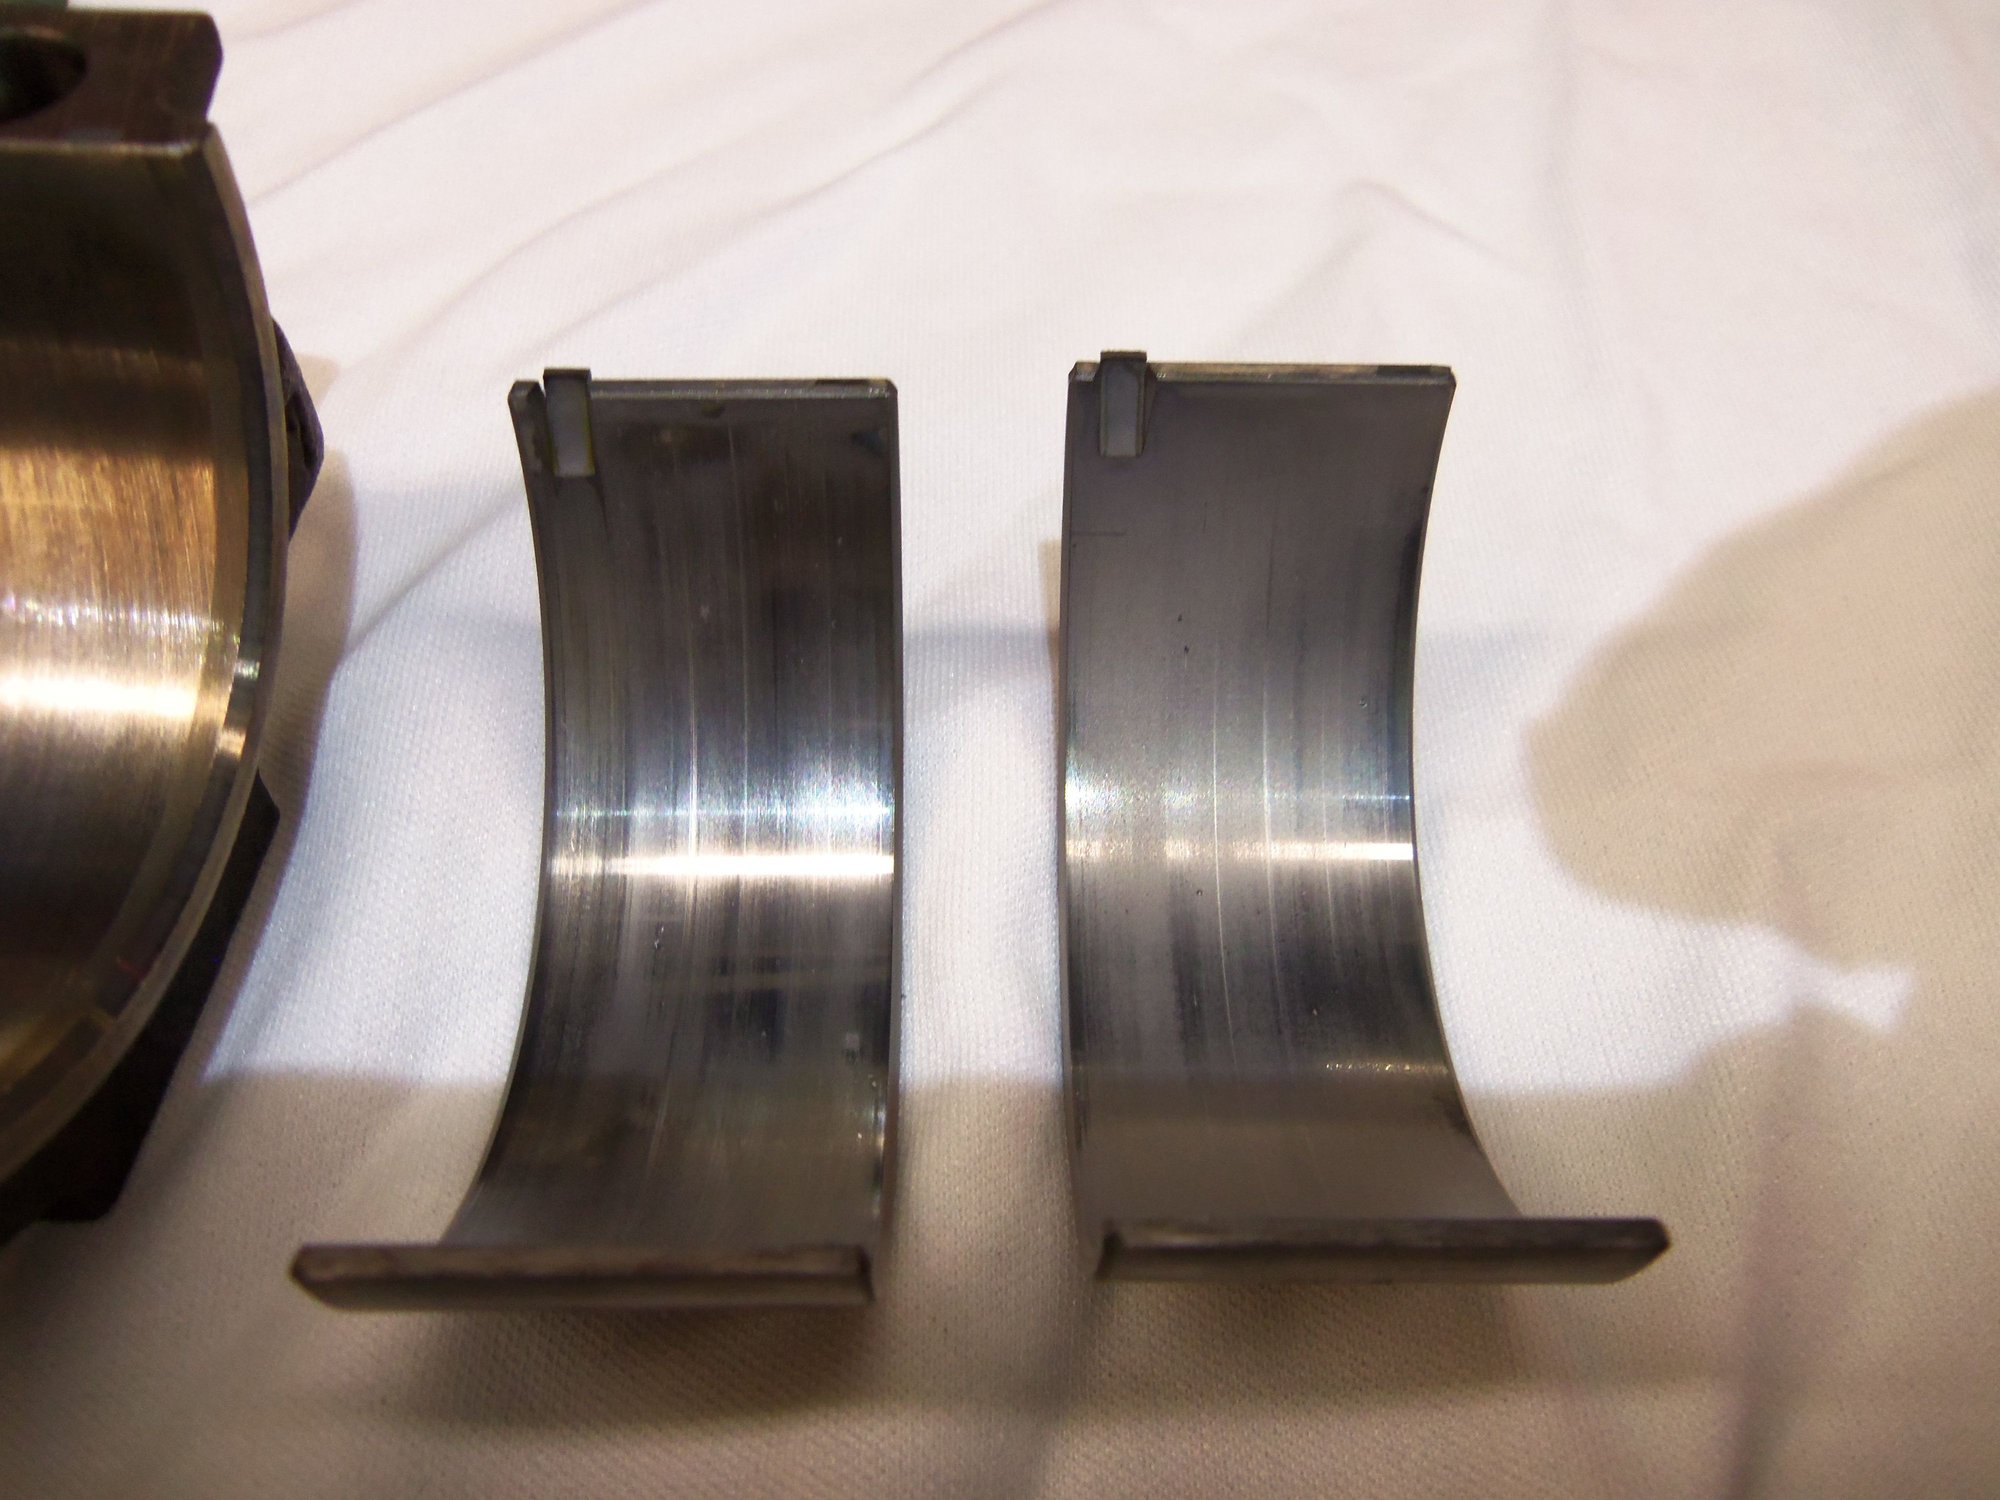
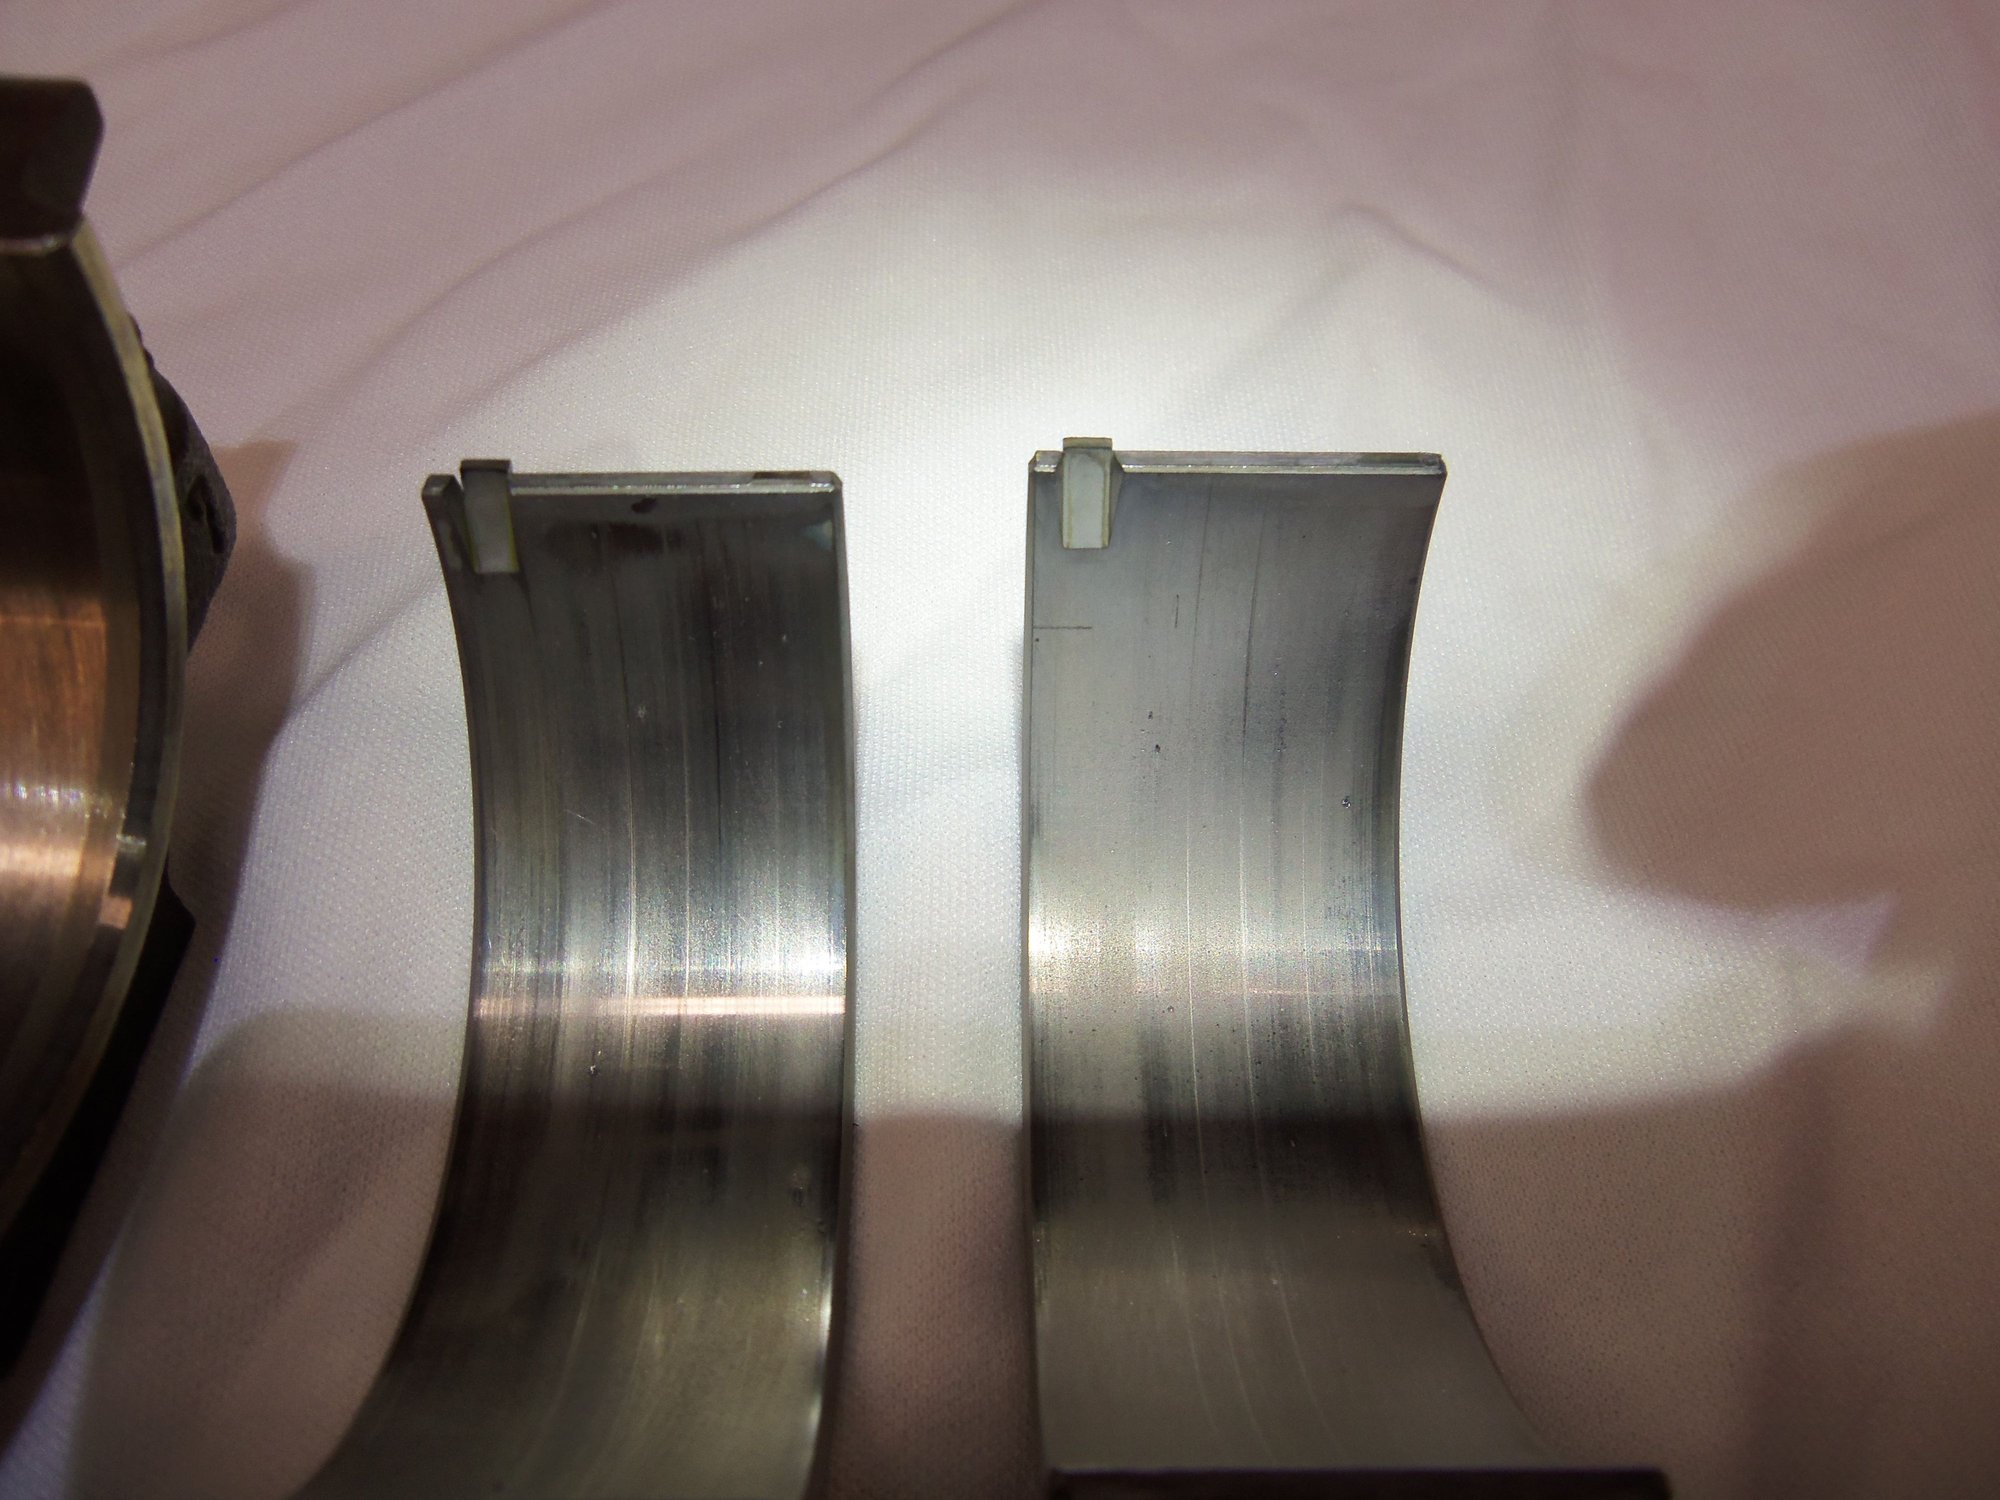
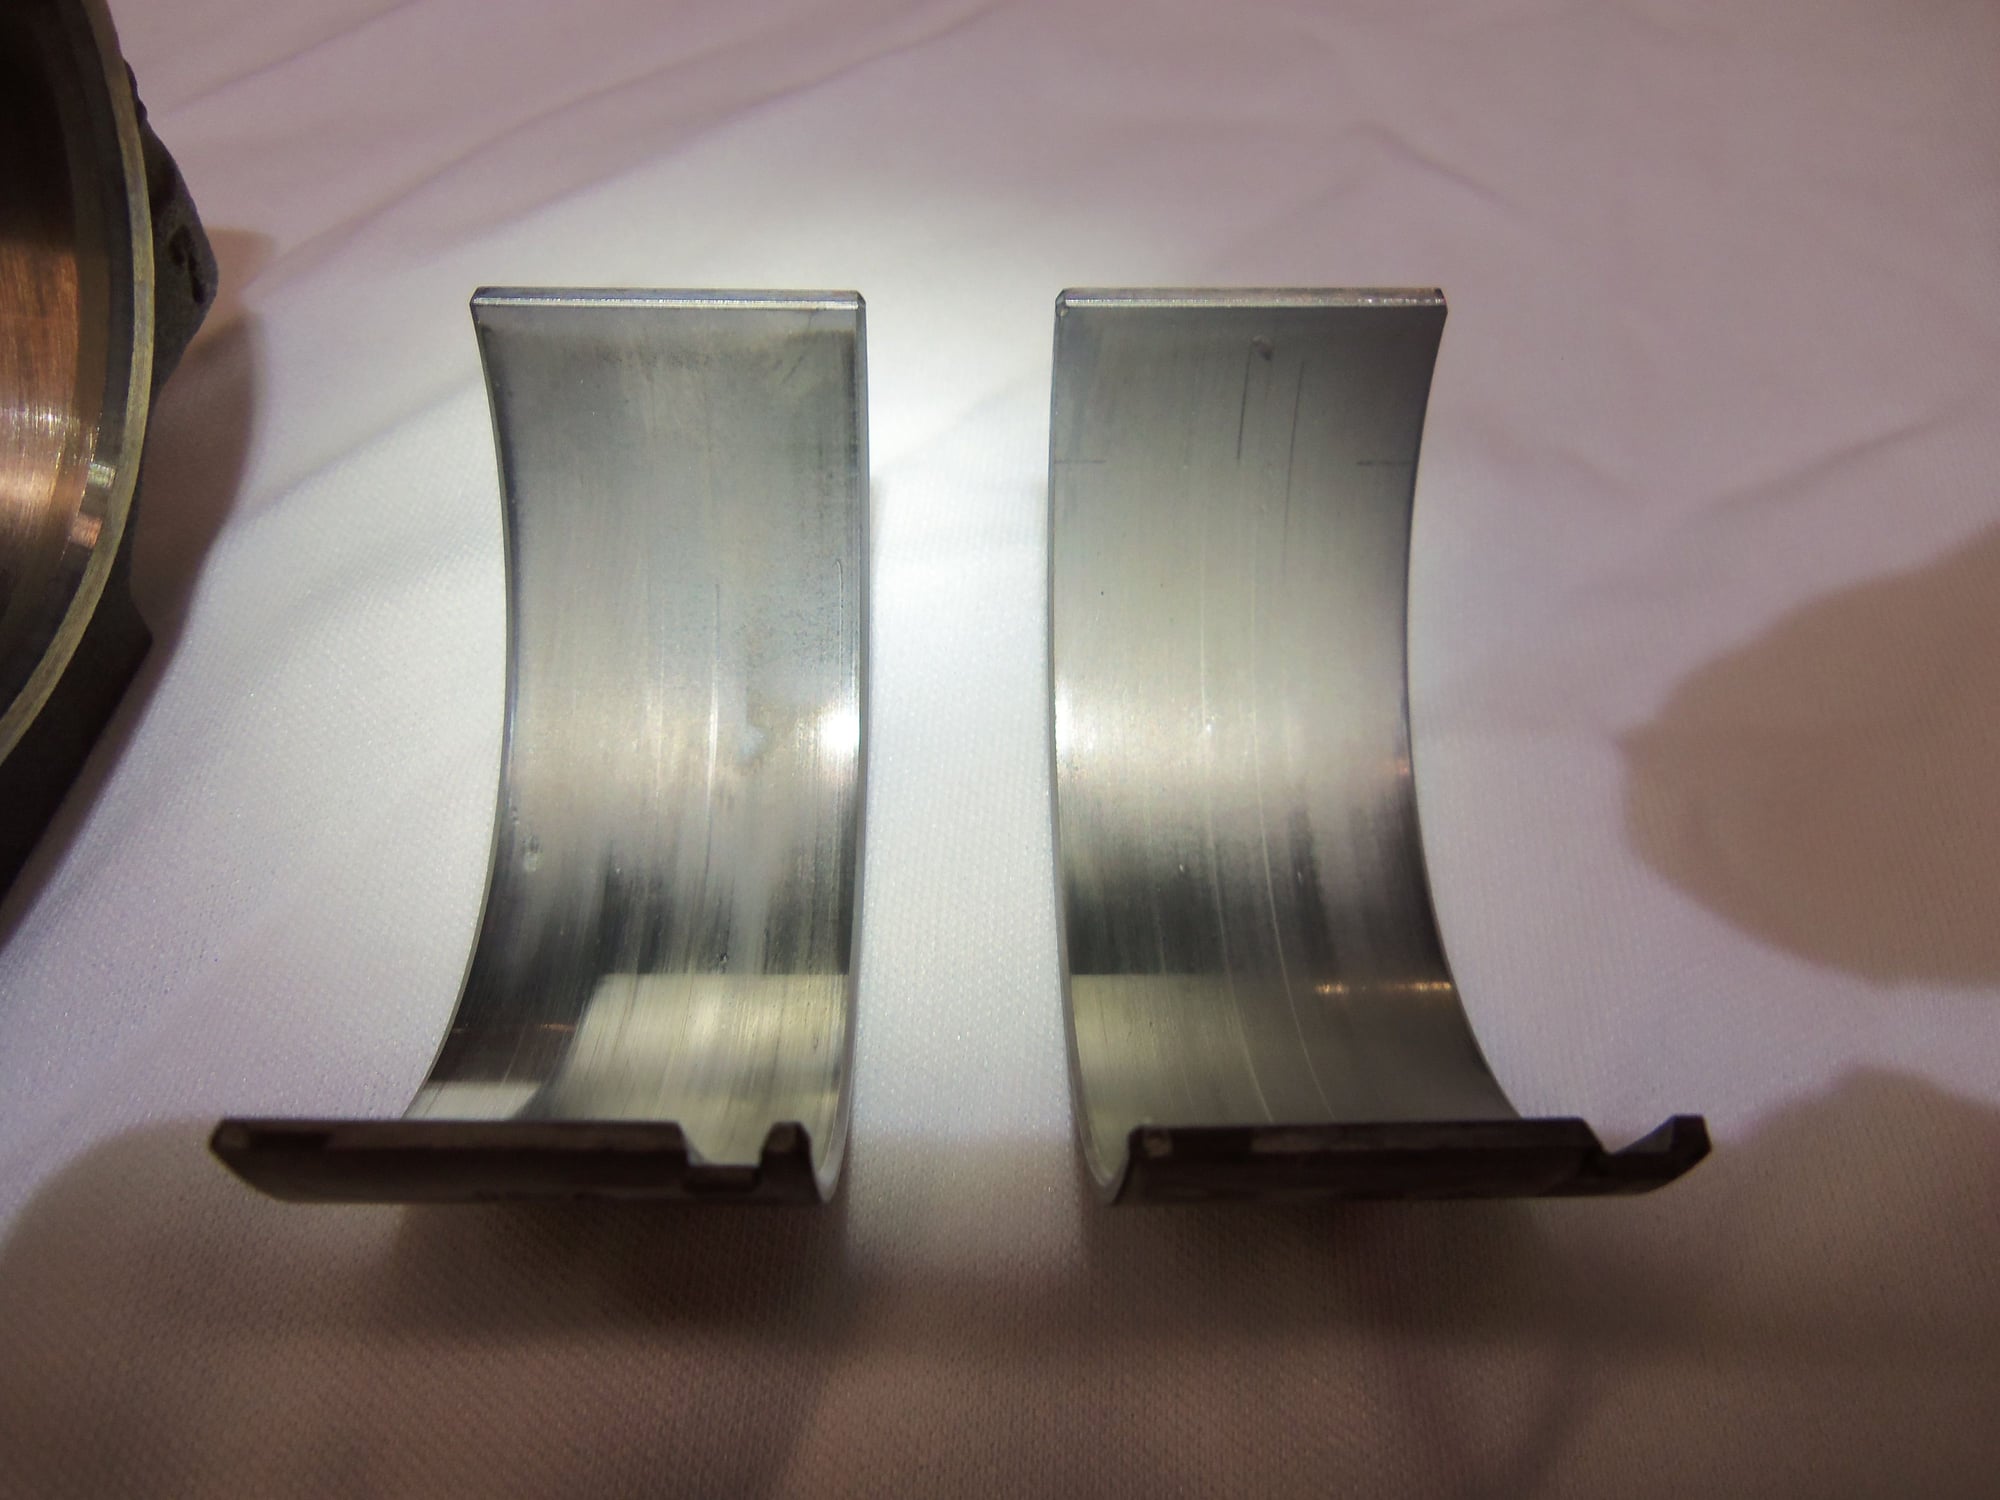
Note: on the photos of the rod bearing shells, I took several in differing light to try to get the best veiws of the bearing surfaces. I VERY much want more experienced eyes to look at these. I believe they are good to run again, based more on clearance, and then on appearance.
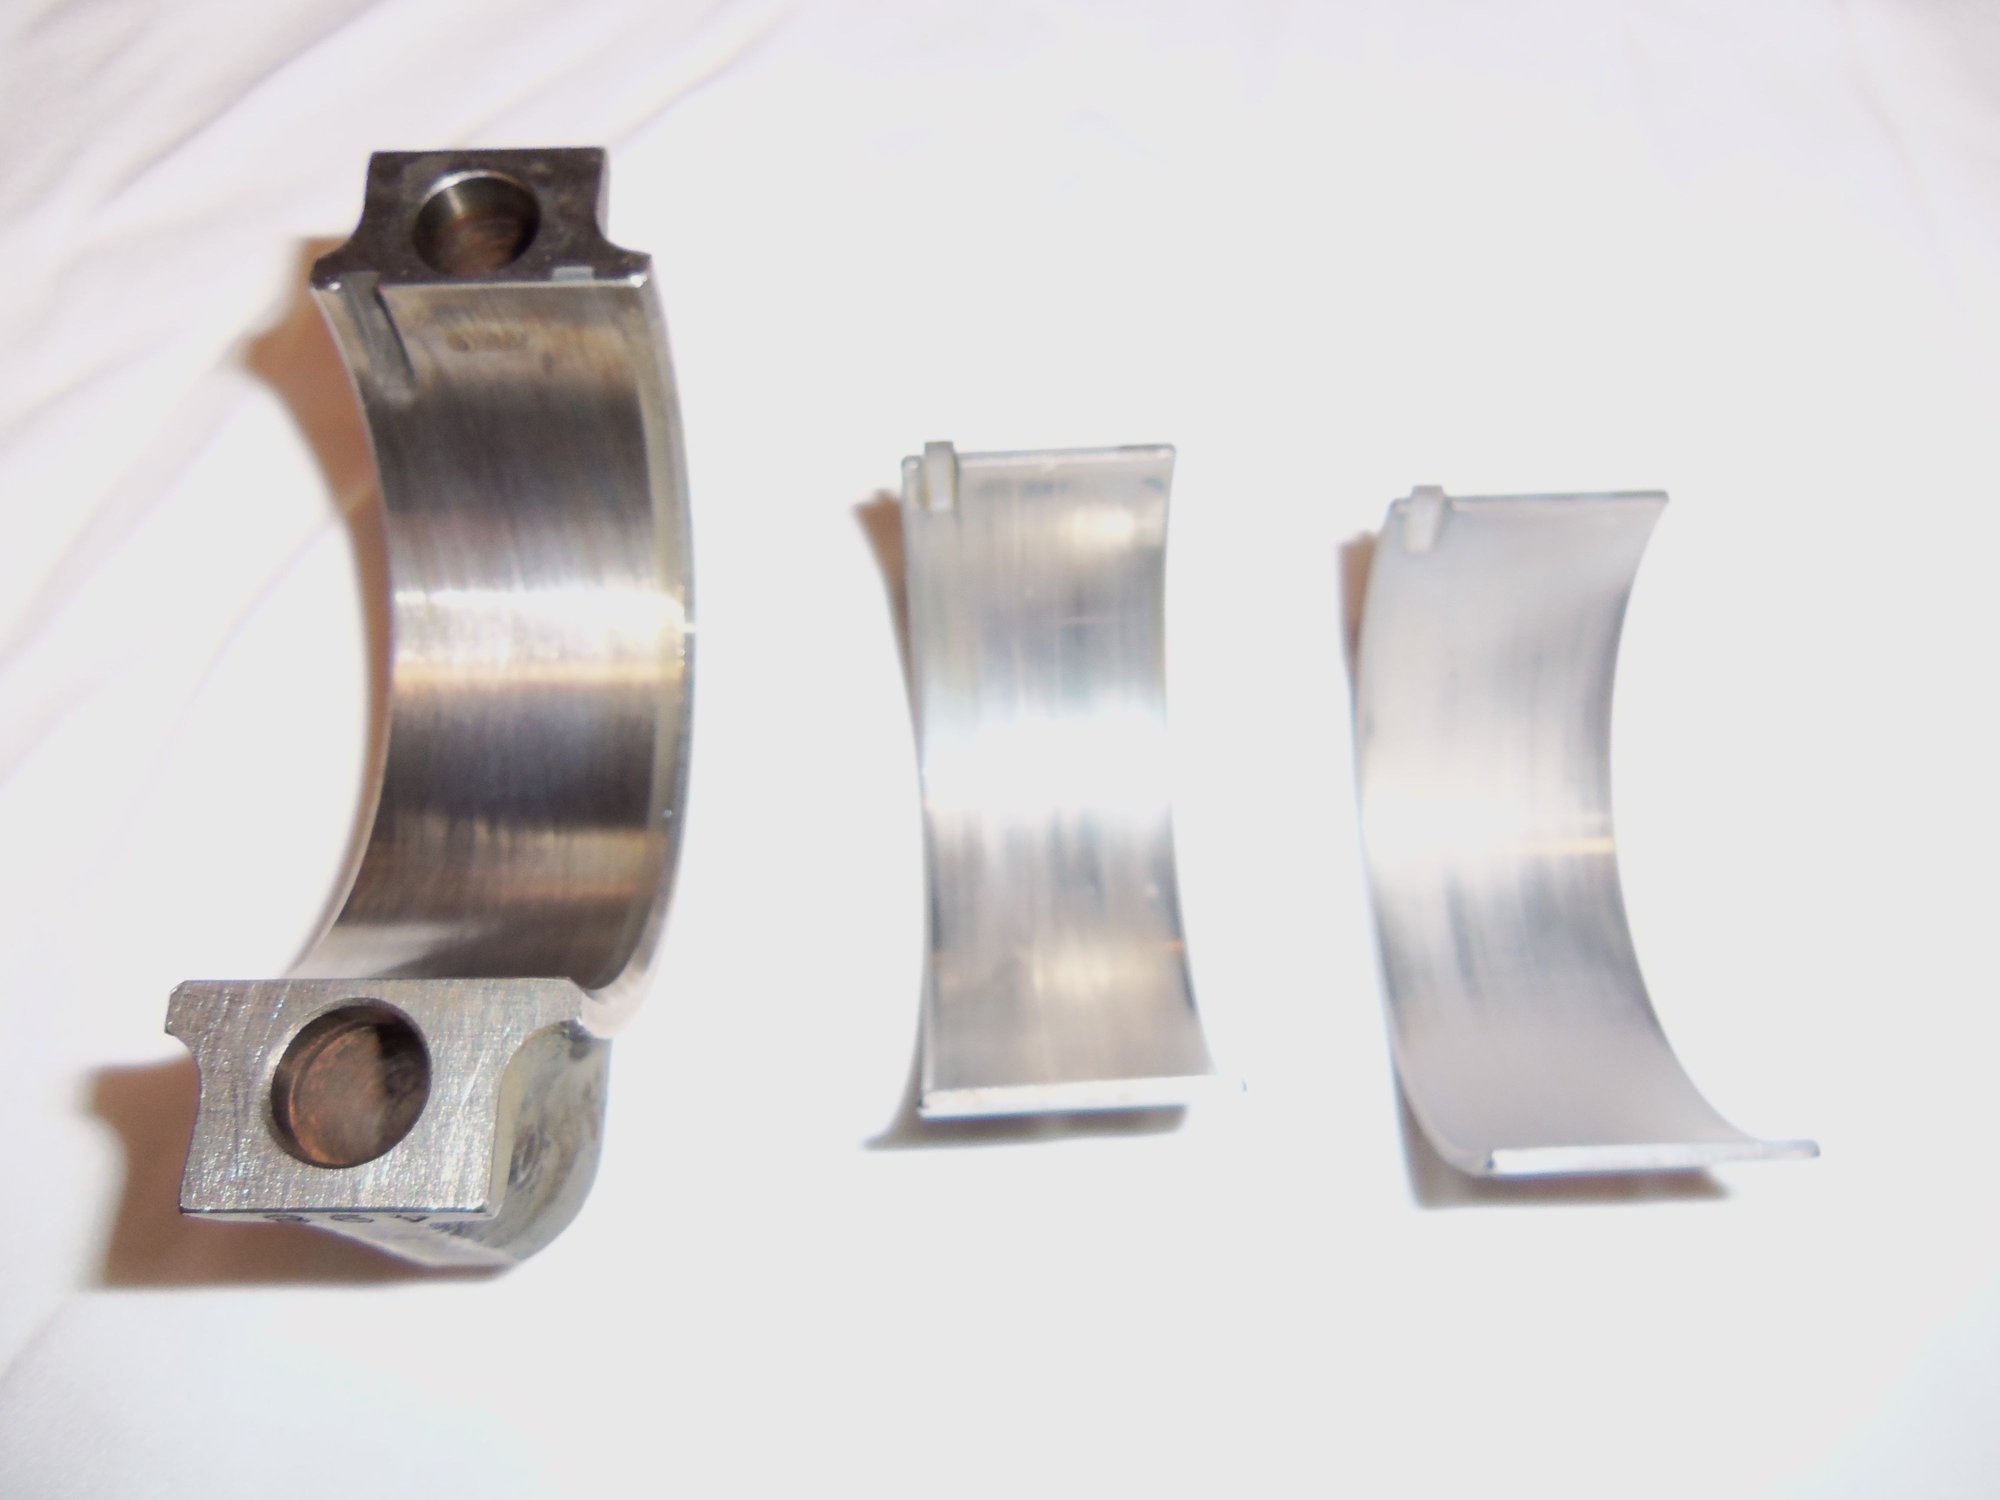
Rod cap, lower shell, upper shell.
Lower shell is above, upper shell is below.
Lower shell is to the left, upper shell is to the right.
Lower shell is to the left, upper shell is to the right.
Lower shell is to the left, upper shell is to the right.
Lower shell is to the left, upper shell is to the right. Shells have been turned around to see the other side surface.
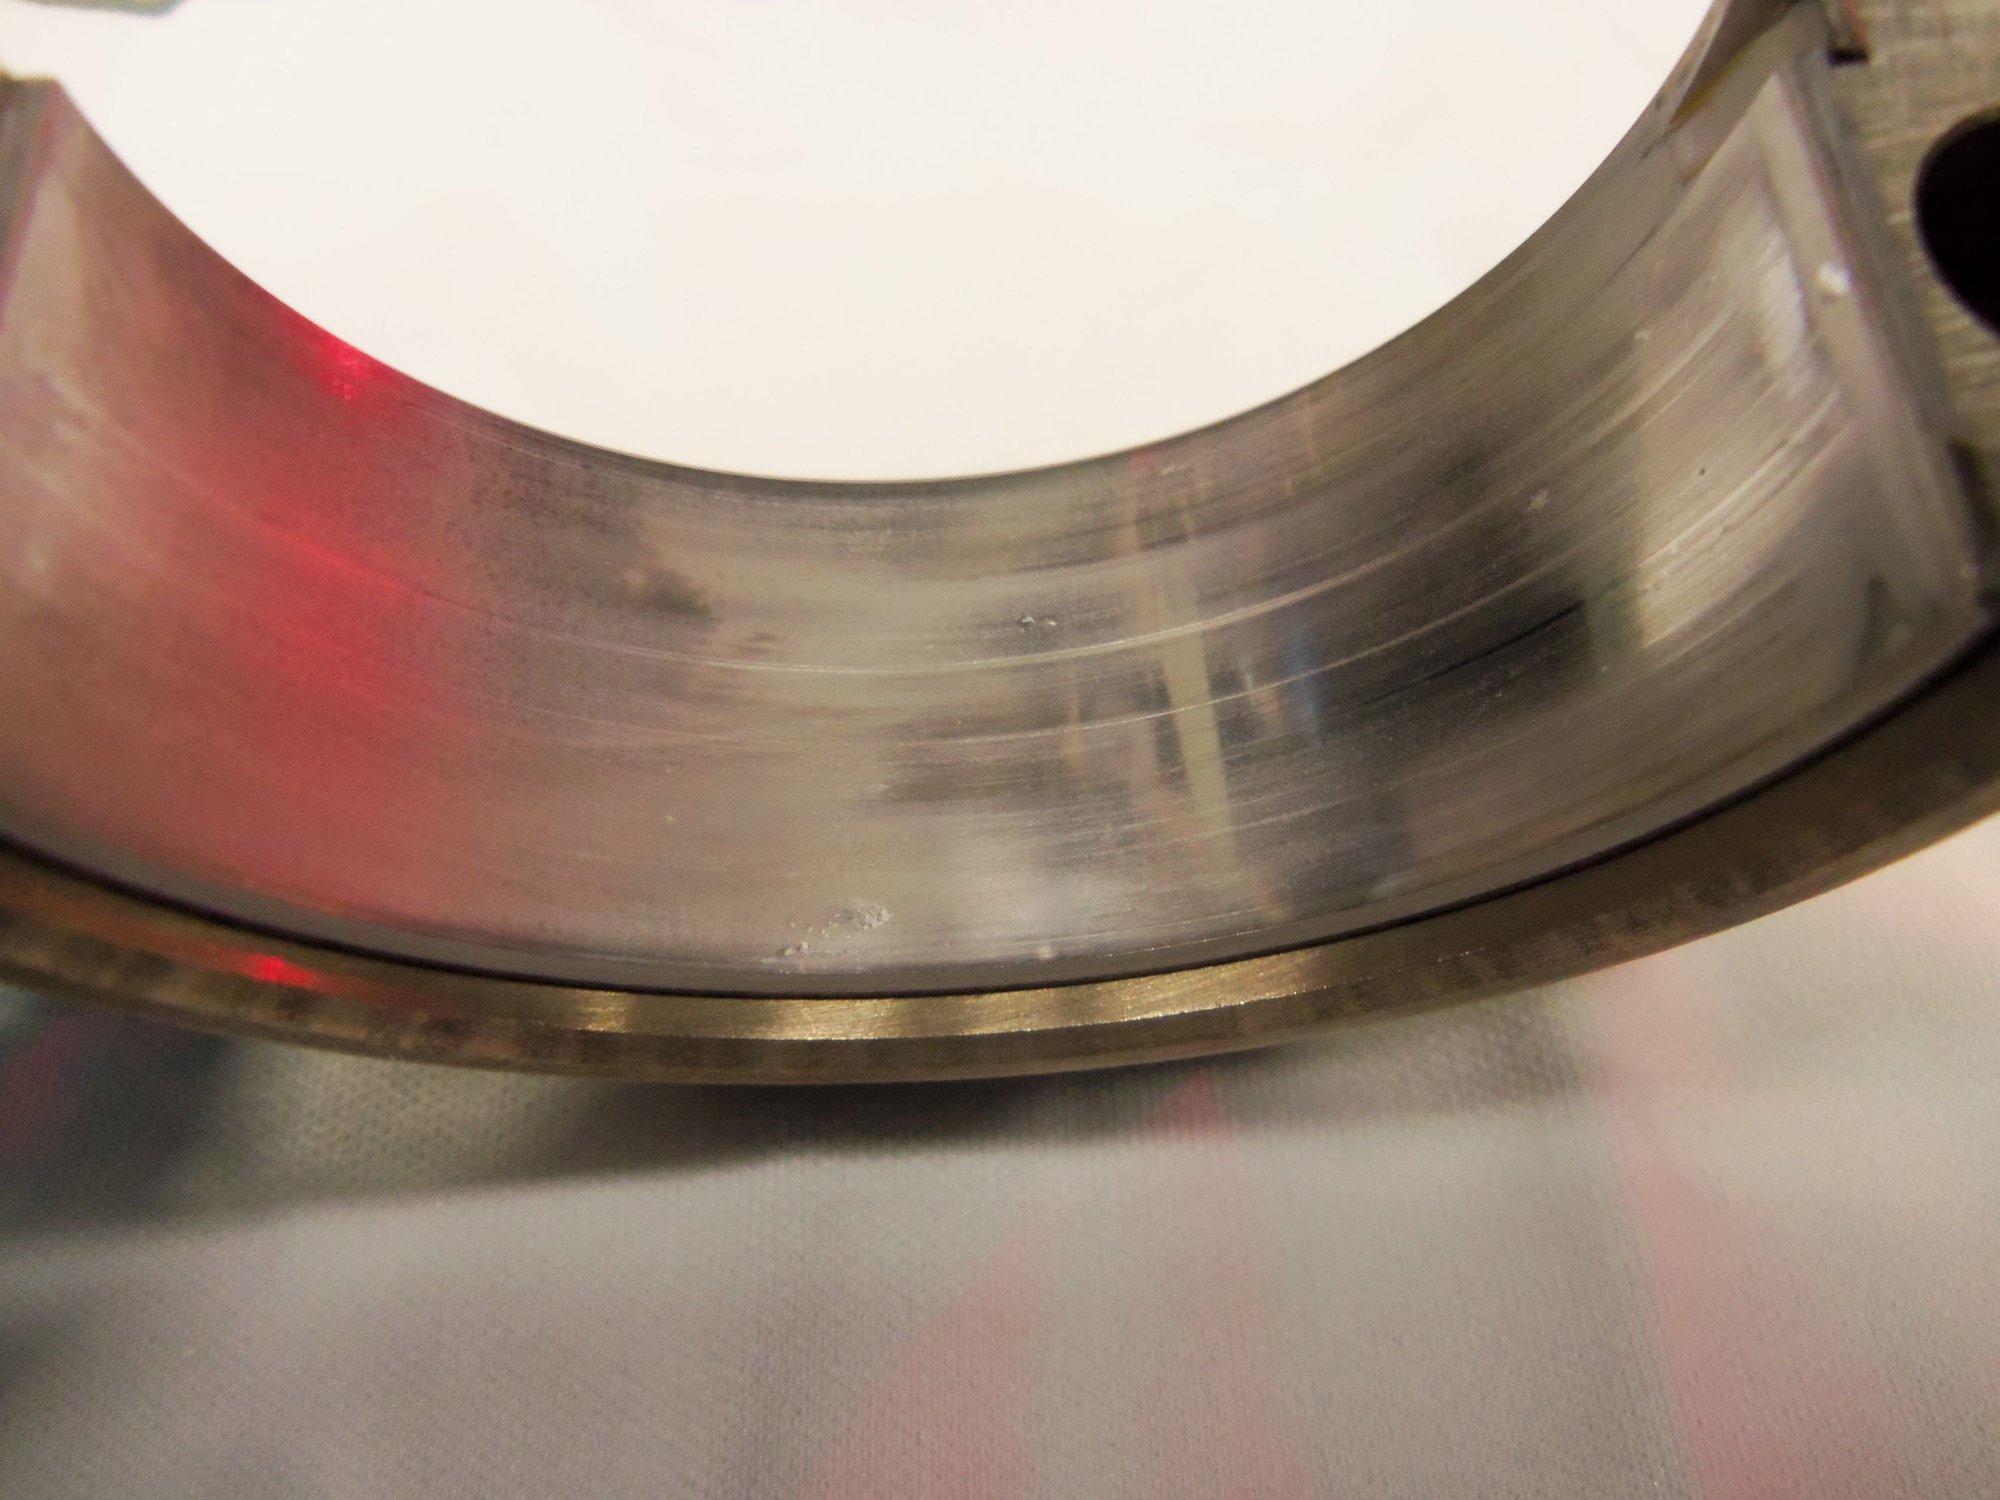
Little something at the lower middle of the lower shell.
Better view of the little something in the lower middle of the lower shell.
Great job and great write-up Seth! Now my question is how many miles are on the bearings? Are they the original ones that were in the engine from the factory in '86? No reason mind you, just curious.
As of this moment, the Red Witch has 168,719 on her clock. As far as I can tell, the rod bearings are OEM, installed in 1986. The shells had Porsche stampings on the back, as well as 'STD.'
PO never mentioned doing anything to the long block.
Those shells look pretty darn good to me as do those plastigage values. I regret not opening my big ends when I had the chance albeit I am confident they were in good nick then and hopefully still now some 10 years on with close to 100k miles under their belt.
Will be interesting to see what the Brains Trust thinks. I could surely do with your new sump gasket that was leaking a bit- not too surprising seeing as how half the bolts or more were loose- urrgh! I tightended the as sensibly as I could - hopefully it will improve the weepage that was not too bad really.

 03-20-2017, 01:59 PM