When you click on links to various merchants on this site and make a purchase, this can result in this site earning a commission. Affiliate programs and affiliations include, but are not limited to, the eBay Partner Network.
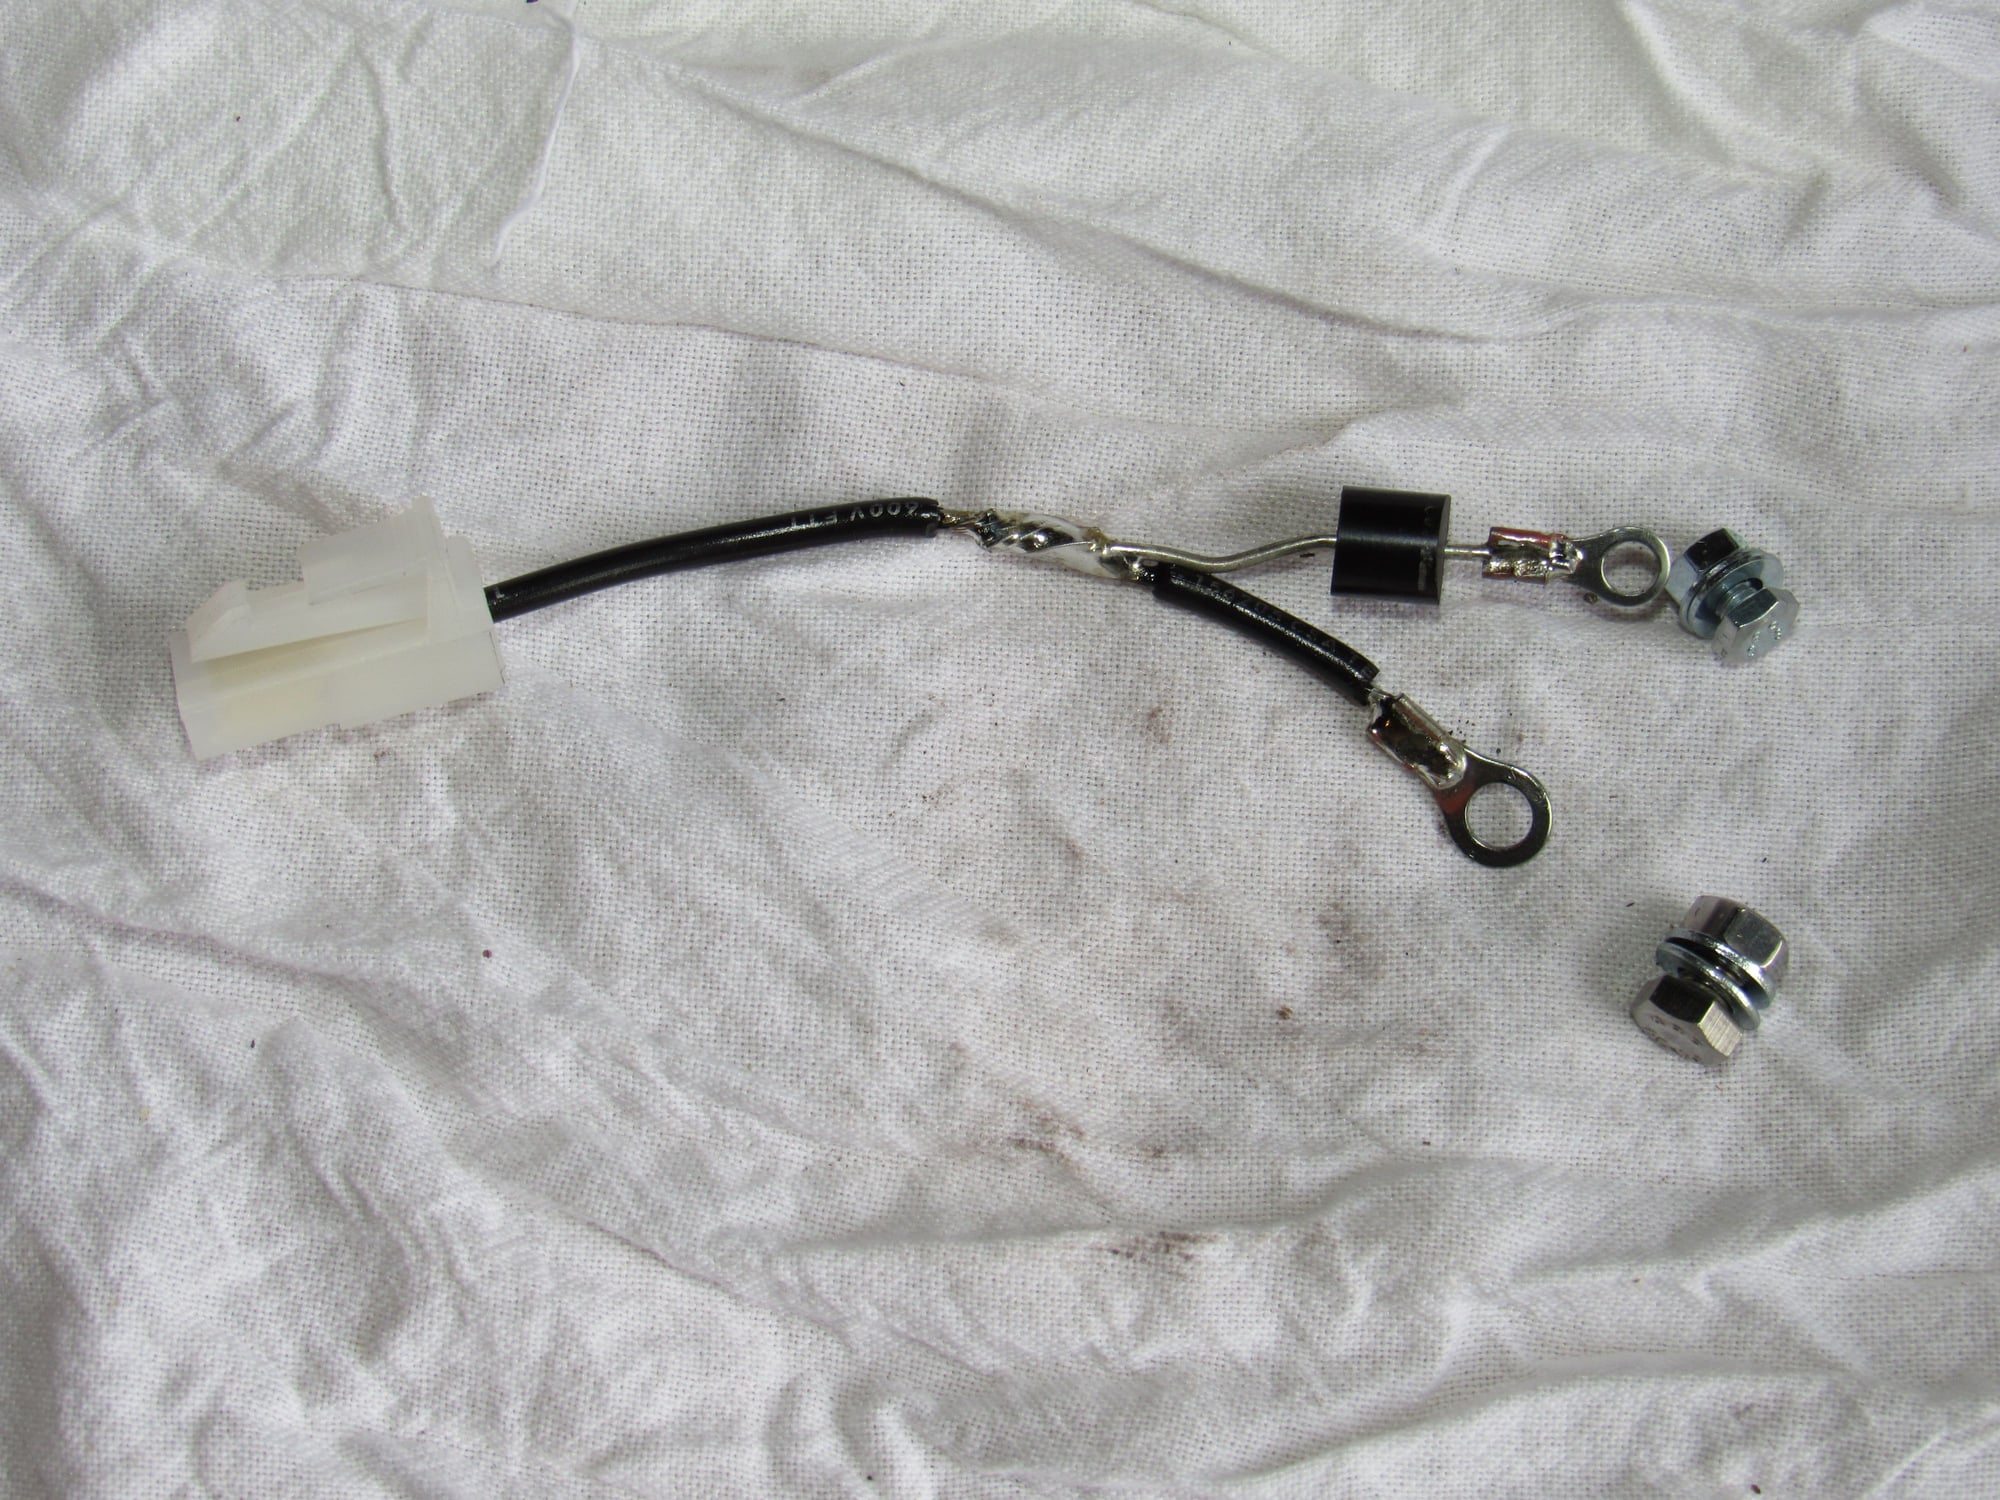
I took a break from the car last weekend to enjoy the ONLY nice weekend this summer but I did finish the starter wiring to keep things moving. I put together a small wiring harness to connect the one wire plug on the Hi Torque starter to the two wires in the car's harness.
On the left is the supplied plug. I soldered in a tail with a ring terminal and a diode with a smaller ring terminal. These match the rings on my wiring harness and I bolted them together with a 4mm and 5mm bolt. Thanks to Dave McKenzie who sent me the diode!
I taped up the bolts individually then over the whole thing and slid on some wire loom. I haven't tested it yet but I think it should work.
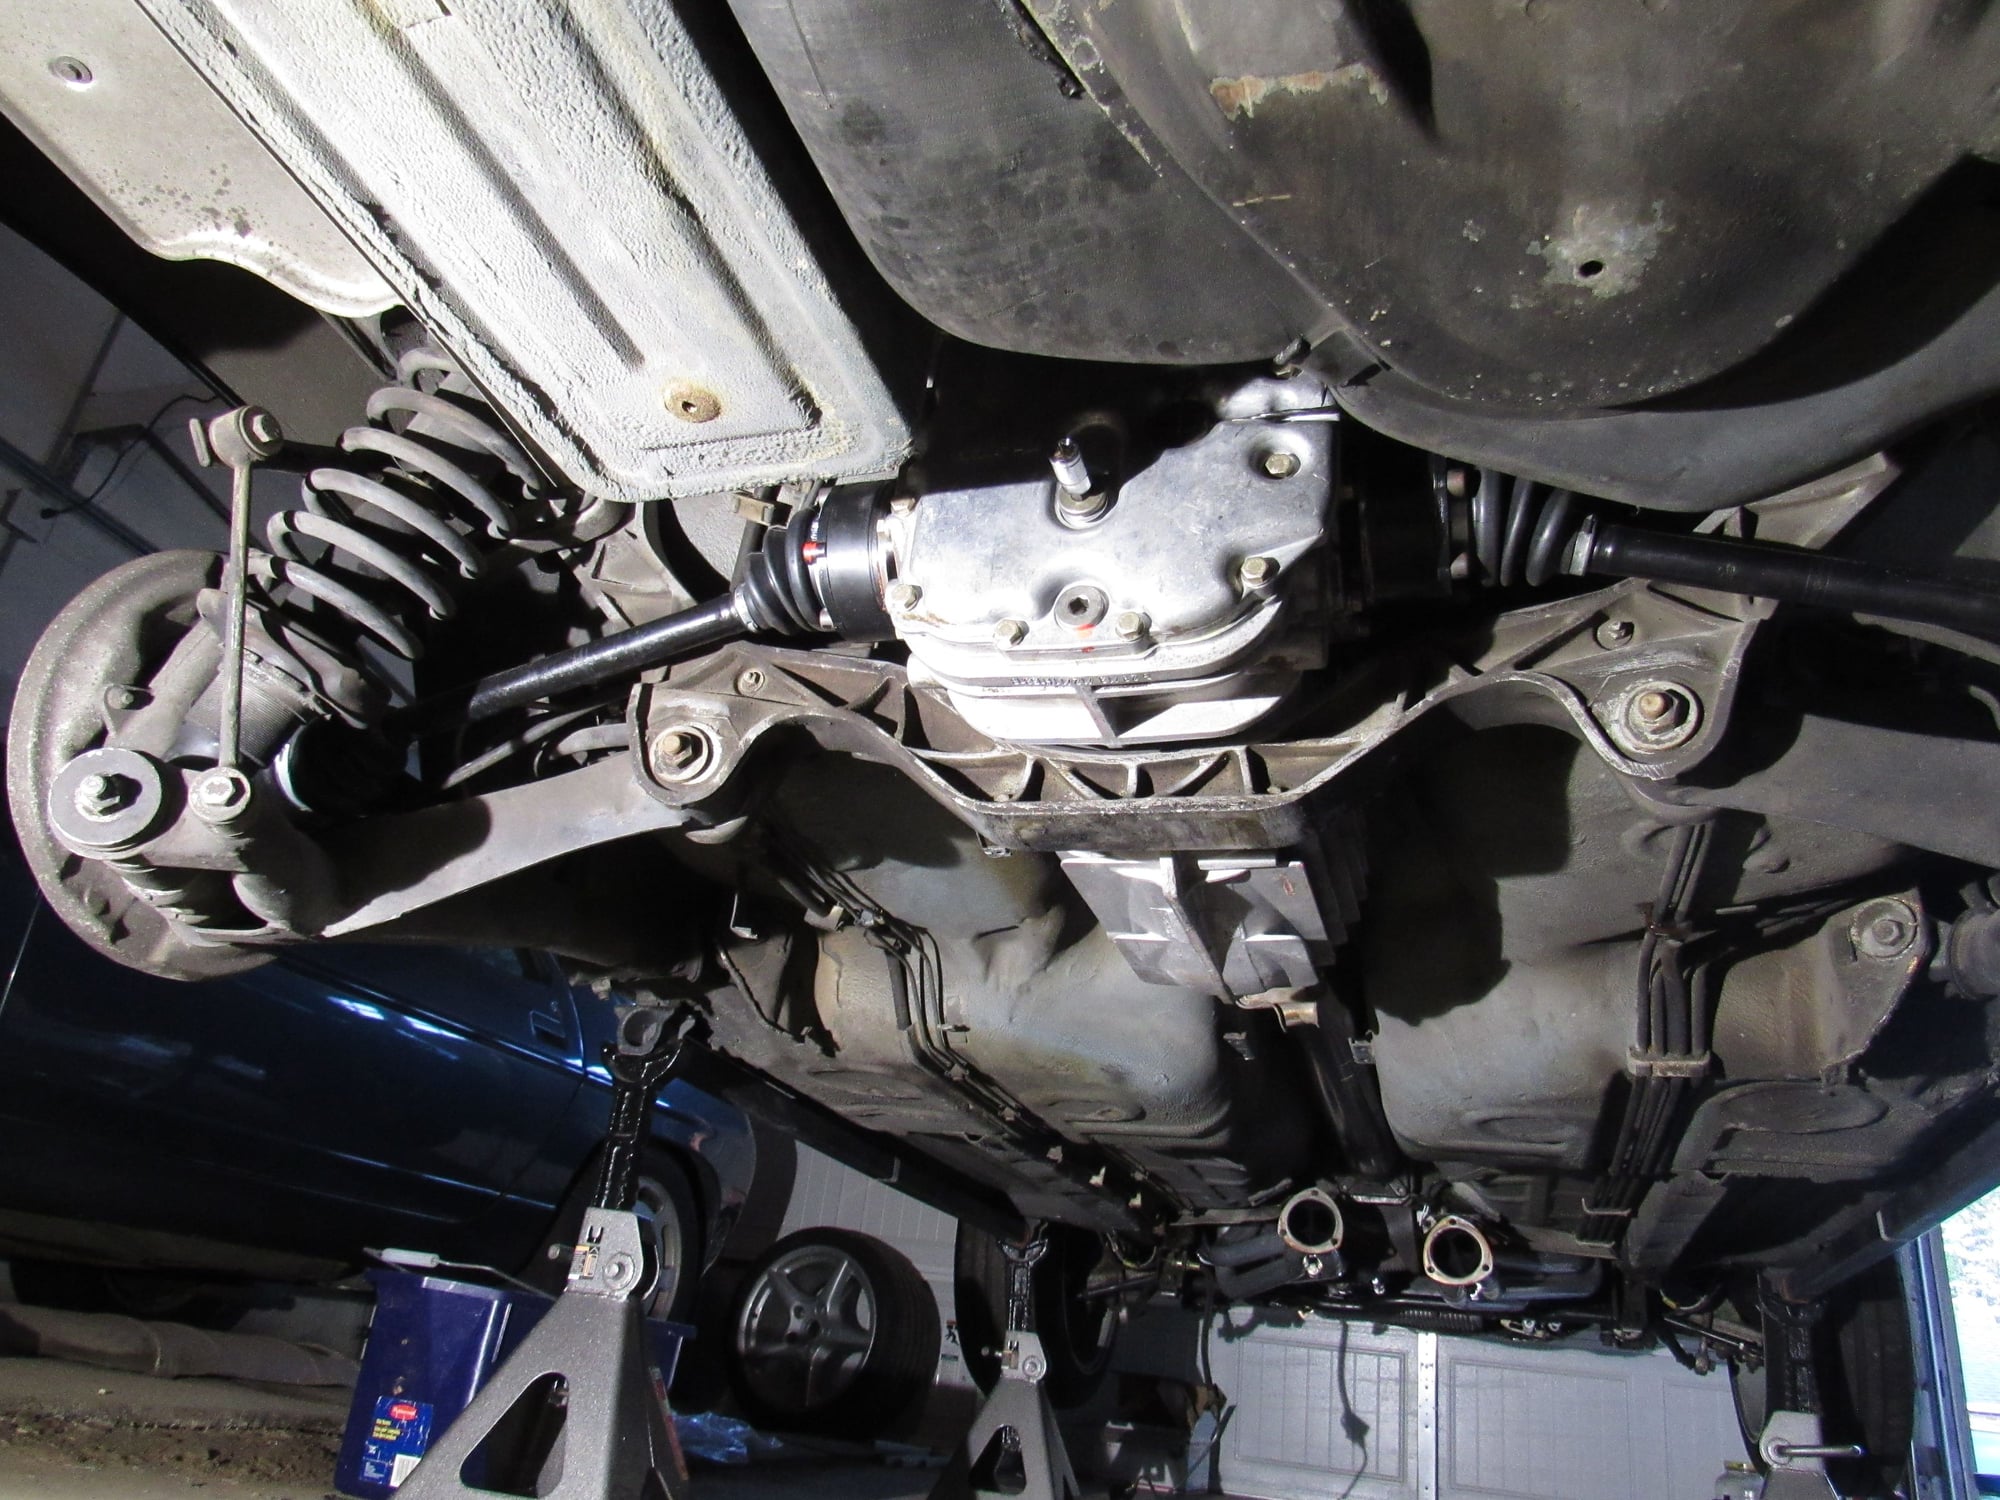
This weekend I have reinstalled the drivetrain. I did have a hiccup with the rebuilt trans mounts so for now I reinstalled the old ones but I have a easy 10mm clearance between the trans and the cross member. Should be OK for a while.
The clutch was a tough job, really tough. I had to juggle what felt like a dozen things. Keep track of the yellow dots on the clutch discs so they are rotated 180 degrees apart, fit the pressure plate and the lubed short shaft while avoiding getting grease on the intermediate plate, and get it all lined up with the pilot bearing. Eventually I got the clutch pack all bolted in.
I dodged a bullet. I did not put the TT clamping sleeve onto the shaft before I bolted the TT to the bell housing. I got lucky because the spot weld broke on the front pinch clamp and it just barely fits in the gap were the guide tube bolts on. If it were not for that I would have had to totally remove the drivetrain from the car to slide that on. For anyone planning a TT rebuild, make note to put that clamp back on the shaft as soon as you are done.
I don't have much for photos, but all the hard stuff is complete.
I finished last weekend. I got tired of dealing with the hard line for the clutch slave and stole the long hose replacement from my '89 project parts stash. I don't think the hard line works with the new starter anyway. Based on my experience replacing brake lines I did not expect more than a few drips but I was wrong and made a bit of a mess so take note, about a cup worth of fluid will come out!
I had some trouble bleeding until I read a tip about removing the clutch slave and working the rod in and out which I did fifteen times and that did the trick.
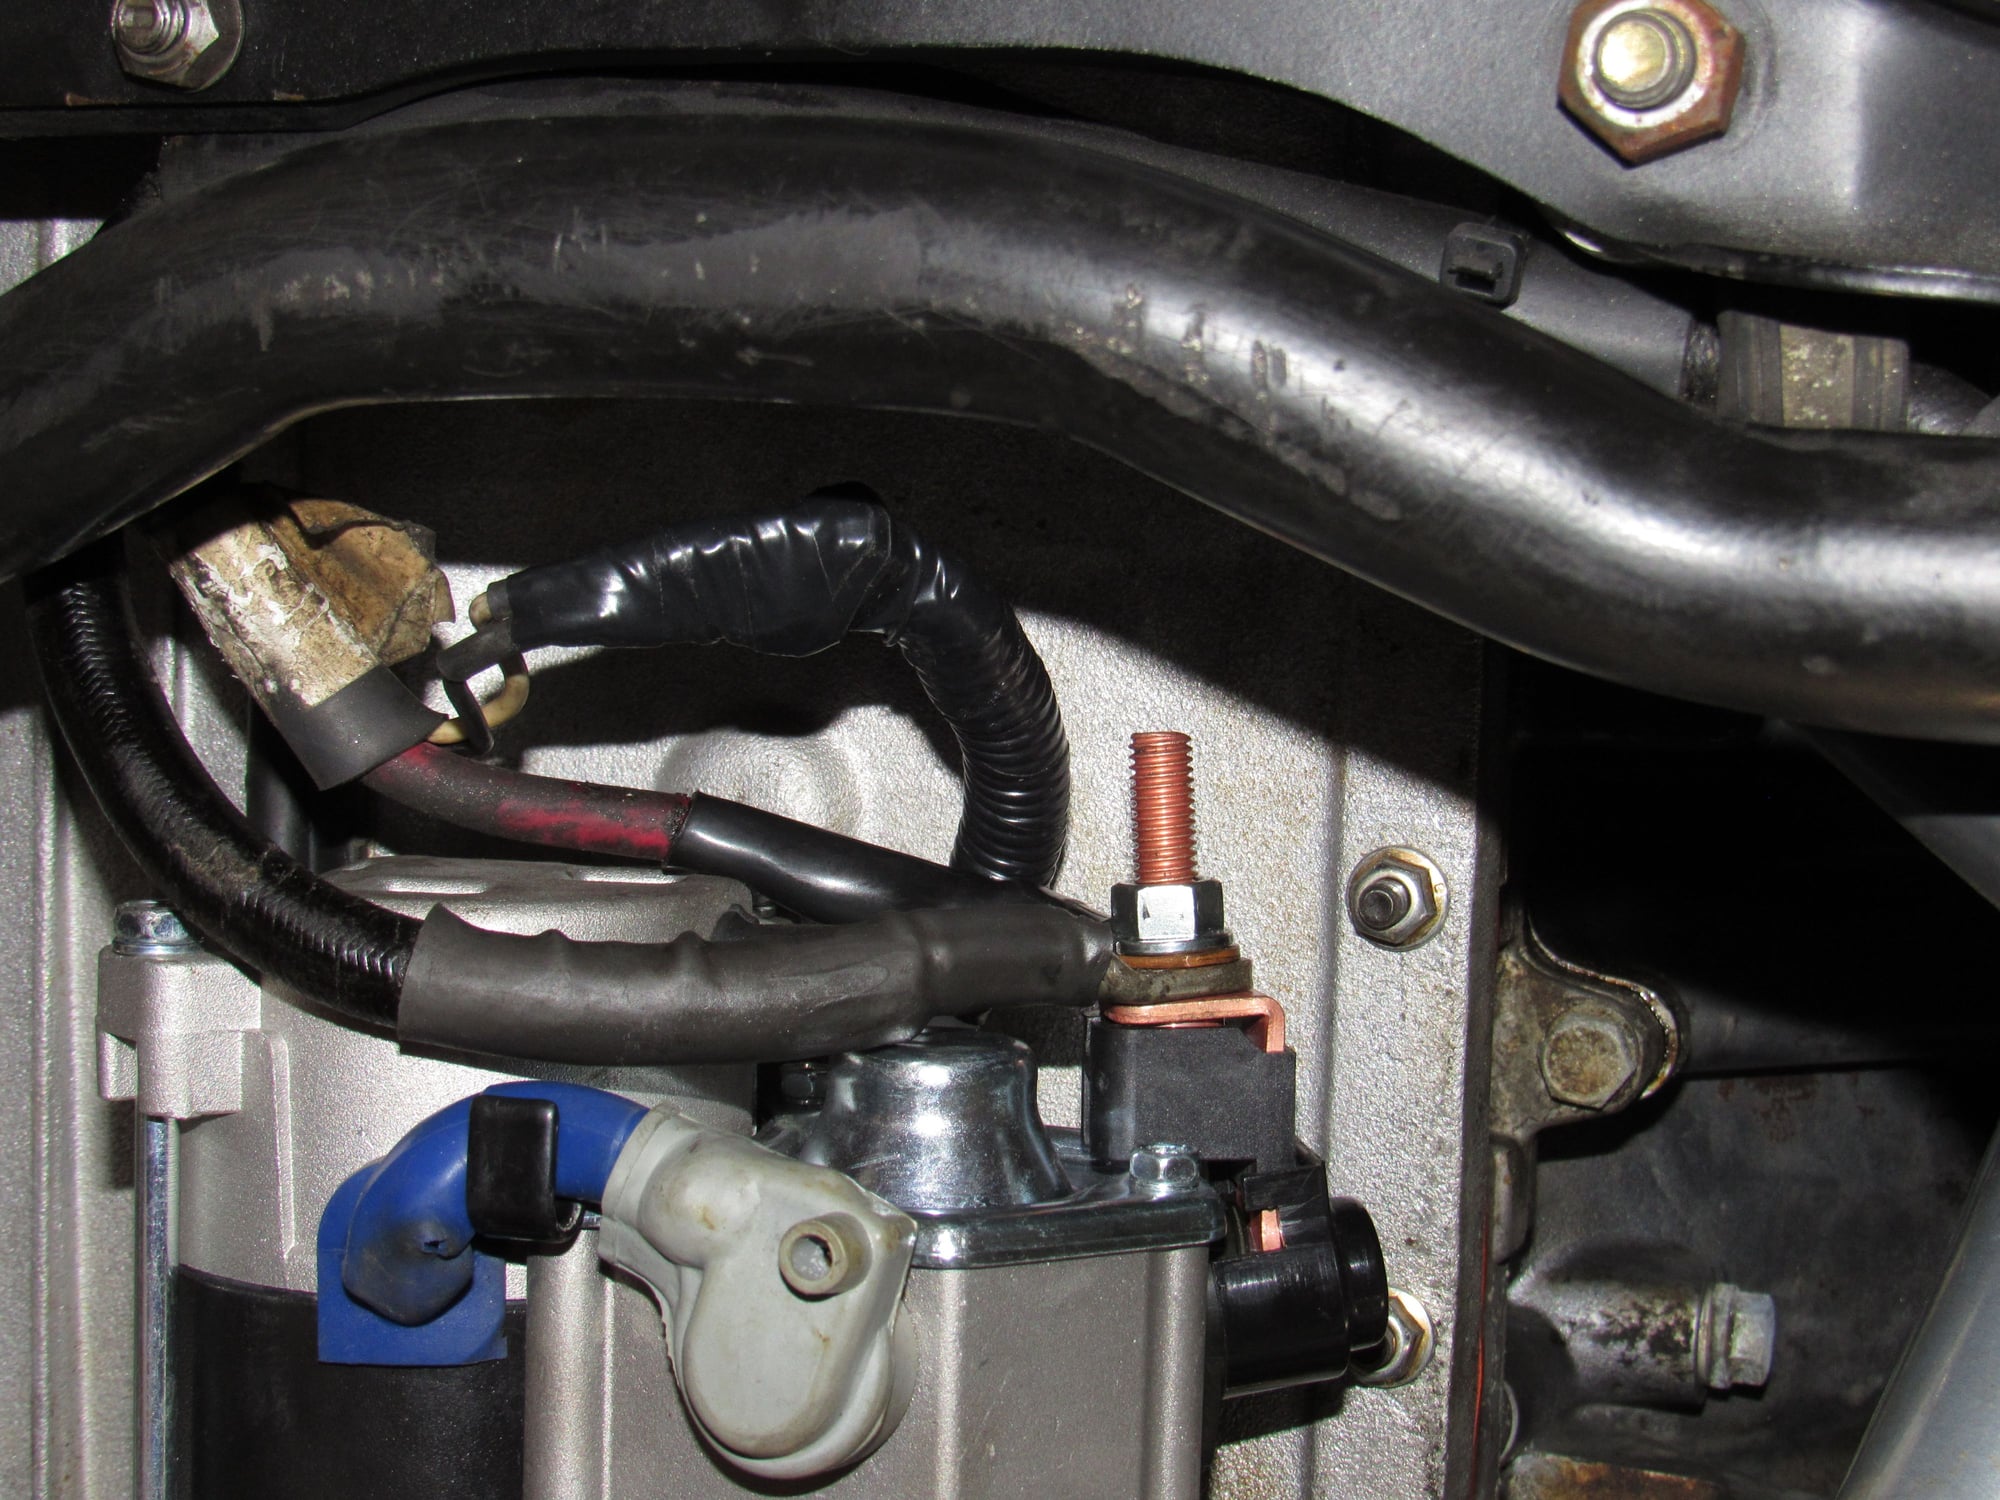
I retightened the header to the engine, reconnected the battery, tried to start and.. CLICK.
Hmm, battery voltage was good and it was good at the starter too. Tried jumping pin 14 to the hot post and still nothing. I tore into the wire harness I made and I mistakenly switched the starter and coil wire connections. Even though the starter wire is bigger it has the smaller eye terminal and vice versa. Once corrected it started right up.
I wanted to be 100% sure that the clutch was fully releasing and since I work alone I used my camera as eyes under the car to check the travel of the clutch slave rod and that the TT shaft would stop when the clutch is released. The manual states that the wear limit is reached when the front edge of the lever reaches the end of the inspection hole. The travel on mine definitely goes past the edge of the hole. https://www.youtube.com/watch?v=afSp2Kpxcxc
And here we see while going through the gears that the shaft stops with the clutch released.
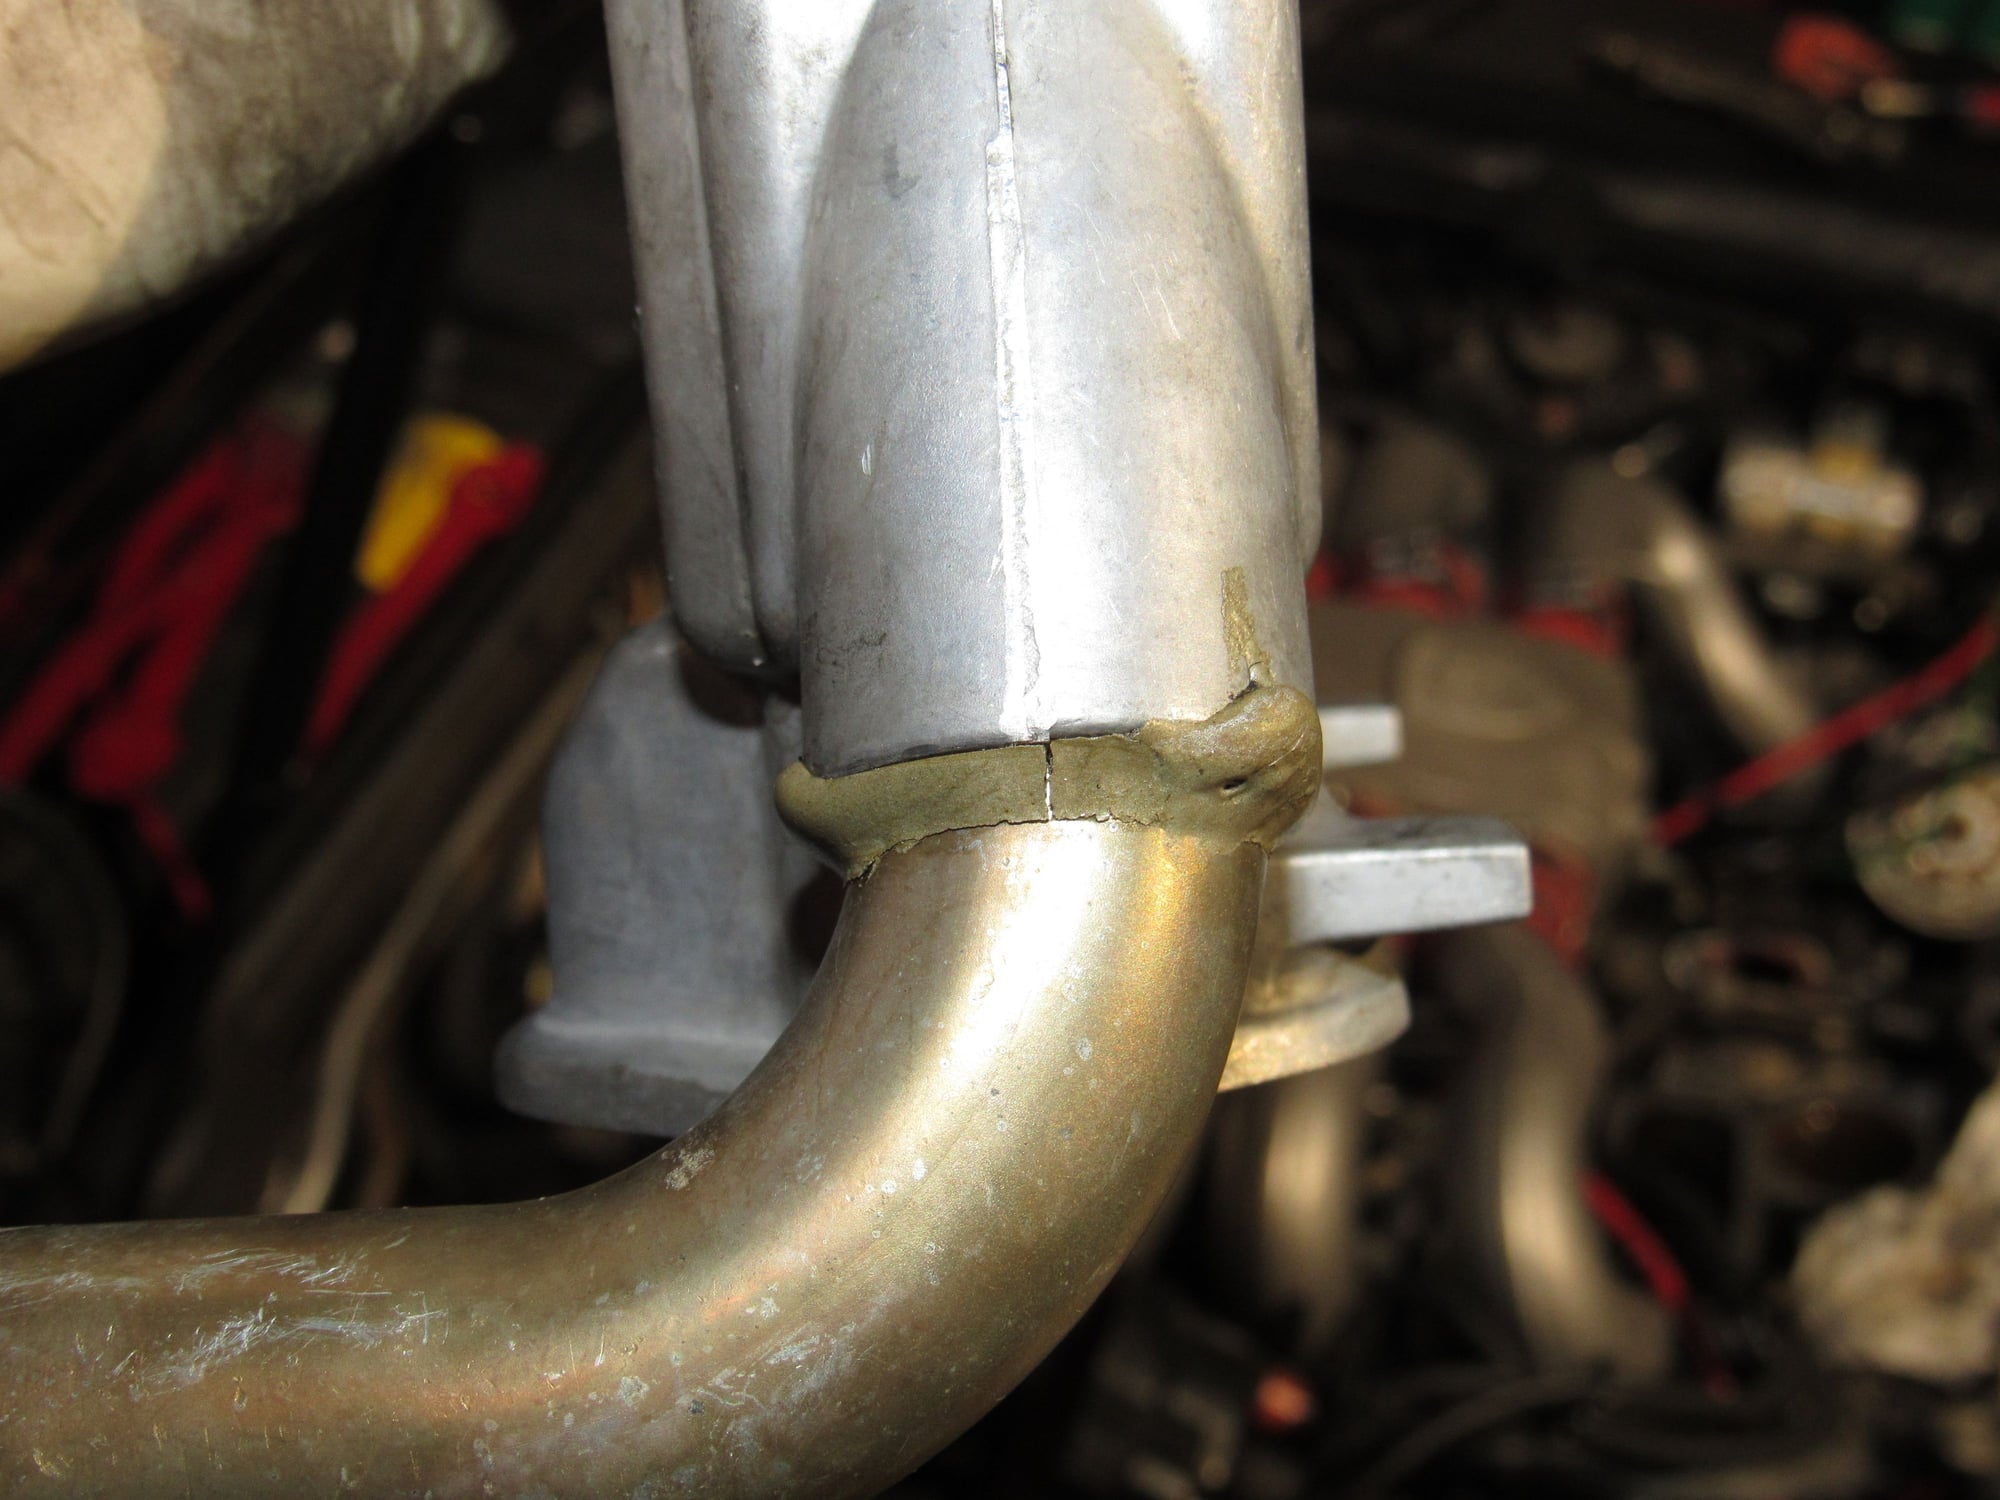
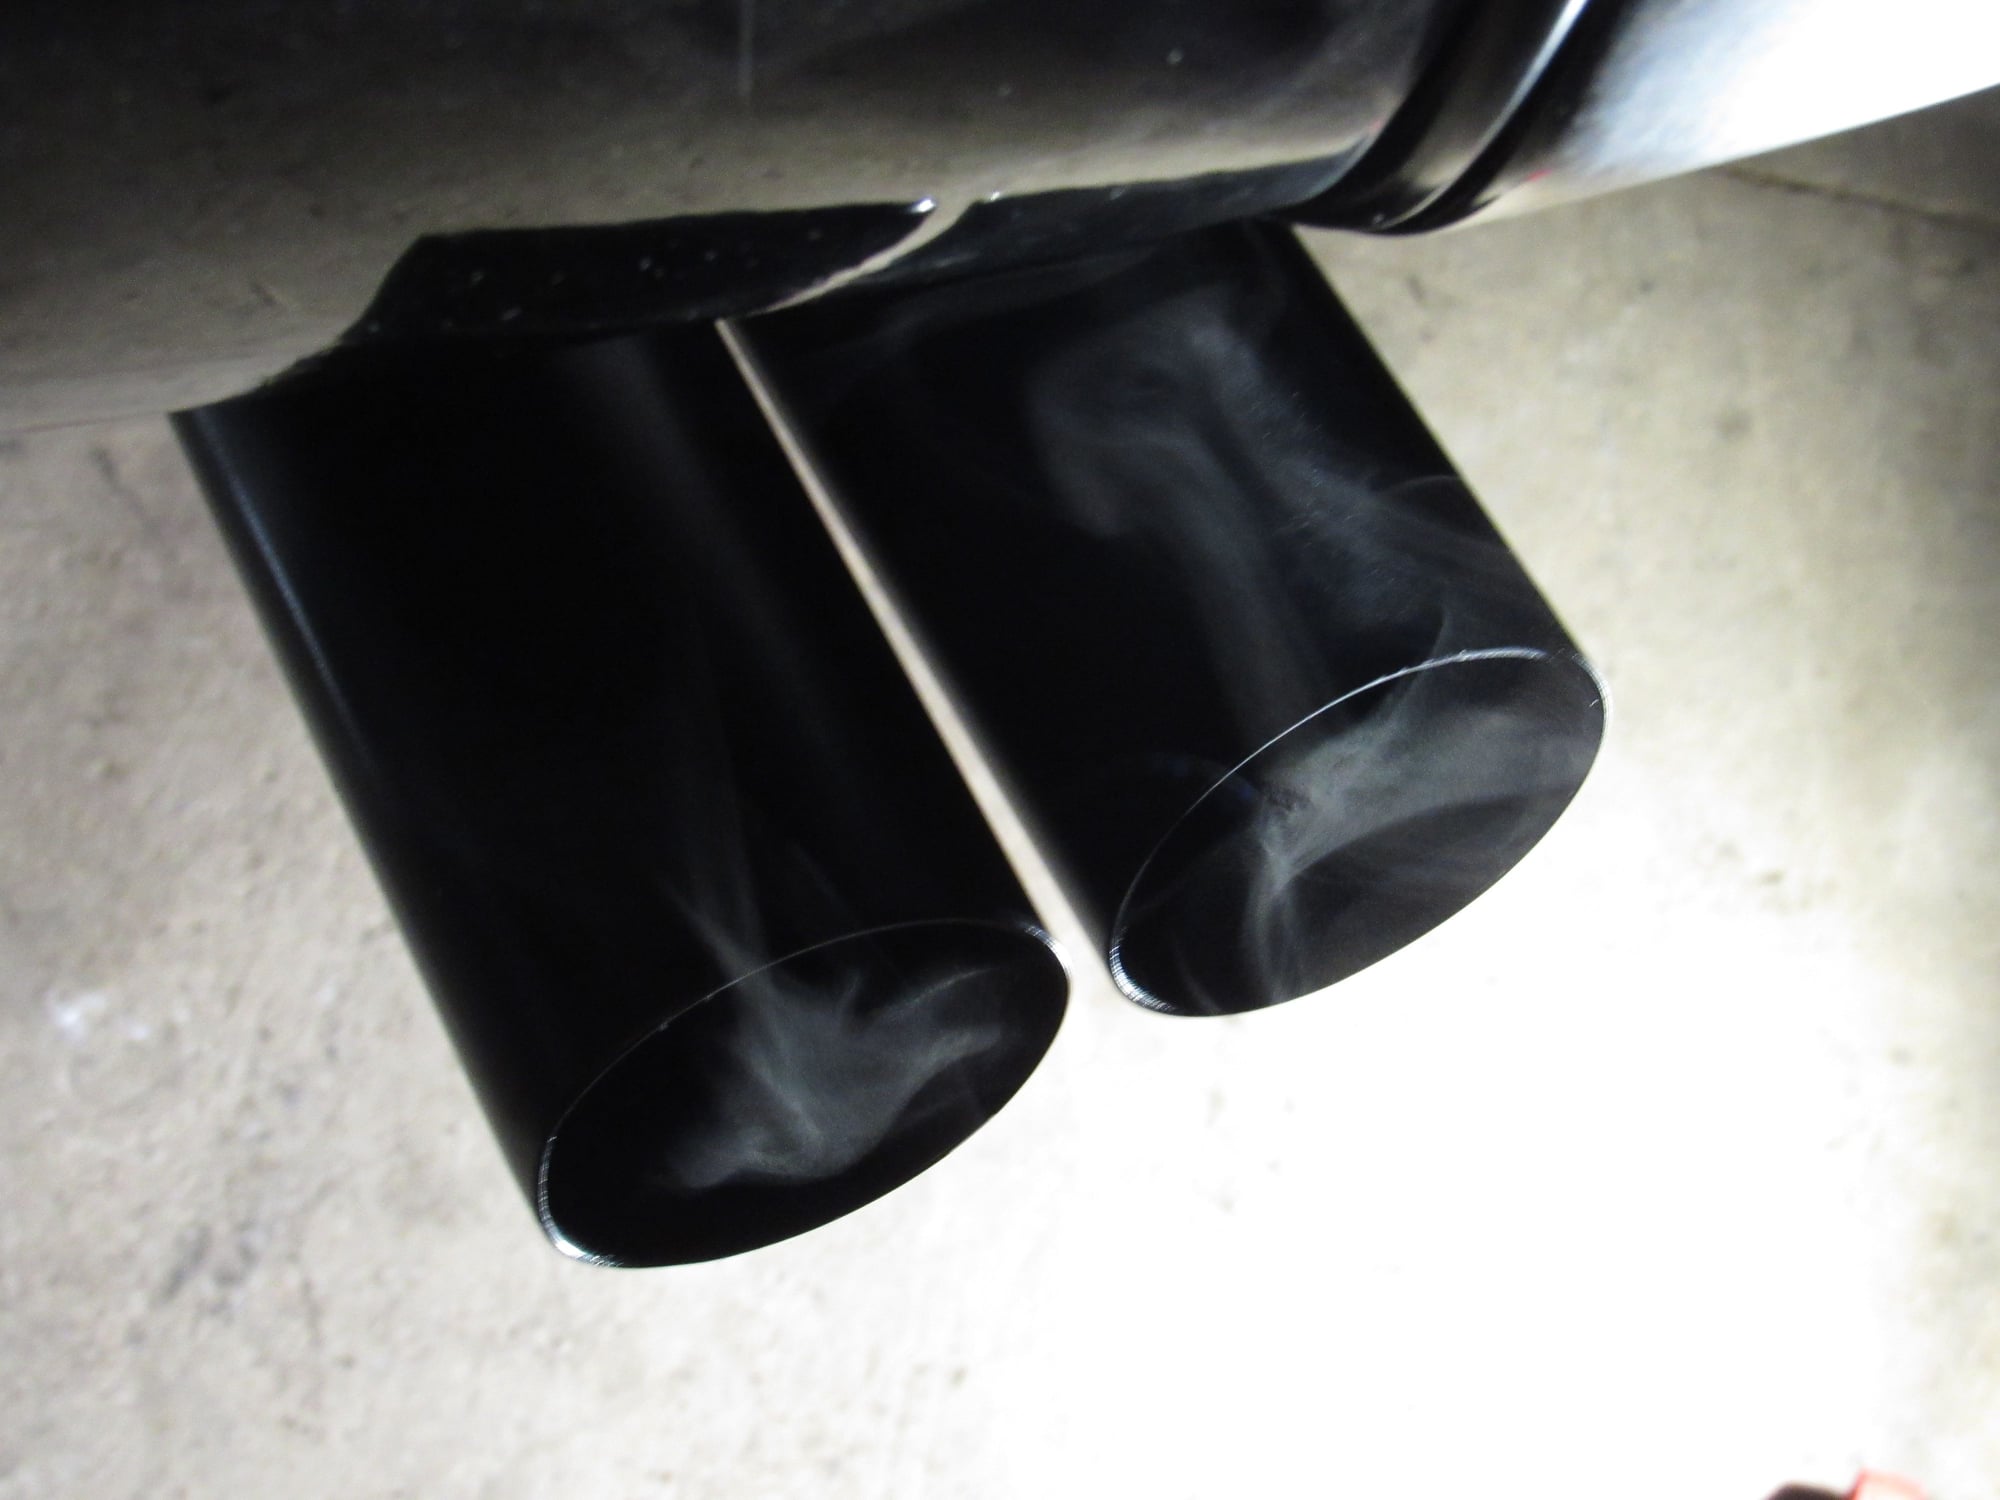
With everything checking out good I installed the exhaust. One of the things I like about these cars is that there is no chrome. The Borla exhaust I have installed had chrome tips on it and I took the opportunity to roughen the surface and paint them.
Two smoking barrels, much better!
After installing the rear wheels and lowering the car back on the ground I torqued the rear axles. I do not have a torque wrench that goes to the 350 ft lb or so required but I do know my weight and figured out how far out on a cheater bar to apply my full weight and get it close. I tested 1st and reverse in my garage and when I could not help myself, went out into a misting rainy night for a test drive.
I had not realized I did this work so close to 80k miles and of course I crossed it.
Wow this really transformed the car. Though the final gear ratio is actually a bit lower than the old gearbox it feels like 1-4 are spaced closer together. There may be a bit of a break-in period as the shifter is a little notchy but they go right in.
I never drove anything with a limited slip before and that was interesting (fun )when I couldn't find grip in 2nd gear on the wet roads.
I only went about 15 miles on back roads and about half way through the clutch pedal lost all pressure. A moment later it was ok again. It did this a couple times but I got back home. I figured I had a bubble in the system and only had time to look at it today and saw fluid leaking at the clutch slave. The new hose to banjo fitting was not even hand tight. That corrected and bled again, all is well.
The only other minor thing is that the steering wheel is off center a few degrees but I figured I would need a realignment anyway. Everything else is perfect. Speedo works, no weird noises, and the vibration I had before from the TT on high rev engine braking is totally gone.
I've got about 700 miles since the overhaul. Everything is running great and I am loving the new gearbox. I made a successful trip to Frenzy but a couple issues came up.
On my way down I noticed my speedo was 15mph slower than GPS and it got slower and slower until it died altogether. On the way back it started coming back to life and progressively regained full function. I guess the car does not like going south I will dig into this winter.
Next my inner door panel started hanging up on the plastic door sill trim so I removed the trim for now. The bottom of my door panel is in bad condition I will have to get creative.
After the Frenzy fun run someone told me my brake lamps were not working. Now this is something I have battled and been paranoid about since I bought the car and I finally won the war
I knew that once in a while the right brake lamp would not come on but every time I had the chance to troubleshoot they both worked. All electrical connections had been cleaned and checked but it was still an intermittent problem. I thought maybe it was some problem with the bulb controller.
When they did work, I also knew that it took some pretty firm braking for the lamps to activate, more than I would normally use (I am really easy on brake pads) so I was always nervous not knowing if they were on or off and checking the mirrors in case of a rear end collision. I did not know any better and figured that's just how these old cars work.
Well after I got home from frenzy I parked in my garage and closed the door behind me so that I could see the brake lamp reflections off the door. Only the left lamp turned on - dimly. Then I gave the brake pedal a good stomp and they both lit. In playing around with the pedal I found that the lamp actuation was totally inconsistent. Sometimes they turned on quickly, sometimes only after a few seconds with hard pressure.
On a hunch, I dug into how the brake lamp switches work and found a write up by Wally Plumley here. To test the wiring I disconnected the plug at the switch and jumpered two of the terminals. The brake lamps came on immediately and repeatedly so that ruled out a wiring problem. At $20 for two new switches it was a no brainer to replace them and see what happens. This is another one of those jobs where the part you are working on is right there but you can't get a tool on it. An adjustable crescent wrench got it done and no fluid came out other than what was in the switches. I gave the pedal a try and even though now it was spongy the lamps came right on and consistently!
Some time ago I got a Motive power bleeder and this was my first time trying it. I bled the brakes and clutch and really liked it. The pedal is now solid and brake lamps turn on with a slight nudge
New brake switches.
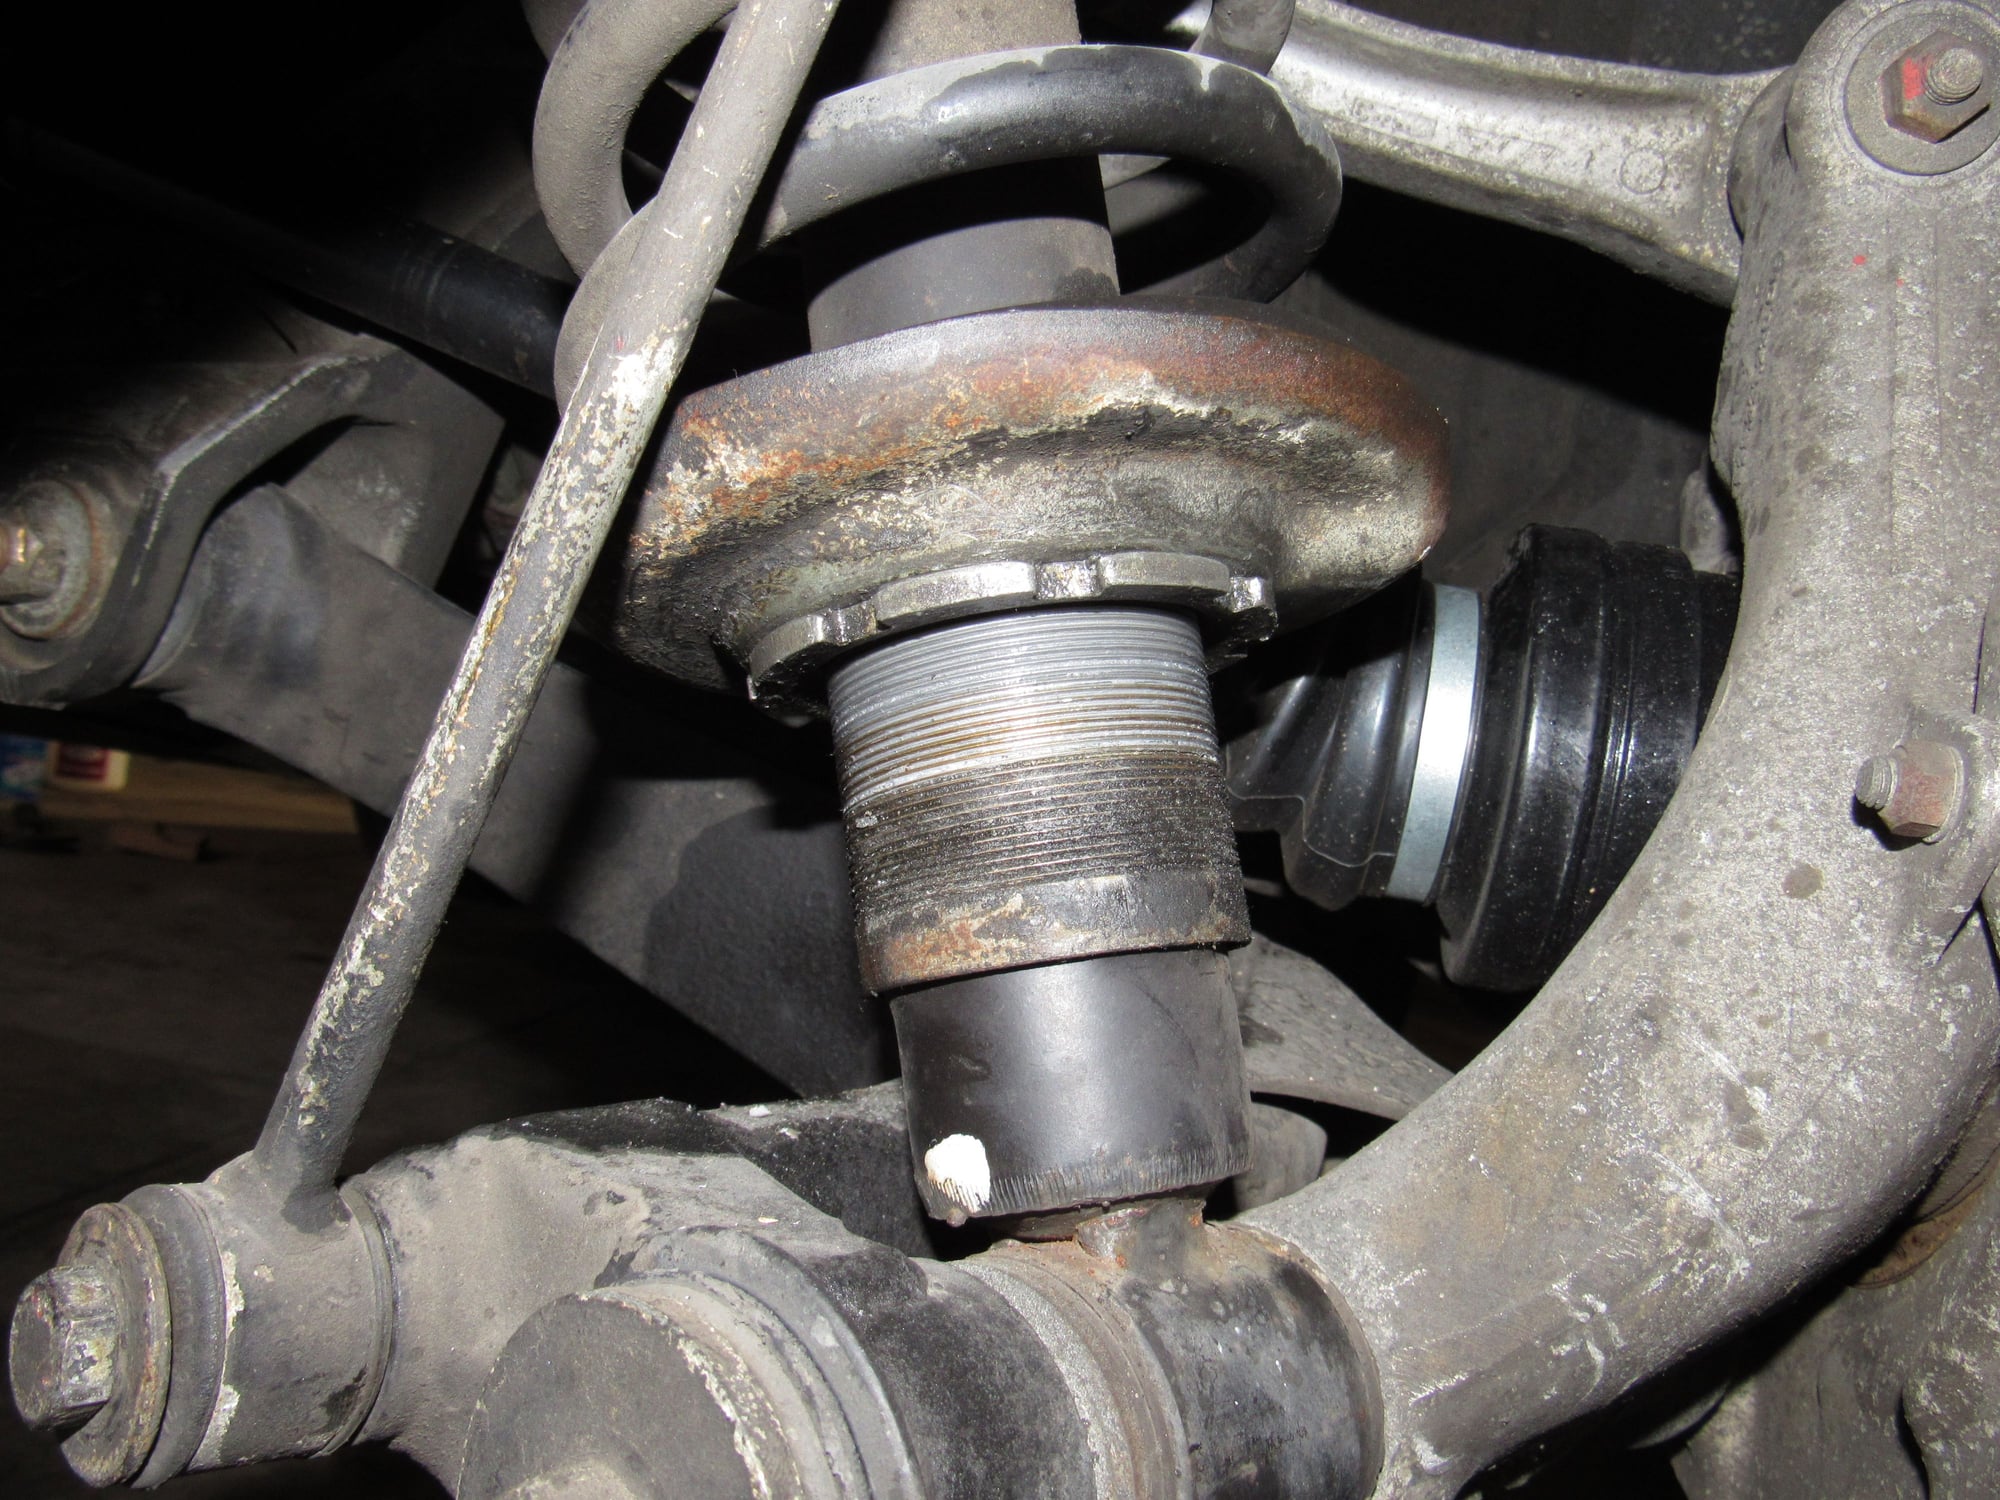
One thing I noticed a while ago was the right rear coilover was lower than the left by about two inches. While I had the wheels off to bleed the brakes I adjusted it with a "strainer nut wrench" out of the plumbing section of Home Depot made by Danco. It is a perfect fit and only cost $10.
Most of the way the entire coil and saddle rotated with the adjusting nut and when it unseized that made things much easier. I matched the height from the bottom of the threaded sleeve to the bottom of the spring saddle.
Now that I am looking at these photos I noticed something wrong. Below is the right rear coilover I adjusted. Notice the adjusting nut and threaded sleeve.
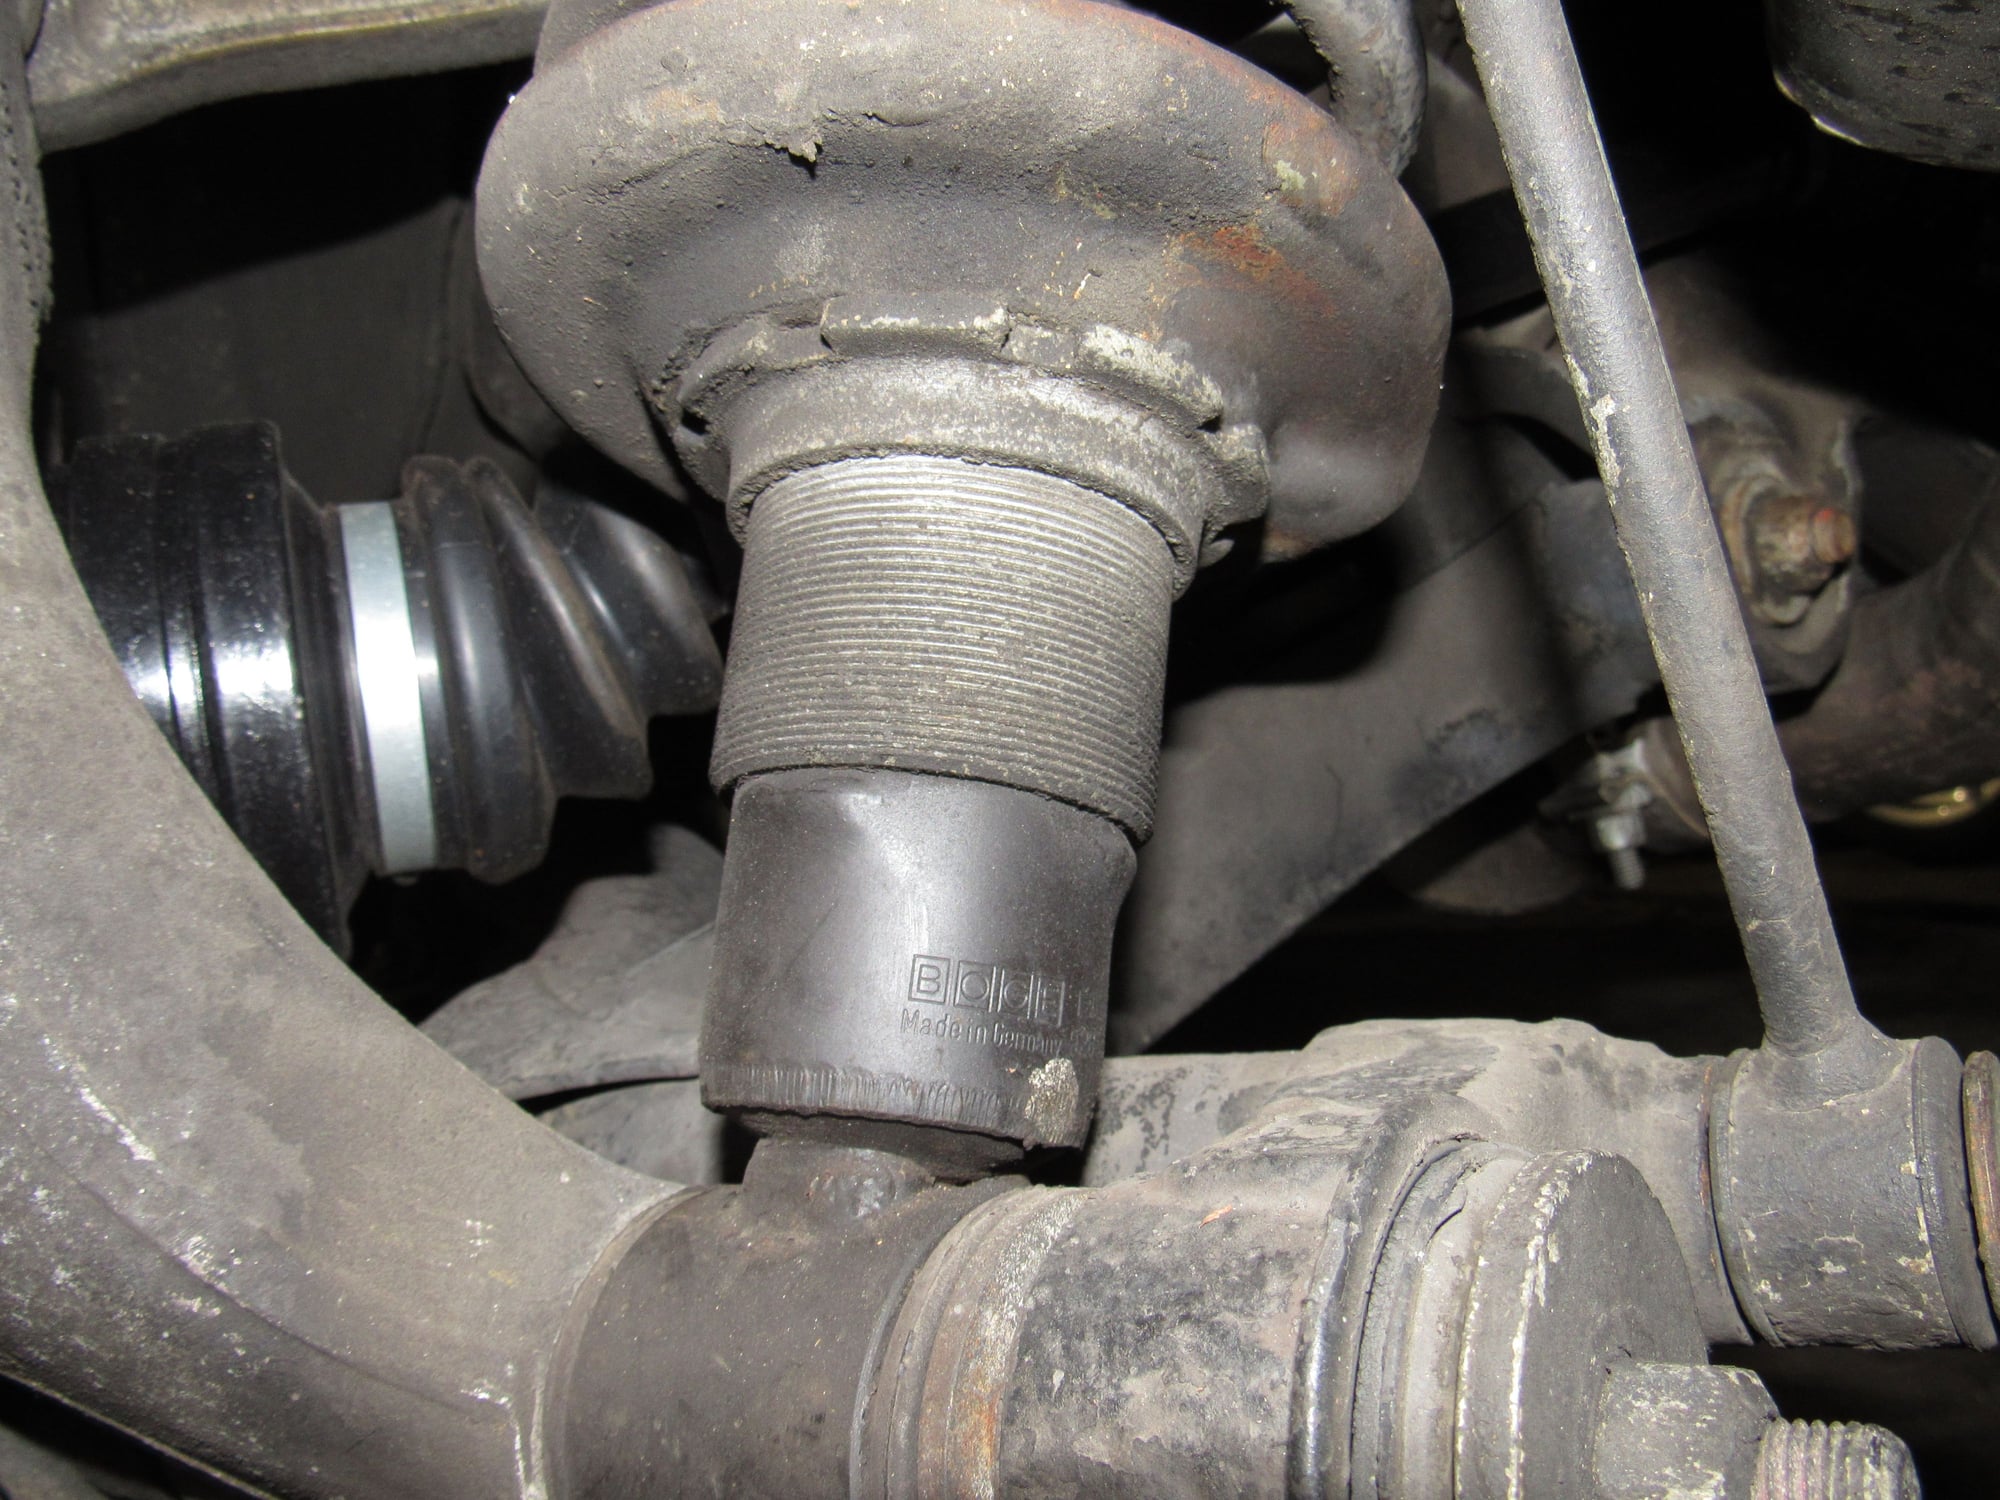
Now see the difference on the left side. I think the nut and threaded sleeve are upside down according to the WSM. The weird thing is that the shocks are original as far as I know, they both have white factory paint marks on the bottom.
After my shock adjustment I could feel it was too stiff in the rear. The spec is 173mm +/- 10mm so I cut a thick strand of copper wire to length and crawled under to measure. I was about 40mm too high! I thought the right coilover was set too low and raised it but the reality was that the left was set too high. It is very much a matter of trial and error to set it perfectly but I have it pretty close now.
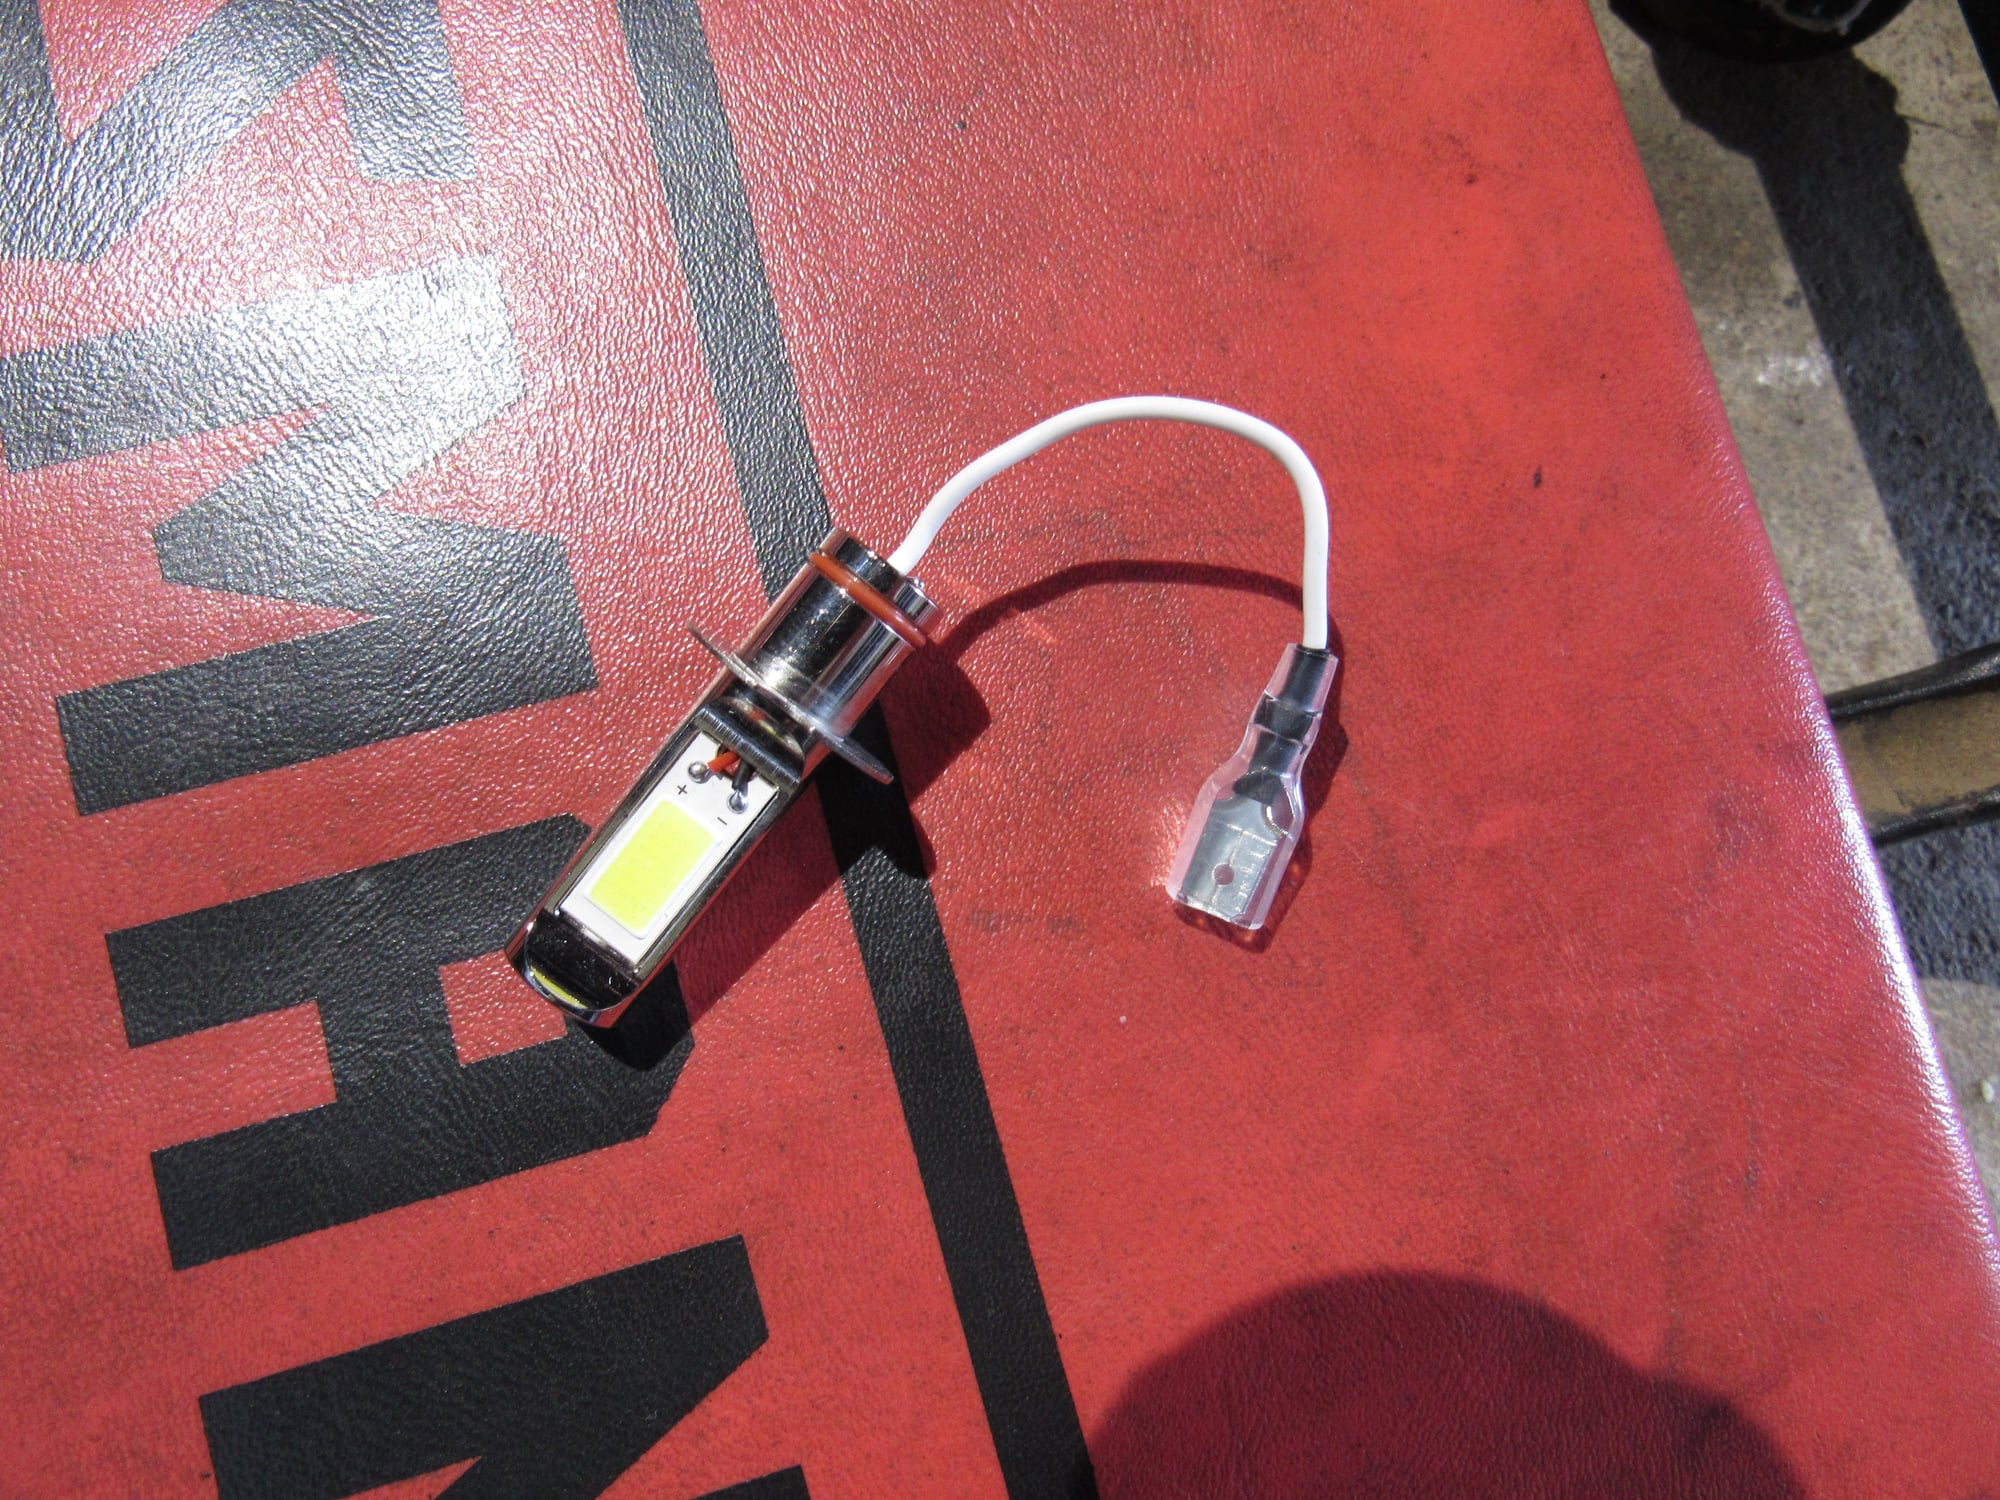
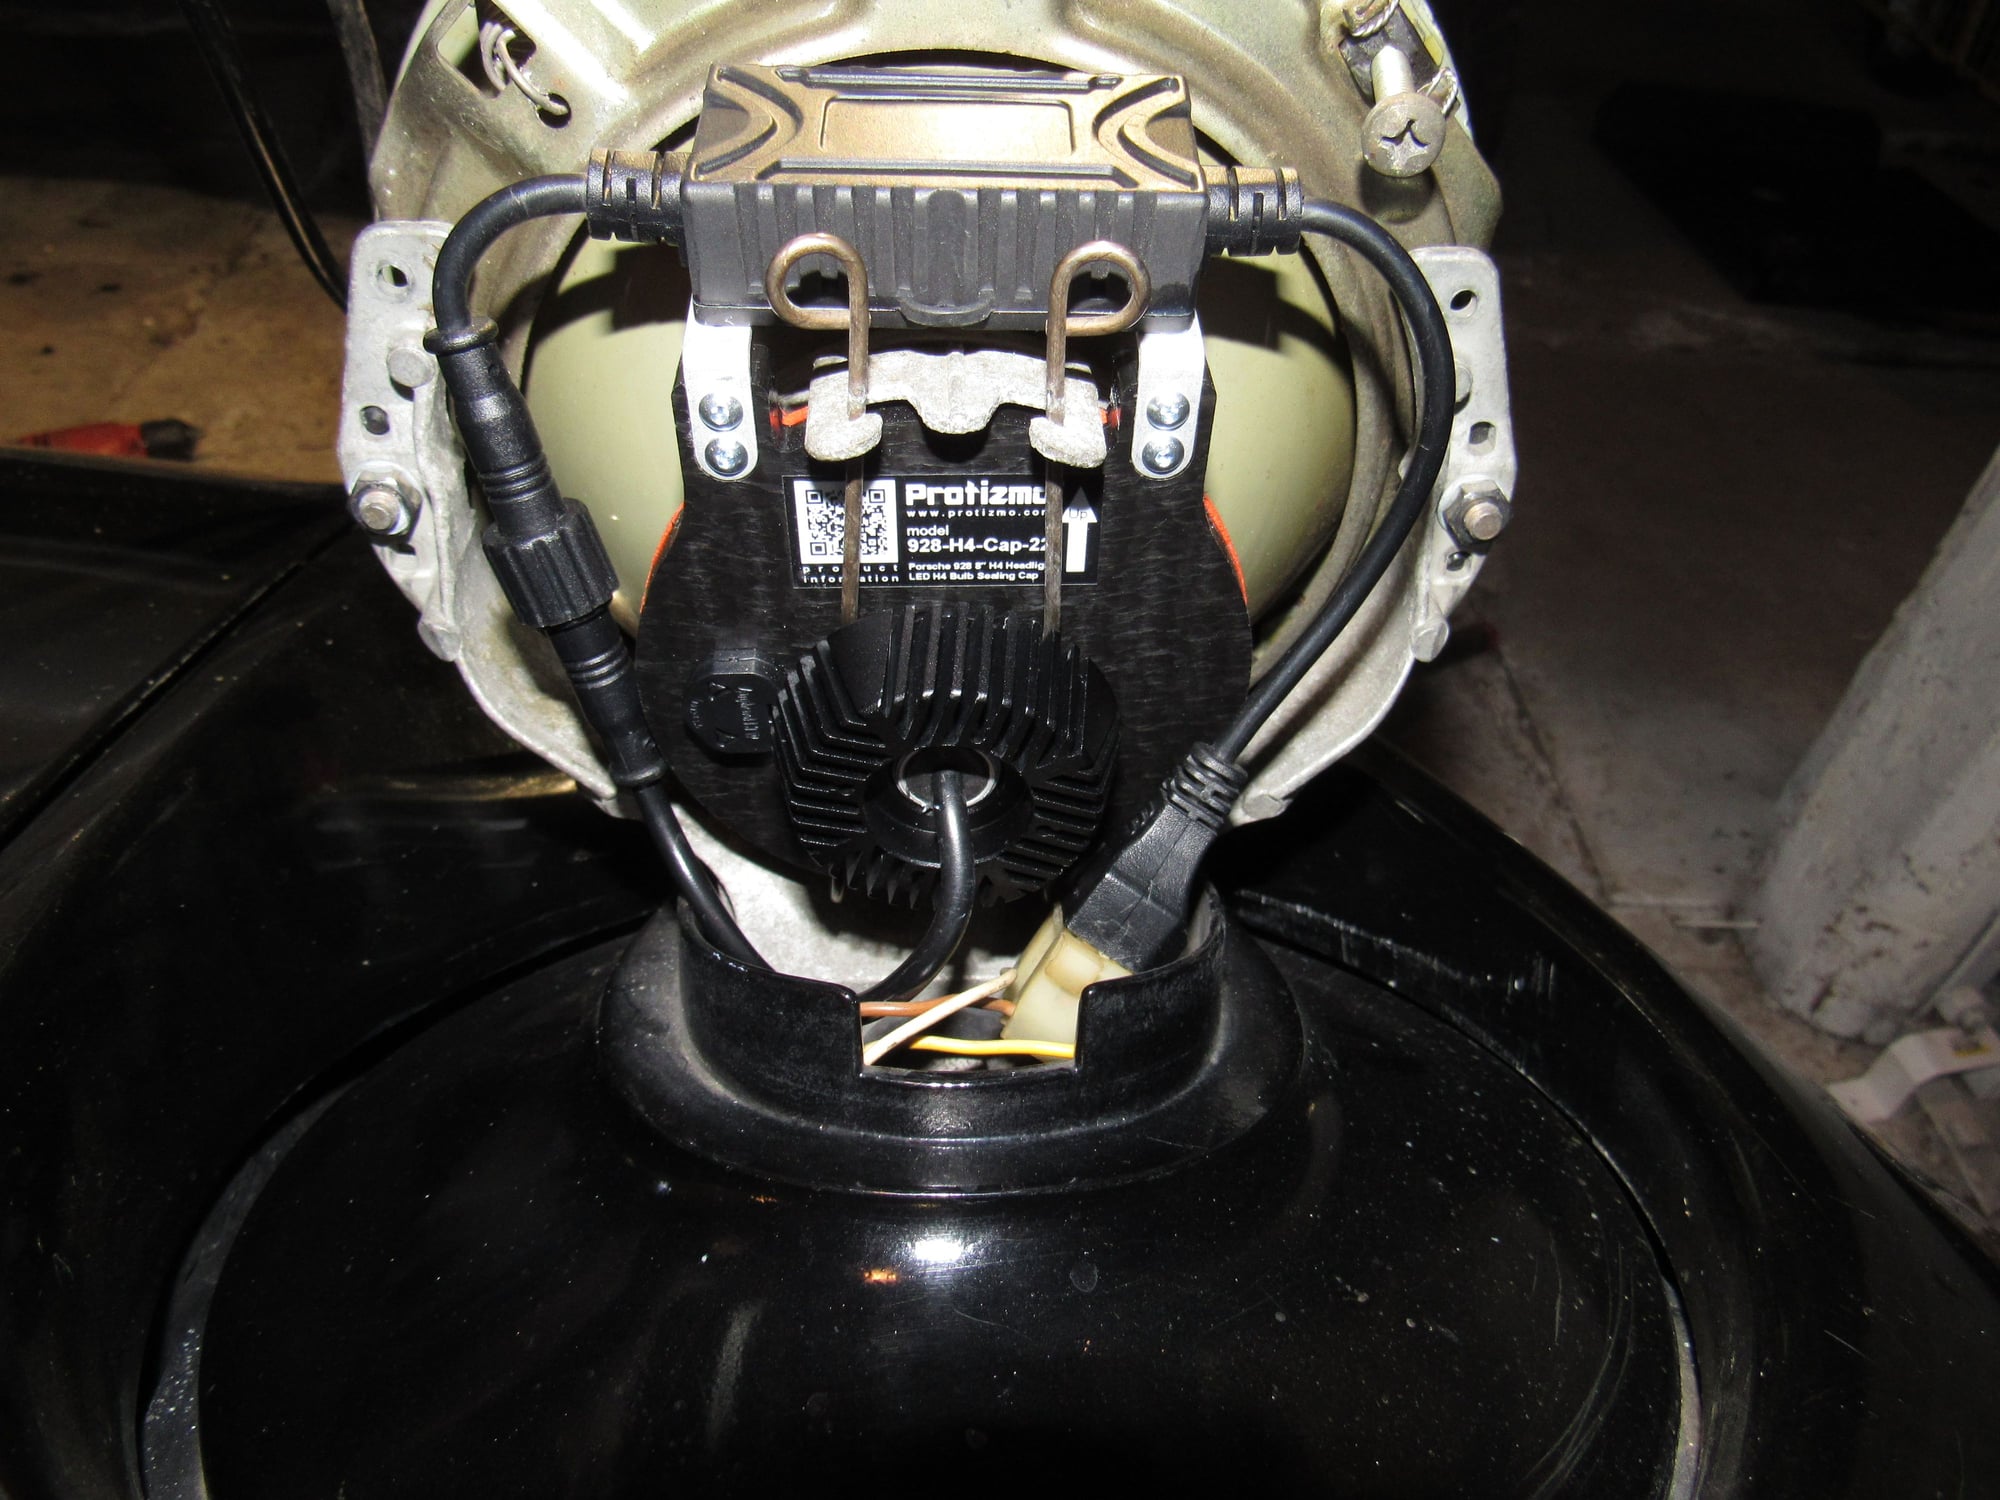
I've also converted all the front lamps to LEDs.
The driving lamps are from superbrightleds: LED driving lamps
I got the foglamps from amazon, the only offering from superbright was too long and hit the shield inside the lamp. These work great:
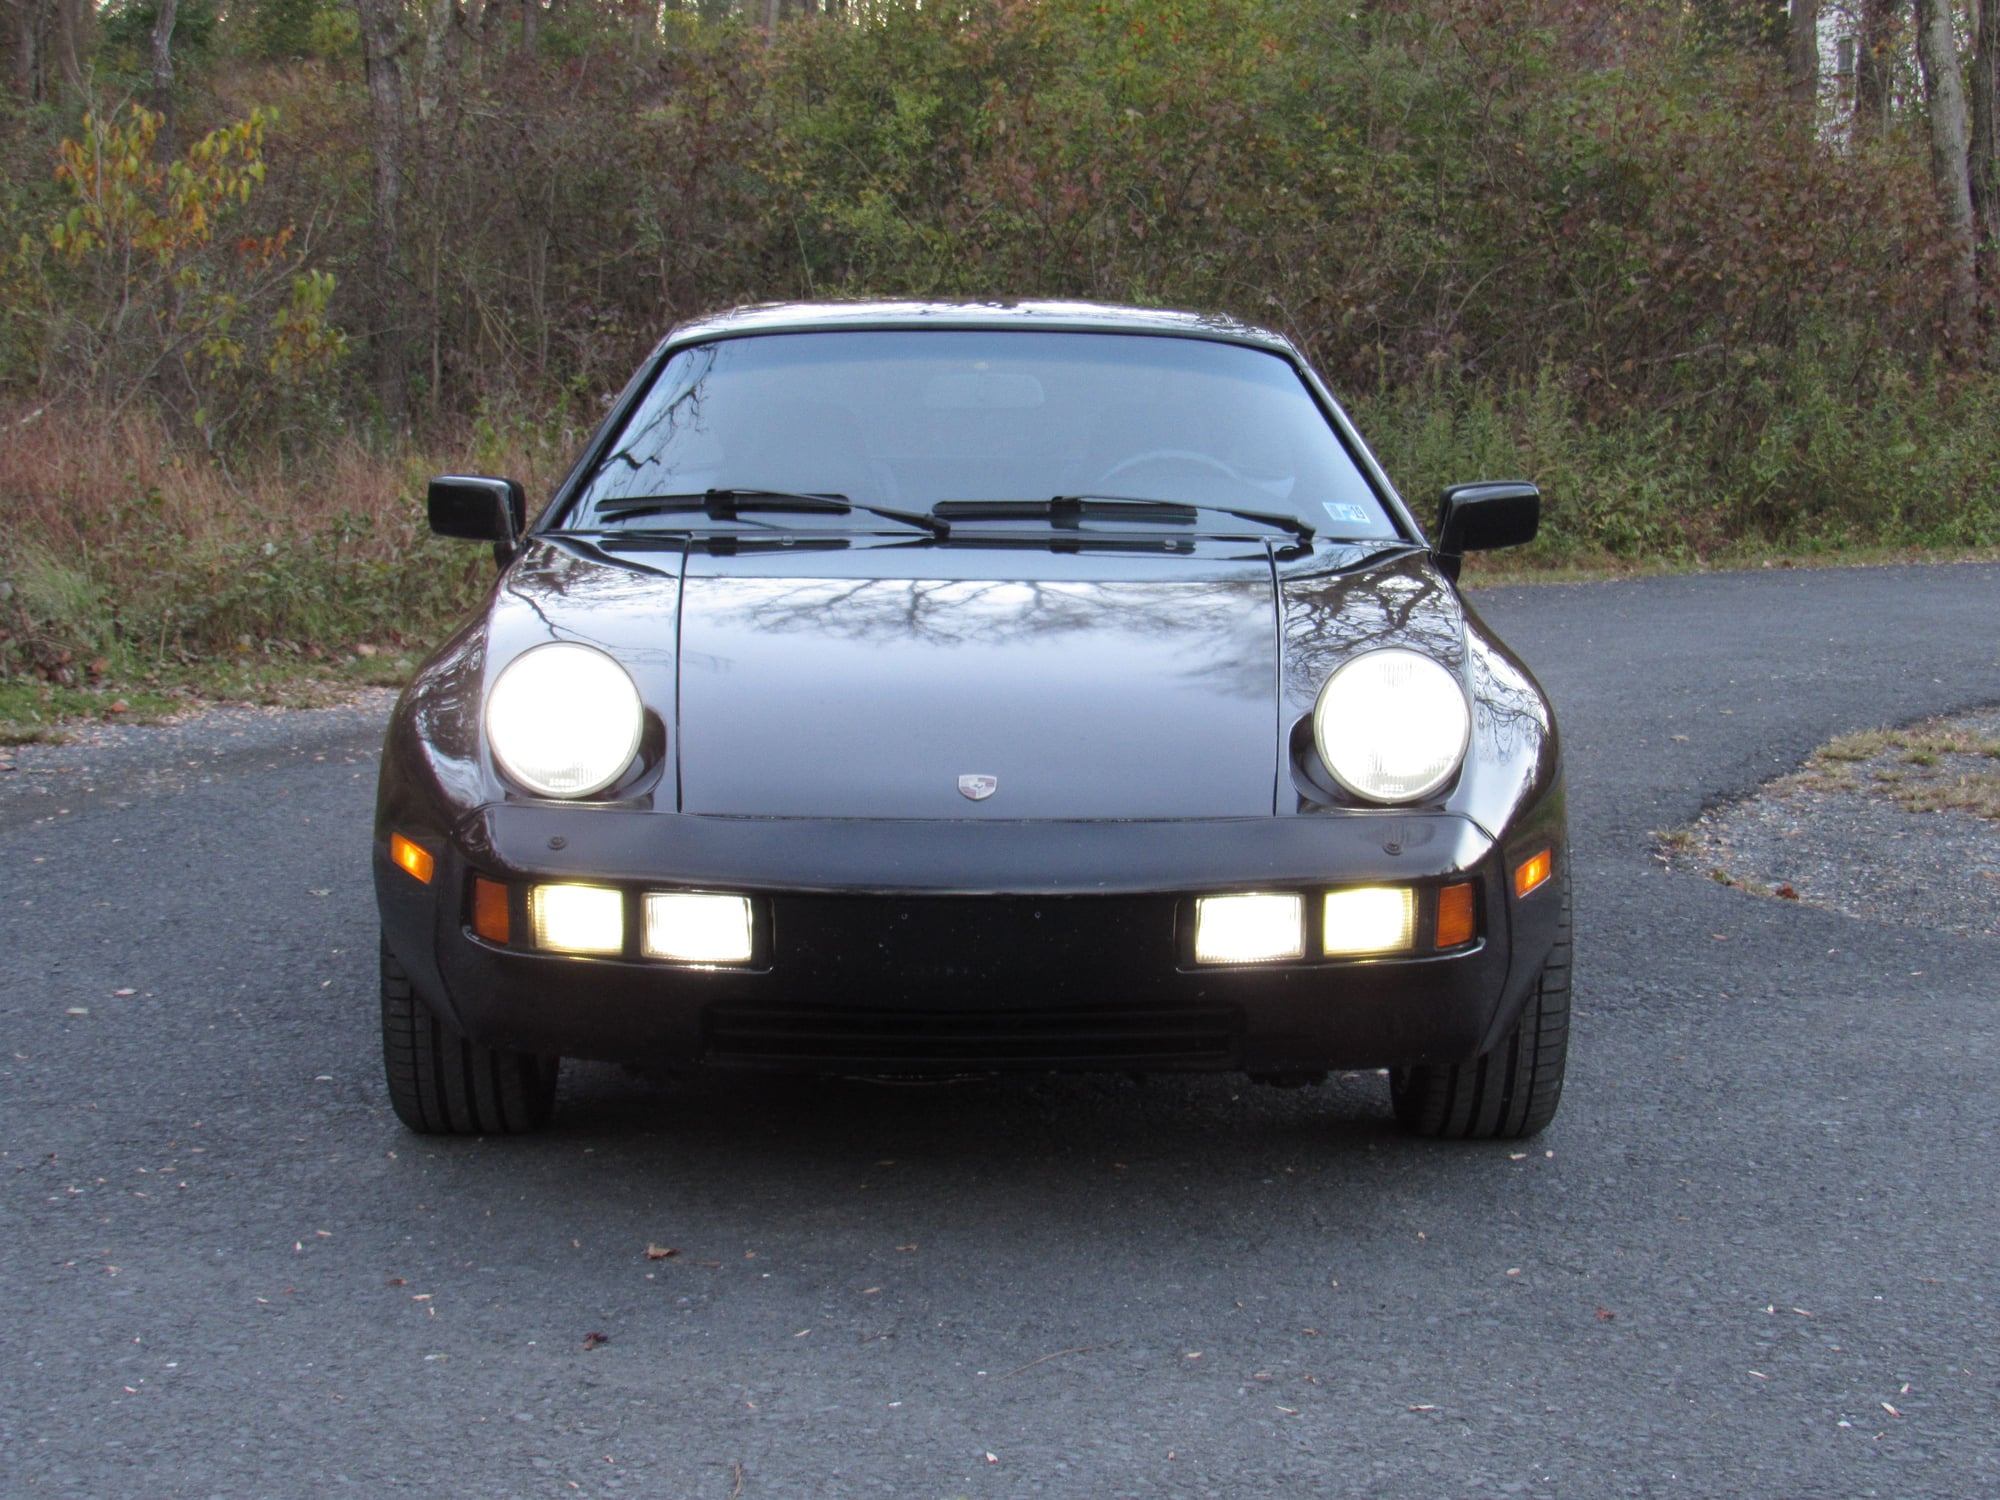
I went behind the local Kmart at dusk to properly aim the headlamps before the conversion. When converting the headlamps to LED you must replace the foglamp relay with a standard "53". I've not gone for a proper night drive but they look great.
Just read through this entire Thread..
Great Job and a labor of love!!!
Thank you. I took a break the last couple of months but I am back at it and fixed some things but found other problems.
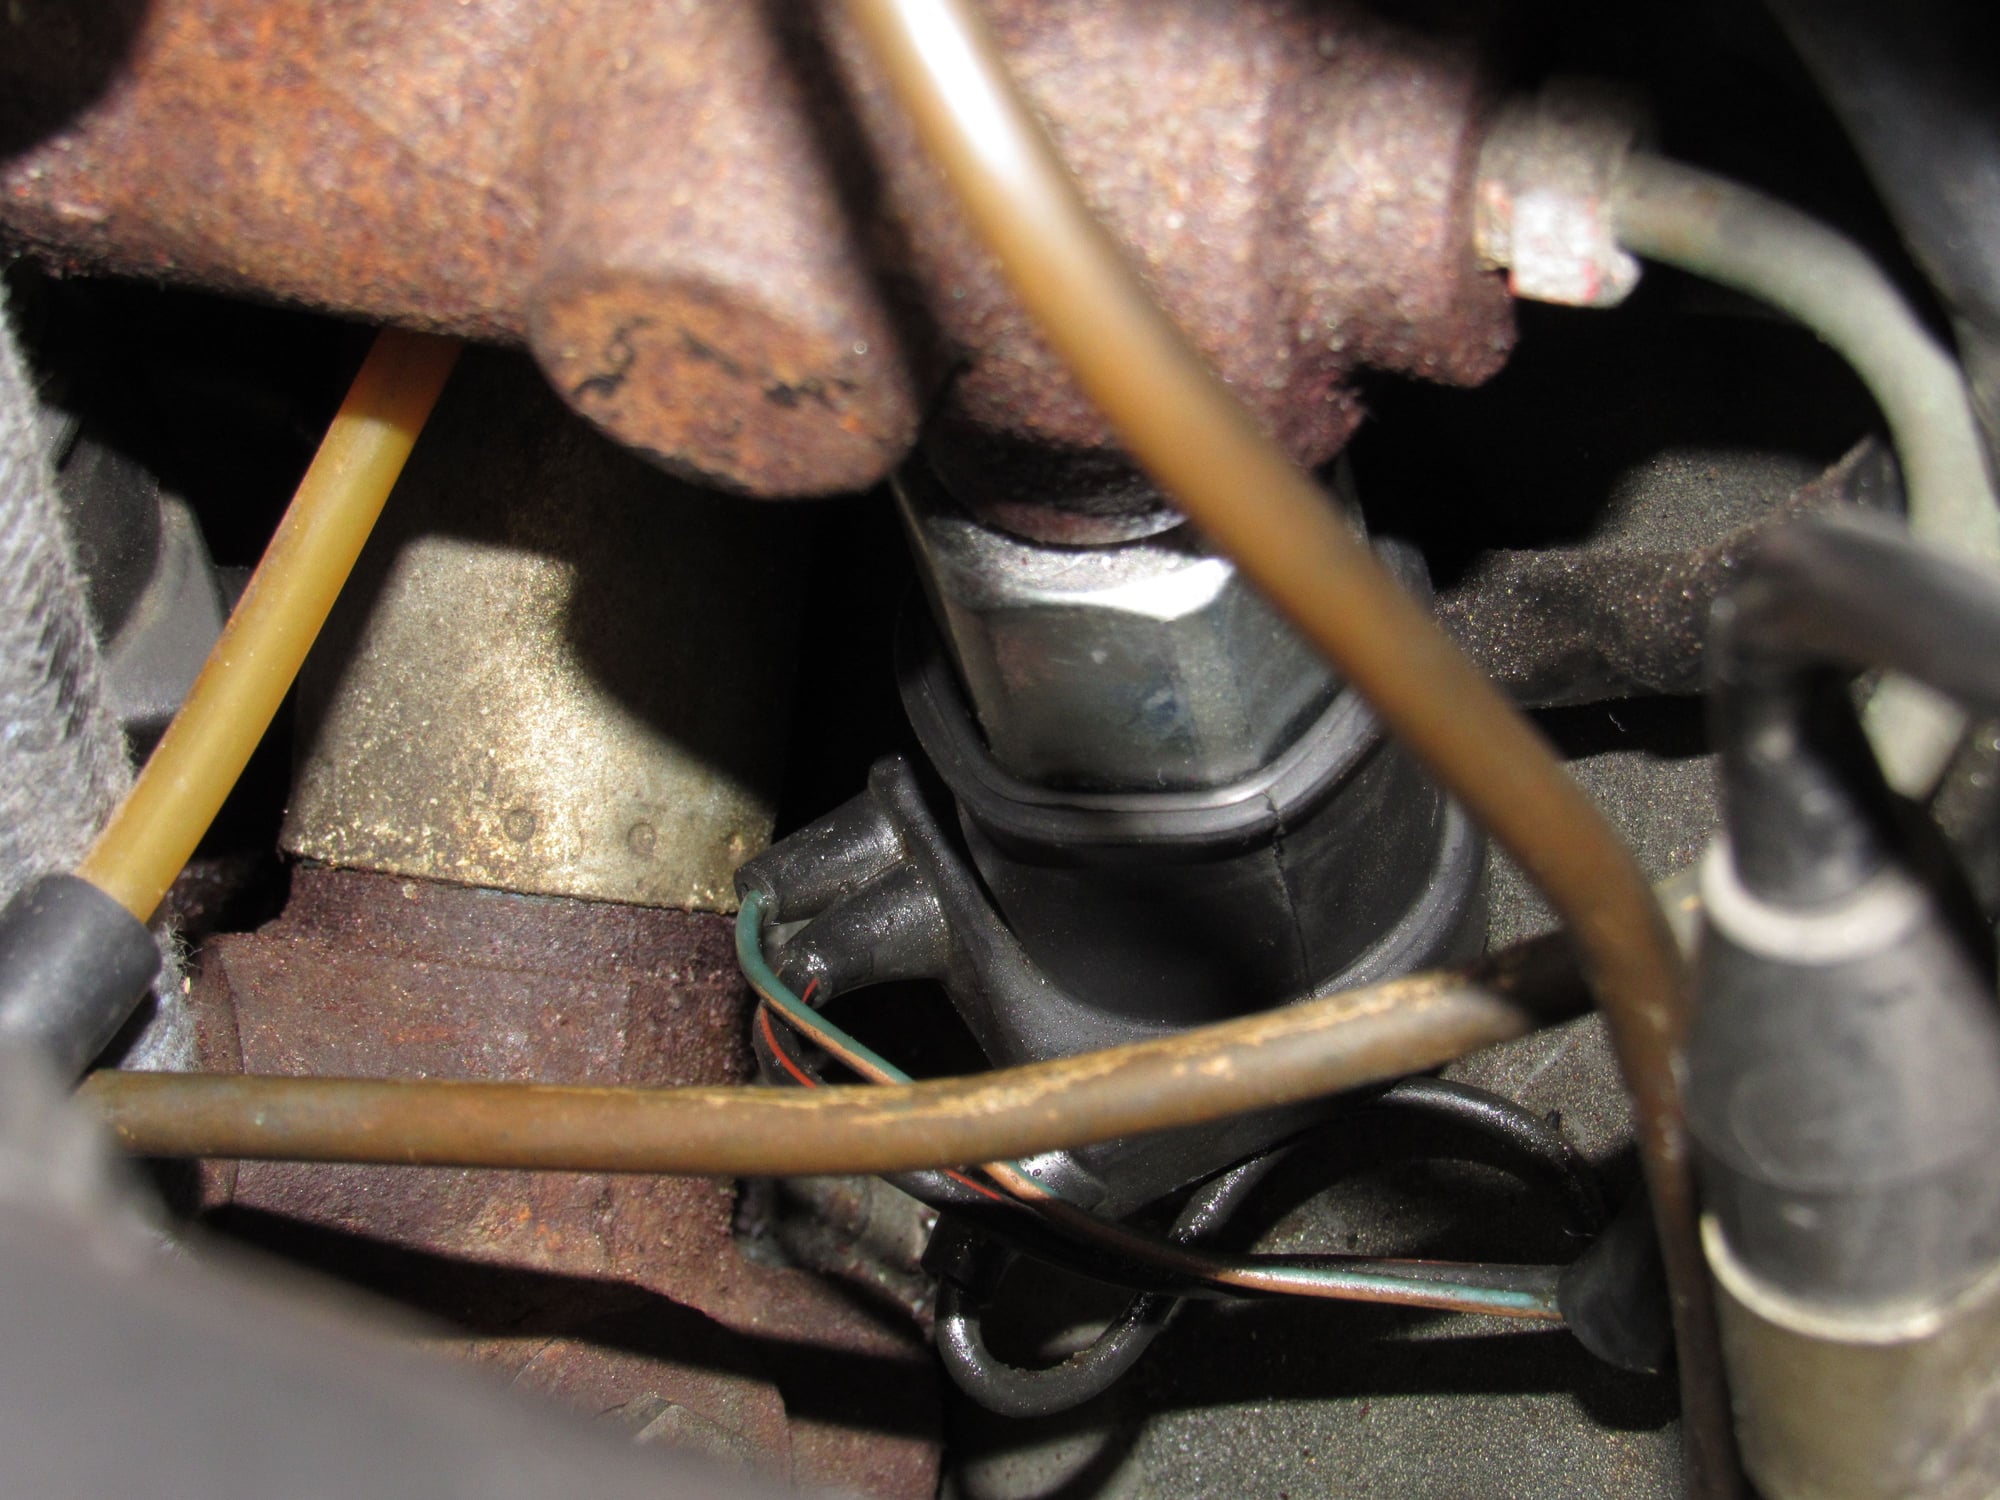
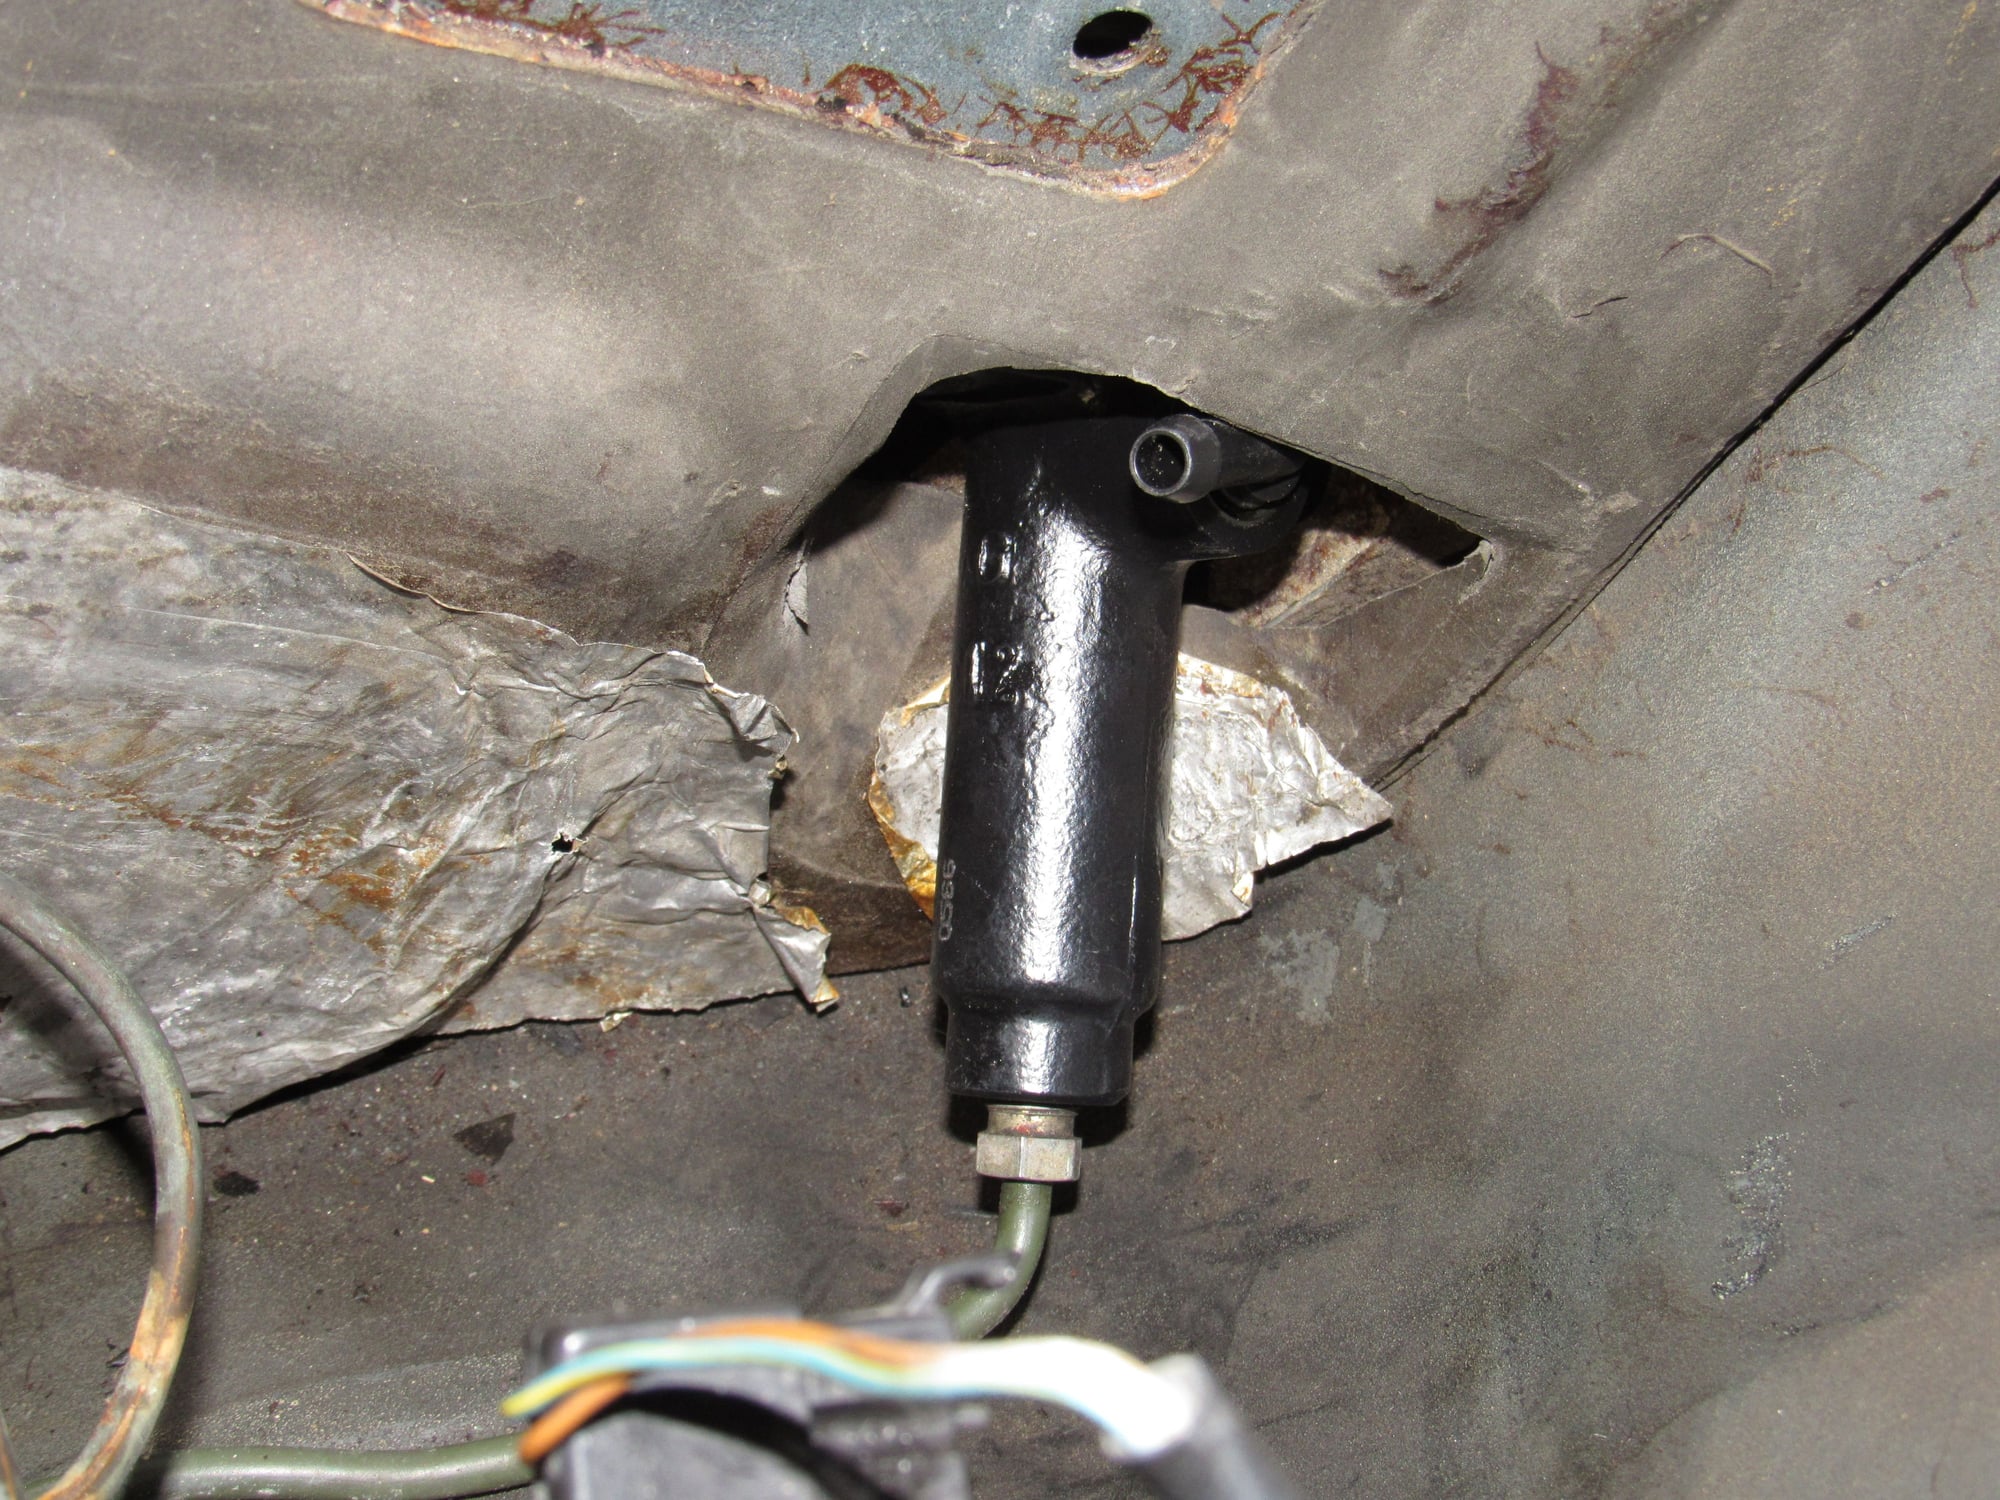
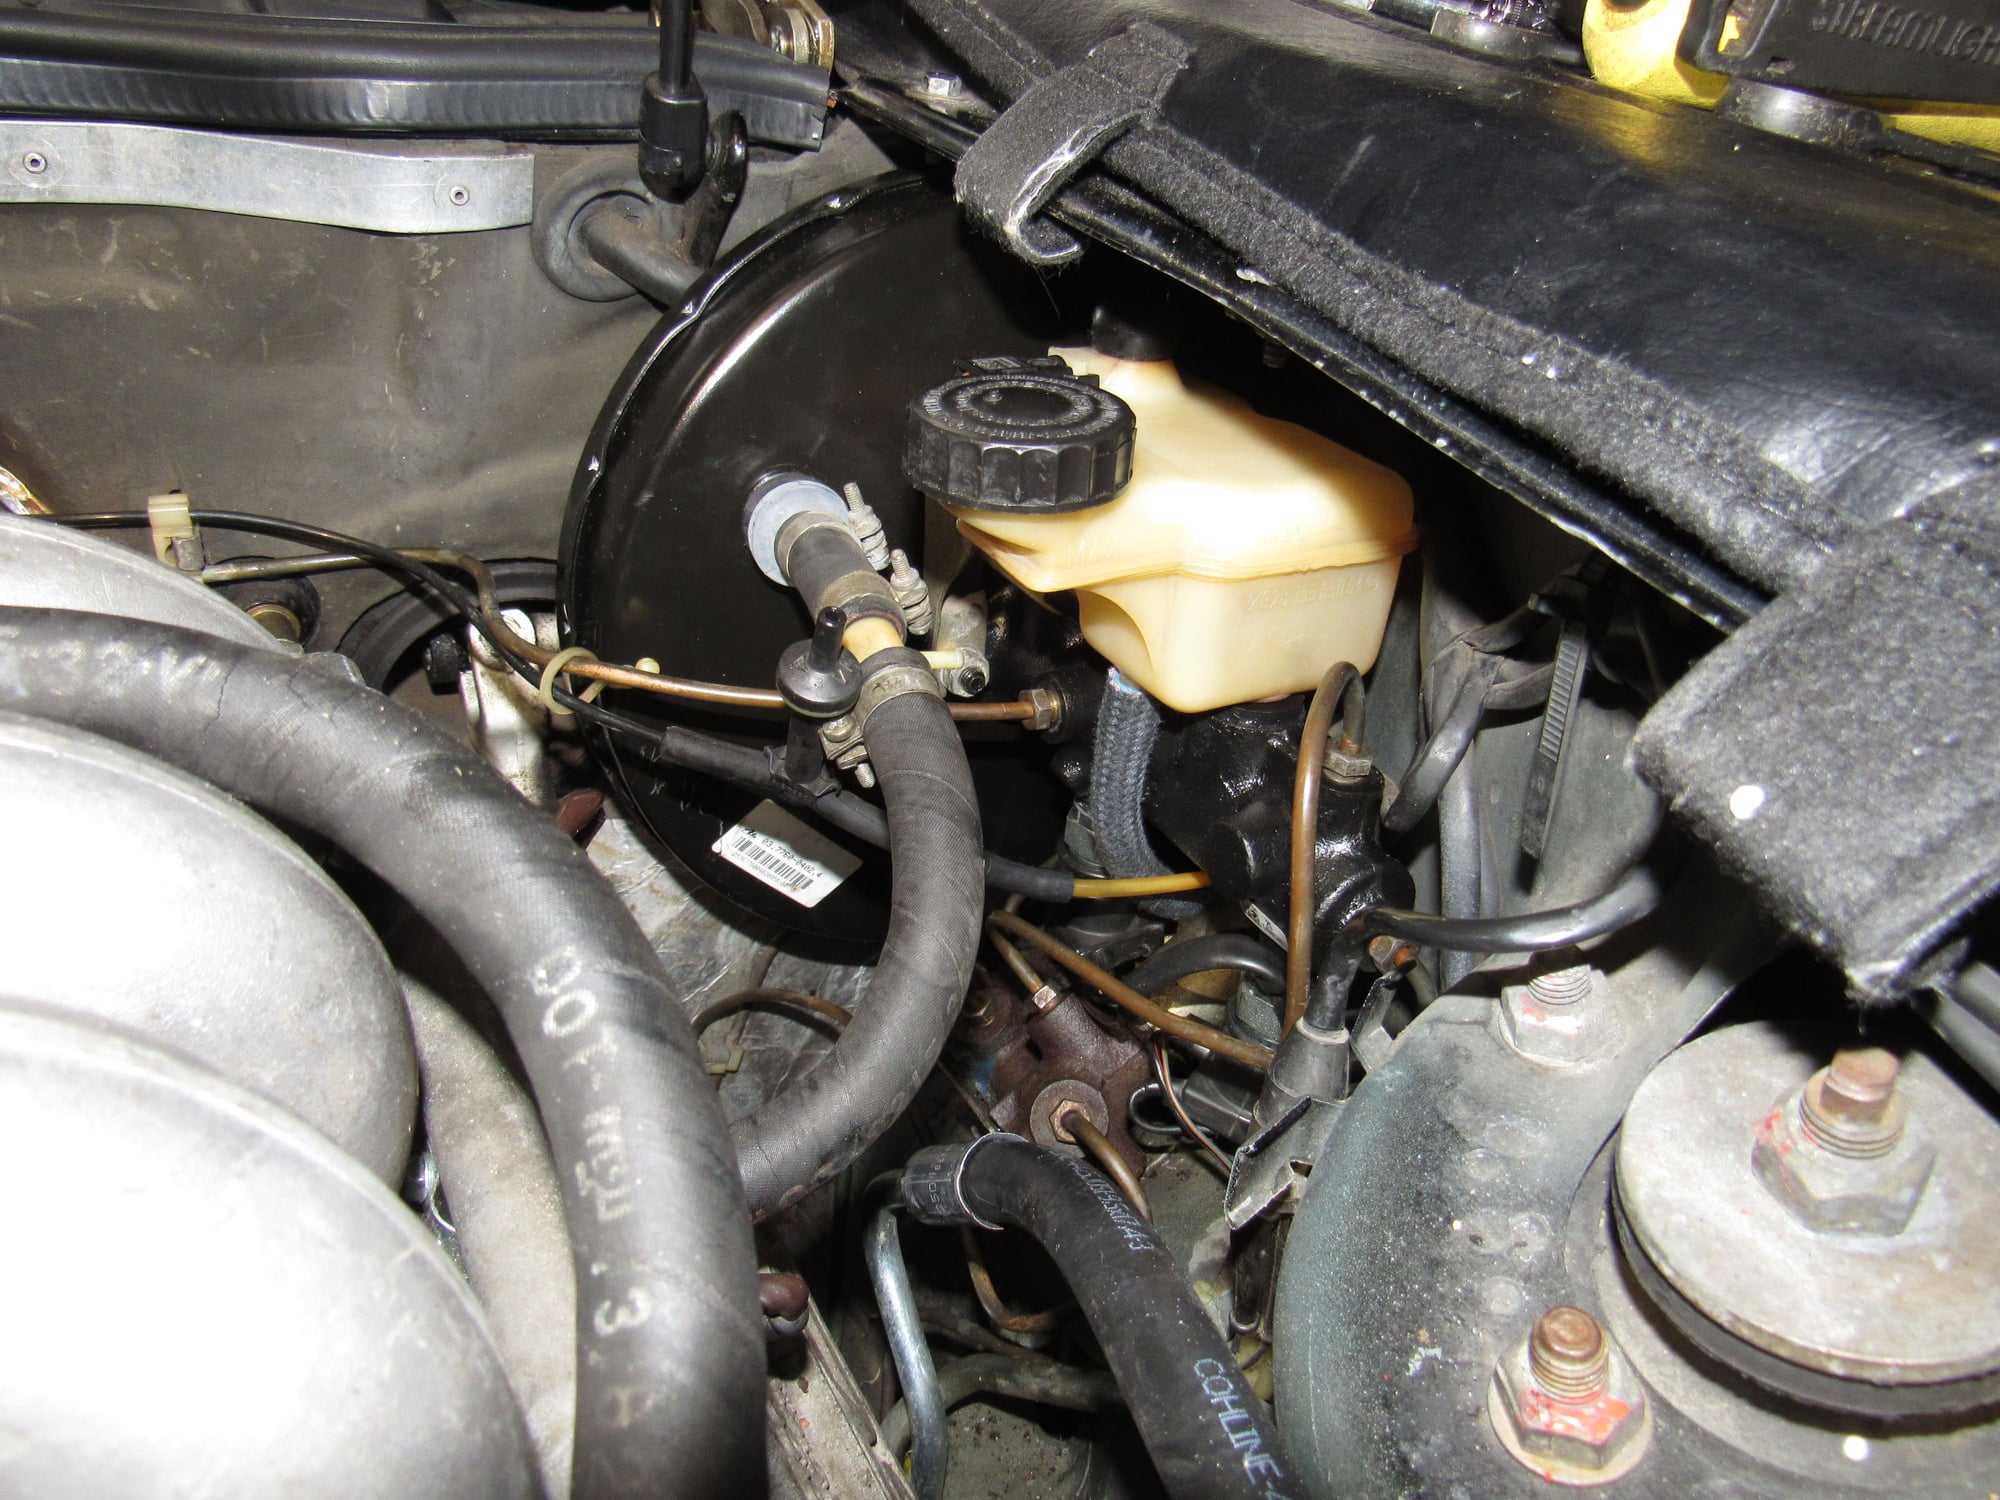
Brake fluid coming out of the booster.
There is only that one droplet, nothing on the carpet, but it means the master cylinder is leaking into the booster necessitating both of their replacements.
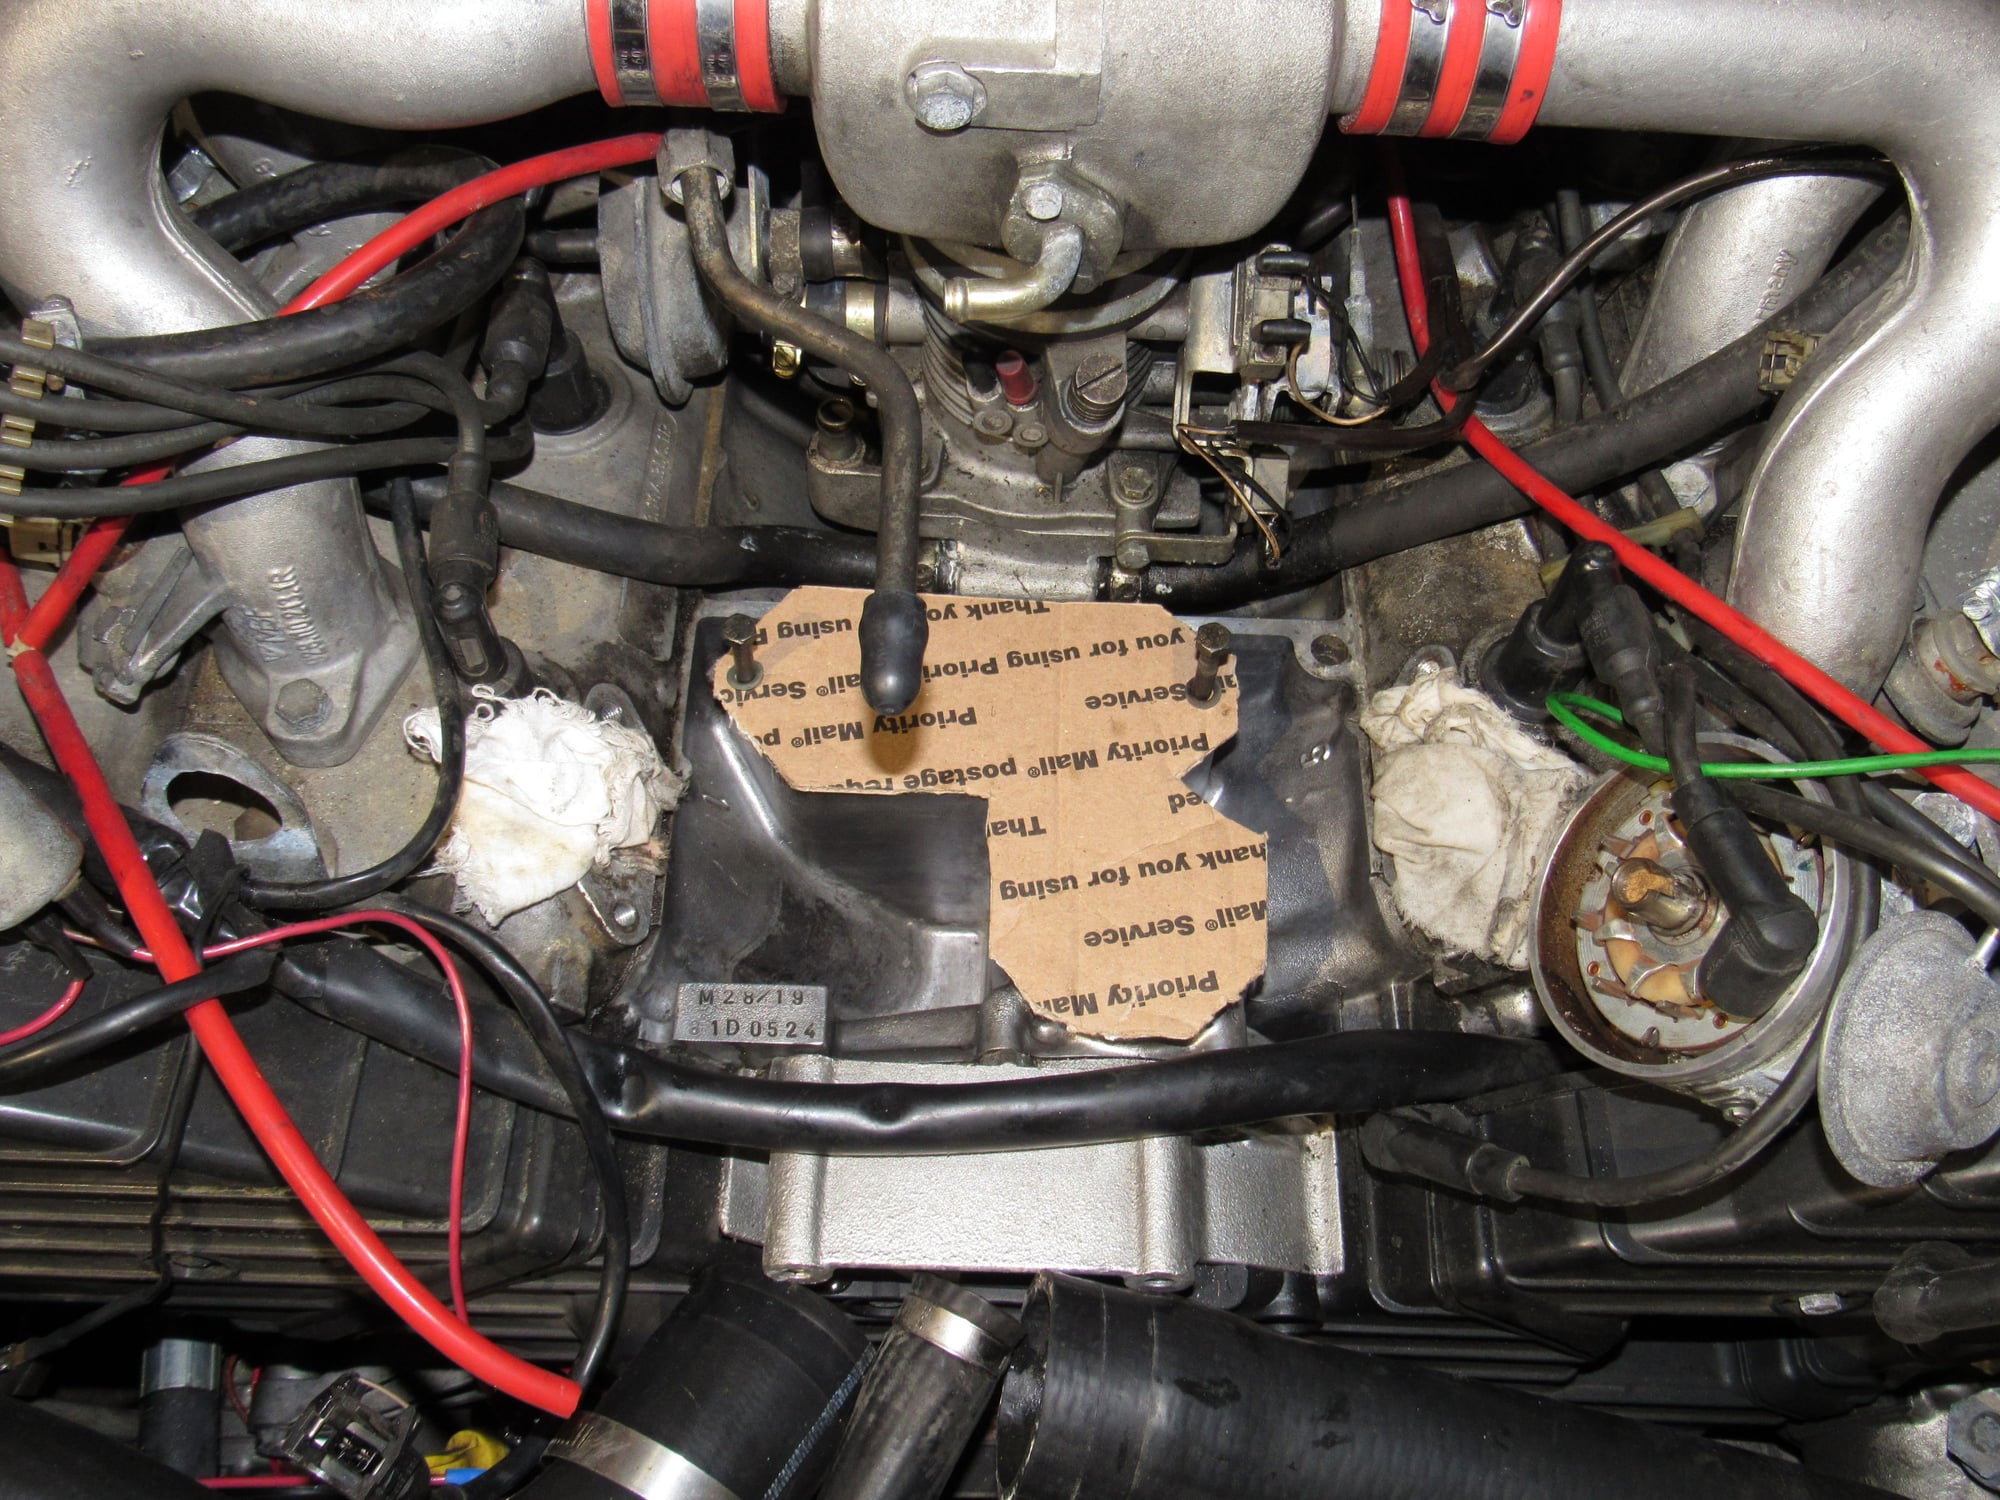
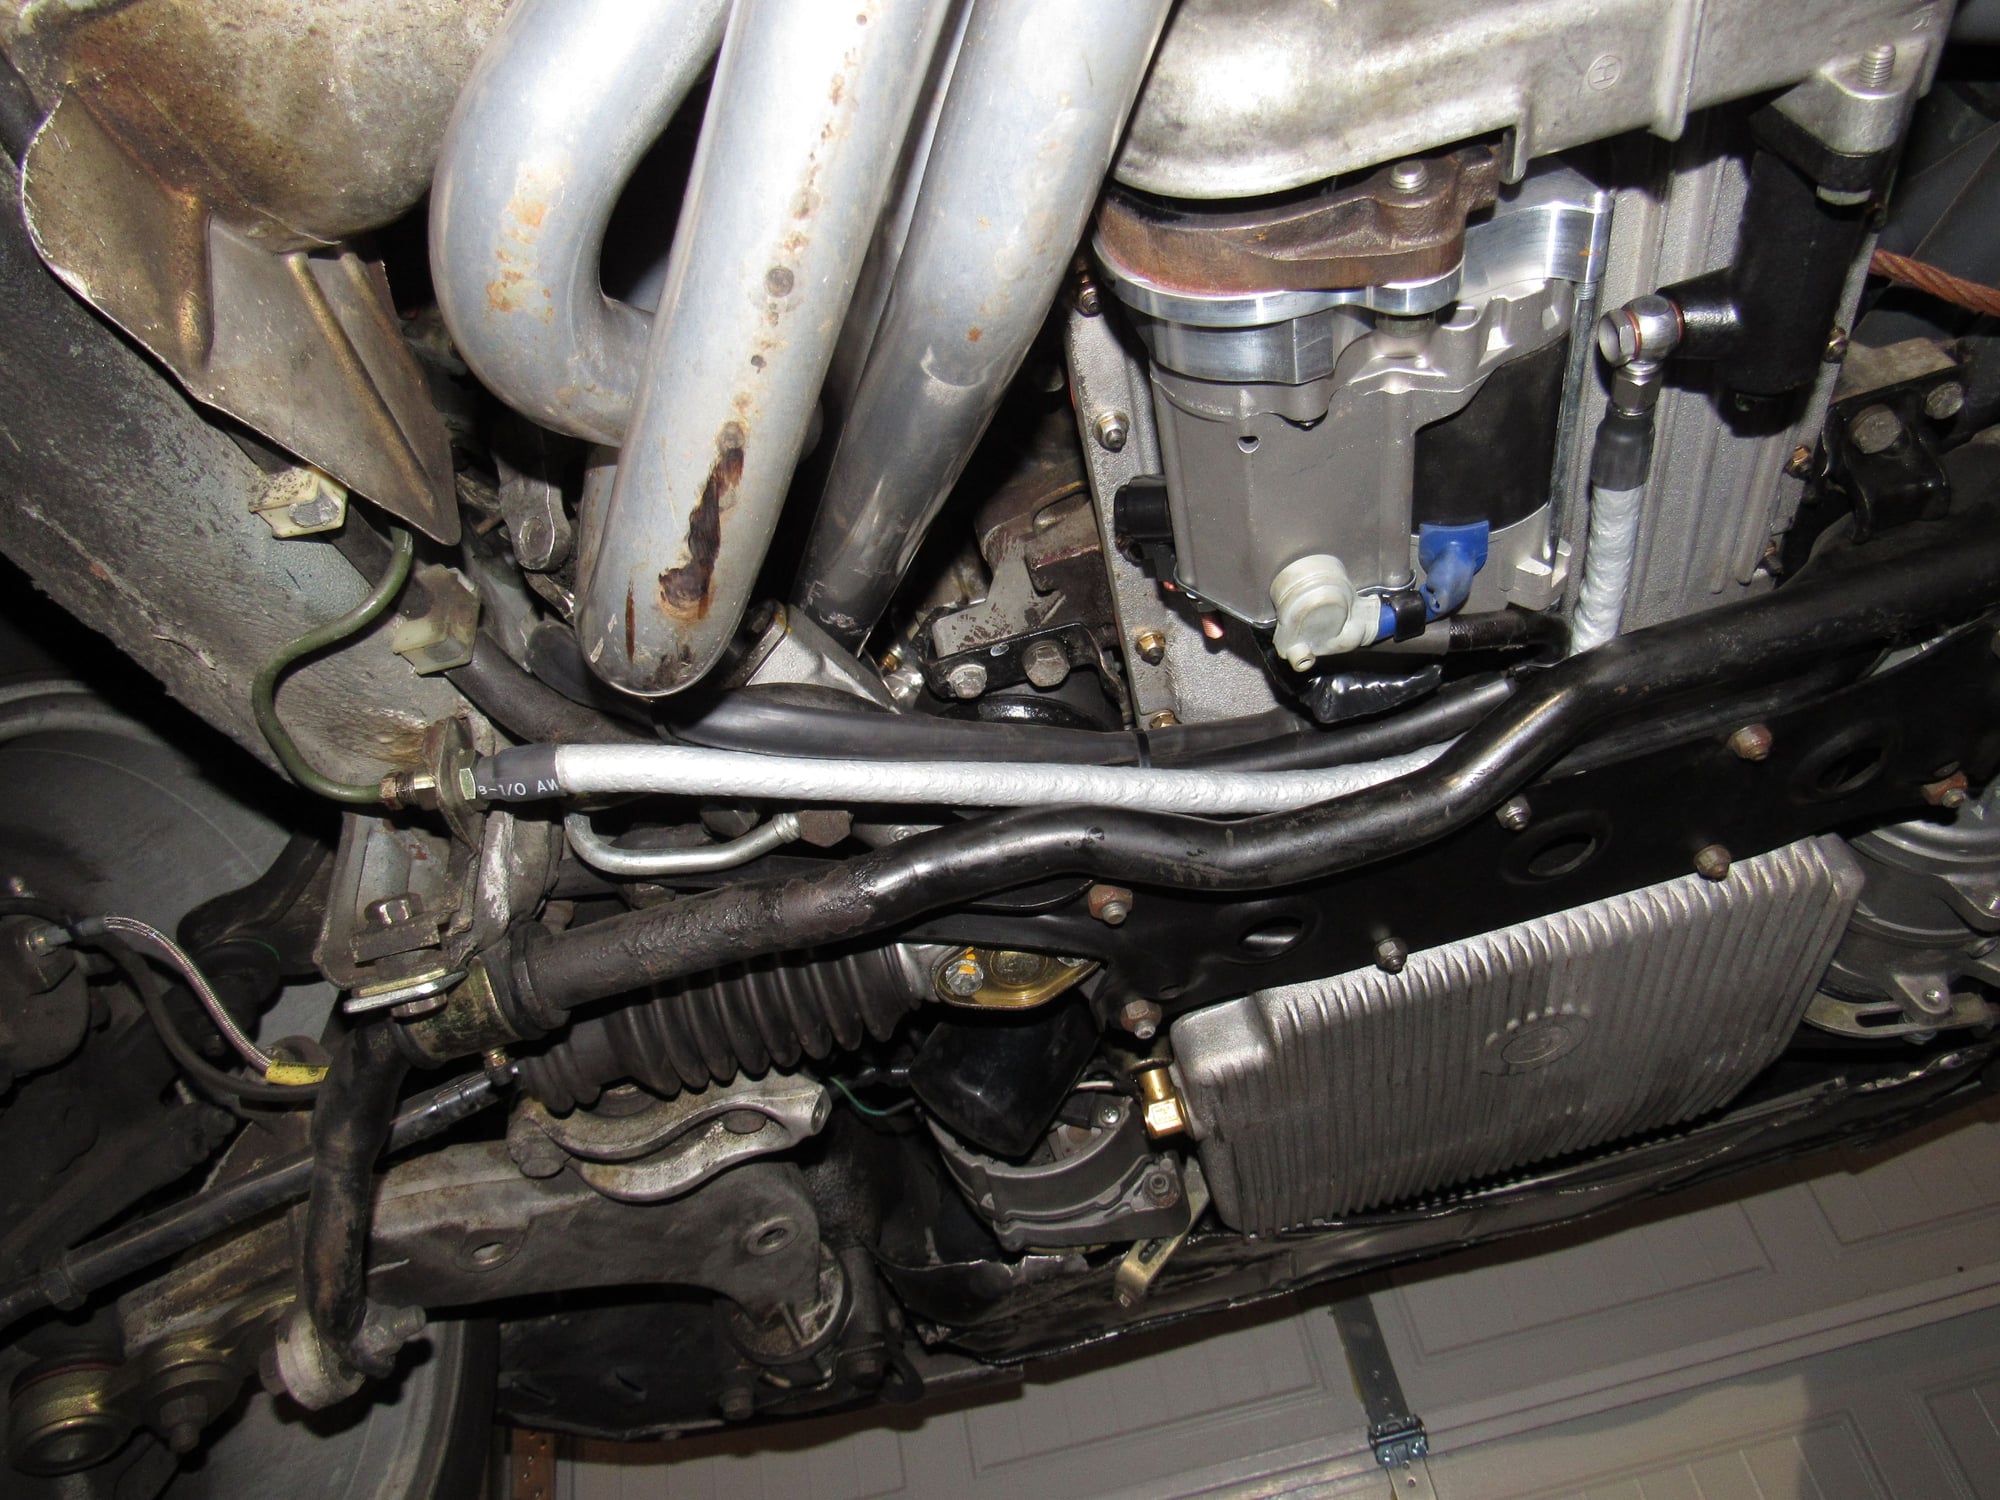
Something else I noticed was this jumper plug next to the L-Jetronic that appears original. I know some of the later cars have a low octane plug that should be left unplugged but what I found is that one yellow wire is for fuel consumption (pin 11 at the L-Jet connector), probably for the MPG gauge on older model cars and the other is for a water temp sensor (pin 13). Why would they be bridged? Just curious.
I removed my left side door card to try my hand at fiberglass to repair the broken off portion at the bottom front in the area of the interior light and coin holder. That attempt is yet to come but I wanted to try and get the central locking and alarm system working. Starting with central locking, it turned out to be two minor problems found after a few hours of blundering effort. The first thing wrong was the power window relay was a standard "24" single purpose relay when a specialized dual purpose is needed. The way it works is that with accessory power off, power is supplied to the central locking and when key is turned to accessory, the relay switches to power the window switches. The manual explains that this is to prevent the possibility of the central locking system activating during a crash and trapping the occupants. For testing purposes until I get the correct relay I have removed it and jumpered the connections.
This is the part I hit a roadblock. With the jumpered connection I should have been getting power to both of the inline fuse holders behind the CE panel but I wasn't. For one thing I forgot or missed that there is no "I" connector at the bottom of the CE panel so when singing my ABCs to get to the "K" connector I was landing on "L". Then when I discovered my error, I still had no power. I found the cause to be the relay terminal pushed out the back of the CE panel. I pulled it out the back, re-bent the retention tab and reinstalled. Finally central locking is fully functional.
My car did not have an alarm module fitted and plugging in a working unit was all it needed. Easy.
Next was the left power mirror that never worked. This took a good amount of time too and I made a post in another thread that I created on the subject but the short story was that the wire harness had been ripped apart and twisted back together and my cross-over switch was wired incorrectly.
The last thing, for now, was trying to get the defrost system working. The mirrors heat up and though the hatch has good power and ground, no power is getting through the grid. I think the only fix would be a new hatch glass. Also once the defrost is turned on (button pushed in), it is supposed to turn off after 15 minutes but does not even when turning the key to off. I had to pull and re-insert the relay. Must be a bad timer mechanism within.
All in all, these are really small repairs but a few steps closer to being able to say "everything works".
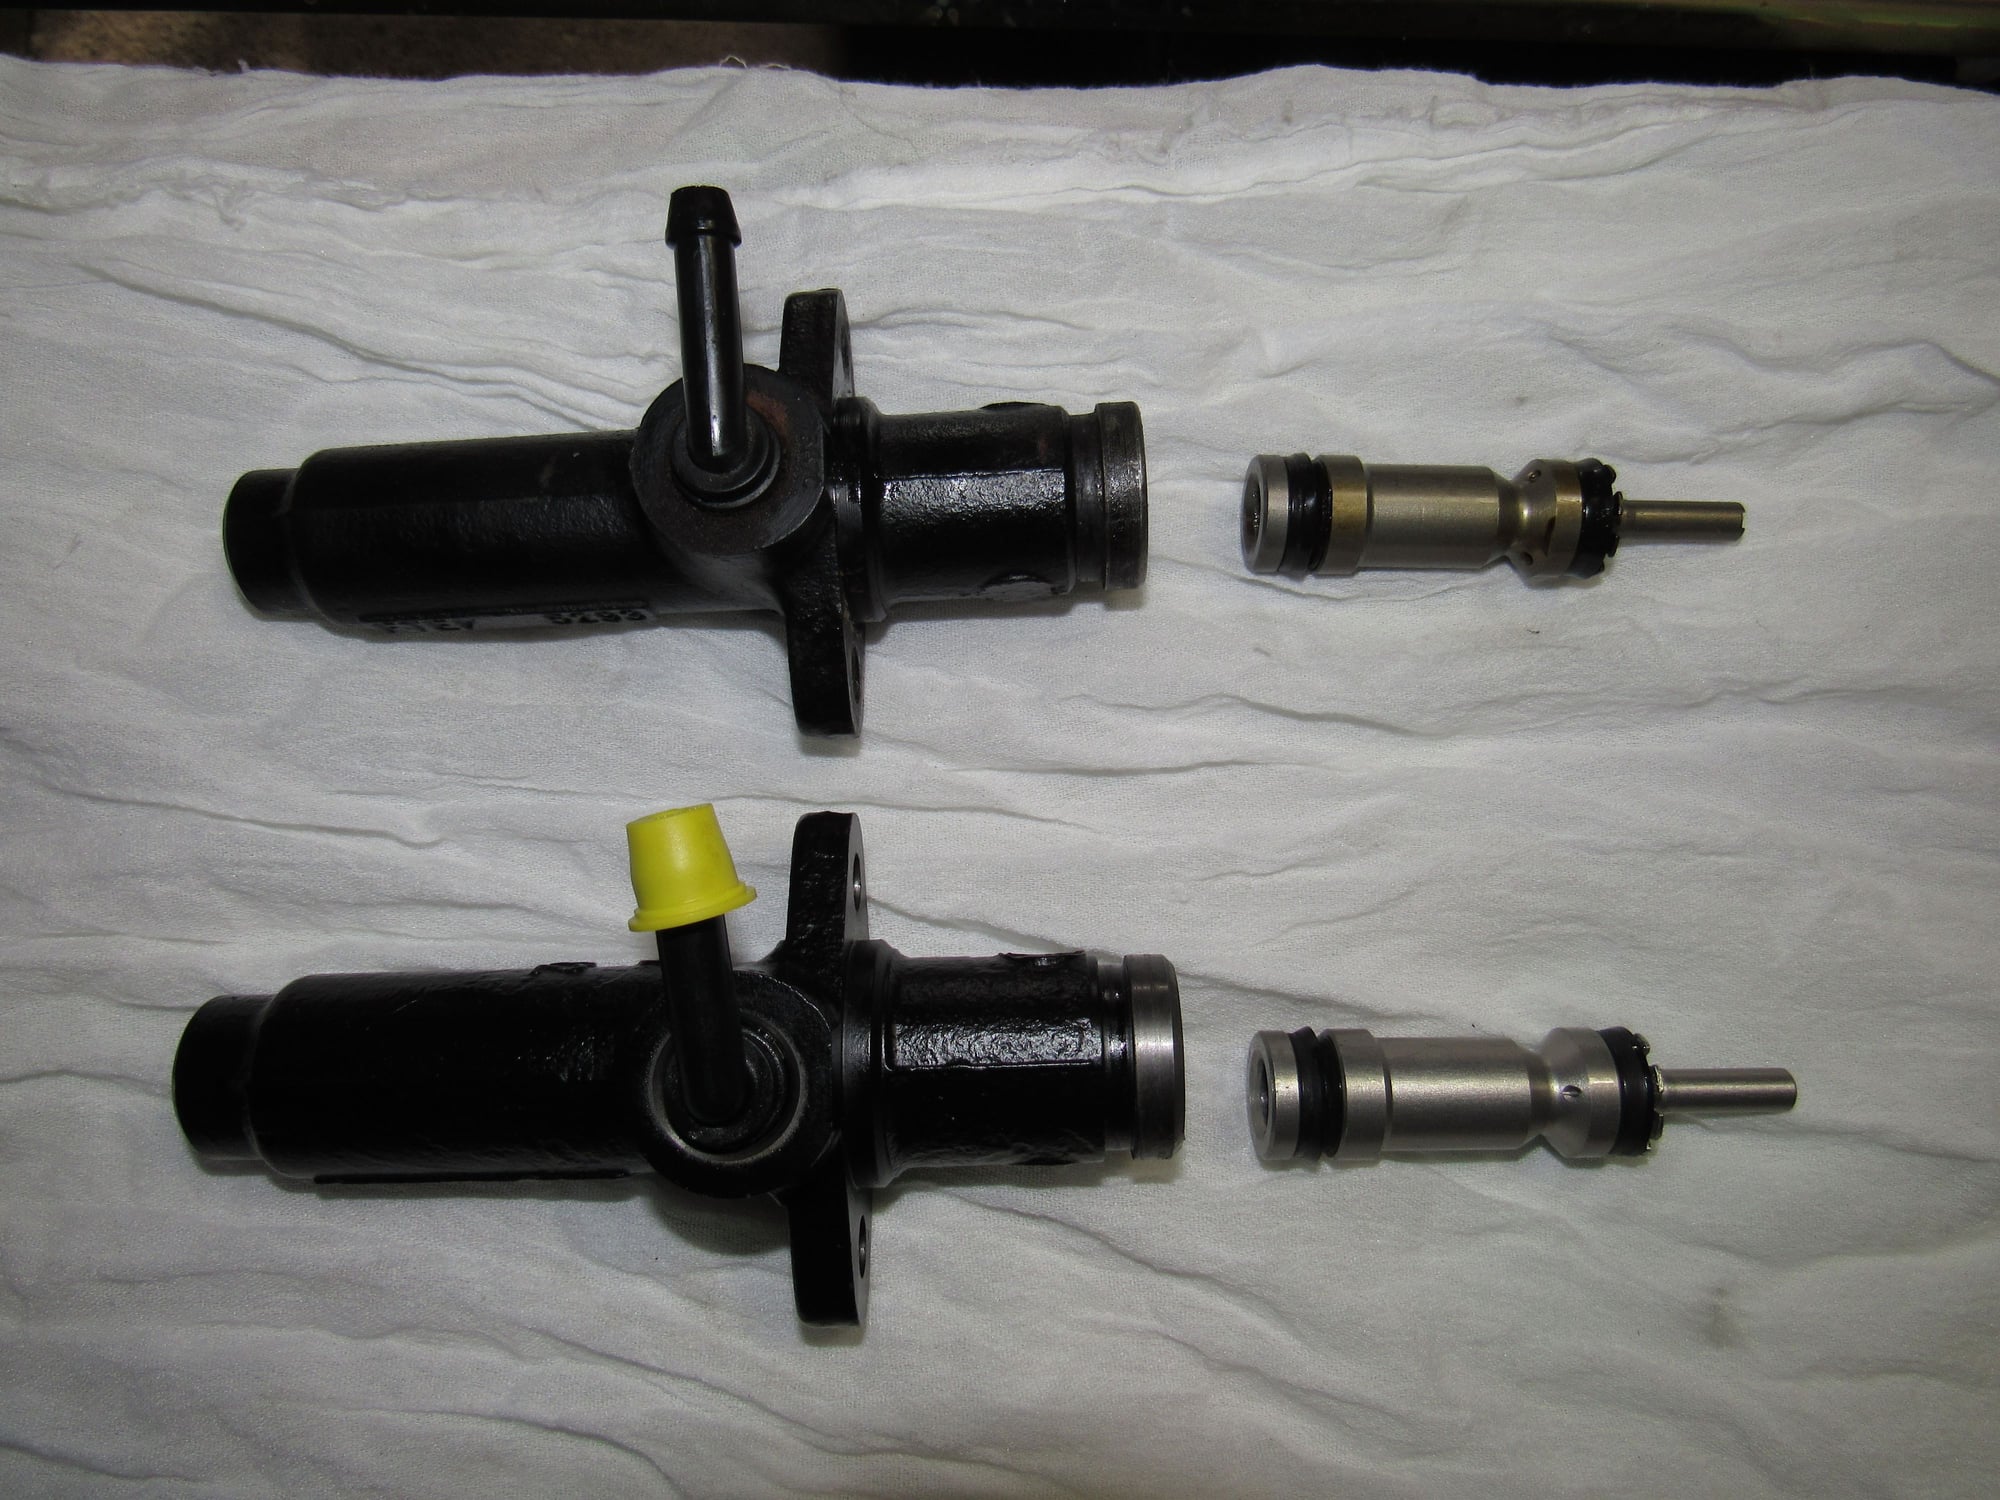
Back in January I mentioned a brake fluid leak from the booster inside the cabin. I caught it in time as nothing dripped on the carpet yet. By removing the vacuum hose at the booster I was able to look inside and sure enough, it was half filled with fluid. I never had any braking problems or had to top off the fluid but apparently the brake master had been leaking a long time. I sucked out about 400ml of very dark fluid with a mityvac. With that diagnosed, a new brake master cylinder, booster, and clutch master is going in. The clutch master looks really good and must have been replaced within ten years but I am replacing it for peace of mind and since everything is out of the way.
I have read some discussion about needing to modify the piston but I checked with Roger and he never heard of any problems.
Both new and old clutch master cylinders are identical. Old on top:
New clutch master installed. Just waiting to receive the booster.
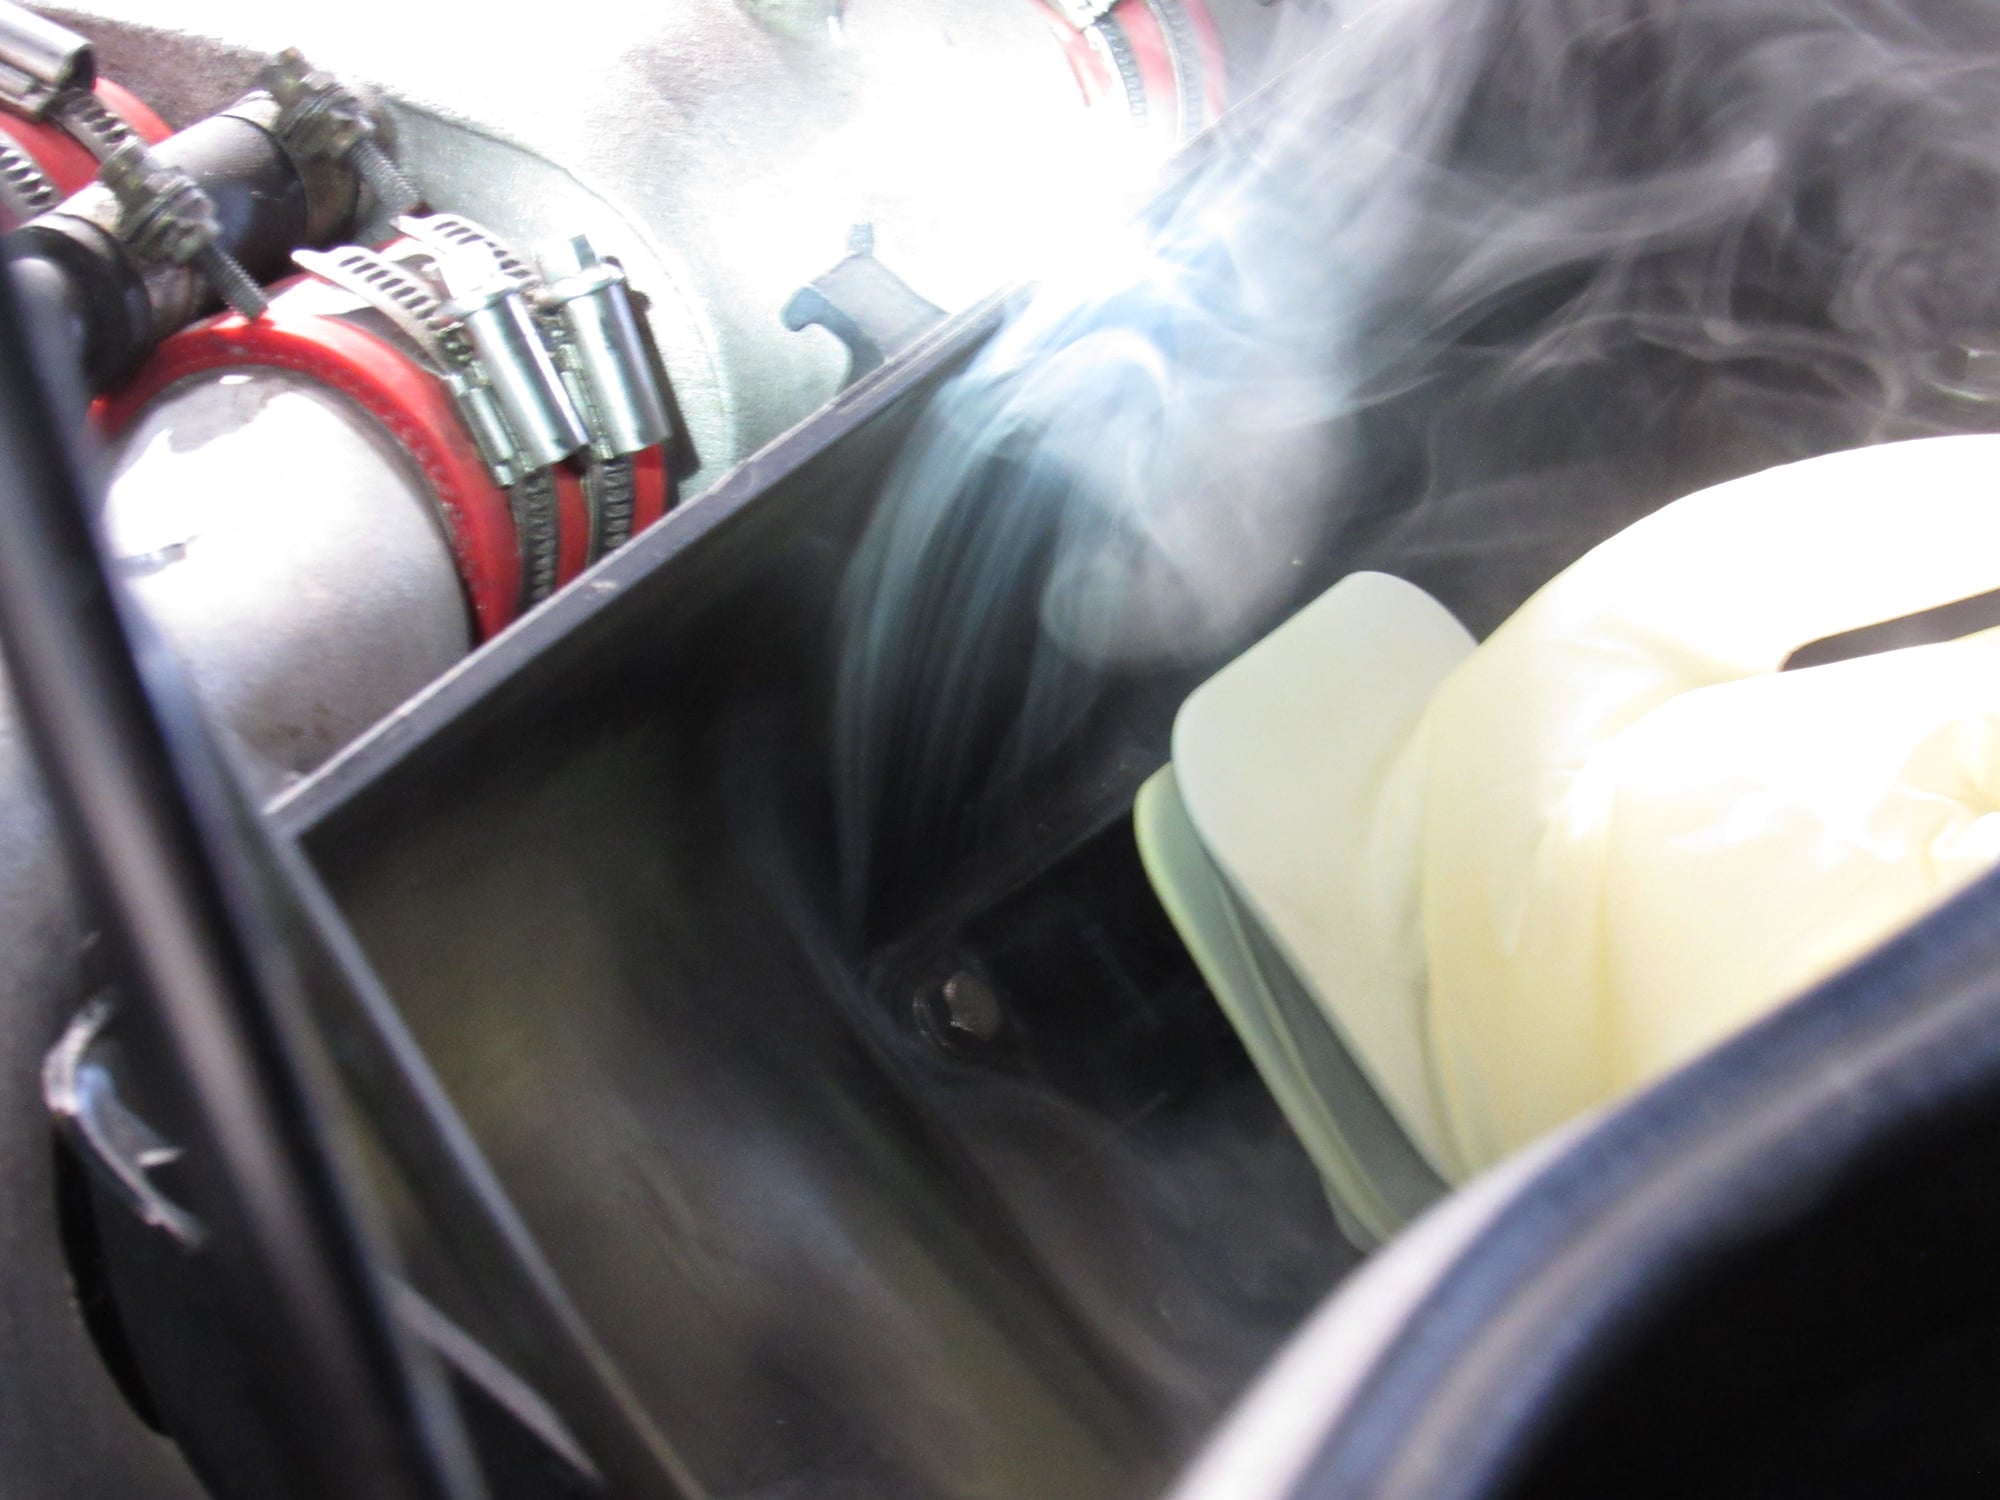
I got a smoke machine and tried it out. I pumped it through the venturi into the intake (you can see the white nozzle in the second photo) and blocked off the intake snorkel with a rubber glove. I got a massive leak! I don't think there is any gasket between the airbox and snorkel, only the other side against the air flow meter. I also have a minor leak at the o-ring of the AFM which is new from last year. I does not push in far enough but there is no adjustment. Maybe double up the AFM to airbox gasket?
To rule out the airbox leaks and look for more, I installed the AFM to the proper depth and tried to seal the open end but failed. I think a gasket and a sheet of steel bolted in place would work to seal it.
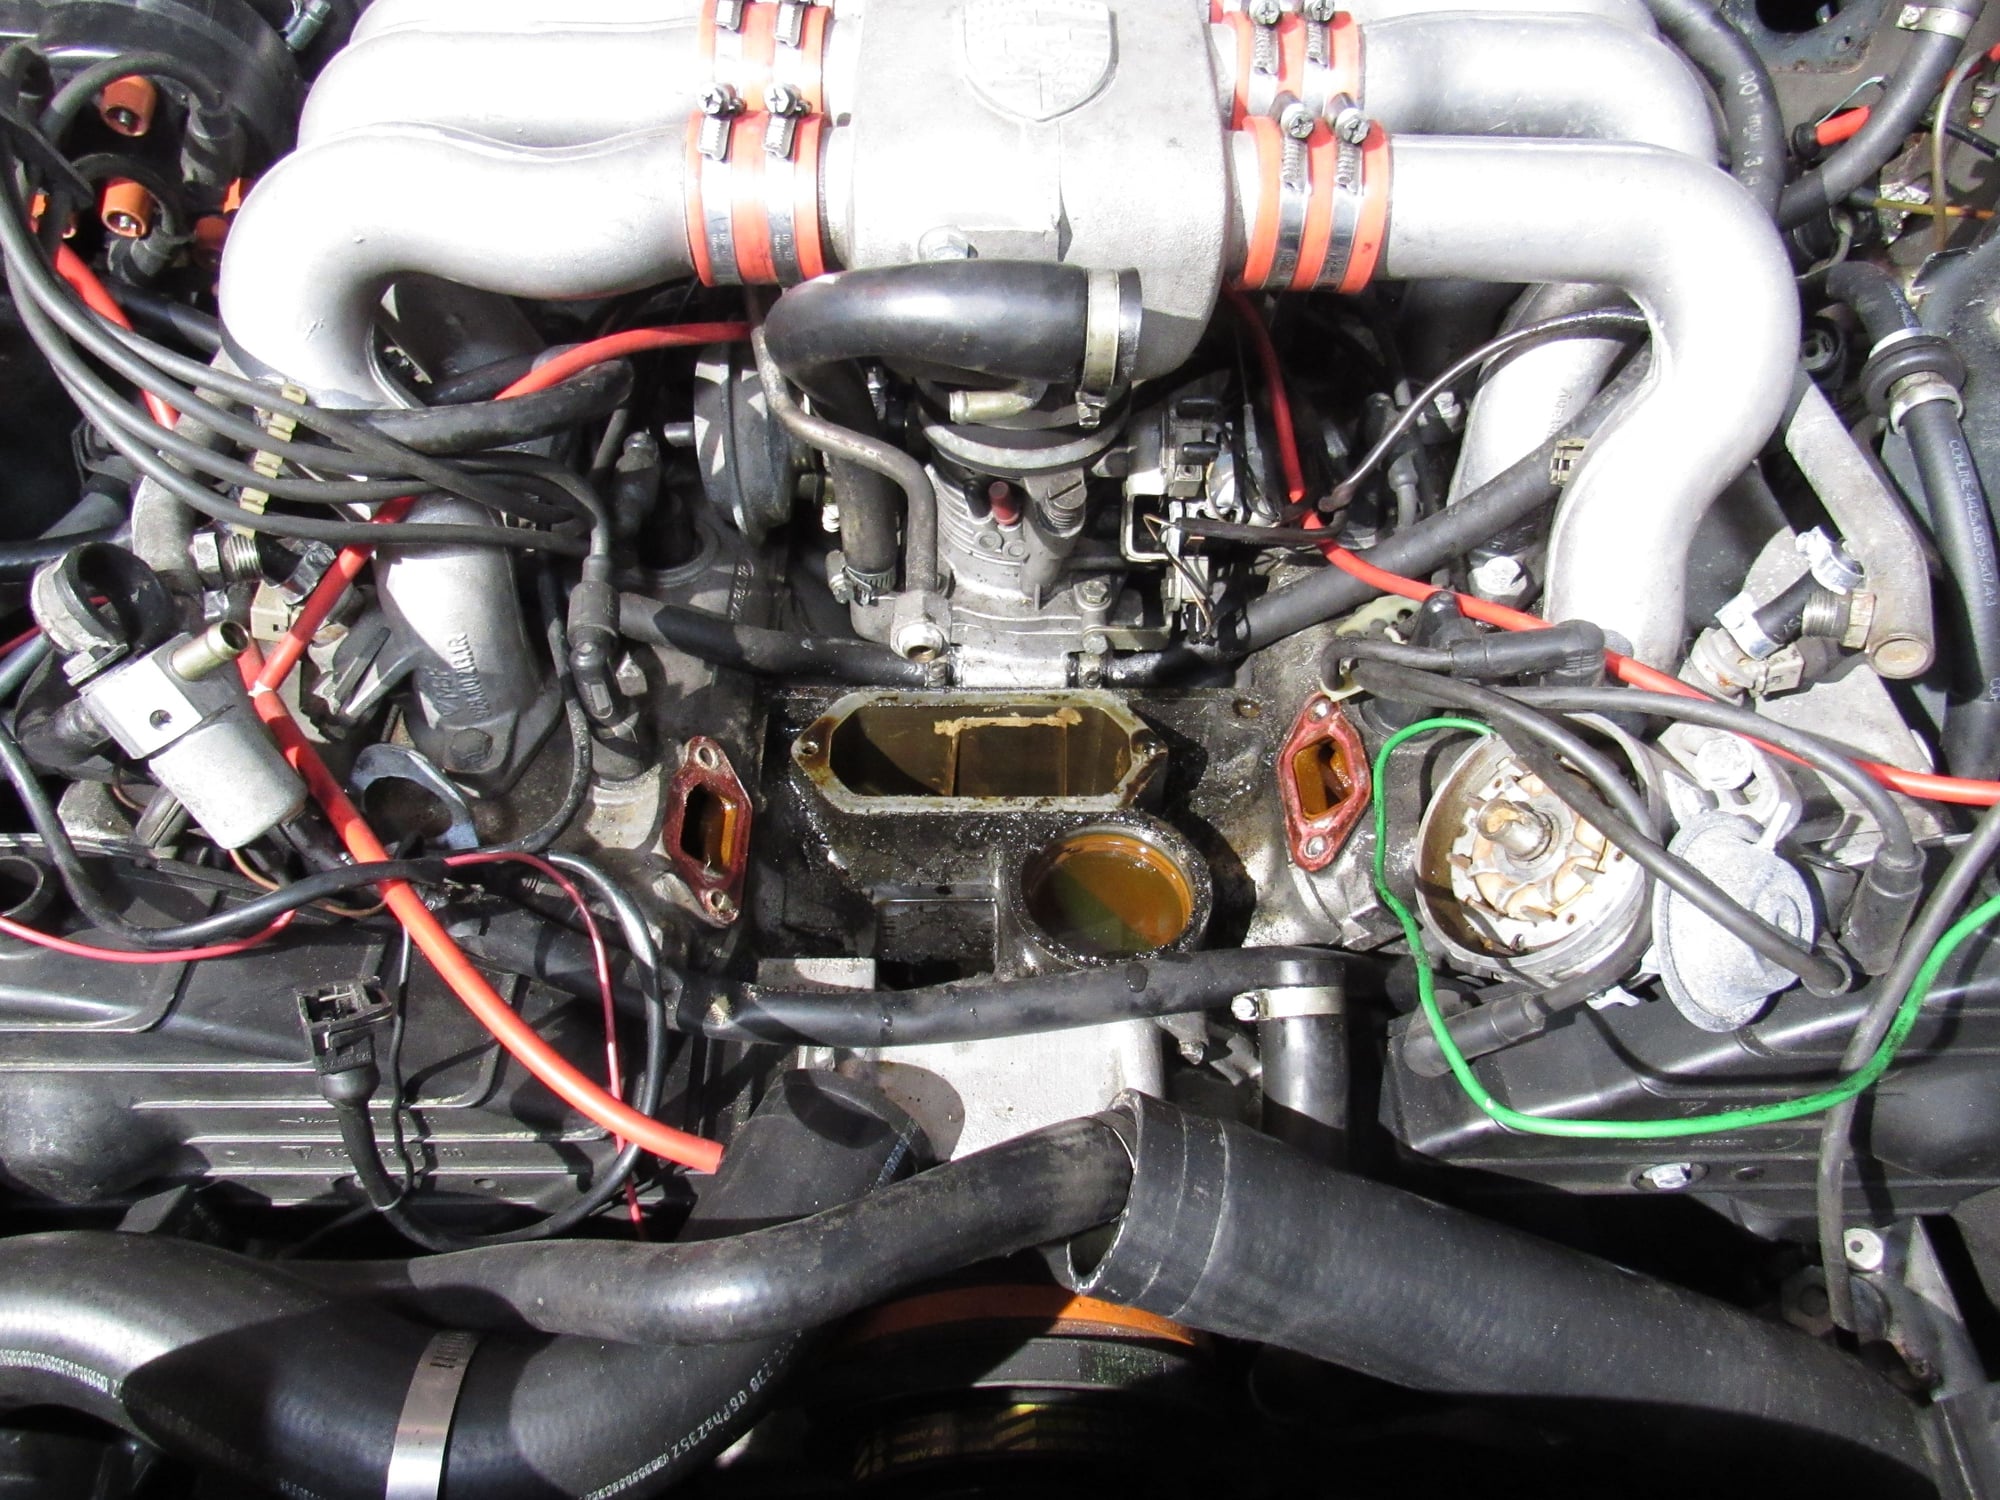
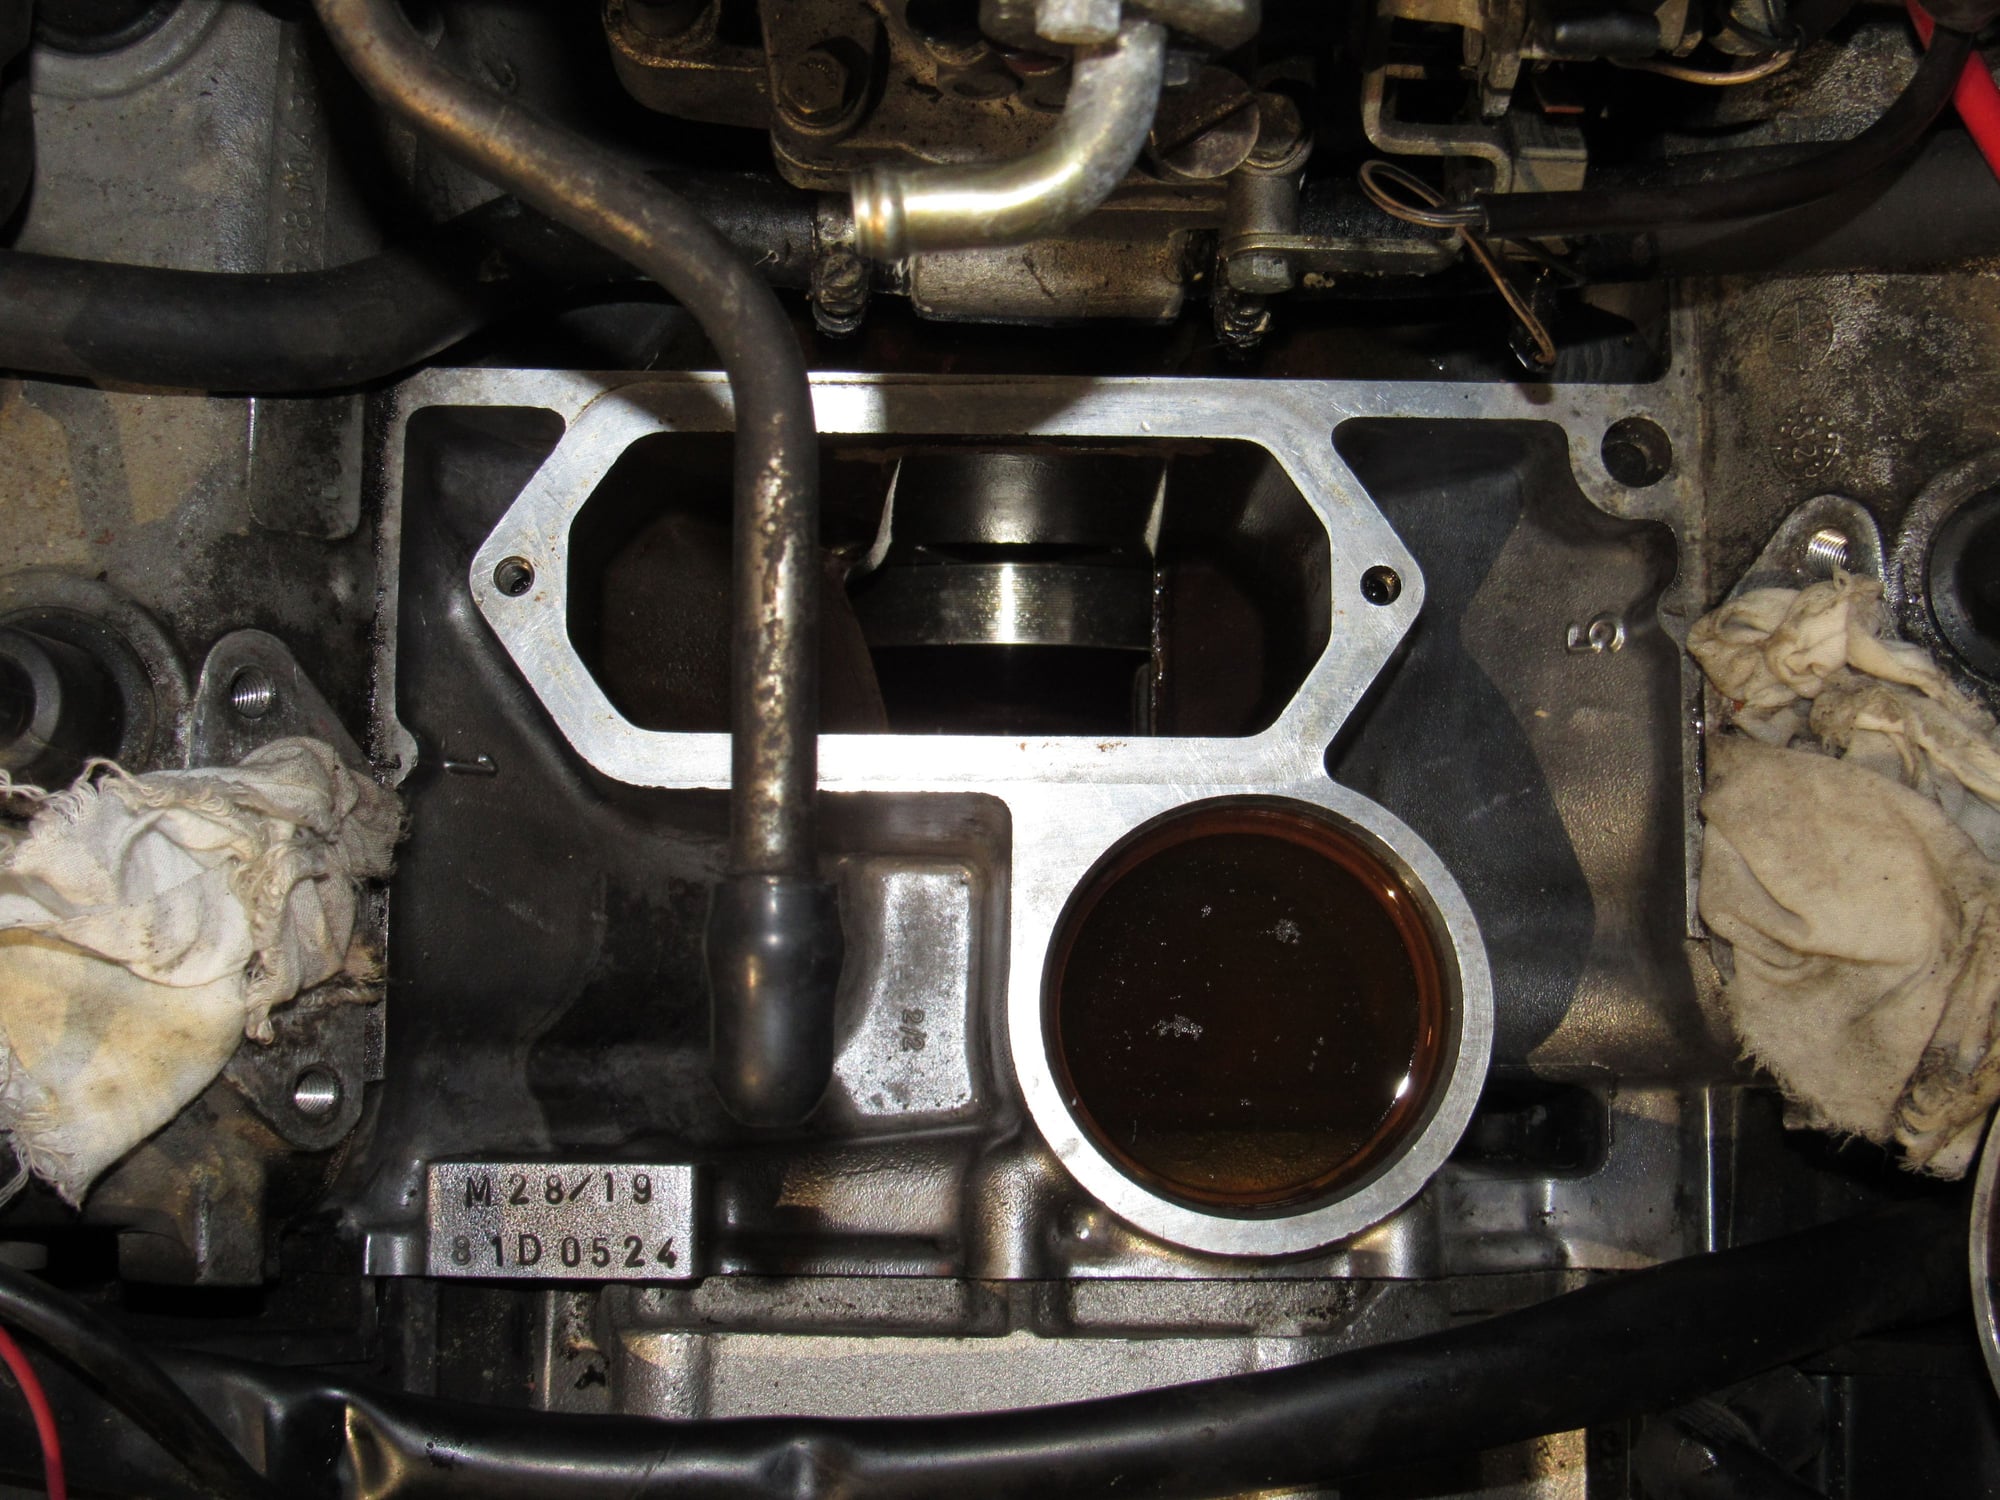
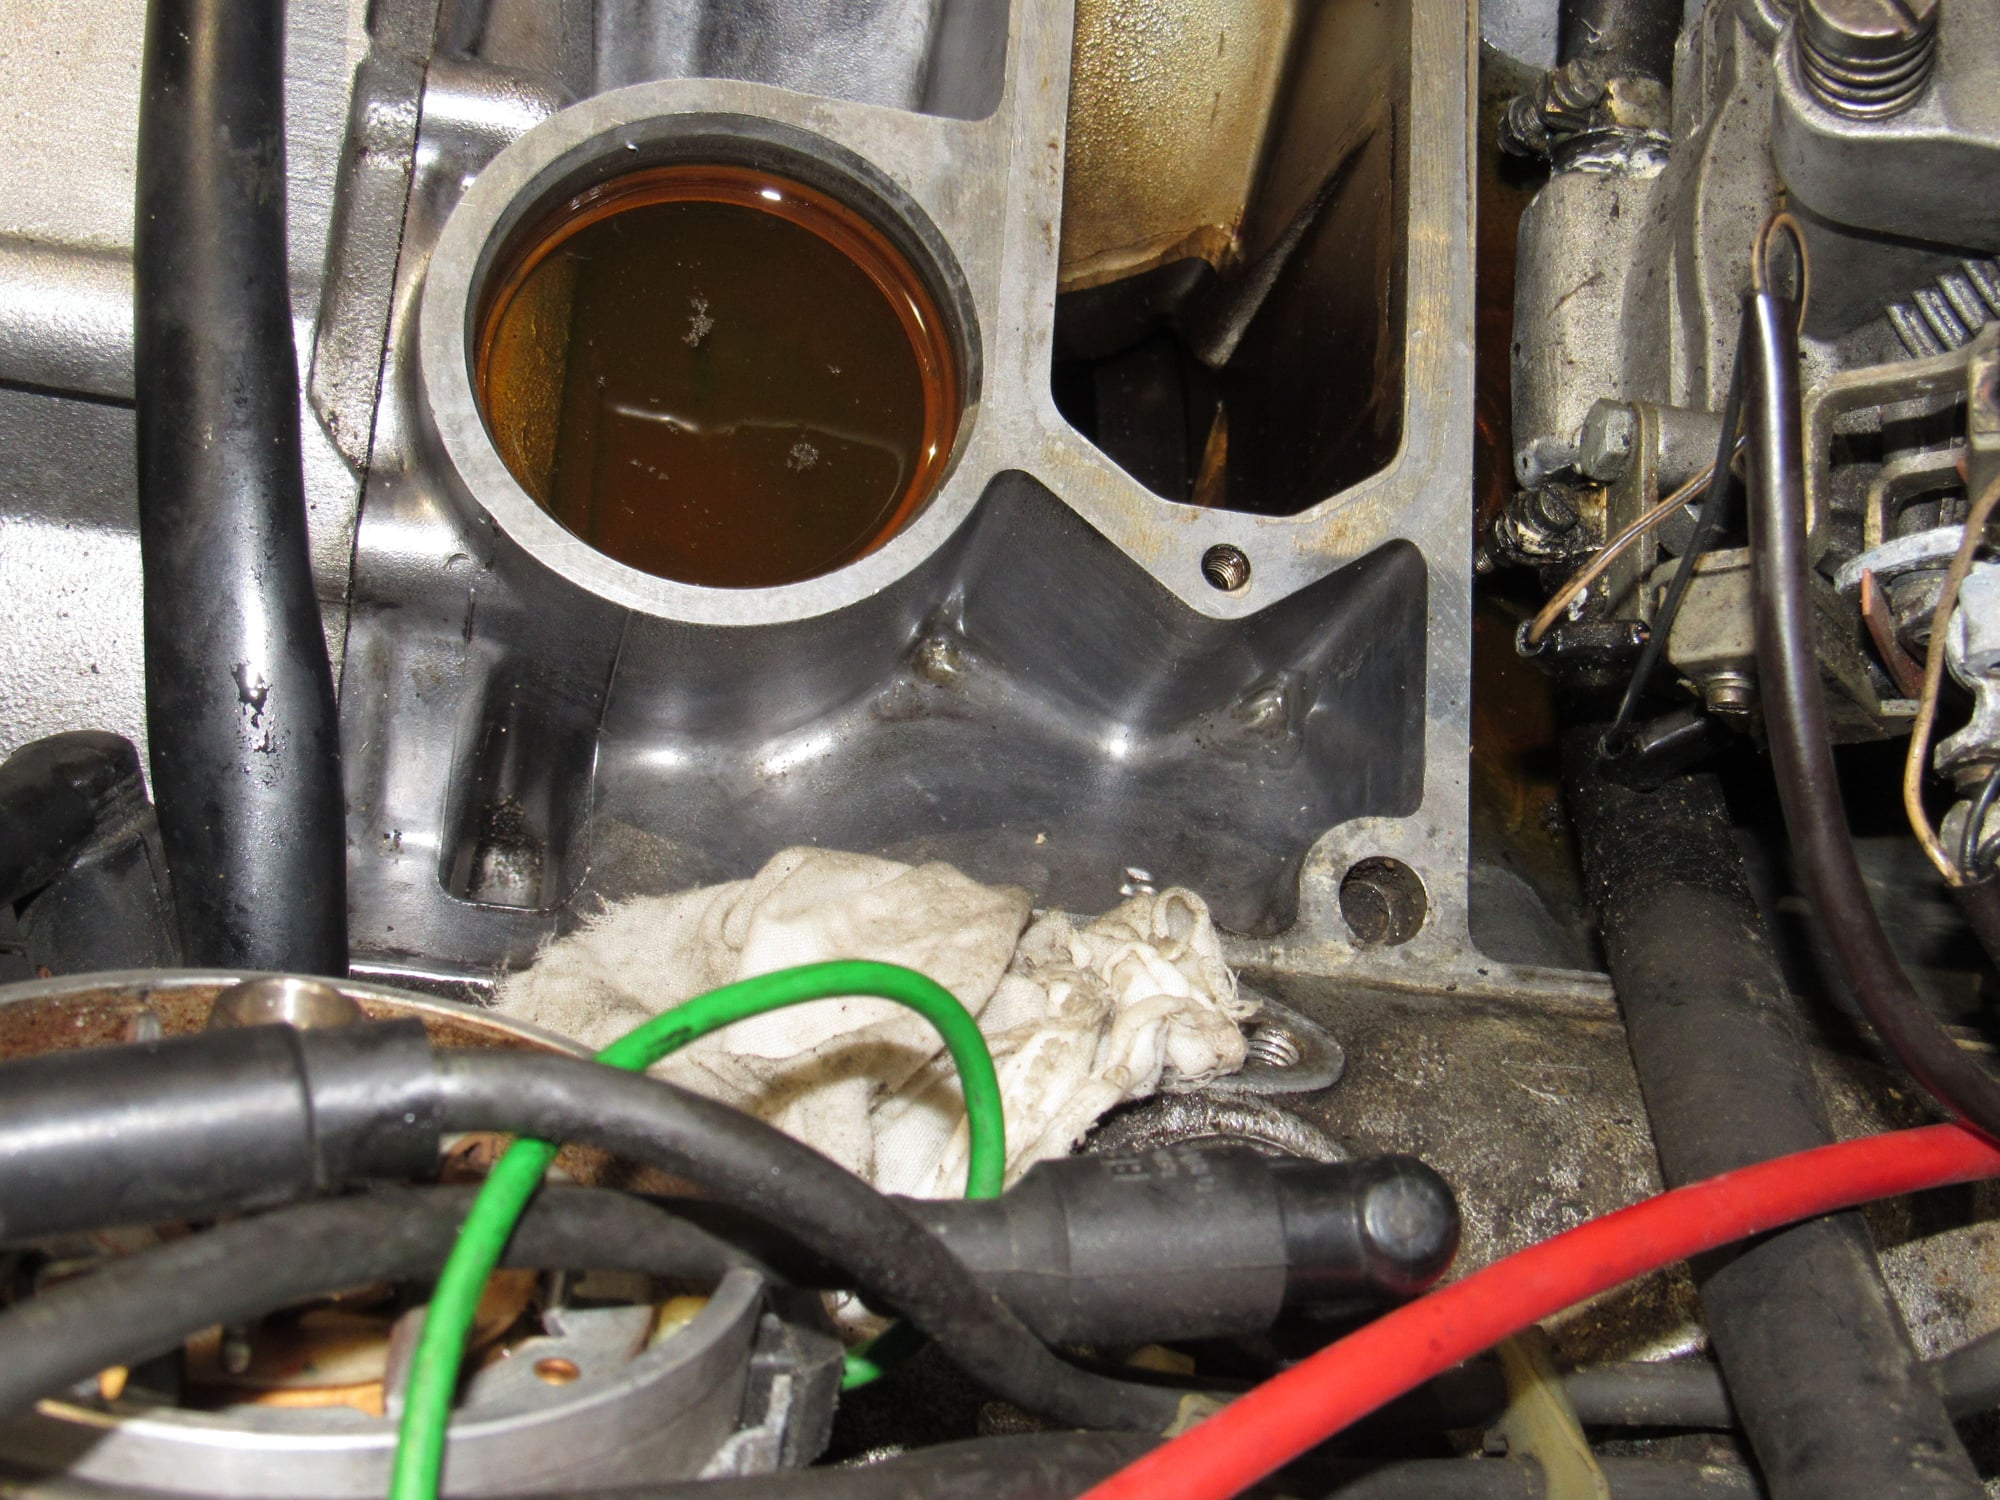
Part of the work planned is to reseal the water bridge and oil filler since I keep getting a mix of fluids in the valley. I started off easy with the left side coolant block off plate. Neither side leak yet but I will renew them. I thought draining the radiator would be enough to drop the coolant level but I was very wrong. Anyway, the way the bolts turned out was very worrisome, it felt as though the heads might snap off. They both came out ok but the threads were filled with nasty corrosion.
Driver side coolant block off plate:
I could not find a photo of the backside of the plate but I am curious if this is the way it is made or is this a lot of corrosion taking place?
It cleaned up nice with a wire wheel. I will phosphorize the bare steel.
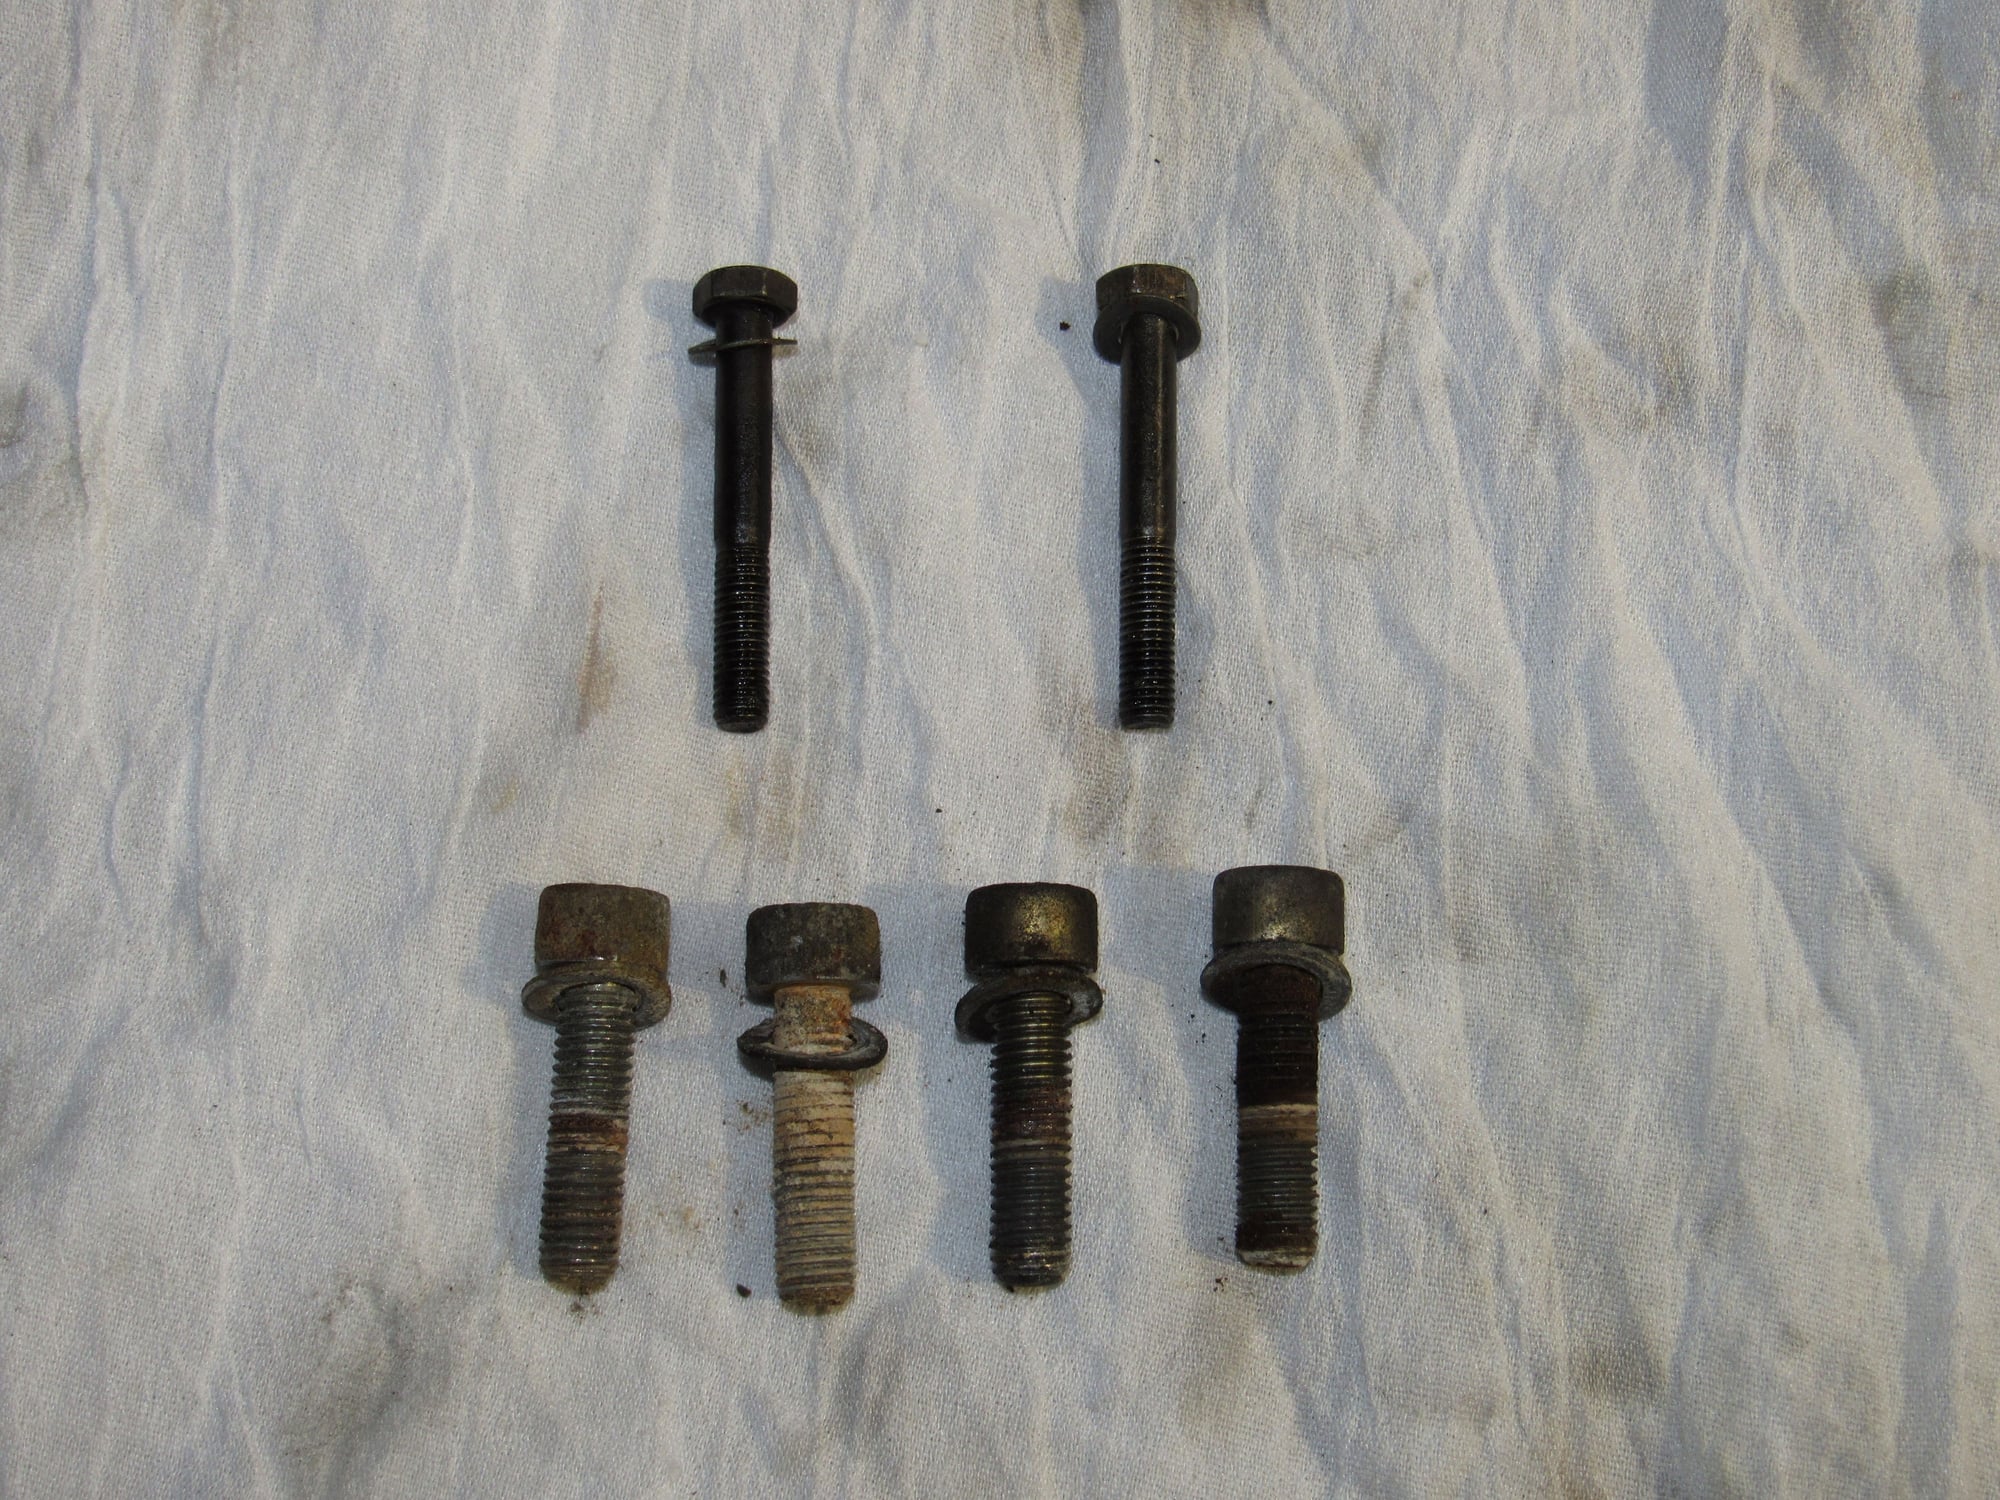
I have heard horror stories of snapping off water bridge bolts but I had no problems at all. It was still well sealed at the cylinder heads and needed a couple taps with a rubber mallet to break free but the bottom o-ring was hard and cracked. Next was removing the oil filler and both bolts were not even finger tight, no mystery why that was leaking. The engine casting in this area has a bunch of deep cavities all filled with sludge.
Both oil filler bolts can be reused but I will get new water bridge bolts.
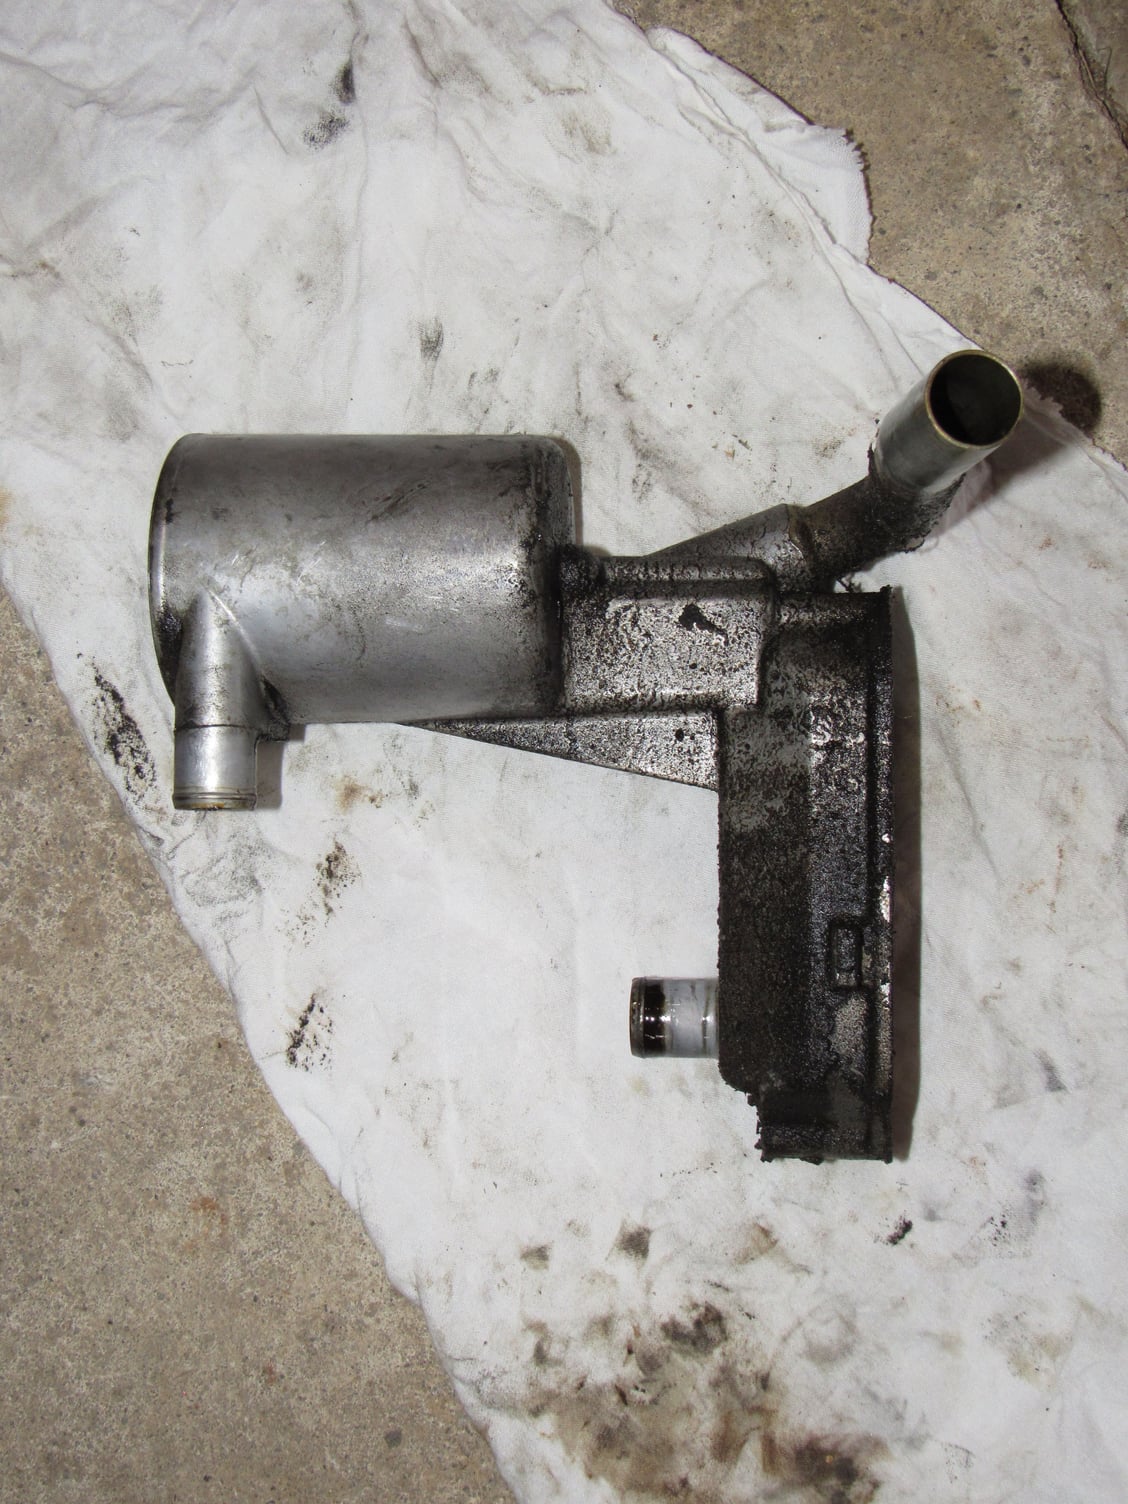
You cannot really see in this photo but the small steel coolant port in the back is heavily corroded, I have a good used replacement.
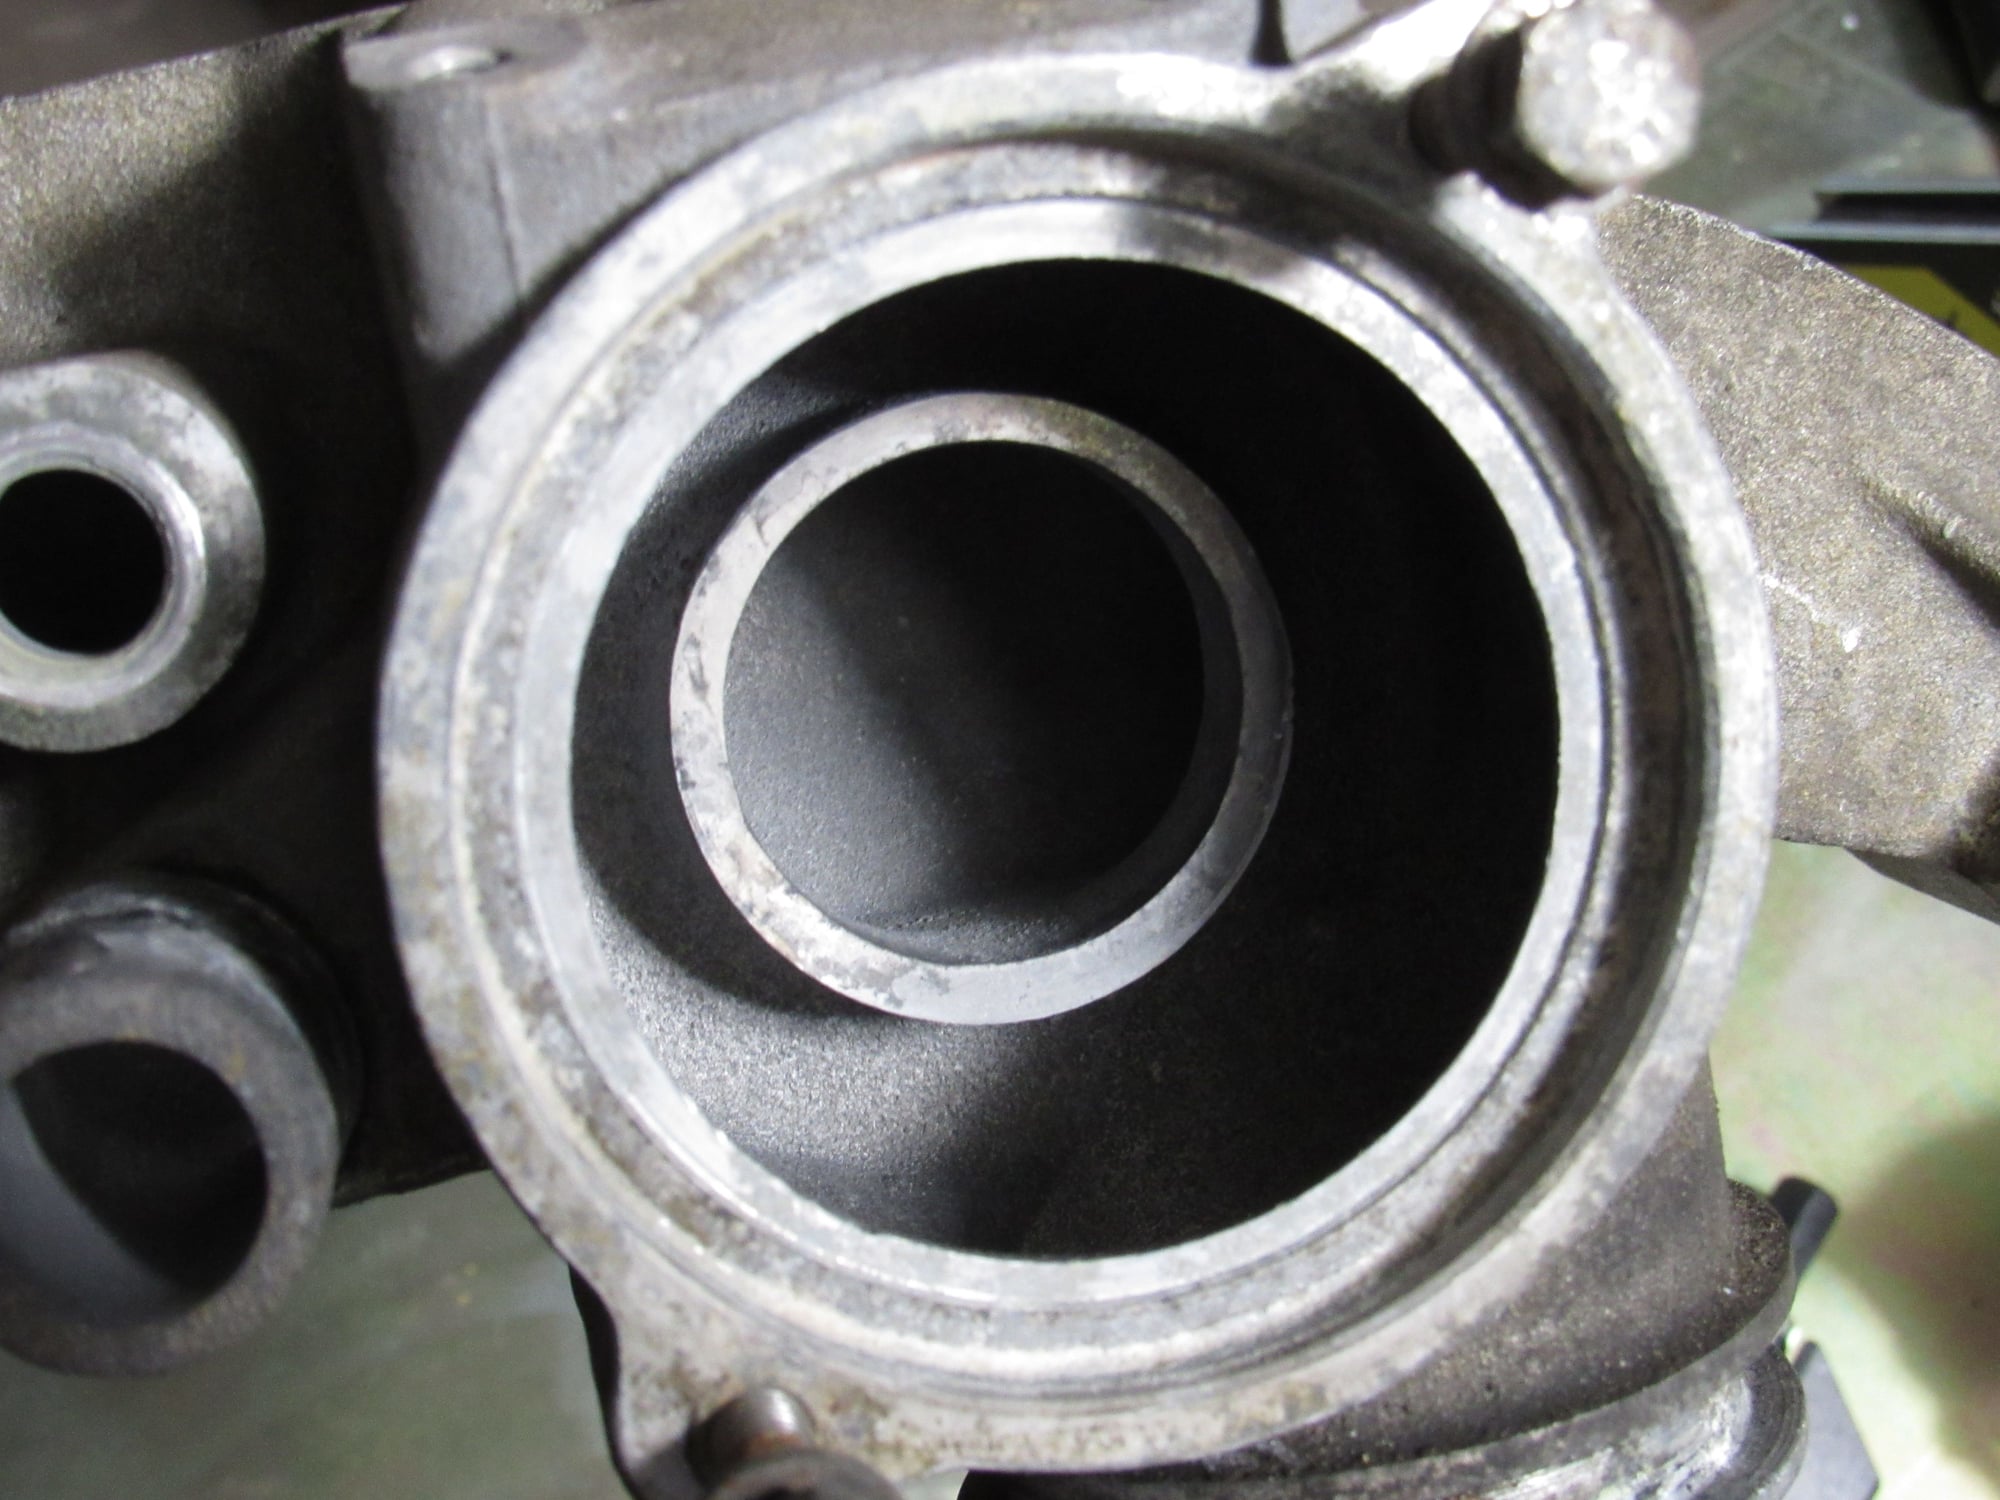
I was expecting a seal behind the thermostat but the early cars do not have it:
Filthy oil filler:
Some of these parts look pretty nice cleaned up:
I was concerned about this crack in the epoxy (?) but I plugged the tube and filled it with water and after a couple of minutes nothing came out.
Cleaning out about three inches thick of sludge and dirt:
I cut out a piece of cardboard to cover the openings:
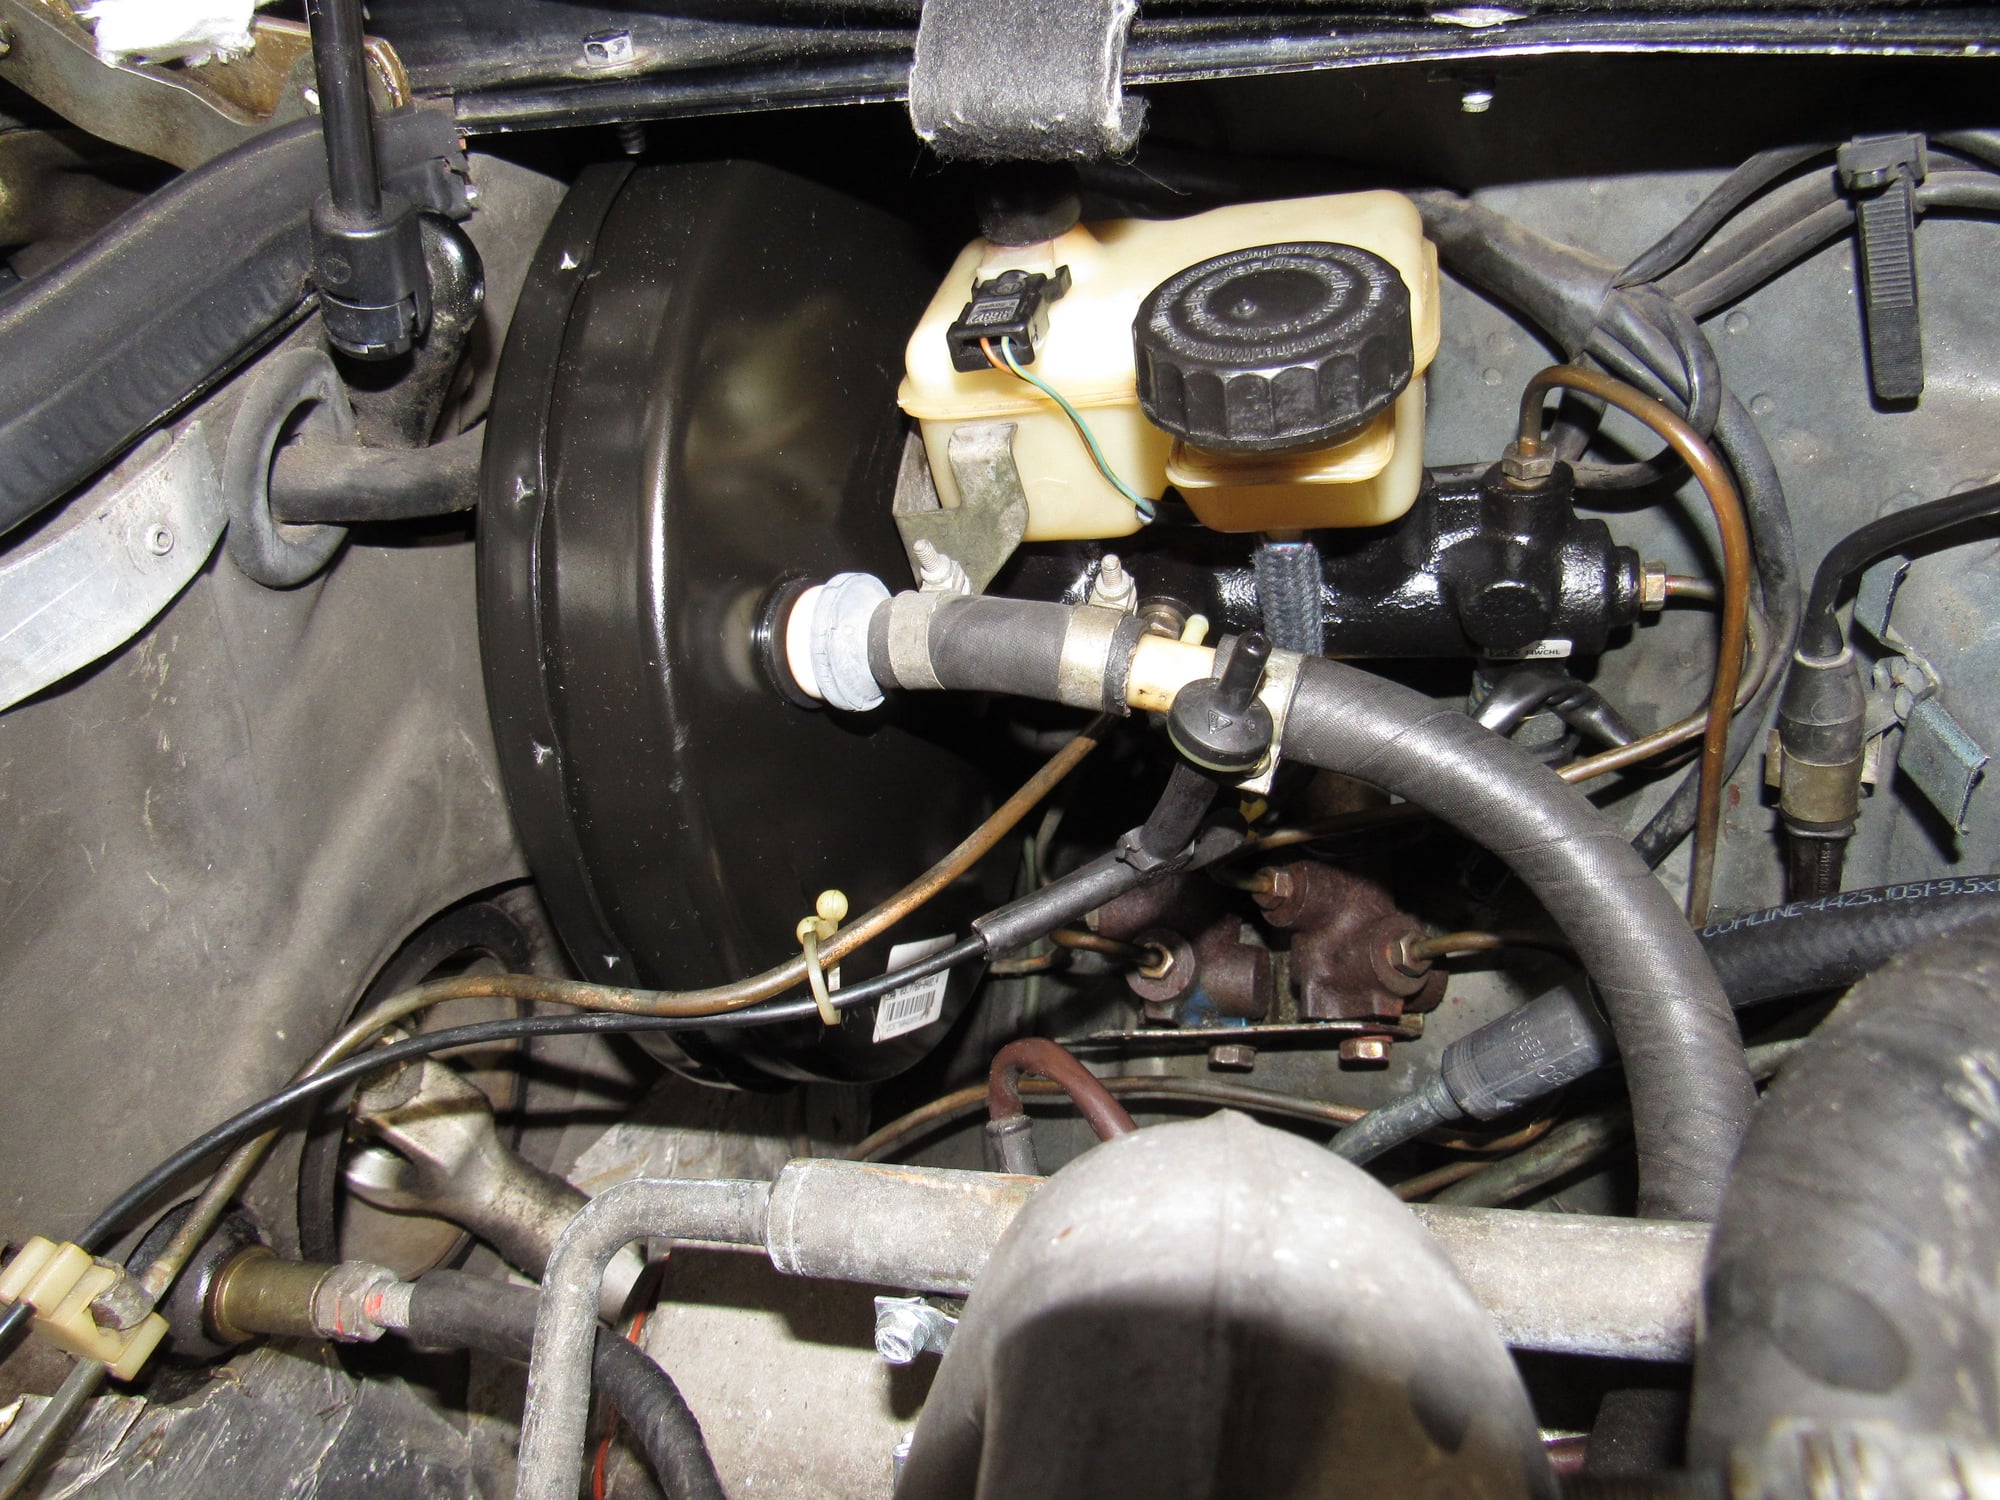
And this took me all afternoon. The brakes lines put up a fight but I got it all back together. New Clutch master cylinder and "blue" hose, new brake booster, and new brake master cylinder:
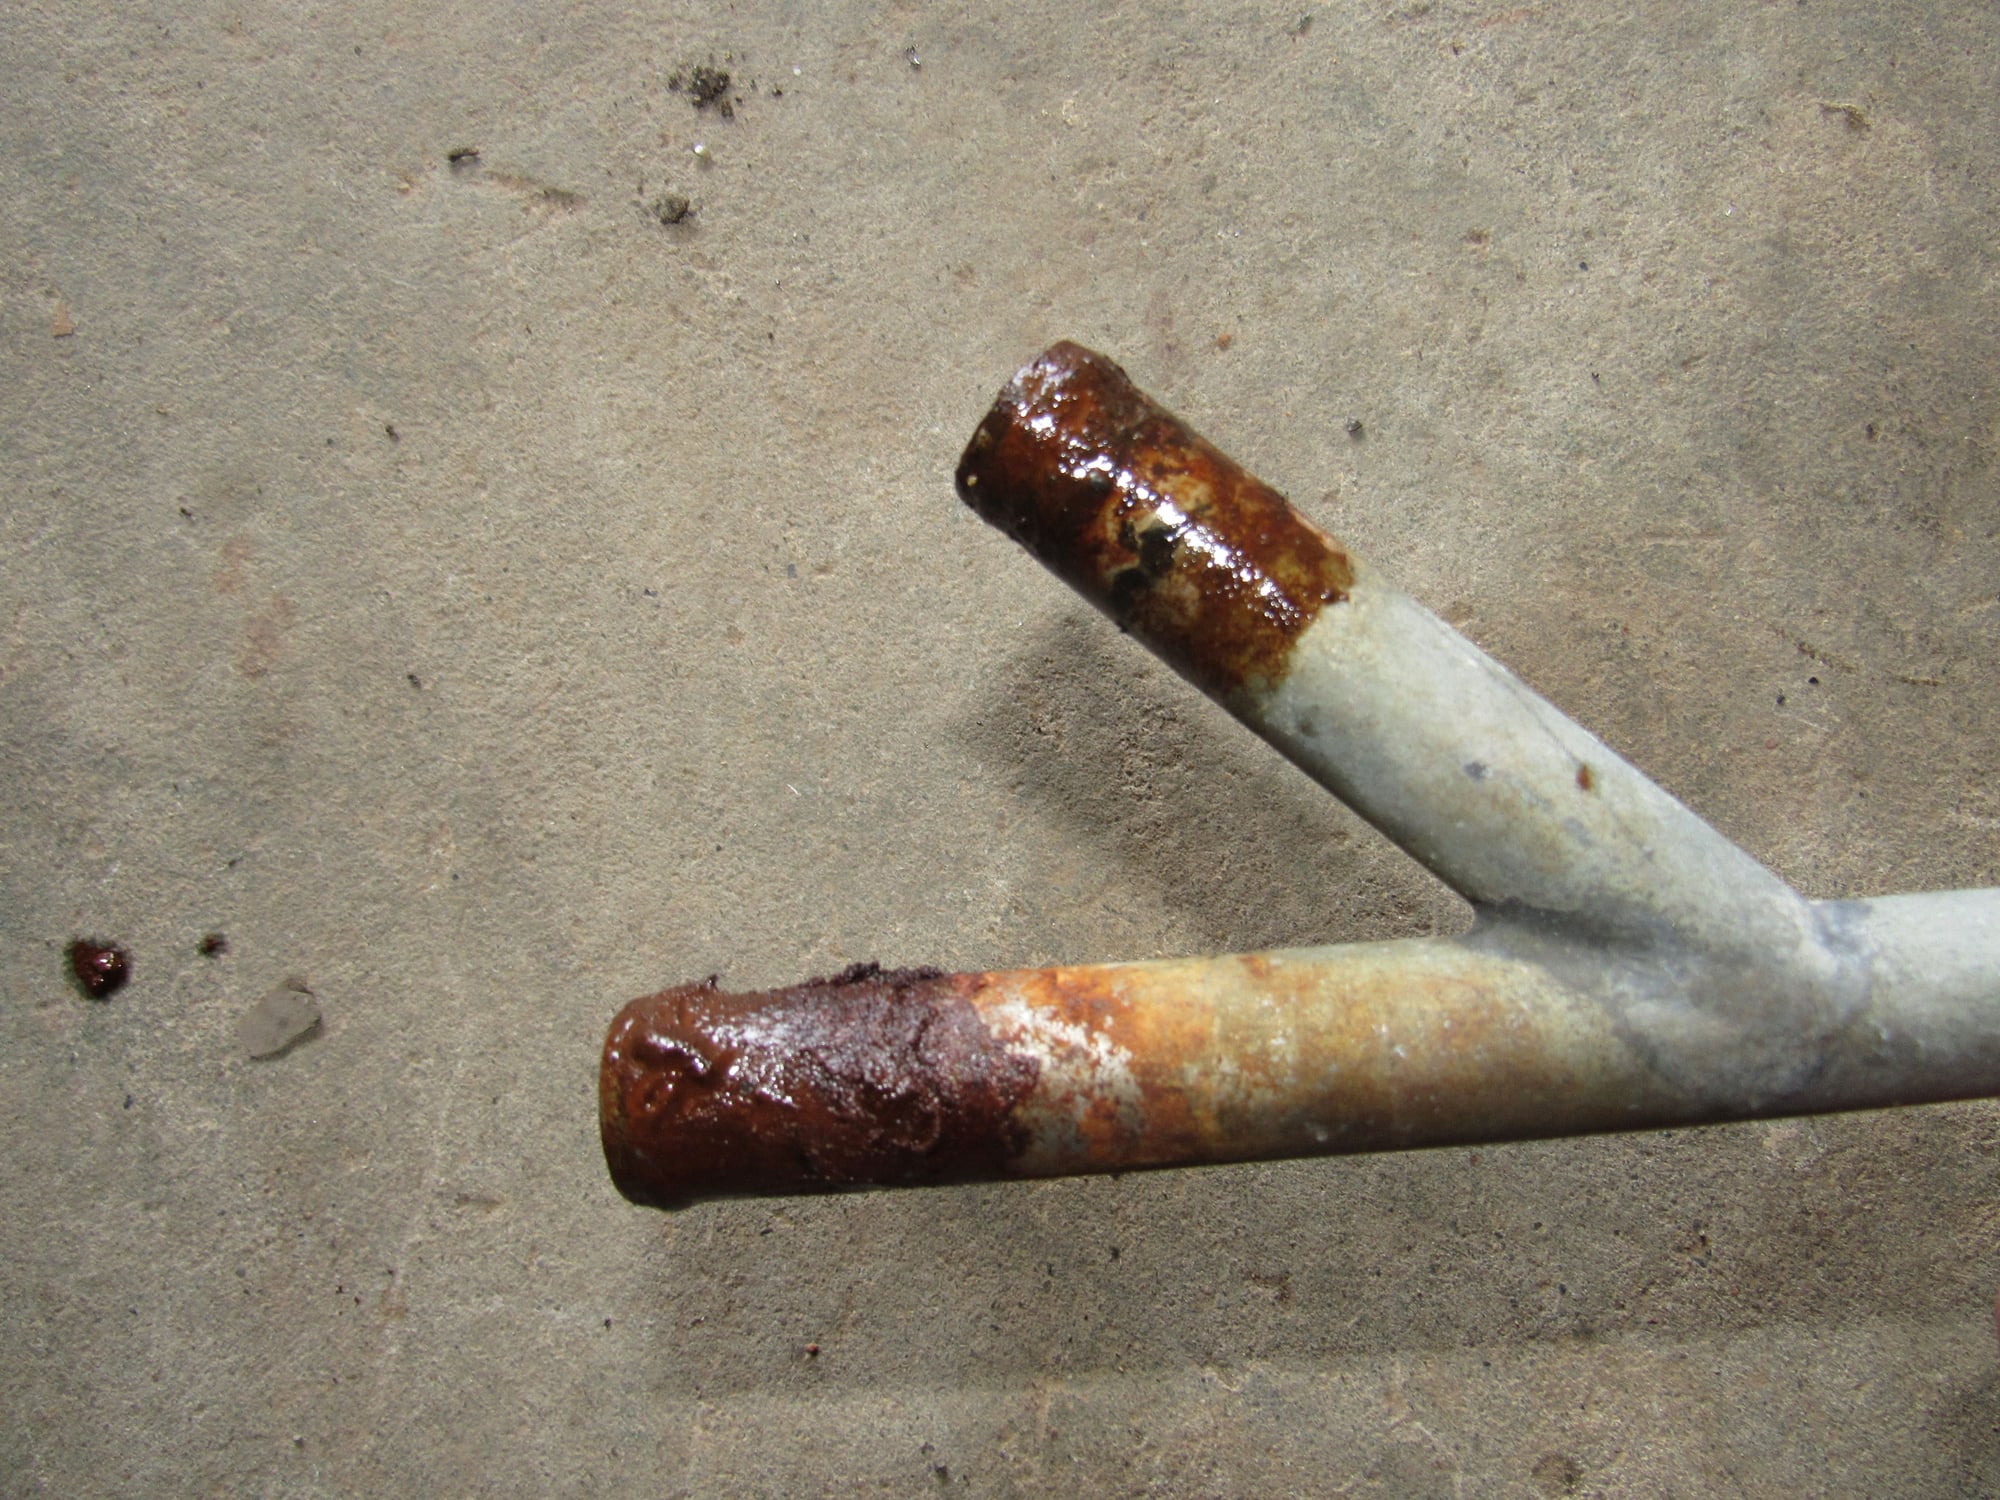
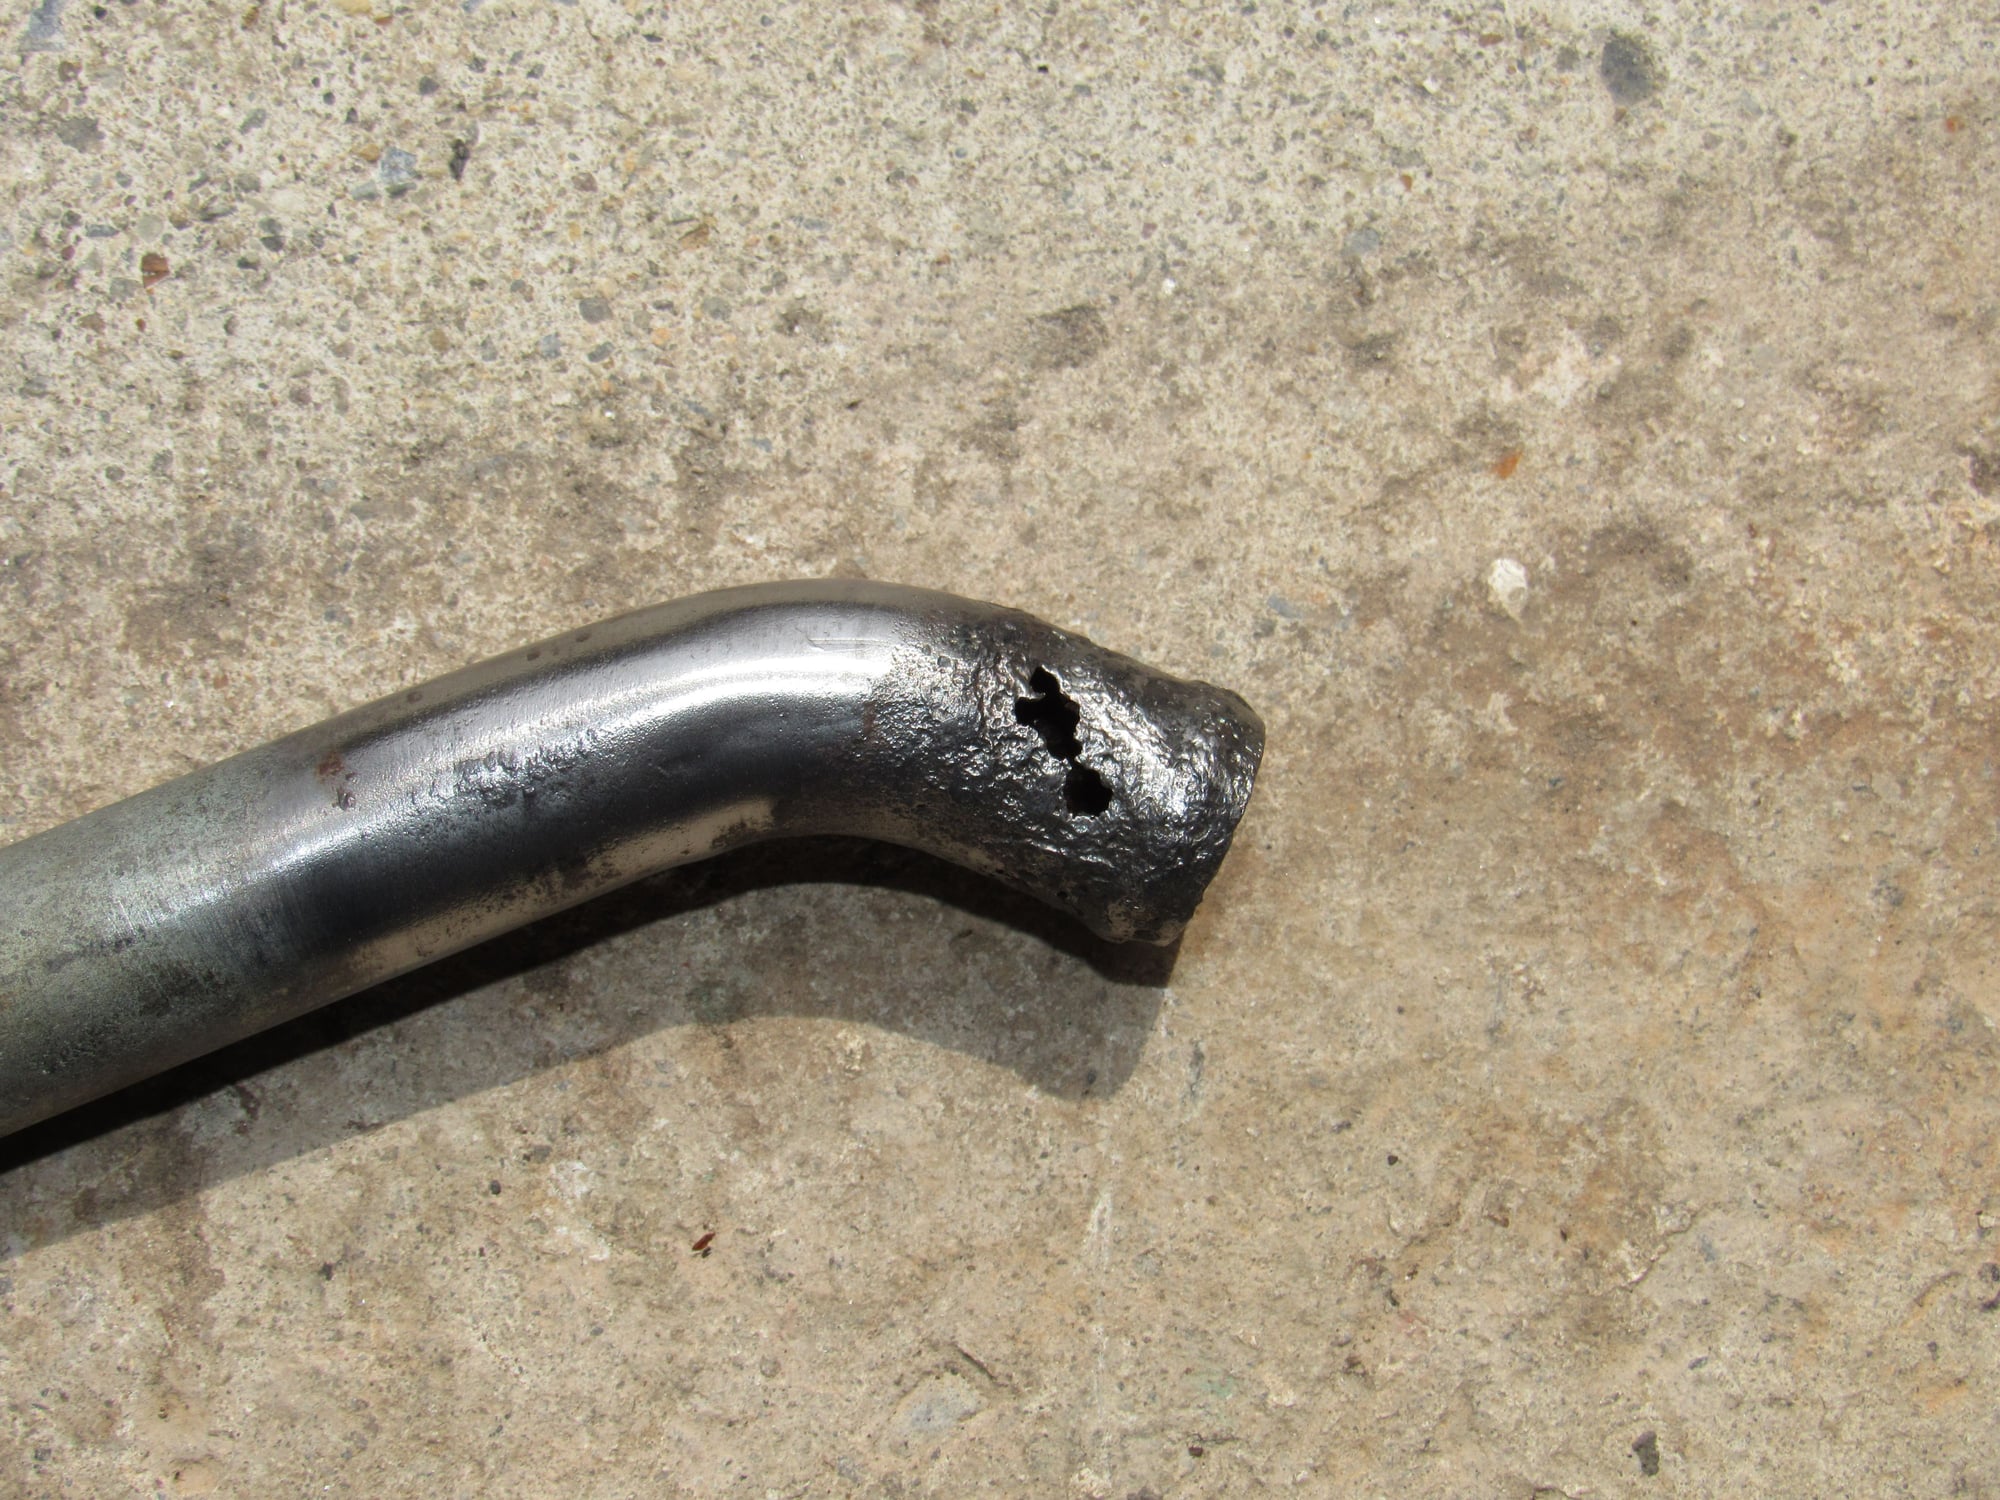
I got a bit further yesterday. The metal coolant Y pipe against the right side of the engine bay never really leaked but was always wet at the ends. Since the system is drained I looked into it and it's bad news, however it is a great time to address it now rather than the side of the road.
It is even worse cleaned up and what metal is left is paper thin.
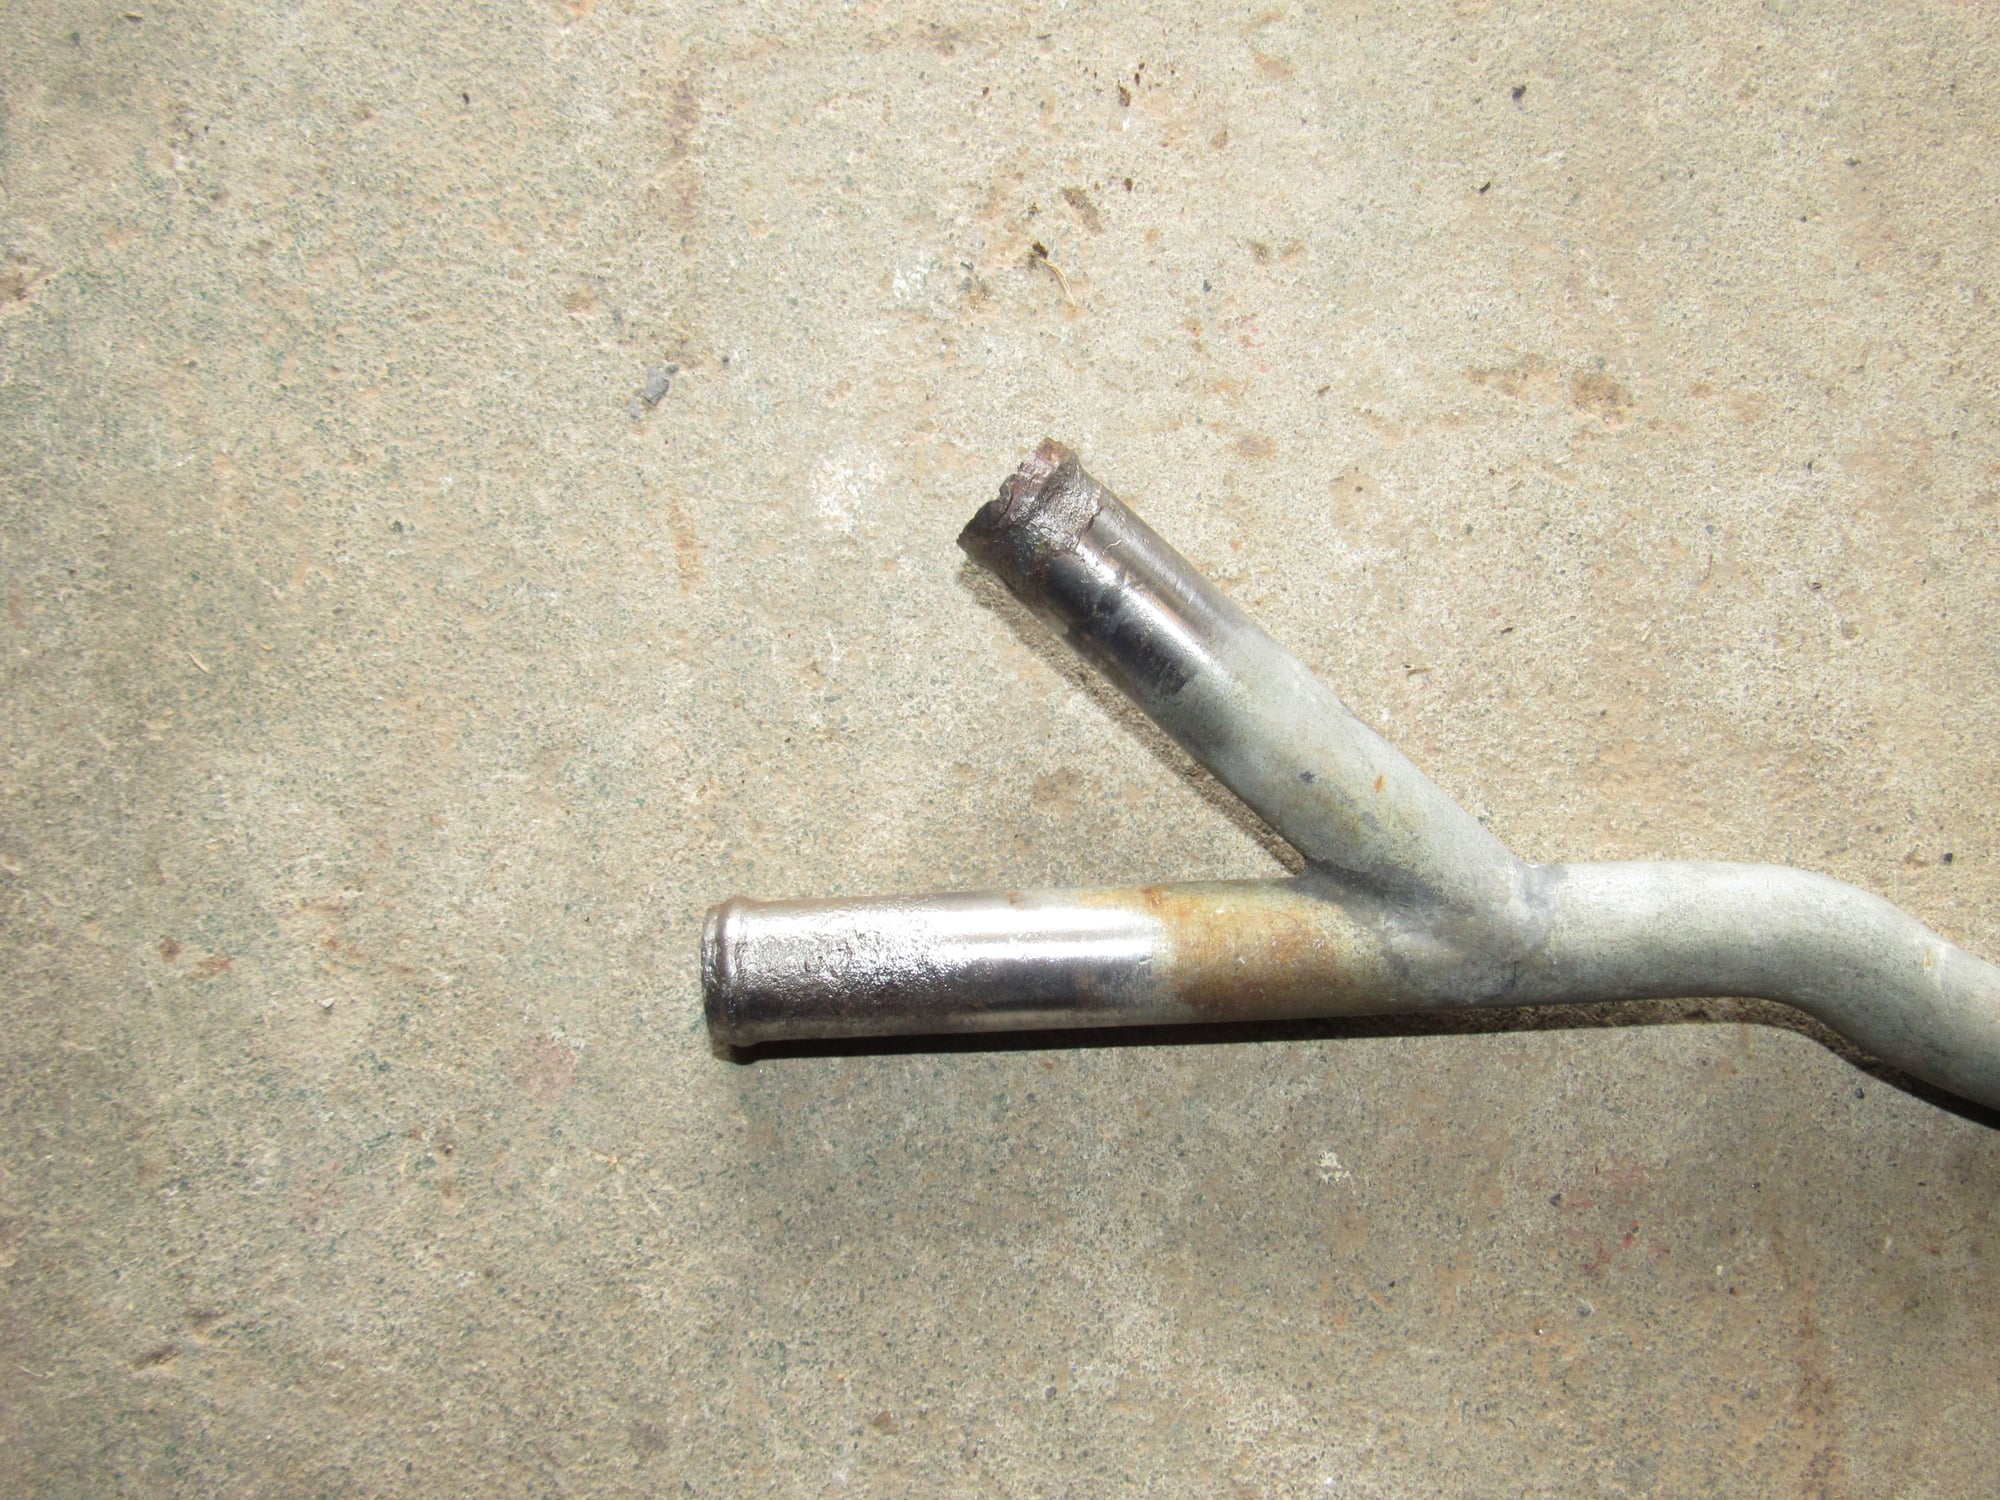
The other ends are not as bad but getting thin.
So I will be replacing the Y pipe and the last of the old coolant hoses from the reservoir to water bridge and to the top of the radiator. The coolant I drained had a lot of rust in it and that must have been a major source. The reservoir has a bunch of sediment in it and the small hose that connects at the top was actually clogged.
I replaced all the red silicone vacuum hoses. There was nothing wrong with them I just prefer the factory look.
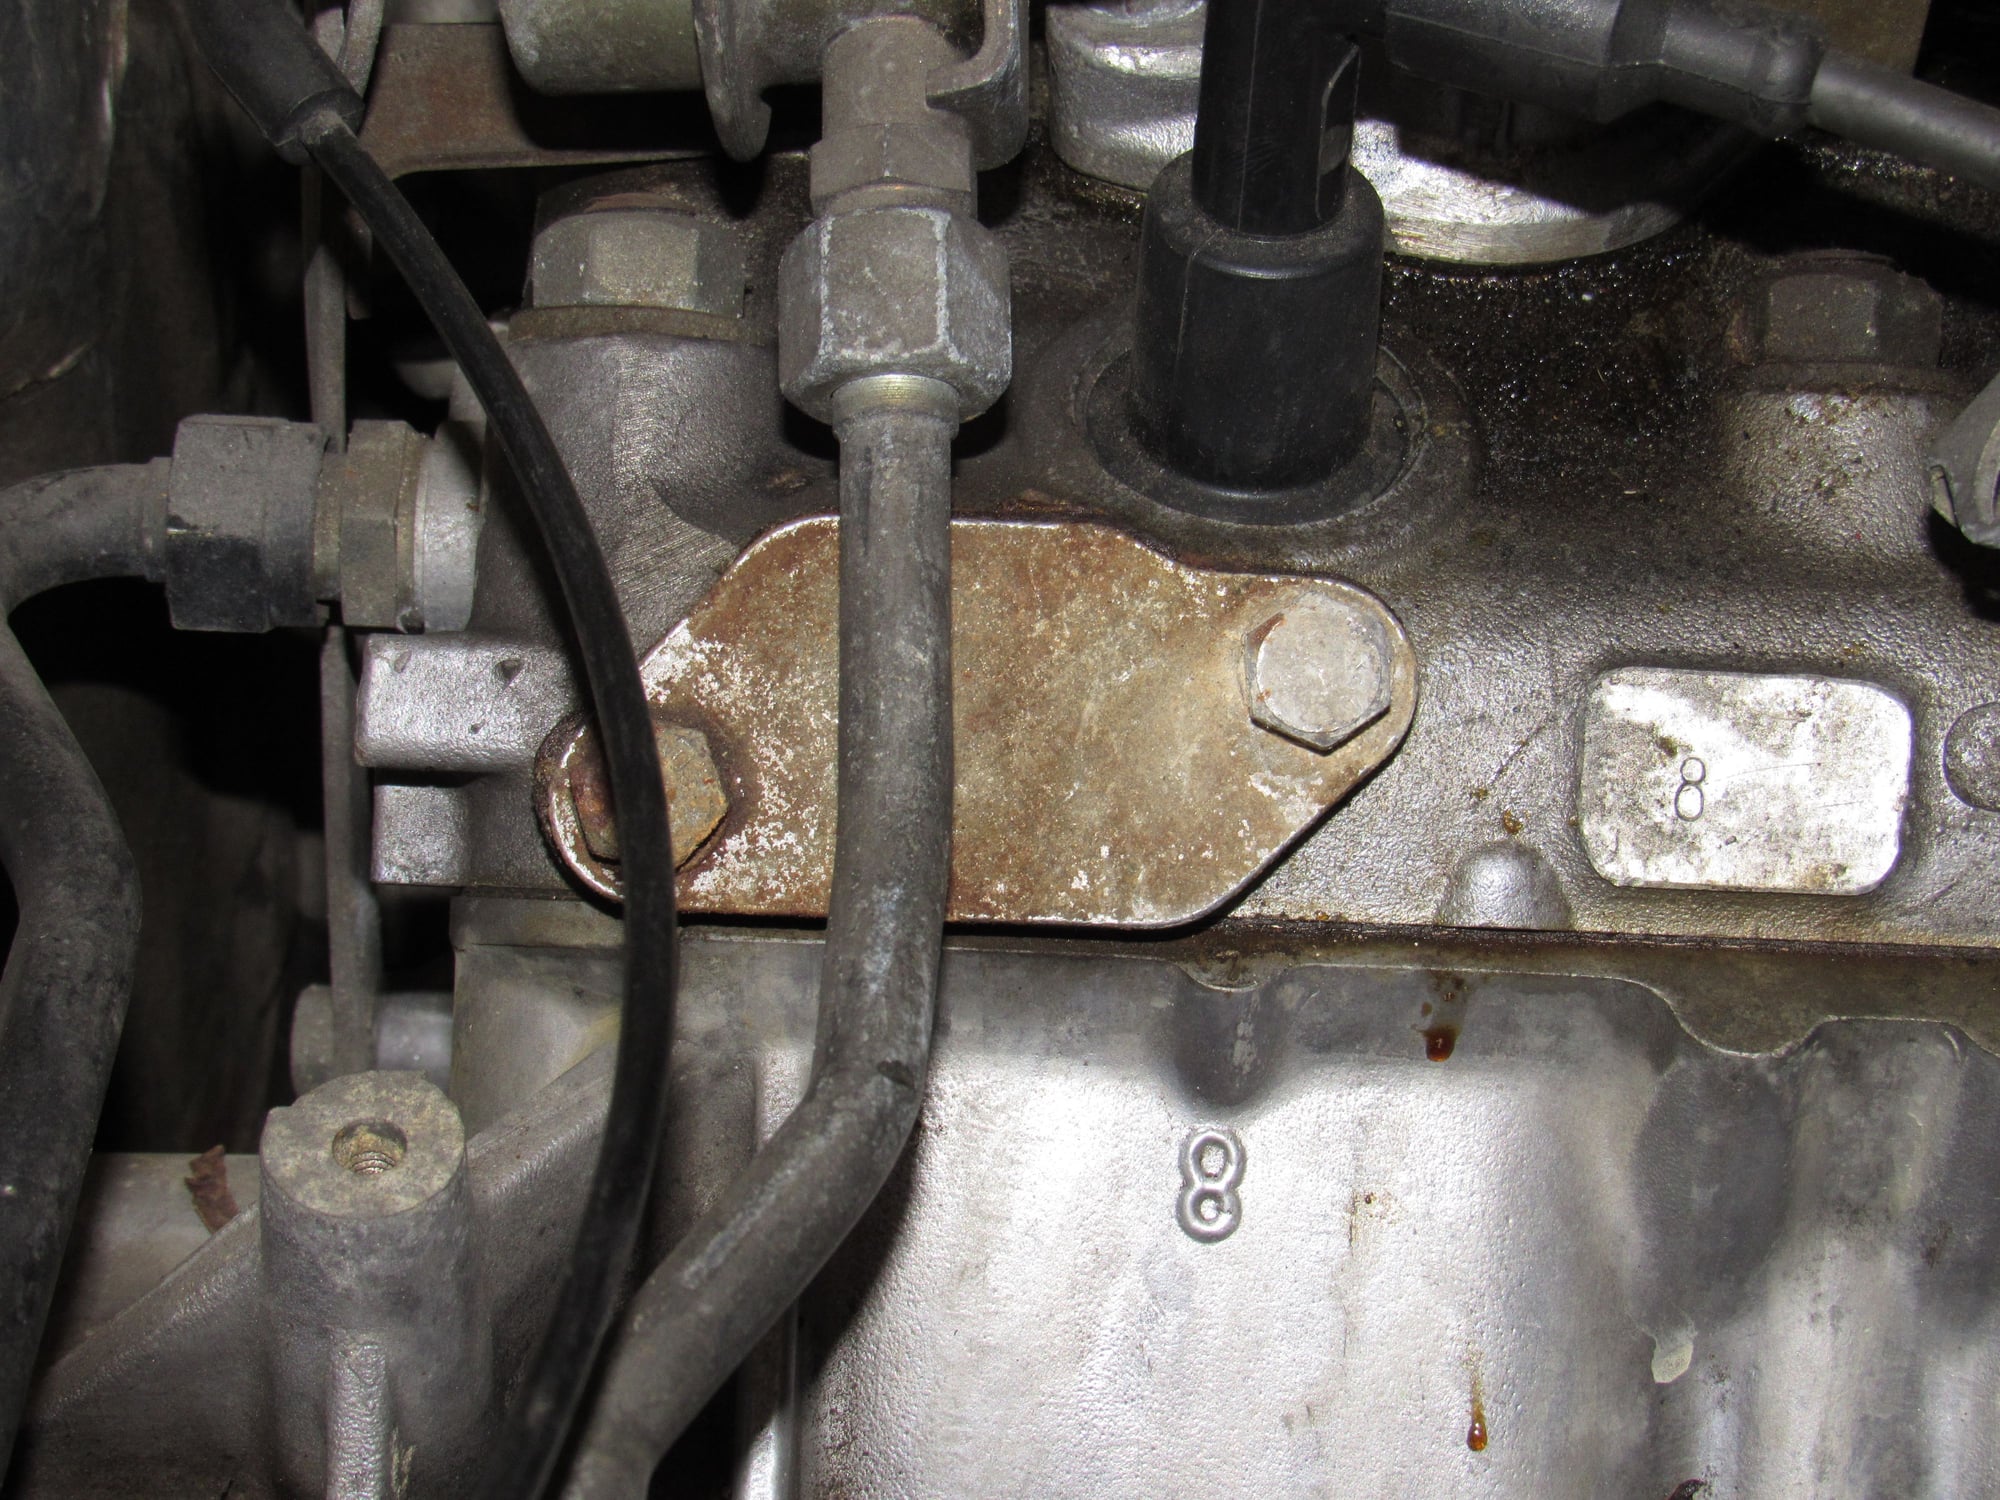
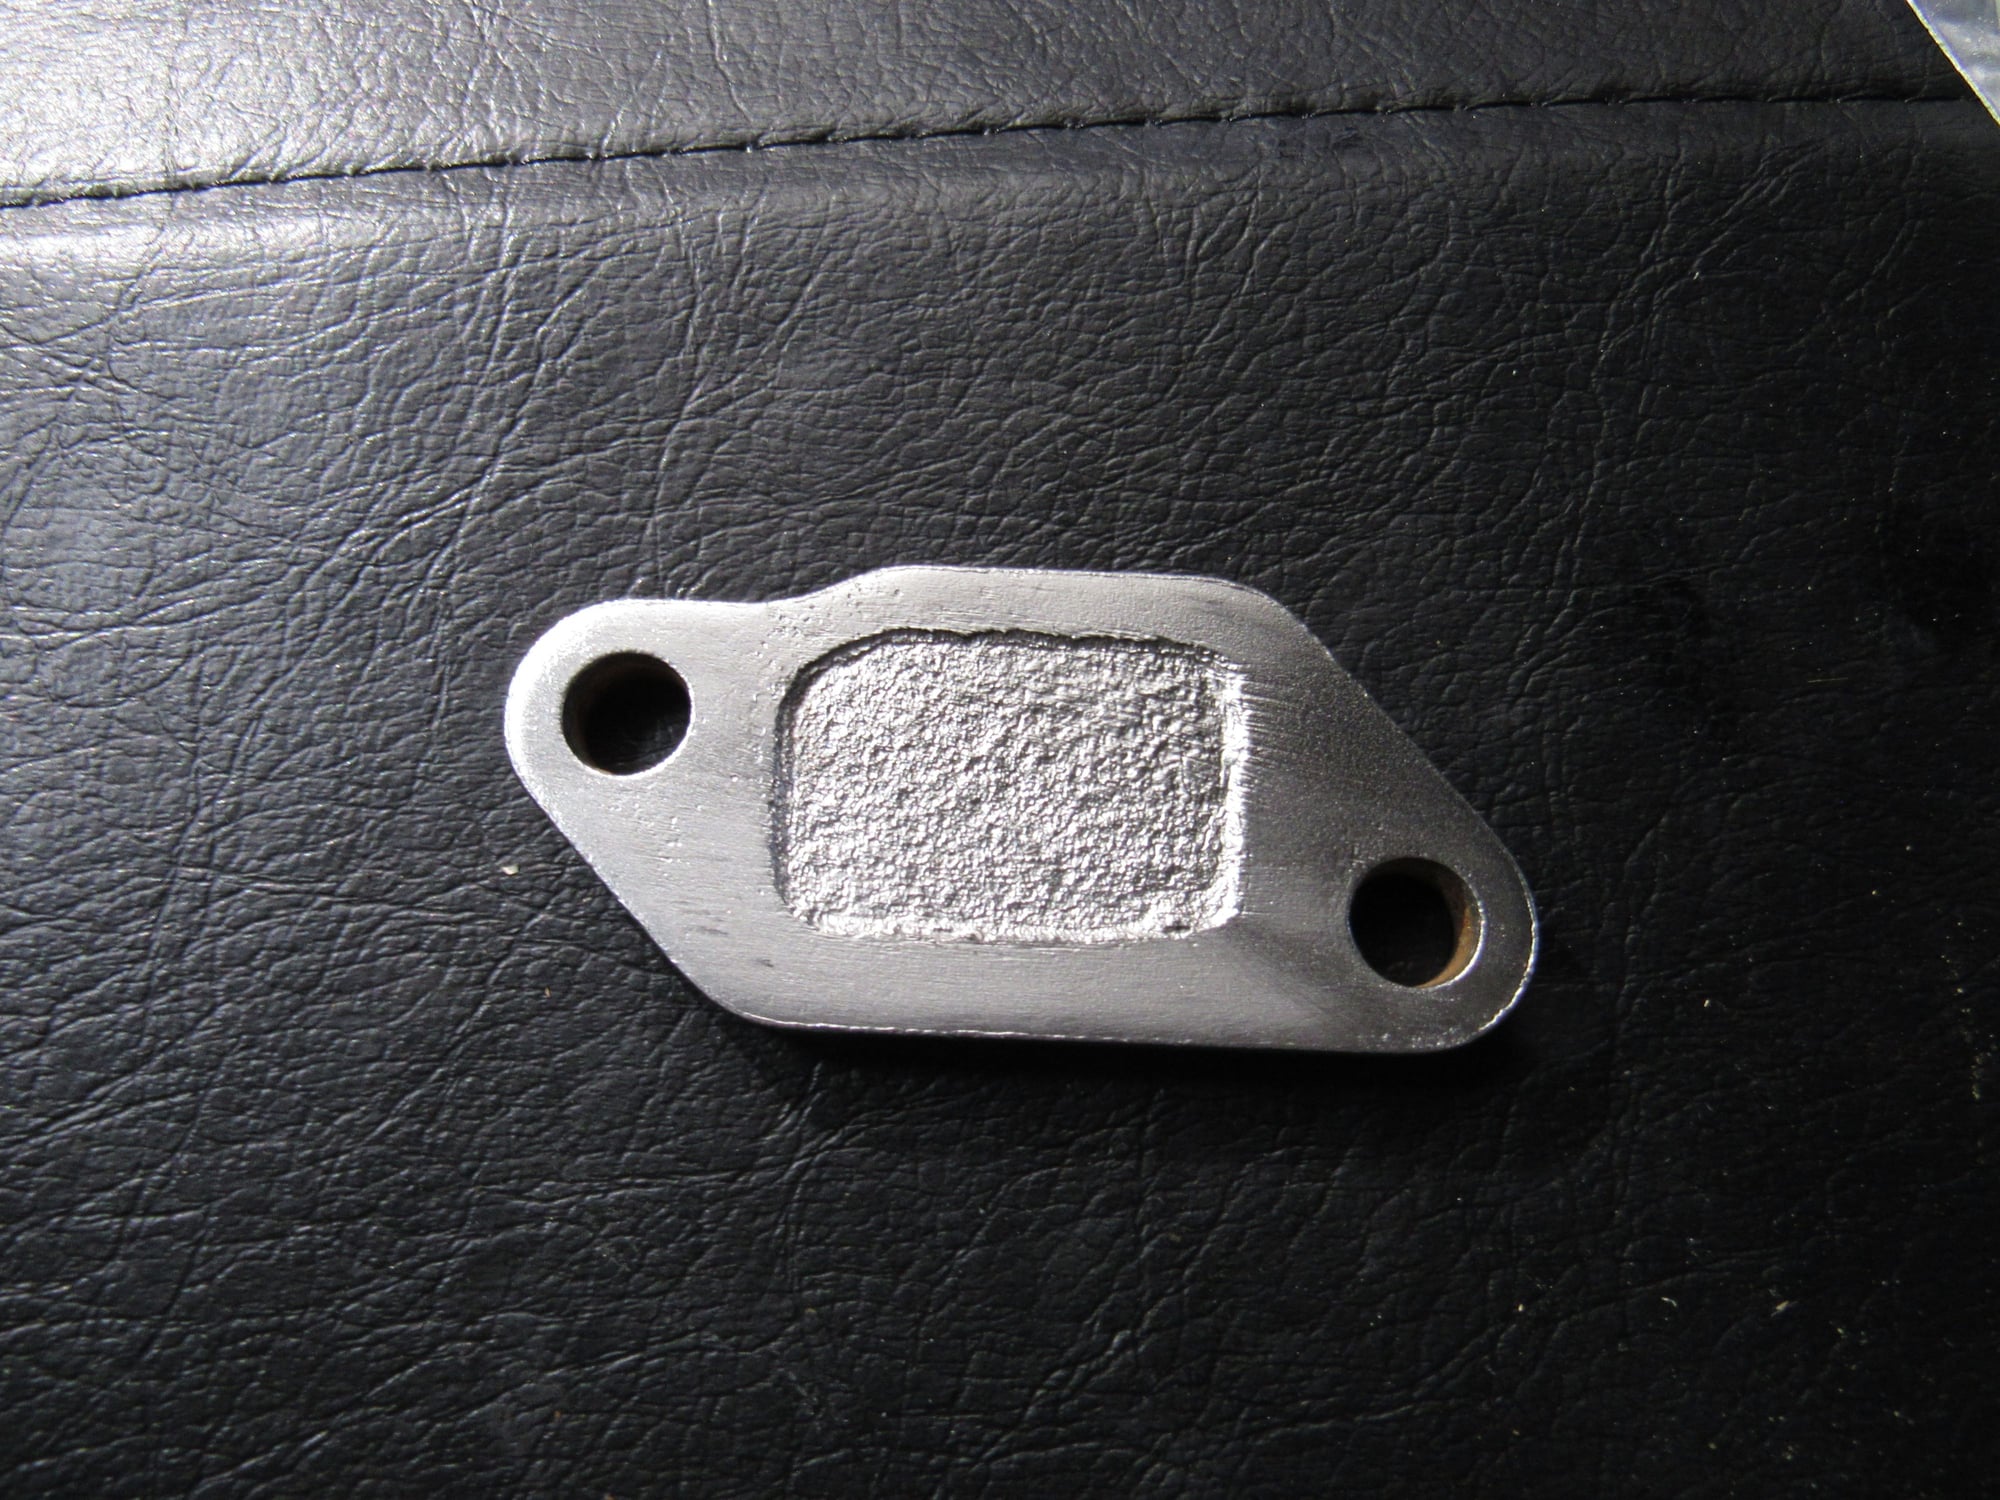
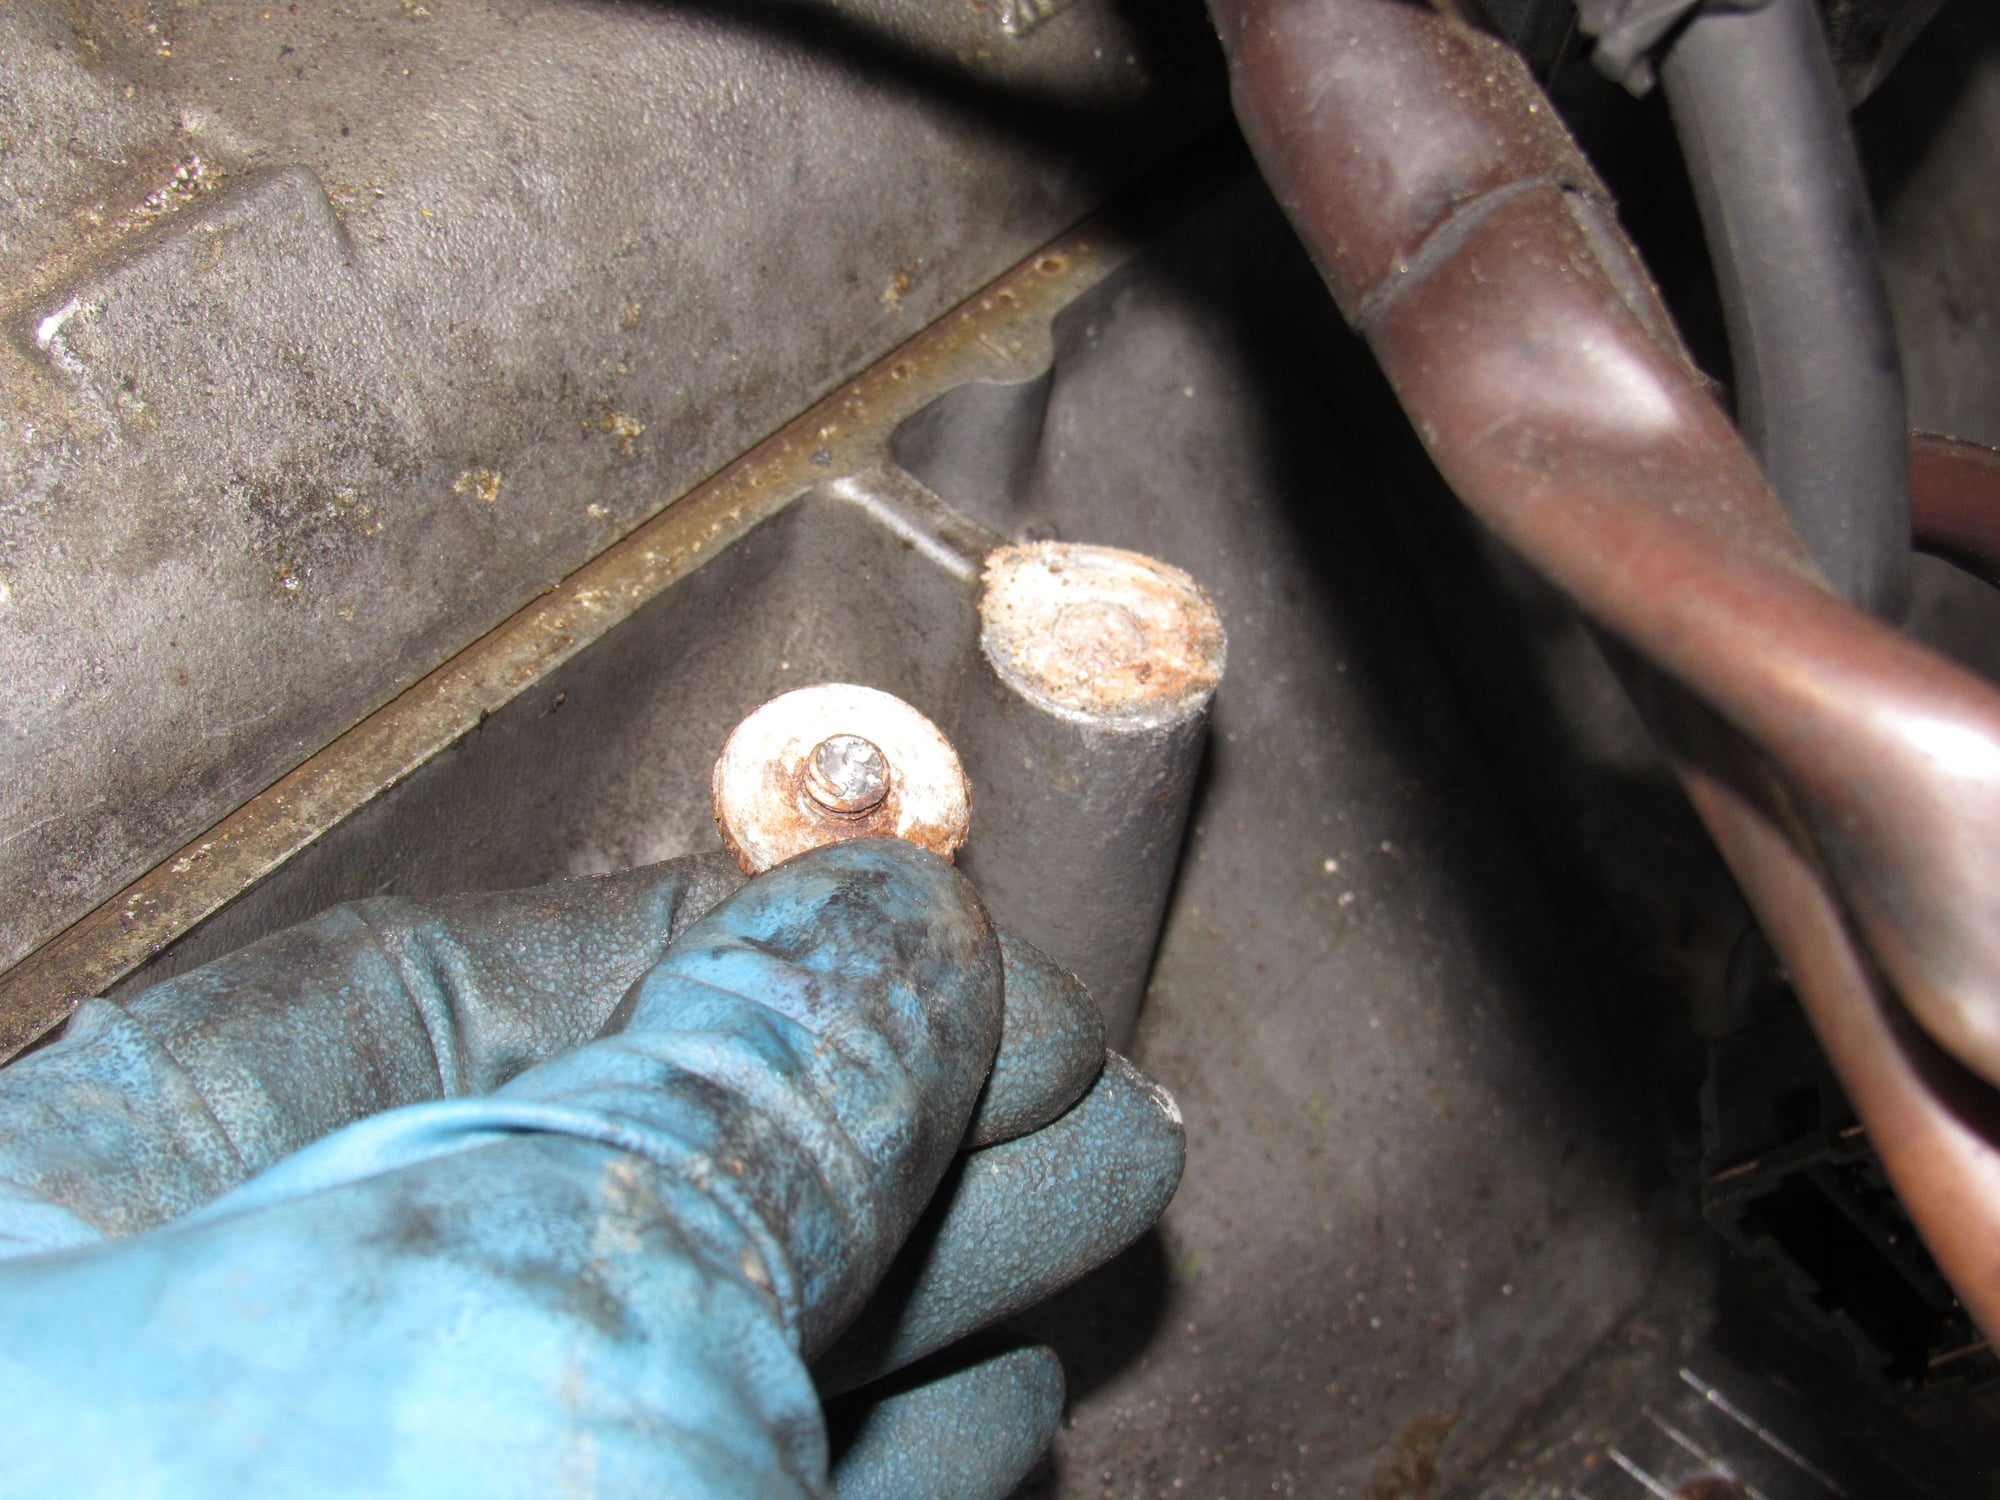
Two of the throttle body bonded rubber mountings came out pretty easily, the third broke off.
I tried every trick I know to extract the stud and nothing worked. I tried welding a nut a half dozen times and they snapped off. I even tried dissolving the steel over the past week with alum and didn't make any progress.
Looks good, did not work:
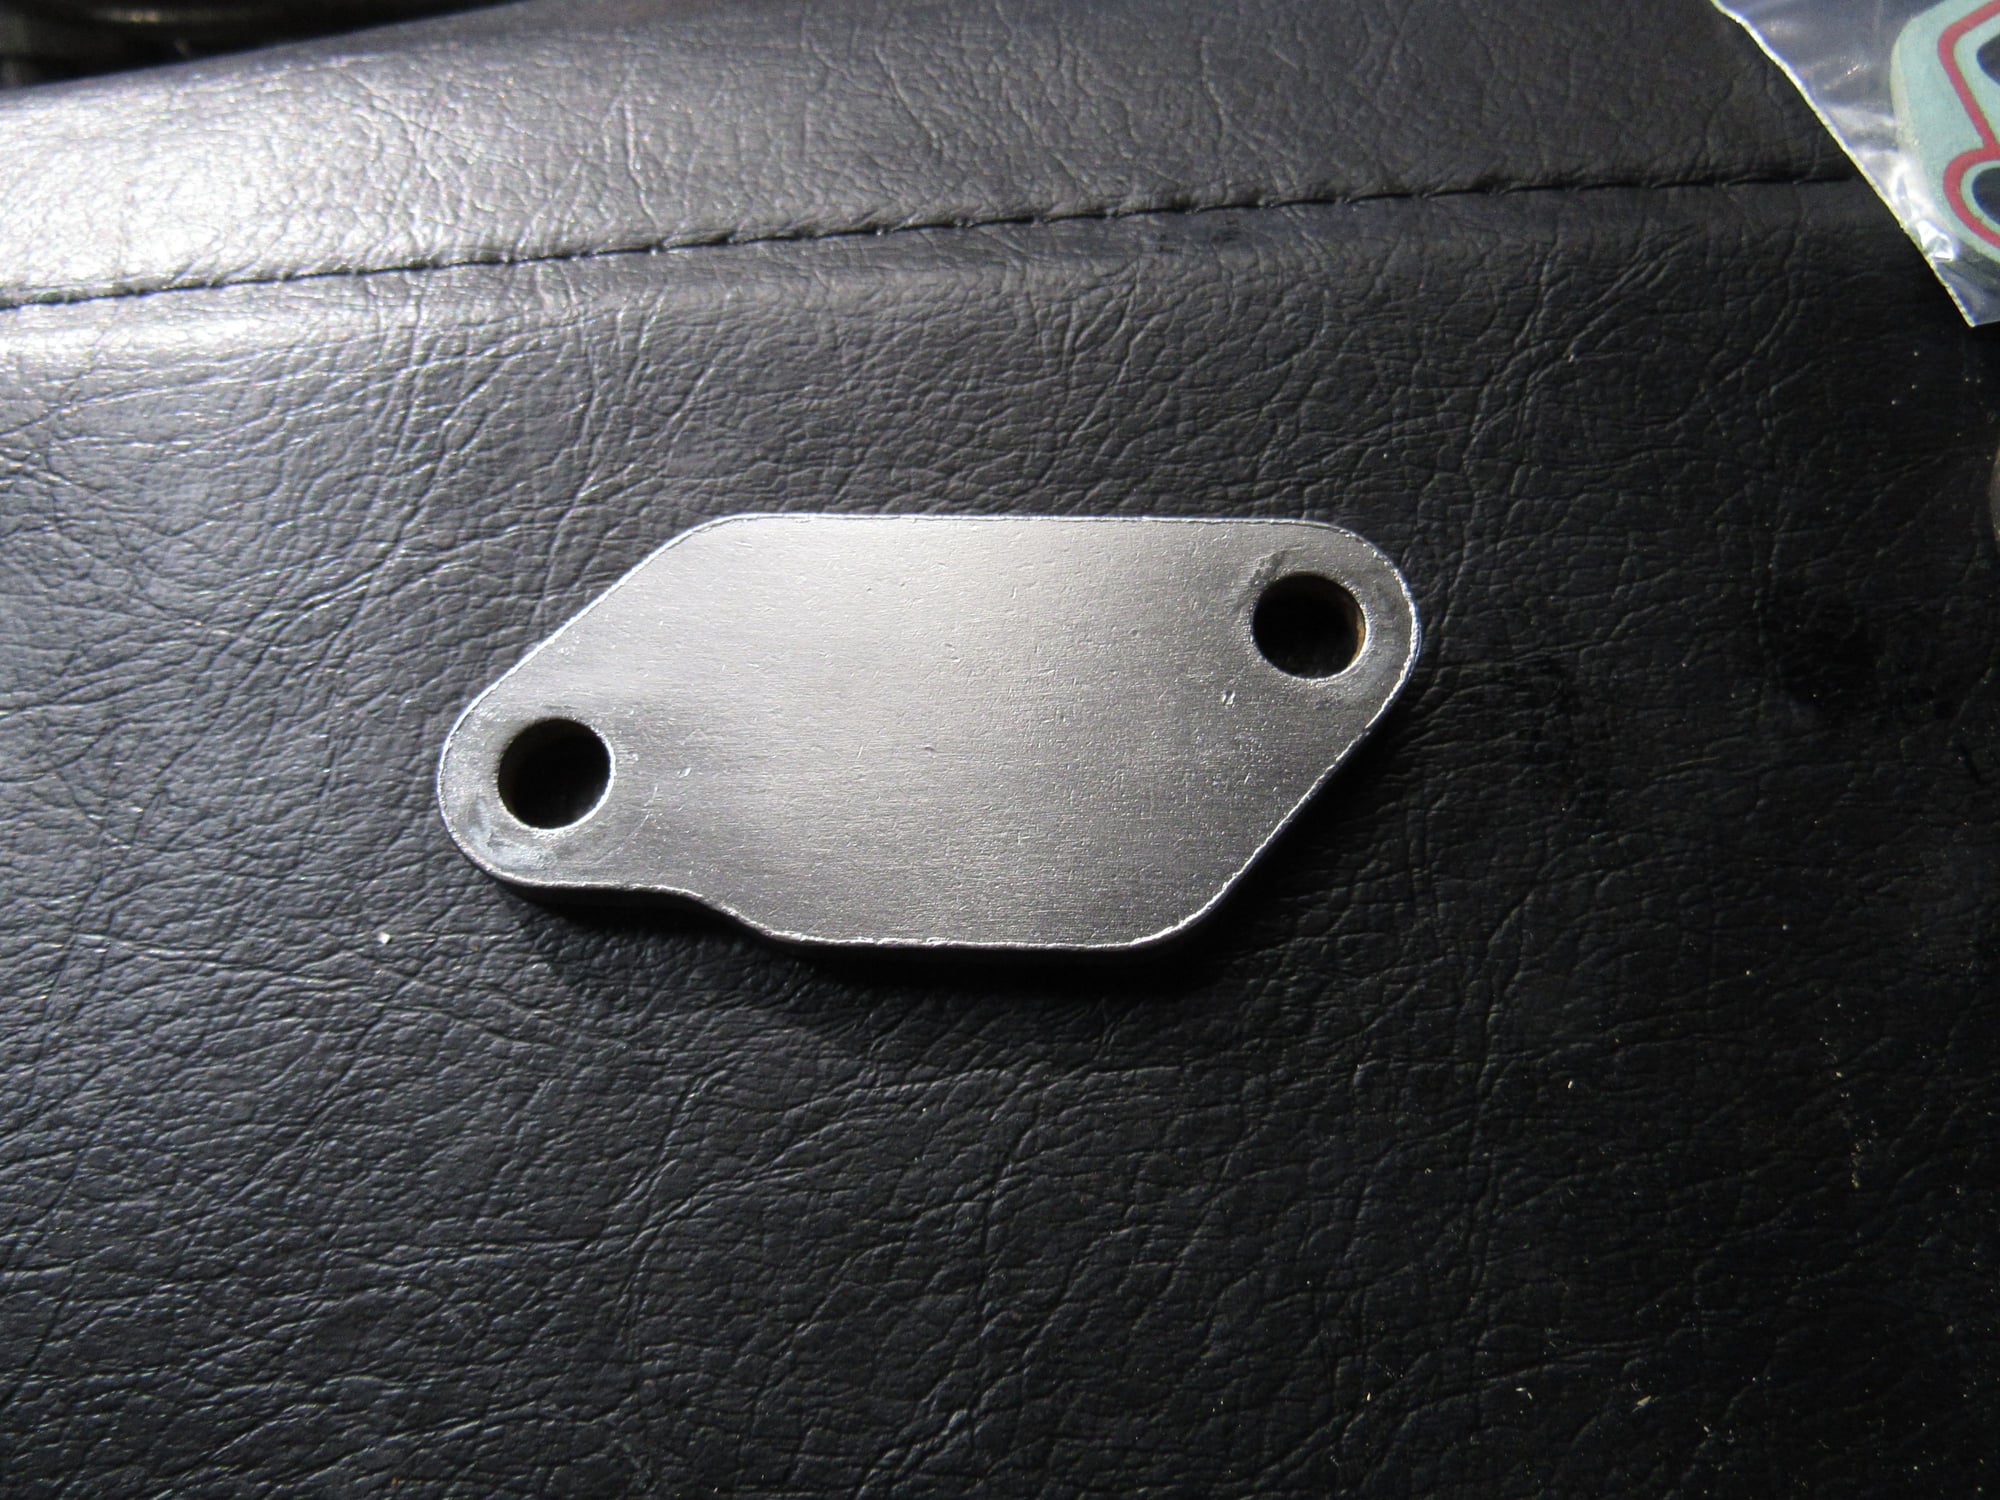
What I finally did is drill out the whole mess and fill with JB weld. I coated the new mount with oil and inserted it until the JB weld sets up and I will remove it until it fully cures. That should leave a nice threaded hole.
Every steel part in contact with coolant is heavily corroded as seen in the Y pipe in my last post. The coolant elbow that connects to the heater valve was rusty at the end. With nothing to lose and since it is generously long, I cut off the bad part and managed to tig weld a flare at the end for hose retention. I think this will work fine.
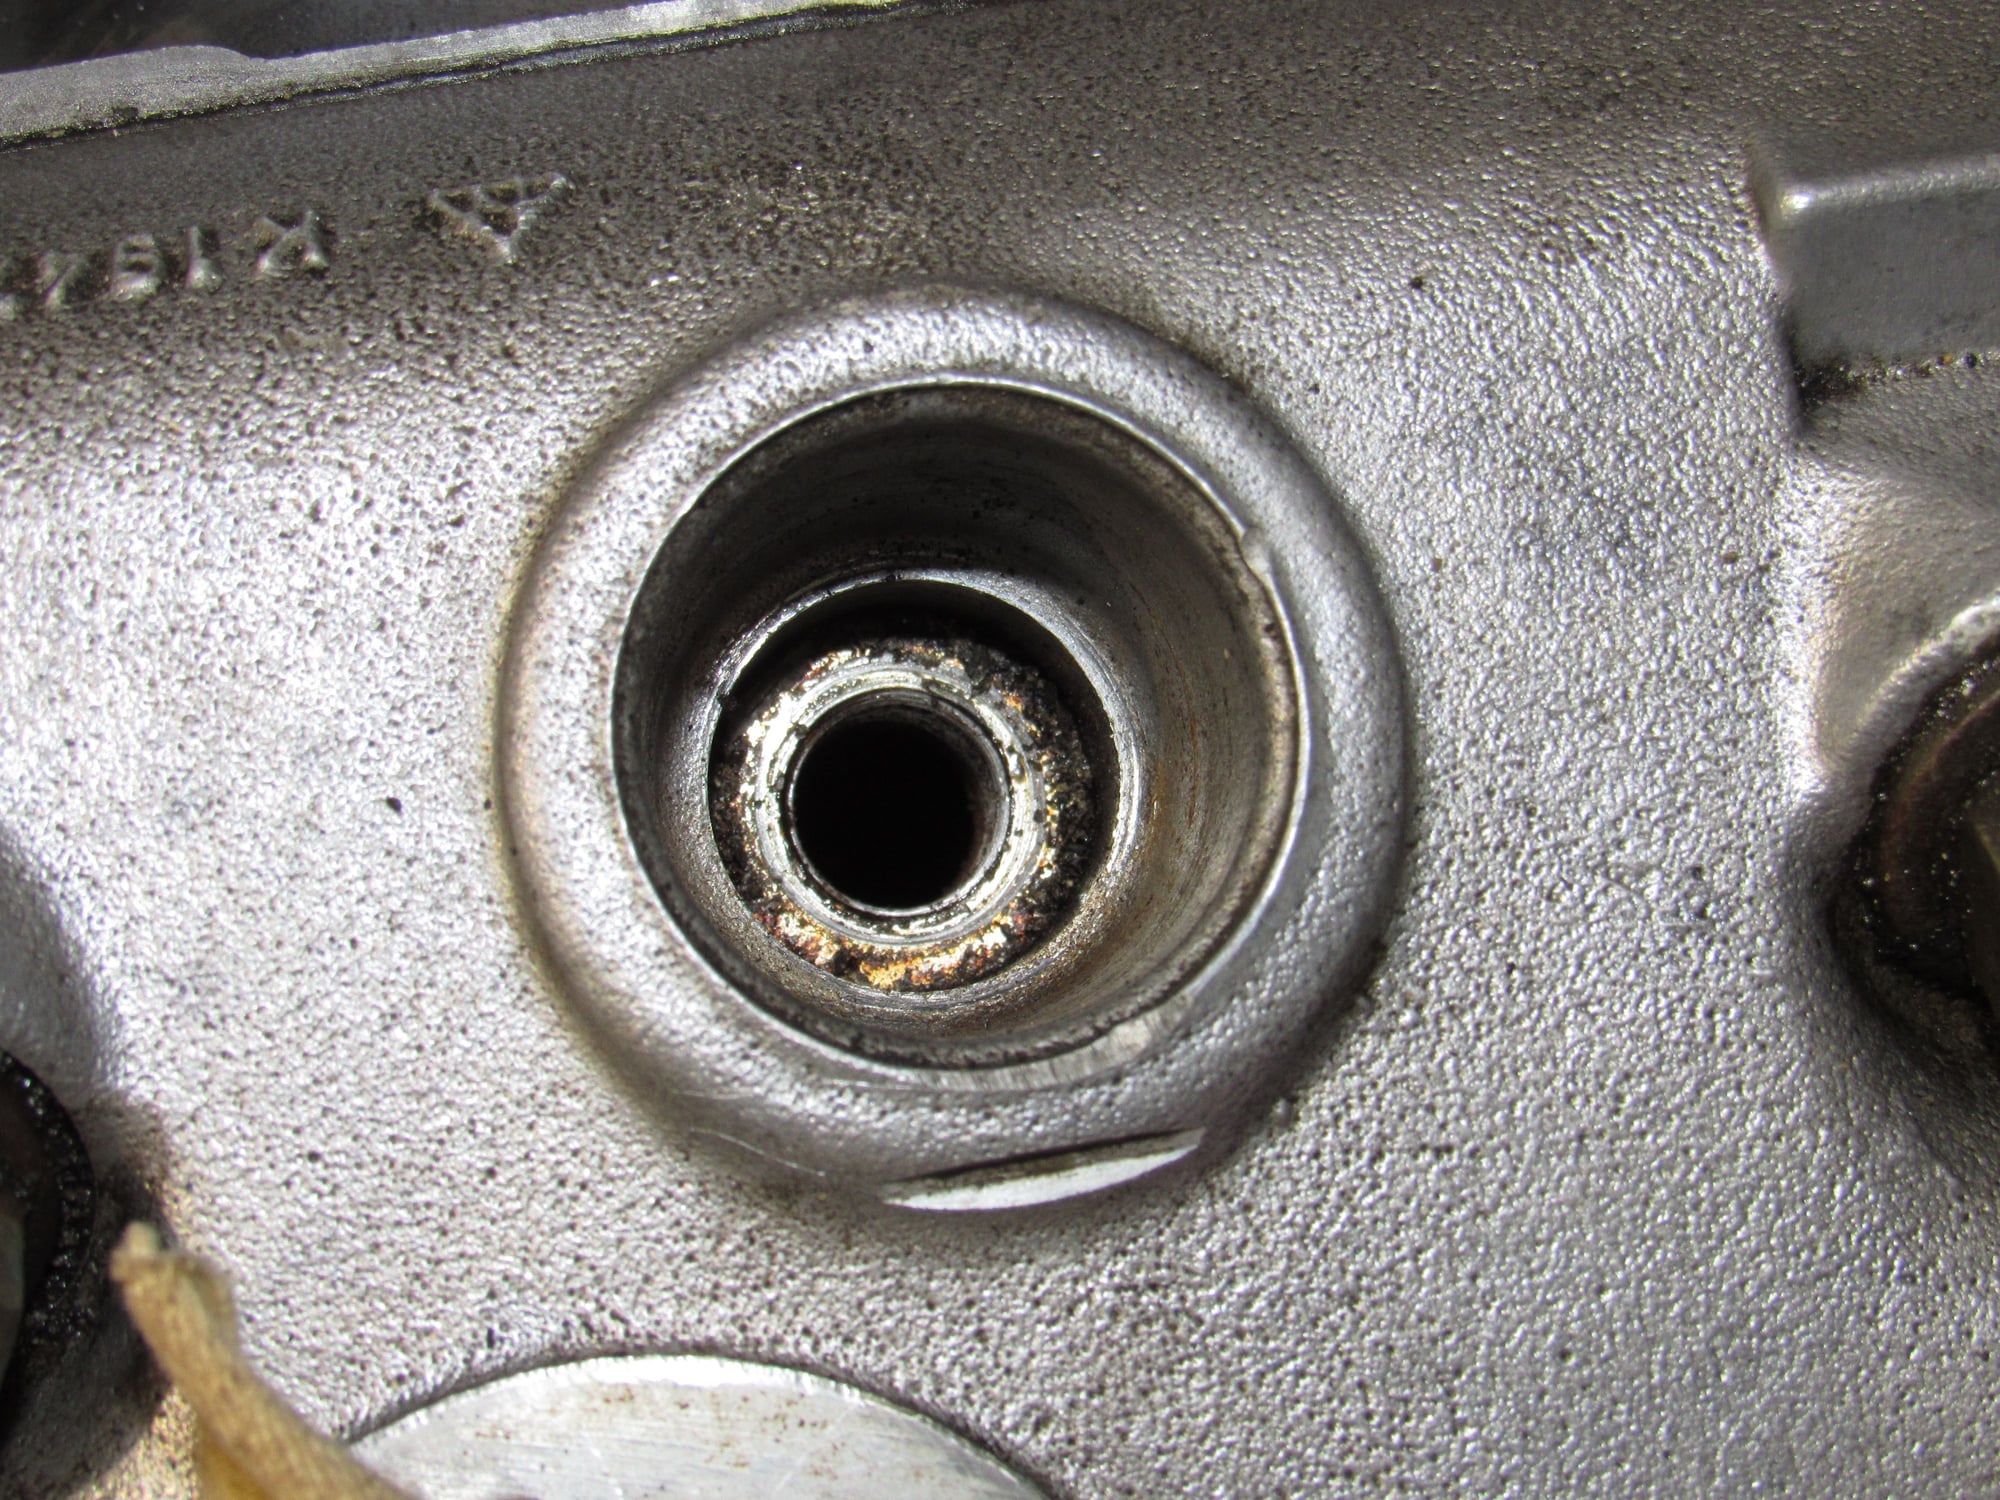
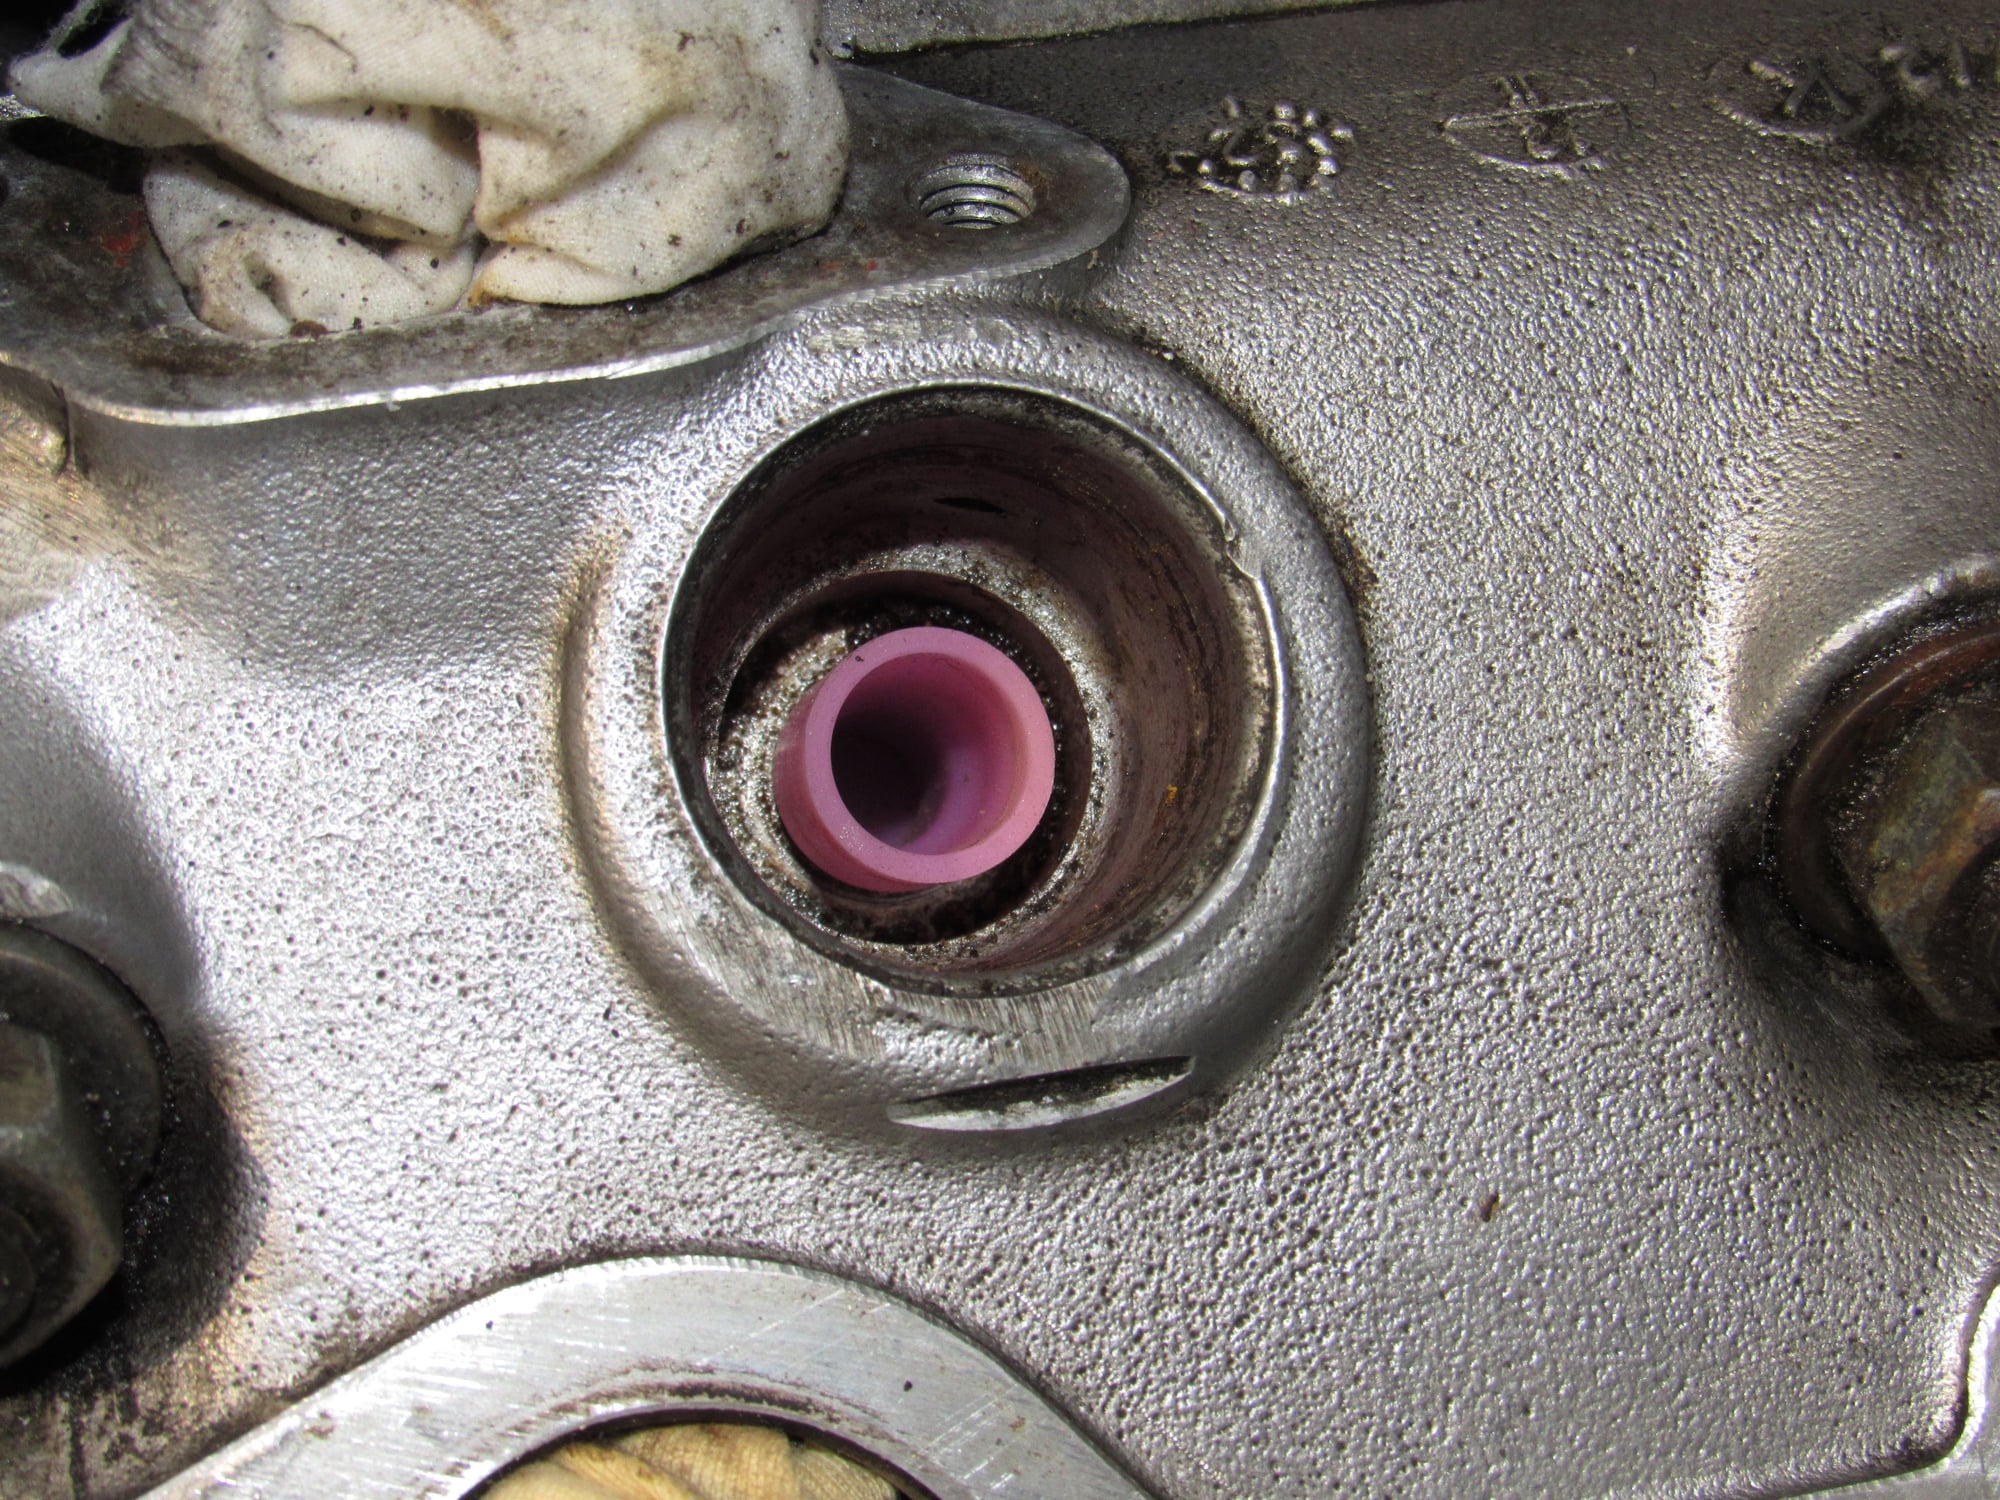
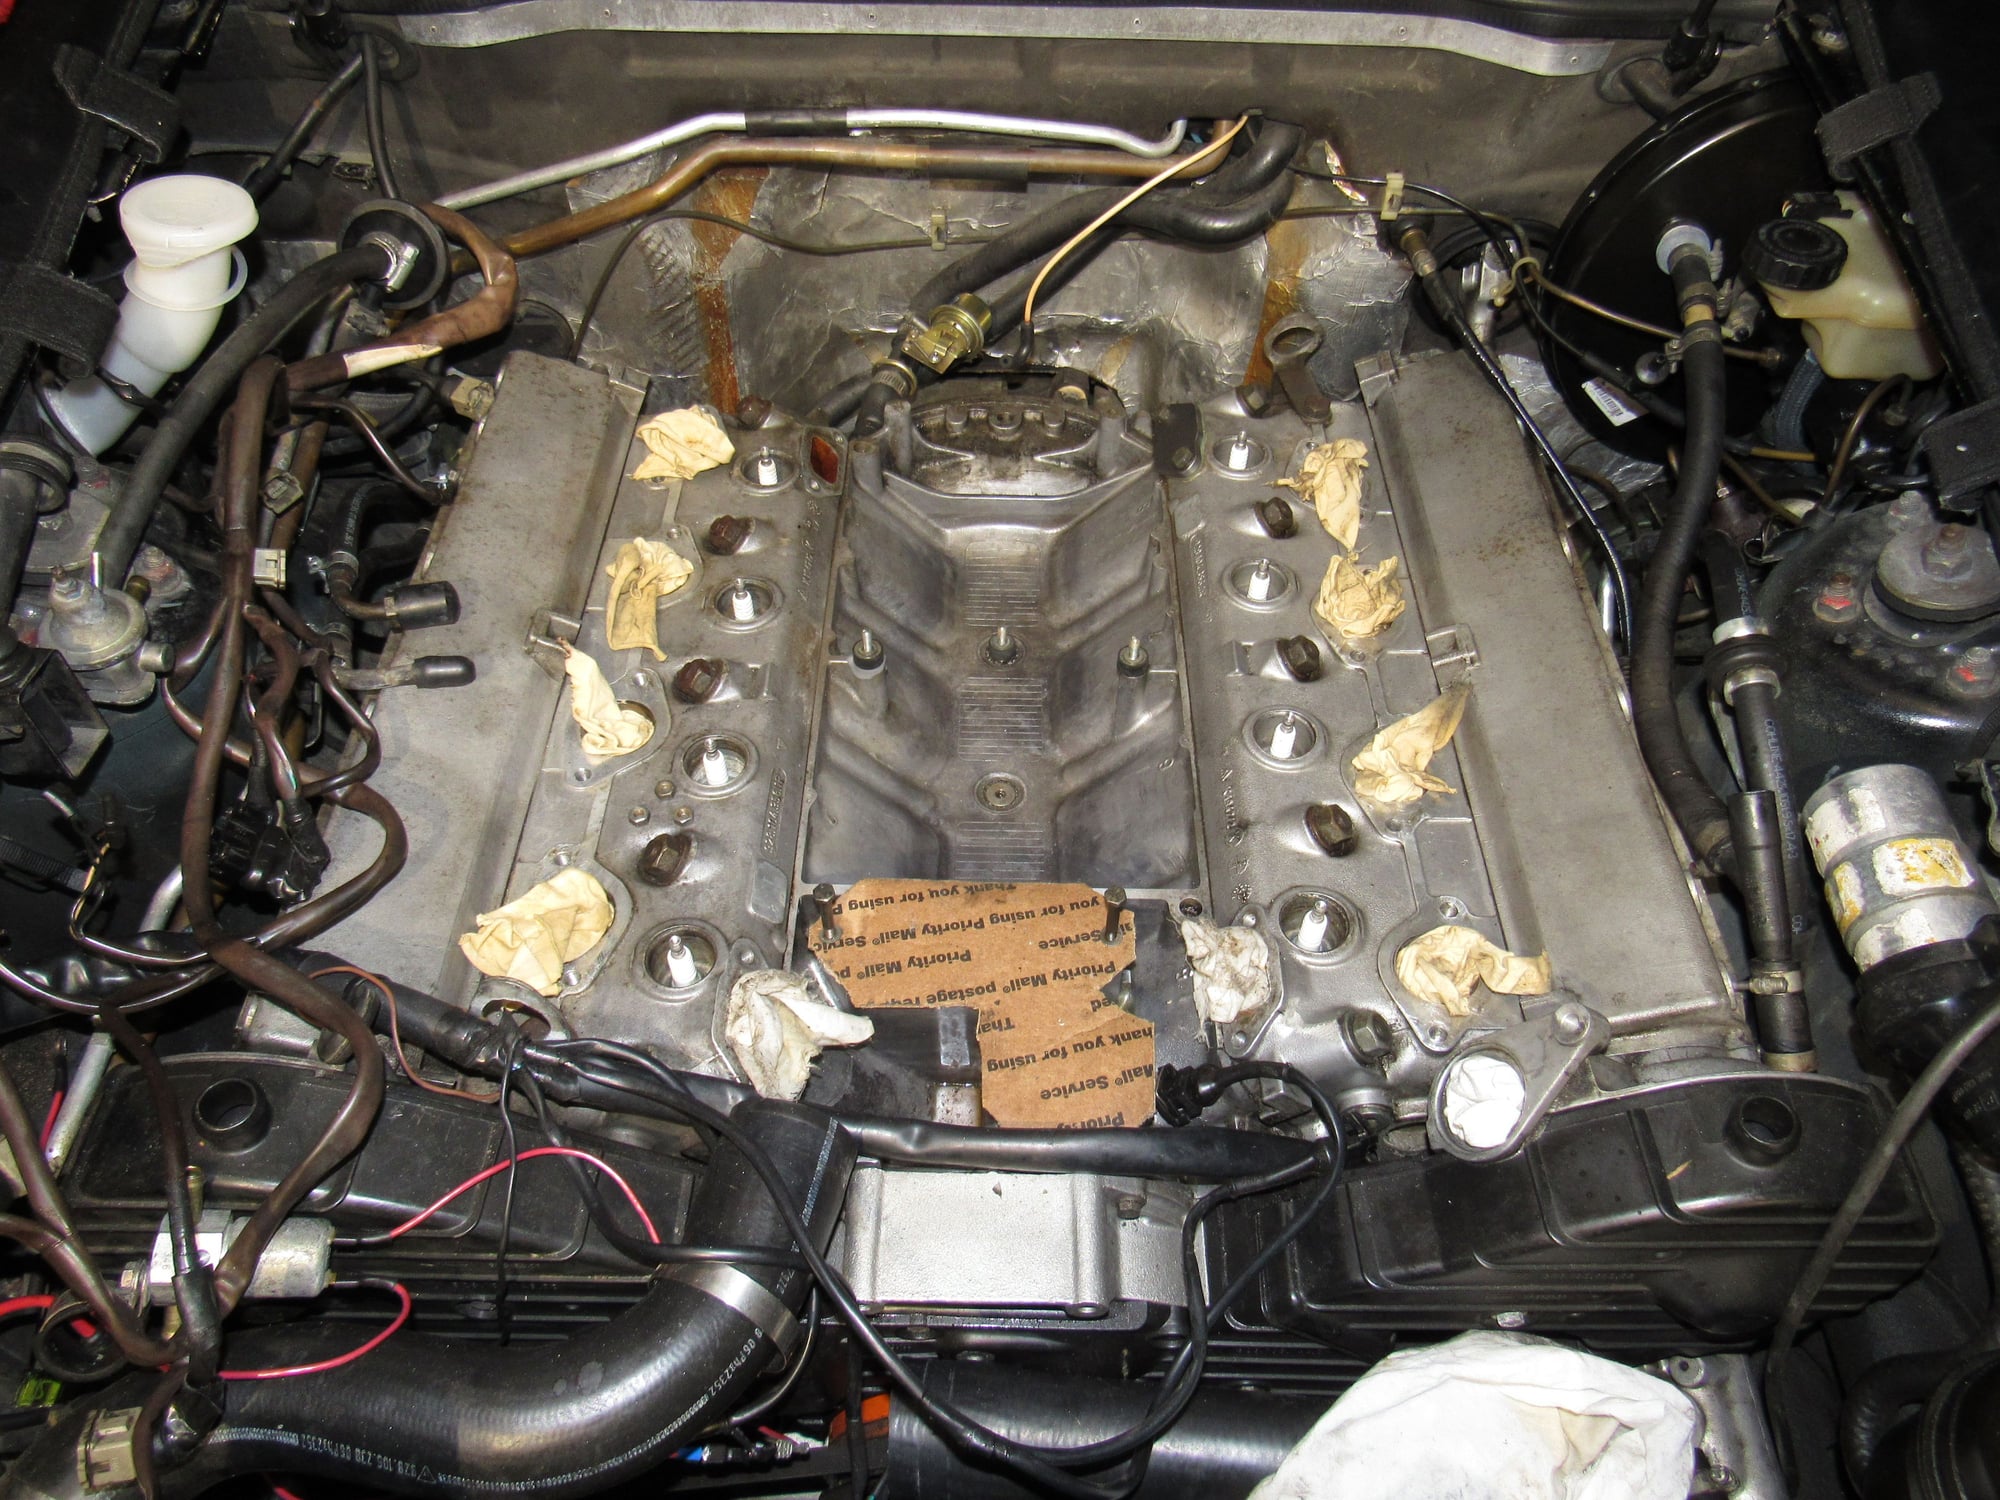
I removed the rest of the intake and spent hours removing the cylinder head to intake gaskets. Then for curiosity's sake, I performed a compression check. When I removed the spark plugs I saw a lot of dirt and grit in the wells and I did not want this to get sucked into the cylinders.
I plugged the holes with vacuum caps and cleaned the dirt out with Q tips.
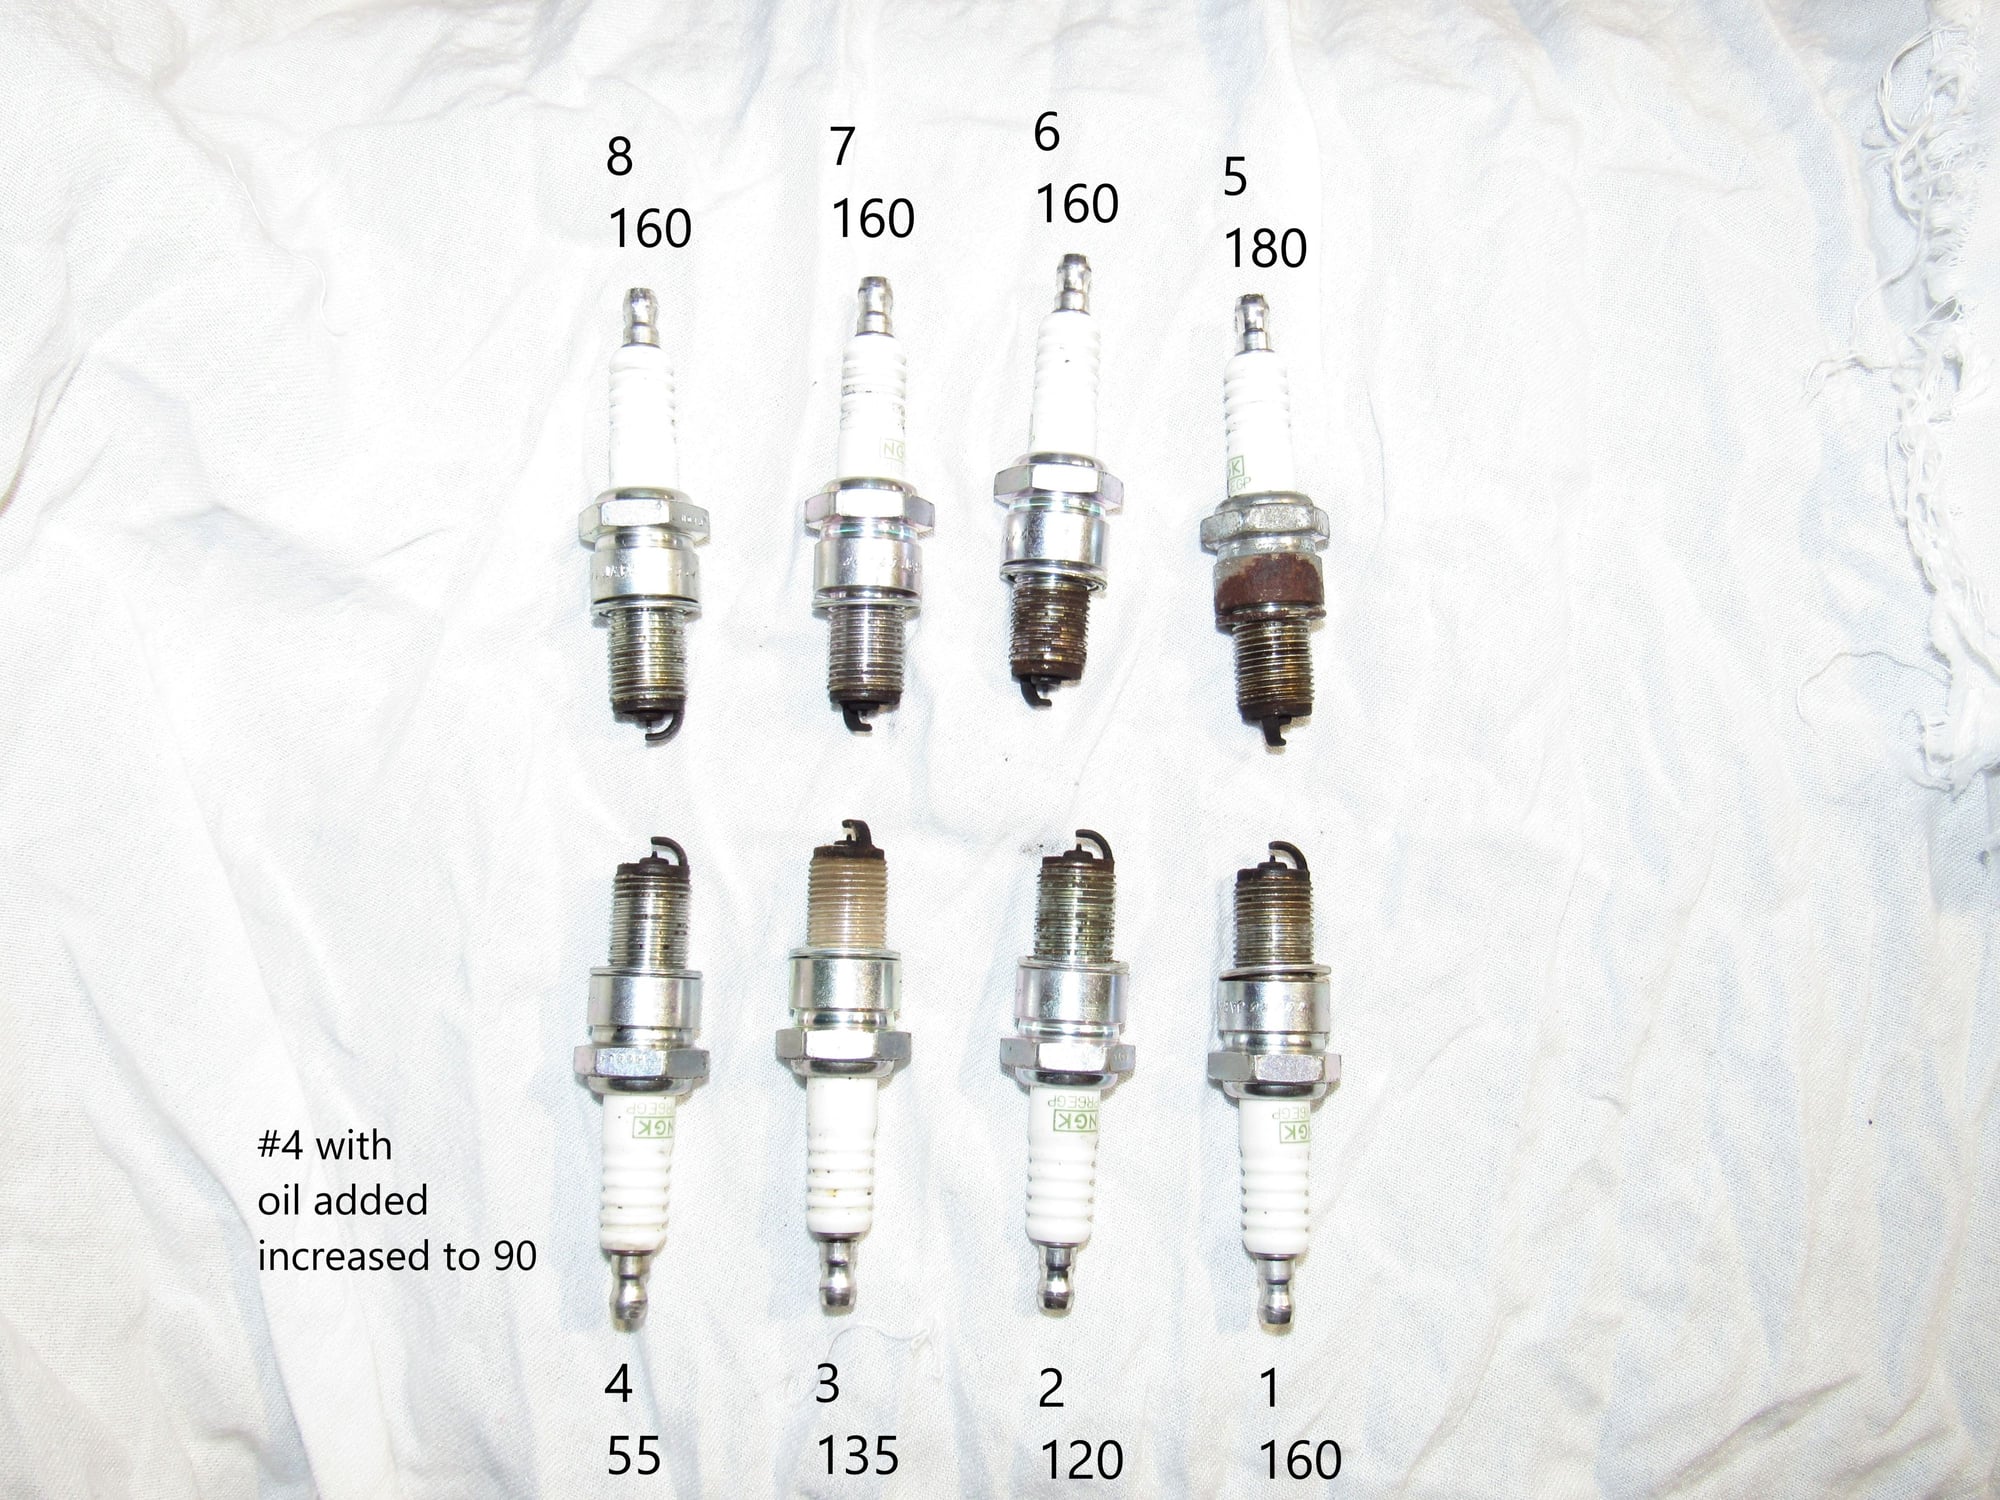
Here are my results. This is a cold test but the left cylinder bank is inconsistent. #4 only measured 55psi. I added some oil and it only raised to 90psi so I think there is a valve leaking. The business end of all spark plugs look the same though these are platinum and I will install the correct WR8DS. The engine ran smooth and strong and I will test again with a warm engine.
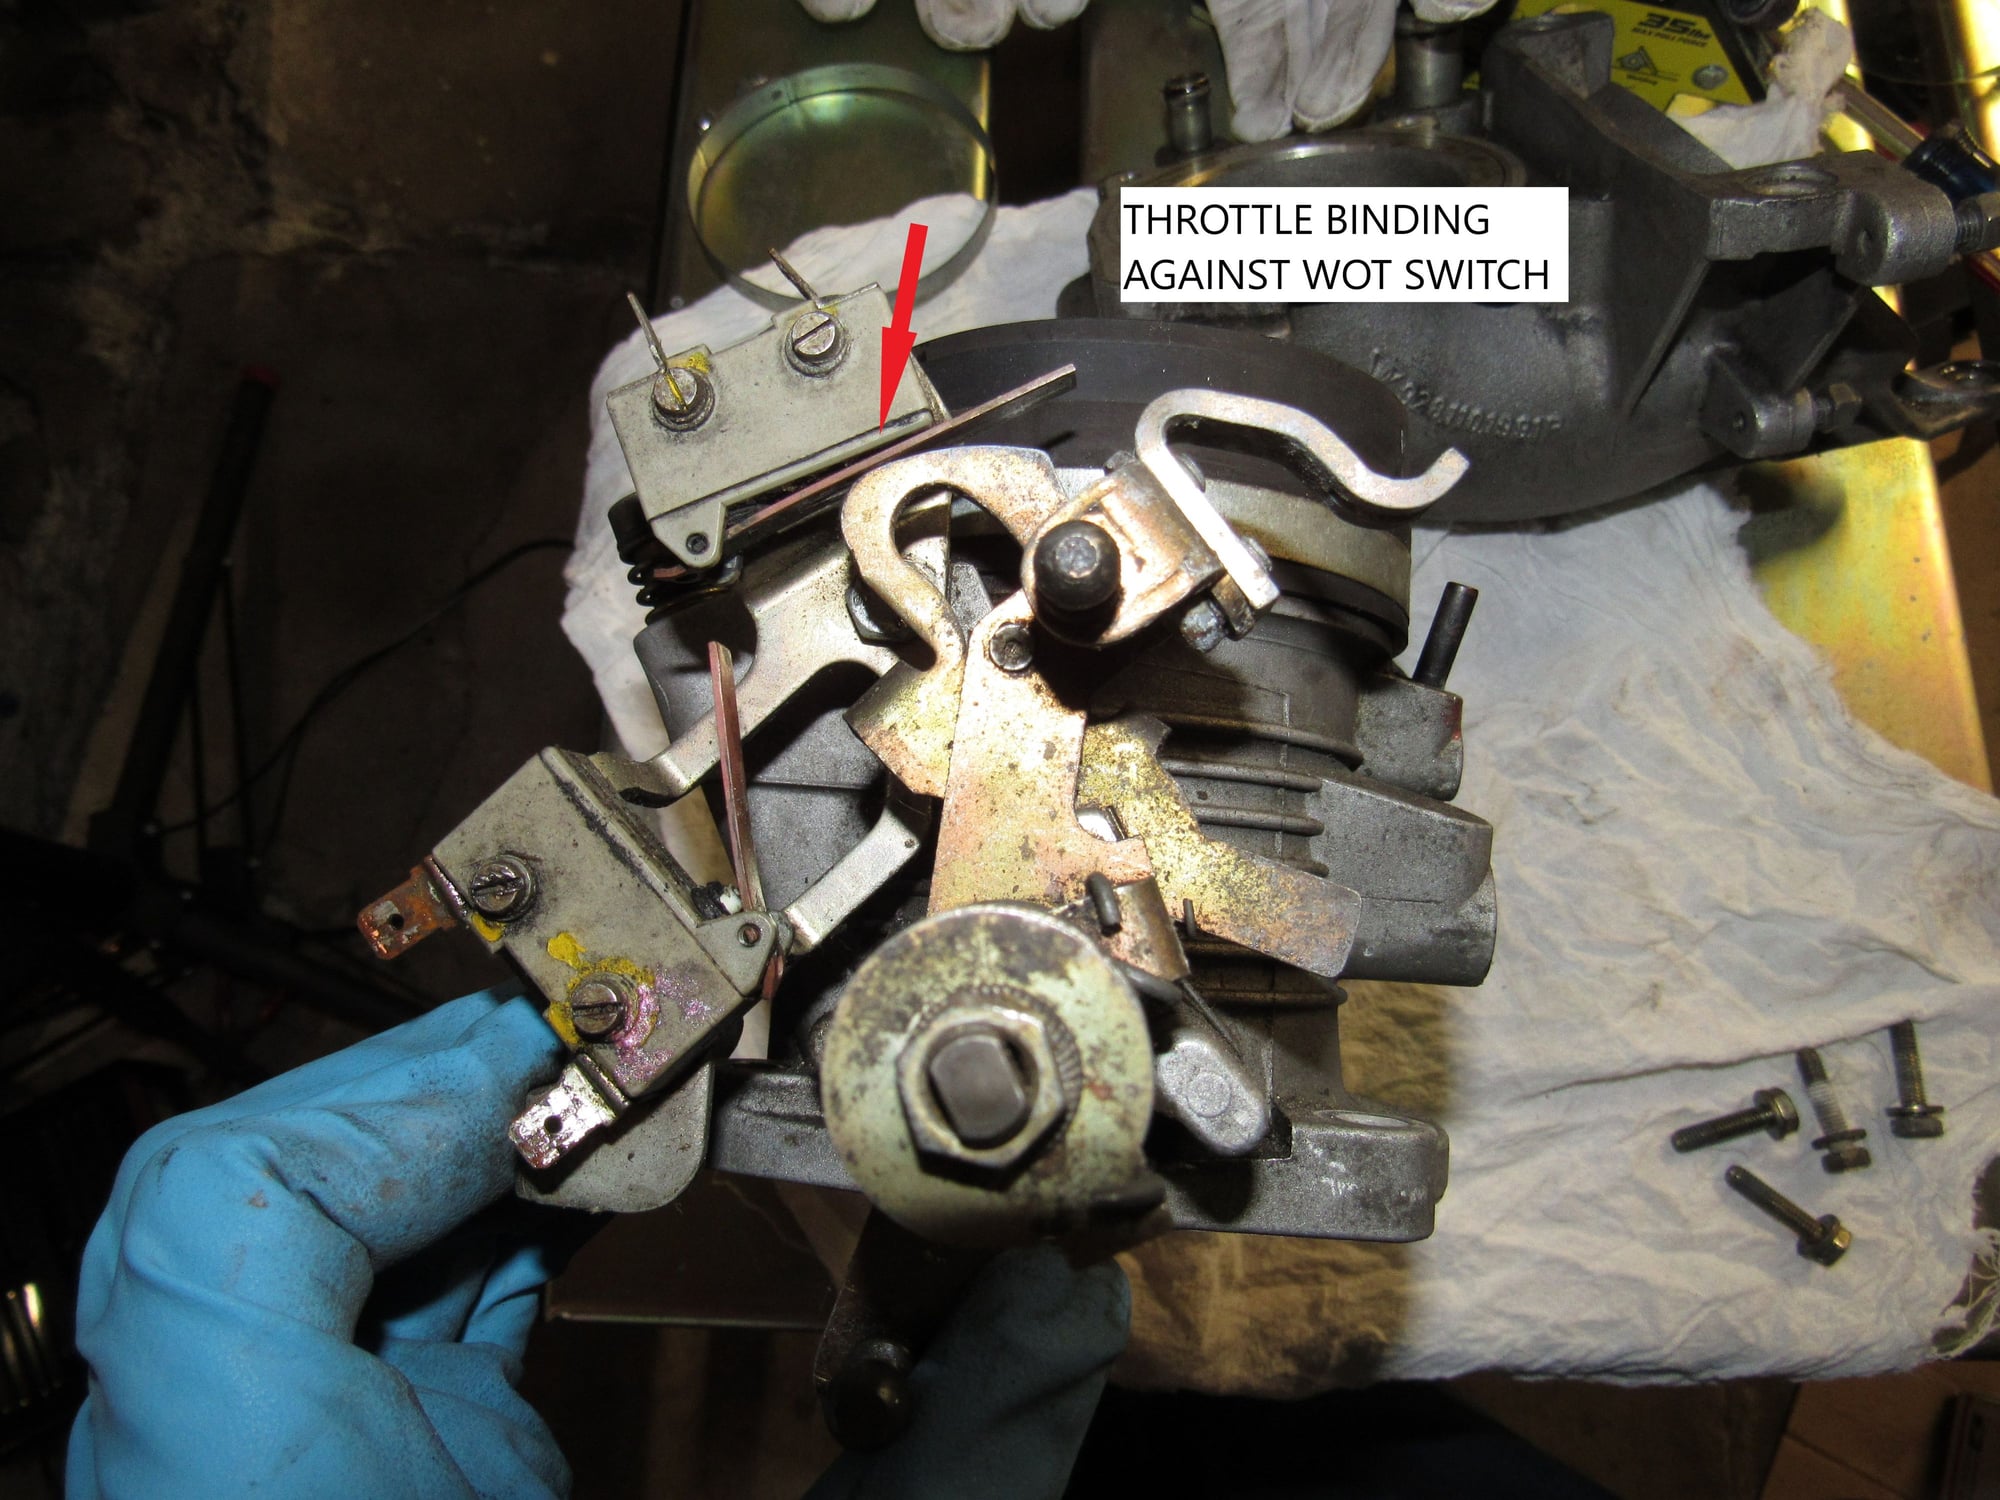
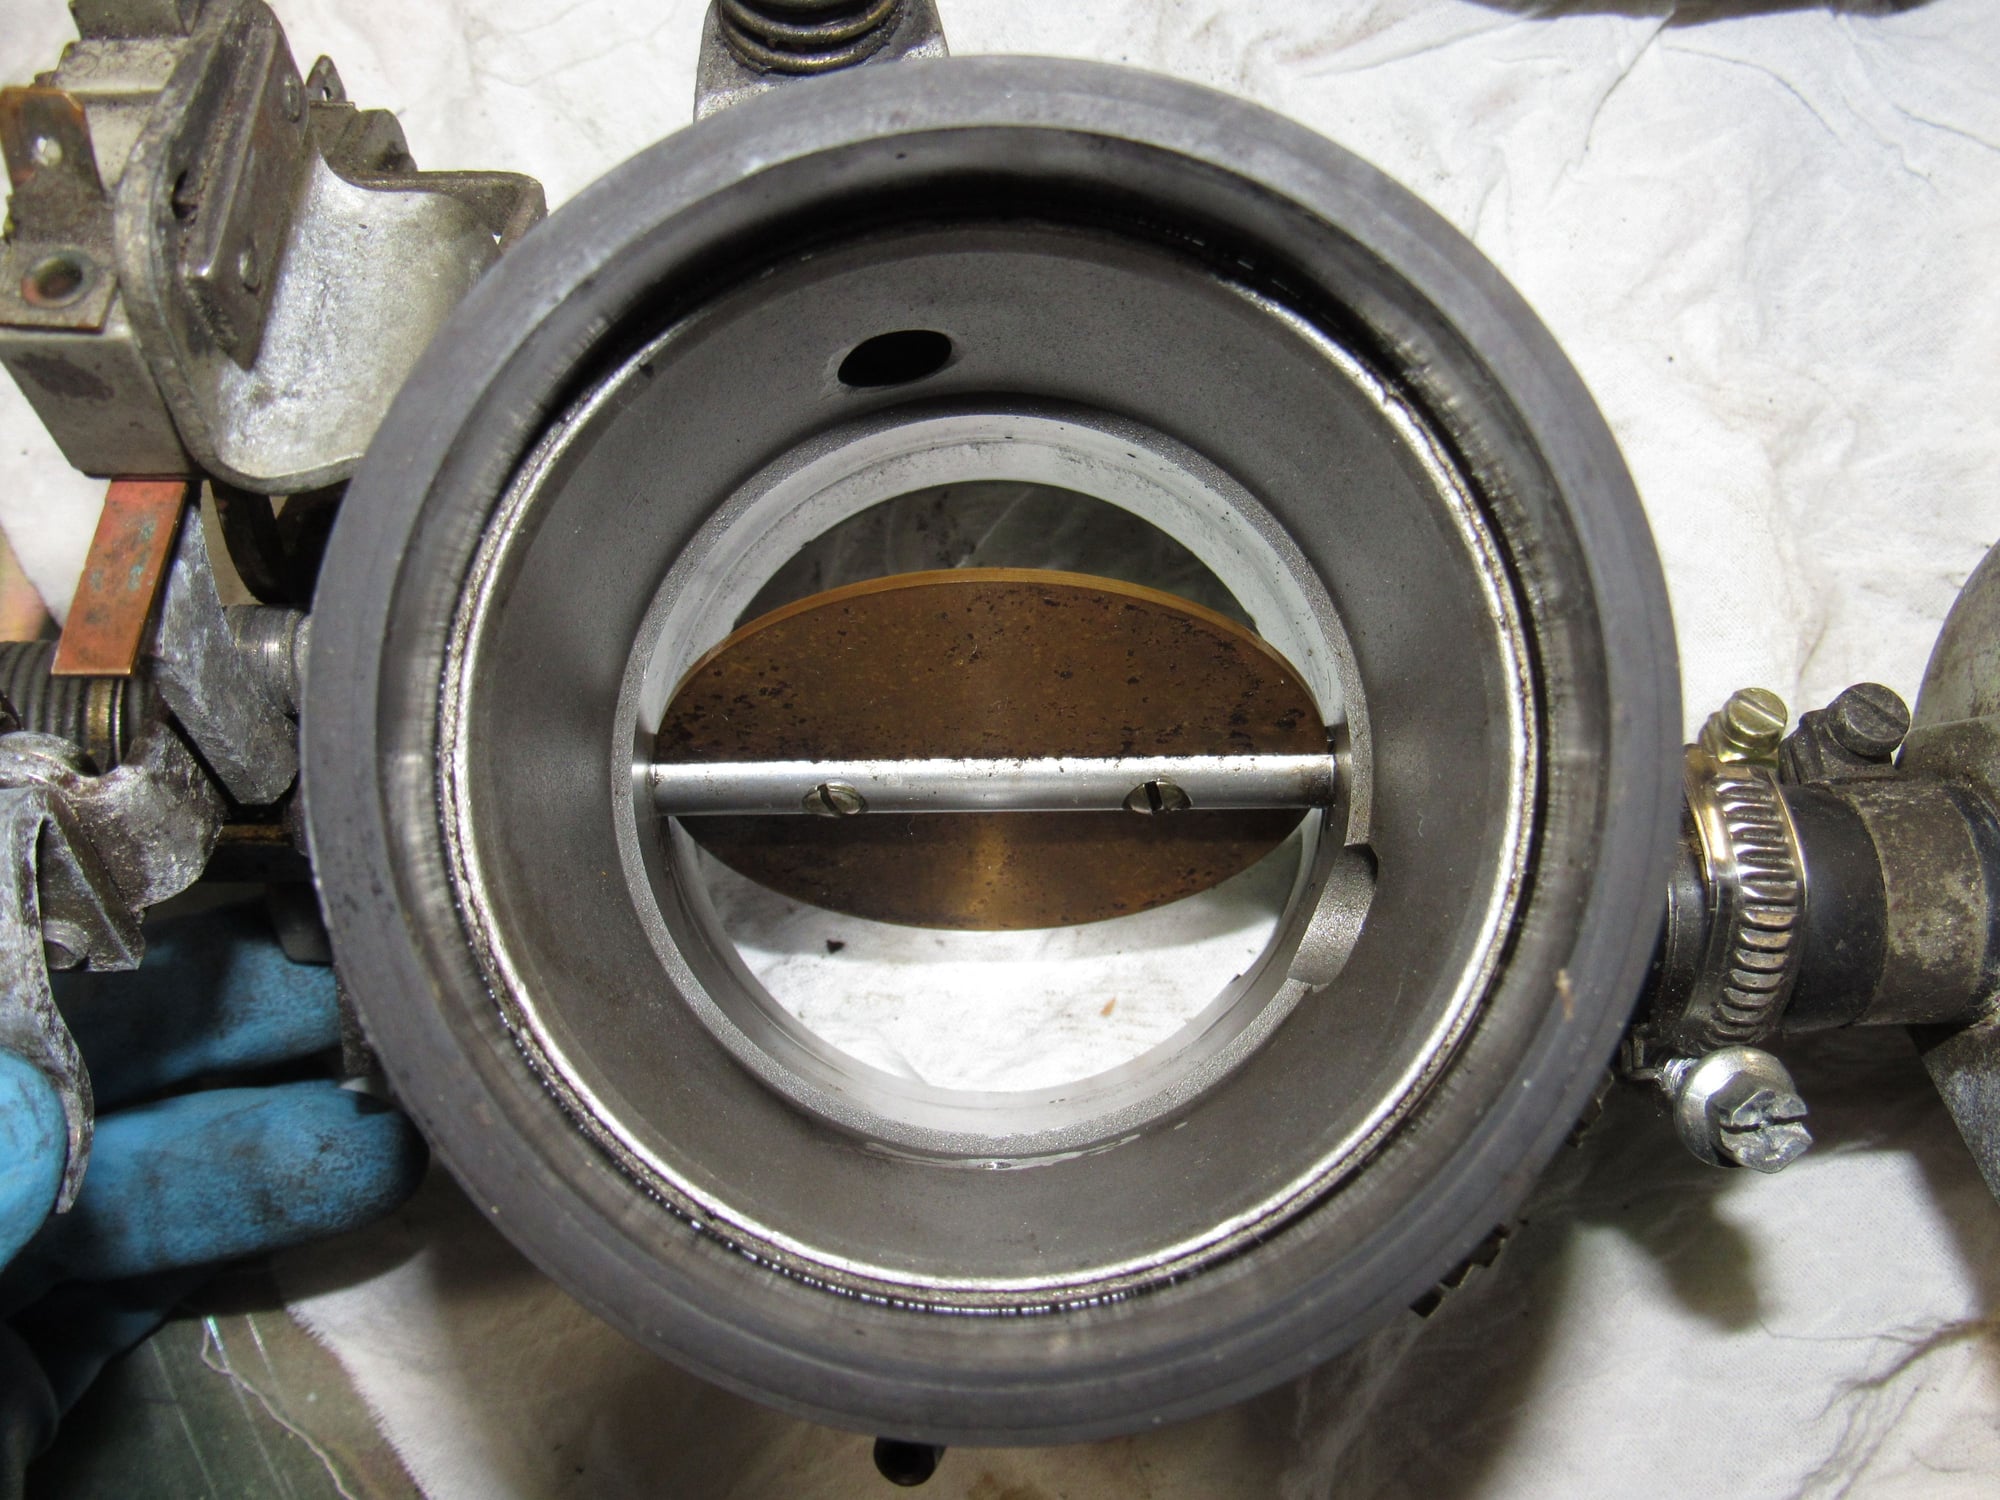
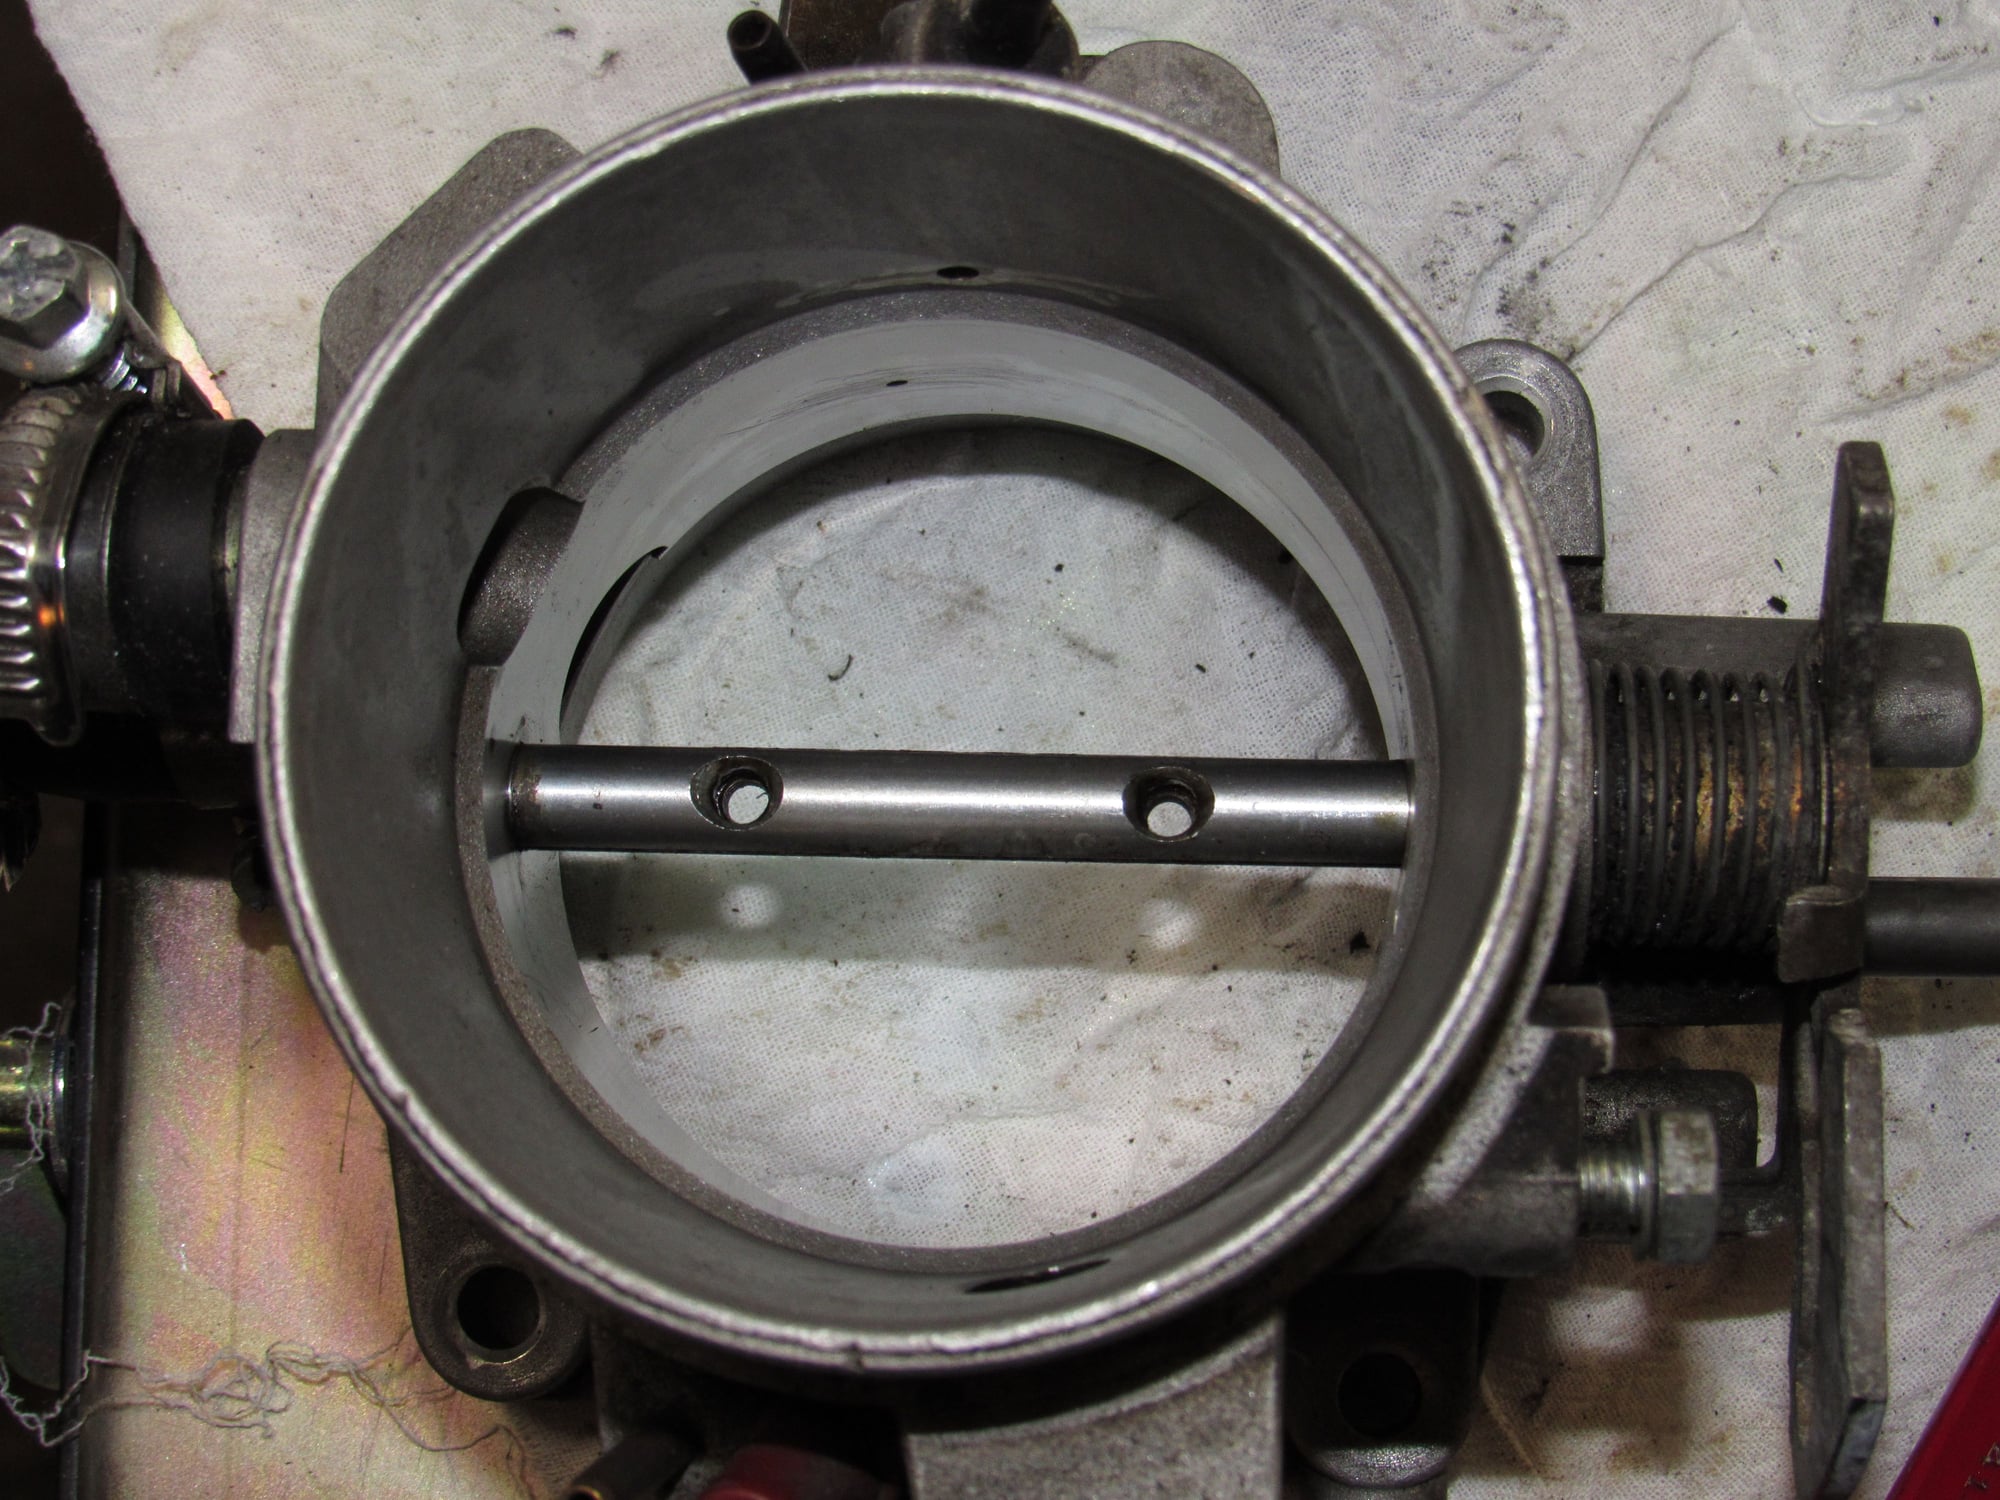
On to the throttle body. I was planning to disassemble and replace bearings but it does not appear possible, or feasible, on the L Jet? In messing around with it I did notice that the position of the WOT switch impaired full rotation of the throttle linkage.
This is as far as the butterfly ever opened, I was probably missing out on some performance?
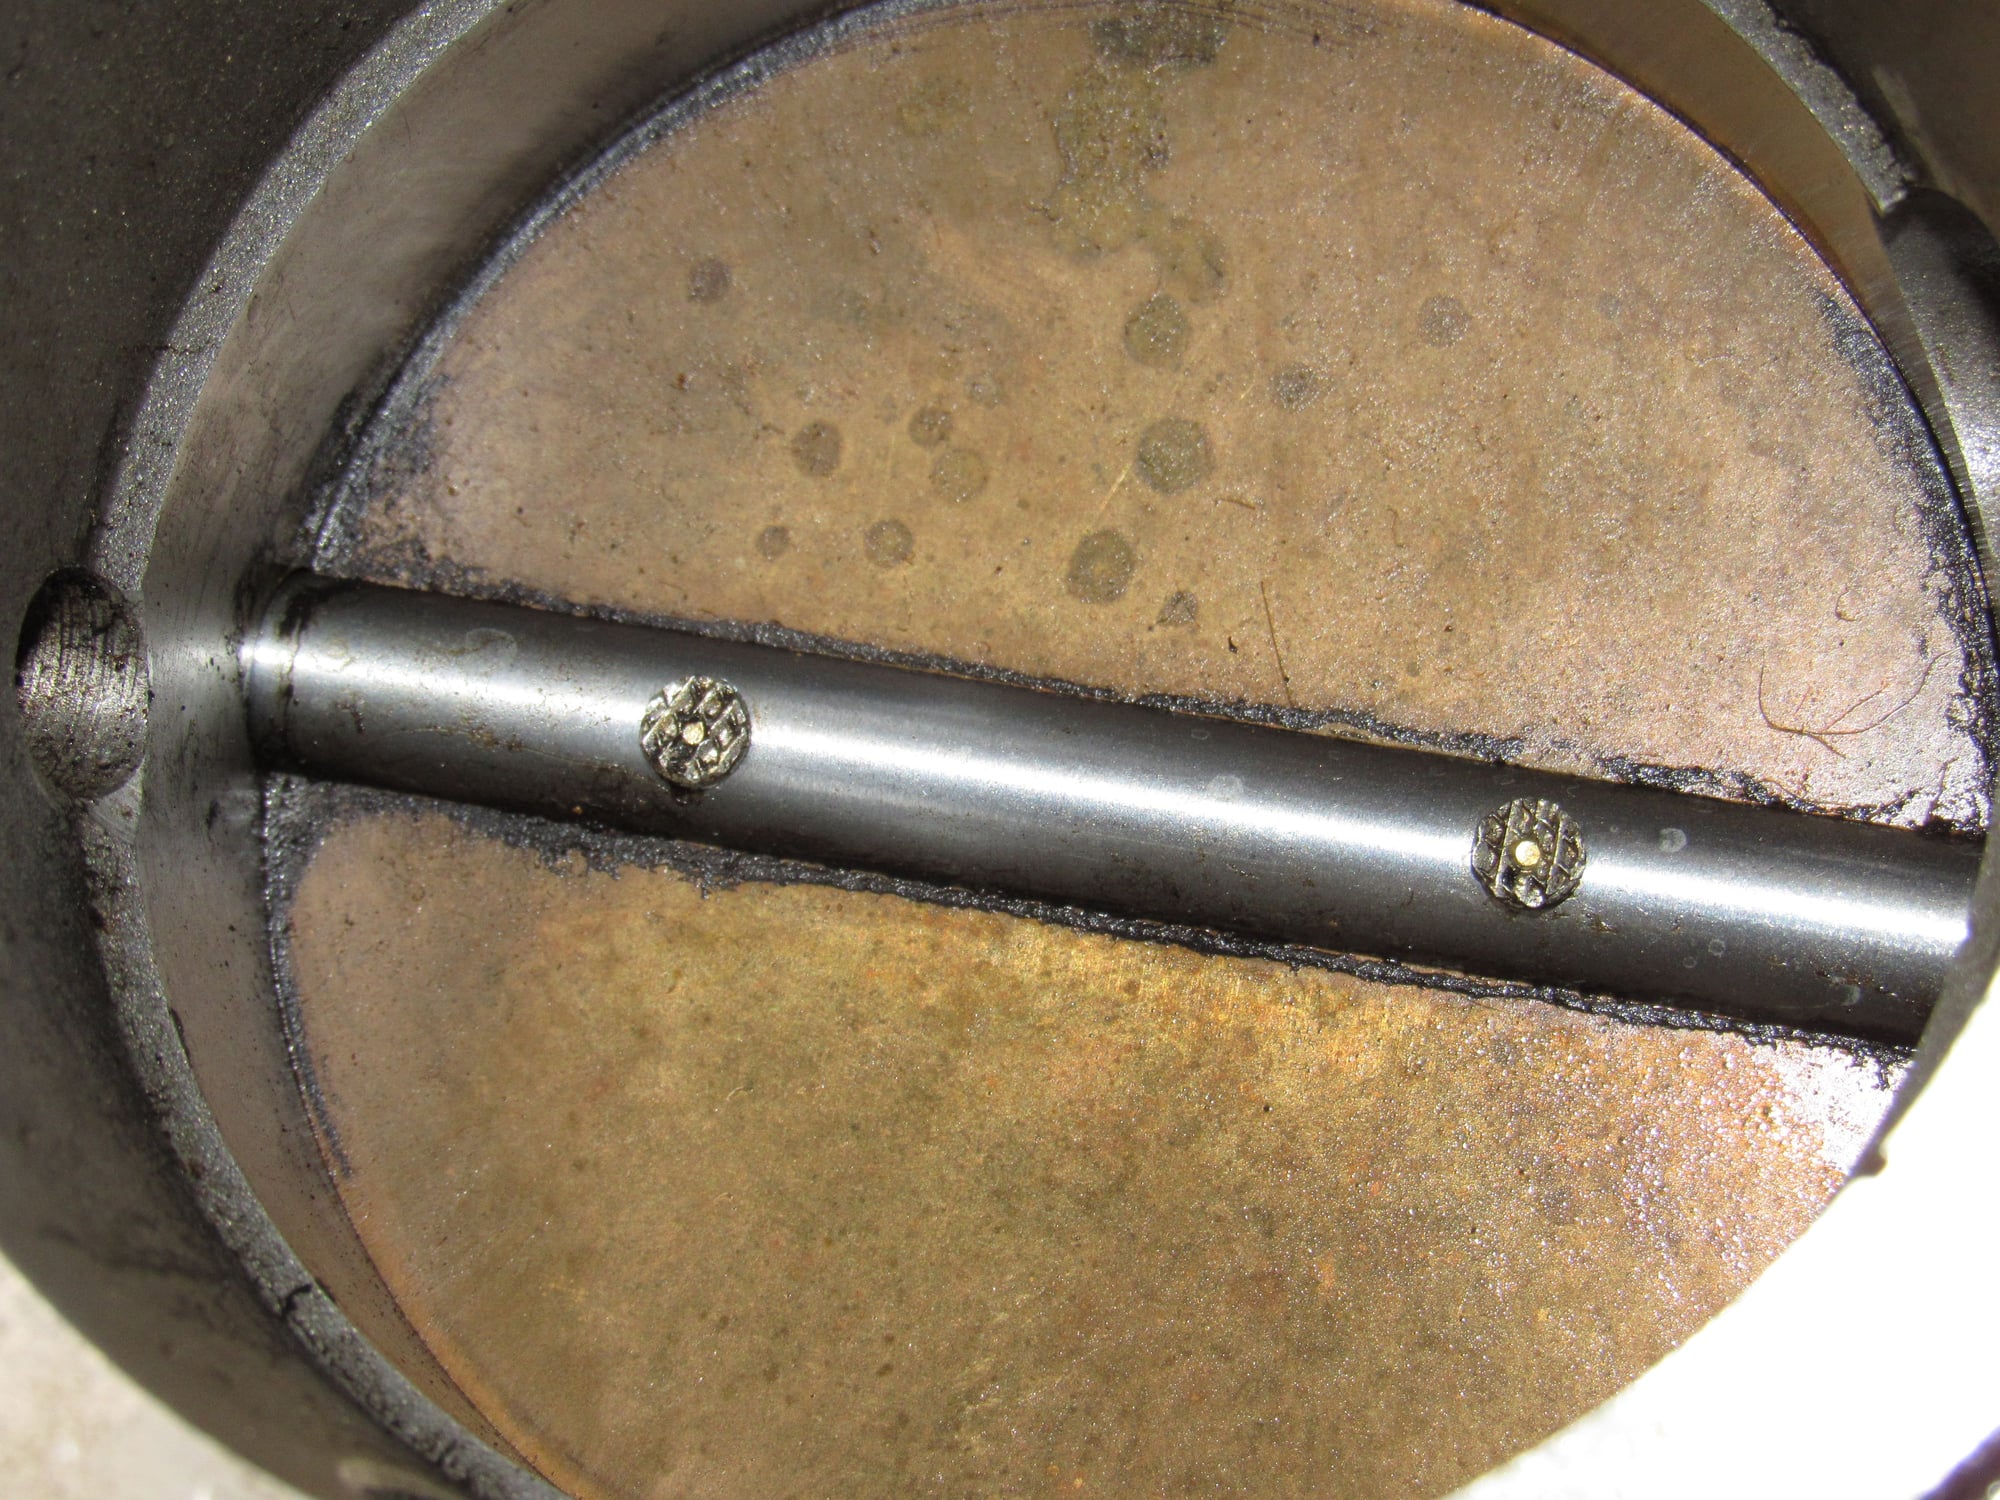
The ends of the screws holding the butterfly to the shaft are compressed to lock in. I gave it a try and unscrewed them without any trouble, I will Loctite on reassembly.
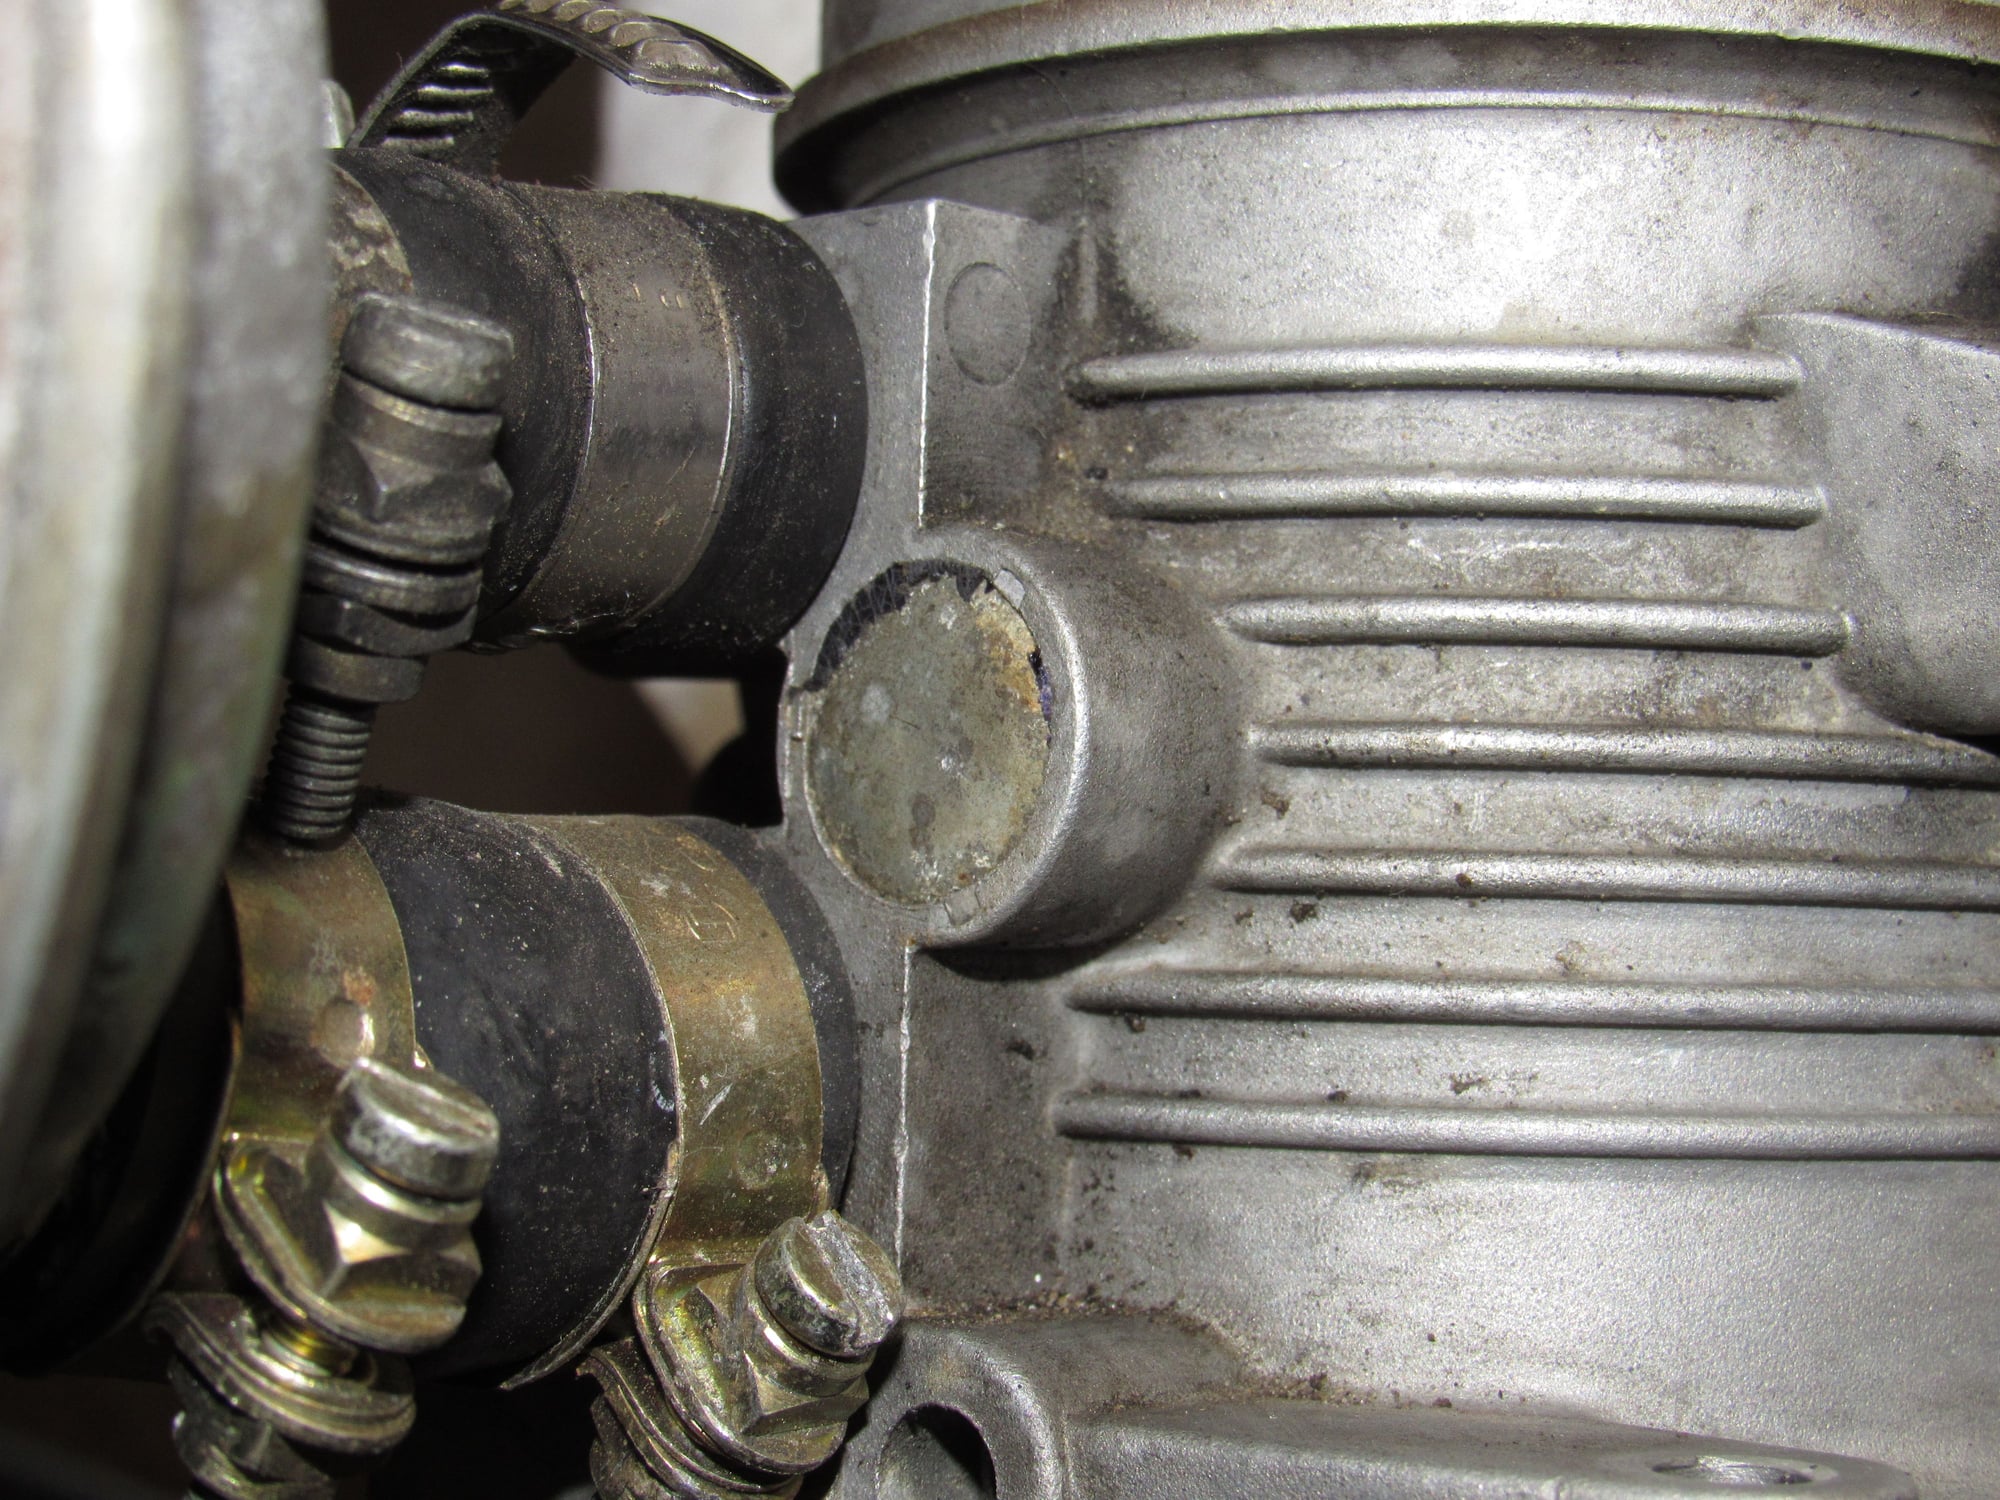
With the butterfly out I was expecting to be able to remove the shaft but it is locked in place by something beneath this plug. At this point I don't think it is worth pursuing further.
Good job Moose!! I like that you even replaced the booster and master cylinder, and very impressed that you removed the entire intake. Yeah you should be getting full open throttle. But rather disturbing about that cylinder
Have you considered replacing your Ljet harness and your engine harness? Those look original. Also Roger has a few original Porsche little harnesses that feed the idle up air valve. I�m replacing all those plus the green wire to hopefully be good for another few decades!


 09-03-2018, 11:24 PM


 Though the final gear ratio is actually a bit lower than the old gearbox it feels like 1-4 are spaced closer together. There may be a bit of a break-in period as the shifter is a little notchy but they go right in.
 )when I couldn't find grip in 2nd gear on the wet roads.

 I will dig into this winter.