When you click on links to various merchants on this site and make a purchase, this can result in this site earning a commission. Affiliate programs and affiliations include, but are not limited to, the eBay Partner Network.
In defence of the LPD though - they stand by the work they do. I have so many bad experience with mechanicals from so many different places I am so over it (and have been driven to DIY and Rennlist). The LPD has never disappointed in quality. Some years ago I had an S3 transaxle rebuild go wrong (3 times) and the LPD charged $0 to reinstall it 2 out of the 3 times even though it wasn't their fault the rebuild didn't work.
So when it comes to my timing belt I will be going back to the LPD - because they've earned my trust. And after doing a few of my own mechanicals I think I've worked out why I've had so many many bad experiences - because it's bloody hard!
I’ve finally made it through to the end of John Pirtle’s Motor Mounts instructions. I can’t repeat enough how thankful I was for these. Having documented some of my own work, I recognise just how much harder it would be to detail every single step in a ‘colour by numbers’ format. But thankfully he did that as it makes it so much more doable for those that follow him.
To that end I apologise to those requesting ‘every little detail’ (up to about 87% now). Despite there being almost as many steps to button it up (37 through to 61) as getting everything off, and despite these steps taking a fair bit of time – I don’t really have a lot of great photos. As such I’ll concentrate on elements that aren’t self-explanatory (to an office worker like myself at least) and if/when I’ve done things that are parallel to the process.
To that end the biggest worry I had was that it would be a whole lot easier to take a bunch of parts off a car – than to make sure all the right ones went back on - and even harder to get them back in the right places.
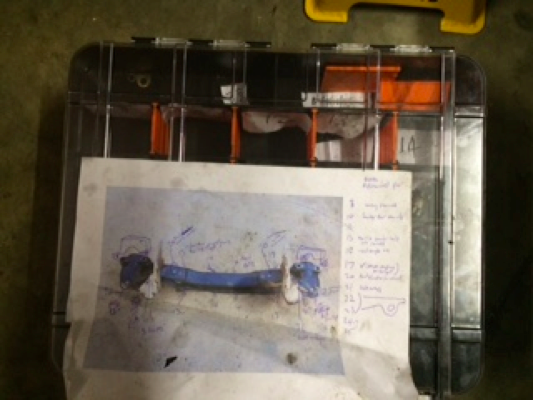
My strategy therefore was to label every part by the Step Number which it was taken off. Not initially, but eventually I cottoned on to the idea of writing that step number on a picture of the cross member which provided a really clear way to locate each part.
Parts box with numbers corresponding to John’s steps and a printout locating each of those steps
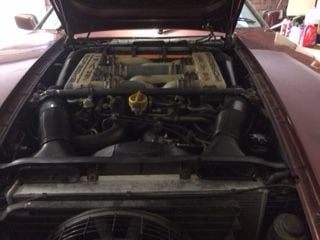
To keep track of what I had done to the car (especially keeping tabs on things like fluid levels) I would leave a note like this on the bonnet. Very helpful given the project took several weeks.
The first challenge was to get the cross member back in position. TheDeputy advised that this would be harder going up than down. You’re not just fighting gravity but also the wheel control arms. I found this may have been one of the few times having the car close to the ground (rather than on a lift at standing height) was an advantage. When you’re lying on your back you can use your arms feet and knees to position everything. Sort of, kind of, not really like bench pressing it up.
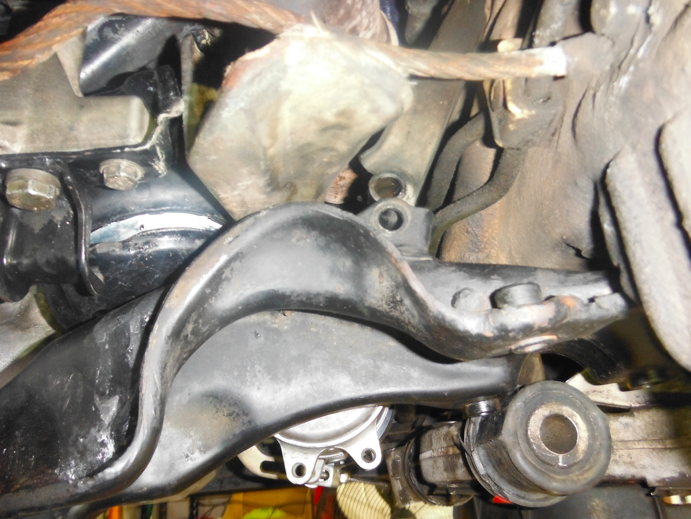
Next was to get the cross member up high enough to get the step 21/37 bolts in. Once you’ve got it semi in position the control arms are below it and no longer cause any difficulty. However it seems there’s no room for error in the position of the bolt and bolthole so that this half a step took a big chunk of my day.
I used a jack to lift the cross member up to the bolthole. Easy right? Noooo. The car would start lifting off its stands before it would reach the bolthole. I found I had to raise the engine lift higher and higher. Probably just a junior error but the new mounts were clearly a lot higher than the old ones (even though they don’t look that different when not under pressure). Once I got the height correct, to get the left - right positioning correct I used a small screwdriver to feel which side was blocked. It sounds easy to use a BFH to just shift it to the side, but to hit it properly I had to get out from under the car out to the side – hit it, get back under, check the fit, get back out, hit it again… (This step would be WAY easier standing up!).
Cross member too low and too far to the right of the Step 21 bolt hole
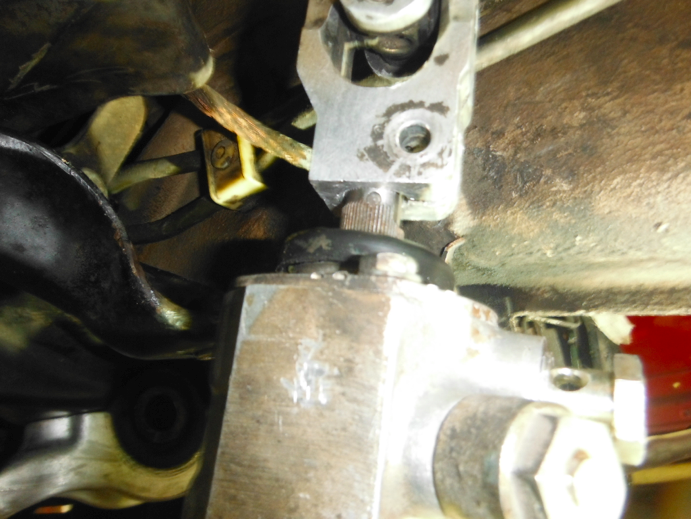
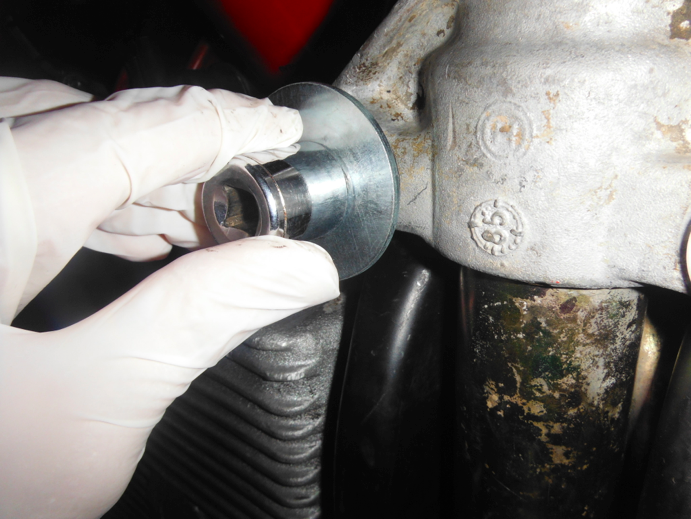
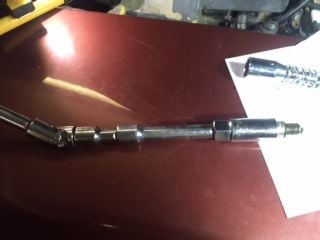
Now that the cross member was on the next challenge was to get the steering rack back on. The most challenging part of this was to get the rack to join up with the steering column coupler. In the picture below you will see a cut out on the right hand side of the ‘male’ end that allows the securing bolt to fit through the bolthole on the coupler.
At first I had this line up so it looked right but the thing wouldn’t go in. Given I needed a BFH to get it out I assumed I’d need some force to get it in. Wrong. Don’t use (crazy) force. I found if it wouldn’t go most of the way in rather easily (but it might go in say a quarter of the way) to stop, pull it out, change the position slightly and try again. Of course it took me a couple of hours and some Rennlist research to figure this out!
Next I brought the steering rack into positions for the Step 43 bushing bolts to go through. I developed a technique to get these bolts through the Delrin bushings. Basically I was worried about the difficulty in getting these bolts to line up perfectly with the bushings holes given the steering rack is tied to the coupling by this stage and you don’t have full ease of movement.
The technique is to only fit the top bushings in initially. This makes it somewhat easier to get the bolts in and then you don’t have to worry so much about this being a tricky jigsaw puzzle with one piece weighing 15kg and holding that above your head for an extended period!
Once you’ve got the rack in position and the bolt down far enough to thread a nut to it you can then simply wind the nut on until the bolt works its way all the way down.
You then can tap the lower bushing into place using a wide washer and a socket.
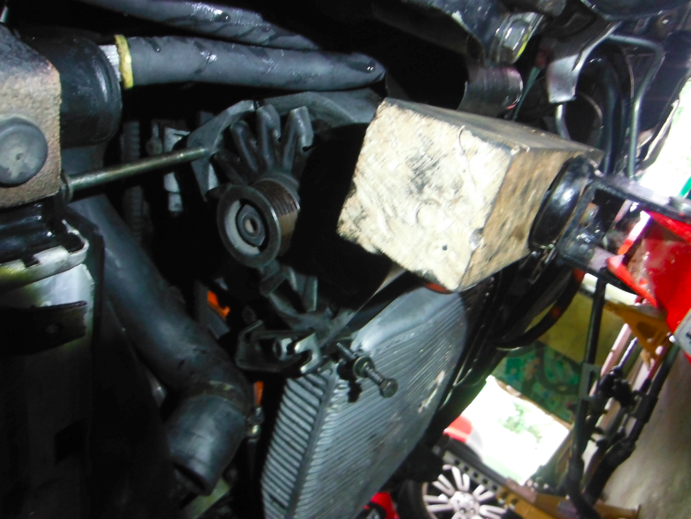
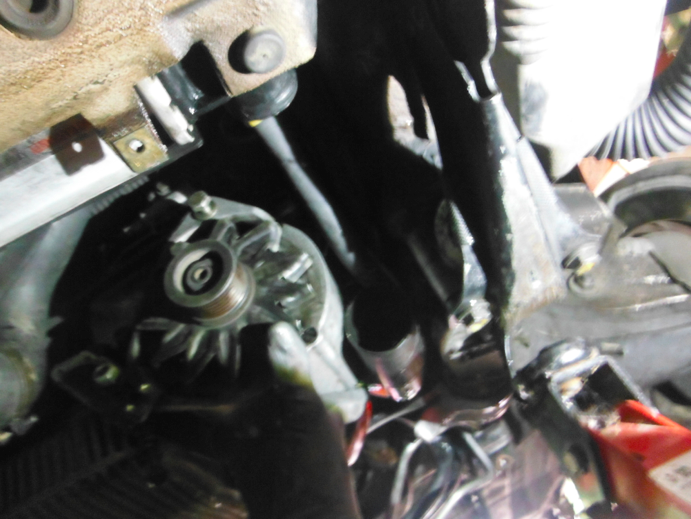
The next step I wanted to show you was refitting the alternator. I’ve mentioned before the coolant hose is in the way so shove that out of the way. Also as MainePorsche suggested I used a jack to lift it up to approximately the right spot.
But then at some point I just had to manually manoeuvre it in place by hand. Again a small screwdriver was helpful to figure out where the bolthole was off centre.
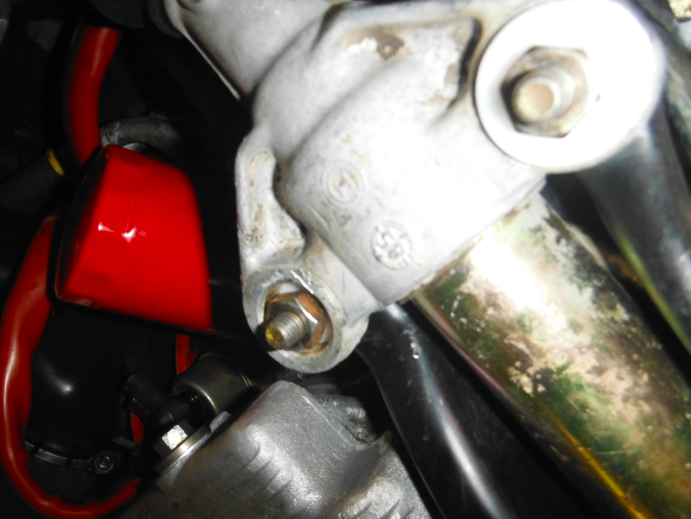
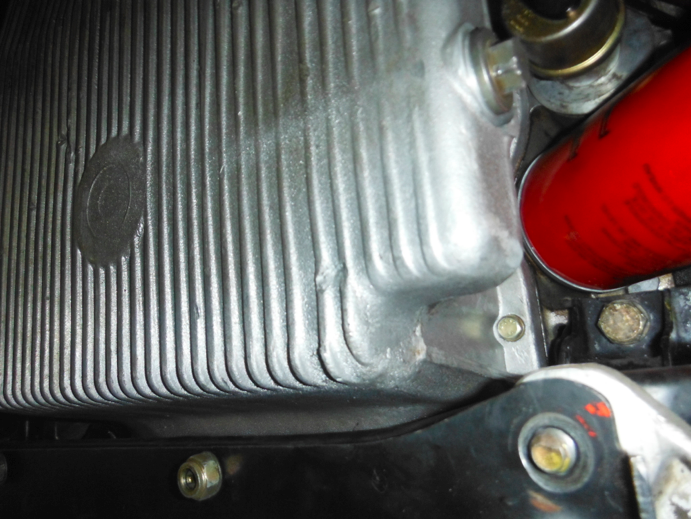
The last observation I’ll make is that I should have stuck exactly with John’s schedule for the buttoning up process. The only place I made a change was to put the oil back in before doing the steering rack. The reasoning for John’s order was made clearer to me once I had to counter hold the bolt head and the oil filter was in the way!
Last comment I’d like to make – I’ve had the pleasure of writing this one up watching Porsche sponsored Angelique Kerber win the Australian Open. How often does that happen?
Last edited by OPM928; 01-30-2016 at 07:38 AM.
Reason: Forgot a picture
A couple things that may help the next time around.
Crossmember and steering rack...a couple hatchet straps are your friend here. Position one on the opposite end in which you are handling/working and it will support some of the load. They almost work as another set of hands.
Alternator...it is best to never let the alternator hang from its wiring harness, bungee cord works great here, and for reinstallation...before you go to hang the alternator, push back the little thin steel collar located on the rear upper mounting bracket (ear) of the alternator housing, just hit the collar with some lube and tap it rearward (but don't use to much force...because housing could crack). This will open up the opening needed to slide the two ears of the alternator over the engine mating bracket. The steel collar will again slip into position, against the mating surface, as the upper carrier bolt is tighten.
Steering rack knuckle...yes, be sure this is aligned properly and tight...and I repeat...tight. This is one area where looseness could cost you your life. Using lock tite on the threads of the securing bolt is recommended.
Very nice write up and pictures, surely will help the next unsuspecting soul that goes to tackle this job. You sure do have a nice clean car, that makes things better in the long run.
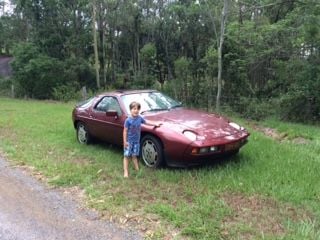
Just old enough to be helpful and think that dear old dad (or granddad in my case) is wise and wonderful. Once they get older...they begin to question everything you do...or give you the "look". Some of my fondest days spent in the garage are with my eight year old grandson.
While I was happy with the crossmember, this would have been such a help for the steering rack.
it is best to never let the alternator hang from its wiring harness
Right. I've done my research on that now. You don't want to break the blue wire. I don't think that's happened in this case. There was plenty of slack in the wire - but not something I'll want to risk for next time.
Steering rack knuckle...yes, be sure this is aligned properly and tight...and I repeat...tight
I think I'm now Australia's largest user of Permatex Blue (same as Loctite blue). I wouldn't say I'm the most proficient at understanding which strength to use where. I know MainePorsche recommends L574 for some of the intake refresh (which I've ordered) but I figure blue stops things working loose from where you've originally torqued them, but you can break the bond should I or a future owner wish to replace that oilpan gasket again! I'm also using torque settings where I can find them. But for somethings I found wildly different points of view.
Some of my fondest days spent in the garage...
I completely agree. I can't believe how much they can learn at this age. But yes, it won't last forever. I'm already planning for middle age crisis Part 2 (without him...)
I've just uploaded a video of the engine idling on start up. It's been a long while since I've heard my or another 928 engine so I can't be sure what to expect. Occasionally the engine hunts (including when it's in gear on low revs) but it's settled down reasonably quickly.
There's also a definite 'tick,tick,tick,tick' noise coming through (you may need headphones to hear it clearly though). I presume that's the injectors.
The sound is very low in the video, but I can hear a ticking noise coming through. Sounds like a tappet, just by the constant nature. Does the noise speed up in relationship to RPM's? And, does it seem closer to the top of the engine?
Did you have this noise prior to the repairs made recently?
Could be a slight exhaust leak, but normally they will subside or fad away as the engine temperature increases.
If the car has been sitting for a long period of time, you may want to run an additive through her...to loosen up any sticky tappets. I believe you mentioned changing the oil, but I haven't gone through the topic to check, and maybe you chose the wrong weight oil? I've read on here where these cars can be kind of particular on oil weight...but I personally haven't had any issues in this area.
I was planning on doing another video to record the engine under increasing revs. Unfortunately it's been a non-starter today. The symptoms are suspiciously the same as prior to me bypassing the intank fuel pump. Now that I've put a new intank pump in I think that may be the problem.
Ticking noise: I used a mechanics stethoscope on the cam covers yesterday and all I could hear was a smooth whirring sound (presumably of the cams). Deputy, you may have noticed I edited my post probably at the same time you were replying. Clearly I'm hoping its just the injectors.
Oil: Castrol Edge 5W-40 SN (fully synthetic) with Titanium
ATF/PS: Castol Dex III ATF
Brake Fluid: Castrol React Performance Dot 4
Diff: Nulon 75W-90 GL-5
Coolant: Nulon Blue Long Life. Organic Additive Technology. Phosphate, Silicate & Borate free (actually I'm still flushing the green colour out of the system so the new blue is not yet in).
I also have some Nulon 'Total Petrol Fuel System Cleaner' which I will add to the tank. I've previously used this to help clean the fuel tank. Contains: Methlcyclopentadienyl & manganese tricarbonyl
While I'm waiting for my intake refresh supplies I thought it would be a good time to do some pre-testing. I'd particularly like to do a compression test on each of the cylinders - and while I've been able to get the starboard (ie right side facing in the direction the car travels forward) plugs (1 - 4) out easily, 5 & 6 which are on the port side appear to be buried behind some piping. I'm trying to figure out whether I need to undo & redo (and later undo for the refresh) this piping for the compression test - or is there another way? I'm a bit nearvous about creating a fire hazard by mucking about with old pipes!
Me old mate Ed China does the compression test without any of the plugs in which he suggests gives the most accurate results. Not sure if that's true?
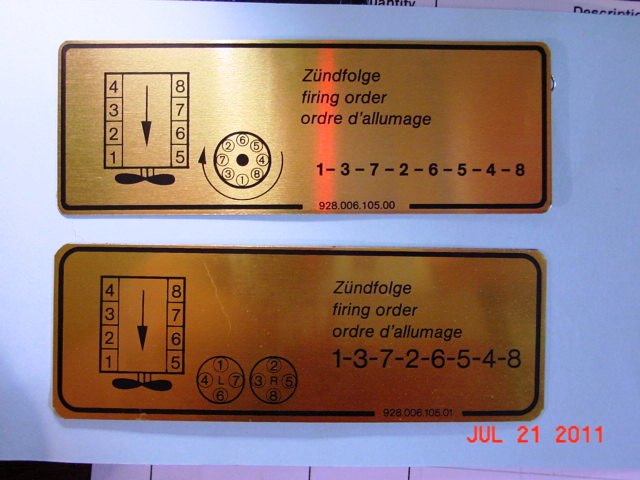
I'm assuming the following cylinder orders (although Ferdinand no longer has one of these stickers)
For those interested - I've used a Stanley flexible 21mm spark plug remover for 1 & 2 which was fine but I had to fit together various pieces from a Sidchrome socket set for 3 & 4.
And Deputy - you're wife must be wrong. It can't be you that's the issue. I'm pretty sure I'm to blame.
Not to worry about the ticking sound. My Aus delivered 86 makes exactly the same tick and it comes from the injectors. I spent a while hunting around with a stethoscope to confirm the noise source after my intake refresh some time back.....
It's a bit disappointing, cos you really want to hear a manly rumble coming from your V8 when you pop the hood, not that ticking sound!
Thanks Booney. I don't mind loud injectors. I do plan on getting them attended to one way or another. I've done some cylinder compression and spark plug gap tests. The results:
Now some would say these numbers are within 15% percent and therefore 'pass', but I consider cylinder 5 (and maybe even 2) to be an outlier:
One of these kids is a little bit different.
I plan on doing a 'wet test' tomorrow https://rennlist.com/forums/924-931-...sion-test.html to see if that makes much difference. I believe this can give some guidance as whether the rings/piston/cylinder or valves are not up to scratch.
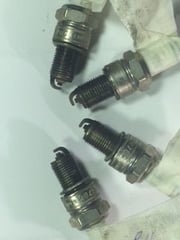
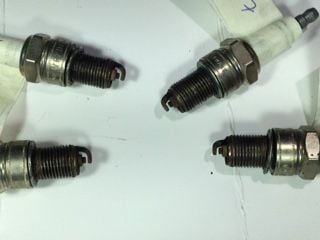
Some pics of what the sparkies look like:
Cylinders 1 - 4
Cylinders 5 - 8
They all look pretty clean - which I think is more of a statement that the car had a full services just before driving into the fallow paddock.
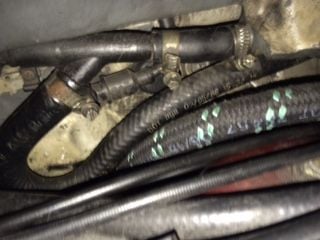
For novice readers (like me) I'll detail how I got to cylinders 5 & 6. Simply I had to remove (what I assume is) the curvy black venturi/brake hose that was sitting in the way of the plugs. With a little hot water at the joins it came off pretty easily. I am still genuinely surprised that it's so involved just to change a spark plug.
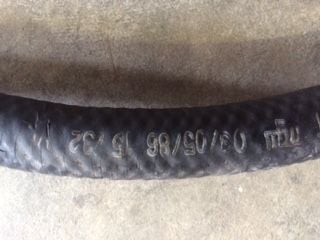
While that may sound simple, the hose manufacturer kindly wrote the date of manufacture. It's a genuine original part. 03/05/86. Good for concours?


 01-28-2016, 07:22 AM