When you click on links to various merchants on this site and make a purchase, this can result in this site earning a commission. Affiliate programs and affiliations include, but are not limited to, the eBay Partner Network.
Thanks Jeff. That's reassuring. I'll still put in some Fuel System Cleaner once I give the car a full tank of petrol (which wont be for a while though).
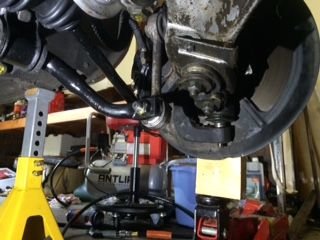
Finally got around to doing the lower ball joints today. Not sure why but I'd been avoiding doing these for a while.
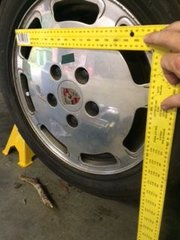
First step was to get some basic measurements of the wheel geometry just to make sure the wheels didn't go back on too badly. (But if I didn't need an alignment before, I will now!).
Bottom of ruler needs to finish up here!
Ball joint remover tool goes here:
I positioned a jack to keep the rotor pretty much in the same place the whole time (on the second wheel I did this before using the ball joint remover - and on cue it lined up to its original 'position' much easier).
Then the new ball joint arm went right where the old one came from. I used a technique from Dwayne's bonnet removal tutorial to reposition it (ie don't clean the old gunk off as it will show you the outline of where the old one went).https://rennlist.com/forums/928-foru...re-w-pics.html
You may notice the only (serious) box left to be ticked is the crank/cam shaft seals + cambelt tensioner gasket.
I've decided to add a new timing belt into the mix and that means I'll most likely take the car to the LPD for that job (which will include a new water pump and of course the crankshaft seals and cambelt tensioner & gasket).
That just leaves me the cam shaft seals (if I understand the layout correctly). However instead of just doing the minimum work that would require I must have read one too many Rennlist threads and have decided to do the intake refresh. Seeing some 30 year old pipes looking a little brittle makes that a pretty convincing argument.
While I'm waiting to receive my intake replacement parts I've finished the compression test with the wet test. Not sure what that's achieved though. The results were all up but seemingly very random results (influenced by how much and how long the wee shot of oil was).
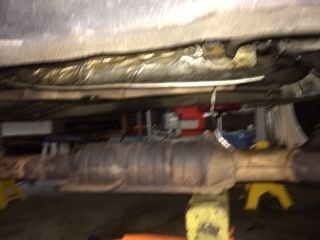
I've also managed to get the exhaust mostly down (I'm just waiting for the WD40 to let me unlock the oxygen sensor. When this is out it means I should be able to change over my transmission cooling pipes which appear to be overdue. I'm also keen to have a look at what I can do to help reduce heat coming up from the cats in to the cockpit.
I won't throw those old ball-joints away. Not sure whether or not they will always be available. I know there would be a bit of a shipping cost, but Mark at 928international has found a source for rebuilding them.
Just food for thought...
Good job, on another successful mission. Haven't had a chance to listen to your video on something with better sound quality, this darn tablet is pretty poor in that department, but it seems like the general consensus is...it's just the injectors. So, that is nice to hear/read.
On the face of it the USD32 that I spent to join Rennlist was the best money I'm ever likely to spend on the car. However that ignores the time that people like you that have volunteered to help me. I can't thank you enough.
I won't throw those old ball-joints away.
That's a cracking idea. I'll keep them with the original radio.
Thanks again Deputy - and to everyone else who's contributed.
There’s been a fair bit of water under the bridge since the last update. I’m well into the Intake Refresh – but far from completing it (as they say it’s easier to take stuff off than it is to put it all back on the right way).
Now that I’ve done the Motor Mounts (and OPG, steering etc) I realise I have been fully spoilt by John Pirtle’s step by step procedure. What’s made me most nervous about the intake is John’s precise MM procedure was a mere 7 pages long, while Mike Frye’s Intake is 18 pages long and Scott Yoo’s is even longer.
After sifting through the parts supplied to me by RT I realised a big part of this job is simply making sure you put the new part on where the old part came off – and there is a lot of parts. I’ve therefore treated this job more of a databasing one than the Motor Mounts.
I’ve spent hours going over every part sent to me, and where each part fits in the PET diagram.
Given I am yet to get this all back together, it’s way too early to claim this as a successful strategy – but at the very least during the process of taking everything off I do have this deja vue feeling that I’ve seen this all before.
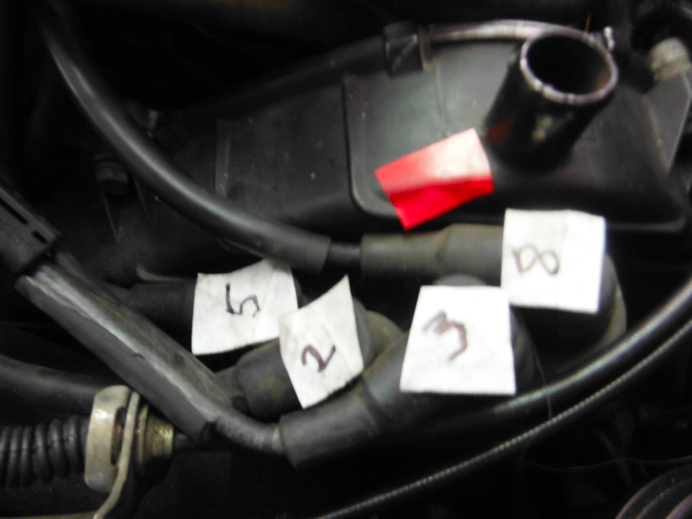
The first step in this process is to catalogue and number each new part with an R (for Roger) number. This should make it easier to identify and remember each part than their 11 digit P-number.
Next step is label the R numbers on the existing parts before taking them off. I hope this makes it easier to get the new ones back on in the right place…
The next little technique I’m using is to add red and green markers all over the place to signify whether a part is on the port or starboard side.
Next we get serious by taking some stuff off. The plenums are what Mike and Scott recommend to start with.
I shot the plenums, but I swear I didn't shoot TheDeputy!
Then it’s off with the pipe organ:
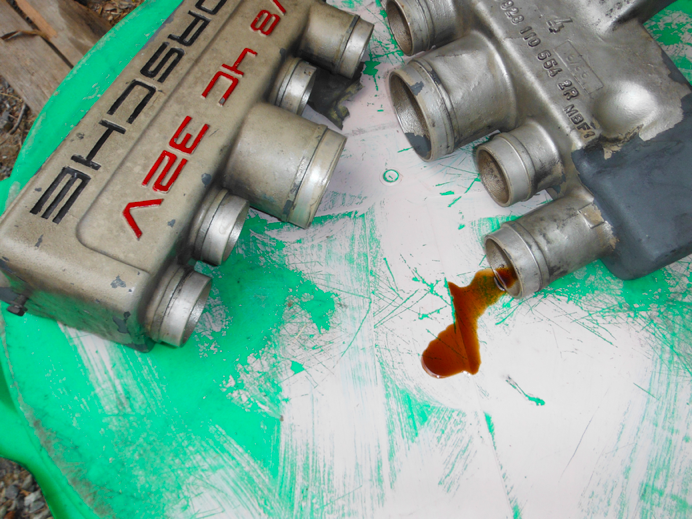
I’ve now managed to get the intake pipes and throttle body off, leaving me with the privilege of getting to the V8’s V-valley.
I’m strongly suspecting this is where a major oil leak has come from:
I note Mike indicated that the metal baffle and o-ring is NLA – cripes!
Plenty of confusion going on within that engine bay, for sure. This is where a nice digital camera comes into play, take plenty of pictures along the way. And marking things, as you have done.
Thanks Deputy. In this process I am always taking your advice to take things slowly (and take lots of pictures). I have a long drive scheduled next week, and by not rushing to finishing the job I hope to do a fair job on getting the car serviceable but Ferdinand unfortunately wont be joining me just yet...
Interesting things you find in your engine bay
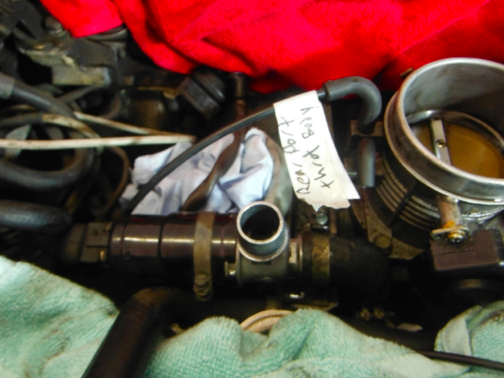
One of the reasons I decided to do the intake refresh was to see what had gone on in my engine bay before I turned up. And to be sure, I've found a couple already. The first is that the rear u-shaped fuel hose (928 110 271 00) is stamped with the concours friendly date of 11/1985.
I'd previously noticed that the fuel lines that are visible from the front of the engine bay are newer - which gave me a (false) sense of security that the 'fuel lines' had been replaced. I guess it just shows that unless you see it for yourself, they haven't all really been replaced.
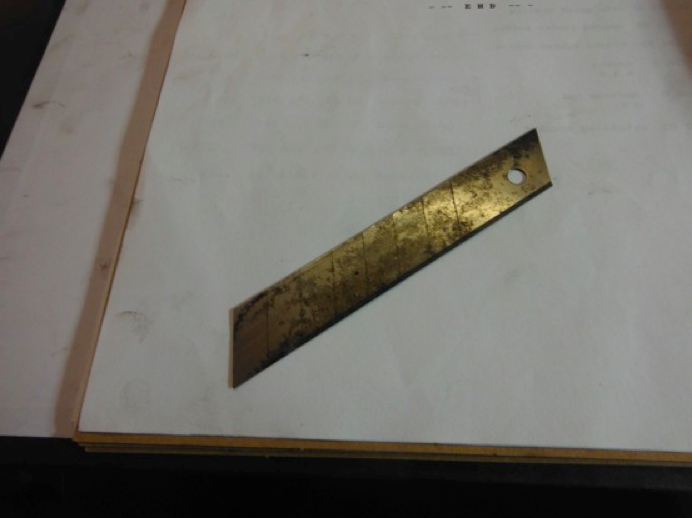
Now while I can't compete with those who've had a living creature living in their engine bay, I found evidence of previous craftsmanship with this razor blade found at the bottom of the V.
Despite overall slow progress over the last couple of weeks I have managed to get the cam covers off. (Hat tip to Scott & Mike for their procedures) Chain is tight and pad looks thick and smooth. Anything else I should be looking for?
To make sure I get the right bolts back in the right hole, I've borrowed I technique I saw from Edd China (Wheeler Dealers).
Bolts in a cardboard sheet.
Another success. I think I found the source of the front starboard oil leak into the exhaust manifold. Definitely from the cam cover seal. Here's the corner it came from.
Starboard cam cover + starboard engine lift point (before cleaning)
"Chain is tight and pad looks thick and smooth. Anything else I should be looking for?"
Oil return check valves. I found the spring seat very worn in my 87. I assume the 86 has the same design. they are a PITA to get out while the engine is in the car, but while you have the cam covers off you may as well check them. There is a post with photo's on rennlist somewhere.
For the baffle under the metal oil filler neck - remove it and try and keep it together as one piece. When you replace it sandwich it between two of the earlier card oil filler gaskets - works a charm.
__________________
Does it have the "Do It Yourself" manual transmission, or the superior "Fully Equipped by Porsche" Automatic Transmission? George Layton March 2014
928 Owners are ".....a secret sect of quietly assured Porsche pragmatists who in near anonymity appreciate the prodigious, easy going prowess of the 928."
Thanks for the feedback guys. Oil Return check valve sounds like a good idea.
Roger the baffle will probably have me baffled until I pull it all apart (which I didn't want to do until I got a better idea of what comes next). At least I am now less baffled why you sent me two card gaskets!
Separately, Scott has recommended I use Drei Bond 1209 for the baffle which in turn I believe was a GB recommendation. This stuff is really hard to get in Aus, (but I might try a BMW mechanic before giving up). This non-Rennlist thread suggests Permatex Grey as a potential replacement. http://www.i-bmw.com/showthread.php?t=13504.
Though I'm not keen to go against a GB/SY recommendation!!
Update: Had a slight issue with a mountain bike a couple of months back. Turns out bikes can't fly. (But I'm pretty good at catching them when they land).
That's slowed me down from doing some of the basics. The good news is I've got the cam covers and intakes back from the powder coater, have sort of refreshed the water bridge and sort of refreshed the throttle. I've also went to a local 928 day and seen a bunch of flex plates get checked are released which is good to know.
I'm probably not far off getting a proper update put together though. Bit jealous that your off the the races with yours though.


 02-04-2016, 06:39 AM


 George Layton March 2014