When you click on links to various merchants on this site and make a purchase, this can result in this site earning a commission. Affiliate programs and affiliations include, but are not limited to, the eBay Partner Network.
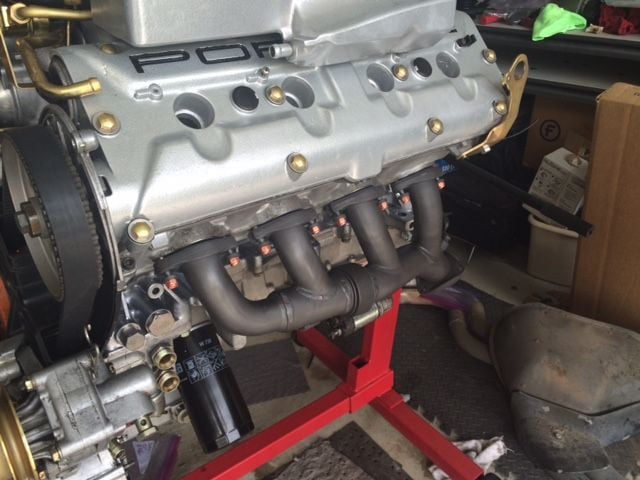
Exhaust manifolds going back on after dressing with Slip-Plate (similar to Calyx, but spray based instead of paste), pretty sure it won't last but it's cheap enough and doesn't require nearly as much prep as Calyx. Before I torque them down, are the manifolds directional? The only difference I can see is the location of the test ports being up or down.
Looks great.
The '85/'86 engines are quite a puzzle to put back together....you seem to have a good handle on it.
Thanks Don. I'm headed to Hawaii for a week so it's going to be a race to get ready for Sharks in the Park.
Latest screwup is that at the last minute I decided to send out the timing belt covers for powder coat, and I grabbed the wrong set not realizing that the covers from the 86 that's spare are different from my 85. Doh! Luckily I have a good PC guy who is relatively cheap and has fast turnaround so it shouldn't set me back much, but still frustrating to mess up like that.
I replaced the rock hard front harness sheething with high temp silicon / fiberglass stuff from Jegs. Was pleasantly surprised to find the wiring inside the harness was still in good shape. Is this the correct routing for the temp sensor wires? PO had them routed on the other side of the thermostat housing which resultied in a very tight fit at the connector and a lot of slack at the alternator. Also, is there a source for the harness clamps and can someone point out where they should go?
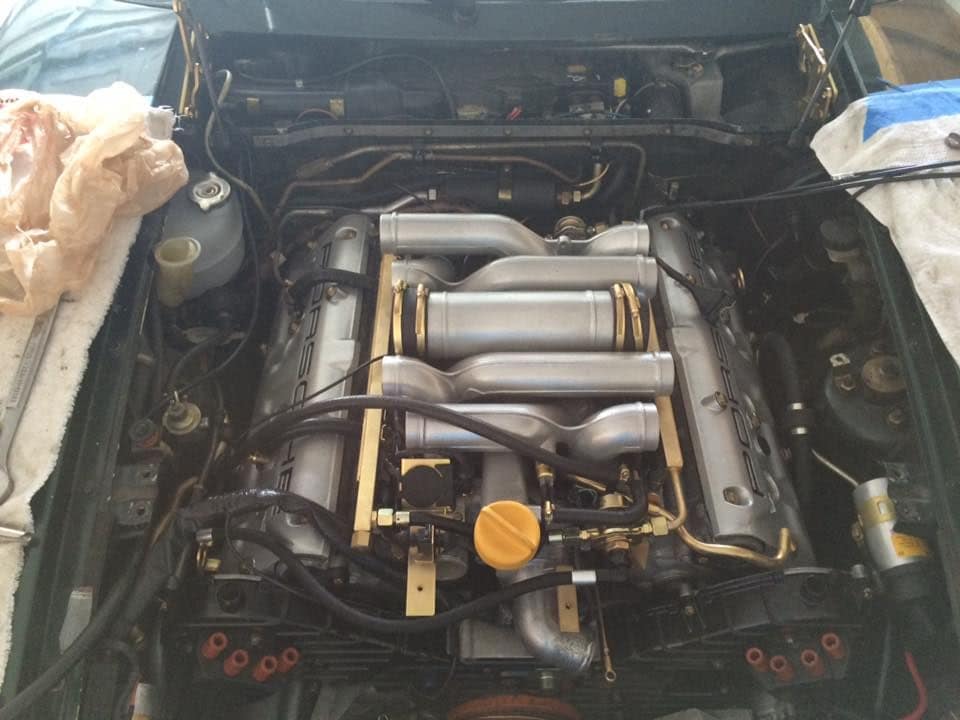
Bill Ball came down yesterday and we got the engine dropped in, things went mostly to plan except for discovering that my starter is going bad, replacement on the way. Today I got the fuel injection harness connected (I had left it in the car when I pulled the engine) and got the coils, rotors and caps in place. I defnitely learned my lesson about doing too much on the stand as to get the harness connected I had to take pretty much all of the fuel plumbing apart which was very annoying.
Next challenge is that after dropping the radiator in it appears my replacement oil lines are a couple of inches too long, going to try re-clocking them at the block as I had set them up pretty much level to the ground which is the shortest path to the radiator.
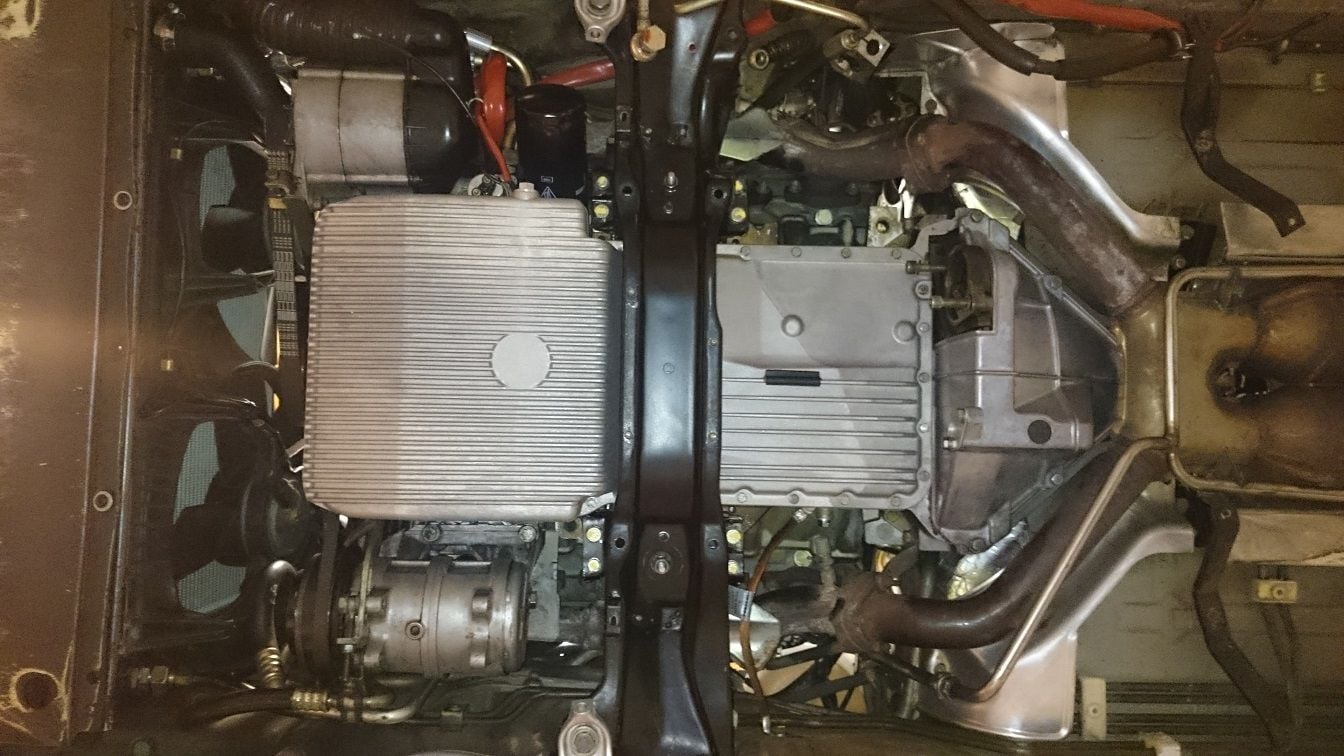
Does anyone have a good picture of the routing of the transmission cooler lines in the engine bay? Specifically need the path for the rubber part of the line that goes directly to the front cooler.
Also wondering what I should do with oil once I'm ready to fire it up. We used dino oil (20w50) on the lifters when replacing them and assembly lube for the cam journals/caps when dropping in the cams. Nothing on the bottom end was touched. Should I run for a couple of hundred miles with dino oil to flush the assembly lube out and then change oil and filter or is that not required here based on the limited amount of assembly lube used which was maybe a few ounces at most? For the record I have run Brad Penn 20w50 in this engine for the last 25k miles or so.
Haven't really been following the thread, but may go back to the beginning to check out your 928's story.
And don't beat yourself up to much, about the disassembly of the freshly assembled parts...it happens to the best of us...especially if to much time transpires...and if hardening of the gray-matter rears its ugly head.
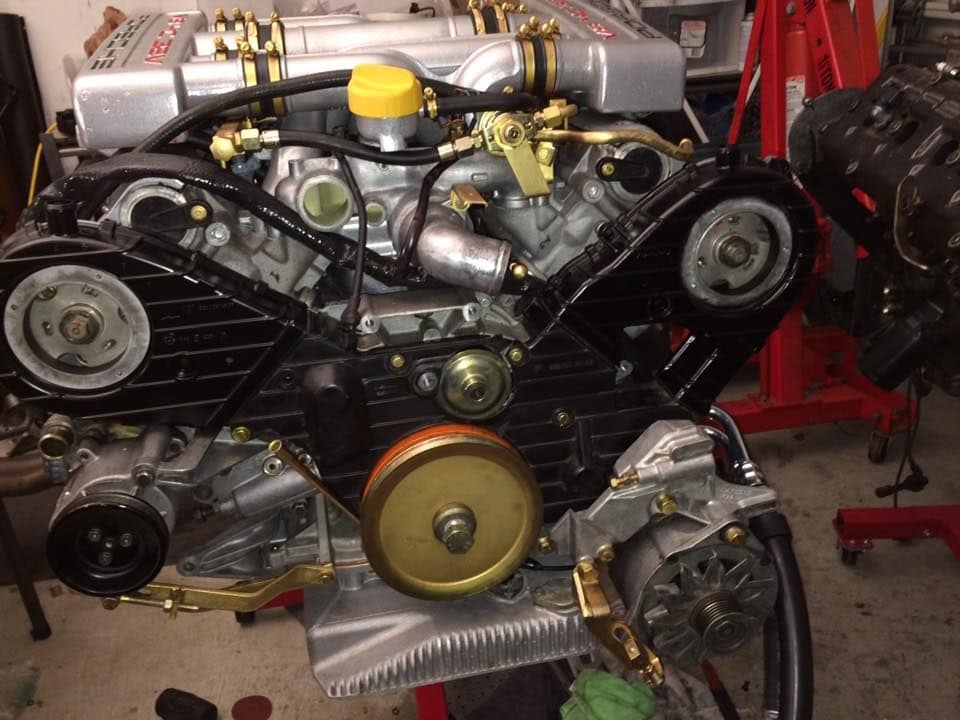
Really had a struggle to get the oil cooler lines on. I bought them from Pelican and they are specified as OE but non-Porsche parts. It seems like they are a bit long. I finally got them to fit by clocking the fittings at the block downwards and orienting the top line as pictured below so neither line hits the alternator or shroud. It's not clear in the picture looking down but the crimp for the bottom line is close but not touching the top hose Is this orientation OK?
Tonight I tackled a few odds and ends and I feel really stupid to have fought the oil cooler hoses with the alternator in place yesterday only to have to drop it today to get the #@#$%^ PS line to the rack from the pump on. I didn't even attempt to wrestle it back in place myself and called in the cavalry (Mrs. Z) to get the bolt in place while I bench pressed it up and wiggled it around.
Oh and I am lucky to have dodged a cracked windshield when I forgot to reattach the strut bar and jacked the car up to get at the PS line. Yay me!
The whole cracked glass without the brace...theyre not related.
The brace doesnt do squat for torsion on the chassis. It prevents pinching of the chassis AT the point it is mounted..which is above the A arm and spring loads from the suspension.
OK there's a bit of misinformation out there on the subject. Evidently jacking the car with or without the brace is fine, just don't take it off or put it on unless the car is on all four wheels.
OK there's a bit of misinformation out there on the subject. Evidently jacking the car with or without the brace is fine, just don't take it off or put it on unless the car is on all four wheels.
Ya...chassis should be pre-loaded before installation.
If a window did crack with it off, you have a soft chassis where someone missed some quality spot welds...


 05-03-2016, 05:51 PM