When you click on links to various merchants on this site and make a purchase, this can result in this site earning a commission. Affiliate programs and affiliations include, but are not limited to, the eBay Partner Network.
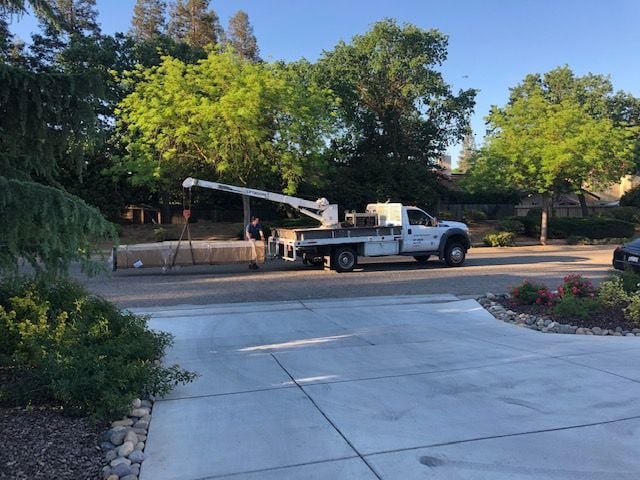
Beer and grilled steaks is all I needed to offer up. About 5 of us dumb old AC guys should be able to assemble the beast on a Saturday. Going to order in the morning, hopefully go pick it up in a week or so. Gotta get the 82 out of the bay and start cleaning/organizing.
Yes quite happy with it. The only issues I have had is with leveling. I have discovered that the base plates are not true, and you have to shim them or it will not lock properly with weight on the runners. The shims come with the lift, so no worries. I got the extra wide/tall model, so it gets quite high, which is great.
I also had had a fluid leak, but that was my fault not tightening a fitting
you will need 3 strong (or fat and dumb) friends to help assemble.
It it comes with a 110v motor, I paid a little extra and got a 230v.
So so far I have had (4) fat friends on it, a Chevrolet z71 truck, a Toyota solara, and an Audi Q7 on it. (Note, no 928 has been on it yet). Next up is a Hyundai tiburon (baby shark), then, hopefully a 928.
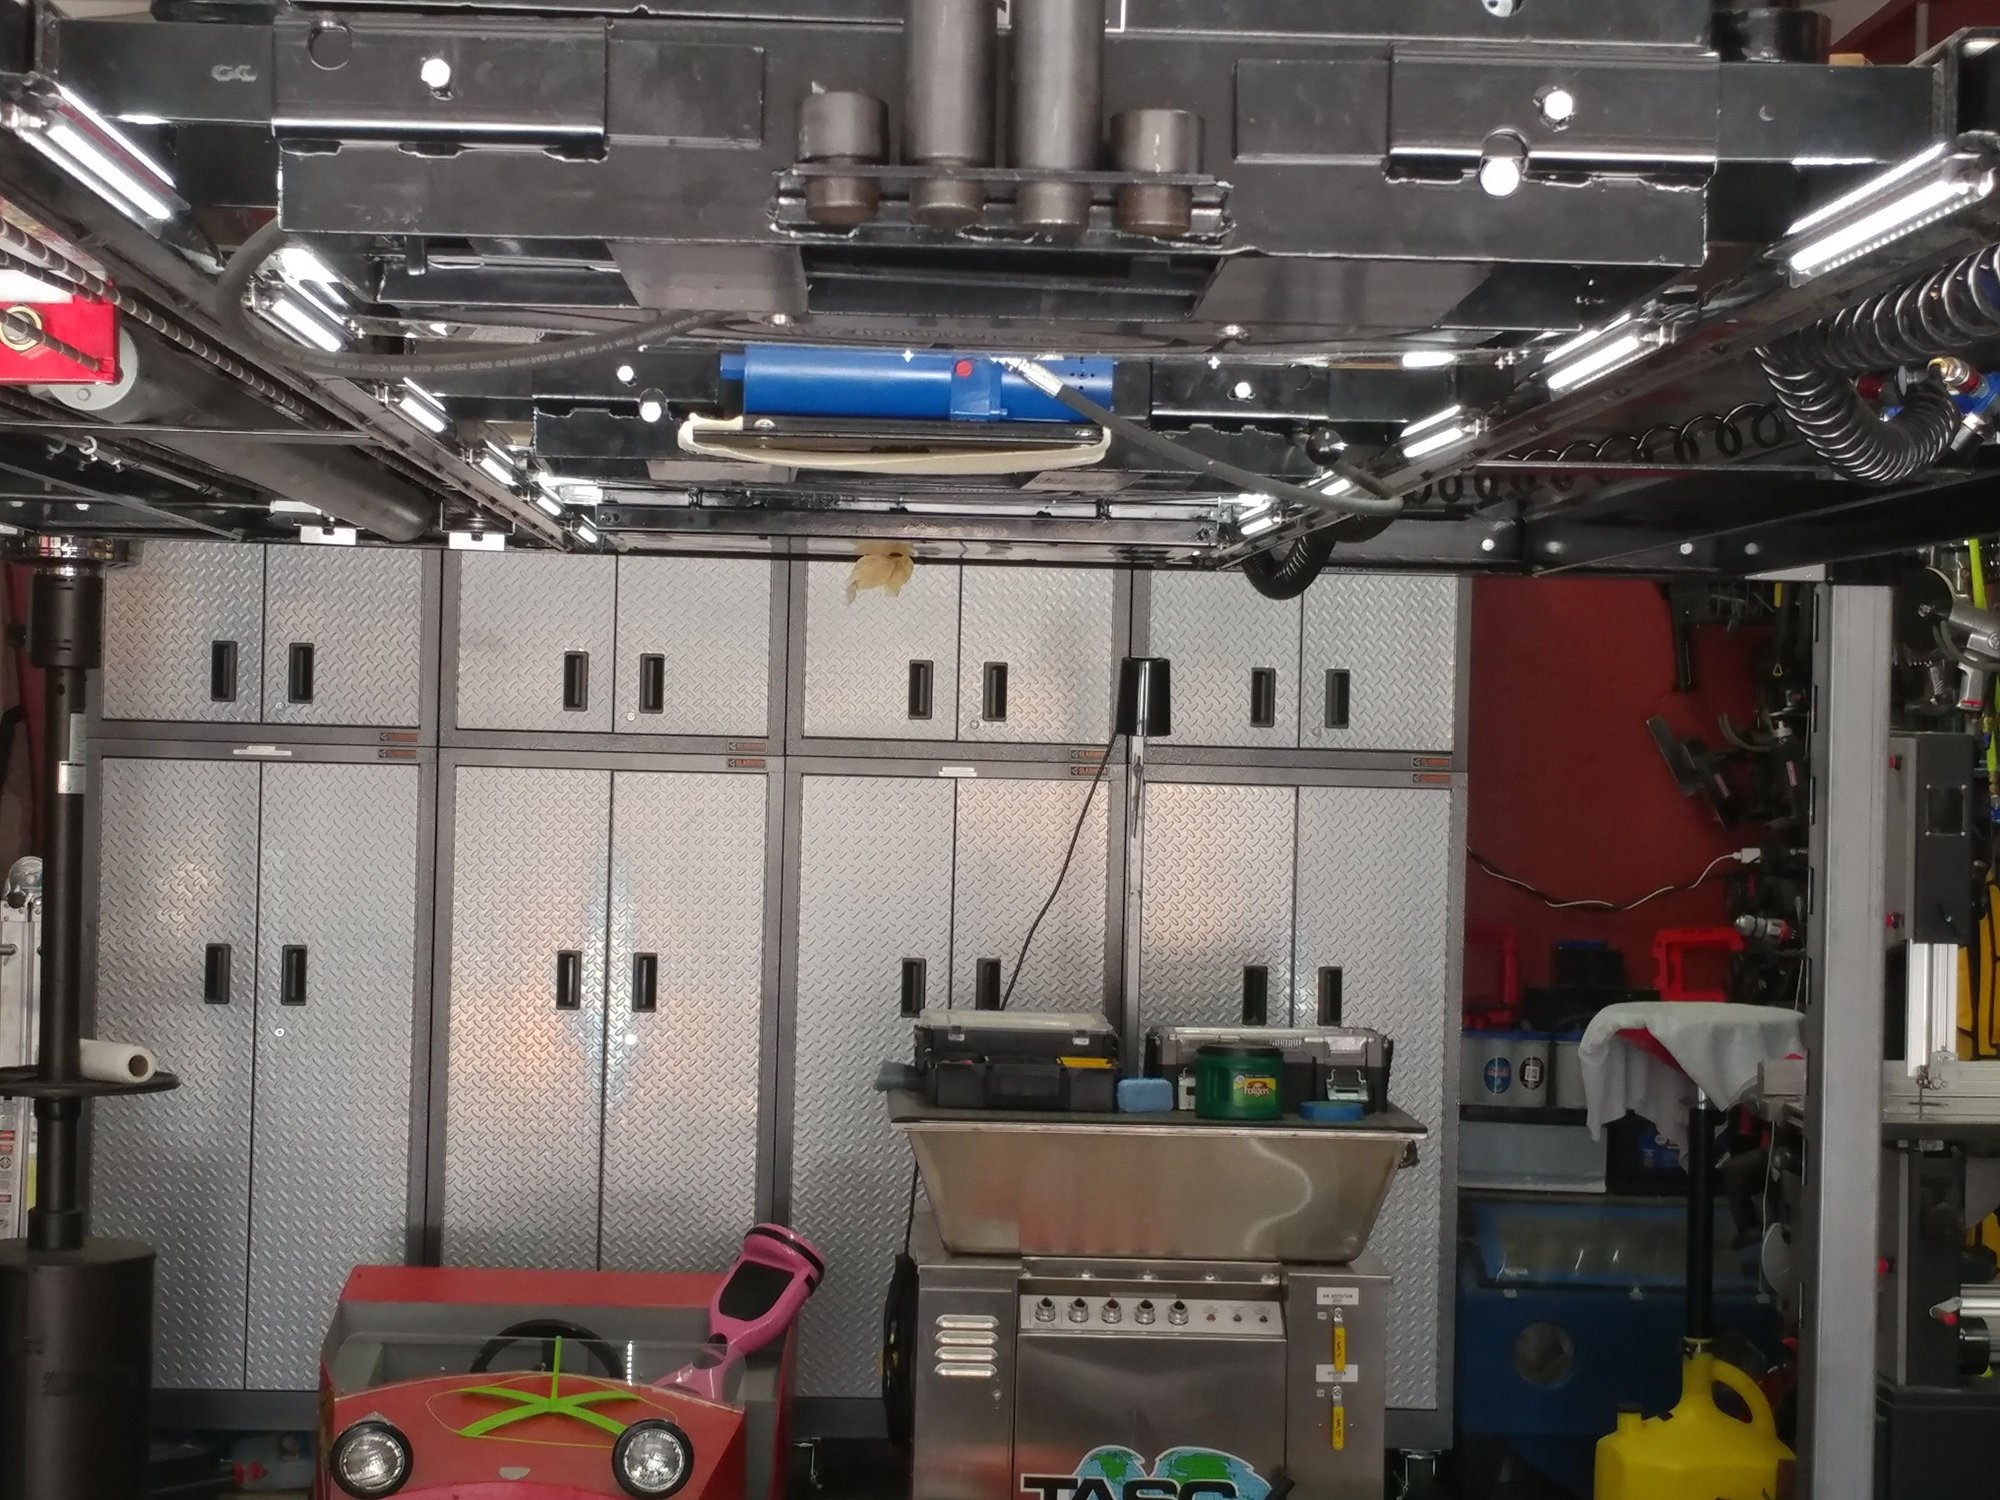
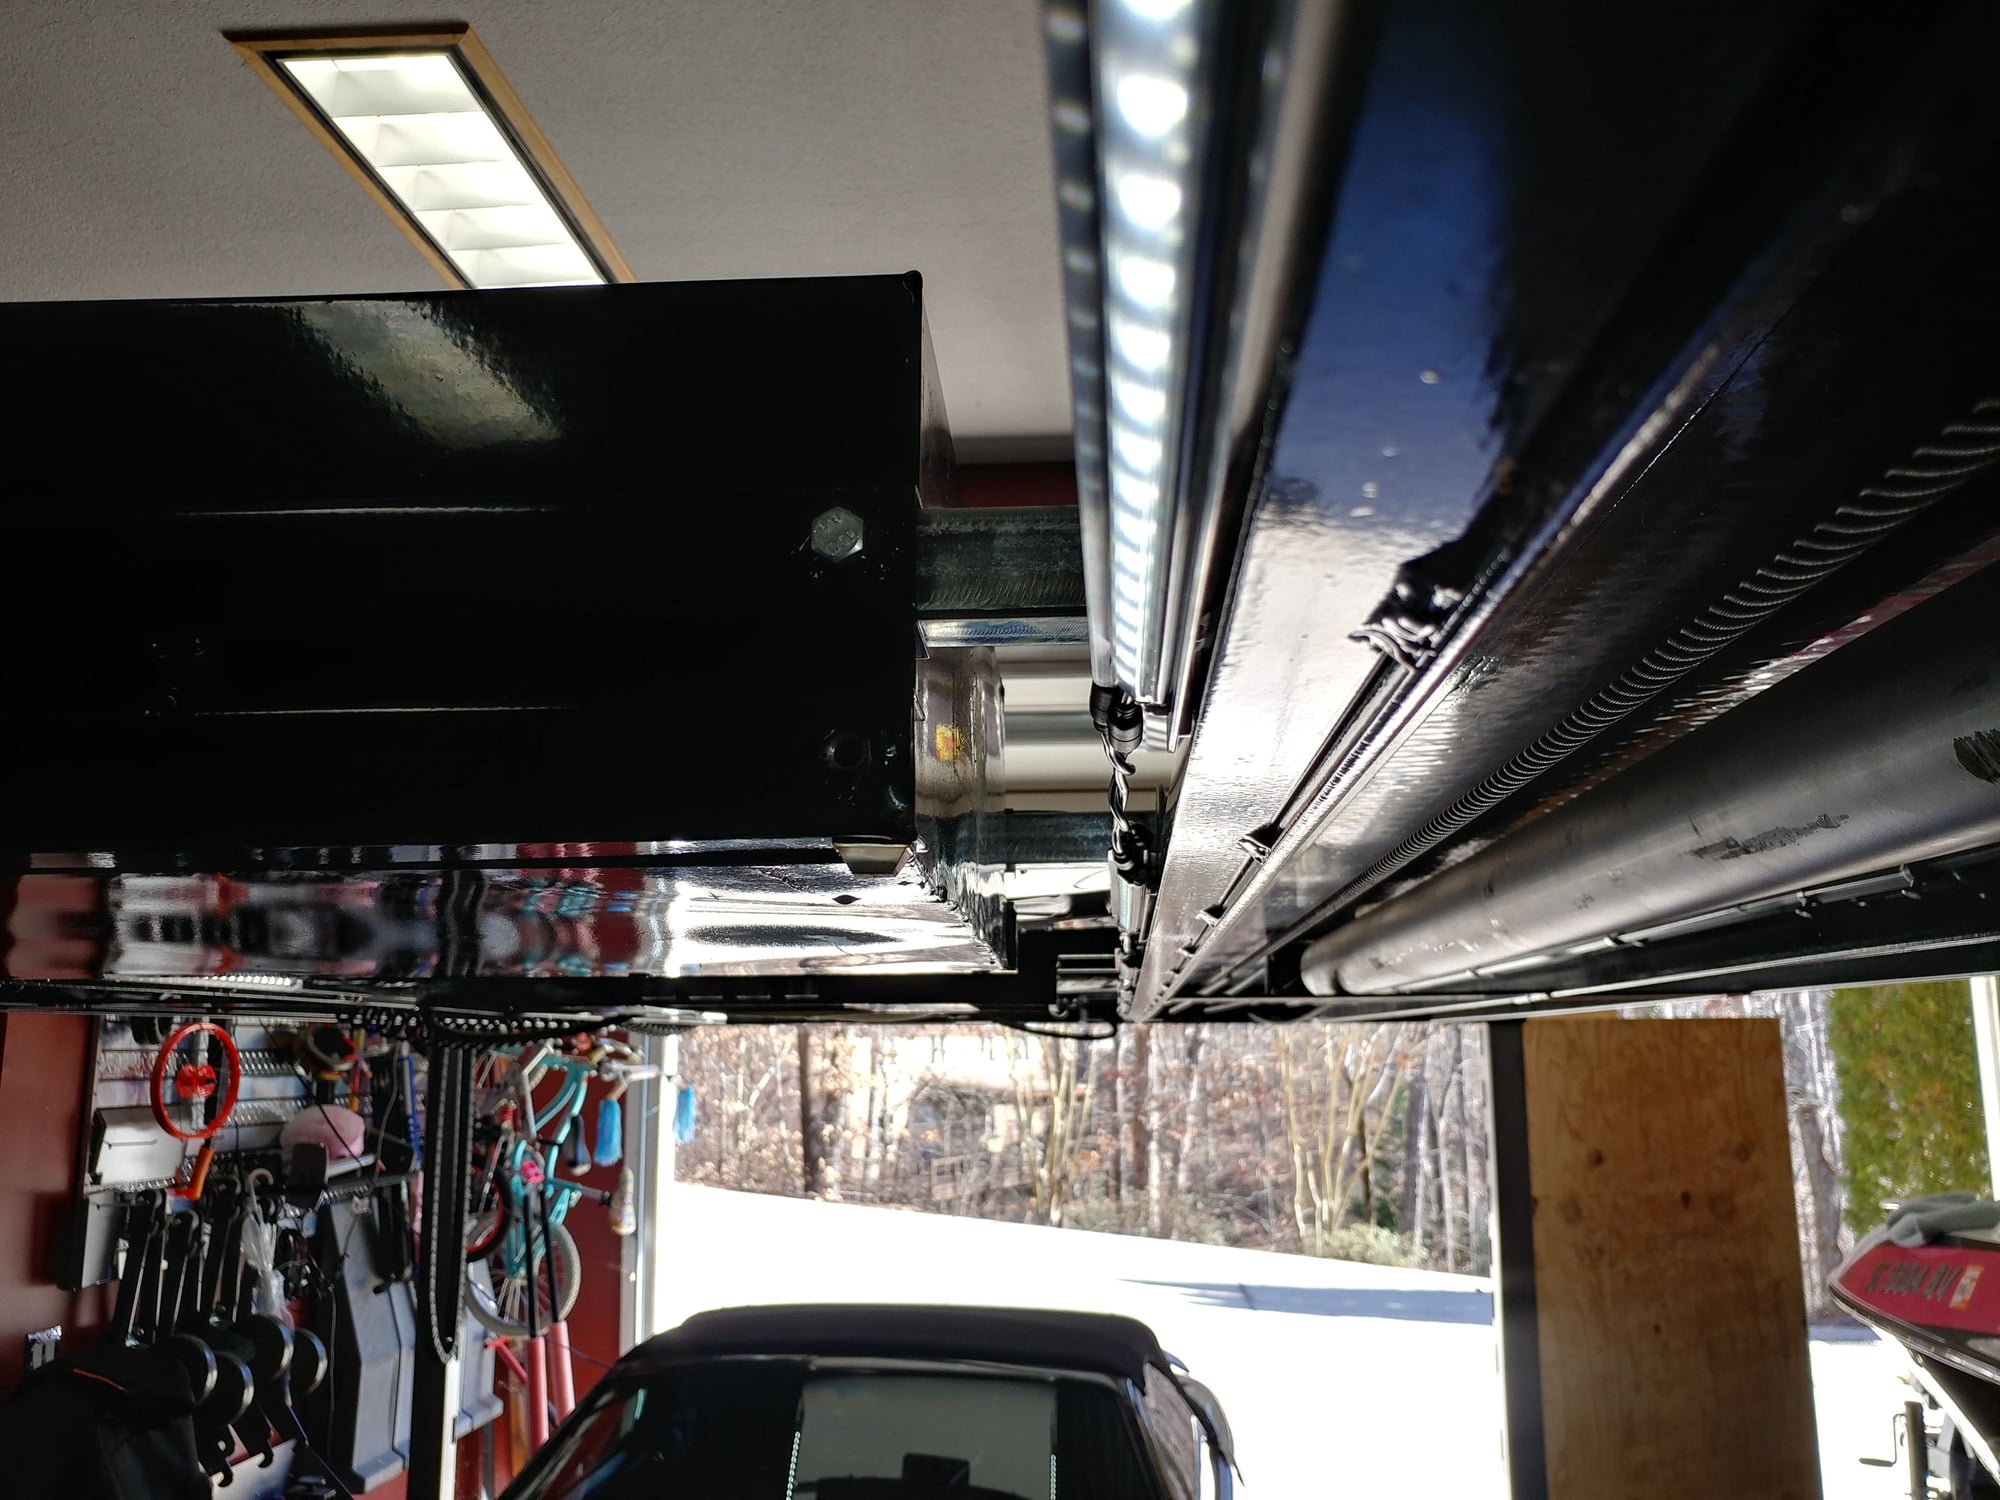
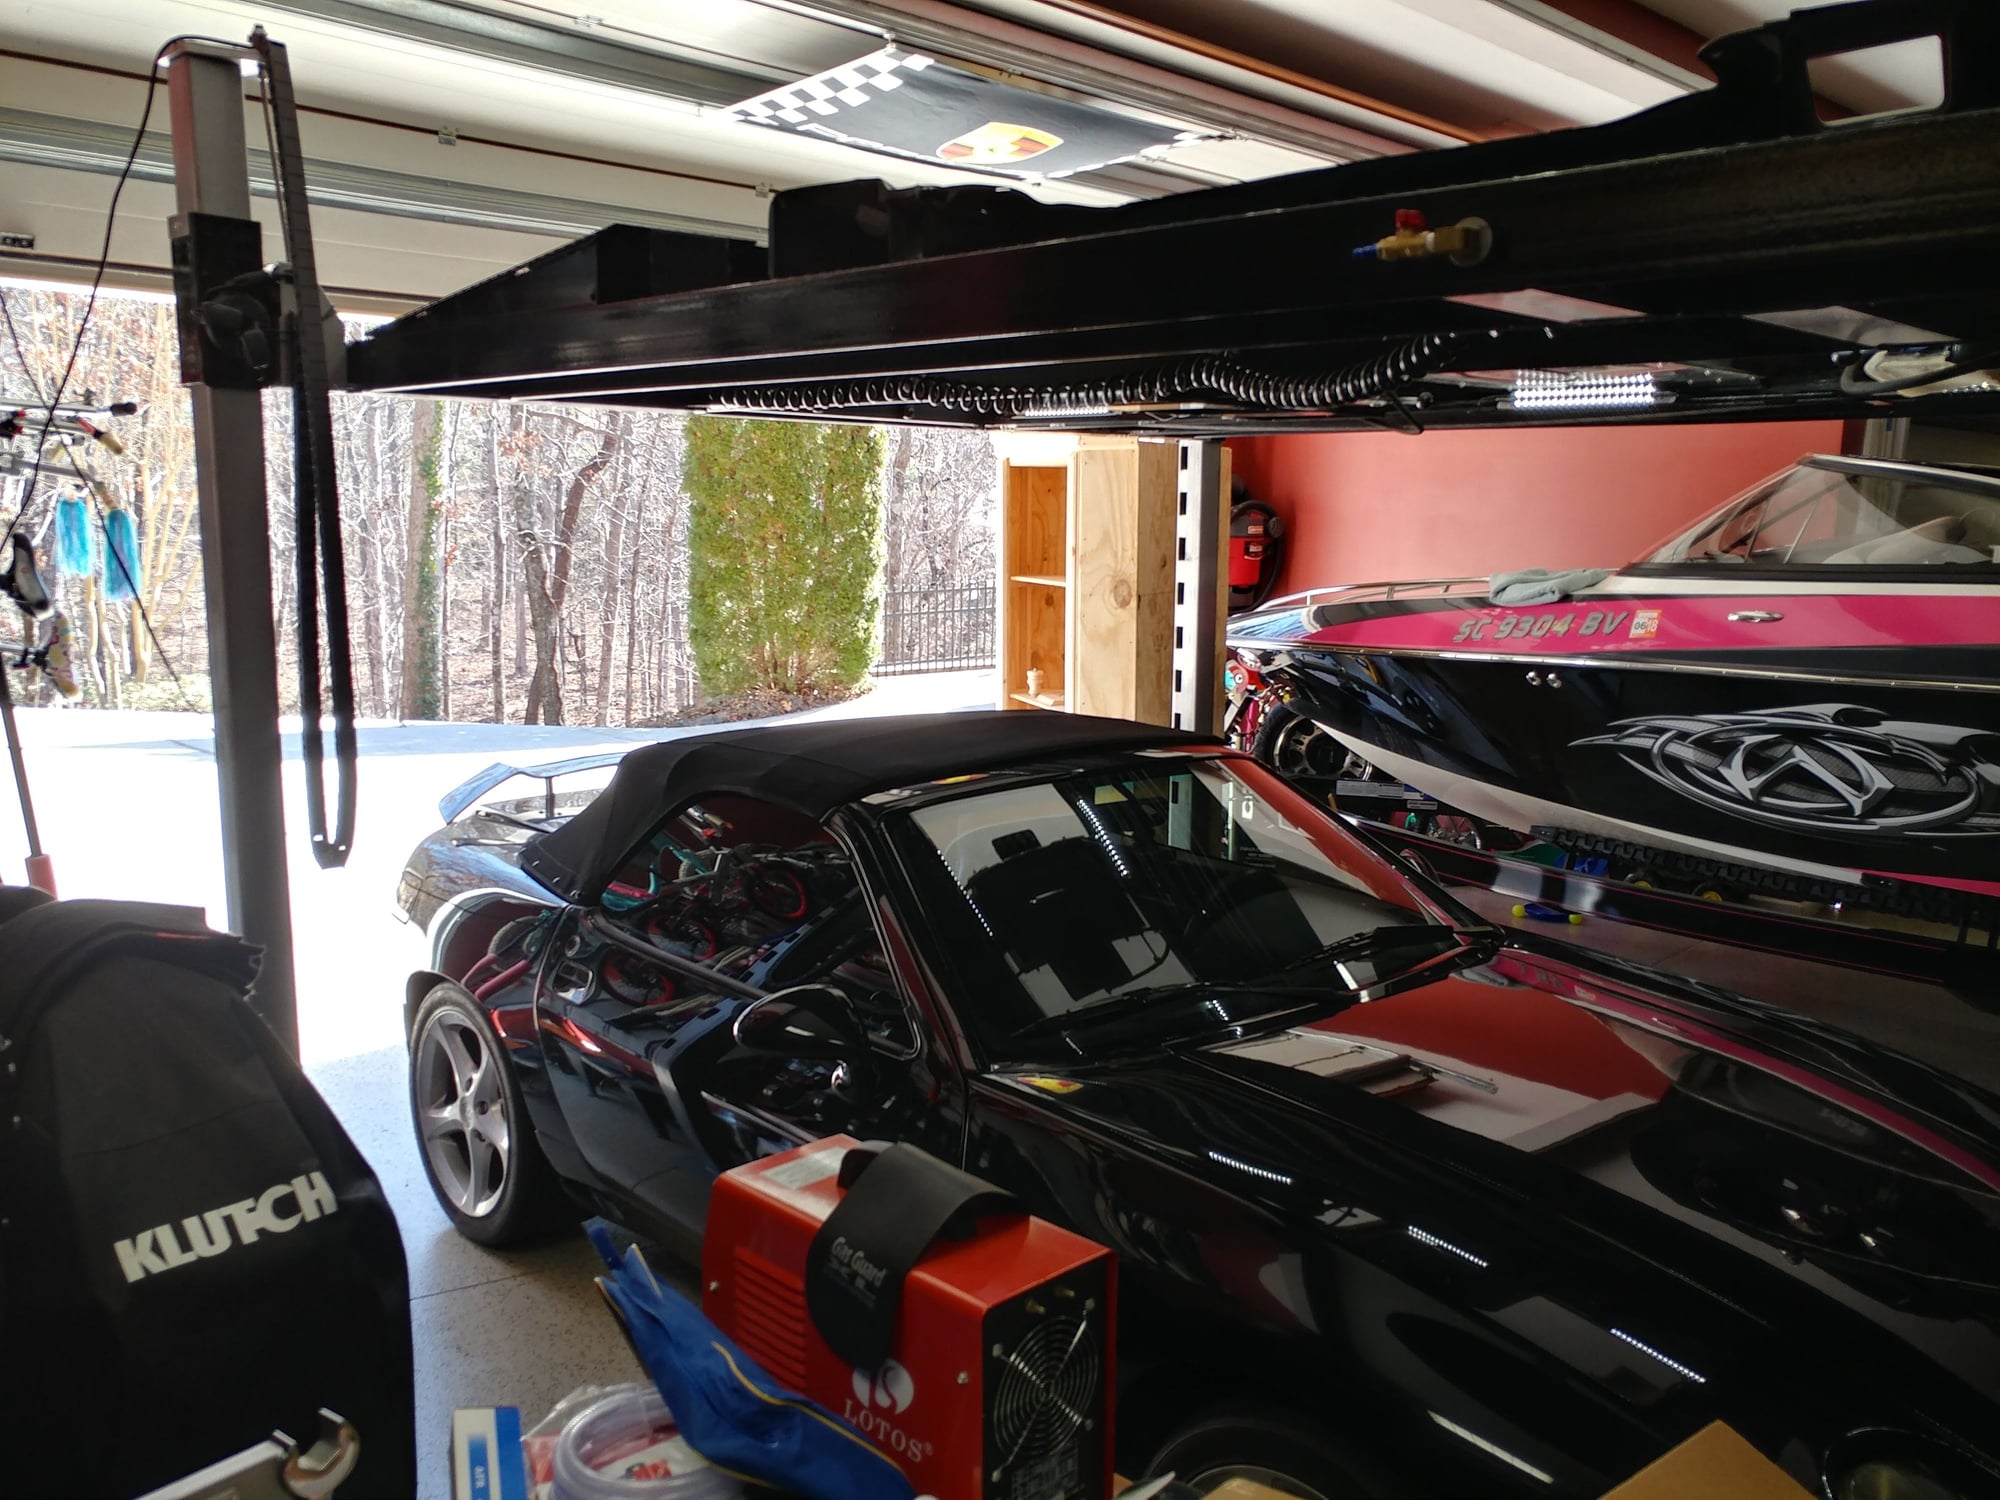
Figured I'd post an update on an upgrade I just completed on my lift in case it gives anyone some ideas. With the lift in my garage and most of the work on my Porsches needing to take place from underneath (997s & 914, plus oil changes on everything else), I was always trying to get a flashlight or worklight into the right position to illuminate what I was working on, then usually knocking it off or dropping it. Also, when working on a vehicle parked under the lift, l(ike waxing a car) the lift would block a lot of the light from the overhead ceiling lights, making it kind of dark. I've actually just completed the installation of some LED strip lights that are so small they mount to the edge of the channel where all my accessories roll or slide on-top of.
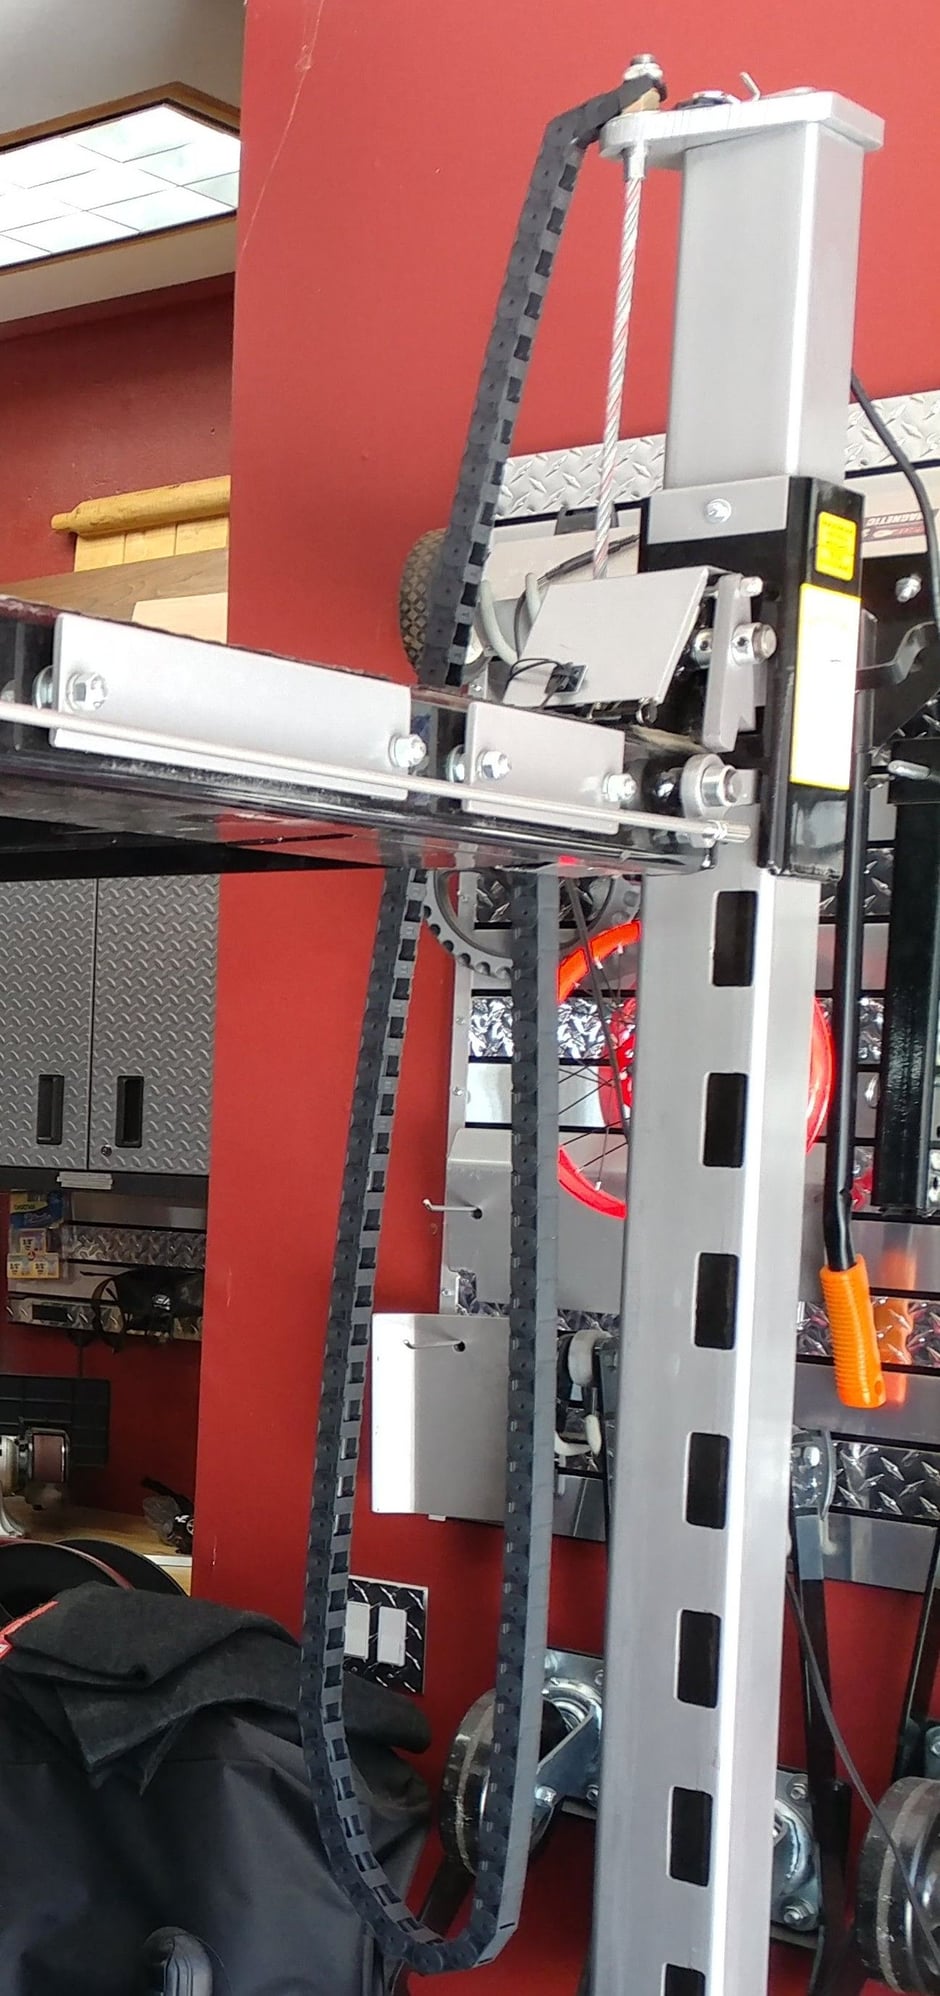
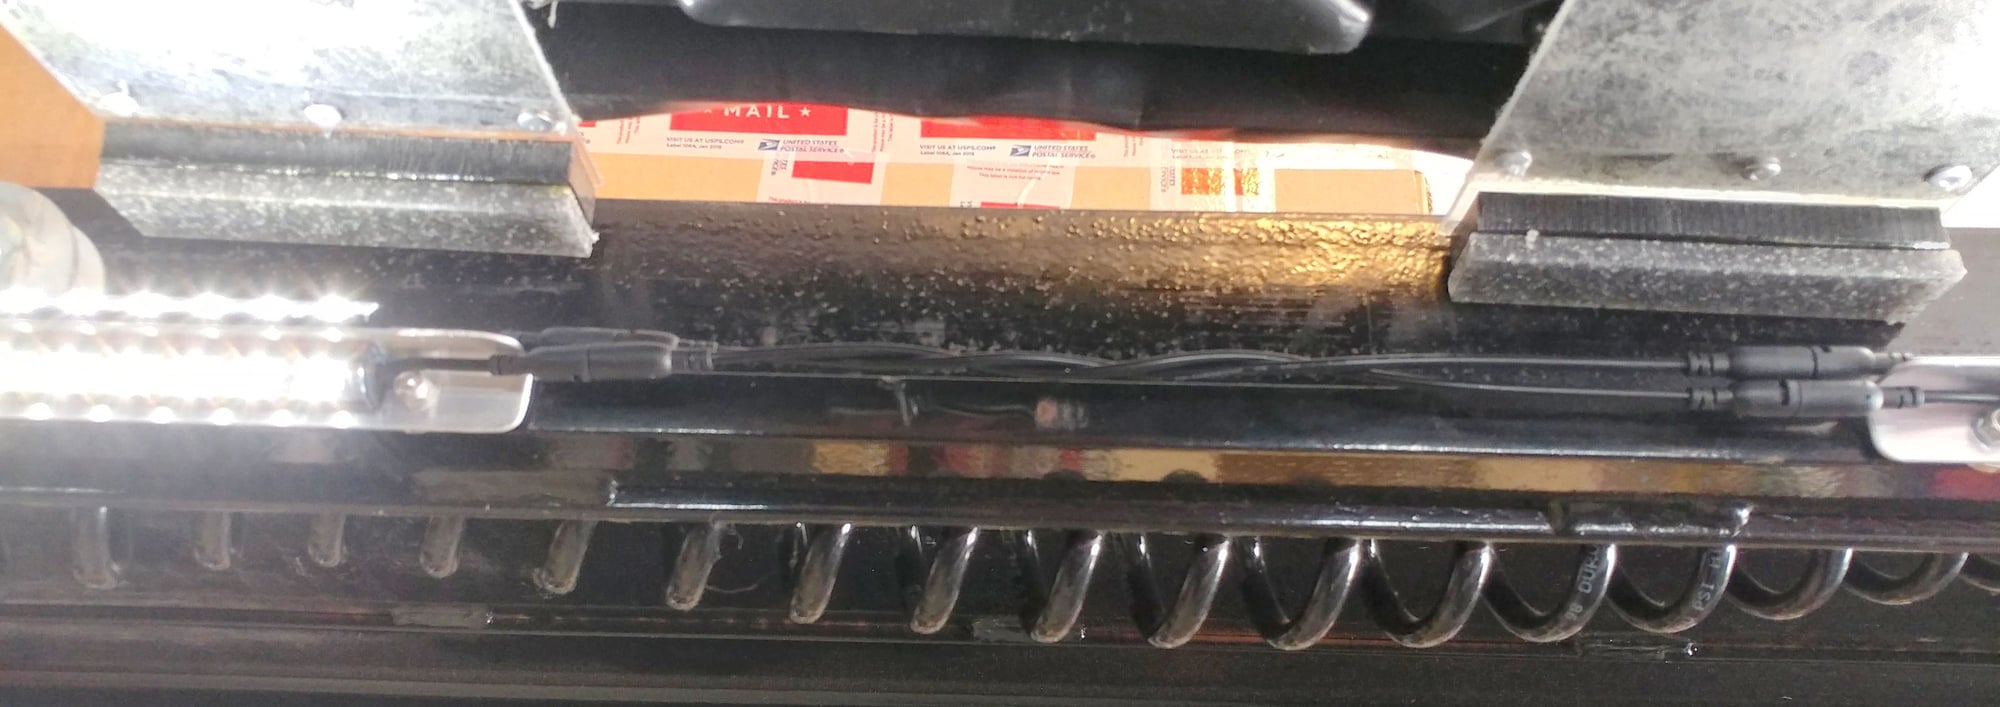
Each strip is 12" long and I fabricated some brackets from lightweight, 3/4" aluminum angle-iron. I bought 3/4" rare earth magnets with a countersunk hole in them and some short, tapered stainless screws with lock nuts. The aluminum brackets are 15" long and the LED strip lights are almost a triangle shape, which allows me to mount them on the brackets using the 3M double-sided tape that came preinstalled on them. I put one light in the corner of the bracket, which aims down and the other on-top in the same place, then daisy chained a whole bunch of them together all the way down the center section of the lift runners with the extension cables that came with them. I drilled 2 holes in the ends of the aluminum brackets, mounted the magnets with the stainless hardware, and each bracket is held securely to the lift using the magnets. I bought 5 sets of the lights (6 / set) in order to have enough and have 2 spares in case one burns out.
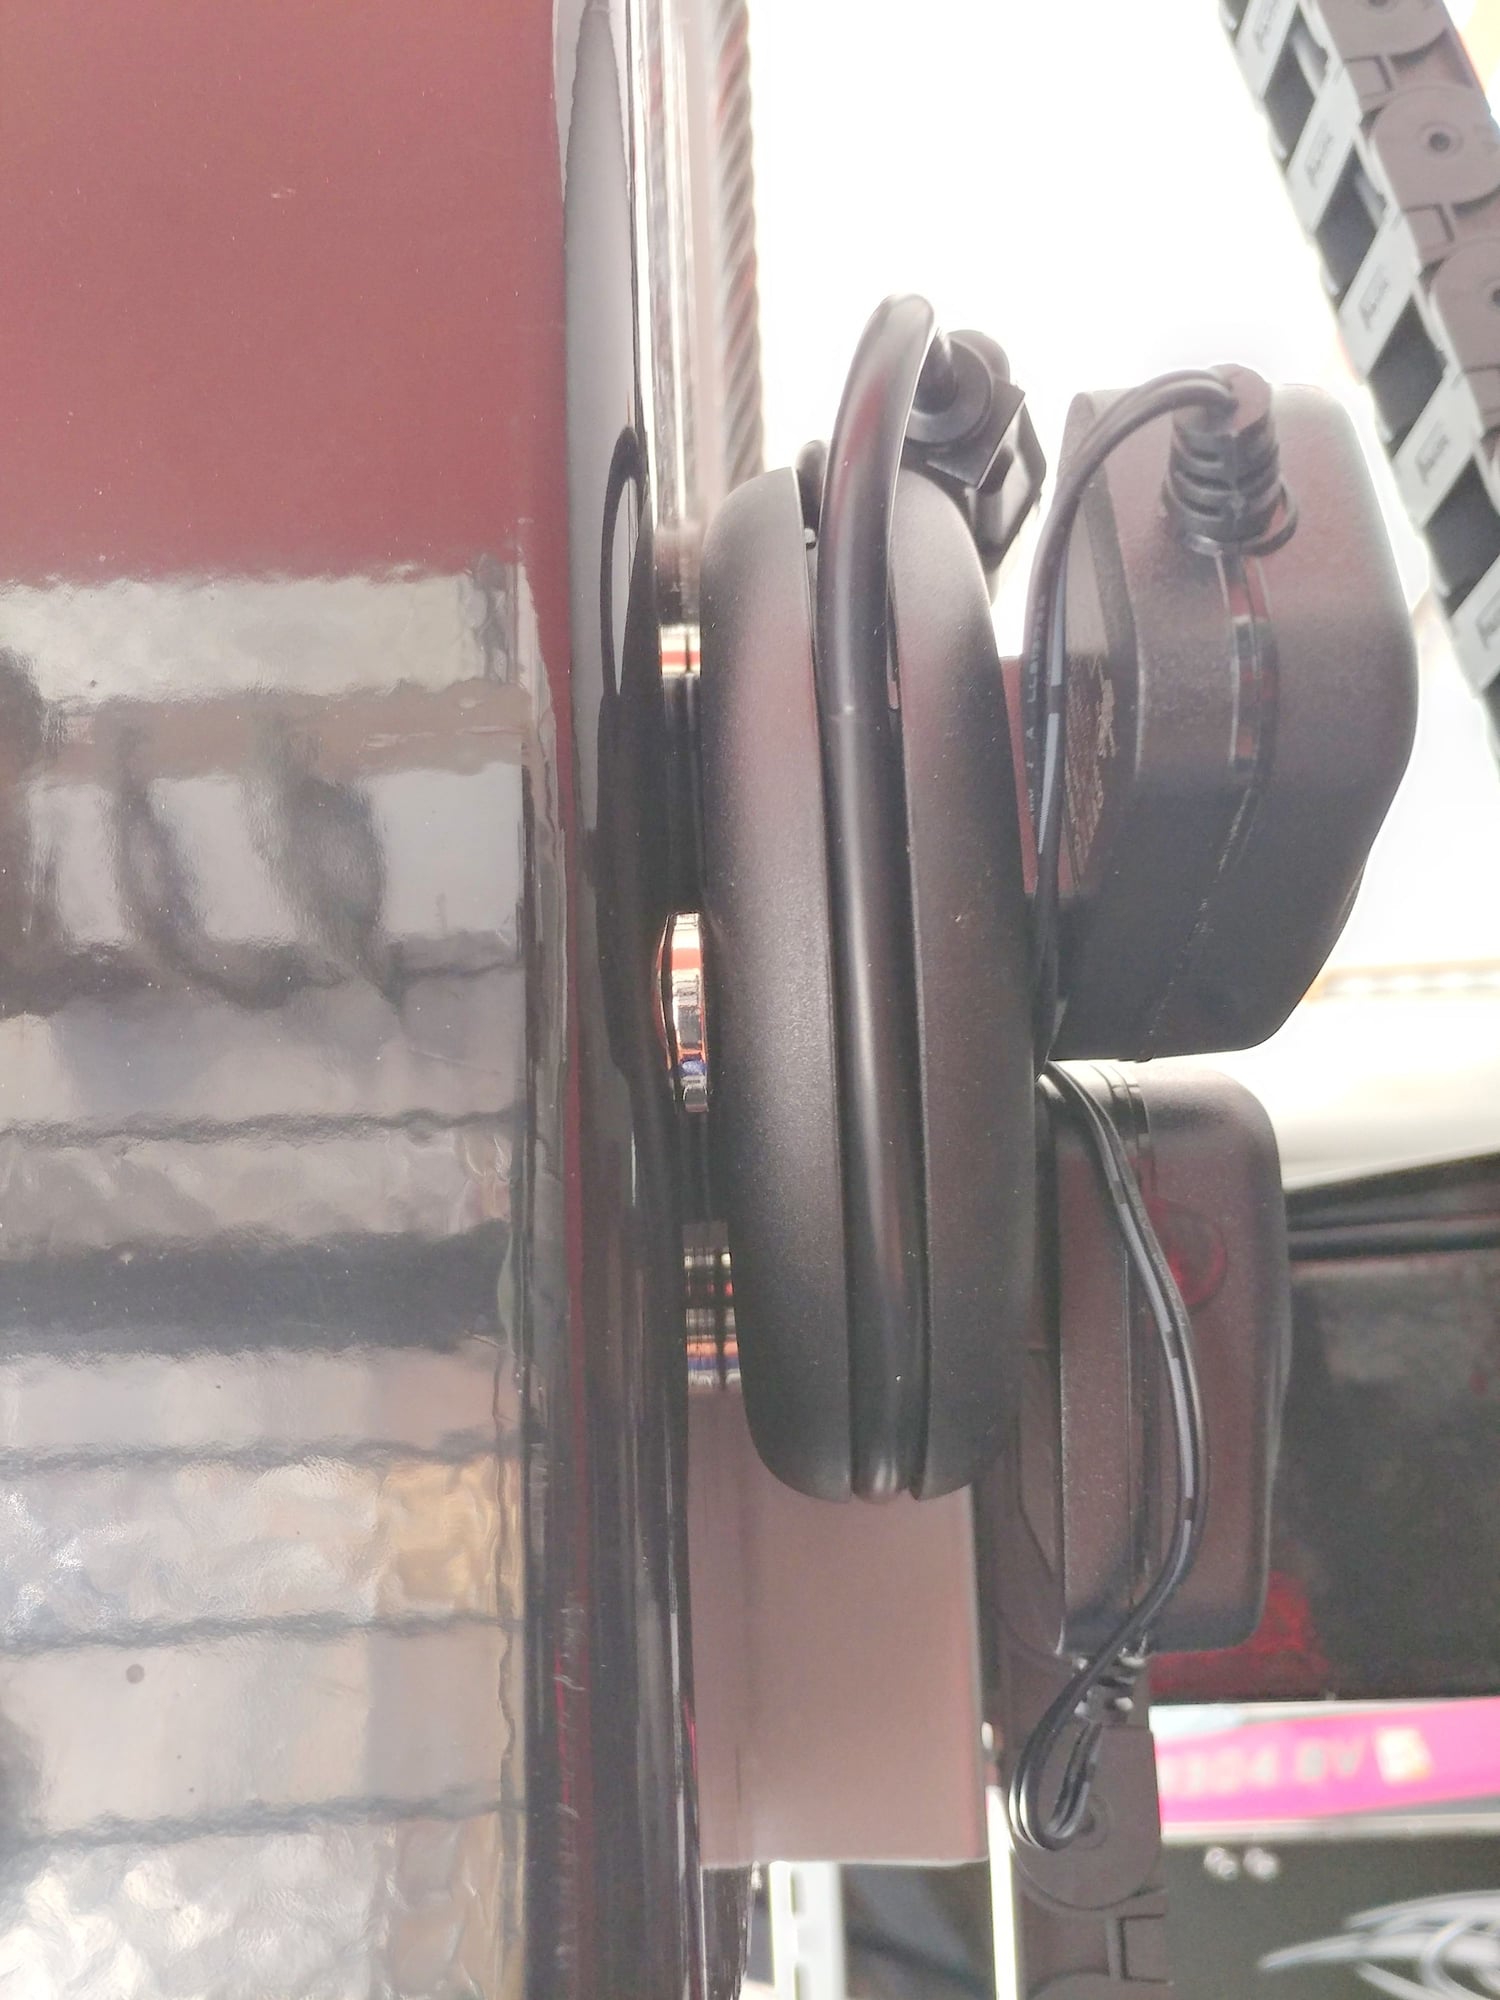
I strung the top lights on the brackets all together in a run, then connected the bottom lights at the end to the top light at the same end, then strung all the bottom lights together coming back. Then did the same on the other side. Amazon Q&A said you could put as many as 8 of these in the same run, but I actually have 14 in each run and they aren't blowing a fuse or having any issues. I got the motion sensing ones and mounted the 2 motion sensors (one for each set of lights) on the inside lift cross-bar at the end closest to the garage door so that it sees me at the other end where I'm usually working (closer to the tools). Since the lights are mounted to the lift ramps, they need to be able to move up and down, or at least the wiring that connects them to power does, so I found a small round travel multi-plug that keeps the cord neatly wrapped around it, replaced the screws that hold it together with longer tapered ones,adding 3 of the magnets to the back of it, and it now sticks to the lift riser support. In order to protect the extension cord that the travel pod plugs into, I found an articulating drag chain protector (needed 3 of them for the length) and this encapsulates the power cord while letting the lift move up and down and keeps it from getting caught on anything. The drag chain is larger than I need for the 1 cord in it, but it was the smallest one I could find where it opens all the way down so I could put the cord in it without needing one large enough to pass the extension cord end through. The travel pod also has a push button on/off switch on it so although the lights are motion sensitive, if I want them completely off, I can just push the button.
All my lift accessories (rolling drain pan, pneumatic bridge jackes, etc) cleared the lights except for my drip trays. I tooks some nylon I had in the garage, cut some spacing blocks and attached them to the ends of the drip pans as risers - now they pass right over them too.
The whole setup integrated extremely well and projects good light both up onto the bottom of the car on the lift and down to the car underneath the lift. They turn on automatically when I walk out and off 4 minutes after not seeing motion. Turned out really well.
I went to some lengths on the lighting in my new garage. I tried to remember as I did this that a good headlamp would still be needed, and nearly enough for all purposes. But I'm happy that I installed all the other lights.
Great solution on the lighting. My stubby 2-post lift (Max-Jax) has no rails to mount the lights on. I've played some with magnet-mounted LED worlights, and they are fine except you must remember to remove them before lowering the car. For those playing along at home, work lighting under the car is always a challenge. A light-colored floor is good for reflecting some of the overhead light. Good lighting like Pete's method from multiple angles is a real plus, helping with reducing shadows as you work. There's a supplementary challenge with not having it shine in your eyes.
Geek solution: A miners cap with LED strips wrapped around the top and front. You could use a batting helmet with some of the brim removed. Where to mount the battery pack...
Mounting the auto with best car lift for home garage, you will provide the additional possibilities in the field of the qualified service of the vehicles. A choice of the equipment should be based on the type of the activity, class of the automobile, and other factors. In any case, the car lift will ease the work of an auto mechanic, and there will no need to crawl under the car in order to do any manipulations. Moreover, the auto lift will provide a service technician with the following advantages:
Convenience and accessibility. Due to the safe location of a car on the mounting kits, the accessibility to any units and mechanisms is provided.
Safety. When the transport vehicle is placed at the convenient height for the repair, a high level of the safety is provided because the auto mechanic does not have to follow the position of the hands.
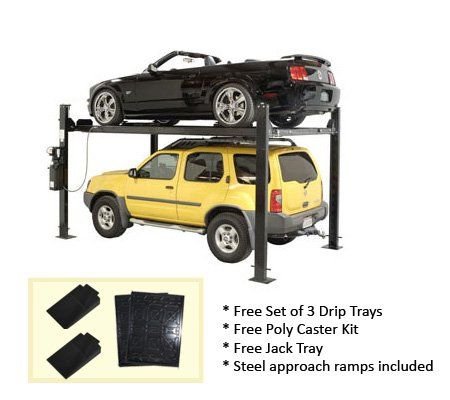
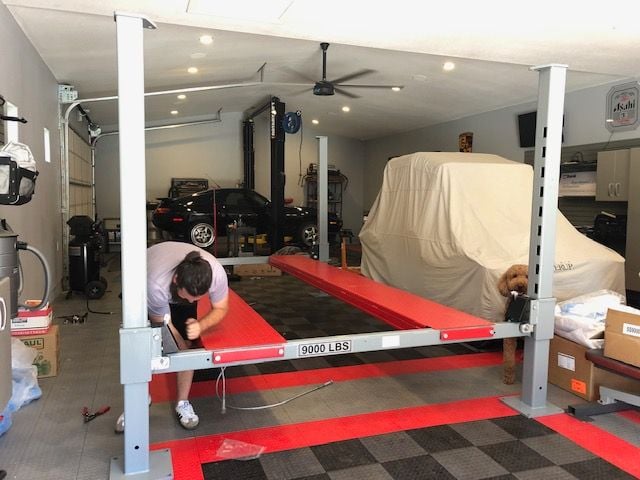
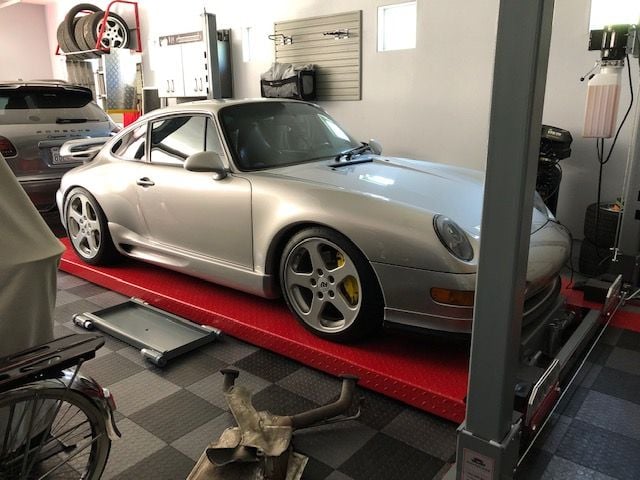
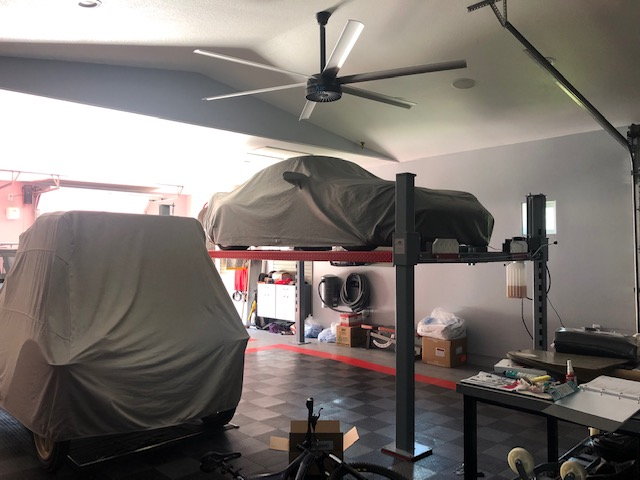
I ended up going with Advantage lifts. I worked with Damien from this company and enjoyed the entire transaction. They have a nice kit which comes with ramps, drip trays and jack tray. I added the hydraulic lift underneath to work on the cars once on the list. You will see in the background I also have a Rotary 2 post asymmetrical lift as well and love that but this will be mainly for storage and easy items like oil changes.
Without any previous knowledge and a buddy helping we completed from unpacking to fully built in under 5 hours. Very happy with the outcome!

 11-12-2017, 11:03 AM


 I've played some with magnet-mounted LED worlights, and they are fine except you must remember to remove them before lowering the car. For those playing along at home, work lighting under the car is always a challenge. A light-colored floor is good for reflecting some of the overhead light. Good lighting like Pete's method from multiple angles is a real plus, helping with reducing shadows as you work. There's a supplementary challenge with not having it shine in your eyes.