
Crank roll pin removal / pilot bearing install
 07-18-2015, 12:39 PM
#1
Rennlist Member
Thread Starter
1) Any pointers on how to remove this crank roll pin?
2) Does the pilot bearing look fully seated or does it need to be recessed further into the crank?
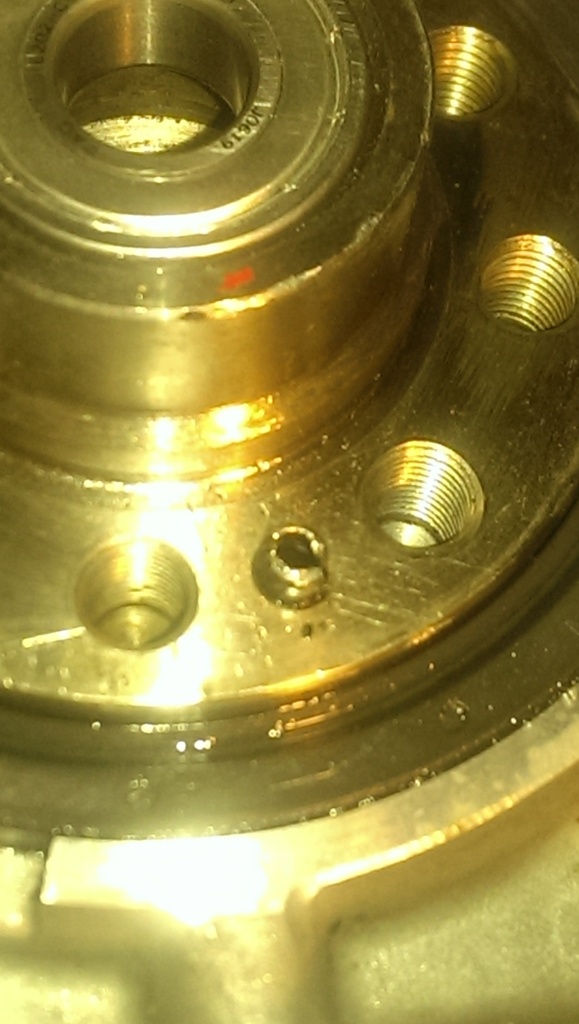
2) Does the pilot bearing look fully seated or does it need to be recessed further into the crank?
 07-18-2015, 07:04 PM
#2
Rennlist Member
Thread Starter
So the deafening silence from the lack of responses tells me that you're all thinking the same thing that I am - sacrifice the brand new rear main seal and put heat to it.
07-18-2015, 07:36 PM
#4
Archive Gatekeeper
Rennlist Member
Rennlist Member
The pin wasn't added to the tail end of the crank until '84 (IIRC?) Agree with Erkka, I'd just leave it.
Flush on the pilot bearing is fine.
Flush on the pilot bearing is fine.
07-18-2015, 08:31 PM
#5
Team Owner
Adam why do you want to remove this pin?
Will the flywheel move around on the pin? Then it should be replaced
Will it catch it and not turn? then use some green loctite and leave it alone
Since this is a clutch driven car the pin does also serve a purpose,
and thats to prevent the flywheel from walking,
this will change the engine timing if the flywheel does walk.
NOTE as an option you could use loctite green and this should lock the flywheel in place.
heat will be needed to separate the parts.
IIRC full cure is reached after 24 hours.
BUT a fresh pin would be best.
That said you could drill into the pin then once you have put a bigger hole in the center then try knocking it into itself.
OR use an induction heater to make it cherry red then put an ice cube on it and pull it out.
If you go this route dont get the crank cherry red just the pin.
NOTE to get a better pull on the pin put a dowel into the center so the edges will compress onto the dowel this will give the vicegrips a better chance to grab and hold the part.
07-18-2015, 10:54 PM
#6
Rennlist Member
Thread Starter
Bolting on twin disk clutch from my '79.Starting to get a bad feeling from everyone's comments. Is it a different bolt pattern? (Engine is an '88)
07-18-2015, 11:46 PM
#7
cranks all have the same bolt pattern. You should be able to clamp one of the large vice grips on it and twist it back and forth to get the pin out. you will need a new pin if you plan to replace it.
Trending Topics
07-18-2015, 11:57 PM
#8
Rennlist Member
Thread Starter
That pin is not coming out. Many hours with vice grips and penetrant. Maybe just drill a clearance hole? It would be very small, and wouldn't have to go all the way through like the factory hole which is cavernous. Wonder if I get get away with not having to rebalance?
07-19-2015, 01:55 AM
#9
Rennlist Member
Thread Starter
I should clarify a bit. I've put the 5L from my '88S4 A/T into my '79 track car which is a 5 speed. I want to retain the '79 DD clutch. I'm running MS3.57 engine management which uses a 16-1 timing wheel at the front of the crank.
07-19-2015, 05:53 AM
#10
Rennlist Member
If you don't need the roll pin for timing alignment, you could just cut the pin off flush, considering it's so hard to get out, and bolt the 79 DD straight on. I can't imagine that the loss of the roll pin projection would have a significant impact on balance.
Alternatively you could drill a hole in the flywheel to take the roll pin projection, and to maintain balance drill an exact duplicate at 180 degrees.
No roll pin on my 82 and the pilot is flush.
BTW: The bolt pattern on the early flywheels with no roll pin has one of the holes rotated by about 2 mm so that it will only go on in one position .... I don't know if the later one has the same pattern, or whether it has equal hole spacing with the added roll pin ... worth checking.
Last edited by Dave928S; 07-19-2015 at 06:46 AM.
07-27-2015, 03:12 AM
#11
Rennlist Member
Thread Starter
Success!
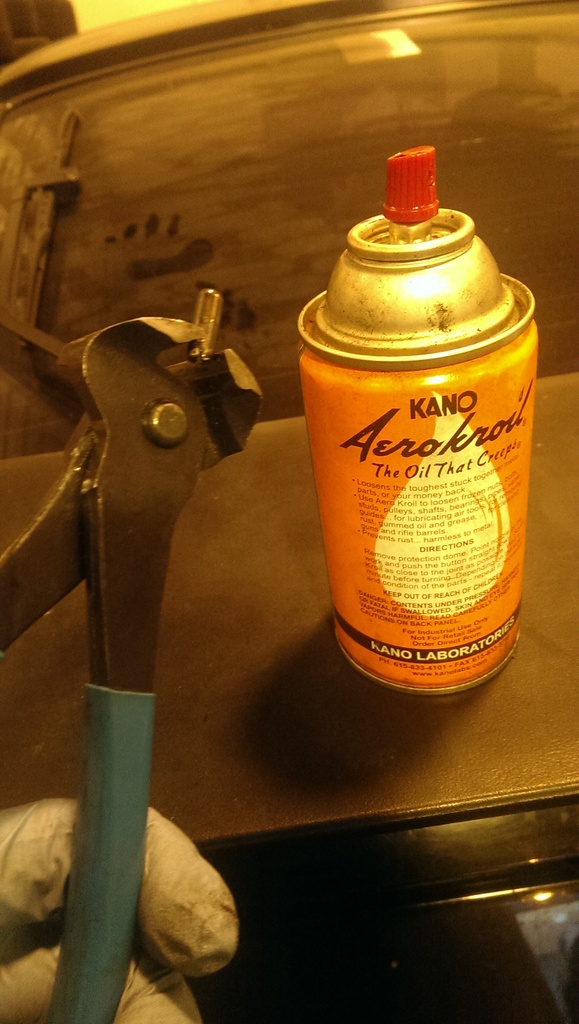
Doust in aerokroil and let sit for a week. Use dykes.
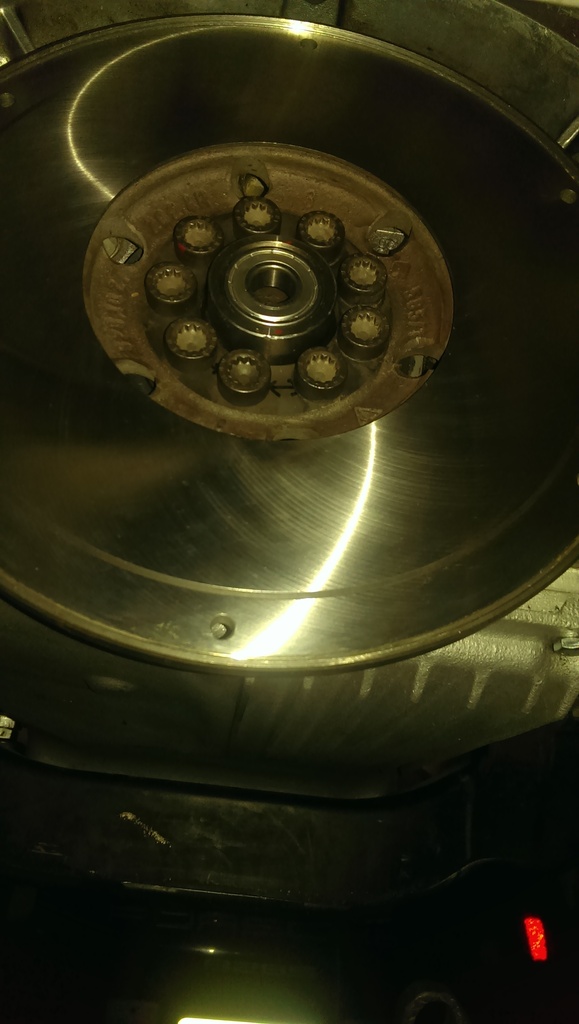
I was actually attempting to cut off the roll pin flush, and instead got some movement and was able to pull it out.
The good news, OB flywheel bolts right up!
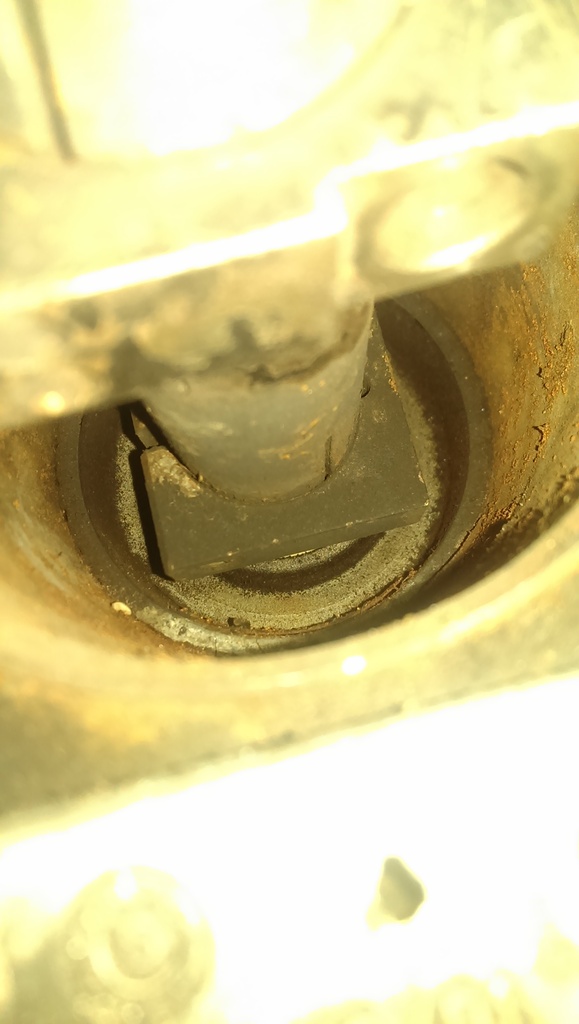
The bad news, I think the front TT bearing has crept forward. When I went to push the guide tube back to make room to test fit the stub shaft into the pilot bearing, I think it bottomed out against the front TT bearing. Not enough clearance to get the stub shaft in.
Doust in aerokroil and let sit for a week. Use dykes.
I was actually attempting to cut off the roll pin flush, and instead got some movement and was able to pull it out.
The good news, OB flywheel bolts right up!
The bad news, I think the front TT bearing has crept forward. When I went to push the guide tube back to make room to test fit the stub shaft into the pilot bearing, I think it bottomed out against the front TT bearing. Not enough clearance to get the stub shaft in.