

Stephan's 1:24 scale 928 attempt
 02-02-2015, 04:34 PM
#31
Intermediate
Thread Starter

Join Date: Aug 2012
Posts: 29
Likes: 0
Received 0 Likes
on
0 Posts
Not been able to maintain too much progress here, but the battery size is still puzzling me.
Based on scale model measurements, the kit battery equates to 408mm / 16 inches length in real life,
which I believe is way too much.
Based on findings on the internet, I believe it's around 11 inches / 278mm.
This will also make the battery box a little smaller and seems to fit better with the overall space available.
Appreciate your input here guys; would be much simpler if I could run out in the garage and check...
 02-02-2015, 06:22 PM
#32
Rennlist Member

'78/79 batteries are huge in length. Not sure the length, but 16" in totally possible. Later cars use normal length batteries. Here is a photo. Ill look for specs.
http://forums.pelicanparts.com/porsc...tery-size.html
http://forums.pelicanparts.com/porsc...tery-size.html
02-02-2015, 06:33 PM
#33
Rennlist Member
Here you go
http://www.interstatedealers.com/IBC..._auto.htm#home
Late batteries are 10.9 inches long, early batteries are 13.9 inches long. According to this, at least.
http://www.interstatedealers.com/IBC..._auto.htm#home
Late batteries are 10.9 inches long, early batteries are 13.9 inches long. According to this, at least.
02-03-2015, 01:13 AM
#34
Intermediate
Thread Starter
Join Date: Aug 2012
Posts: 29
Likes: 0
Received 0 Likes
on
0 Posts
Thanks Karl! I read somewhere that the first models had the battery mounted to the tranny, but I have not been able to locate any pictures on how this impacts the trunk flooring layout.
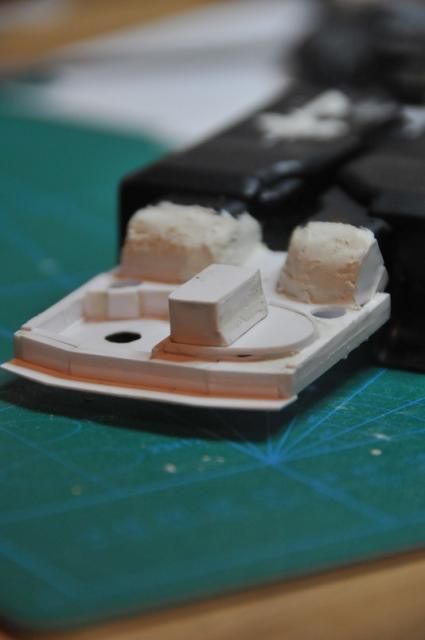
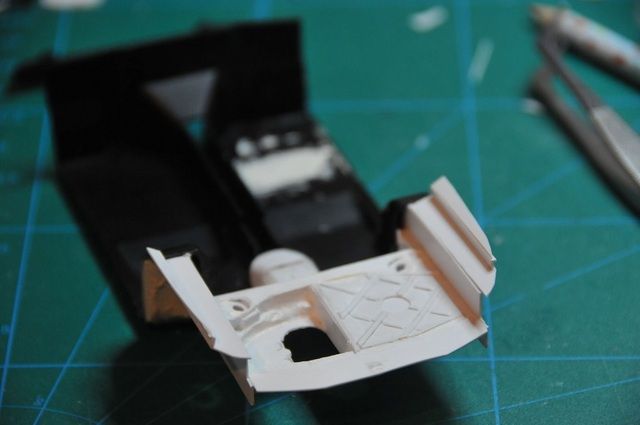
Based on reference pics available, and an initial idea to build a car from around the time I was born (1984),
I yesterday decided to cut the battery and shorten it.
Yet a new, shorter battery box was also made. I think it is starting to resemble what I see in pictures available to me:
Based on reference pics available, and an initial idea to build a car from around the time I was born (1984),
I yesterday decided to cut the battery and shorten it.
Yet a new, shorter battery box was also made. I think it is starting to resemble what I see in pictures available to me:
02-03-2015, 01:37 PM
#35
Intermediate
Thread Starter
Join Date: Aug 2012
Posts: 29
Likes: 0
Received 0 Likes
on
0 Posts
More research on this - summary to hopefully to provide more understanding for my own part:
The "old" type (first models) seem to sit in it's own cage, rather than a box integrated into the chassis:
http://members.rennlist.com/sharkski...BatteryBox.htm
The newer type ('80 outwards?) has a box that is a integrated in the trunk floor.
I have not been able to locate ANY detail pics of what this looks like in the front, but as you see from the first pic in the last post I believe it has a 45 degree slant in front,
covering the top half of the box.
How this box looks inside I have very little to base further building on; Please show me if you can.
Also the width/length of the access hatch (lid) could be interesting to compare with my model.
02-03-2015, 06:34 PM
#36
Nordschleife Master
I was just under my 85. This information applies to that car. Other years may be a bit different.
Battery box is flat on the front. No angle. The exhaust runs right past it.
Bottom of box is 15 3/4" x 7 7/8"
Lid is 17 3/4" x 9 7/8"
Hope this helps
Battery box is flat on the front. No angle. The exhaust runs right past it.
Bottom of box is 15 3/4" x 7 7/8"
Lid is 17 3/4" x 9 7/8"
Hope this helps
02-04-2015, 04:28 PM
#37
Rennlist Member
I think the hatches are the same on all years. The early battery box is just a rectangular box with two mounting arms that come off which bolt to the tranny. Here are some shots of the late box.
http://www.caraudio.com/forums/car-a...ubstitute.html
http://www.caraudio.com/forums/car-a...ubstitute.html
02-05-2015, 10:18 AM
#38
Rennlist Member
There are actually two "late" boxes, the one that applies to the model you are building is designed for an H8, but for 86.5 and on, IIRC, the smaller H6 was fitted to accommodate the changed exhaust system (the top of the front interior panel of that box is at an angle).
02-14-2015, 04:21 AM
#39
Intermediate
Thread Starter
Join Date: Aug 2012
Posts: 29
Likes: 0
Received 0 Likes
on
0 Posts
Been working on this in between, I am just about satisfied with the shape now.
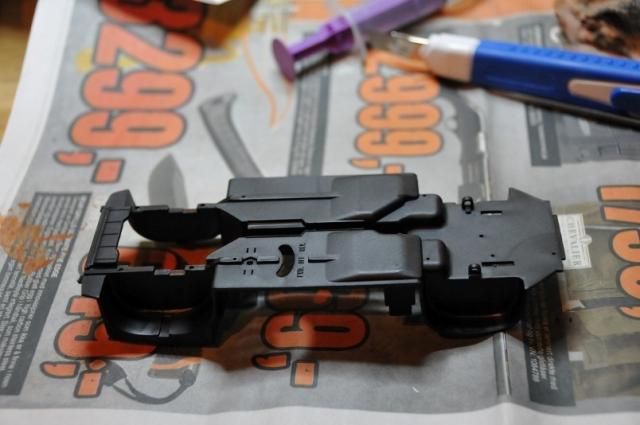
First, this is what the chassis looked like out of the Box:
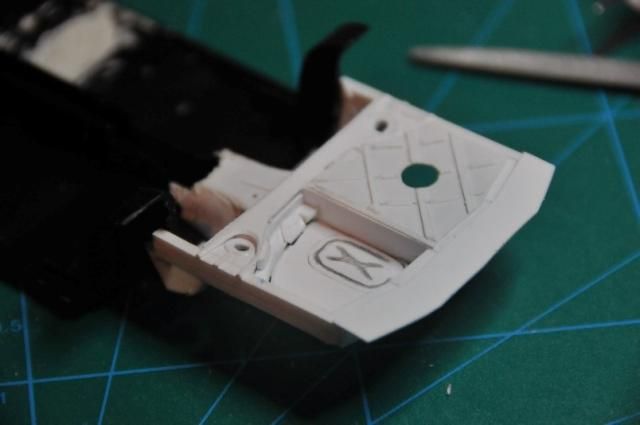
Here's where I am today. Of course everything will be smoothed out.
Wondering how to emboss the battery Hatch - just drawn on for now:
First, this is what the chassis looked like out of the Box:

Here's where I am today. Of course everything will be smoothed out.
Wondering how to emboss the battery Hatch - just drawn on for now:

 02-14-2015, 07:14 AM
#40
Rennlist Member
The older cars also had a lug post mounted in the front of the battery box for the positive cable. A short cable went from the battery to the post, and a long cable went from the post to the front of the car.
02-14-2015, 09:41 AM
#41
Nordschleife Master
Actually, the "drawn on" version looks pretty good. Score around the edges to make it look like the hatch is real, and you've got a good representation.
Unless, of course, you are going to insist on it really opening.
Which is understandable. Overkill, IMO, but understandable.
Unless, of course, you are going to insist on it really opening.
Which is understandable. Overkill, IMO, but understandable.
02-14-2015, 04:42 PM
#42
Intermediate
Thread Starter
Join Date: Aug 2012
Posts: 29
Likes: 0
Received 0 Likes
on
0 Posts
It's already opened, and the plan is to try and make some hinges for it.
It is probably overkill, but at the same time a very nice touch if I can make it work and find a connected battery down there.
It is probably overkill, but at the same time a very nice touch if I can make it work and find a connected battery down there.
02-14-2015, 09:25 PM
#43
Nordschleife Master
More power to you.
It's what I always heard termed "superdetailing." Limited only by your imagination, skills, patience and time.
The easiest hinge would simply be thin tubing (I prefer brass because it's easy to work with, but still reasonably strong). Cut a bunch of short sections, run a wire through them and then epoxy alternate sections to the frame and the lid.
Epoxy because it gives you some working time (don't use the "5 Minute" stuff), it will work on the brass, and it won't attack the plastic if you get some where you don't want it. It just wipes off. It works good on the windows too.
03-12-2015, 05:08 PM
#45
Intermediate
Thread Starter
Join Date: Aug 2012
Posts: 29
Likes: 0
Received 0 Likes
on
0 Posts
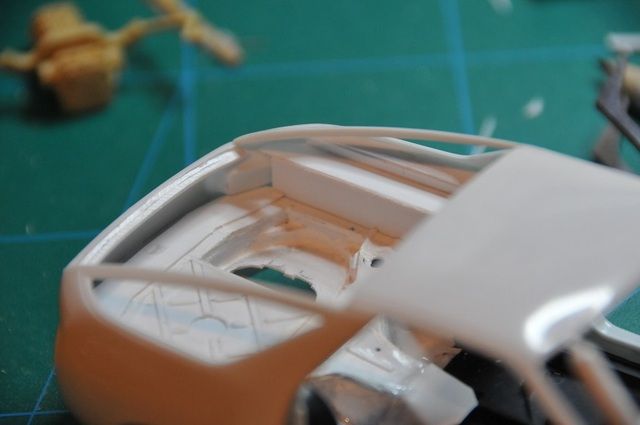
Hi guys. Been a while since my last update, but the build is slowly progressing.
Starting to add putty to get the shapes smoother, and also start building the inner rear fenders.
They still need some smoothing, but the trunk is starting to resemble something I think.
Plan is to shoot a coat of grey once I get the basic shapes down, so I can better see where smoothing is needed.
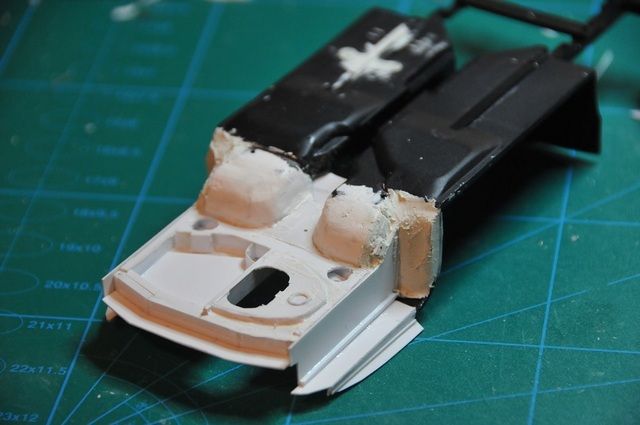
Here's what it looks like placed inside the body:

Starting to add putty to get the shapes smoother, and also start building the inner rear fenders.
They still need some smoothing, but the trunk is starting to resemble something I think.
Plan is to shoot a coat of grey once I get the basic shapes down, so I can better see where smoothing is needed.


Here's what it looks like placed inside the body:

