When you click on links to various merchants on this site and make a purchase, this can result in this site earning a commission. Affiliate programs and affiliations include, but are not limited to, the eBay Partner Network.
^ Thanks and she definitely appreciates what I am doing for her.
I remembered yesterday that upon reinstalling the engine I left the top motor mount nuts loose so I could orient the engine mount as it was being lowered. Thankfully, you can access the top nuts from the rear of the engine so it only took about 10-15 minutes to tighten. I also bled all the brake today, which wasn't on the list. Finally, I was able to install the four ball joint boots on the two front spindles so "MY" work is just about done (minus underhood heat barrier replacement). I will take it to the shop Tuesday for the AC and alignment and then to the dent shop to pull a fender ding. I'll post some pics of the ding before/after so I am hopeful it can be completely removed without notice.
I had the car aligned today as well as converted the AC to R134. Good news is the car looked to be holding vacuum and AC was definitely cold. I did notice that my fuel level sender is on the fritz so likely need to fix or replace.
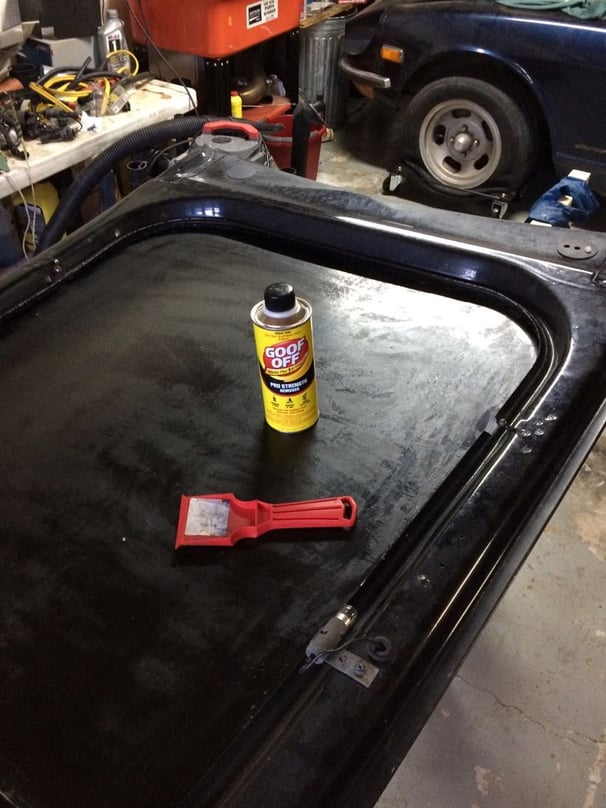
I was able to remove the old hood insulation in preparation for the new 1/2" insulation, which I ordered from an Wicks Aircraft Supply for $40 along with some 3M 80 adhesive from Amazon for $25. After this I will have the fender dent removed and start on the paint correction.
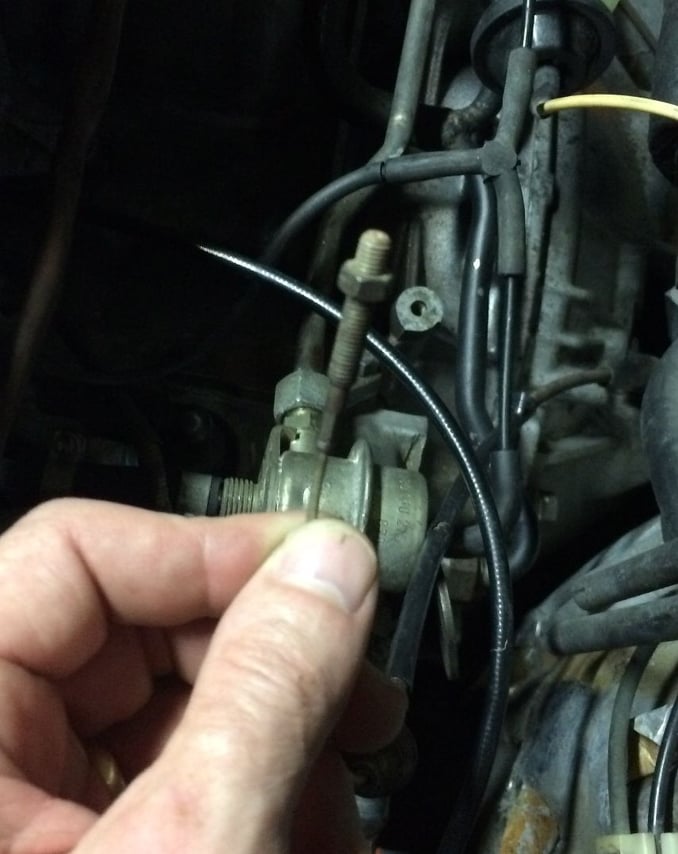
The car was hanging up when trying to shift since I purchased the car. Previous owner couldn't figure it out either and after replacing the filter, K1 spring, fluid it did not resolve the issue. When I had the car in the shop today the mechanic said to look at the throttle cable adjustment that hooks the trans to the throttle body. So I did some reading and this adjusts the shift speed of the trans. I decided just to disconnect the cable and what do you know....car shifts at 2k rpm in each gear. Therefore, the shift speed cable was too tight and was causing the issue. I will hook back up tomorrow and start adjusting.
This is weird, I took off the airbox to adjust the shift cable linkage and with it unscrewed all the way (adjust at the end of the cable) it is ~5/8" from being able to snap onto the throttle body. Simply put, I have to pull on the cable 5/8" in order for the linkage to snap on the throttle body. This would explain why there is so much preload on the shift cable. I don't think there is any adjustment on the transmission and I believe the only adjustment capability is on the linkage at the end of the cable. WTH? Any input is appreciated.
Last edited by 240Z TwinTurbo; 04-26-2017 at 09:14 PM.
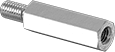
I just ordered three different length metric standoff's from McMaster Carr so I should be able to get it within the proper adjustment window. Nothing looks to be non OEM so I don't understand why the cable requires so much preload to attach the linkage to the throttle body.
Part numbers and parts description if anyone is interested...
Male-Female Threaded Hex Standoff
18-8 Stainless Steel, 8 mm Hex Size, (20, 25, 30) mm Length, M5 x 0.8 Thread Size
93655A466
93655A469
93655A472
So the car is now registered and insured so it has been on the road since Monday, at least legally.
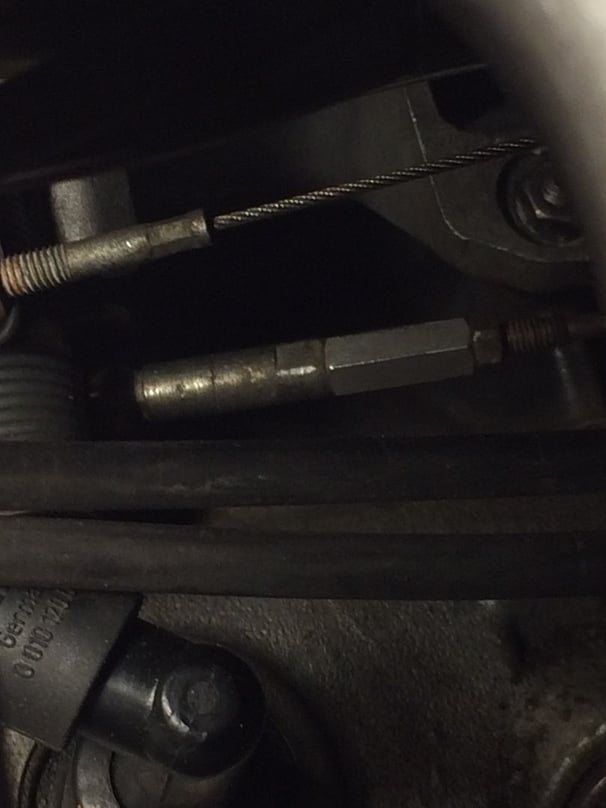
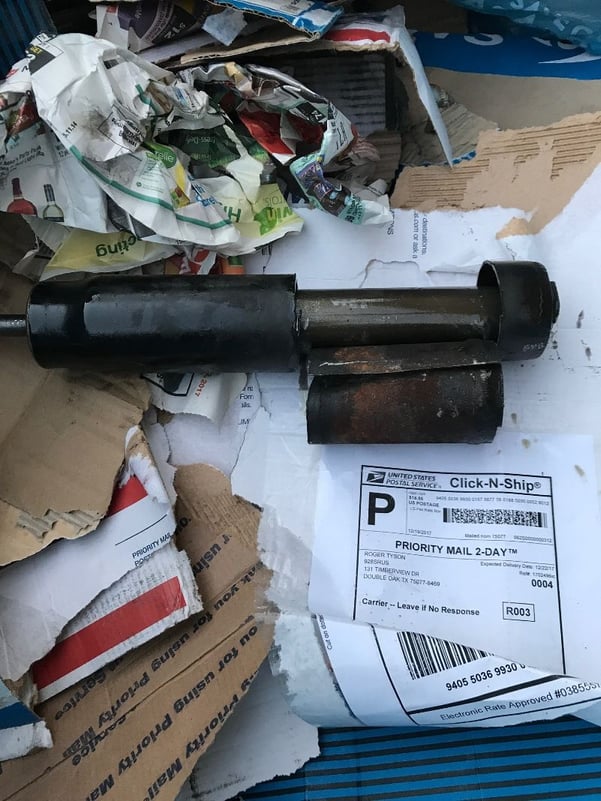
I received the three different length pieces to extend the cable for the shift speed and used the one that got the cable linkage within ~0.25" of the throttle body linkage. After about 5 adjustments I have the cable dialed in and it shifts very well under all circumstances. Below is a pic of the piece that extended the cable linkage.
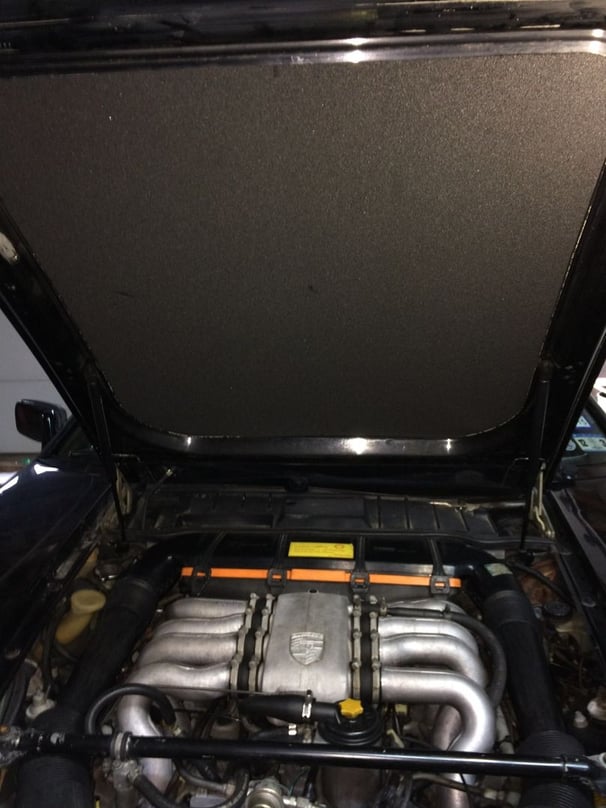
I was also able to install the new hood insulation material that was purchased from an aircraft supply company. Below is the picture.
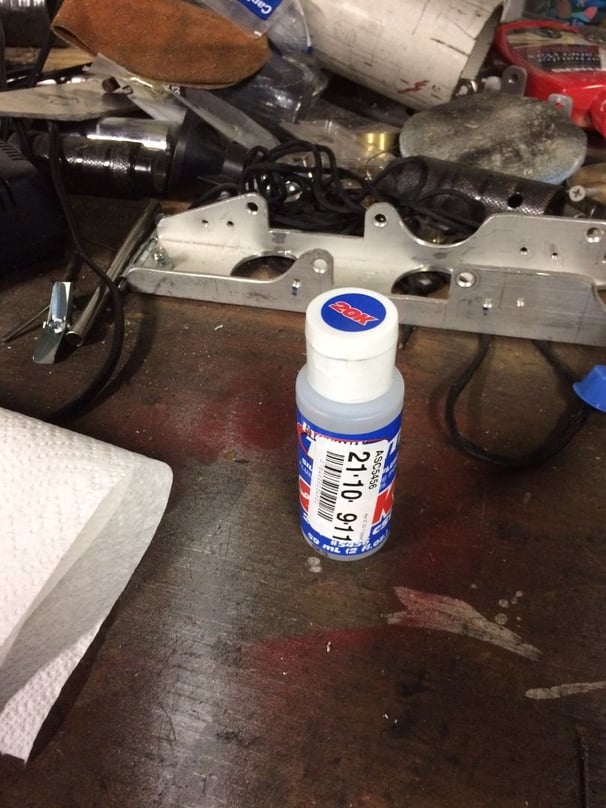
So after driving the car a few days I have noticed the temps climb to the last white line so I ordered some 20K CST silicone gear oil from Amazon and will refill the fan to help increase the shear in hopes the fan will couple more with the engine speed. I will also be removing the windshield wiper setup to flush the system. Although it currently works, it sprays unevenly from the nozzles so I need to make sure there isn't crap in the system. I will address the headlight nozzles as well. I think for the Intense System I will likely leave it alone for now, but we'll see.
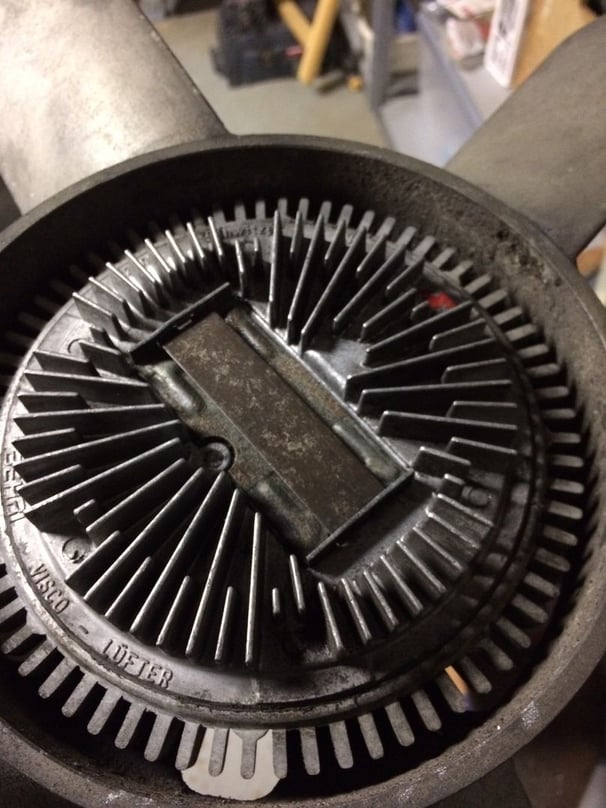
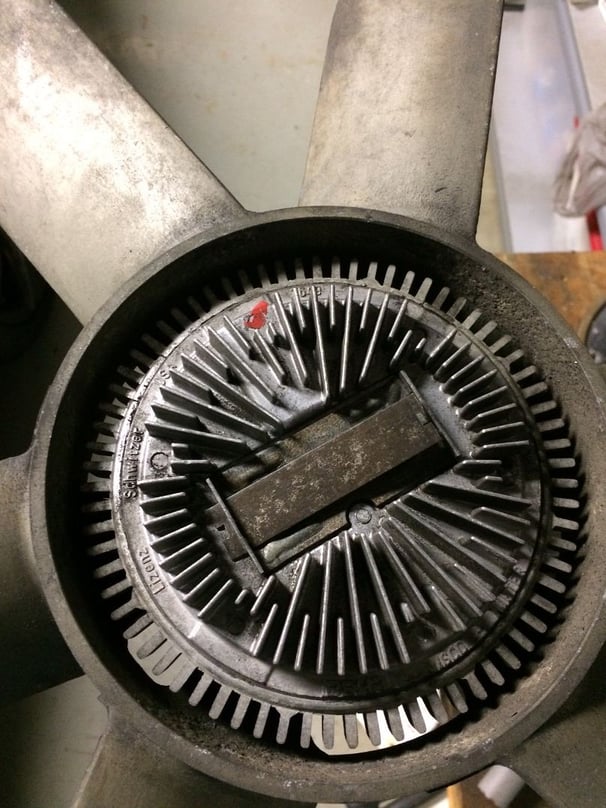
The car is doing well so far and still no leaks. I did notice the car was running on the warm side so after a quick search I decided to service the fan clutch. Purchased some 20K CST Lucas oil from Amazon for $6 and away I went.
I guess the 83 had a new design as removing the cap for the filler plug was super easy. Just press on one side and slide the plate over and it can then be removed.
I used a 3cc syringe with the needle removed, which worked perfectly to fill the hole with no leaks. I initially tried 9cc's, but the car temps didn't move. I then added another 15cc's and the car temps thus far have been consistently lower. I'll monitor temps to see I need to add more.
Next project will be to replace the old fuel filter and then I am going to remove the washer system to inspect and clean. Although it works it does not spray evenly and some holes only dribble out.
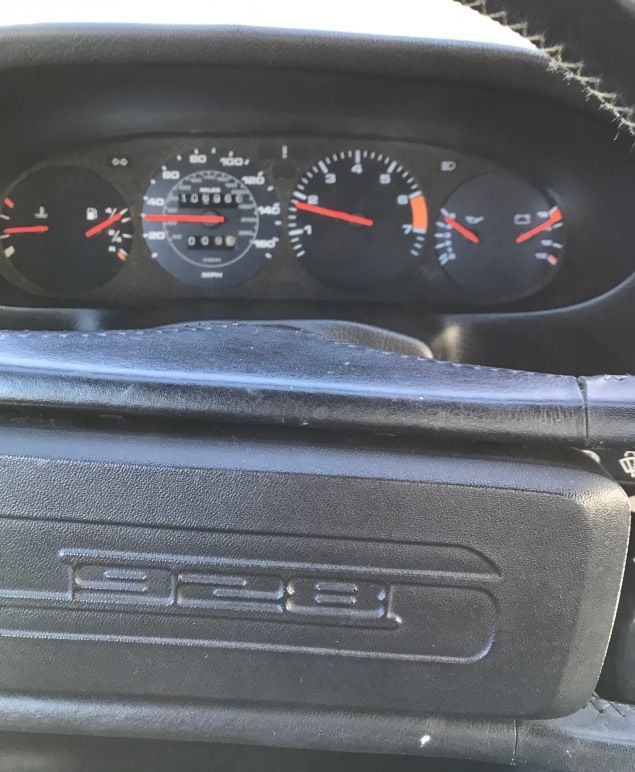
I followed that up by ordering one of Roger's Circuit Board Upgrade kits for the dashpod. This fixed my trip meter, odometer, and speedo issue.
Notice how all of this now works along with my fuel gauge right after fill up?
I have also completed the paint correction, which took about 40hrs, but I have been unable to take pics because its too cold to wash the car. Below is a link to the thread I made regarding the paint correction. https://rennlist.com/forums/928-foru...1983-928s.html
Ordered a bunch of parts from 928rUS as well as 928Int so thanks to both vendors for great service. I'll update pics later as I install the various parts!
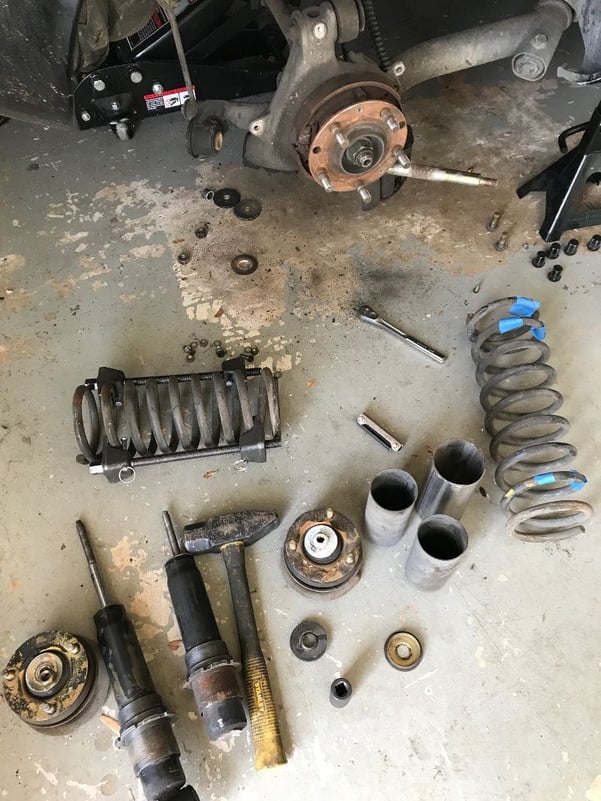
I was able to finish replacing the rear struts today. I purchased a set of used rear pins from 928 International as contingency should the old ones not come out. However, after soaking them the night prior with PB Blaster they came out in just a matter of minutes. I purchased a lug nut (M14x1.5) to fit all the way over the threads and rest upon the pin shoulder so it would not jack the threads. After just a few hits with the 5lb hammer it was moving. I then used a hollow SS tube I had that was slightly smaller than the pin to drive it out.
I next removed all the suspension stuff and rented a spring compressor from AutoZone.
Unfortunately, I was unable to beat off the spring perch collar so I had to have it pressed off. One came off with no issue, but the other wouldn't budge. I ended up drilling a hole in the shock tube to drain the oil and release any gas. I then took a 4" grinder with a cutoff wheel and cut the strut on either side of the threaded collar leaving about 1/4" either side. I then used a hack saw the cut through the inside of the tube, which took about 10 minutes. Using a screw driver, I then hammered it along the edge of the cut and it collapsed the tube inside the collar.
So I am on to the front, where I have already changed the struts. However, I noticed the inner tie rod ends were toast so I ordered new ones from 928rUS along with the upgraded steel lower ball joint assembly. Apparently, mine was the original aluminum piece so it was recommended that I upgrade it to the later steel version. I will pull apart the front suspension in two weeks to finalize the suspension changes.
If anyone needs a set of used rear suspension pins with washers and nuts I will sell for $75 shipped Cont US. It was $100 shipped from 928 Int, but they charge a 25% restocking fee so might as well help out a member. I'll post in the for sale section soon.

 04-23-2017, 08:20 PM