

A 86.5 Intake Refresh Picture Thread from a first-timer
 11-23-2013, 01:49 PM
#106
Burning Brakes
Thread Starter
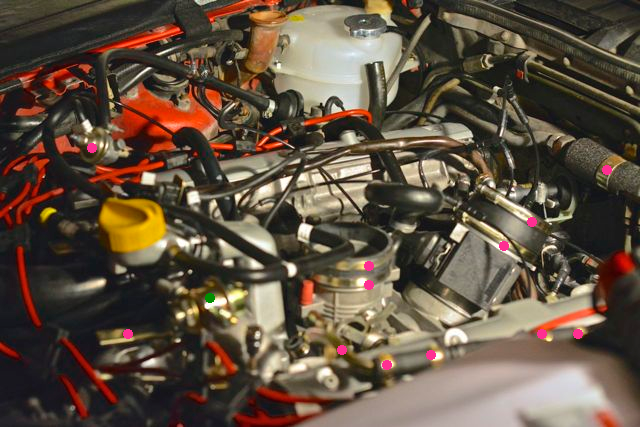
I everything I plated, I plated myself. I live in mid-Missouri, and all of the plating services within a 200-mile radius got not great reviews. Plus, I like the convenience of being able to plate things one at a time (and thus not lose track of anything.)
In the picture below, the parts that are marked with a pink dot are things I re-plated myself (using the Caswell Copy-Cad kit.) The only new-looking part that I didn't plate in the picture is the front fuel pressure damper (marked in green.)
Most of the rubber is new. I had to fabricate a couple of NLA hoses- Roger helped me with that. The rubber I re-used I cleaned with simple green, then applied , let dry, then applied That brought some life back into the rubber.
Many parts I cleaned in a solution of 2:1 water:simple green, using an ultrasonic cleaner that I bought at I like it because it has a drain hose, so I don't have to tip the unit over to empty it. My last unit failed because some of the display got wet during draining.
I read less-than-stellar reviews of the Eastwood plating kits online, so I went with the Caswell. I found a couple of helpful links on the Caswell stuff here:
http://lainefamily.com/CaswellPlating.htm
http://forum.ih8mud.com/40-55-series...d-plating.html
With the Caswell Copy-Cad kit, you also need to buy the following:
- a heating unit. Caswell sells them.
- a few buckets (2 gallons.)
- a constant current rectifier. Caswell sells them. Mine is a 5 ampere maximum unit. That means that I can plate 5/.14 = 35 square inches maximum at a time. Caswell sells them, but I got mine at Amazon.
- extra "brightening solution." You'll see it on the Caswell website, it goes quickly.
- a thermostat for the heating unit, and a heavy-duty glass thermometer. Caswell sells them.
- a copper pipe, which you will cut and bend the ends to fit over one of the buckets. You will also need copper wire and two alligator clips.
- I would recommend buying very thick rubber gloves, a respirator, and eyewear. And, something to strip the parts down to bare metal before plating, whether that be a wire wheel, bead blasting cabinet, or both.
Last edited by syoo8; 01-09-2014 at 11:58 AM.
 11-23-2013, 02:04 PM
#107
Inventor
Rennlist Member
Rennlist Member
I hope you are replacing that washer fill spout! 
11-23-2013, 02:06 PM
#108
Burning Brakes
Thread Starter
The difference was amazing. Ben's stuff came out beautifully, while the door locks (in addition to being weeks delayed) were not completely finished- there were little spots missing powder, etc. I am very glad that Roger talked me out of sending my intake to the local guy, who knows what would have happened.
11-23-2013, 07:45 PM
#109
Rennlist Member
Join Date: Oct 2005
Location: Gatineau, Qu�bec, Canada
Posts: 5,188
Received 1,339 Likes
on
508 Posts
Thank you very mutch Scott.
I have already looked on Caswell's site but wasn't sure if I would go with there stuff.
Probably will now.
My intake is remove now and want to replate many small parts.
I think this is the right time to buy the kit and make the engine bay looks better!
I have a lot of time in front of me as the car is put away for the winter.
I might need to ask you few questions when I'll be ready to buy or plate things.
Of course, if you don't mind.
Many thanks again and keep up the good work.
Last edited by Bertrand Daoust; 12-04-2013 at 05:59 PM.
11-27-2013, 12:08 AM
#110
Burning Brakes
Thread Starter
Putting the runners back on the car, I started fiddling around with the throttle linkage.
When I pulled the throttle open I could hear the TPS 'click.'
... but I couldn't get it to 'click' back unless I manually pushed the throttle back to idle. If I just let the throttle relax back to idle position, it wouldn't click.
Any ideas? I am thinking that I need to lengthen/shorten the throttle linkage.
12-04-2013, 12:29 AM
#111
Burning Brakes
Thread Starter
Just got back from a trip, and time to get back to work.
There is one allen-head cam-cover bolt on the driver's side that is difficult to reach.
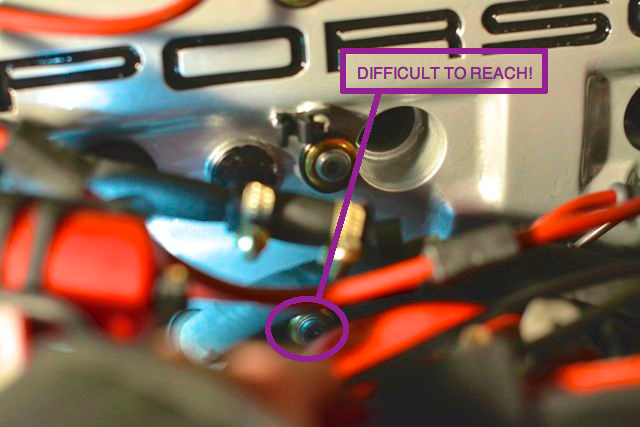
I bought a , that did the trick. It was cheap.
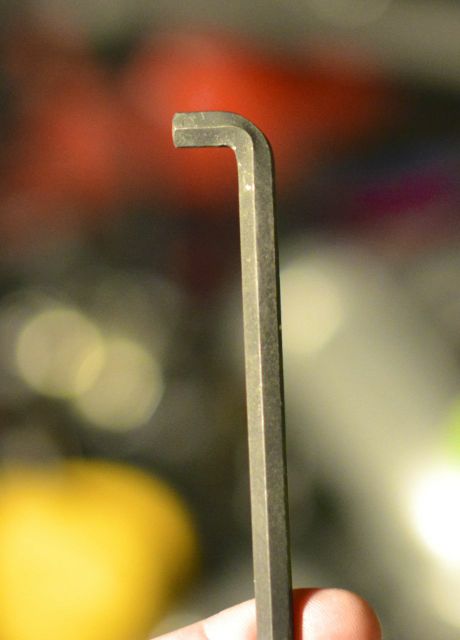
There is one allen-head cam-cover bolt on the driver's side that is difficult to reach.
I bought a , that did the trick. It was cheap.
12-04-2013, 12:40 AM
#112
Burning Brakes
Thread Starter
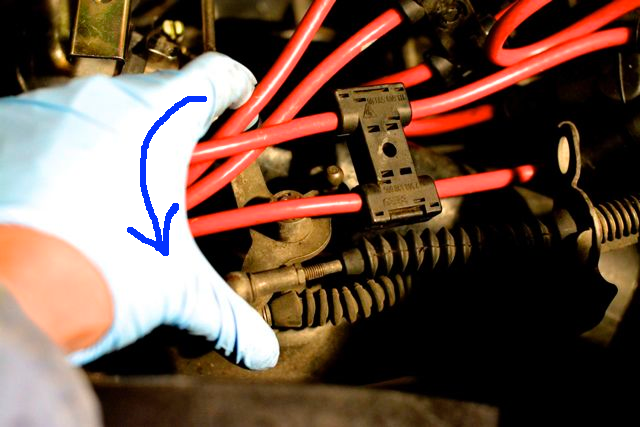
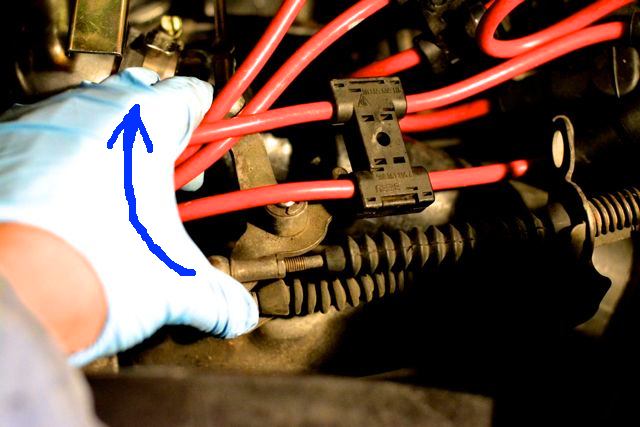
I've been trying to remove the fuel return hose fitting from the fuel cooler. It is completely stuck and I couldn't remove it with a regular wrench. I blasted the area with Kroil, to no avail.
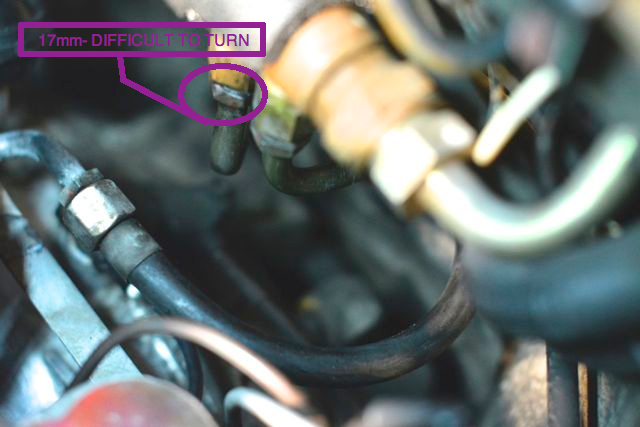
As per SeanR's instructions in another thread, I cut the fuel line return hose, then threaded a 17mm gear wrench. The problem is that my gear wrench is too wide to fit (my gear wrench is made by "Gear Wrench.") SeanR's picture below shows a Blackhawk-brand stubby gear wrench, which I suppose I have to go out and purchase, unless any of you have a better suggestion.
Any ideas?
12-04-2013, 12:59 AM
#113
Three Wheelin'

Get a 17mm O2 sensor spanner and grind the edges off. Some are thin anyway. i have one that is thin and gets into most tight spots where they normally put O2 sensors.
12-04-2013, 02:06 AM
#116
Nordschleife Master
Scott,
For removal of that fitting I use a 19mm crowsfoot on the fuel cooler to prevent damaging it.
And then slide a 17mm crowsfoot on the fitting itself. I then put extensions into the crowsfeet, and breaker bars on the extensions. That way I am out of the cramped area, and have a good tool on the fitting to ensure it does not become rounded. Only use 6 sided crowsfeet (as suppose to more of a 12 point style).
 12-04-2013, 02:25 AM
#118
Burning Brakes
Thread Starter
Colin- thank you for the tips! I'll go hunting for a set of crows feet wrenches- I don't have any, and it is probably time to get some.
