

S4 MY89 Carbon Canister Y-Connecter Replacement
 04-19-2012 | 01:02 PM
#1
Thread Starter
Racer
Joined: Apr 2011
Posts: 353
Likes: 0
From: Australia
Hi, found this replacement approach from another Rennlister (forget who just now???) anyway just wondering about the integrity of this approach and using what looks like brass plumbing fittings to offer a permanent fix rather that going down the plastic replacement path. I believe Roger also sells a stainless steel replacement part however I am in Oz and want to get this fixed asap with car back on the road.
Cheers
Cheers
04-19-2012 | 06:49 PM
#4
Under the Lift
Lifetime Rennlist
Member
Lifetime Rennlist
Member
Joined: Mar 2002
Posts: 18,648
Likes: 49
From: Buckeye, AZ
So, you made a T with 2 x 1/2" sides and a 3/8" ?
This one is Nylon, under $2 and should do as well.
http://www.hardwareworld.com/Hose-Ba...h-pYB7L4L.aspx
This one is Nylon, under $2 and should do as well.
http://www.hardwareworld.com/Hose-Ba...h-pYB7L4L.aspx
04-19-2012 | 07:05 PM
#5
Archive Gatekeeper
Rennlist Member
Rennlist Member
Joined: Sep 2002
Posts: 17,687
Likes: 2,860
From: Irvine, CA
The brass fittings should work just fine. Nicole sells a nice metal replacement- the only potential benefit to it that I could see is that by some late model year, the vent lines are made out of plastic tubing that isn't flexible (and is a king kong PITA to get the broken plastic Y-pipe pieces out of...). So it may be a bit of a struggle to get the hoses to line up. This is probably not an issue for an '89, just mentioning it for posterity. Here's Hebert's '91 with Nicole's piece and the plastic tubing.

By '93 they're all plastic (but there's no 'Y'....)

By '93 they're all plastic (but there's no 'Y'....)
04-19-2012 | 08:16 PM
#7

Cottage Industry Sponsor
Lifetime Rennlist
Member
Lifetime Rennlist
Member
Joined: Oct 2001
Posts: 25,784
Likes: 150
From: Silly Valley, CA
Trending Topics
04-19-2012 | 08:17 PM
#8

Chronic Tool Dropper
Lifetime Rennlist
Member
Lifetime Rennlist
Member
Joined: Oct 2001
Posts: 20,506
Likes: 549
From: Bend, Oregon
I replaced mine with the factory piece a dozen years ago. Took the time to tie everything up so the hoses don't strain the plastic part. All is still well.
Even if yours hasn't failed (yet...) its a good idea to spend a few minutes with the tie wraps to unload the plastic part. Simple PM task IMHO.
Even if yours hasn't failed (yet...) its a good idea to spend a few minutes with the tie wraps to unload the plastic part. Simple PM task IMHO.
04-20-2012 | 12:16 AM
#9
Thread Starter
Racer
Joined: Apr 2011
Posts: 353
Likes: 0
From: Australia
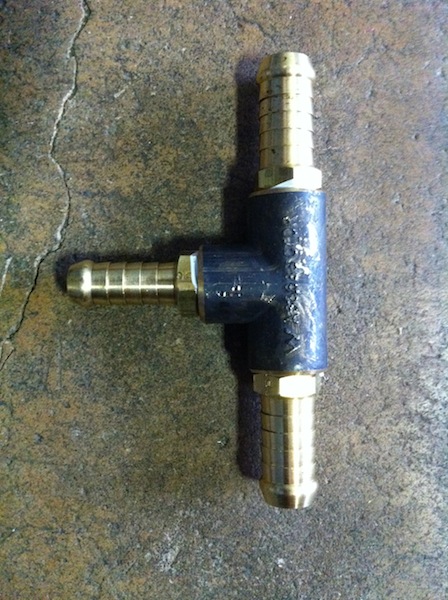
Hi, well the job has been done. instead of the 3/8" tee (which I felt was a bit bulky) I went with 1/4" tee with the appropriate sized barred brass fittings. Here's the pic before install,
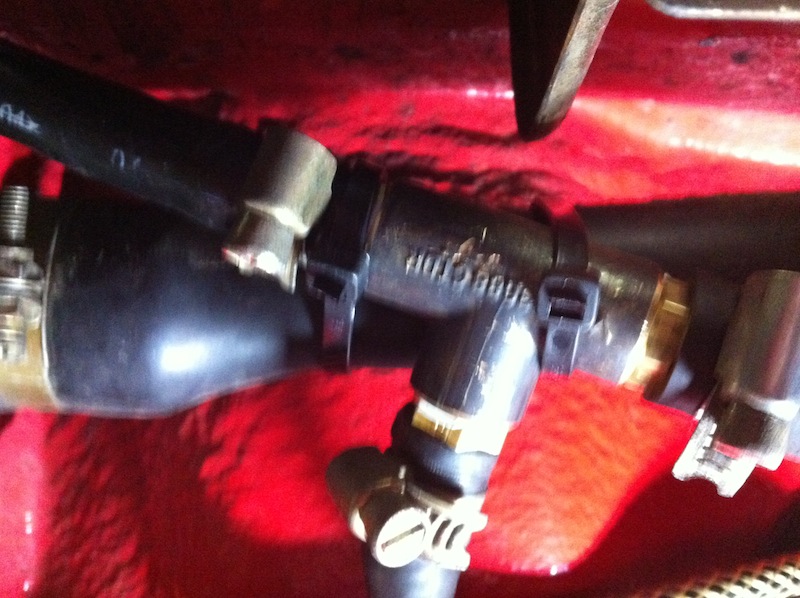
Here's a pic after install and you will see that I have tie wrapped to main filler hose to washer tank,
So now very much looking forward to no more fuel smells in the cabin. Suspect that it may also assist in idle and fuel economy as the old cracked plastic Y-piece does/can allow unmetered air into the system. I did notice on my last trip to Canberra (routinely do this trip every 2 weeks) that the fuelk economy was down by around 2-3% and that prior to leaving with a FULL gas tank, I had probably the strongest of fuel smells when I opened the door! Anyway will see how she runs on the next trip.
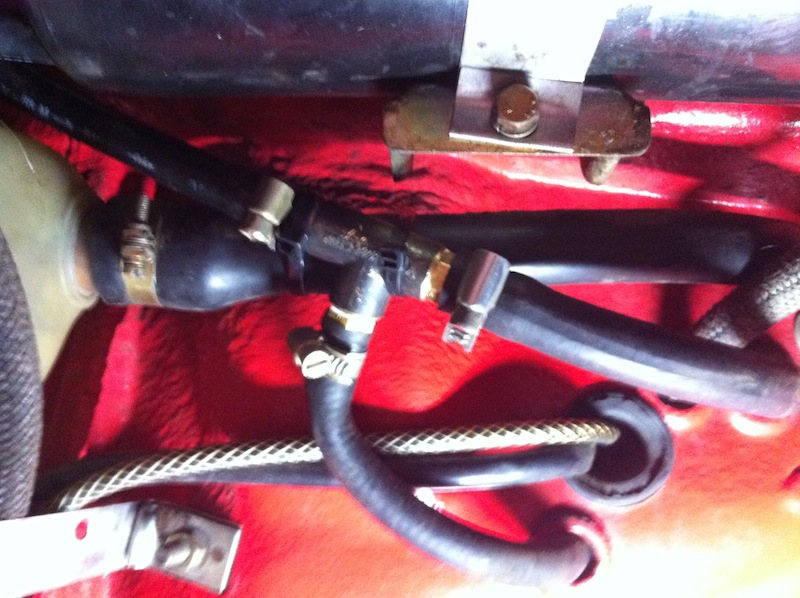
Whilst there I secured the vent/overfill hose. Pic here,
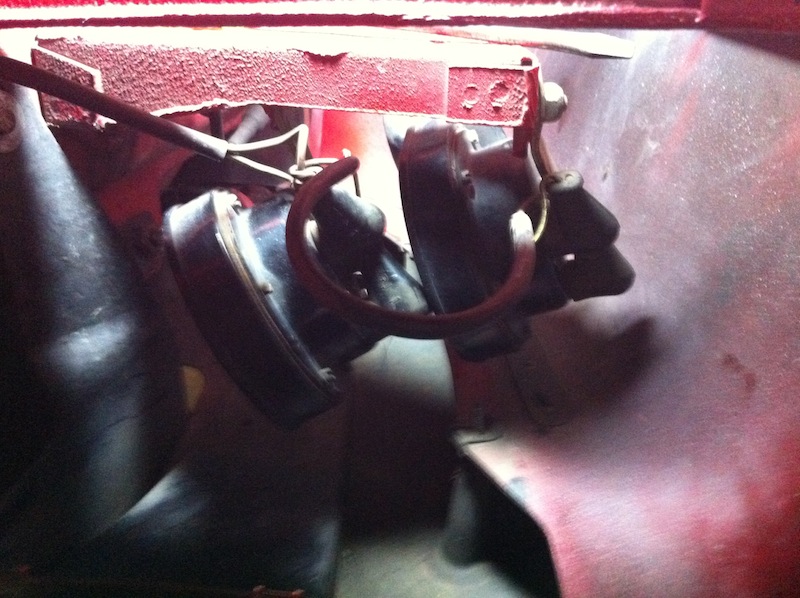
I also checked the horn mounting and secured. The mounting bracket had become loose and the horns were flapping about a little bit,
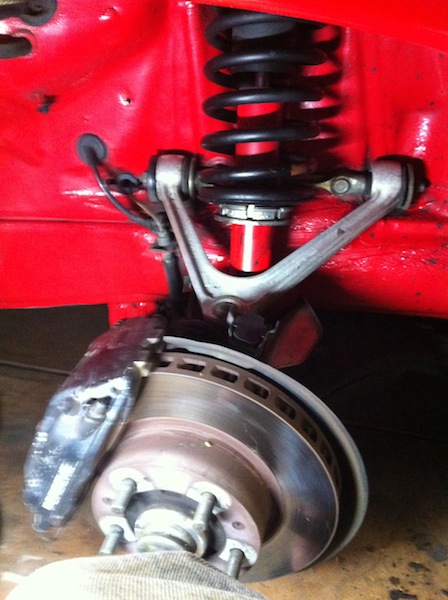
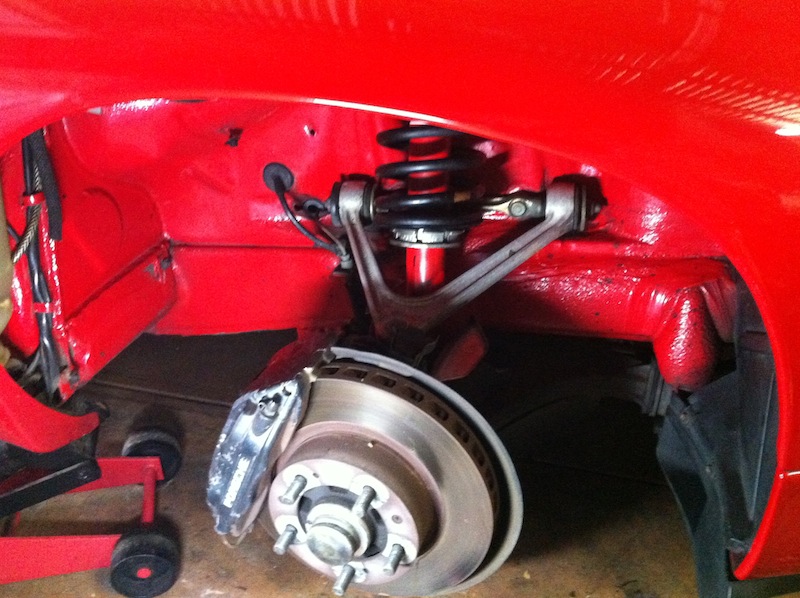
An for good measure a couple of shots of the front right suspension in all its naked glory :-D
Thanks to all who assisted. There is just some much experience, expertise and knowledge on this forum. Where woulkd we be without you all??
Cheers
Here's a pic after install and you will see that I have tie wrapped to main filler hose to washer tank,
So now very much looking forward to no more fuel smells in the cabin. Suspect that it may also assist in idle and fuel economy as the old cracked plastic Y-piece does/can allow unmetered air into the system. I did notice on my last trip to Canberra (routinely do this trip every 2 weeks) that the fuelk economy was down by around 2-3% and that prior to leaving with a FULL gas tank, I had probably the strongest of fuel smells when I opened the door! Anyway will see how she runs on the next trip.
Whilst there I secured the vent/overfill hose. Pic here,
I also checked the horn mounting and secured. The mounting bracket had become loose and the horns were flapping about a little bit,
An for good measure a couple of shots of the front right suspension in all its naked glory :-D
Thanks to all who assisted. There is just some much experience, expertise and knowledge on this forum. Where woulkd we be without you all??
Cheers

 05-19-2021 | 11:47 AM
#13
Chronic Tool Dropper
Lifetime Rennlist
Member
Lifetime Rennlist
Member
Joined: Oct 2001
Posts: 20,506
Likes: 549
From: Bend, Oregon
There's nothing in the cannister that deteriorates with age or use, so unless one of the nozzles has broken off, the old one is just fine.
The original T suffers when strain is placed on the plastic by hoses that are not supported well. Spend a little time with some cable tie-wraps, supporting the connected hoses to other plumbing in the fenderwell area. I replaced mine with another factory piece very soon after I received the car (in the 1990's...), and did the bit of extra work then. It's still working fine well over 20 years later. The plastic piece didn't upset the corner balancing of the car.
My way-back-then instruction is attached.
05-19-2021 | 05:47 PM
#14

Former Vendor
Joined: Feb 2005
Posts: 15,230
Likes: 2,481
From: Anaheim
At this point, a huge percentage of the charcoal canisters have "come apart", internally. Huge percentage!
The little tiny charcoal pellets will be found loose in the hoses, dribbling out of the charcoal canister. This is a disaster waiting to happen.....or already occurring.
These tiny (light) pellets are easily sucked up (and past) the vacuum control valve right by the coolant overflow tank, which will keep that valve from closing.
From here, the tiny (light) pellets will be sucked up to the electrical control valve (sits on the top of the water pump) and then this valve will not close.
With both valves stuck open, there is constant intake vacuum on the system. If the "Y" is broken, other than a substantial intake air leak, there will not be any harm.
However, if you repair the "Y" (or the "Y" is not already broken), the intake vacuum will "suck" the fuel tank down when the engine is running and then allow the tank to re-expand when the car is shut off. A few cycles of this almost always resulting in a cracked fuel tank. (Expensive.)
We see a tremendous amount of cracked tanks, preceded by a "y" replacement.
The replacement charcoal canister is the same one as pictured above, in Rob's 2nd picture of the GTS canister (993 201 221 03.)
This charcoal canister has three fittings, instead of two, as is shown in Rob's picture.
Use of this superceeded canister completely eliminates the need for that "Y", which is a fantastic update!
....And for those who are really concerned about the environment (and not just the typical "liberal lip service" of being concerned, while they remove the catalytic converter or air pump from their 928), the improvement to the fuel tank ventilation system is huge!
100% of the raw fuel vapors are now forced to go through the charcoal canister and are recycled into the engine, versus the inefficiency of the pre-1993 system, which allowed a large percentage of the vapors to simply escape.
......Which is why Porsche made the supercession 20 years ago!
Last edited by GregBBRD; 05-19-2021 at 05:50 PM.
