

Piston Swap
 08-09-2011, 05:20 PM
#1
Rennlist Member
Thread Starter
AADDPP requested that I take pictures and document ala Dwayne what I am doing when doing a piston swap.
I'll make an attempt at it:
First we assume you have the engine out of the car, on a stand with the heads off and the oil pan off.
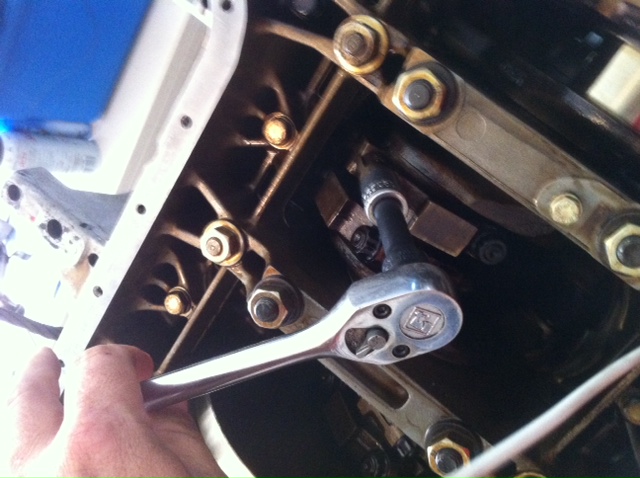
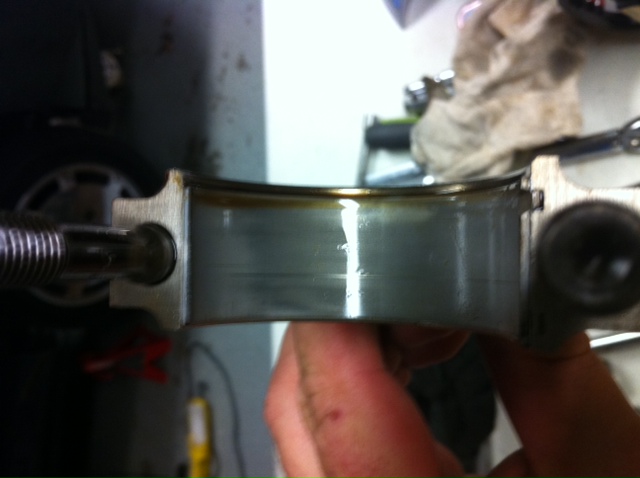
Loosen the connecting rod nuts with a 14mm 12 point socket:
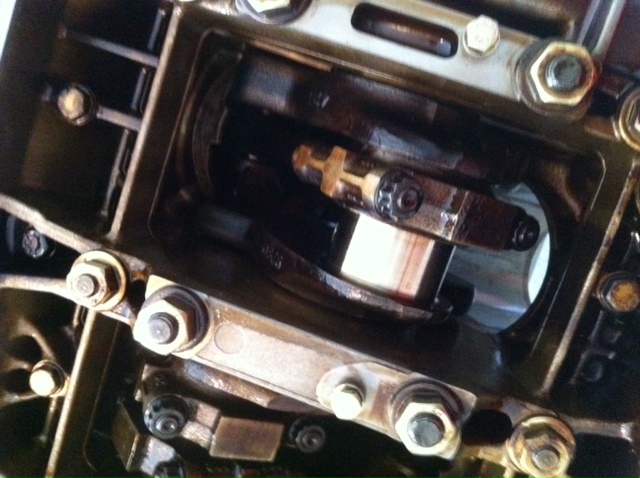
Then remove the cap and bearing from the connecting rod. Be sure to note the orientation of the cap. I don't know if they go one way or there other but if you put it back on the same direction it came off, you can't be wrong. Then push (or pull depending on the orientation of the block up or down on your stand) the piston out of the block where the heads used to be (that's to help you Jerry)
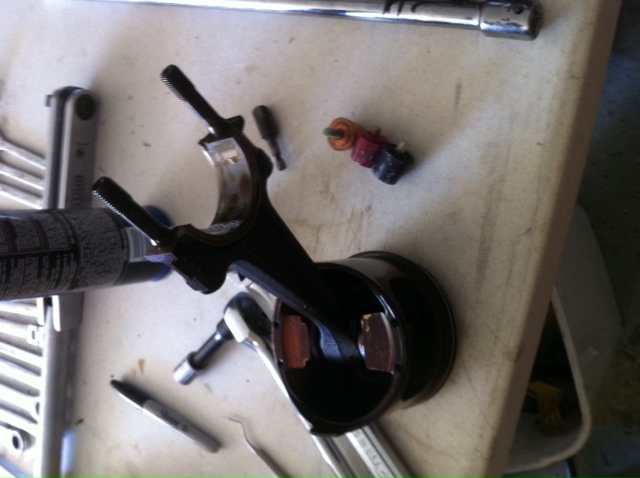
Now you can change the rings and move the connecting rod from your old piston over. This is as far as I got at lunch today so I'll post more tonight after I get back from a bike ride.
I'll make an attempt at it:
First we assume you have the engine out of the car, on a stand with the heads off and the oil pan off.
Loosen the connecting rod nuts with a 14mm 12 point socket:
Then remove the cap and bearing from the connecting rod. Be sure to note the orientation of the cap. I don't know if they go one way or there other but if you put it back on the same direction it came off, you can't be wrong. Then push (or pull depending on the orientation of the block up or down on your stand) the piston out of the block where the heads used to be (that's to help you Jerry)
Now you can change the rings and move the connecting rod from your old piston over. This is as far as I got at lunch today so I'll post more tonight after I get back from a bike ride.
Last edited by jeff spahn; 08-09-2011 at 09:22 PM.
 08-09-2011, 06:06 PM
#3
Archive Gatekeeper
Rennlist Member
Rennlist Member
Rod caps definitely need to go on the way they came off. The factory provides some convenient markings:

08-09-2011, 06:09 PM
#4
Rennlist Member
what is wrong with that piston?? is the coating gone on the sides or something? holes in it? ring lands damaged?
I would also do what was suggested. re use the rod, weigh both pistons and match the weight by taking weight off the piston in a way that cant structually hurt it. if its too light already, there is not much you can do then.
I would also do what was suggested. re use the rod, weigh both pistons and match the weight by taking weight off the piston in a way that cant structually hurt it. if its too light already, there is not much you can do then.
08-09-2011, 06:15 PM
#5
Rennlist Member
Thread Starter
what is wrong with that piston?? is the coating gone on the sides or something? holes in it? ring lands damaged?
I would also do what was suggested. re use the rod, weigh both pistons and match the weight by taking weight off the piston in a way that cant structually hurt it. if its too light already, there is not much you can do then.
I would also do what was suggested. re use the rod, weigh both pistons and match the weight by taking weight off the piston in a way that cant structually hurt it. if its too light already, there is not much you can do then.
The piston top is very damaged and full of big nicks and dings. Figured it would be best to replace it rather than run it damaged. Don't want to chance it breaking. Looks like it ate a washer or something. I'll post close ups of the piston in this thread tonight.
If you want it I'll send it to you for the cost of shipping.
08-09-2011, 07:06 PM
#6
Rennlist Member
Thread Starter
what is wrong with that piston?? is the coating gone on the sides or something? holes in it? ring lands damaged?
I would also do what was suggested. re use the rod, weigh both pistons and match the weight by taking weight off the piston in a way that cant structually hurt it. if its too light already, there is not much you can do then.
I would also do what was suggested. re use the rod, weigh both pistons and match the weight by taking weight off the piston in a way that cant structually hurt it. if its too light already, there is not much you can do then.
Last edited by jeff spahn; 08-09-2011 at 10:17 PM.
08-09-2011, 07:11 PM
#7
Rennlist Member
Ok, Jeff, I did what you said. I got the engine out and put it on the stand, then took the oil pan off. Then I used the same kind of wrench on the rod bolts and got the rod cap off, but for the life of me I cannot get the damn piston to come out past the crank and all that other stuff in the way. I must have missed a page or two of the instructions.
Jerry Feather
Jerry Feather
Trending Topics
08-09-2011, 07:17 PM
#8
Archive Gatekeeper
Rennlist Member
Rennlist Member
Jerry-
If you bend the old connecting rod over 90o, then rotate the crank around just so, you can just barely squeeze the piston out through the bottom:

If you bend the old connecting rod over 90o, then rotate the crank around just so, you can just barely squeeze the piston out through the bottom:
08-09-2011, 07:28 PM
#9
Rennlist Member
Thanks Rob. That Helps. That must have been on one of the missing pages of instructions.
What do you use to bend the rod with. Where should the bend be made. Do I have to bend the new rod also before I can get the new piston back in. How do I straighten the new rod out after it is back in.
Is there any trick to "squeezing" the piston? Is that how the hammer marks got on your crank case? How big a hammer do I use for the squeeze.
I'm pulling you chain, of course. Dwayne is a tough act to follow and we are a ways short of his kind of tutorial here.
Jerry Feather
08-09-2011, 09:19 PM
#10
Rennlist Member
Thread Starter
You are funny Jerry. I read that and laughed out loud and my friends gave me strange looks til I read them your reply. I'll edit the post tonight when I get home.
08-10-2011, 03:00 PM
#11
Three Wheelin'

Join Date: Jan 2010
Location: Muriland
Posts: 1,382
Likes: 0
Received 0 Likes
on
0 Posts
Jeff, thanks for posting the photos and the steps that you followed. Looks pretty straight forward, though its still intimidating to consider doing this the first time. Hopefully everything goes well from here forward with your repair.
Thanks again, Dave
Thanks again, Dave
08-10-2011, 04:32 PM
#12
Rennlist Member
Thread Starter
Dave. Really taking out the piston is super easy. I was pleasantly surprised by how much of a non-event it really was. Taking the engine out wasn't really that bad either. Last engine I did was in a 76 Buick Century. Granted there are a lot more connections on this engine but it isn't that bad. Something I did find I had to do to get the engine out was not only unbolt the engine from the bell housing but also unbolt the bell housing from the torque tube. The flywheel was catching on the bell housing edge and not letting it come out. One that was free, engine came right out. I imagine installation is just gonna be reverse of removal. I am going to totally assemble the engine on the stand and then put it in instead of working around the cramped underhood area.
08-10-2011, 09:21 PM
#13
Rennlist Member
Can you post a pic of your rod bearings and what piston/bore # it is? Thanks- Gunar
08-10-2011, 10:26 PM
#14
Rennlist Member
Thread Starter
Gunar
It is piston #5 (driver's side front).
Here are the bearings. You can see there is a very tiny score in the bearing. There is no score in the crank. I have a new bearing coming for this rod.
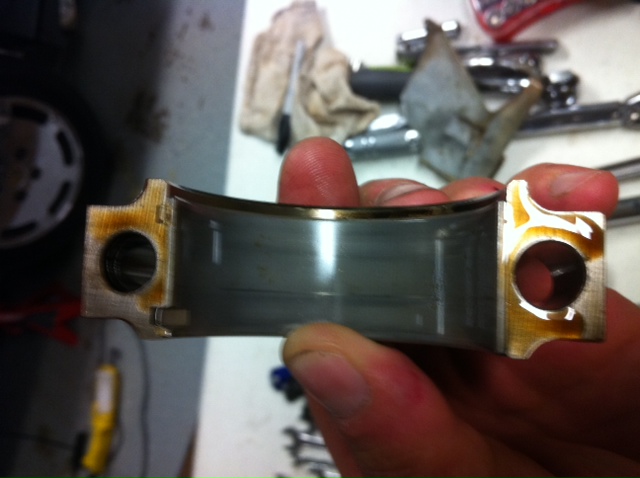
I am having the piston weight matched to the old one. Should be able to get it to less than 1/2 a gram when all done. Piston's had holes drilled but we are off by 9 grams right now due to different weights in the wrist pins. Gonna balance everything out at the shop tomorrow. Should have together and running (hope) by Sunday.
It is piston #5 (driver's side front).
Here are the bearings. You can see there is a very tiny score in the bearing. There is no score in the crank. I have a new bearing coming for this rod.
I am having the piston weight matched to the old one. Should be able to get it to less than 1/2 a gram when all done. Piston's had holes drilled but we are off by 9 grams right now due to different weights in the wrist pins. Gonna balance everything out at the shop tomorrow. Should have together and running (hope) by Sunday.
08-10-2011, 10:45 PM
#15
Rennlist Member
Gunar
It is piston #5 (driver's side front).
Here are the bearings. You can see there is a very tiny score in the bearing. There is no score in the crank. I have a new bearing coming for this rod.
Attachment 558314
Attachment 558315
I am having the piston weight matched to the old one. Should be able to get it to less than 1/2 a gram when all done. Piston's had holes drilled but we are off by 9 grams right now due to different weights in the wrist pins. Gonna balance everything out at the shop tomorrow. Should have together and running (hope) by Sunday.