

OB Seat cover replacement
 08-02-2012, 06:35 PM
#31

Thanks for the encouragement....I sure need it, because it is somewhat daunting  ......and can't wait for the tip's....
I did recover my wife's vw passat driver's seat in the past....but that sure was simpler....
I will post some pic's as work progresses
......and can't wait for the tip's....I did recover my wife's vw passat driver's seat in the past....but that sure was simpler....
I will post some pic's as work progresses
 08-02-2012, 10:40 PM
#32
Burning Brakes
Just a small insight. I have been using .035 aluminum tig welding wire to replace the hog clips, the alloy is 5356. Its comes long and can be fed through the material and clip points and then pulled tight. Its then soft enough to twist and bend under with very little effort but yet still stiff enough to not come undone when the seat is used. It doesn't rust either. I found this was way easier and faster then trying to re use the old hog clips.
08-03-2012, 09:28 AM
#33
Rennlist Member
Hey,
I know it's an old post, but maybe worth a try....
I am redoing seats with a similar kit. I have a question on how you attached the back and bottoms of the kit to the cushion. The original is sewn in at the low spots between the cushions....
I think the kit needs to be glued at these spots, or did you use the hog rings????
If glueing, which glue did you use????
If hog rings, do you have any pictures or can you describe how you did it???
Any other tips would be appreciated.
Thanks
Maciej
When Tim did his set the black felt strips sewn to the bottom of the seat segments was narrow and made it difficult to glue down and hold. The seat cover manufacuter mad a change to them based on our feed back and they are now much wider making the gluing process easier. I used weldwood yellow contact cement and a 1 inch brush to apply to the seat welting and seat cushion.
I glued one segment at a time using a piece of PVC pipe over the top side of the cover and clamps to hold pressure on the PVC with wood top and bottom. Let dry 24 hours and move to the next segment. The side listing strips once secured really hold the area through use.
I took pictures of each step of disassembly to help me get the new covers back on. This will help with where to use hog rings. The bottom cushion also has a wire that runs through pockets around the entire bottom edge. I was concerend about the wire cutting through the vinyl so added flexable plastic tubing to the pockets and then ran new picture frame wire throught the tubing.
One thing the new covers don't have are listing srtip pockets and the bottom edge of the back cover headrest and the top edge of the backrest center pad cover. You will see those during disassemble. I used an old Tshirt edge leveredging the pocket sewn on the bottom edge to add these as it seemed to help hold the cover in place more tightly in those places.
I also bought a more robust set of straight and angle hog ring pliers. The seat comes with hog rings and cheap pliers but they are hard on the hands. I used a small set of bolt cutters to remove the old hog rings. Much easier than prying them off.
I realized I did not take pictures of reassembly

They turned out better than what I had but not as good as Robb or Pauls work!!
08-03-2012, 11:21 AM
#35
Rennlist Member
Couple of more items.
The backrest center cushion is a sperate piece and cover that glues down between the padded segments on the front side and then glues around the back side. This is a solid foam piece so no rigid areas to use hog rings. The factory used blind staples to hold the glued down flaps on the back side. I bought one and a ton of staples so if anyone needs to borrow for thier project shoot me a PM.
Depending on the condition of your seat foam, collapsed from big butts like mine, you will probably want a roll of polyester batting to help fill in areas and to minimze wringles. I used it along the backrest sides especially around the seat tilt **** and on the bottom cushion on top of each seat segment.
08-03-2012, 01:09 PM
#36
Thanks for the information. I plan to also place a few stiches between the foam segments attaching the black lining on the new vinyl covers to the thick fabric backing and also using some glue. I will take some pictures as things progress...due to this post motivation I will try to start next week....
This weekend I am putting my front suspension back together after:
1) replacing front springs/shocks - old springs "torched" by previous owner to lower car. Got bilstein's and 3x green springs from 928int. Will have to play with ride height, but anything will be better than previous extreme low.... 5 inches ground to oil pan
2) tie rods - inner/outer on right, - outer only on left (the inner one still very tight)
3) upper a-arm boots - joints are tight
4) brake lines - stainless steel
5) lower ball joints - still had aluminum ones (this is a 1978 model), which were tight with still intact boots, but just wanted to play it safe
Also mult other small "projects" going on..... too many to list
08-03-2012, 01:13 PM
#37
....just saw your update
in my middle back segment the factory used hog ties to secure the vinyl at the back to the foam, it seemed to work fairily well, I will probably go that route if it willl seem secure.....
in my middle back segment the factory used hog ties to secure the vinyl at the back to the foam, it seemed to work fairily well, I will probably go that route if it willl seem secure.....
08-10-2012, 10:31 PM
#38
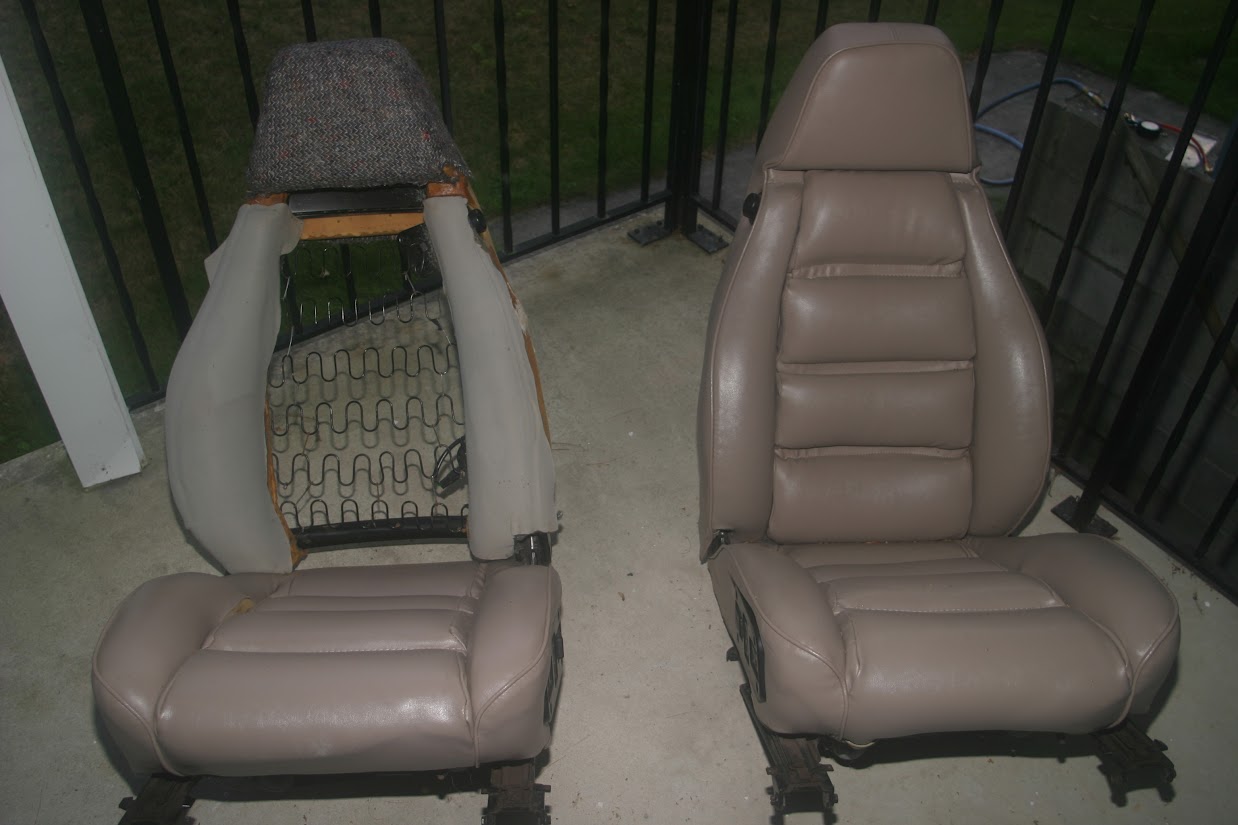
Here are some pictures of the old seats, starting the disassembly of the backrest. See details of how the old vinyl is attached to the seatback being sewn in....
I was busy this week so hopefully will get farther next week....


I was busy this week so hopefully will get farther next week....
08-20-2012, 10:00 PM
#39
Was a bit busy last 2 weeks....
Finaly moving forward. Got:
1) Weldwood cement also the 3M adhesive spray
2) Hog ring pliers
Started with rear seats. After removing old fabric glued down the vinyl to the foam pieces. Still have to do the folding piece of the back seats, it is going to be a challange as the kit I have does not include the carpet backing.....
Also started on the back rest for the front seat. One thing I noticed (other than the low quality stitching done on these new covers) is that the specing between the foam segments of the seats is not the same on these new covers. I am attempting to do the best I can to line things up, starting in the mid segment (which should come out OK), but the top and bottom segment lines will not be ideal. The hog rings do help to keep things aligned in this area.
In the photos see summer use of ski poles
More to come, but this is a long process.....

