

Yet another top-end refresh (WAS: Trying to fix irregular/poor idle ...)
 08-18-2010 | 05:57 PM
#46
Thread Starter
Addict
Rennlist Member
Rennlist Member
Joined: Jul 2001
Posts: 7,330
Likes: 110
From: Shawnee, KS, USA
I'm actually not sure any more, Wally. It seemed as though generally loading the engine with A/C and/or putting it in gear would make it much more susceptible to low RPMs and/or stalling. However, I've since read up on this a little more, and it appears that on automatics, there is a designed-in idle speed drop for when the gear selector is in anything other than P or N.
So it could be that the behavior isn't really that far off.
I really think I need to test all the inputs to the LH and EZK, find all the signals that aren't right (like the known problem with the TPS), fix the vacuum leaks, and see if any problems remain. I just haven't been comprehensive enough in my approach yet.
The intake refresh is obviously a useful/necessary next step and, I suspect, will improve things and maybe fix them entirely.
Yes, it's too late.  Doesn't really matter anymore, as it's soon to be replaced.
So it could be that the behavior isn't really that far off.
I really think I need to test all the inputs to the LH and EZK, find all the signals that aren't right (like the known problem with the TPS), fix the vacuum leaks, and see if any problems remain. I just haven't been comprehensive enough in my approach yet.
The intake refresh is obviously a useful/necessary next step and, I suspect, will improve things and maybe fix them entirely.
Doesn't really matter anymore, as it's soon to be replaced.
09-04-2010 | 11:24 PM
#47
Thread Starter
Addict
Rennlist Member
Rennlist Member
Joined: Jul 2001
Posts: 7,330
Likes: 110
From: Shawnee, KS, USA
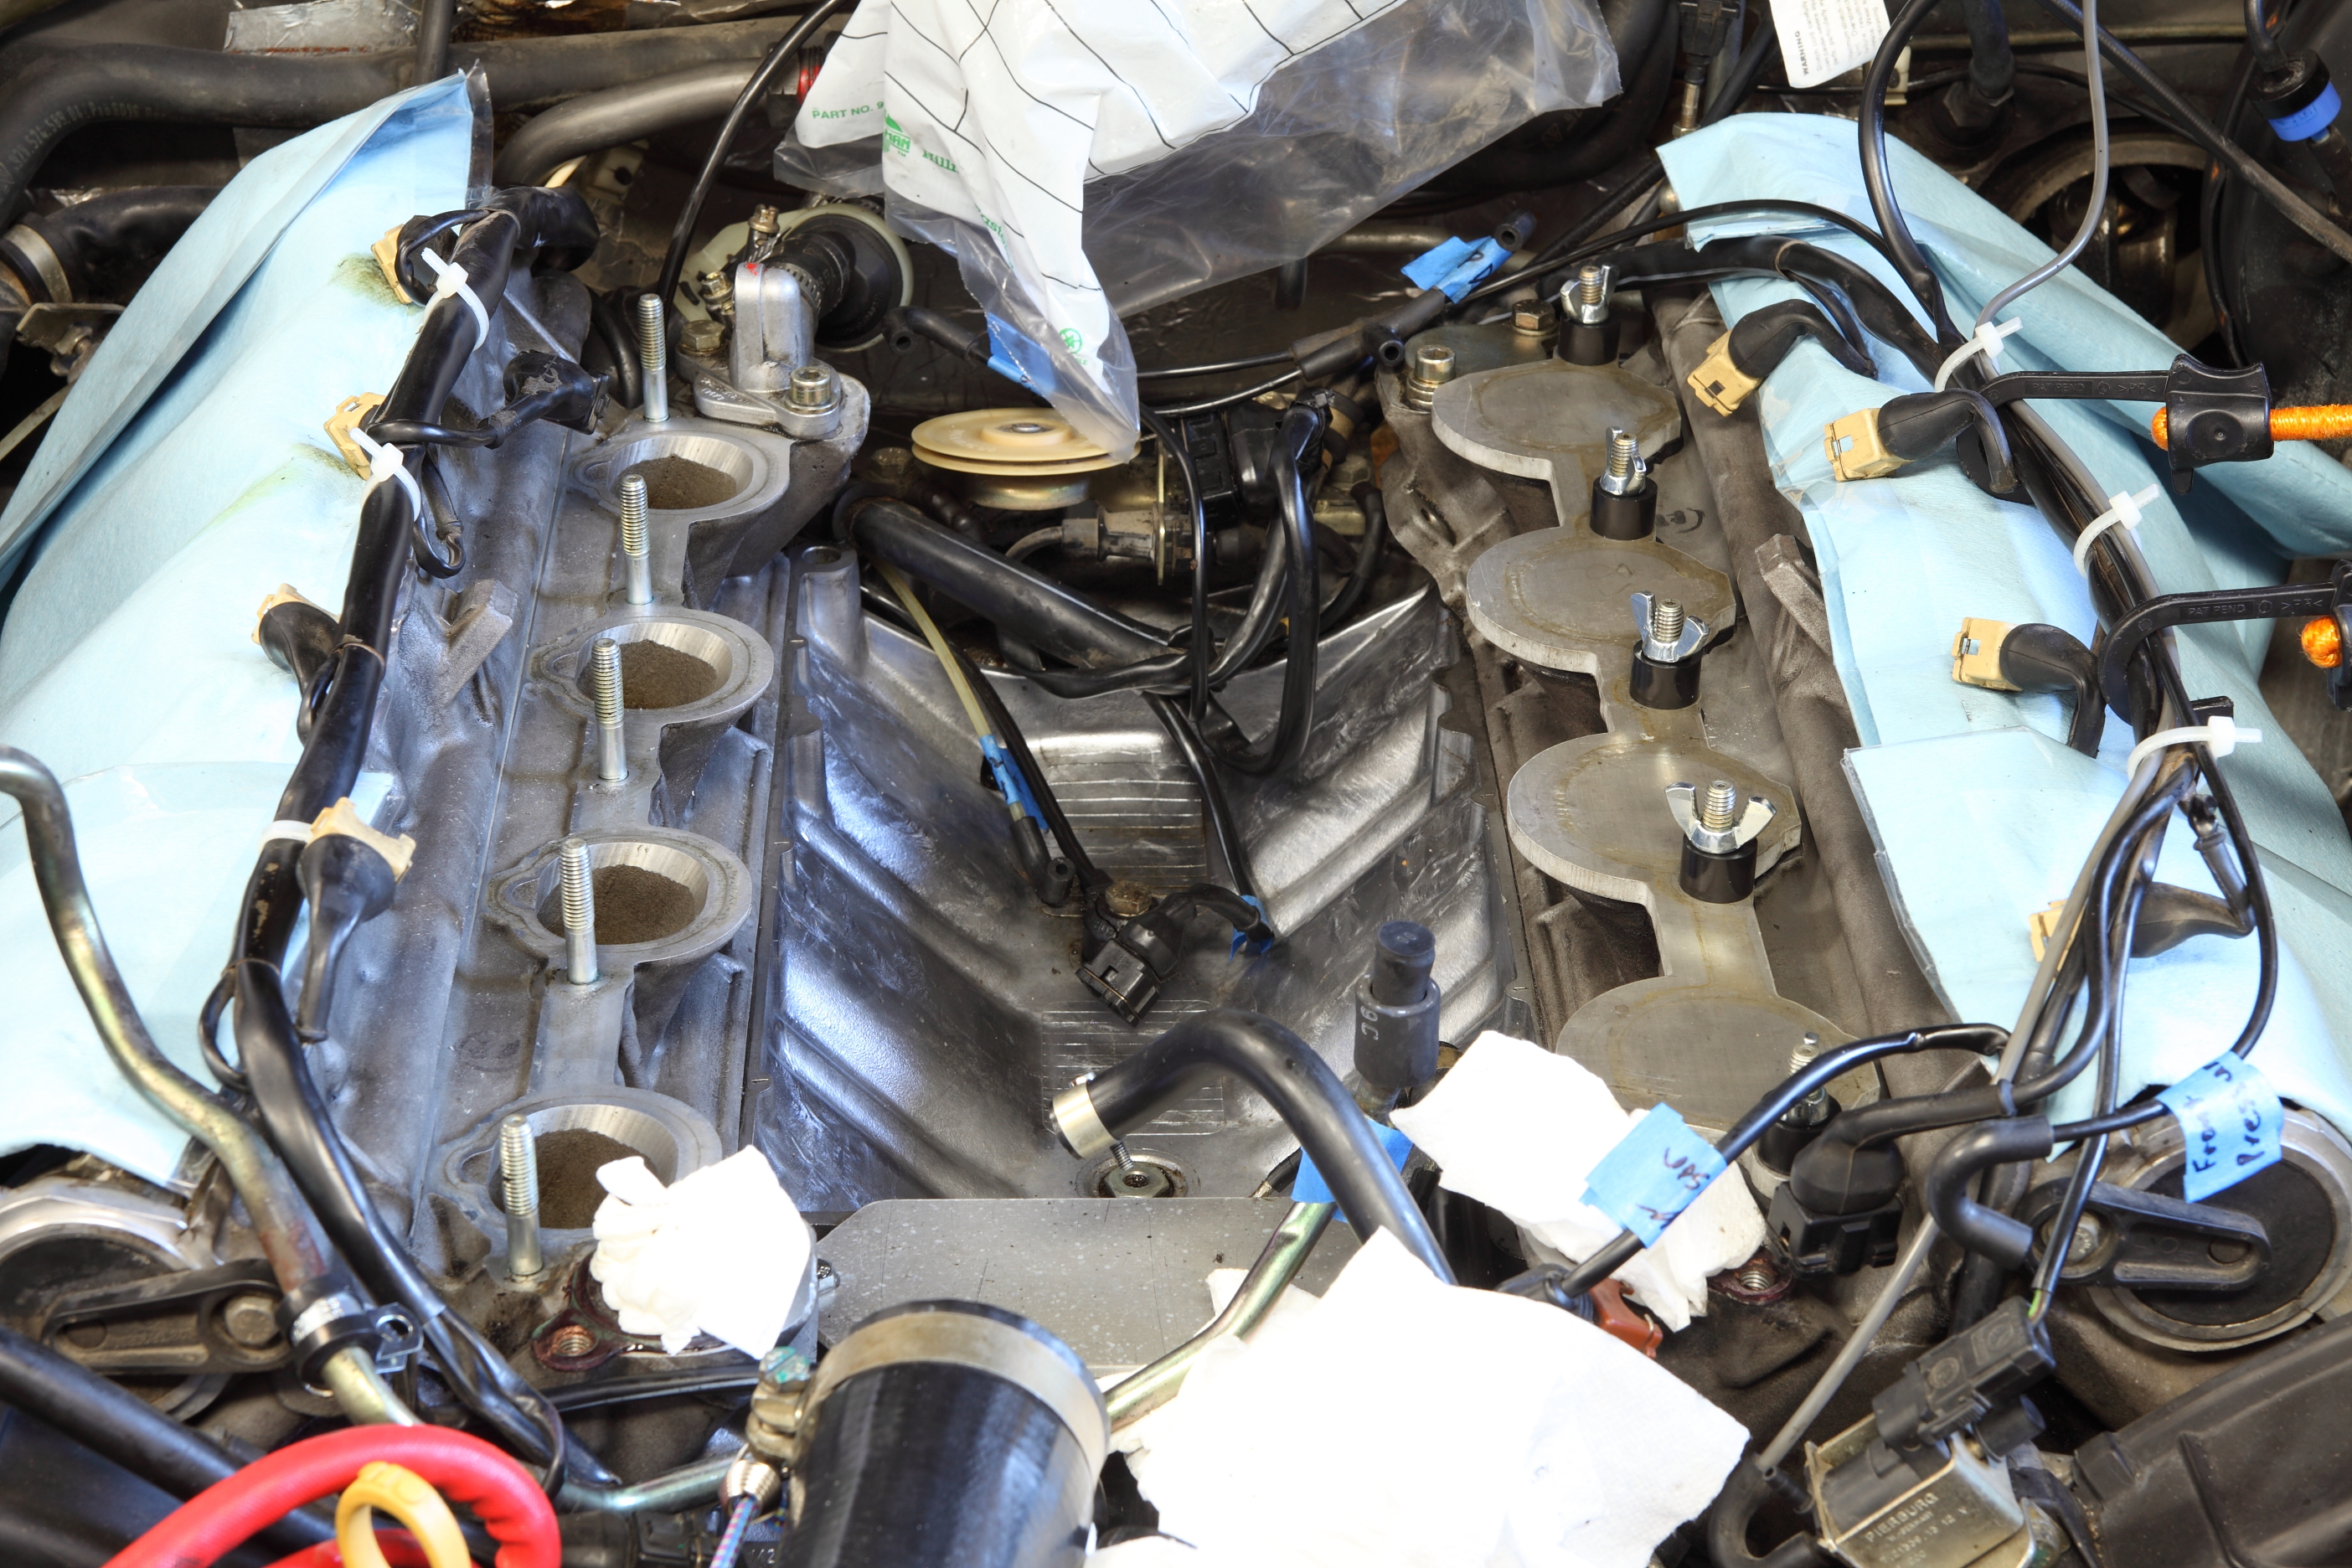
I finally started dealing with the intake refresh a few days ago. Got the intake off today. The plastic Y connector coming off the rubber/plastic MAF boot (or whatever it's called) on the right side was pretty loose where I heard the vacuum leak. I'll replace the boot, hoping that a new one will provide a tighter fitting, but why aren't there hose clamps here? Any reason not to add them?
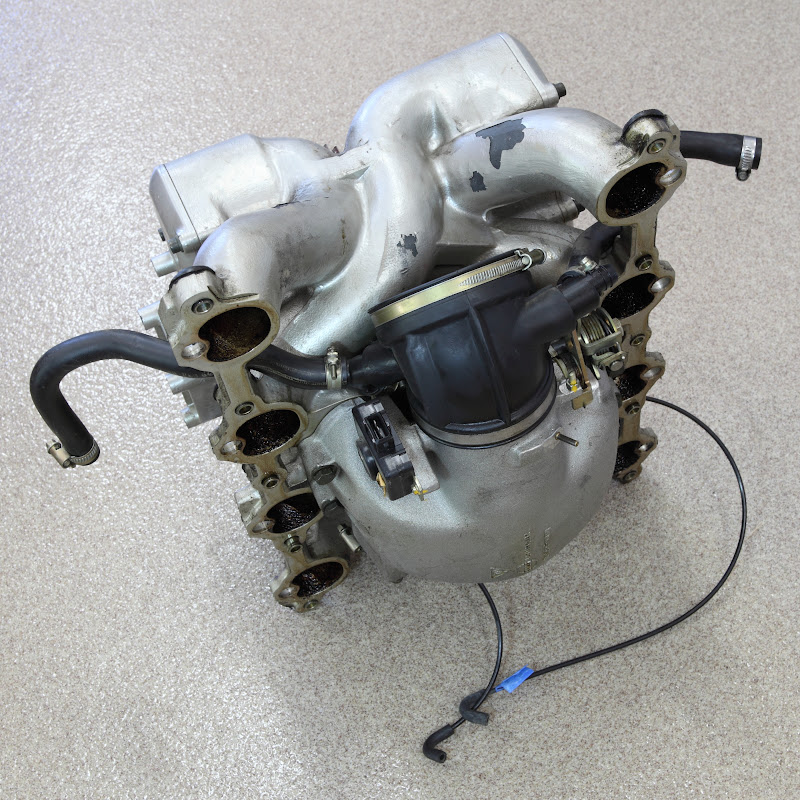
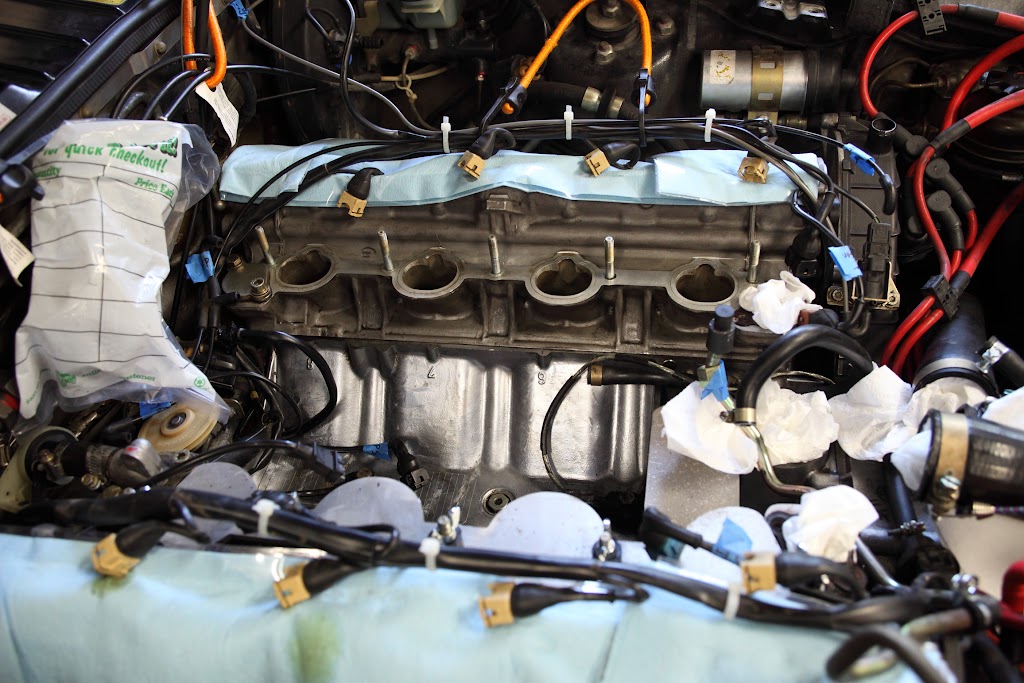
Engine bay looked like this a couple of hours ago. (Don't worry; intake ports have been covered with 928 Specialists aluminum covers since then and the three studs that came out have been reinserted).

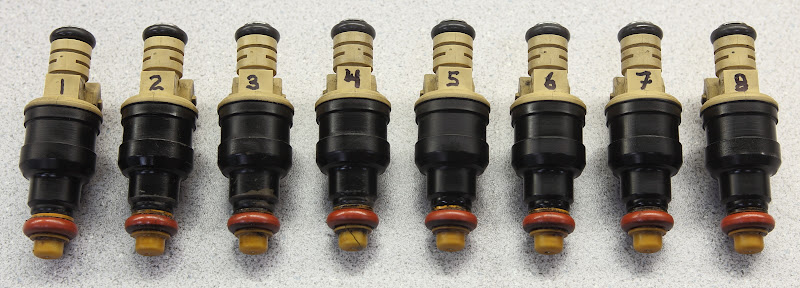
Injectors went off to WitchHunter Performance for cleaning and flow testing a couple of days ago.
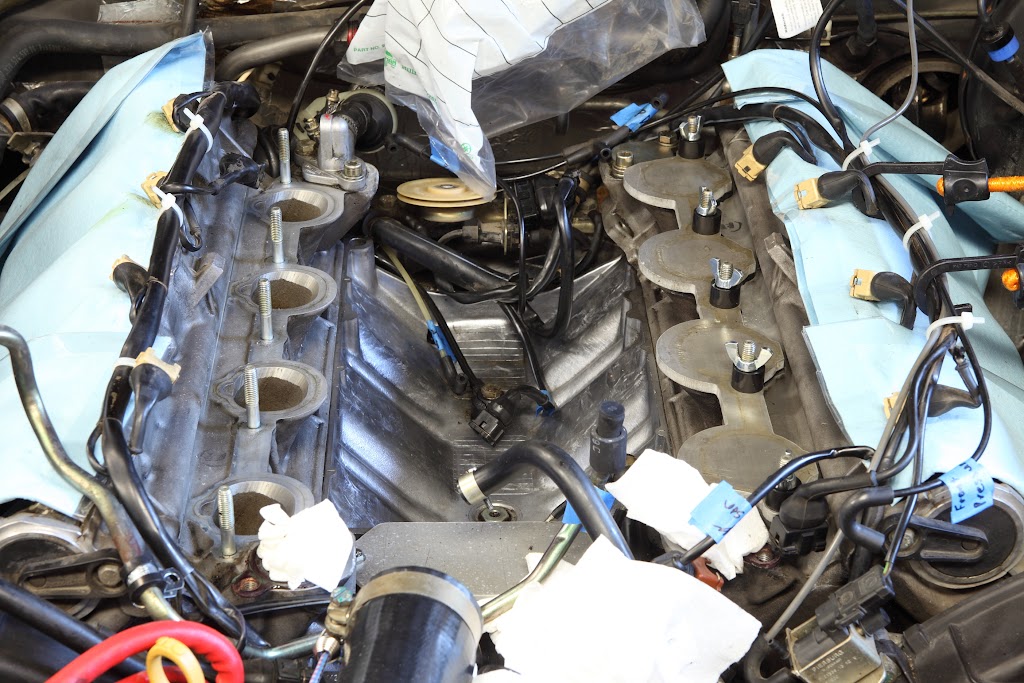
For comparison purposes, here's what things looked like a couple of days ago. (Fuel rails and injectors were off at the time, but not much else).
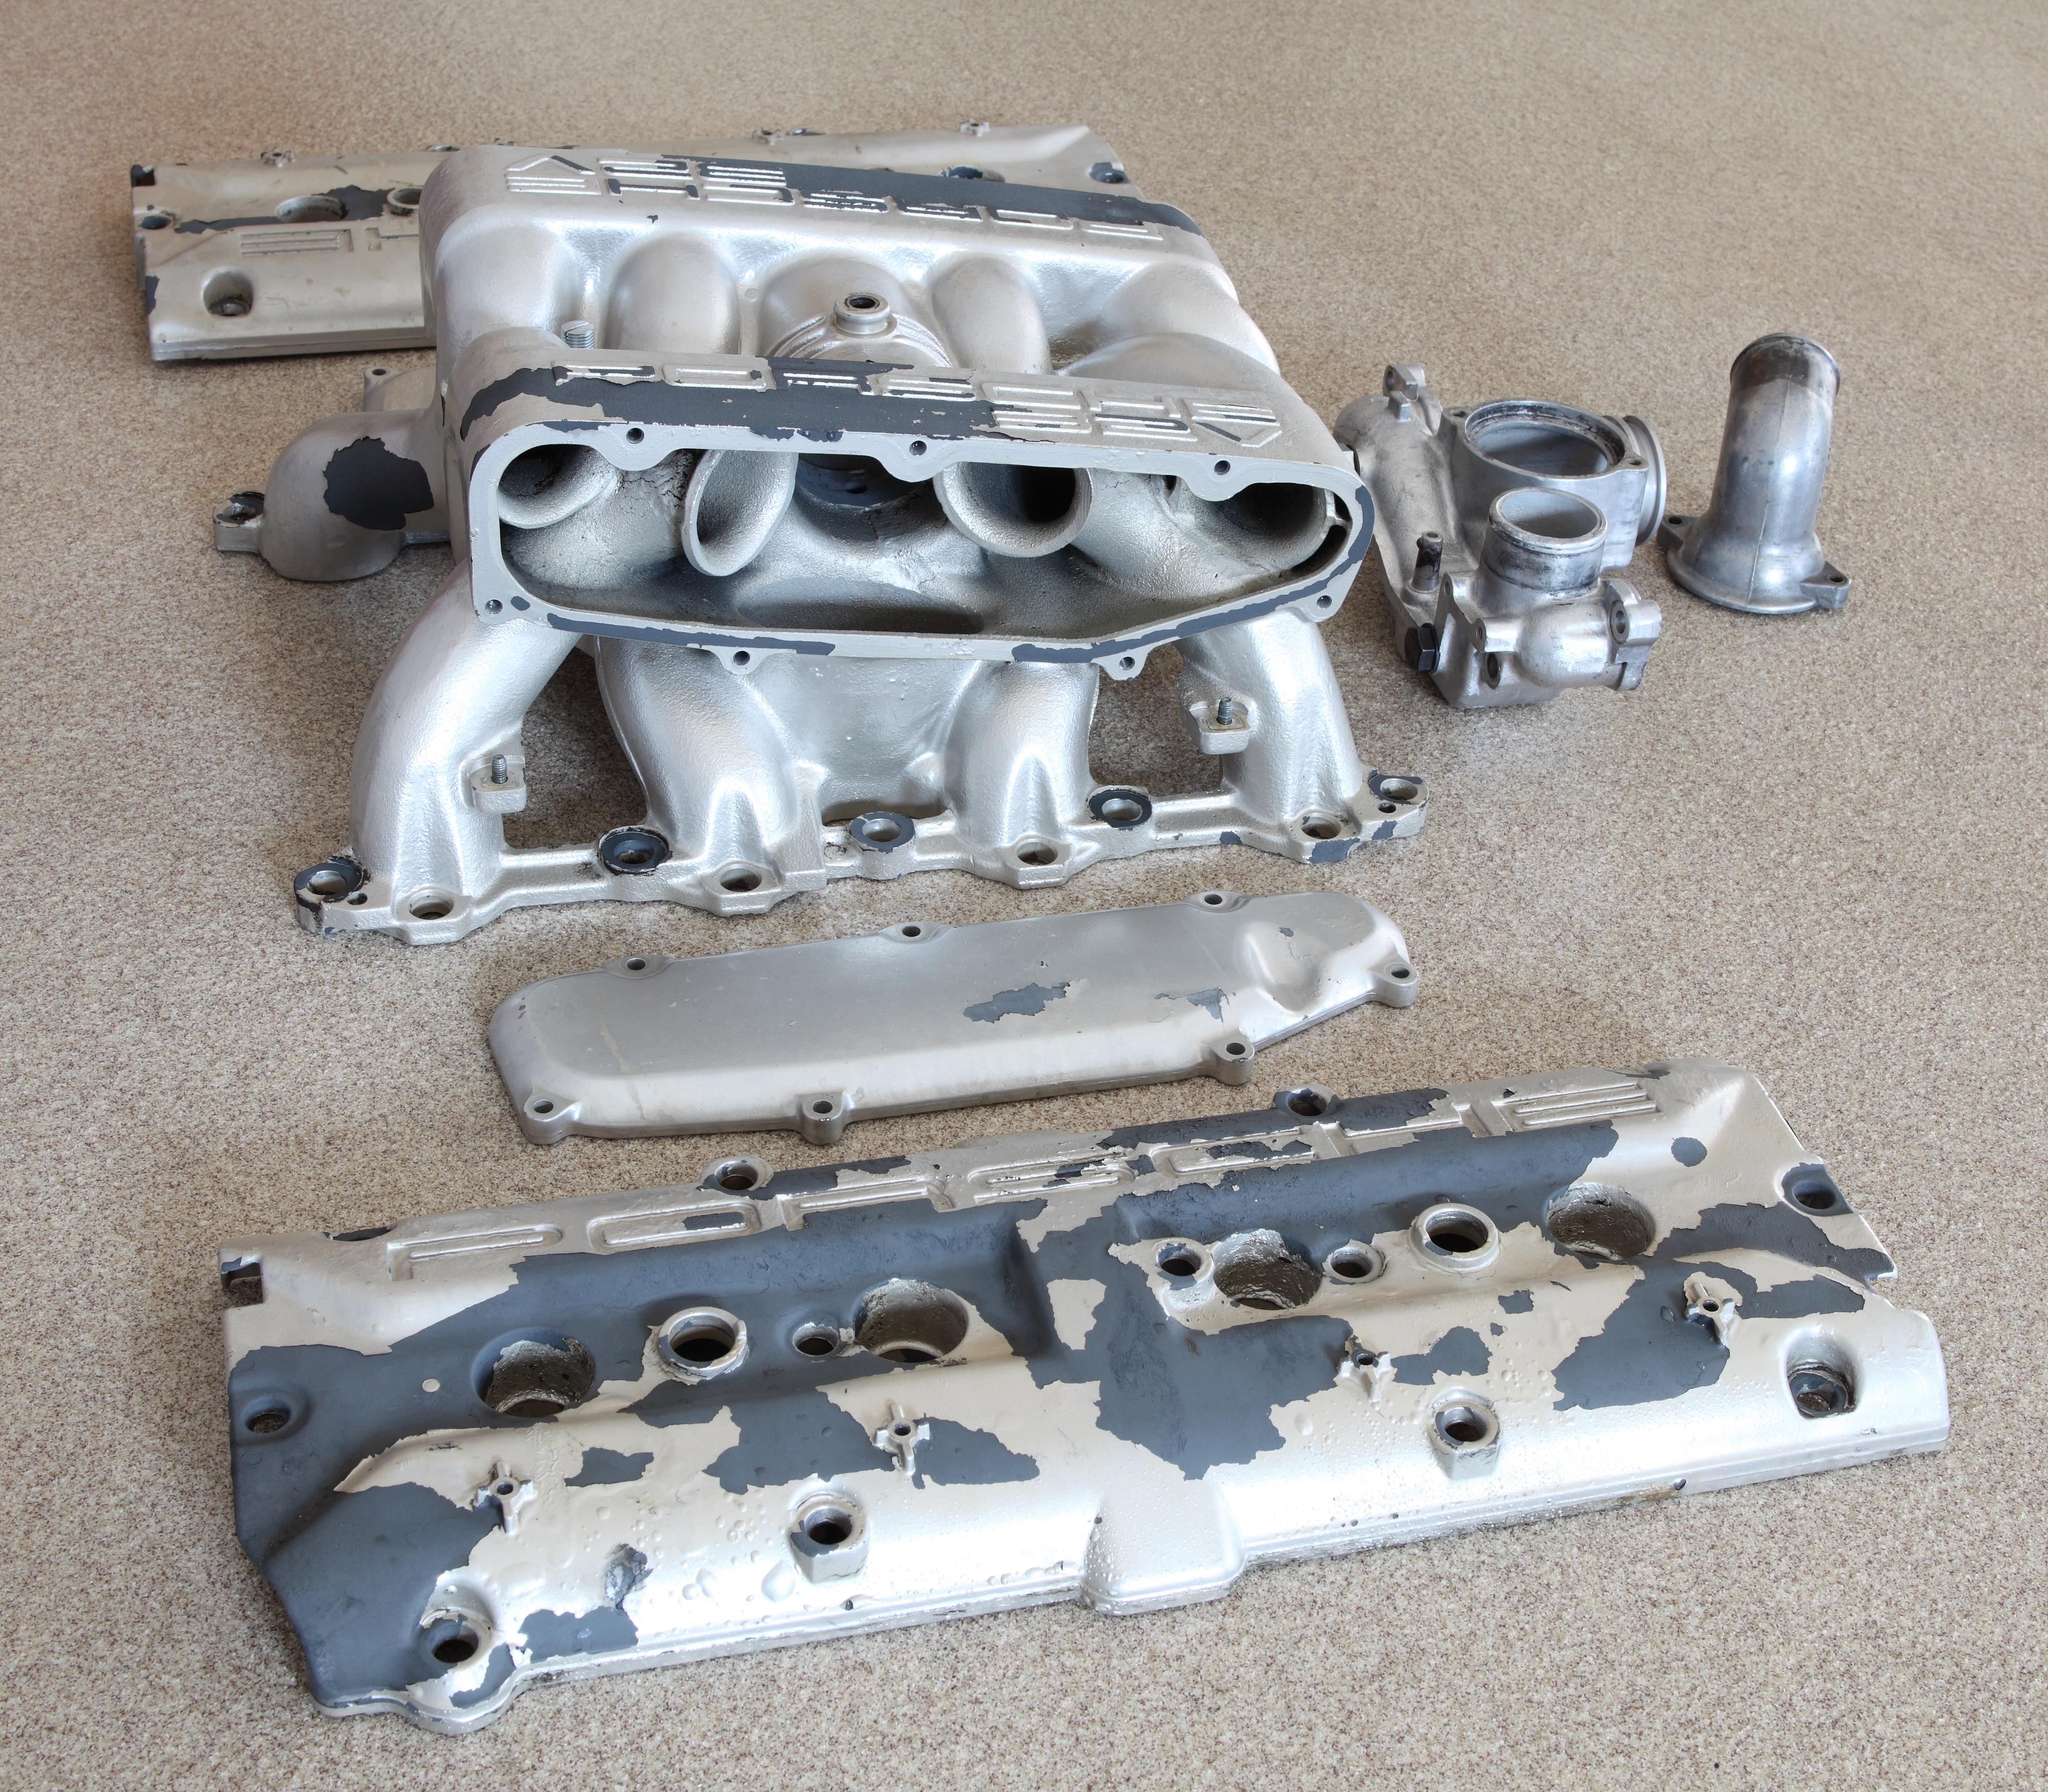
This should look a lot nicer after the valve covers, intake, and water bridge are powder coated. I talked to the powder coating guy yesterday and expect to take everything in on Tuesday. Should get it back in a week or so.

Engine bay looked like this a couple of hours ago. (Don't worry; intake ports have been covered with 928 Specialists aluminum covers since then and the three studs that came out have been reinserted).
Injectors went off to WitchHunter Performance for cleaning and flow testing a couple of days ago.
For comparison purposes, here's what things looked like a couple of days ago. (Fuel rails and injectors were off at the time, but not much else).
This should look a lot nicer after the valve covers, intake, and water bridge are powder coated. I talked to the powder coating guy yesterday and expect to take everything in on Tuesday. Should get it back in a week or so.
09-05-2010 | 12:13 AM
#48

Drifting
Joined: Aug 2003
Posts: 2,259
Likes: 2
From: Camarillo, CA, USA
Those breather hoses off the MAF coupling should have clamps on the hoses. The plastic fittings just plug in the rubber coupling.
Are you considering the GTS dynamic kickdown mod for your automatic?
While your waiting and before any valley cleaning, you could....
Cover fuel lines, fuel rail injector ports, and any electrical connectors (fuel injectors) with corners cut from plastic sandwich bags, using rubber bands.
Normally with top end refresh, you should replace all breather hoses, ISV, flappy actuator, both knock sensors, valve cover gaskets and o-rings.
09-05-2010 | 01:47 AM
#49
Thread Starter
Addict
Rennlist Member
Rennlist Member
Joined: Jul 2001
Posts: 7,330
Likes: 110
From: Shawnee, KS, USA
Tell me more... I don't remember seeing that mod.
There's some pretty good sludge and grit to clean out.
Some of the breather hoses were remarkably soft and pliable.
I've got the upper and lower cam chain tensioner pads, too, since I'll soon have easy access. Really great deal (>$100 for each pair) on those parts; I guess it must be some pretty amazing plastic.
")
I'm looking forward to the reassembly part. Much nicer working with new parts going into a clean engine.
It'll also be nice having some stuff (like the intake and throttle body) that I can work on elsewhere (like on the deck out in sunshine) instead of being stuck in the garage.
09-05-2010 | 01:06 PM
#50
Drifting
Joined: Aug 2003
Posts: 2,259
Likes: 2
From: Camarillo, CA, USA
Here's the link to Schocki's thread on the Dynamic Kickdown Mod. You will also see my supplemental posts after completing the mod on my 90' S4. You might want to send a PM to Schocki to ask him about updating his photos, now lost in the thread....
https://rennlist.com/forums/928-foru...-finished.html
https://rennlist.com/forums/928-foru...-finished.html
09-07-2010 | 02:01 PM
#51
Thread Starter
Addict
Rennlist Member
Rennlist Member
Joined: Jul 2001
Posts: 7,330
Likes: 110
From: Shawnee, KS, USA
Here's the link to Schocki's thread on the Dynamic Kickdown Mod. You will also see my supplemental posts after completing the mod on my 90' S4. You might want to send a PM to Schocki to ask him about updating his photos, now lost in the thread....
https://rennlist.com/forums/928-foru...-finished.html
https://rennlist.com/forums/928-foru...-finished.html
I might just go ahead and do it, especially since I'll be waiting for my stuff to be powder coated anyway.
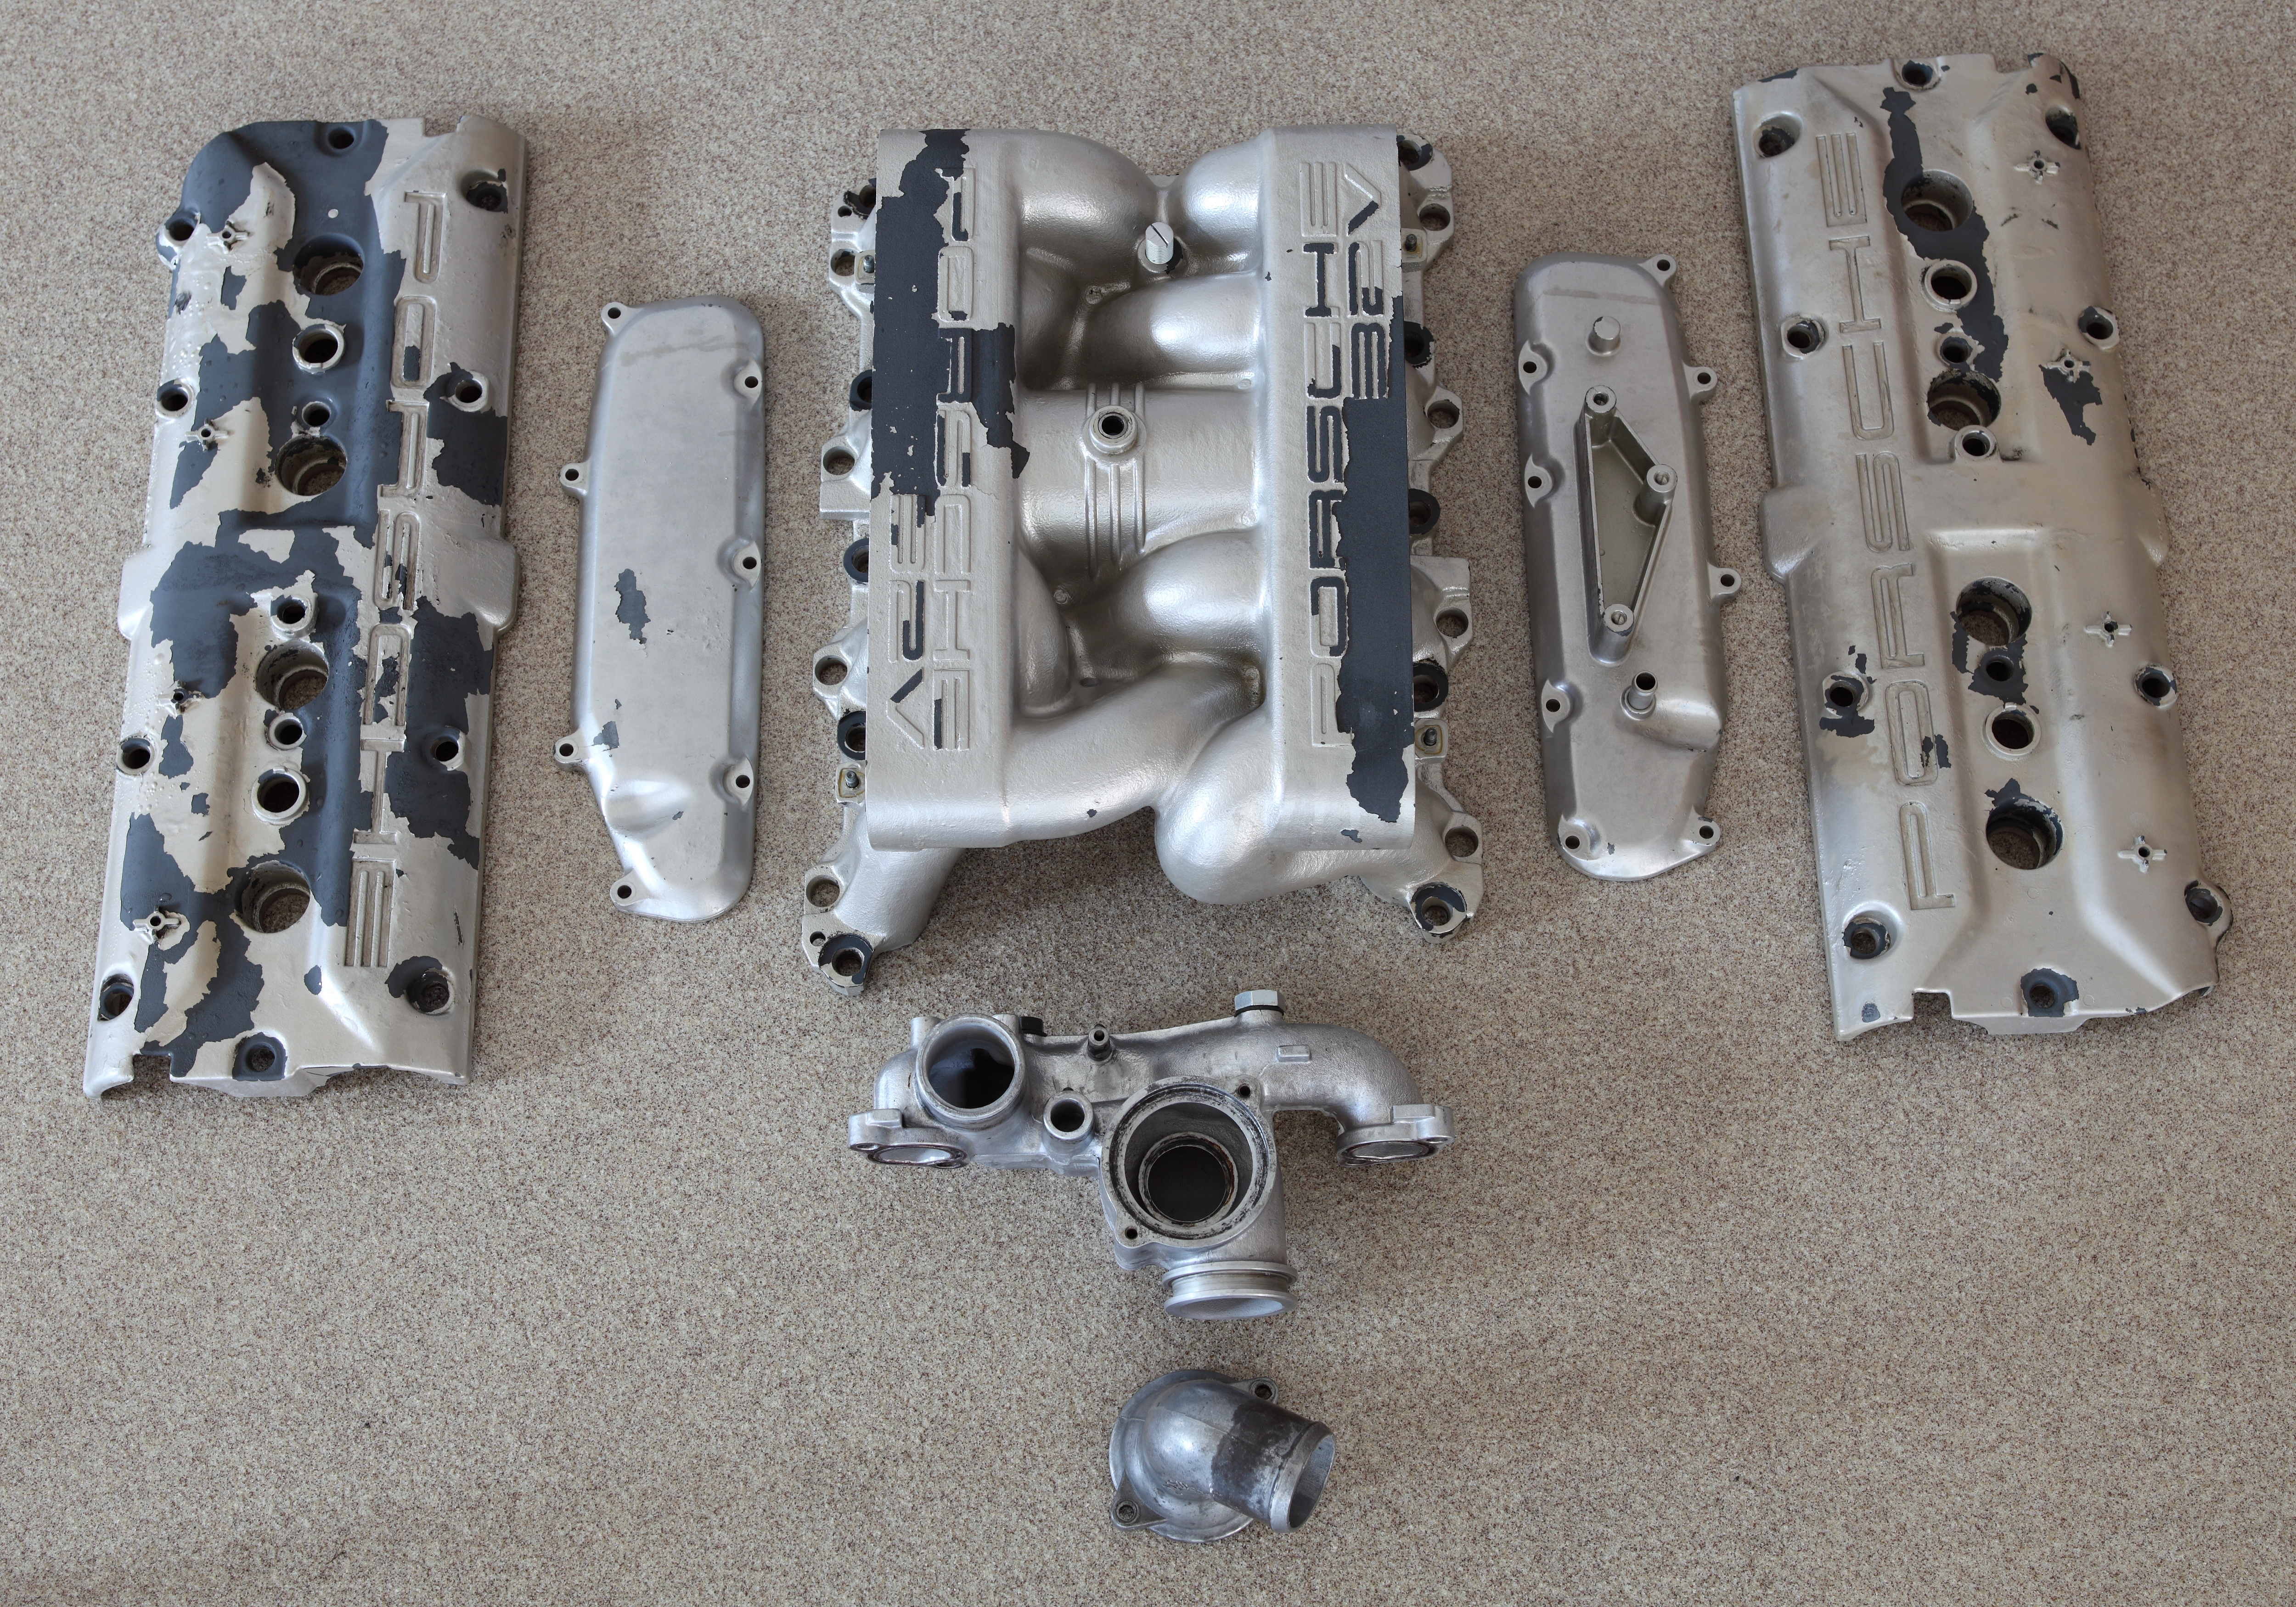
I finally got everything pulled apart over the long weekend and took the intake and cam covers to the car wash this morning before work. Got the worst of the crud and oil blasted off, along with quite a bit of peeling paint.
Last edited by Ed Scherer; 05-09-2011 at 11:56 PM.
09-20-2010 | 12:41 AM
#52
Thread Starter
Addict
Rennlist Member
Rennlist Member
Joined: Jul 2001
Posts: 7,330
Likes: 110
From: Shawnee, KS, USA
Until I get my cam covers and intake back from the powder coaters (should be done by the end of this coming week), I'm just slowly making progress on all the stuff that should be done with the intake and cam covers off, as well as other stuff that's easy to get to now.
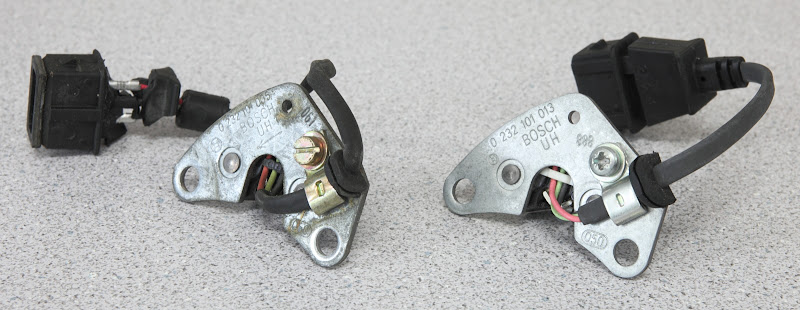
Replaced the hall sender today. The old one probably still worked OK (not sure), but the connector was coming apart. Old and new parts shown below. Note that the new one's cable is about 2 cm shorter than the old one; I wound up flipping the plug and socket around on the mounting bracket (sender's connector on bottom, wiring loom connector on top). I think this has been noted by others before. One thing is for sure... this is a very easy job when the right side cam cover is off and all the other stuff (e.g., fuel line, engine lift bracket, etc.) is out of the way.
The main thing I did today, though, was cleaning. I was getting pretty nervous about how much gritty sludge was caked on the heads around the intake ports. I had them covered (with the old gaskets underneath), but I knew at some point I'd have to remove that stuff and carefully clean all that crap out without getting so much as one grain of grit down the intake ports. I think I succeeded. It's all a matter of using lots of paper towels, moistened with engine degreaser and making damn sure to always move away from the ports toward a middle spot and then kind of roll them in a way that assures that no grime ever passes over a port.
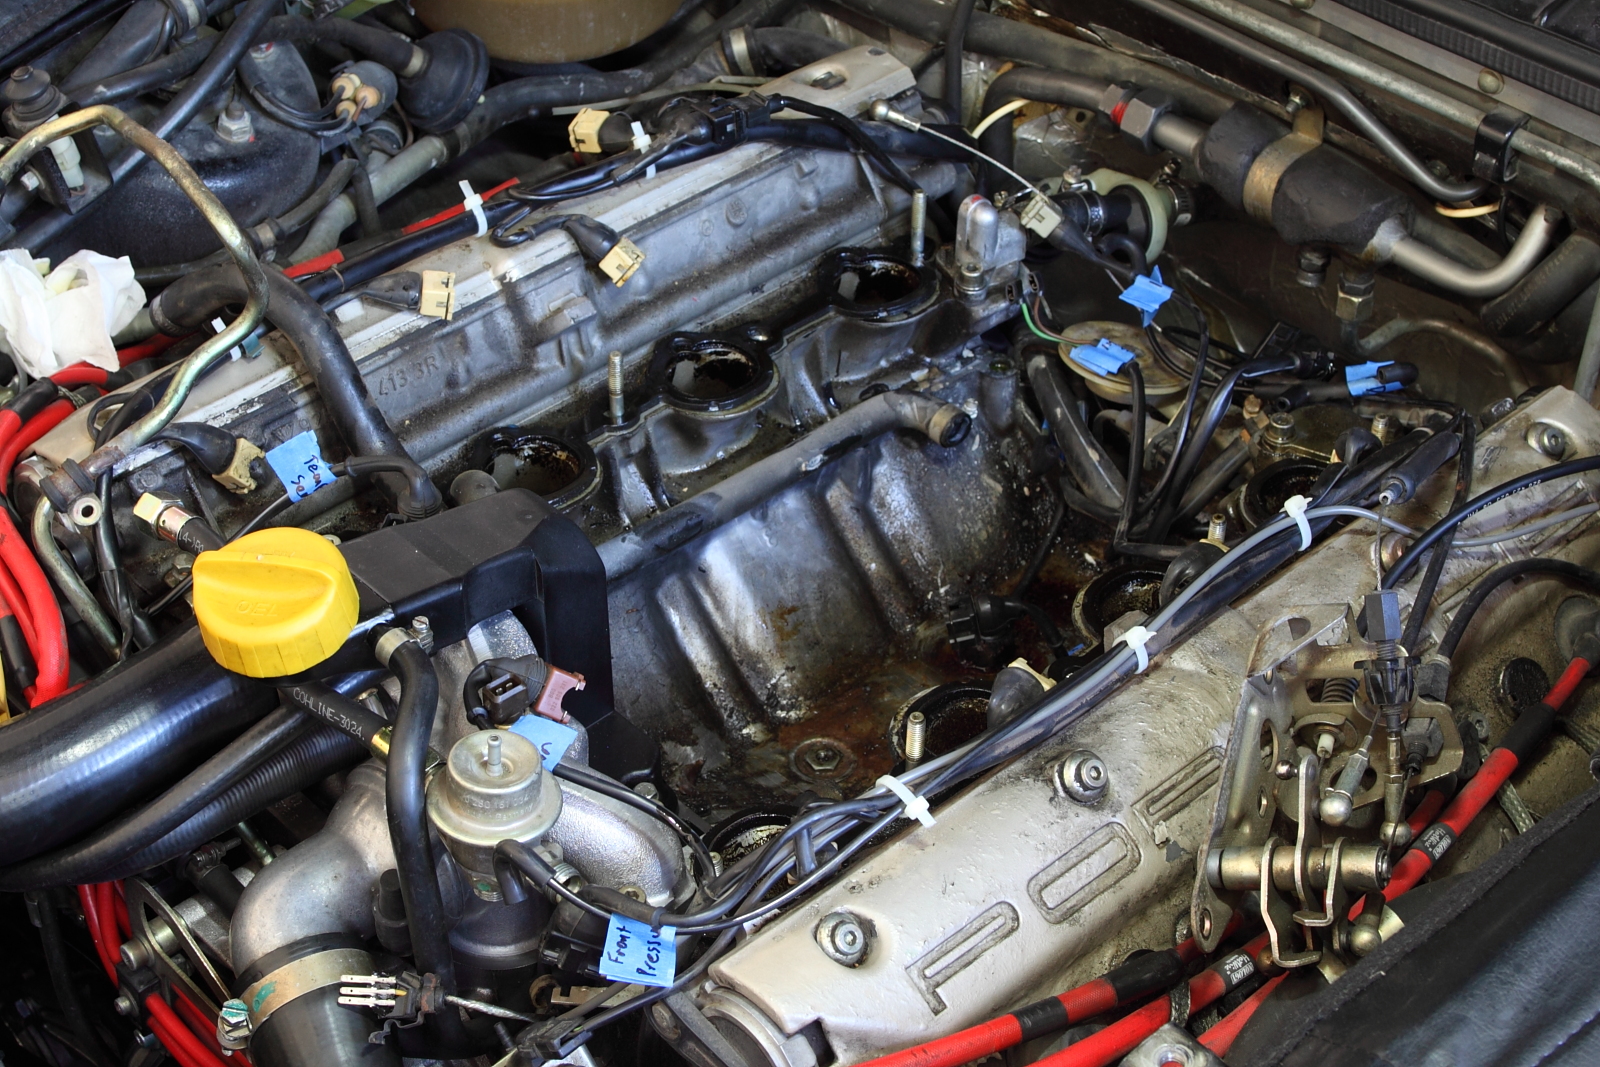
Anyway, got it from looking like this a couple of weeks ago (unfortunately, the gasket obscures the view of the worst of the scariest gritty sludgy crap):

to this:

Still to do within the next few days:
Replaced the hall sender today. The old one probably still worked OK (not sure), but the connector was coming apart. Old and new parts shown below. Note that the new one's cable is about 2 cm shorter than the old one; I wound up flipping the plug and socket around on the mounting bracket (sender's connector on bottom, wiring loom connector on top). I think this has been noted by others before. One thing is for sure... this is a very easy job when the right side cam cover is off and all the other stuff (e.g., fuel line, engine lift bracket, etc.) is out of the way.

The main thing I did today, though, was cleaning. I was getting pretty nervous about how much gritty sludge was caked on the heads around the intake ports. I had them covered (with the old gaskets underneath), but I knew at some point I'd have to remove that stuff and carefully clean all that crap out without getting so much as one grain of grit down the intake ports. I think I succeeded. It's all a matter of using lots of paper towels, moistened with engine degreaser and making damn sure to always move away from the ports toward a middle spot and then kind of roll them in a way that assures that no grime ever passes over a port.
Anyway, got it from looking like this a couple of weeks ago (unfortunately, the gasket obscures the view of the worst of the scariest gritty sludgy crap):
to this:


Still to do within the next few days:
- Preparing parts for GTS style breather update (mostly, modifying cam cover adapter elbows so they fit in the left-side holes in the cam covers).
- Doing miscellaneous things to prepare for the GTS style dynamic kickdown modification (thanks again for telling about that mod, Borland!)
- Replacing the knock sensors (the sensors themselves are coming apart, the connectors are coming apart, and the cable insulation is coming off all over the place).
- Replacing various cooling system related stuff (all four gaskets on the ends of the heads, heater valve and short hose).
- Putting the throttle body back together again with lots of new parts (throttle arm bearings, ISV, GTS-style throttle position switch, flappy actuator, etc.) A bearing puller is coming tomorrow that I think will make removing the small needle bearings really easy.
- Replacing the upper and lower pads on the cam chain tensioner. I'm rather nervous about doing this, based on the various posts I've read here on Rennlist — mostly about dropping something (like the aluminum washers on the oil feed tubes) down the oil passages. I'll make damn sure to stuff paper towels in the oil drains and try my best to avoid dropping washers at all.
Last edited by Ed Scherer; 05-09-2011 at 11:56 PM.
09-20-2010 | 01:04 AM
#53
Thread Starter
Addict
Rennlist Member
Rennlist Member
Joined: Jul 2001
Posts: 7,330
Likes: 110
From: Shawnee, KS, USA
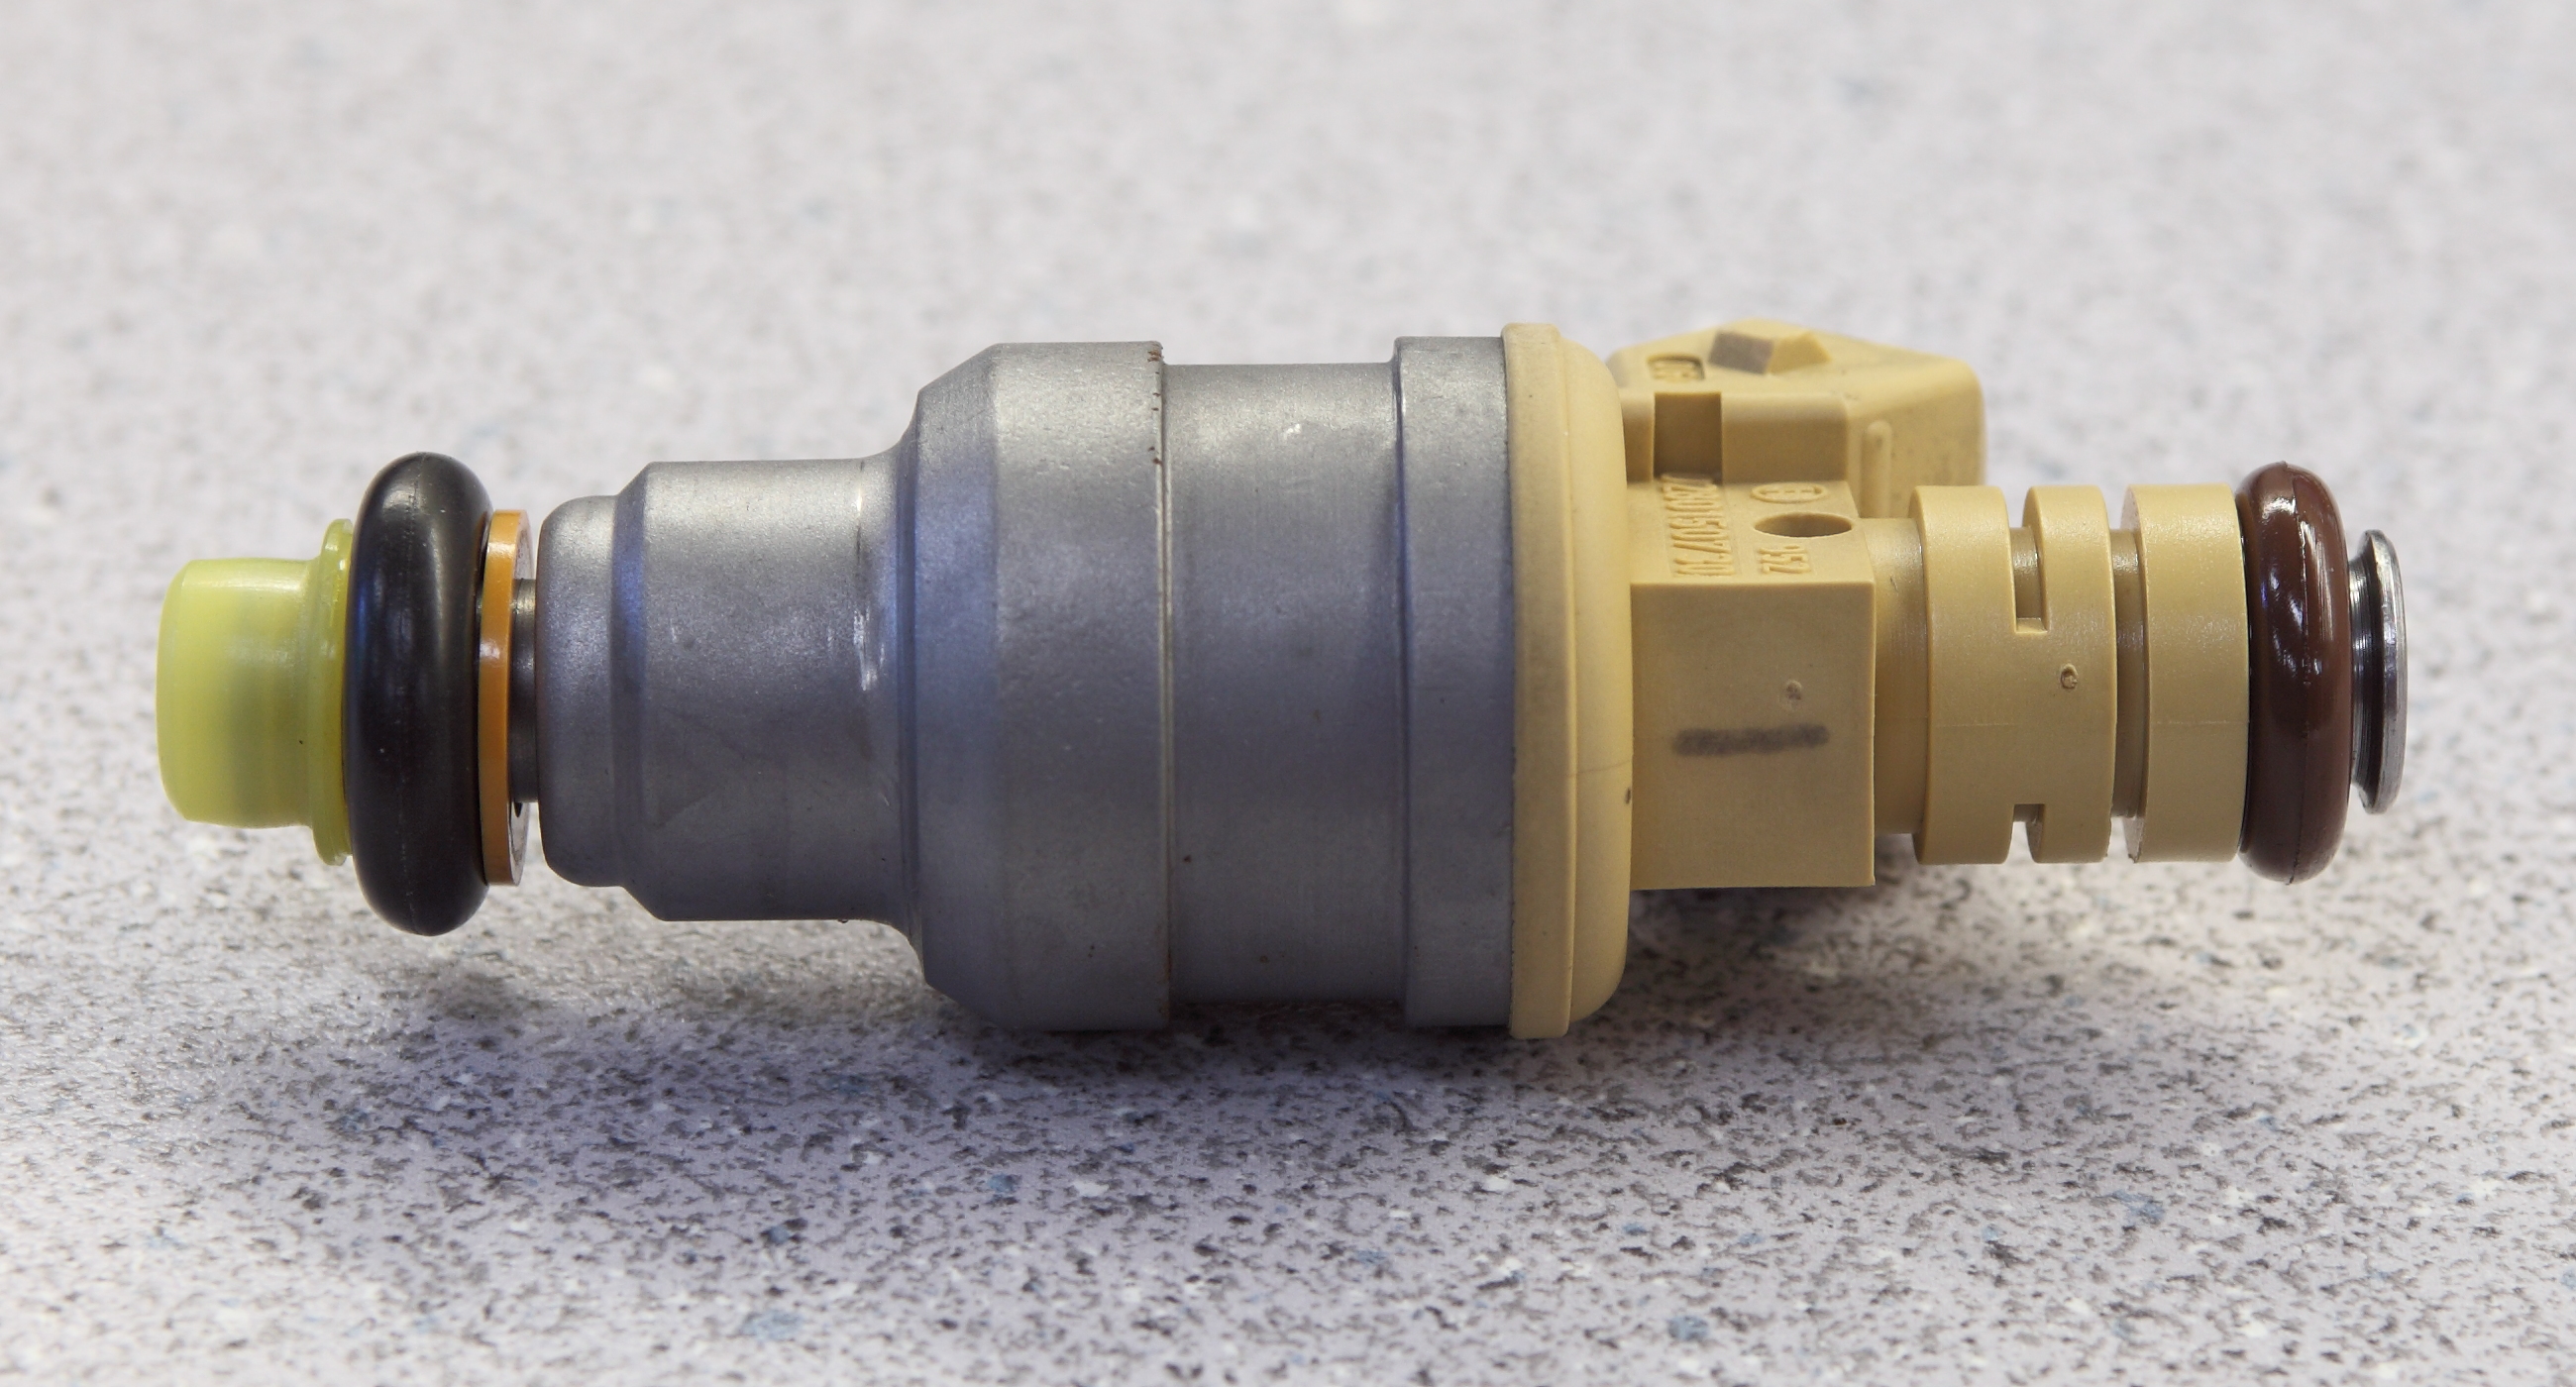
Oh yeah... one other thing: I mentioned a few posts back that I sent off the injectors to Witchhunter Performance for cleaning and flow testing. Got them back (quite awhile ago, actually) and was very pleased with the service (enough so to post "Another recommendation for WitchHunter" in the "WitchHunter Performance" thread). Here's a sample cleaned injector:

And here's the report that was included:

And here's the report that was included:
Last edited by Ed Scherer; 05-09-2011 at 11:57 PM.
09-20-2010 | 08:50 AM
#55
Thread Starter
Addict
Rennlist Member
Rennlist Member
Joined: Jul 2001
Posts: 7,330
Likes: 110
From: Shawnee, KS, USA
 09-20-2010 | 09:57 AM
#56
Team Owner
Joined: May 2004
Posts: 28,637
Likes: 2,665
From: Philly PA
Ed since your into this i would suggest to replace both knock sensors and the crank position sensor the connectors on all of them will eventually look like the hall sensor connector.
Also inspect the intake where the flappy is for the flappy stop, its a 17mm bolt head with an off center hole in it make sure there is one on the roll pin the flasppy should just be close to closing when its in position also consider repacing the ISV and the TPS and flappy pot, all of these pieces require intake removal to replace.
The new air guide tube will have a tight fit on the plastic Y connectors,
no need to clamp them to the guide.
the hoses should have clamps dont overtighten them as the new Y connectors will crack.
09-20-2010 | 10:05 AM
#57
Thread Starter
Addict
Rennlist Member
Rennlist Member
Joined: Jul 2001
Posts: 7,330
Likes: 110
From: Shawnee, KS, USA
Ed since your into this i would suggest to replace both knock sensors and the crank position sensor the connectors on all of them will eventually look like the hall sensor connector.
Also inspect the intake where the flappy is for the flappy stop, its a 17mm bolt head with an off center hole in it make sure there is one on the roll pin the flasppy should just be close to closing when its in position also consider repacing the ISV and the TPS and flappy pot, all of these pieces require intake removal to replace.
The new air guide tube will have a tight fit on the plastic Y connectors,
no need to clamp them to the guide.
the hoses should have clamps dont overtighten them as the new Y connectors will crack.
Also inspect the intake where the flappy is for the flappy stop, its a 17mm bolt head with an off center hole in it make sure there is one on the roll pin the flasppy should just be close to closing when its in position also consider repacing the ISV and the TPS and flappy pot, all of these pieces require intake removal to replace.
The new air guide tube will have a tight fit on the plastic Y connectors,
no need to clamp them to the guide.
the hoses should have clamps dont overtighten them as the new Y connectors will crack.

Last edited by Ed Scherer; 05-09-2011 at 11:58 PM.
09-20-2010 | 10:17 AM
#58
Team Owner
Joined: May 2004
Posts: 28,637
Likes: 2,665
From: Philly PA
when fitting the stop try to stick a small wire into the edge of the flappy plate this will hold it open just a tick
then fit the stop, what you dont want to do is fit the stop then start twisting it this can shear off the roll pin its fitted on basically tap it into the correct position add a drop of green loctite to the stop.
also use some hondabond 4 on the new O ring seal to block on the oil fill tube, consider fitting the 928INTL block off plate as well use the HB4 on both sides of this if you fit it,
IMHO the O ring seal isnt good enough for the fill tube
09-20-2010 | 10:23 AM
#59
Thread Starter
Addict
Rennlist Member
Rennlist Member
Joined: Jul 2001
Posts: 7,330
Likes: 110
From: Shawnee, KS, USA
when fitting the stop try to stick a small wire into the edge of the flappy plate this will hold it open just a tick
then fit the stop, what you dont want to do is fit the stop then start twisting it this can shear off the roll pin its fitted on basically tap it into the correct position add a drop of green loctite to the stop.
also use some hondabond 4 on the new O ring seal to block on the oil fill tube, consider fitting the 928INTL block off plate as well use the HB4 on both sides of this if you fit it,
IMHO the O ring seal isnt good enough for the fill tube
then fit the stop, what you dont want to do is fit the stop then start twisting it this can shear off the roll pin its fitted on basically tap it into the correct position add a drop of green loctite to the stop.
also use some hondabond 4 on the new O ring seal to block on the oil fill tube, consider fitting the 928INTL block off plate as well use the HB4 on both sides of this if you fit it,
IMHO the O ring seal isnt good enough for the fill tube
And what is the 928INTL block off plate? Haven't heard of it.
BTW, I don't have a replacement crank position sensor; my connector looked OK and I remember a few posts about it being hard to remove sometimes; I was hoping to avoid an unnecessary replacement. It's about the only WYAIT part I wasn't planning on replacing. Should I replace it anyway?
Thanks for your tips, BTW.
09-20-2010 | 11:52 AM
#60
Team Owner
Joined: May 2004
Posts: 28,637
Likes: 2,665
From: Philly PA
I dont know what the bonding agent that you spected,
but the Honda dealer has the HB4 its about 10.00 a tube.
Call 928INTL ask them for the block off plate it goes under the fill tube and has a plate that blocks oil being flung up to the bottom of the fill tube,
this will reduce the chance of oil leaking from the fill tube and aid in oil drainback into the sump.
I used the HB4 on both sides of this plate and also added a small bead to the O ring to assist in sealing the O ring and fill tube mount to the plate
By all means replace the CPS then your good to go for another 20 years, plus its a lot easier to work with the intake removed ,
soak the part in PB blaster before you try to remove it it may be a bit tight coming out of the engine .