

Official Thread: Mark B's 928 Racer
 05-06-2009 | 02:25 AM
#16
Not the sharpest tool in the shed
Rennlist Member
Rennlist Member
Joined: Dec 2008
Posts: 8,856
Likes: 335
From: Chandler, AZ, USA, Earth, Milky Way Galaxy
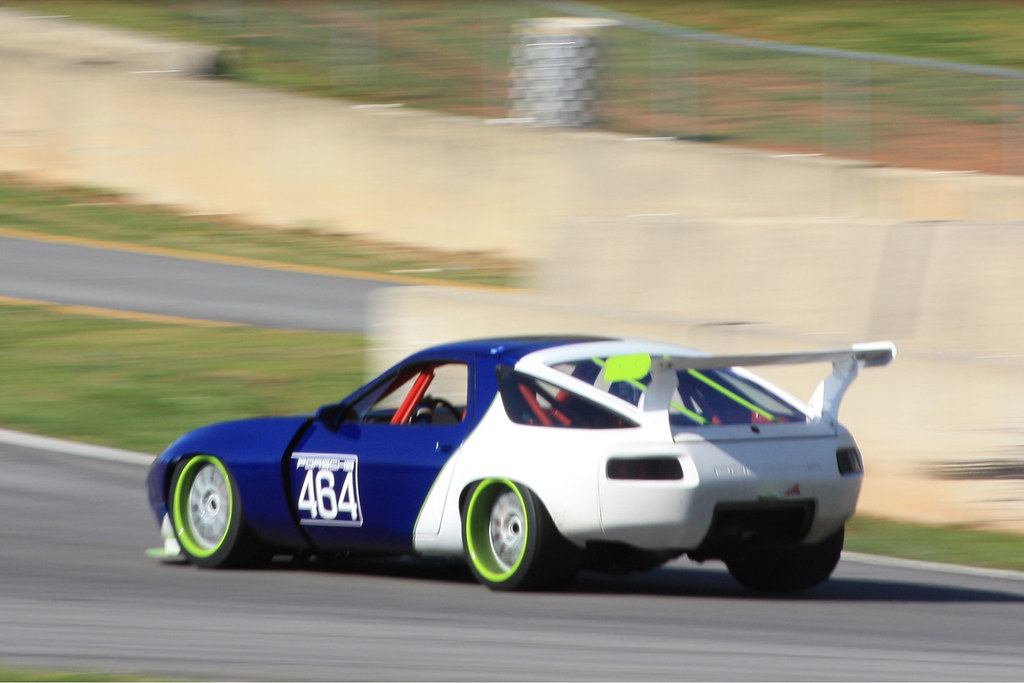
Incredible effort and result. Love the paint graphics too. The widened wheel wells look awesome. Your car says "move over or go faster" in rear view-ese. Just super! 
More pics please of interior, engine and undercarriage.
More pics please of interior, engine and undercarriage.
05-06-2009 | 02:32 AM
#17
Addict
Rennlist Member
Rennlist Member
Joined: Oct 2001
Posts: 1,115
Likes: 2
From: Berkeley, CA
Mark -
Outstanding work! Every detail - the fenders/flares, the wing, the splitter, the paint, the wheels - is executed beautifully and quite professionally. You've built this & you're still in school? You've got quite a future in front of you if this is any indication of your talent & capabilities.
If this car isn't done, what on Earth do you have planned next?
-Dennis
Love these two pics in particular:
05-06-2009 | 11:53 PM
#20
Thread Starter
Drifting
Joined: Jun 2003
Posts: 3,348
Likes: 1
From: Ann Arbor, MI
Dennis:
Thank you! Planned next? You'll just have to wait and see...
Nah, eventually the motor will need to be freshened up probably at the end of next season (hopefully it lasts). I'd love to do some similar things to what you did, so I appreciate all the work you and Jim did on your motor. I also plan on doing a full graphics setup on it with mine and my dads' logos on it and whatnot. The pass. side paint job needs a bit of spicing up, as I'm really favoring the driver's side right now, so I'll probably make that side a bit more interesting with the graphics.
Dave:
The wheels are actually covered in vinyl. When I had them apart to widen them, I covered the outers.
On to the next phase:
(well, I was going to add more but flickr is giving me problems. The next phase(s) tomorrow.)
Last edited by Benton; 05-07-2009 at 01:23 AM.


 05-07-2009 | 03:23 PM
#25
Thread Starter
Drifting
Joined: Jun 2003
Posts: 3,348
Likes: 1
From: Ann Arbor, MI
I agree about the blue side... the white side will get some spice when I do the graphics.
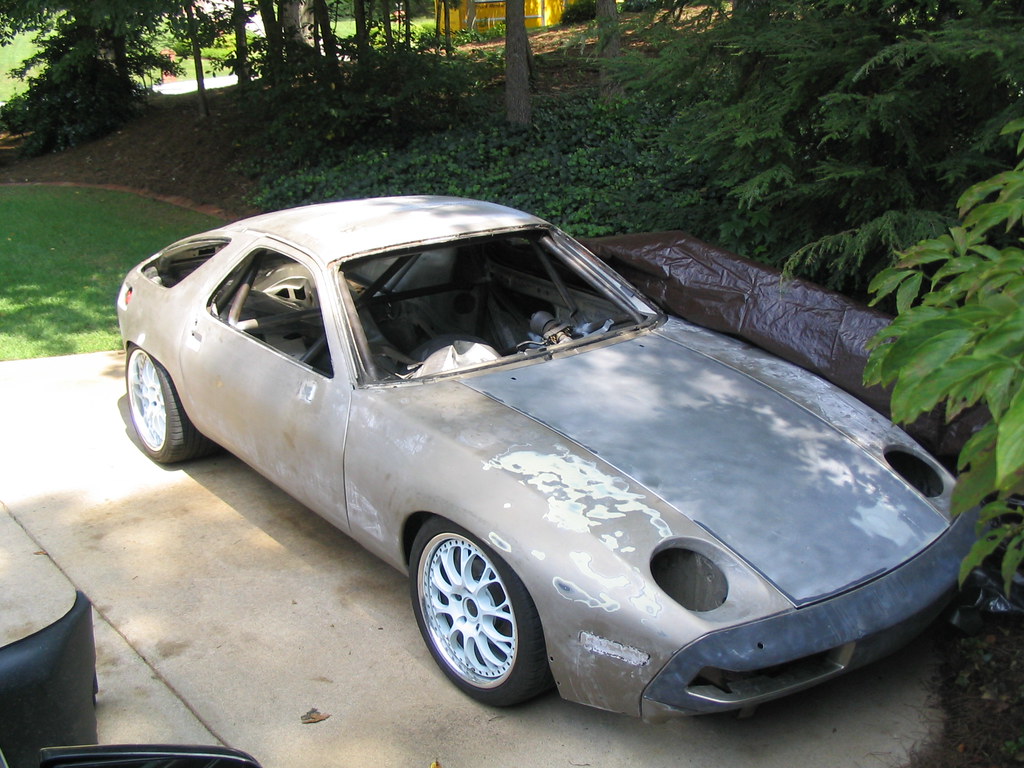
Next update:
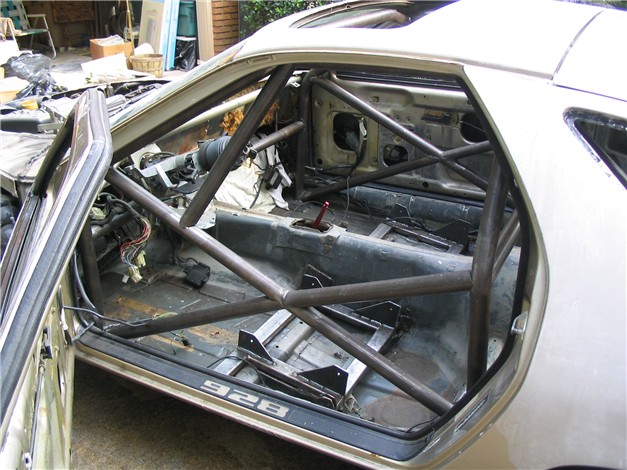
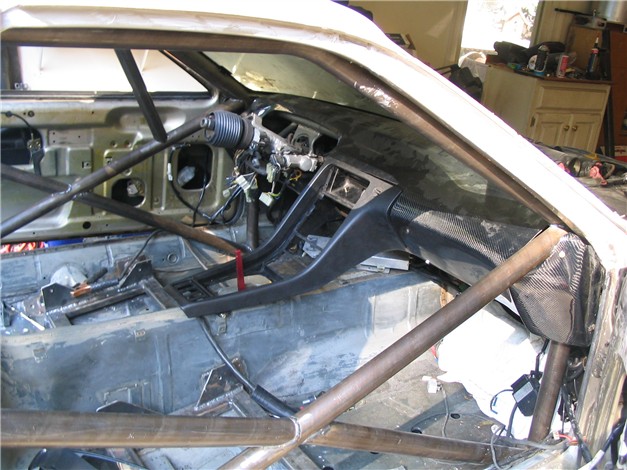
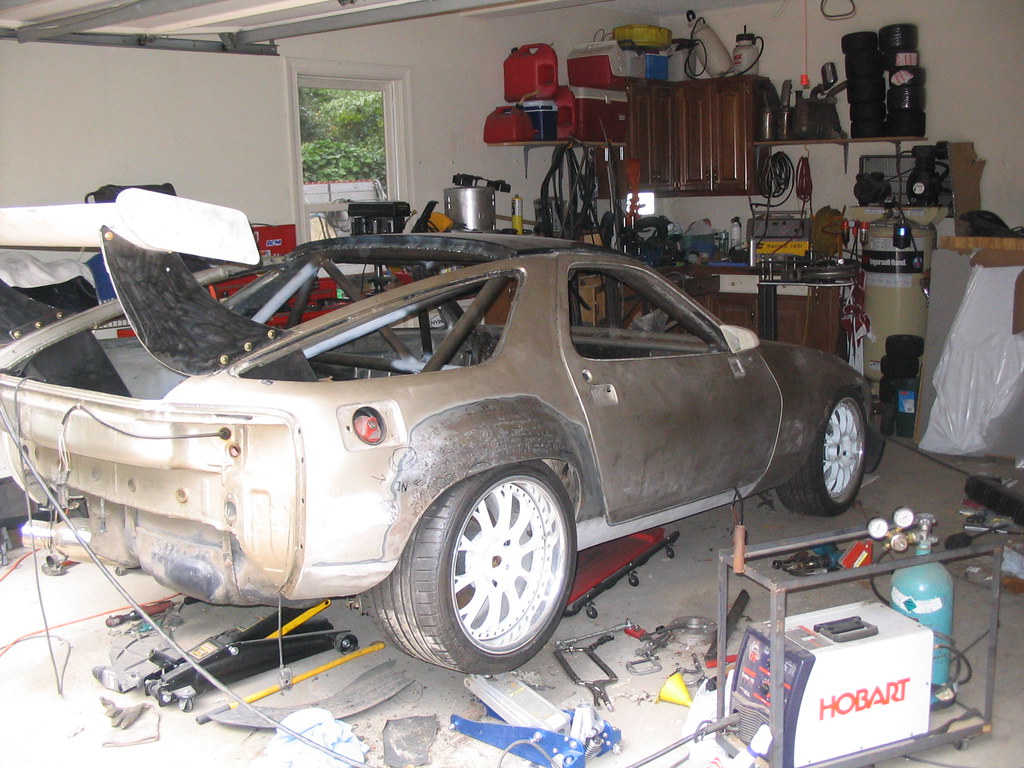
After the interior was stripped of sound deadening and whatnot (what a miserable experience) I started building the cage and mocking up the dash. You can also see the seat mounts I added. A bit overbuilt and heavy, but I erred on the side of safety there. After four years, there are some things I would change on how I built the cage, but I'm pretty happy with it.

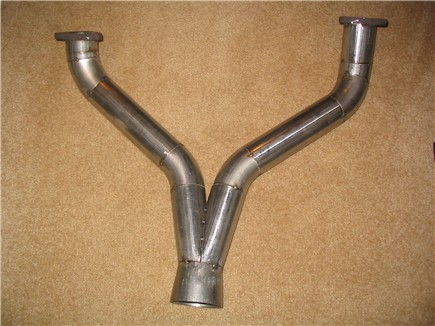
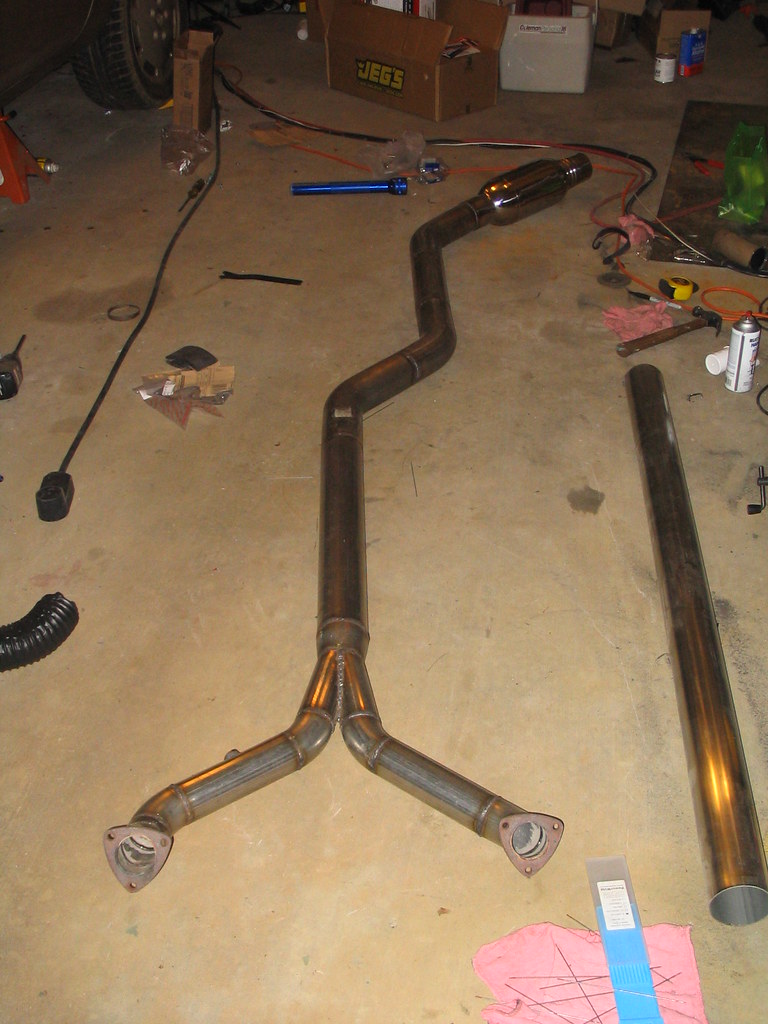
After that, I built the exhaust system. All stainless 2.5" Y-pipe to 3.5" single. I have since added a Borla race muffler where the cats were and also re-routed the exit at the back.
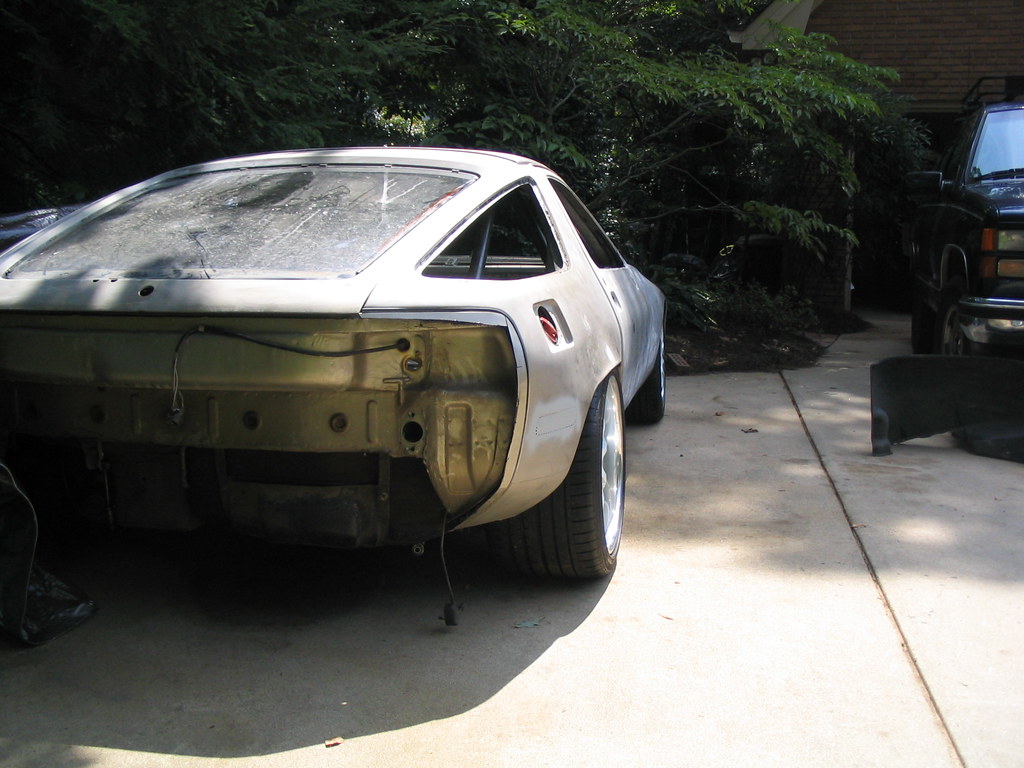
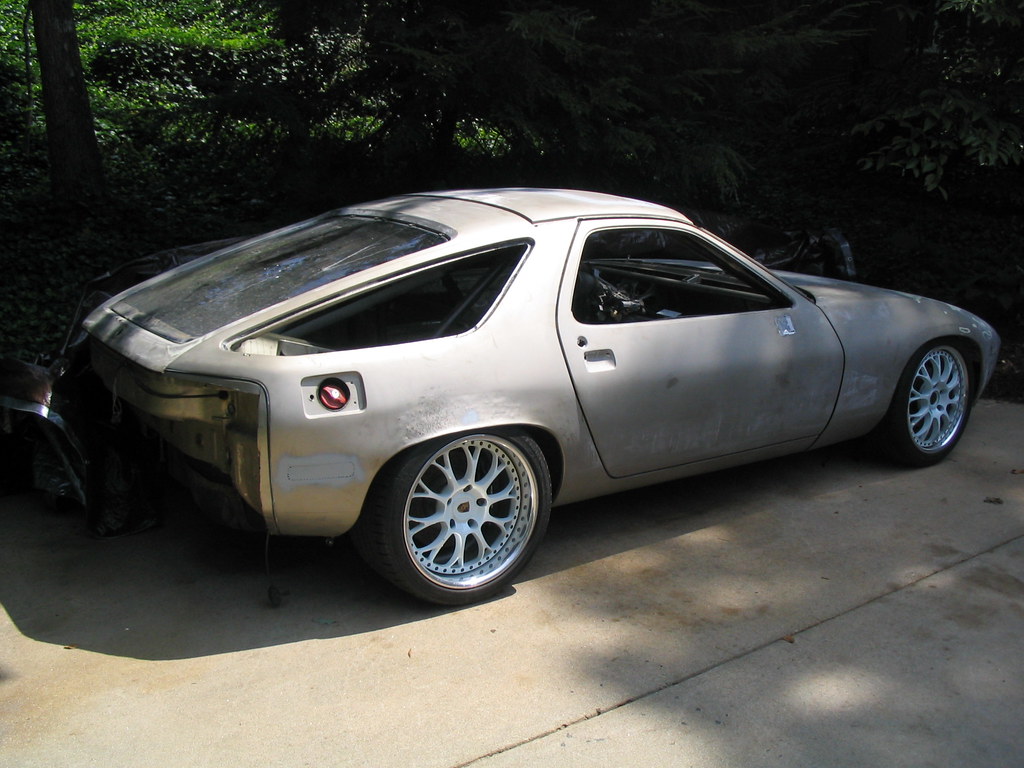
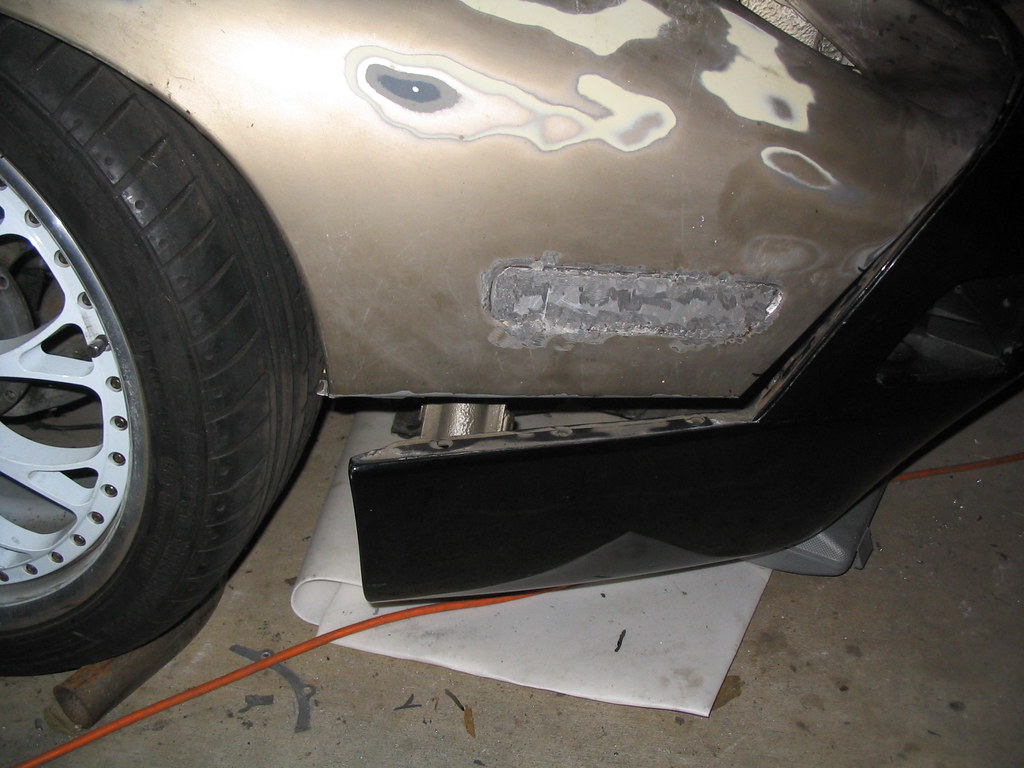
We bought the wheels used as 8" front and 11" rears. I originally just rolled the rear bodywork, and the car sat like this from 7/05 to 5/06. You can also see where I have filled the marker light holes and mirror holes:
Next update:
After the interior was stripped of sound deadening and whatnot (what a miserable experience) I started building the cage and mocking up the dash. You can also see the seat mounts I added. A bit overbuilt and heavy, but I erred on the side of safety there. After four years, there are some things I would change on how I built the cage, but I'm pretty happy with it.
After that, I built the exhaust system. All stainless 2.5" Y-pipe to 3.5" single. I have since added a Borla race muffler where the cats were and also re-routed the exit at the back.
We bought the wheels used as 8" front and 11" rears. I originally just rolled the rear bodywork, and the car sat like this from 7/05 to 5/06. You can also see where I have filled the marker light holes and mirror holes:
05-07-2009 | 03:41 PM
#26
Thread Starter
Drifting
Joined: Jun 2003
Posts: 3,348
Likes: 1
From: Ann Arbor, MI
When I got back to work in summer of '06, I wasn't a huge fan of how the rear wheels fit. I decided to try my hand at some metal work, so here is the process of forming the rear fenders.
First, rough out the shape with a ball-peen hammer and sand-filled "shot bag" (I filled a freebie makeup kit bag my girlfriend had with sand... anything relatively durable, but not too large to hold in your hand). Be ready for some burning forearms.
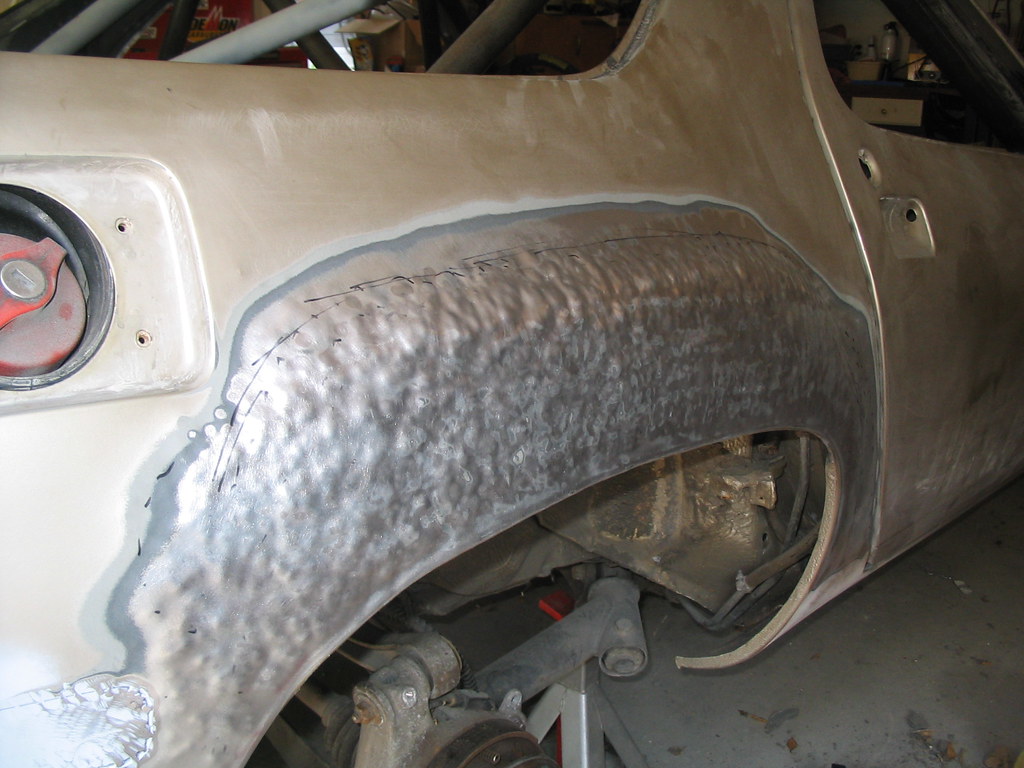
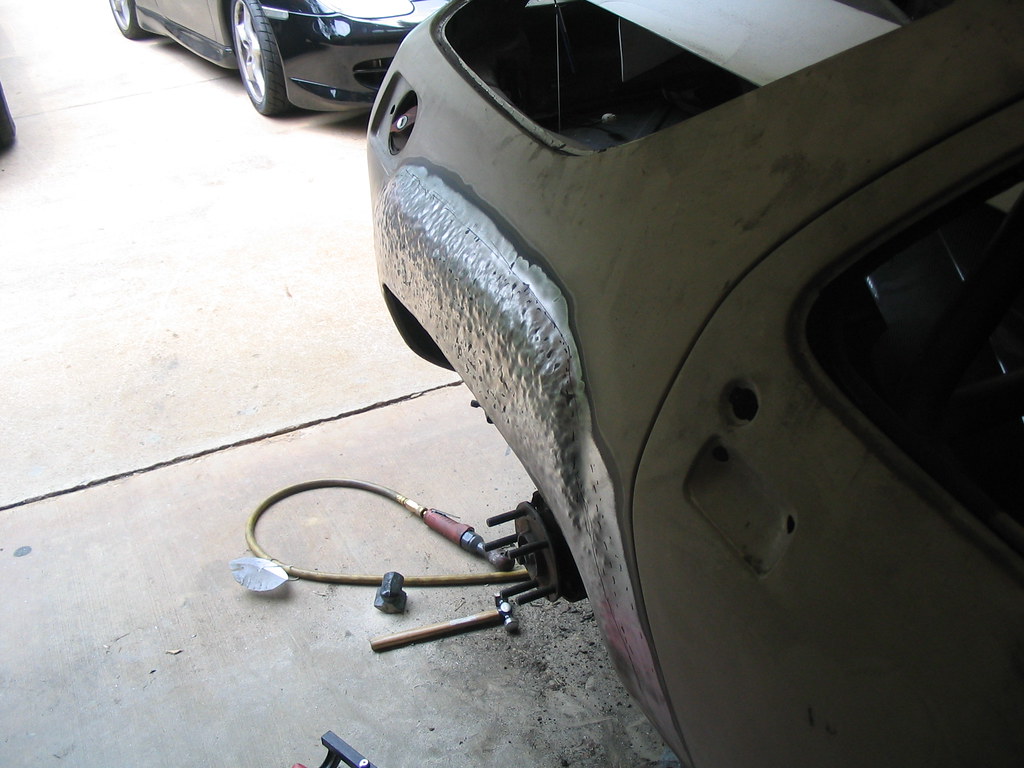
Here, I test fit the wheels with stacked 20mm spacers. The final shape was pulled out another 10mm or so; about 2.75" per side is the total amount.
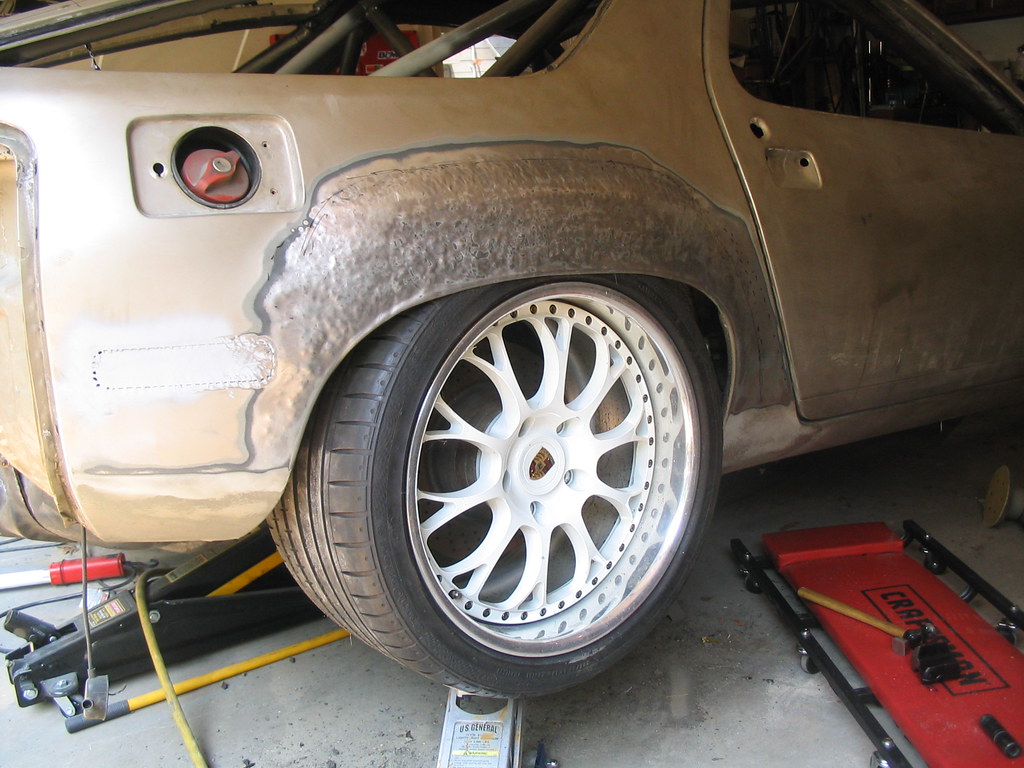
In the above picture you can also see the first wing mounts I made from steel. Why I made them from steel, I don't know? Young and naive...
They have since been cut out and changed.
First, rough out the shape with a ball-peen hammer and sand-filled "shot bag" (I filled a freebie makeup kit bag my girlfriend had with sand... anything relatively durable, but not too large to hold in your hand). Be ready for some burning forearms.
Here, I test fit the wheels with stacked 20mm spacers. The final shape was pulled out another 10mm or so; about 2.75" per side is the total amount.
In the above picture you can also see the first wing mounts I made from steel. Why I made them from steel, I don't know? Young and naive...
They have since been cut out and changed.
05-07-2009 | 04:20 PM
#27

Nordschleife Master
Joined: Sep 2004
Posts: 9,429
Likes: 2
From: Not close enough to VIR.
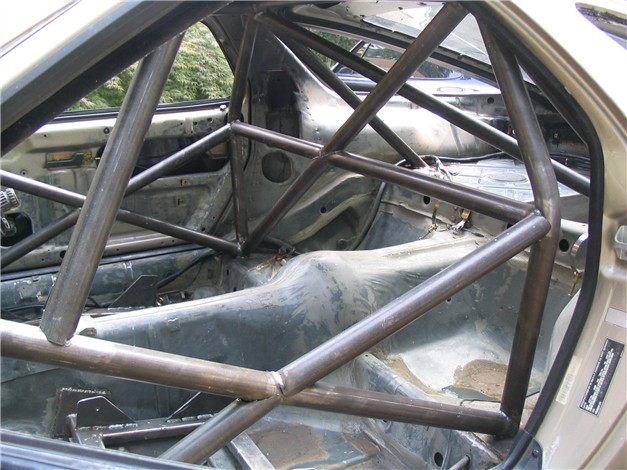
If you run into a tech inspector that knows what they're doing, you'll get yelled at for the main hoop diagonal. It should be 1 piece, not 2. Most sanctioning bodies will allow it just because too many people screw it up to make everybody fix it. NASA had to change their CCRs last year to 2 piece diagonals because so many former SCCA and PCA cars came over with improperly built cages.
05-07-2009 | 04:22 PM
#28
Thread Starter
Drifting
Joined: Jun 2003
Posts: 3,348
Likes: 1
From: Ann Arbor, MI
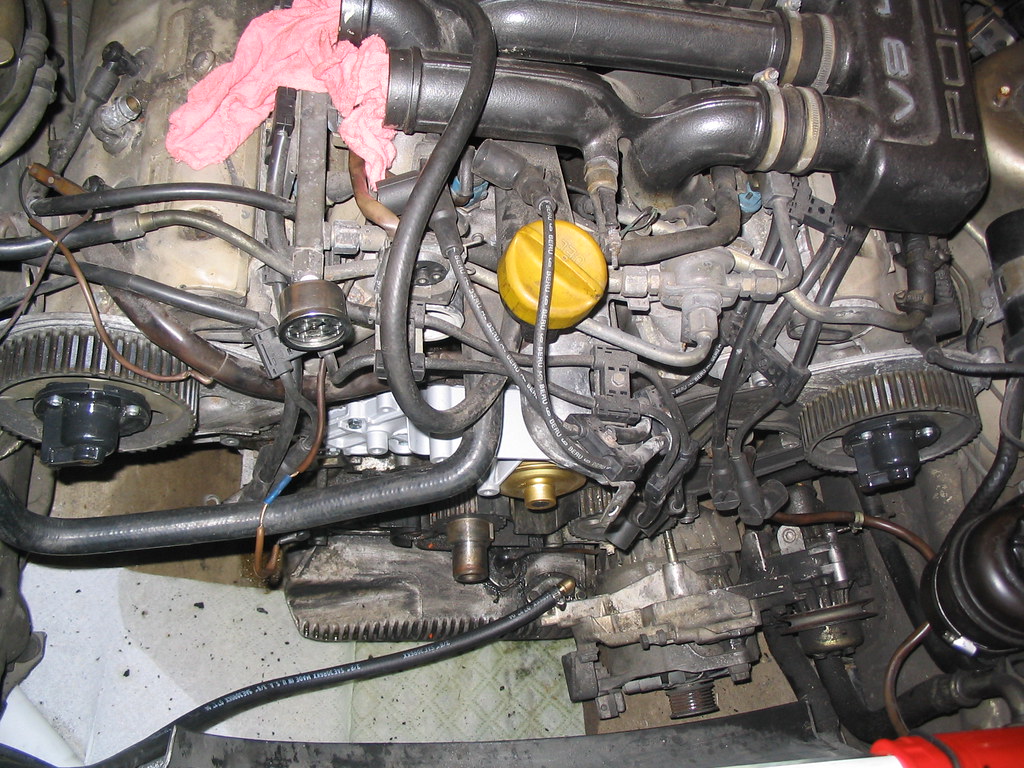
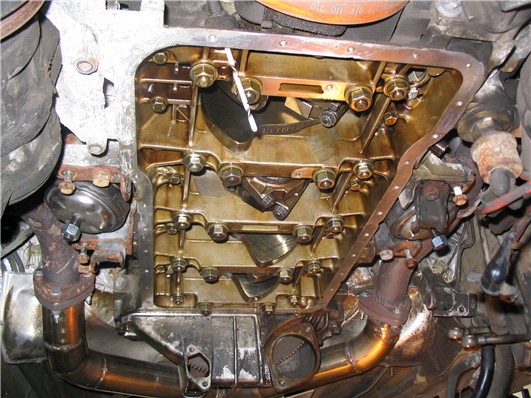
TB/WP time! I also installed new injectors, an air/oil separator from 928 Specialists, added a fuel pressure gauge, changed the rod bearings, adjusted the cam timing with Ken's tool, new solid rubber motor mounts from 928M, new tranny mounts, short shifter, new shifter cup/bushings/rear linkage, and more stuff I'm probably forgetting.

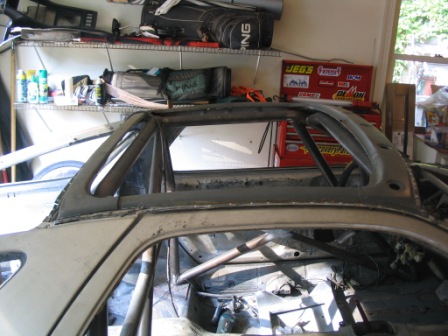
Before I painted the car, I decided to replace the roof skin with a factory non-sunroof roof panel. Strangely enough, I ordered it straight from our local dealership. I think the parts manager said there were something like 2 of them left in Germany.
First, drill out the spot welds and remove the skin:
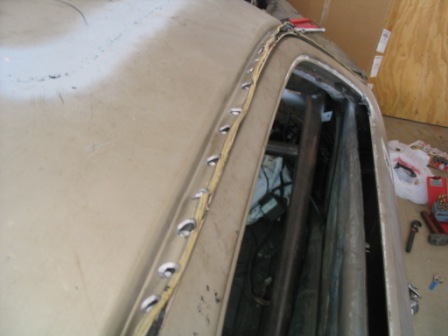
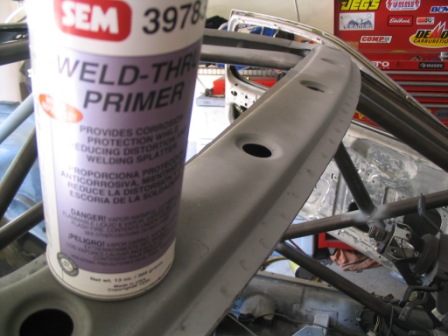
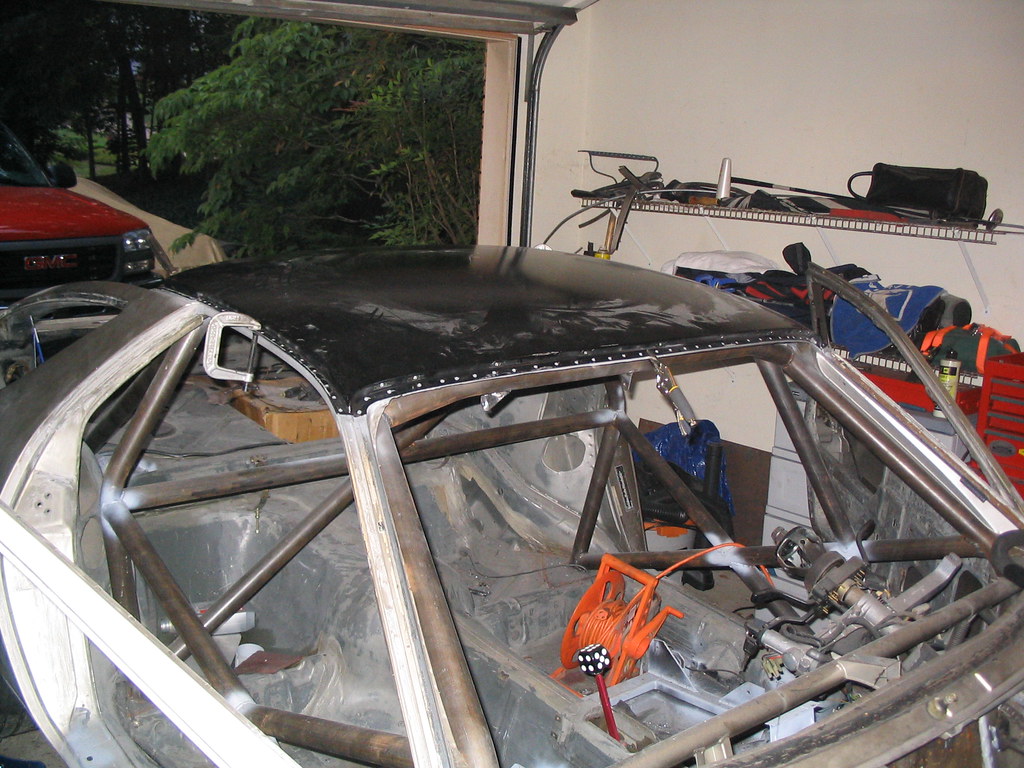
Since I don't have a spot welder, I drilled about 100 1/4" holes around the perimeter of the new skin. Before welding on the new, make sure you prime the roof frame with weld-thru primer to help prevent rust. After that, weld on the new! The welding has to be done very slowly and only in small sections to prevent warping.
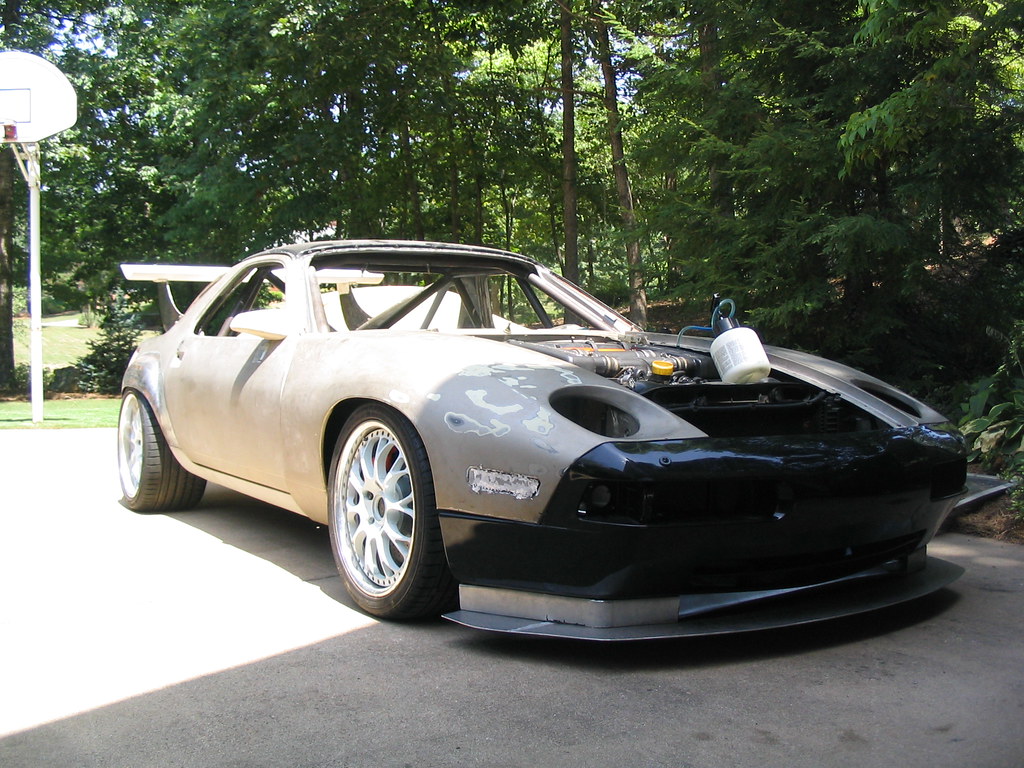
The suspension is Koni 3012 double adjustables with heim joints. Here is a photo after building the mounts and test-fitting:

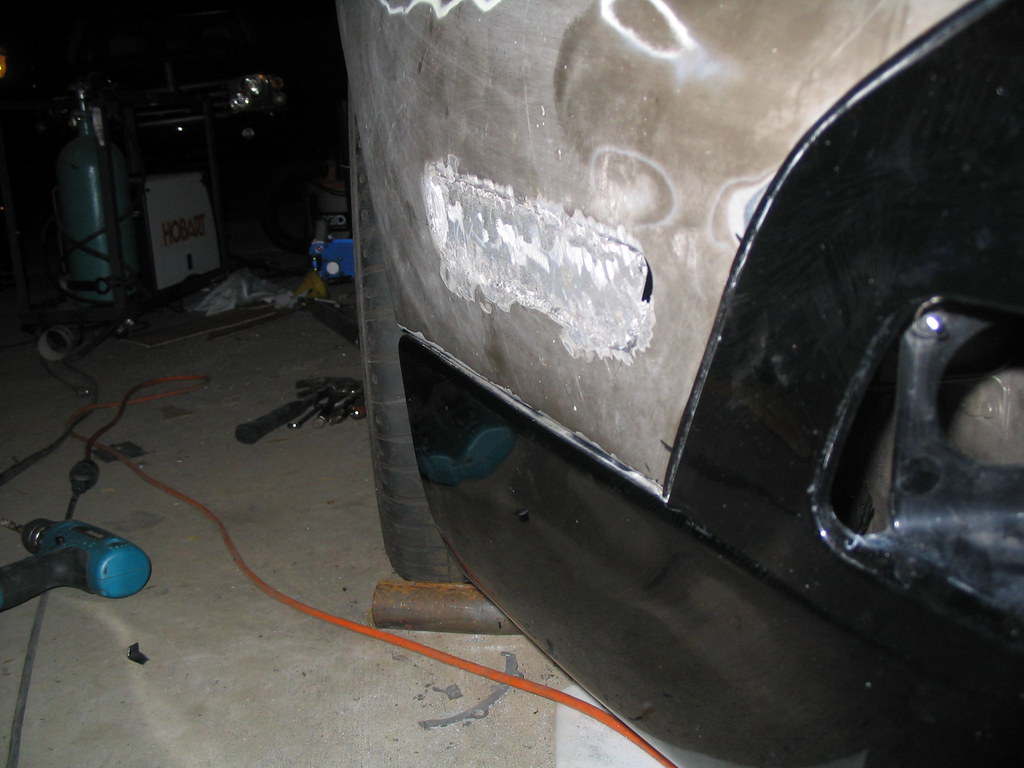
Iccy928: Here are the photos of the S4 bumper/S fenders. I had to weld up a simple support structure on the backside to keep it from flopping around, since the old support doesn't fit anymore.
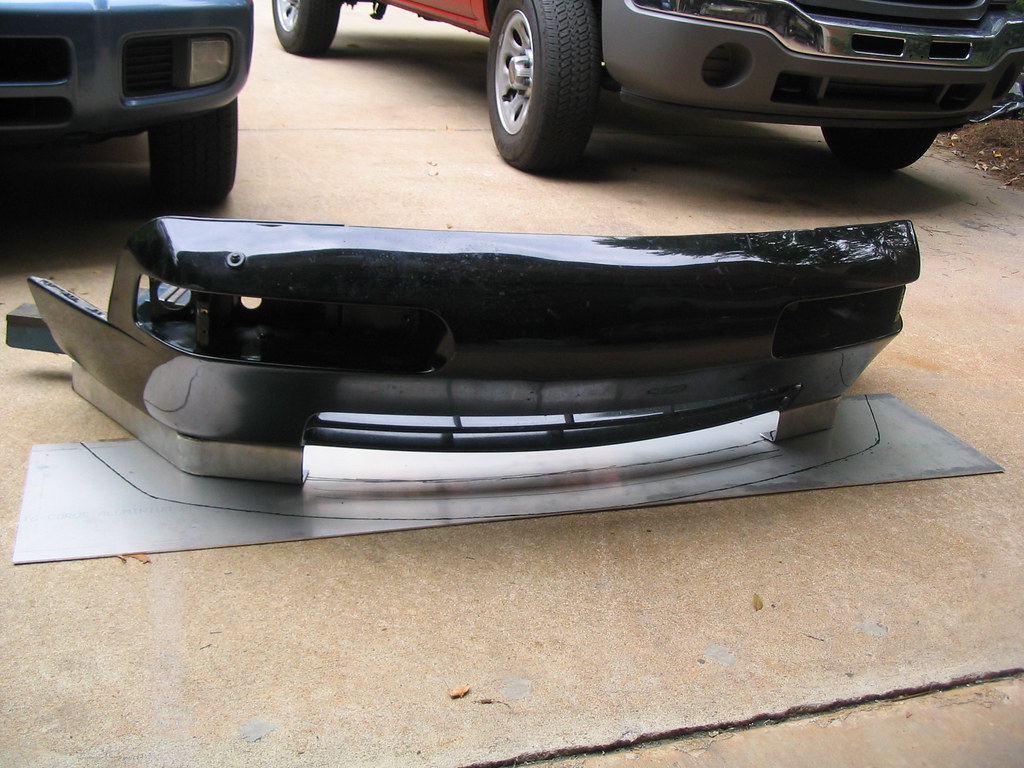
The splitter is 1/8" 5052 aluminum. The supports were made from 1/16" aluminum sheet. Not yet made by this time are my turnbuckles/brackets and the "ramp" I fashioned for the middle to force air up to the radiator. I need to vent my hood, as I know a ton of air is getting rammed up in there with no way to get out.
Before I painted the car, I decided to replace the roof skin with a factory non-sunroof roof panel. Strangely enough, I ordered it straight from our local dealership. I think the parts manager said there were something like 2 of them left in Germany.
First, drill out the spot welds and remove the skin:
Since I don't have a spot welder, I drilled about 100 1/4" holes around the perimeter of the new skin. Before welding on the new, make sure you prime the roof frame with weld-thru primer to help prevent rust. After that, weld on the new! The welding has to be done very slowly and only in small sections to prevent warping.
The suspension is Koni 3012 double adjustables with heim joints. Here is a photo after building the mounts and test-fitting:
Iccy928: Here are the photos of the S4 bumper/S fenders. I had to weld up a simple support structure on the backside to keep it from flopping around, since the old support doesn't fit anymore.
The splitter is 1/8" 5052 aluminum. The supports were made from 1/16" aluminum sheet. Not yet made by this time are my turnbuckles/brackets and the "ramp" I fashioned for the middle to force air up to the radiator. I need to vent my hood, as I know a ton of air is getting rammed up in there with no way to get out.
05-07-2009 | 04:32 PM
#29
Thread Starter
Drifting
Joined: Jun 2003
Posts: 3,348
Likes: 1
From: Ann Arbor, MI
If you run into a tech inspector that knows what they're doing, you'll get yelled at for the main hoop diagonal. It should be 1 piece, not 2. Most sanctioning bodies will allow it just because too many people screw it up to make everybody fix it. NASA had to change their CCRs last year to 2 piece diagonals because so many former SCCA and PCA cars came over with improperly built cages.
I'd rather not get into this argument. I built the cage the way I wanted, and it fits the rules. If I get a tech inspector that knows what he's doing and he "yells" at me, well, I guess my feelings will be a little hurt.
")
Thanks for the picture compliment, Bill!
Last edited by Benton; 05-07-2009 at 04:50 PM.

 Thanks ever so much for making this thread and documenting it for all of us to enjoy. So how much do you want to come up here and finish my car this summer?