
My 1988 928 S4 - TB/WP Job And Brakes
 01-11-2009, 10:22 PM
#1
Instructor
Thread Starter

Join Date: Aug 2008
Posts: 189
Likes: 0
Received 0 Likes
on
0 Posts
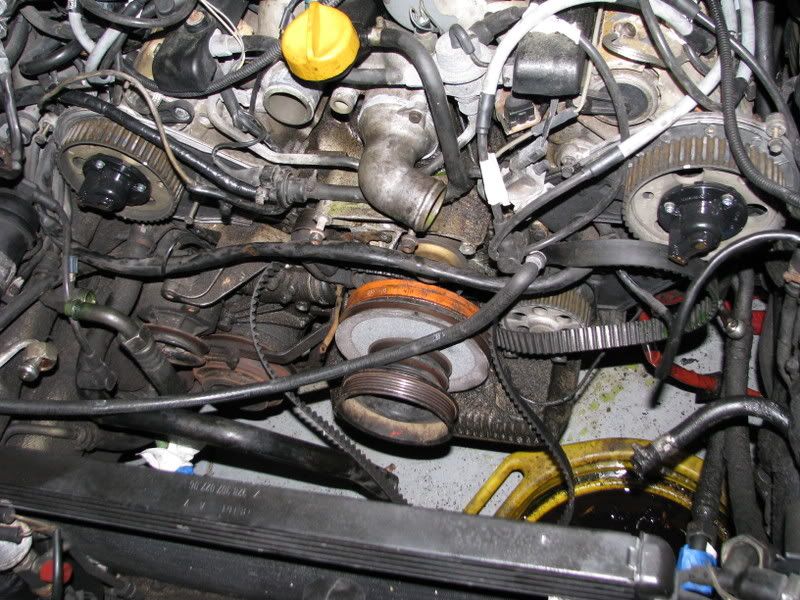
Well I am about half way through the TB/WP job and decided to go ahead and remove the radiator today.
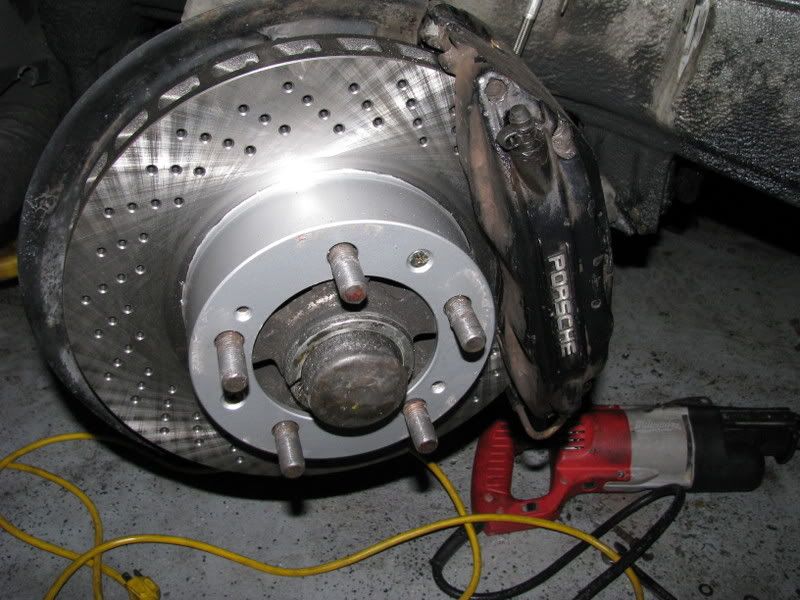
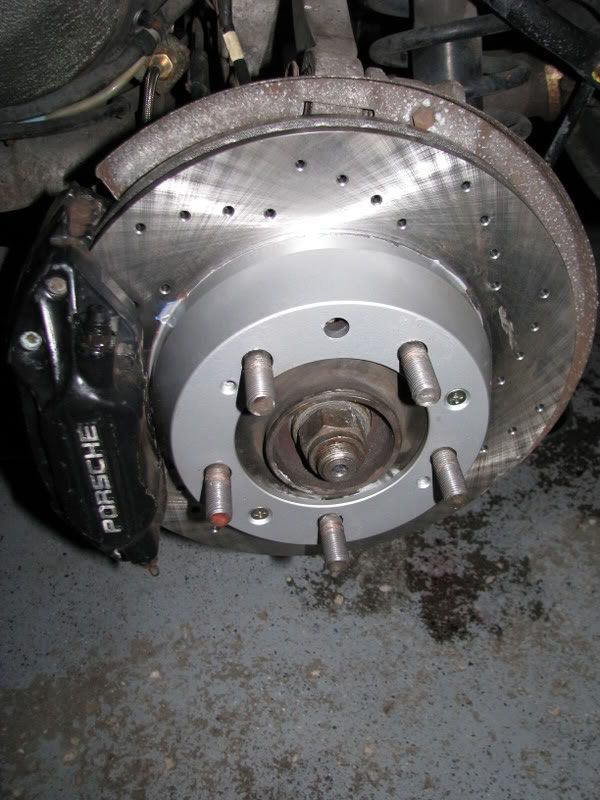
I went ahead and replaced the rotors, pads, lines, and fluid for the brakes:
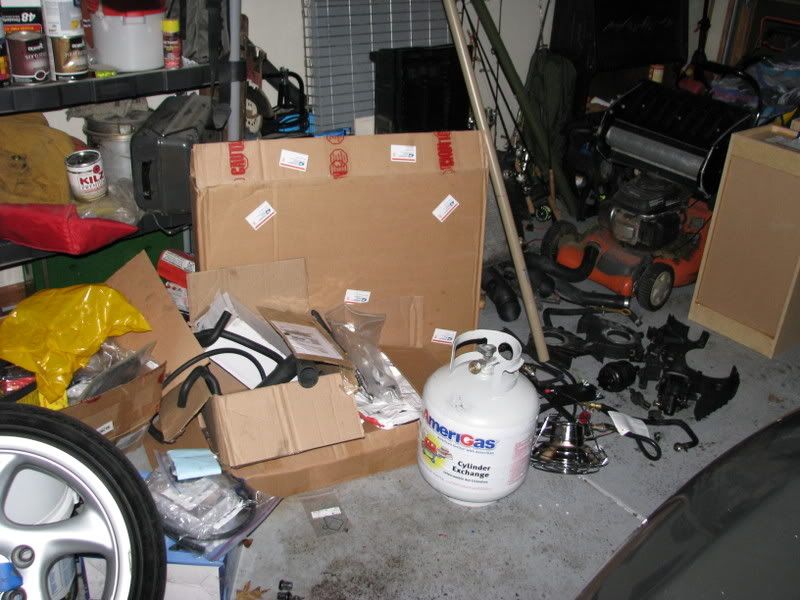
I still got the fuel lines, vacuum lines, knock sensors, hall sensor, X Pipe and high flow cats, and suspension to go before I take the rear end out and send off the trans to be rebuilt. Heres some random pics of parts and the beast.
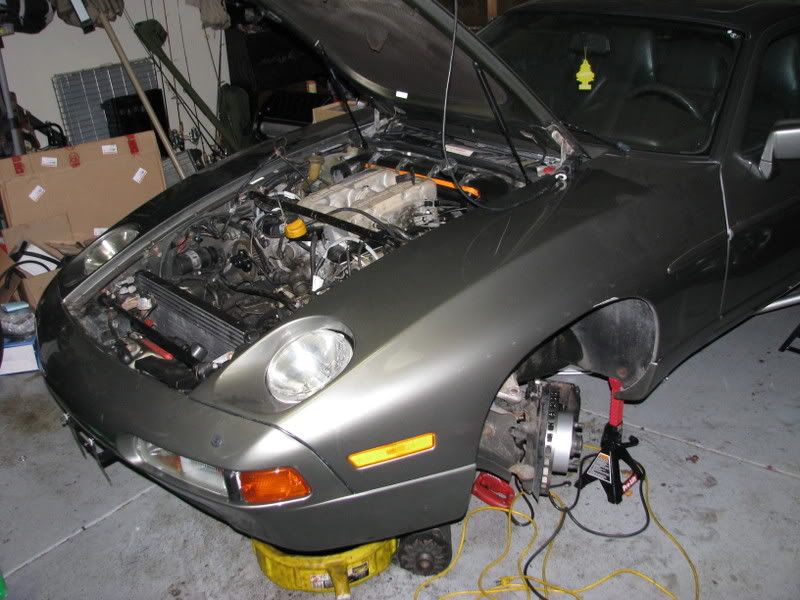
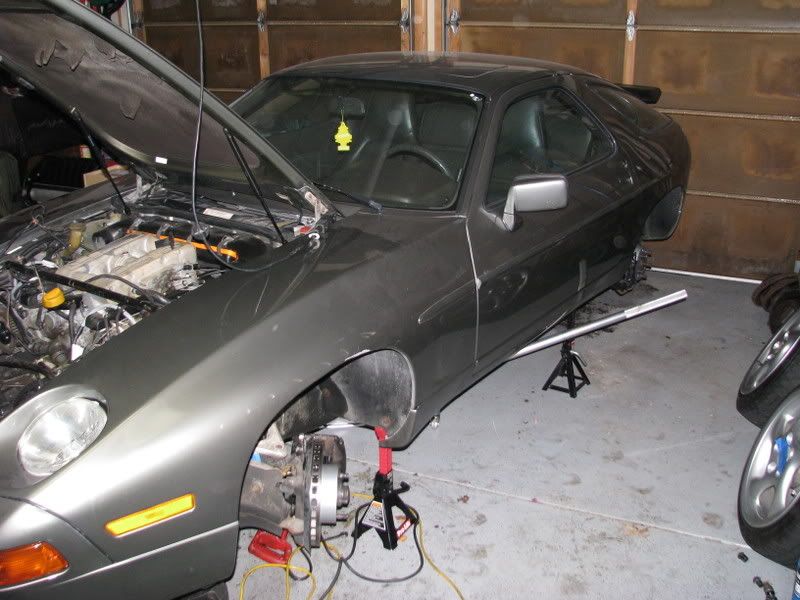
Also, I am thoroughly conviced that every bolt or other fastner on this car is rusted/welded on. My new favorite tool is the sawzall!
I went ahead and replaced the rotors, pads, lines, and fluid for the brakes:
I still got the fuel lines, vacuum lines, knock sensors, hall sensor, X Pipe and high flow cats, and suspension to go before I take the rear end out and send off the trans to be rebuilt. Heres some random pics of parts and the beast.
Also, I am thoroughly conviced that every bolt or other fastner on this car is rusted/welded on. My new favorite tool is the sawzall!
 01-11-2009, 10:29 PM
#2

I was going to ask what you used the sawzall on......but I see it on both sides of the car. I don't think I want to know.
But I will say you are about 3 gallons of Simple Green from a pristine looking engine.
But I will say you are about 3 gallons of Simple Green from a pristine looking engine.
01-11-2009, 10:40 PM
#3
Three Wheelin'
Join Date: Sep 2007
Location: Ridgecrest, California
Posts: 1,363
Likes: 0
Received 146 Likes
on
30 Posts
Hello IndyMatt,
I just finished the same job on Virginia ('87) and removed the radiator as well - makes it much more roomy to work. You'll be glad when it's all done and running smooth as silk - I know I am! Good luck with the project and keep the pics coming!
I just finished the same job on Virginia ('87) and removed the radiator as well - makes it much more roomy to work. You'll be glad when it's all done and running smooth as silk - I know I am! Good luck with the project and keep the pics coming!
01-11-2009, 11:22 PM
#4
Instructor
Join Date: Mar 2006
Location: Morgan Hill, CA
Posts: 185
Likes: 0
Received 0 Likes
on
0 Posts
Glad to hear the radiator is out. I can just invision a tool slip and an oh s#@t!
I've done the job once, and more room more better.
The picture in my avitar was taken during that job.
Don't get overwhelmed, just step by step. It comes apart and goes back together.
Have a cool beverage of choice when it's all over.
Cheers,
I've done the job once, and more room more better.
The picture in my avitar was taken during that job.
Don't get overwhelmed, just step by step. It comes apart and goes back together.
Have a cool beverage of choice when it's all over.
Cheers,
01-11-2009, 11:30 PM
#5
I still want to know what the sawzall was for
01-11-2009, 11:35 PM
#6
Rennlist Member
01-11-2009, 11:44 PM
#7
Team Owner
now is a good time to replace the power steering resivour and both of the lines that go to it , you can cut off the factory crimped line on the short hose and secure the new hose with a screw clamp . Also consider getting a set of universal AC sealing O rings from NAPA or Azone so you can refit the line you removed and also refit a new receiver drier prior to pulling a vacuum on the system.
I would guess that the AC line was disconnected to remove the Radiator fans, it isnt usually necessary to do this.
Also take a magnet to the oil pump pulley if it sticks then you have a steel gear, if its aluminum then you should replace it and also remove the 1mm spacer behind it if you use the new steel gear , and also replace the oil pump radial seal and the O ring plus the 3 smaller bolt O rings.
Goodluck on your project
Trending Topics
01-11-2009, 11:54 PM
#8
Instructor

Join Date: Nov 2006
Location: Houston, TX
Posts: 103
Likes: 0
Received 0 Likes
on
0 Posts
to help with the bolts sticking and snapping: before working on a section bathe it in penetrating fluid. invest in a little propane torch for heating the stuck bolts and quench em with penetrating fluid. wake the bolts. Think about snap on sockets with "flank drive" they work well for me.
Penetrating fluid is also good for loosening up the engine grime. I use tons of the stuff. wet down a what you are going to work on tomorrow tonight and let it sit. Try some "weasle ****" as well if you aren't using it already.
Keep up the good work!
Penetrating fluid is also good for loosening up the engine grime. I use tons of the stuff. wet down a what you are going to work on tomorrow tonight and let it sit. Try some "weasle ****" as well if you aren't using it already.
Keep up the good work!
01-11-2009, 11:59 PM
#9
 01-12-2009, 12:57 AM
#10
Addict
Rennlist Member
Rennlist Member
Join Date: Oct 2003
Location: Gone. On the Open Road
Posts: 16,432
Received 1,603 Likes
on
1,047 Posts
Couple of things:
1) Looks like you need new cam sprockets.
2) Looks like the motor is at 45 degrees BTDC on #6. Not #1. (Rotors should be pointing to the left side of the car.) This is ok for replacing the belt. But, once your new belt is on you want to turn the motor over once more to 45 BTDC on #1. If you tension the belt as the motor is currently, your tension will be far too low.
01-12-2009, 08:24 AM
#11
Instructor
Thread Starter
Join Date: Aug 2008
Posts: 189
Likes: 0
Received 0 Likes
on
0 Posts
to help with the bolts sticking and snapping: before working on a section bathe it in penetrating fluid. invest in a little propane torch for heating the stuck bolts and quench em with penetrating fluid. wake the bolts. Think about snap on sockets with "flank drive" they work well for me.
Penetrating fluid is also good for loosening up the engine grime. I use tons of the stuff. wet down a what you are going to work on tomorrow tonight and let it sit. Try some "weasle ****" as well if you aren't using it already.
Keep up the good work!
Penetrating fluid is also good for loosening up the engine grime. I use tons of the stuff. wet down a what you are going to work on tomorrow tonight and let it sit. Try some "weasle ****" as well if you aren't using it already.
Keep up the good work!
The first thing it was used for was because of a caliper bolt that was almost welded to the damn spindle. It stripped out and then I tried to drill it, very unsuccessfully. I used oil, more oil, heat and more heat, easy outs, nothing worked. So 928 International had used calipers half price! So out came the sawzall for the bolt and damn near half the caliper. There was no other way, I'm telling you, NO OTHER WAY!
01-12-2009, 08:28 AM
#12
Instructor
Thread Starter
Join Date: Aug 2008
Posts: 189
Likes: 0
Received 0 Likes
on
0 Posts
now is a good time to replace the power steering resivour and both of the lines that go to it , you can cut off the factory crimped line on the short hose and secure the new hose with a screw clamp . Also consider getting a set of universal AC sealing O rings from NAPA or Azone so you can refit the line you removed and also refit a new receiver drier prior to pulling a vacuum on the system.
I would guess that the AC line was disconnected to remove the Radiator fans, it isnt usually necessary to do this.
Also take a magnet to the oil pump pulley if it sticks then you have a steel gear, if its aluminum then you should replace it and also remove the 1mm spacer behind it if you use the new steel gear , and also replace the oil pump radial seal and the O ring plus the 3 smaller bolt O rings.
Goodluck on your project
I would guess that the AC line was disconnected to remove the Radiator fans, it isnt usually necessary to do this.
Also take a magnet to the oil pump pulley if it sticks then you have a steel gear, if its aluminum then you should replace it and also remove the 1mm spacer behind it if you use the new steel gear , and also replace the oil pump radial seal and the O ring plus the 3 smaller bolt O rings.
Goodluck on your project
I will take a look at the oil pump pulley and do the magnet test. I will ask Roger to add the Oil Pump stuff to my order.
Thanks for the suggestions!
01-12-2009, 08:29 AM
#13
Instructor
Thread Starter
Join Date: Aug 2008
Posts: 189
Likes: 0
Received 0 Likes
on
0 Posts
Couple of things:
1) Looks like you need new cam sprockets.
2) Looks like the motor is at 45 degrees BTDC on #6. Not #1. (Rotors should be pointing to the left side of the car.) This is ok for replacing the belt. But, once your new belt is on you want to turn the motor over once more to 45 BTDC on #1. If you tension the belt as the motor is currently, your tension will be far too low.
1) Looks like you need new cam sprockets.
2) Looks like the motor is at 45 degrees BTDC on #6. Not #1. (Rotors should be pointing to the left side of the car.) This is ok for replacing the belt. But, once your new belt is on you want to turn the motor over once more to 45 BTDC on #1. If you tension the belt as the motor is currently, your tension will be far too low.
Thanks I was going to pull the spark plug in the number one cylinder to double check, so thanks for the tip about the rotors!
01-12-2009, 08:58 AM
#15
Rennlist Member
In your pics, it look like the big power wire, the one that crosses the front of the engine, does not pass thru the timing belt. Mine does and it's looped under the right cam sprocket tower, then up and over to the power bus on the right side. That's where you will find the hall sensor, just behind the backside of the cam sprocket.
Also the wire bundle runs through a p-strap which is mounted to the engine hanging bracket. A real PITA to put back together.