

S4 A/T rebuild thread
 07-25-2008, 08:03 PM
#1
Rennlist Member
Thread Starter
I'm going for it.
A lot of the information here is stuff that has already been posted on Rennlist at one time or another, the vaste majority of which has been provided by Steve Cattaneo. I'm looking to put it all together in one place to make it easier to reference.
This thread from a little earlier has some good info.
I went to the local TranStar depot (www.transtar1.com) and picked up the rebuild kit.
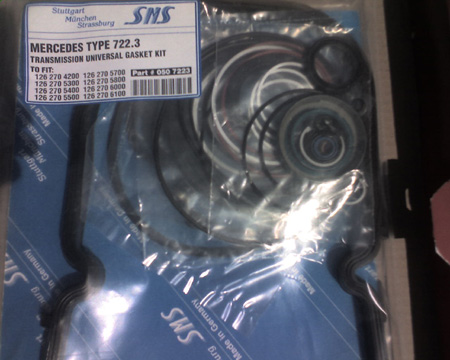
Steve C. has referred to this kit as # TSKB5500D/LS. The counter person at the place couldn't find it under this number. I found out later after thumbing through the catalog that this is the "Reference" number. The actual "part #" is 68004B. If you want the full blown kit with the steels its 68006B. (Wish I would have known it at the time, I may go back and swap).
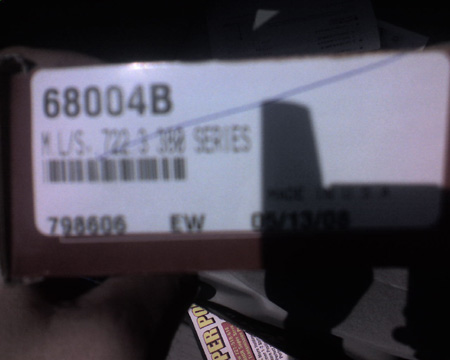
You get the friction discs and a whole lotta seals. It does not come with the filter, that was extra.

Steve has also mentioned a shift kit #55C011. The counter guy couldn't figure this one out either. Again after looking through the catalog that I got with my purchase, it turns out that this is the reference #. It sounds like some TranStar outlets must stock by Ref #, and others by Part #. Both numbers are in the catalog. The part # for the shift kit (Valve Body Recalibration Kit) is S68165G. It runs about $58.
If I get clearance from RV I'll post PDF scans of the catalogue pages that have Part #'s, Ref #'s, and pics. Its about 6 pages.
This should be fun, I think?
A lot of the information here is stuff that has already been posted on Rennlist at one time or another, the vaste majority of which has been provided by Steve Cattaneo. I'm looking to put it all together in one place to make it easier to reference.
This thread from a little earlier has some good info.
I went to the local TranStar depot (www.transtar1.com) and picked up the rebuild kit.
Steve C. has referred to this kit as # TSKB5500D/LS. The counter person at the place couldn't find it under this number. I found out later after thumbing through the catalog that this is the "Reference" number. The actual "part #" is 68004B. If you want the full blown kit with the steels its 68006B. (Wish I would have known it at the time, I may go back and swap).
You get the friction discs and a whole lotta seals. It does not come with the filter, that was extra.
Steve has also mentioned a shift kit #55C011. The counter guy couldn't figure this one out either. Again after looking through the catalog that I got with my purchase, it turns out that this is the reference #. It sounds like some TranStar outlets must stock by Ref #, and others by Part #. Both numbers are in the catalog. The part # for the shift kit (Valve Body Recalibration Kit) is S68165G. It runs about $58.
If I get clearance from RV I'll post PDF scans of the catalogue pages that have Part #'s, Ref #'s, and pics. Its about 6 pages.
This should be fun, I think?
Last edited by atb; 07-30-2008 at 06:40 PM. Reason: resize pics
 07-25-2008, 10:08 PM
#5

Sounds fun man. Take pictures.
 07-25-2008, 10:23 PM
#7
Nordschleife Master
I did my first transmission rebuild a few months back for a tractor and its pretty simple honestly. I bunch of parts but they just go in easily enough and before you know it its all back together.
I would not hesitate to rebuilt my own automatic transmission if i had to on a P-car. (PLEASE LET ME NEVER BUY AN AUTOMATIC PORSCHE THOUGH!) I think it will be fun actually!
Good luck!
I would not hesitate to rebuilt my own automatic transmission if i had to on a P-car. (PLEASE LET ME NEVER BUY AN AUTOMATIC PORSCHE THOUGH!) I think it will be fun actually!
Good luck!
Trending Topics
07-25-2008, 11:16 PM
#8
Former Vendor

Join Date: Feb 2004
Posts: 2,139
Likes: 0
Received 0 Likes
on
0 Posts
Hi Adam,
In my study of the 928 auto driveline I "helped" rebuild my 1986.5 track car auto trans. Actually I watched and stood out of the way while the young tech went at it.
From memory there are a few possible areas that can cause you problems and then there is the hidden seal buried in the trans that most do not replace since you have to drill out rivets and replace them with small bolts afterwards. You will also need a small spring compressor at one point which is available online and the Transtar place will probably be able to sell you or loan you one.
I can't wait to see your pictures and read your write-up. Spread the rebuild over a few days, keep everything super clean and don't rush anything. The shift kit modification is the easiest part.
I just checked and I have some pictures from that rebuild which shows the hidden seal and the small spring tool and some other areas. Let me know if you want them.
Good luck,
Constantine
07-26-2008, 01:50 AM
#9
Rennlist Member
Thread Starter
Thanks all, should be interesting to say the least.
Constantine, go ahead and post your pics and tools here regarding the hidden seal, I'll then incorporate them in my build up as well.
We'll only be getting about 3/4's of the story here, since I've already dropped the pan, valve body, and pulled out two of the pistons. It's been pretty basic removal stuff, just unscrewing bolts and pulling out circlips. If I get into anything tricky in the tear down, like the hidden seal that Constantine has mentioned, I'll post about it, but this is mostly going to be about the reassembly.
Also, if any of the Rennlist sponsor/vendors have a part # for a Porsche rebuild kit, or can get the M/B kit, please post availability here, it would be great to get these parts through one of the usual suspects.
07-26-2008, 04:57 PM
#11
Road Warrior
Rennlist Member
Rennlist Member
might have steve c do a note about replacing the planetary gear washers. iirc, they are NLA, but he can get tme made. then you have to drill out the rivets, replace the washers and re-fasten. his details could be invaluable on that one. otherwise it's $650 from porsche for a new assy.
07-27-2008, 03:21 PM
#12
Rennlist Member
Thread Starter
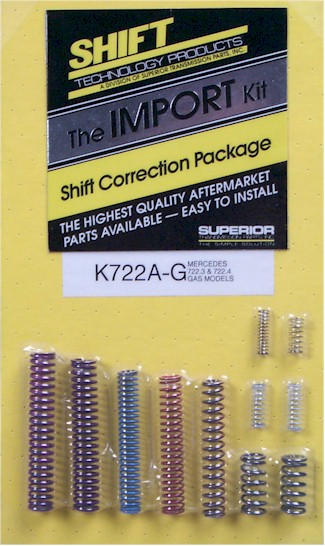
More info on the shift kit (Valve Body Recalibration Kit) TranStar P/N S68165G.
The TranStar counter guy said the product is actually made by Superior Transmission (www.superior-transmission.com) and their P/N is K722A-G.
To see the part weblink, click here.
The Text of the link is as follows:
This valve body kit deals with these problems:
Harsh 1-2 shift
Soft or flare 2-3 shifts
Slip or flare 2-3 (cold)
Soft or flare 3-4 shifts
This Shift Correction Package services early and late 722.3 and all 722.4 Mercedes transmissions,1980 to 1990, Gas Models.
This Superior kit softens the harsh 1-2 shift.
The K722A-Gas kit offers options on firming up the 2-3 and 3-4 shifts from normal to firm to even firmer.
This kit also offers an even softer option on the 1-2 shift.
Proper installation will stabilize shifts of this unit.
Note to purchasing: Ask for Superior part number K722A-G
07-27-2008, 04:31 PM
#13
Rennlist Member
Thread Starter
So I decided to attempt to remove the differential with the tranny still in the car. I was pretty sure that this is doable in the 5 speeds, and it appears that there would be enough room with the A/T after removal of the heatshield on the gas tank.
First steps are pretty basic, so no pics.
1) Remove the fill plug in the diff cover plate, to a) make sure that it will come out (I imagine this will be easier with the cover plate still on the tranny in the car) so you can refill when you're done, and b) allowing venting when draining the diff fluid.
2) Remove drain plug under the bottom of the diff case.
3) Remove the sensor from the diff cover plate. It is held on by a wire hanger which is bolted to the plate, just unscrew the bolt all the way. Gently grab the wire going into the sensor and pull away from the cover, the sensor should come away with no resistance, it looks kind of like a miniature hockey puck.
4) Unbolt the inner CV joints from the tranny output flanges. Get an electric drill/screwdriver for this job, it can take an eternity with a hand wrench. You'll still need the hand wrench to break them loose, but the electric drill with a short extension and universal makes quick work of it all.
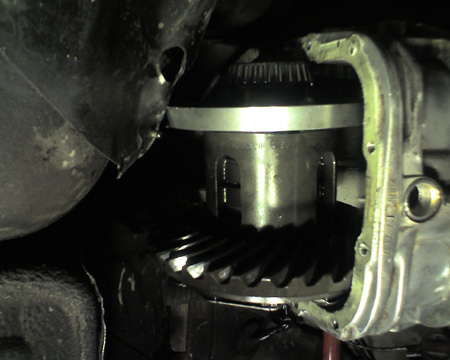
Once you've accomplished all of this, you will be here:
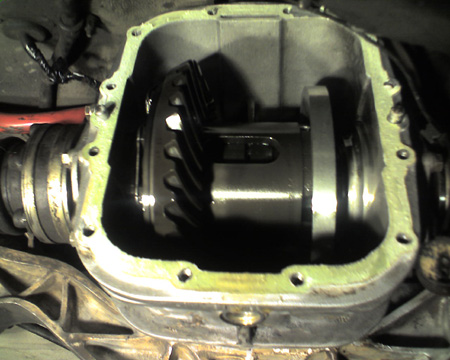
If you have an open diff, it will look different of course, but hopefully when you open her up you'll see one of these.
The differential is suspended on bearings by the two collars that support the output flanges. If you look into each output flange (that part that the CV joint bolts to) you will see a 17mm bolt holding it in. I pulled two of the CV joint mounting bolts and screwed them partially back into the flange, and wedged a wrench inbetween them to counter hold. I then unbolted the 17mm bolt with a socket and long extension. These bolts do not have a lot of torque on them, and break loose fairly easily. You can then pull the flanges out of the sides of the tranny by hand. There should be little or no resistance in doing this.
Sorry no pics of this part, but it really is self explanatory when you see it.
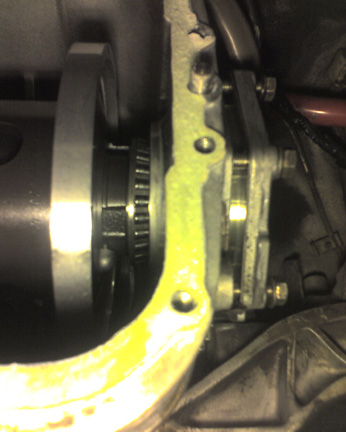
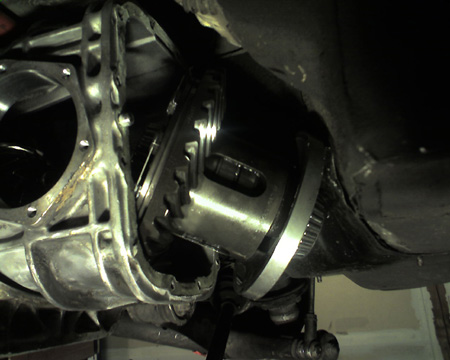
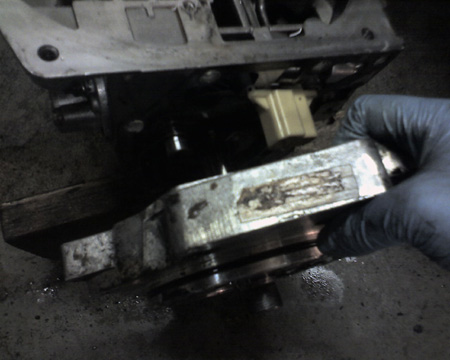
Now it is time to remove the collars. Because they support the diff, I didn't want to completely remove the collars. I backed out the mounting bolts so that I could separate the collar from the tranny casing, but not so far that it would no longer support the differential:
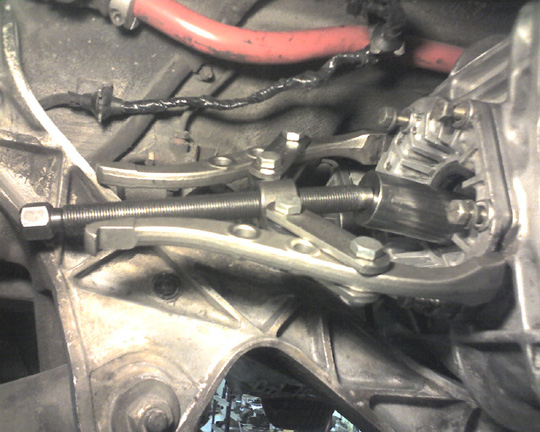
It took a couple taps with a plastic mallet for the collar to break free. The driver side was more stubborn, and I had to break out the gear puller. There are "ears" on the flange to accomodate this. There was very little resistance, and it backed off nicely:
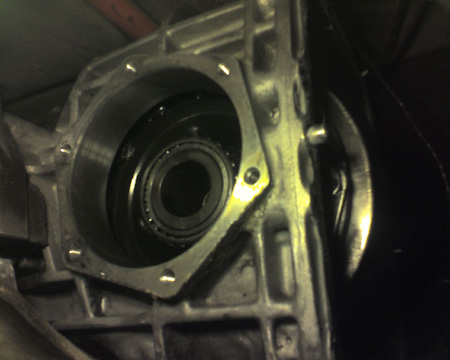
And now you can see the bearing exposed:
With the collar completely removed, you are left with a lot of room:
I then removed the heat shield on the tank. It looks like its a very thin aluminum with asbestos backing. It is held on by 4 connectors, they unscrew easily if you insert a small screwdriver into one of the four slits in the connector:
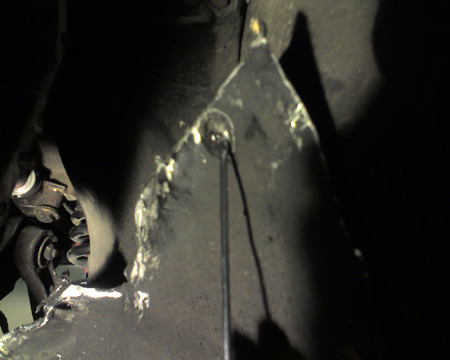
Hmmmmm. The tin-foil like substance was only a cover. Underneath was a pretty thick steel frame that is attached to the gas tank strap. Wasn't expecting that.")
No matter. Reach in, grab the diff, and gently pull it out of the back of the transaxle case:
and....................
DOH!!!

Well, I guess I was going to have to drop the rear suspension sooner or later...
First steps are pretty basic, so no pics.
1) Remove the fill plug in the diff cover plate, to a) make sure that it will come out (I imagine this will be easier with the cover plate still on the tranny in the car) so you can refill when you're done, and b) allowing venting when draining the diff fluid.
2) Remove drain plug under the bottom of the diff case.
3) Remove the sensor from the diff cover plate. It is held on by a wire hanger which is bolted to the plate, just unscrew the bolt all the way. Gently grab the wire going into the sensor and pull away from the cover, the sensor should come away with no resistance, it looks kind of like a miniature hockey puck.
4) Unbolt the inner CV joints from the tranny output flanges. Get an electric drill/screwdriver for this job, it can take an eternity with a hand wrench. You'll still need the hand wrench to break them loose, but the electric drill with a short extension and universal makes quick work of it all.
Once you've accomplished all of this, you will be here:
If you have an open diff, it will look different of course, but hopefully when you open her up you'll see one of these.
The differential is suspended on bearings by the two collars that support the output flanges. If you look into each output flange (that part that the CV joint bolts to) you will see a 17mm bolt holding it in. I pulled two of the CV joint mounting bolts and screwed them partially back into the flange, and wedged a wrench inbetween them to counter hold. I then unbolted the 17mm bolt with a socket and long extension. These bolts do not have a lot of torque on them, and break loose fairly easily. You can then pull the flanges out of the sides of the tranny by hand. There should be little or no resistance in doing this.
Sorry no pics of this part, but it really is self explanatory when you see it.
Now it is time to remove the collars. Because they support the diff, I didn't want to completely remove the collars. I backed out the mounting bolts so that I could separate the collar from the tranny casing, but not so far that it would no longer support the differential:
It took a couple taps with a plastic mallet for the collar to break free. The driver side was more stubborn, and I had to break out the gear puller. There are "ears" on the flange to accomodate this. There was very little resistance, and it backed off nicely:
And now you can see the bearing exposed:
With the collar completely removed, you are left with a lot of room:
I then removed the heat shield on the tank. It looks like its a very thin aluminum with asbestos backing. It is held on by 4 connectors, they unscrew easily if you insert a small screwdriver into one of the four slits in the connector:
Hmmmmm. The tin-foil like substance was only a cover. Underneath was a pretty thick steel frame that is attached to the gas tank strap. Wasn't expecting that.
No matter. Reach in, grab the diff, and gently pull it out of the back of the transaxle case:
and....................
DOH!!!
Well, I guess I was going to have to drop the rear suspension sooner or later...
07-28-2008, 02:27 AM
#14
Rennlist Member
Thread Starter
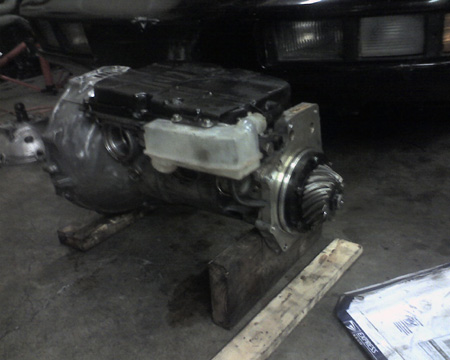
A few more pics from today.
Thanks to Tom Middleton for giving me a hand today, things go much faster when you can double team this stuff. Had the tranny and TT dropped and stripped in about 2-1/2 hours.
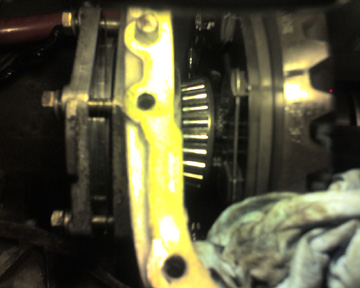
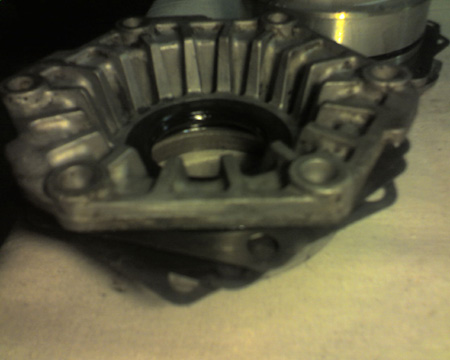
Make sure to keep the corresponding shims with their respective collars so as to not throw off the lash of the ring and pinion. You can see them here:
Here's how far we got today, I need a mondo socket to remove the pinion gear. I believe it's a 36mm.
Thanks to Tom Middleton for giving me a hand today, things go much faster when you can double team this stuff. Had the tranny and TT dropped and stripped in about 2-1/2 hours.
Make sure to keep the corresponding shims with their respective collars so as to not throw off the lash of the ring and pinion. You can see them here:
Here's how far we got today, I need a mondo socket to remove the pinion gear. I believe it's a 36mm.
07-30-2008, 04:48 AM
#15
Rennlist Member
Thread Starter
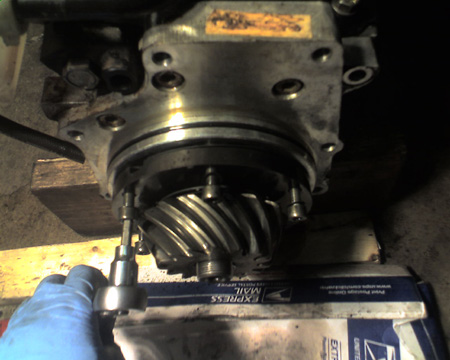
Step one in this process is to remove the pinion gear.
The big nut on the end is a 36mm. I used an air gun on it (light setting) with no problems. Make sure that the shift linkage is in Park. The nut is a collared nut, and is crimped in the keyway slot to hold it in place.
Step one is to uncrimp the collar on the nut to allow it to spin freely off the shaft.
Here the nut has been uncrimped and the collar is free from the channel.
With the big nut off, unbolt the allen head bolts around the base of the pinion.
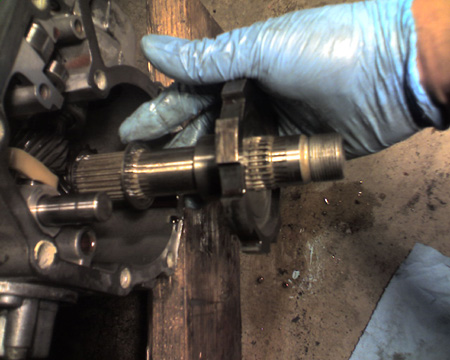
Once the base bolts are out, mount up the gear puller to remove the pinion assembly.
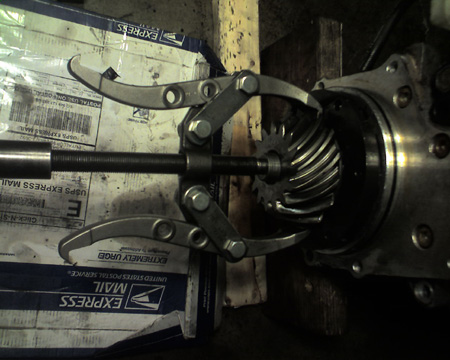
And out she comes.
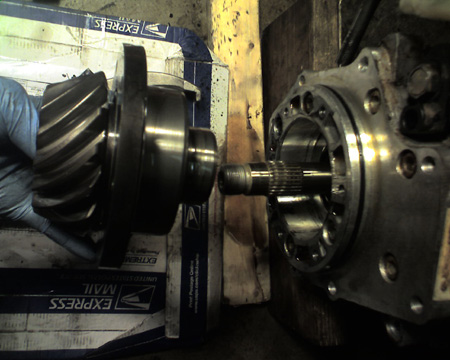
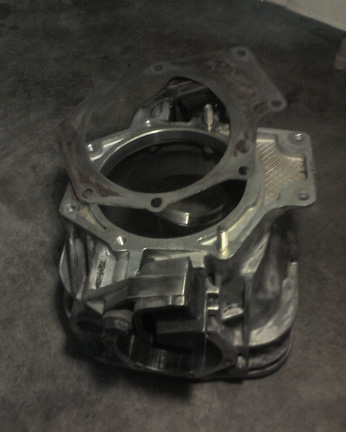
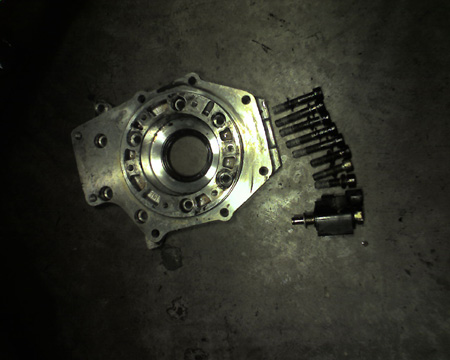
The rear tranny housing is held on by eight allen head bolts.
You also need to release the black plastic housing that is held on by a 19mm bolt head (the one right above the allen held bolt being removed in the picture).
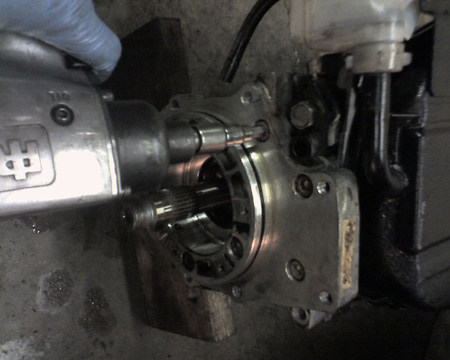
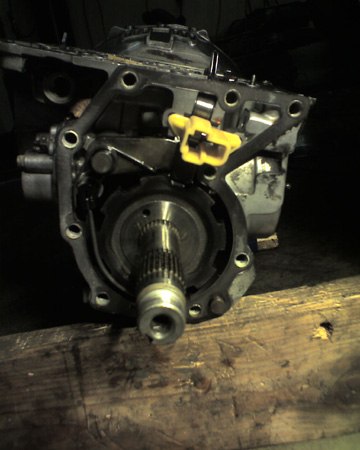
A light tap with a plastic mallet frees up the rear housing.
The five longer bolts go around the shaft in the circular boss, the three shorter ones go below. The black plastic housing actually bolts into the center section, but interferes slightly with the rear housing. All eight allen bolts have washers that like to stay against the aluminum housing cover, make sure you find them all.
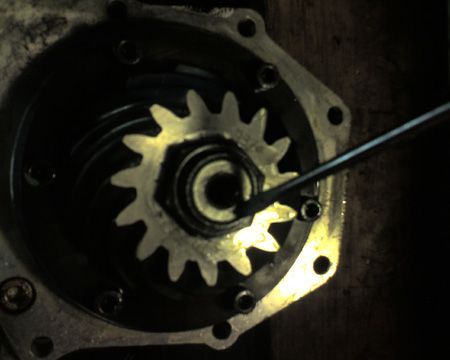
With the rear housing off, you have a full view of the Park Gear and pawl (sp?)
The pawl with spring, plastic fitting, and line all pull out by hand.
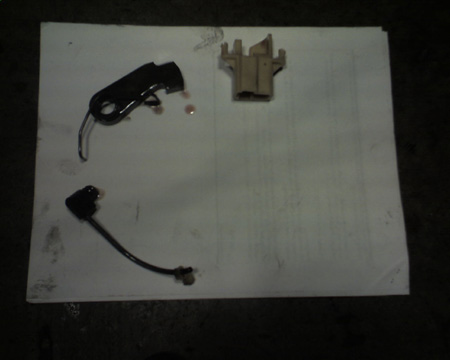
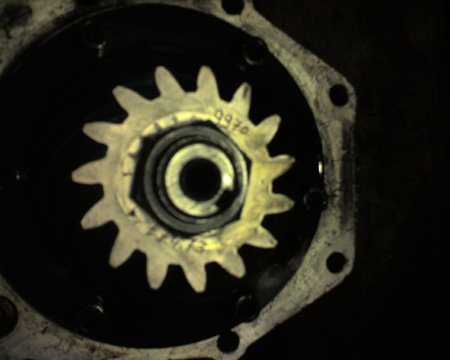
From there you can reach in and remove the Park gear, and the shims behind it.
Here's the gear, and it turned out there were four shims stacked together.
Getting close to the money shot here folks, the next installment will be the center section where all the fun is. I'm contemplating doing a "re-enactment" of the removal of the pan, valve body, and pistons, so that this thread follows the same disassembly chronology as the WSM's.
Until next time....
The big nut on the end is a 36mm. I used an air gun on it (light setting) with no problems. Make sure that the shift linkage is in Park. The nut is a collared nut, and is crimped in the keyway slot to hold it in place.
Step one is to uncrimp the collar on the nut to allow it to spin freely off the shaft.
Here the nut has been uncrimped and the collar is free from the channel.
With the big nut off, unbolt the allen head bolts around the base of the pinion.
Once the base bolts are out, mount up the gear puller to remove the pinion assembly.
And out she comes.
The rear tranny housing is held on by eight allen head bolts.
You also need to release the black plastic housing that is held on by a 19mm bolt head (the one right above the allen held bolt being removed in the picture).
A light tap with a plastic mallet frees up the rear housing.
The five longer bolts go around the shaft in the circular boss, the three shorter ones go below. The black plastic housing actually bolts into the center section, but interferes slightly with the rear housing. All eight allen bolts have washers that like to stay against the aluminum housing cover, make sure you find them all.
With the rear housing off, you have a full view of the Park Gear and pawl (sp?)
The pawl with spring, plastic fitting, and line all pull out by hand.
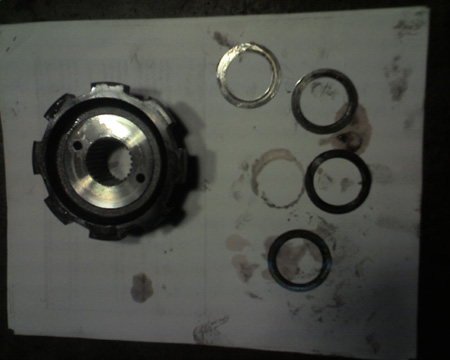
From there you can reach in and remove the Park gear, and the shims behind it.
Here's the gear, and it turned out there were four shims stacked together.
Getting close to the money shot here folks, the next installment will be the center section where all the fun is. I'm contemplating doing a "re-enactment" of the removal of the pan, valve body, and pistons, so that this thread follows the same disassembly chronology as the WSM's.
Until next time....
Last edited by atb; 07-30-2008 at 01:03 PM.