
Rear Interior Foam Underlayment Replacement with Pics
 05-26-2008, 02:43 PM
#1
Three Wheelin'
Thread Starter
Join Date: Sep 2007
Location: Ridgecrest, California
Posts: 1,363
Likes: 0
Received 147 Likes
on
31 Posts
So the foam that was underneath the carpet and spare tire cover at the back of the '84 (my daily driver) had hoplessly disintegrated. Last summer, I cleaned it all out but was left with no foam under the carpet at all. When we purchased my Wife's '88, it had all the original foam in pristine condition so I thought I'd take it for myself! NOT!!
I was, however, able to sneak her's out and use it as a template to make my own. Since this was a first for me and I imagine there are others out there that also need to replace their foam underlayment, I took a few pics along the way.
Here's a list of the materials I used:
1. Replacement Foam (got some from Wal-Mart)
2. Cardboard sheets from a large box at least 2' by 3'
3. Utility knife
4. Felt tip Marker
5. Straight Edge
6. Scissors
7. Spray adhesive (I used 3M 77 Multi-purpose adhesive)
8. Spray paint
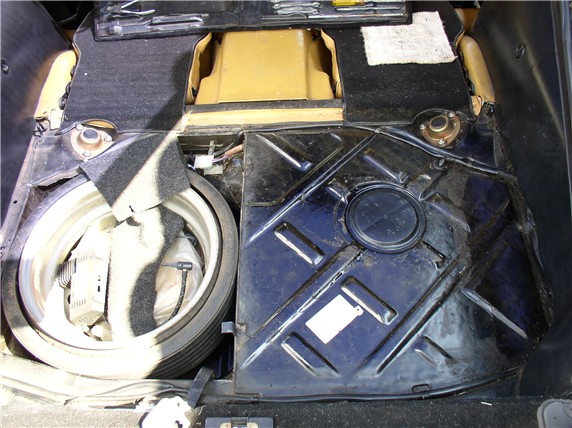
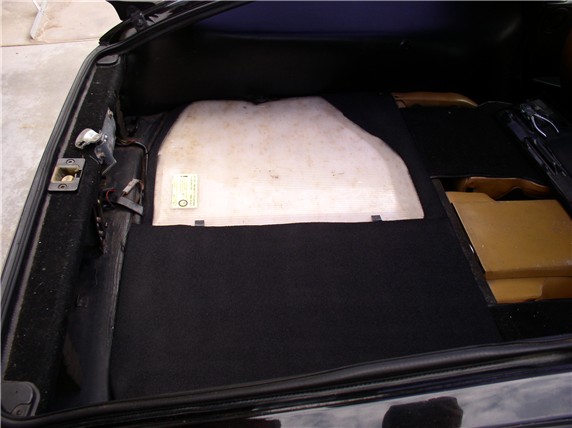
Here's what I started with in my car (the previously abused '84).
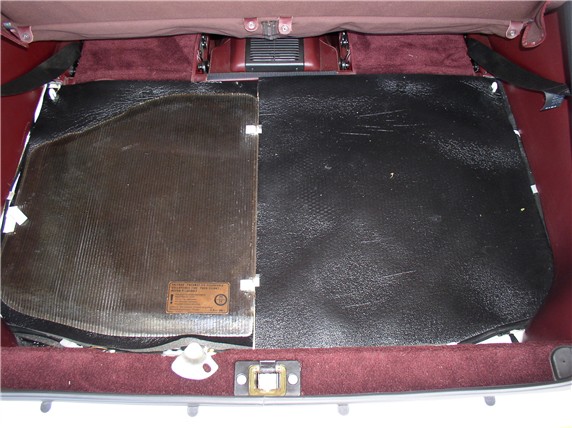
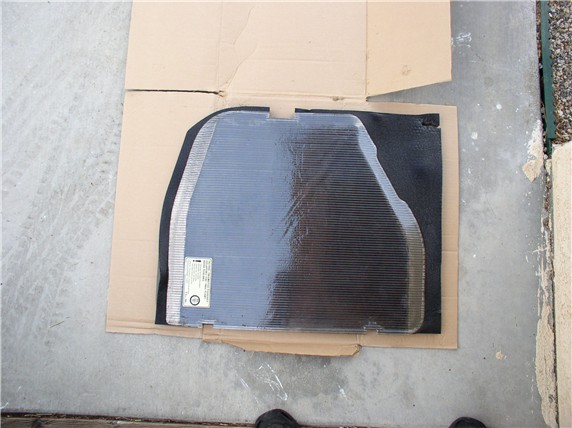
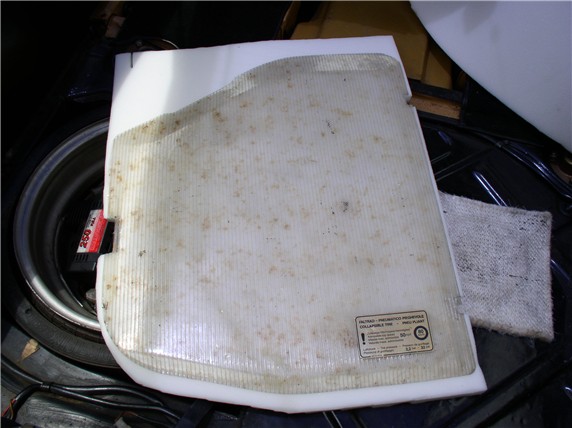
Here's the foam sections from my wife's '88.
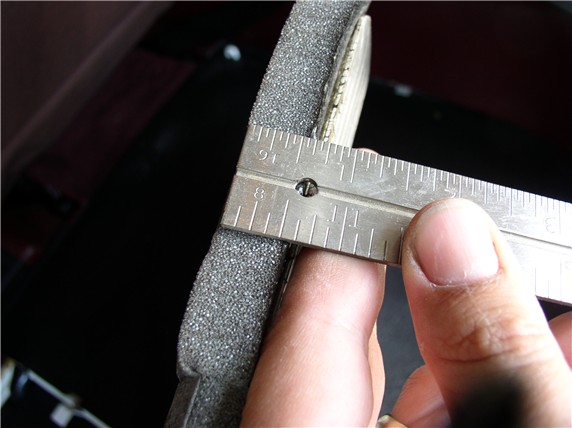
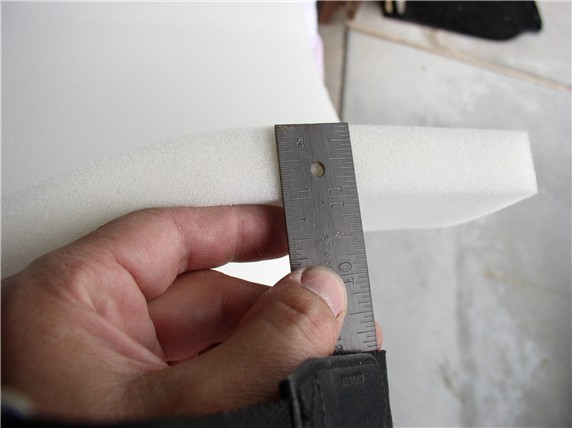
The original foam is about 5/8" thick and has a glossy coating on the top side. Its consistency is similar to lightweight foam rubber or the type of material you find in egg crate foam sheets for sleeping.
First, I confirmed the size of her tire cover was the same size as mine. And it is. When I cleaned the old decaying foam from the back of my spare tire cover, I could not get 100% of the glue stain color off the plastic. I tried several things such as soap and water, citrus cleaner, brake parts cleaner, mineral spirits, rubbing compount, bug and tar remover. None of which worked very effectively so I cleaned it the best I could with a razor blade.
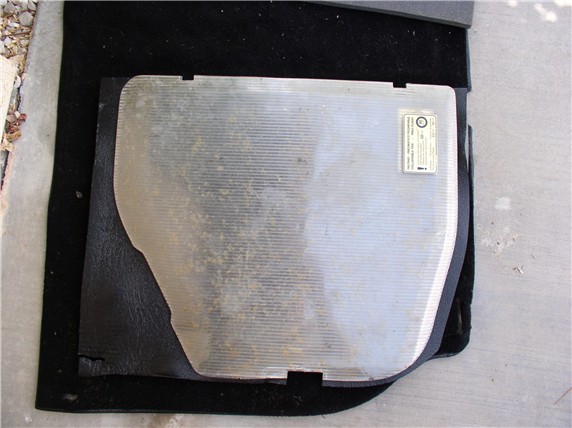
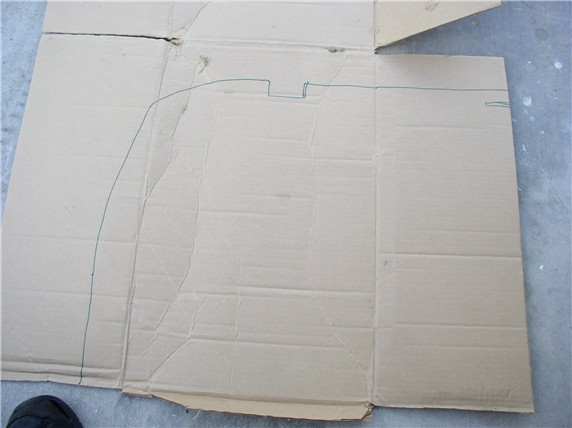
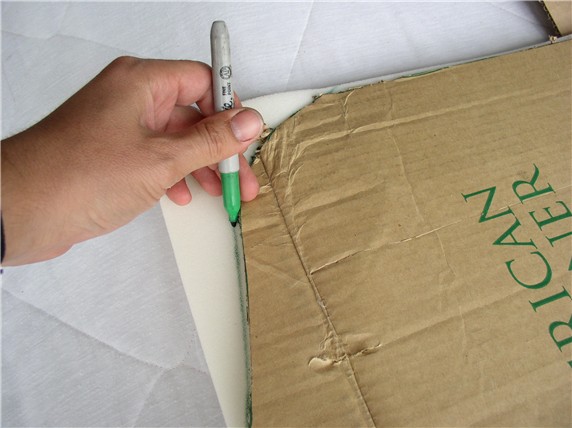
Next, I found some cardboard to make a template for the foam pieces. I though it might come in handy to have templates for future use. Here's the foam piece from wifey's '88 on the cardboard.
I drew the outline on the cardboard with a marker. Lined up the straight edges with the straight edges of the cardboard to minimize cutting.
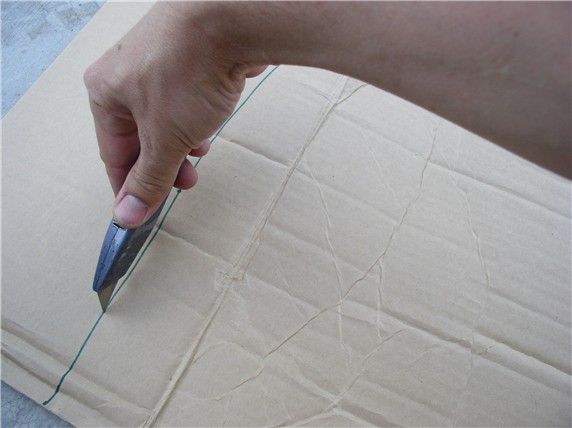
I then cut the template out using a utility knife.
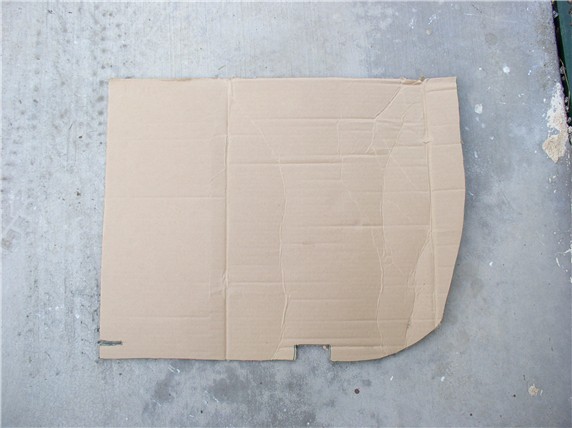
Here's one of the templates after the cutout.
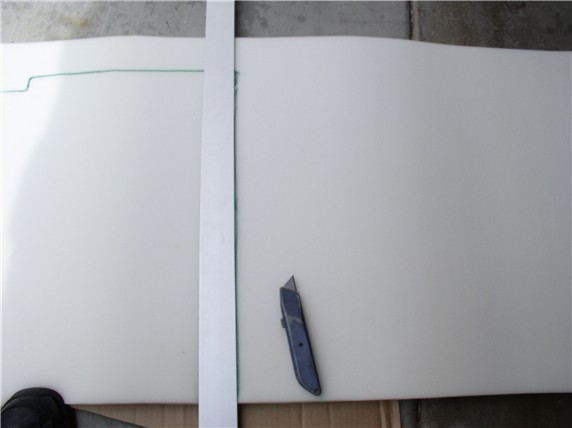
I found some foam for replacement at Wal-Mart. It's 2' by 8' by 1" thick, urethane foam.
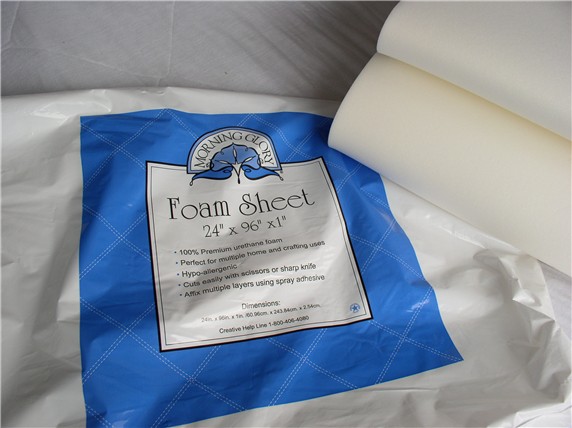
It's a little thicker (about 3/8" thicker) than the original foam. I wasn't sure if it would be too thick but thougth I'd give it a try anyway. At least it might provide additional padding and sound deadening.
I then traced the pattern onto the foam with the marker.
I used scissors to cut the rounds and.....
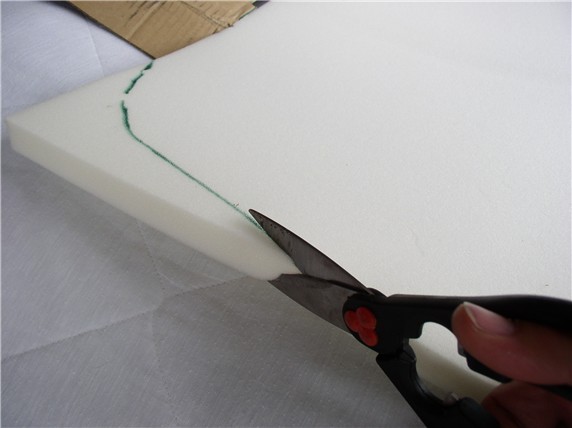
....used a straight edge and utility knife to cut the straights.
Next, I test fit the tire cover on the foam cutout and installed it in the hatch area to ensure everything would fit. I trimmed the foam where needed with the scissors. You have to be careful when cutting with scissors because it is easy to leave jagged edges. Then I sprayed the adhesive to the foam and to the back of the hard spare tire cover. I let the adhesive sit a couple of minutes then mate the two and line up the notches in the foam for proper fit.
Continued....
I was, however, able to sneak her's out and use it as a template to make my own. Since this was a first for me and I imagine there are others out there that also need to replace their foam underlayment, I took a few pics along the way.
Here's a list of the materials I used:
1. Replacement Foam (got some from Wal-Mart)
2. Cardboard sheets from a large box at least 2' by 3'
3. Utility knife
4. Felt tip Marker
5. Straight Edge
6. Scissors
7. Spray adhesive (I used 3M 77 Multi-purpose adhesive)
8. Spray paint
Here's what I started with in my car (the previously abused '84).
Here's the foam sections from my wife's '88.
The original foam is about 5/8" thick and has a glossy coating on the top side. Its consistency is similar to lightweight foam rubber or the type of material you find in egg crate foam sheets for sleeping.
First, I confirmed the size of her tire cover was the same size as mine. And it is. When I cleaned the old decaying foam from the back of my spare tire cover, I could not get 100% of the glue stain color off the plastic. I tried several things such as soap and water, citrus cleaner, brake parts cleaner, mineral spirits, rubbing compount, bug and tar remover. None of which worked very effectively so I cleaned it the best I could with a razor blade.
Next, I found some cardboard to make a template for the foam pieces. I though it might come in handy to have templates for future use. Here's the foam piece from wifey's '88 on the cardboard.
I drew the outline on the cardboard with a marker. Lined up the straight edges with the straight edges of the cardboard to minimize cutting.
I then cut the template out using a utility knife.
Here's one of the templates after the cutout.
I found some foam for replacement at Wal-Mart. It's 2' by 8' by 1" thick, urethane foam.
It's a little thicker (about 3/8" thicker) than the original foam. I wasn't sure if it would be too thick but thougth I'd give it a try anyway. At least it might provide additional padding and sound deadening.
I then traced the pattern onto the foam with the marker.
I used scissors to cut the rounds and.....
....used a straight edge and utility knife to cut the straights.
Next, I test fit the tire cover on the foam cutout and installed it in the hatch area to ensure everything would fit. I trimmed the foam where needed with the scissors. You have to be careful when cutting with scissors because it is easy to leave jagged edges. Then I sprayed the adhesive to the foam and to the back of the hard spare tire cover. I let the adhesive sit a couple of minutes then mate the two and line up the notches in the foam for proper fit.
Continued....


 05-26-2008, 03:06 PM
#5
Three Wheelin'
Thread Starter
Join Date: Sep 2007
Location: Ridgecrest, California
Posts: 1,363
Likes: 0
Received 147 Likes
on
31 Posts
Next, I placed both pieces in the area for a test fitting.
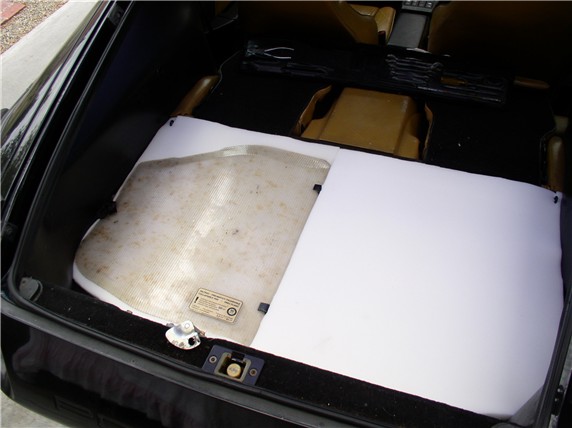
It didn't seem right to leave the foam unaltered and white so I decided to paint it with gloss black spray paint. If you have an old piece of plywood, lean it up agains a table or wall at an angle and put the foam against it. It will stay (like velcro) while you paint.

For the piece with the tire cover, it will require the tire cover be taped off to avoid overspray. Make sure you tape the edge of the cover. Otherwise, paint will overspray into the passageways and show up on the plastic cover.
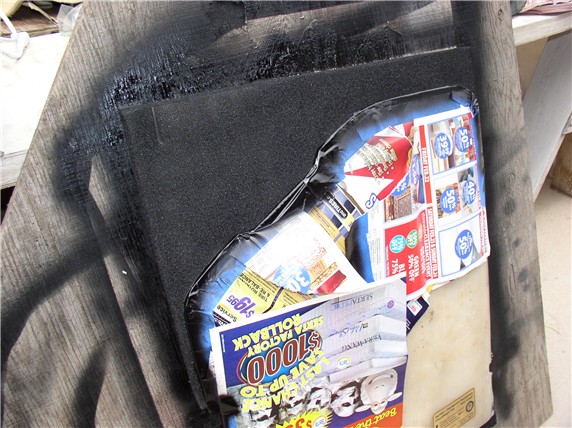
After the paint has dried, do another test fit. Don't install in the car right away because it still stinks like paint. Let it air out until you don't smell the paint any more (noticeably). I like the way it turned out. It's not too thick as I thought it might be. I also put scrap foam in the cavities behind the tool holder at the rear of the car.
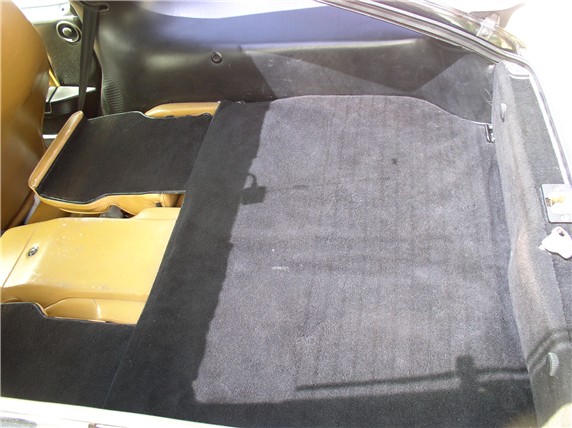
Here's a pic with the carpet back in. I would like to get one of those cargo nets like my wife's car has but not sure where they are available - assuming it's original Porsche equipment - not sure.
I'm very happy with the results here. Between the adhesive (which I already had), the spray paint (which I had also) and purchasing the foam, I think the total cost was about $20 and took me about 3-4 hours to complete. Please feel free to comment or suggest improvements. THANKS for reading!
It didn't seem right to leave the foam unaltered and white so I decided to paint it with gloss black spray paint. If you have an old piece of plywood, lean it up agains a table or wall at an angle and put the foam against it. It will stay (like velcro) while you paint.
For the piece with the tire cover, it will require the tire cover be taped off to avoid overspray. Make sure you tape the edge of the cover. Otherwise, paint will overspray into the passageways and show up on the plastic cover.
After the paint has dried, do another test fit. Don't install in the car right away because it still stinks like paint. Let it air out until you don't smell the paint any more (noticeably). I like the way it turned out. It's not too thick as I thought it might be. I also put scrap foam in the cavities behind the tool holder at the rear of the car.
Here's a pic with the carpet back in. I would like to get one of those cargo nets like my wife's car has but not sure where they are available - assuming it's original Porsche equipment - not sure.
I'm very happy with the results here. Between the adhesive (which I already had), the spray paint (which I had also) and purchasing the foam, I think the total cost was about $20 and took me about 3-4 hours to complete. Please feel free to comment or suggest improvements. THANKS for reading!
05-26-2008, 03:08 PM
#6
Three Wheelin'
Thread Starter
Join Date: Sep 2007
Location: Ridgecrest, California
Posts: 1,363
Likes: 0
Received 147 Likes
on
31 Posts
Not sure what happened.....when I loaded the pics the first time, they didn't come through. So I edited the post, deleted the links and uploaded them again and now it seems to be working. THANKS.