When you click on links to various merchants on this site and make a purchase, this can result in this site earning a commission. Affiliate programs and affiliations include, but are not limited to, the eBay Partner Network.
I have a copy and will lend it to you if you like. I am in Denver, so shipping to AZ should be pretty quick. Let me know and if you want it we can arrange via PM. Just promise to return it to me when you are done.
Why not scan the book and make it available for others? I am working on an 86.5 928 now and I bet the owner would like a copy of this.
Why not scan the book and make it available for others? I am working on an 86.5 928 now and I bet the owner would like a copy of this.
We would need the permission of John Kelly. He worked on this and was selling it and is copyrighted. I haven't been able to get a hold of him. Does anyone know anything about him? You can see it is a very thorough book; google Books has the first 14 pages available: https://www.google.com/books/edition...C?hl=en&gbpv=1
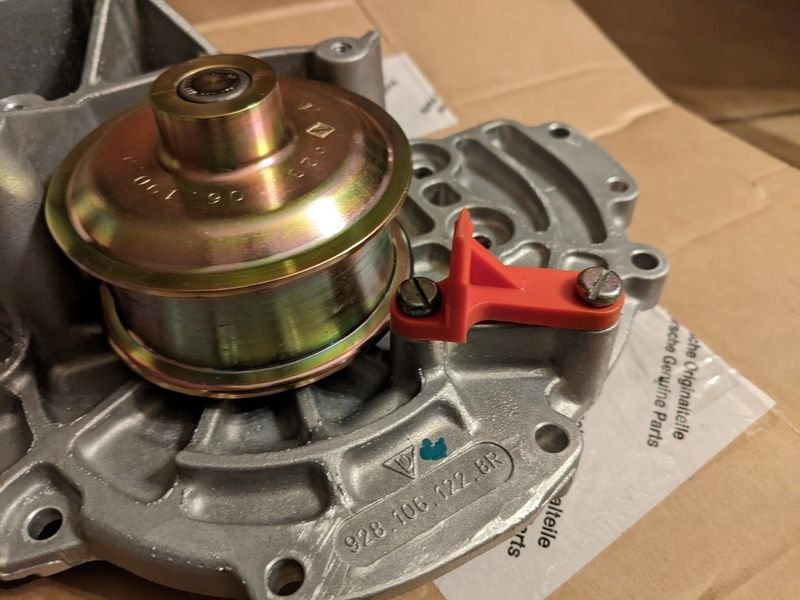
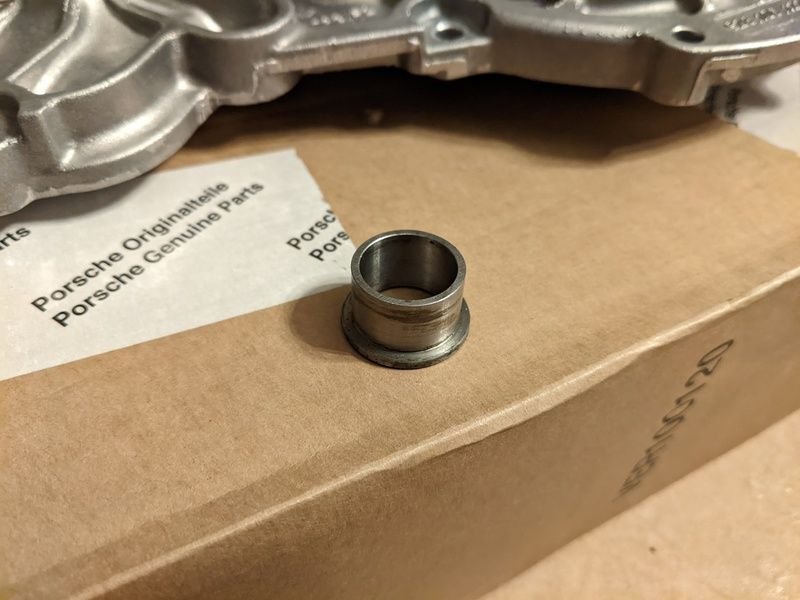
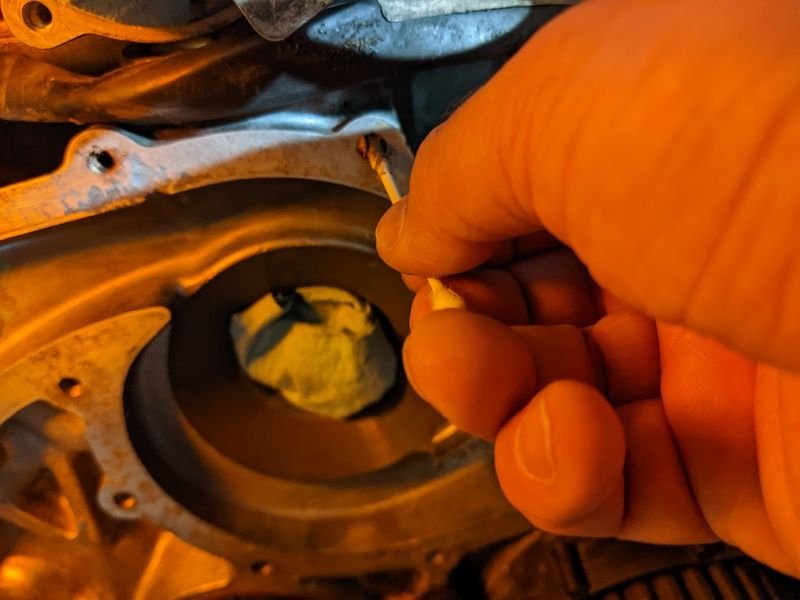
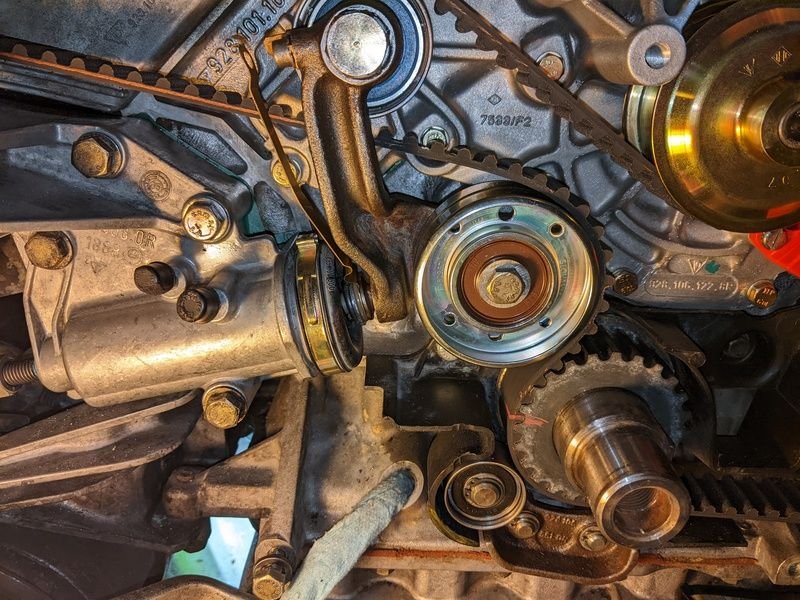
I transferred the timing marking from the old water pump to the new one, as well as the idler boss, which sits on the tensioner arm bolt pivot point. New upper idlers come with this boss, but since I replaced the bearing in mine, I needed to re-use the bushing.
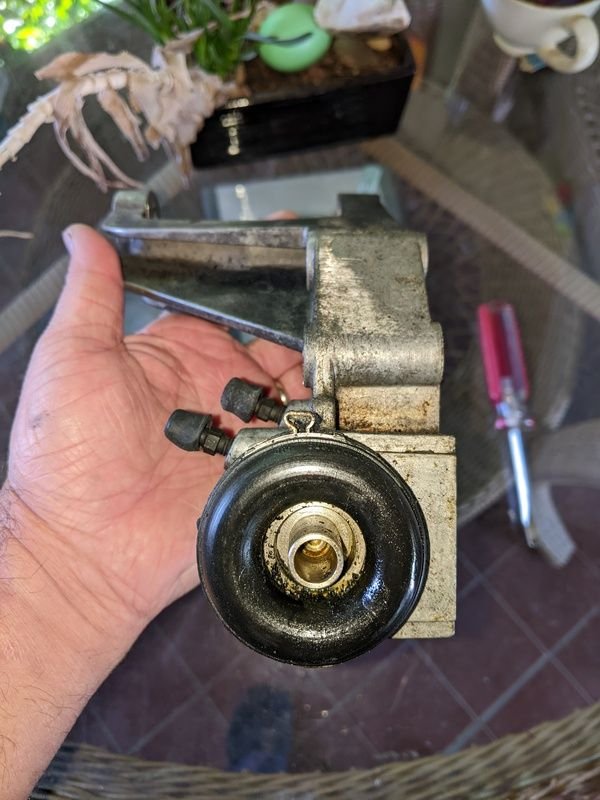
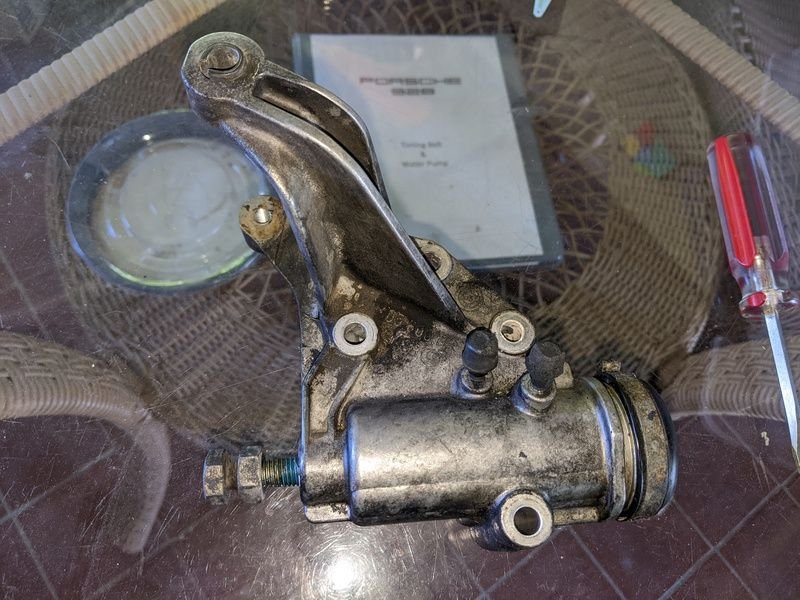
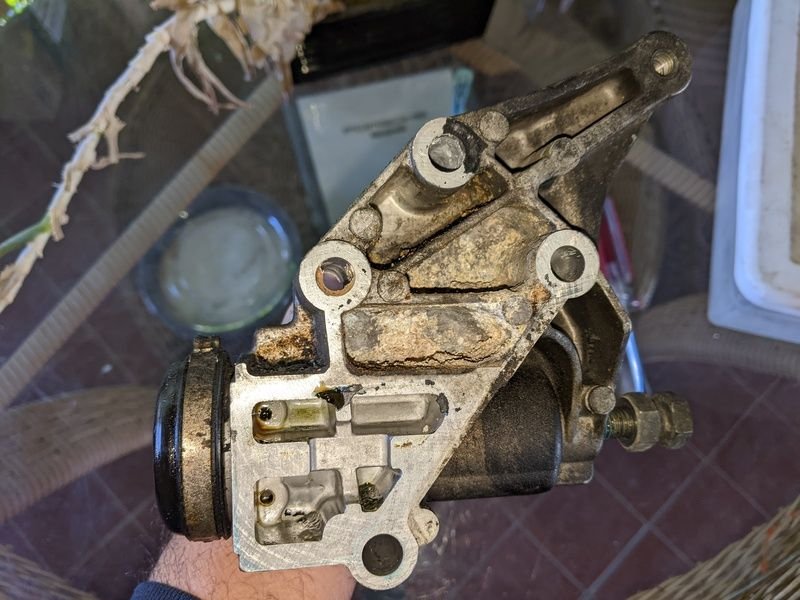
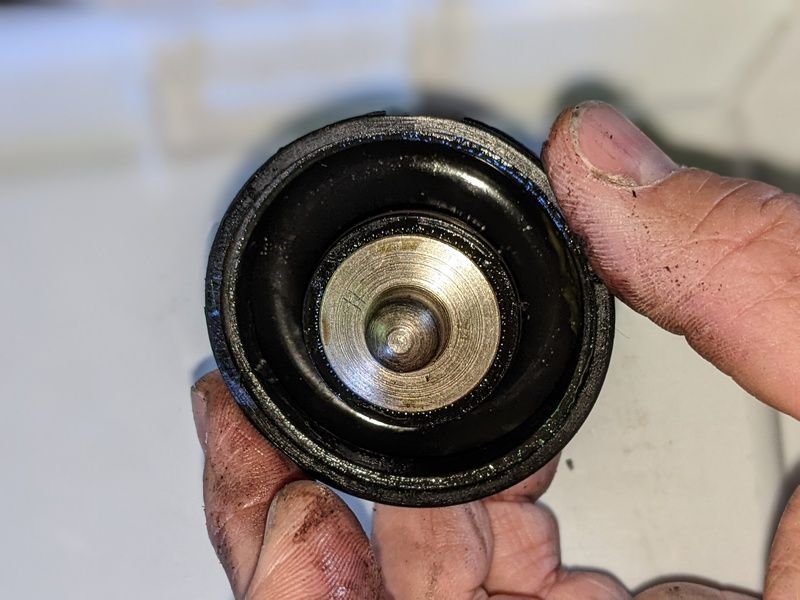
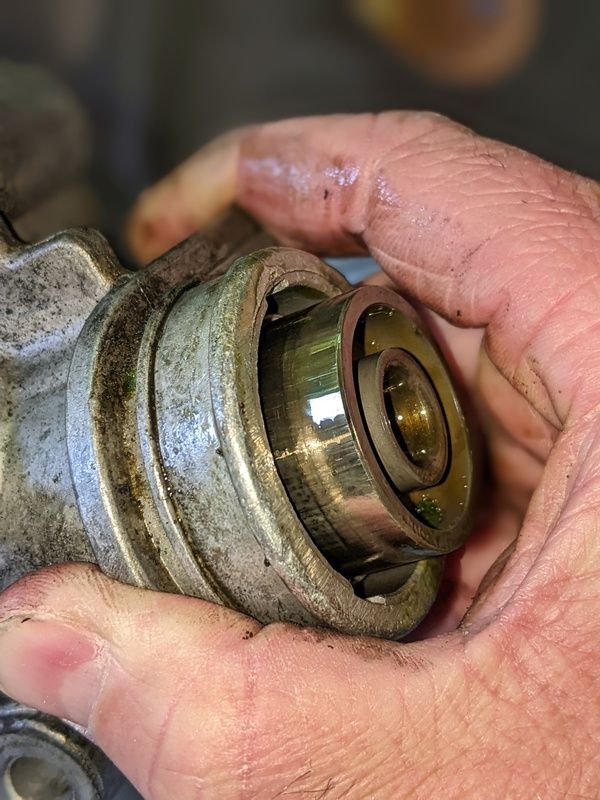
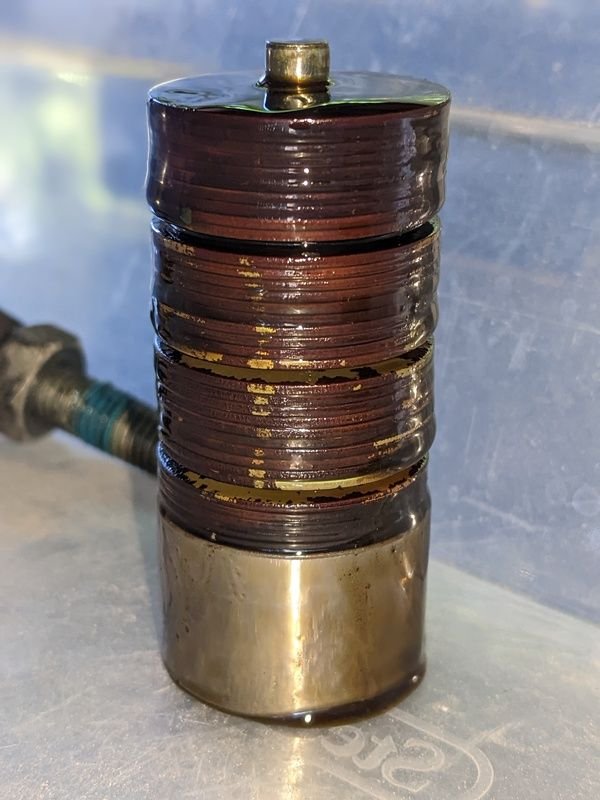
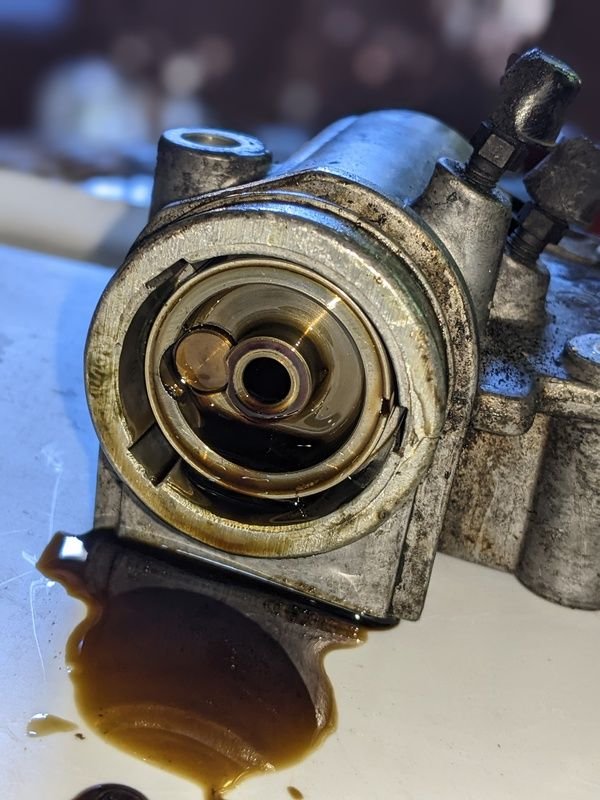
I also disassembled and cleaned the parts of the tensioner. I was slightly nervous about this, but as long as everything is documented, I think it should be a piece of cake. The boot clamp was easily removed. The boot itself holds a plunger, which is kept in place with circlip. These need to taken apart if you are getting a new boot (get a new boot). Then I carefully removed the piston with the dreaded washer stack. I took photos and also quickly threaded the washers onto a zip-tie. This kept the stack together while also allowing me to thoroughly clean the stack. The bottom of the tensioner holds the valve with the O-ring. The valve is facing towards the bottom. Everything was thoroughly de-greased and washed and the gasket mating surface lightly hand-sanded with a 400 grit paper.
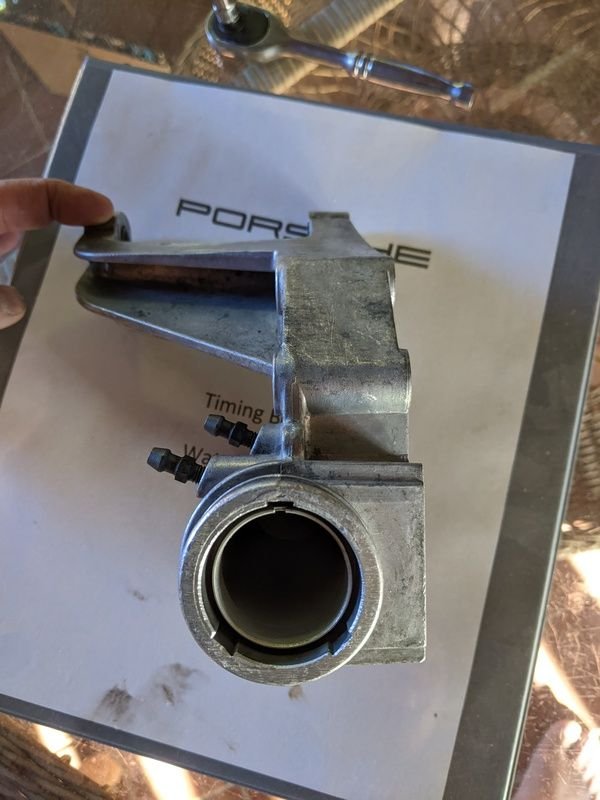
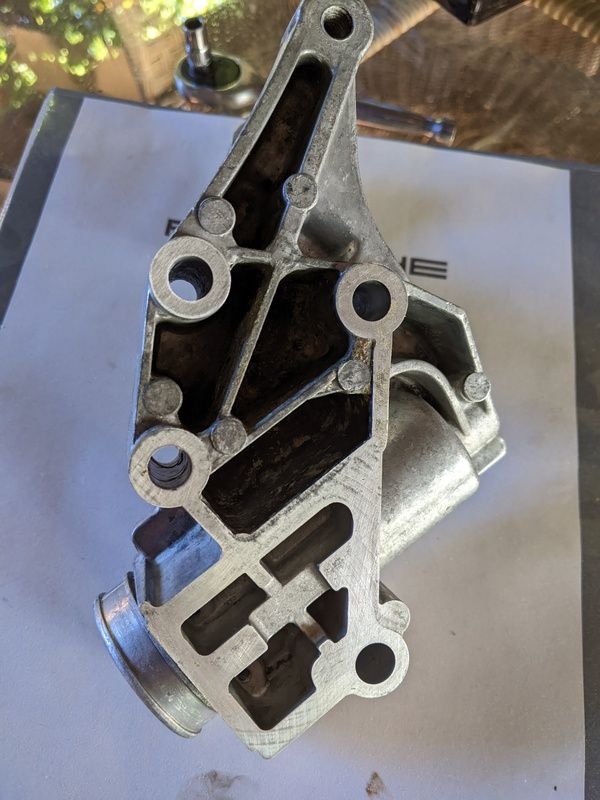
Marker transferred over to the shiny new OEM pump. The idler upper roller bushing. A minor crack on the belt cover back plate. This will be JB welded together to make sure we don't get any unwanted rattle. The front of the dirty (de)tensioner. The clamp is at ~ 11.5 hour position. It needs to go back here to make sure it does not interfere. Side view of the dirty (de)tensioner. And the back. There was VERY little oil left in it. I am quite sure it wasn't doing its job well. The back-side of the boot, with the plunger in place, held in by a circlip. The piston coming out. The stack of washers. These change shape under heat (I'll assume the stack contracts to allow the de-tensioning). Little oil left. The valve faces towards the bottom. The washer stack on a zip-tie, all clean! The clean tensioner. Ahhh ... look how clean This can go straight back!
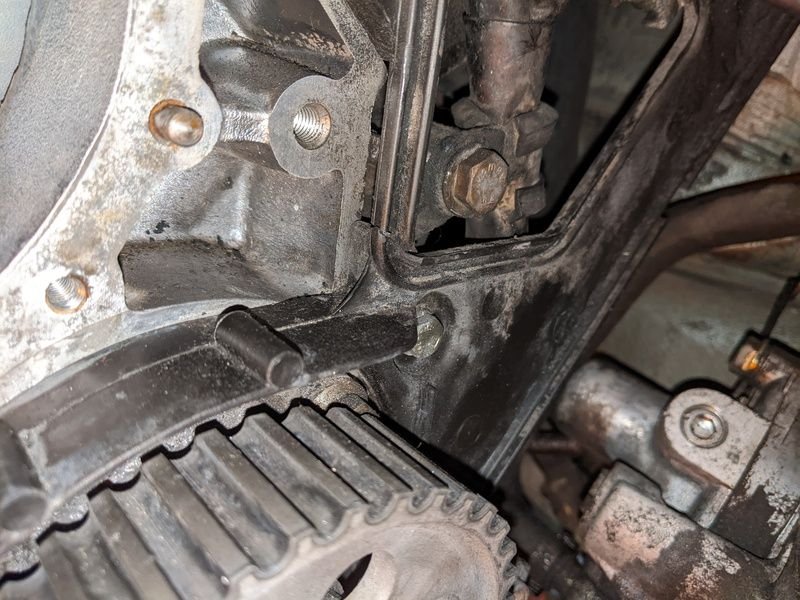
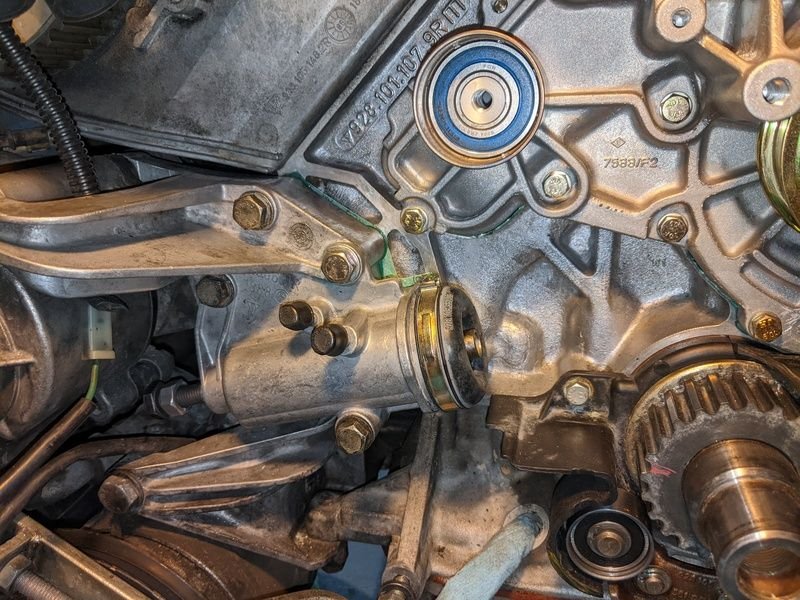
I installed the lower idler roller back onto the engine. Clean and rolls nicely with the new bearing.
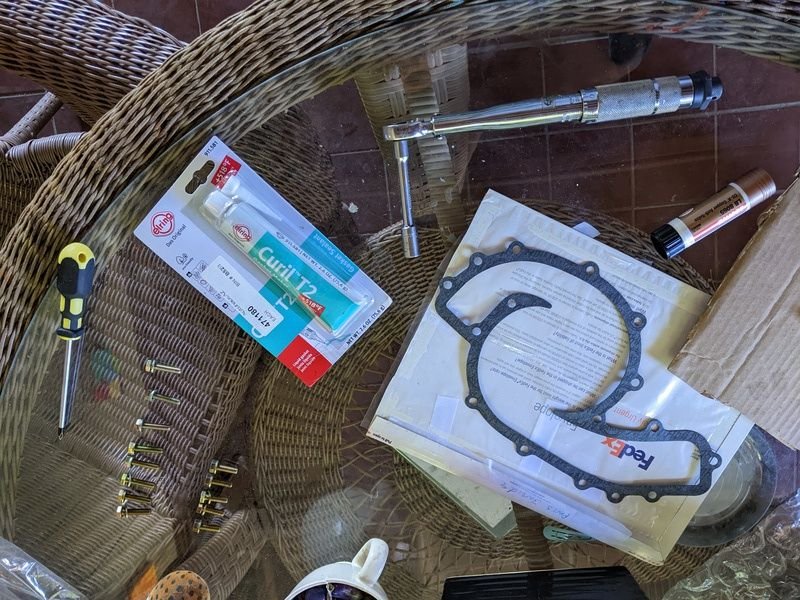
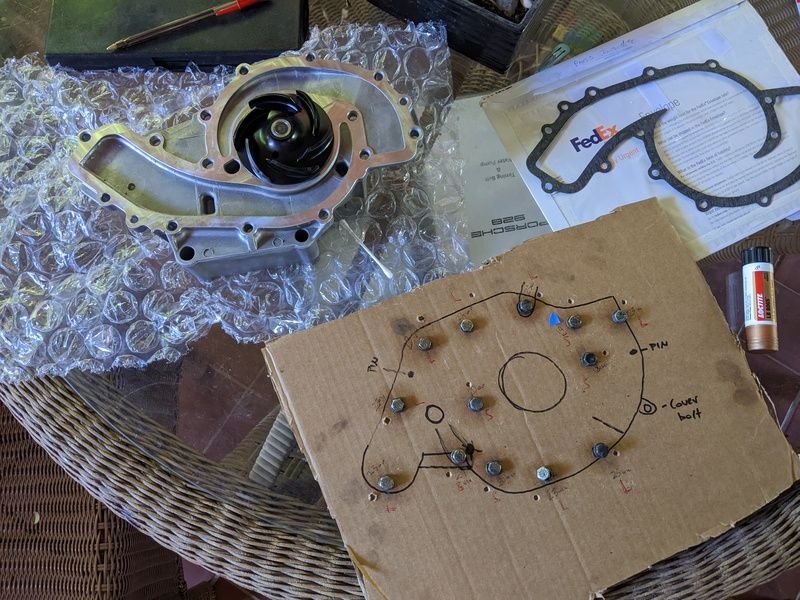
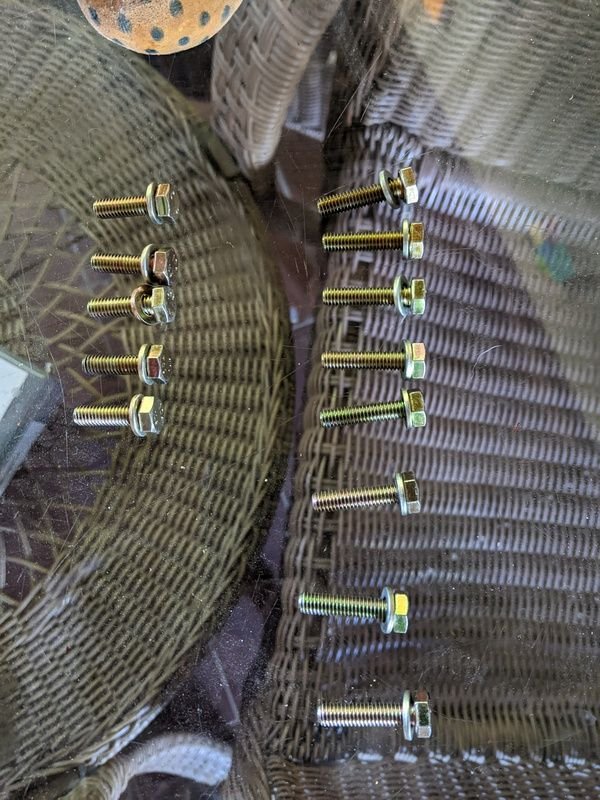
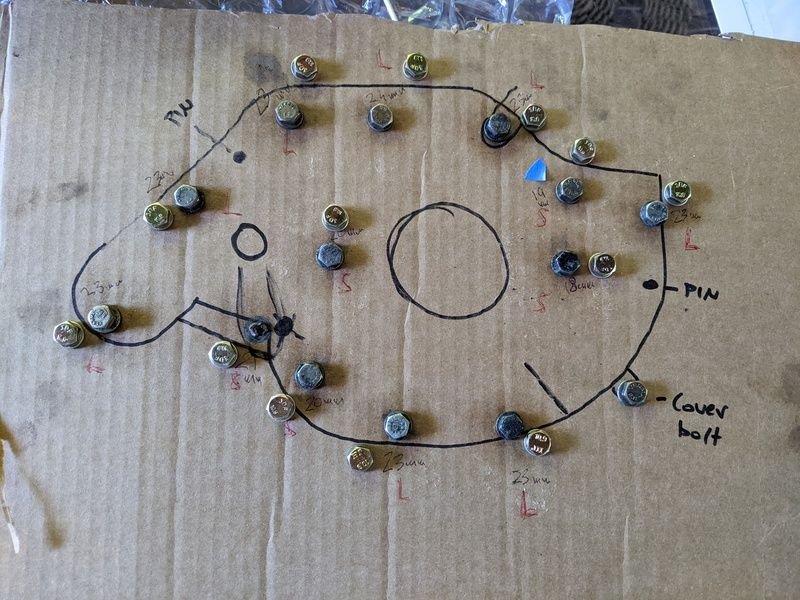
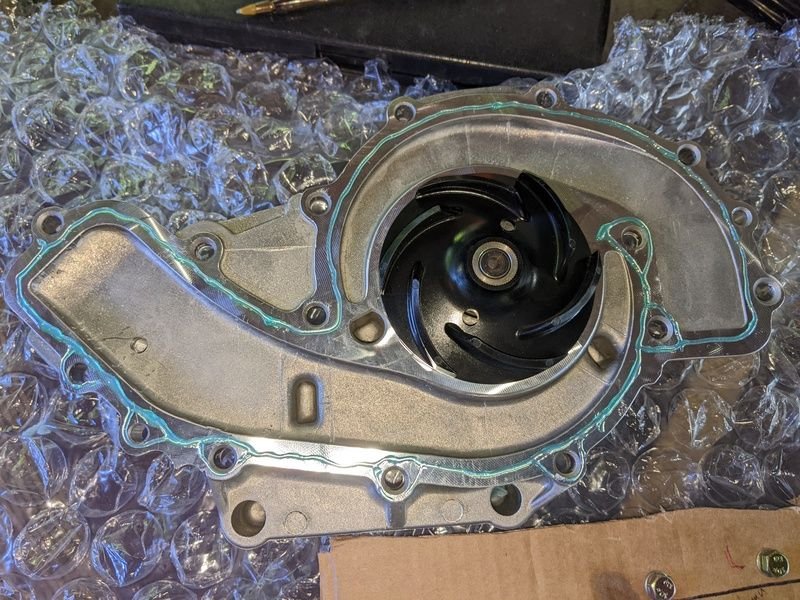
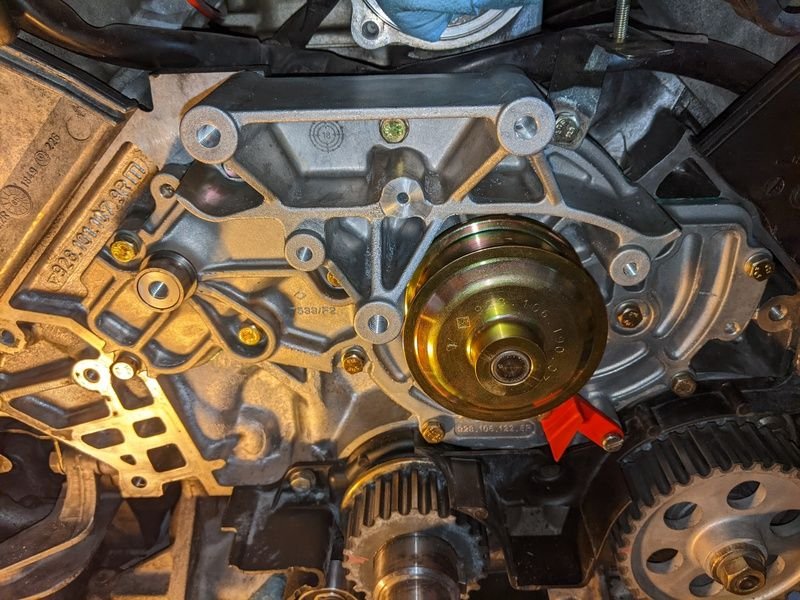
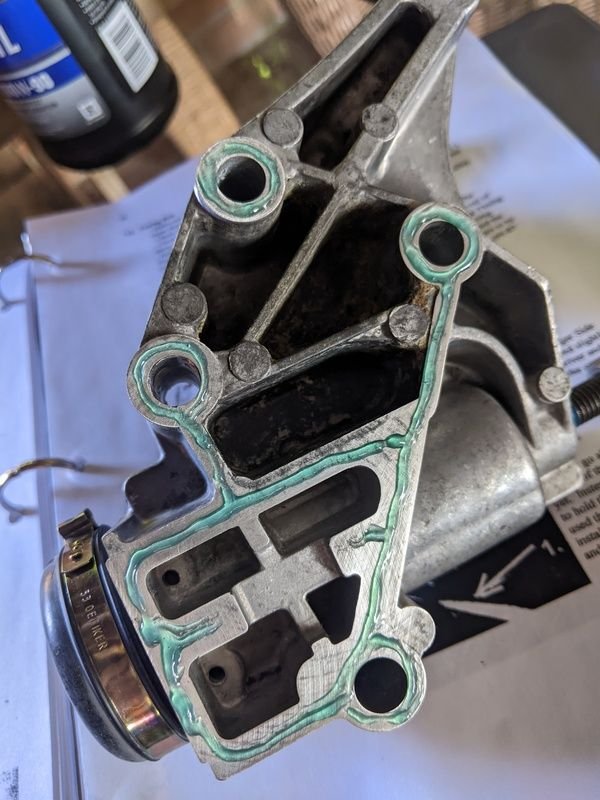
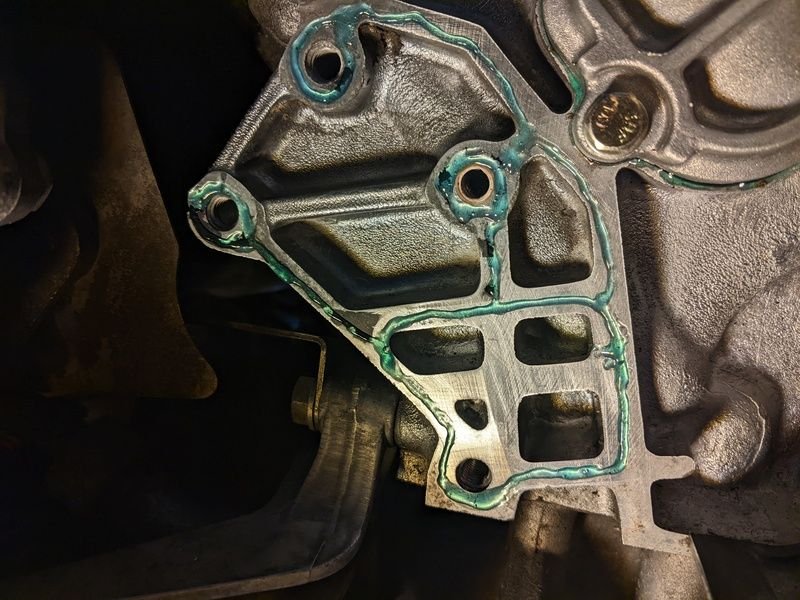
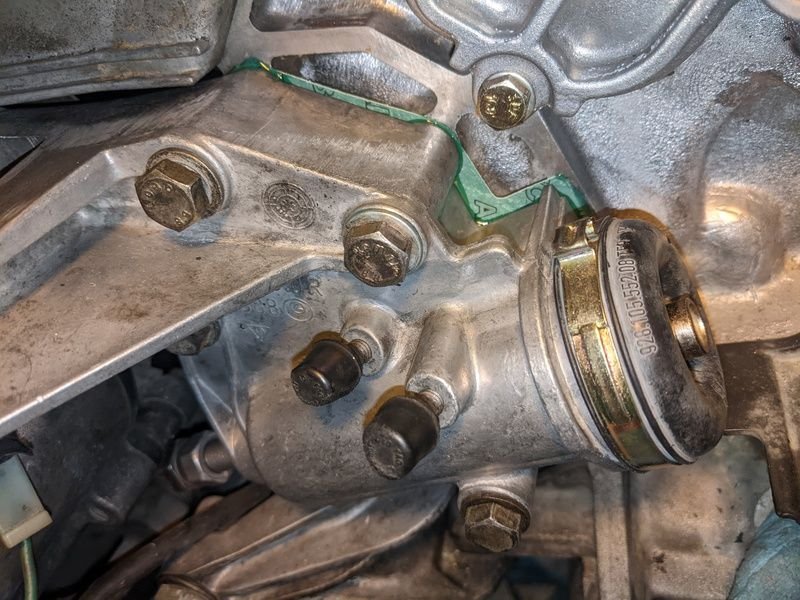
I also installed the new WP back on. I ordered a tube of Curil T2 for sealant onto the paper gasket and I also had a set of new bolts. For the long bolt that goes through the cover, I temporarily used one of the cleanest shorter older bolts I had. First, I laid everything out I needed in neat order, so that I could move relatively quickly once I started using the sealant. I then put a little copper grease into each WP bolt hole with a Q-tip. Then came a sealant. I dabbed a little extra onto the spots where I had some minor pitting and then laid a continuous thin bead across the engine mounting surface. Then I pushed the gasket onto this by hand. This kept the gasket on and also squeezed out minor excess that was placed in the pitted part, which I could clean with my fingers. Then I similarly laid a thin bead onto the new pump and put it in. Torquing in star pattern, first to 6 Nm, then 8 Nm, then after an hour to 10 Nm (using a small, 1/4 torque wrench). The "temporary" long bolt was only torqued down gently to 6 Nm. I only had minor squeezage, so I should have used enough but not too much sealant. So far, happy. I hope the gasket stayed at its right place when I put the WP on. The bolts seemed to go in easily.
Bolts, gasket, Curil T2, torque wrench, and copper grease stick. Old bolts laid out in their places, masked, and new WP. Ahhh, fresh bolts. New bolts placed where they need to go, so that I could move quickly, without having to think. Greasing the holes. Don't worry, I removed the paper towel before putting on the WP. Thin bead of Curil T2 on the WP. Beautiful emerald color. Spread easily, but seemed sticky. Minor squeezage only Ta Da!
Minor update: I checked on the Curil T2 that seeped out at the edges and touched it with my fingers. It is really interesting. It is supposed to be a "non-hardening" sealant, and boy do they mean it. Its consistency was EXACTLY the same as when I applied it 10 hours ago. It is like a very sticky gel. It's supposed to be extremely heat tolerant and all kind of chemical tolerant (oil, coolant, fuel, spirits). It is meant to only seal 0.2mm gaps though, but allow those parts to be easy to be taken apart later (and cleaned with isopropyl). My guess is that it will work. My only worry are the corroded pitted parts, where I do worry that it simply dripped down and didn't stay. There is no curing time for it, it stays like this forever. Anyone any experience with this stuff? It is supposed to be the next generation of the Curil K2, which I know a few of you use.
Lots of progress over the past two days (considering I have two little kids, etc.)
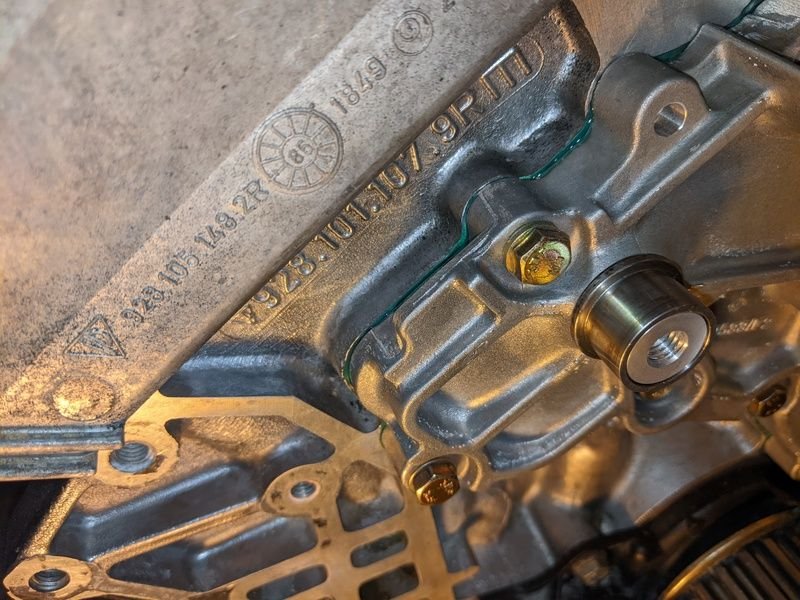
I finished the rebuilding of the tensioner. I don't have photos of the process, but it is literarily the reverse of taking it apart. I used a new end bolt, to lessen the chances of leakage and also used a new O-ring, boot, gasket, clamp. I filled the tube up 1/4 way with gear oil before reassembly, lubed the piston a bit, and carefully dropped in everything. I mounted the tensioner using the same Curil T2 as I did with the water pump. Not too happy being the test-mule with this really gel consistency sealant, but will report back when I have coolant and/or oil everywhere. Since it is non-hardening, I put a little even on the tensioner bolt, for good measure. Fitting in the air pump was a PIA.
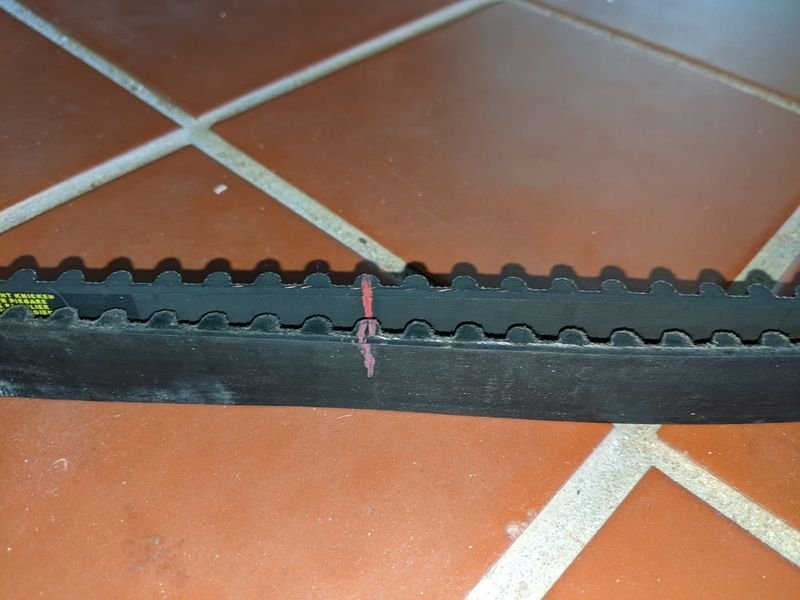
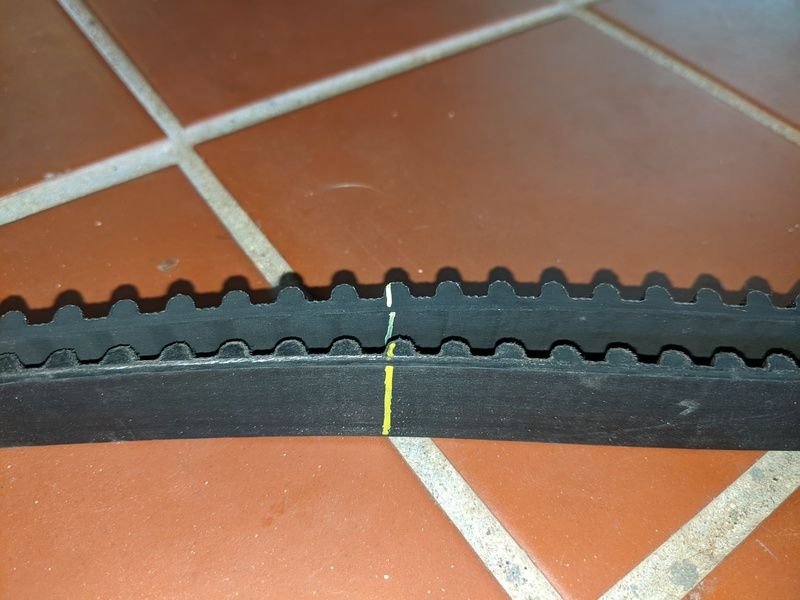
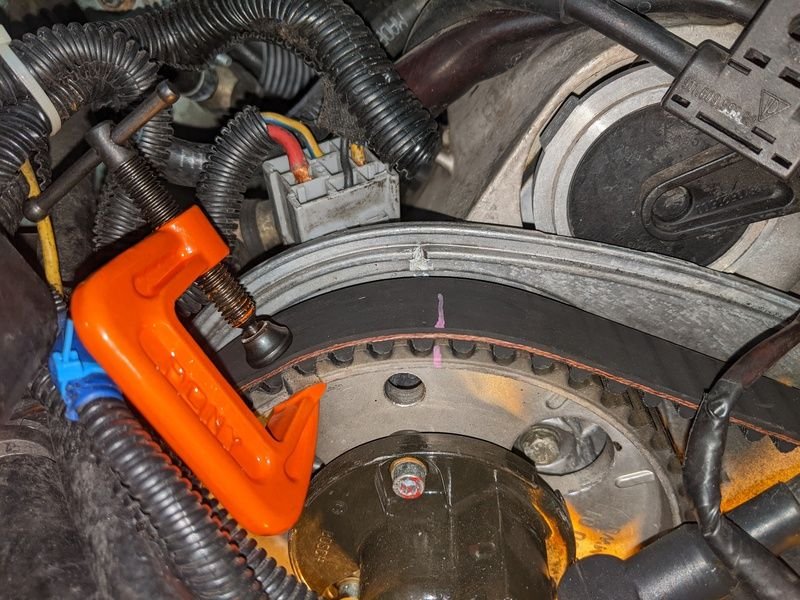
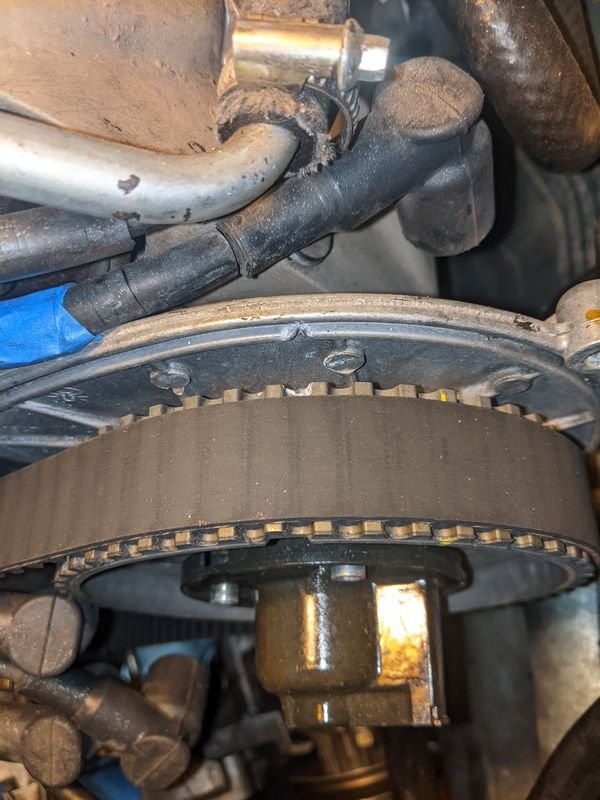
I offered up the new timing belt. Remember when I put markings on the old belt (and cam gears and the crank gear)? Well, I transferred those markings over to the new belt and used them to find the right place on the belt. Just simply placing the two belts side-by-side and following the teeth around, takes about 30 seconds and guarantees a well placed timing belt.
I reassembled the tensioner arm, using two new nylon bushings (little moly grease in there), a new bolt (just to be safe), and a new roller. I also needed a new copper bridge. All went in fine. I tightened the tensioner enough that the belt is on there tight, but not final tightness.
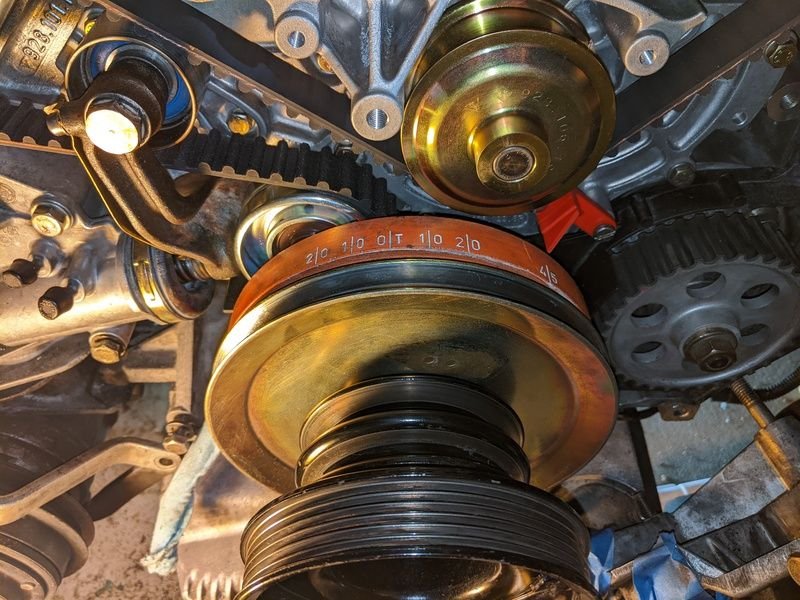
Then, I cleaned the damper, AC and accessory pulleys, and mounted them. Used a little blue threadlocker on the crank bolt and did my evening exercise with the 218 ftlb torque. Damn, that's a lot!
Done for tonight.
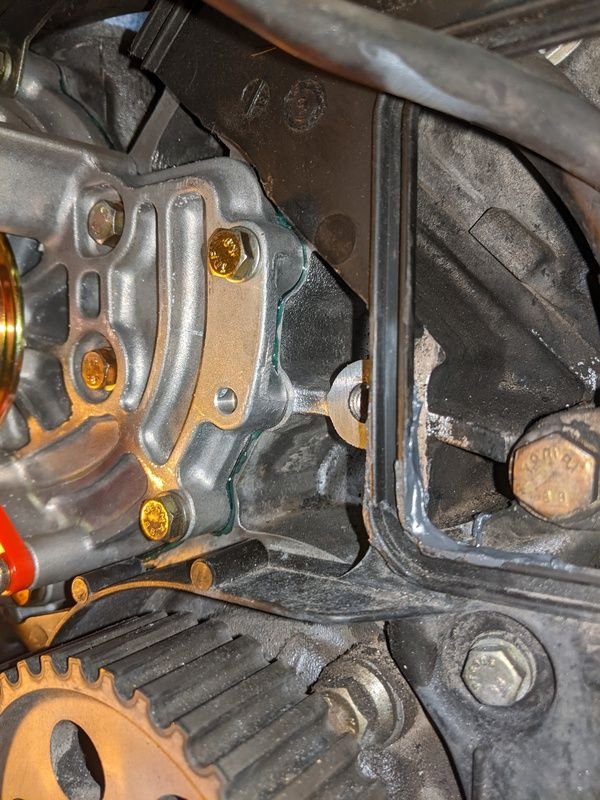
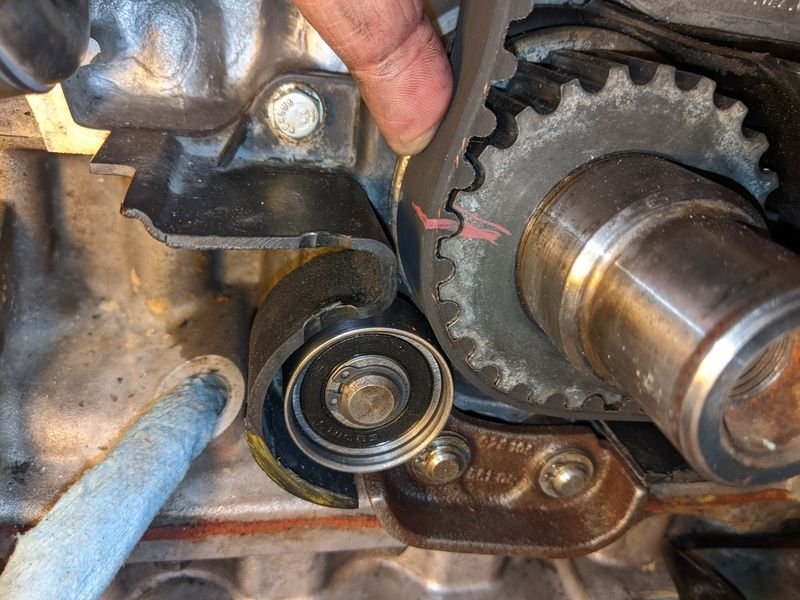
Curil T2 on the rebuilt tensioner. And some of the jelly on the mounting surface. Mounted in place. I used some copper grease on the non-coolant passage bolts, and blue threadlocker on the one that goes into the coolant passage. Emerald Curil oozing out. Crank marking. One of the cam gear markings. Placed to position And here also. Belt not tensioned yet, so marking is slightly of from the 45 marker, but will be ok once tightened and rotated. Obviously, one the engine has been rotated around, these markings wont align again. All in position and seems to be located finely, unlike before when it rolled off of the tensioner pulley. Hopefully stays like this once I roll it around a few times. I also used blue threadlocker on the pivot bolt, as it goes into the water pump/coolant. Marking still ok after some tightening. No rotation yet. Good here too. And the stack assembled and torqued down, with blue threadlocker on the crank bolt. Used a little copper grease on the damper, so hopefully that slides off easier next time.
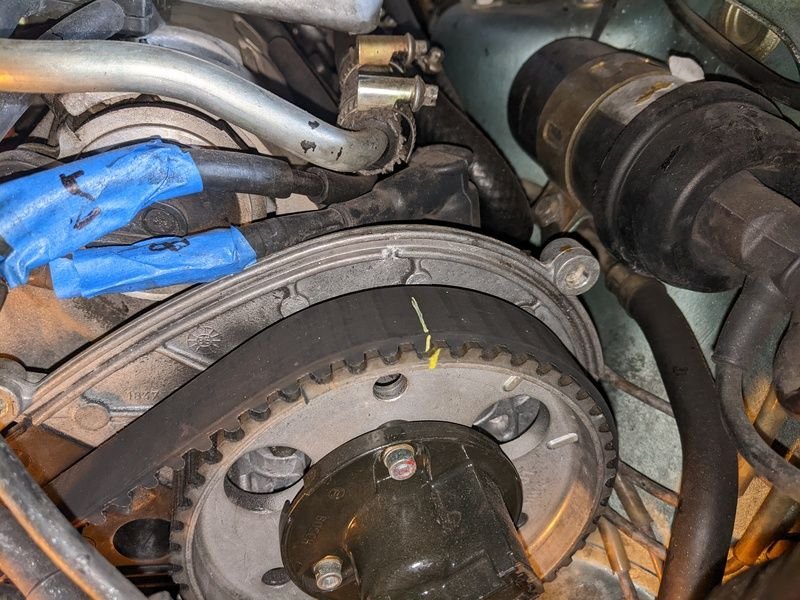
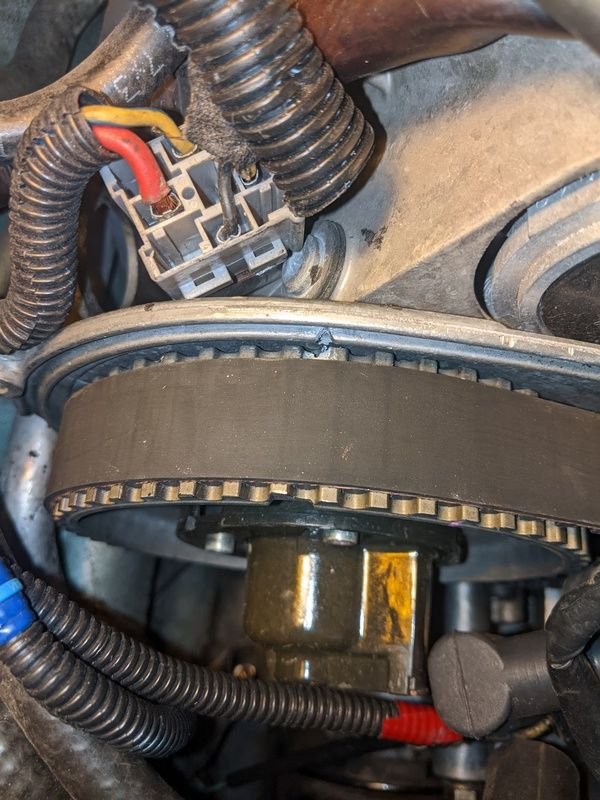
Today, I removed the flywheel lock tool, put back the cover, and spun the engine around about 5 times, adjusting the tension each time. I don't have the 9201 tool, but I have two Kempf tools (a friend's and mine), so I had two independent tools at least. This is the best I could do. Interestingly, once I had the tools' pointer in the window, I started getting a closed circuit around the tensioner (from the tensioner arm spade connection to the body of the tensioner). So, the system is quite accurate. I gave it one more turn on the tensioner bolt, which placed the needles at the other edge of the window. I'll call this good for now, especially since I don't have the center cover on yet and don't know the exact space to measure.
The timing marks still line up! So, my marker method worked.
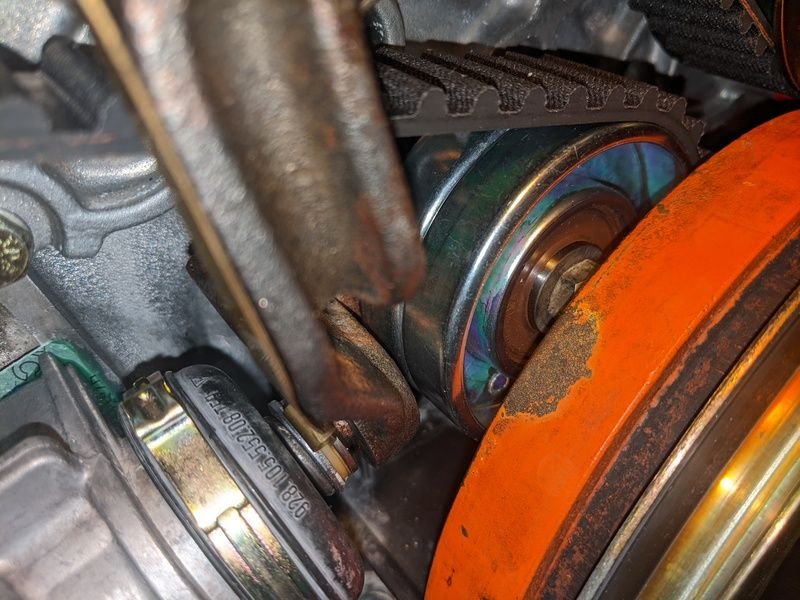
The belt is riding nicely in the center of the cam gears, which is great. I don't know how much 5 hand revolutions allow it to settle though. It is still riding close to the edge of the tensioner pulley, which I don't like, but at least not off of it. That did move a little closer to the edge, compared to how I put it on, so hopefully that shows some settling. I'll likely spin it around a few more times, but damn this engine has good compression. Not fun. And no, I am not going to remove the spark plugs just for this.
Oh, and yes, I did put the belt on in reverse, with the writing facing backwards. I don't think it actually matters.
-Andras
Driver's side TDC mark after 5 revolutions. Well centered on the cam gear! Passenger side TDC mark after 5 revolutions. This is slightly off, but good N'uff. Well centered here also. Riding close to the edge of the tensioner pulley. Not a fan of this, to be honest, but at least on it and not off, as before. We have contact!
So, I haven't given an update for a while. I have been buttoning things up now, I am in the home stretch.
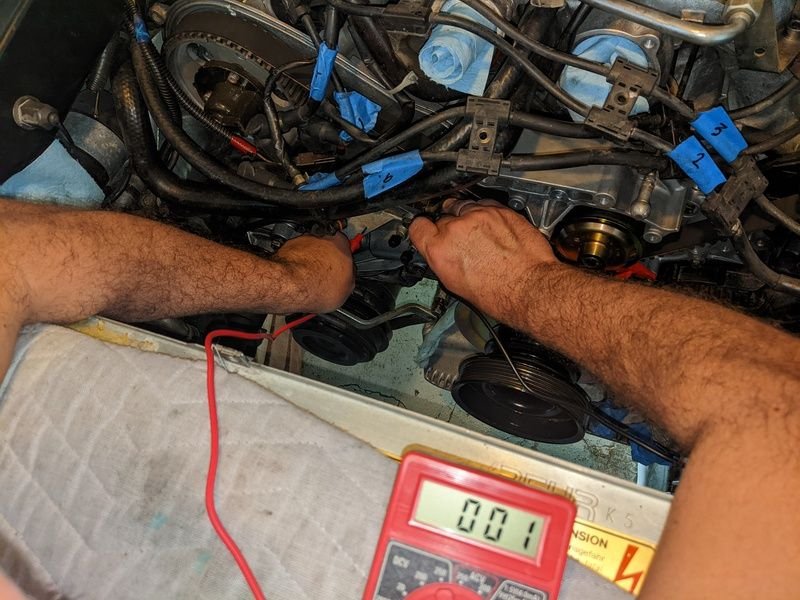
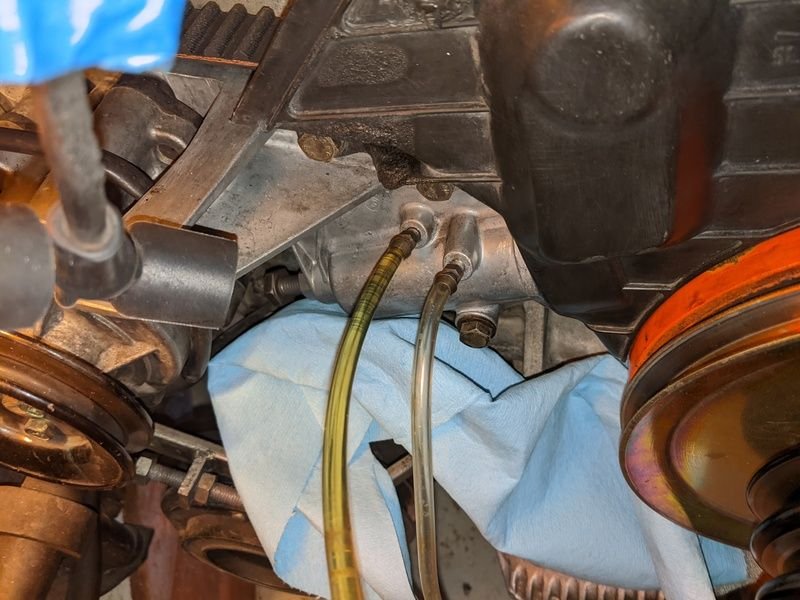
I have filled up the tensioner with gear oil. This thing fills SLOWLY. And you really want to undo the filler screws basically to the point where they almost come out. I tried not to squeeze the gear oil bottle too much, but you do get frustrated after a while.
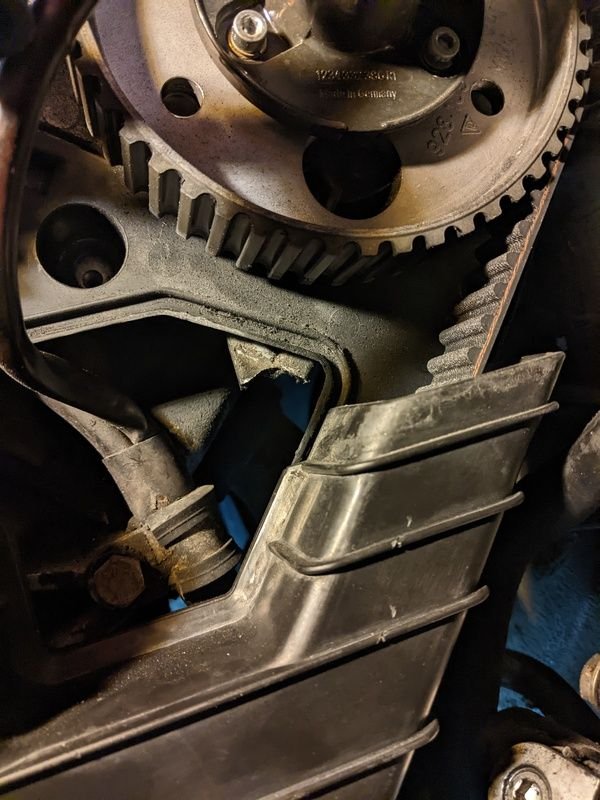
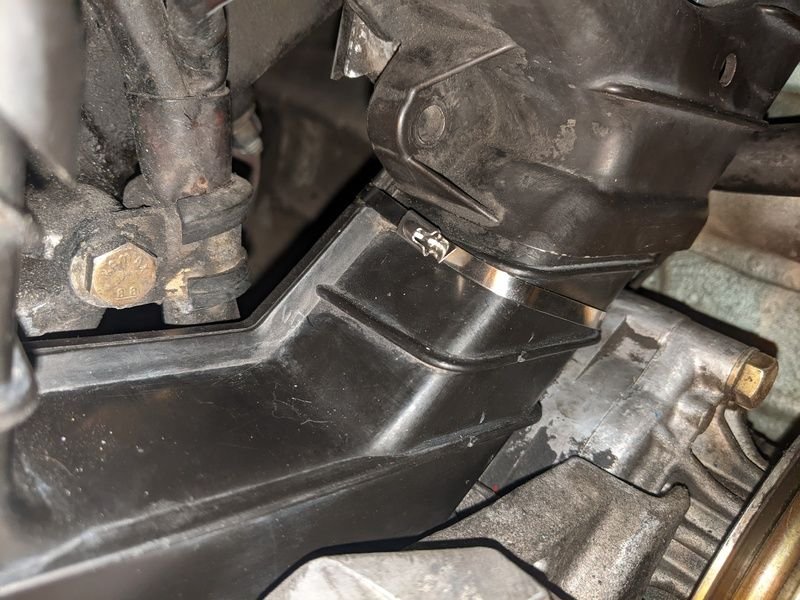
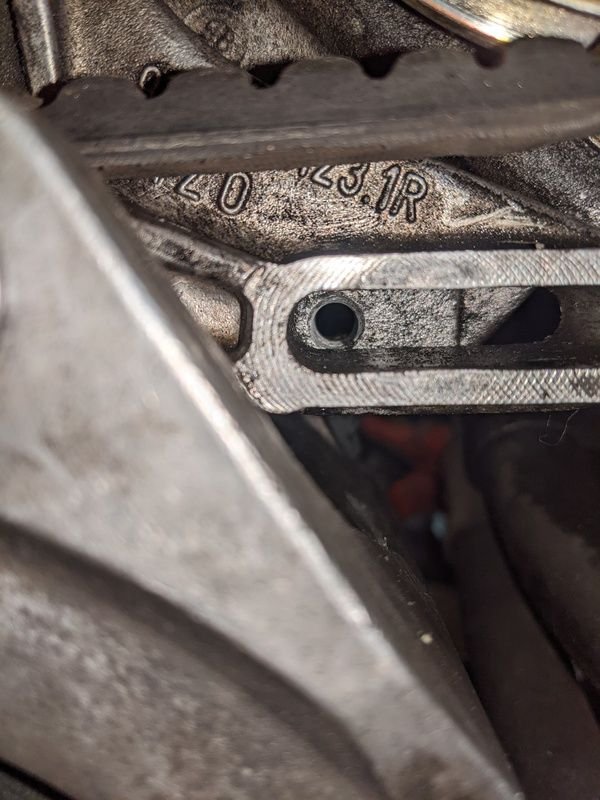
I also noticed two things: 1) The center cover was a little wobbly, not sitting flush, as it was for the previous owner, 2) the bottom screw mount for the driver's side top cam cover was broken off. I used a metal zip tie to tie down the center cover at that point. I don't want it making any noise. I already noticed during disassembly that one of the power steering pump mounting bolts was missing. I'll be going out to buy a new M8 bolt for that today. I have installed the new thermostat and also the distributor caps. I couldn't put on the other accessory belts until I secure the PS pump.
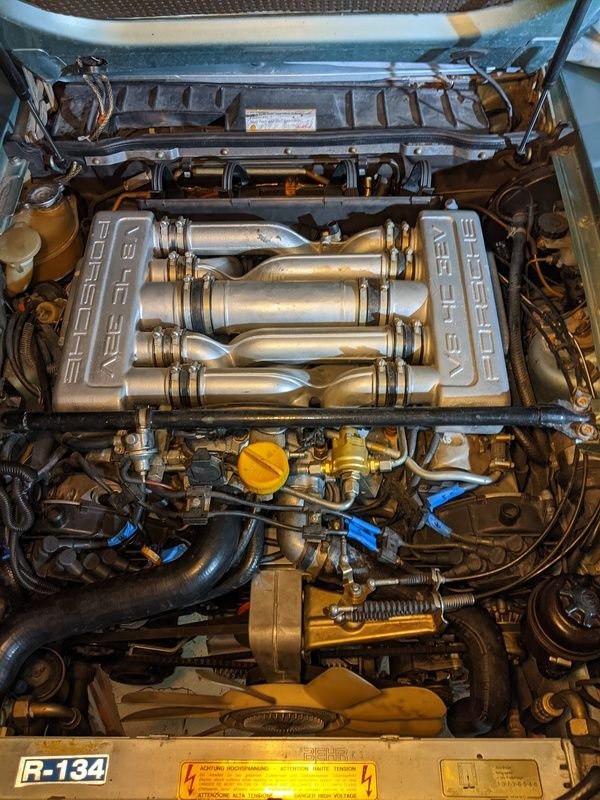
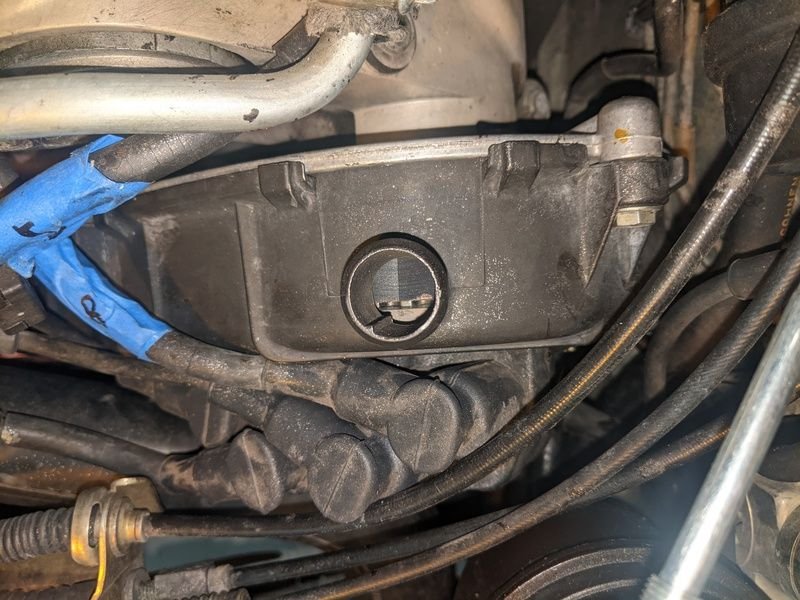
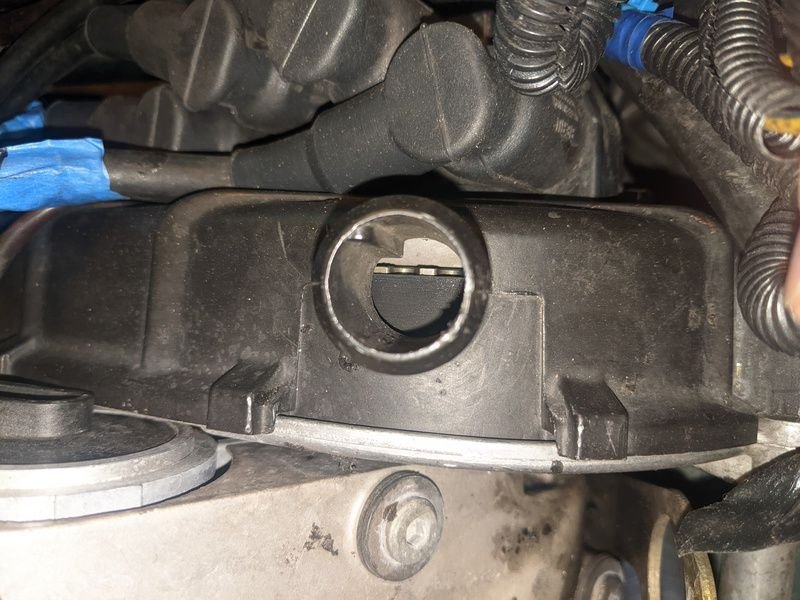
If you recall, the car also had this hideous solution to the heater core valve opening once the car is stopped, where the PO looped a manual valve shutoff coolant hose above the plenum. I started removing that and will be coming up with a nicer solution; either installing a secondary manual cable pull valve or just a cable pull to the stock valve.
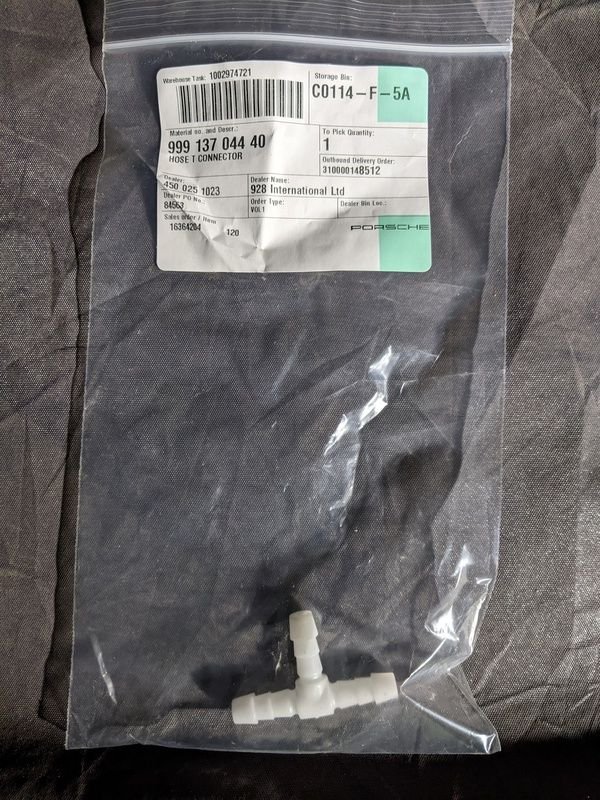
Oh, the upper breather hose at the filler neck was cracked, so I ordered a new one. I tried to remove it and with that I managed to break the T-piece. So, a new one of those coming in the mail. The PO installed a generic one and reading through threads that's not OK, as the factory one has a restriction on it. So, at least that is getting fixed also.
Getting to the light at the end of the tunnel.
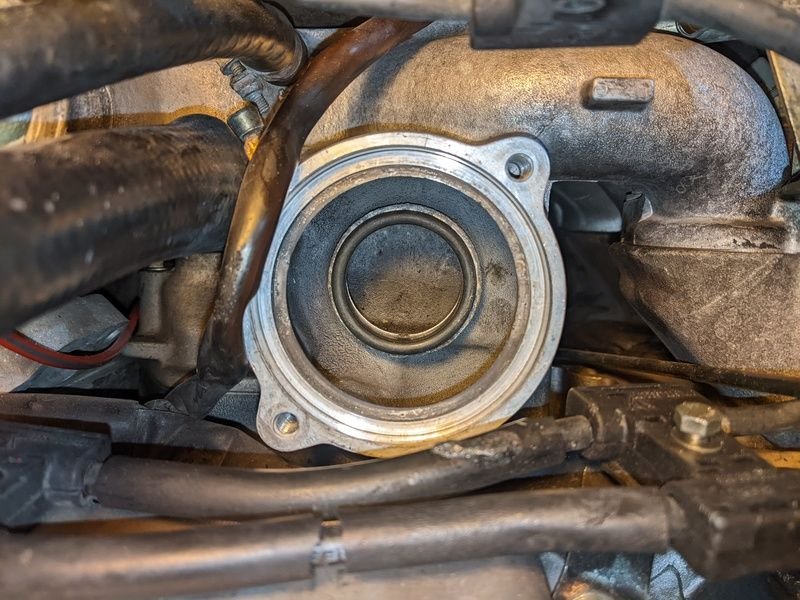
Filling the thing with gear oil. SLOOOOOW process. Don't rush it. Wobbly here. Notice the broken tab for the bolt for the upper cover. Metal zip-tied the sucker down. Missing this bolt for the P/S pump. Will be getting a new one. Rear thermostat gasket tapped in. This was a bit more difficult than I hoped. I also didn't want to ruin the new O-ring.
Well, I am finishing everything up. I buttoned all the components back up on the front. Everything just goes back the way they came off. I used a new radiator drain plug and new aluminum washers on the engine block drains. The old ones were still stuck to the block, so I had to remove those first. Otherwise, I didn't encounter any issues. All looks good.
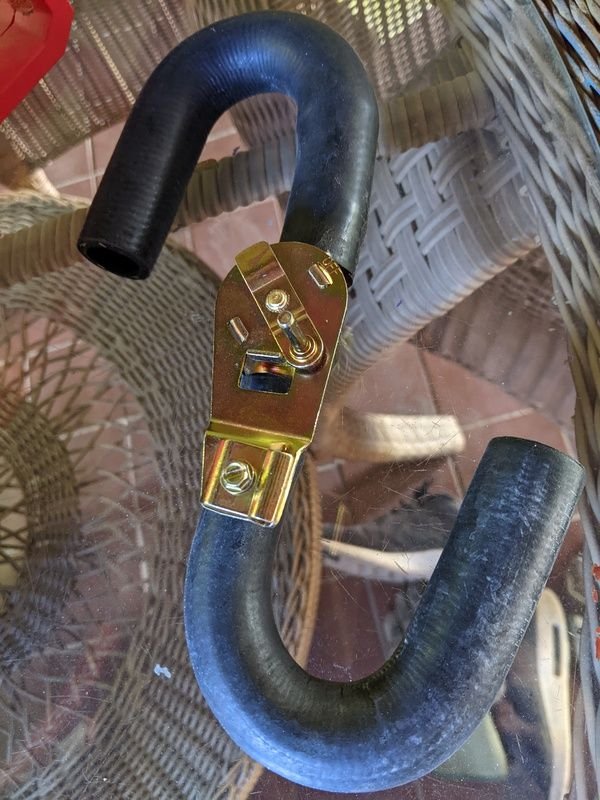
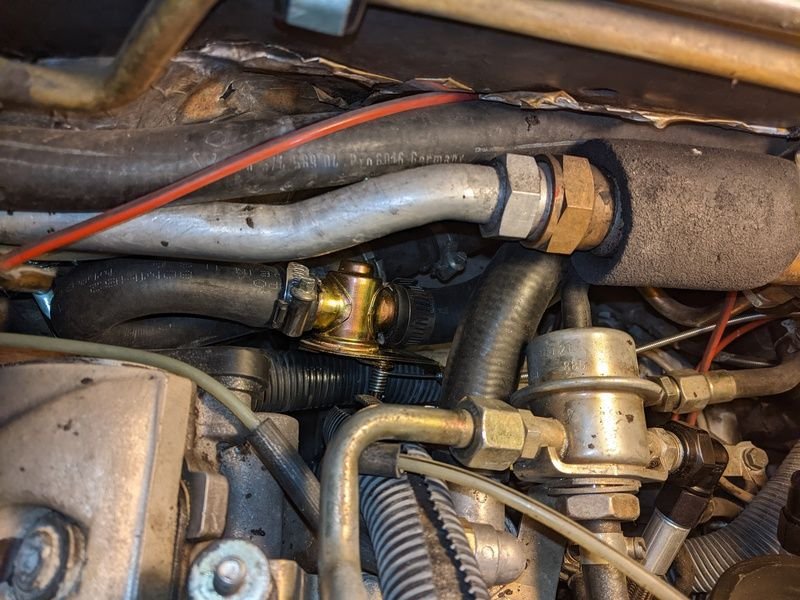
One thing I did do, was to replace the solution the PO came up with to solve the heater-core soaking of hot coolant after engine shutoff and loss of vacuum. He looped a huge hose with a manual shutoff valve across the engine block. I never liked the look of this (see my initial posts), but understood why he did it. In the AZ summer, when it is 110-120 outside, it is excruciating enough to sit in a warm car, without having the engine heating you and the cabin not cooling off quickly. So, I decided to install a cable operated valve in series with the factory valve and tuck it away. There is enough space in there, you just have to work it a bit. I bought one of these 5/8in "four seasons" valves and a cable for it. The factory connections are 19 mm (3/4 in) and a straight connection would not work anyway, due to lack of space. To solve this problem, I bought 2 U -shaped hoses (Gates 18743), which have 3/4 in connection on one side and 5/8 on the other. I cut off an 1" on both of them on the 5/8 side and connected them like this:
Once I got the angles right, this was locked down with clamps on the valve and the connecting clamps also slid on. Then, this contraption could be lowered into place and hooked up. Since the hoses are pre-bent, there are no kinks, the coolant will flow freely.
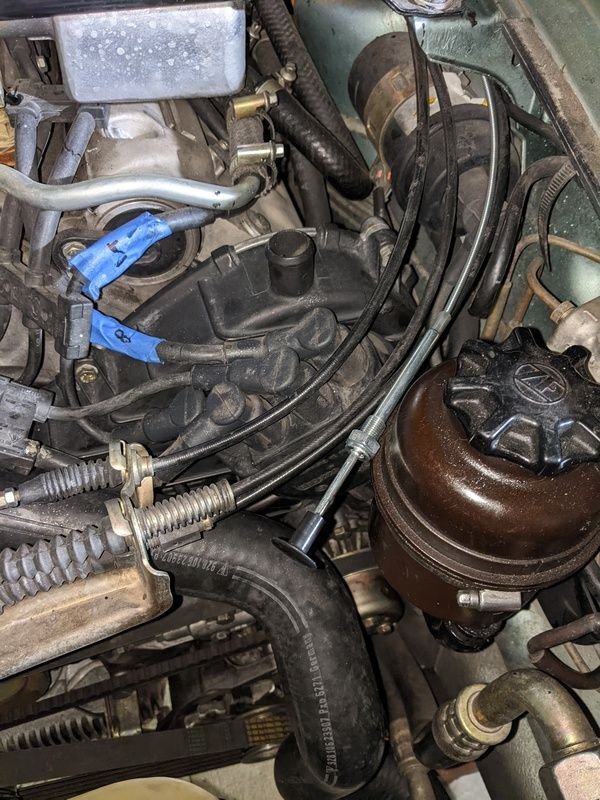
For now, I pulled the open/close cable up to the front of the engine bay. For now, I'll leave it here and will see whether I want to install it somewhere else later.
The engine bay is all ready otherwise. I wanted to replace the oil breather hose that goes from the filler neck to the plastic T, and I have the part, but as I was taking it apart, the plastic T broke. This led me down the rabbit hole and realizing that the PO had an aftermarket part in there, which is wide open. Stan has a thread on this on rennlist, where he discusses that the factory part has a smaller hole towards the T-part, so I ordered an OEM replacement. I also ordered 8 qts of Pentofrost NF, which should be here next week. I have to travel for next week anyway, so when I get back, I'll do a proper flush with 5 gallons of distilled water (also check for leaks), then another 5 gallons of distilled water, with half of that drained and the Pentofrost added in. So, no testing whether all this work will pay off just yet. I hope to post a video of the running engine next time. For now, here is the completed TB/WP job!
looks great. A real right of passage! I will be curious to see how the Curil T2 holds up on the water pump and tensioner. Keep us posted.
Oh, gosh, don't increase my worries. The tensioner is filled and I haven't seen any leakage, so fingers crossed. My hope is that the WP seals generally well with a good gasket without any added sealant anyway, so hopefully all will be well with the Curil T2. I am off for a week to Baltimore to partake in the commissioning of the James Webb Space Telescope, but once back, I hope to fire her up.
So, I am finally back and got to finish the project. The plastic T arrived from 928Int and was installed easily.
It took me about an hour driving around town to find distilled water. All stores are out of it and I have no idea why. Target finally had some, so I stocked up. I poured in about 4 gallons of it and crossed my fingers. She started right up and ran beautifully! After about 10 minutes the engine warmed up and kept a nice temperature slightly below the half line. Remember, I had an issue with the hot temperatures previously. I think I can certainly resolve it now that it was the bad thermostat and the old rear gasket. The core heated up well also, cabin was getting hot air, so the manual valve I put in works. All in all, really happy. Waiting now for it to cool off, do a flush or two, and then finally put in 2.5 gallons of Pentofrost NF. I am not going to remove the engine coolant bolts, as I just installed them with fresh aluminum washers, but I hope to be able to drain enough from the radiator and top of the engine to put all of it in once I am done with flushing it. Hopefully, next post is about a first drive.
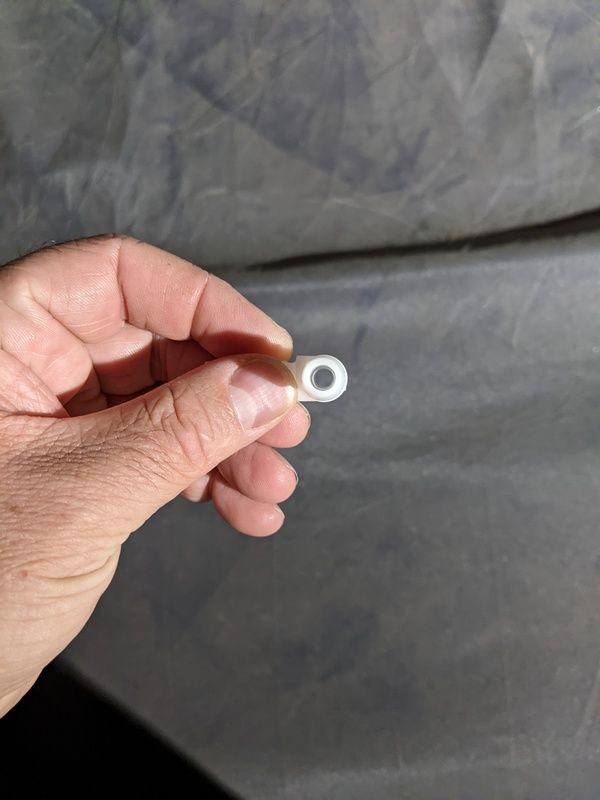
New plastic T. It is different than what you can get at autozone .... The T part has a smaller hole! I have no idea why, but I guess it is important. Probably stops oil fumes from going down that line. It is open ended here. All indicators on the money! Belt riding nicely on both cam gears!! Finally, hopefully no more shredding.
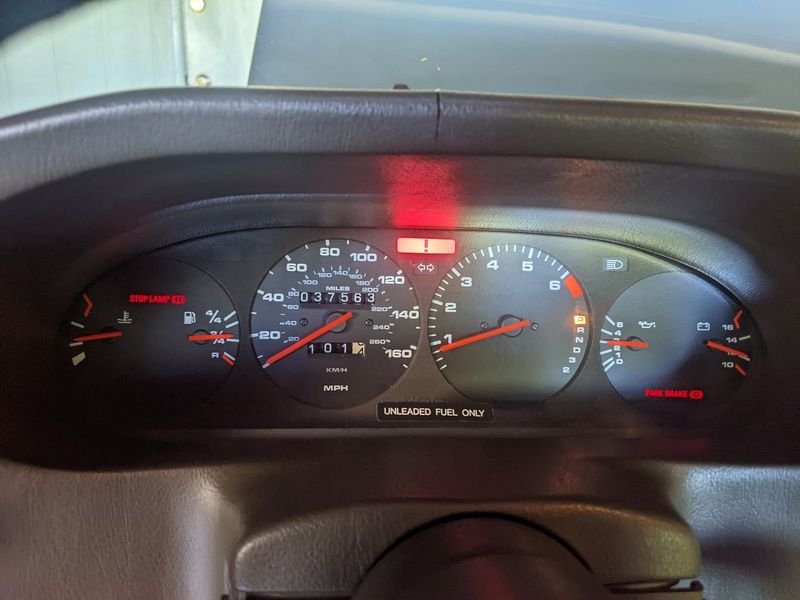
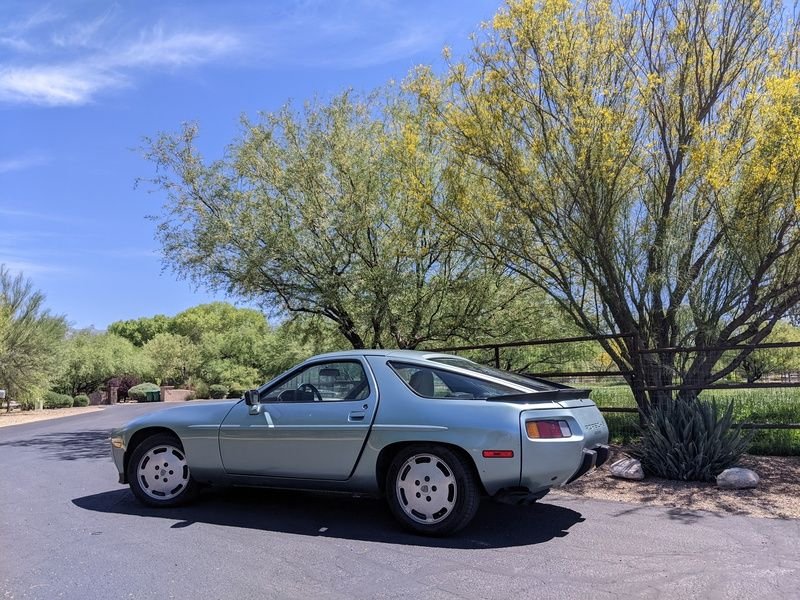
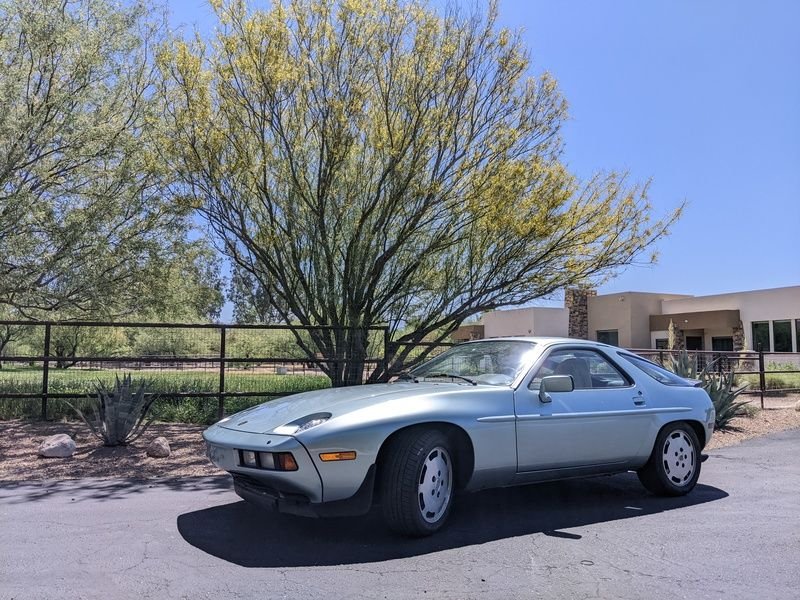
Ok, probably last post to this thread, as I will consider it closed. I took her out for a longer 1 hour drive today. She ran nicely. It is 100F outside and while driving the temperature was beautifully even below the mid-level a little bit. Considerable improvement. I did hop out for a few minutes to take photos and while idling there the gauge went up closer to the 3/4 line. I guess the combo of huge heat outside, A/C running, and possible air bubbles in the system still, cooling is not 100% effective yet. BTW, how does one completely remove all air bubbles from the 928 system?
Engine runs super strong. Shifts, as before, as a bit harsh at both moderate and WOT. Either I have a vacuum issue somewhere or need to adjust the modulator pressure. Someday I'll test this. Otherwise, I am really happy. Previously it had issues restarting while warm (had to give it a little gas). I will be testing that soon.
Thanks for following along if you did!
After idling a few minutes in the 100F weather, with A/C on. Lower than before, but still a bit high. Maybe air in the system? How do you get it ALL out? The upper hose does feel very easily squished. Nothing like a Crystal Green Metallic 928 under the blue southwest sky!

 04-04-2022, 04:41 PM