When you click on links to various merchants on this site and make a purchase, this can result in this site earning a commission. Affiliate programs and affiliations include, but are not limited to, the eBay Partner Network.
I owe the forum some updates on this project. I have been away on vacation for a few weeks and I have been slow to re-engage on this project given some of the head scratching issues I was trying to resolve. This post covered on some of the issues but there were more that I've added below:
Problems to address:
Sometimes starter grinding on starter ring (user error, dowel pins not driven into the flywheel causing slight miss alignment of ring)
Weird vibrations became apparent after some driving (something in the clutch, probably rough flywheel as greg pointed out, or unbalanced clutch)
Too much breather oil in intake after high RPM runs (problems with the vacuum pump+provent breather system).
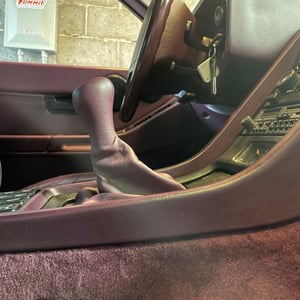
Hans Shifter making contact with chassis tunnel (something about the uniqueness of my TT) (fixed)
I've been researching and talking with list members and vendors on how to mitigate them, I think I have identified the causes and path forward for each and have starting digging in and taking things apart, again.... I'll follow up with some posts on each topic.
Last edited by Michael Benno; 10-02-2022 at 09:23 PM.
Reverse lights....the quick and dirty way.
Disconnect the two wires at the switch.
Turn on the key.
Touch the two wires together. If the light work, the problem is at the switch or the actuation pin being excessively worn.
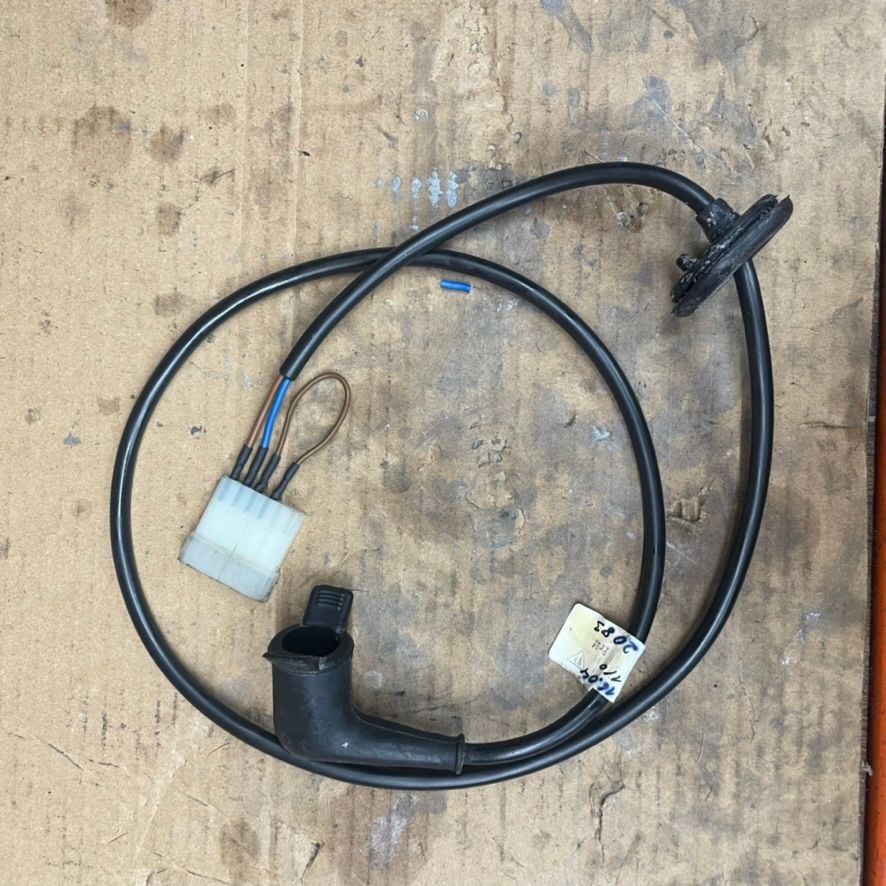
Only use a factory reverse light switch. (Yes, I know, they are expensive....see if Mark Anderson has a nice used one that works. If not, I can find one.)
The aftermarket ones are terrible. (Even those cost me $49.00) They fail quickly and leak down the electrical posts in the switch.
I tried 3 of them, before completely giving up.
Manual and autos have different rear wiring harnesses. I found this out with an 89S4 I had here a couple of years back.
No reverse lights and you could start the car in gear. I thought it was a bad gear selector switch, but no.
I started tracing the wiring from the hatch to the CE panel. The rear wiring harness terminated in a different spot on the CE panel. Same plug, different position.
I checked the wiring diagrams and sure enough the 89S4 had a manual rear wiring harness.
I moved the wiring to where an auto should be and made wiring changes in the hatch and we had reverse lights and the car would not start in gear.
Not sure if you are not fighting the same issue here.
I think I have pictures I took for my customer.
Edit: The wire colors are different - according to my notes the manual harness wires are blue and blue/black. If you need me to dig into the WSM wiring diagrams let me know.
The wiring diagrams refer to the option code a manual transmission.
Last edited by Kevin in Atlanta; 09-30-2022 at 12:49 AM.
Reverse Light Saga
Long story short, reverse lights are restored.
Greg, you are absolutely correct on the questionable quality on the URO reverse switches. I went through two failed URO units before opting for the Porsche part which is what is in there now.
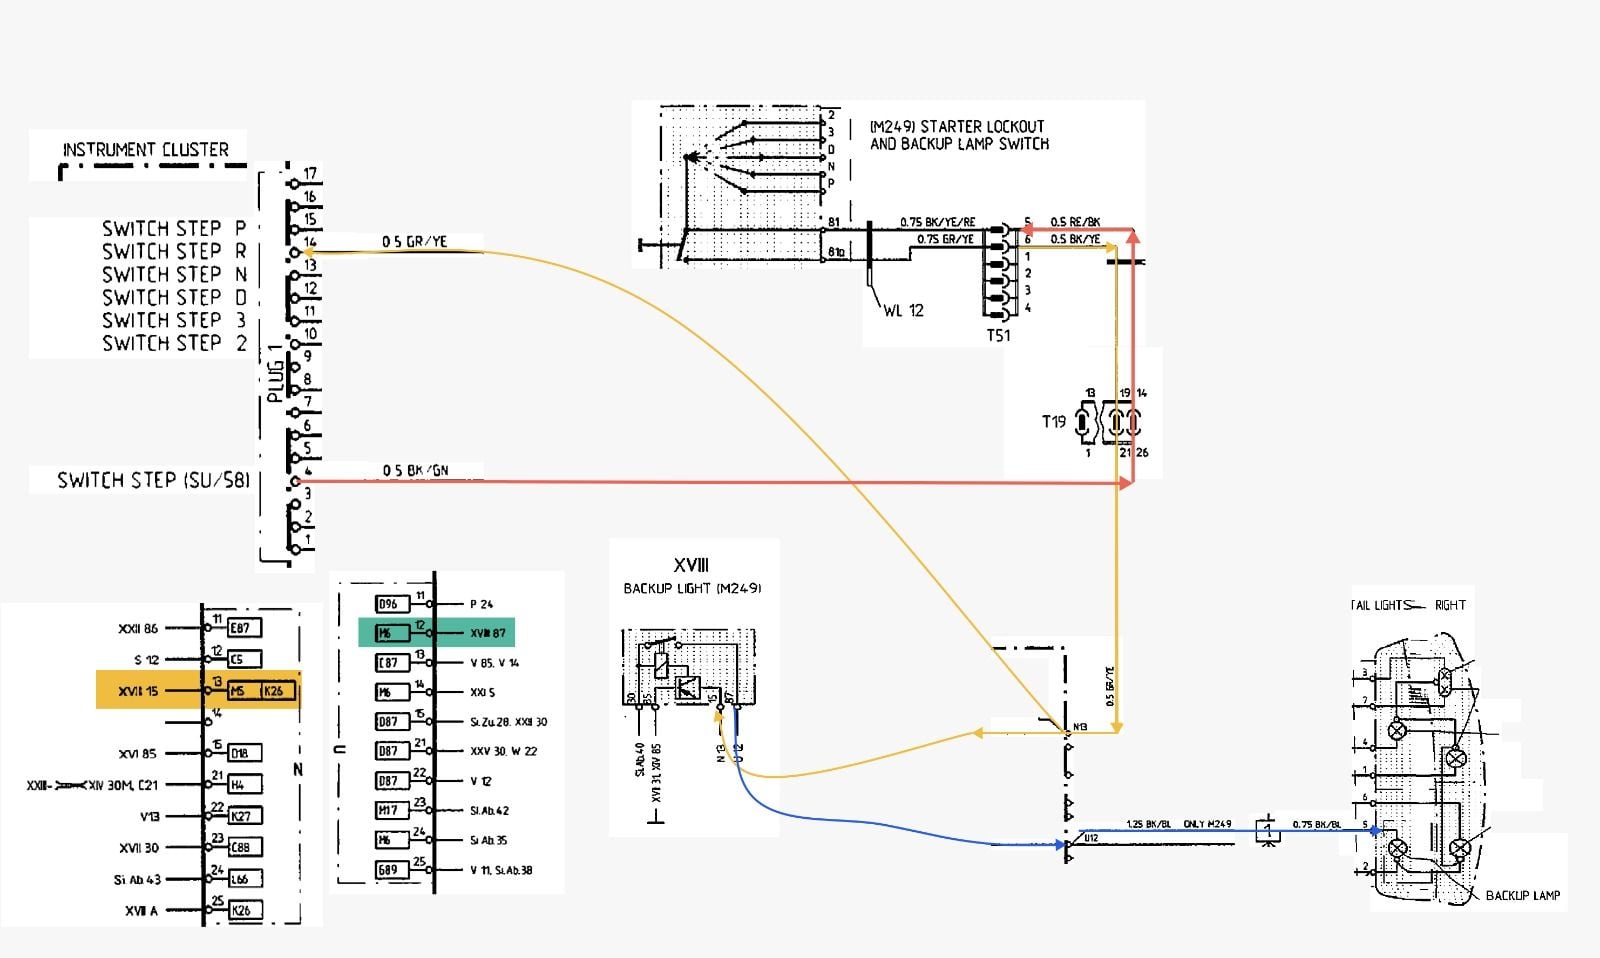
However, the switch was not the problem in this last iteration of the problem. I previously had the reverse lights working, along with "R" indicator on the dash. I did this by bypassing the stater interlock and integrating the manual reverse switch into the automatic harness. However, at some point the reverse lights and the "R" indicator stopped working. I spent a very long time studying the electrical diagram and tracing the voltage source. I was able to determine the issue was there was no voltage being supplied to the transmission switch, which in turn activates the relay and provides voltage to the rear lights. There was no voltage on the red line below, instead that line was shorted to ground.
Through lots of testing with my DMM, I was able to confirm the issue seemed to be upstream of the T19 connector which is located behind the LH/EZK and CE panel on the A-pillar. The problem was someplace between that connector and the digital dash. Since I didnt remove the dash or pod as part of the project, I suspect something fried on the digital dash as a result if higher amp draw from the tail light bulbs (LED). FYI,All fuses checked out.
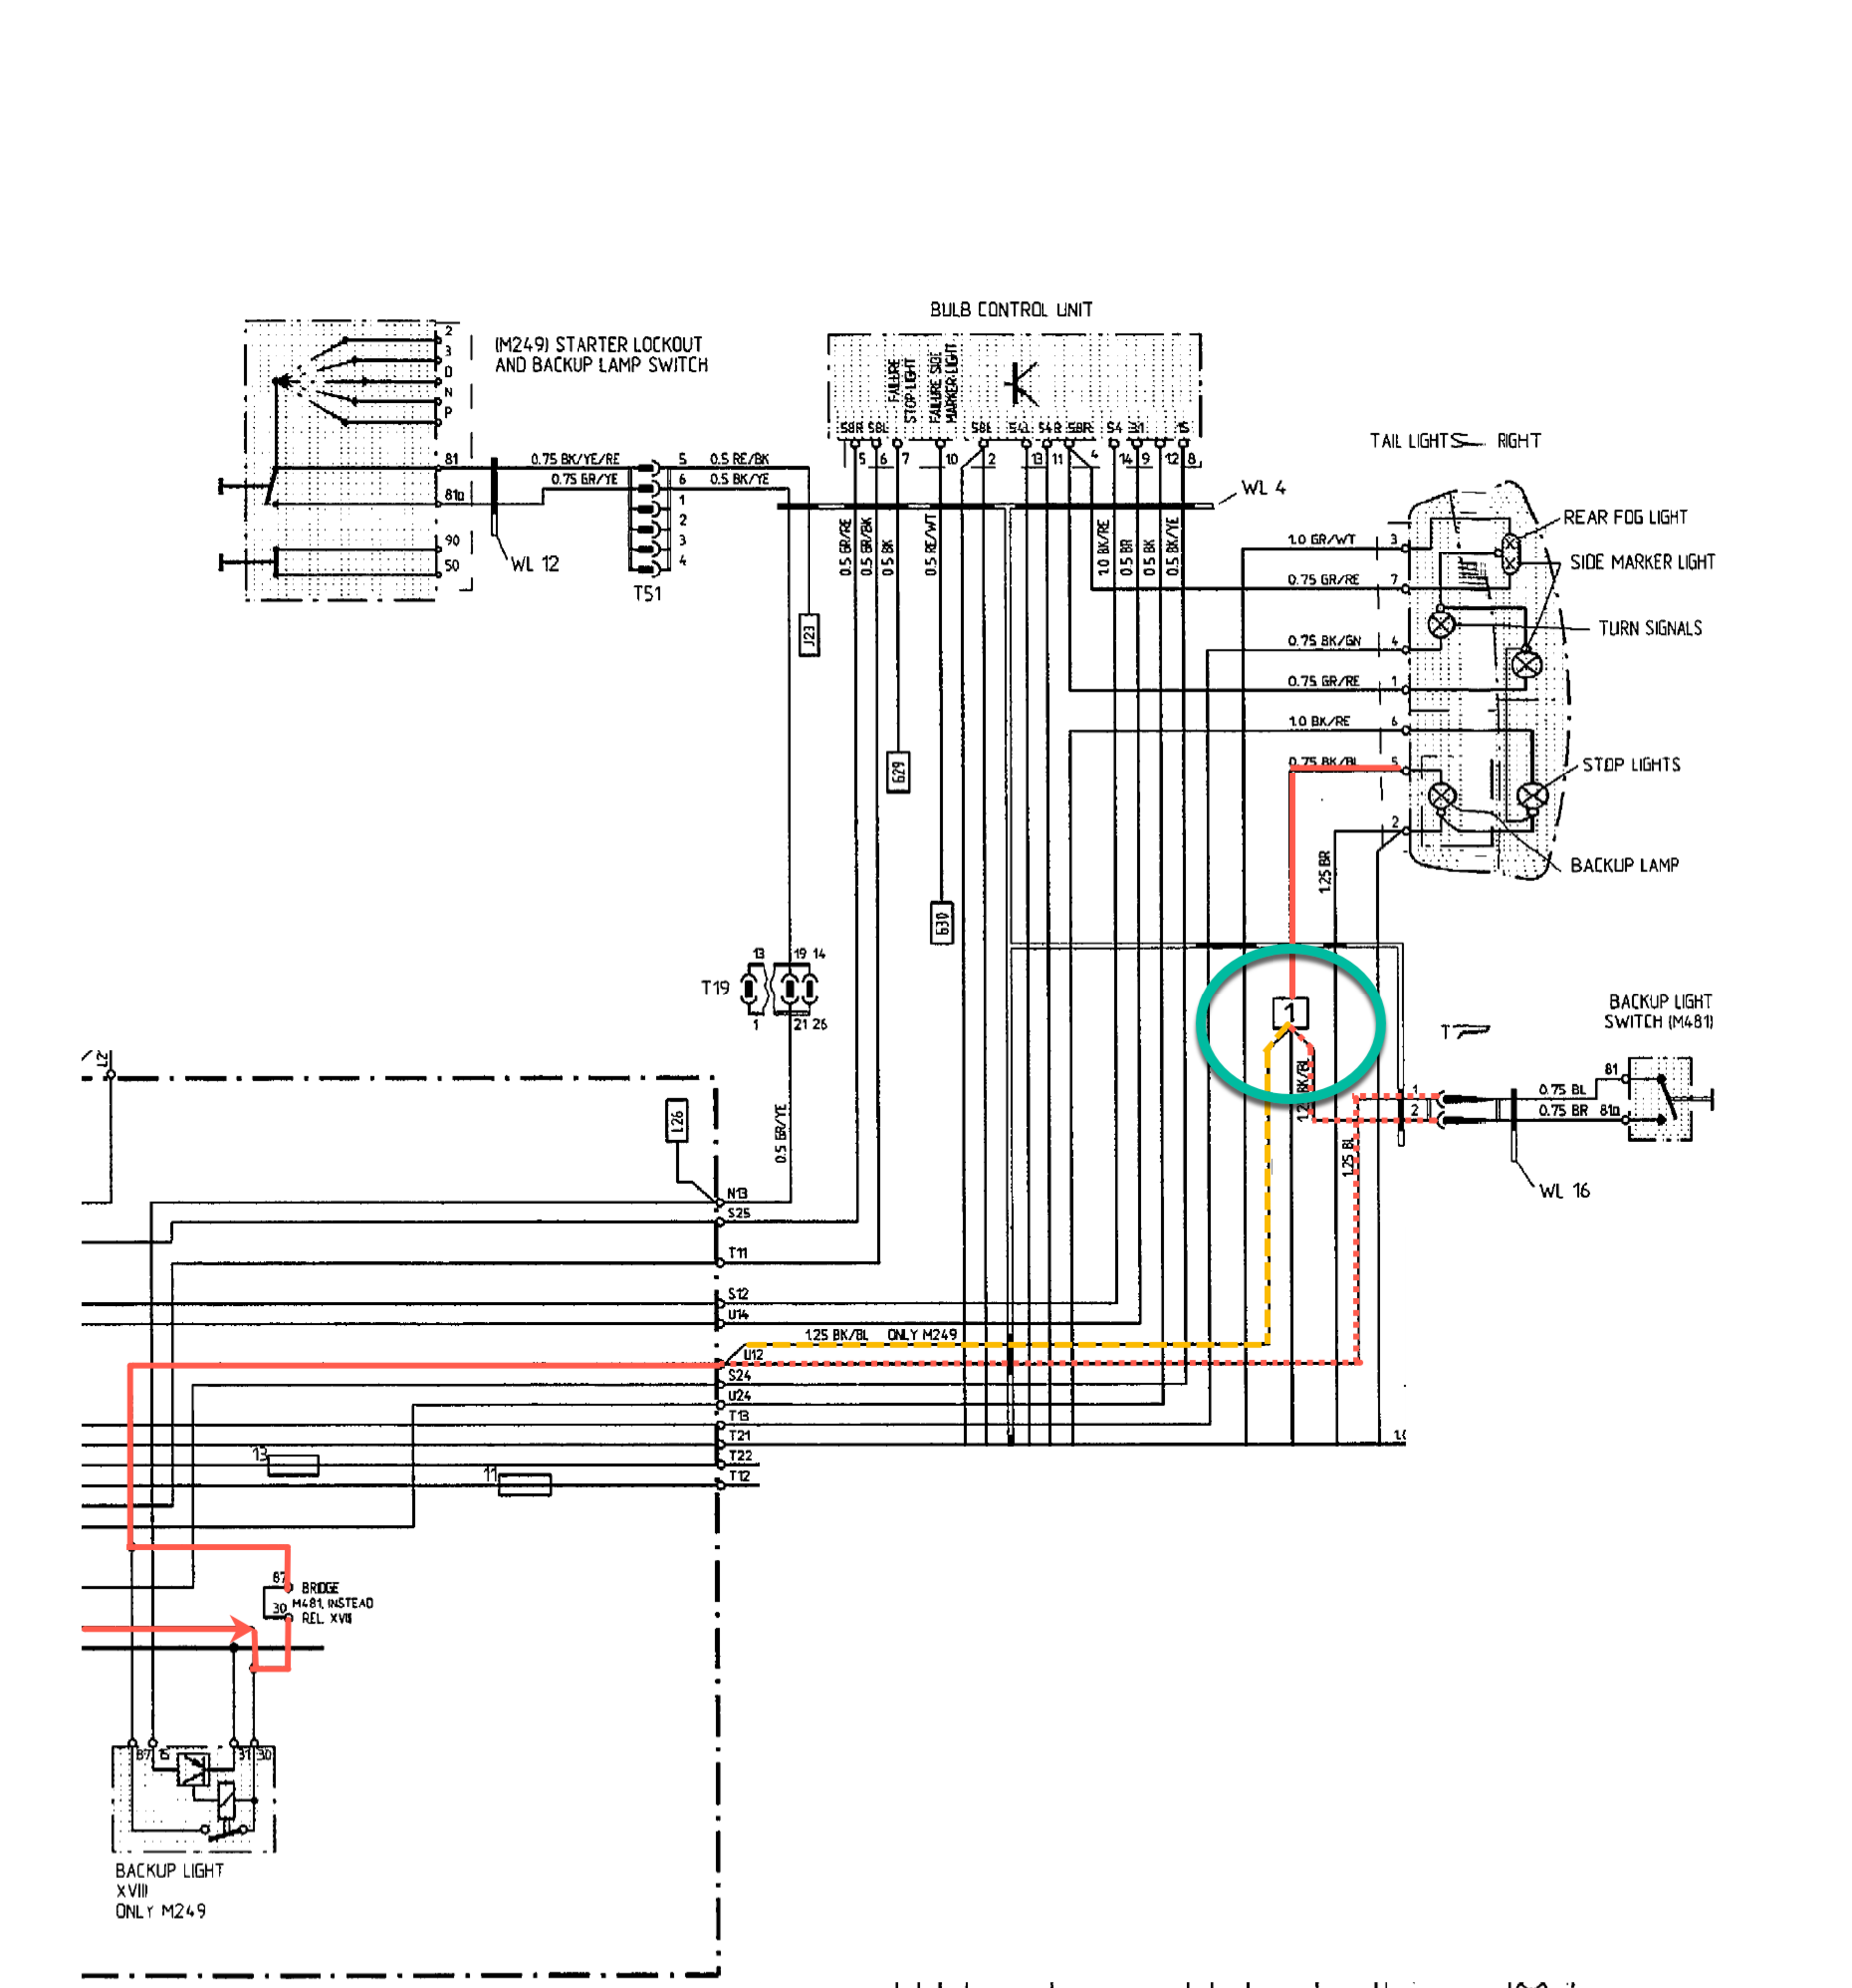
I gave up on making this solution work again and decided to convert the harness to that of the 5-speed style that bypasses the dash indicator and uses a bridge on the CE panel instead of the relay. Again after studying the wiring diagrams a bit more, I realized I needed to rewire the connections at connection point 1. In automatics the switching is done before the relay. In manuals switching is dong after the relay (bridge), and voltage is always supplied from the CE panel. So I concluded that I needed to find that connection point and reroute the that supply line (yellow dashed) to the transmission switch (red dashed).
.
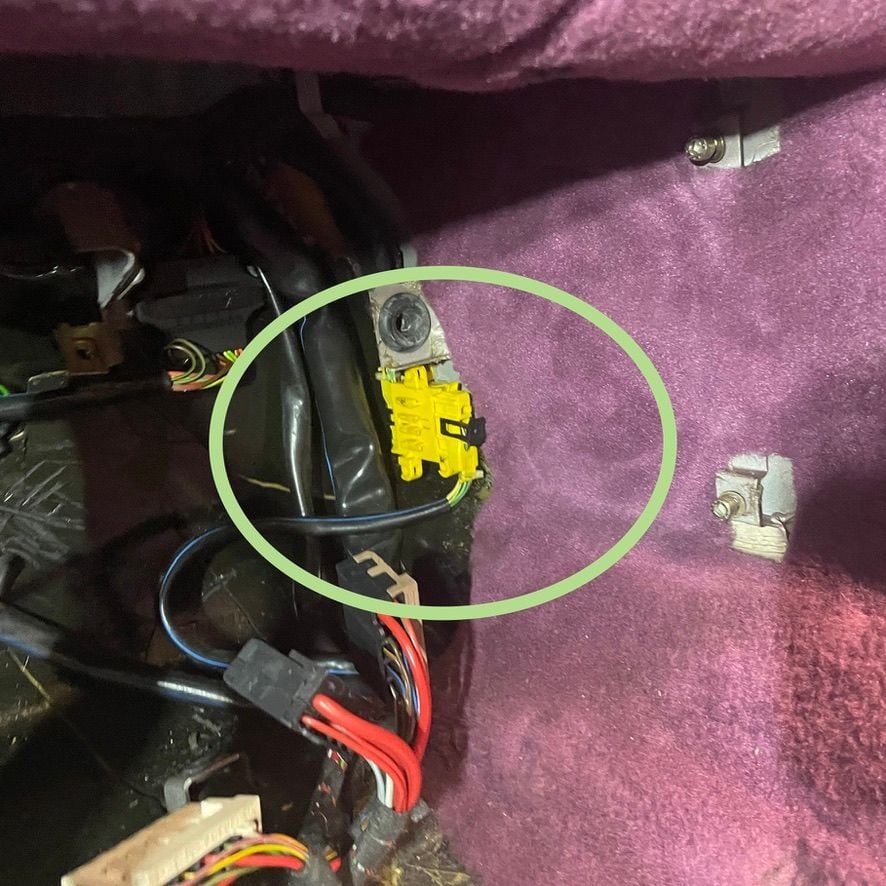
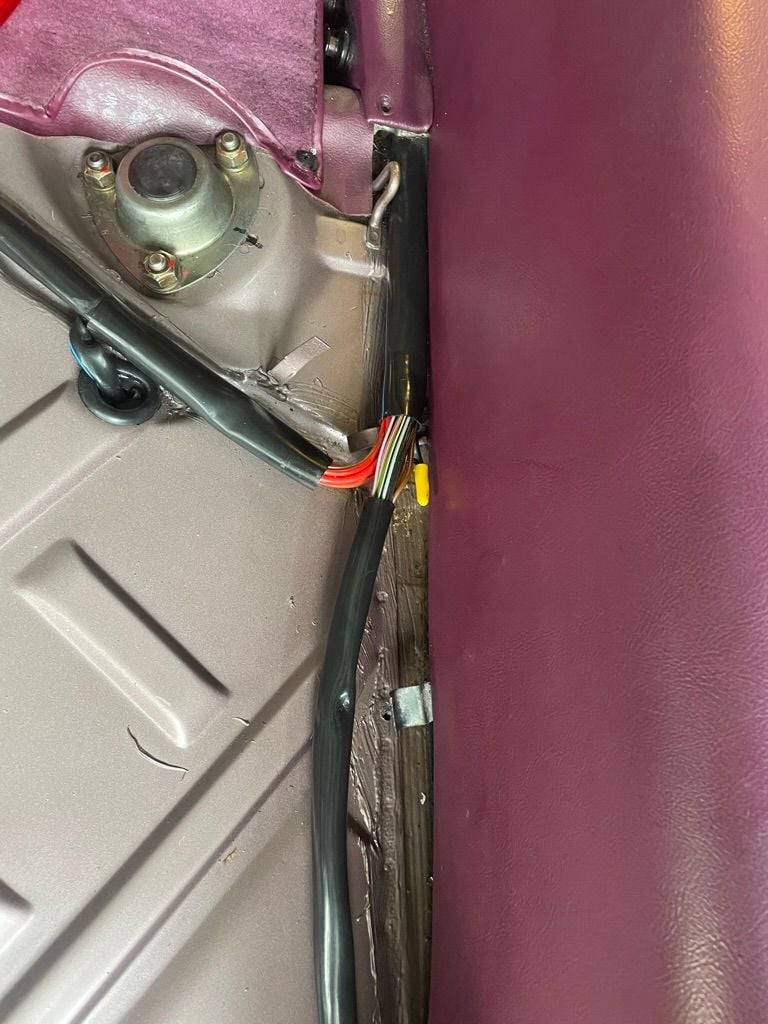
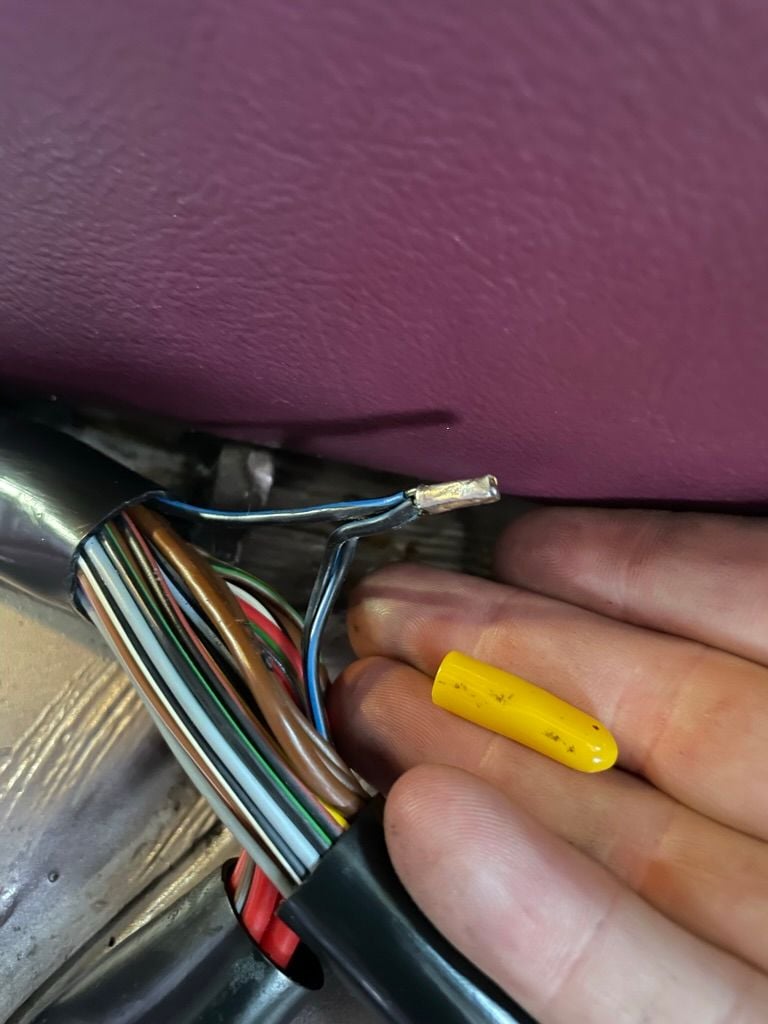
Finding that connection was actually really easy, it's on the rear harness as it passed over the fuel tank
I was able to remove that non-soldered crimp and separate the voltage supply and route that to the transmission switch and back splicing the wires that fead the transmission harness connector already in the harness.
So now the car is wired like a manual and reverse lights have been restored
Last edited by Michael Benno; 09-30-2022 at 12:41 PM.
The following 6 users liked this post by Michael Benno:
Darklands (10-01-2022),JBT3 (09-30-2022),PorKen (09-30-2022),RennHarry (09-30-2022),Slavic (10-03-2022),WestInc (10-01-2022) and 1 others liked this post. (Show less...)
Initially after the conversion was complete the clutch and starter were working normally on the first two shakedown drives. However as I drove the car a few more times I noticed sometimes the starter would not engage the starter ring in the most smooth way. I would sometimes hear metal on metal as the starter bendix gear "found" the starter ring. Also, I was developing increasing vibration from the clutch assembly when in gear especially under high load.
I decided to remove the clutch assembly and see what was going on. The first issue I noticed was that I make a mistake when assembling the clutch using the dowel pins. This dual clutch uses 3 of the same size dowel pins for centering all three of the main assemblies: 1. Pressure plate, 2. Intermediate plate, 3 flywheel. When I removed the clutch I noticed that I had not driven the dowel pins into the flywheel (User Error). Which means the IP and PP assembly probably shifted a little since the ID tolerances of the bolt holes are slightly larger than the OD of the assembly bolts. This shifting was probably enough to make the starter ring oblong to the starter gear position thus casing the stater interference. That's my theory anyway. My plan it to re-assemble ensure the dowel pins are sufficiently penetrating both the flywheel and PP. One question I do have is on the length of the dowel pins. The dowel pins I have are 6mm in diameter x 28mmm in length. 28m seems too short such that the pins are only able to be half way penetrating the PP and the Flywheel. It would seem that I would need 35-38mm length dowel so that it would be flush with the outside surface of both the flywheel and PP. Any thoughts on this?
As for remediating the clutch vibration or shuddering. My working theory is that the Flywheel needs resurfacing (as Greg previously pointed out). I got a lot of mixed advice on whether the flywheel needed resurfacing on the initial install. However after having the vibration issue, I decided I want to rebuild this clutch assembly and try to mitigate all possible variables. So, I decided follow Greg's suggestion to have the flywheel resurfaced just to eliminate one possible variable.
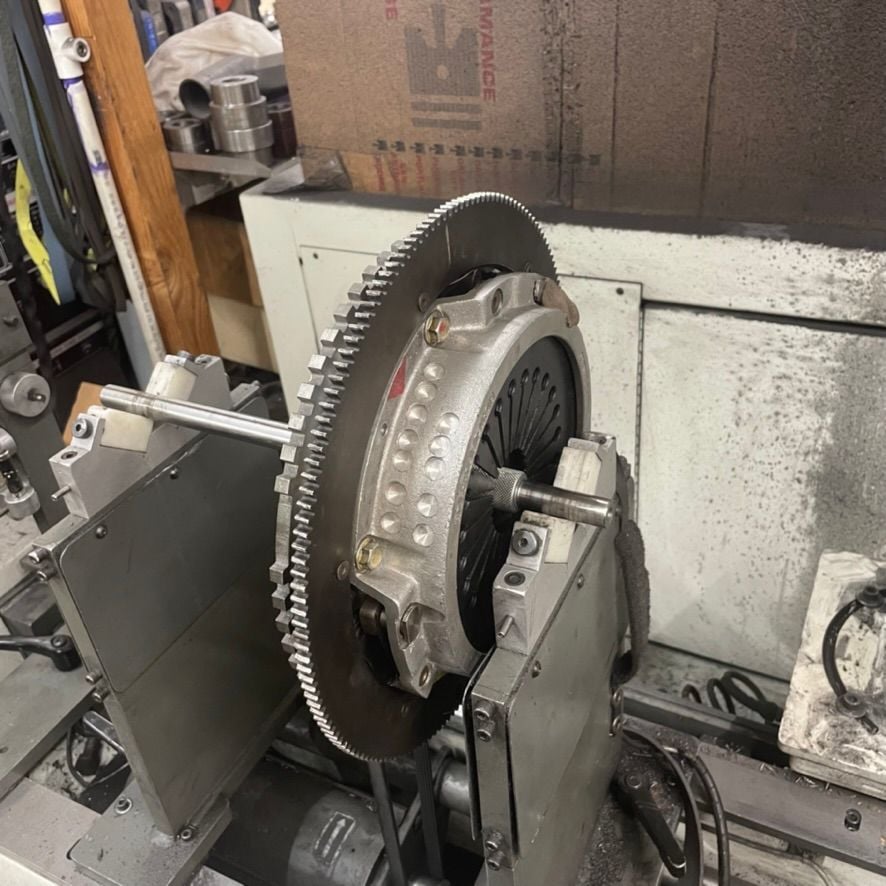
Also, I did some DYI balancing of each of the components and found that the PP was significantly out of balance. So I found a local automotive machine shop that would balance the clutch assembly. I had to figure out how to remove the release bearing which is a bitch even with a hydraulic press. But I figured it out eventually. So that is happening now and I should have the assembly back this week. Also, I decided to get new clutch discs just to eliminate another potential variable. Hopefully this will help address the vibration problem.
Update: Just visited the machinist who wanted me to verify he had the clutch assembled correctly before he stated drilling for balancing. He noted the flywheel was 6g out of balance and the pressure plate was 22 grams out of balance. He noted there was a previous attempt to balance this used PP but the drillings were not in the heavy spot.
Last edited by Michael Benno; 10-06-2022 at 12:31 PM.
I think the WSM says to get them flush with the PP. I read that after I had them flush with the flywheel. Later, I pressed the pins until they were flush with the PP. No vibrations from the clutch pack. But, I will have the clutch pack balanced at some point and confirm how far they made it into the flywheel.
I will add that using a early upper bell housing made a huge difference with the clutch engagement. That and backing off the clutch pedal rod so there was some play where it meets the master cylinder. I finally got MY GTS running perfect and the clutch engages closer to my other manual 928. Cannot stop driving it...
This is fantastic news Kevin, nice work and way to spend the extra effort replacing the upper bell housing! Glad to hear you are happy with the results. I am also glad you are finally able to get your GTS running again with a fresh motor to boot! Enjoy hopefully I�ll be able to join the club too soon
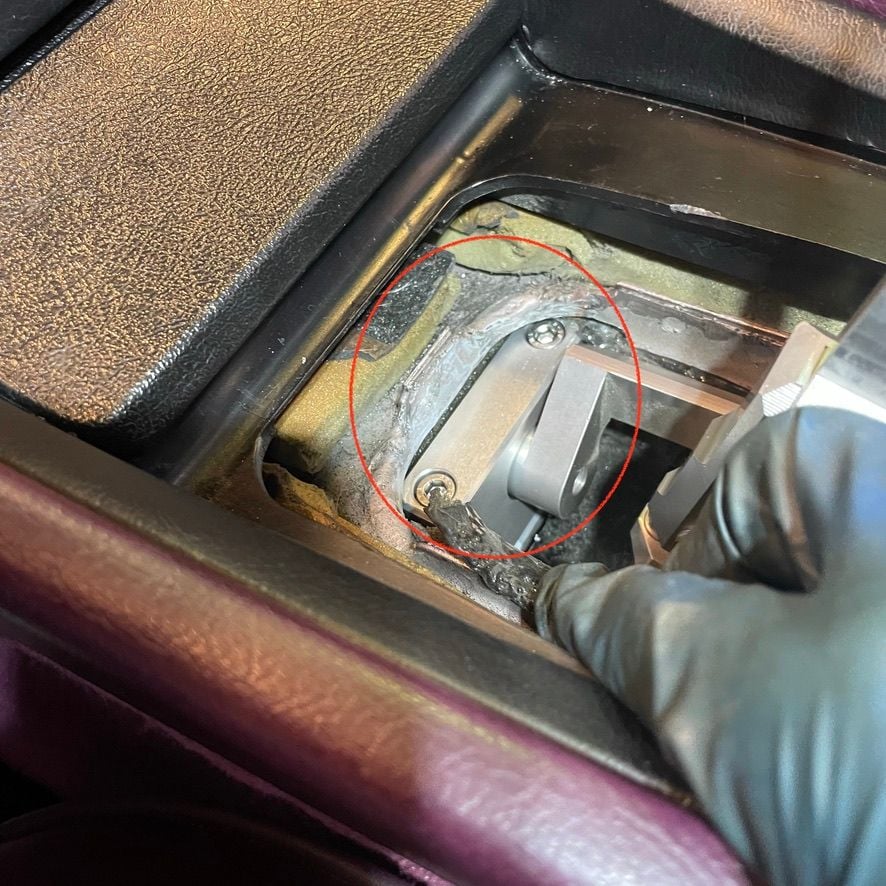
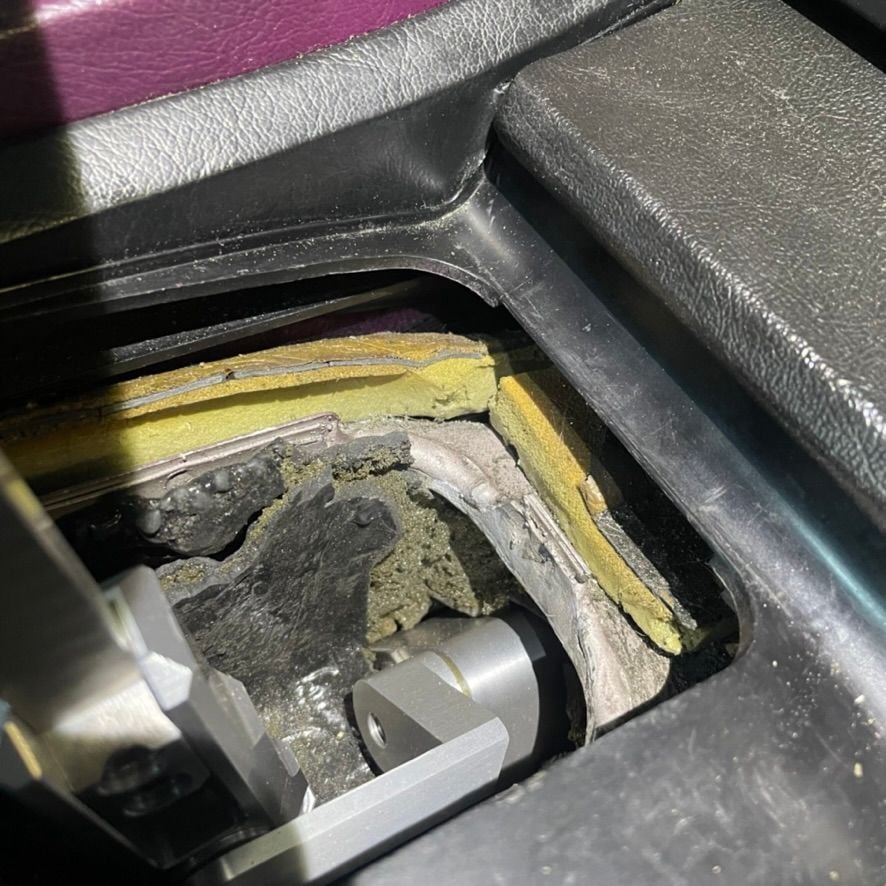
After the initial shakedown drives and the driveline had some time to settle. I noticed "knocking" in the tunnel area. On further inspection the front pivot of the Hans shifter assembly was extremely close to the tunnel and making contact from time to time while driving. I should point out that both the motor mounts and the transmission mounts are new in this car. So the drive line is probably sitting as high as it ever will.
I spoke with Hans, who was extremely helpful and supportive in troubleshooting this issue. We researched photos of dozens of other installations and none of them had this interference issue. Most implementations had more vertical clearance and the pivot block was not directly under the opening seem which protrudes down about 4mm. We think there were a few different things going on here. The main issue is that the donor manual torque tube was a bit of oddball unit because the mounting block for the shifter was in an unusual position as compared to the studs. This cause the front pivot to be pushed back further than normal and required a different mounting plate, which Hans graciously provided. At the time, I didn't foresee that it would cause a fitment issue with tunnel. Han's indicated that he has seen some variance in where these studs are in reference to the block and variance in where the block is, but this was a bit more off than he has seen.
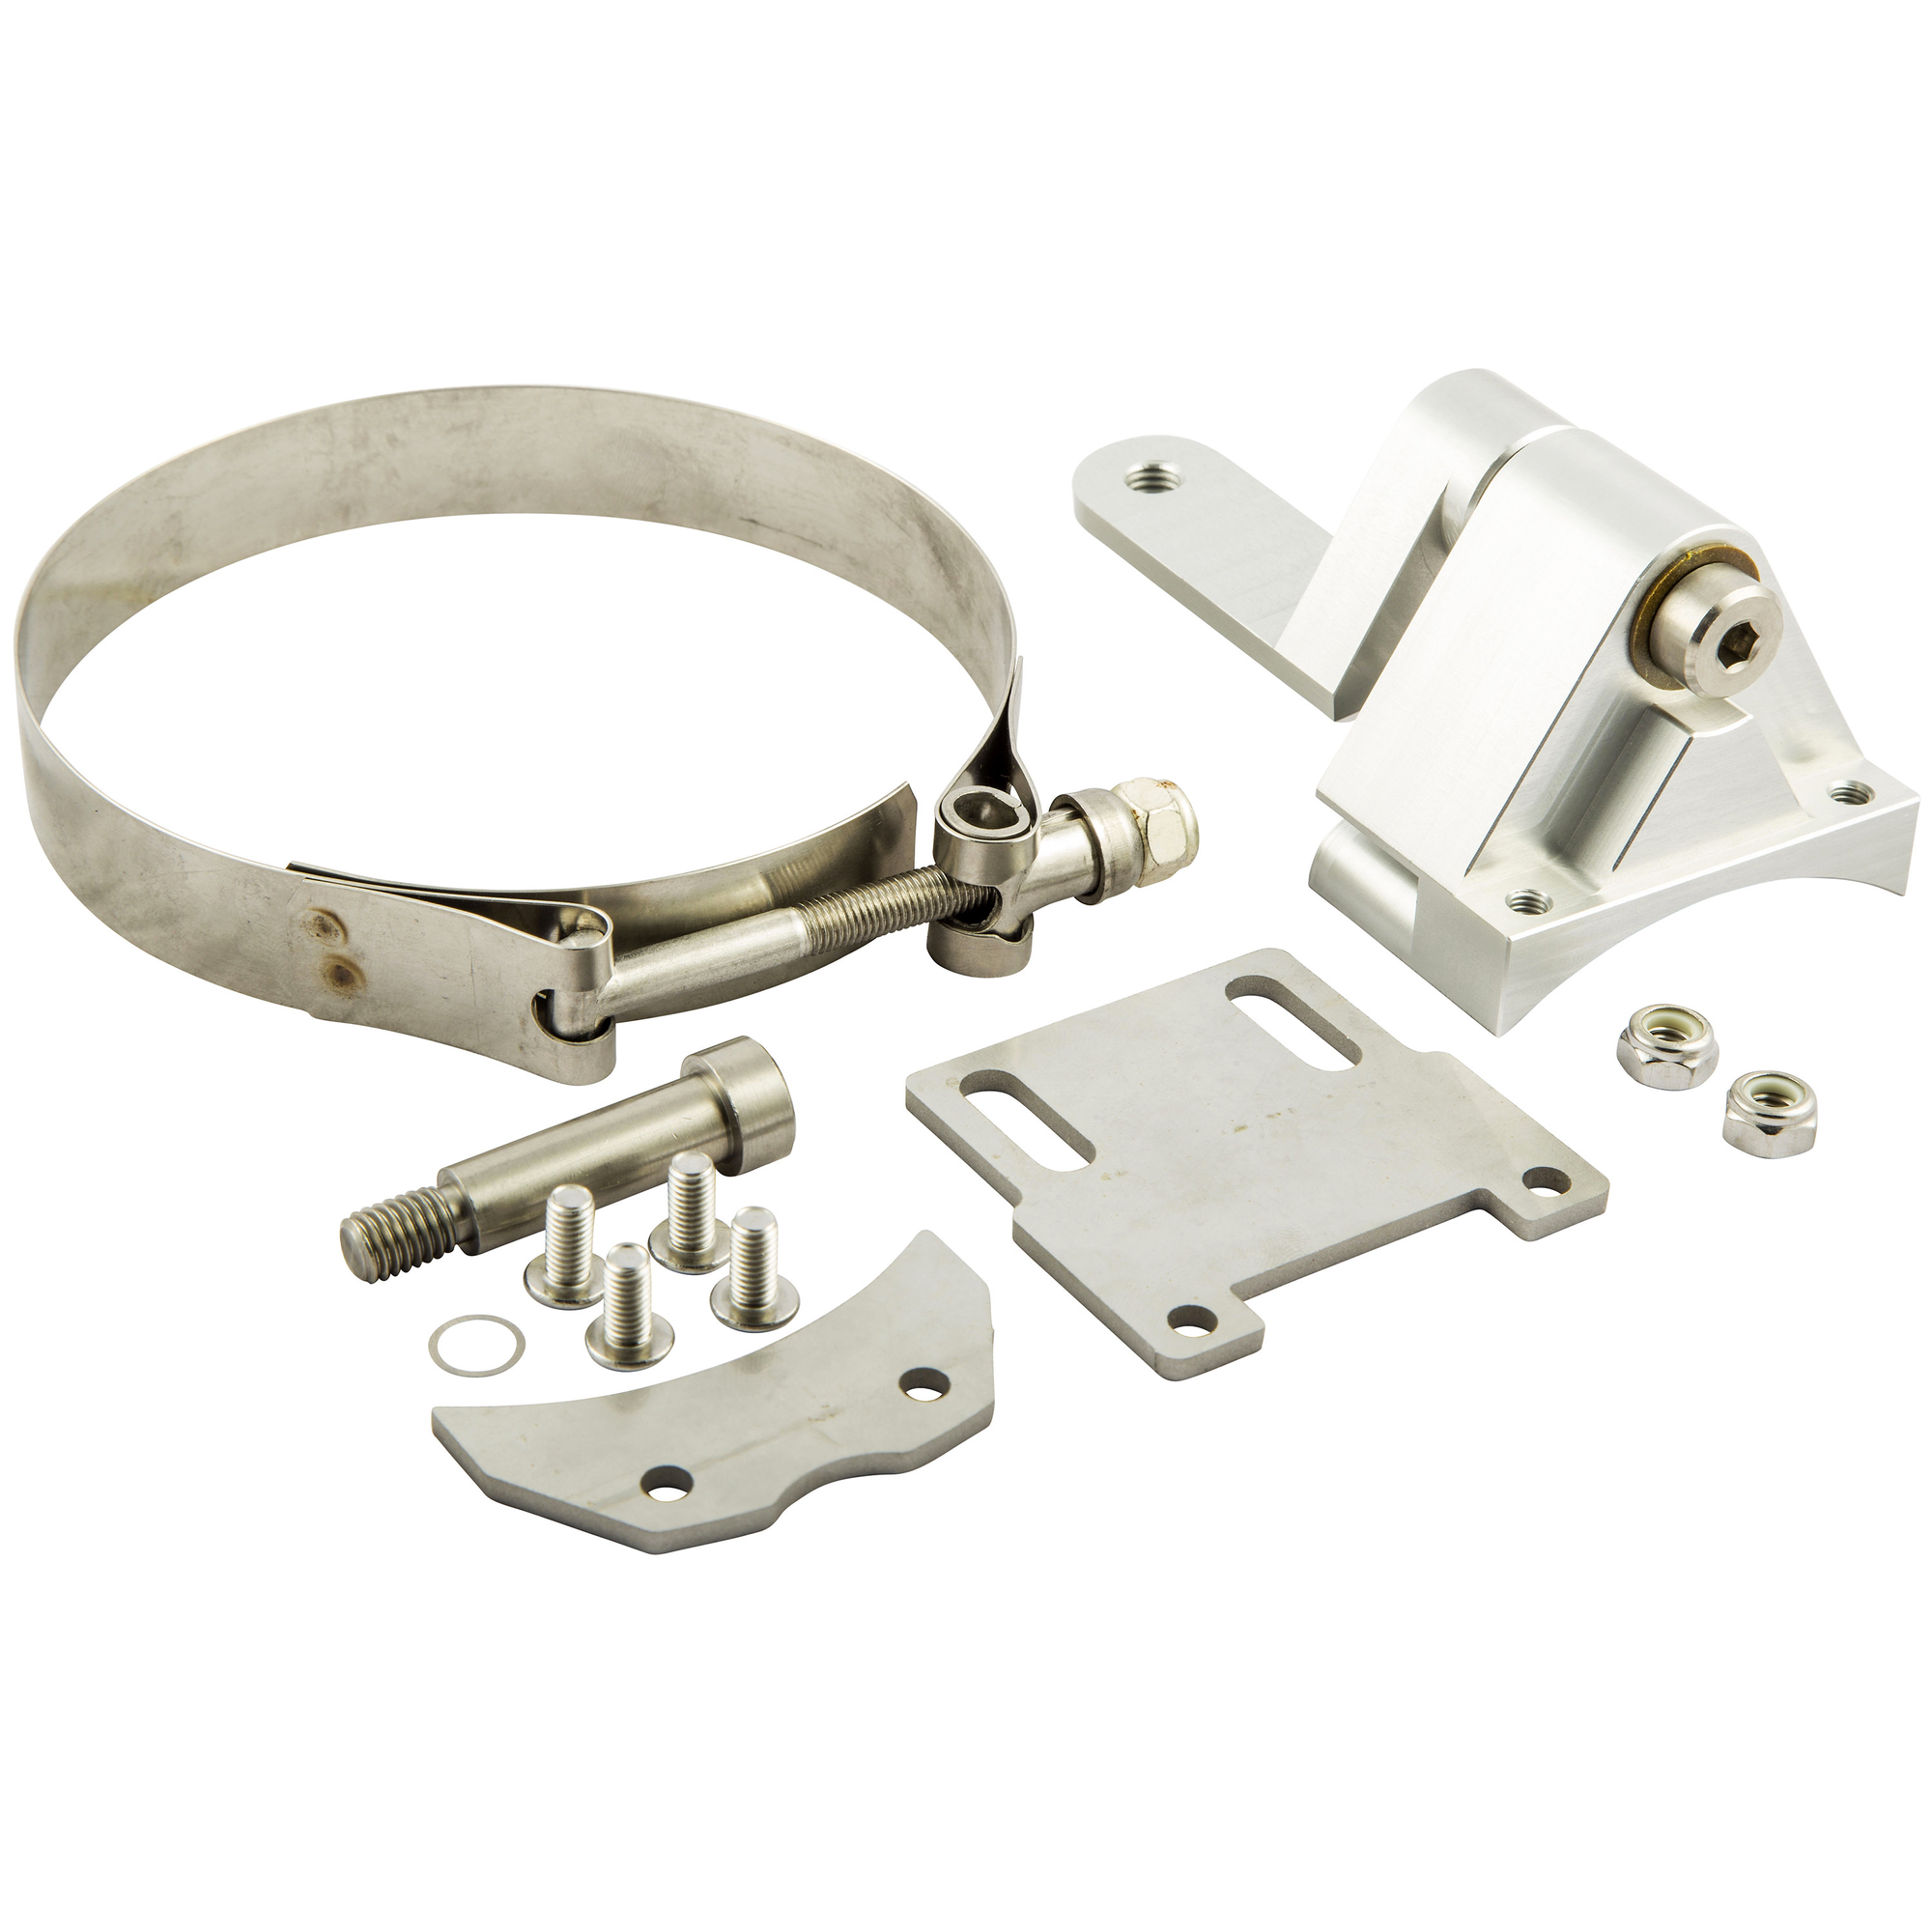
Here is the revise mounting bracket that Hans provided. It was longer to accommodate the increased reach.
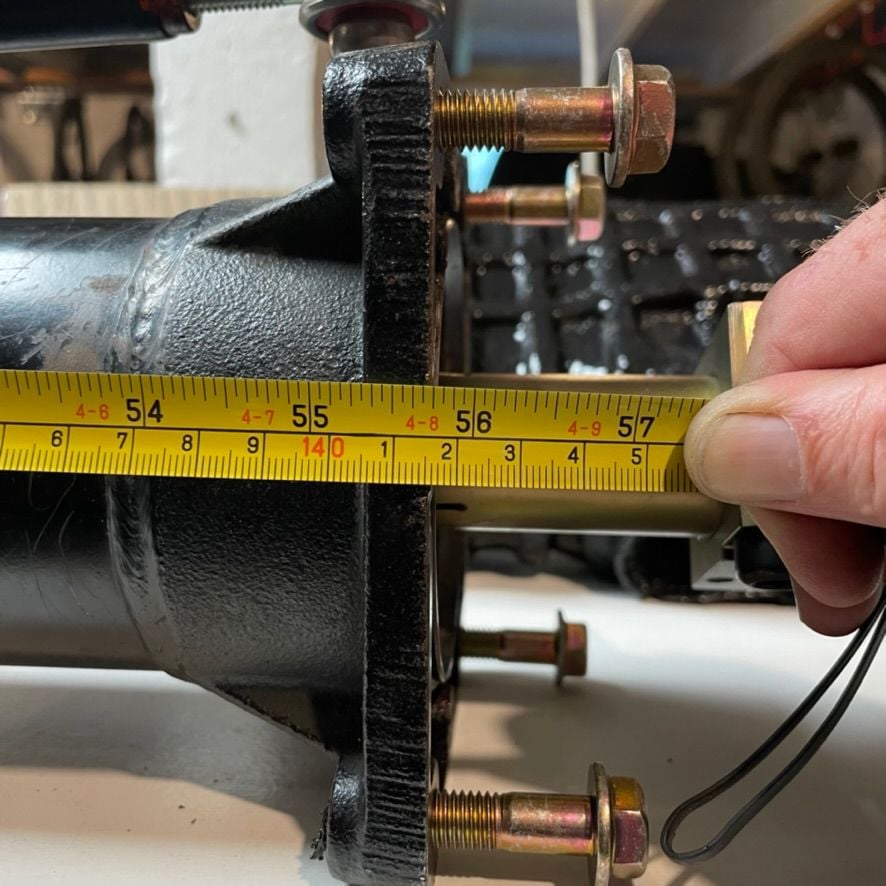
And for those who want me to check to make sure I have the correct length TT, this donor torque tube was from a 1984 model. I measured the length 20 times to make sure I didn't have the early 78/79 shorter TT.
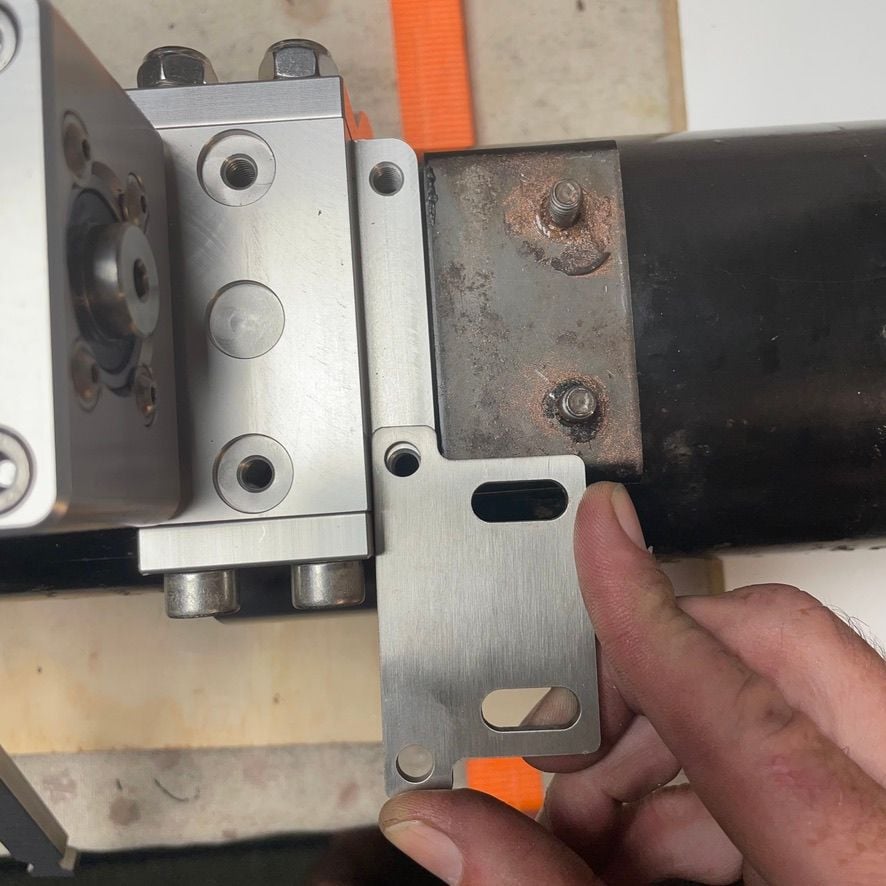
So in the end Hans suggested the simplified version of the clamp assembly because the pivot assemble is a lower profile. He sent one off to me to try and I began the process of dropping the trans and TT to remove the shifter.
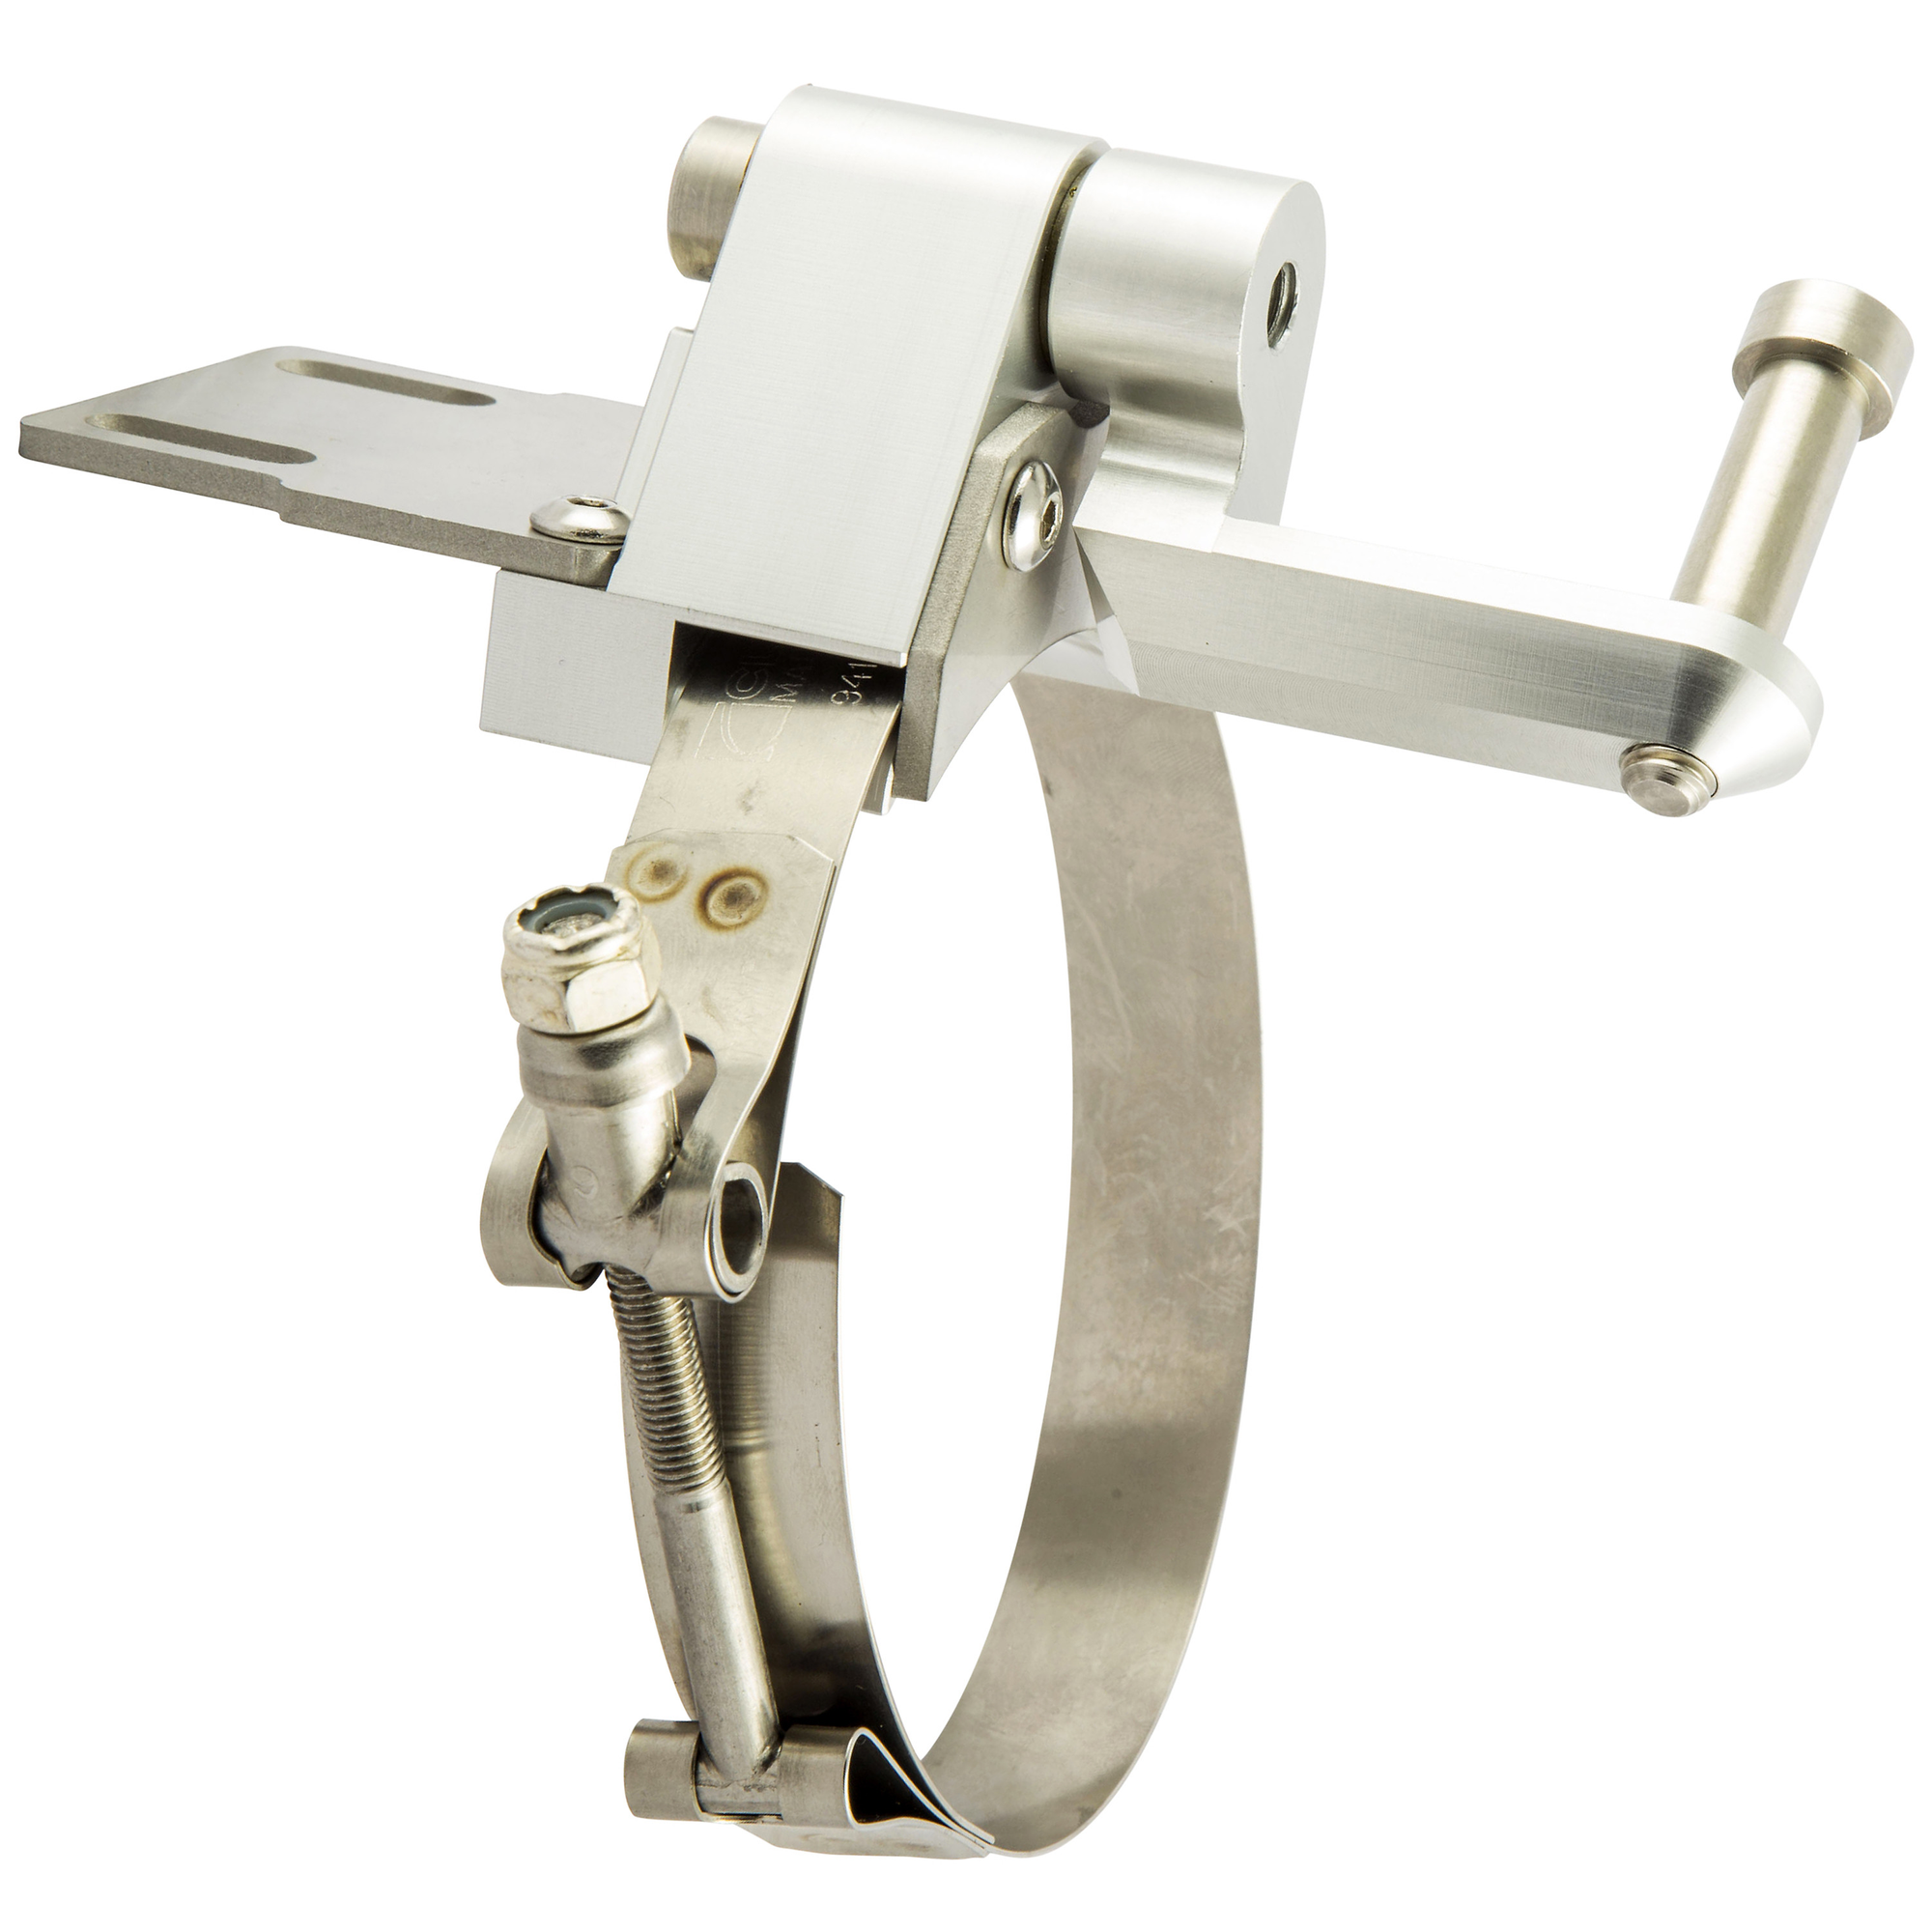
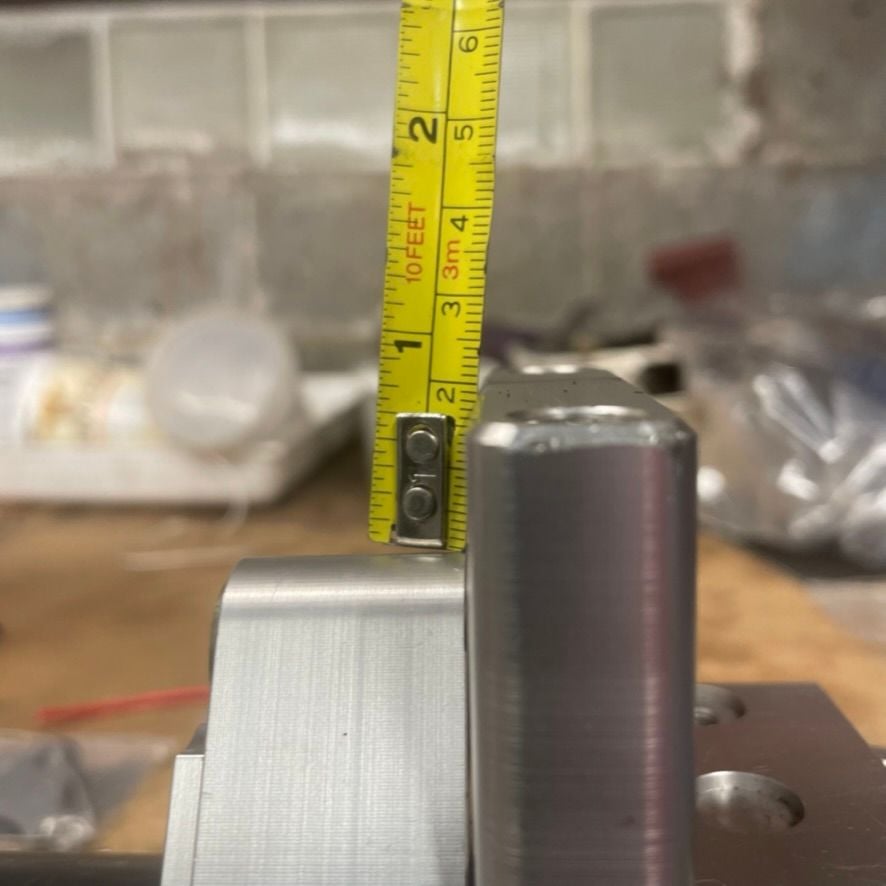
Here you can see the differences between the fully adjustable pivot and the simplified pivot. It's about 18mm shorter. I thought about taking the spacers out of the bearing pivot assembly but I was worried it would not give me enough clearance. So I decided to install the simplified clamp.
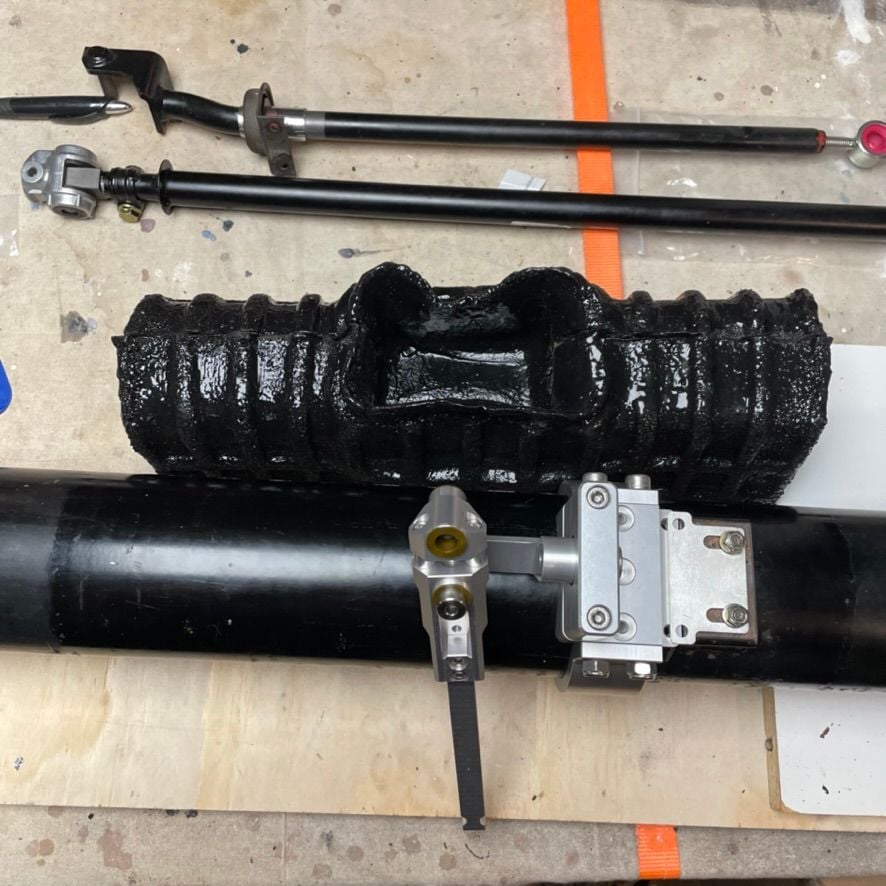
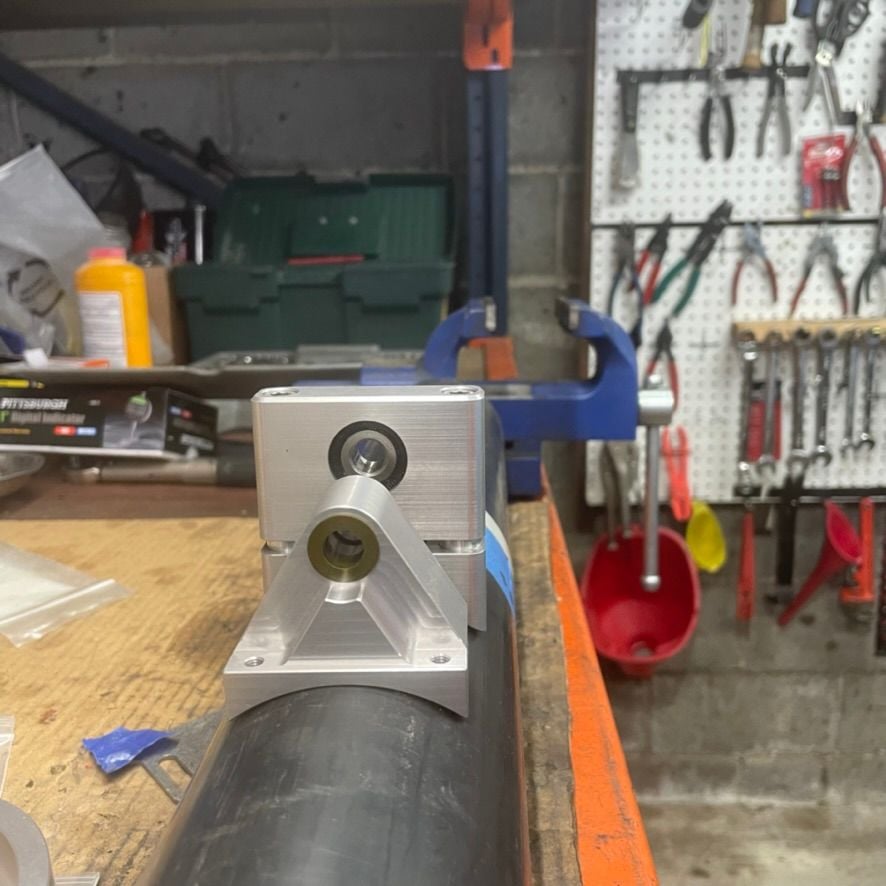
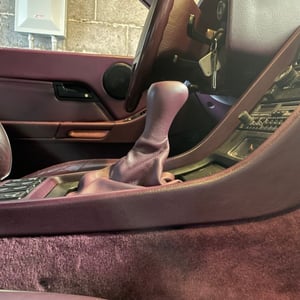
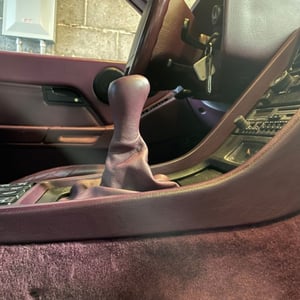
Here you can see the final installation with the tranny and TT all bolted in. The shifting is still perfect with noticeable difference in shifting through gates. So hopefully this issue is resolved.
All back together and working properly
Special shout out to Hans makes some fantastic products and has always been super supportive in helping me work out the complexities with my particular snowflake.
Last edited by Michael Benno; 10-02-2022 at 09:13 PM.
Lots or work last night and today. I had the flywheel refinished and then had the clutch assembly balanced to help mitigate any opportunity for vibrations. Here are some images on the clutch balancing and a little video
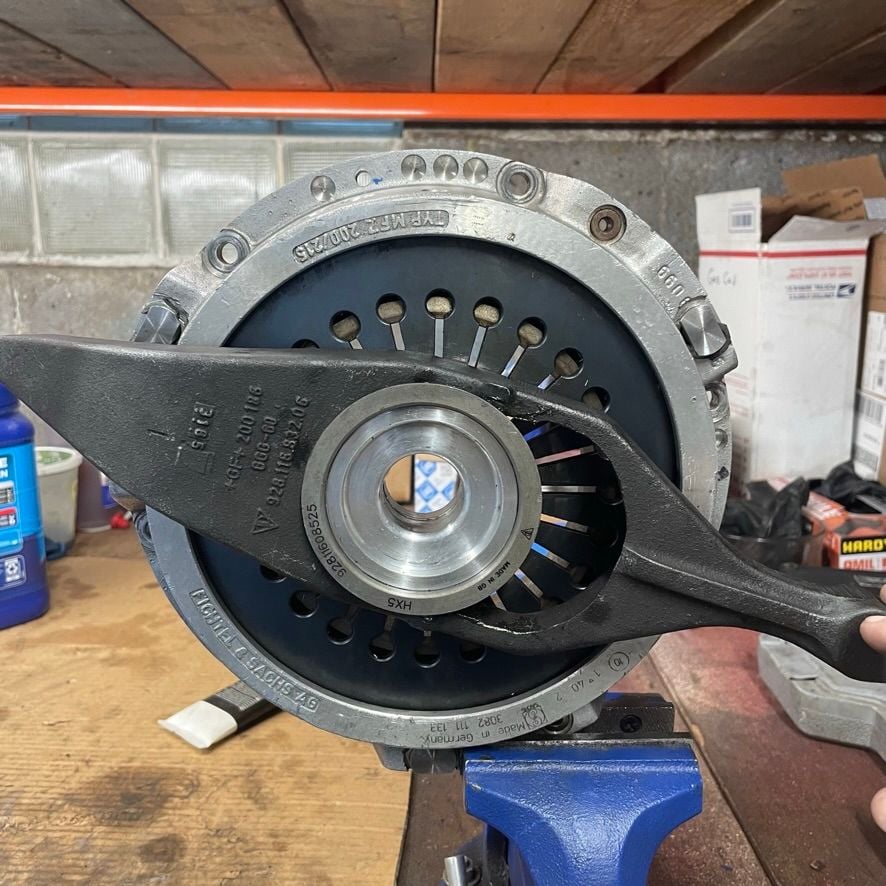
I had to re-assemble the throwout bearing and fortunately the machinist let me use his hydraulic press. Thanks for @Tom M for helping provide with some guidance on how to do it.
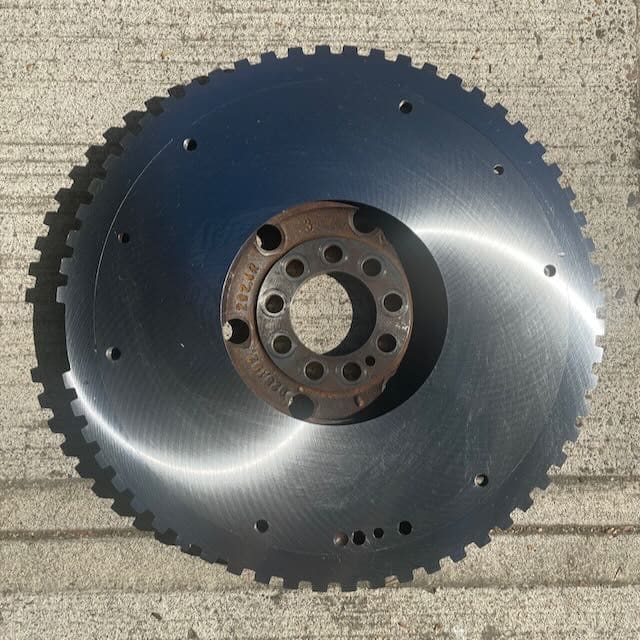
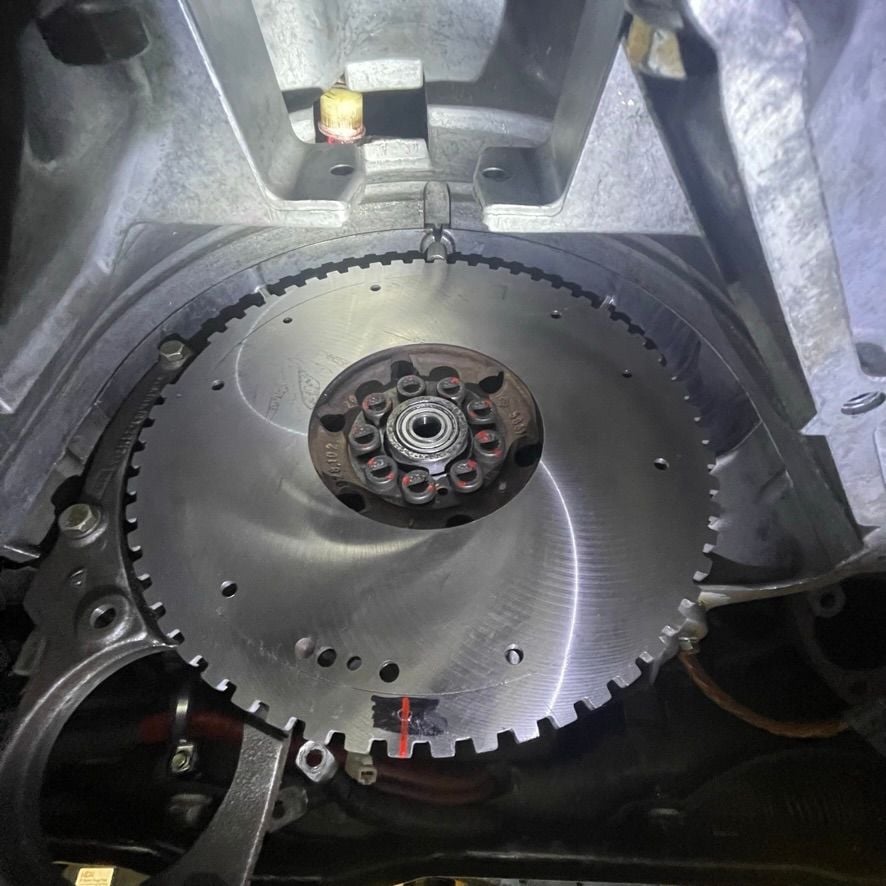
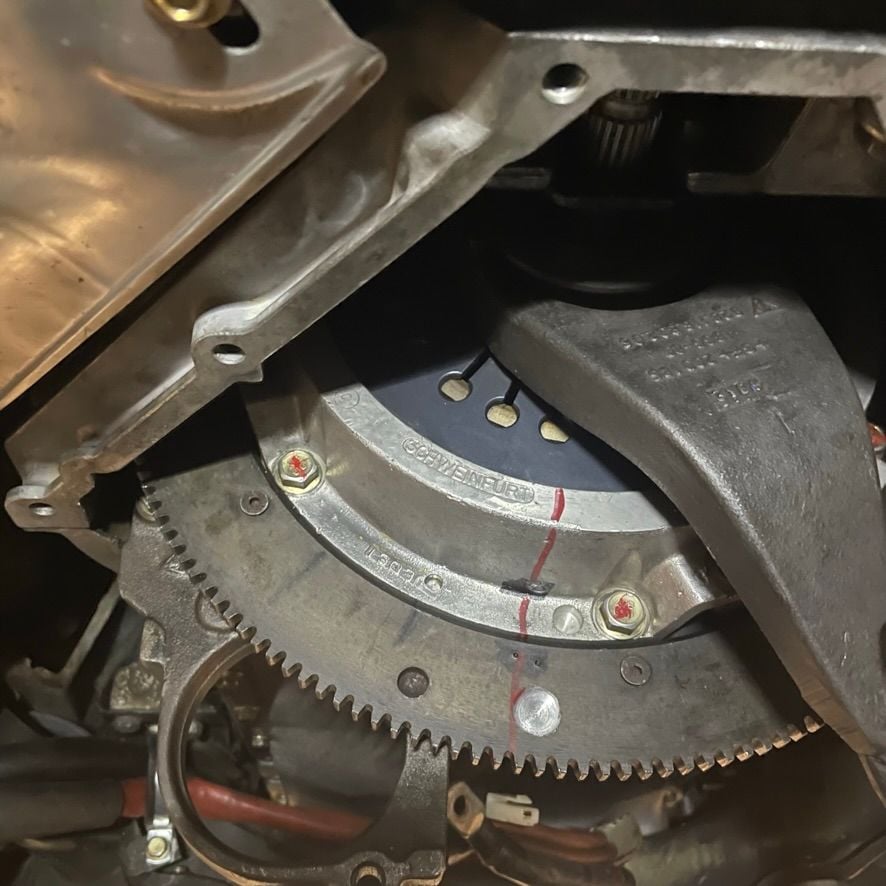
Flywheel installed, torqued (twice) and cleaned. You will notice the marking on the bottom that is the balance marks for re-assembly to ensure all the parts are put back in the same orientation.
Here you can see the clutch assembly in the car with the dowel pins pressed into the flywheel to ensure proper alignment. It was something I tipple checked that all three dowel pins were properly aligned.
I checked that the clutch would properly release once I had it all installed. I used a ratchet strap to simulate the slave pushing on the clutch for and then gave the central shaft a spin. Here is a video of the test so you can see how I did it
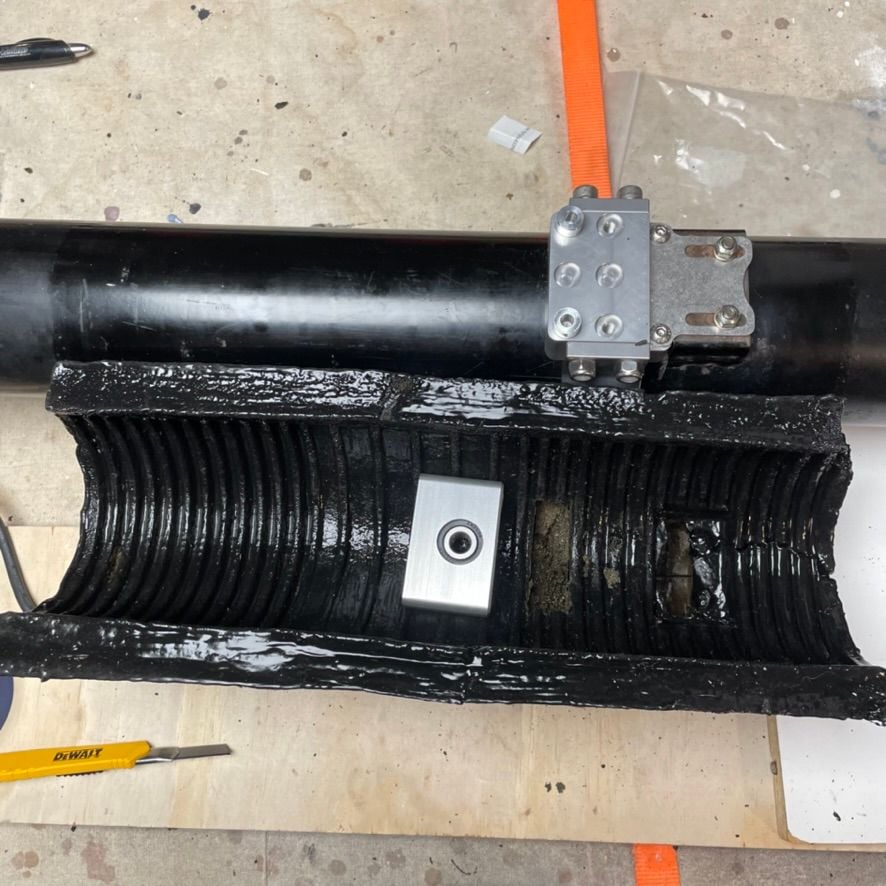
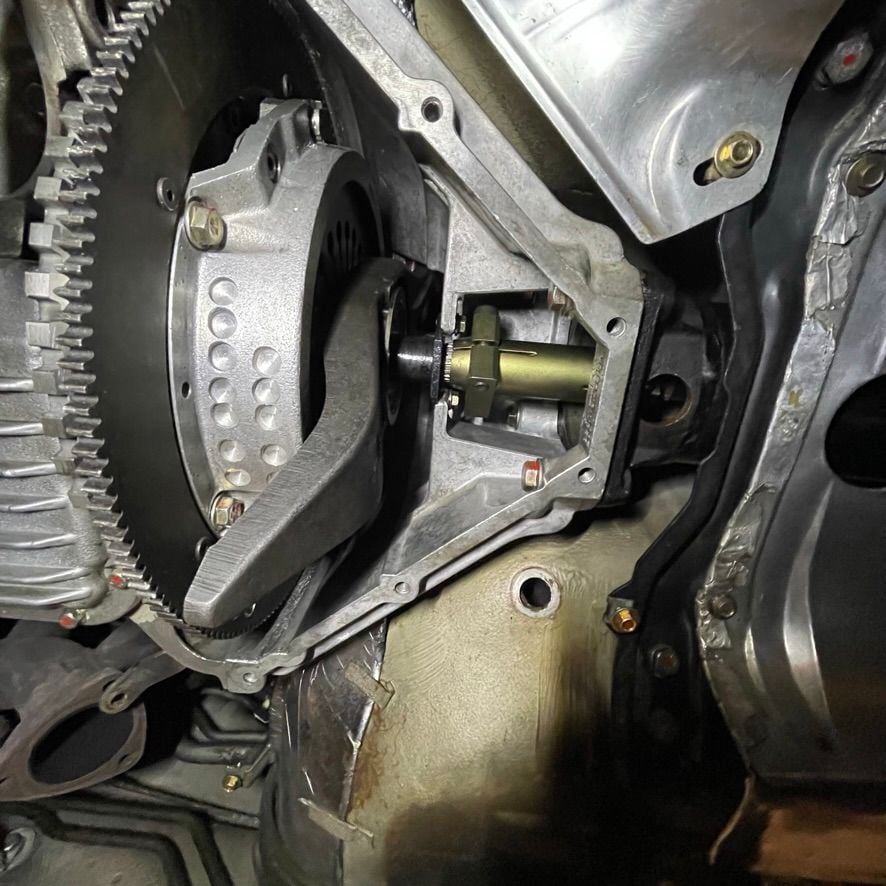
After the test all that was left was to clamp it to the driveshaft and button everything up.
It was getting pretty late but I was able to test the gears in the air and drop it down and go for a test drive. Special thanks to @Constantine for the guidance on clutch brake in procedures and this handy video.
So I kept the dive short, light action on the clutch and revs under 4k. The clutch seemed to preform normally, which is a very good sign. The jury is out on whether I have resolved the vibration issue. More driving will tell.
Well, I would say I have all the of the issues resolved. The clutch is working properly again (balanced and Flywheel machining), The stater properly engages (new intermediate plate). Revers lights are working thanks to some rewiring. And the excessive blowby has been fixed by removal of the crankcase vacuum pump and returning the breather system back to mostly stock.
The car is running great, driving awesome, and I cant wait for the break-in period of the clutch to pass so I can really open the revs up. The lower gear ratios on the GTS trans are so much better than that of the 87/88 5-speeds. Makes the car so much quicker. The car is more or less 100% dialed. The dual disk clutch was a huge pain in the *** and I don't think I would redo that decision. Those intermediate plates suck even when you understand them (which takes some time).
Anyway, thanks everyone for helping me along the way. It's good to have the car I want and now I get to enjoy it.

 09-29-2022, 07:46 PM