When you click on links to various merchants on this site and make a purchase, this can result in this site earning a commission. Affiliate programs and affiliations include, but are not limited to, the eBay Partner Network.
Mirror button came off the windshield during the drive today. I forgot that on the 81, I actually sanded the glass and the mirror button so the glue would have something to grab onto. Tried again and we'll see if it holds tomorrow. Of not, night try a different adhesive.
Got all the interior lights working properly and updated to LEDs Rear cargo and rear roof
Sanded the windshield right where the button attached and the back of the button itself, reglued and now everything is mounted and it's holding.
Dropped the wheels and tires of at the refinisher. Should get them back in 7-10 days.
Seats are coming along at the dyer as well. Have had the prep solution applied which makes them more recoritve to the color and disassembled so he can get the balc into all the mating areas. Backs have been masked off and the vinyl to recover the hardbacks in exterior body color has been ordered.
Was always worried about dropping something on the exposed mirange woofers and damaging them. Found some string metal grilles on Amazon that ha free right dimensions and installed them today. While doing that redid the speaker connector as 2 of the existing crimped on connectors came off in my hand when I was unplugging them.
Put some weatherstripping between the grill mount ring and speaker so there wouldn't be any vibration or buzzing from bass vibrations
All 4 done and ready to install
Done
Then reversed my design idea for the secondary fuse box and magnetically mounted it underneath the parcel shelf. Magnetically so I can easily get it down to check or replace fuses. We'll see if the magnets are storing enough and it stays up. If not I'll switch it to click/lock Velcro.
In a related thread... GREAT NEWS!! The 928 BuckeyeLandsharks showed up in force last weekend and assisted with the engine reinstall on the 81 Euro. We had it back in the car with all the major items hooked up in one day (including the headers - Ugh!!). Mike and I took 1/2 of the next day to finish up final connections, fuel lines, alt, PS pump, belts, fluids, etc... Aaaaaaaaaaand... SHE STARTED RIGHT UP!!
No pinging, smacking, or mashing of pistons with valves or any other drama! WHEW!!! I guess we dodged the "Interference Engine" BULLET! The engine runs very well, even with USA 82 Cams & Lifters (instead of the proper Euro cams). Actually, I can't tell the difference as it always ran very strong with the 81 CIS Spider & Cams and 84 Euro 4.7 Bottom End. I'm guessing the Euro final drive of 2.38 or 2.54 (optional I think) may have something to do with that seat of the pants performance as well. So... after a very long, somewhat complicated and taxing repair, I'm back to my original short list of minor repairs including new throttle cable (ALWAYS replace these on 41 year old cars), 4 wheel alignment, sunroof adjustment, rear hatch plastic liner and a stock air filter (throwing out the K&N), etc, and a fresh oil change. What OIL does everyone use...? ROFLMAO!!!! Thanks to everyone for your insights, recommendations, expert experience and assistance! We used your input at every turn!
Did some preliminary wiring on an aftermarket heated seat controller. The 991 sport seats are heated. I'll be installing this in the ashtray or clock area and it will control the seat bottom and backrest heating elements in the new seats.
Nice upgrade! The 997 sport seats wouldn't happen to be heated... are they? If so, I'll be hitting you up on where to get that controller
I don't think the pair in the white car are. These I bought just happened to be so decided to make use of that.
If you look at the yellow box with the contacts under the seats, this picture should show you where the contacts for heating would be. If the contacts are there, then yes - if not, then no.
Wheel refinisher shared some pics with me. I think these are going to look fantastic on the car with the windows matching the paint color and the machined faces bringing out the metallic aspect of the paint. They'll be ceramic coated, tires mounted and balanced, and ready for pickup by Tuesday of next week.
In preparation for the seats getting finished, decided to figure out where and how to install the controller for them and also wanted to install a fast charging dual USB with volt meter like I did in my other car.
Wanted to replace the cheap looking, mirrored Jager AT plate cover. Bought one off eBay but after removing the plate from the car realized it was just a veneer stick over the factory plate. Fixed the lights under the indicator strip and reinstalled.
Decided to make a bracket to mount the heated seat controller in the ashtray. The 2ndnhole is to being the USB feed for the stereo in as well.
Made this bracket that secured in the ashtray and the hole is for the control panel
Mocked up
Going to go like this
Drilled out the old cigarette lighter and installed this dual USB charger with voltage gauge
Used pvc as a spacer so I could clear the ashtray mechanism and tighten down the ring.
Also replaced the leaking LCD clock that didn't keep good time with this analog one from China I found on Amazon . Almost the right size but had to fabricate a plate from Plexiglas to hold it. May have to make a new plate as this one has the clock slightly off center. With the bevel it's less noticeable, but will likely bug me enough where I'll redo it.
Finished seat controller, voltage gauge with charger, and clock
The ashtray stuff hides behind the normal ashtray cover when parked so it looks stock.
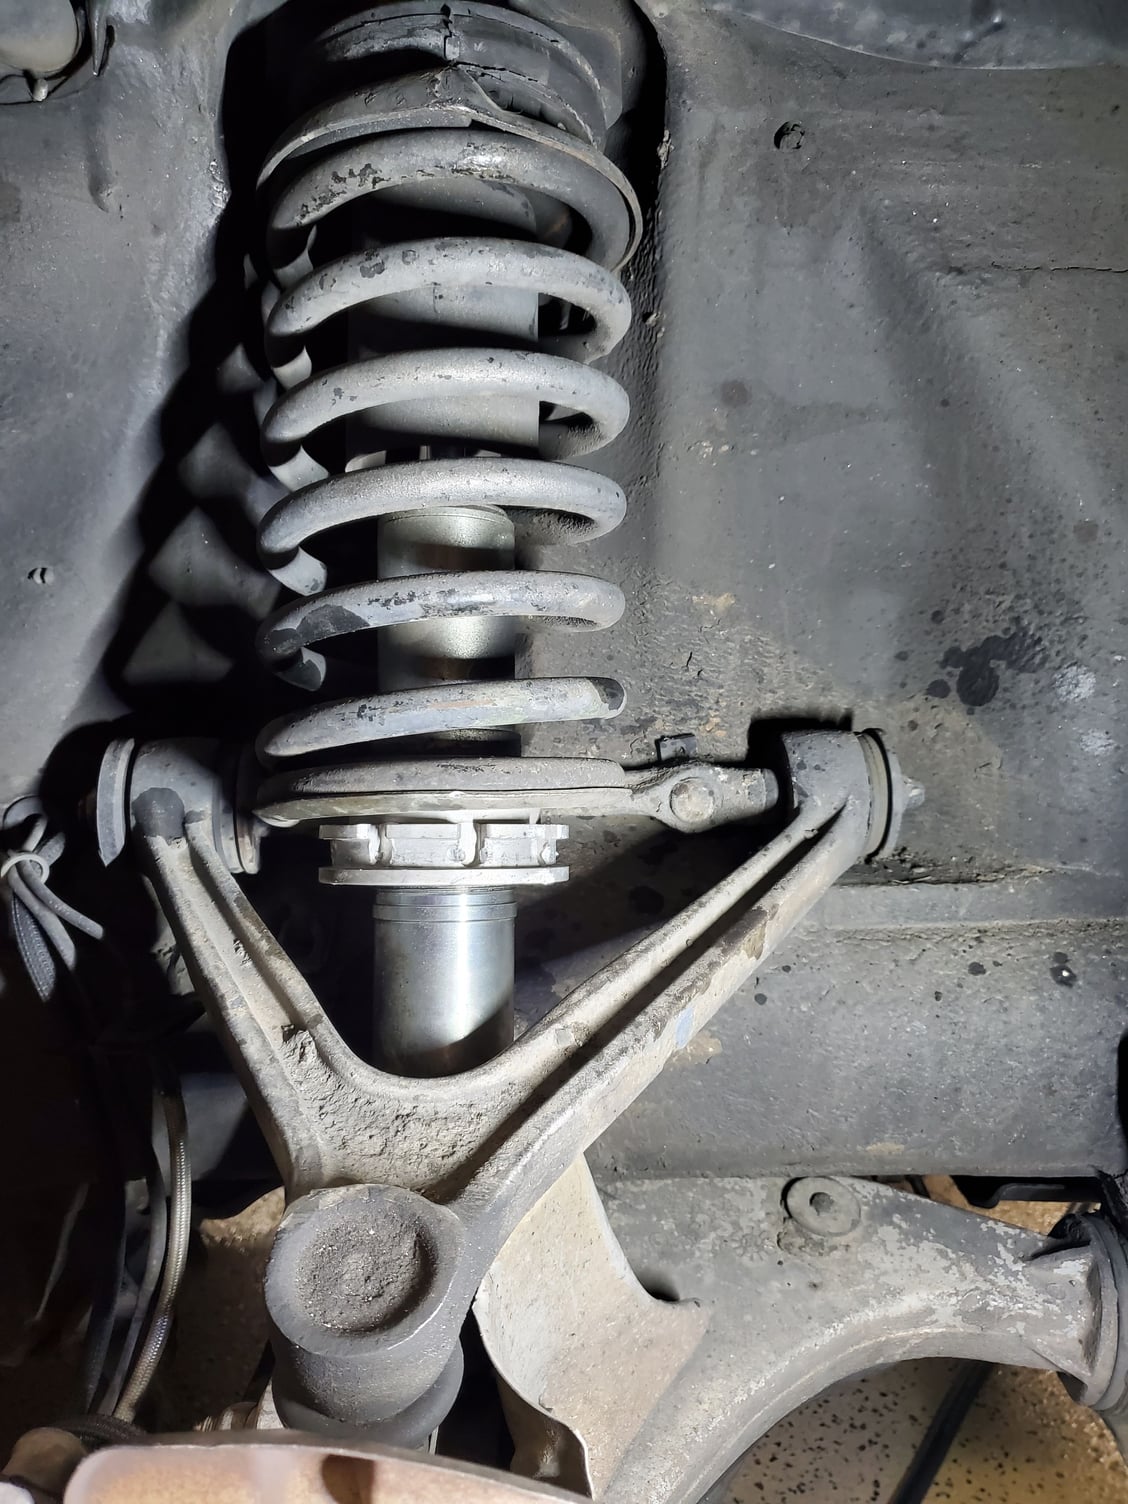
In preparation for the new wheels being ready tomorrow, I lowered the front spring perches today to get rid of the 4x4 look that was necessary for front clearance due to wheel offsets - rear ride height looked looked good.
Lubed the collars and threads, let it soak and tried to turn them with the spanner wrench. They laughed at me.
Got out the spring compressors to remove the spring tension. Tried the spanner again. More laughing.
Got out my punch and 5 lb sledge and they started moving. Then had a genius idea since I was going to be hammering in the collar grooves anyway - air chisel.
Put on the pointy bit so it would stays engaged in the rounded collar indentations and pulled the trigger. Collars spin around with hardly any effort. Set them evenly and left a few threads at the bottom of each for adjustments after the suspension resettles and I measure the clearance and the rear to front rake.
Previous RH wheels will get dropped at the wheel refinisher to have the curb marks fixed and barrels repolished, mismatched brand tires removed, then offered up for sale to a 911 guy since that's what the offsets should fit properly.
Now being able to see the front widths and offsets, it's obvious why the fronts were so far out. 8.5x18 et48 so that's a 15mm difference compared to the 8x18 et 57 (6mm from the extra 1/2 the 1/2" width difference and 9mm from the offset difference. Car should drive better now too.
Question regarding your spring compressor.
I want to buy one but have no idea what kind to look for.
Any model would be good or I need a specific one?
Any link for one like yours?
Question regarding your spring compressor.
I want to buy one but have no idea what kind to look for.
Any model would be good or I need a specific one?
Any link for one like yours?
Thanks and keep up the good work!
I don't think there's much special about them as long as they have safety pins to lock the hooks onto the coils. I've used this pair on 914 shocks, 997 shocks, and 928 shocks and they've done the job well for me. May be Harbor Freight ones, but don't remember since I bought them many years ago

 01-11-2022, 04:33 PM