When you click on links to various merchants on this site and make a purchase, this can result in this site earning a commission. Affiliate programs and affiliations include, but are not limited to, the eBay Partner Network.
I stumbled across this today. Is this the go for when I put the fuel fittings back together. Stupid question thread or face of the connection. Not sure of the correct terminology. https://rennlist.com/forums/928-foru...uel-lines.html
I tested the TPS today. Seemed to work as advertised. With the throttle position closed and the micro switch engaged I got around 16 ohms. When disengaged open circuit. Switching the connections it showed low resistance around 3/4 of the throttle opening towards WOT. I found the below thread very useful. It seemed there is only a micro switch at in the Idle position not at the WOT position. There it just seemed to be like a lock or indent sort of selection. Is this normal. Sorry next explained well. https://rennlist.com/forums/928-foru...questions.html
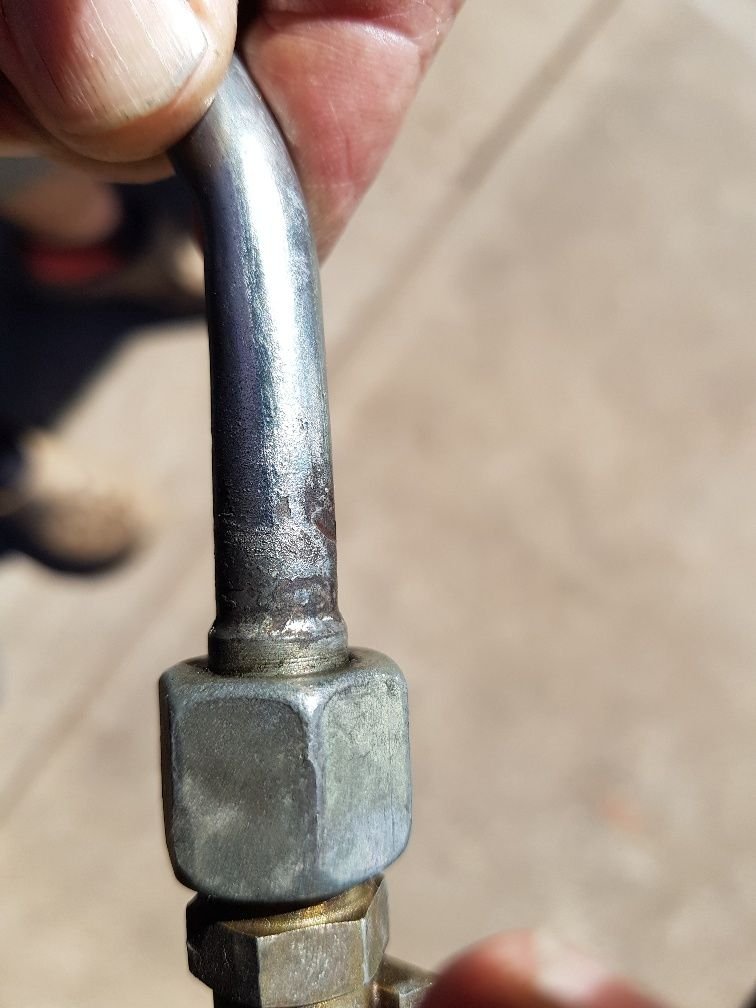
I found a nick or rub mark in the rear fuel pipe that sits between the two fuel regulators. I guess I need a new one. Let me know what you think. From the side it doesn't look as deep.
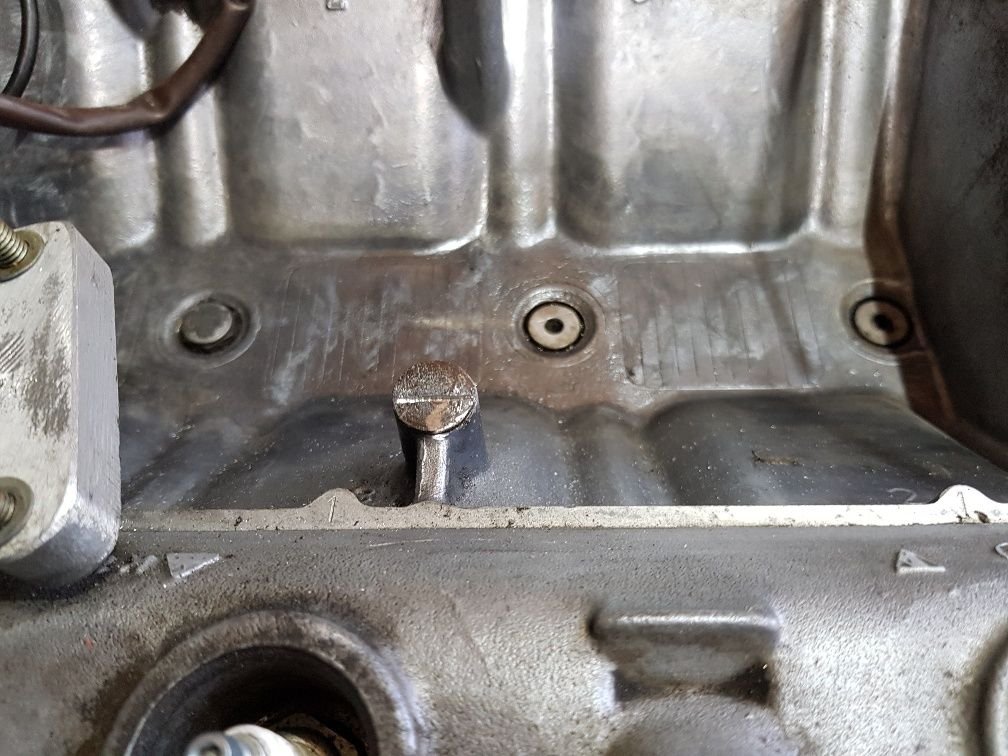
Just for other peoples reference I used a multi tool tool to cut a slot in the broken inlet bonded mounts. Came out easily.
As mentioned in a previous post I made a bolt dedicated to cleaning out the water bridge threads. It worked very well. The one that gave me the most troubles needed a few run through s. I went until resistance then backed off and cleaned out the grove. Tape for thread depth. Also cut with a multi tool.
I am currently cleaning up a bunch of stuff ready for plating. Mainly what is immediately visible.
I have also been thinking about getting a Mityvac. Seems like a good tool for vac testing things like the top end, maybe regulators and even brake bleeding.
One process I dont really feel up to is building a vacuum test rig for the throttle body, inlet and maf like some have. I know it will come back to bite me. Now that I have cleaned a lot of gunk away the thing will probably leak.
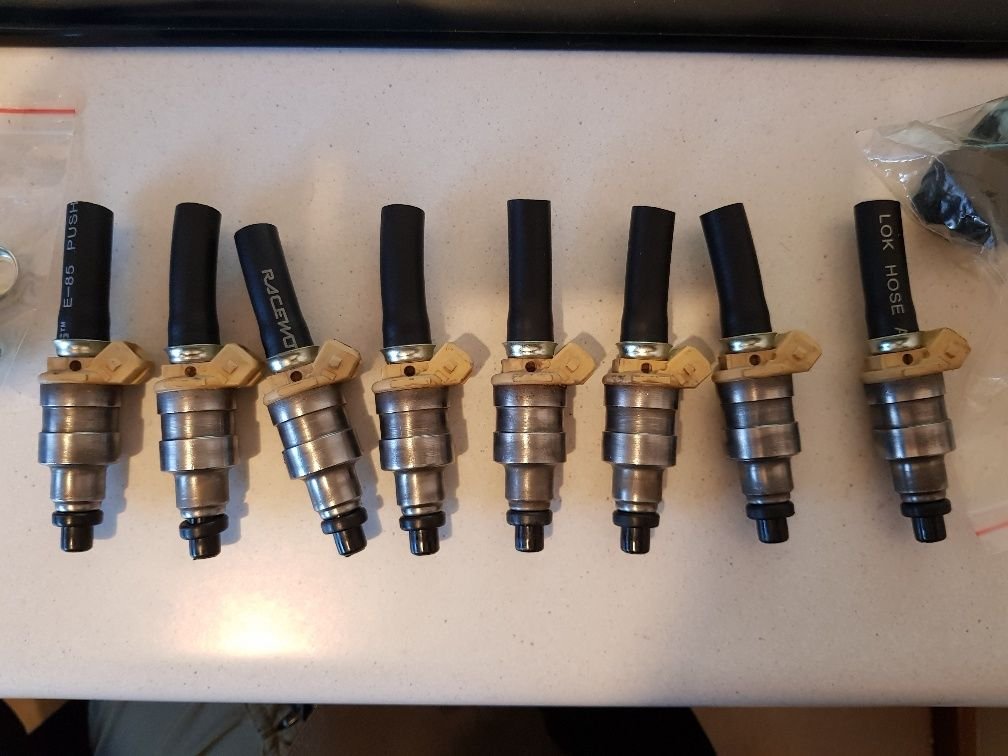
A long time a go I bought a injector tester thinking I would do the injectors myself. Although I have decided to have them professionally done I had to try it out. They all work but the patterns are messy and drippy. Best left to the experts.
Something I am a bit nervy about is the fuel pressure damper. It had a bit of crud built up in it. I think I have gone ultrasonic crazy so I stuck it in there. I intend to have it re-plated as well. I am sort of expecting these processes to kill it but I dont know how tough they are. I have decided to not touch the fuel regulators. AUS car has two regulators at the back and one damper at the front. I wonder if I vacuum test the damper afterwards and it holds would it be ok?
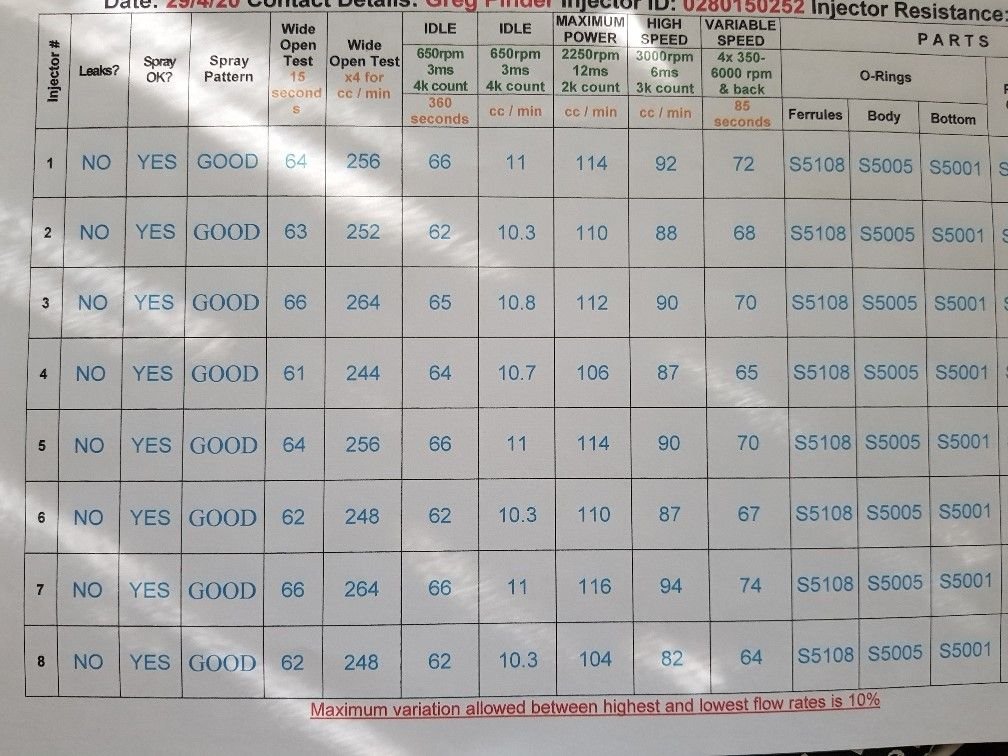
I got my injectors back today. Mixed results on the report. Up to 14% variation in one of the areas. Think I will stick with them for now they do work and dont leak. What strategy if any should I use for which cylinders to balance the good and bad injectors out.
Getting to the stage where I need some bits to start re-assemble. Just tinkering around now.
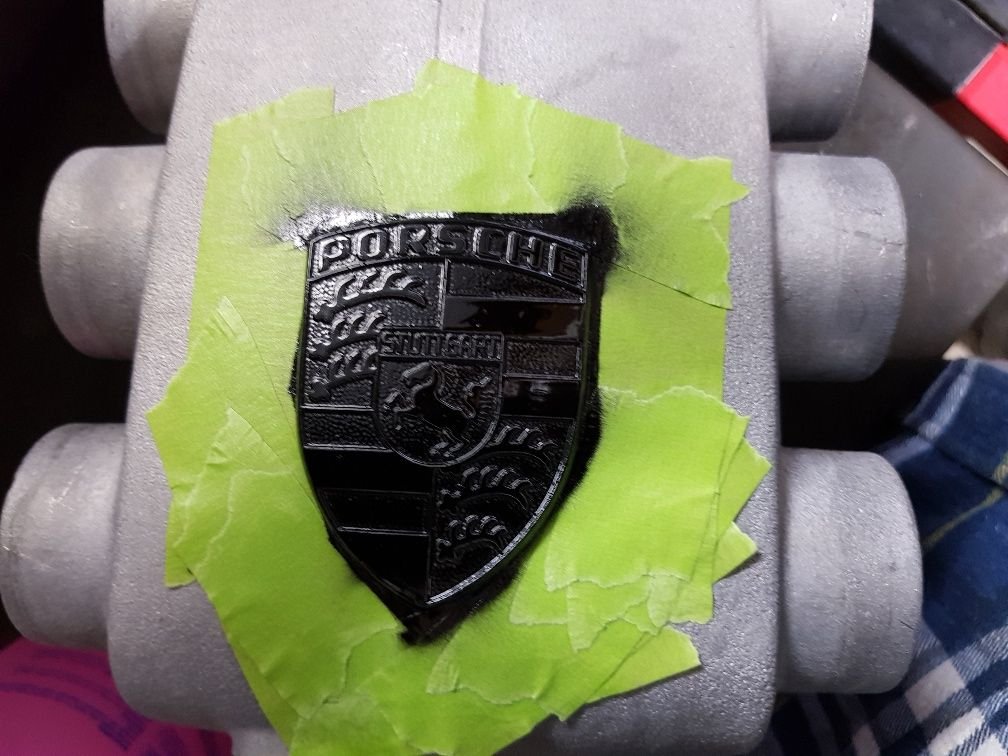
Today I painted my intake badge. Just painted the whole thing. Let it touch dry and dampened a rag in thinners and rubbed it over the top using a rubber hockey puck. Seemed to work ok.
Also unboxed my radiator finally. I also bought a Mityvac and tested it on my damper.
I am also trying to collect all the Torque specs. There have been a couple of good posts but not specifically the 16V. More S4. I will find what I can and post what I think for clarification hopefully. I would like to ask why do a lot of specs have a + option to it. Like 16+2 NM.
Greg - that plenum badge looks great - that's how they came from the factory. When I did my intake refresh a few years ago on my 78, my badge was flaking badly, so I just removed all of the black paint, but it bugs me because it isn't factory correct. Can you describe the process that you used in a bit more detail?
Thanks!
Yeah sure. I taped it off as the first picture. Then actually put a larger cover over the whole thing just exposing the badge. I taped along the bottom edge of the badge as it mates the top of the inlet. Then simply sprayed two coats of black paint over the whole badge. Only 15 min between coats. Came back later and used a hockey puck ( first thing at hand but rubber for some give) and lightly soaked the rag with thinners. You dont want it too wet so it drips or runs. Then keeping it flat ran it gently across the top of the badge. I only did one or two light passes and moved to a clean bit of rag and reapeated until happy.. I used open weave for no reason but being handy. But worked well. I just put the rag and puck across the open spout with thinners and upended it quickly. You will be able to do it on the car easily. Just protect against over spray. This will work well on wheel center caps as well.
I have my intake on the bench at the moment for a bit of welding. I cleaned up inside the runners on the side with a die grinder to clean off the casting marks and will finish off with a Dremel with a sanding wheel. The inside edge in particular needs smoothing off. Might be a good idea with yours too while you have the chance. Air does not like sharp corners and everything helps.
At the part I have been dreading. Getting this gasket off. Its stuck hard. Whats the best tool I dont really have a dedicated gasket scraper but may get one. Otherwise I only have a razor blade insert styles or plastic putty filler scrapers that seem a little flimsy.
be very careful - you do not want to score that surface. I use a razor, and take my time. attack material at a low angle, and take off little bits at a time.
Hi Greg,
I remember using a spray on gasket remover chemical that worked pretty well. I think it was by Permatex. Not sure what would be available by you.
Good luck,
Dave
Thanks yes. I haven't been super confident yet. You can see a couple of attempts have already marred the surface a bit. The photo makes it worse but I moved on to other tasks as I work it out. Looking into some form of gasket stripper.