When you click on links to various merchants on this site and make a purchase, this can result in this site earning a commission. Affiliate programs and affiliations include, but are not limited to, the eBay Partner Network.
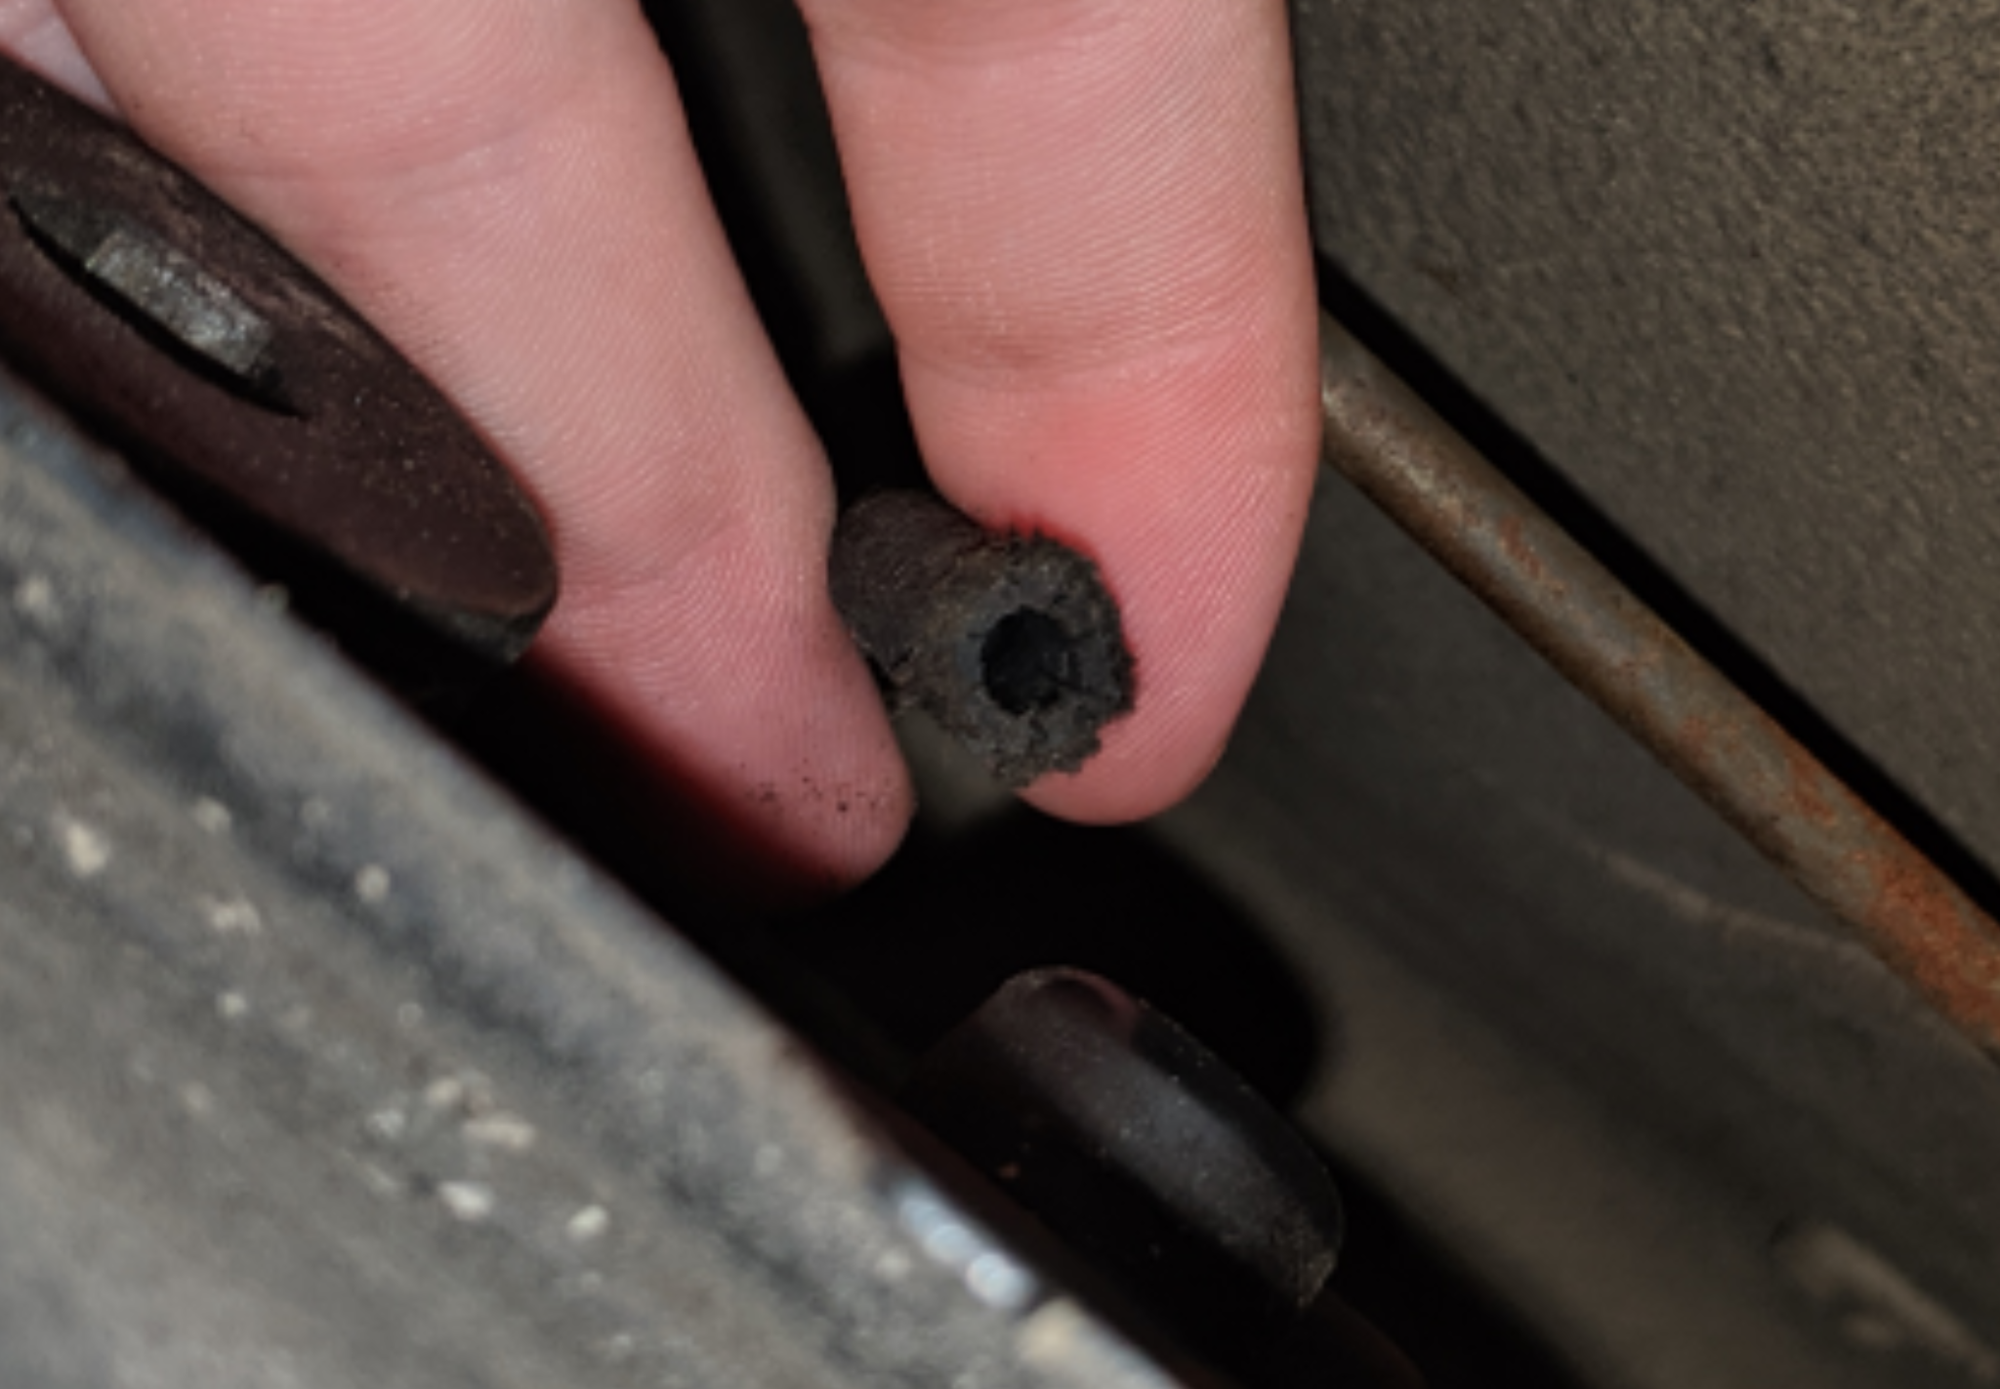
I checked the line where it fits on the modulator, it crumbled in my hands. I've searched, but I haven't found complete answers to my questions.
The line the goes along the torque tube to the engine, that's made of the small diameter plastic hardline? I can see the line on top of the transmission from the passenger side, but where exactly does the hardline end and the flexible begin exactly?
How am I meant to get my hands in there without dropping the exhaust?
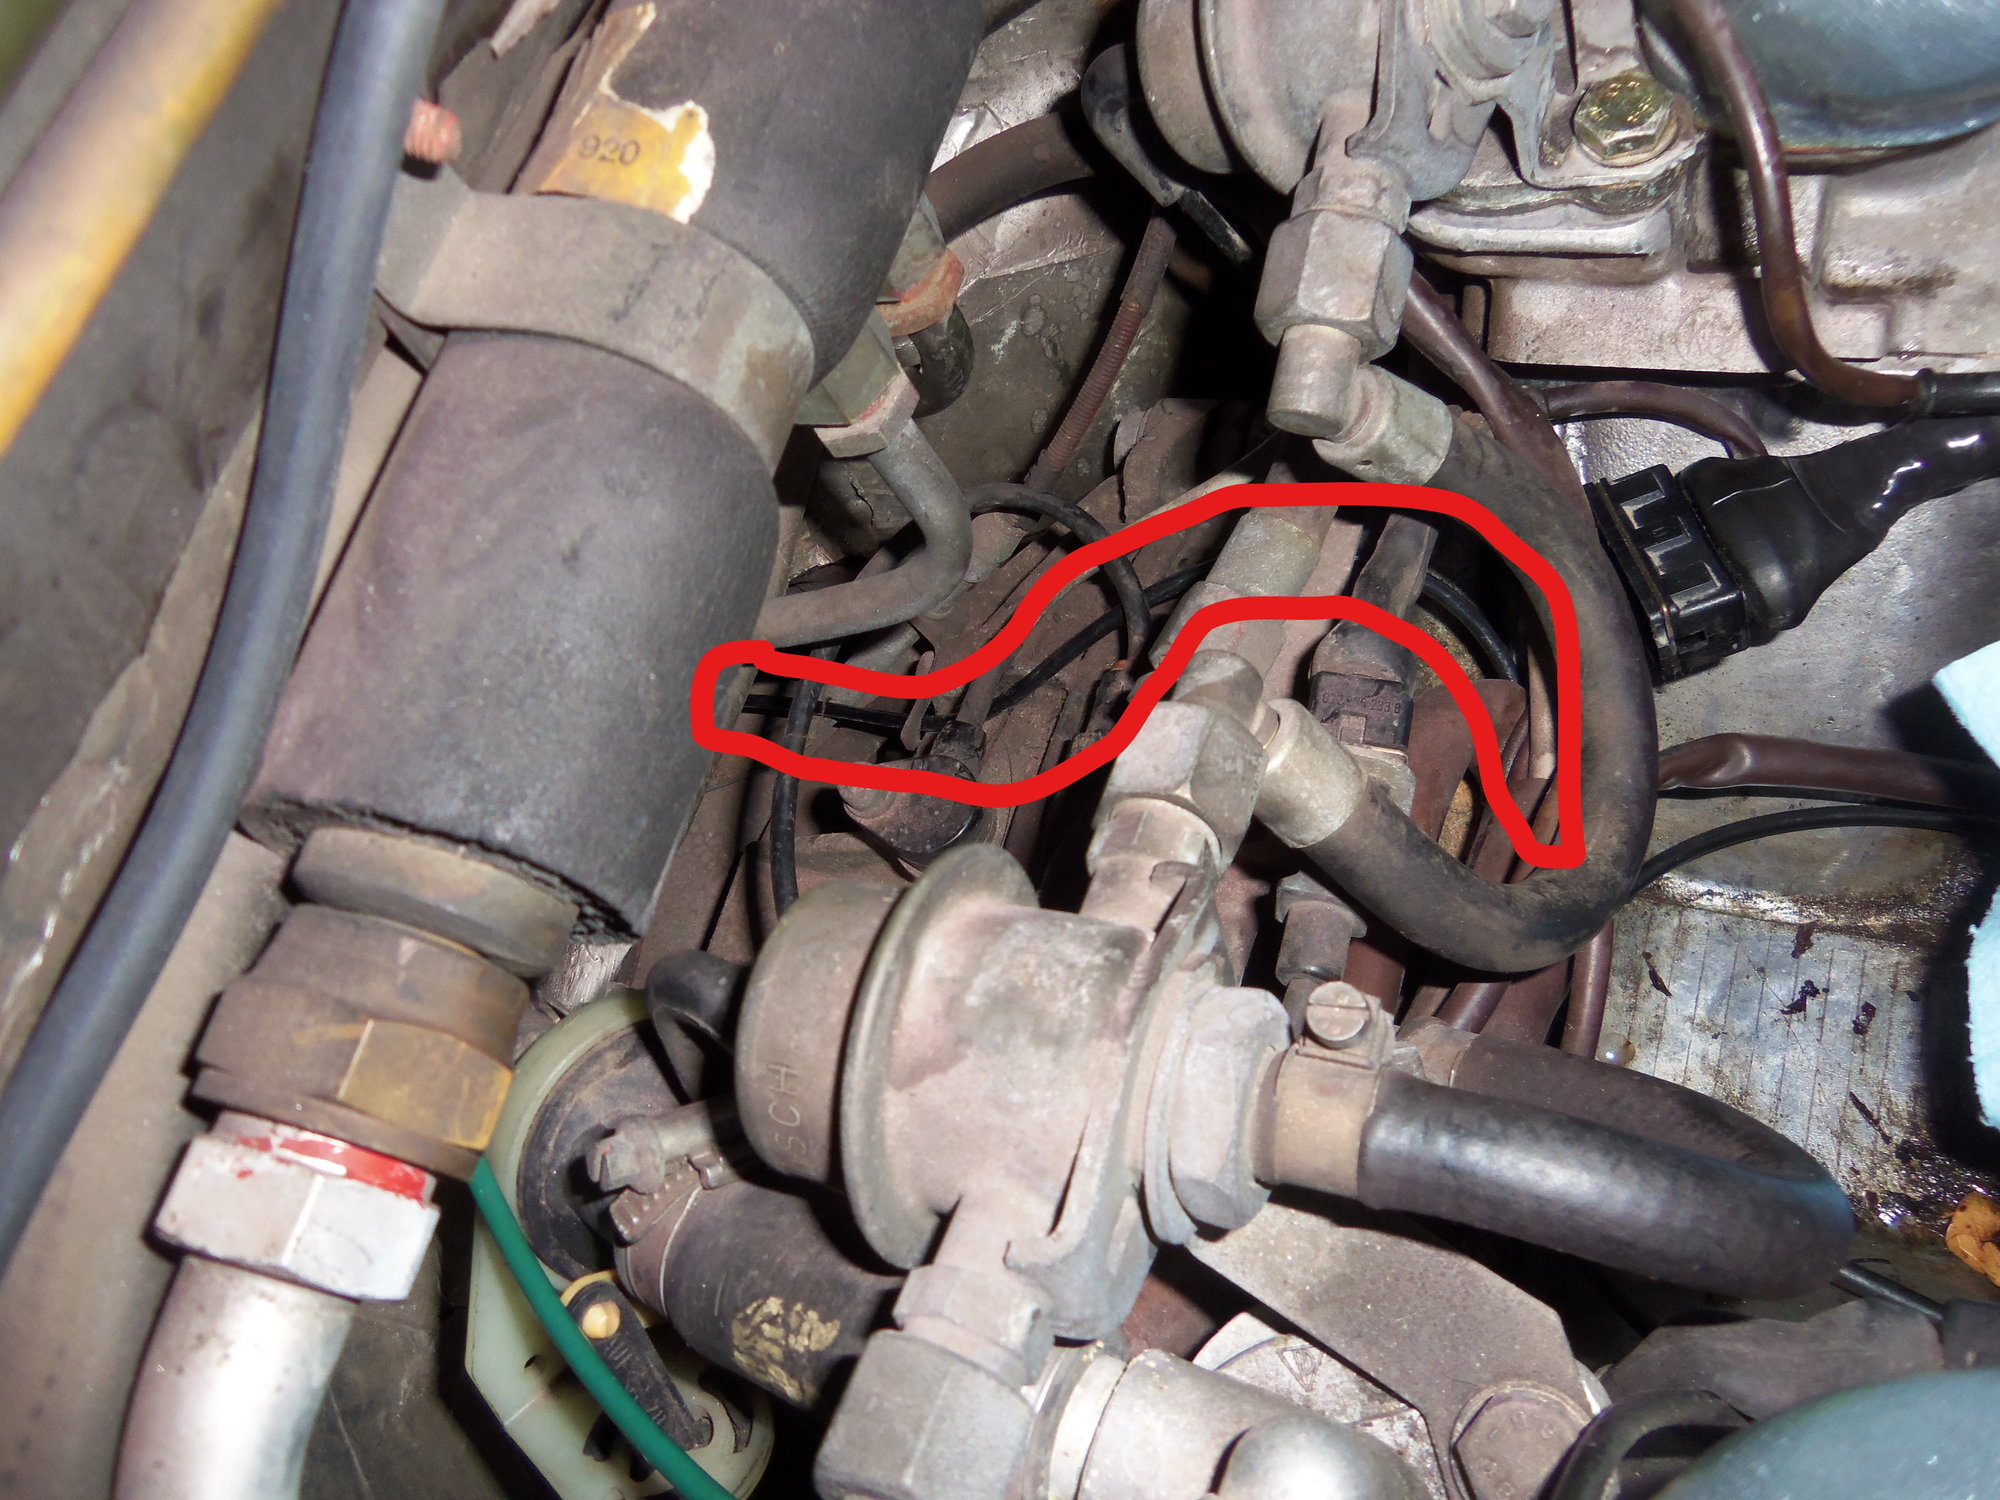
The line atop the torque tube is steel for most of its run. Braided vacuum line goes on each end. Transmission end vacuum line goes to the modulator, engine end is short and connects to a plastic line that goes to the 7-way splitter in the engine V.
Please refer to the photos starting at post #130 in my torque tube thread below:
Also, a few years ago, I replaced both sections of vacuum line and the plastic line with everything in place on my Red Witch. There was much cursing and bending of hands, but I got it. Long reach needle nosed pliers were an invaluable help.
Here are a few photos of that misadventure:
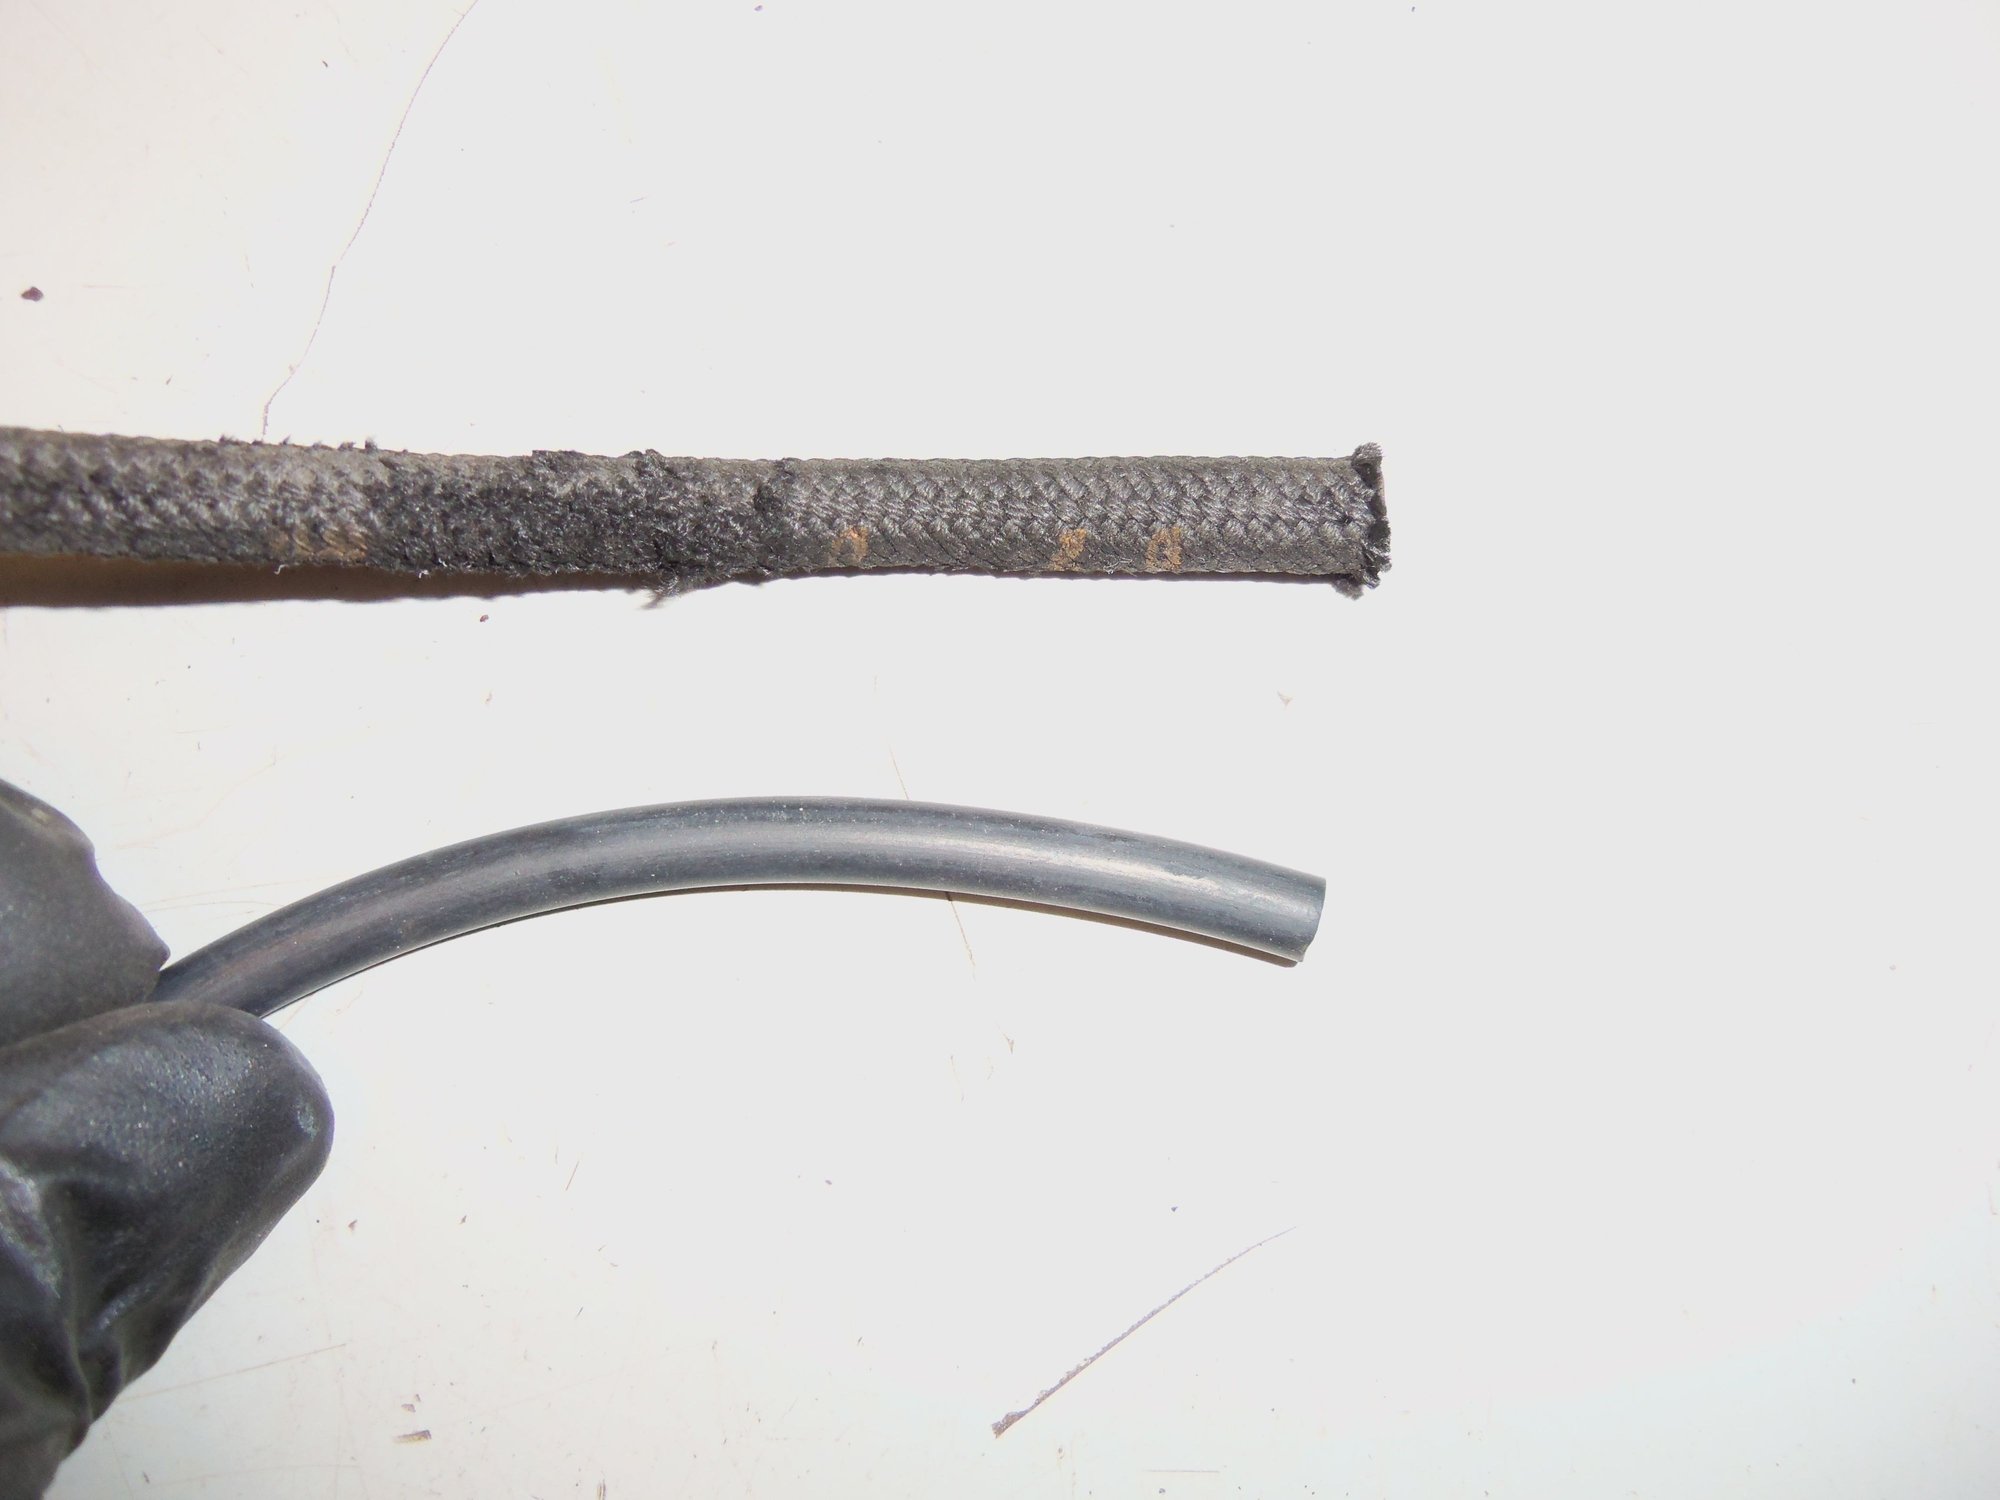
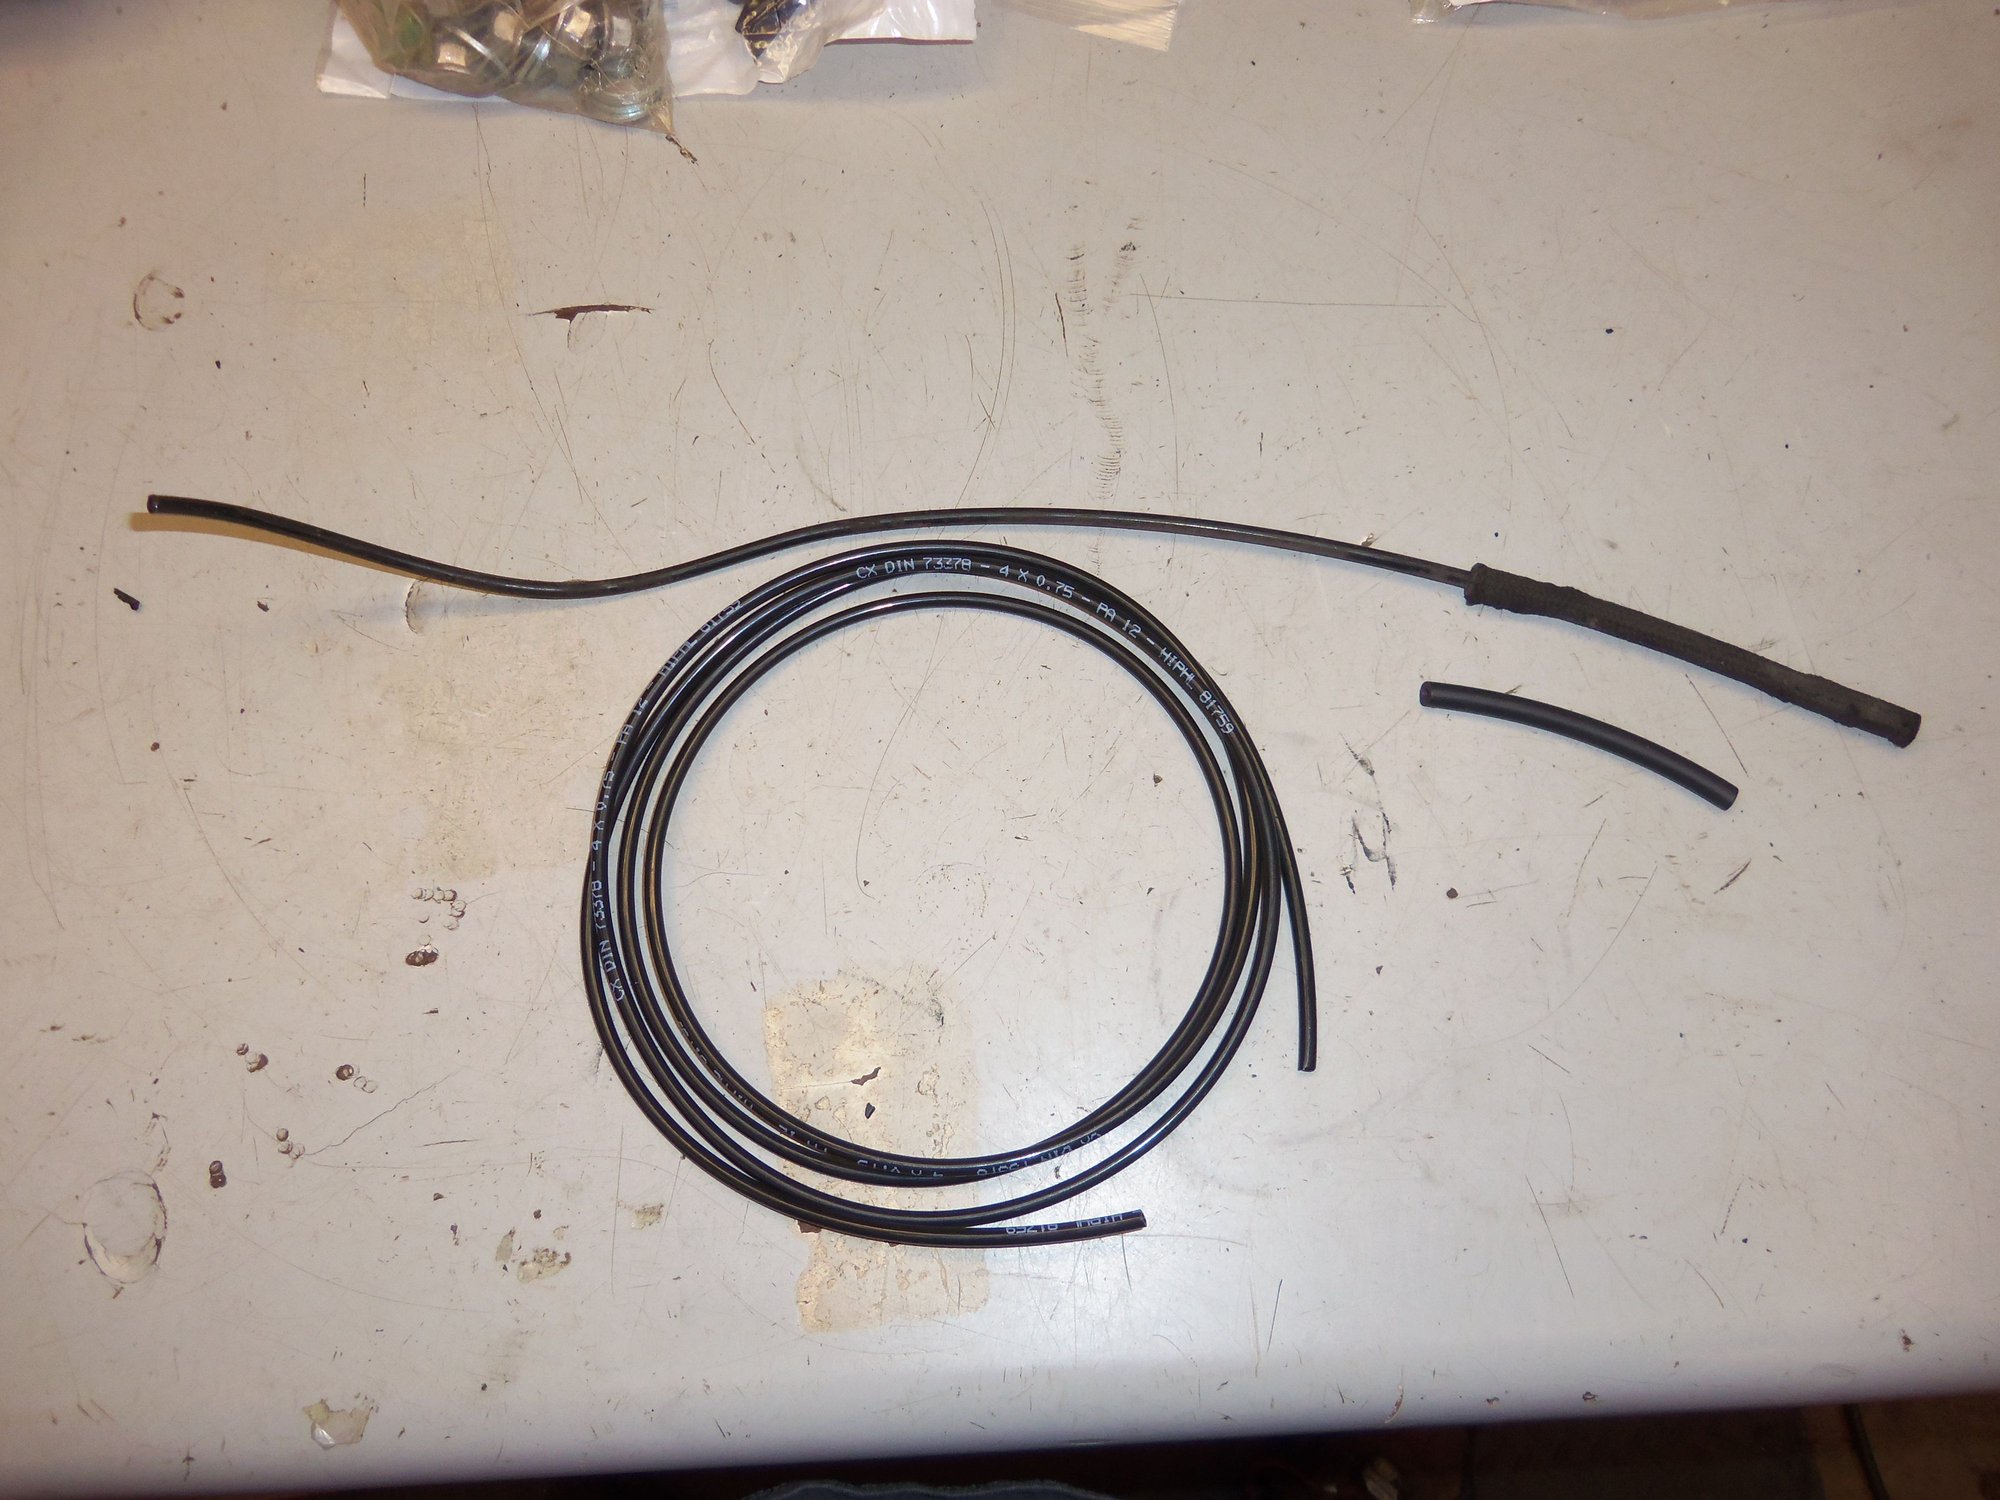
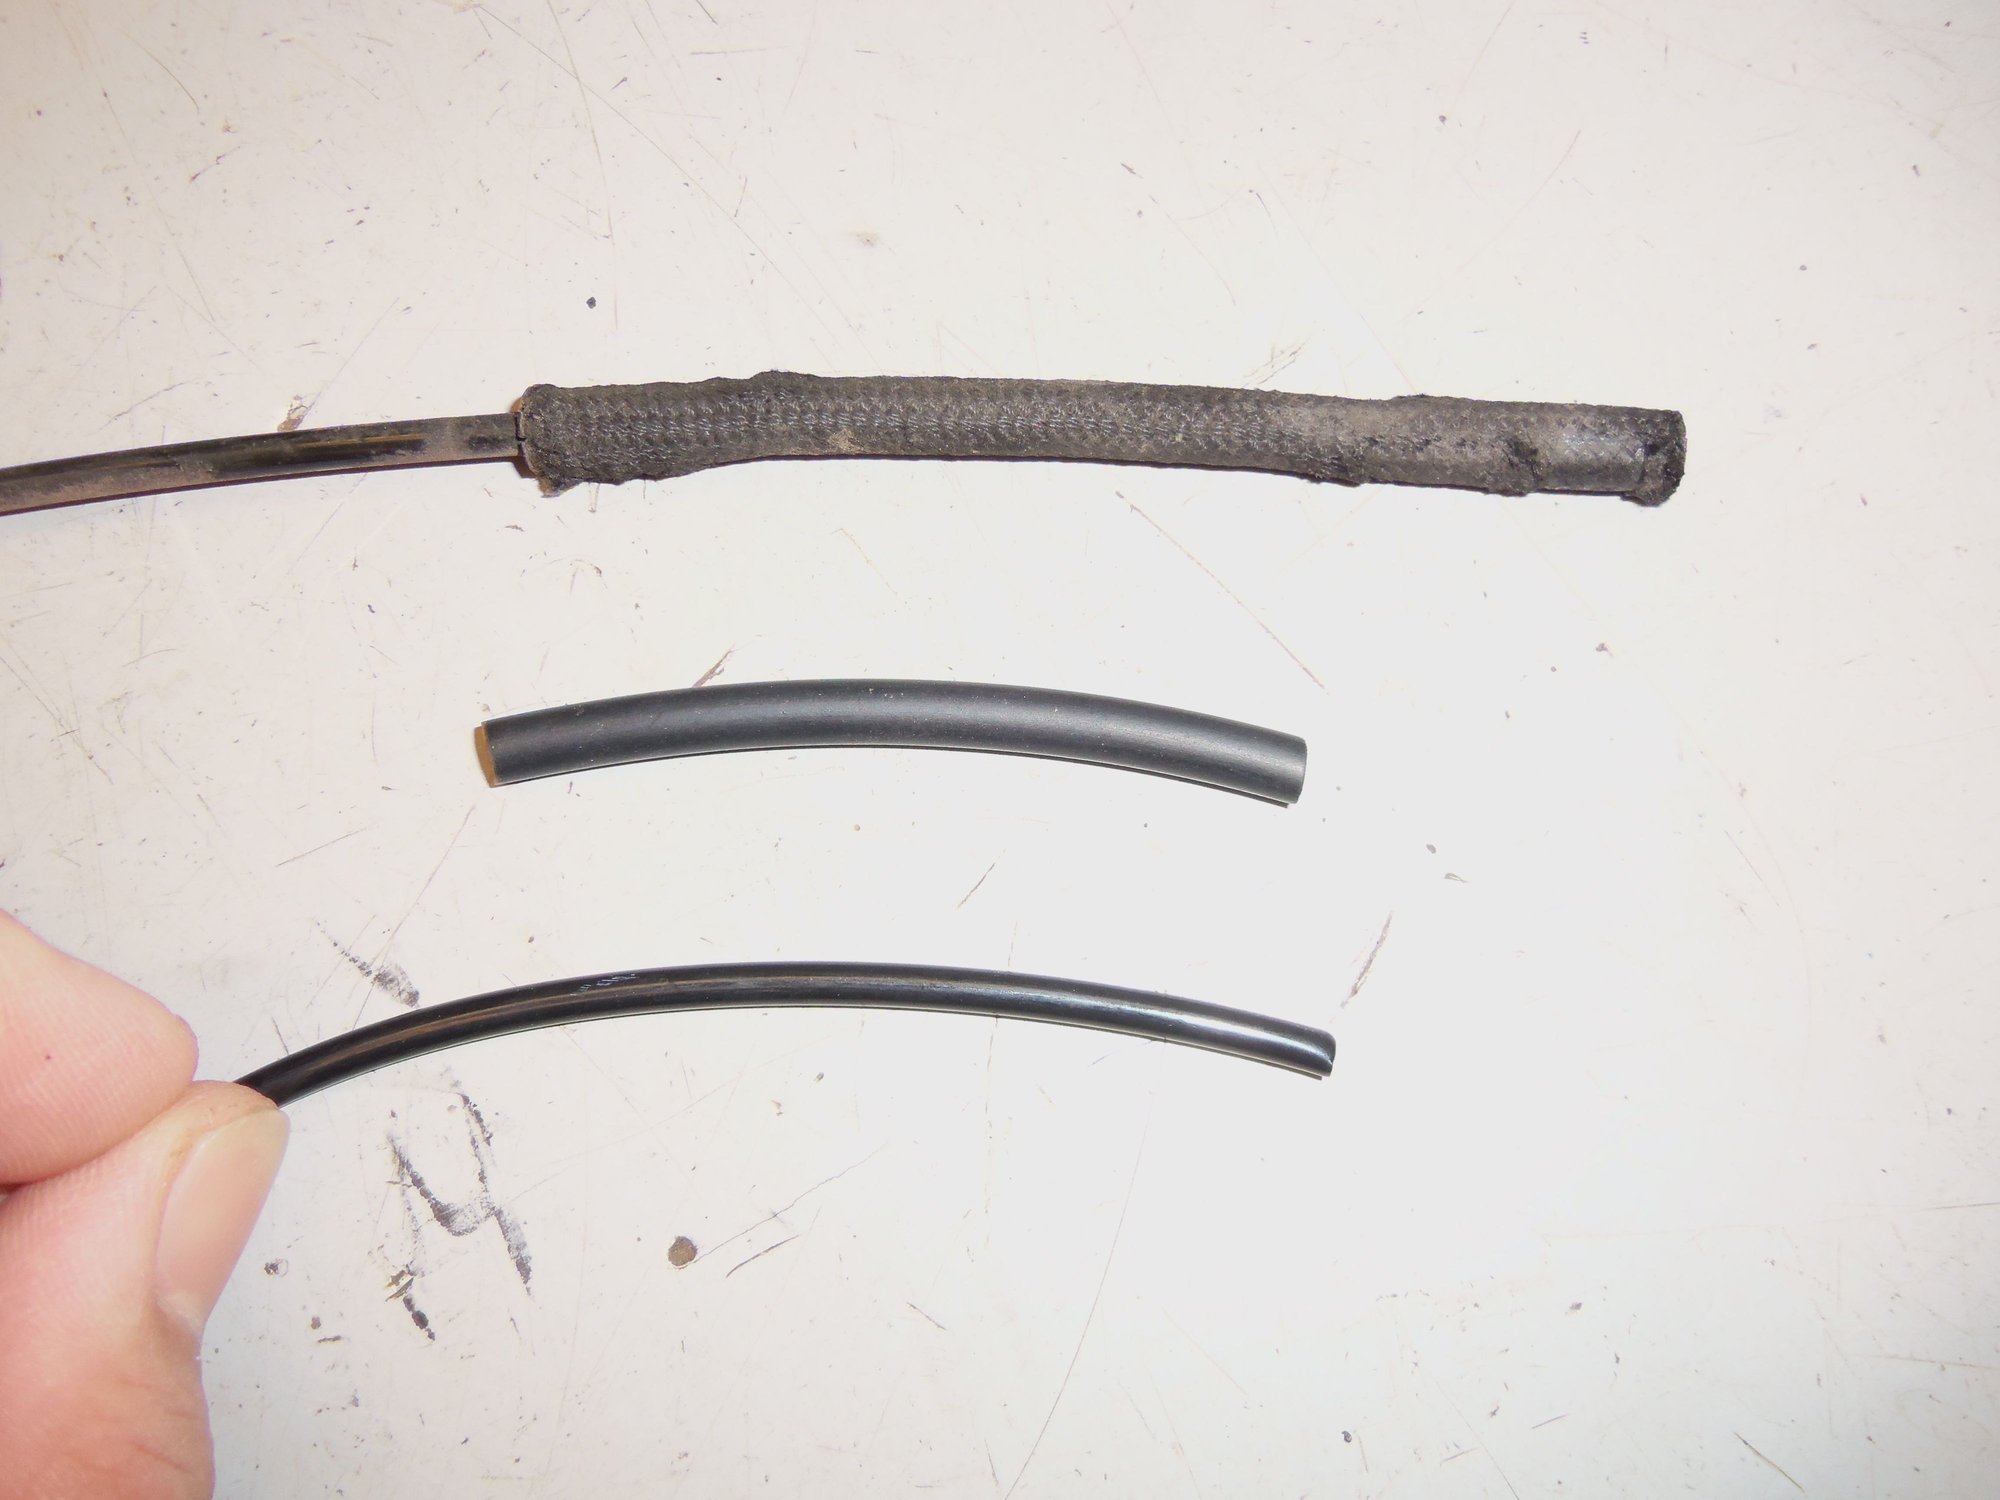
Original braided vacuum line above, generic replacement line below.
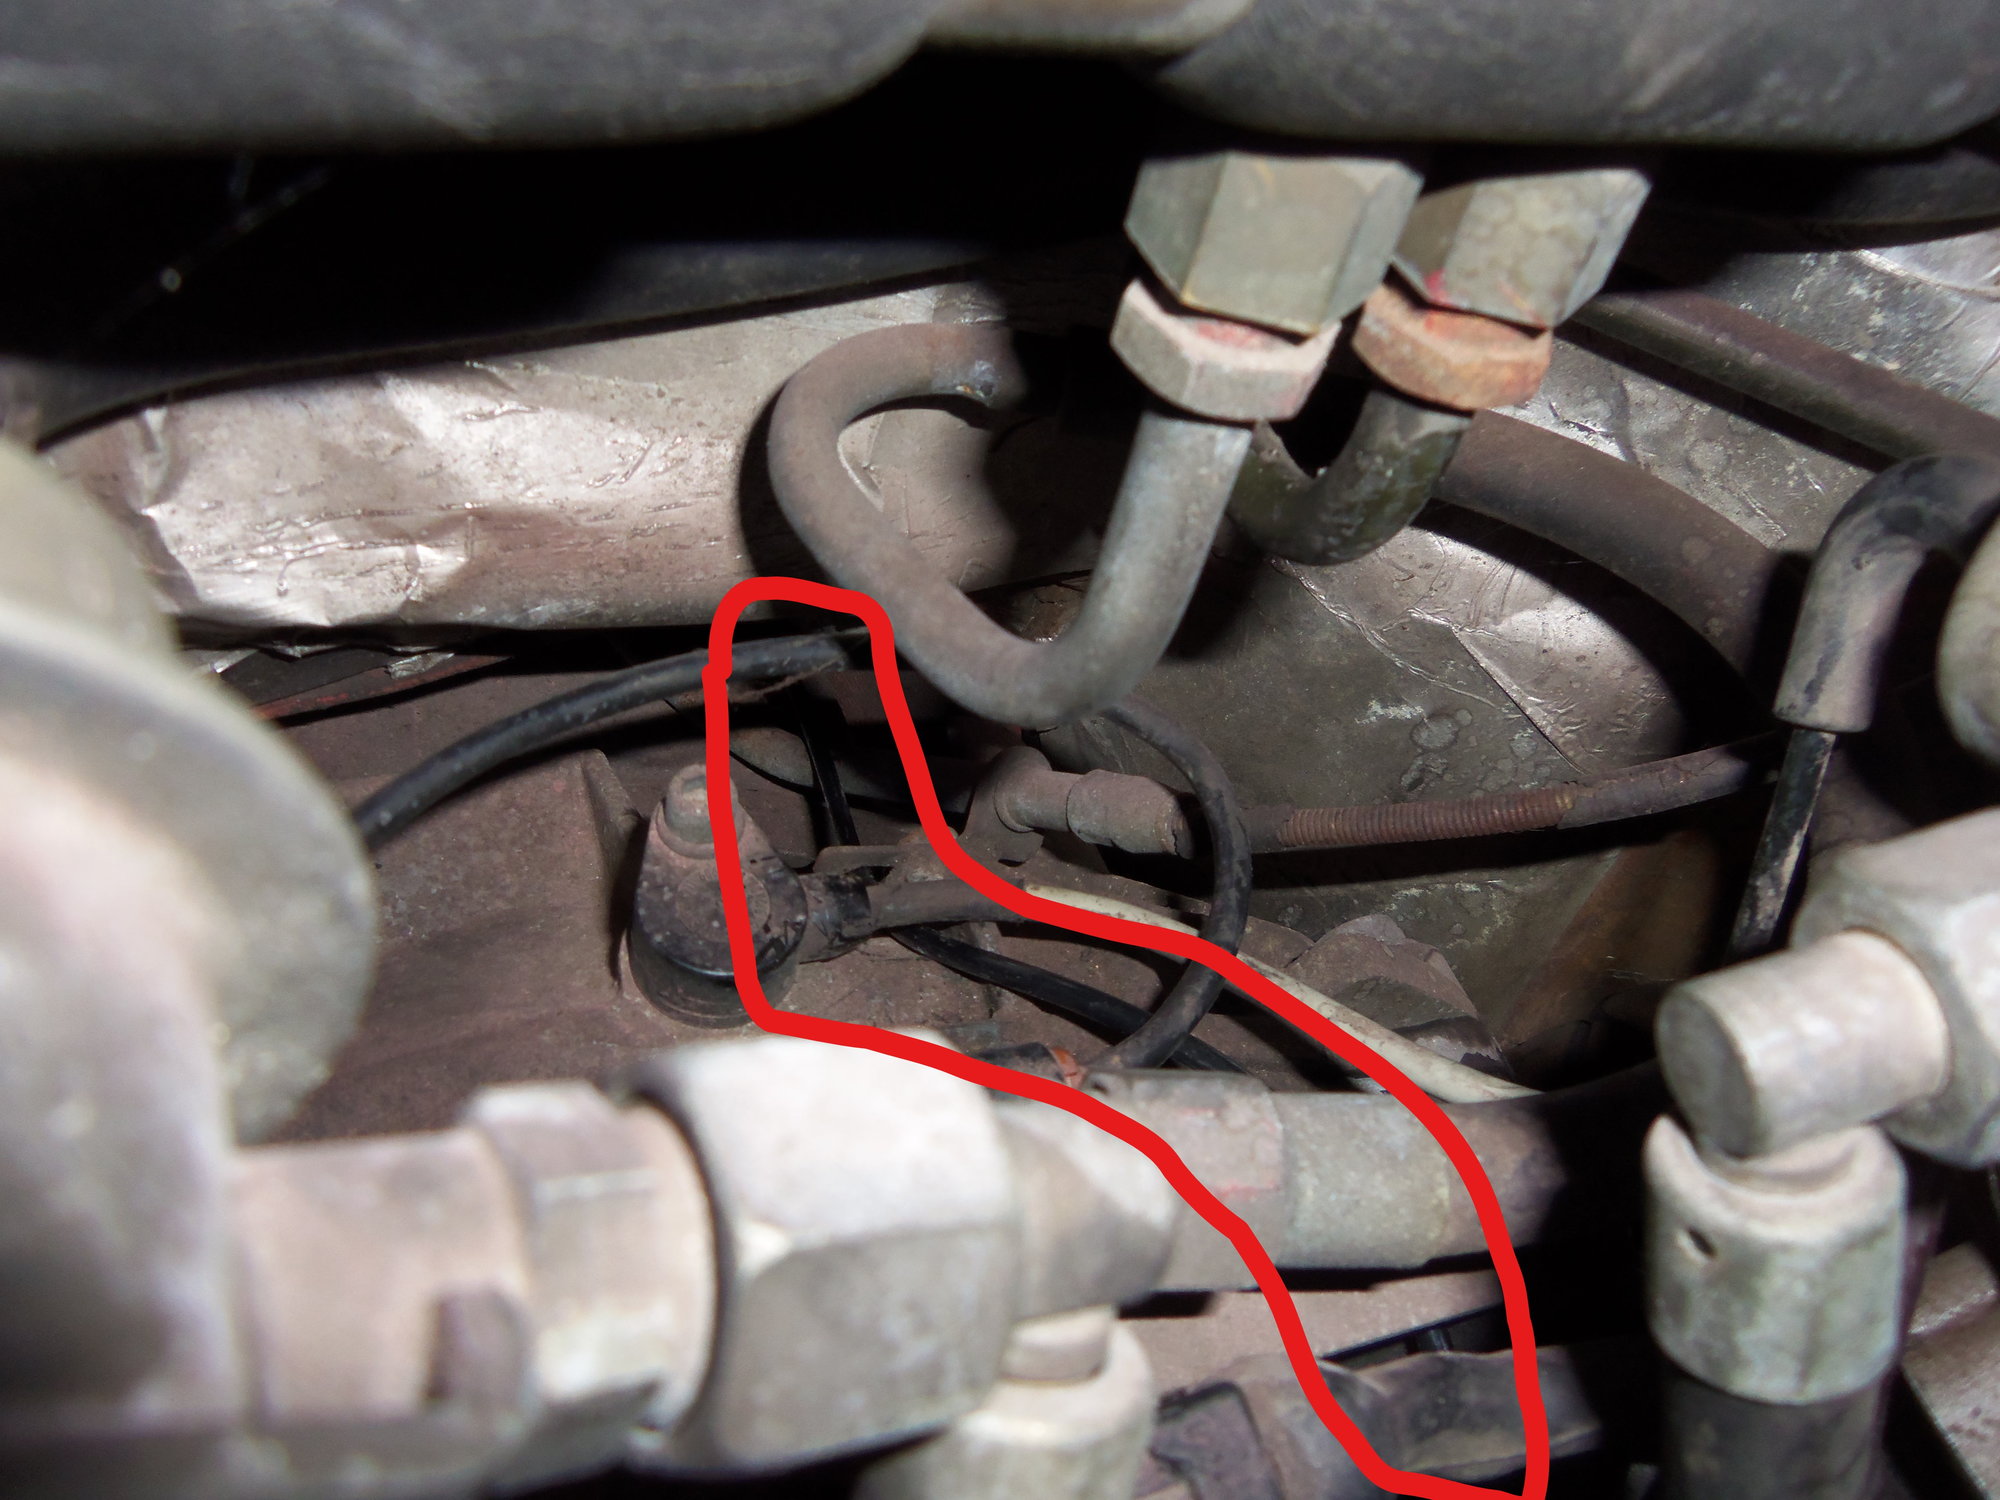
Vacuum line routes from modulator on the driver's side up across the top of the transmission casing.
Vacuum line comes across the top of the transmission casing to down to the metal line on the passenger's side of the torque tube.
Old plastic line and braided vacuum line at top, new at bottom.
Close up.
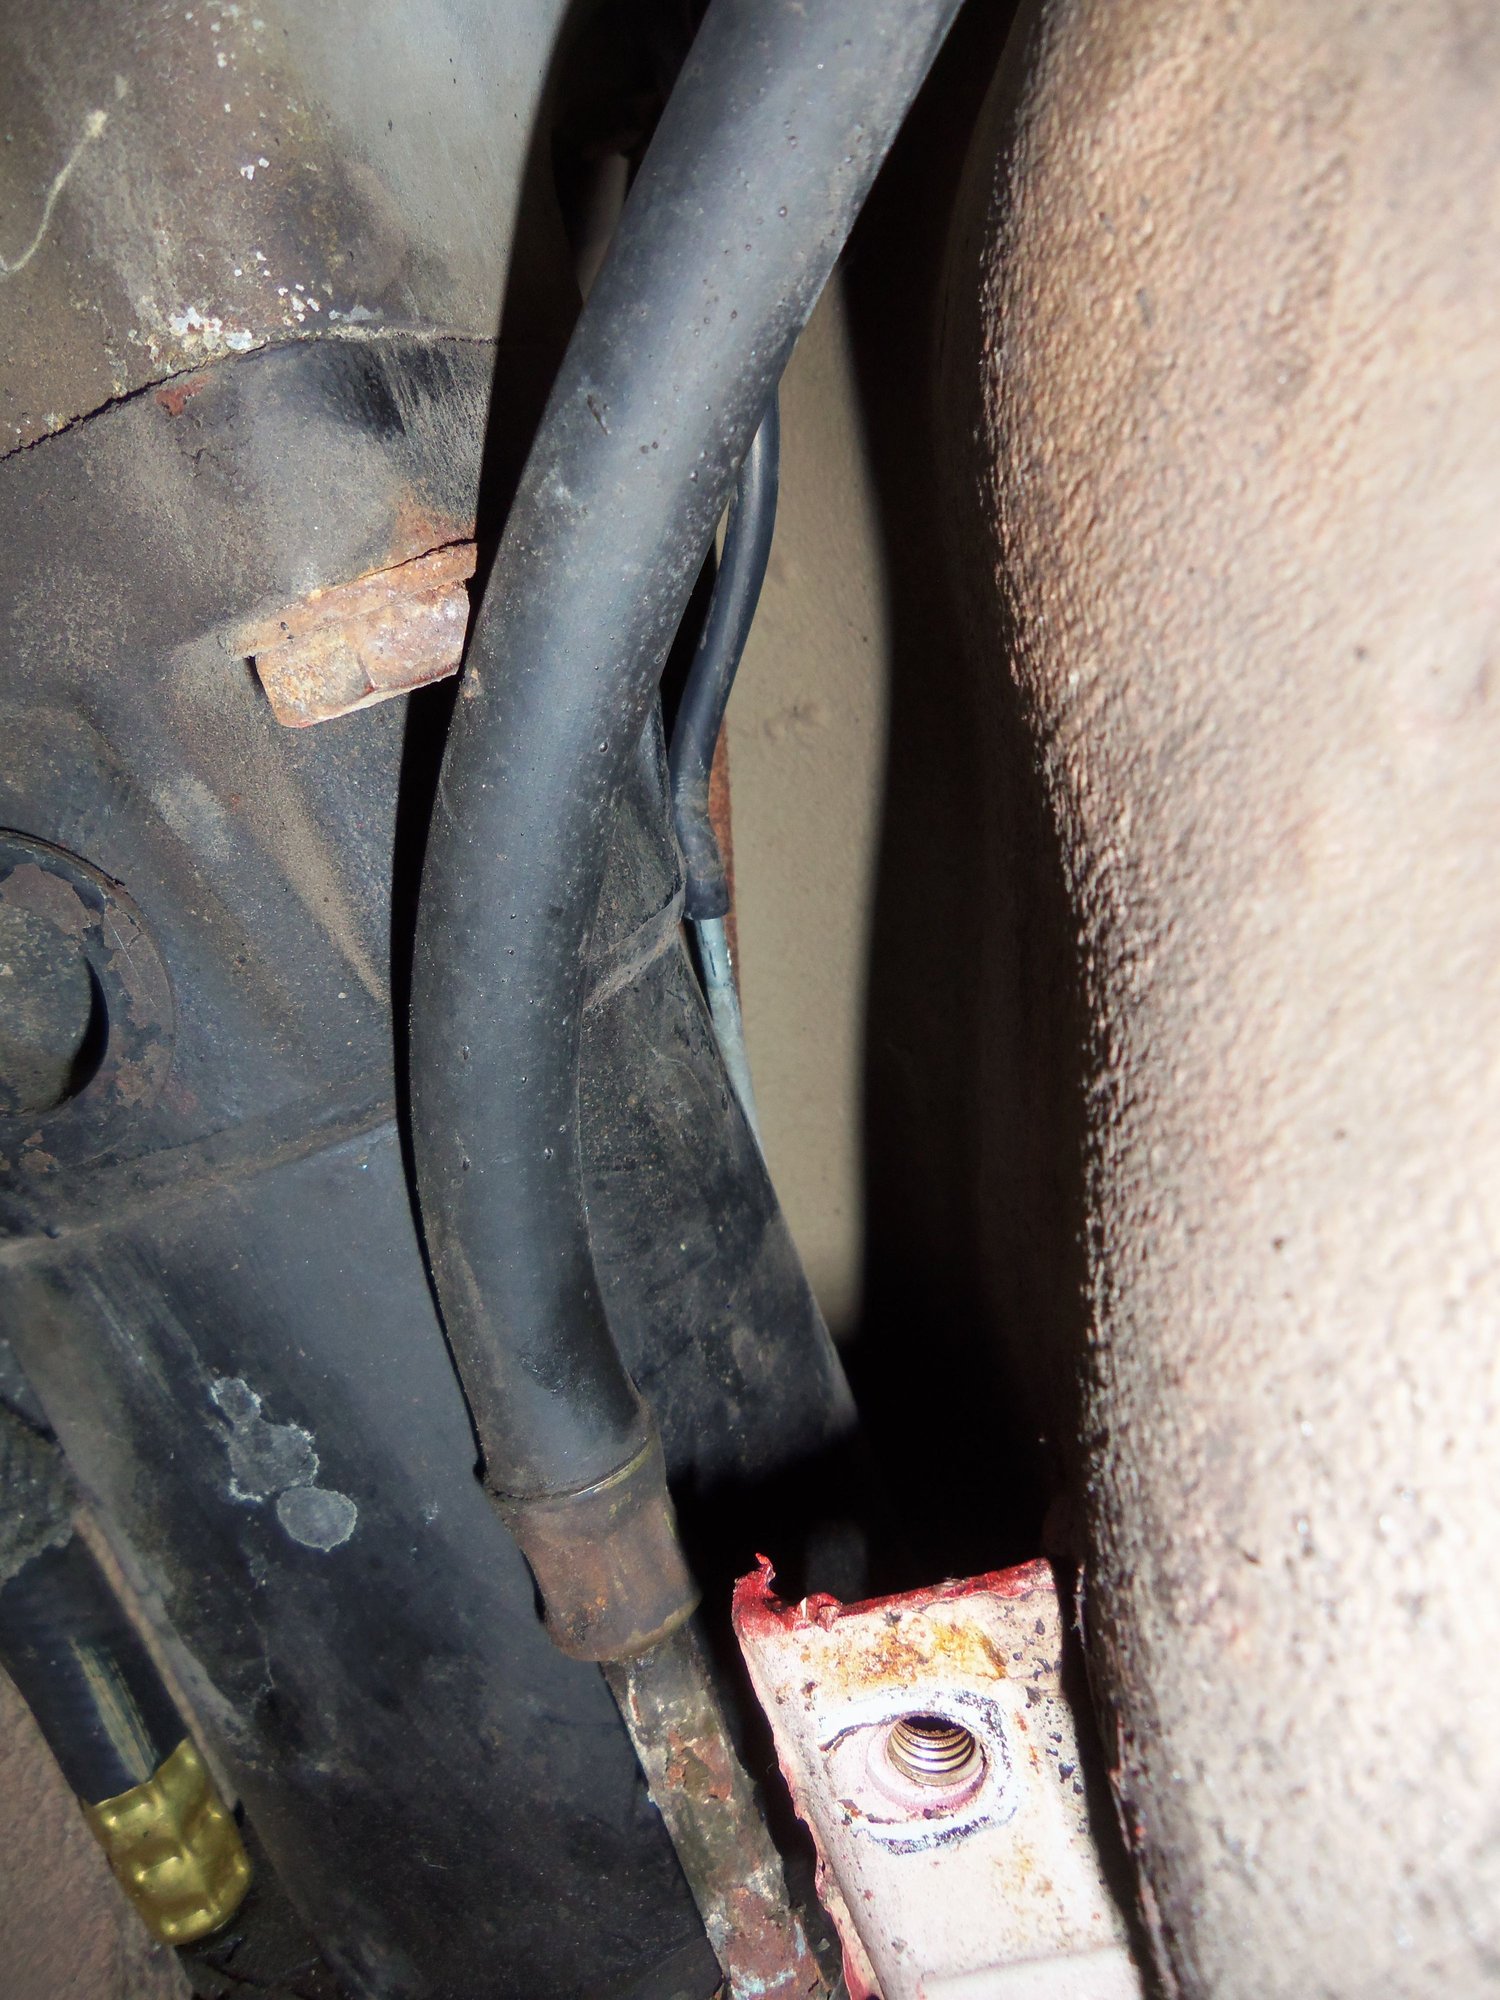
The metal line runs along the torque tube. At the front, the vacuum line connects again.
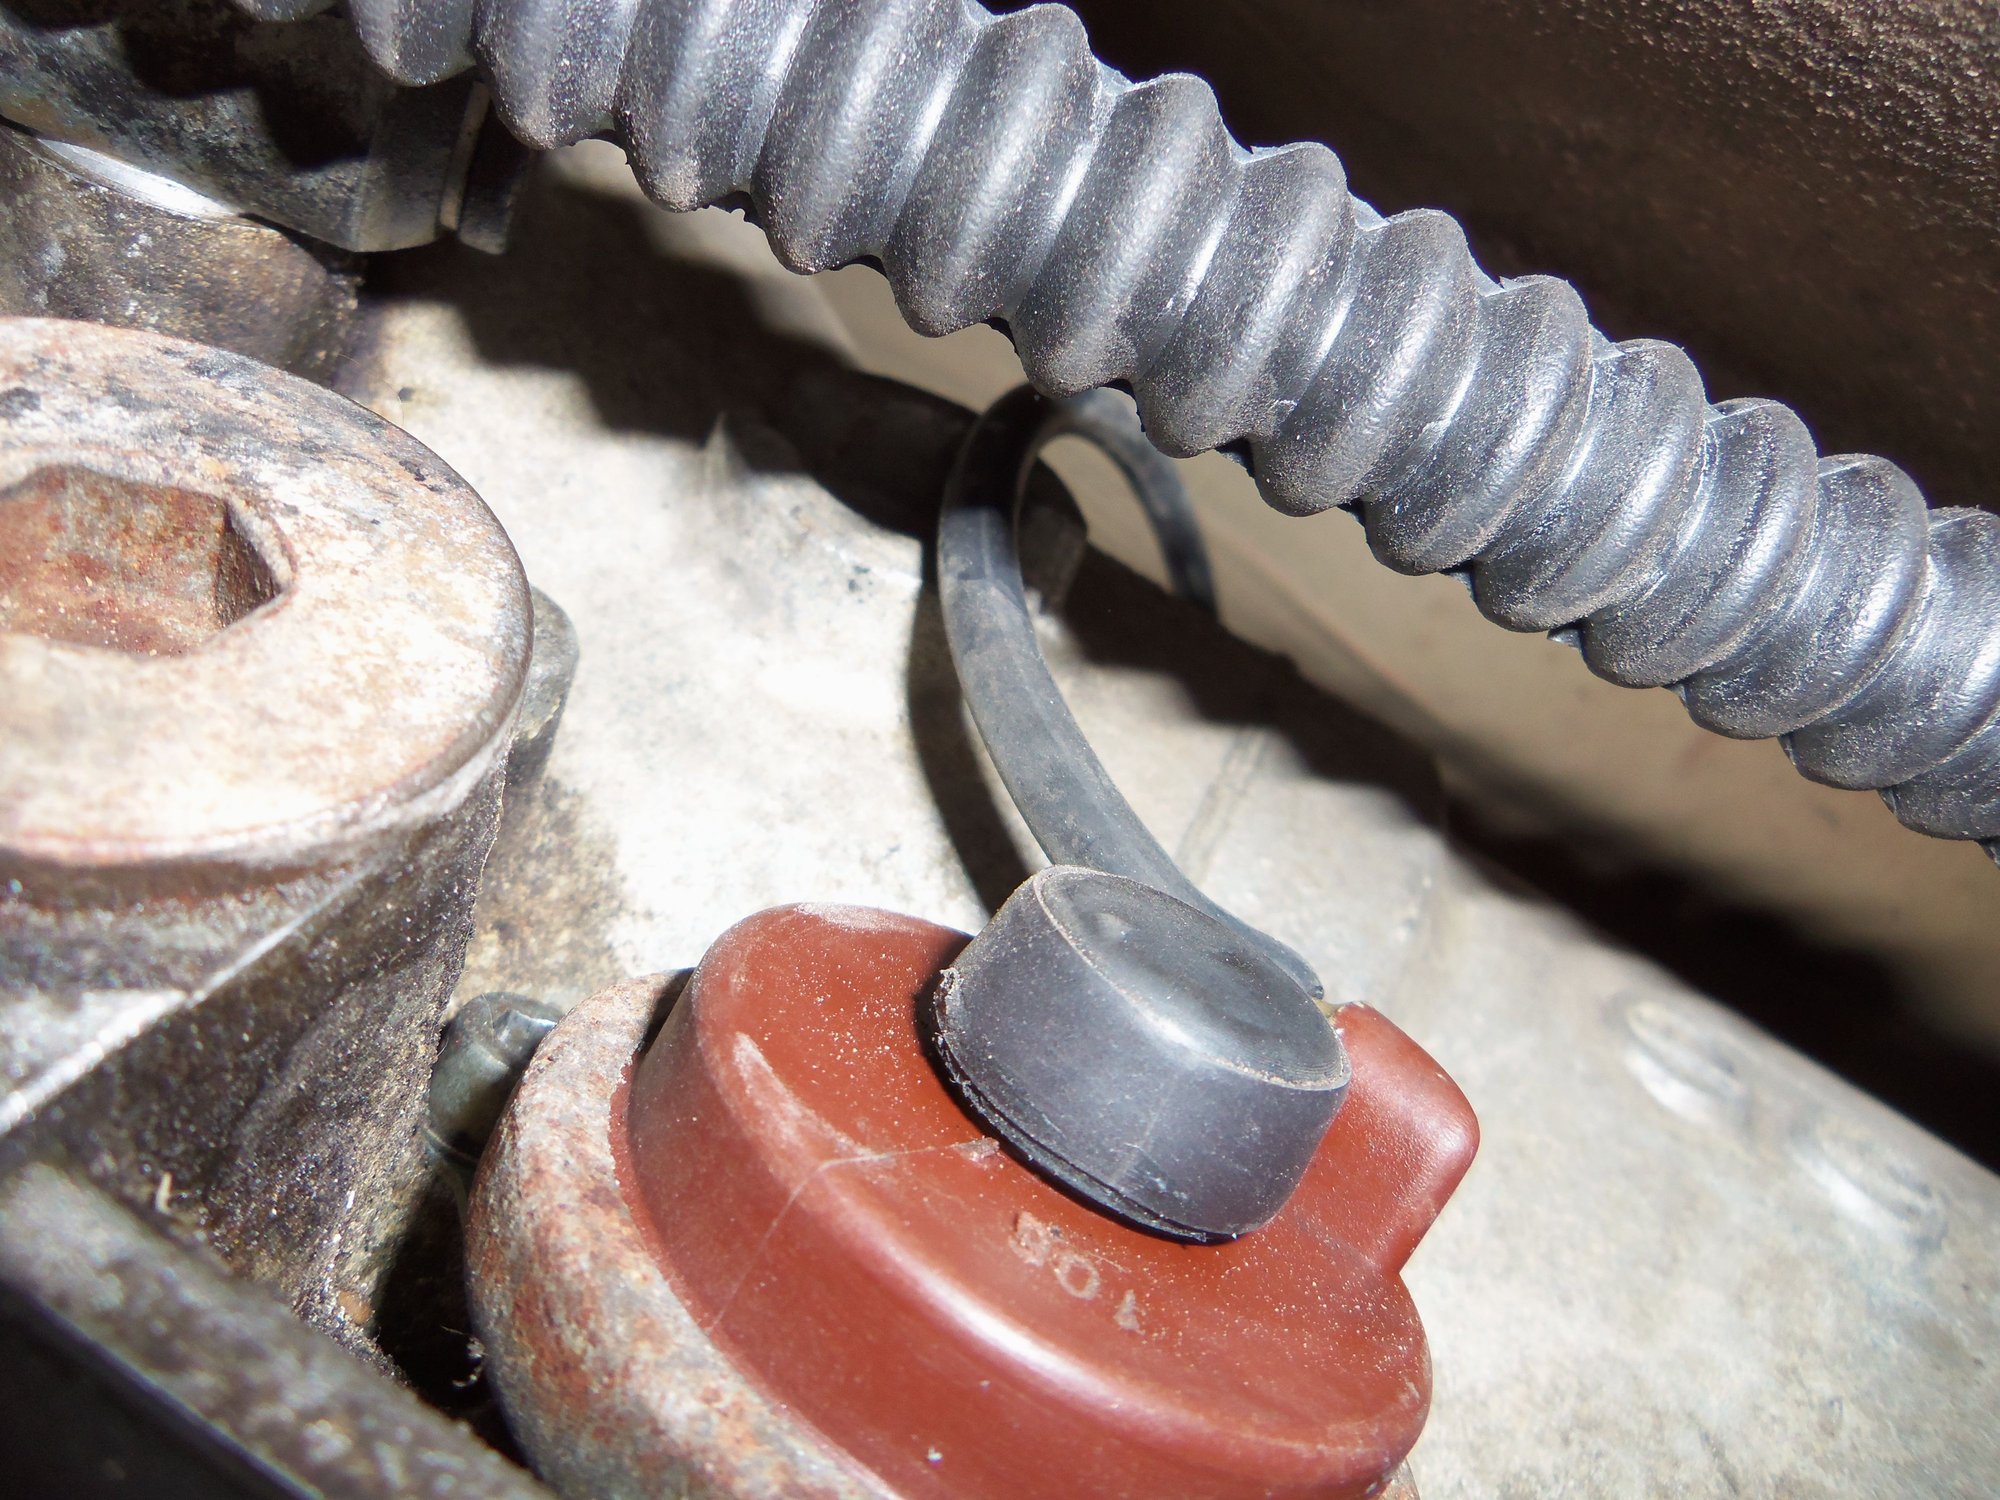
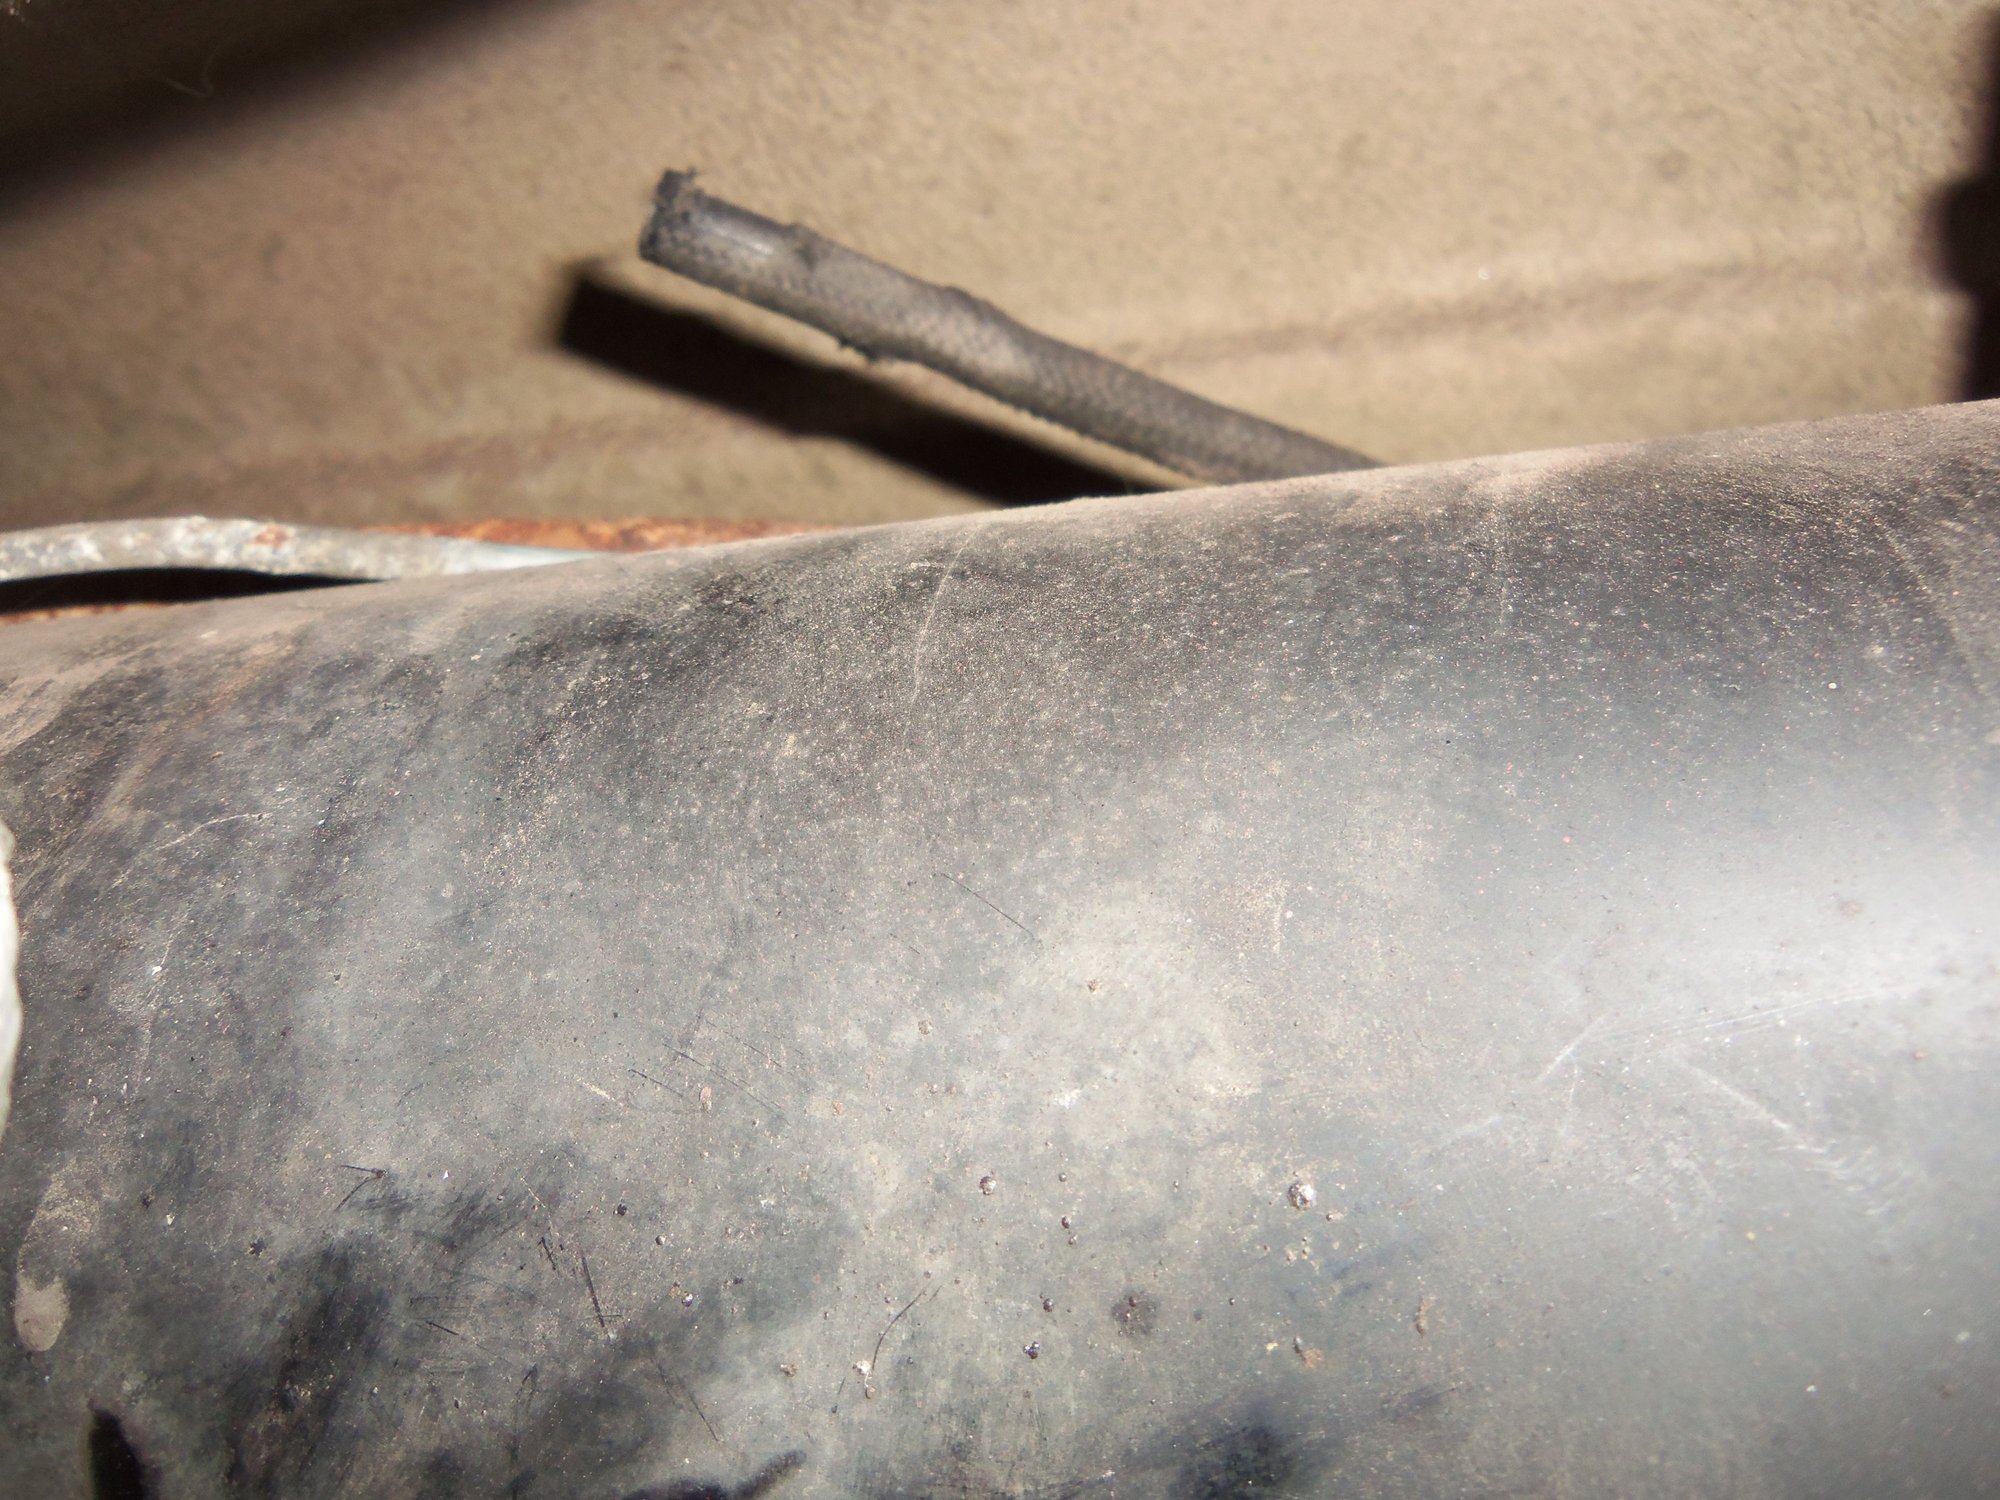
Plastic line from the rubber vacuum line goes across the top of the bellhousing, under a little clamp bracket.
Plastic line comes up from the bellhousing to into the engine V
Good Luck!!!
A couple of notes: the plastic line at the bellhousing goes through the little clamp bracket. The bracket does NOT need to be unbolted to allow the plastic line to pass. Be aware that the metal line just sits in plastic isolators on the torque tube. It is not fixed in position. Be gentle with it as you manhandle the old vacuum lines off and new ones on.
I learned that the hard way...
Ah. Sheet...
I missed part of what you wrote. The exhaust and heat shields were dropped on the Red Witch when I did all this work.
I honestly don't know how you could get around that.
It all must come down.
I just did this on my 89. Same issue. I had to drop the exhaust system to get to it including the heat shields. It is't hard to do, just a bit cumbersome.
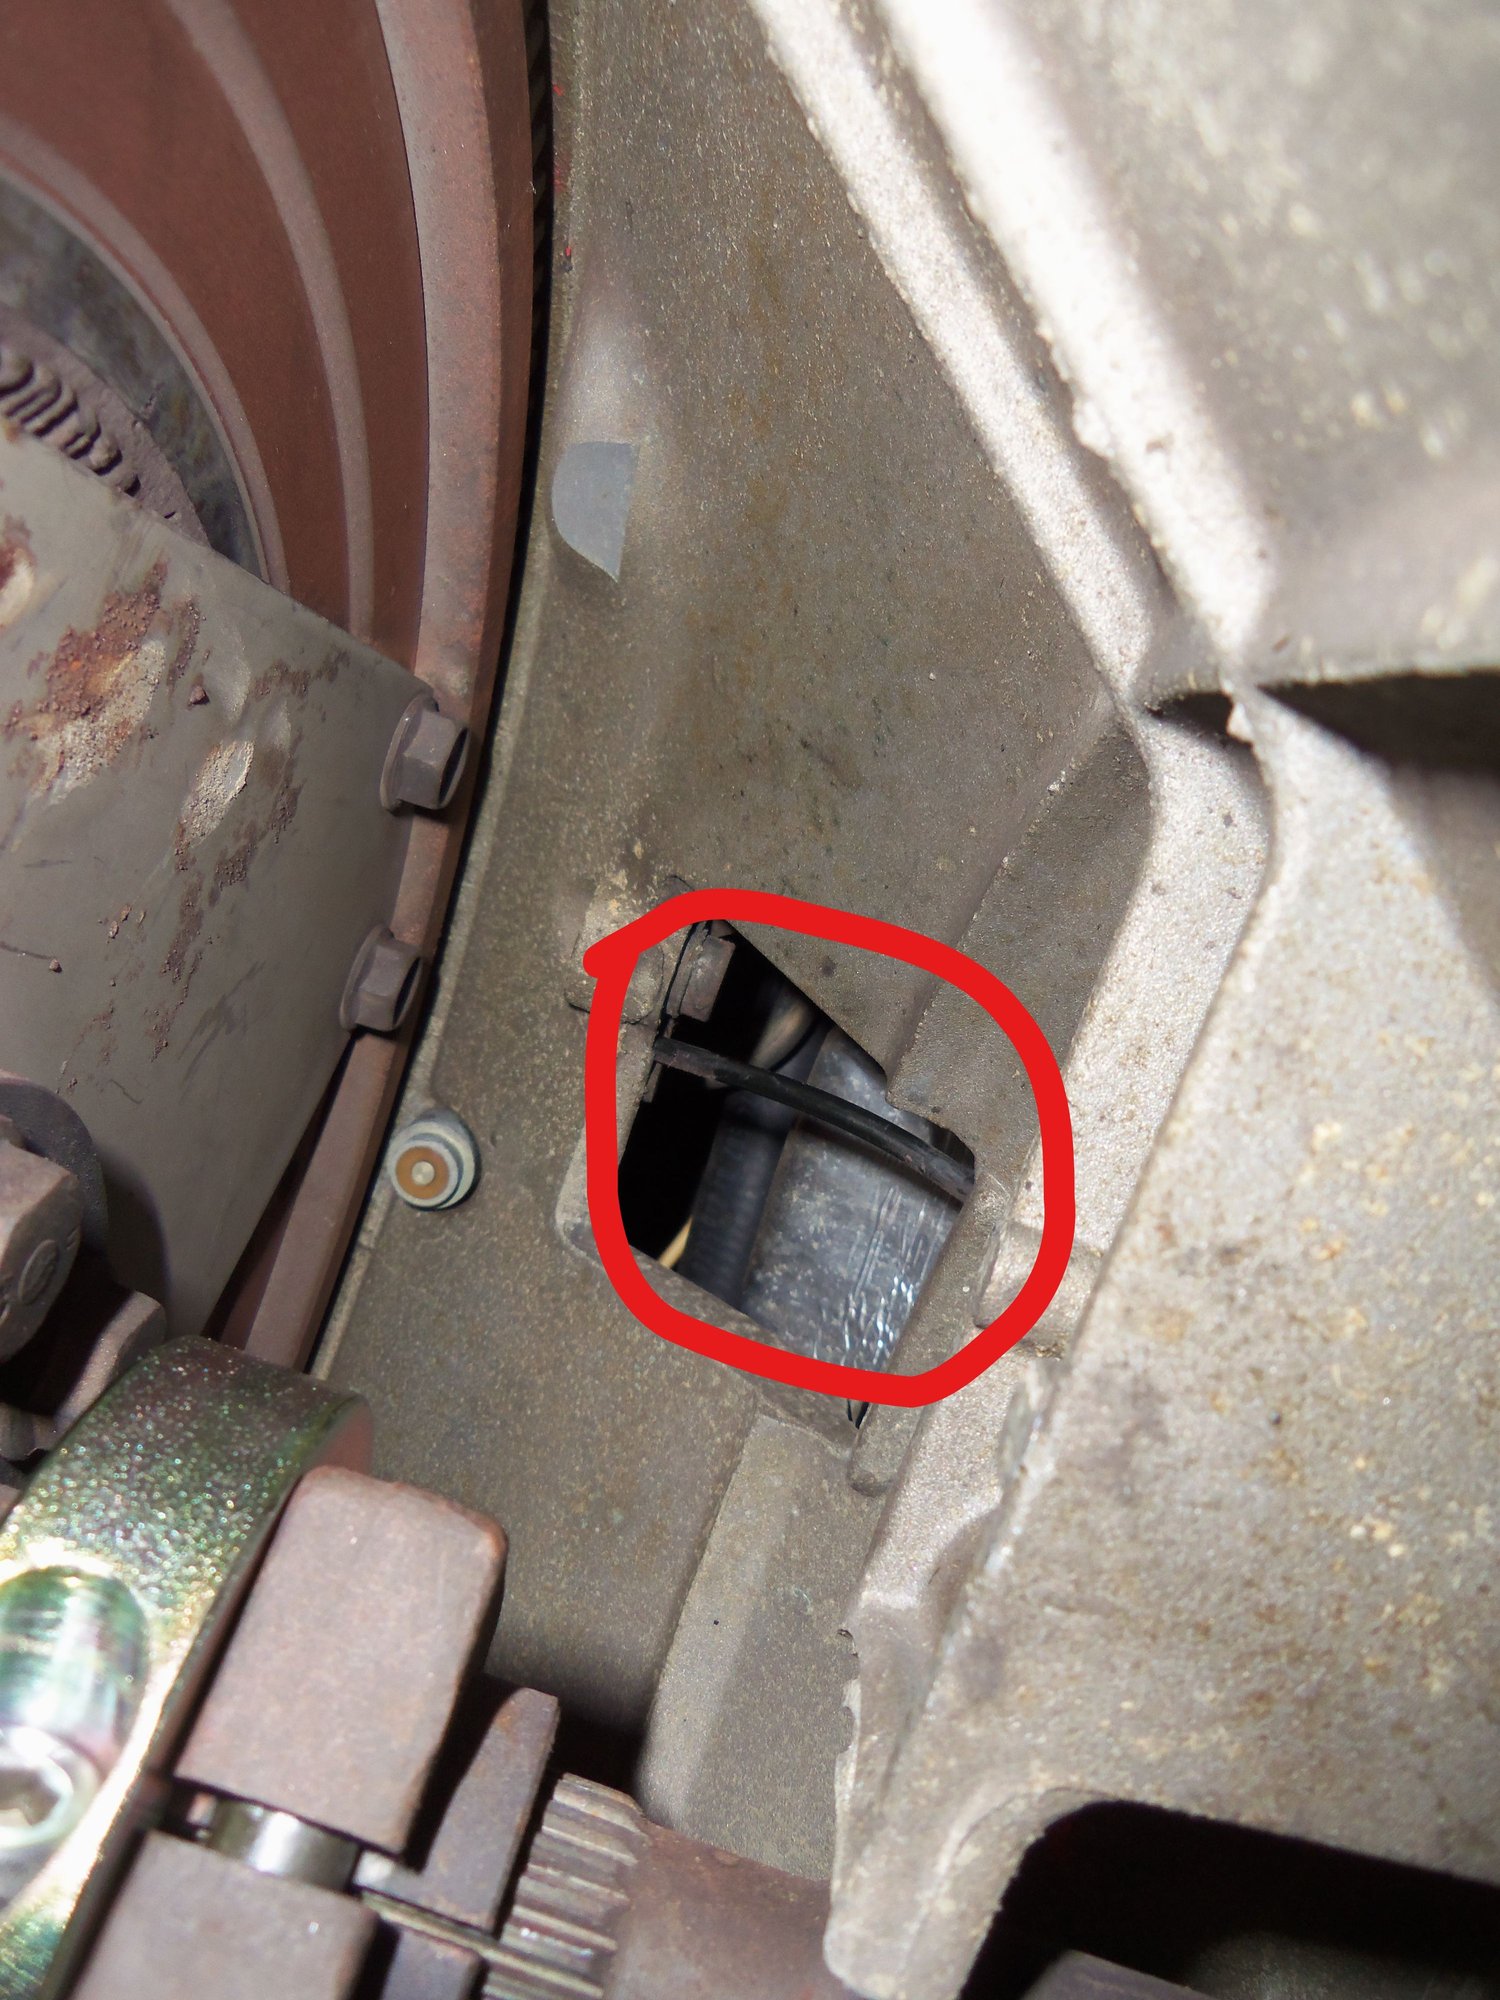
Yes, in that red box you have is the junction of the vacuum line and metal line. I painted the metal line black for corrosion protection. It is not black plastic.
If you remove the air filter housing, you should be able to see the other section of rubber/plastic vacuum line. It may be another point of vacuum loss. Also, you need to check the integrity of the other lines and connectors that are involved in the entire engine vacuum chain. Use a vacuum gauge to determine if idle vacuum is what it should be. And you should check that the modulator itself holds vacuum. If you find the over all idle vacuum is low, use a vacuum pump to test each actuator to locate the contributors.


 09-18-2019, 09:10 PM