When you click on links to various merchants on this site and make a purchase, this can result in this site earning a commission. Affiliate programs and affiliations include, but are not limited to, the eBay Partner Network.
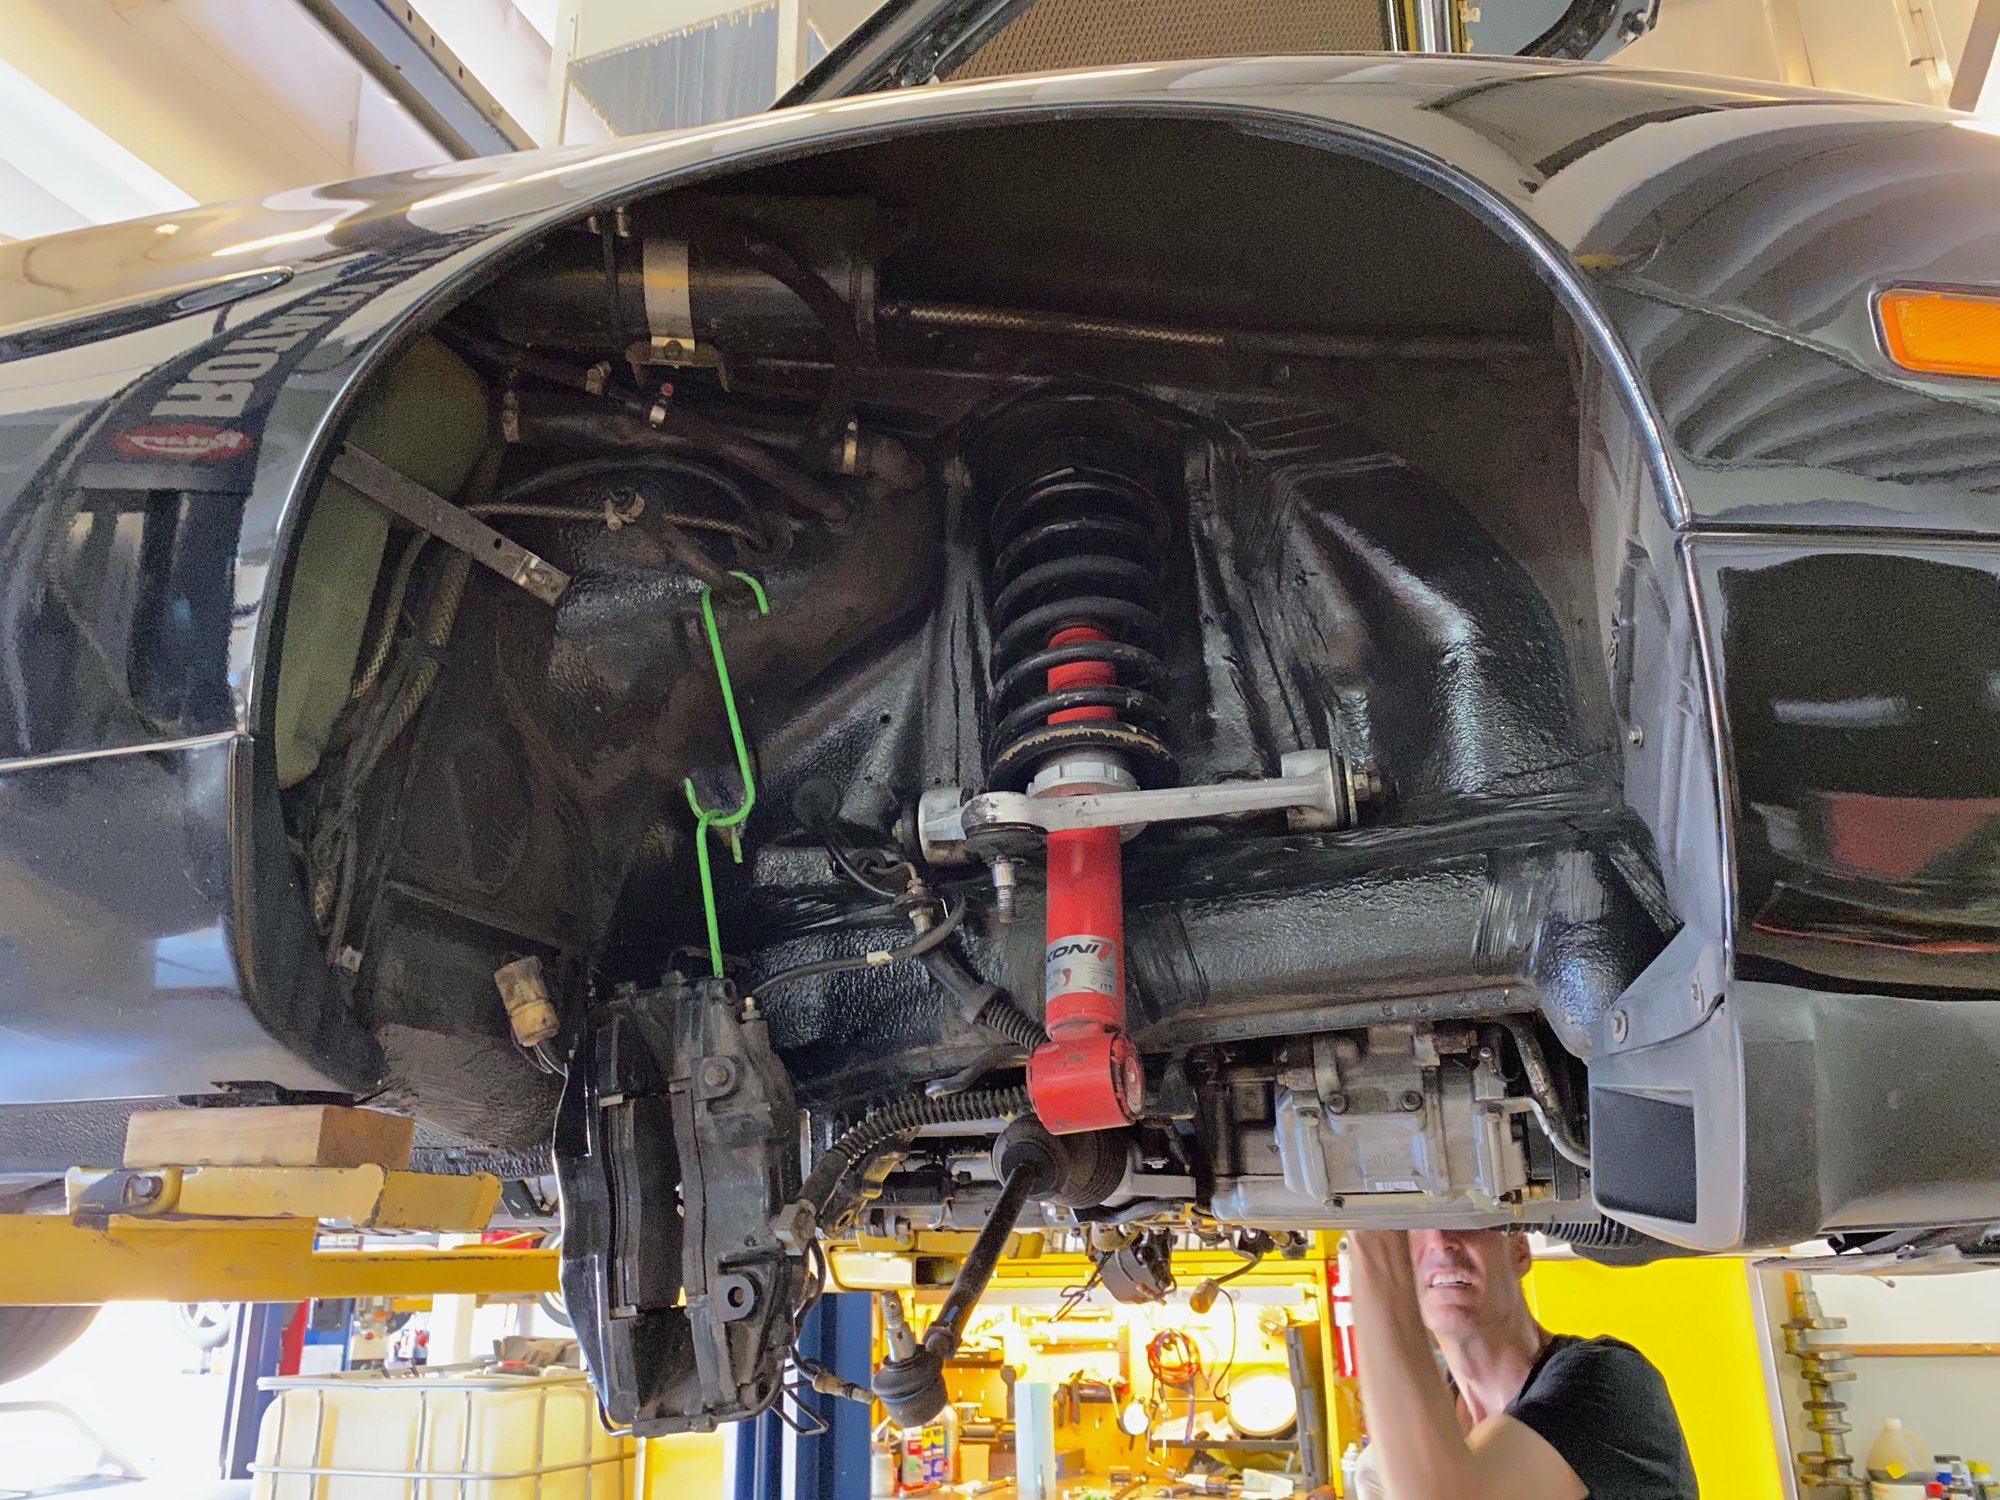
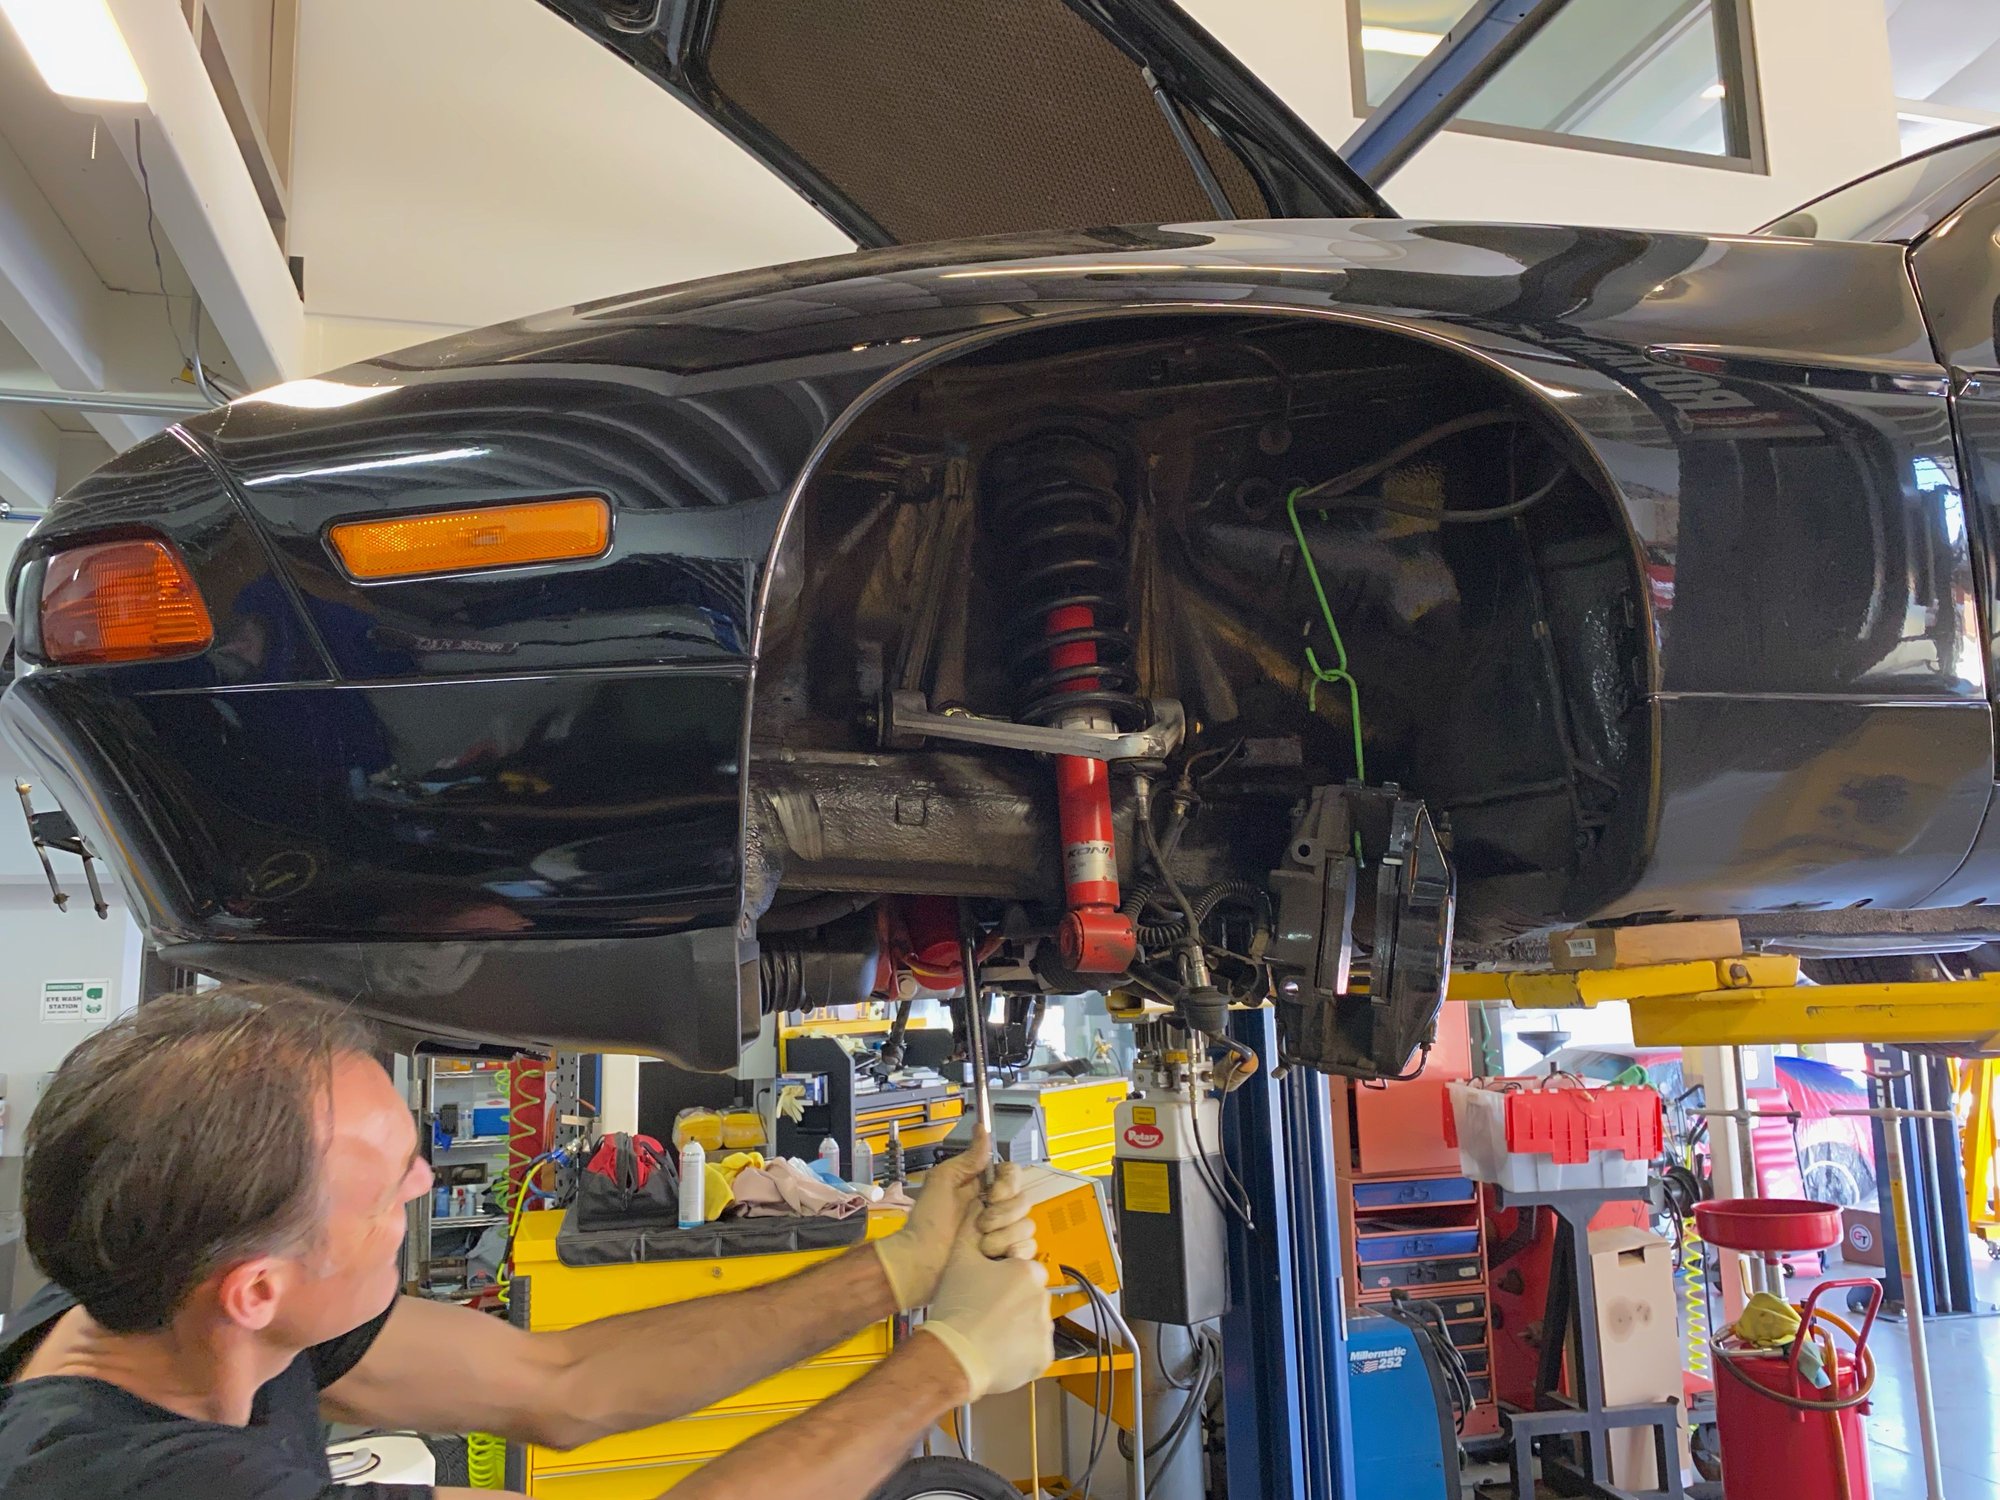
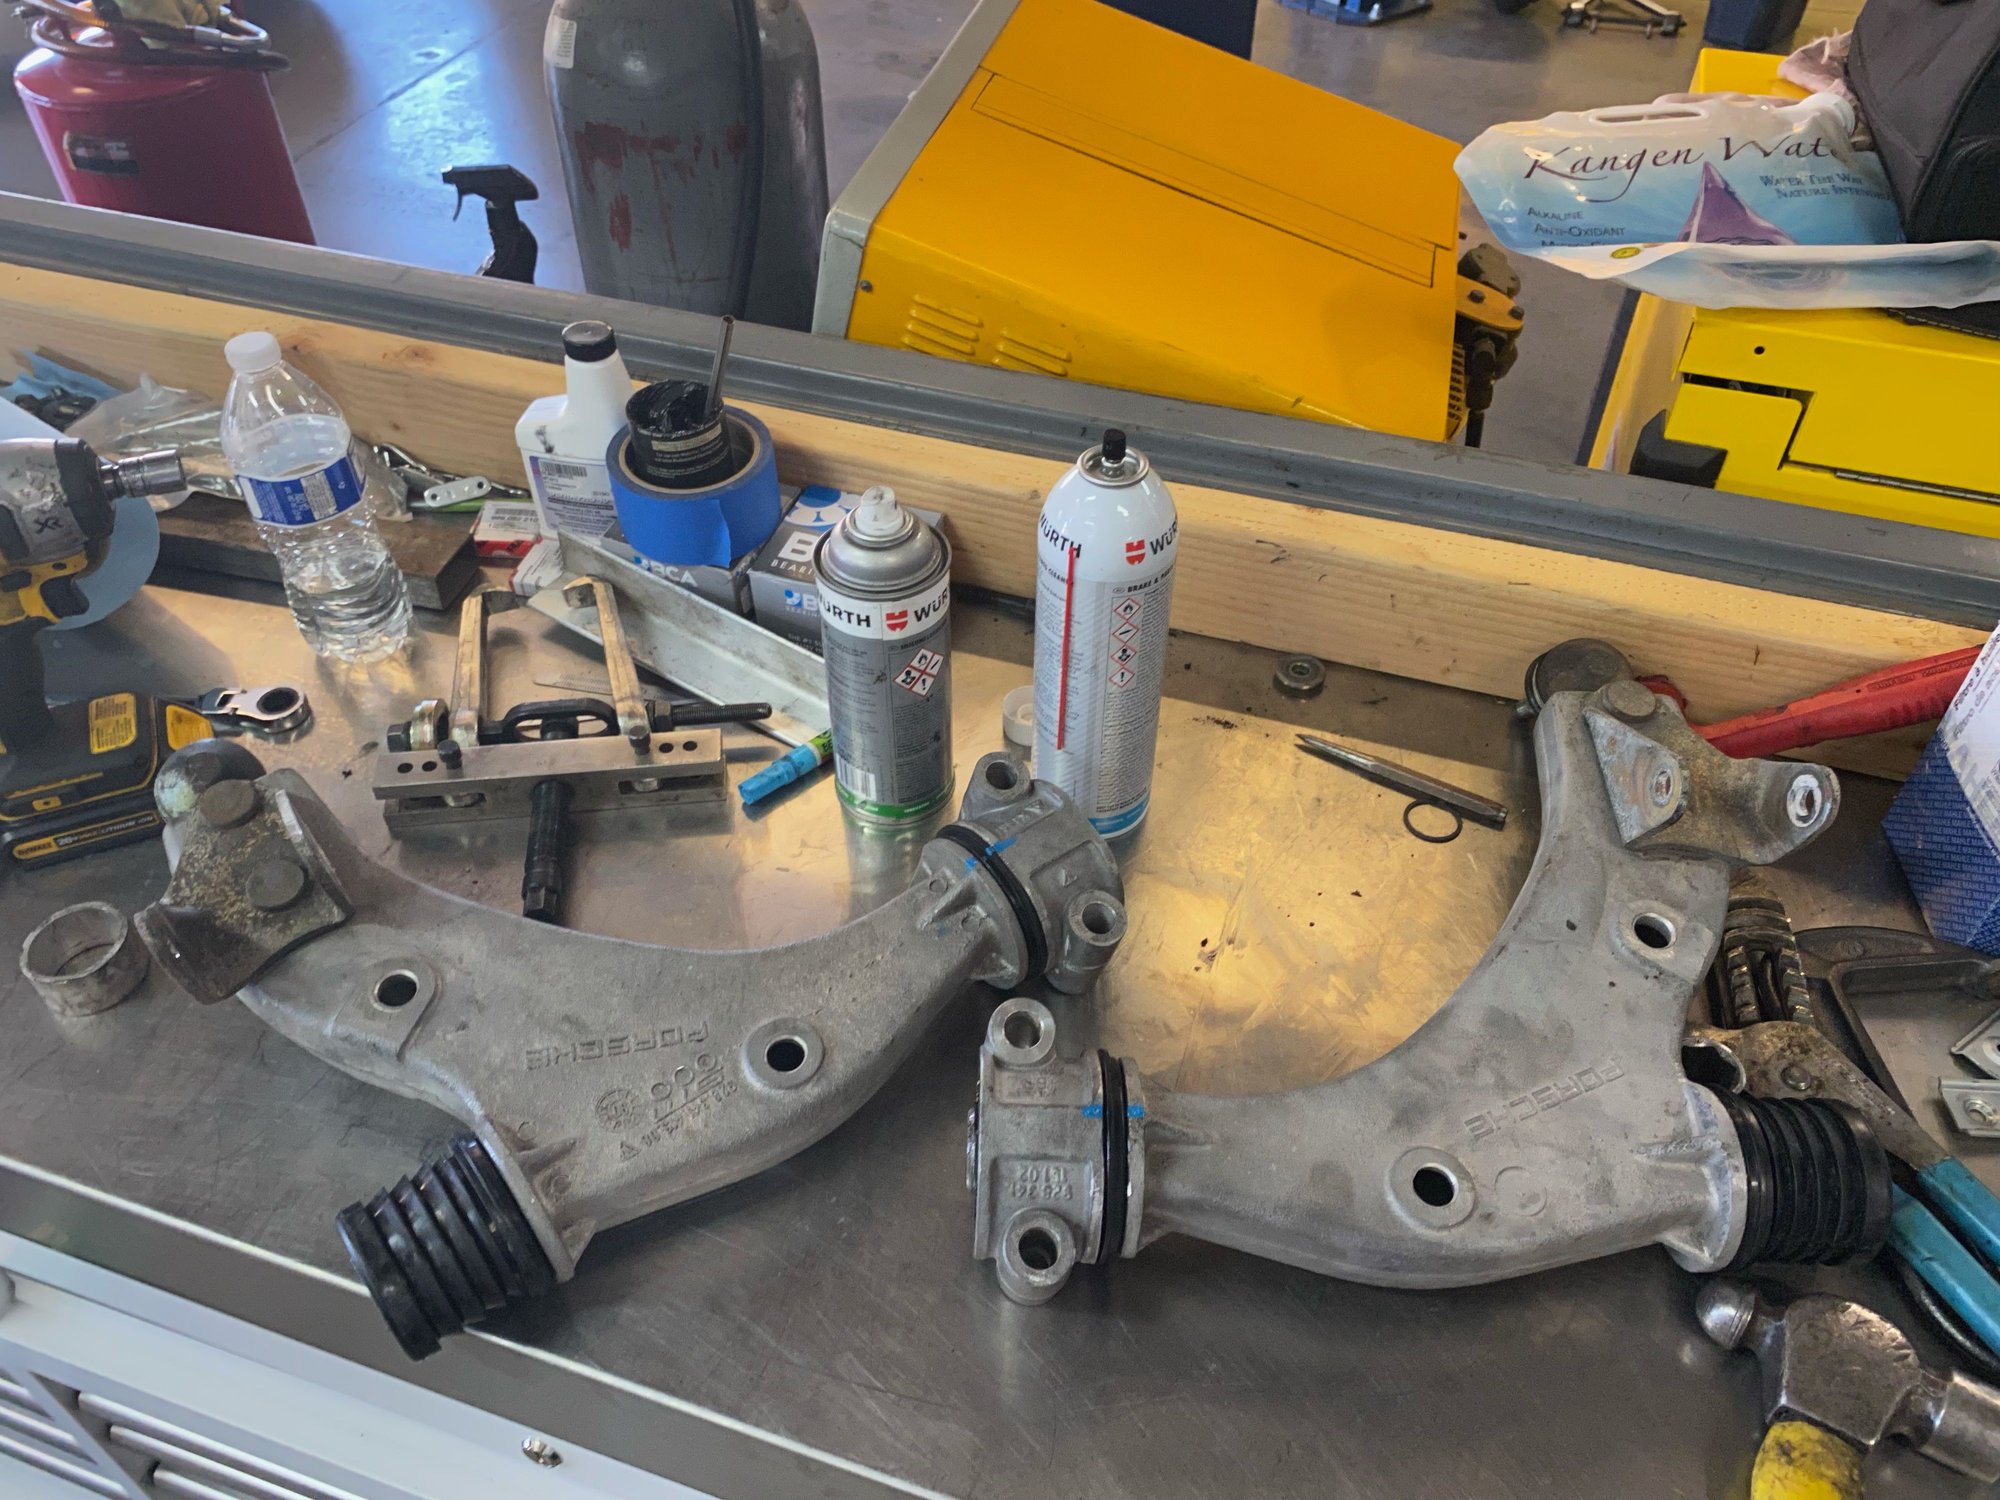
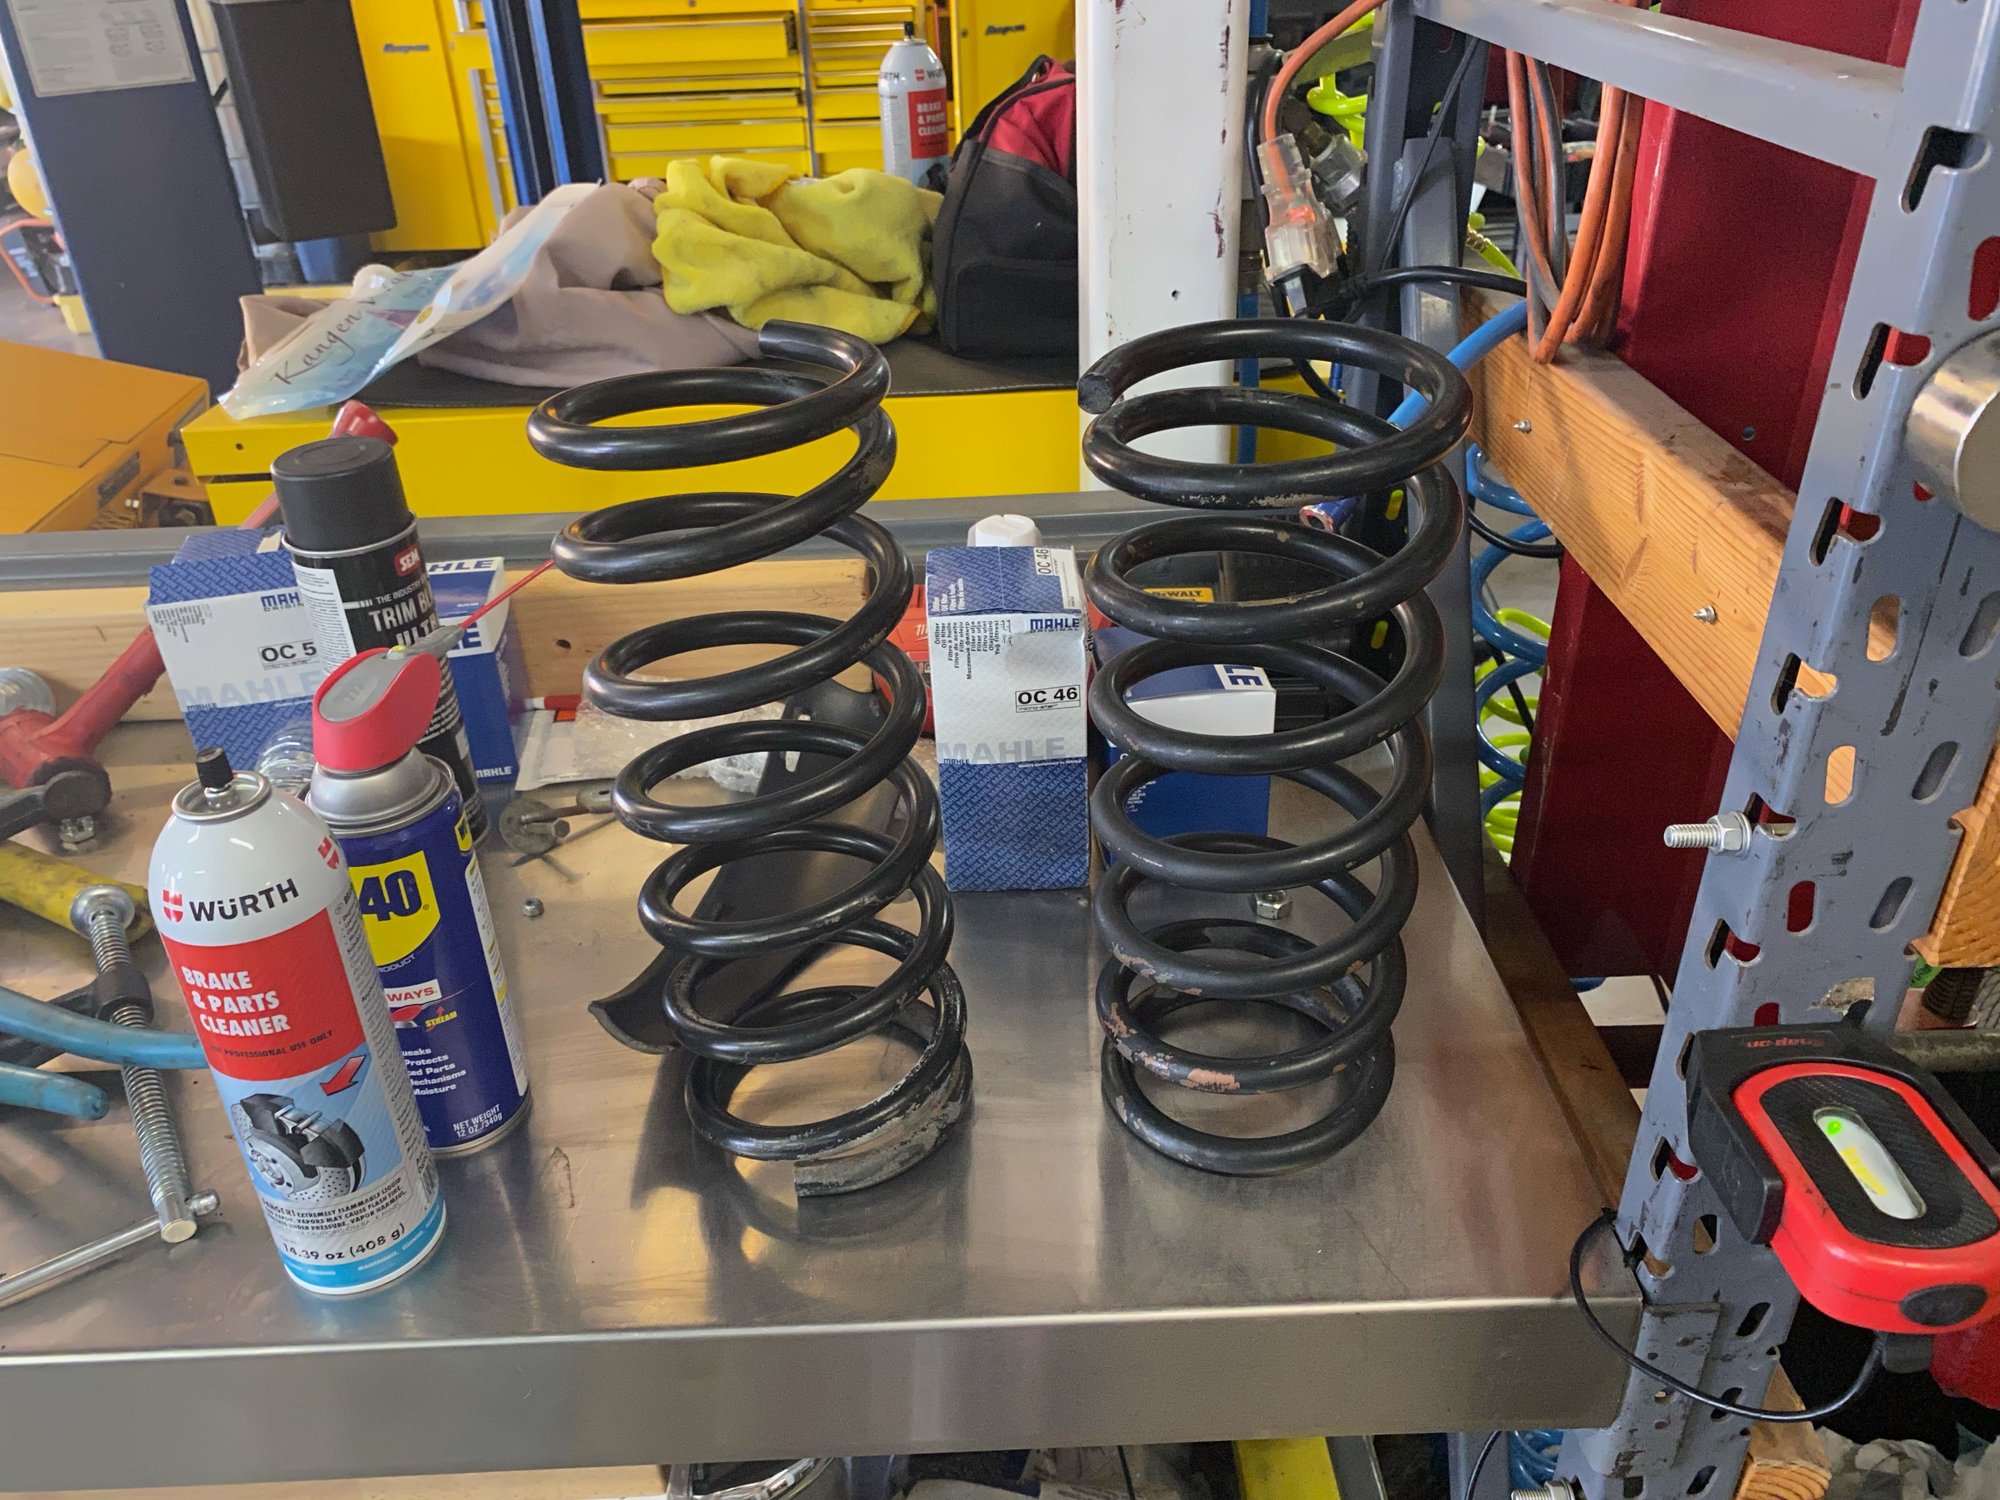
We began the full suspension refresh project today. Front and rear... every piece will be redone with new parts including all the rubber, Boge shocks, new Porsche springs etc. Every part came from Porsche (including the bolts, nuts and washers). 928 International provided the lower control arm bushings, upper rebuilt control arms and rear toe links.
You will be amazed, in the beginning. This deteriorates a bit...and then gets incredible, if you do this process correctly.
A couple of helpful (hopefully) tidbits....
Don't tighten anything that can "twist" until the car is setting near the ride height you have chosen. This includes lower shock mounts, contol arms, and sway bar links.
Avoid lowering the car too much. Porsche designed the car to sit at the factory 183 +/-10mm in the front and 173 +/- 10mm in the rear, which allows proper suspension travel. About the minimum heights these cars can tolerate, without changing stock pieces, is 163mm on the front and 153 in the rear. Note that 163mm in the front only gives you 13mm of shock travel (about 1" of wheel travel, until the foam shock stop contacts the shock. Once this occurs, the effective spring rate goes up, considerably.
The rear rocker bars take a fair bit of torque to get them properly "crushed", so they don't move about, in the aluminum bracket. They don't need to be over torqued, but access to the hardware is tough and alignment guys never get them near factory torque. Torque these and the camber eccentrics to factory specifications when the alignment guy is done.
The car will obviously need to be aligned, when you are done, and will feel fantastic after the first alignment. After about 500 to 1000 miles, the rear rocker bars will find their "happy resting place" (which we have found has been in the toeout direction.) You will know this has occurred because the car will begin to feel like it is wandering and will be a bit unpredicable in higher speed corners.
The rear toe will need to be reset.
No matter how much you pull the front down, it is going to settle over the next 1000 miles. A trick is to set the front height to where you want it and align it there. Measure and record the ride height. After it settles (or as it settles), raise the front height back to your desired specifications and the alignment will be very close.
When your alignment specialist "kisses" the rear to set the toe, he can then "kiss" the entire car to make it all perfect.
At that point in time, the car will be really fantastic!
You are 100% on the correct "path" and I hope some of the above helps you in your endeavor.
Thank you for your feedback. Yes, based on all the readings, I decided to go all in and do every piece (functional and cosmetic) leaving no part behind, after all what is on the car is 30 years old and the rubber parts are mostly gone. The foam shocks in the front disintegrated on extraction! Every piece of rubber is either rock solid, torn on flat compressed. We are even changing the sway bar mount rubber. Same goes for the rear which we have not touched yet and will start tomorrow.
As with regards to the suspension, I will stay at factory height spec (probably 175-180 front / 173 rear). I know it is not the sexiest but the ride at factory height is phenomenal.
I will pass the recommendations to Dan as he gets this put together and keep you posted.
P.S. since we were there, we will throw new discs and pads etc... and replace that broken y connector and one cracked splash guard!
Another suggestion:
Buy the superceded charcoal canister and toss that stupid "Y" in the trash. Far superior tank venting, vapor recovery, and engine "happiness."
(There's a thread, here, that I just talked about this.)
Another suggestion:
Buy the superceded charcoal canister and toss that stupid "Y" in the trash. Far superior tank venting, vapor recovery, and engine "happiness."
(There's a thread, here, that I just talked about this.)
I had no idea they superseded from the '91 design. I will look into that. Hopefully not too many things to change!
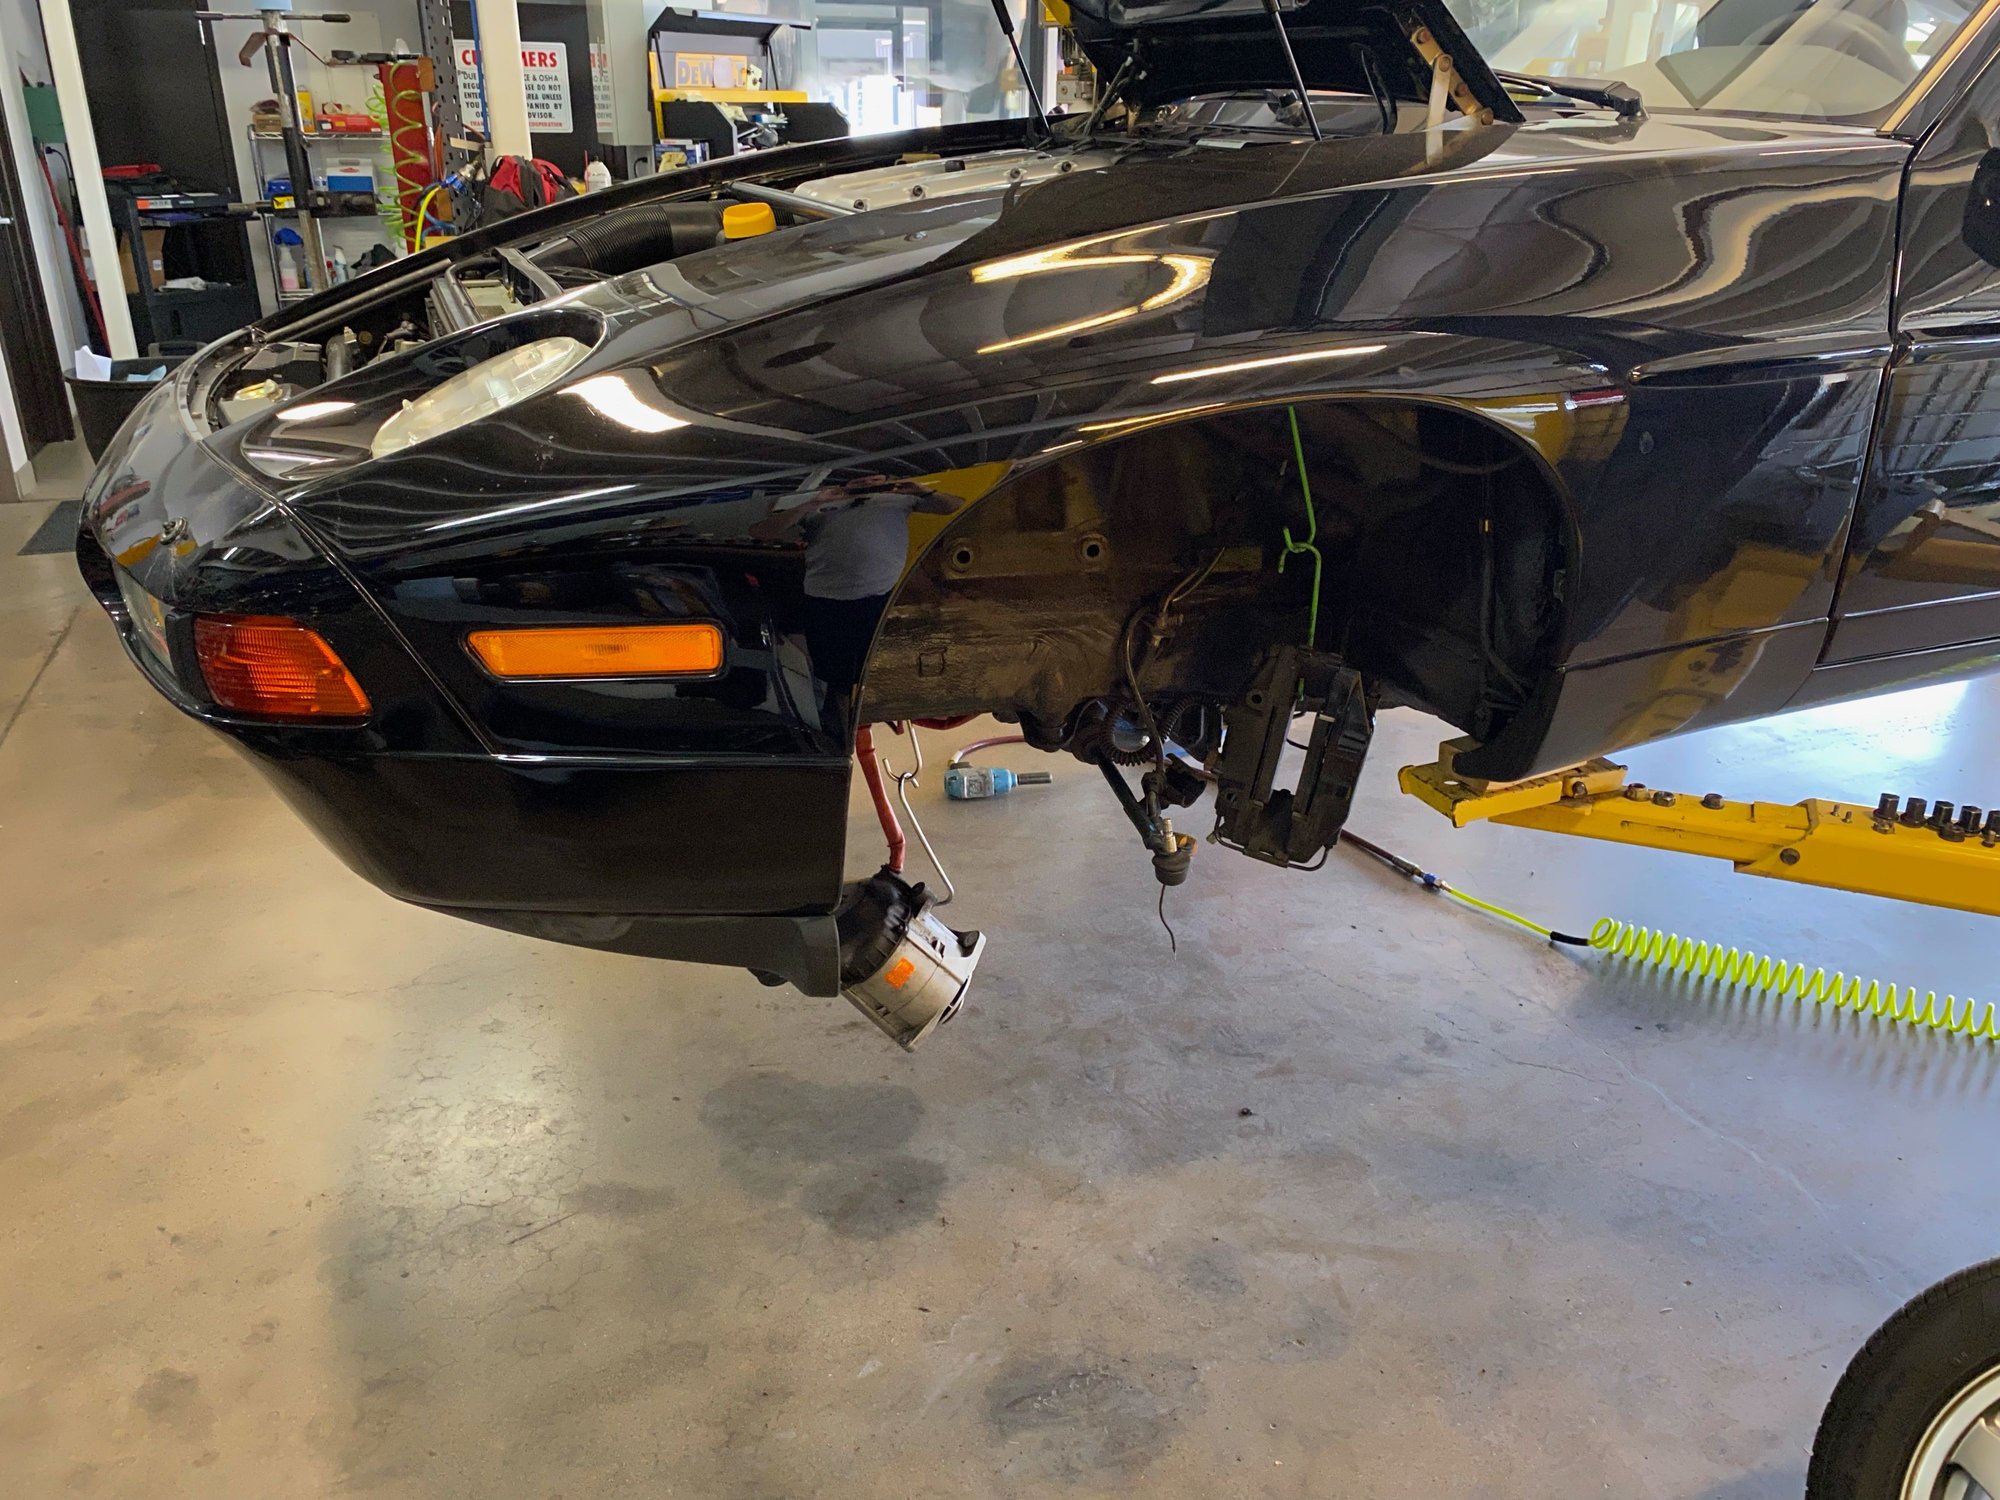
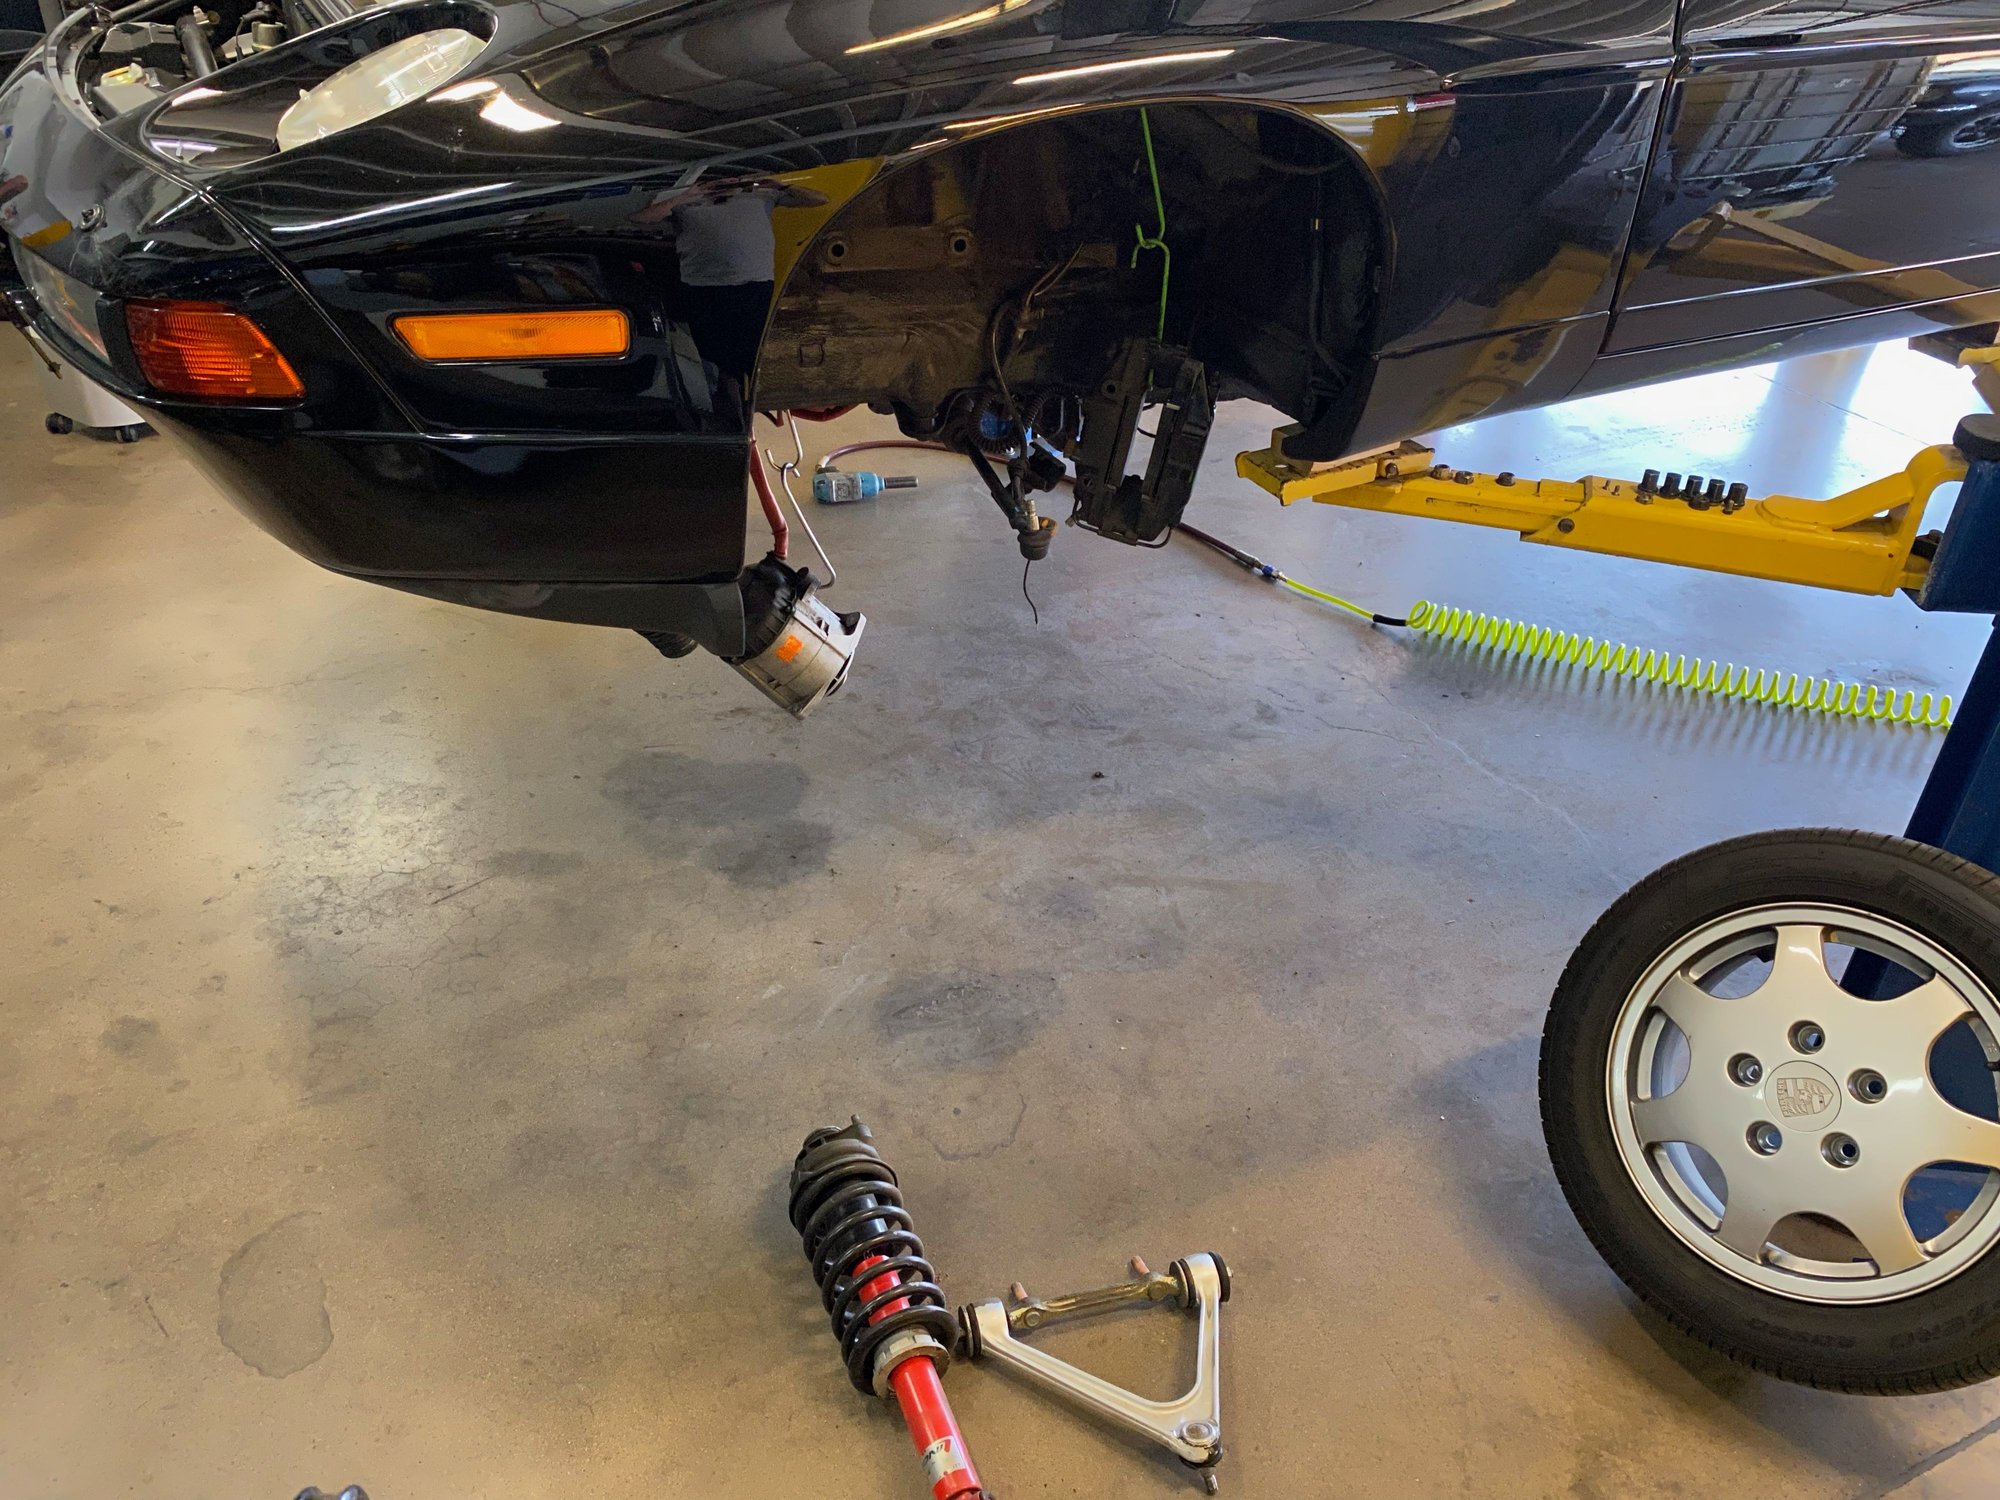
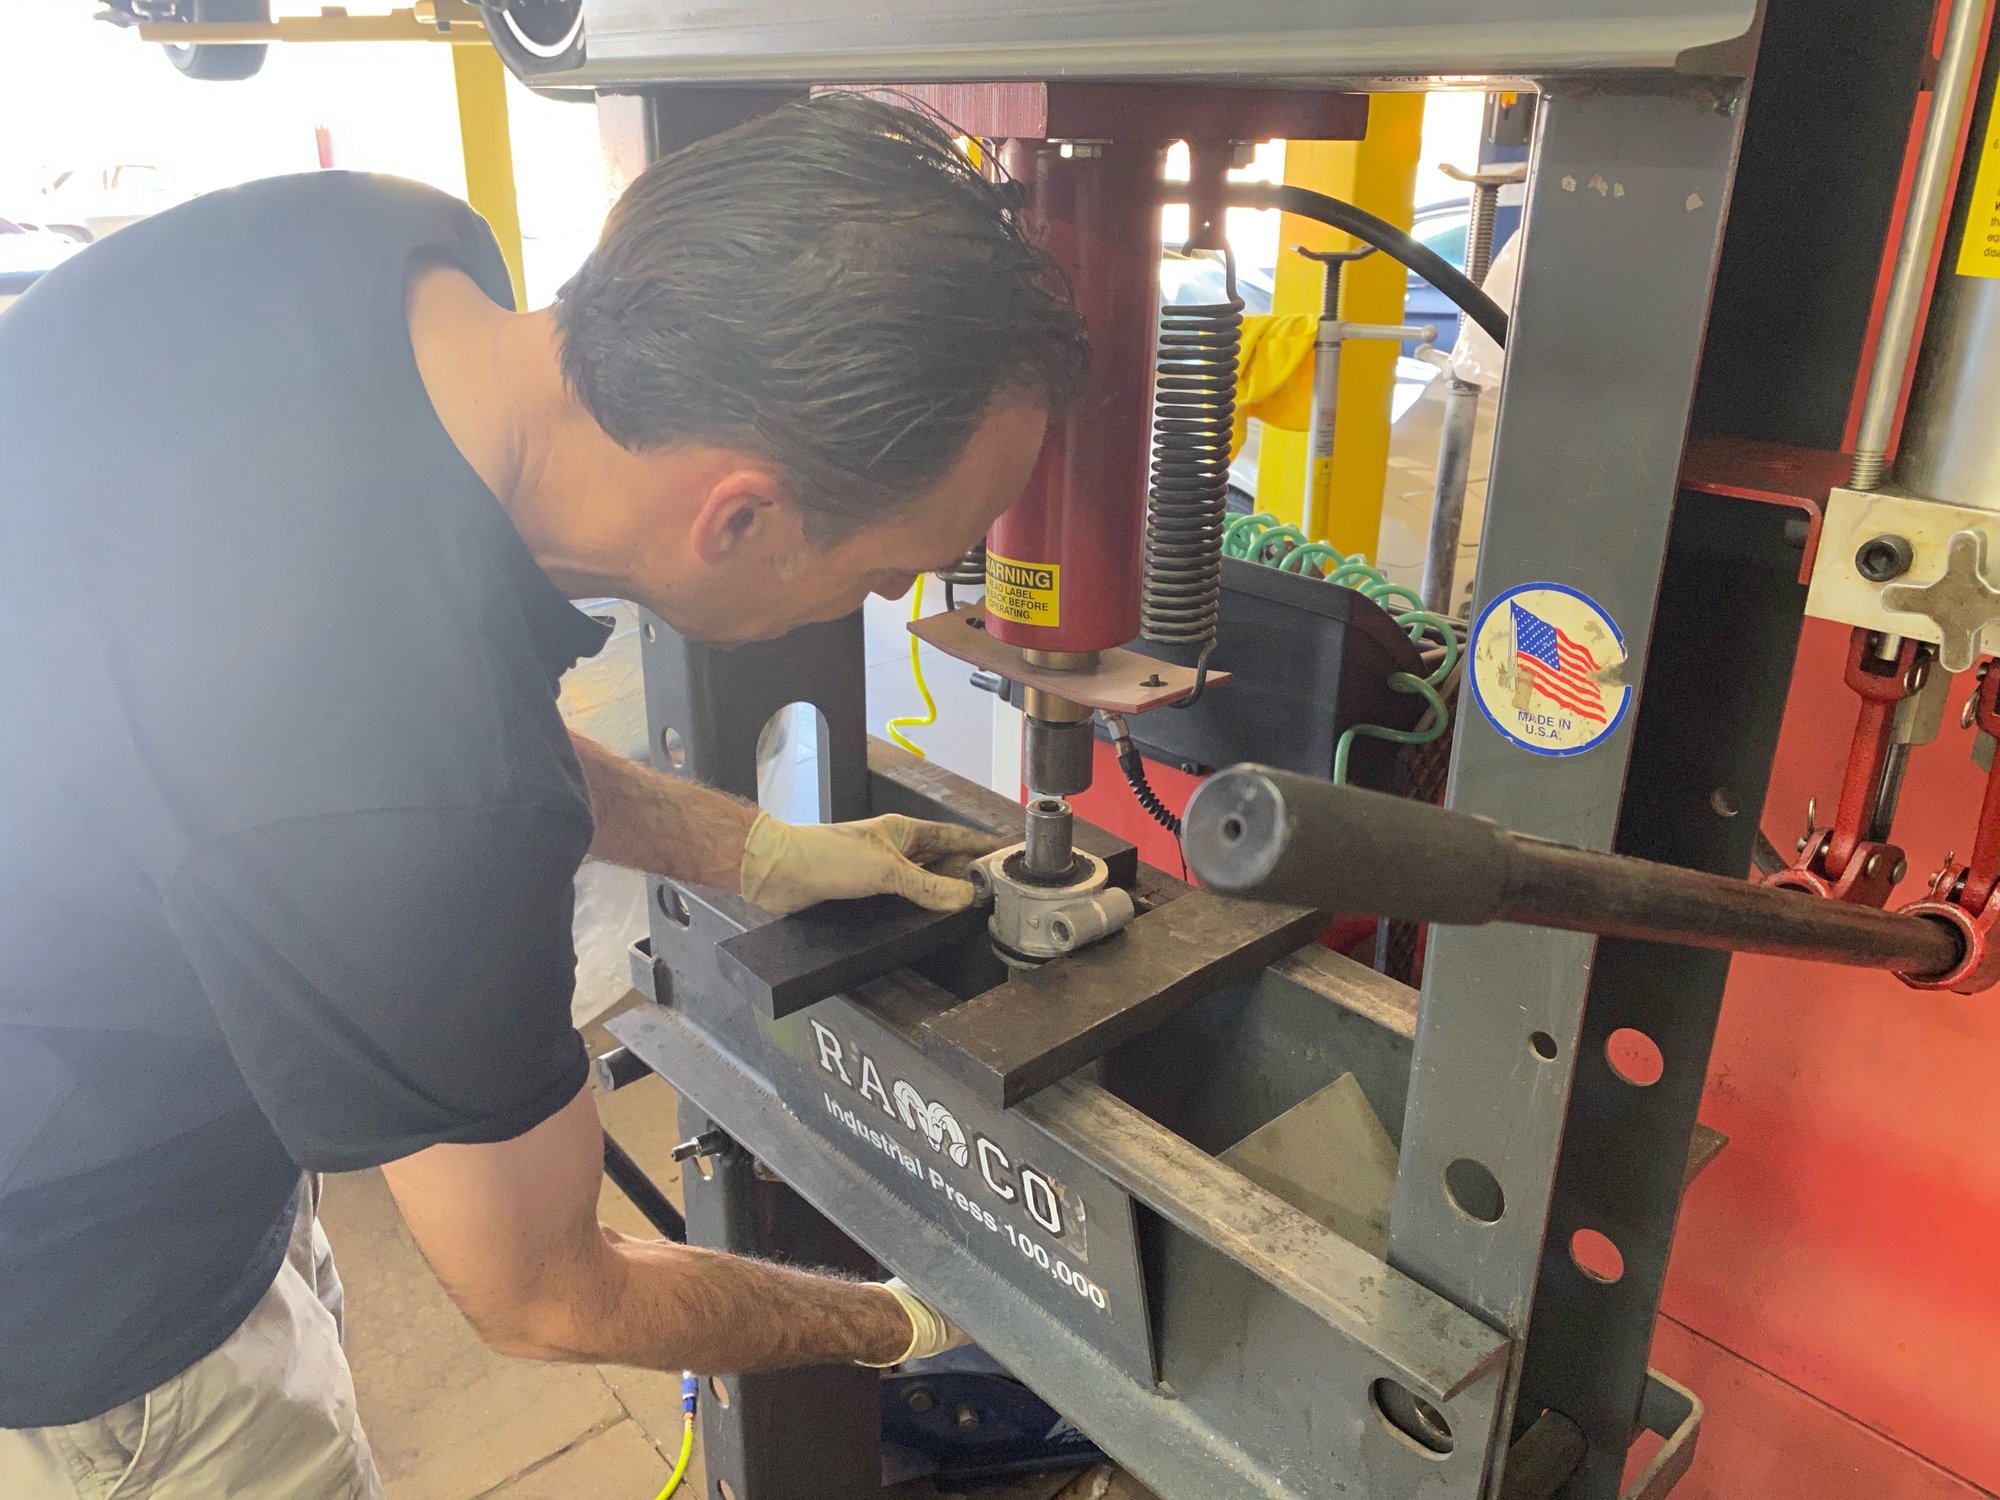
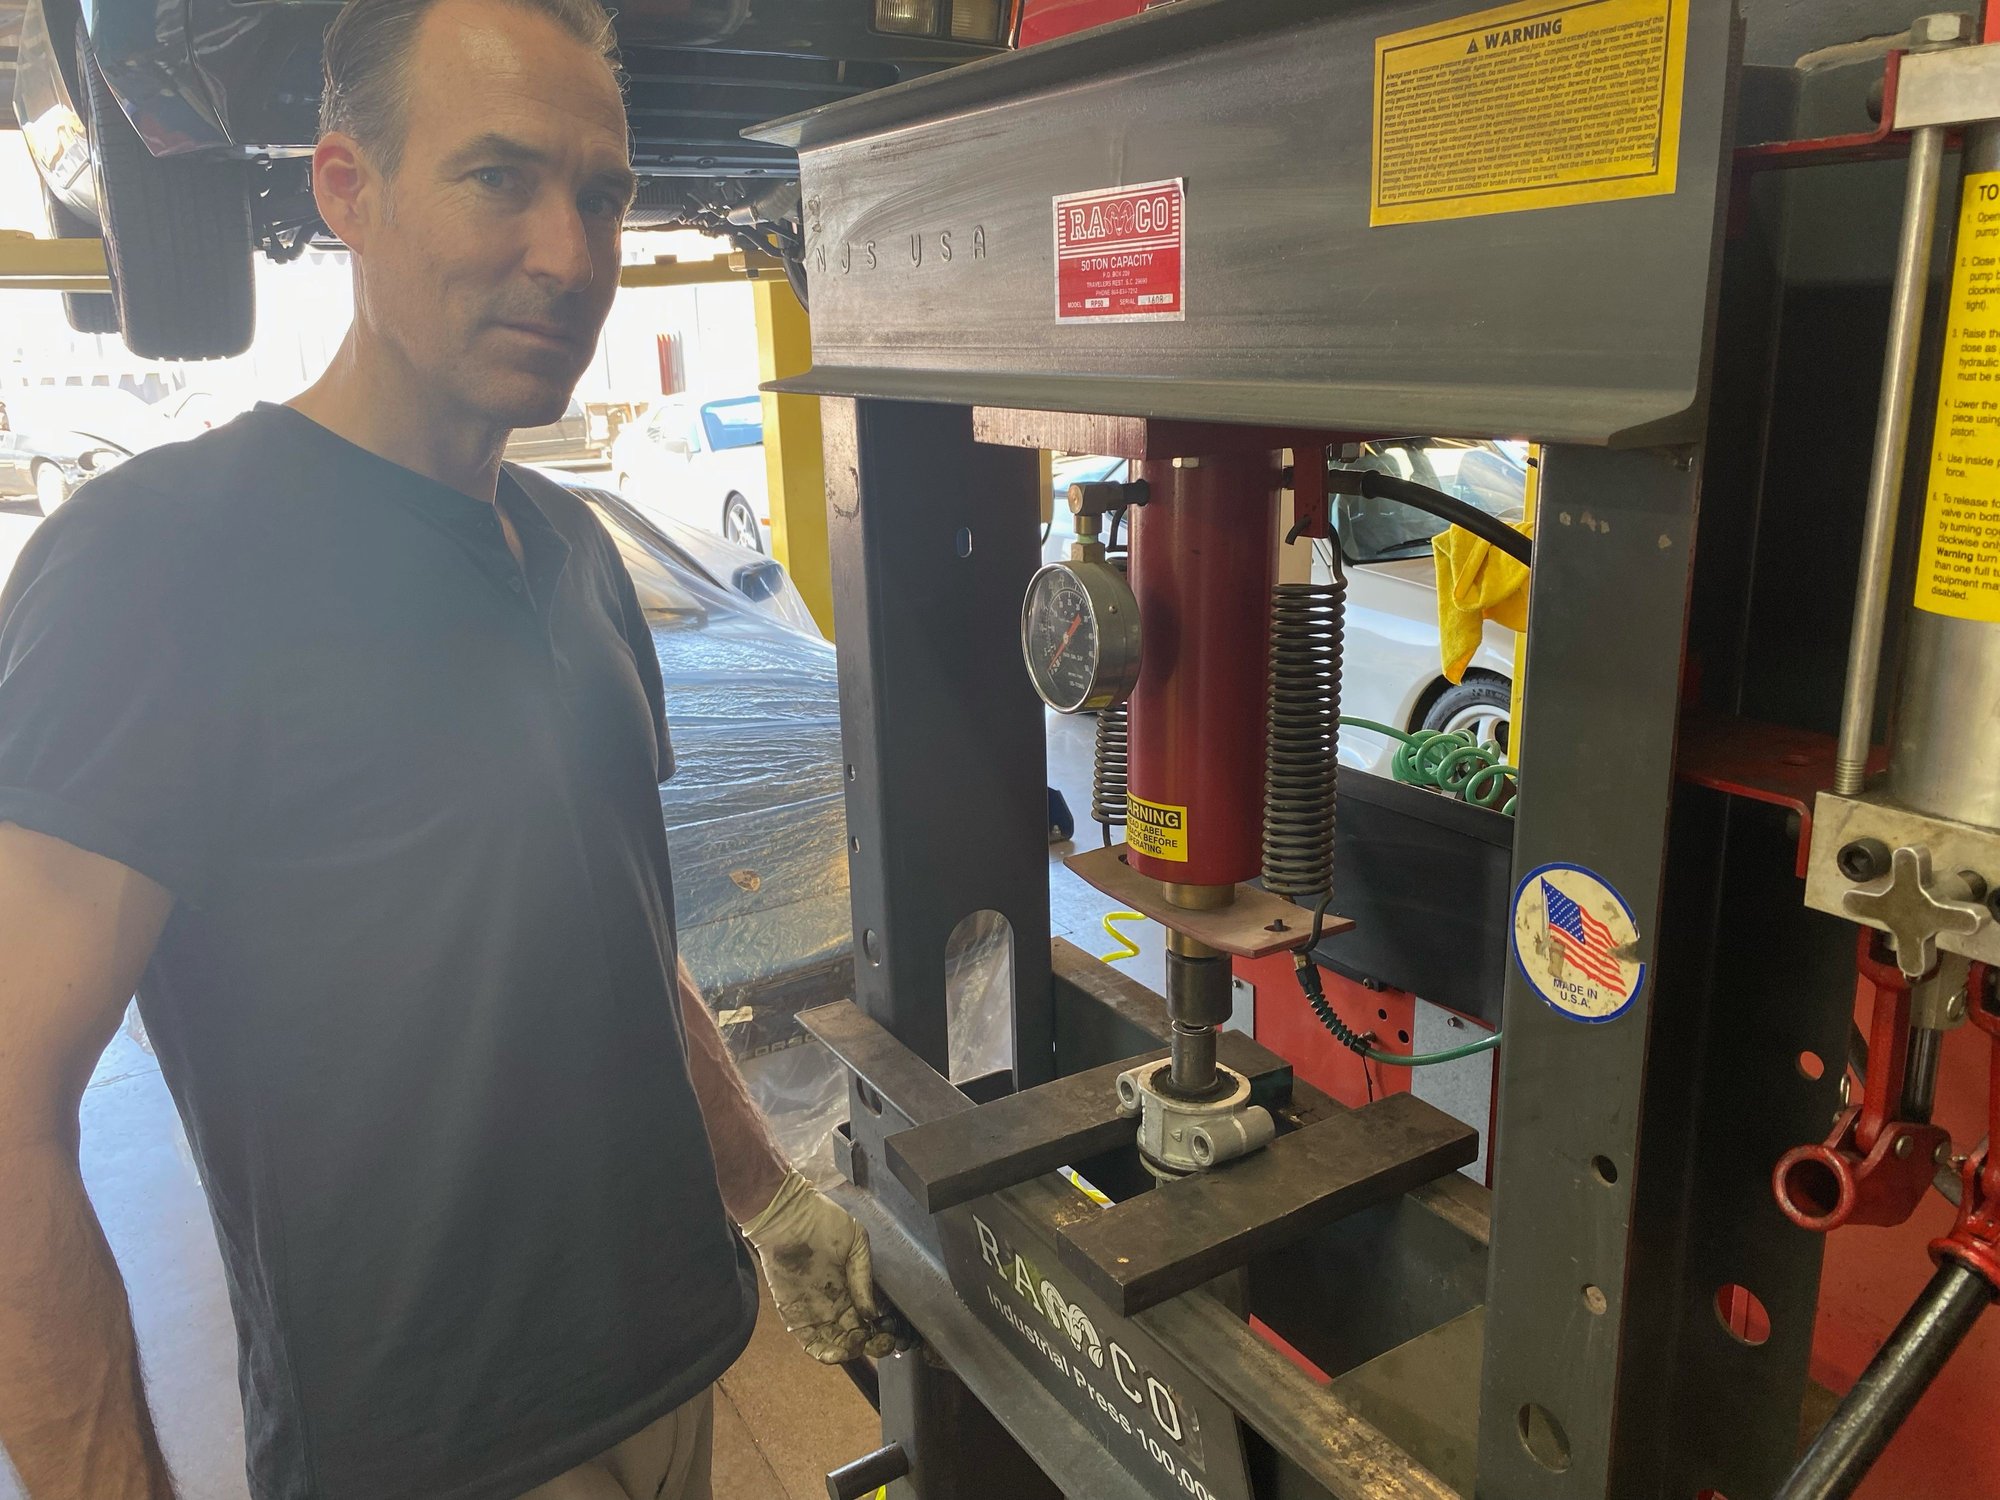
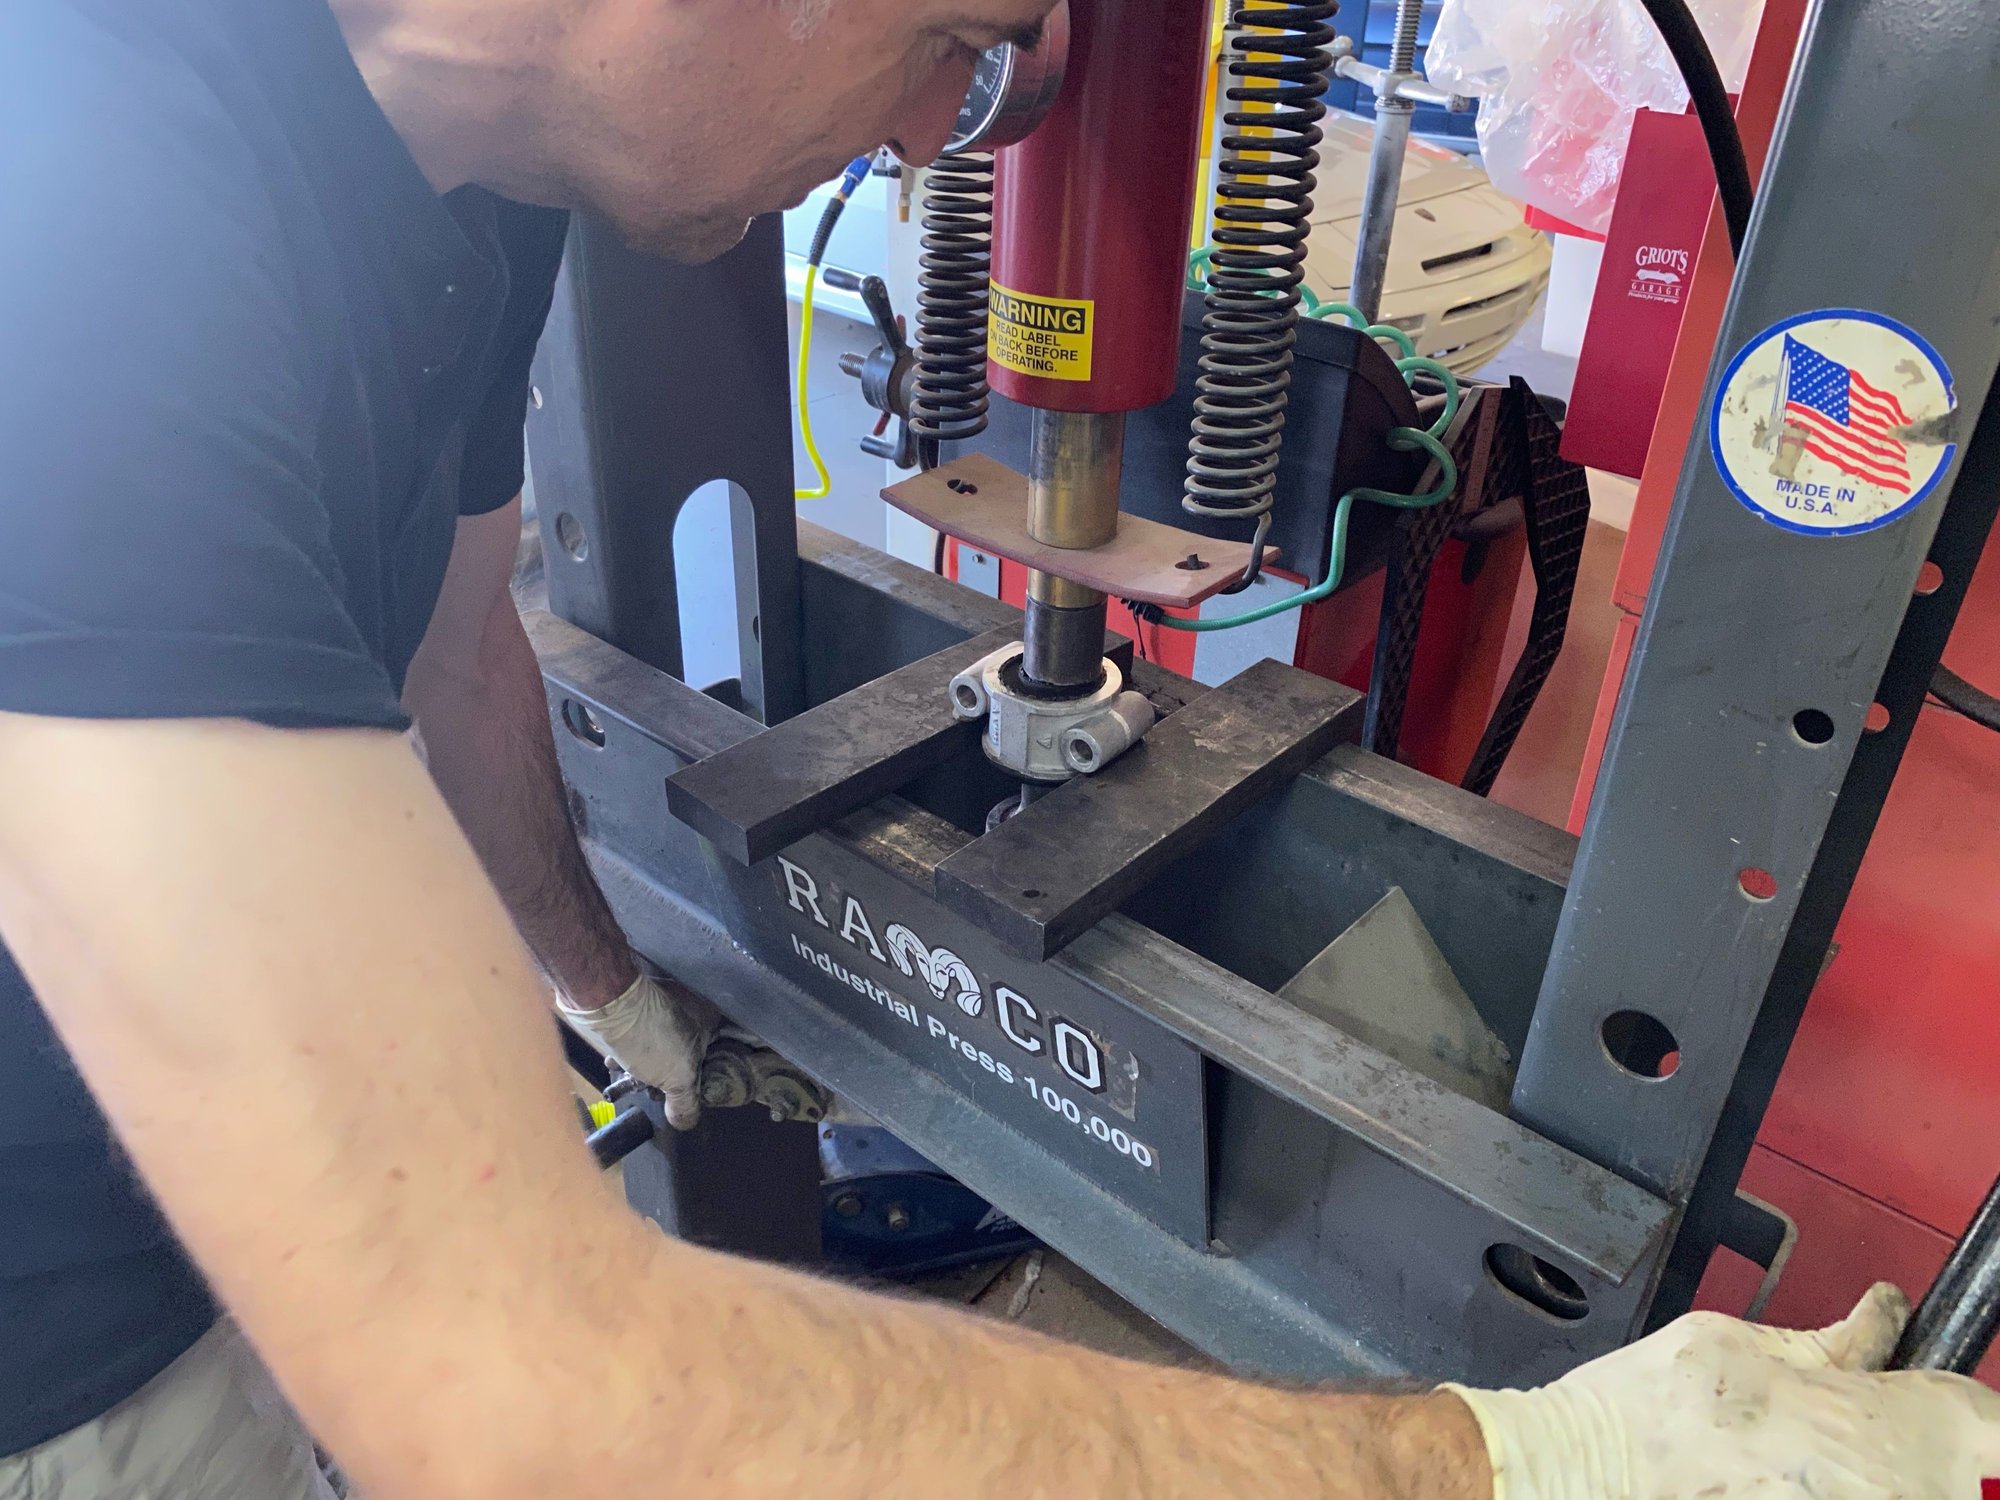
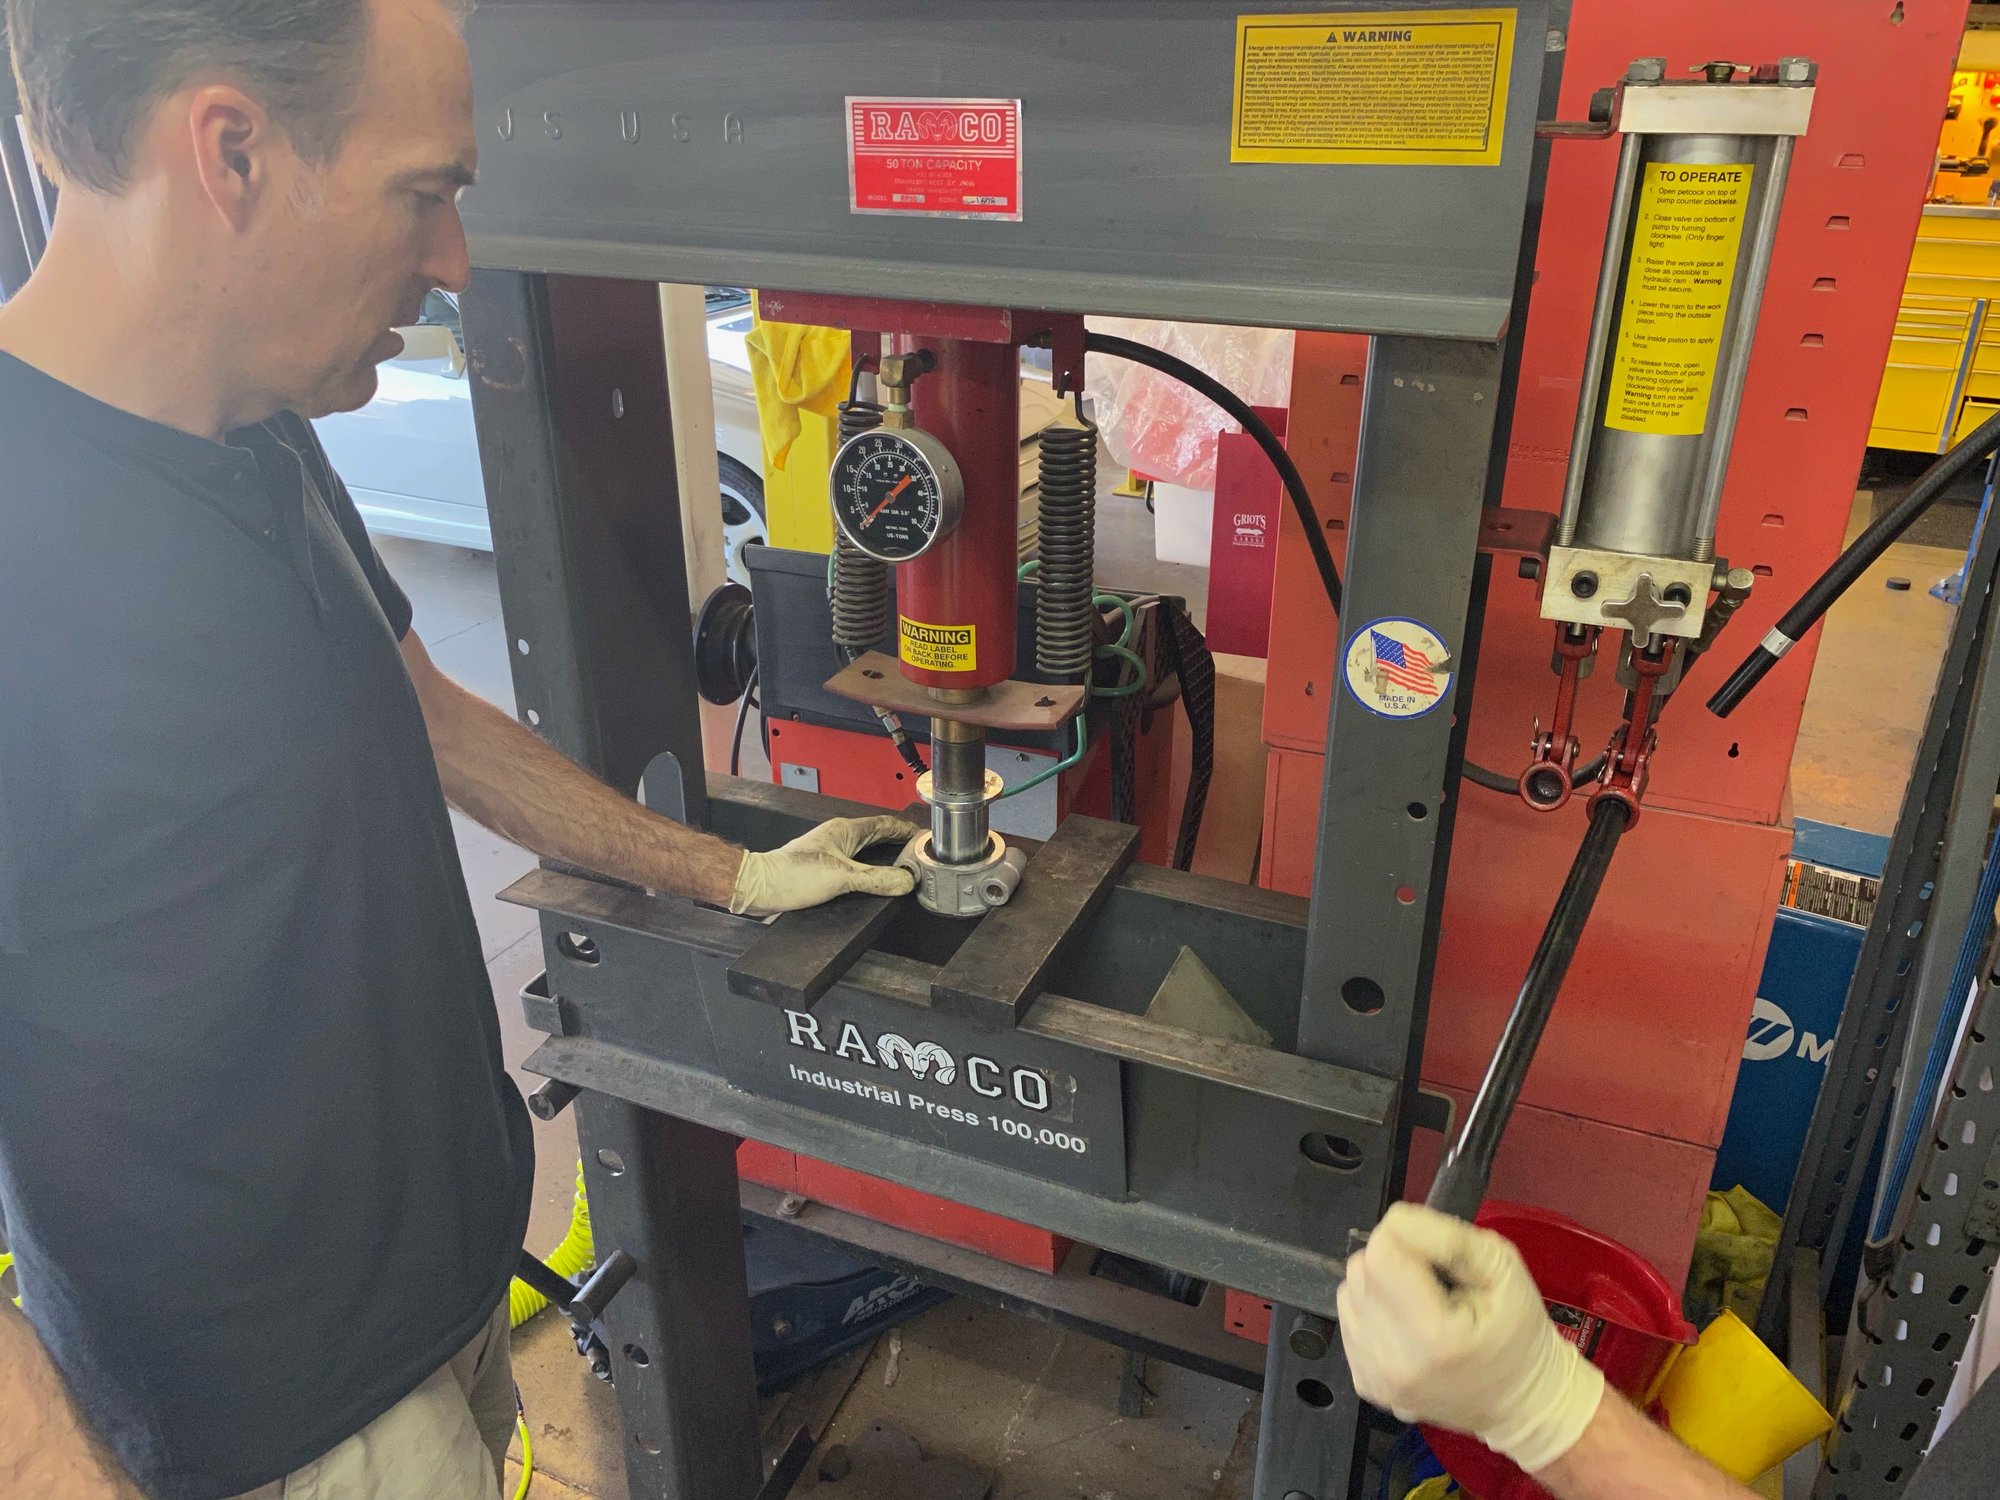
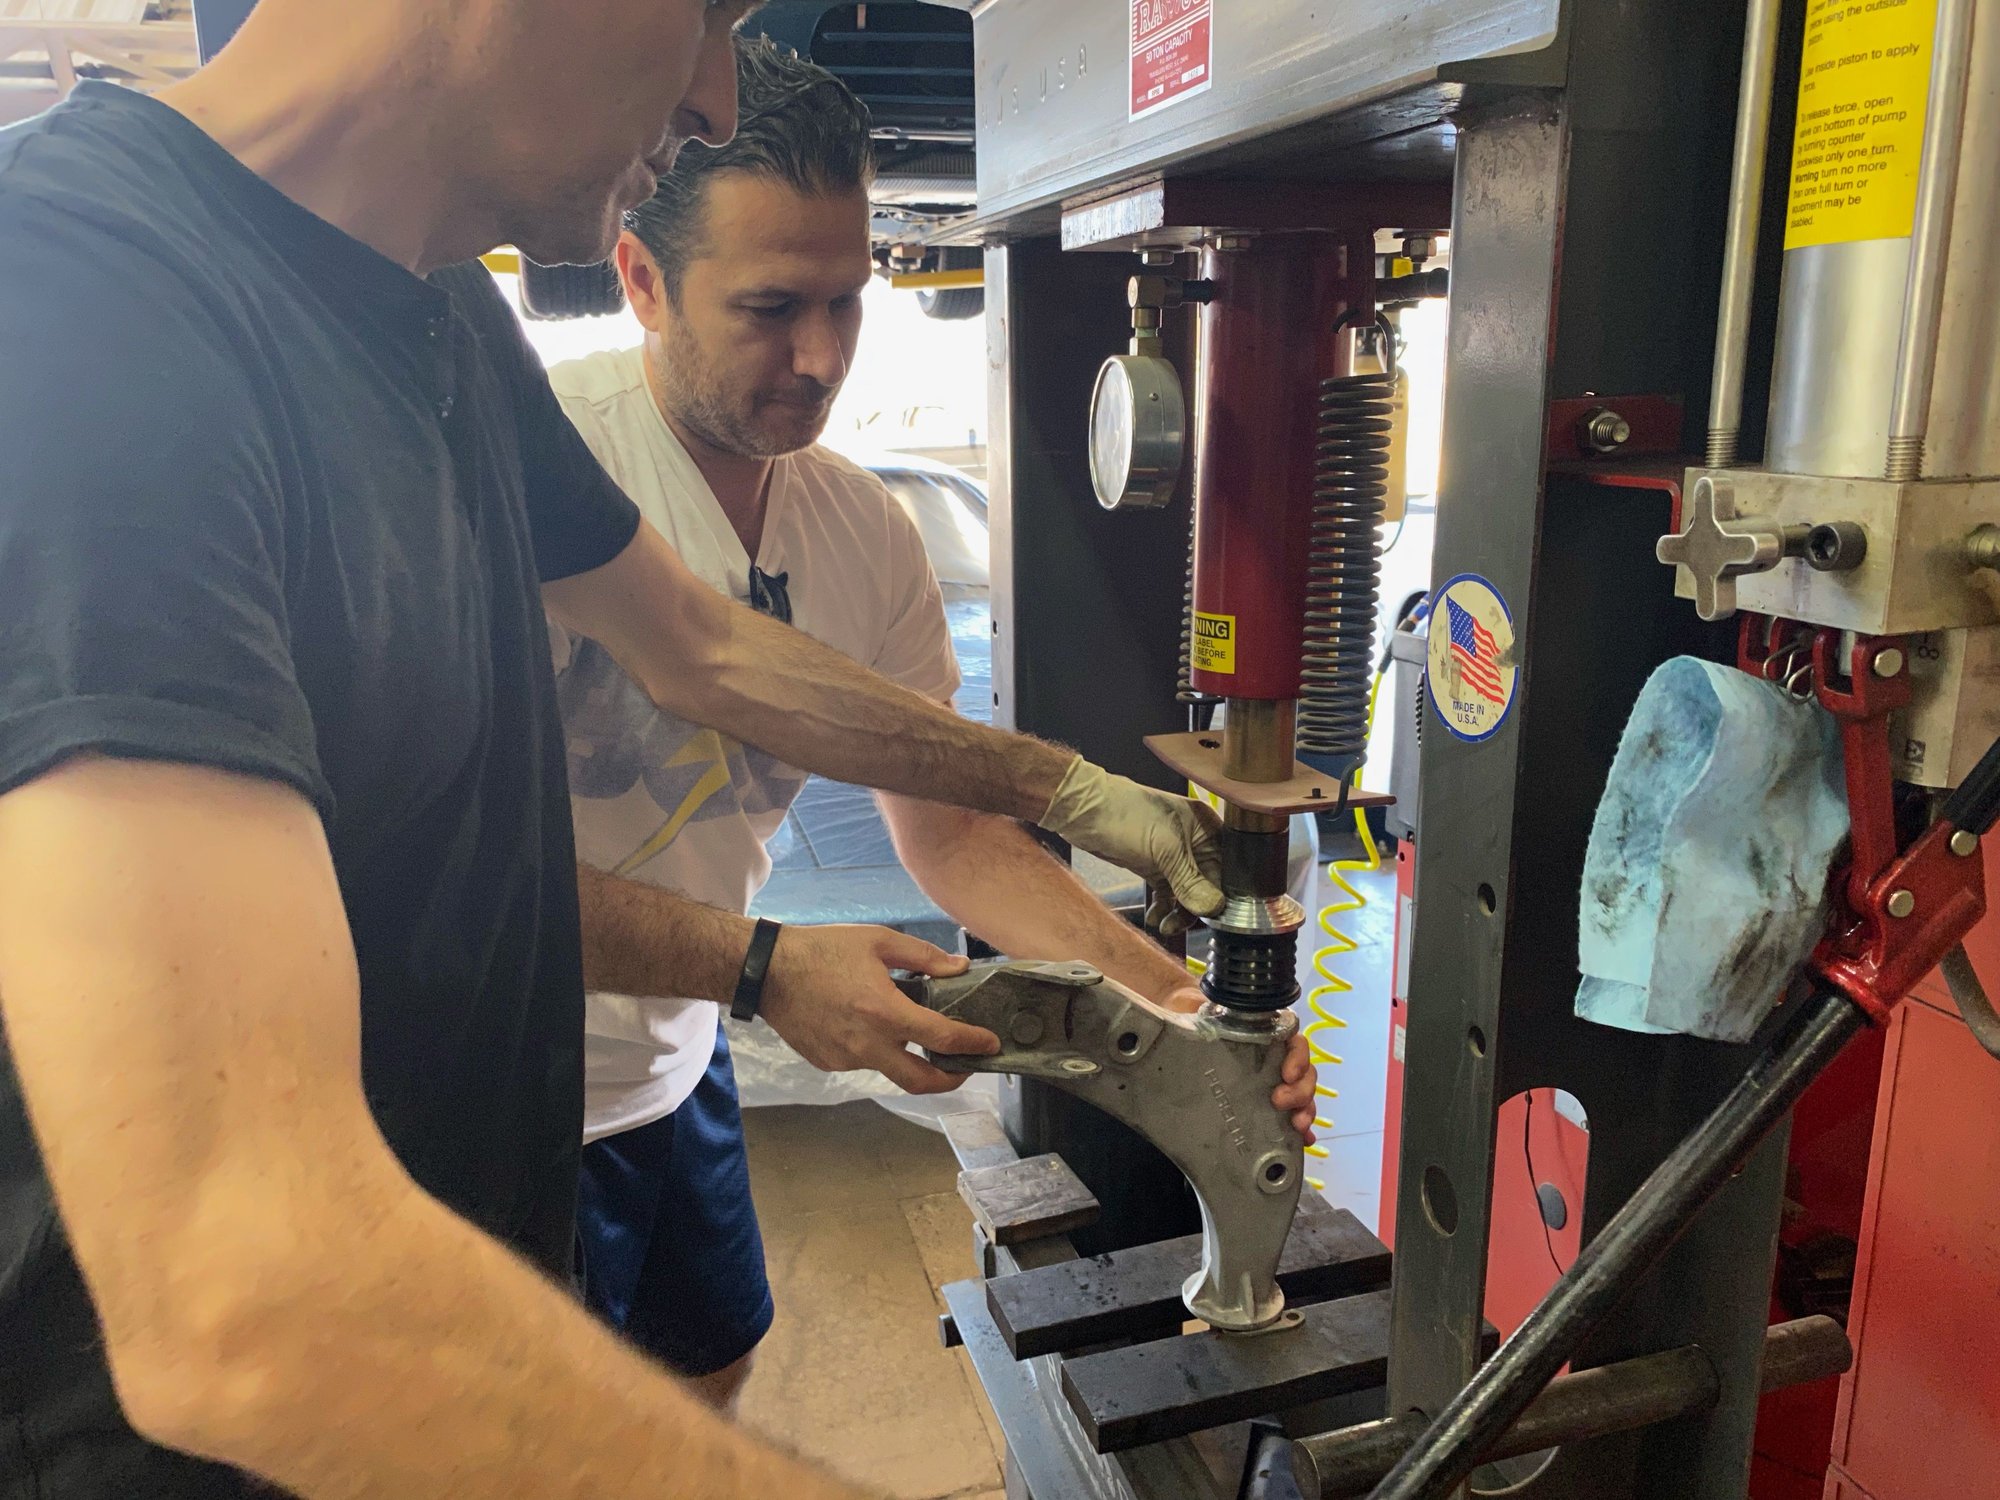
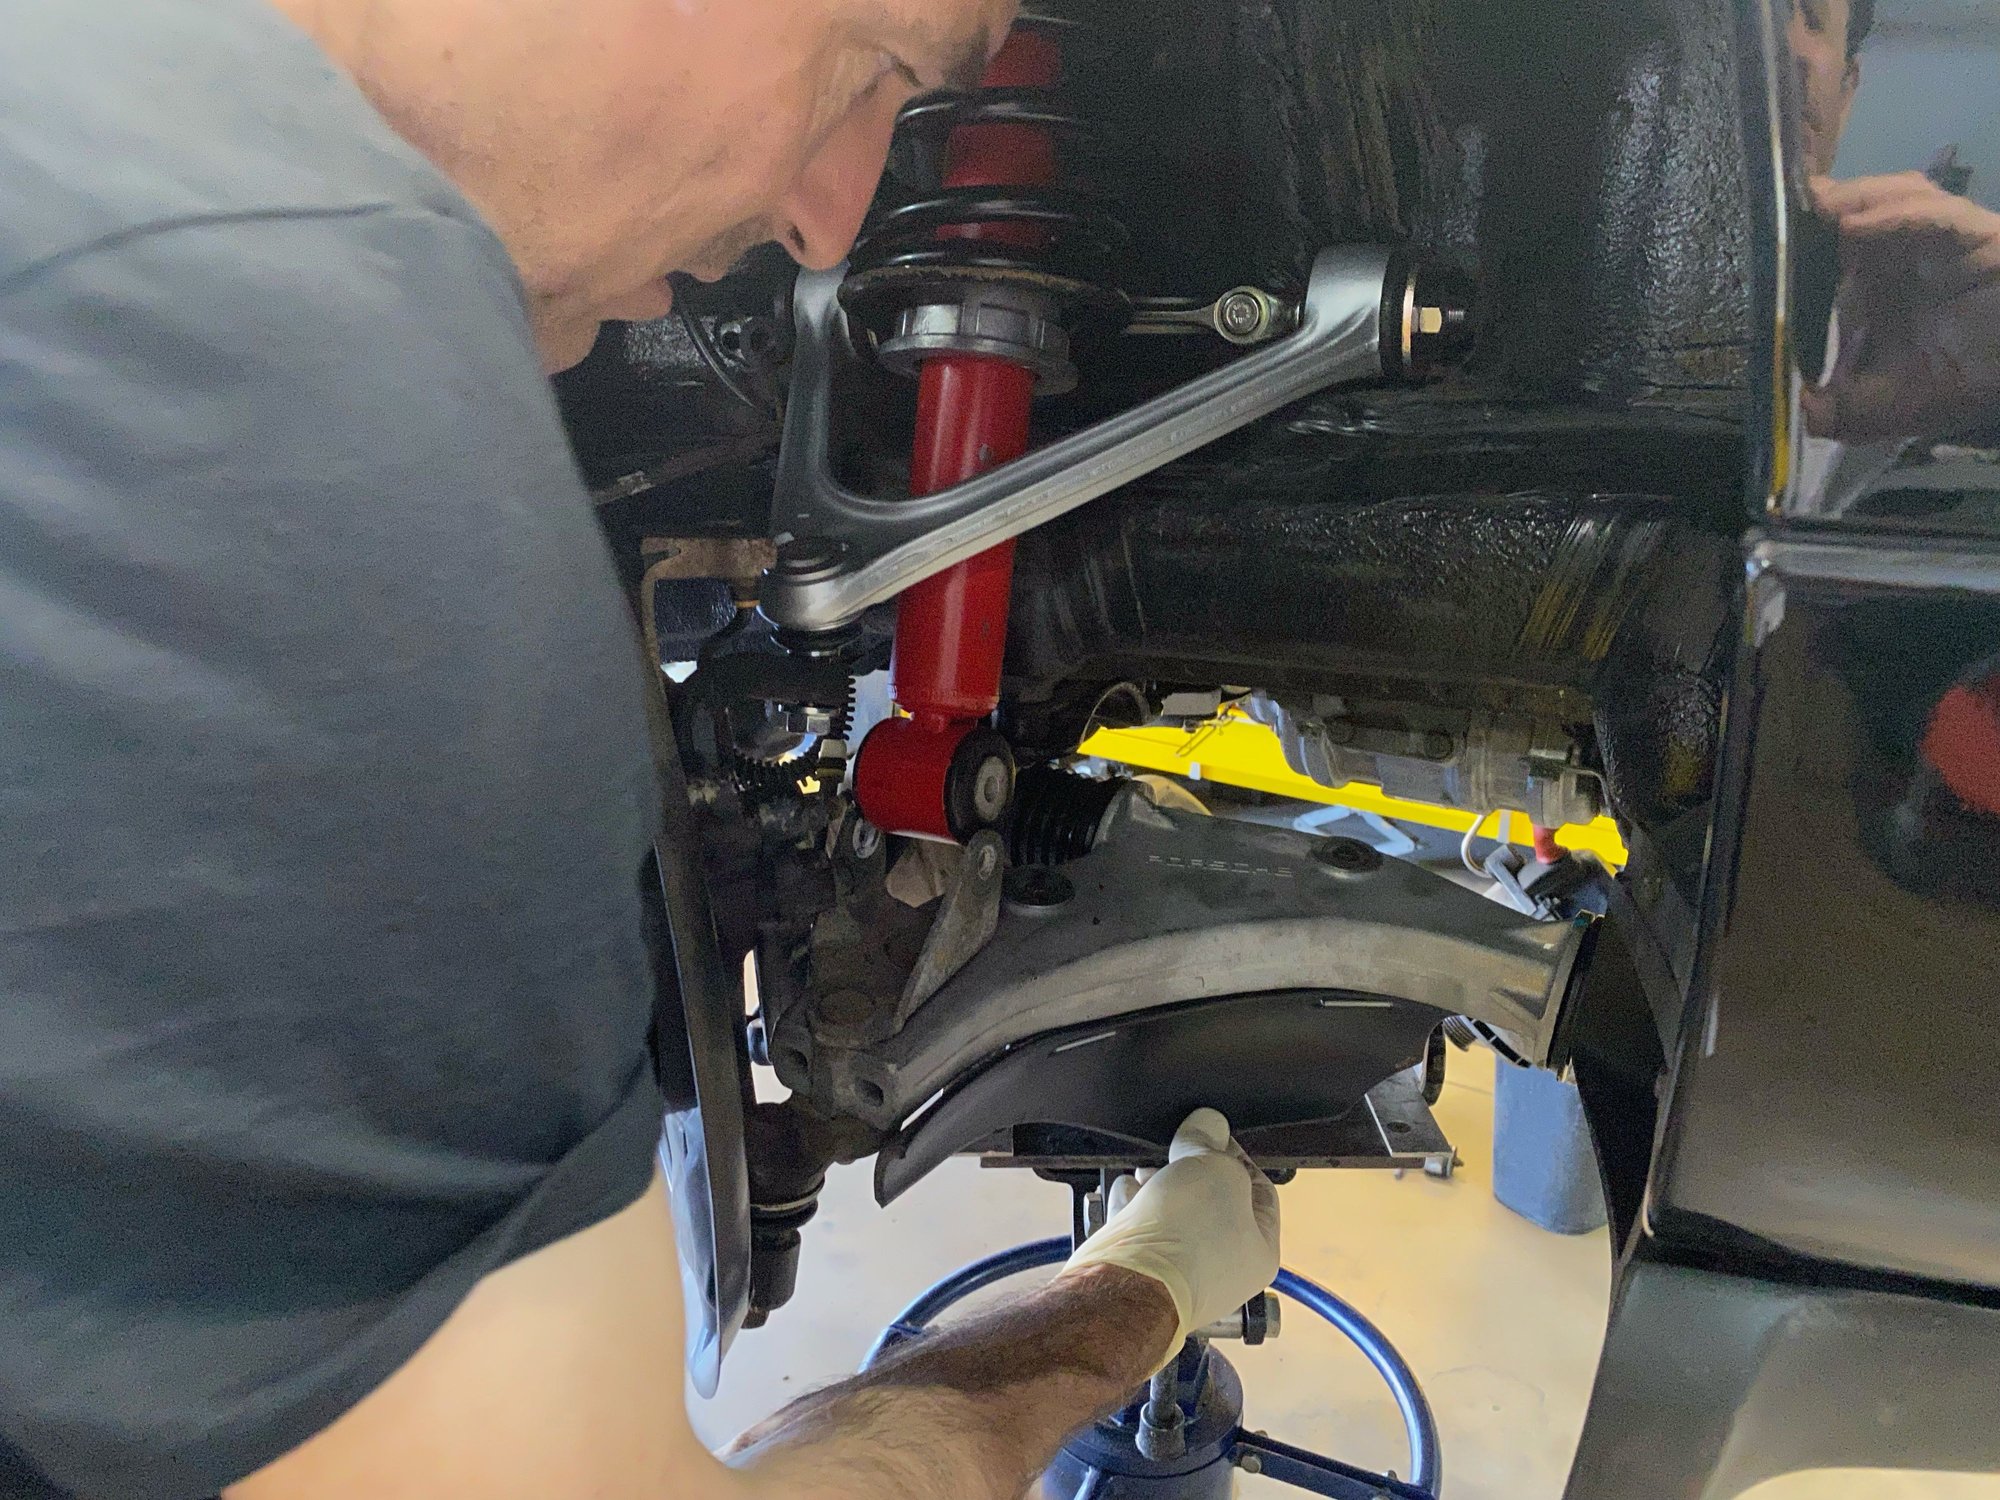
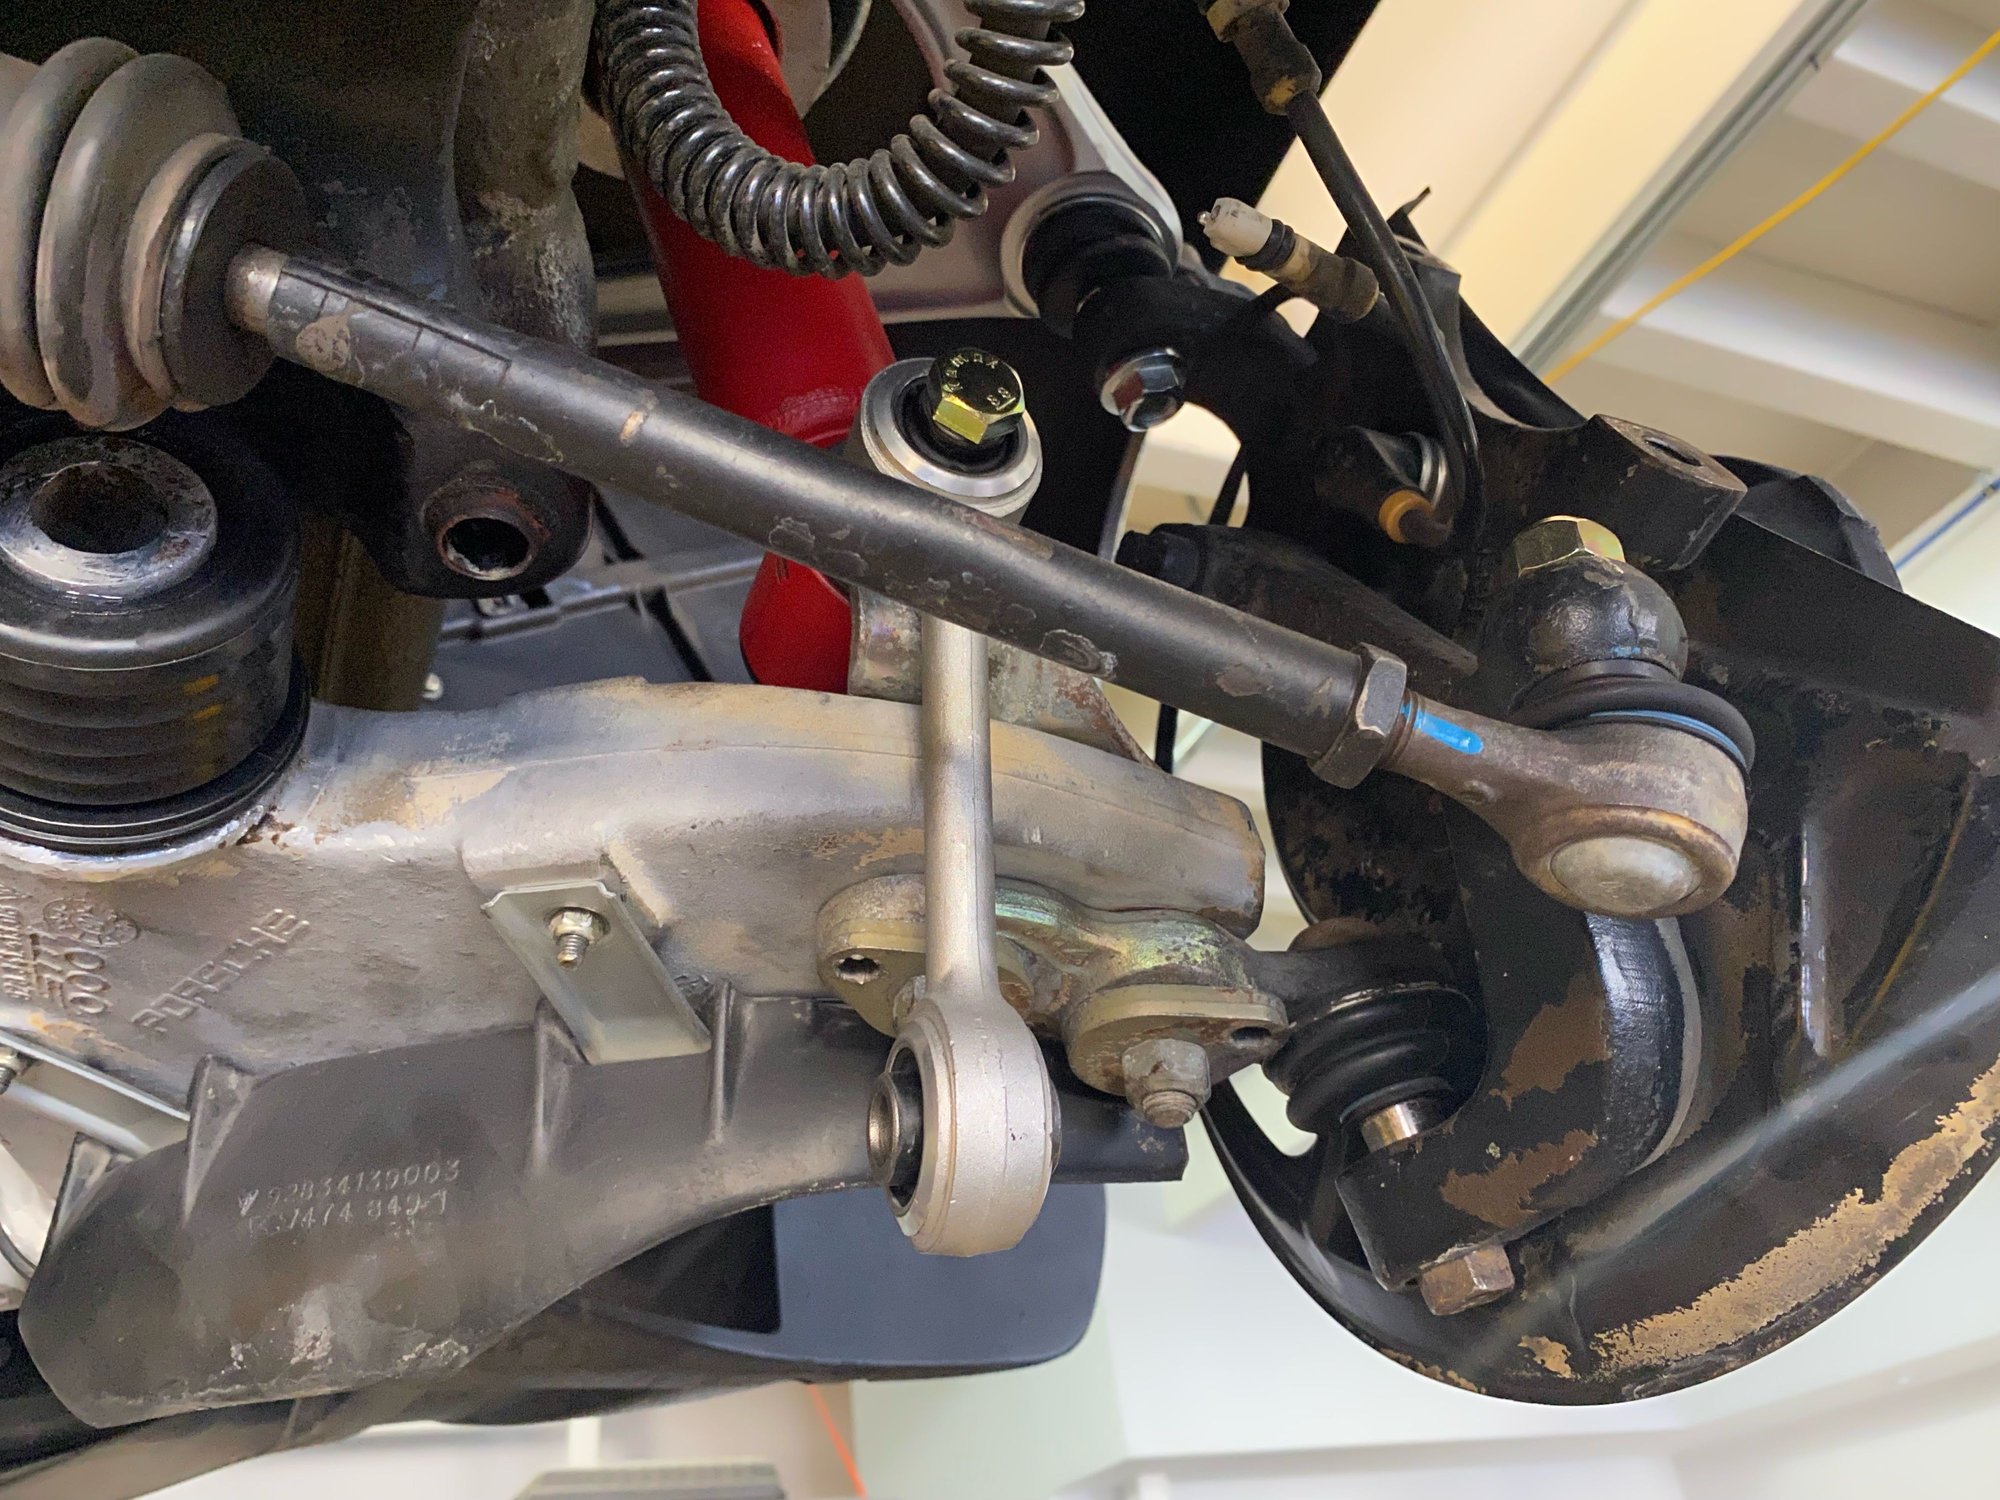
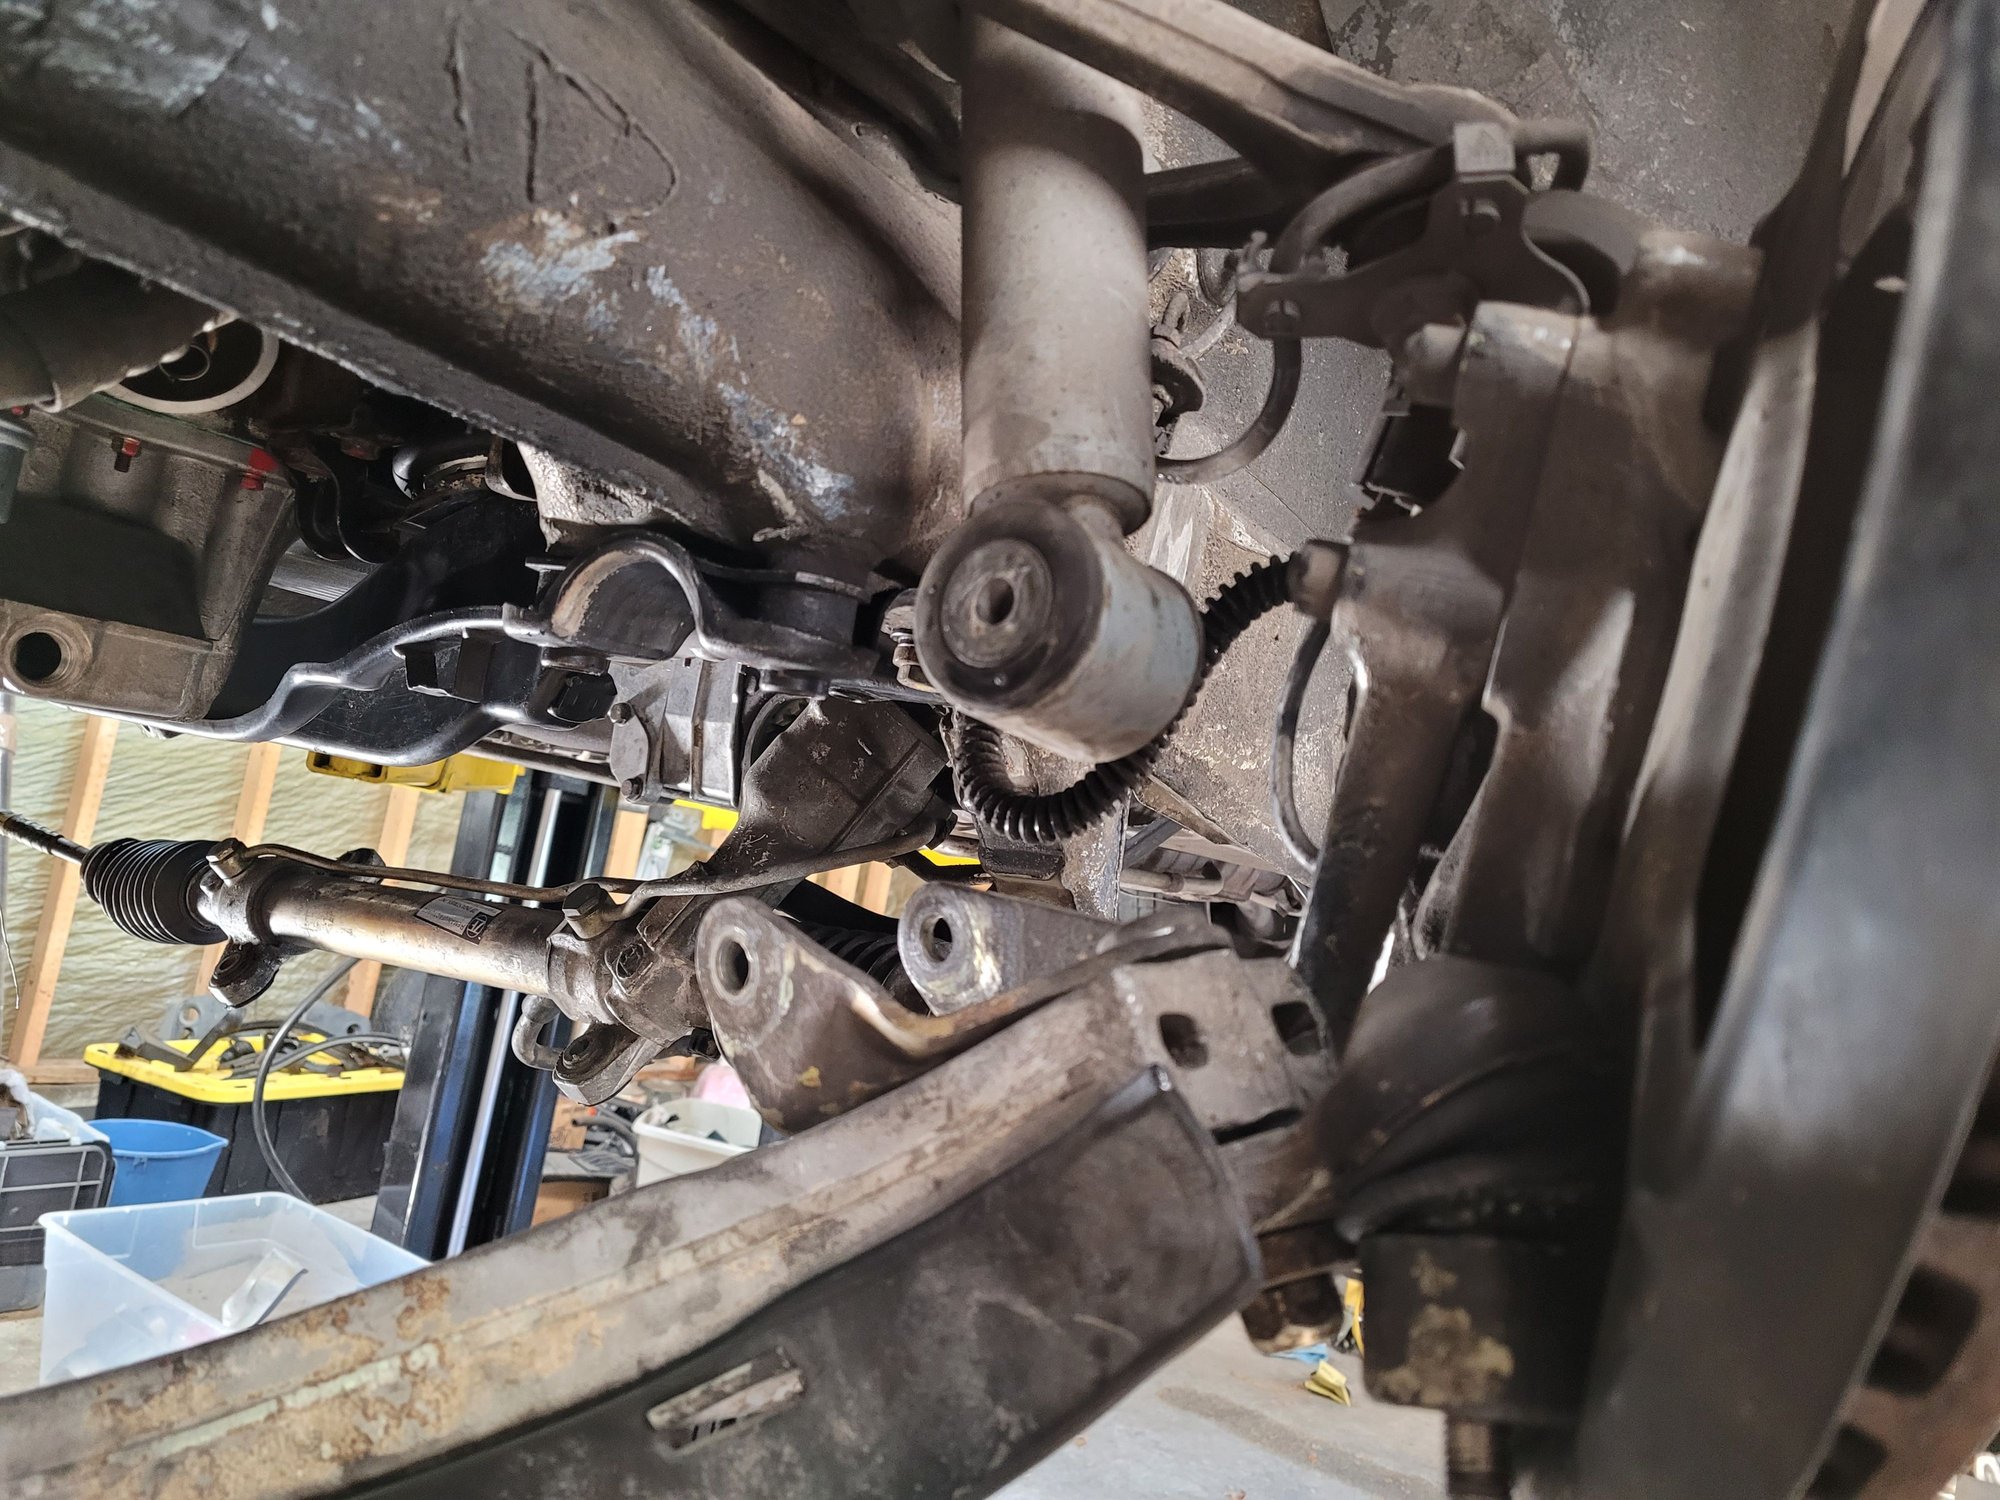
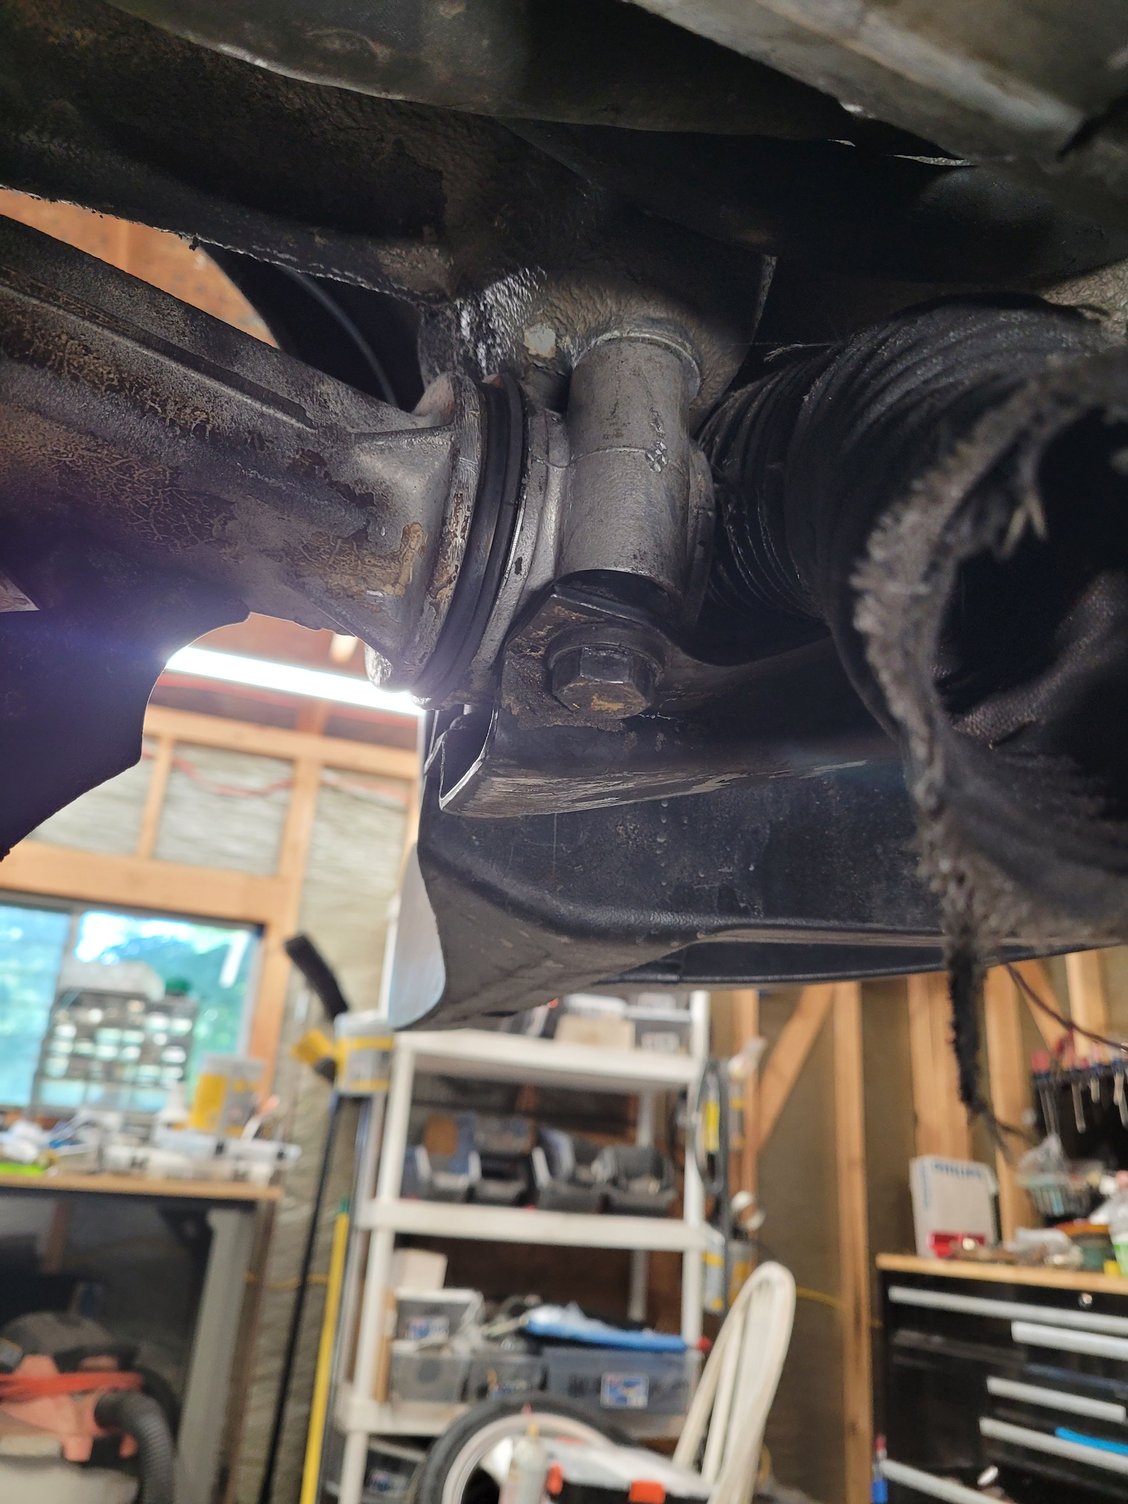
Ok so here are some pics from today. The front suspension is almost completely done (still sway bar to have its bushings replaced and the brake system installed).
Notes:
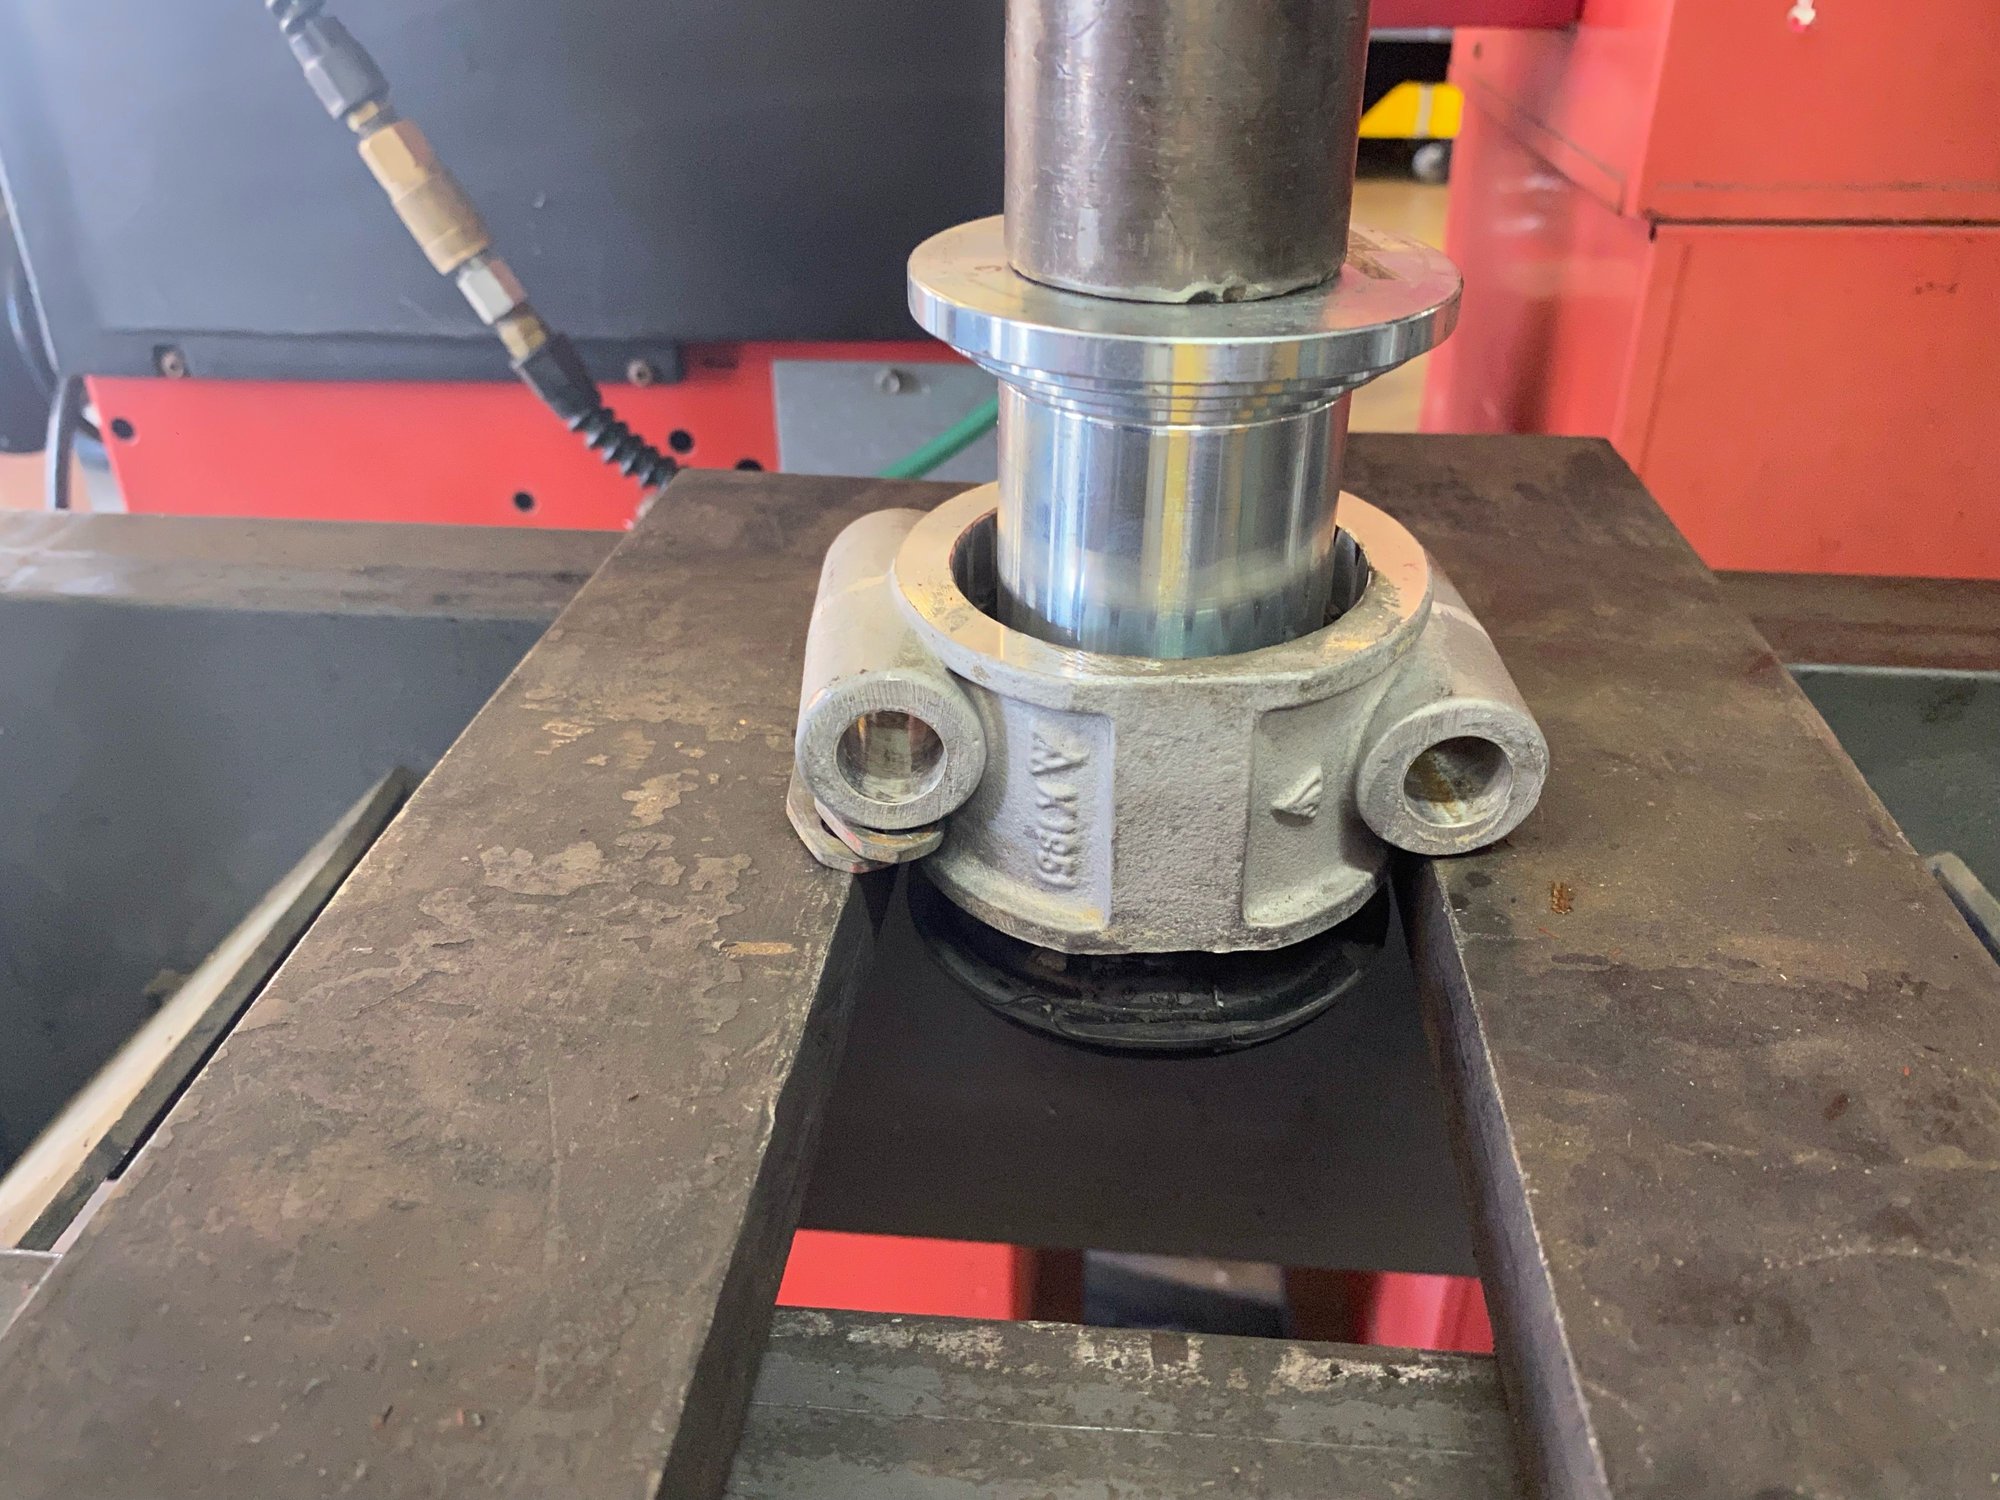
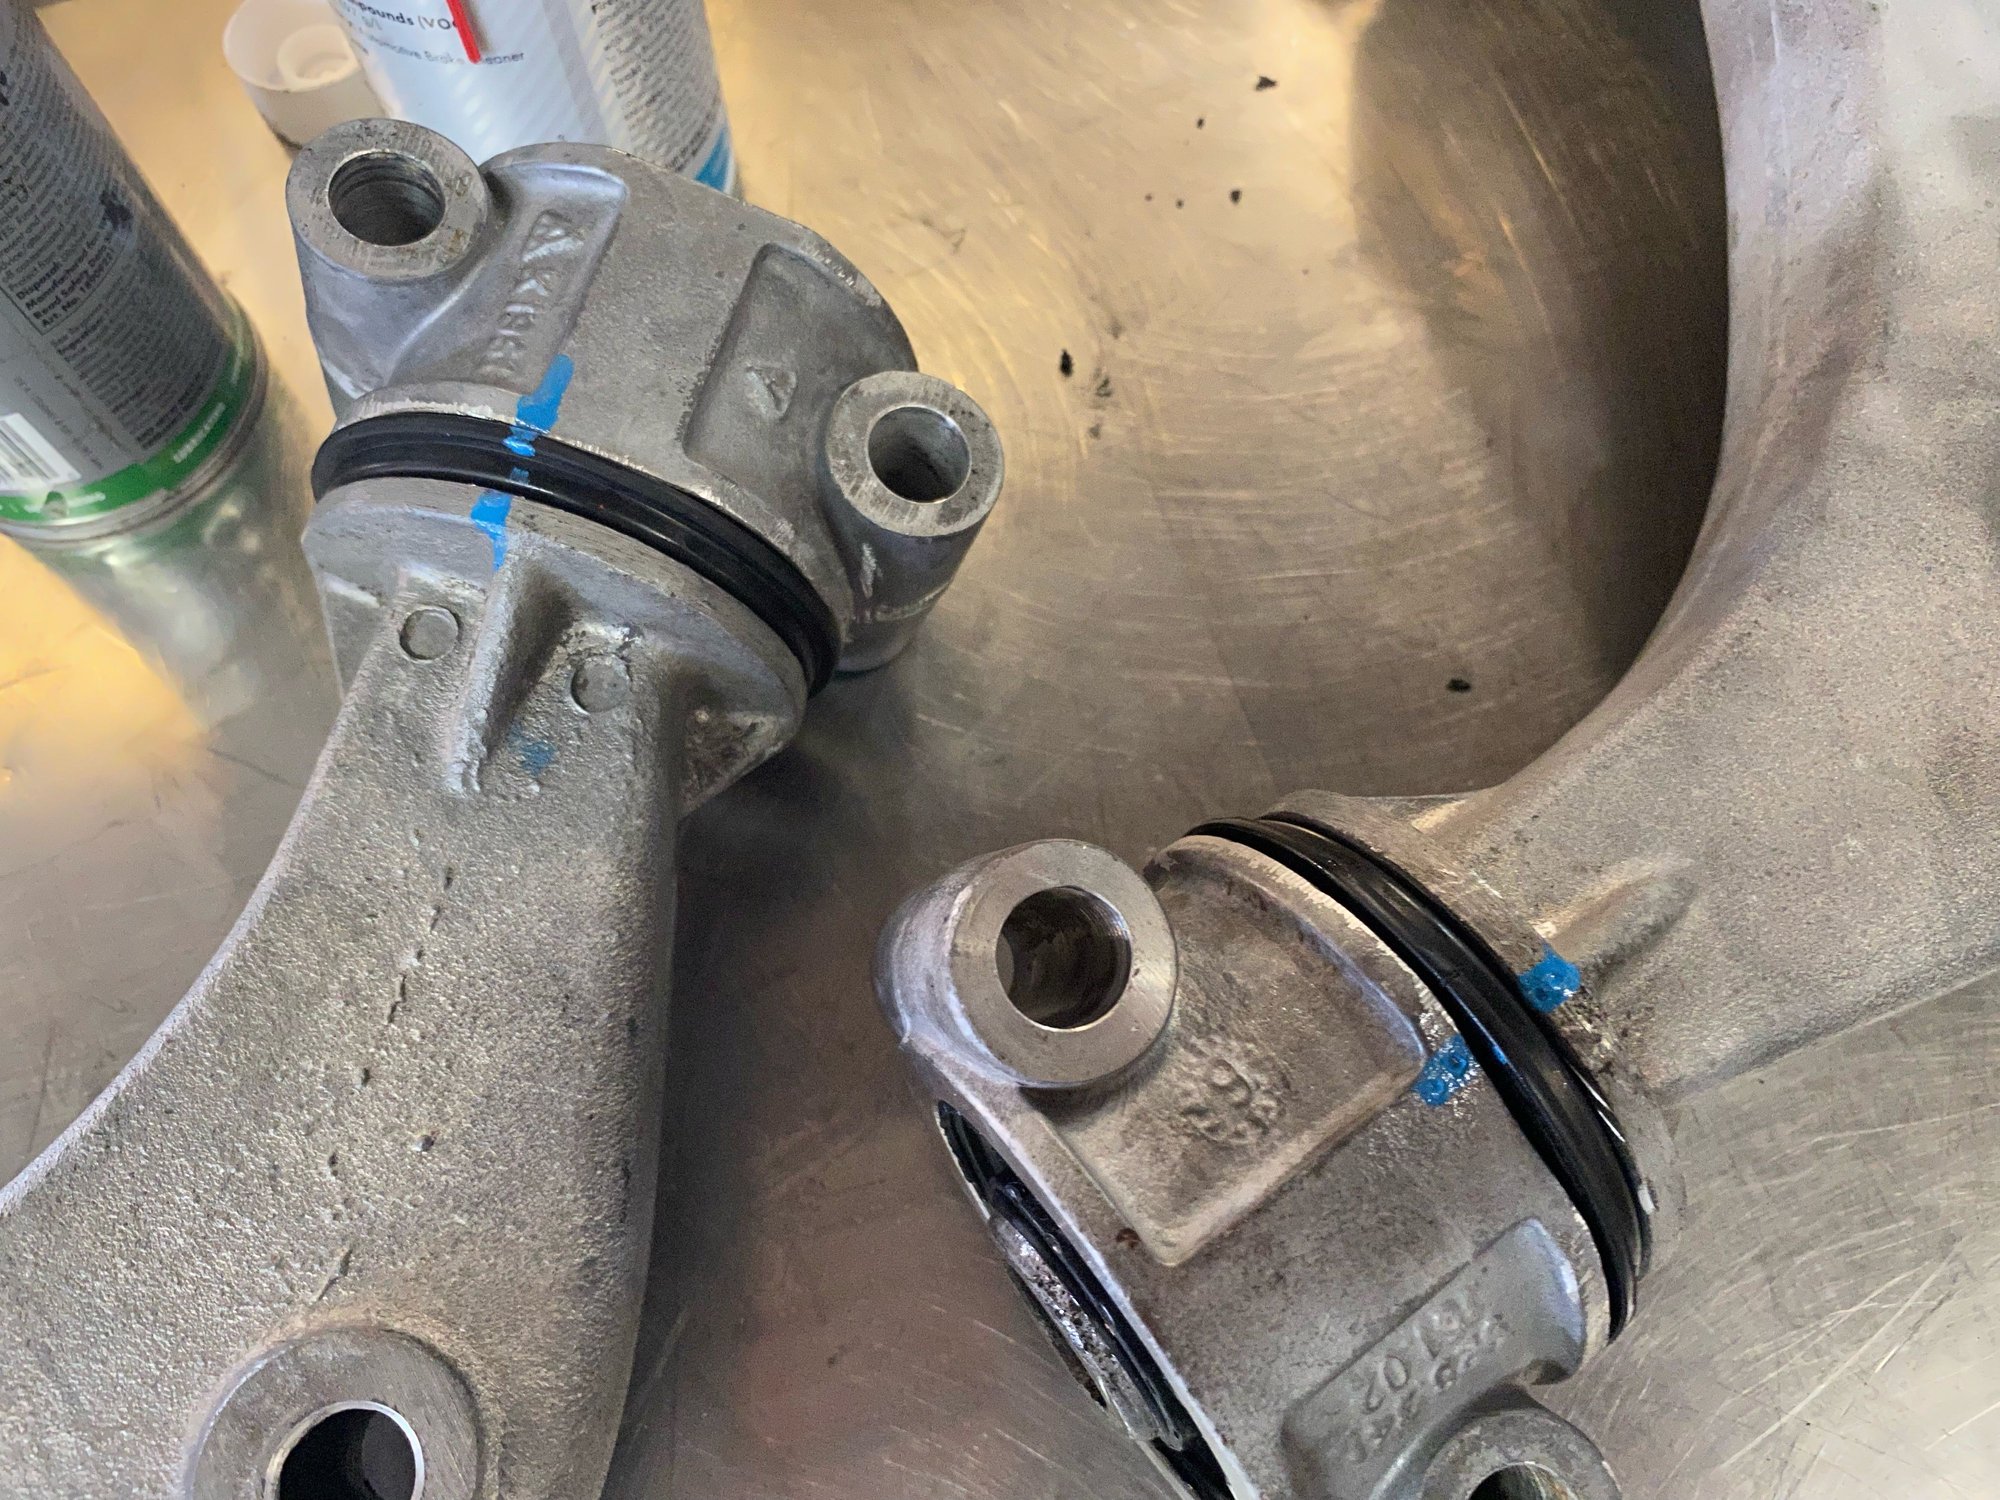
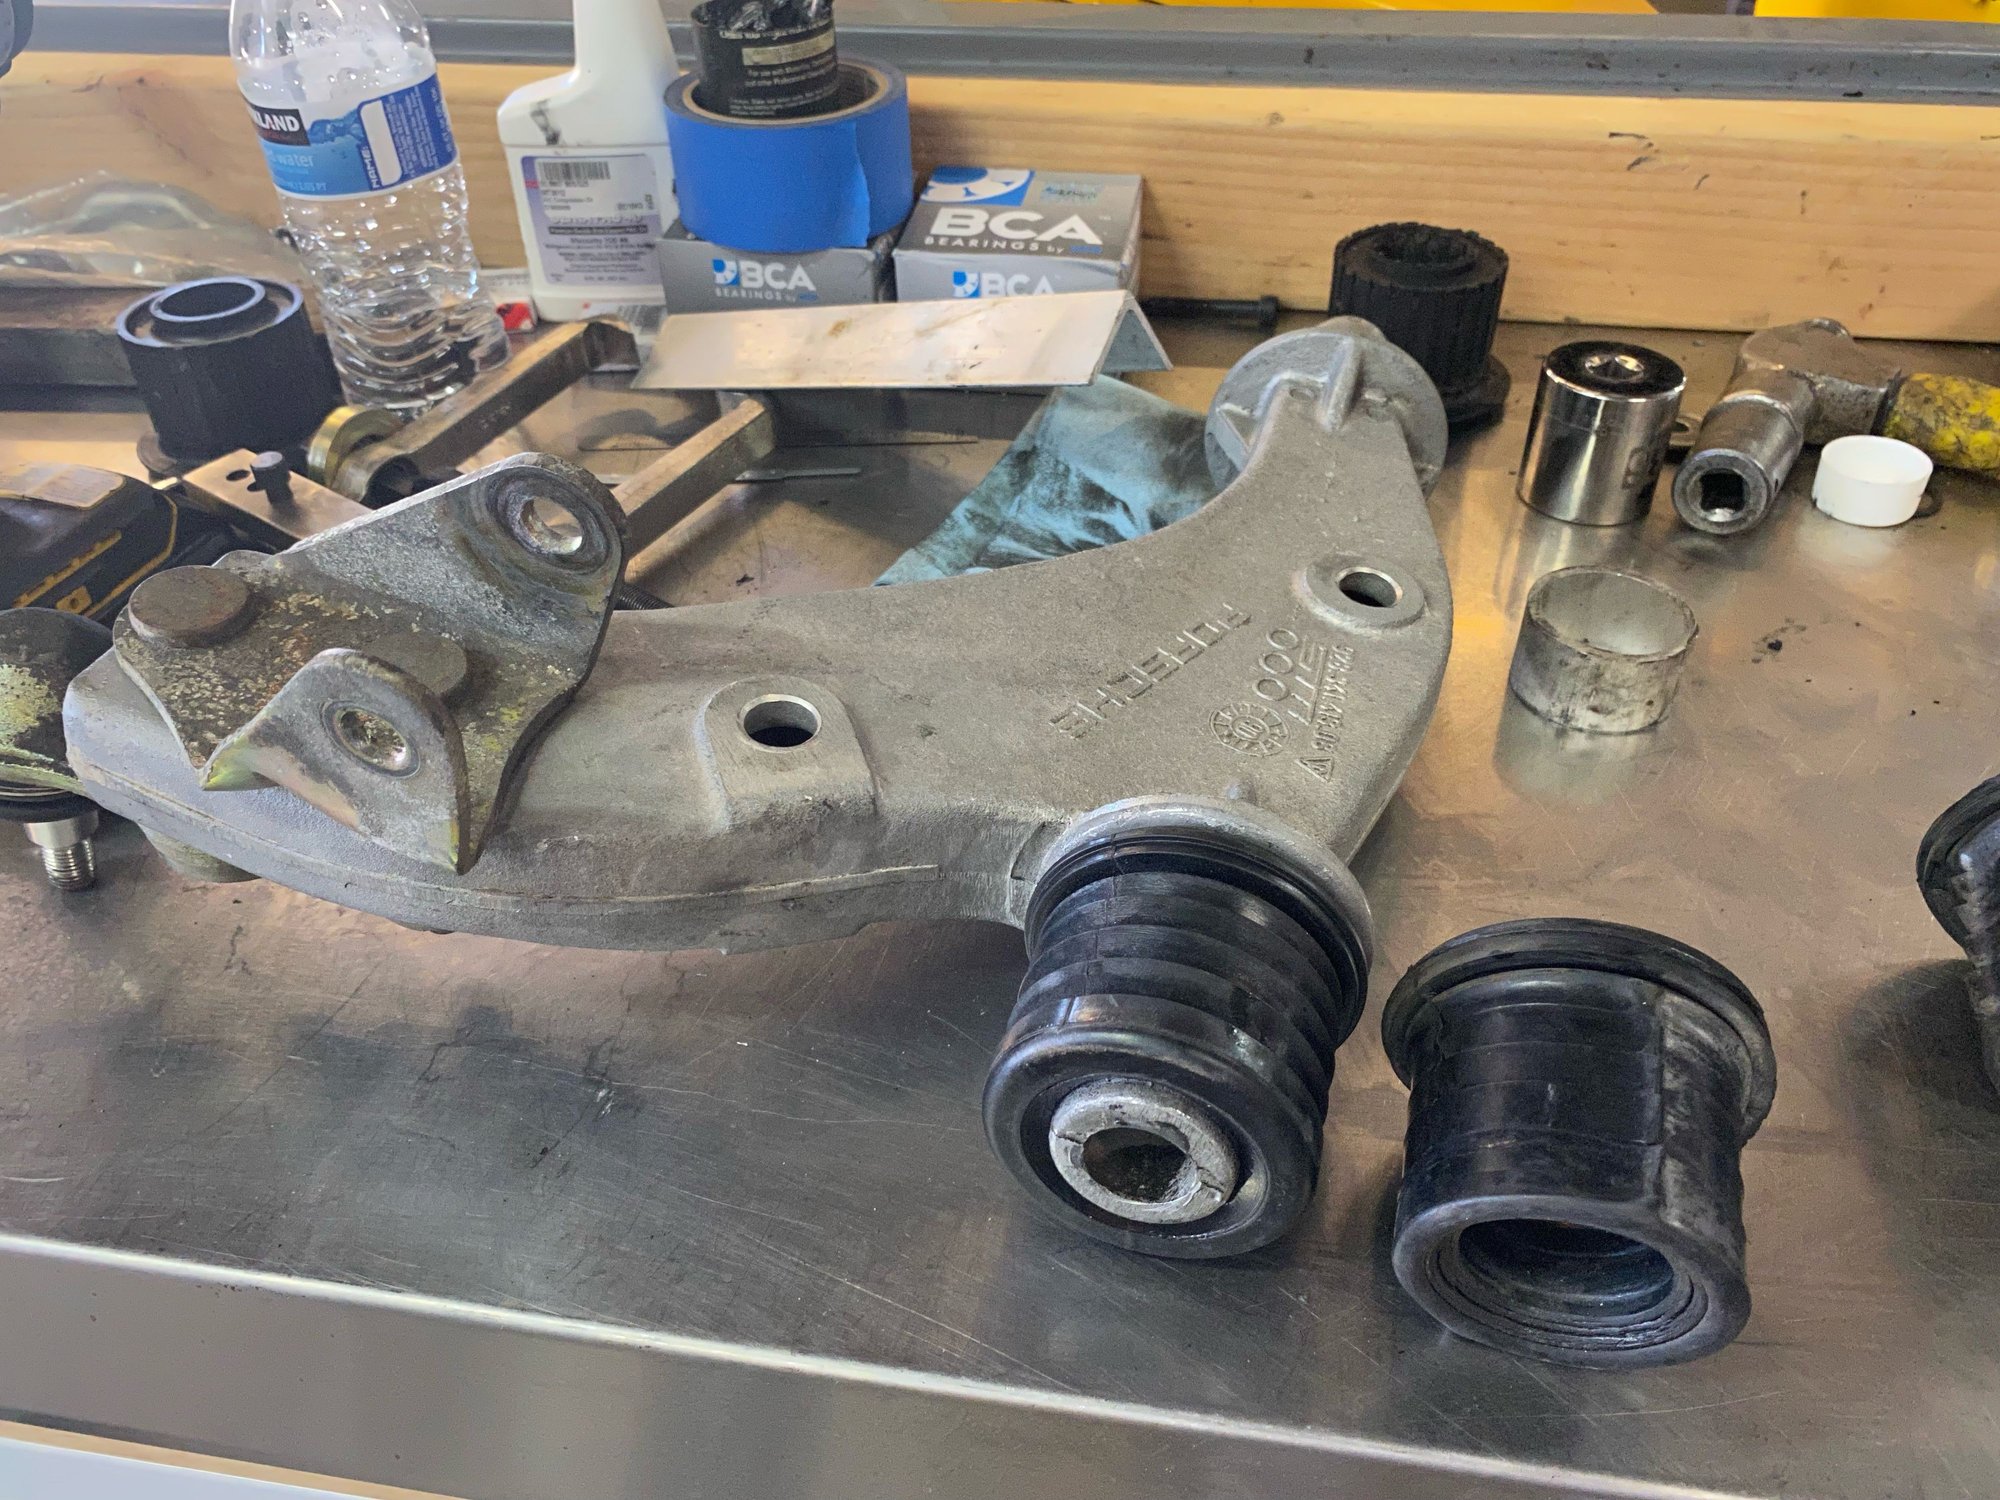
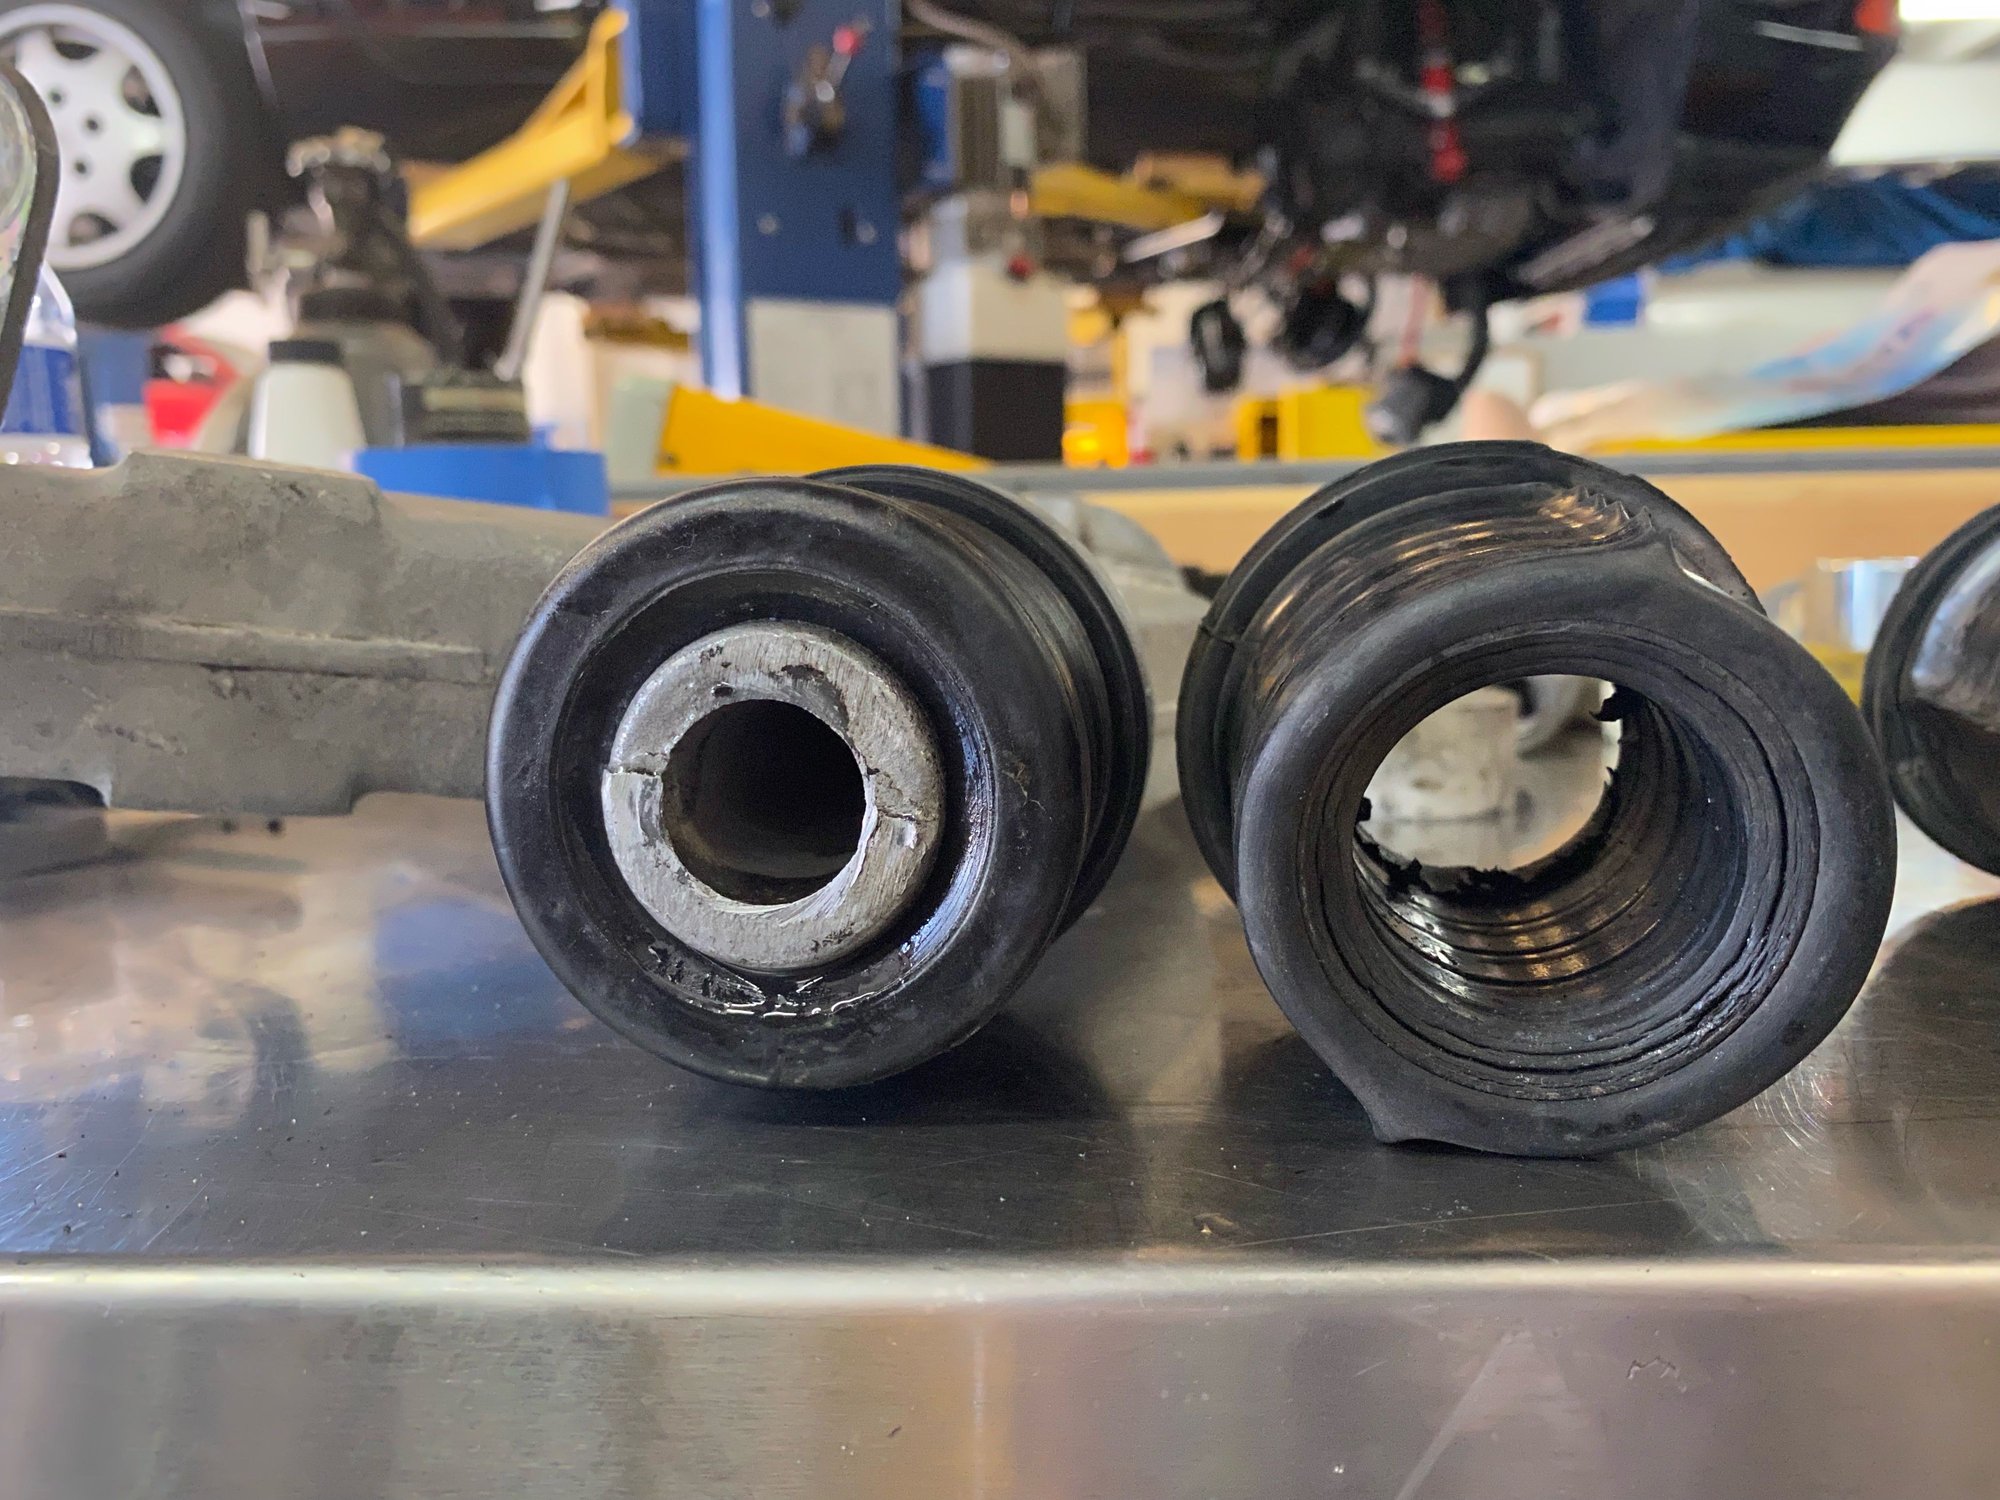
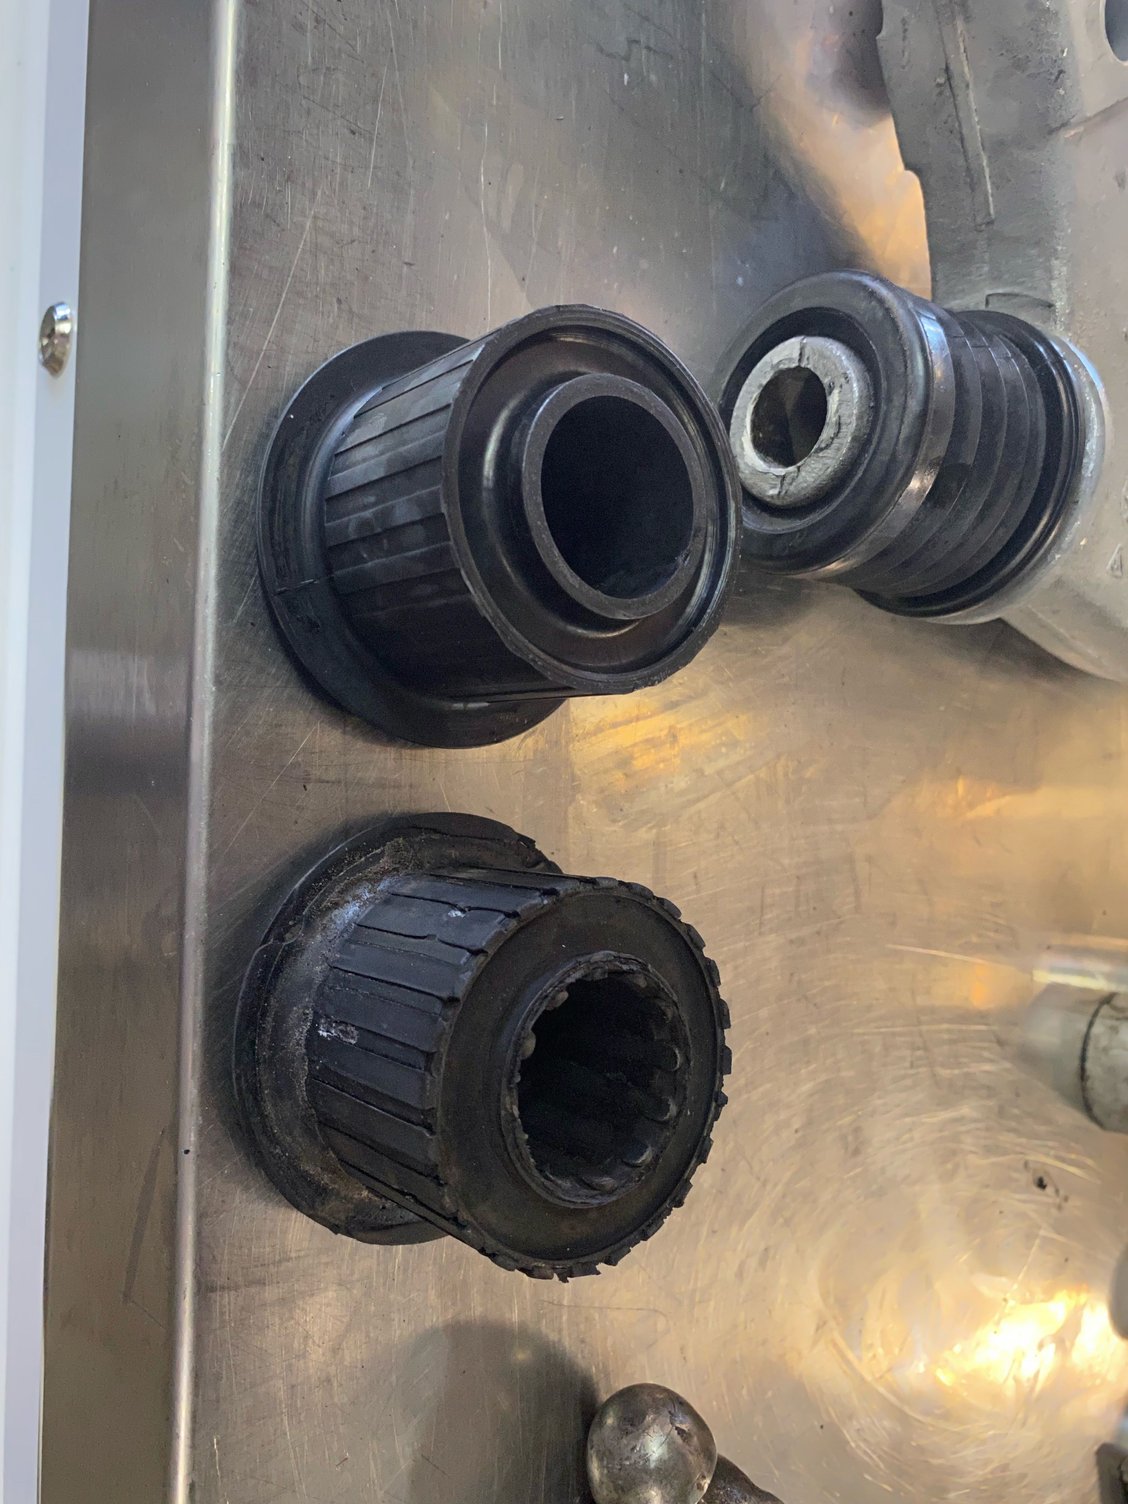
- Removing and installing the bushings on the rear of the LCA is pretty much a straight forward item with a press. Make sure to keep a note to the alignment of the metal pivots so when you reinstall, you keep close to original setting for bolt installations (makes life easier)
- For the front bushings, the removal is a chore and take some work as there is nothing to leverage in order to push out the bushings. Installation is straight forward
- You will need 4 hands for the job
- You need some pressing tools including the press and large round rings to push the bushings in place properly
- Take your time
The LCA's are in and honestly it was not that bad.
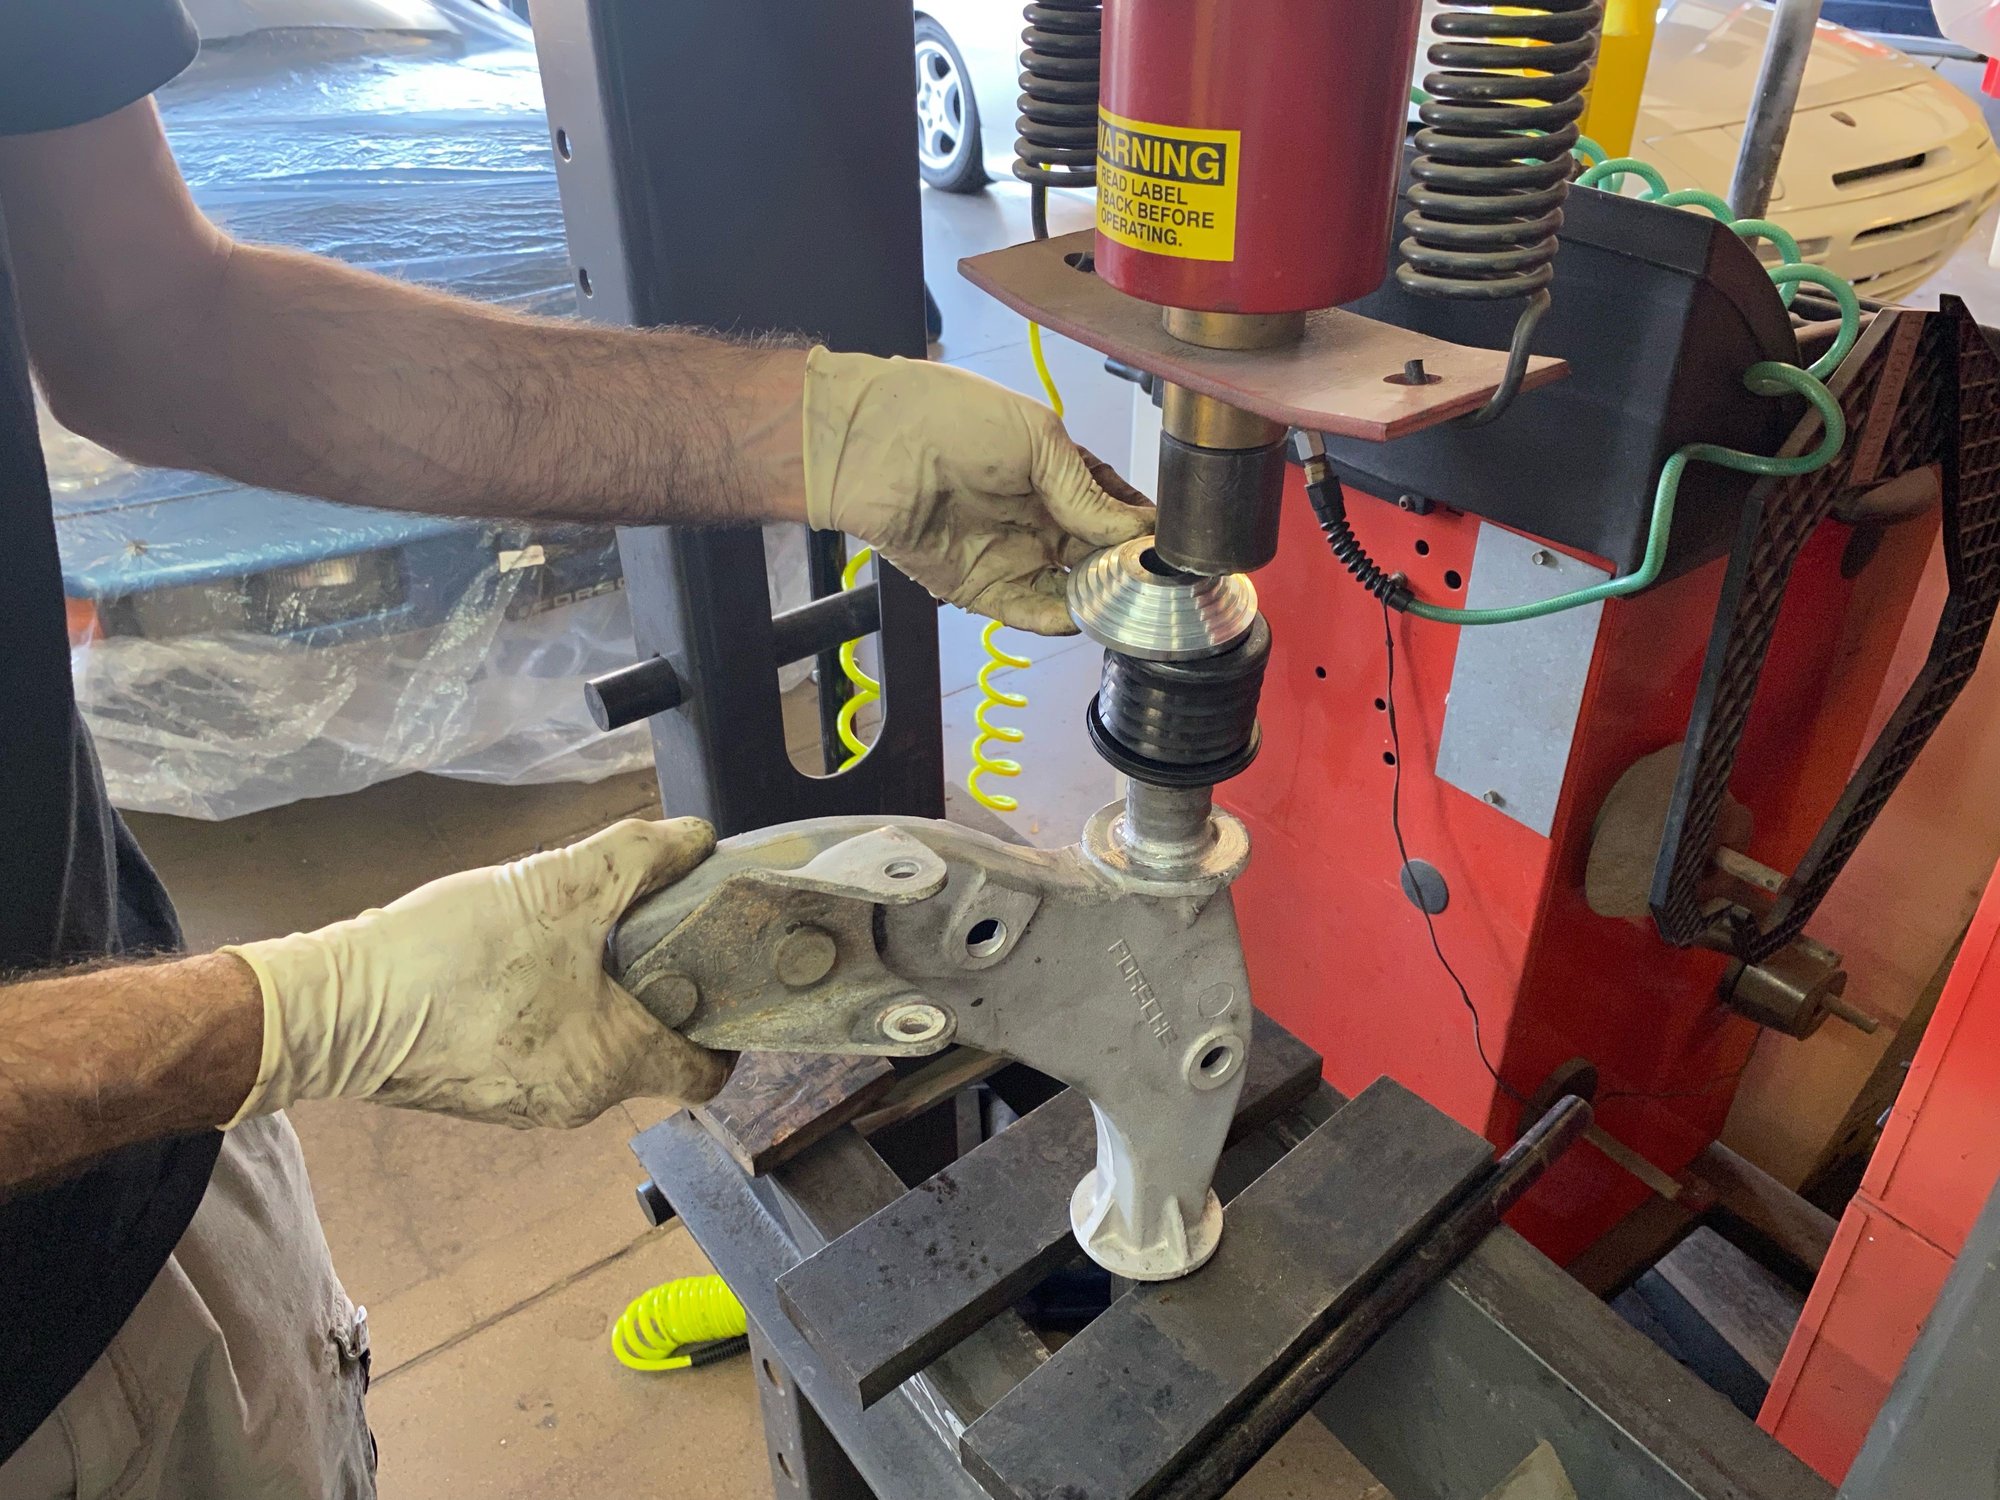
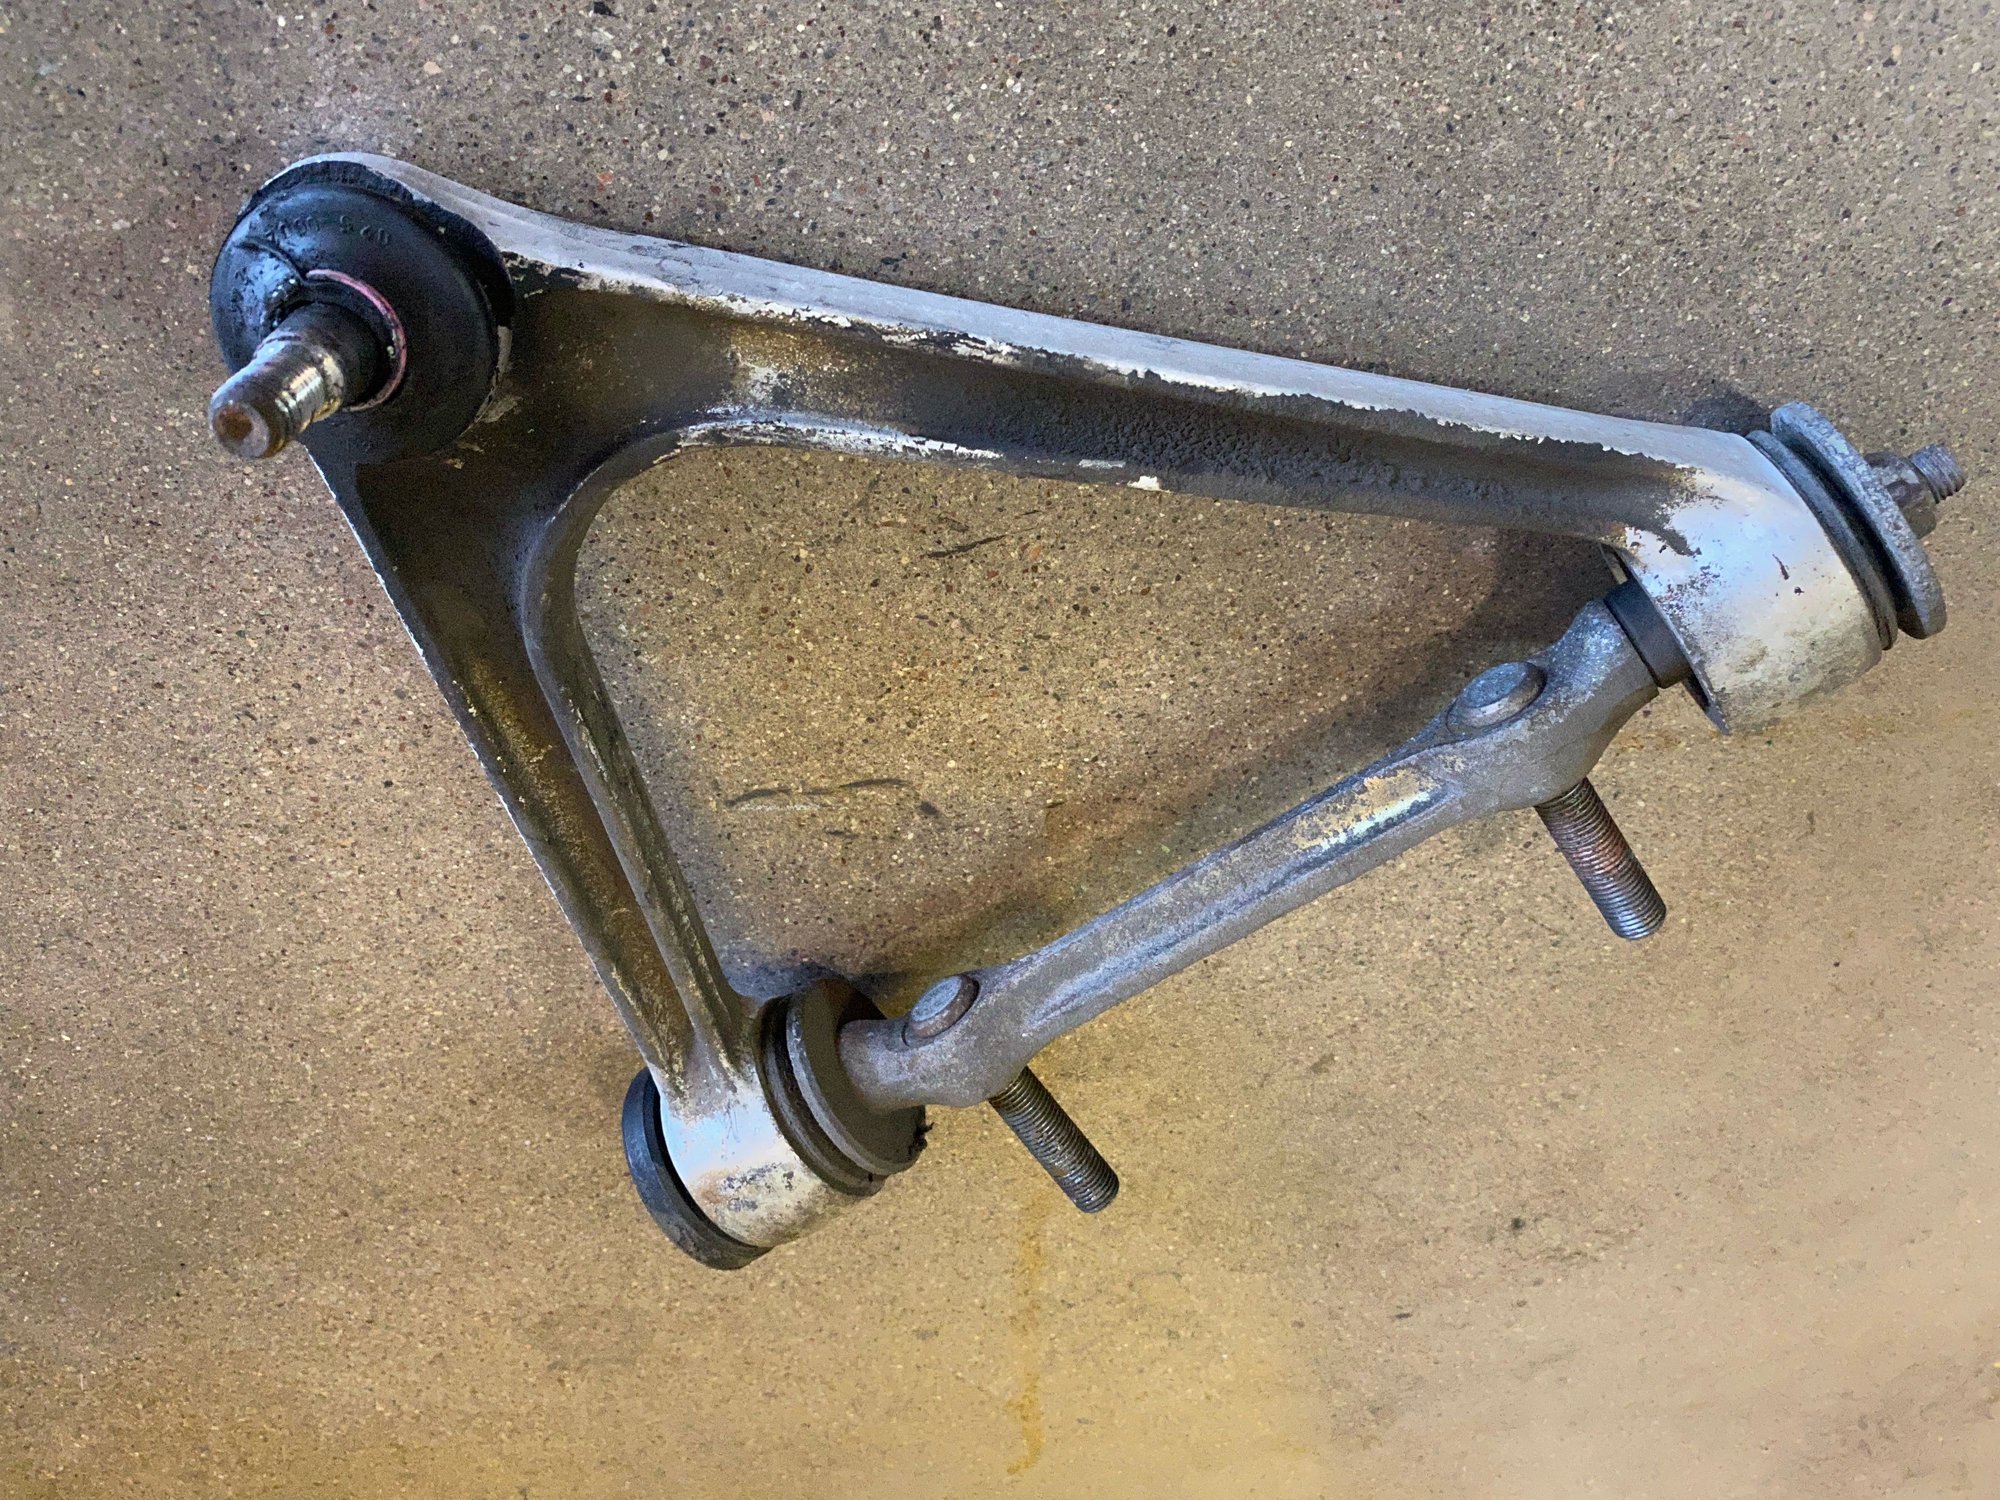
On the driver side I attached the LCA to the eccentrics.
For people that have done this or will do this mark the left and right lower shock mounts. What you see above is not correct. A painful lesson I had to learn. :-(
Next I swung the LCA into position and was able to start the to front bolts.
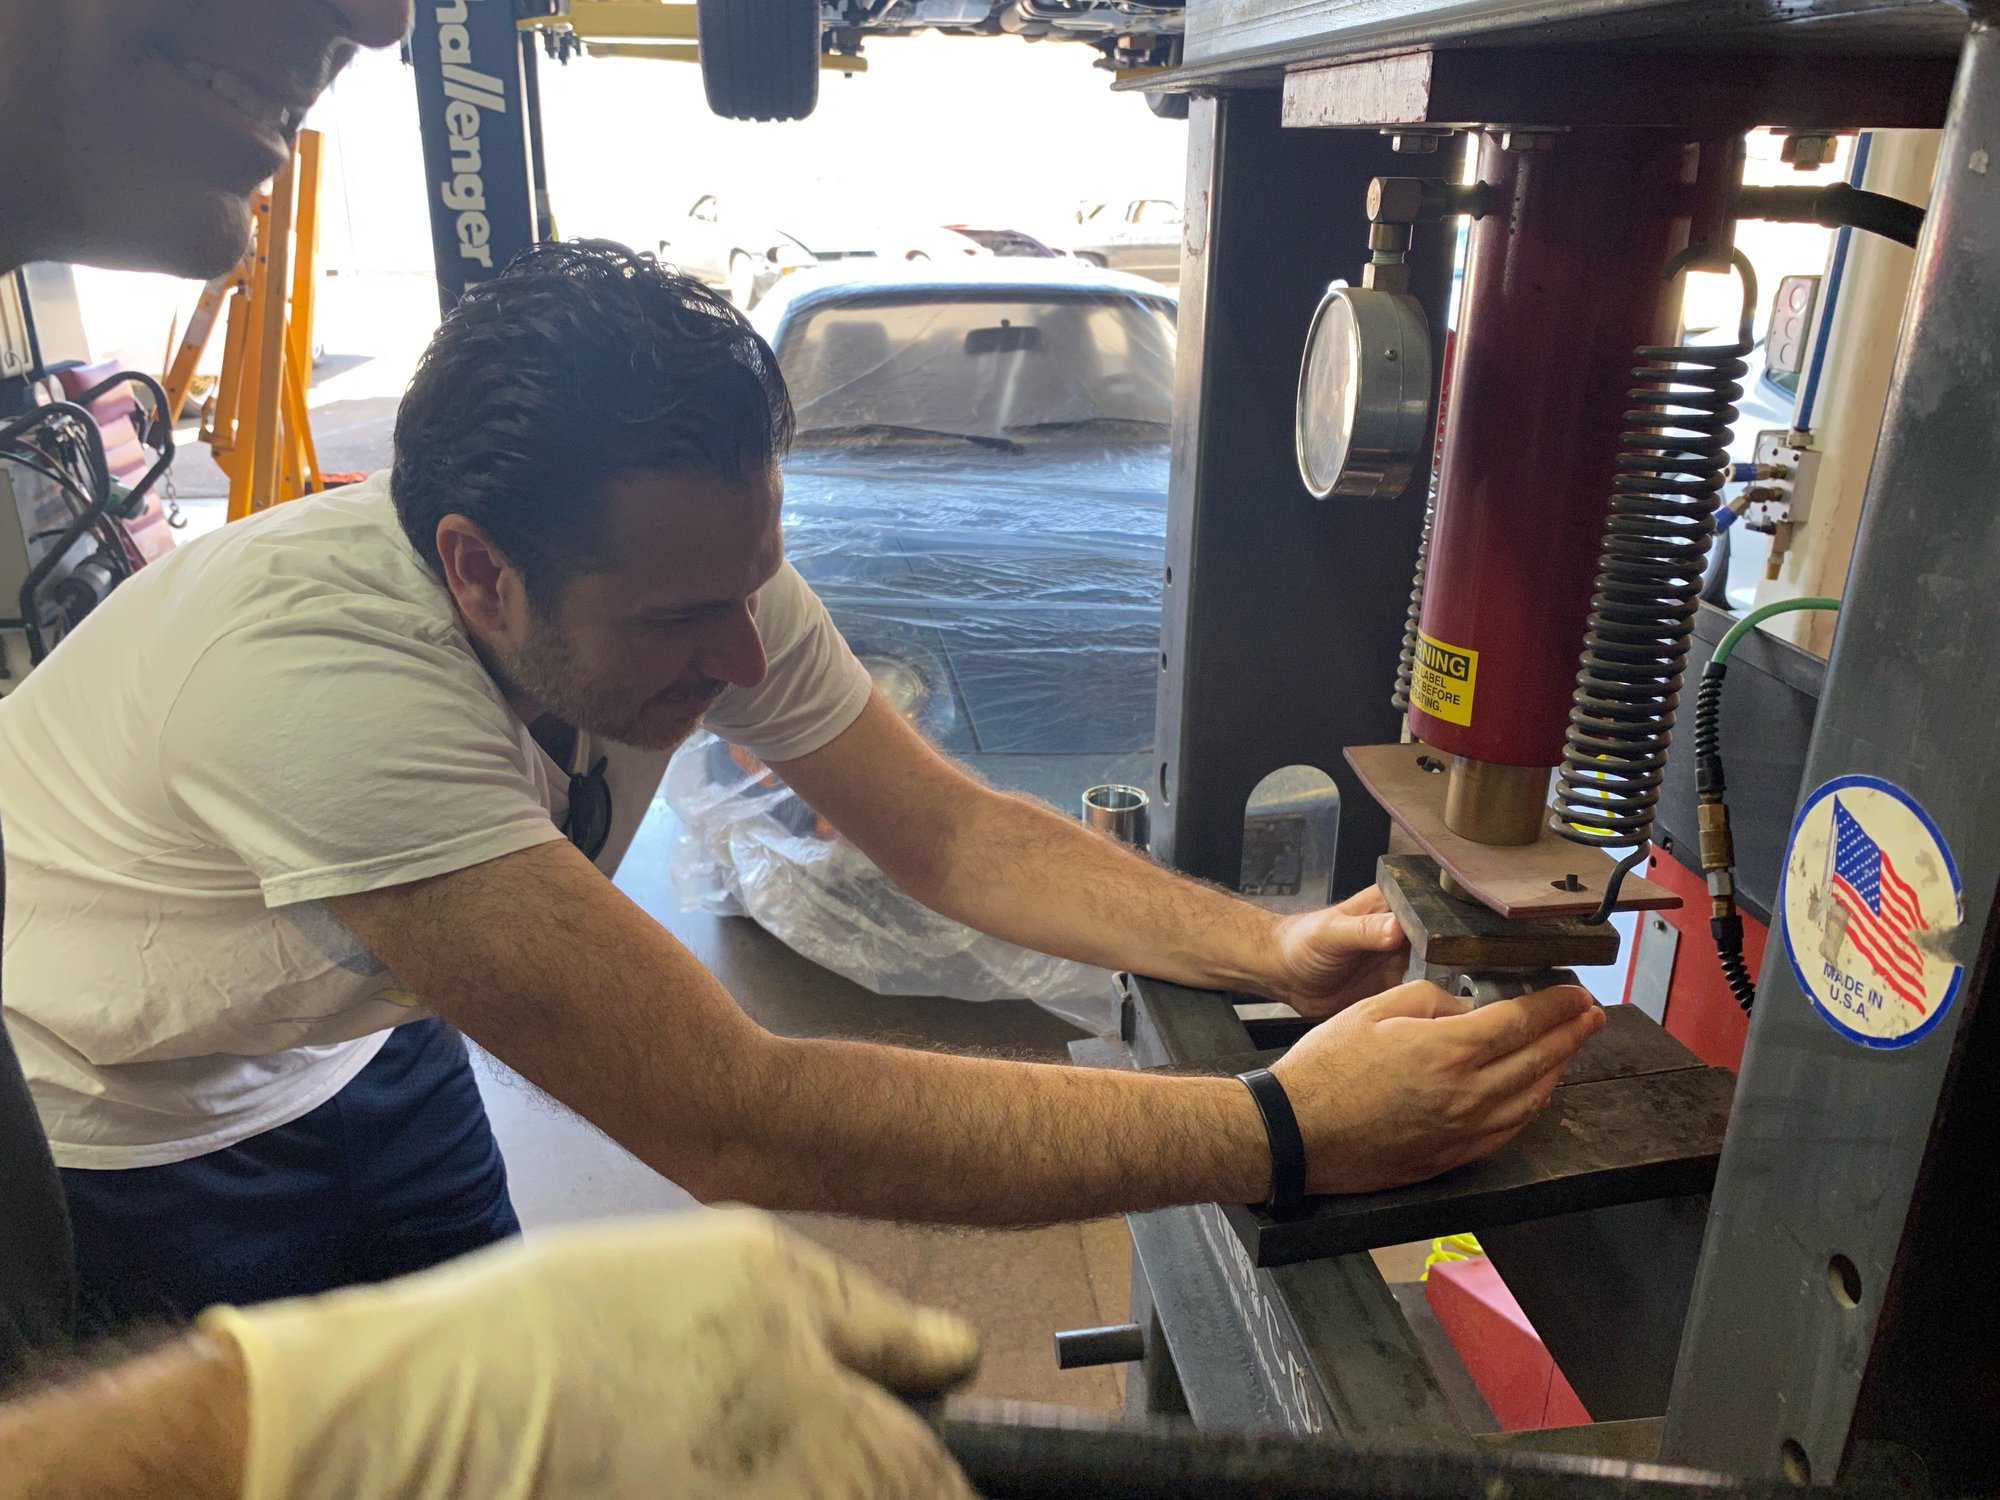
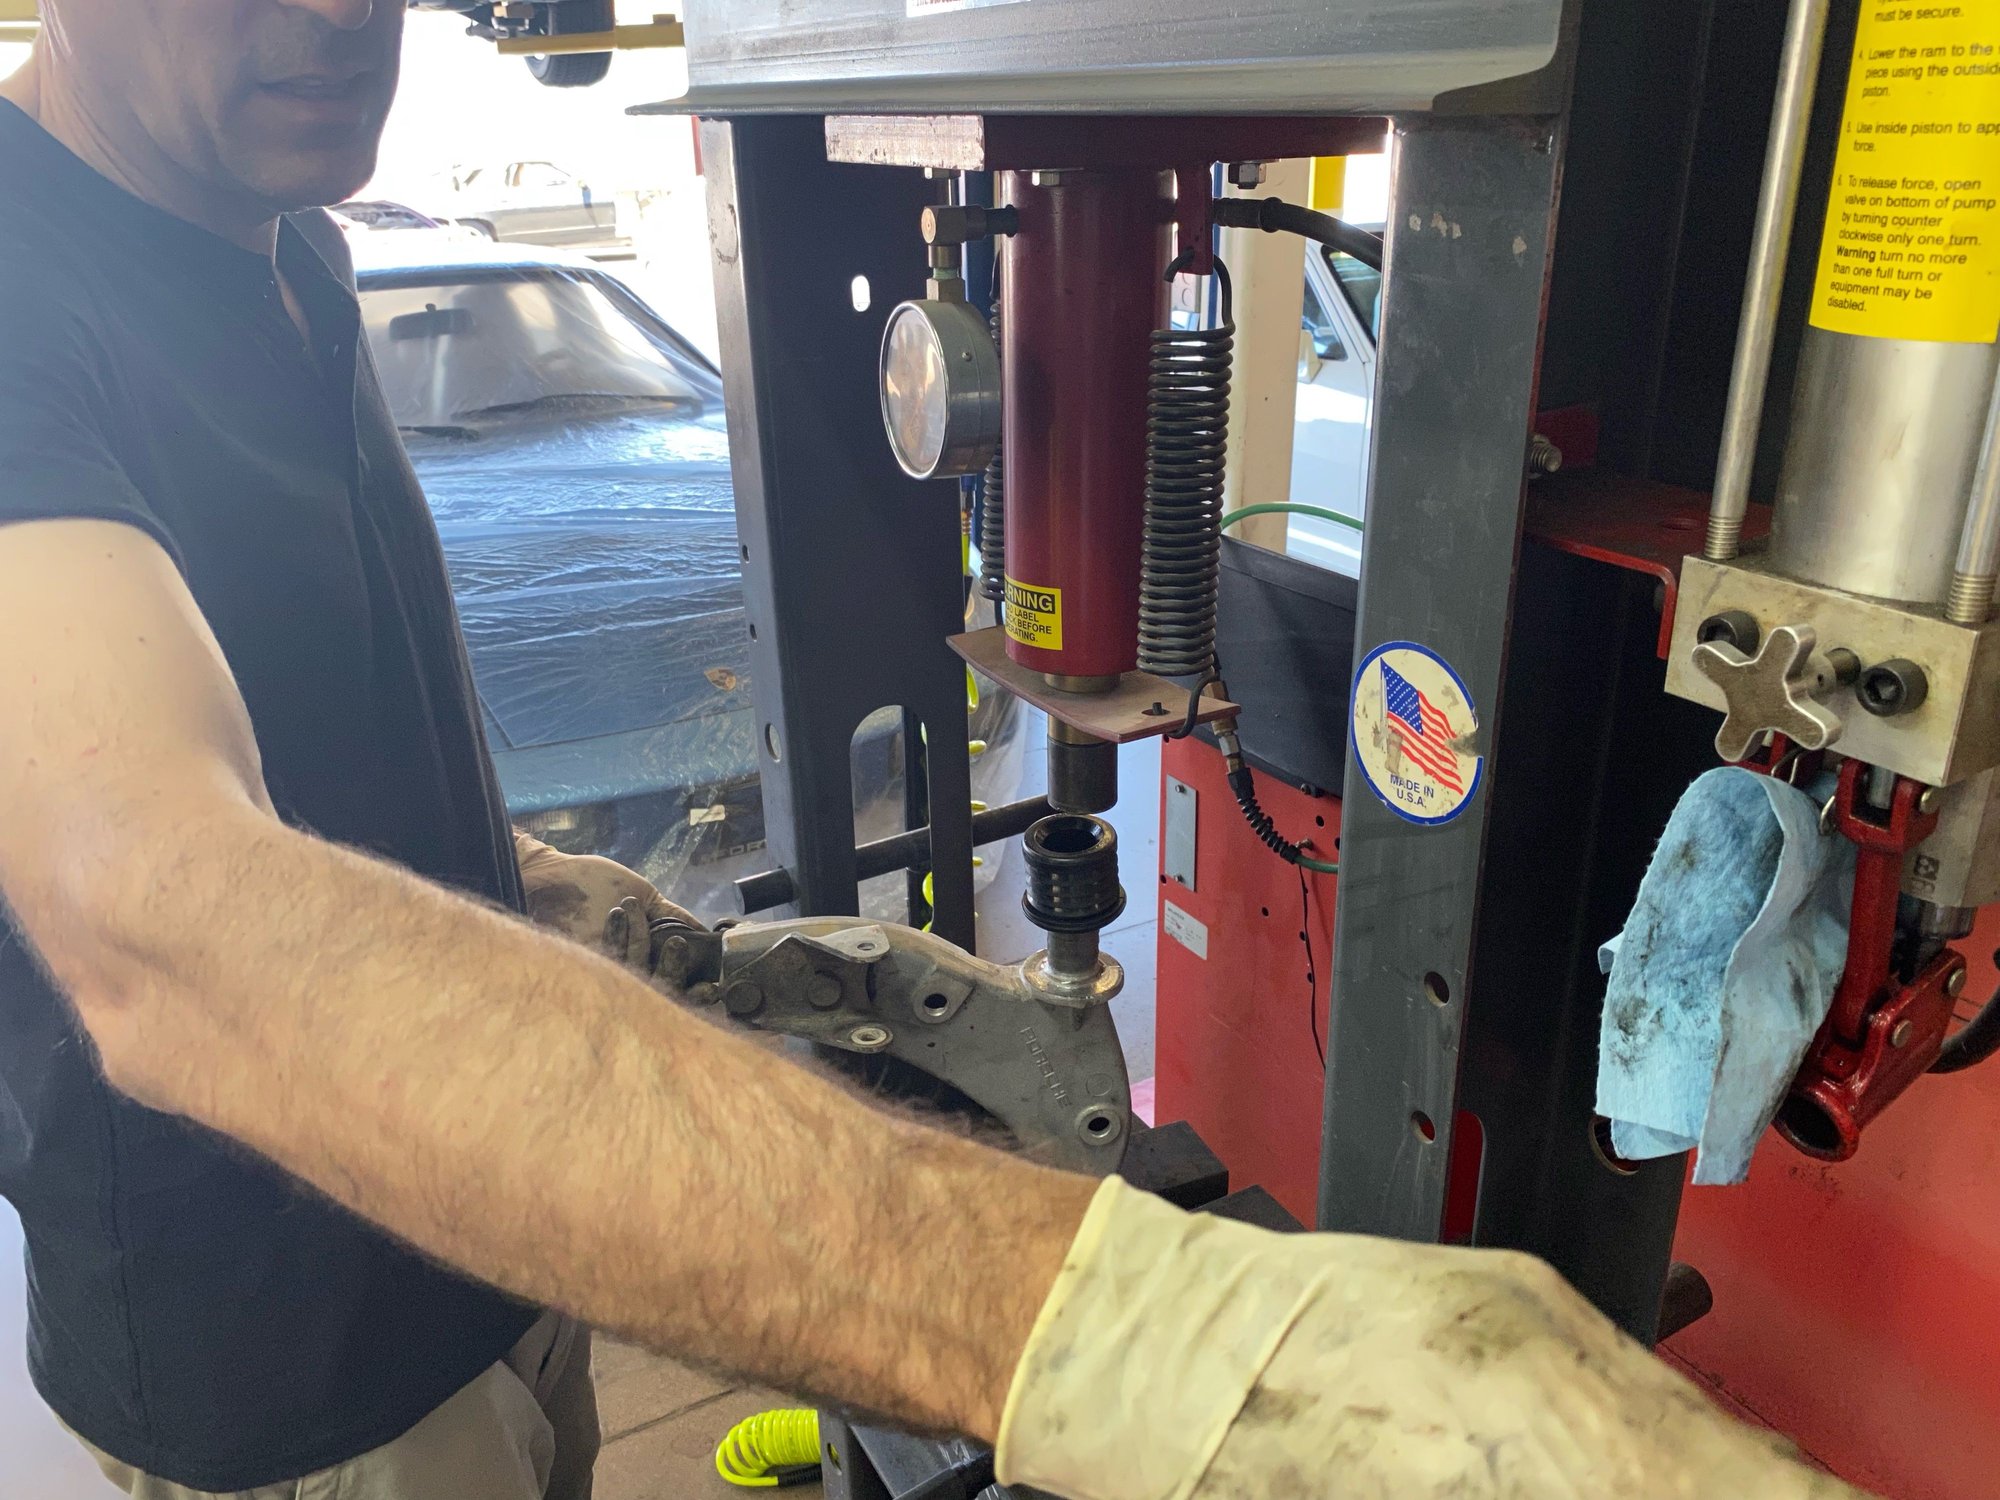
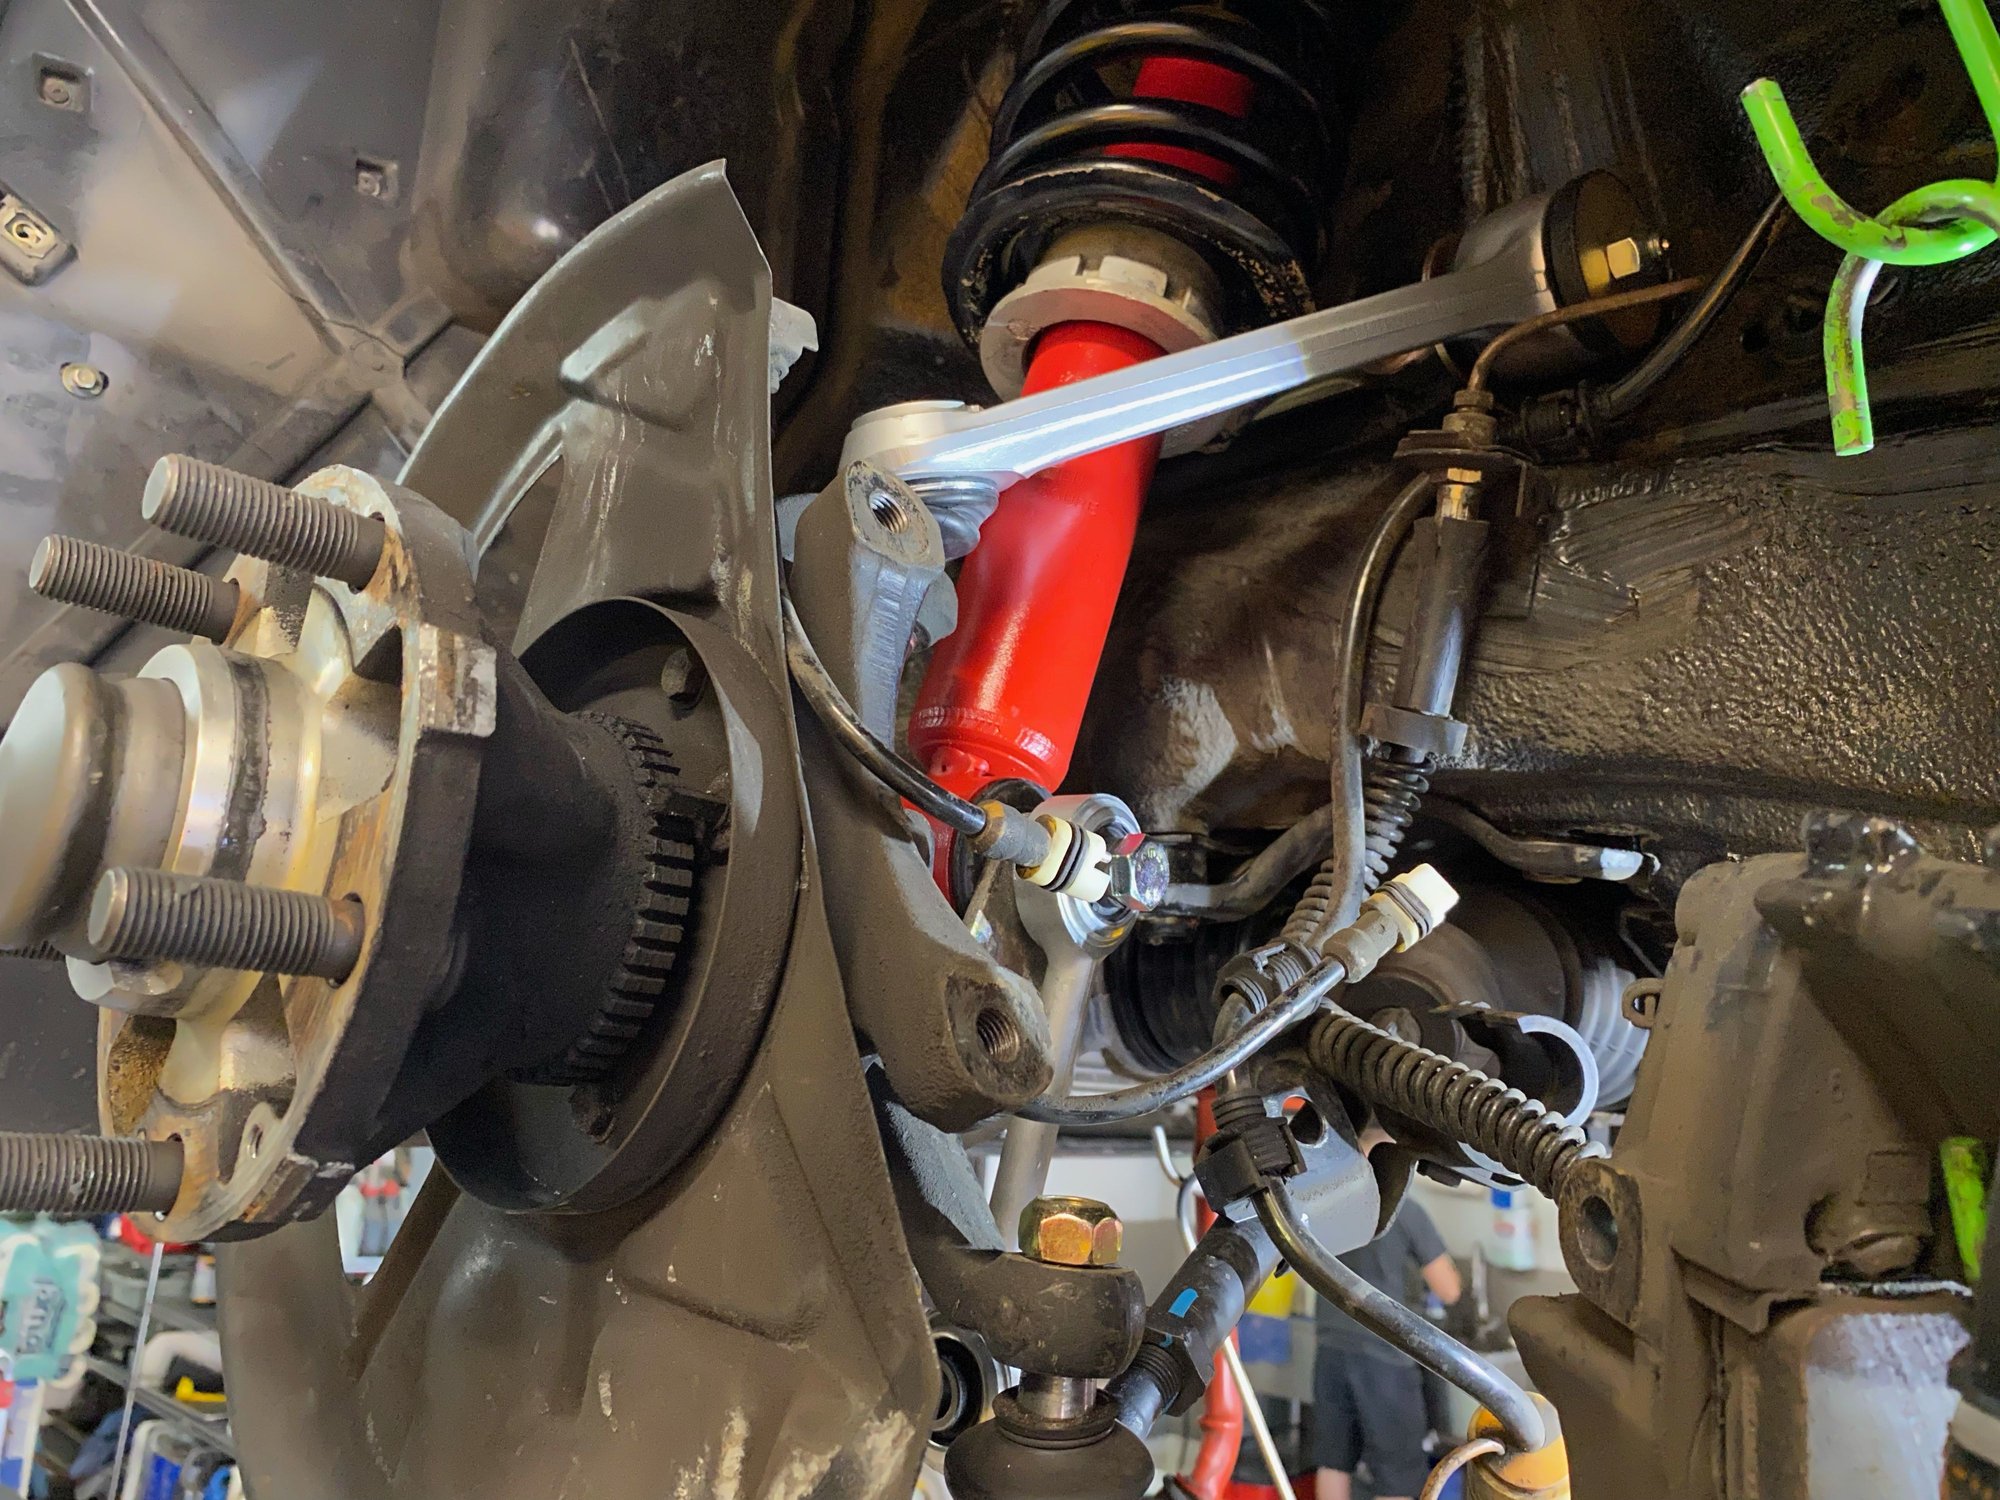
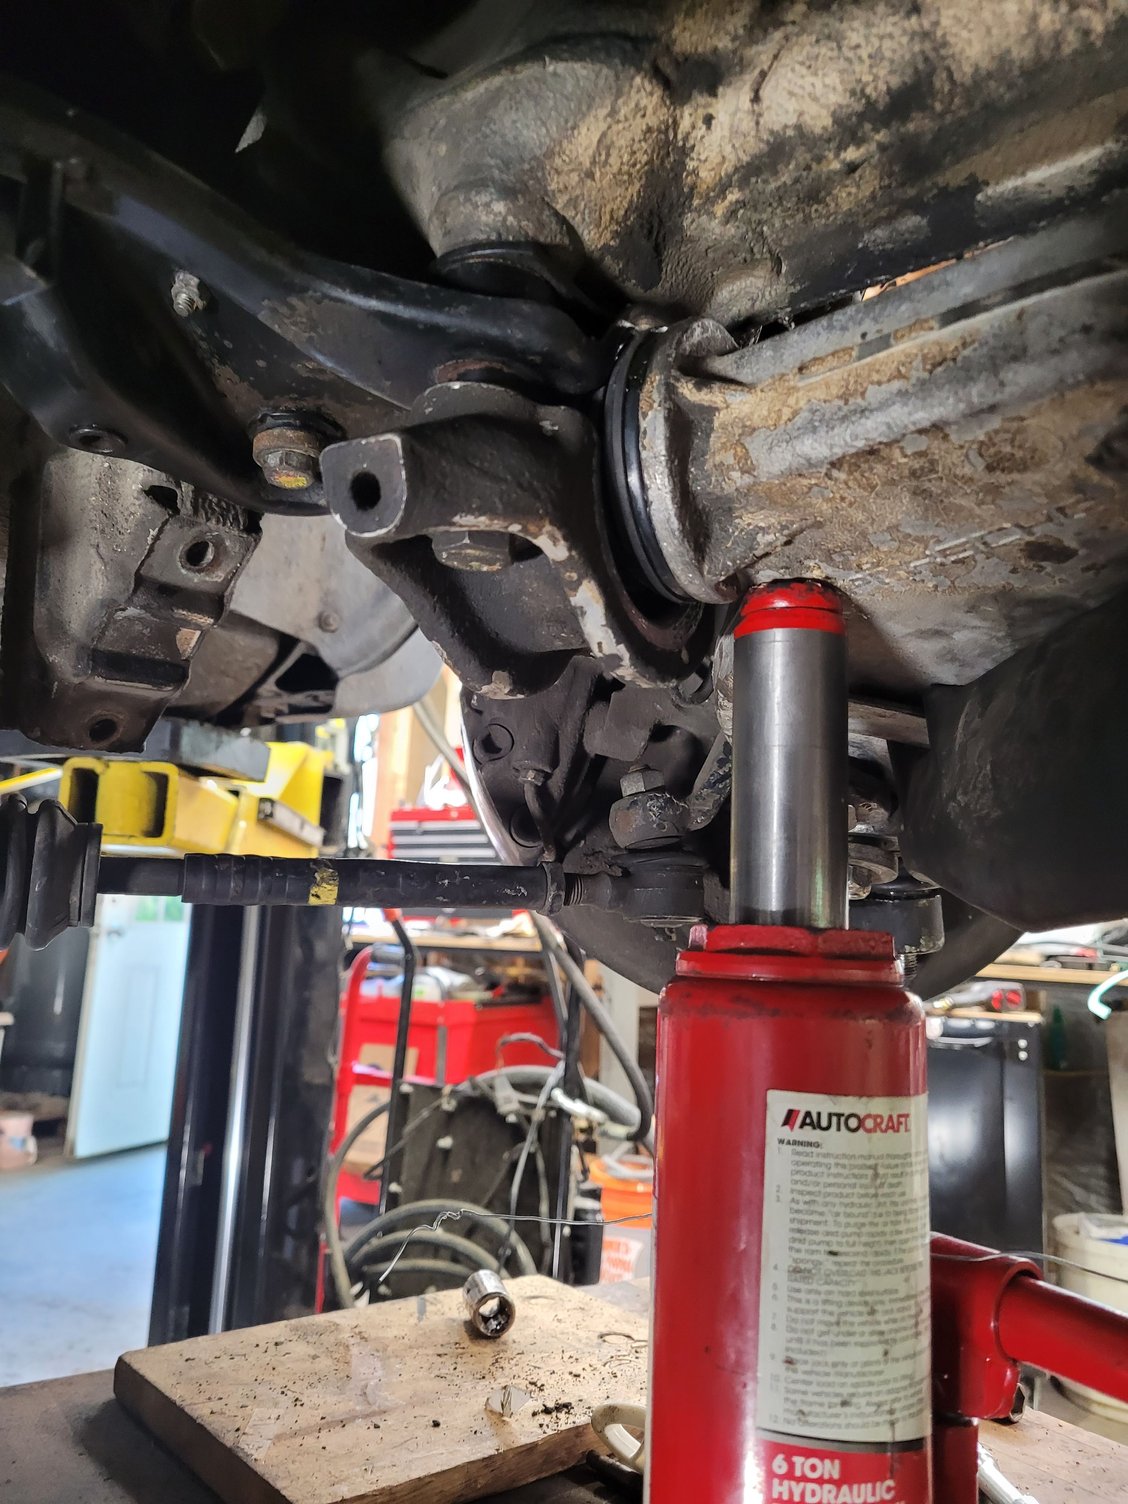
Then it was on the the rear. I used a bench and a bottle jack to press the saddle in far enough to start the bolts.
Then it was on to the passenger side. That side required me to start with the rear saddle bolts.
A couple of lessons. One, buy the rebuilt units from Mark or atleast make sure whoever presses the bushings on gets the orientation right and presses the bushings on until there is no gap. And mark the damn lower shock mounts. That extended the LCA adventure but 2 hours. Feh! My own damn fault.
That was my biggest takeaway. Any gap will make the LCA replacement a nightmare.
Now the suspension is back up and eccentrics are close enough to drive it to the alignment shop.
Rather satisfying. I've never gone this far into the front suspension and learned a bunch.
I had done similar without the ability to completely replace everything. I will try and get to the Lower control are bushings in the spring of next year.
I did replace everything else.
Question..
I haven't driven it yet (hopefully this week) and was wondering about loosening the upper control are bushing bolts to assist with the settling. I called the vendor months ago and he said not necessary, but If I read Greg's reply correctly he suggests to loosen everything. It sounded reasonable to me when I first installed and based on vendors suggestions I did not. Re-thinking that now.
Yep, I understand you loosen everything mounted in rubber then set your ride height, after settled, tighten and torque, get it aligned. Will be doing my LCA's over the winter. Don't forget your LCA"s also. Been following your engine issue, and wish you the best with that.
I think the vendors that sell the UCA should ensure that this is in the instructions. These things are too expensive to not provide complete details to include torques.
In Kevin's pick of rear leather with the bottle jack under it, is that torqued down? Should the lower clamp be sucked up all the way, or is there a gap that exists when torqued correctly?
Thanks all, posted pics in my thread 79 hellblau as well, not trying to double post, only trying to get this on the road!
Sucked all the up. The picture was taken at the point I could thread the bolts in.
Trying to get ride height set. I no longer have a lift so it is not as fun anymore.
Currently it looks ridiculous.
18" Panameras the fender is at about 28 1/2" high.
I currently have the LCA bushing bolts "loose" and have driven it to try and get it to settle.
LCA are almost parallel.
so far I have 5 turns on the collars with no discernible change.
I will loosen everything again.
John
Use the proper measuring points, not the fender. (Look at link in my sig)
It will take time to settle the front end if you cant pull it down. I do not recall the shade-mechanic method to accomplish this, with a loose bushing...but someone will chime in.
I know what _I_ would do, but that would likely be frowned upon.


 05-20-2021 | 03:54 AM