When you click on links to various merchants on this site and make a purchase, this can result in this site earning a commission. Affiliate programs and affiliations include, but are not limited to, the eBay Partner Network.
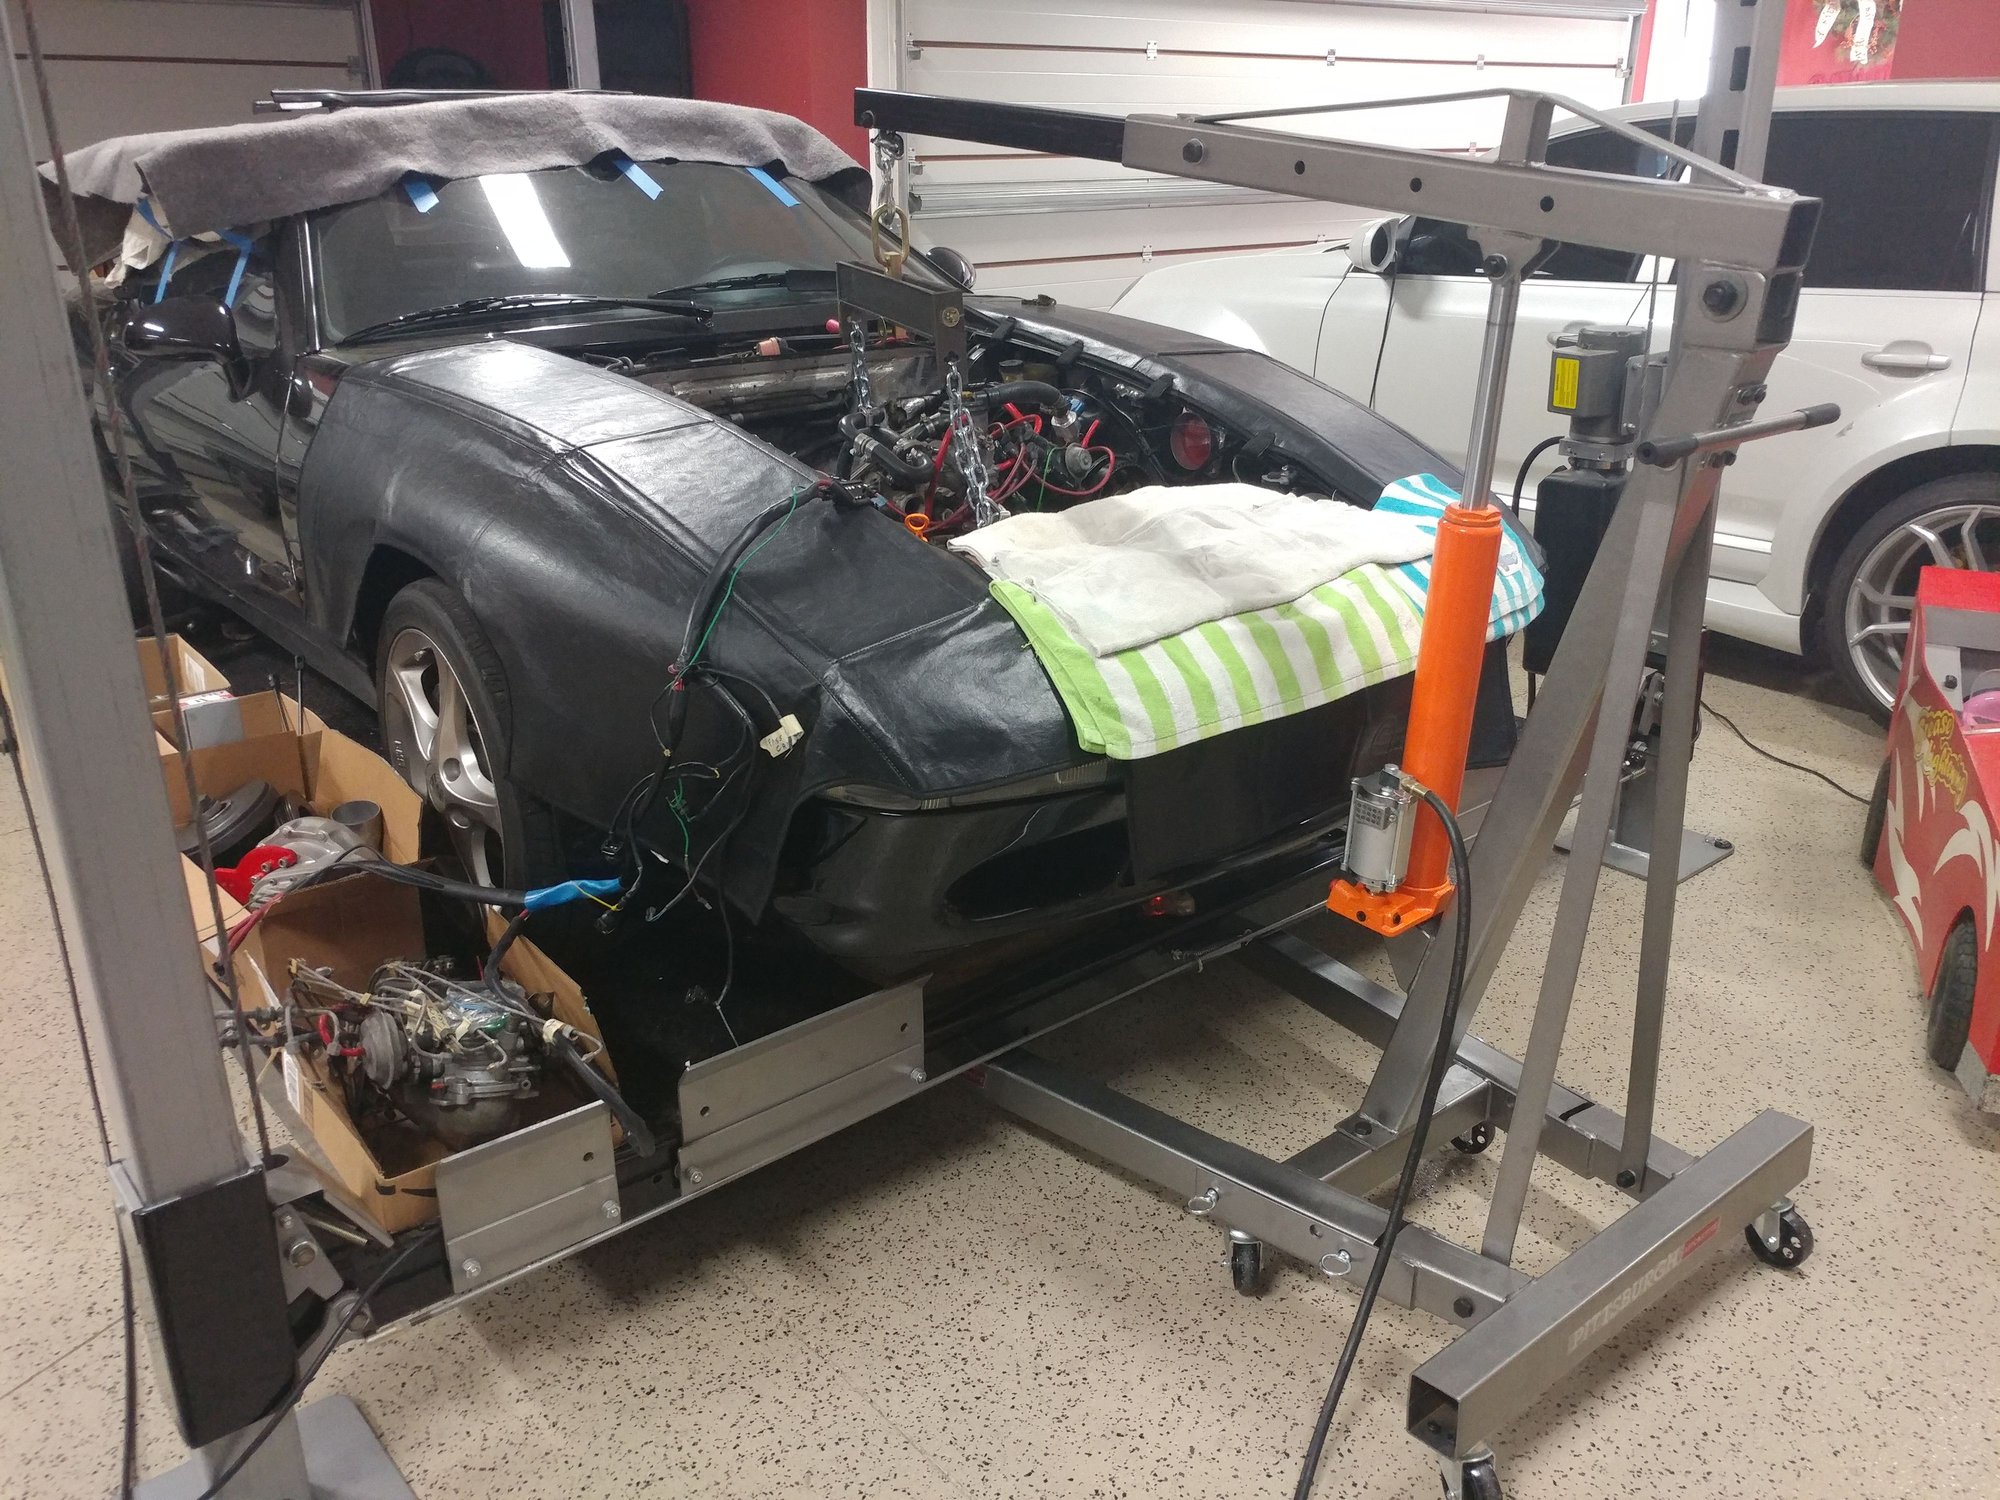
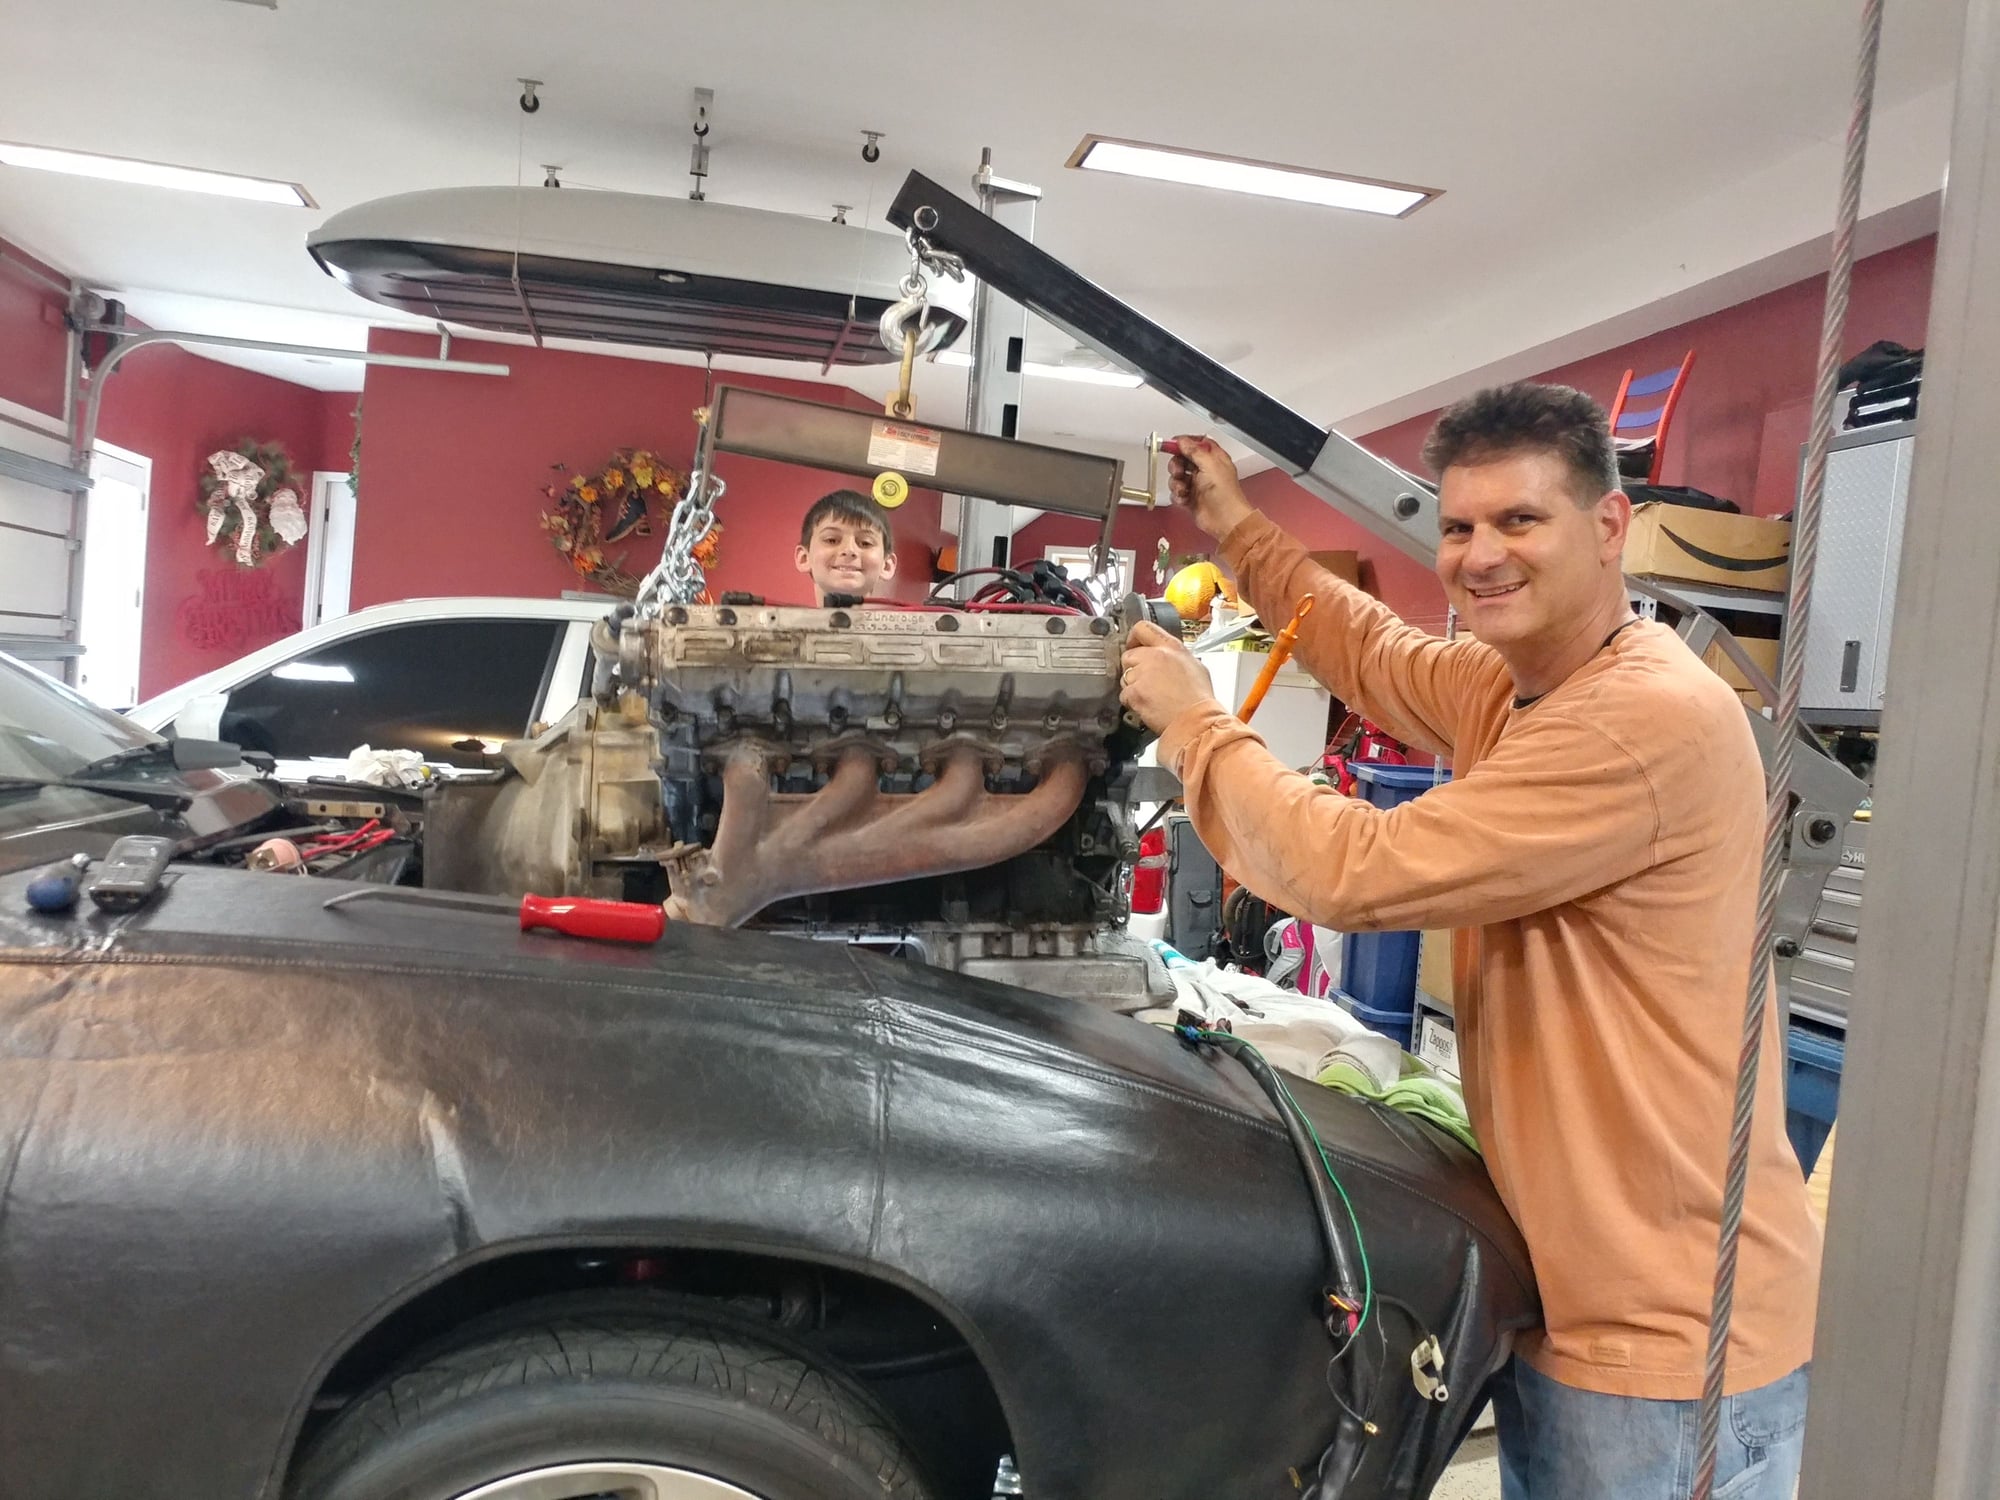
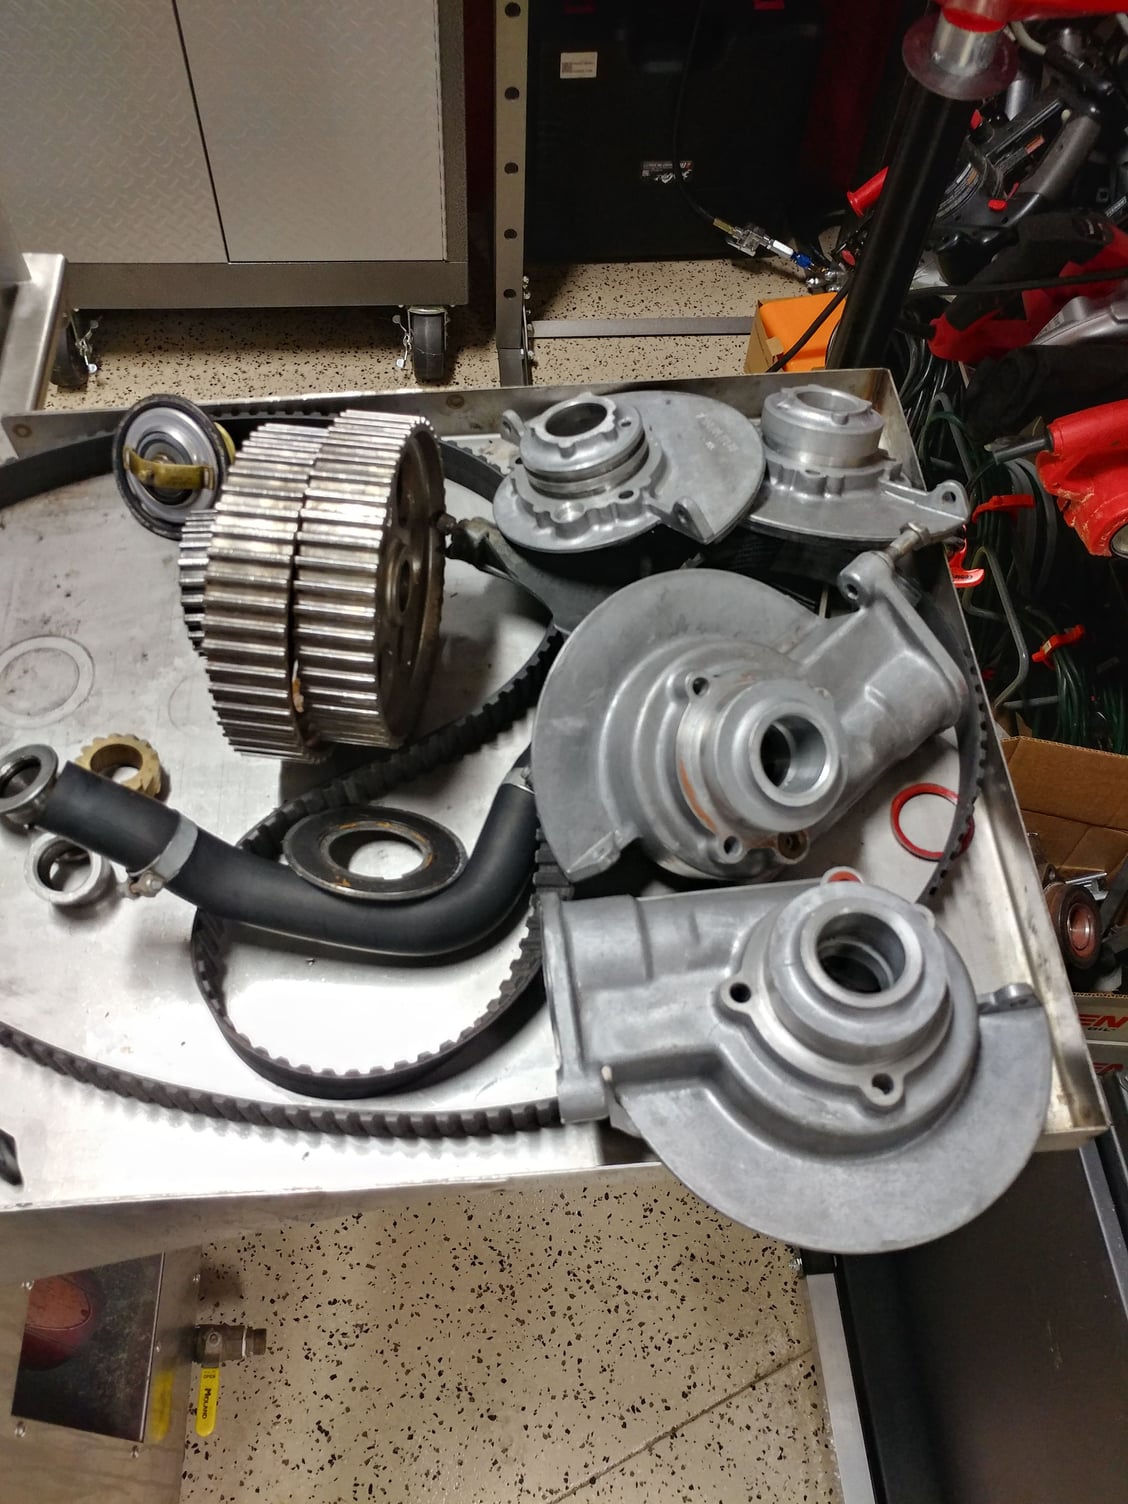
Now I'm starting to clean up and swap parts from one to the other and to clean up the engine bay. Took about 2 hours to clean all the greasy dirt off the engine cross-member.
My removal method did work though. Left the motor mounts in place and took the 4 main bolts from the motor brackets out that attach to the motor mounts. Not sure this is much easier than dropping the rack to remove the lower motor mounts though, because you have to lift the motor higher to clear them, I think, and I ended up dropping the rack anyway to clean everything and am going to repaint the support plate under the rack too.
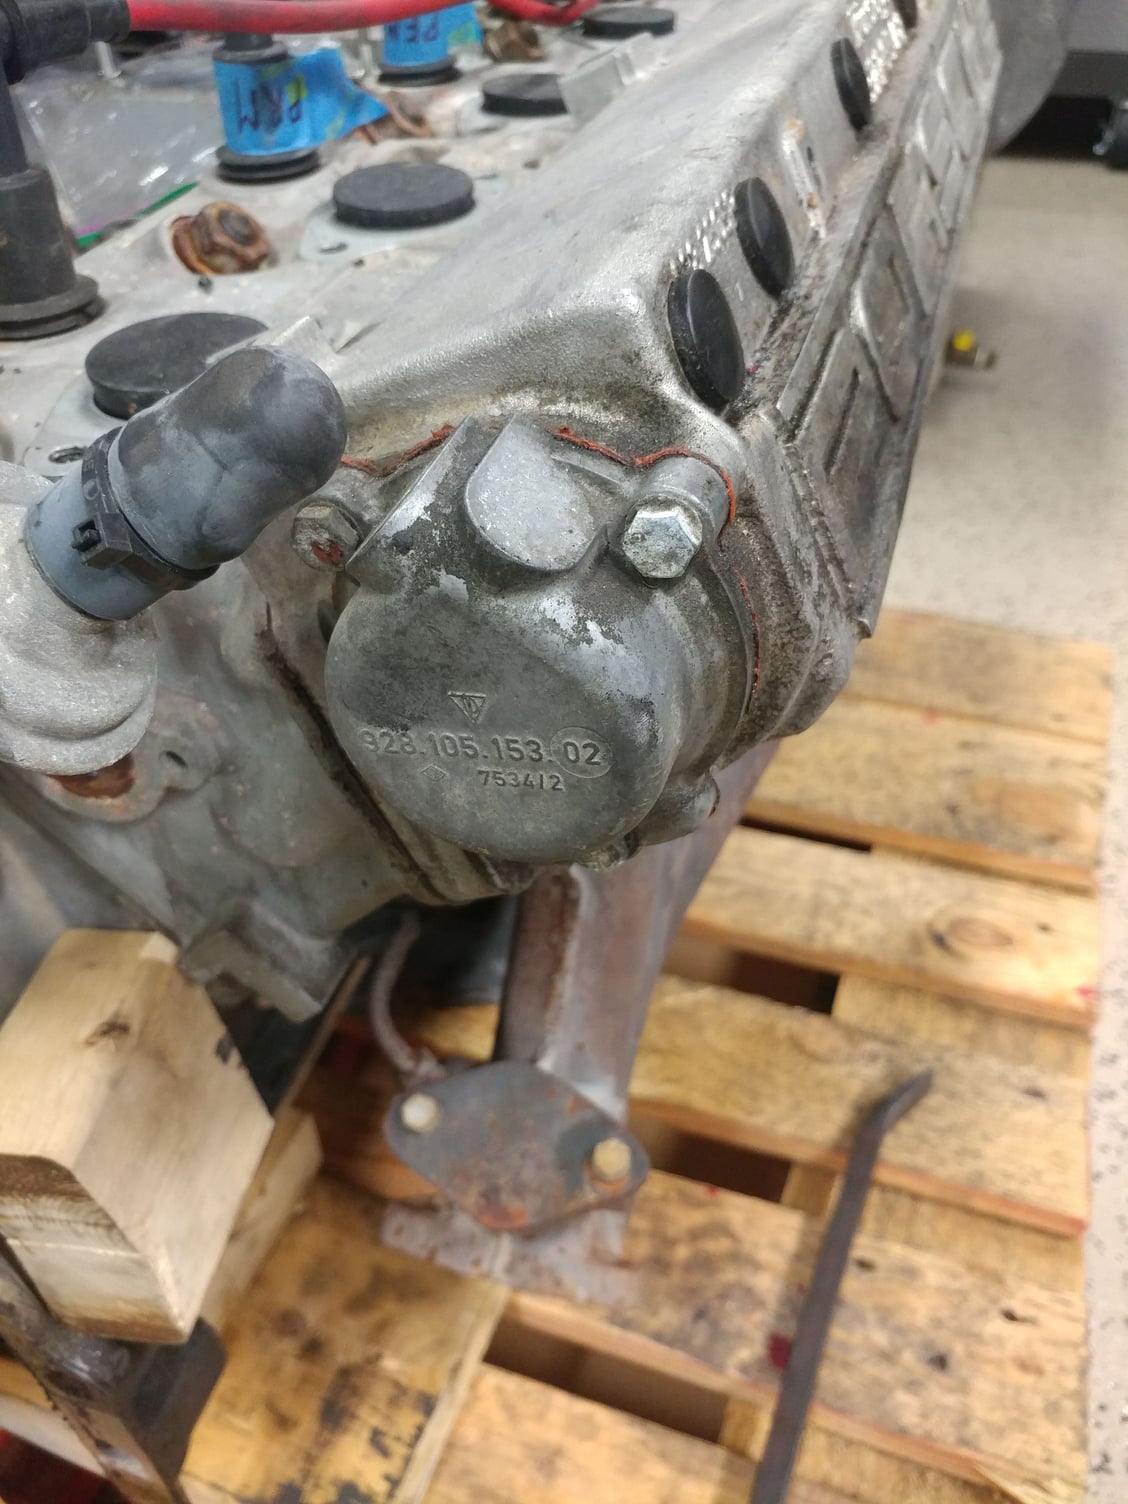
When pulling the motor today I noticed the cam tower covers, plugs, and the end caps are different between the two motors.
Here's the end cap on the cam towers from my current 4.5L engine.
and here's the end cap from the 4.7L engine
Since I'm planning to reuse my 4.5L cams in my 4.7L engine because of the higher lift and longer duration, here are the questions:
Will the 4.5L cams fit properly into the 4.7L cam towers with the 4.7L cam tower caps, or
Do I need to use the end caps from the 4.5L cam towers with the 4.7L cam towers, or
Do I need to reuse the 4.5L cam towers complete and if so, do they just bolt onto the heads of the 4.7L engine, or
Is there some other magic combination I need to do between these parts to have it go together correctly?
Also, which cam followers/lifters should I use - the ones that came out of the 4.7L head if the 4.5L cams are being used with those, or the ones that were working with the 4.5L cams in the current engine, or does it not matter and just use the ones that look to be in better condition?
Hi Pete,
I'm sure there are a few things to do with the engine out, but there is an a/c line that runs along the passenger fender side of the engine compartment. I think it goes from expansion valve to condenser? It's very difficult to change this line with the engine in place. Something to consider.,
Dave
Great work
Other than the hard lines, I think all of these were new 2 years ago
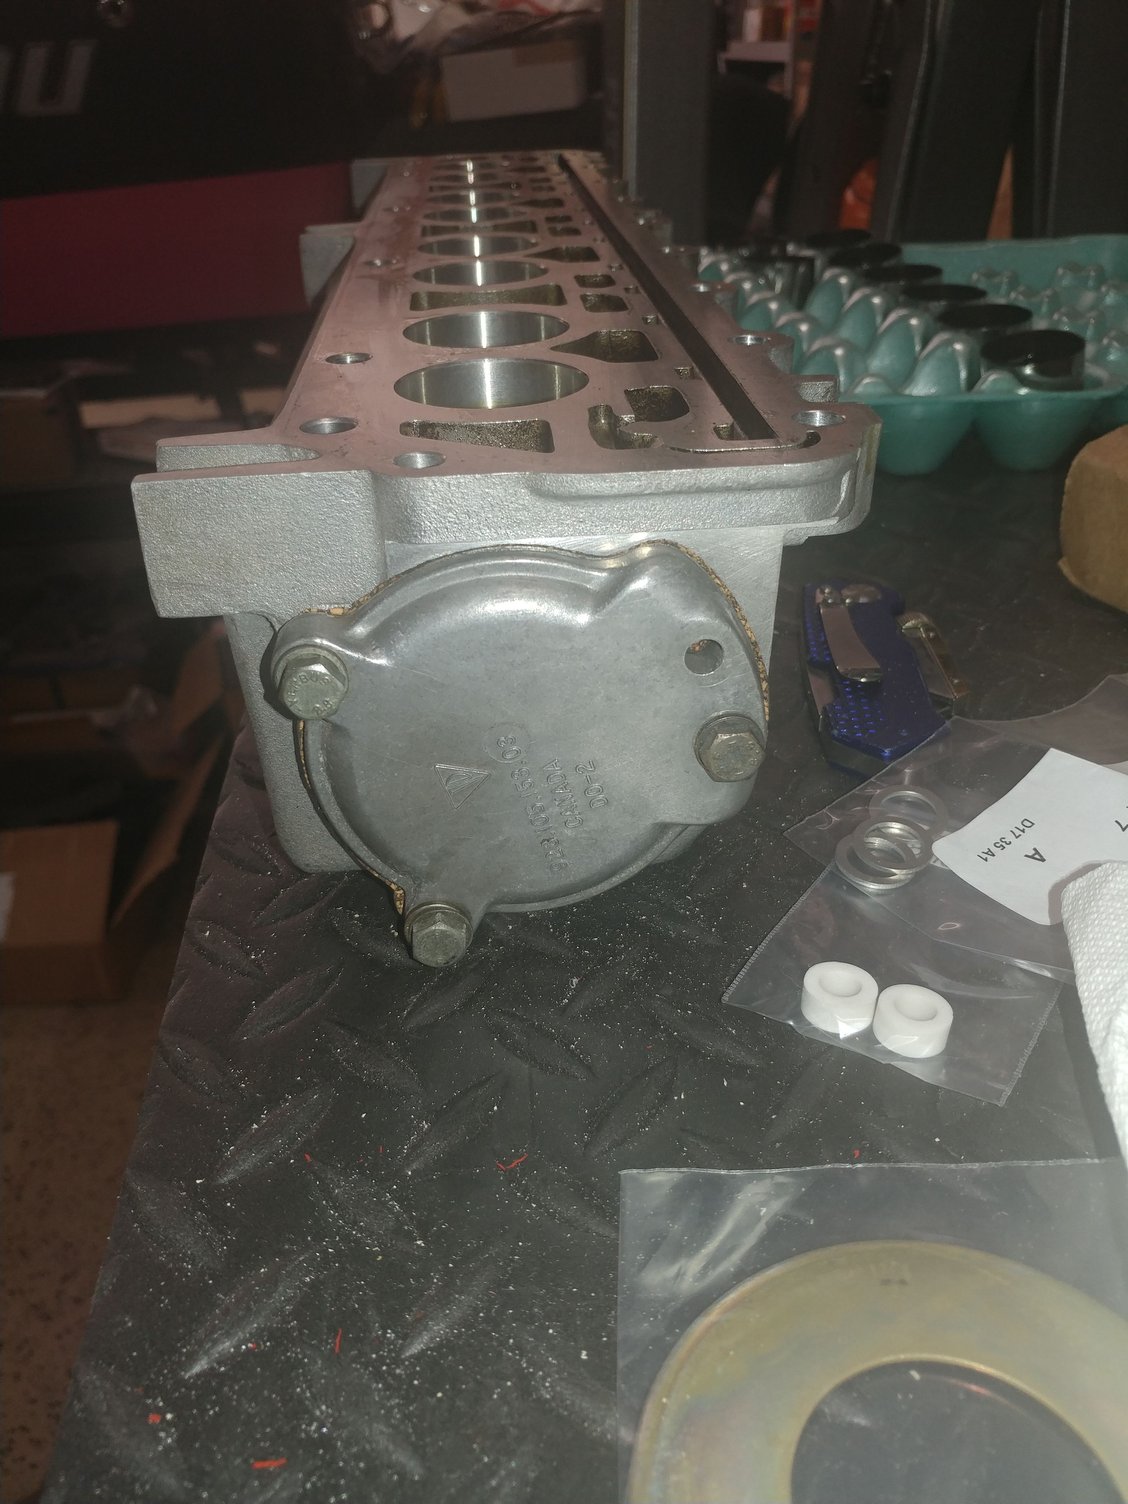
Pete - opt for the cam tower from the 4.7L motor. The rubber plugs from the early motor are hard to find and pricey, and they often leak. The other cam towers will have nice threaded plugs and crush rings. Much better. Consider it an upgrade.
Pete - opt for the cam tower from the 4.7L motor. The rubber plugs from the early motor are hard to find and pricey, and they often leak. The other cam towers will have nice threaded plugs and crush rings. Much better. Consider it an upgrade.
Carl,
Thanks for following along and chiming in. I came to that same conclusion last night. Having already taken the cam towers and end caps from the 4.7L to the powdercoater, I got concerned about whether I could just put the 4.5L cams into those cam towers, so last night, pulled the cam towers and cams from the 4.5L motor. When I layed them side by side, everthing lined up so I determined there wasn't anything special about the cam tower design of the 4.5L that would make those cams only work in those towers. Upon inspecting the cam lobes themselves, the 4.5L cams actually look to be in better shape too - less dark discoloration on the lobes.
The question I have now is should I use the followers/lifters that were in the 4.7L motor with the 4.5L cams or use the lifters from the 4.5L cam with the 4.5L cam in the 4.7L towers? The lifters out of the 4.7L look like they might be slightly better/newer as the underside is still a nice dark bronze color whereas the ones from the 4.5L have faded. Tops and sides all look to be about the same - no pitting, uniform scuff marks from use, etc.
Here's last night's photo set so you can see what the 4.5L towers and heads looked like, the lifter sets side by side, etc.
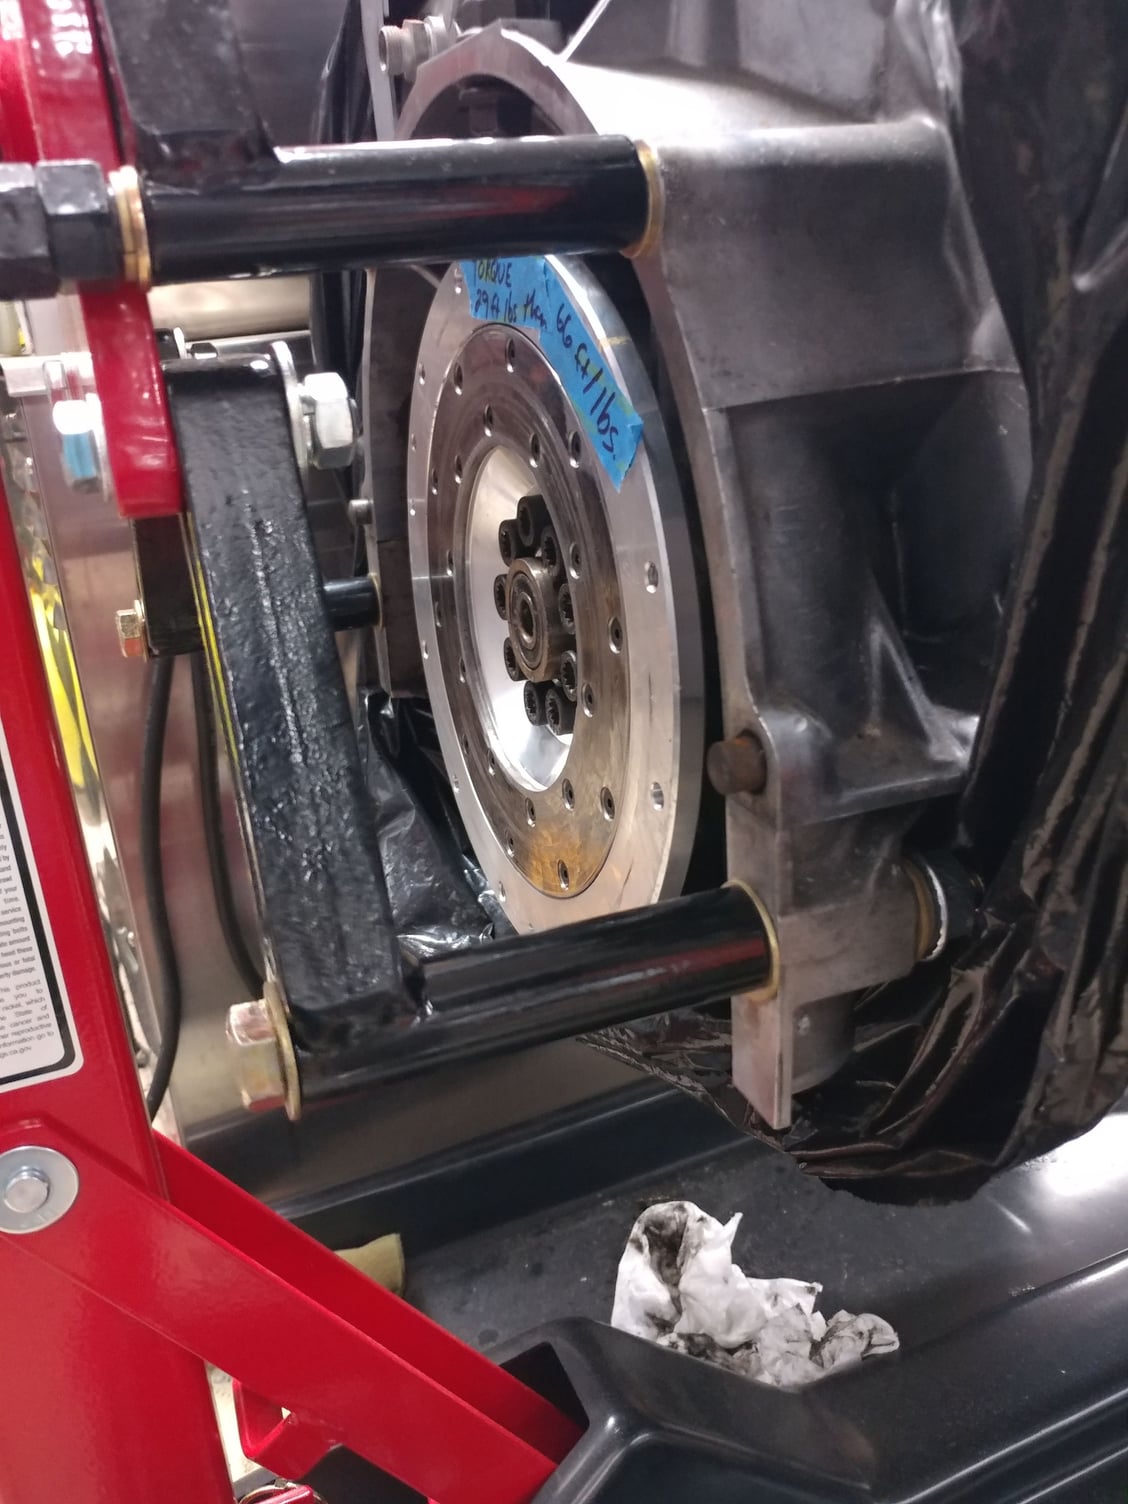
Pulled the lightweight SPEC flywheel from the 4.5L motor to remount onto the 4.7. Remember when I pulled the lower bell housing for the clutch and found what looked liked interference damage - think I discovered the cause of that - look at the outer ring of bolts on the backside of the flywheel - threaded part has been ground even with the nuts and the edges / faces of a few of the nuts have also been "shaved". When I removed the bell housing, I created some clearance in the area where that damage was - would you guys reinstall the lightweight flywheel or should I clean up the one that came on the 4.7L motor and use that one instead?
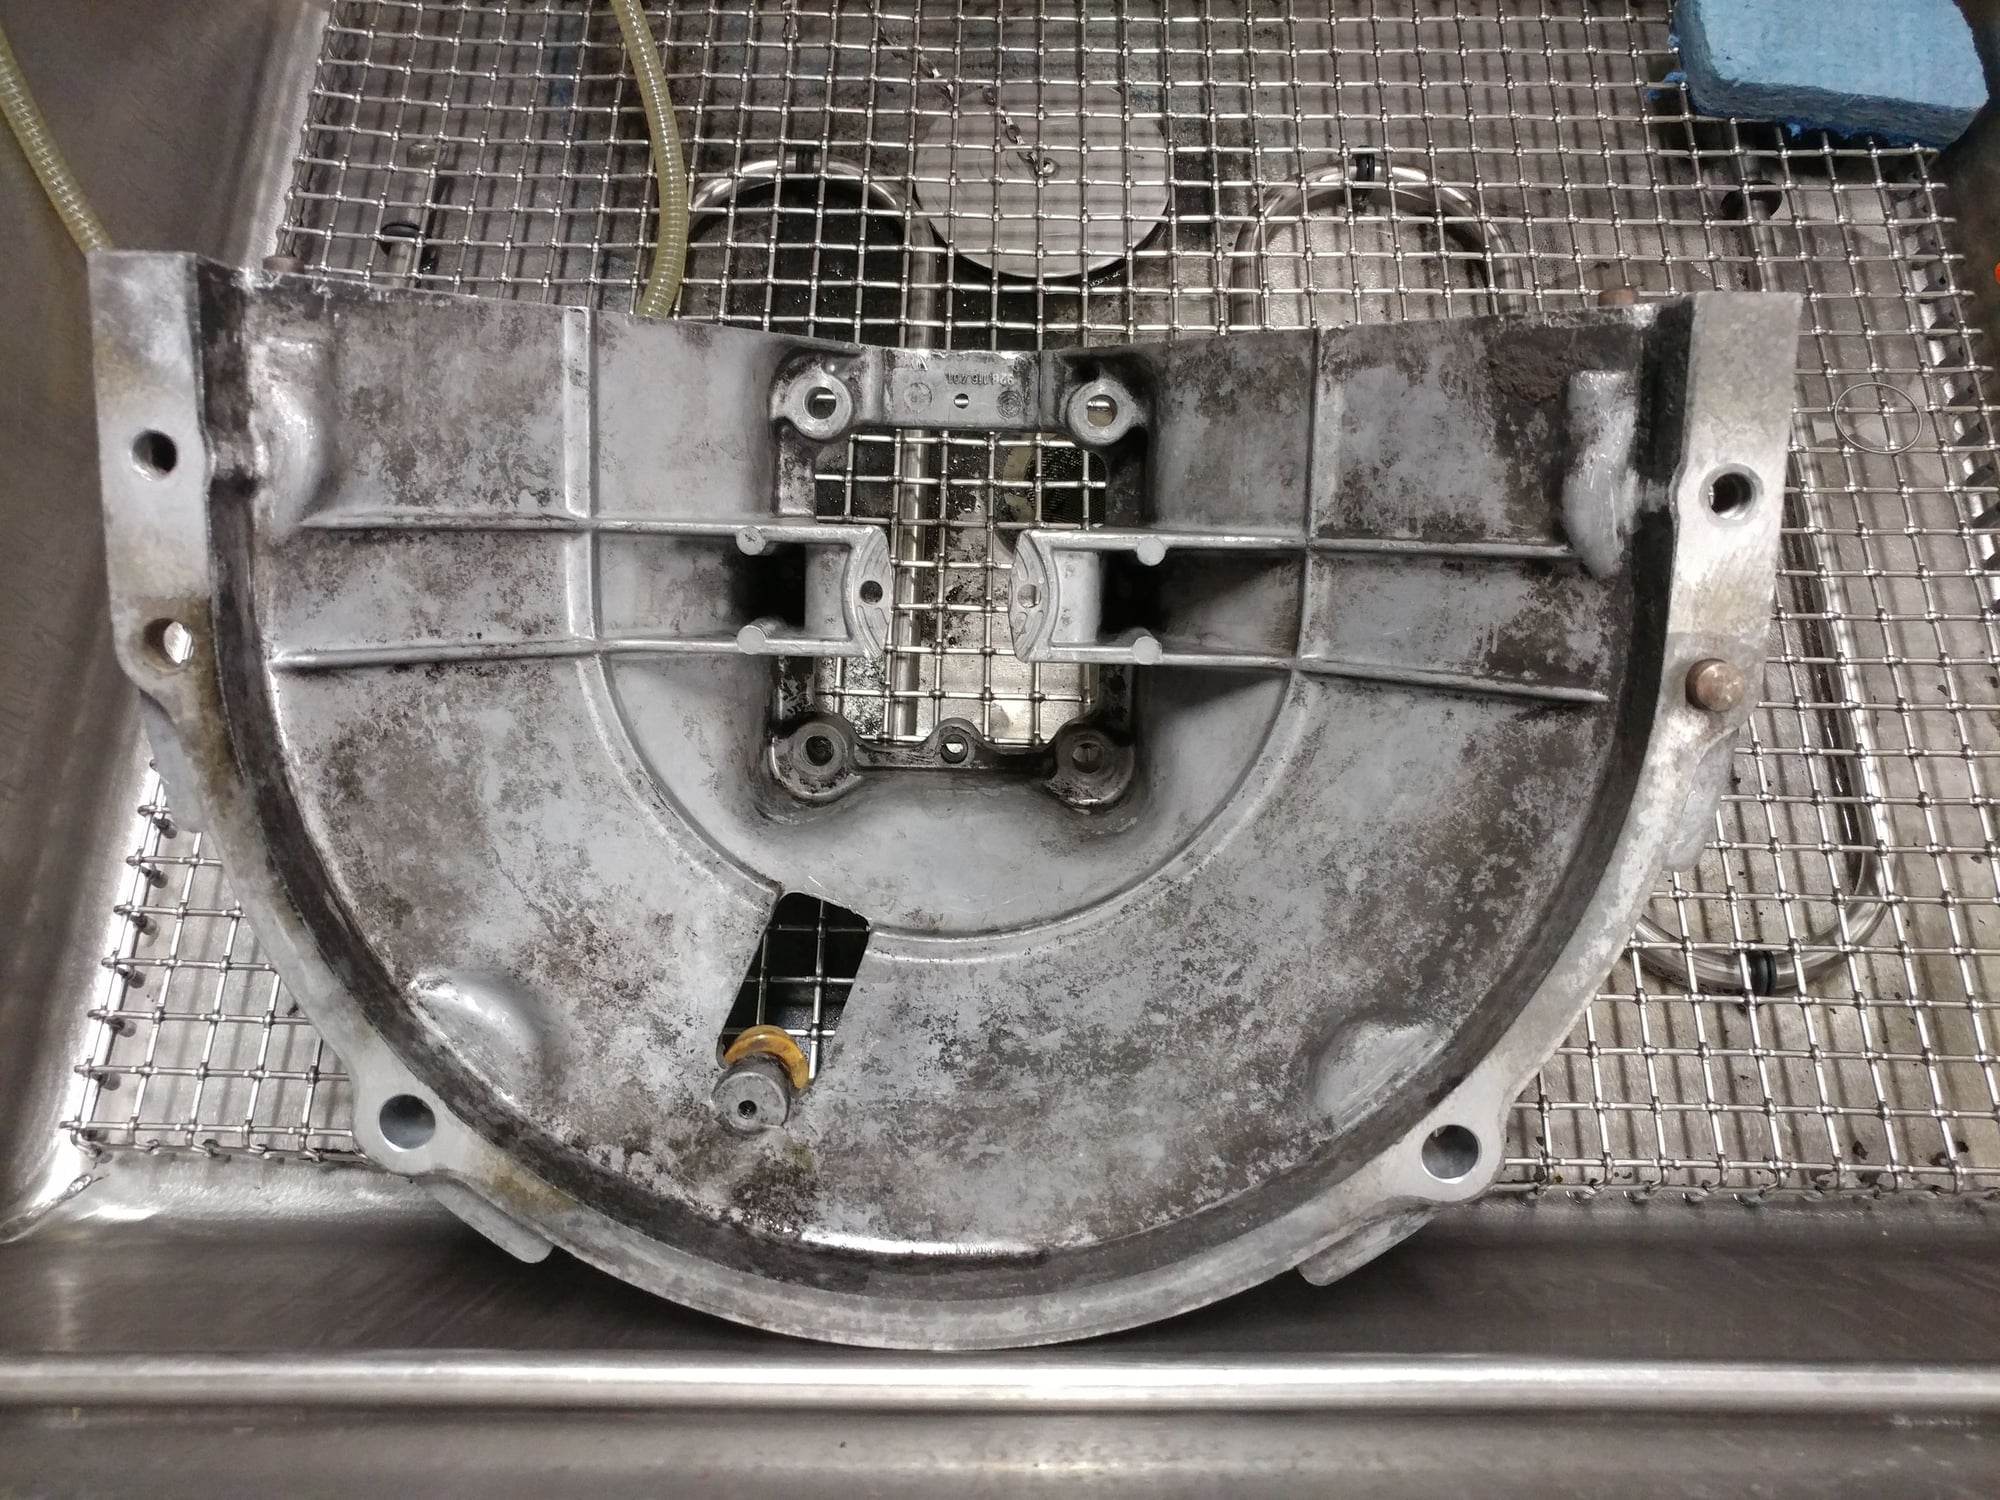
Reminder of what the lower clutch housing damage looked like
Note the outer circumference of bolts that are ground smooth. Looks to me like there was interference between them and someone ground down the bolt heads and machined some clearance into the housing cover. Had this happened naturally, the damage to the bell housing would have been in a constant arc where the bolt heads spun through it, not in a vertical pattern as shown.
There is also some deformity to the metal on the flywheel contact ring on the inner circumference, which I can clean up with a grinding wheel.
Here's the heavier flywheel that came on the 4.7L motor
,,,so would you guys clean up and use the OEM flywheel from the 4.7L motor or will I not like the way the car feels now that I've been driving it with the lightweight flywheel and gotten used to the freer-revving nature? Will it feel lethargic with the heavier flywheel?
Next, I pulled the cam towers from the 4.5L motor to compare it's cams to those from the 4.7L motor since the difference in end-cap had me concerned that I might need to reuse the 4.5L cam towers with it's cams and that they wouldn't just slide in and work right in the 4.7L towers.
4.5L cam tower end cap (thicker and domed for some reason)
4.7L cam tower end cap (thinner and flatter)
First I set the motor at TDC
1-4 TDC mark aligned (or pretty close to it)
5-8 TDC mark aligned
Front view of 4.5L before things start coming apart. Tensioner had lateral play in it - normal or not? Doesn't matter as I'm replacing that one with one of Ken's on reassembly.
1-4 Cam Tower. Interesting design compared to the 4.7L one. In the 4.5L, the lifters ride in these guide pairs that have flat sides where they meet each other. In the 4.7L, the lifters just ride in machined bores in the tower.
Is the Dark Brown sludge normal? The 4.7L didn't look like this when I took it apart.
1-4 cam side of Head
1-4 4.5L cam on towel / 4.7L cam on bubble wrap. The 4.5L cam actually looks to be in better shape to me - what do you guys think?
4.5L on towel / 4.7L on bubble wrap
4.5L on towel / 4.7L on bubble wrap. 4.7 looks like is has some lobe wear or hot spots.
4.5L on towel / 4.7L on bubble wrap. 4.7 looks like is has some lobe wear or hot spots.
1-4 4.5L lifters out, organized, and stored
5-8 4.5L Cam Tower
5-8 4.5L Camshaft
4.7L Lifters on the Left / 4.5L on the right. Which should I reuse during reassembly. The bronze color on the 4.7s looks fresher, but if the lifter should stay with the cam lobe it was paired with before the other shiny sides are comparable between the 2 sets.
Any opinions, input, or guidance is welcomed. Thanks.
About your flywheel: That a light-weight aluminum flywheel, and it allows the engine to rev faster because it stores less kinetic energy than a heavier flywheel. The moment of polar inertia is lower – so the torque the engine makes is immediately available to the tires, rather than having to overcome the mass of the flywheel first before it can turn the tires.
That said: it’s a double-edged sword. Because it stores less energy; it also is a little harder come away from stop signs without chugging, requiring more throttle in order to replace the weight it doesn't have.
You may be happier with the stock flywheel from the 4.7 motor. You aren't racing, and you know know what clutch chatter is. I noted you are also replacing the SPEC friction material with stock friction disks, that will also make for smoother launches.
About your flywheel: That a light-weight aluminum flywheel, and it allows the engine to rev faster because it stores less kinetic energy than a heavier flywheel. The moment of polar inertia is lower � so the torque the engine makes is immediately available to the tires, rather than having to overcome the mass of the flywheel first before it can turn the tires.
That said: it�s a double-edged sword. Because it stores less energy; it also is a little harder come away from stop signs without chugging, requiring more throttle in order to replace the weight it doesn't have.
You may be happier with the stock flywheel from the 4.7 motor. You aren't racing, and you know know what clutch chatter is. I noted you are also replacing the SPEC friction material with stock friction disks, that will also make for smoother launches.
Carl,
Now that I know how all this stuff comes apart and goes together, and aren't really afraid of it anymore (the abyss of the unknown), I'm planning to reinstall the lightweight flywheel with the OEM friction discs that have the internal marsailles springs. If this combination isn't smooth enough, I'll just drop the lower housing, pull the clutch again and install the other flywheel to see how that goes, but compared to my 997, the 928 doesn't feel like a light, free-revving motor, so don't think I want to make it less so than the way it drives currently.
Ordered more parts from Carl, Roger, and Mark and now think I'll have everything I need to put the new engine together and into the car. It was mostly gaskets, seals, covers, etc.
While waiting on those parts to arrive and for the powdercoated items to be ready, I cleaned up more oily parts to get them ready for paint and/or install. Also installed the lightweight flywheel onto the 4.7L motor, but haven't torqued it down yet.
Next is probably the oil pump seals, pan gasket, and cleaning up the engine bay.
Also pressure tested my radiator and it has a tube leak, so that's being sent off tomorrow to be recored.
Remember how the inside of the upper bell housing was caked with black crud - not anymore.
Looking great Pete!! You are really coming along fast. I think you'll be back on the road before me. LOL.
Speaking of installing the flywheel, I've been trying to figure out if the bolts go in dry, with anti-seize, or with Loctite. The WSM mentions the torque procedure in several places, but doesn't say to put anything on the threads. I assume this means dry, or they would have said different. However virtually every flywheel I've ever installed or seen installed had something on the threads depending on application.
Thanks Chris.
The bolts I removed had some copper anti-seize on them and wanting to be able to get them out again at a future date, I cleaned them up and reinstalled with a little Marine grade anti-seize. I'm going to tighten them by having someone hold the crankshaft bolt at the opposite side since that will be in a tightening opposing direction as I torque the flywheel bolts at the opposite end.
The bolts I removed had some copper anti-seize on them and wanting to be able to get them out again at a future date, I cleaned them up and reinstalled with a little Marine grade anti-seize. I'm going to tighten them by having someone hold the crankshaft bolt at the opposite side since that will be in a tightening opposing direction as I torque the flywheel bolts at the opposite end.
OK, cool. Thanks for the info. Right, wrong, or indifferent I put anti-seize on mine as well.
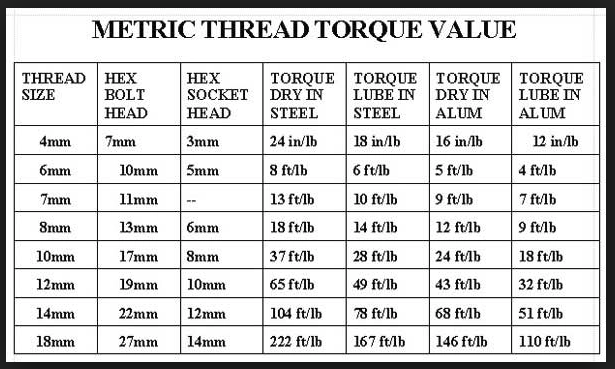
You have to be careful with thread lubricants. Most torque specs are dry unless other-wise mentioned. If you add anti-seize or some lubricant, it is very easy to over-torque the fastener because the lubricity allows over-rotation during assembly.
Check some typical torque charts, the good ones call out the different torque values depending on which lube you use. Here is just a simple version I found. Note how, if lube is used, you need to tighten to a much lower torque. Other charts are more precise as to which type of lube is used, but that's more than the average weekend mechanic needs to worry about. Problems of over-torque can include: over-clamping and deforming the parts being clamped; damage (strecthing) of the fastener; and failure of the threads in the fastener or the host material


 04-20-2019 | 09:53 PM