
My first timing belt/water pump/PK-Tensioner job. Worklog. 92 GTS.
 02-07-2018, 04:12 PM
#46
Pro
Thread Starter

 02-07-2018, 04:31 PM
#47
Rennlist Member
Thanks. I might have some reservations, but only because this is new territory for me, never tried it, I've heard the name before but didn't know what it was until today...I'm sure it works well. Regardless, if there are better alternatives out there, I would like to know about them and maybe use them next time. I like good quality stuff
02-07-2018, 04:49 PM
#48
Go with a time cert. 928% better then a helicoil. I just finished rebuilding an 89 that at least a dozen helicoils in it, all time certs now. I get mine off Amazon in the US.
02-07-2018, 04:49 PM
#49
Rennlist Member
Join Date: Oct 2005
Location: Gatineau, Qu�bec, Canada
Posts: 5,171
Received 1,295 Likes
on
492 Posts
I read like you that Time Sert is better but Helicoil did the job perfectly.
And was available around here. Not Time Sert.
I took few pics when I did this job.
Let me know if you want me to post them.
And was available around here. Not Time Sert.
I took few pics when I did this job.
Let me know if you want me to post them.
02-07-2018, 04:53 PM
#50
Pro
Thread Starter


 02-08-2018, 02:25 PM
#52
Pro
Thread Starter
Thanks Bertrand. I did the same process today. My photos are almost identical, so I'll leave them for your imagination since we have yours already. Anyway, it was easy, and it worked like a charm. Never thought stripping a hole like that was no big deal actually. Water pump is installed, all bolts torqued to 9.5nm
I also assembled the PKT-S, and did that ready as far as to install the belt.
I was waiting for my last parts delivery before I could continue and it arrived this afternoon. In the meantime I fixed some other small stuff, see photos below.
Water pump installed, PKT-S hanging awaiting belt:
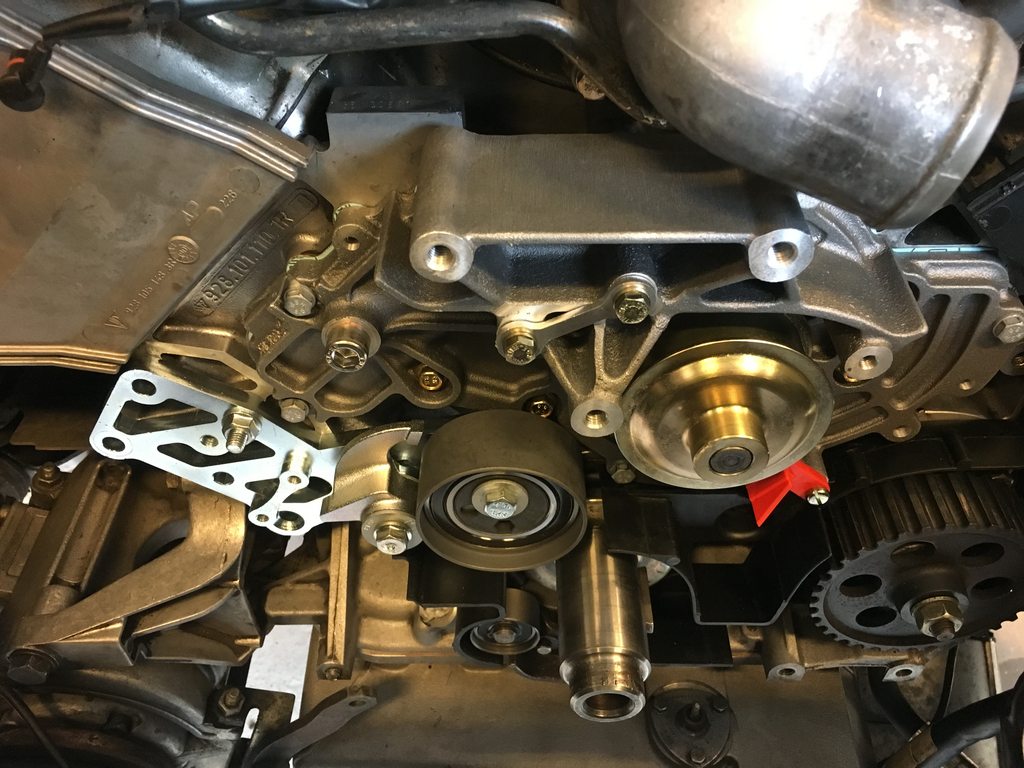
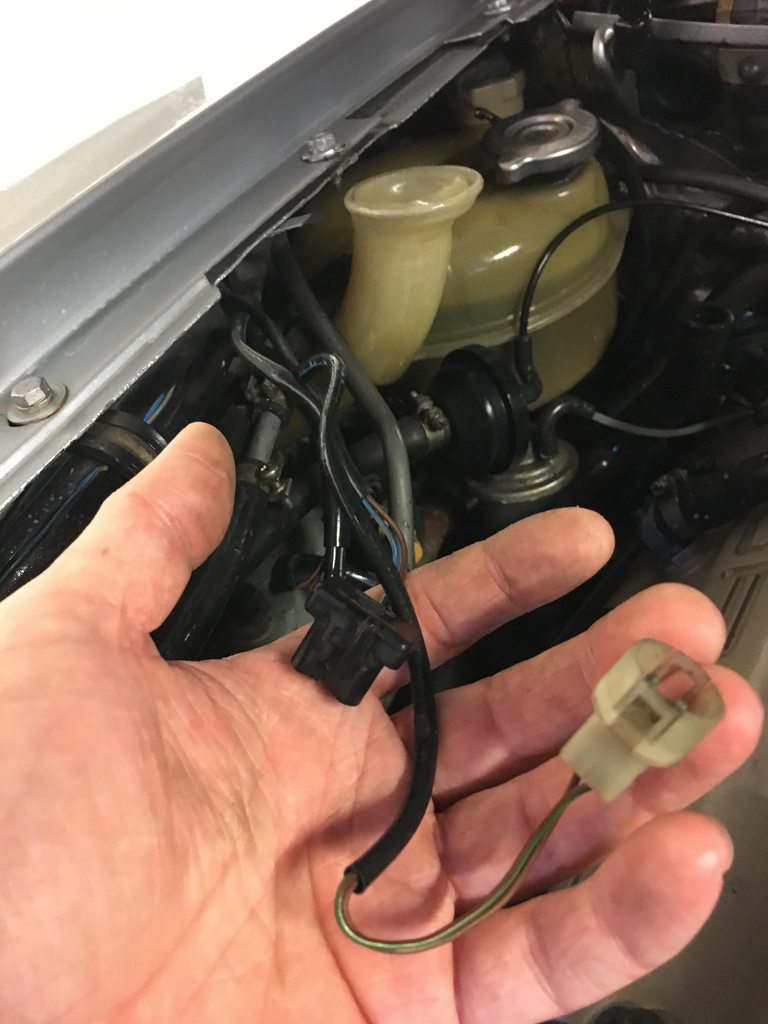
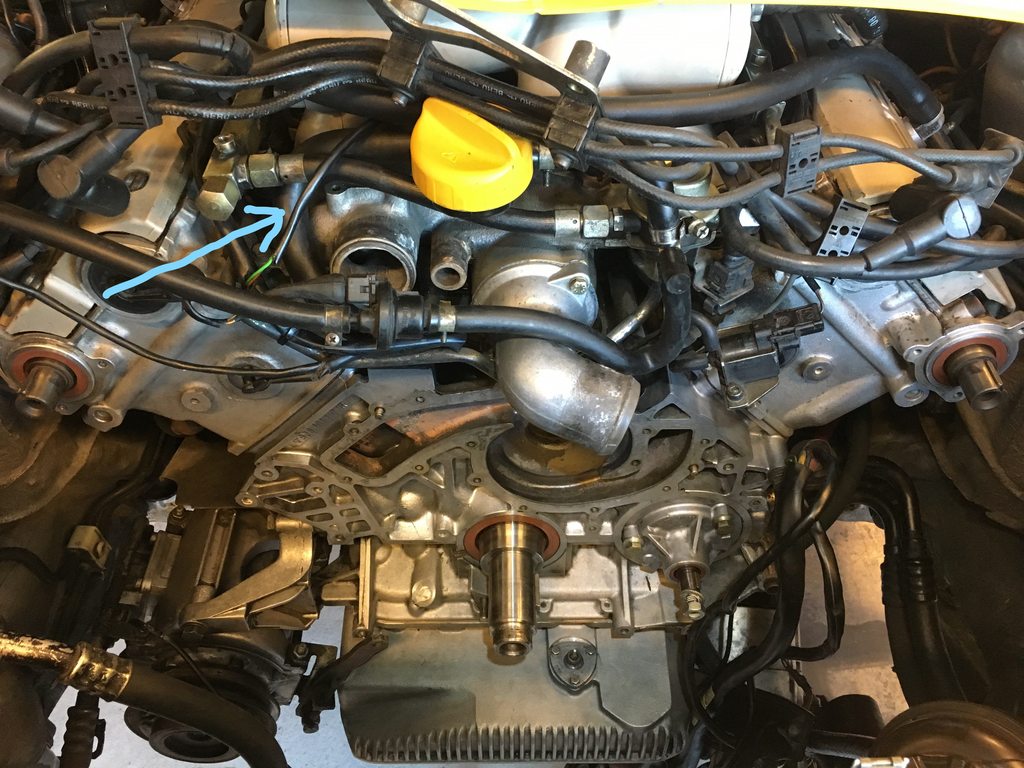
Installed missing coolant pressure warning switch, you can see the old steel bypass tube right in front of my thumb, and the connector is the black one.
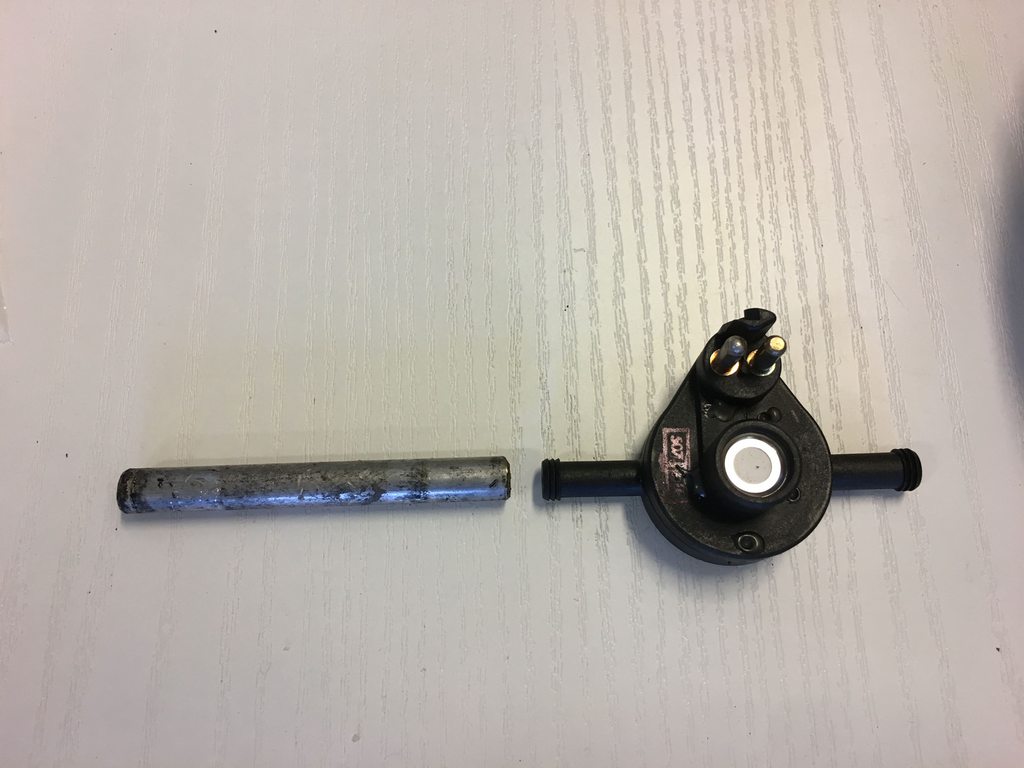
Bypass vs new switch. Unfortunaltely i forgot to take pic after installed.
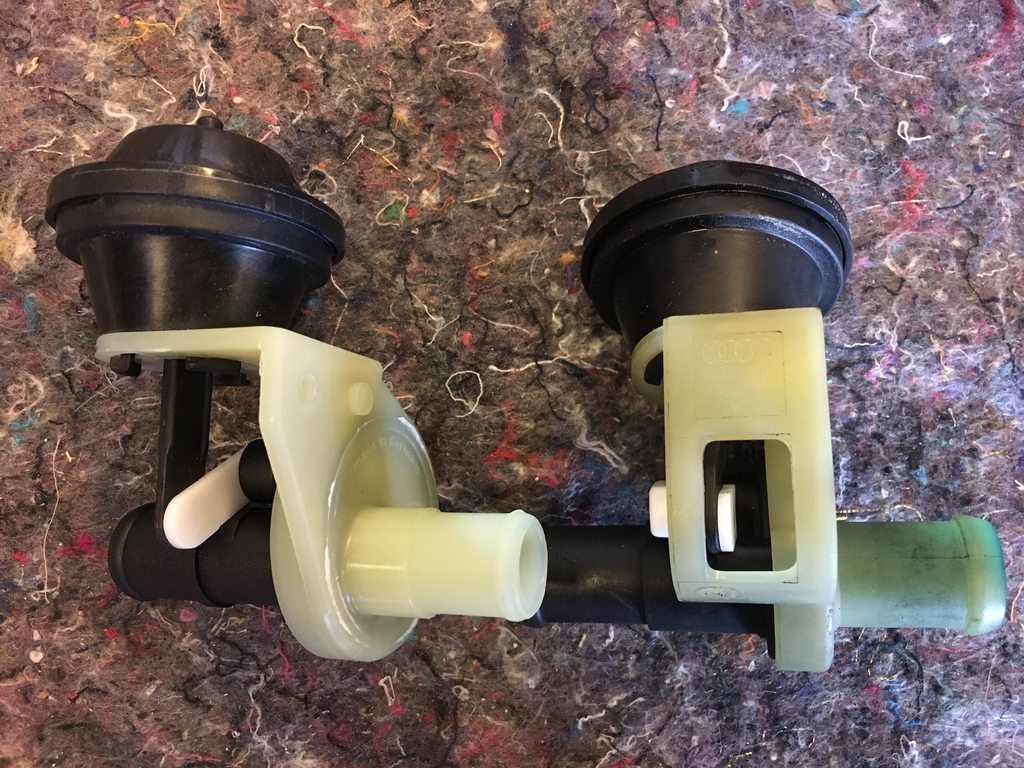
Removed old heater valve (Audi!:O) to replace with new one, including the short rubber hose in front of it.
Rerouted a breather hose that goes from bottom MAF area, through intake and into oil filler neck. Someone for some reason had it routed up under PS fuel rail and then back to the filler neck. Before vs now:
Attachment 1351556
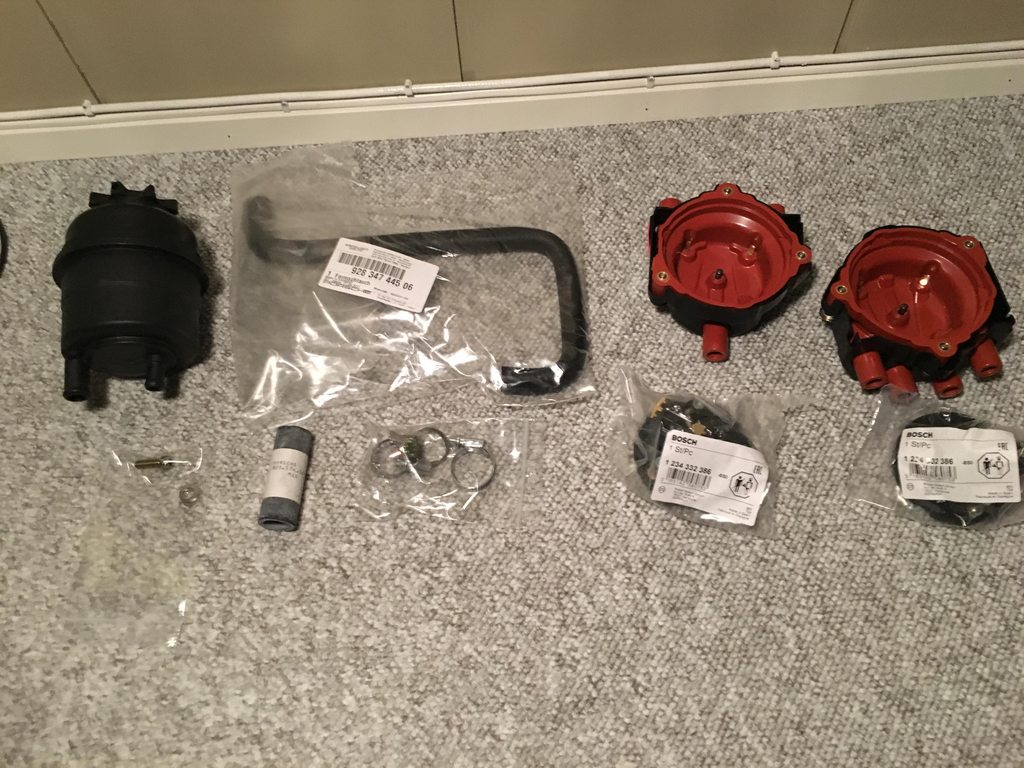
And the last (hopefully) parts delivery. New servo container, hose, clamps, distributors and rotors. And some other small stuff.
Will hopefully install belt tomorrow.
I also assembled the PKT-S, and did that ready as far as to install the belt.
I was waiting for my last parts delivery before I could continue and it arrived this afternoon. In the meantime I fixed some other small stuff, see photos below.
Water pump installed, PKT-S hanging awaiting belt:
Installed missing coolant pressure warning switch, you can see the old steel bypass tube right in front of my thumb, and the connector is the black one.
Bypass vs new switch. Unfortunaltely i forgot to take pic after installed.
Removed old heater valve (Audi!:O) to replace with new one, including the short rubber hose in front of it.
Rerouted a breather hose that goes from bottom MAF area, through intake and into oil filler neck. Someone for some reason had it routed up under PS fuel rail and then back to the filler neck. Before vs now:
Attachment 1351556
And the last (hopefully) parts delivery. New servo container, hose, clamps, distributors and rotors. And some other small stuff.
Will hopefully install belt tomorrow.
02-09-2018, 09:03 AM
#53
Pro
Thread Starter
Ok now I need some good advice. I am reinstalling the two coolant drain bolts to the block. I cleaned the bolts and coated the threads with a tiny bit of copper paste.The first one PS went in nice, tightened to 25nm. The DS bolt though, is making a lot of resistance when I am turning the wrench, as if it it damaging the threads. when I take it back it goes easy backwards, and in again, easy until it hits deeper than I have been already. When I take the bolt out, there are no aluminum on the bolt.
It looks like it is correctly inserted, I took some photos from a couple of angles and it looks good to me. Right now it is about half way in, but I thought I'd check if I have any other options than just continue and hope for the best. This is the one place I don't want to **** up as it is no space to do anything up there...
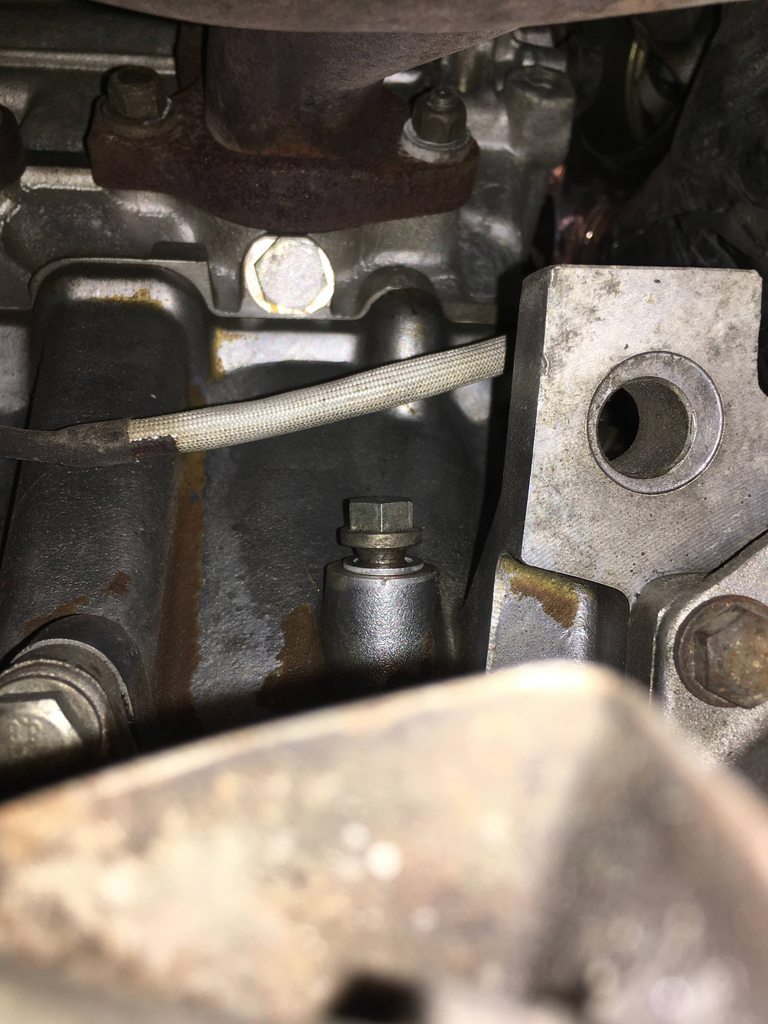
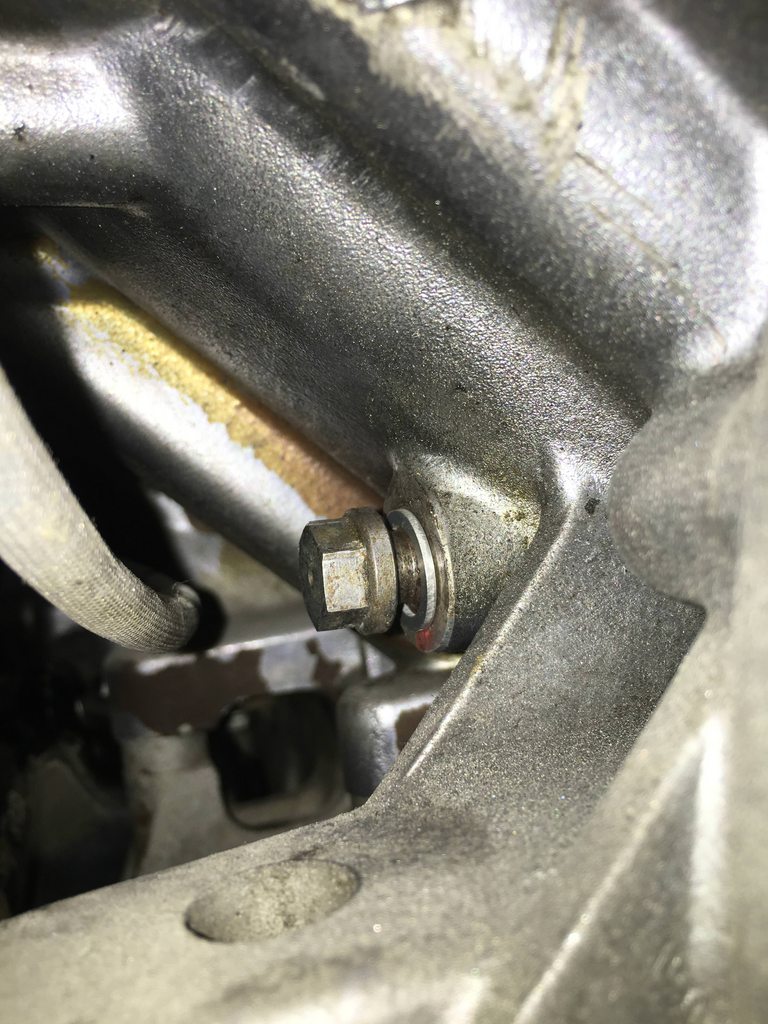
It looks like it is correctly inserted, I took some photos from a couple of angles and it looks good to me. Right now it is about half way in, but I thought I'd check if I have any other options than just continue and hope for the best. This is the one place I don't want to **** up as it is no space to do anything up there...
Last edited by paalw; 02-09-2018 at 09:19 AM.
02-09-2018, 09:10 AM
#54
Rennlist Member
Not that it is much help but both mine came out and went in quite freely. It will be interesting to see what the brains trust reckons. Have you got access to an endoscope to take a closer look at the threads in the block?
02-09-2018, 09:19 AM
#55
Pro
Thread Starter
No I haven't. Might be worth to mention there is quite a bit of brown/black residue on the bolt when I remove it, so this might be a case of just very dirty threads in the block. One of the bolts were also quite rusty/****ty before I cleaned them.
02-09-2018, 09:31 AM
#56
Rennlist Member
Hmm- sounds as though you need to flush the block some. One of the tricks when you have sufficient kit out of the way is to stick a hose pipe into the block and flush the crap out of it.
Not sure I understand why such crap would cause your issue unless the particle size is just right to wedge the threads- either way you need to get rid of that crap I would suggest. The main main worry being how much of it is there in there and why?
Not sure I understand why such crap would cause your issue unless the particle size is just right to wedge the threads- either way you need to get rid of that crap I would suggest. The main main worry being how much of it is there in there and why?
02-09-2018, 09:56 AM
#57
Rennlist Member
Join Date: Oct 2005
Location: Gatineau, Qu�bec, Canada
Posts: 5,171
Received 1,295 Likes
on
492 Posts
Some dirt might have got there when you drained the block.
Like Fred said, a good flush would be a good thing to do.
Then, try to clean the thread with a small brush as much as you can. With a tooth brush maybe.
If you feel resistance when you put those bolts - any bolt actually - there is something wrong.
Make sure everything is as clean as possible and the thread is not dammaged and everything should go well.
02-09-2018, 10:09 AM
#58
Pro
Thread Starter
All coolant that has come out has been very clear and nice, I don't suspect there is a lot of stuff in there. But how the threads got that dirty, well that is strange yes.
02-09-2018, 10:38 AM
#59
Rennlist Member
While the block is flooded clean coolant is being drained. However when you get down to the dregs at the bottom there is a localised increase of superficial velocity as the level bottoms out and the vortex then picks ups crud that was previously lying there somewhat benignly and in the process possibly leaves crud at or around the lip possibly washing a little into the threads and it hangs there until you thread the bolt back in.
02-09-2018, 11:40 AM
#60
Pro
Thread Starter
Makes sense Fred. Well I tried to continue driving the bolt in, and it finally grabbed and feel like it is ok torqued. I don't know what happened here, I don't think I will ever undo this bolt until engine is out for some reason.