

My first timing belt/water pump/PK-Tensioner job. Worklog. 92 GTS.
 02-02-2018, 01:12 PM
#31
Pro
Thread Starter
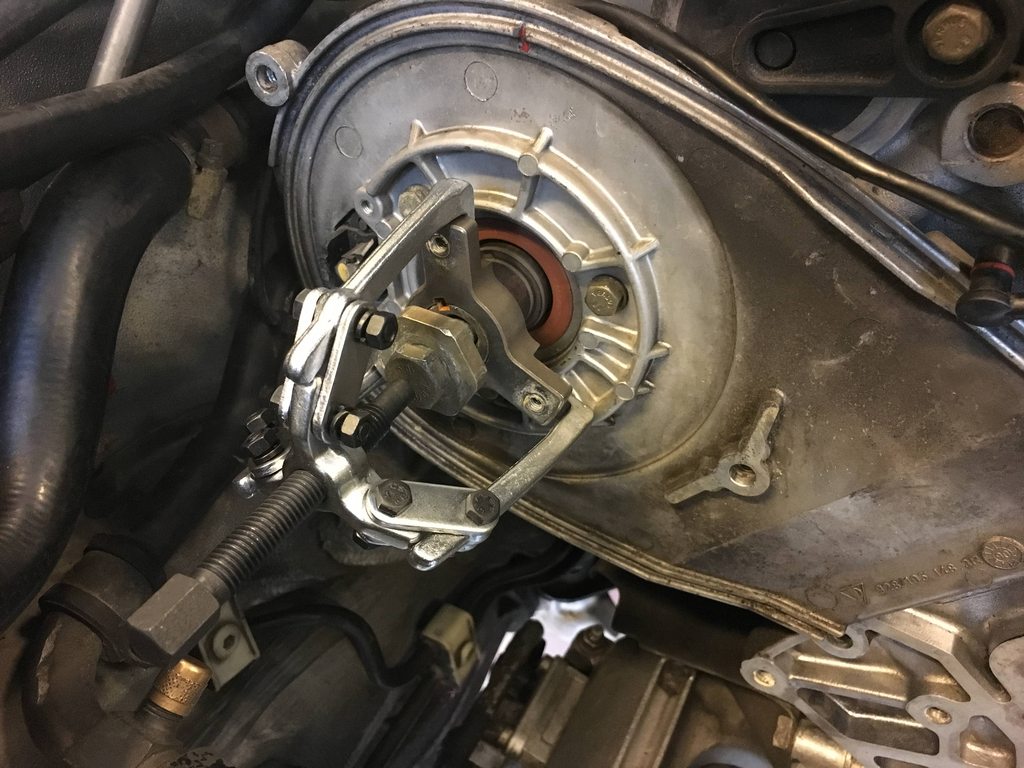
Today there has been some progress. I finally received the flywheel lock, so then I could proceed. Got the crank bolt off without major problems, the accessory wheels and vibration damper all came off without drama. Loosened the tension on the belt and got that off. Looked like new by the way, Gates belt. Water pump off, tensioner off. crank gear off. Oil pump gear not off, my 3 leg puller didn't fit, so I need to go buy a 2 legged one.
I will replace the cam gears and hall sensor, and I guess now is an ok time to do that step. Will look into that in detail at next session. Removed the rotors today and shot photos of cam gear positions, see below.
Then the plan further is first to get the oil pump gear off, then the plastic backplate. Then inspect for leaks at oil pump and crank, and if any signs, replace bushings/o-rings. Then clean up, and start to reassemble.
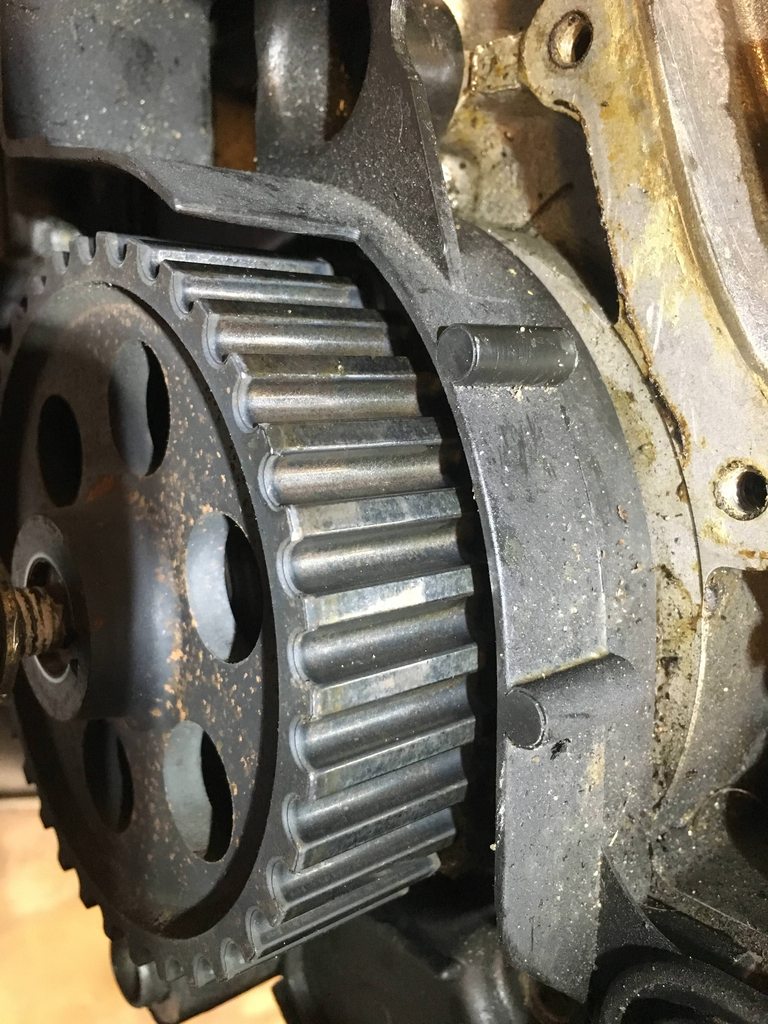
The oil pump gear, and the crank gear, looks shiny and maybe worn? I don't know the importance of these to be perfect, is it the same as the cam gears that they should have coating material? See detailed photos below.
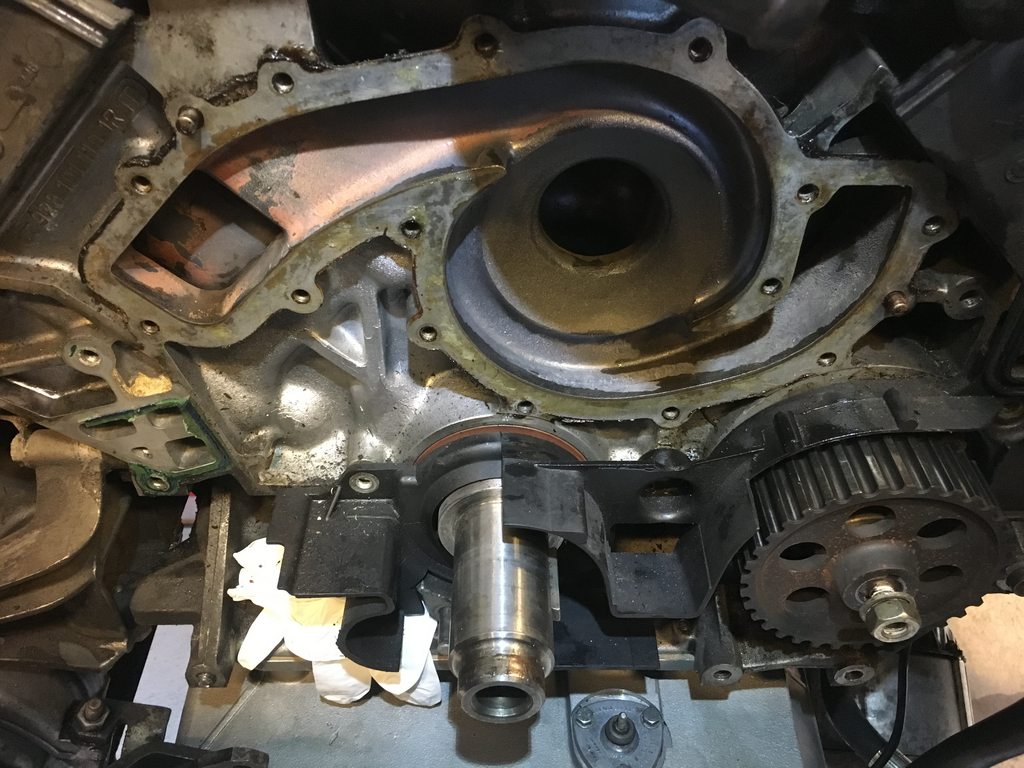
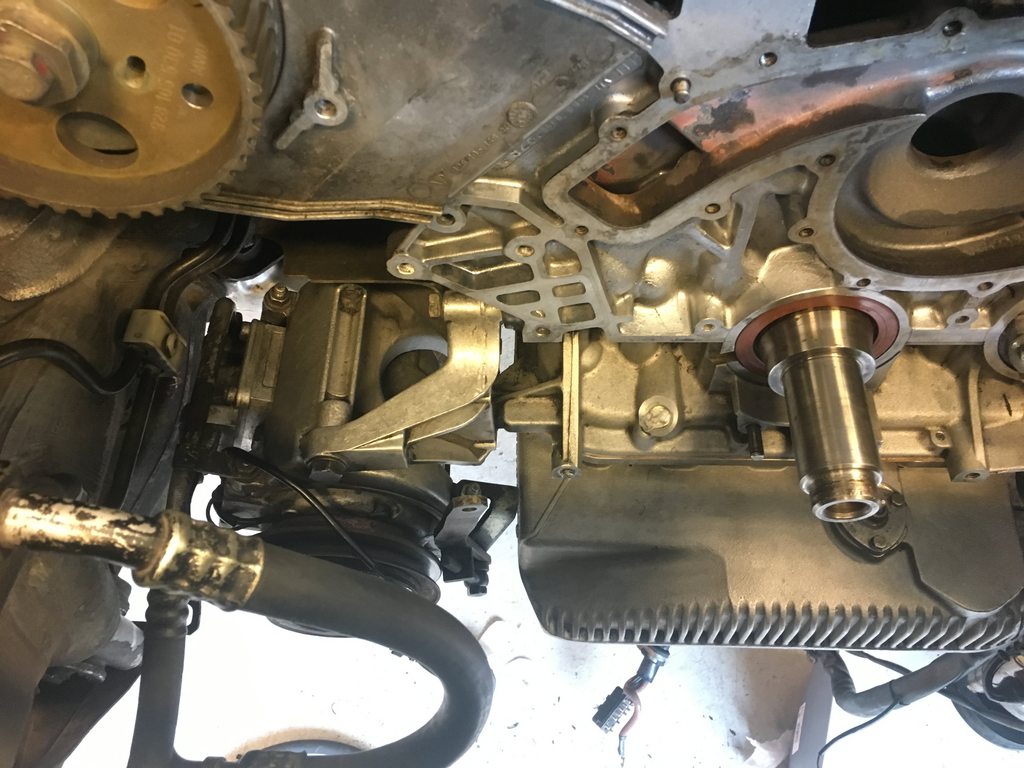
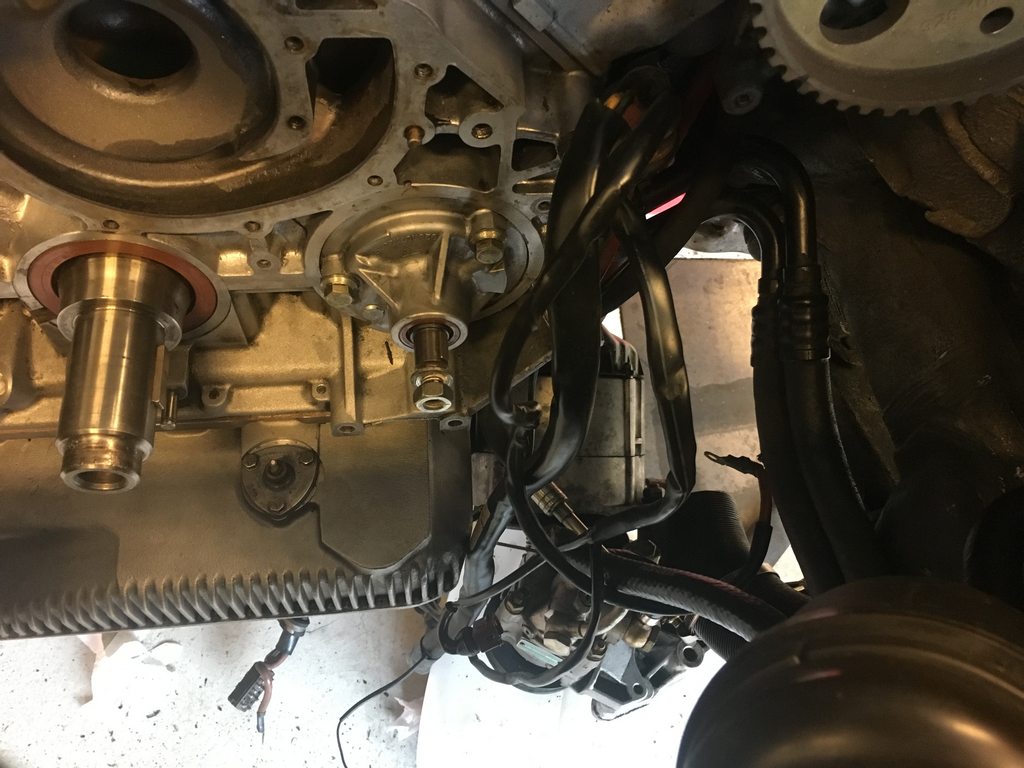
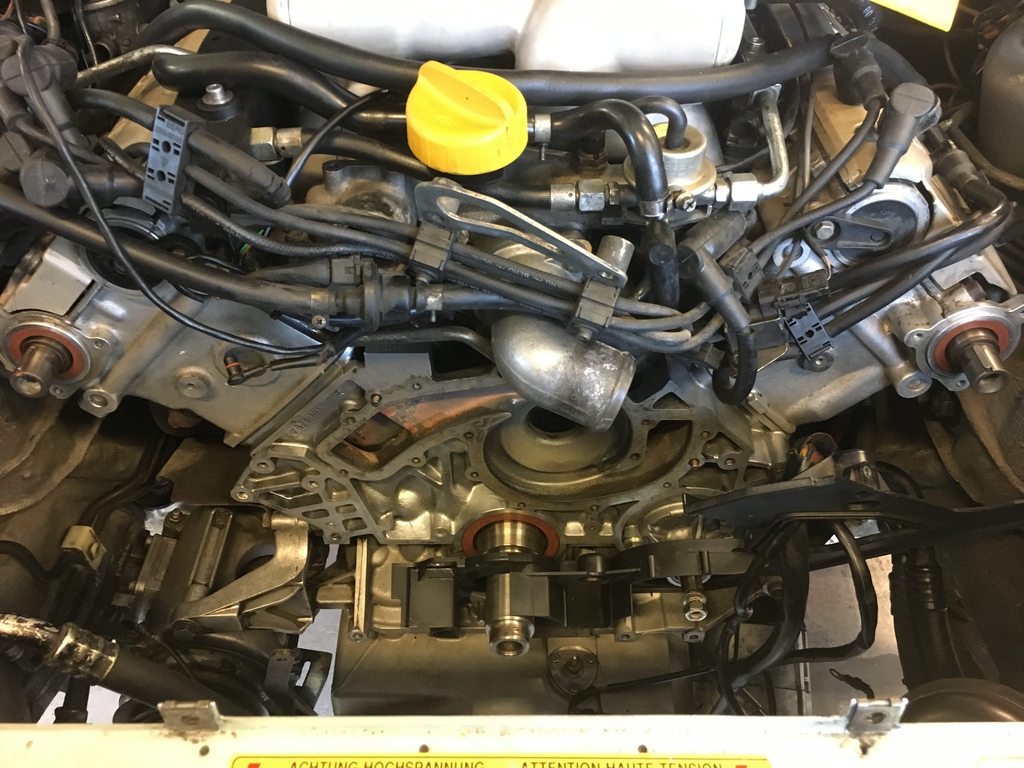
First a couple of as we speak status pics. Everything looks ok to me:

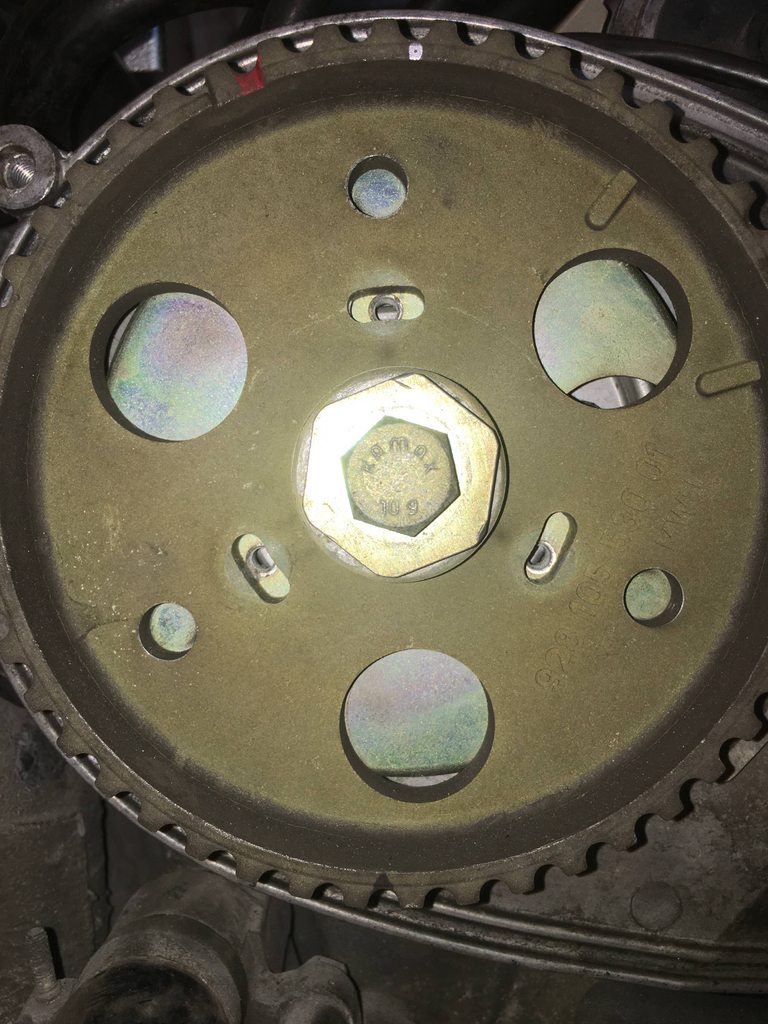
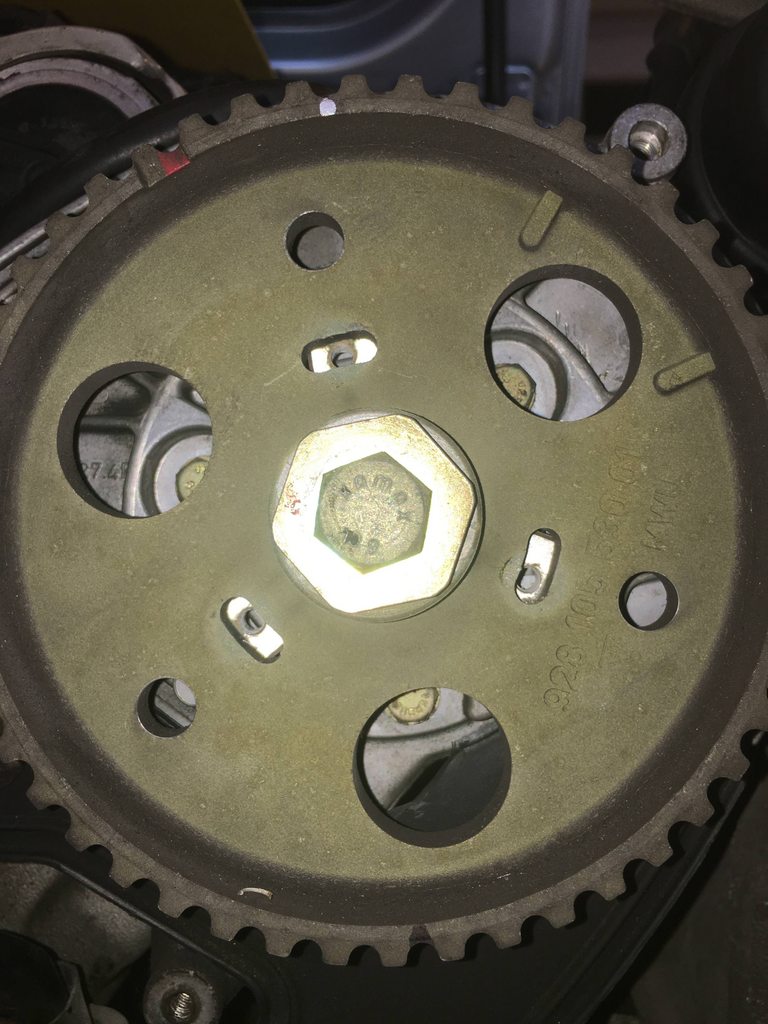
Old cam gear positions:
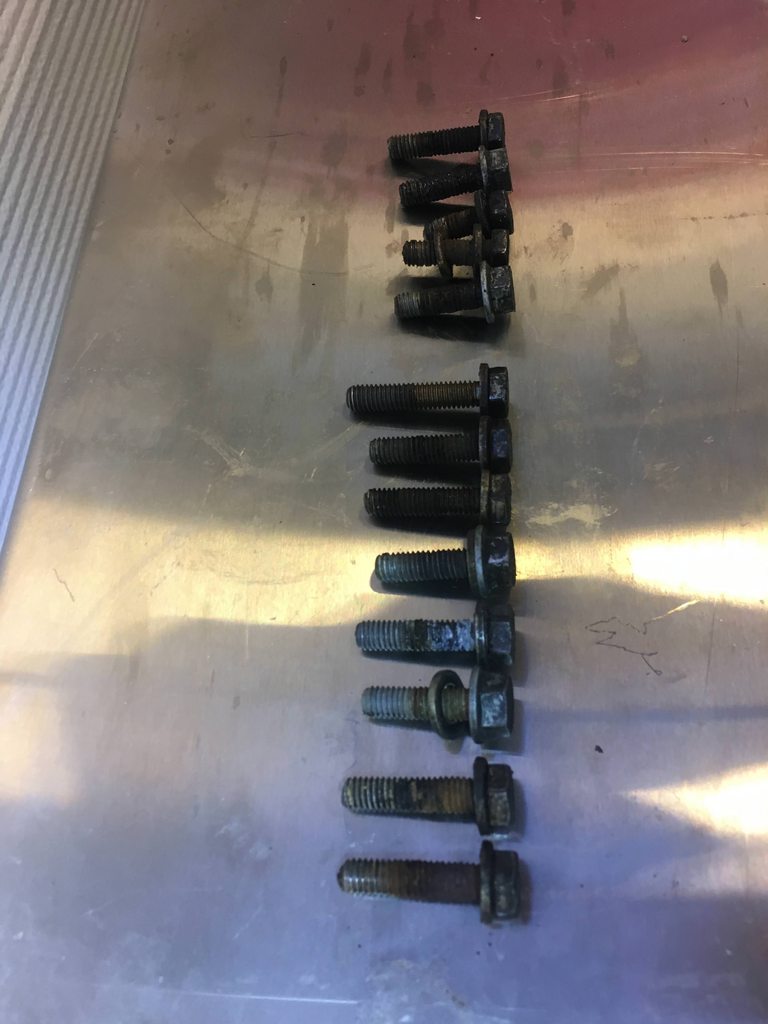
Varying lenght on the old water pump bolts. Luckily I already have 13 new ones, 8 long and 5 short.
Crank gear. How does it look?
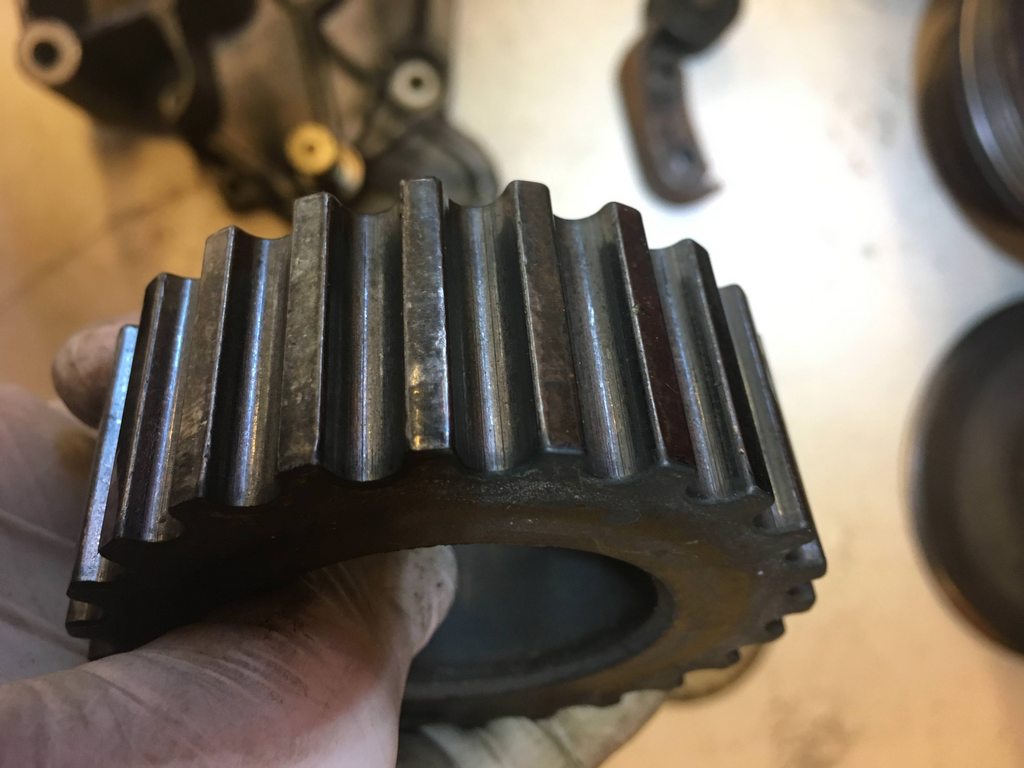
Oil pump gear. About same condition as crank gear.
I will replace the cam gears and hall sensor, and I guess now is an ok time to do that step. Will look into that in detail at next session. Removed the rotors today and shot photos of cam gear positions, see below.
Then the plan further is first to get the oil pump gear off, then the plastic backplate. Then inspect for leaks at oil pump and crank, and if any signs, replace bushings/o-rings. Then clean up, and start to reassemble.
The oil pump gear, and the crank gear, looks shiny and maybe worn? I don't know the importance of these to be perfect, is it the same as the cam gears that they should have coating material? See detailed photos below.
First a couple of as we speak status pics. Everything looks ok to me:
Old cam gear positions:
Varying lenght on the old water pump bolts. Luckily I already have 13 new ones, 8 long and 5 short.
Crank gear. How does it look?
Oil pump gear. About same condition as crank gear.
 02-03-2018, 12:28 PM
#32
Team Owner
oil [pump gear looks new and its the steel version, use it
crank drive gear looks ok for further service
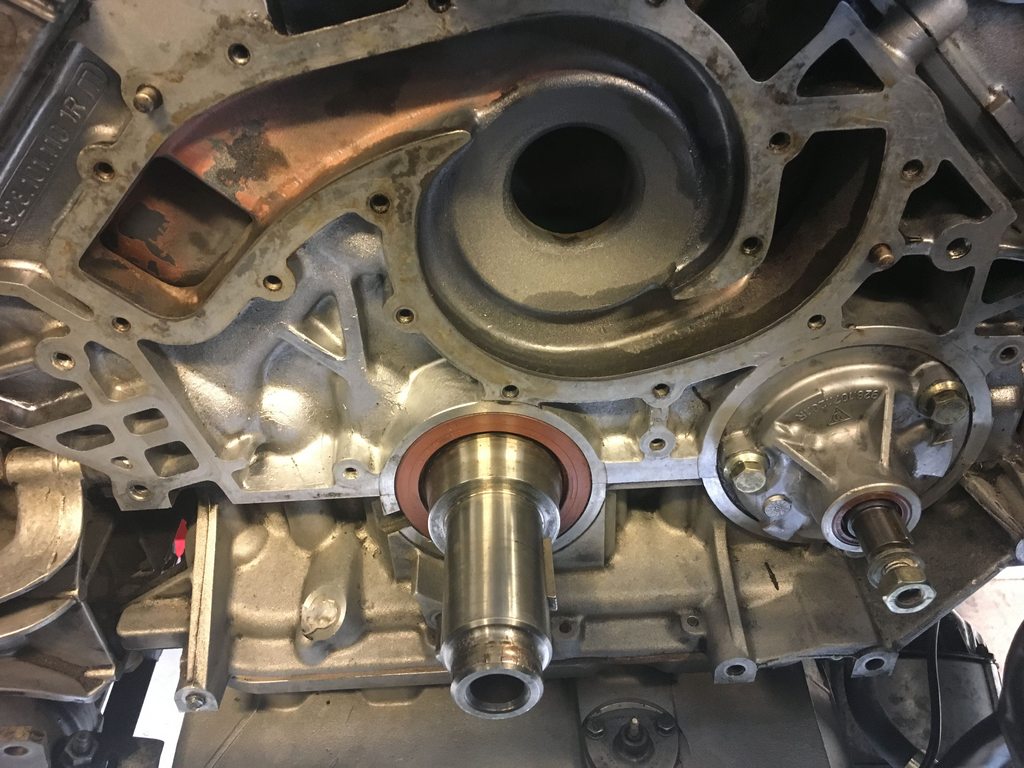
the oil pump and front main seals may have been replaced based on the lack of oil deposits under them
crank drive gear looks ok for further service
the oil pump and front main seals may have been replaced based on the lack of oil deposits under them
02-04-2018, 12:06 AM
#34
Team Owner
aluminum is the original gear and it gets swapped for the steel version the aluminum gear would crack.
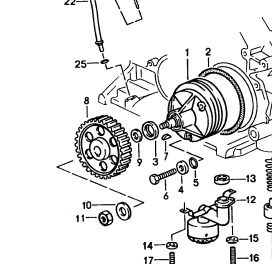
NOTE if you remove the oil pump gear,
make sure the 1MM washer is also gone.
The washer is only used on the aluminum gear and sometimes its left in place by the mechanic.
REF WSM for the rest of the story
NOTE if you remove the oil pump gear,
make sure the 1MM washer is also gone.
The washer is only used on the aluminum gear and sometimes its left in place by the mechanic.
REF WSM for the rest of the story
 02-05-2018, 08:15 AM
#36
Pro
Thread Starter
I removed oil pump gear. There was no 1mm washer behind it (no 9), no 10 was was present in front.
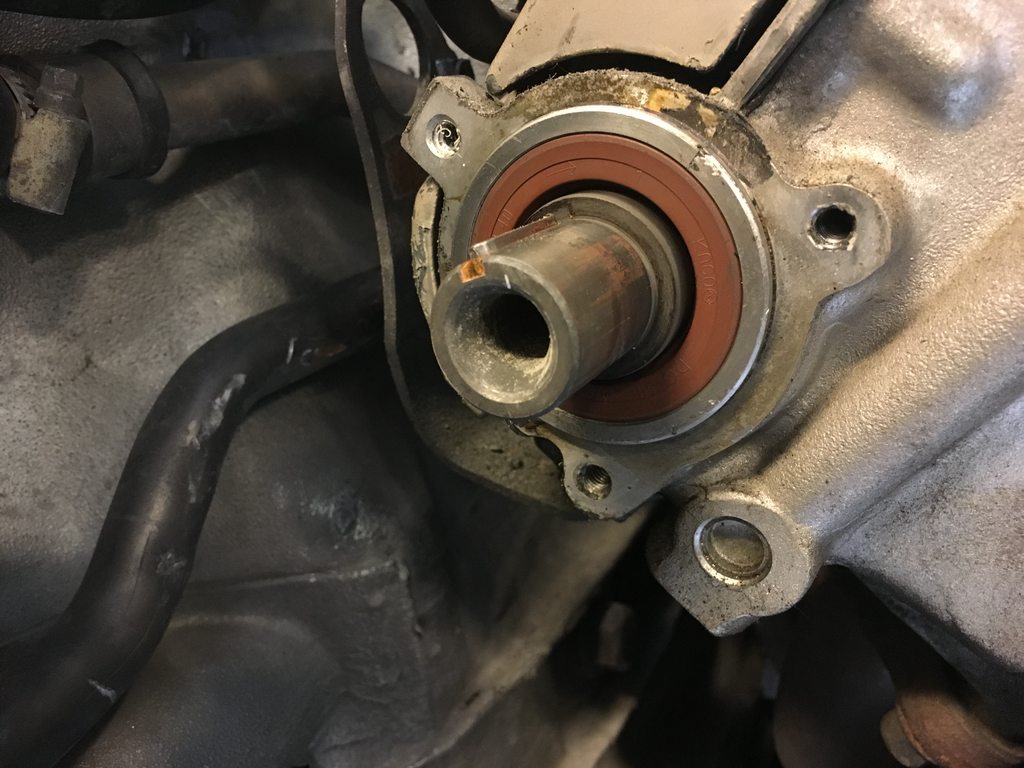
The areas surrounding oil pump and crankshaft were dry and nice, so I don't think I'll touch them, even though I have all the new sealings/o-rings.
Cleaned up the whole area, cleaned some parts that will go on again. Next tomorrow is to replace hall sensor and cam gears. Looking forward to that experience.
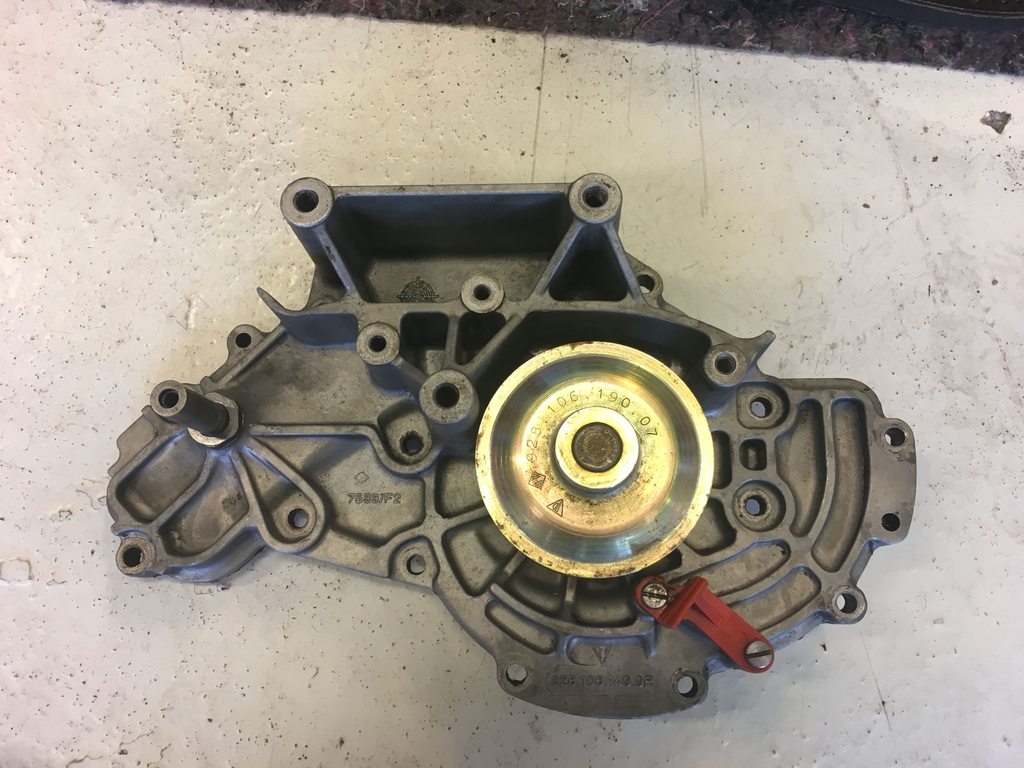
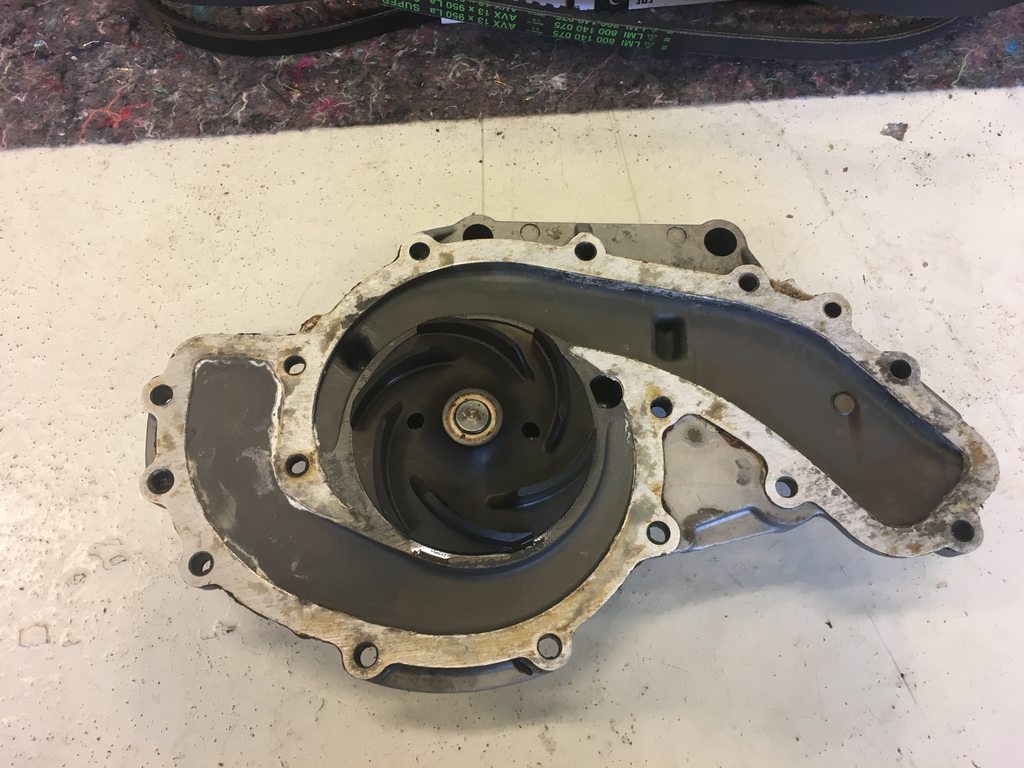
The old water pump is original Porsche, no leaks, no sounds, worked well. Is it worth anything as a core or something? I guess I should keep it?
Cleaned up:

Clean parts going back:
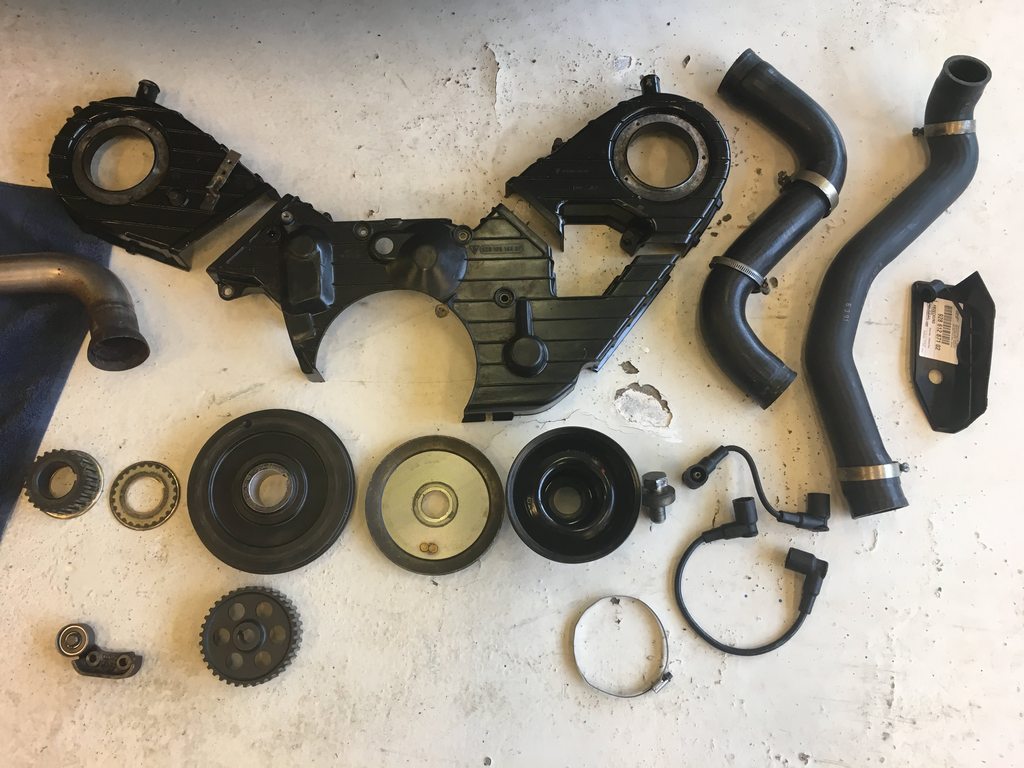
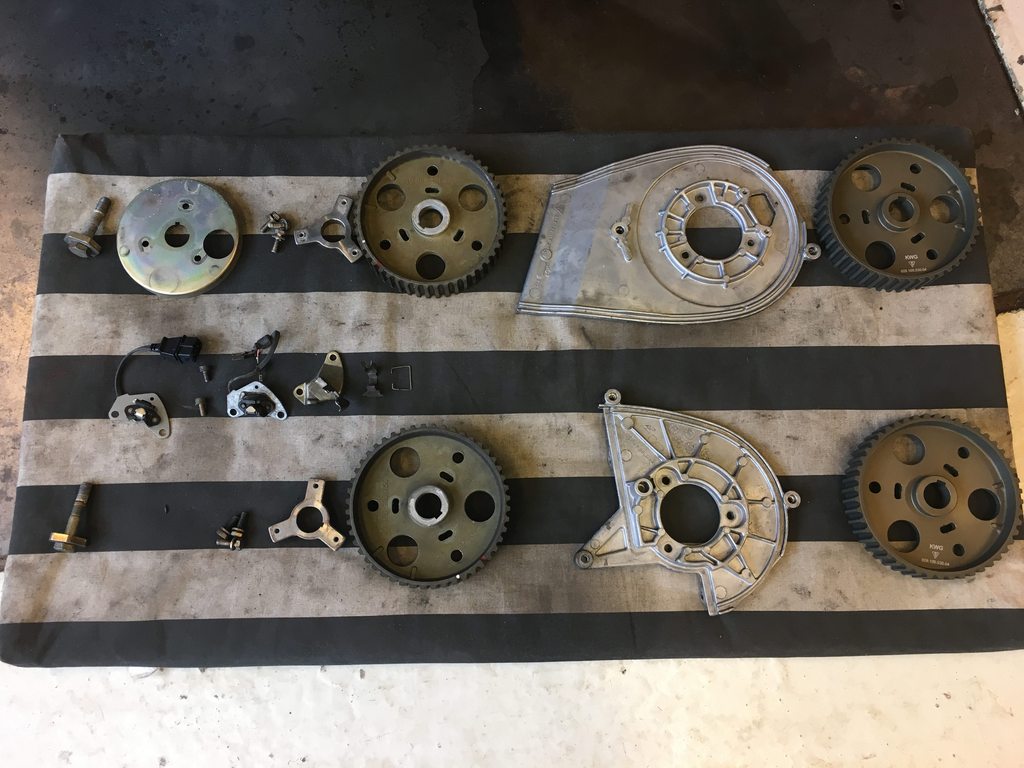
Old parts done their jobs:
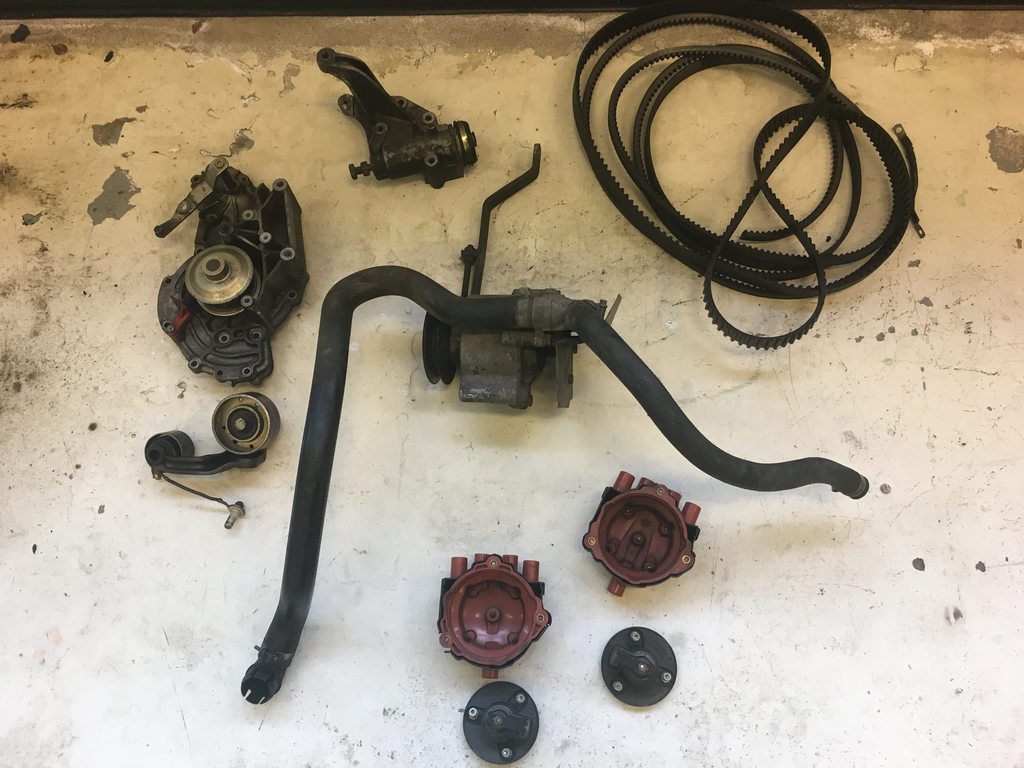
Old waterpump, what to do with it?
The areas surrounding oil pump and crankshaft were dry and nice, so I don't think I'll touch them, even though I have all the new sealings/o-rings.
Cleaned up the whole area, cleaned some parts that will go on again. Next tomorrow is to replace hall sensor and cam gears. Looking forward to that experience.
The old water pump is original Porsche, no leaks, no sounds, worked well. Is it worth anything as a core or something? I guess I should keep it?
Cleaned up:
Clean parts going back:
Old parts done their jobs:
Old waterpump, what to do with it?
02-05-2018, 09:35 AM
#37
Rennlist Member
I am a firm believer in old water pumps, especially if they are genuine Porsche and if they work. The one in my race car was fitted in 2006, has done around 25k miles and I have no intention of changing it. I know it goes against the received wisdom, but they don't have a use by date. If the bearing is good and the seal too, I would not even disturb it when I check/change the timing belt. The same with my GTS, which is a sister car to yours - new OEM pump with the first rebuild in 2007. 15k miles since then. As good as new. Now a second rebuild later, still no intention of changing it...
02-06-2018, 09:49 AM
#38
Pro
Thread Starter
Not a lot of progress but some. Removed the old cam gears and backing plates. They came off easily without resistance, I had to help a little bit on the 3-armed thing behind the gears. Luckily it all looked dry and nice around the sealings, so I won't touch them either.
Hall sensor connector was toast, 80% gone. Seems like it has been repaired before, there were some silicone-looking stuff helping the connectors stay in place. Anyway, a new one is going in.
Next will be to reinstall the backing plates, then install the new gears. And then the other stuff to get the belt on again. I am in luck, it looks like I will be able to borrow a PK32vr kit from a fellow 928 enthusiast not far away, to set the correct timing after belt is on.
Some pics:
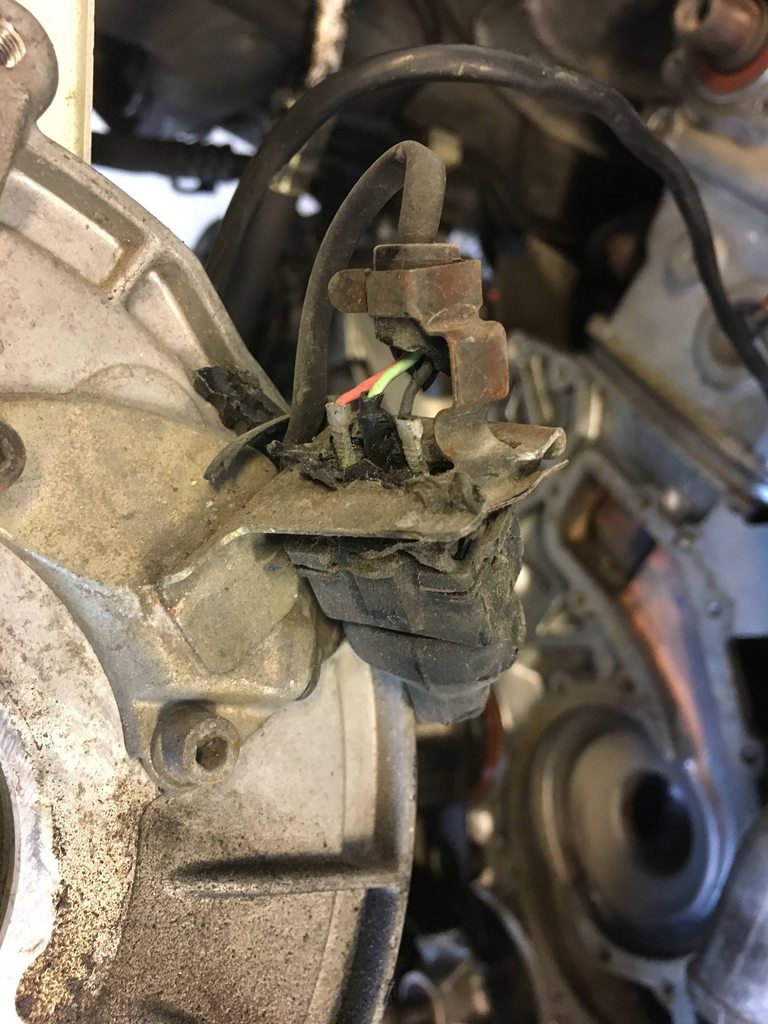
02-07-2018, 09:11 AM
#40
Pro
Thread Starter
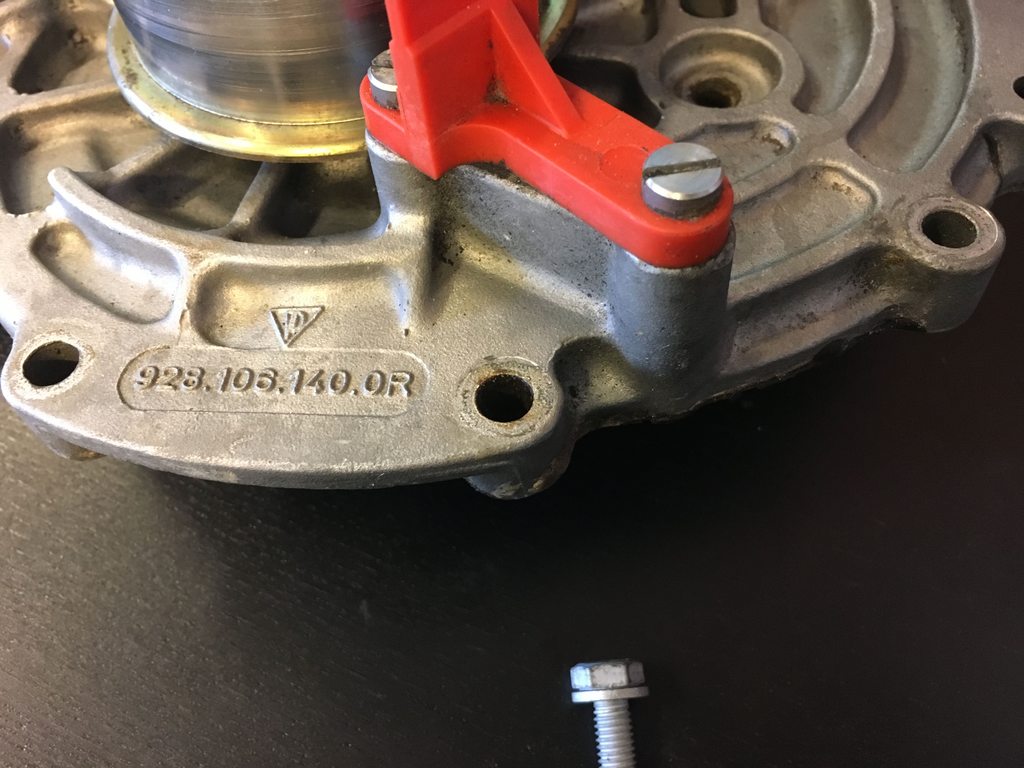
Everything was going so smooth, something had to stop me soon. And it looks like it did. I put the gasket on water pump surface and installed all bolts lightly. Then torquing them down to 10nm afterwards. The last bolt, the one lowest at drivers side just below the red timing marker, decided to go straight through the threads almost without force and long before 10nm. So it looks like the damage was already done. Question is, what do I do about this? Probably not a good idea at all to just let it be...?
Bolt with alu:
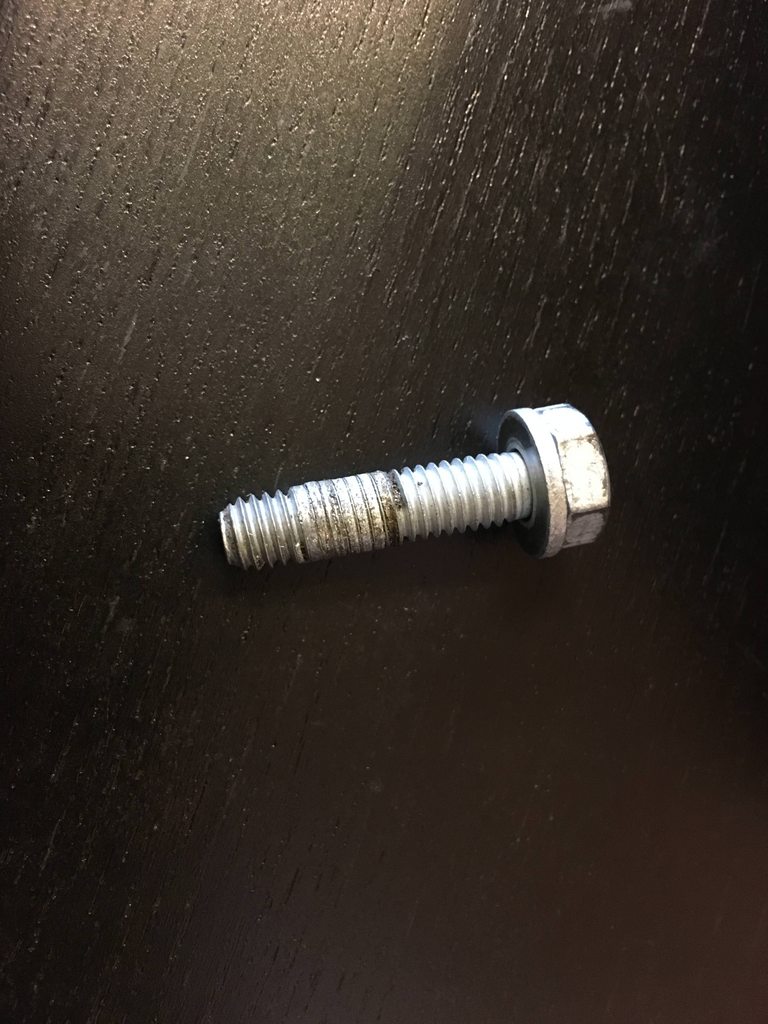
The hole in center of pic is the bad one.
Bolt with alu:
The hole in center of pic is the bad one.
02-07-2018, 09:22 AM
#41
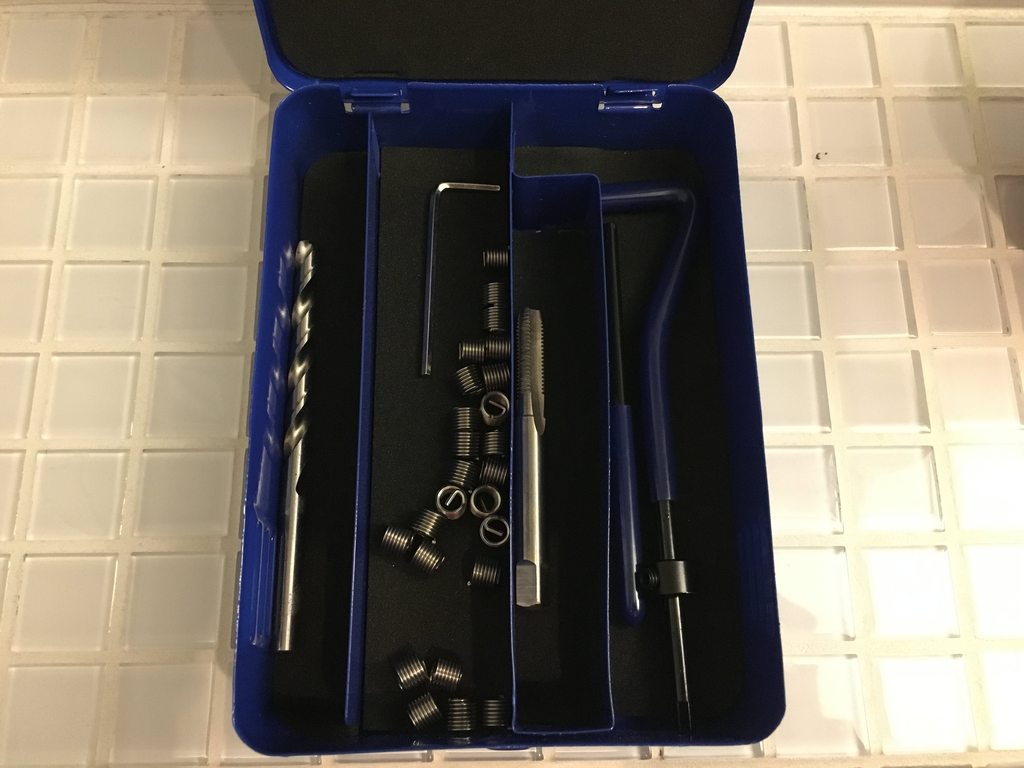
Drill it and put a Timesert in if you have enough area or a helicoil may work if you don't.There are Timesert kits that come with the correct drill bit, counterbore and tap along with the inserts.
02-07-2018, 09:23 AM
#42
Rennlist Member
Join Date: Oct 2005
Location: Gatineau, Qu�bec, Canada
Posts: 5,178
Received 1,318 Likes
on
499 Posts
Don't worry.
Helicoil will fix this.
That's what I used when it happened on one of my WP bolt.
I would certainly not leave it like this.
Keep up the good work.
Helicoil will fix this.
That's what I used when it happened on one of my WP bolt.
I would certainly not leave it like this.
Keep up the good work.
02-07-2018, 02:23 PM
#44
Pro
Thread Starter
Ok lets see if this will do the trick. Should I use any lubing/oil/grease when making the threads for the insert?
I see that the Time Sert are generally rated better, but this will do if it works. Might get a set of Time Sert for future incidents, I'm not sure they sell them here so I might order from US.
I see that the Time Sert are generally rated better, but this will do if it works. Might get a set of Time Sert for future incidents, I'm not sure they sell them here so I might order from US.
02-07-2018, 03:51 PM
#45
Rennlist Member
Helicoil inserts have been around for ages- well tried and well tested so a bit puzzled why you seemingly have reservations. If there are better alternatives fair enough but that does not make the Helicoil inadequate.
Good luck with the repair.
Good luck with the repair.