When you click on links to various merchants on this site and make a purchase, this can result in this site earning a commission. Affiliate programs and affiliations include, but are not limited to, the eBay Partner Network.
-remove engine
-remove front pinch clamp and flex plate from drive shaft
-remove bellhousing from the torque tube
-remove transmission cooling lines
-disconnect TV cable at the transmission
-disconnect vacuum line at the transmission vacuum modulator
-remove rear pinch bolt
-remove torque tube
-remove cover from torque converter
-remove torque converter
-replace transmission oil pump front seal
-reinstall torque converter
-replace torque converter bearings in cover
-replace bearing inserts in torque tube
-reassemble in reverse
I am shooting for the moon and spec'ing out the following:
-Constantine Super Bearings
-Constantine Super Clamp
-Greg Brown 300M drive shaft
I know, silly money that I may not be able to scrounge up. But, I am going to try. I have taken a long, hard look around my workshop. I am selling off a few defunct projects to help fund this.
Plenty more to follow! I EXPECT your opinions, advice, ideas, insults, etc...as I do this project. I have researched it, but am making this up as I go.
I want this torque tube to be as bullet proof as possible.
When the bearing starts migrating you literally have no choice but to do something about it. Presumably you will be going to Constantine's Super Bearings and [possibly?] his flexplate clamp.
The torque converter bearings are a pretty standard WYAIT item.
Official 928 Jackhole award is in the mail to you.
Grazzi.
Originally Posted by FredR
When the bearing starts migrating you literally have no choice but to do something about it. Presumably you will be going to Constantine's Super Bearings and [possibly?] his flexplate clamp.
The torque converter bearings are a pretty standard WYAIT item.
The bottom of the rabbit hole is nigh!
I agree, FredR. I was in denial about pulling the engine. However, EVEN I understand the need to rebuild the torque tube when the opportunity presents itself.
I am shooting for the moon and hoping to be able to afford the full suite of Constantine SuperBearings, a Constantine SuperClamp, and a Greg Brown 300M driveshaft. We shall see...
Originally Posted by Otto Mechanic
Seth, can you give an estimate on how many miles you had on the torque tube before this rebuild?
Thanks,
Originally Posted by Otto Mechanic
Hmm, maybe never mind? I see from your post on cam chain pads that you've got around 168K on this engine and drive train?
That is correct, 168,*** miles on the car. To my knowledge, torque tube has never been out. Now is the time.
I am shooting for the moon and hoping to be able to afford the full suite of Constantine SuperBearings
168K is pretty good, I have about 72K on mine so it's good to know I may not need to do it right away.
I just rebuilt the TT on my '89 944S2 with Constantine's bearings, what a difference! The car was literally shuddering hard enough to disturb my wife, now it's smooth as silk. I can't say enough about those bearings.
Of course I should also mention I just ordered PorKen's S300 chips for the 928 so the TT is about to see some serious horsepower. Your post attracted me for that reason. I'll be following your progress with great personal interest
Alright, finally made some progress. After the second attempt, the torque tube is now out.
It was not as easy as I had hoped. And the torque tube fought me.
Most people remove the torque tube while still connected to the transmission. I did it backwards. I removed it from the transmission.
The first attempt was a failure. My intent was to remove the torque tube itself from the torque converter cover. I lowered the bellhousing end and supported it in the angled position with a jack stand. I was able to get a 19mm impact socket on the upper bolts. Unfortunately, they just laughed at my pneumatic impact gun. I think the 3' of extensions had something to do with that. Back to the drawing board.
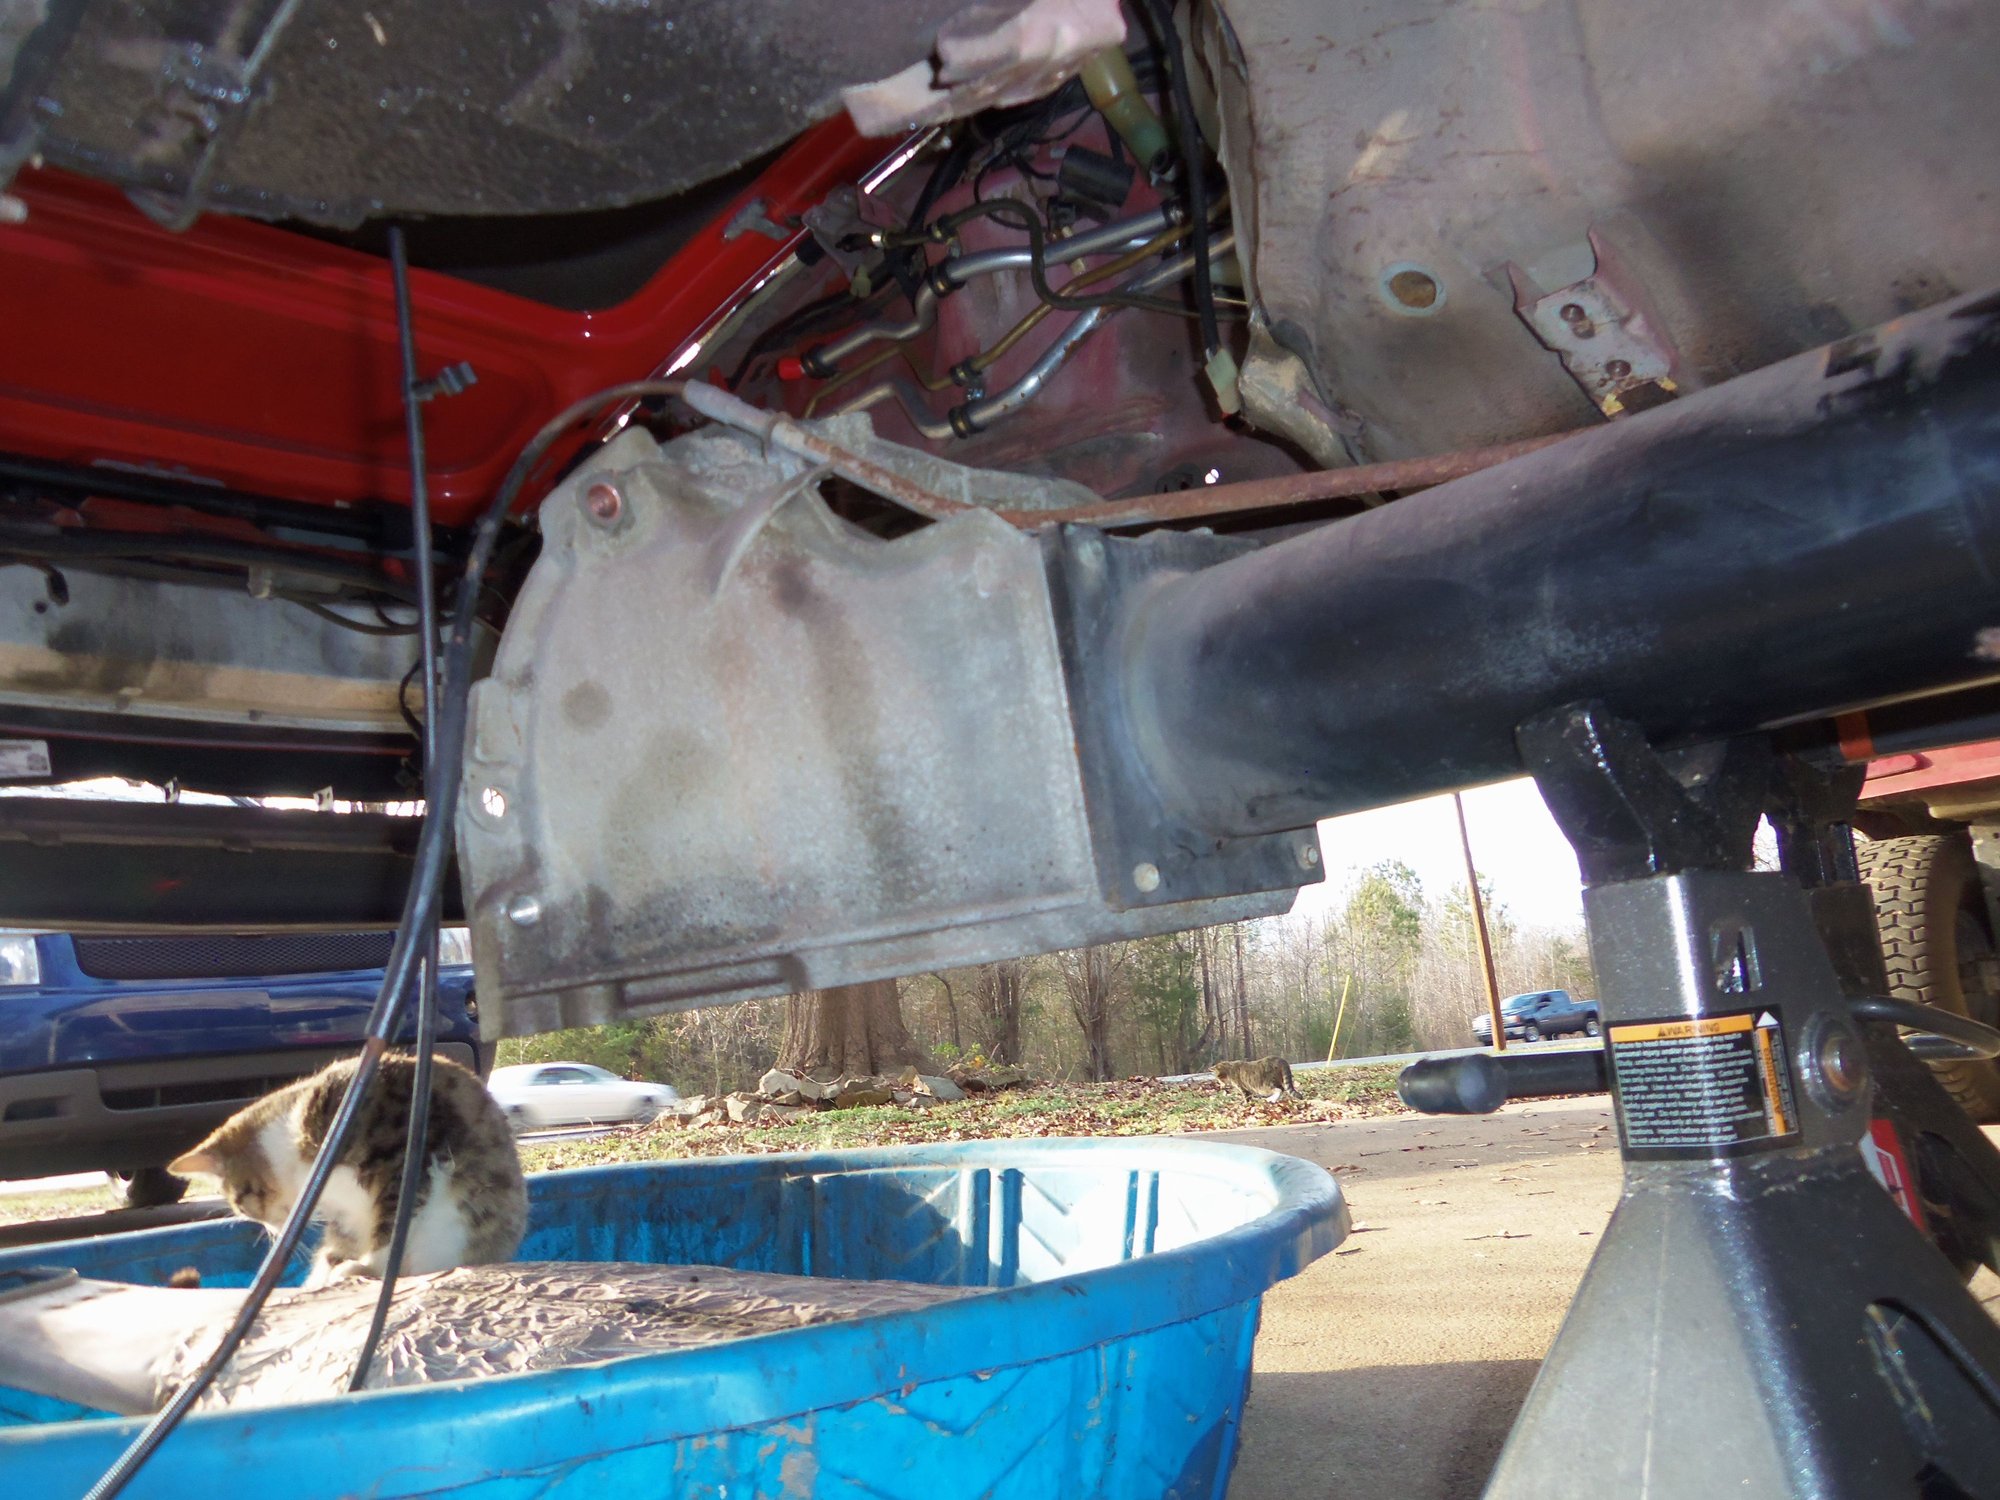
This time, I removed the cover from the torque converter. Note, before I attempted the first try, I had removed the rear flexplate to torque converter bolts. As well, I levered the drive shaft forward until it was clear of the rear pinch clamp. I did not want to inadvertently bend the drive shaft during the removal efforts.
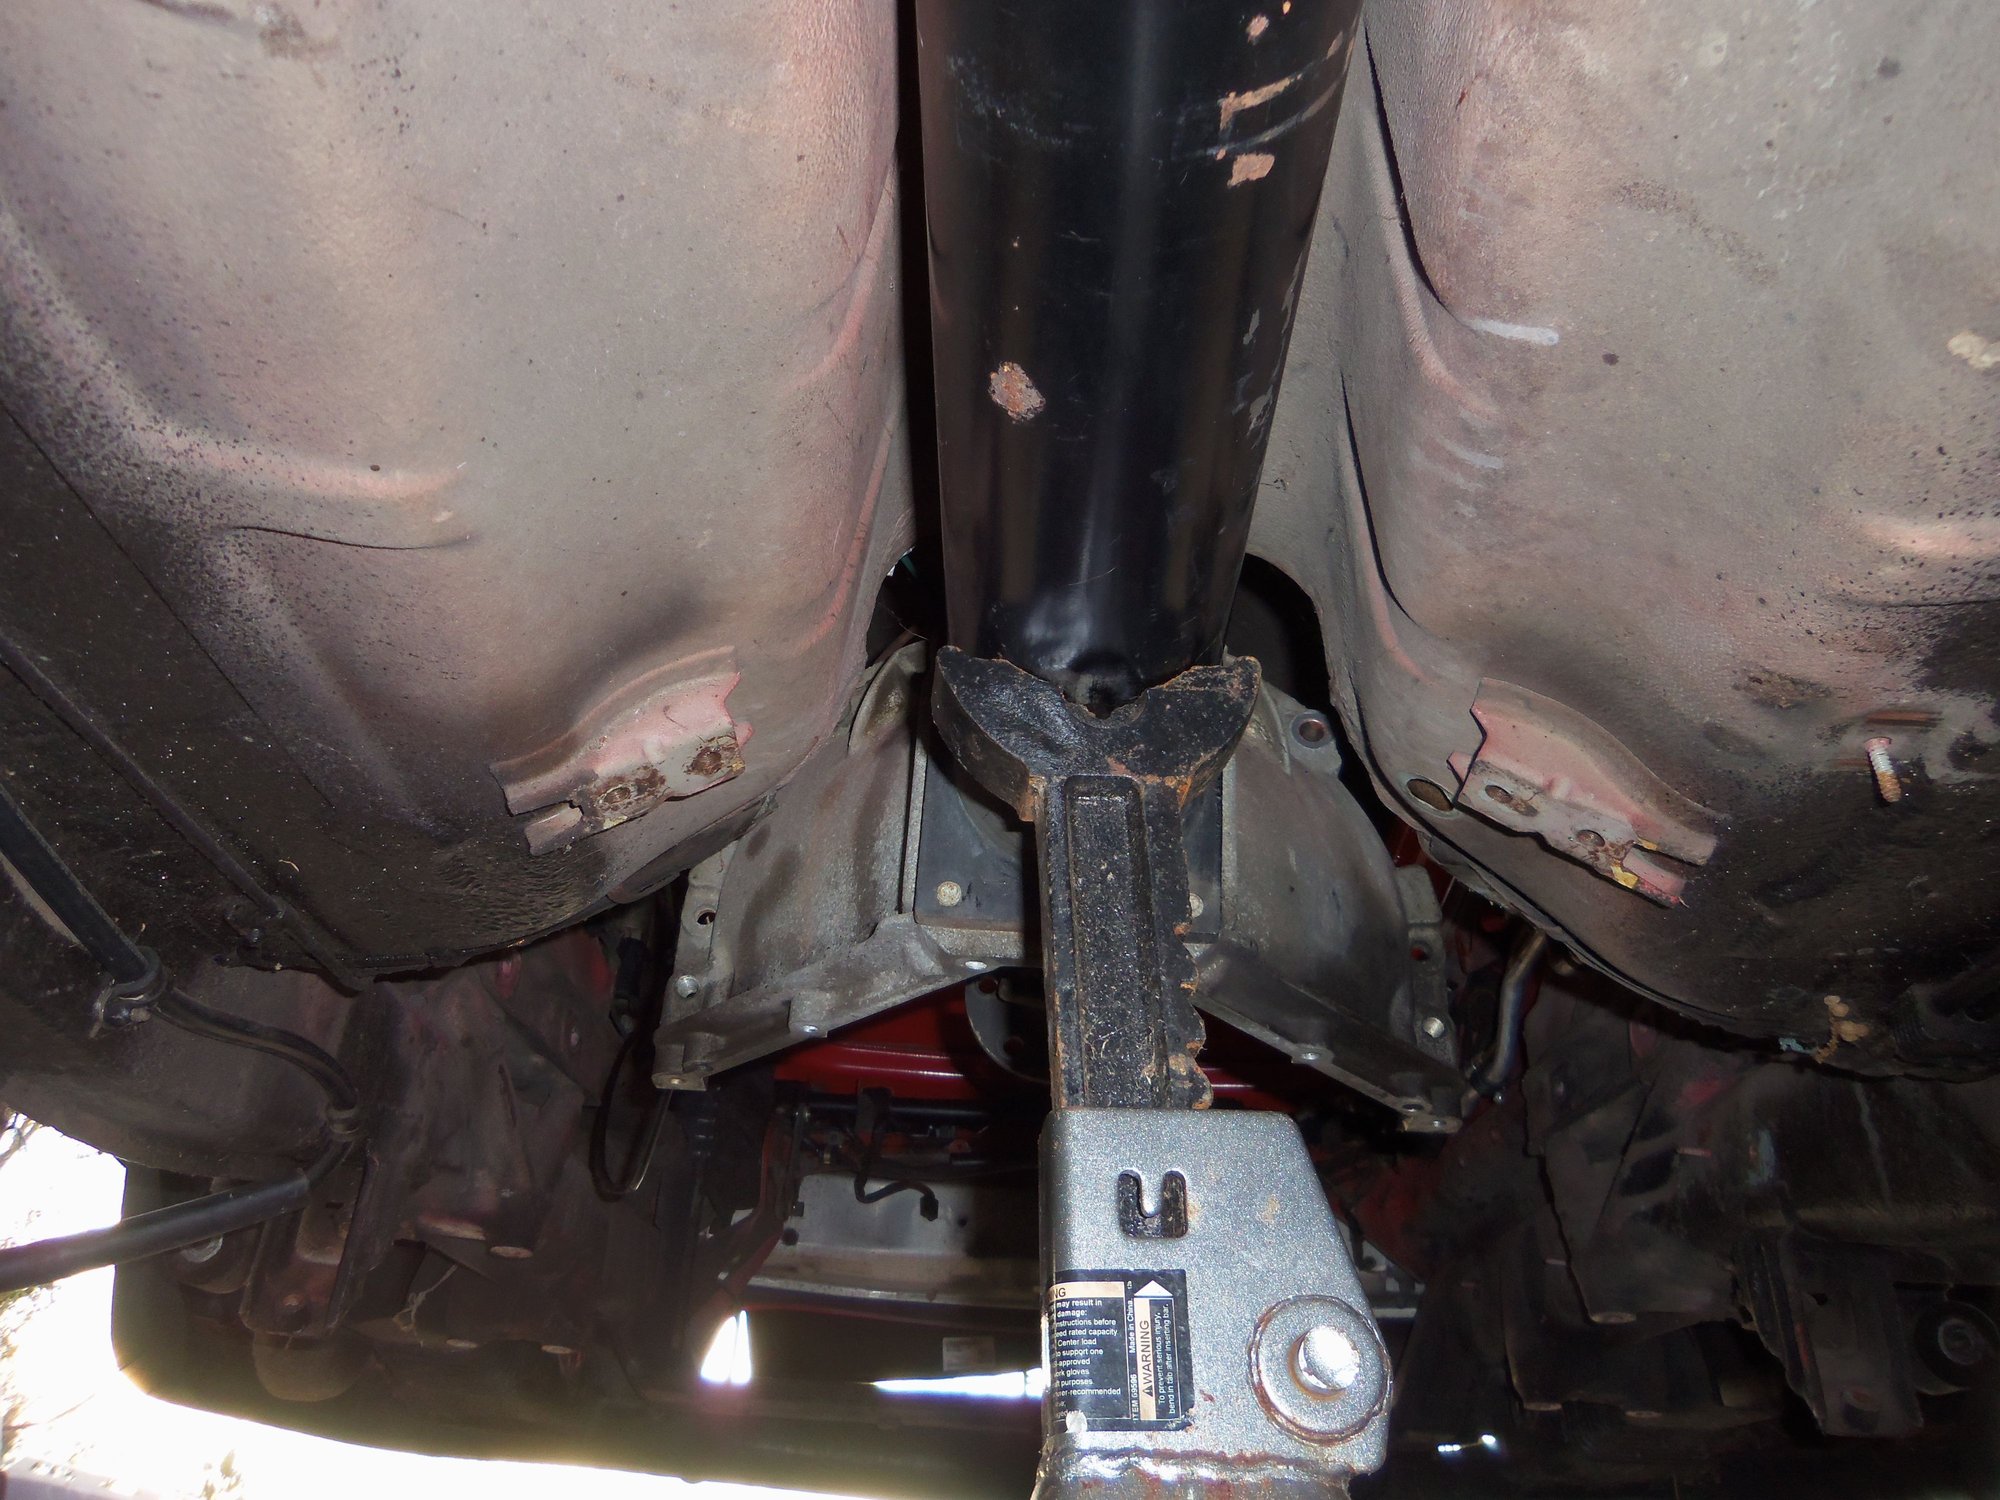
Again, I lowered the front of the torque tube and supported it on a jack stand. Via an arsenal of 6mm hex bit related tools, I was able to crack loose and remove all 8 torque converter cover bolts. I removed the top 4 bolts, then lifted the front of the torque tube back up into place. I supported it with a thin piece of wood above the little crossmember there.
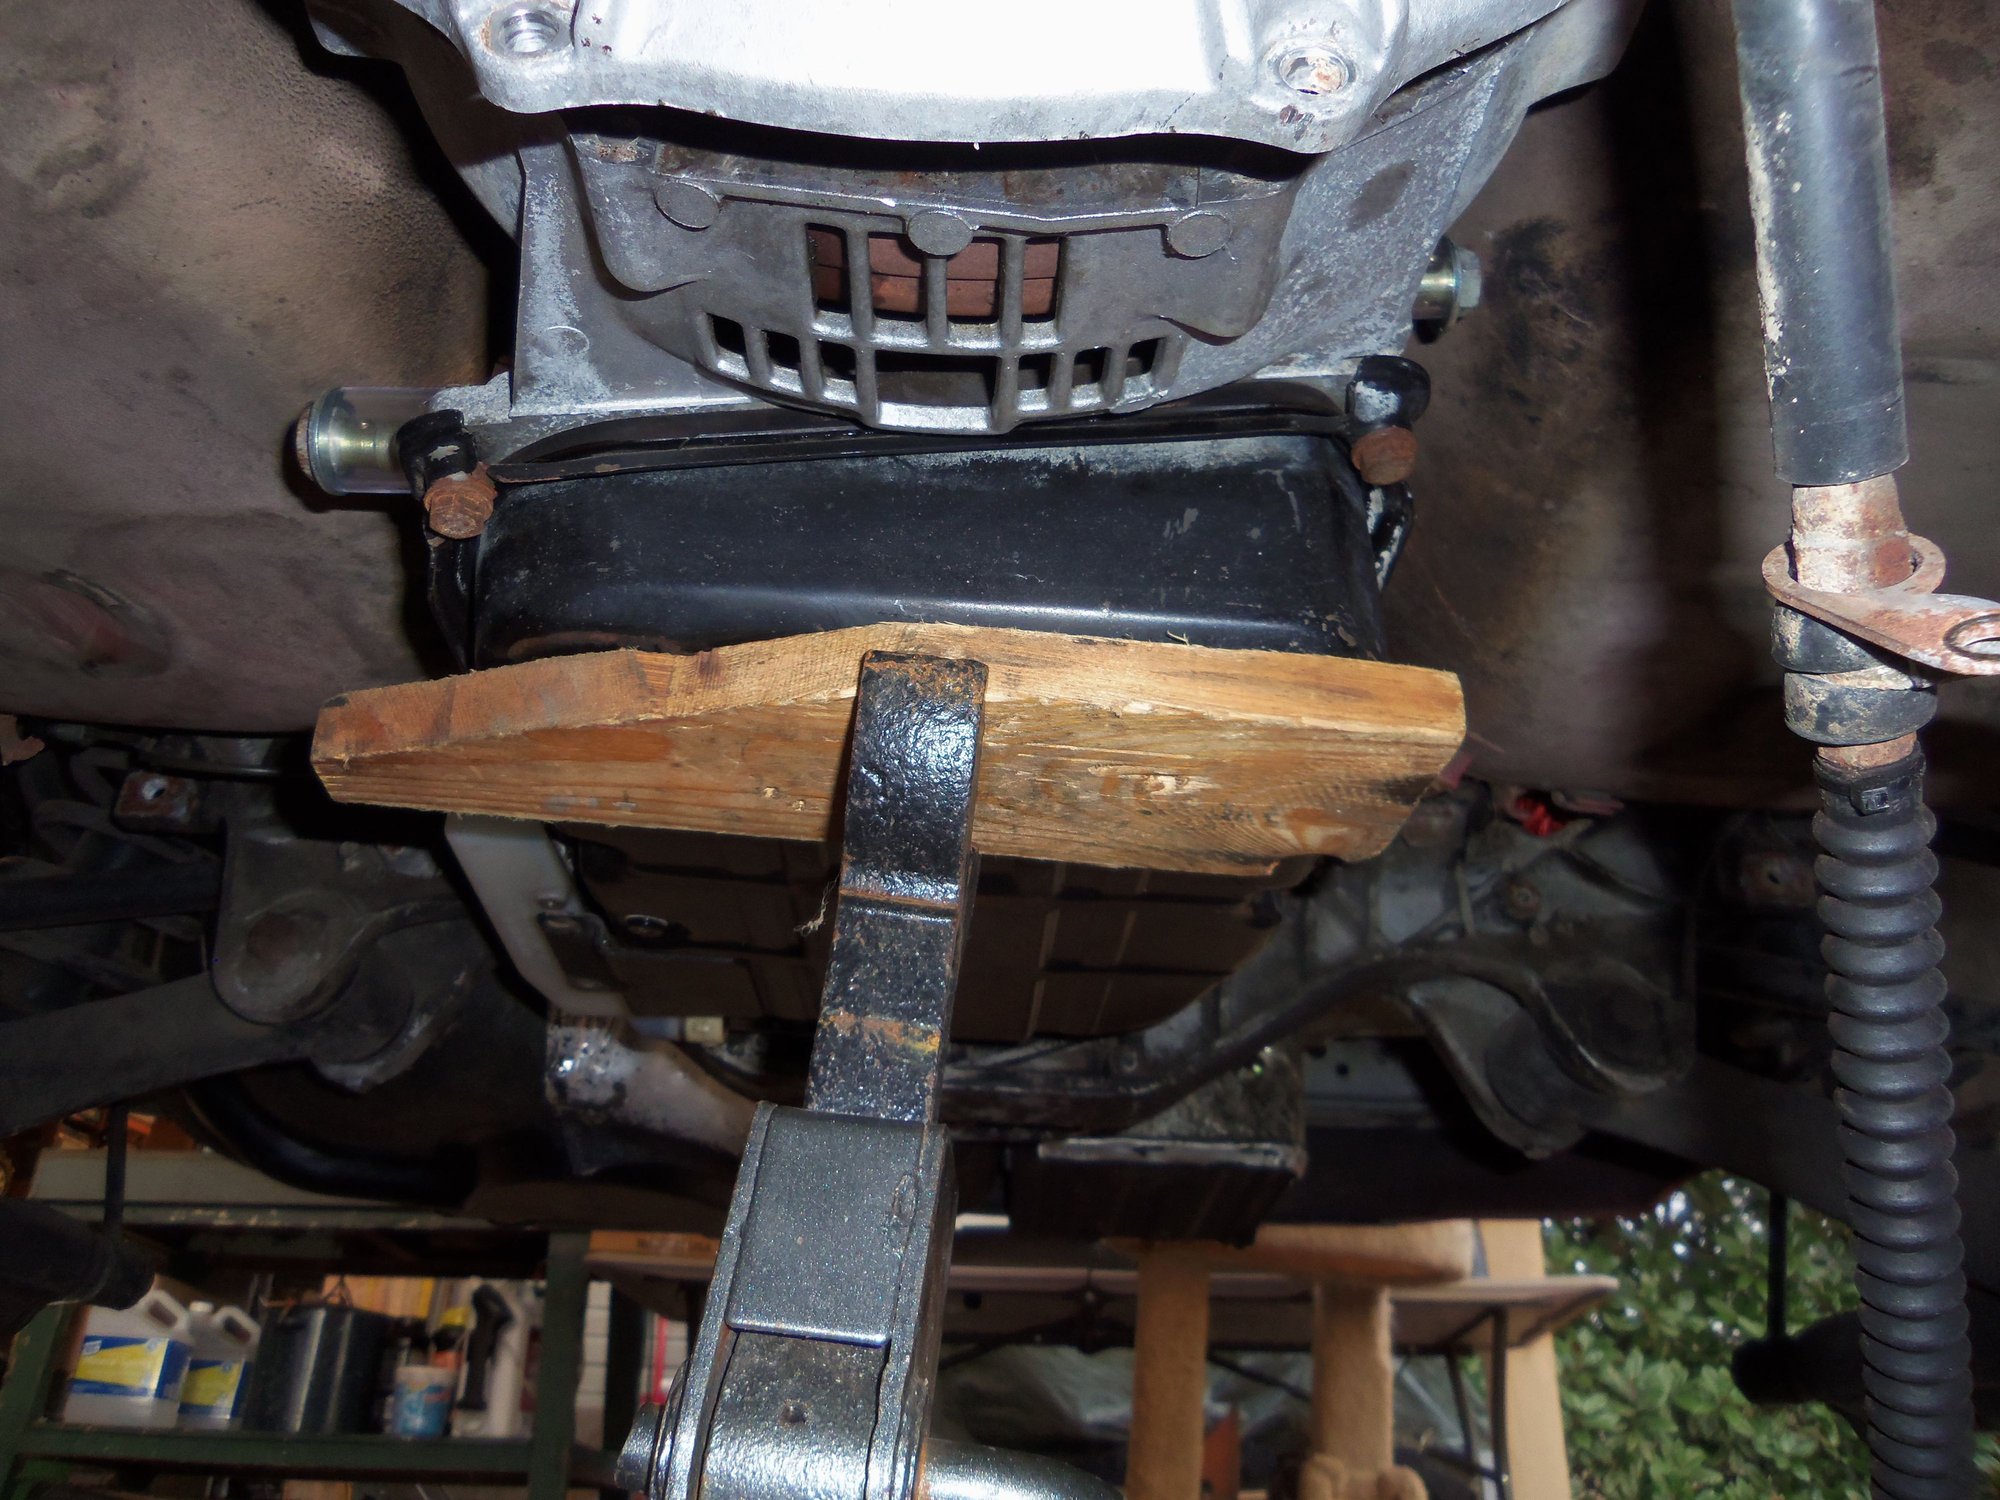
I supported the transmission with a piece of wood and a jack stand, under the front edge of the pan. That is a calculated risk in that yes the pan is sheetmetal, but I believe the structure of the front of the pan will support the weight.
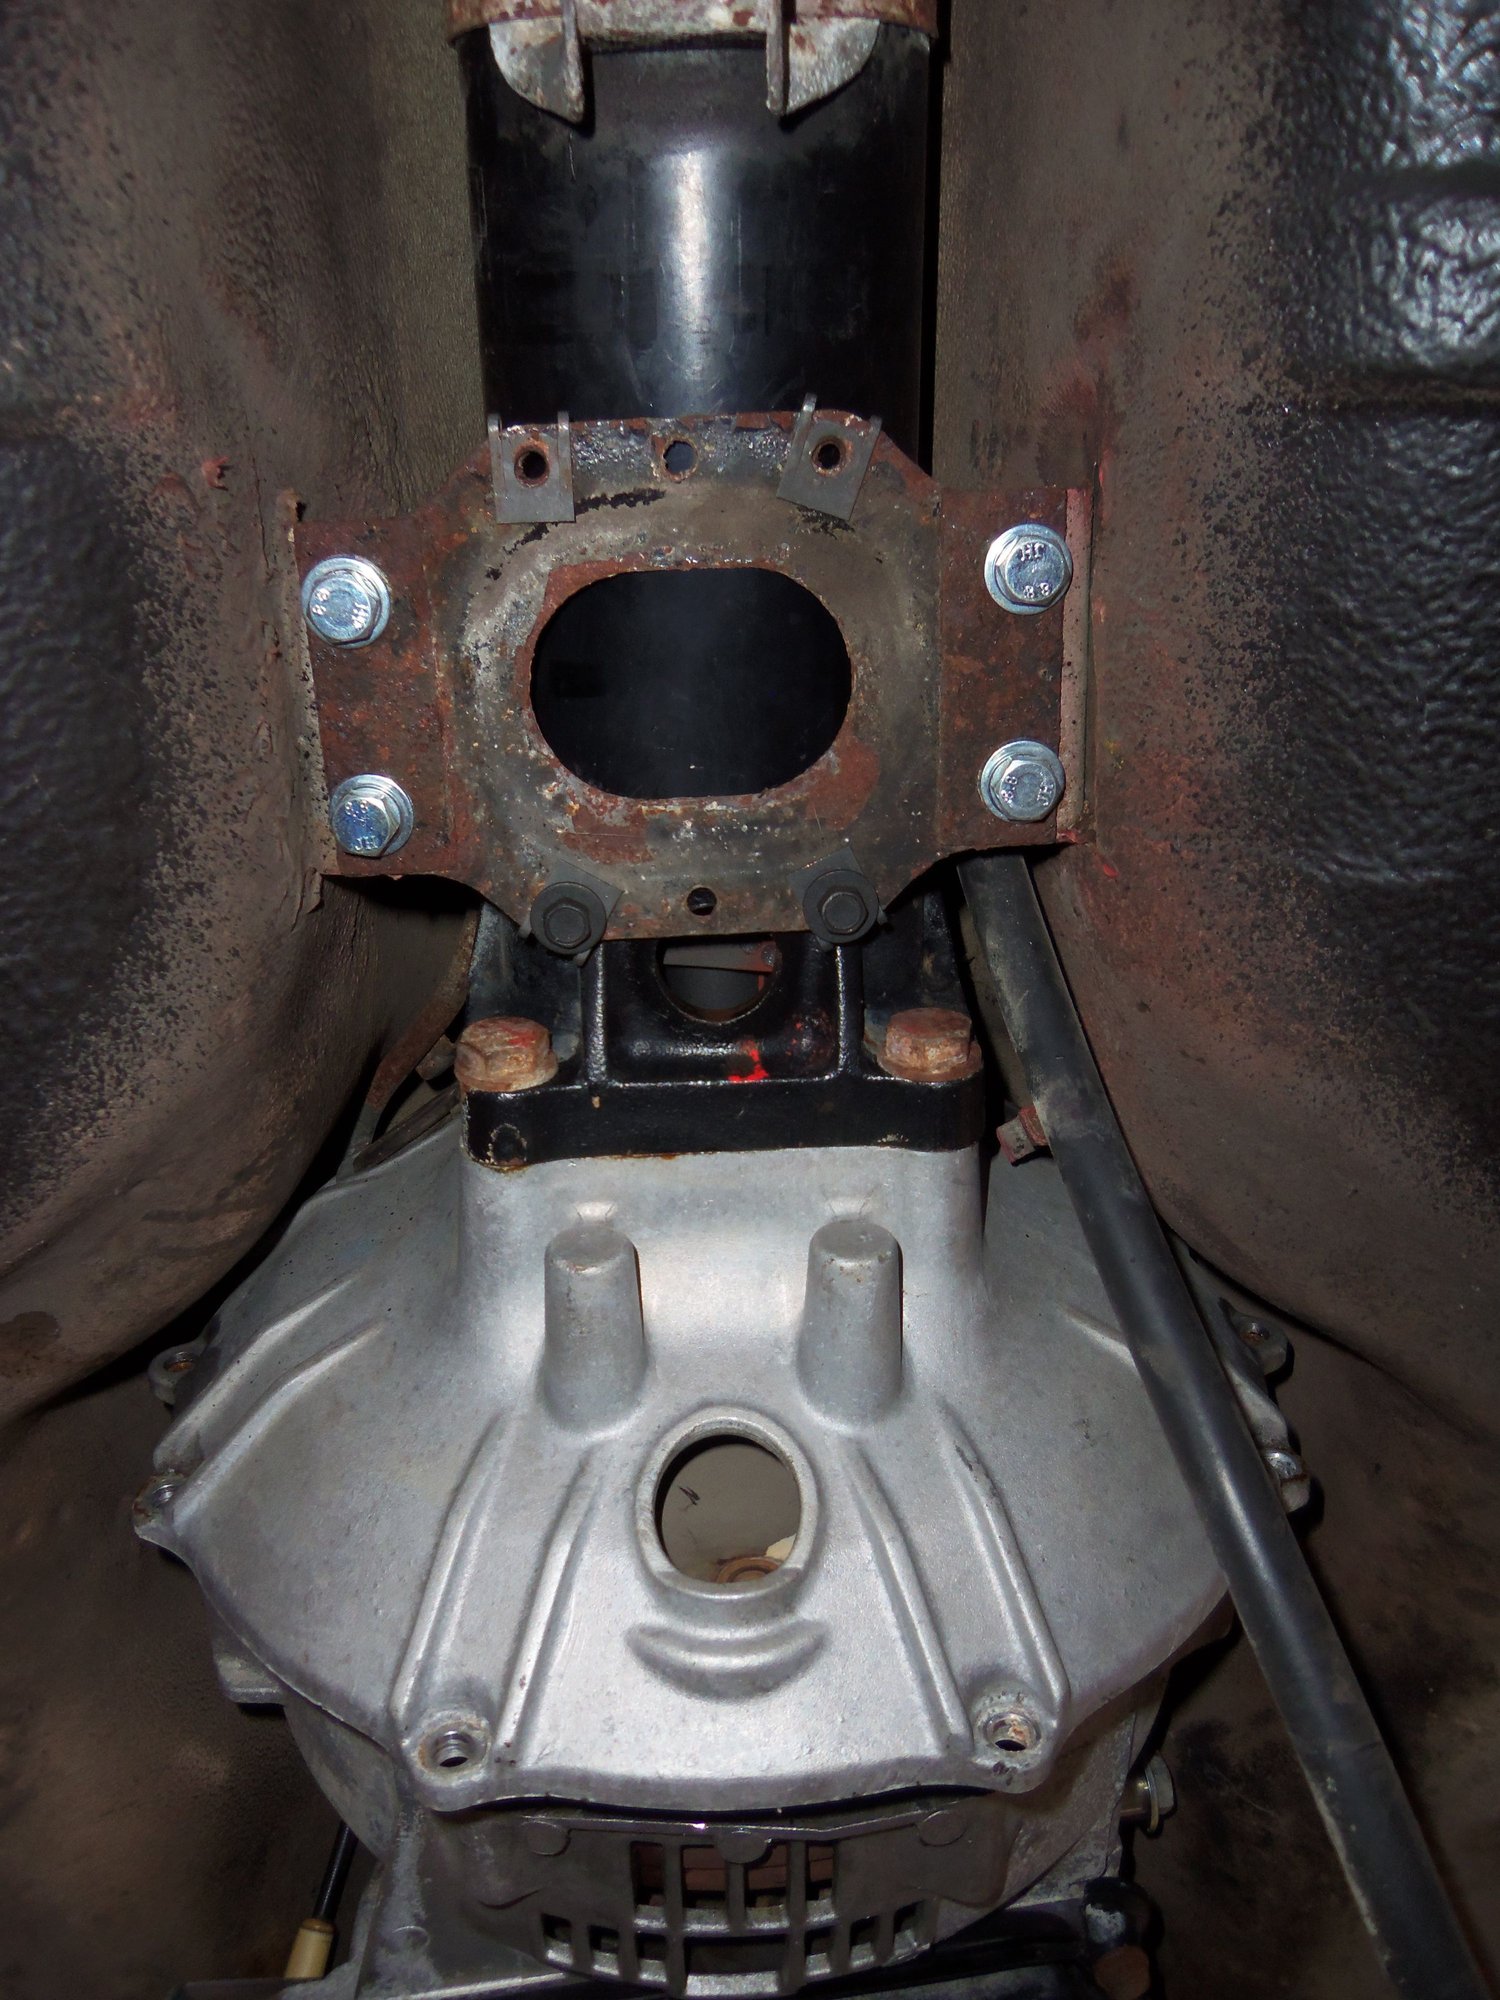
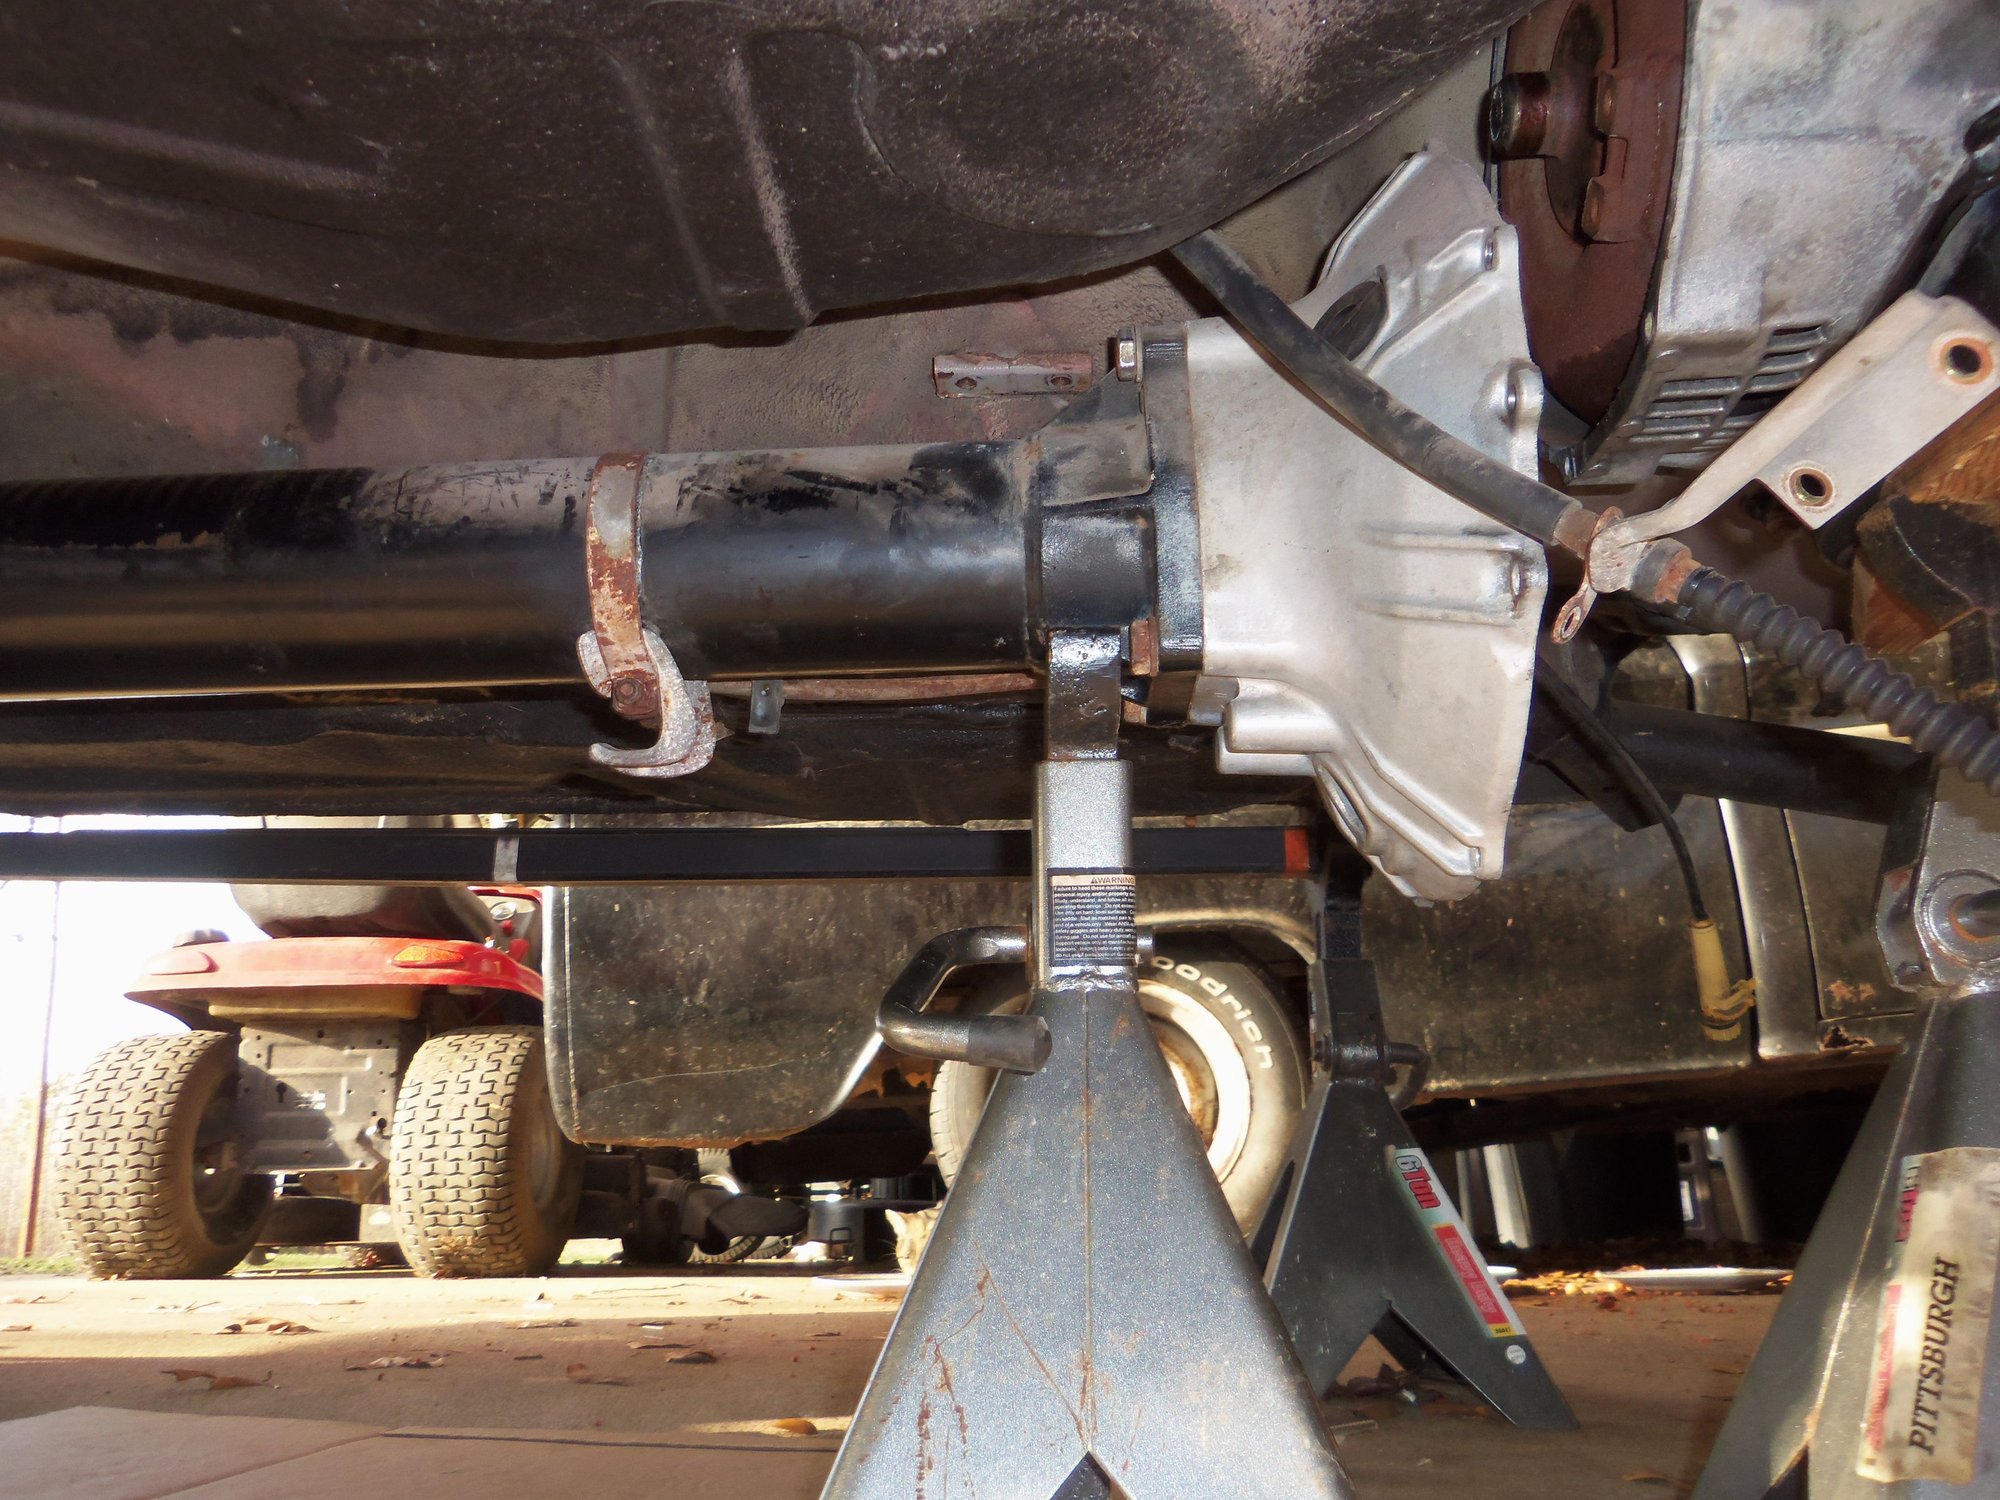
After removing the lower 4 cover bolts, I had to get the cover to break loose from the alignment pins. I was able to rotate the flexplate and torque converter independently of each other, so I didn't think they were stuck to each other. It took a combination of wiggling the front end of the torque tube and prying with screwdrivers to get the cover to break loose. Once pulled off, I let the torque tube rest on the little crossmember at the front and support plate at the rear. Then it was just a matter of lowering the tube onto jackstands, then lowering them one at a time.
I was pleased to see that I was able to move the torque tube assembly by myself. Makes it easier to deal with.
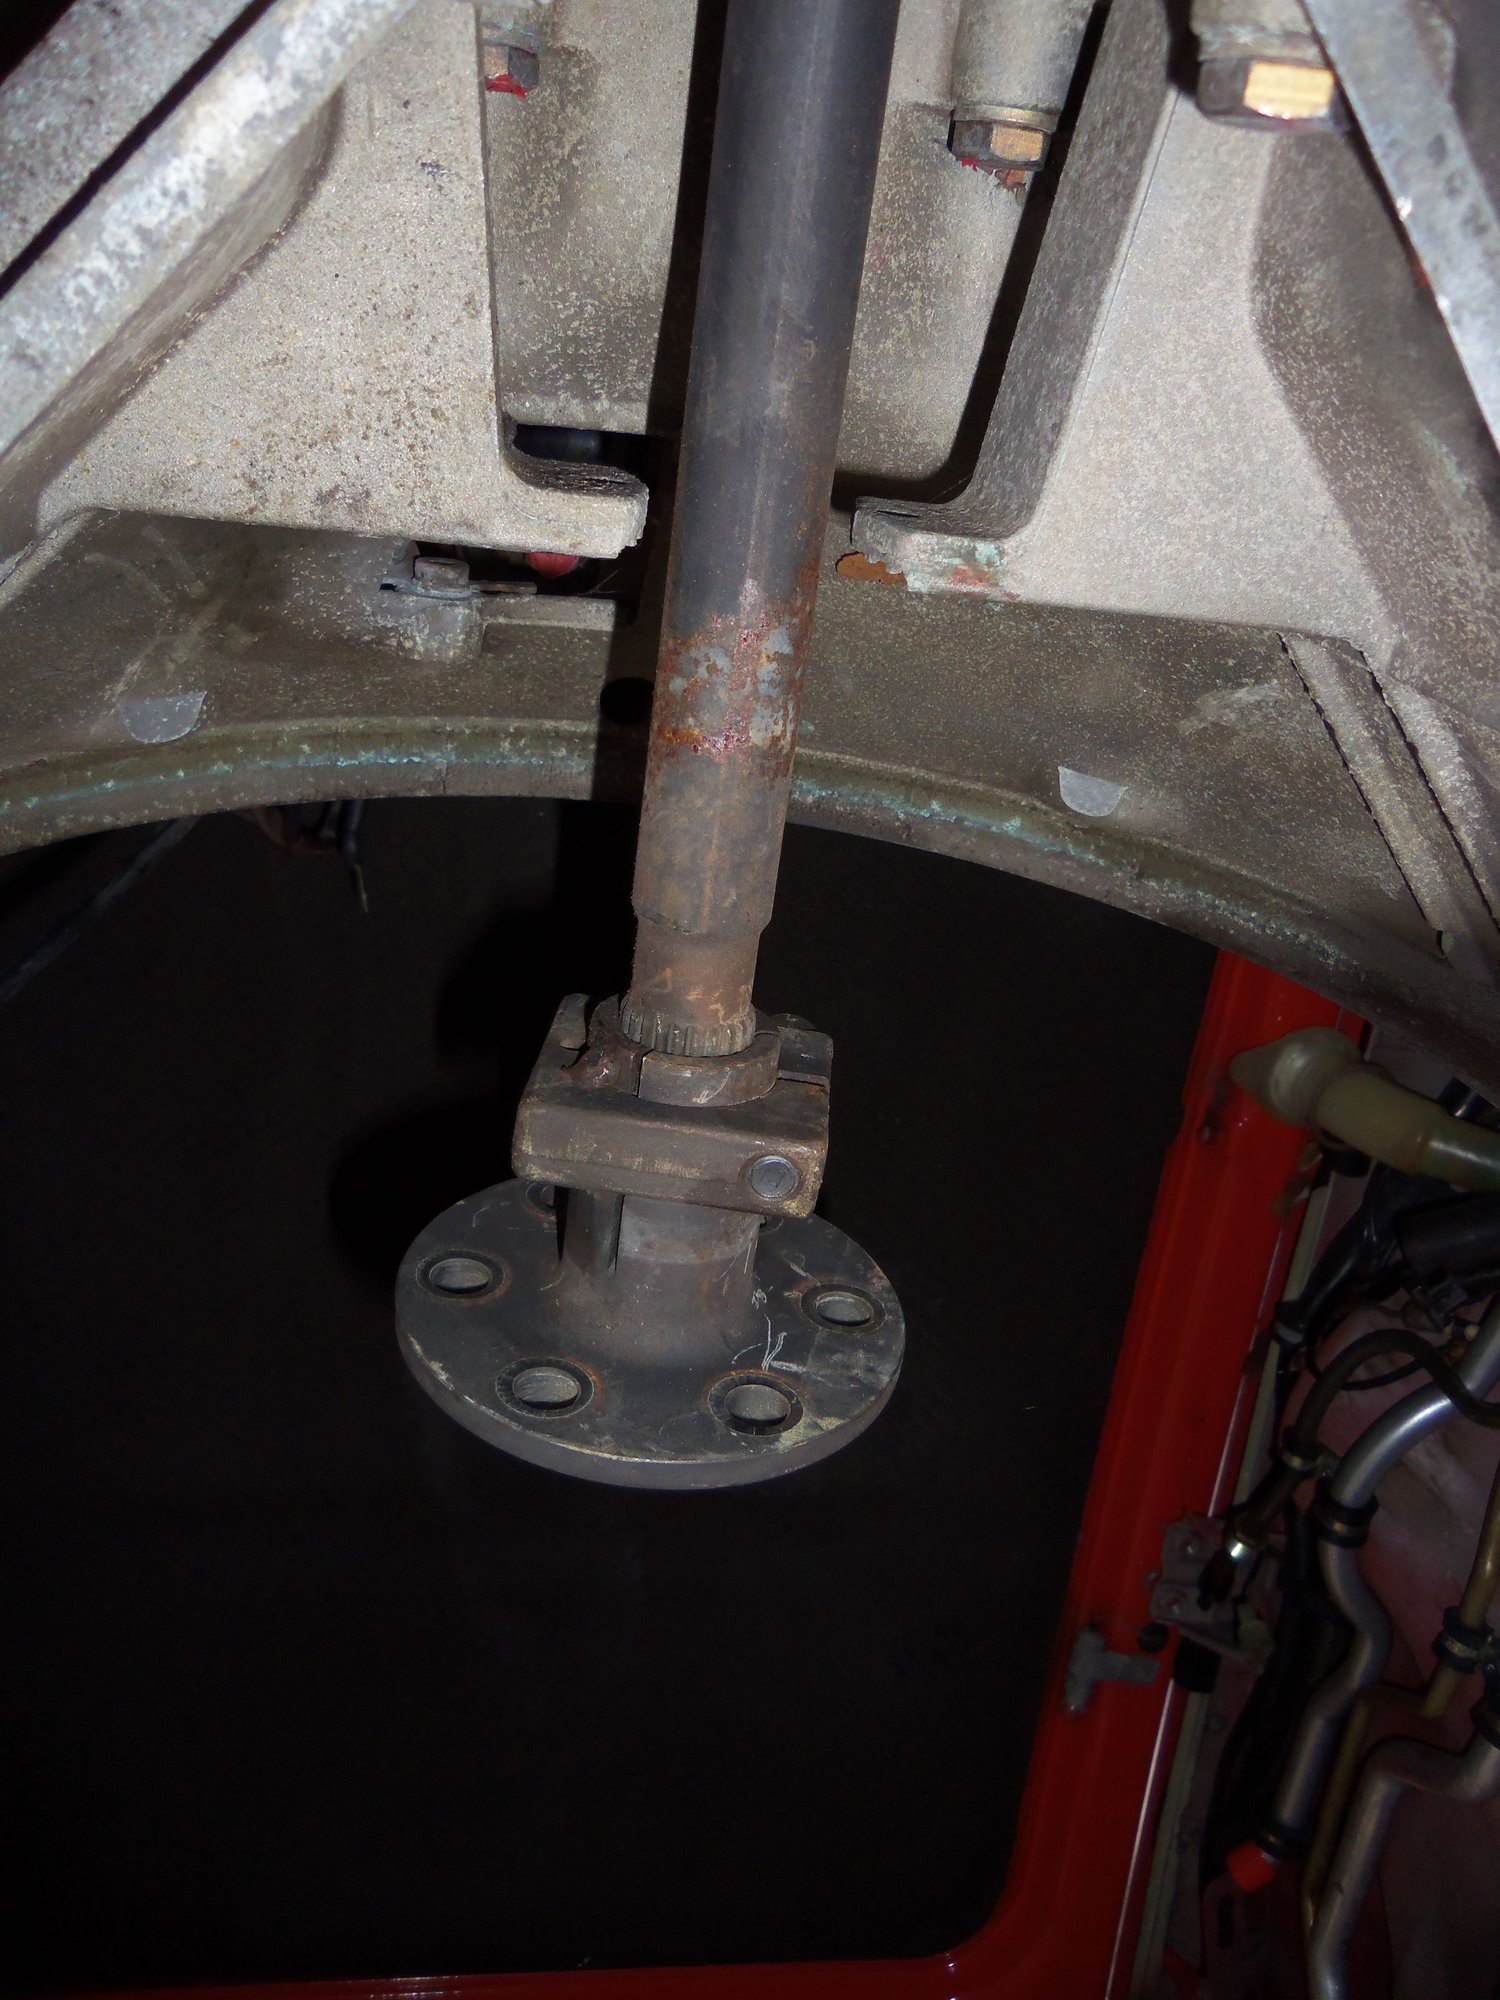
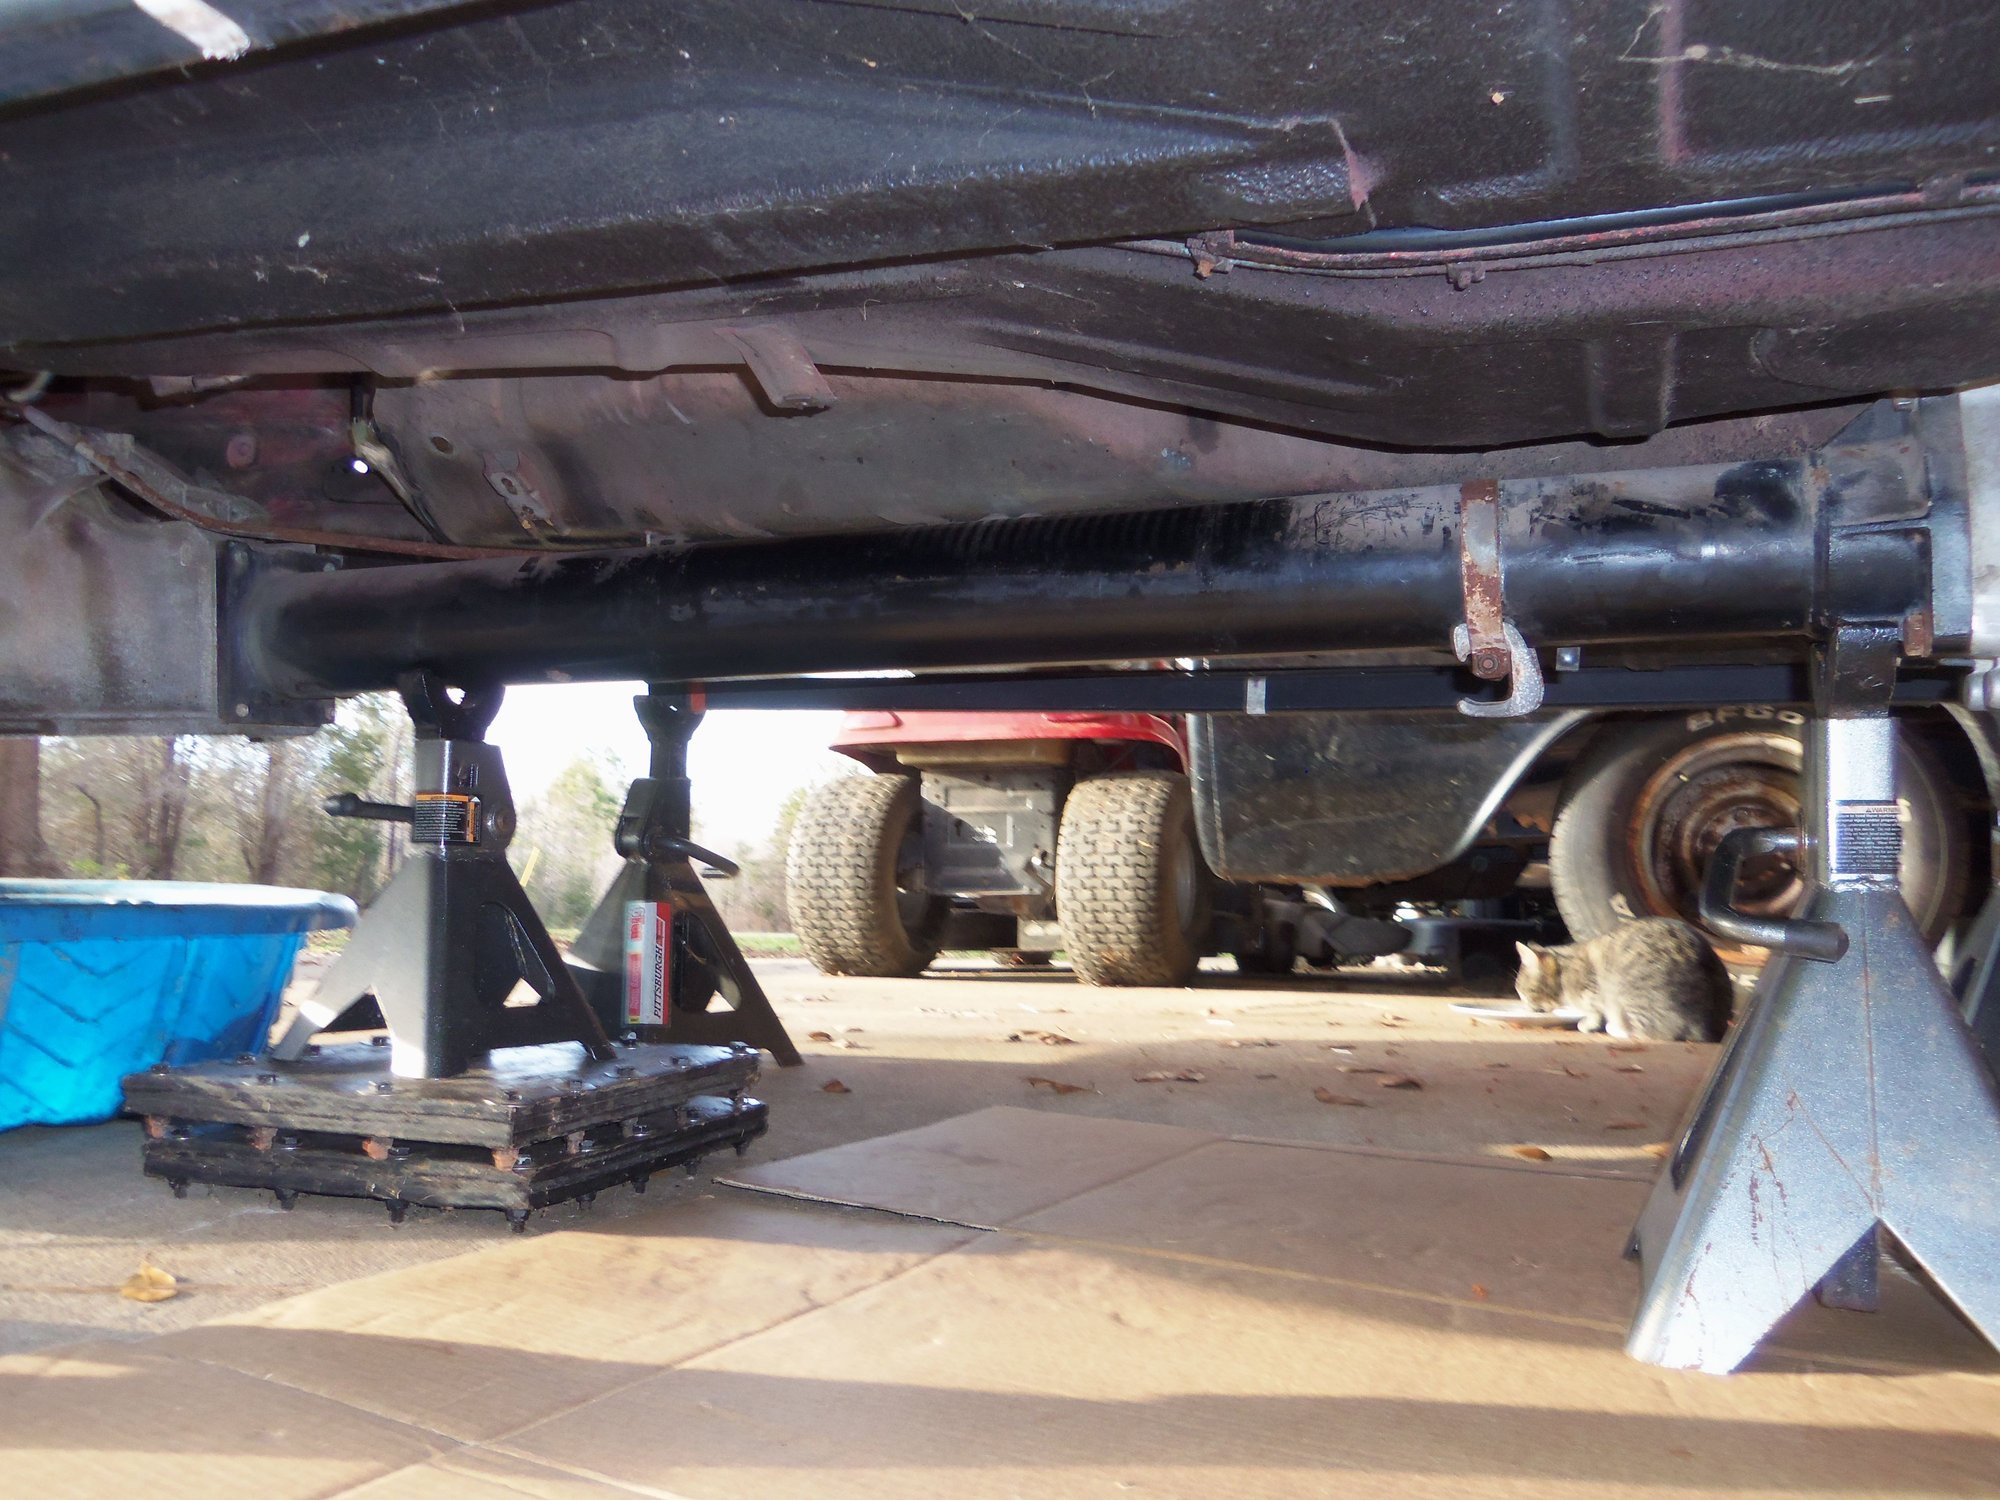
Driveshaft has been pried out enough to clear the rear pinch clamp. Also, note that this is the correct 25mm drive shaft and not the later 28mm shaft.
Various tools needed to break loose and remove the torque converter cover bolts.
Support under front edge of transmission pan.
Front end of torque tube supported.
Finally got the cover separated from the transmission.
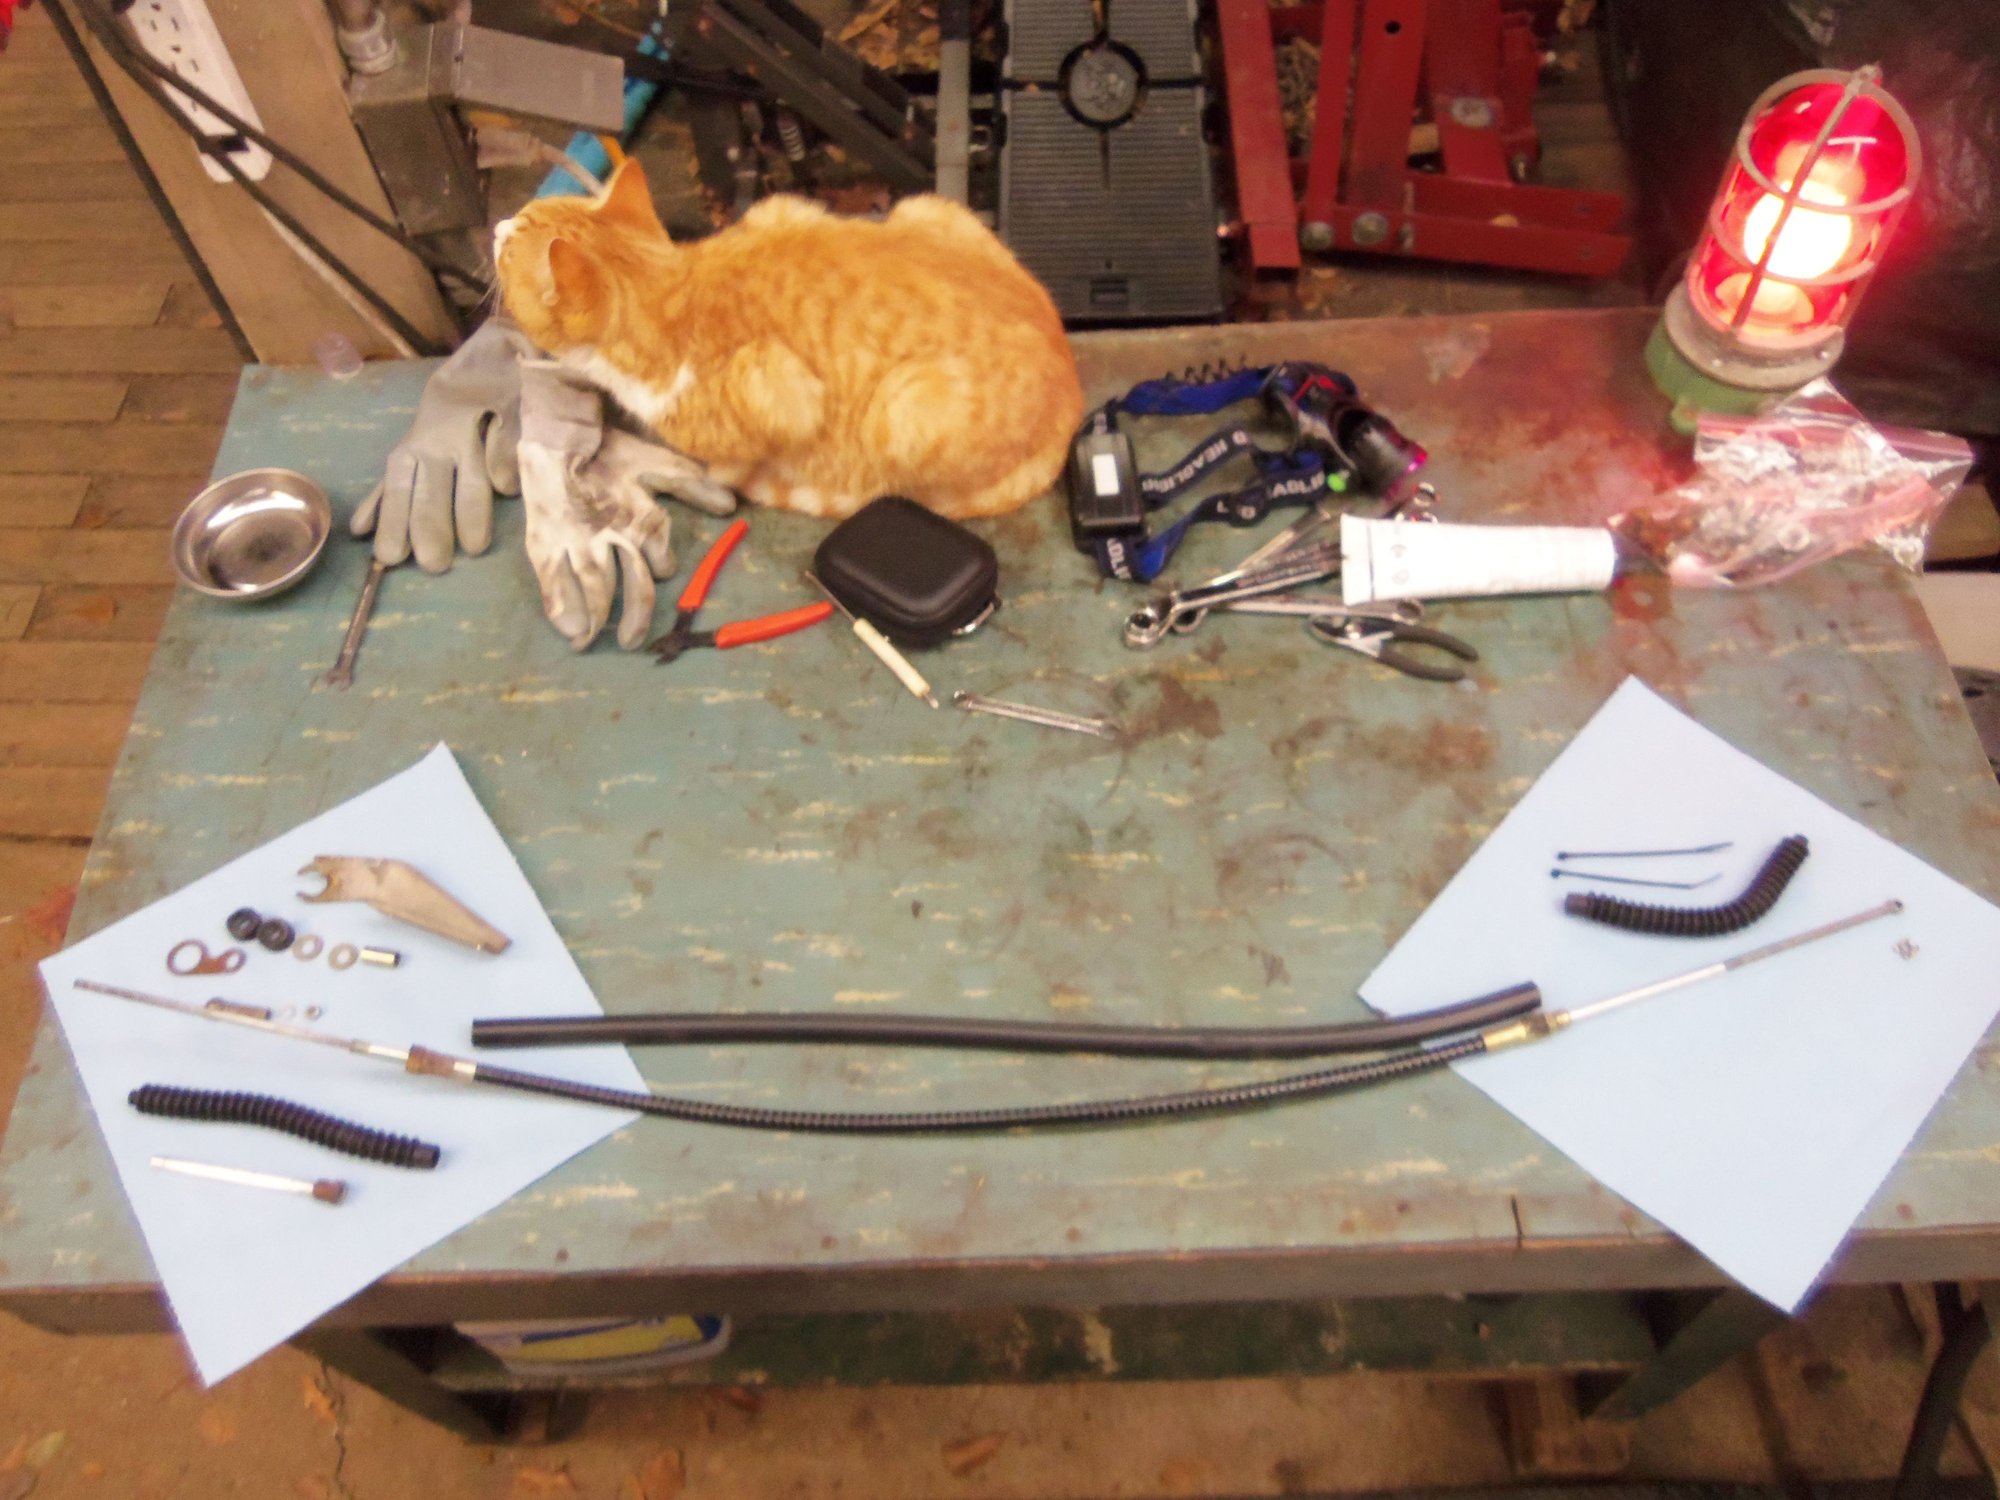
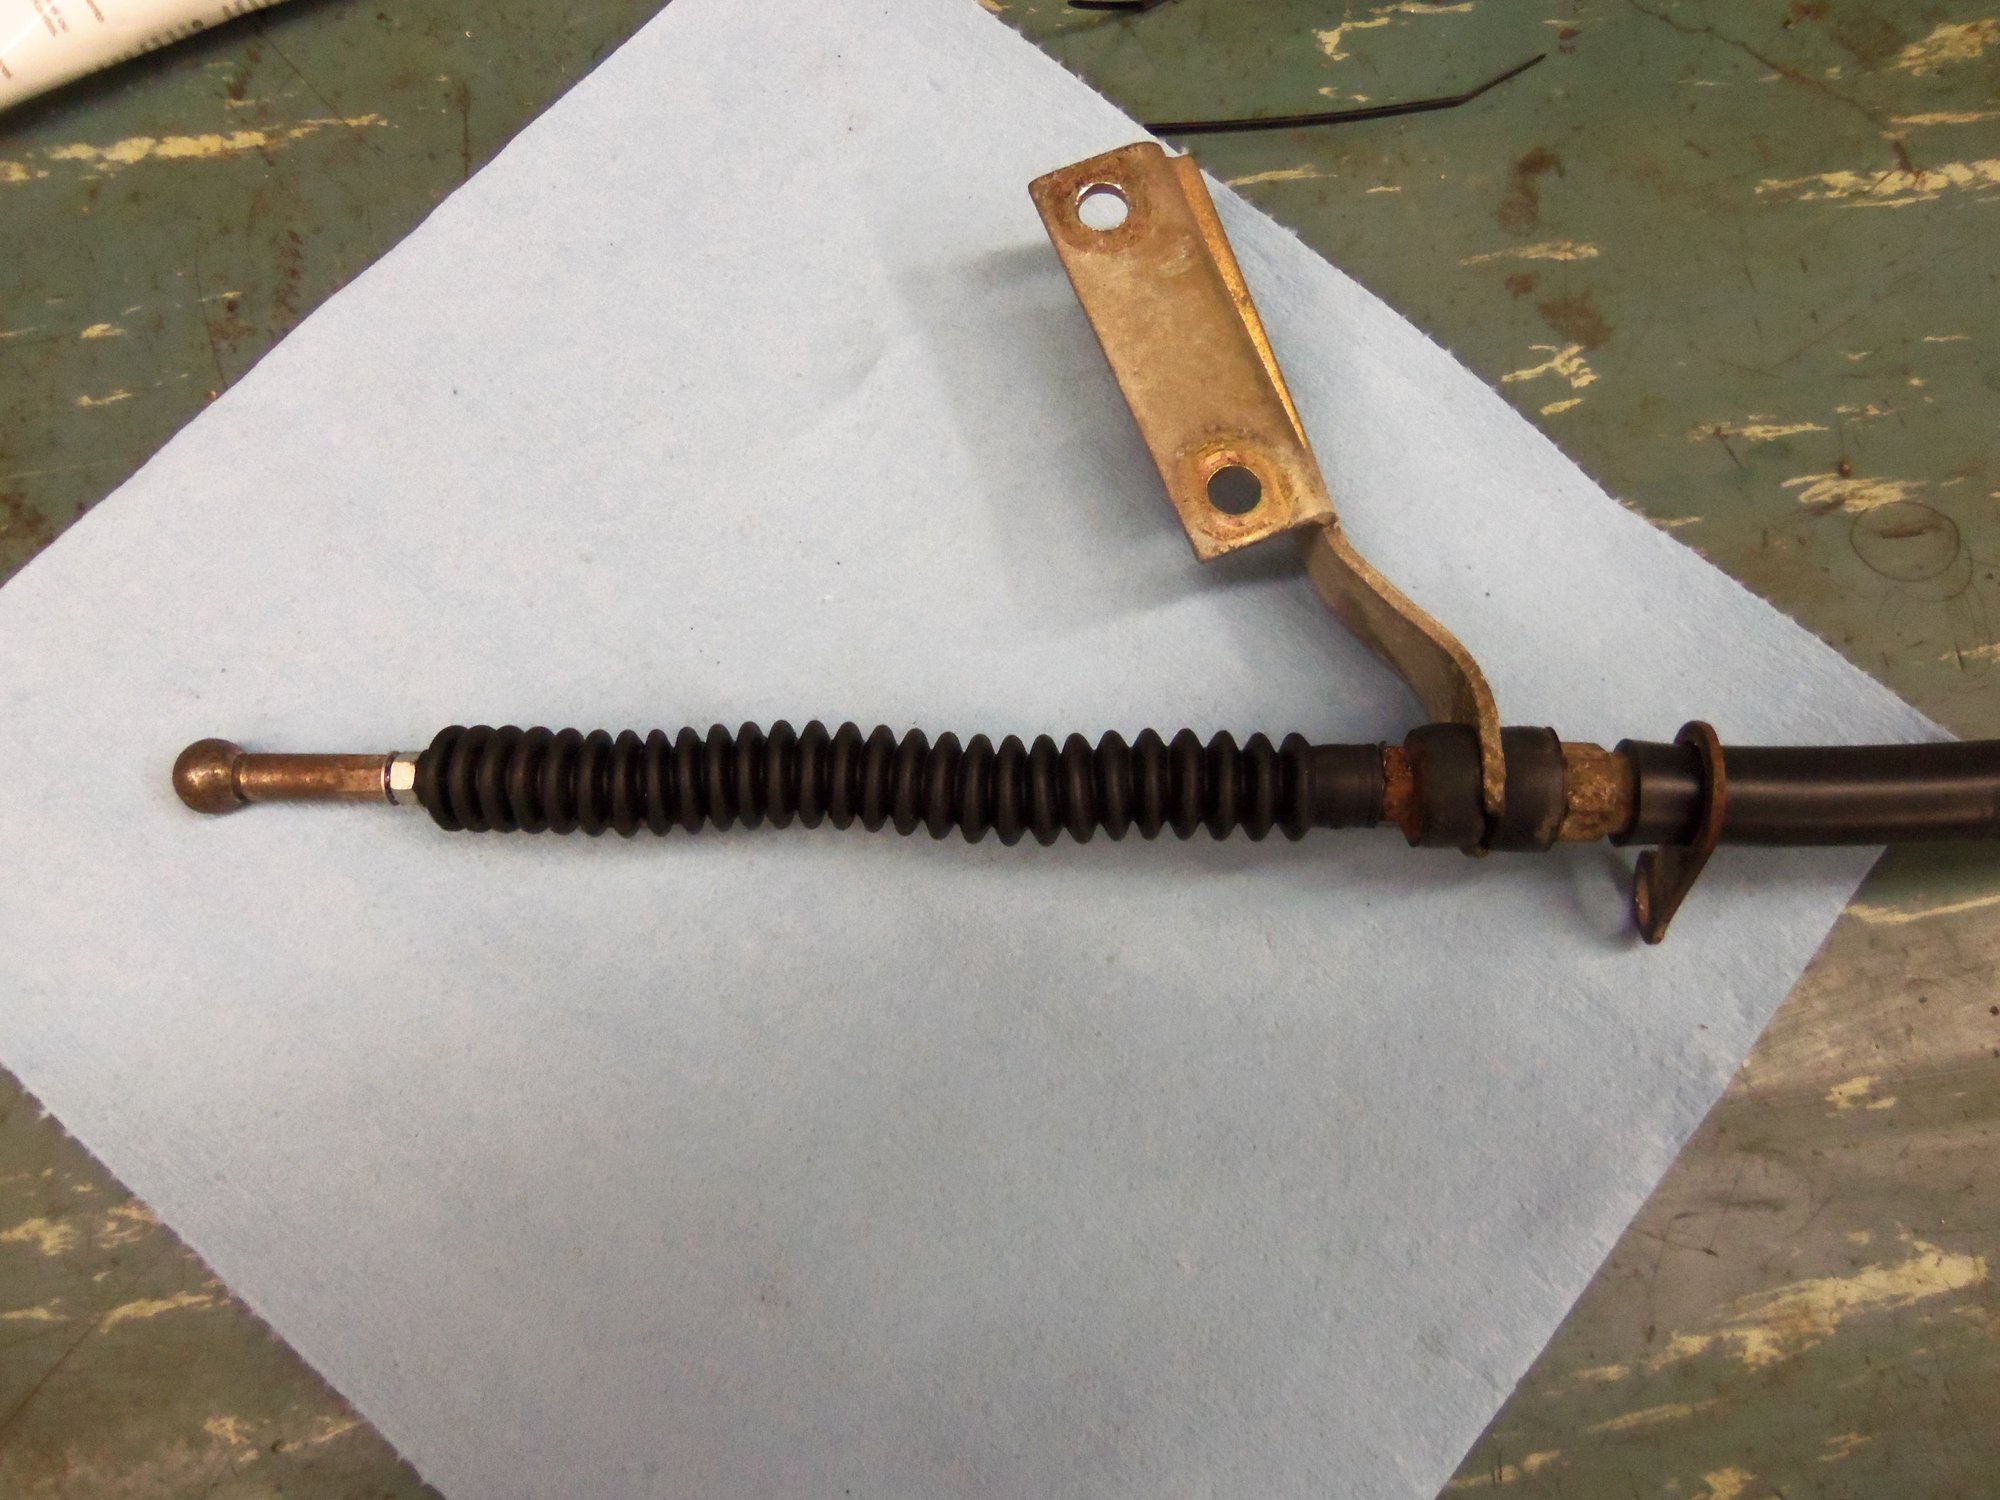
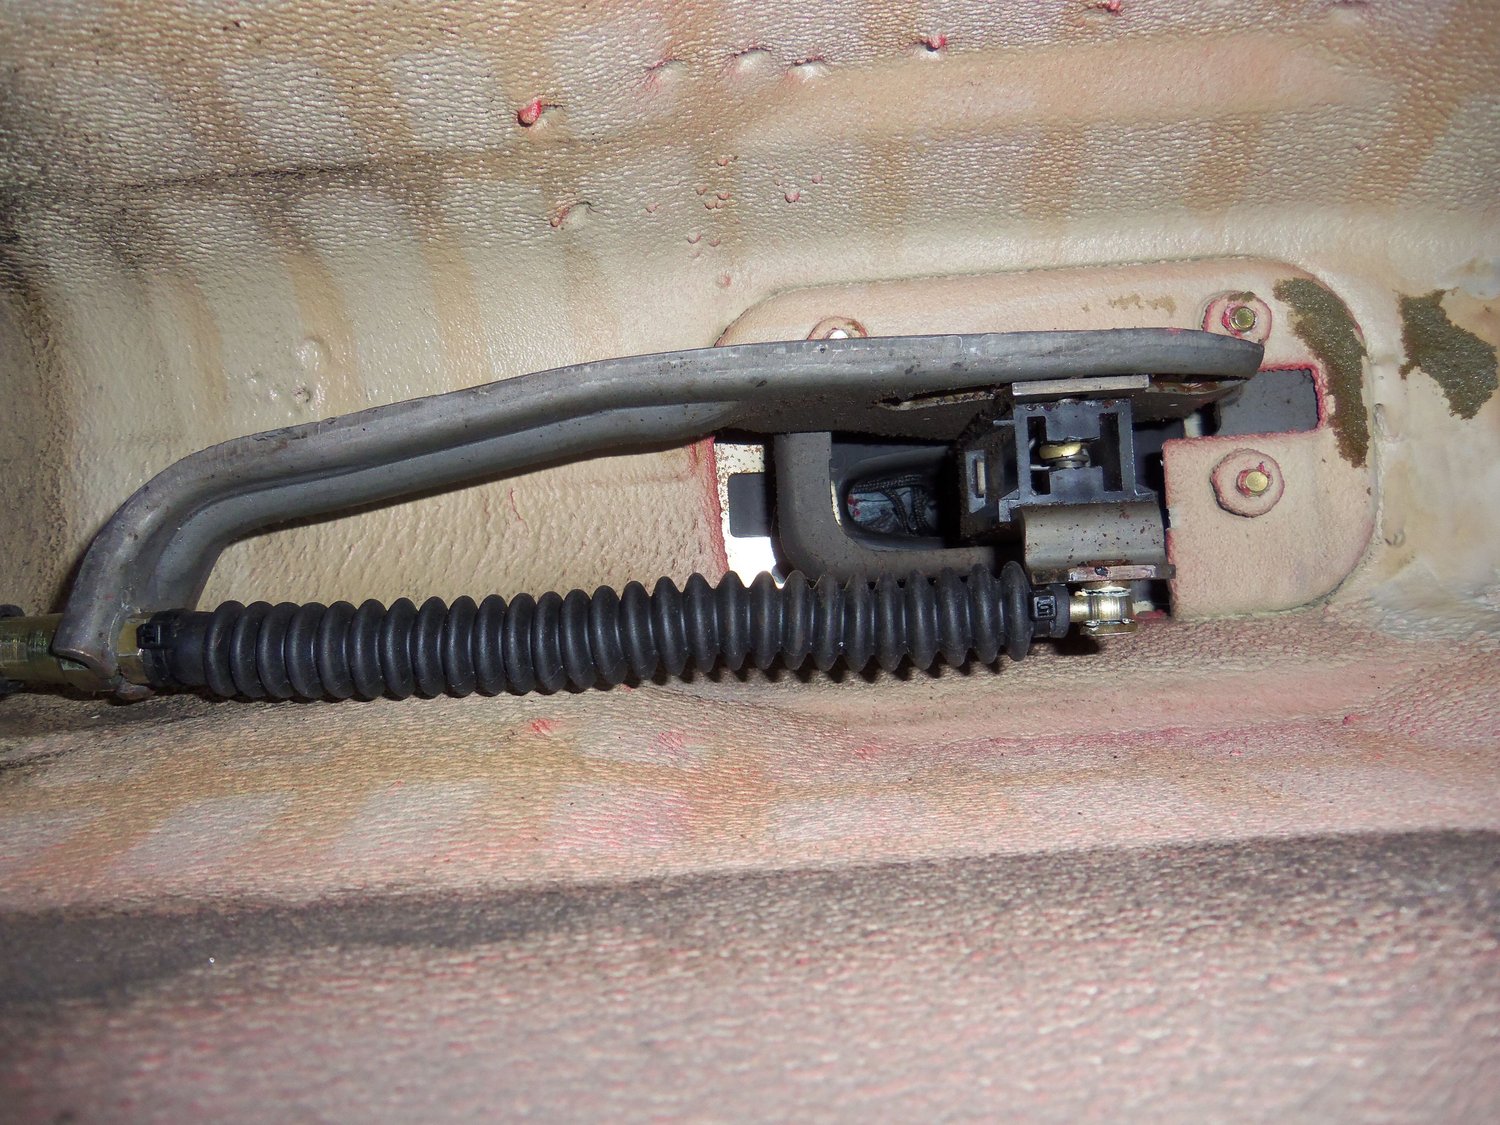
With the torque tube out of the way, I got a look at the shifter end of the shift cable. The boot was a nasty mess. It had turned to sticky mush. My intent was to change the boot in situ. I had already changed the transmission end boot last year. However, the cable felt stuck. I went ahead and removed the assembly.
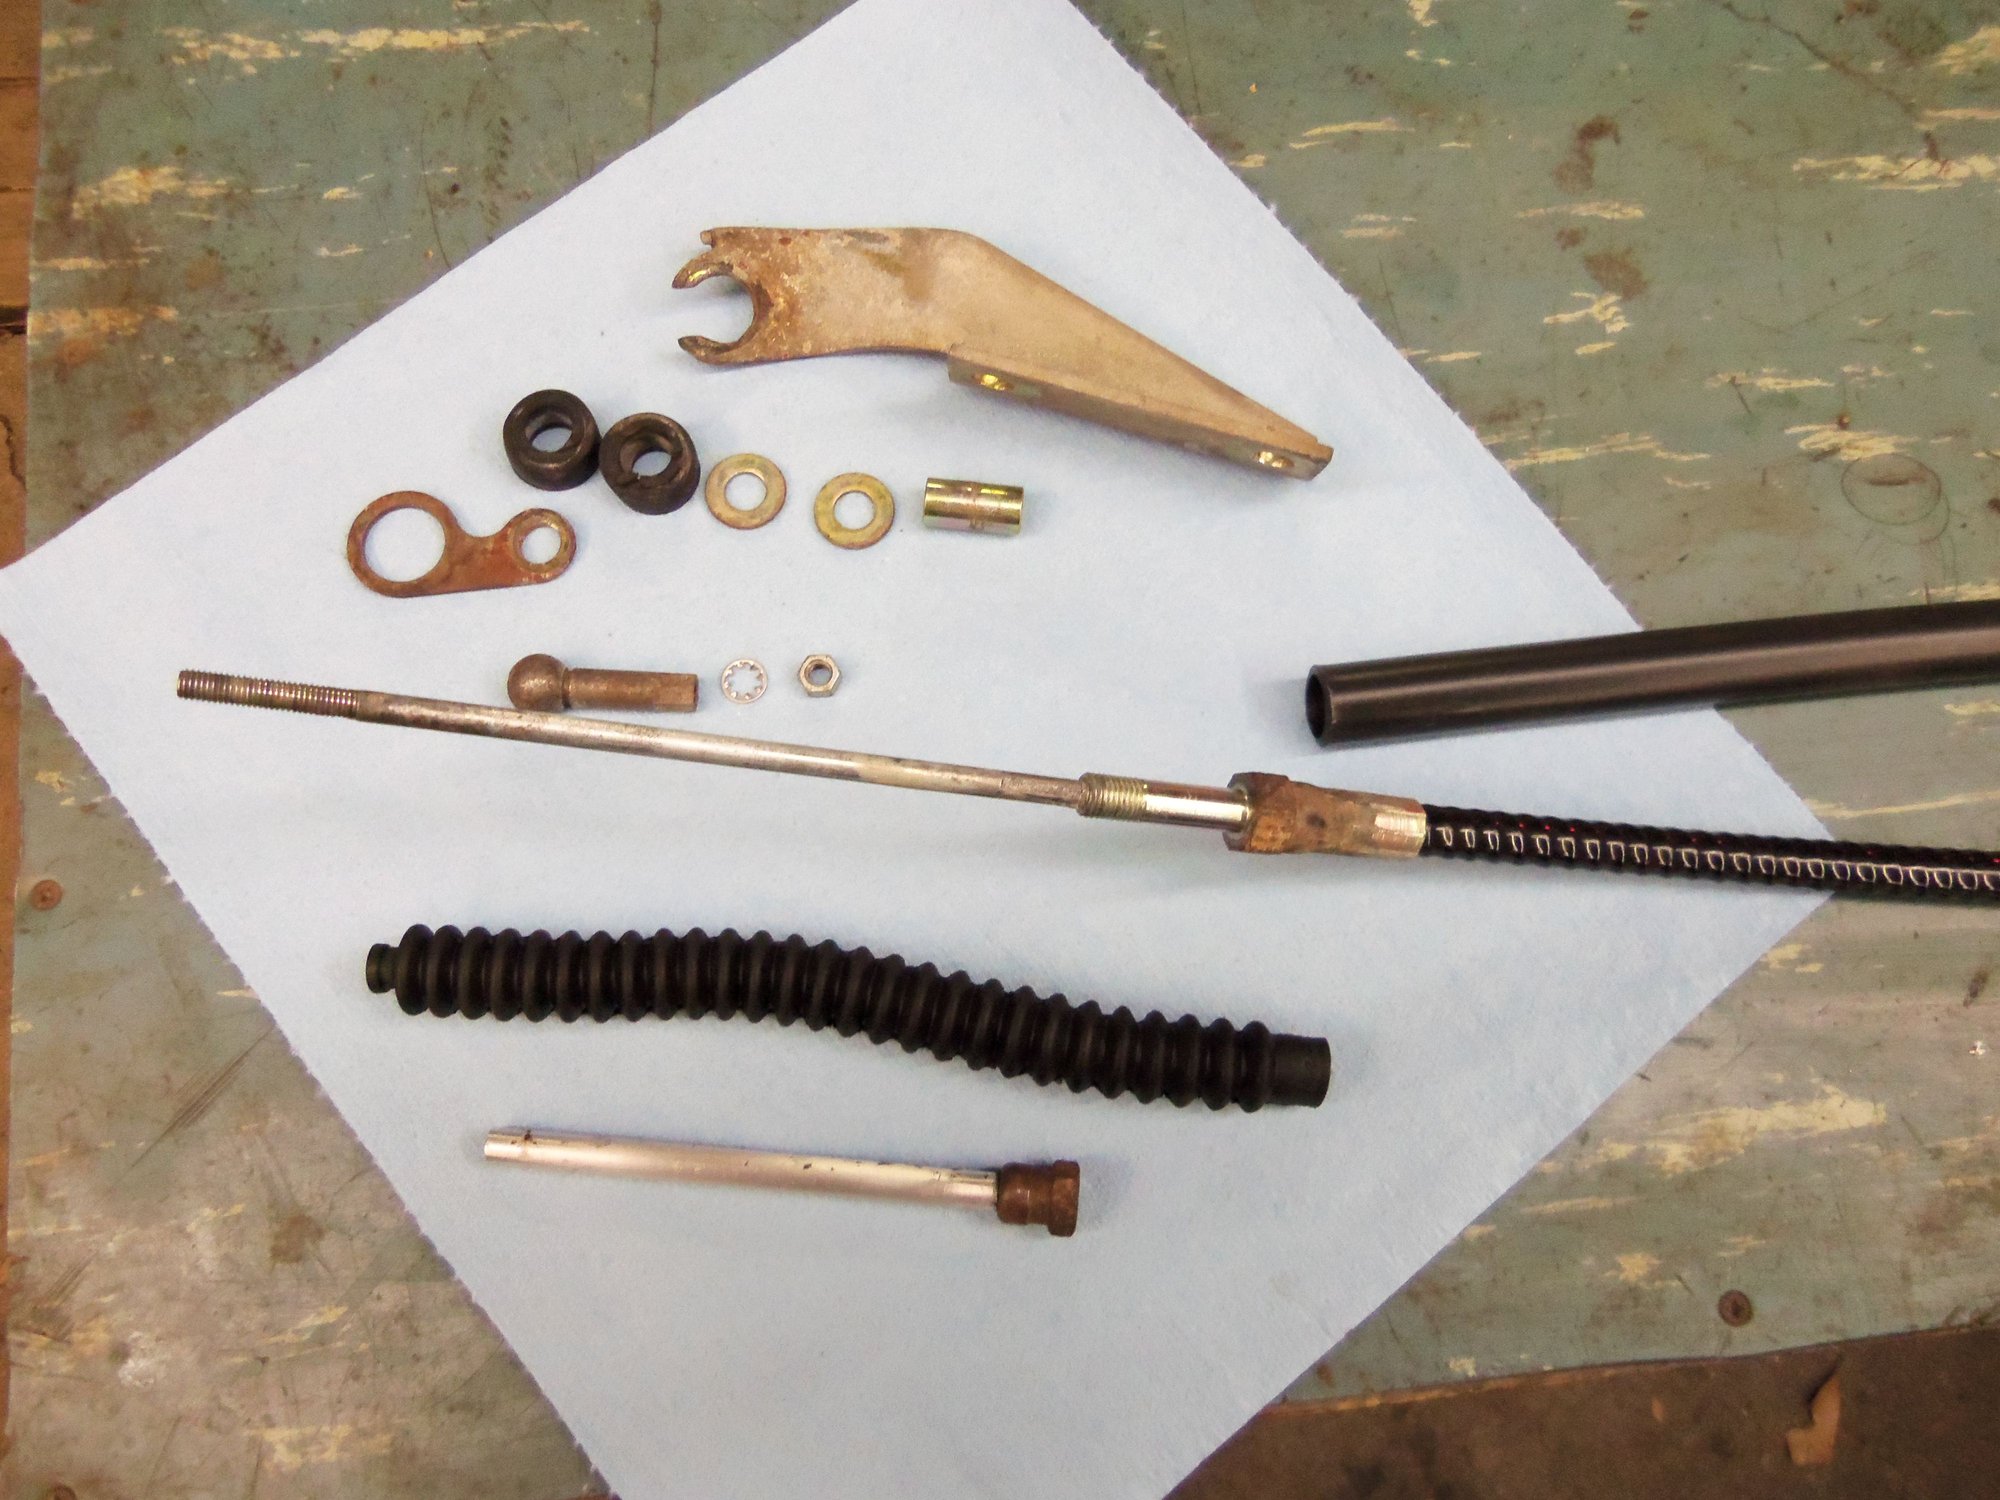
On the work bench, I disassembled, cleaned, and lubricated the cable assembly as much as possible. I had hoped to be able to pull the cable assembly completely out of the sheath. However, the threaded rod at the transmission end did not want to go through. I decided not to force it.
I clamped the rod end of the cable into a drill. Using rags and brake cleaner, I removed old grease from as much of the spinning cable as could reach. Then, I sprayed brake cleaner down the sheath with the cable spinning, acting like a reverse Archimedes' Screw.
Once dry, I used the drill to again spin the cable, while I lubed it with white lithium grease. In my head, spinning the cable in reverse would do the same reverse Archimedes' Screw thing and draw grease down into the sheath. I don't know how well that actually worked. If nothing else, each end of the cable is well lubricated.
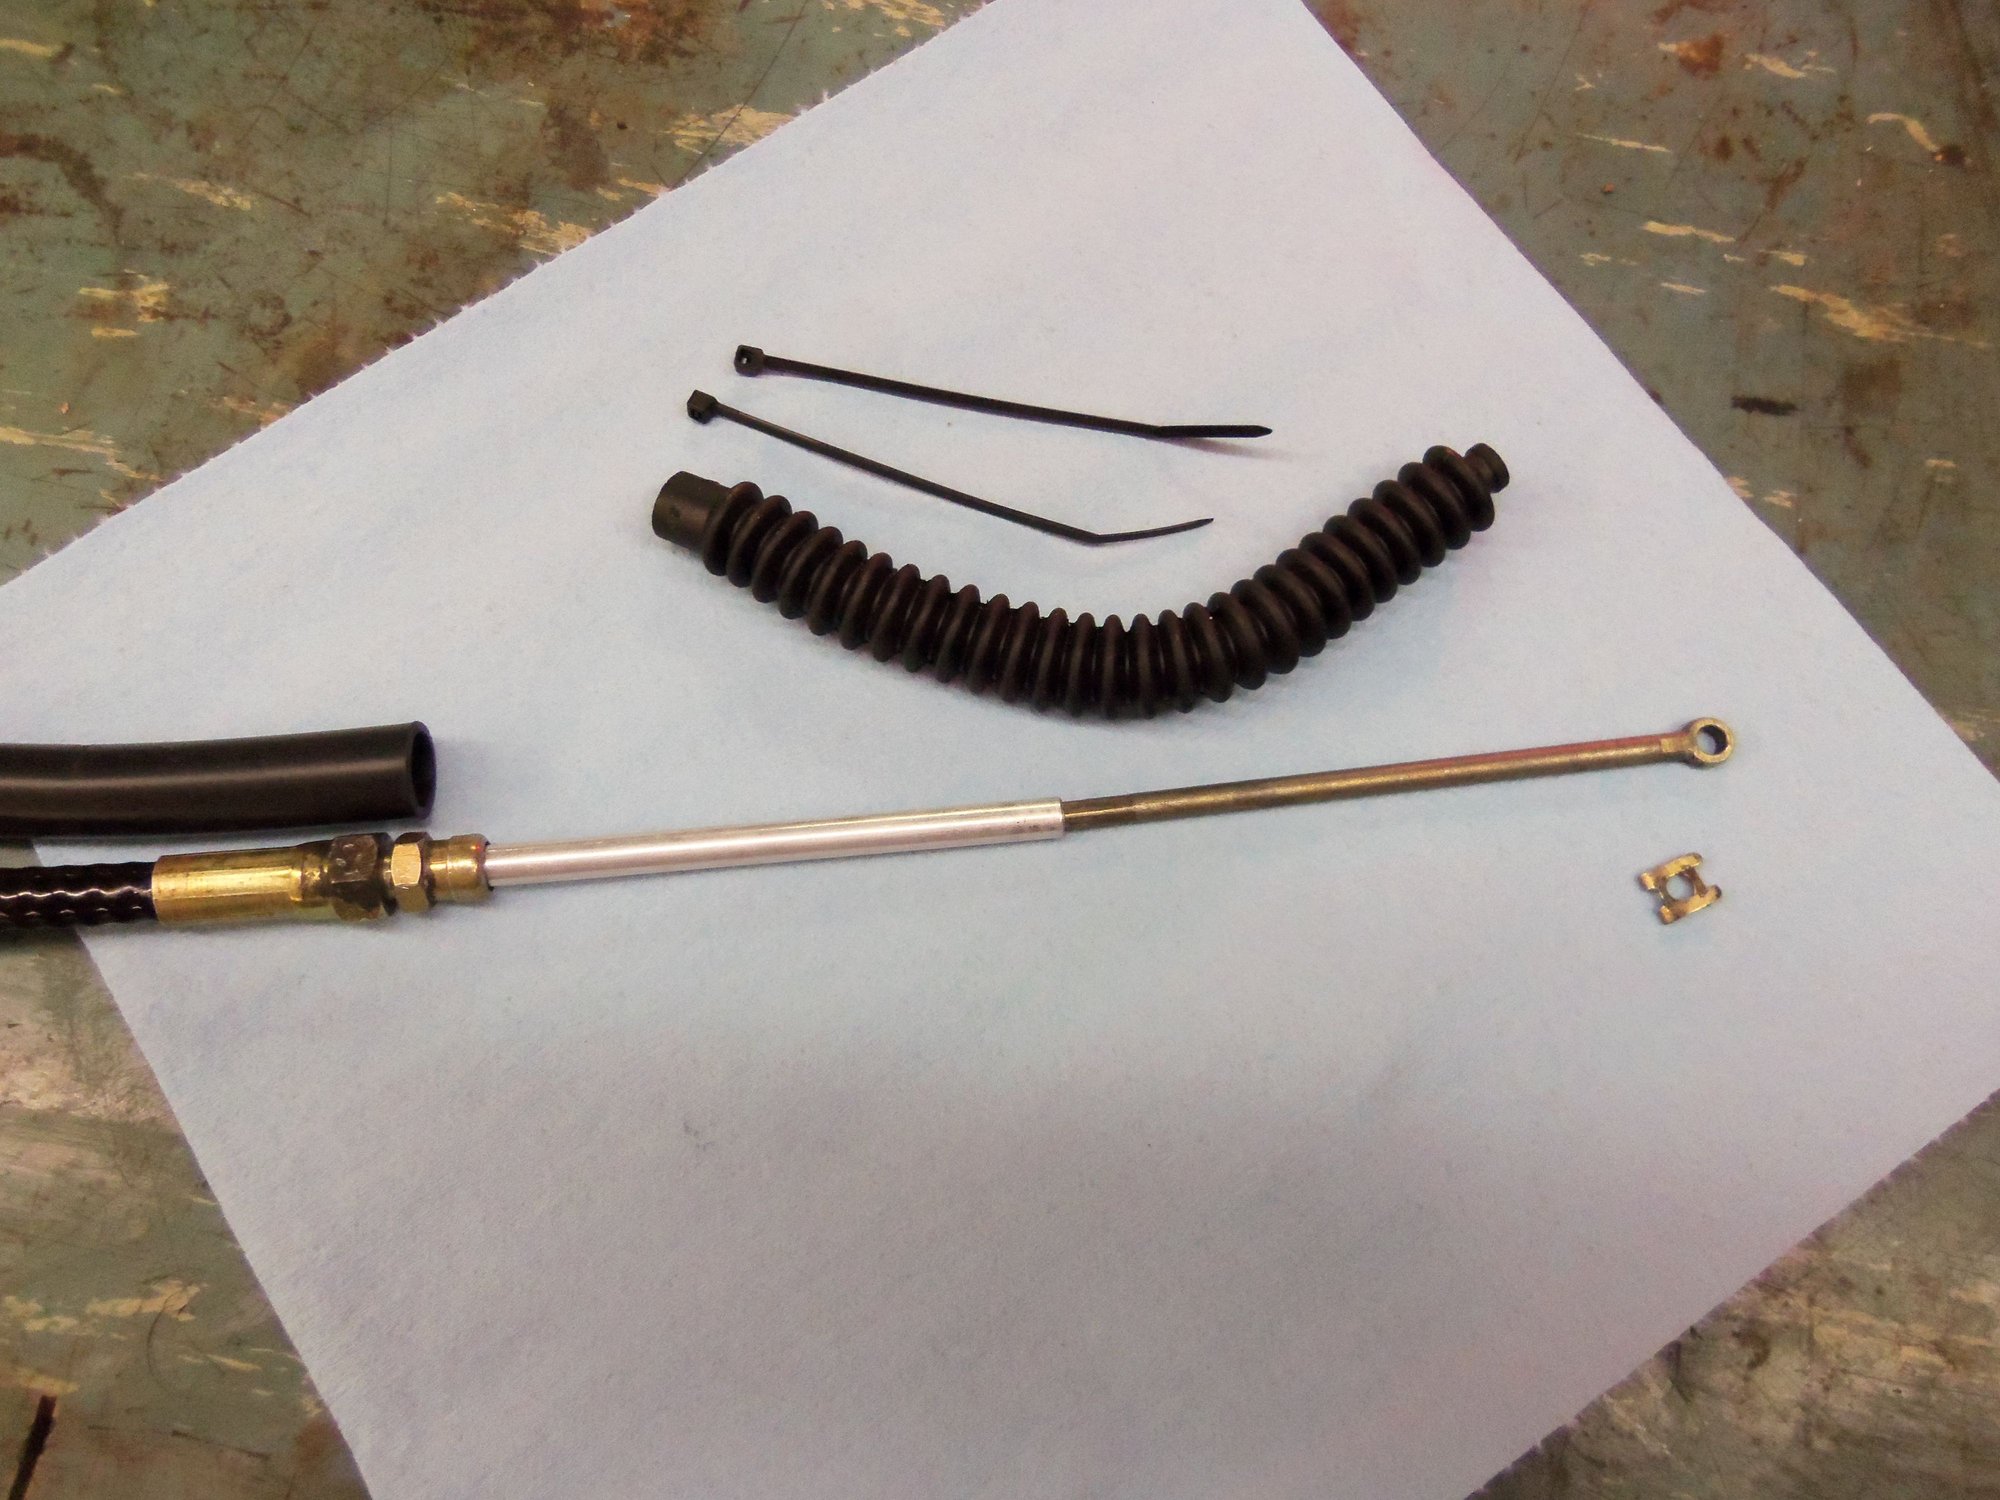
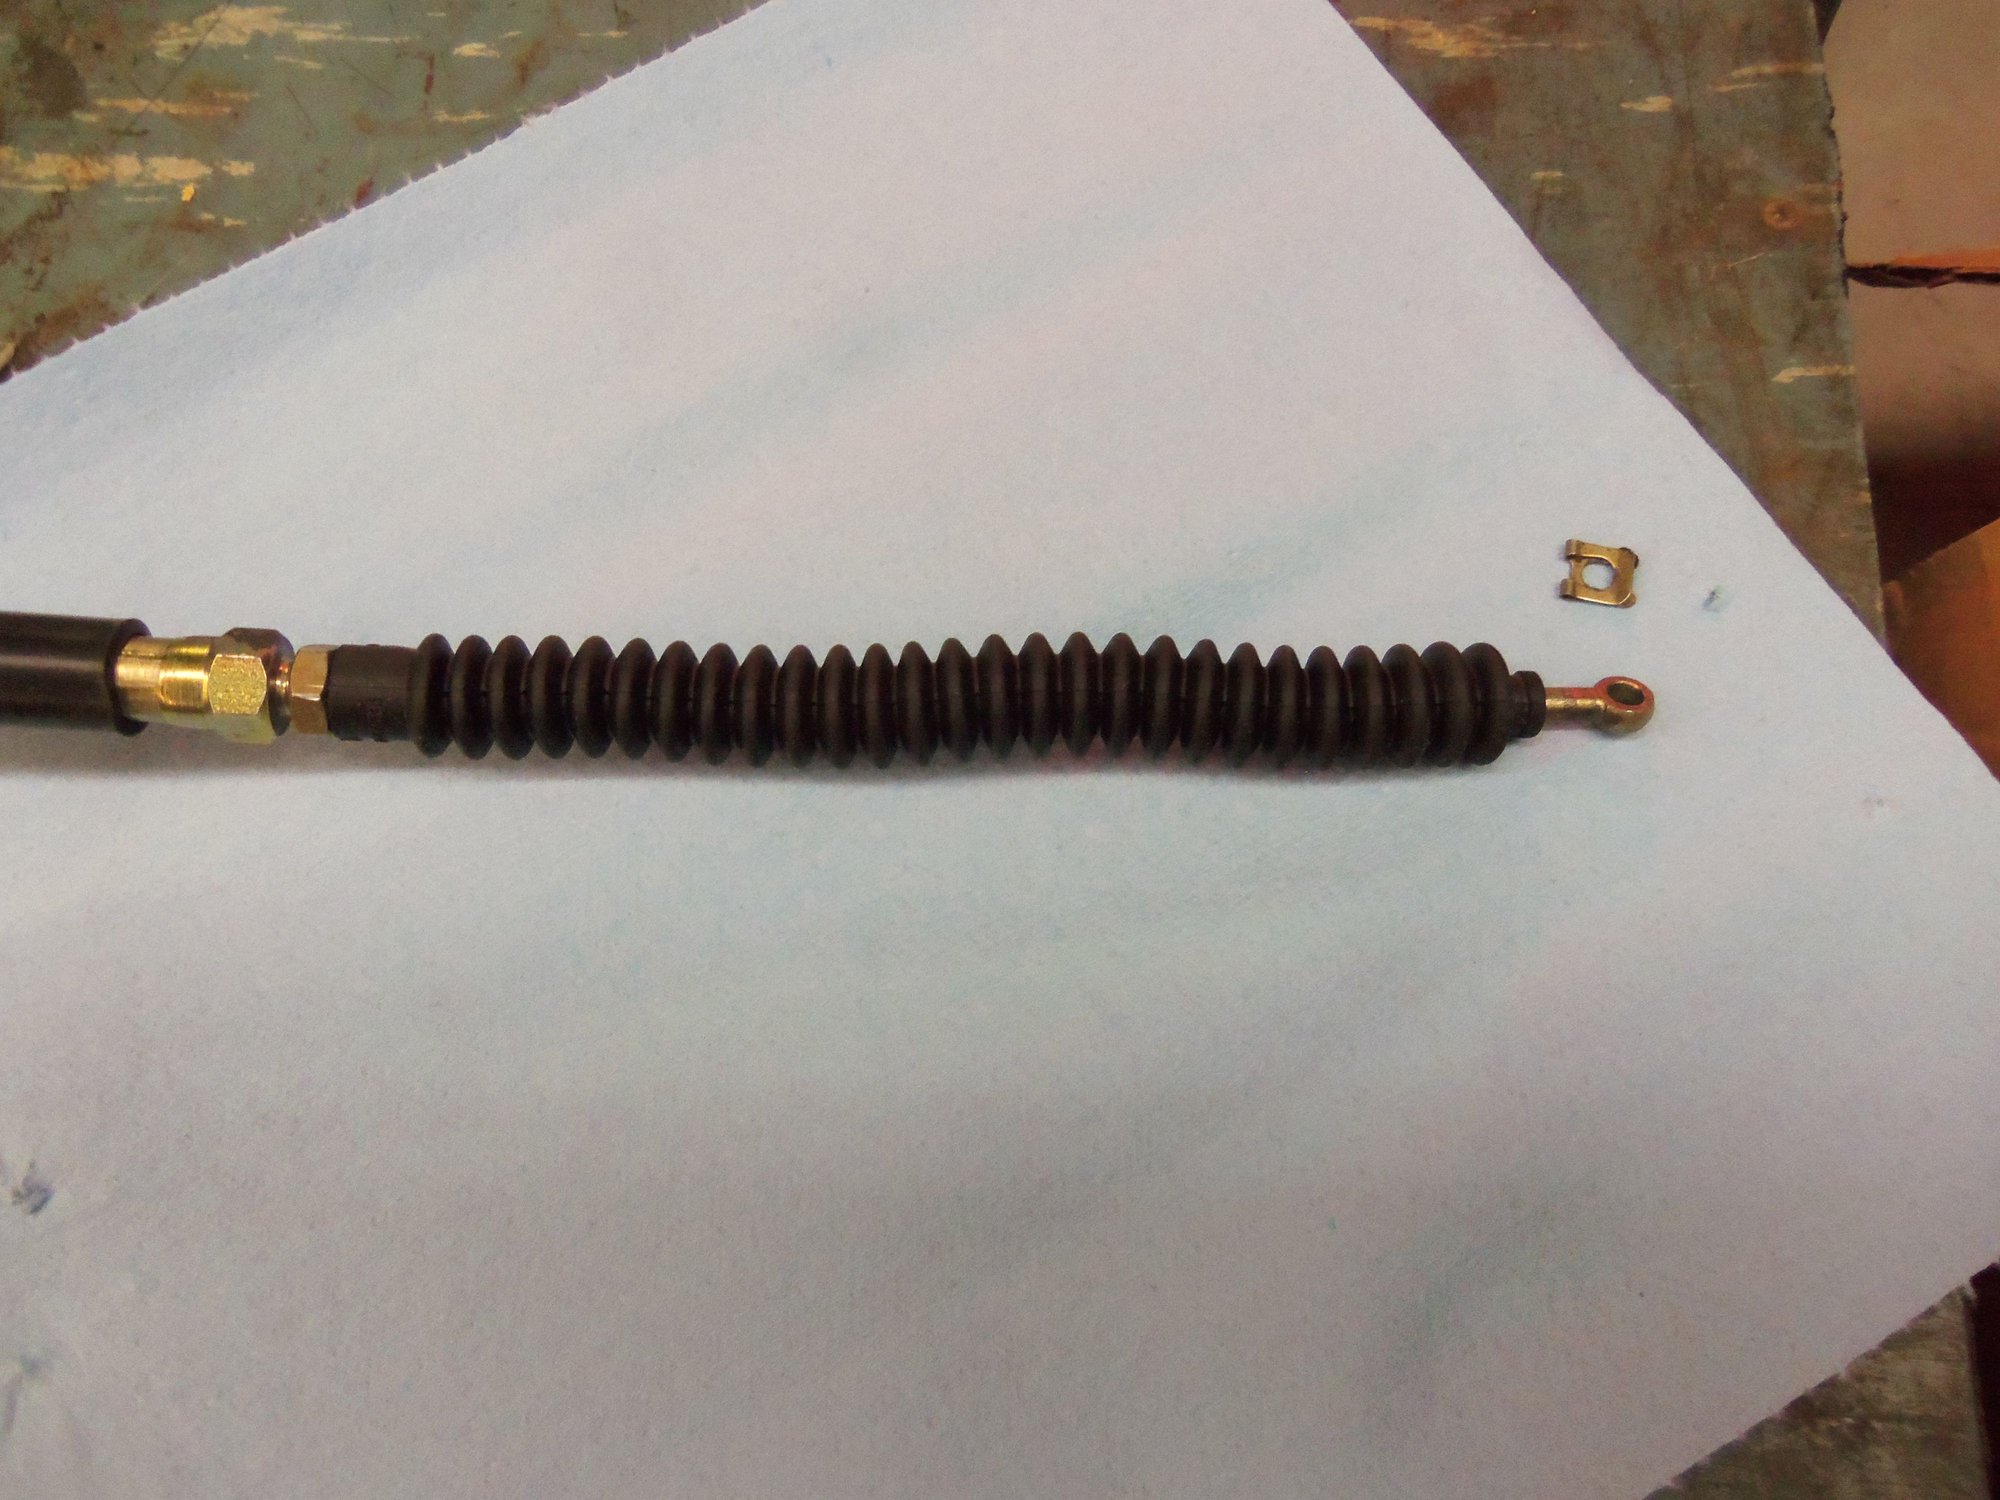
Once cleaned and lubricated, I reassembled everything. I left both boots loose.
Once I installed the cable and routed it temporarily to the transmission, I secured both ends of each boot with a tiny zip tie.
Much better! It is a little thing, but it is good to clean, lube, and install new boots on the cable.
Underside of automatic transmission shifter.
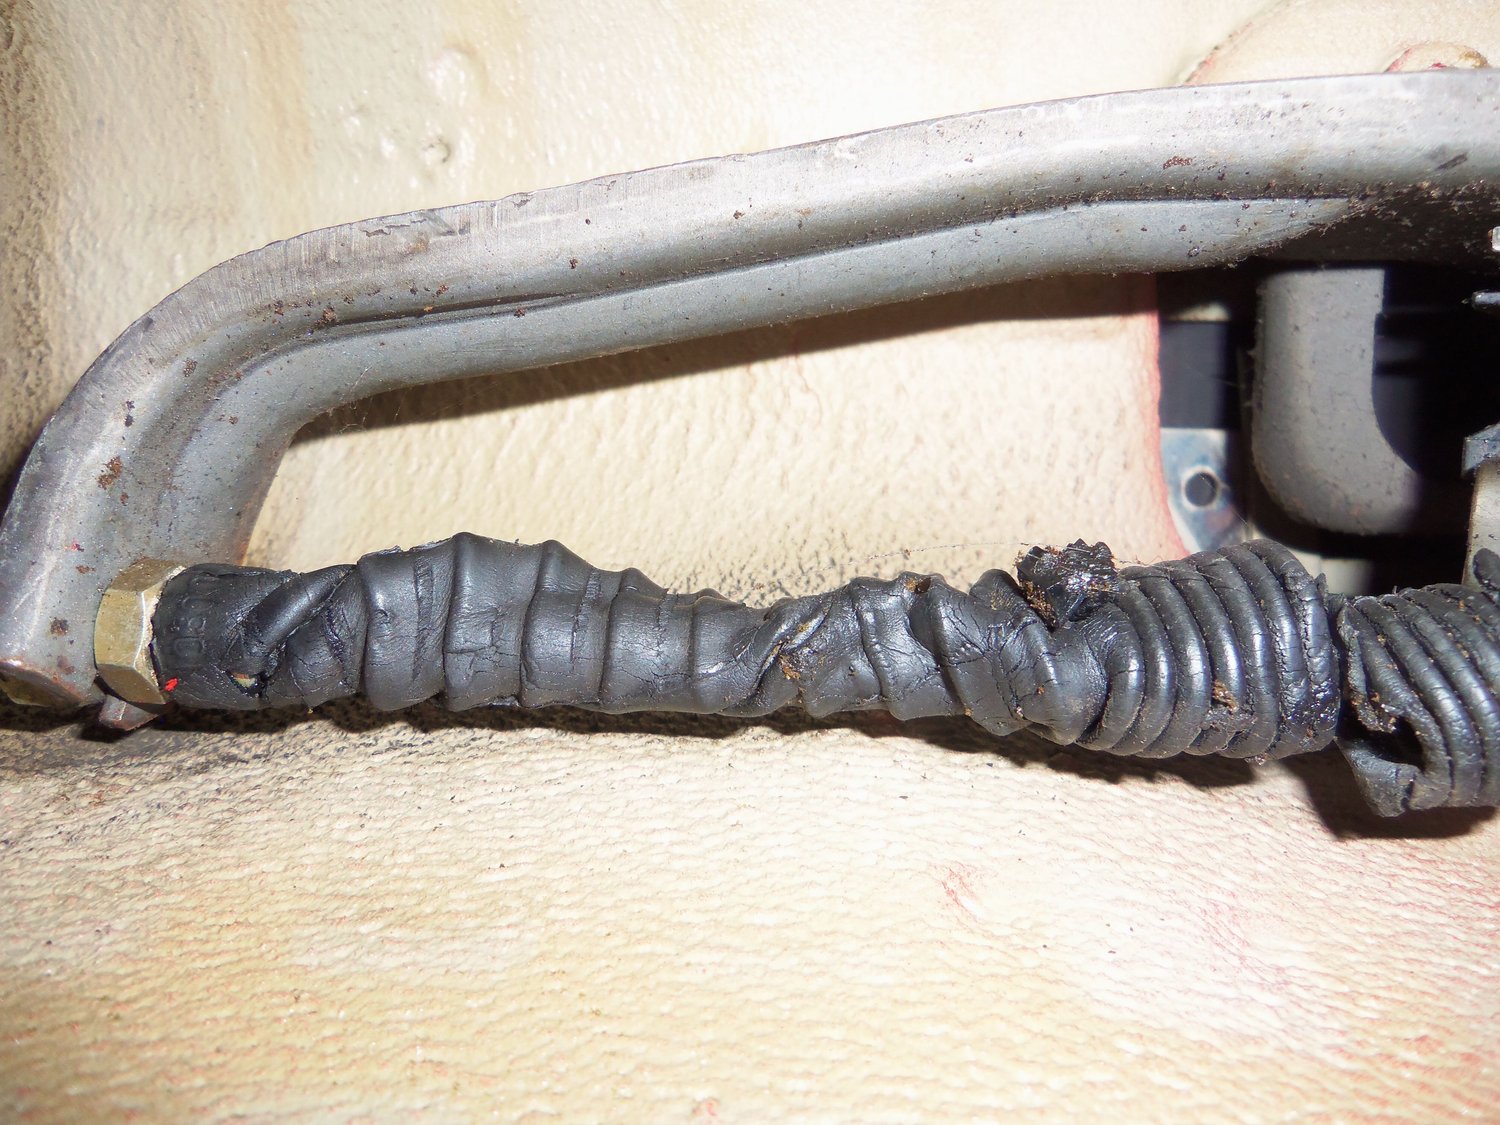
Boot looks terrible.
Boot looks worse. Shifter is in 'P'.
Uh-oh, boot doesn't extend. Shifter is in '2'.
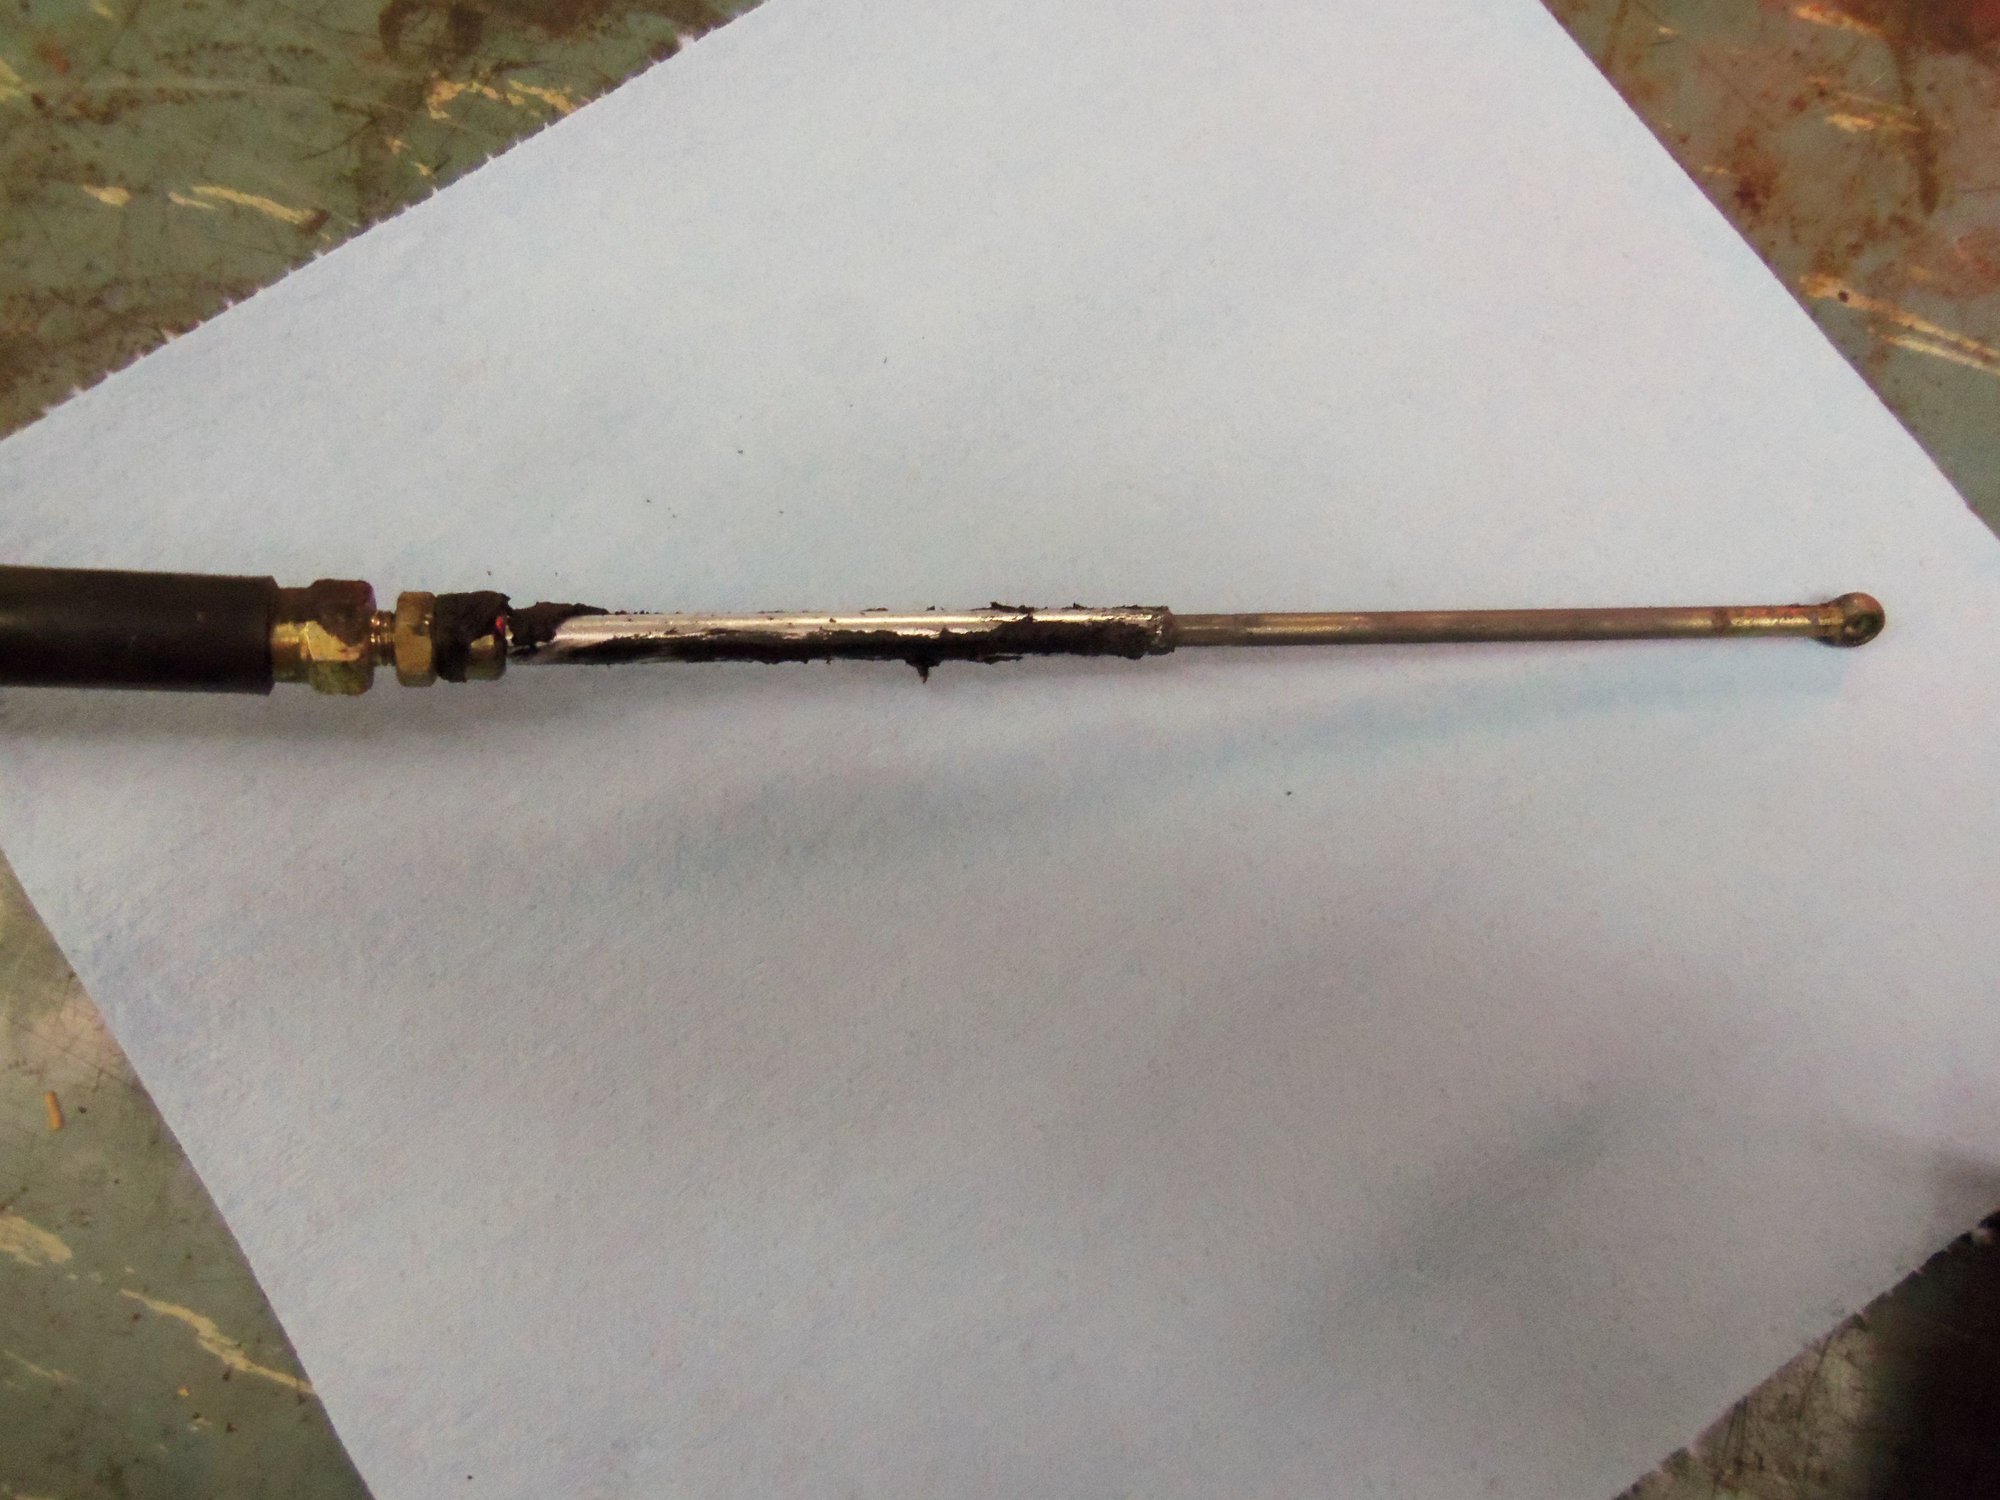
Gooey remains of boot on end of cable.
Removed chunks of boot versus new boot.
Shifter end of cable.
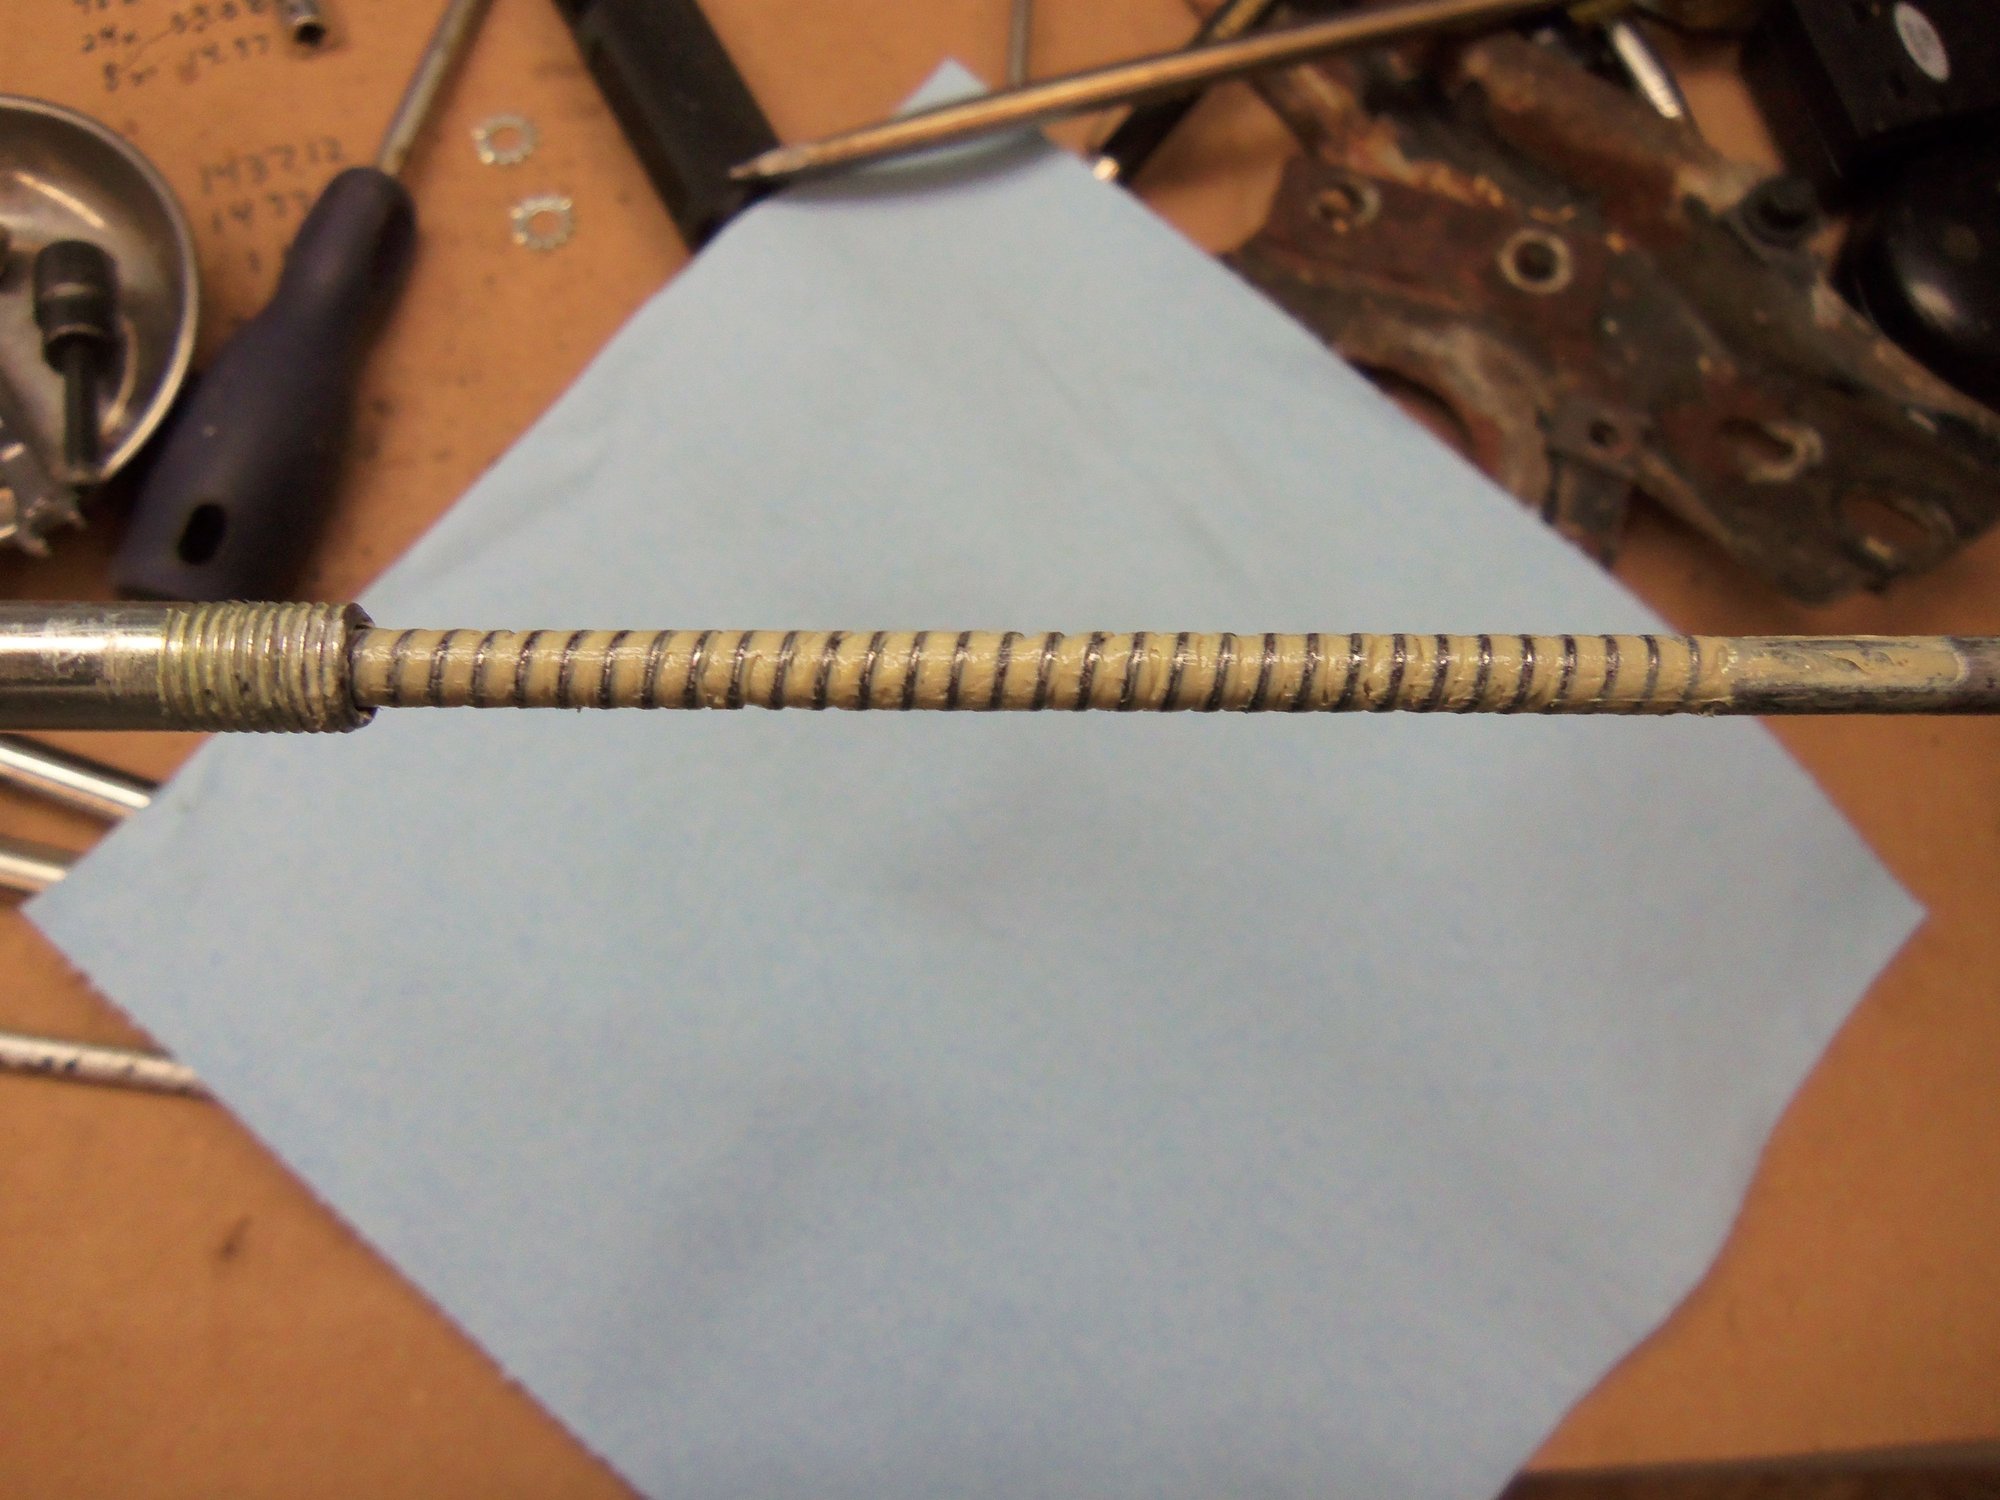
Actual spiral wrapped cable.
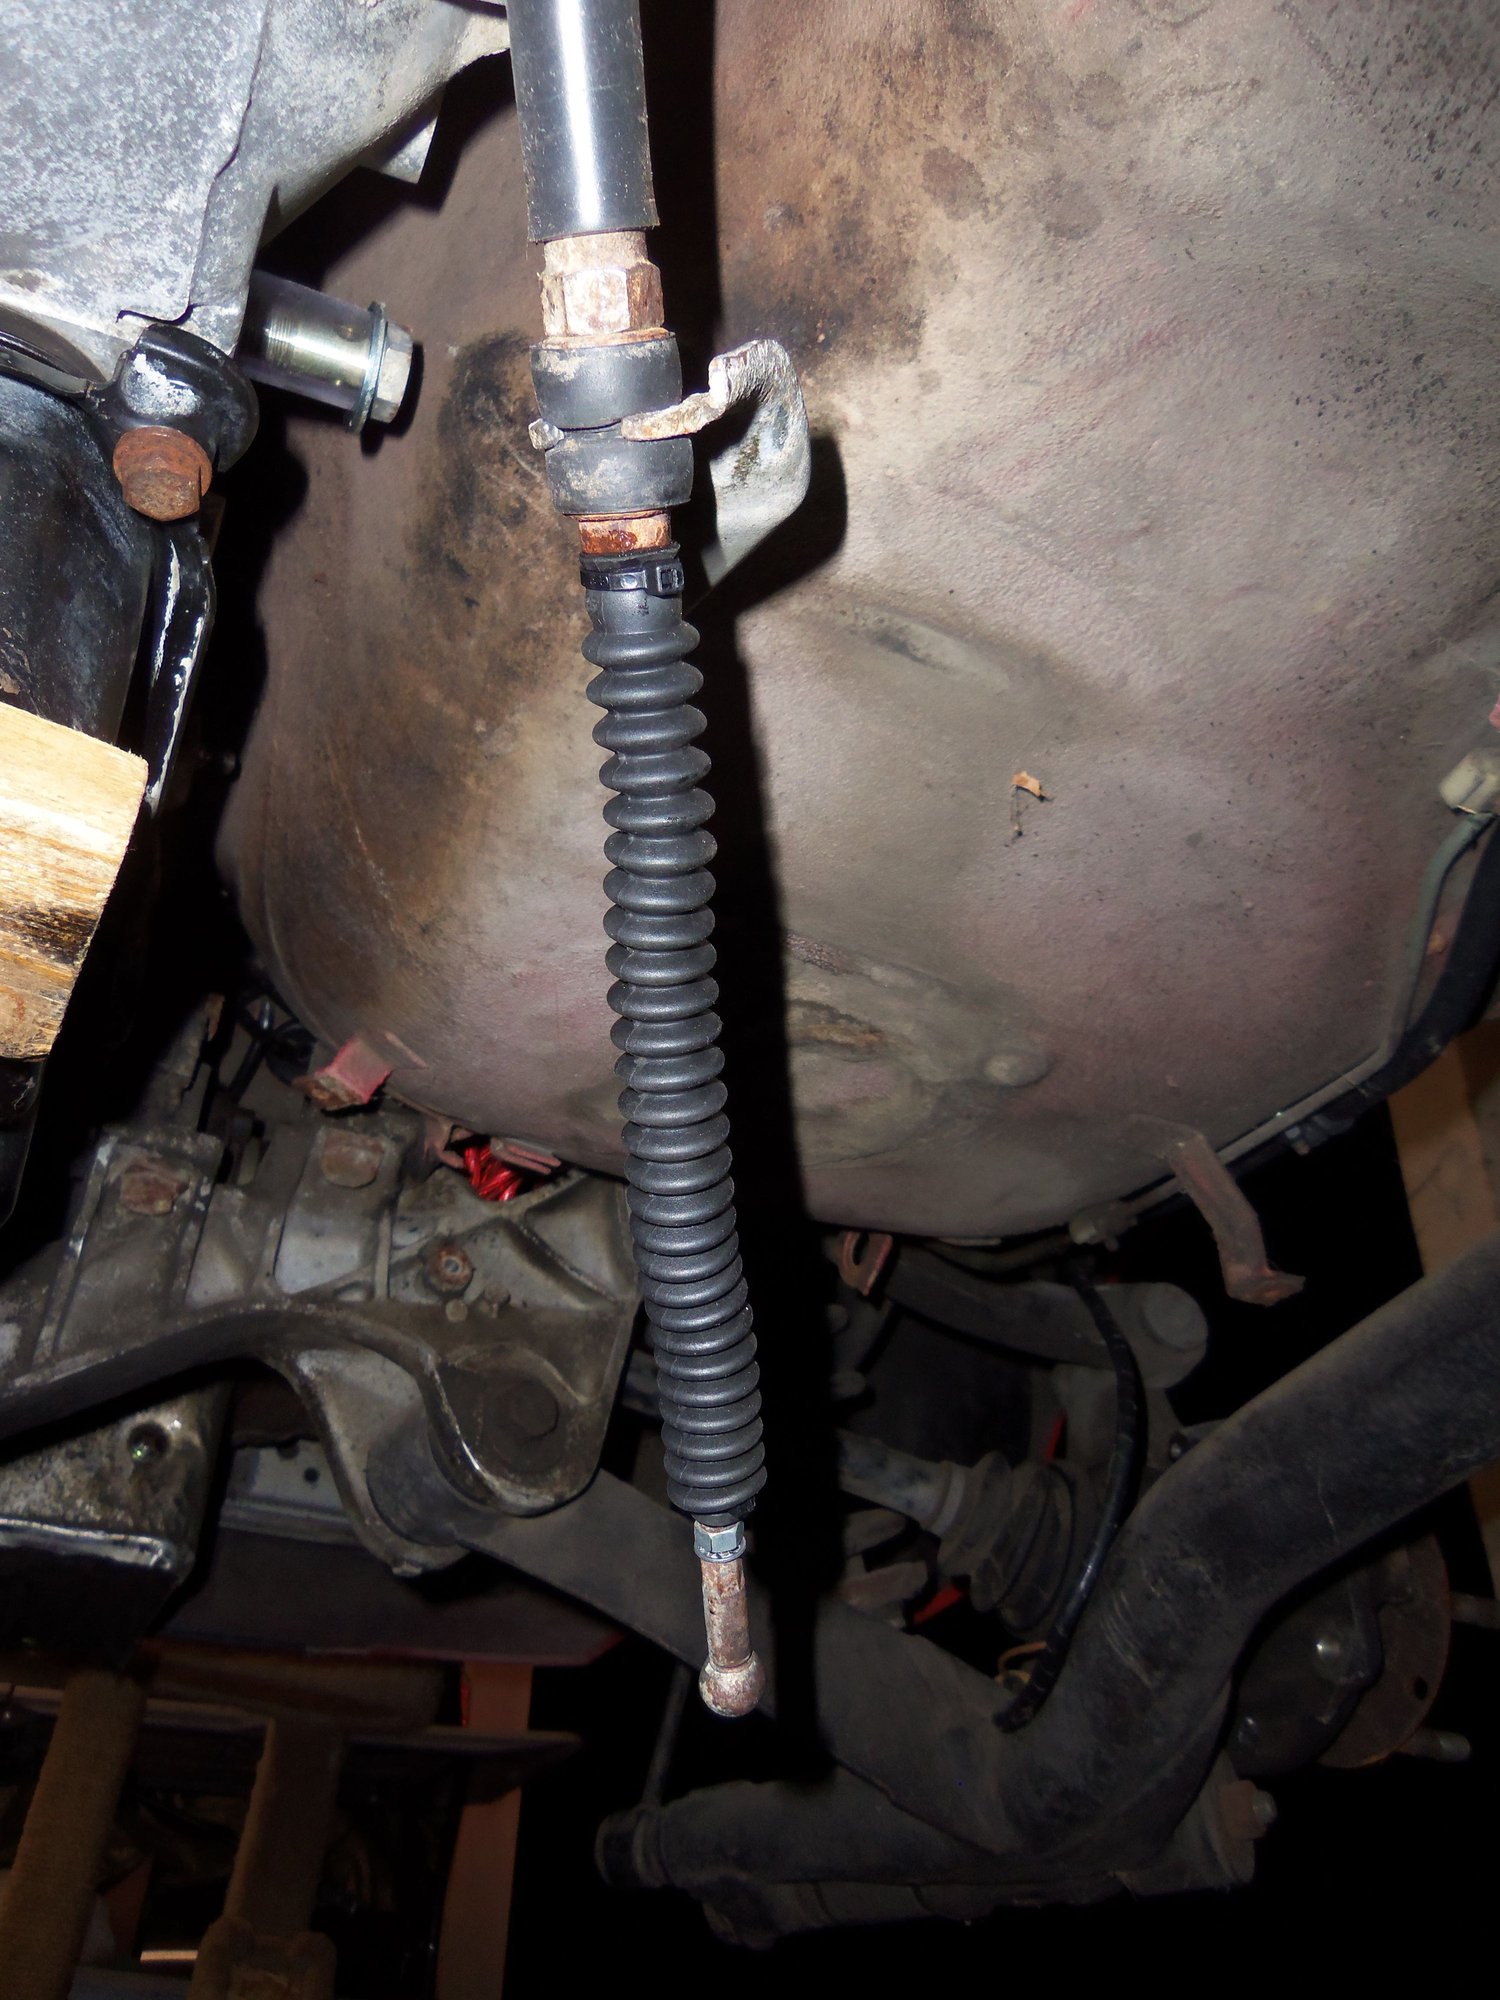
Transmission end of cable, with new boot installed last year.
Spiral wrapped cable after cleaning grease from it.
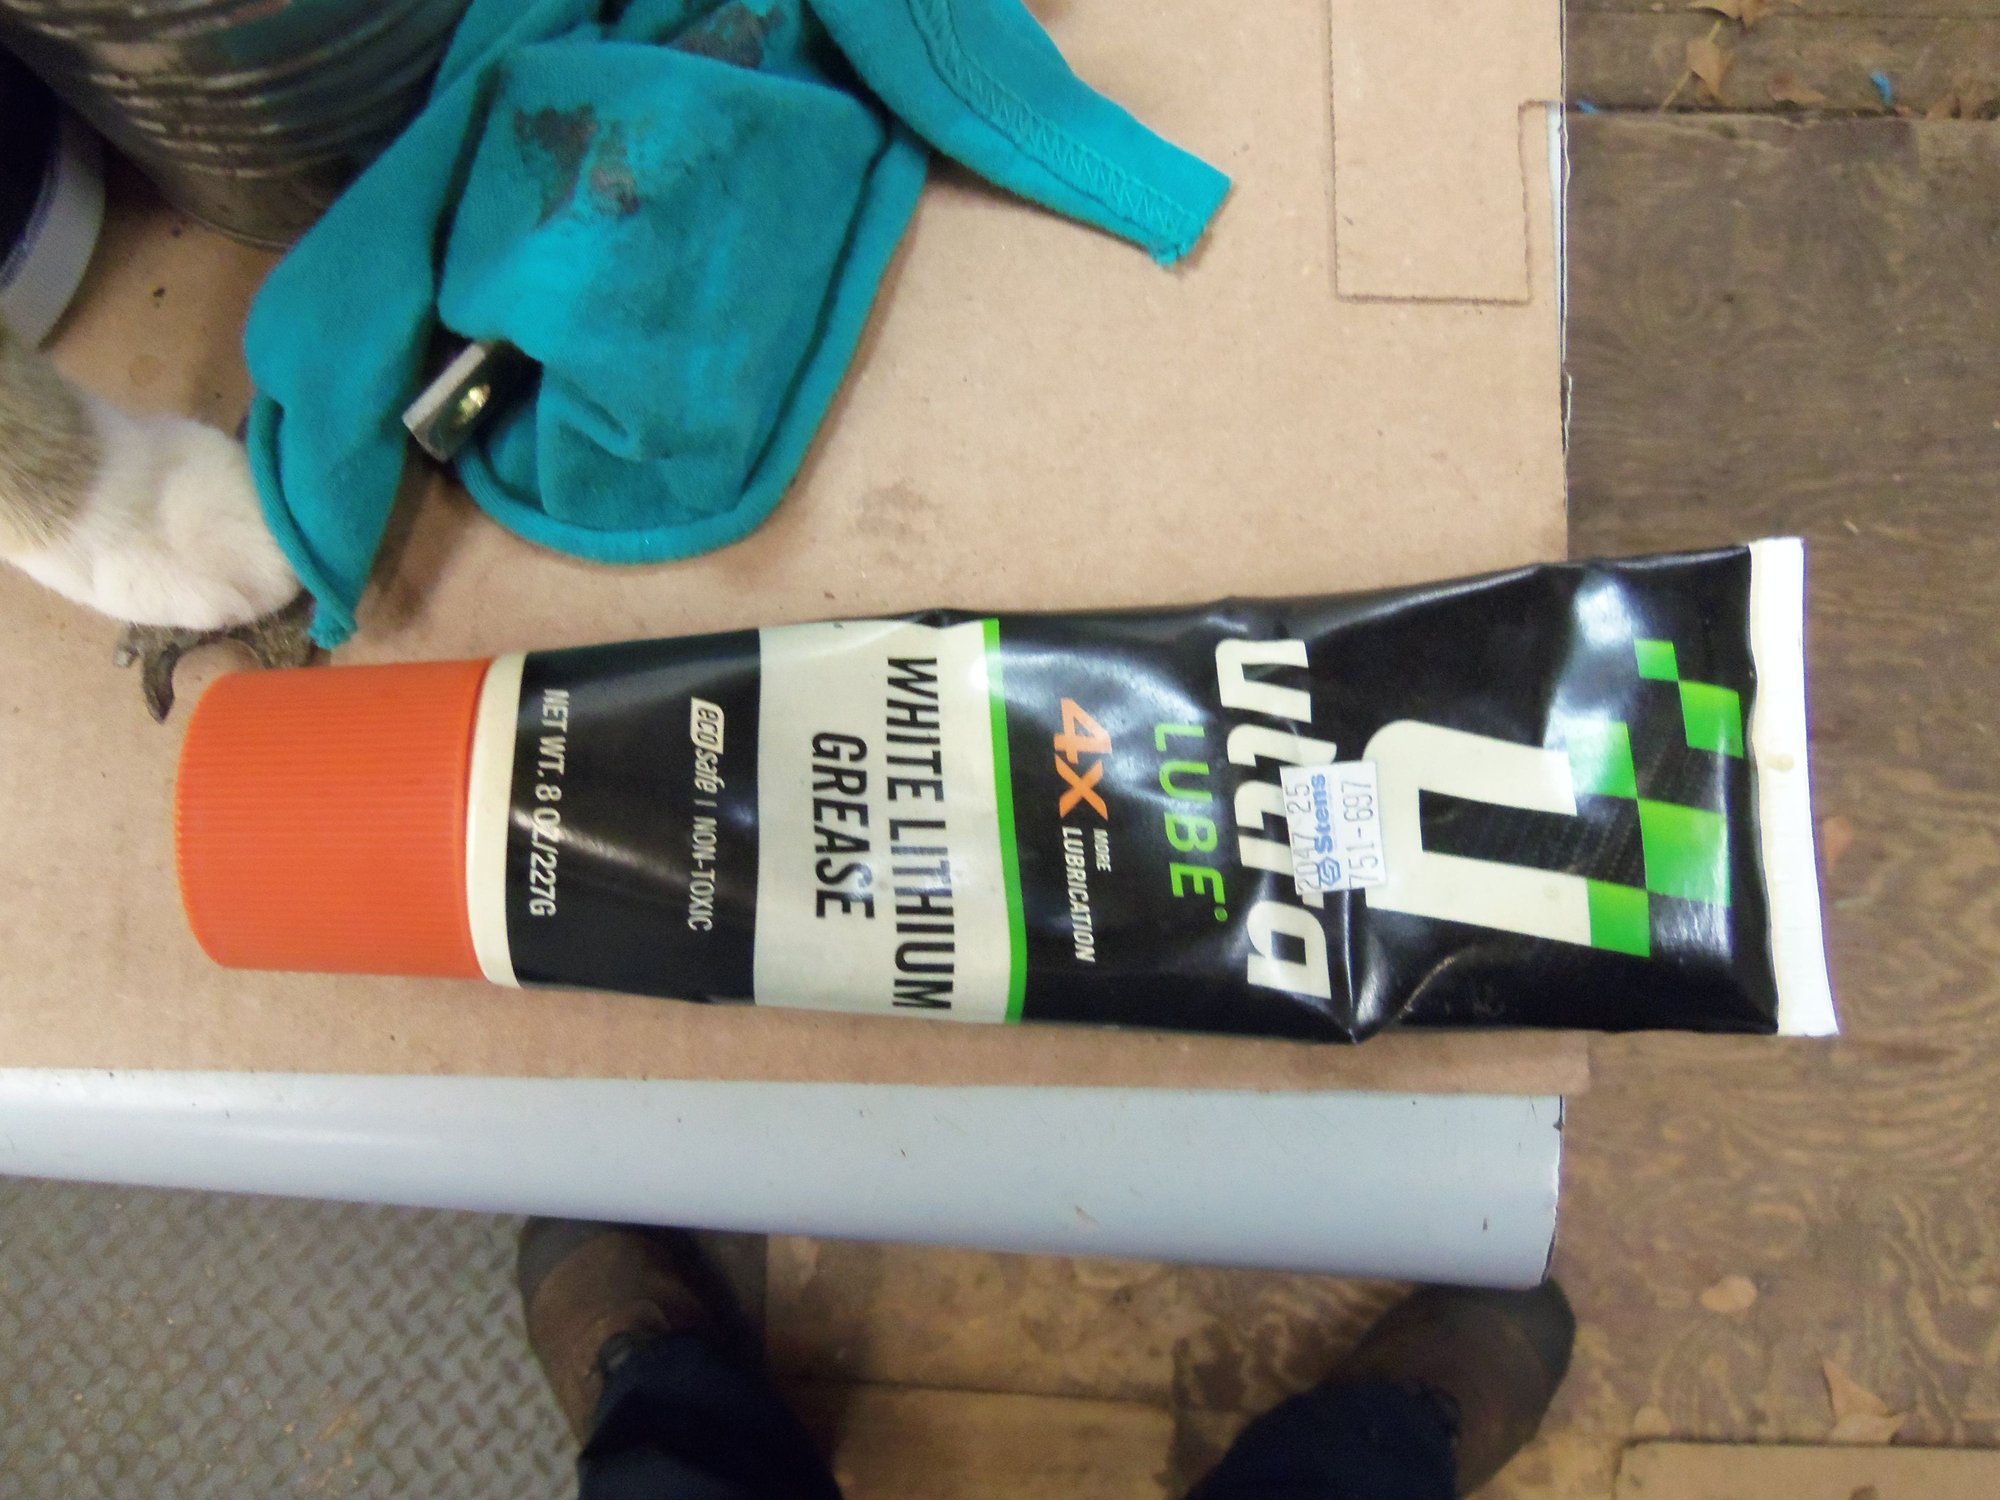
White lithium grease applied to spiral wrapped cable.
Cable cleaned and lubricated, some assembly required. Nacho is helping by knocking random things over.
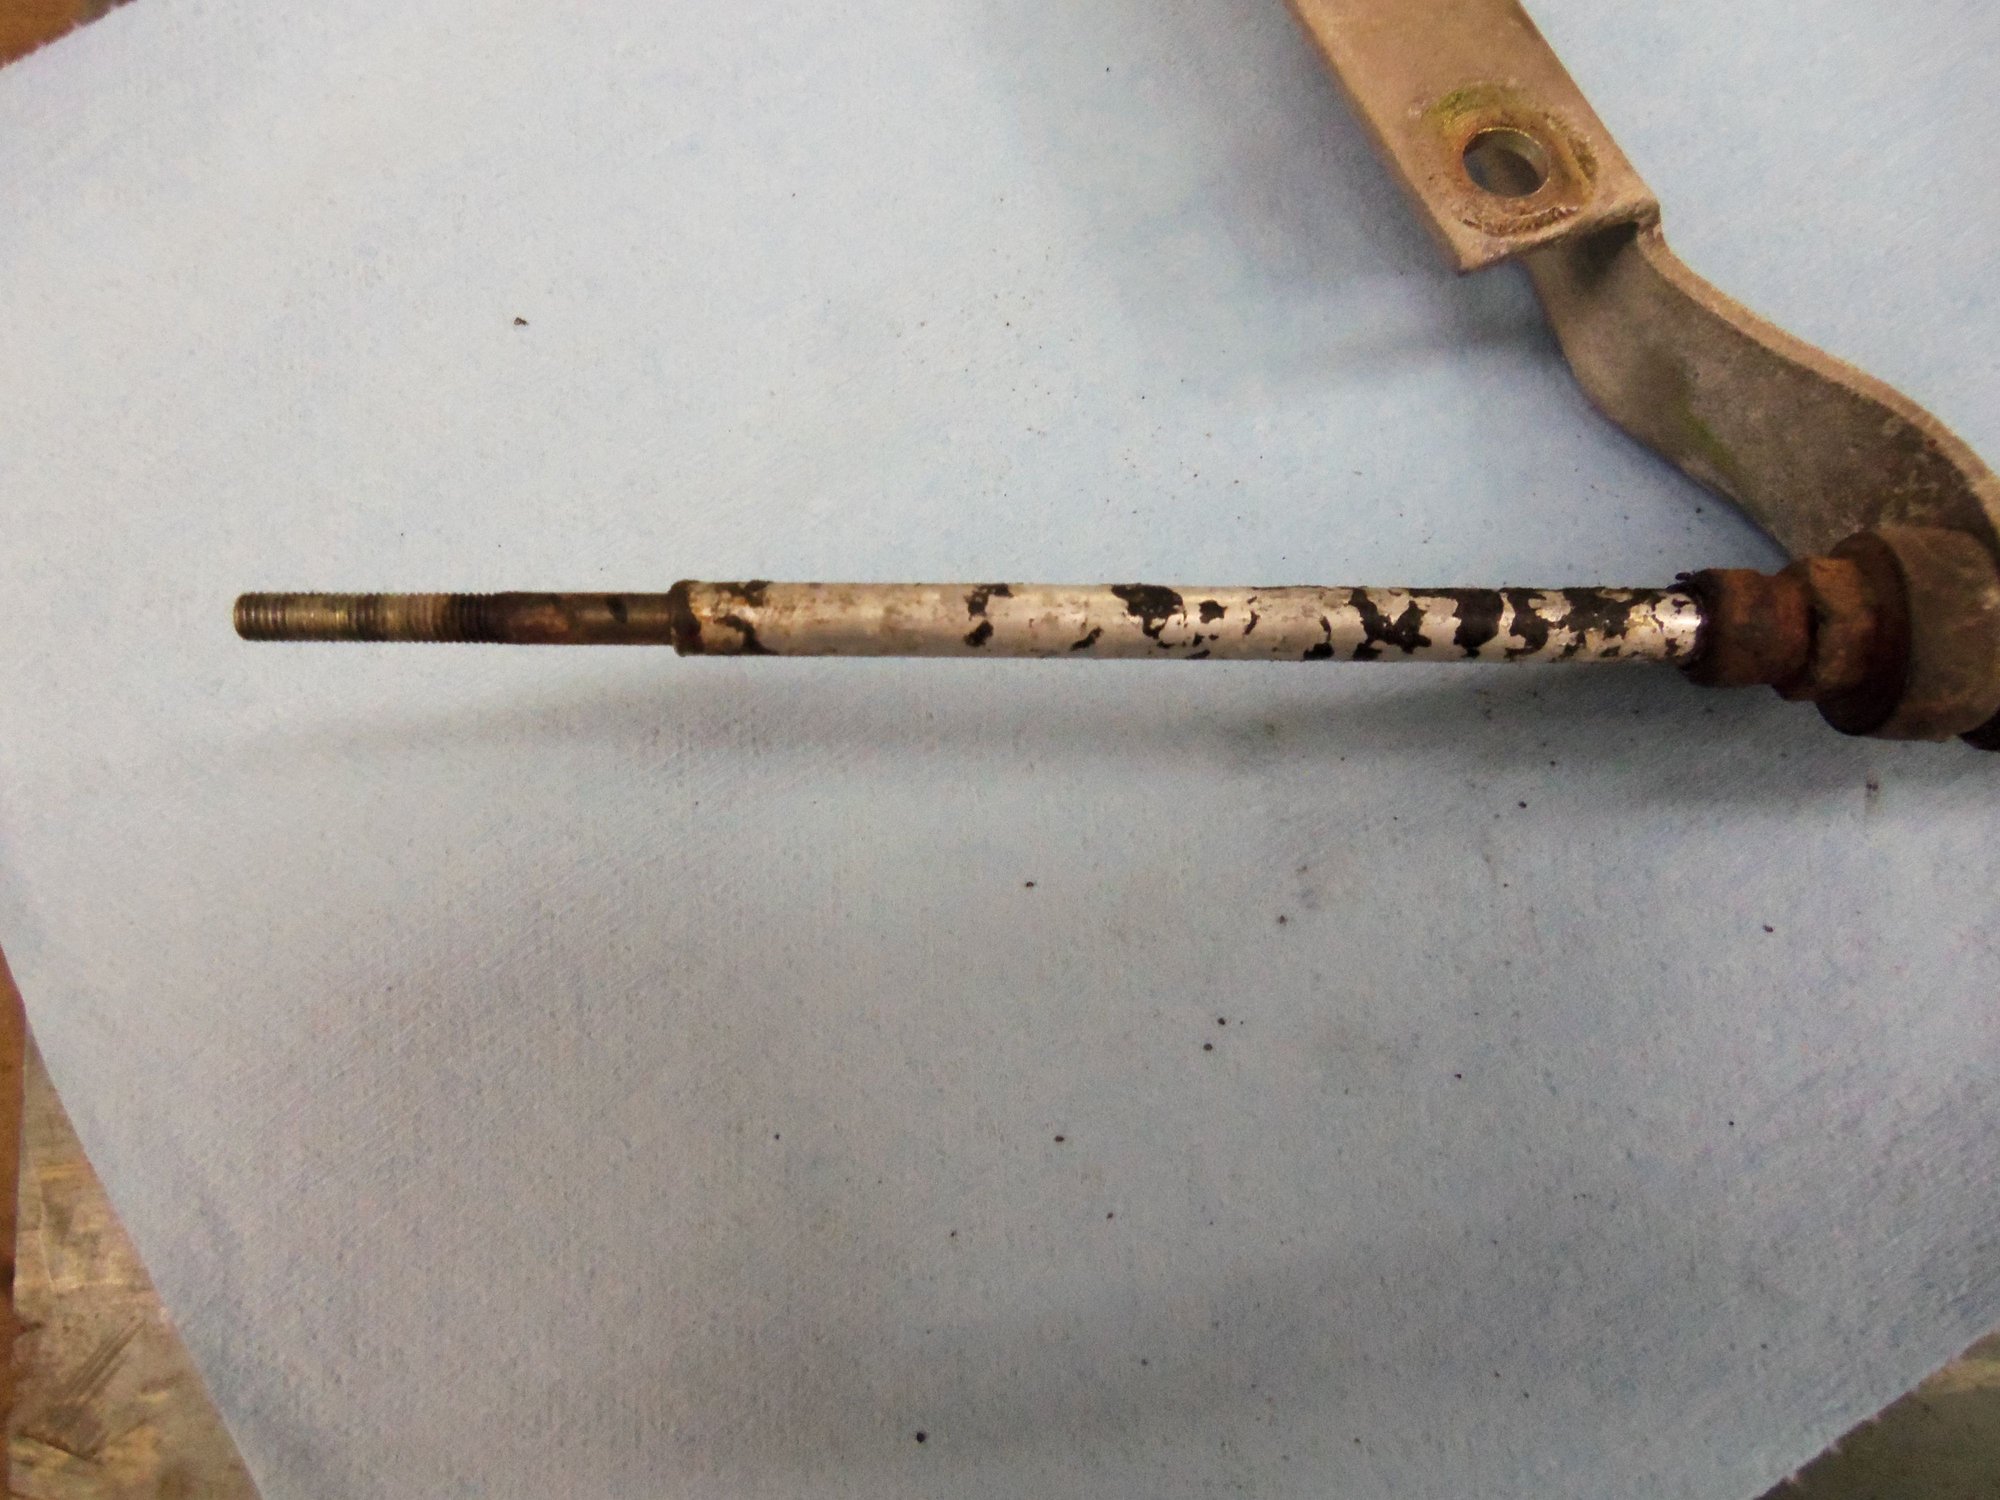
Transmission end of cable.
Shifter end of cable.
Assembled transmission end.
Assembled shifter end. Note tiny clip to secure rod onto shifter lever.
Nacho average cat!! Way to go Seth, Nice write up. Think I am going to change the boots on my shifting cable. Might have them shipped with my Speedo from Mark @ 928 intl. (Hope they reply soon). Going to go through the same thing over the holidays. Putting super bearings and super clamp in along with converter bearings, and seals in rear end.


 10-14-2017, 11:52 PM