When you click on links to various merchants on this site and make a purchase, this can result in this site earning a commission. Affiliate programs and affiliations include, but are not limited to, the eBay Partner Network.
OK, maybe not "rebuilt". How'd you feel about re-manufactured? .
The TT is very definitely more work on the 928 than the 944. I used a 6' all thread rod and some nuts & washers to pull the old bearings, what you've described seems much more complex. There's a certain level of mechanical genius in this description. Well done.
Eh...maybe. "Remanufactured" gives me too much credit.
Otto, next time I do a 928 torque tube, I AM using the long threaded rod technique. If nothing else it would be a more controlled effort. Especially for installing all the bearings and damper.
Thank you! I try to write my posts to keep the reader somewhat interested. I try to keep them from getting too 'dry.'
Nice and detailed write up, will be of help to others going forward.
I know this has been a back and forth topic, but the vibration dampener is not needed when using the Super Bearings. However, one can also look at it as a "belt and suspender" approach to make doubly sure there will be no harmonic vibration problems with the torque tube going forward.
That the front Super Bearing moved slightly to 9" is no problem. It is still well within the range of keeping the front of the drive shaft from vibrating under operation.
Joking aside, you've really addressed issues throughout the thread that have stymied me in the past. Thank for showing the trade offs along with your thought process!
Nice and detailed write up, will be of help to others going forward.
I know this has been a back and forth topic, but the vibration dampener is not needed when using the Super Bearings. However, one can also look at it as a "belt and suspender" approach to make doubly sure there will be no harmonic vibration problems with the torque tube going forward.
That the front Super Bearing moved slightly to 9" is no problem. It is still well within the range of keeping the front of the drive shaft from vibrating under operation.
Good luck with the rest of the build!
Cheers.
Thank you, Constantine! I am glad to hear you chime in. I was preparing an e-mail to send you during business hours on Monday detailing the mistake I made. I am relieved to hear that the front bearing will not be an issue. Thank you for your confidence. I understand about the vibration damper. An unintended benefit of me taking far too long to work on my 928 is that I have had plenty of time to think about what I am doing. I have researched the damper and noted numerous facts, opinions, discoveries, etc... It was my own personal decision to put the damper back in. However, let me reiterate: if it were not for 928 International's recently released rubber isolators, I would have in no way shape or form considered putting the damper back in.
I am glad that I now have pretty much as bullet-proof a 928 torque tube as can be had.
Originally Posted by Landseer
Inspirational work Seth.
Or are you really Dwayne?
Joking aside, you've really addressed issues throughout the thread that have stymied me in the past. Thank for showing the trade offs along with your thought process!
Thank you, Chris! Nope, not Dwayne. However, like Dwayne, I am a commoner who is trying to do things right, and leave a mark for others to follow. I try to show all my steps AND mistakes so others don't have to make them.
Originally Posted by SeanR
I'm going to start sending transmissions to you man.
Do it. I think I finally have my mojo back. However, you might have to get in line. I think some of the Buckeye Landsharks crew want me to work on their automatics...
I started today thinking it would be a quick job. In preparation for reinstalling the transmission under the Red Witch, I installed the NOS 928 Specialists performance rear anti-sway bar I bought last year.
I was wrong. It was not quick.
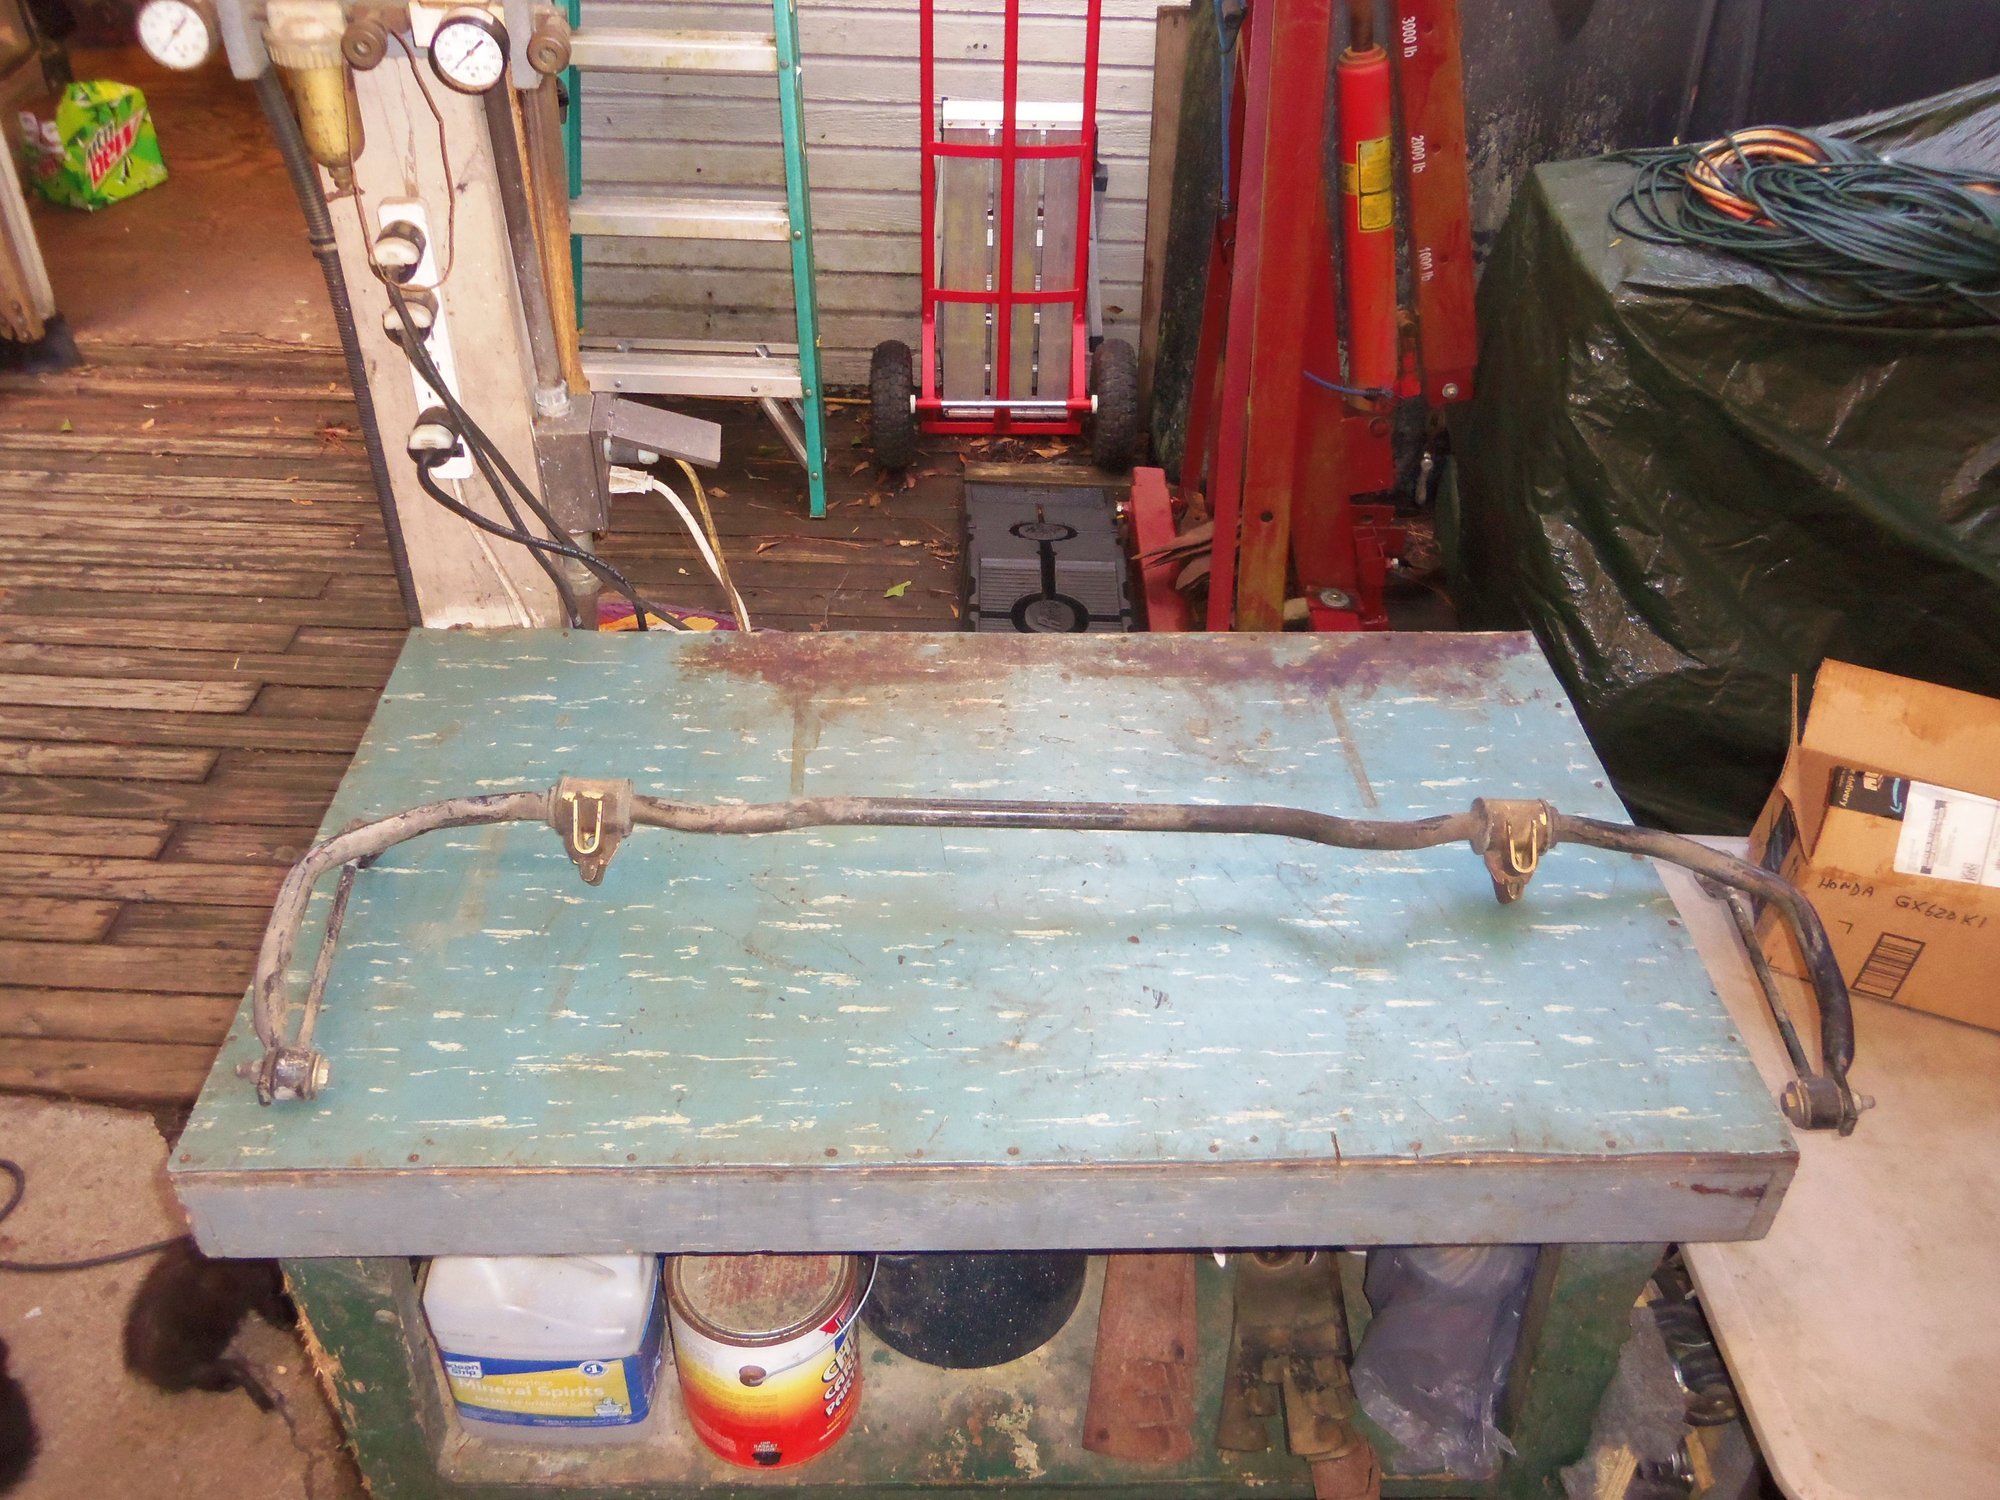
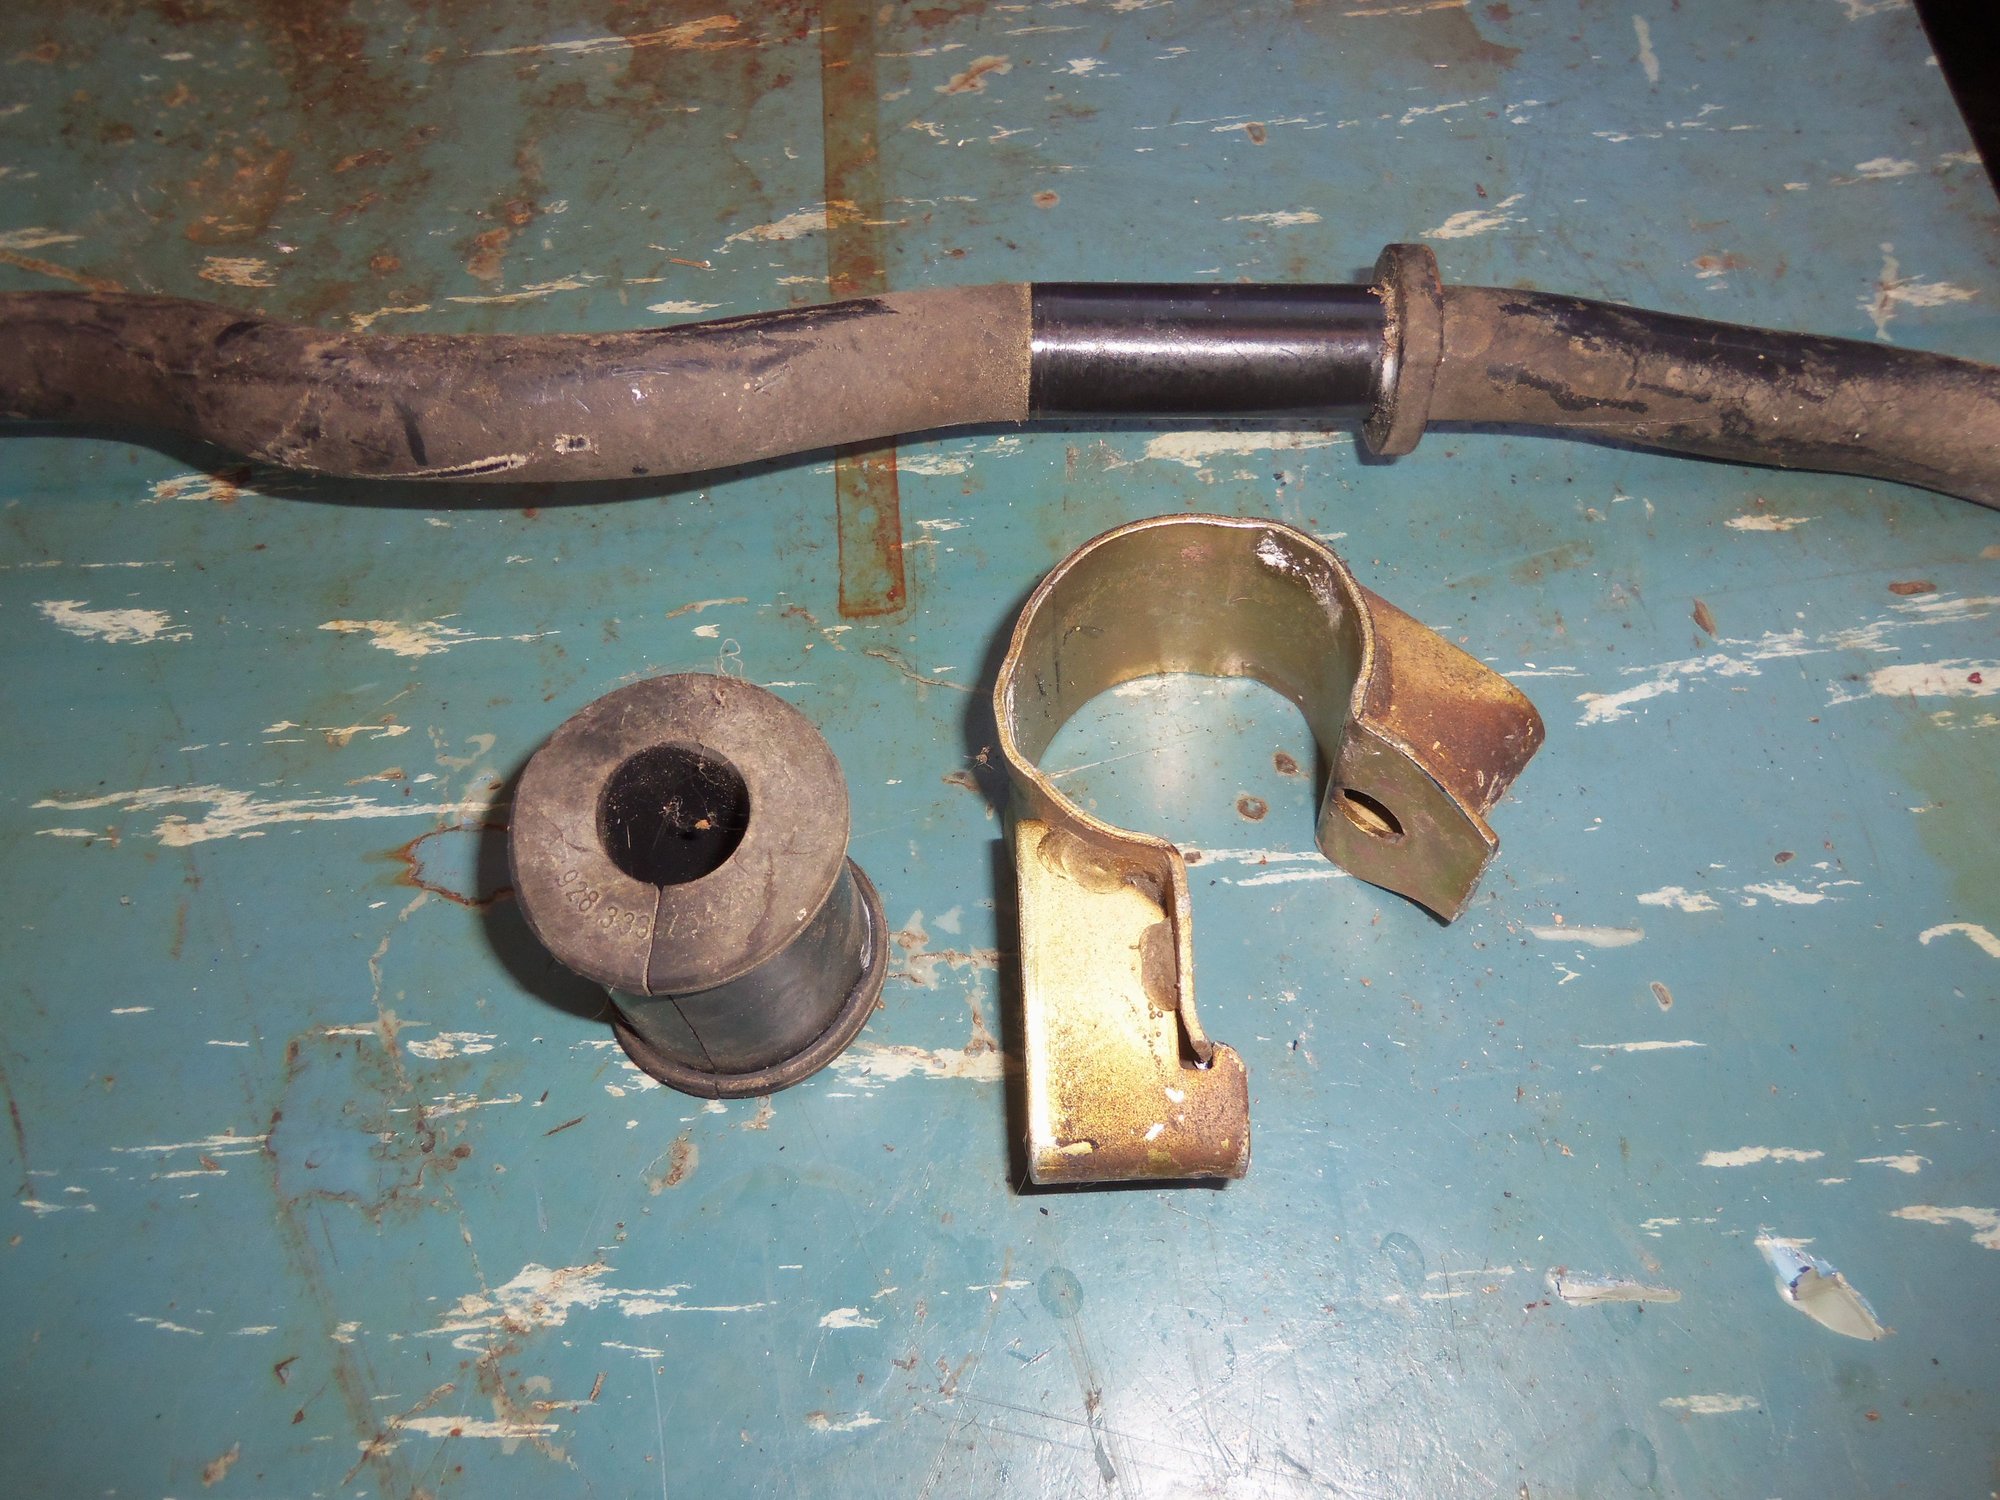
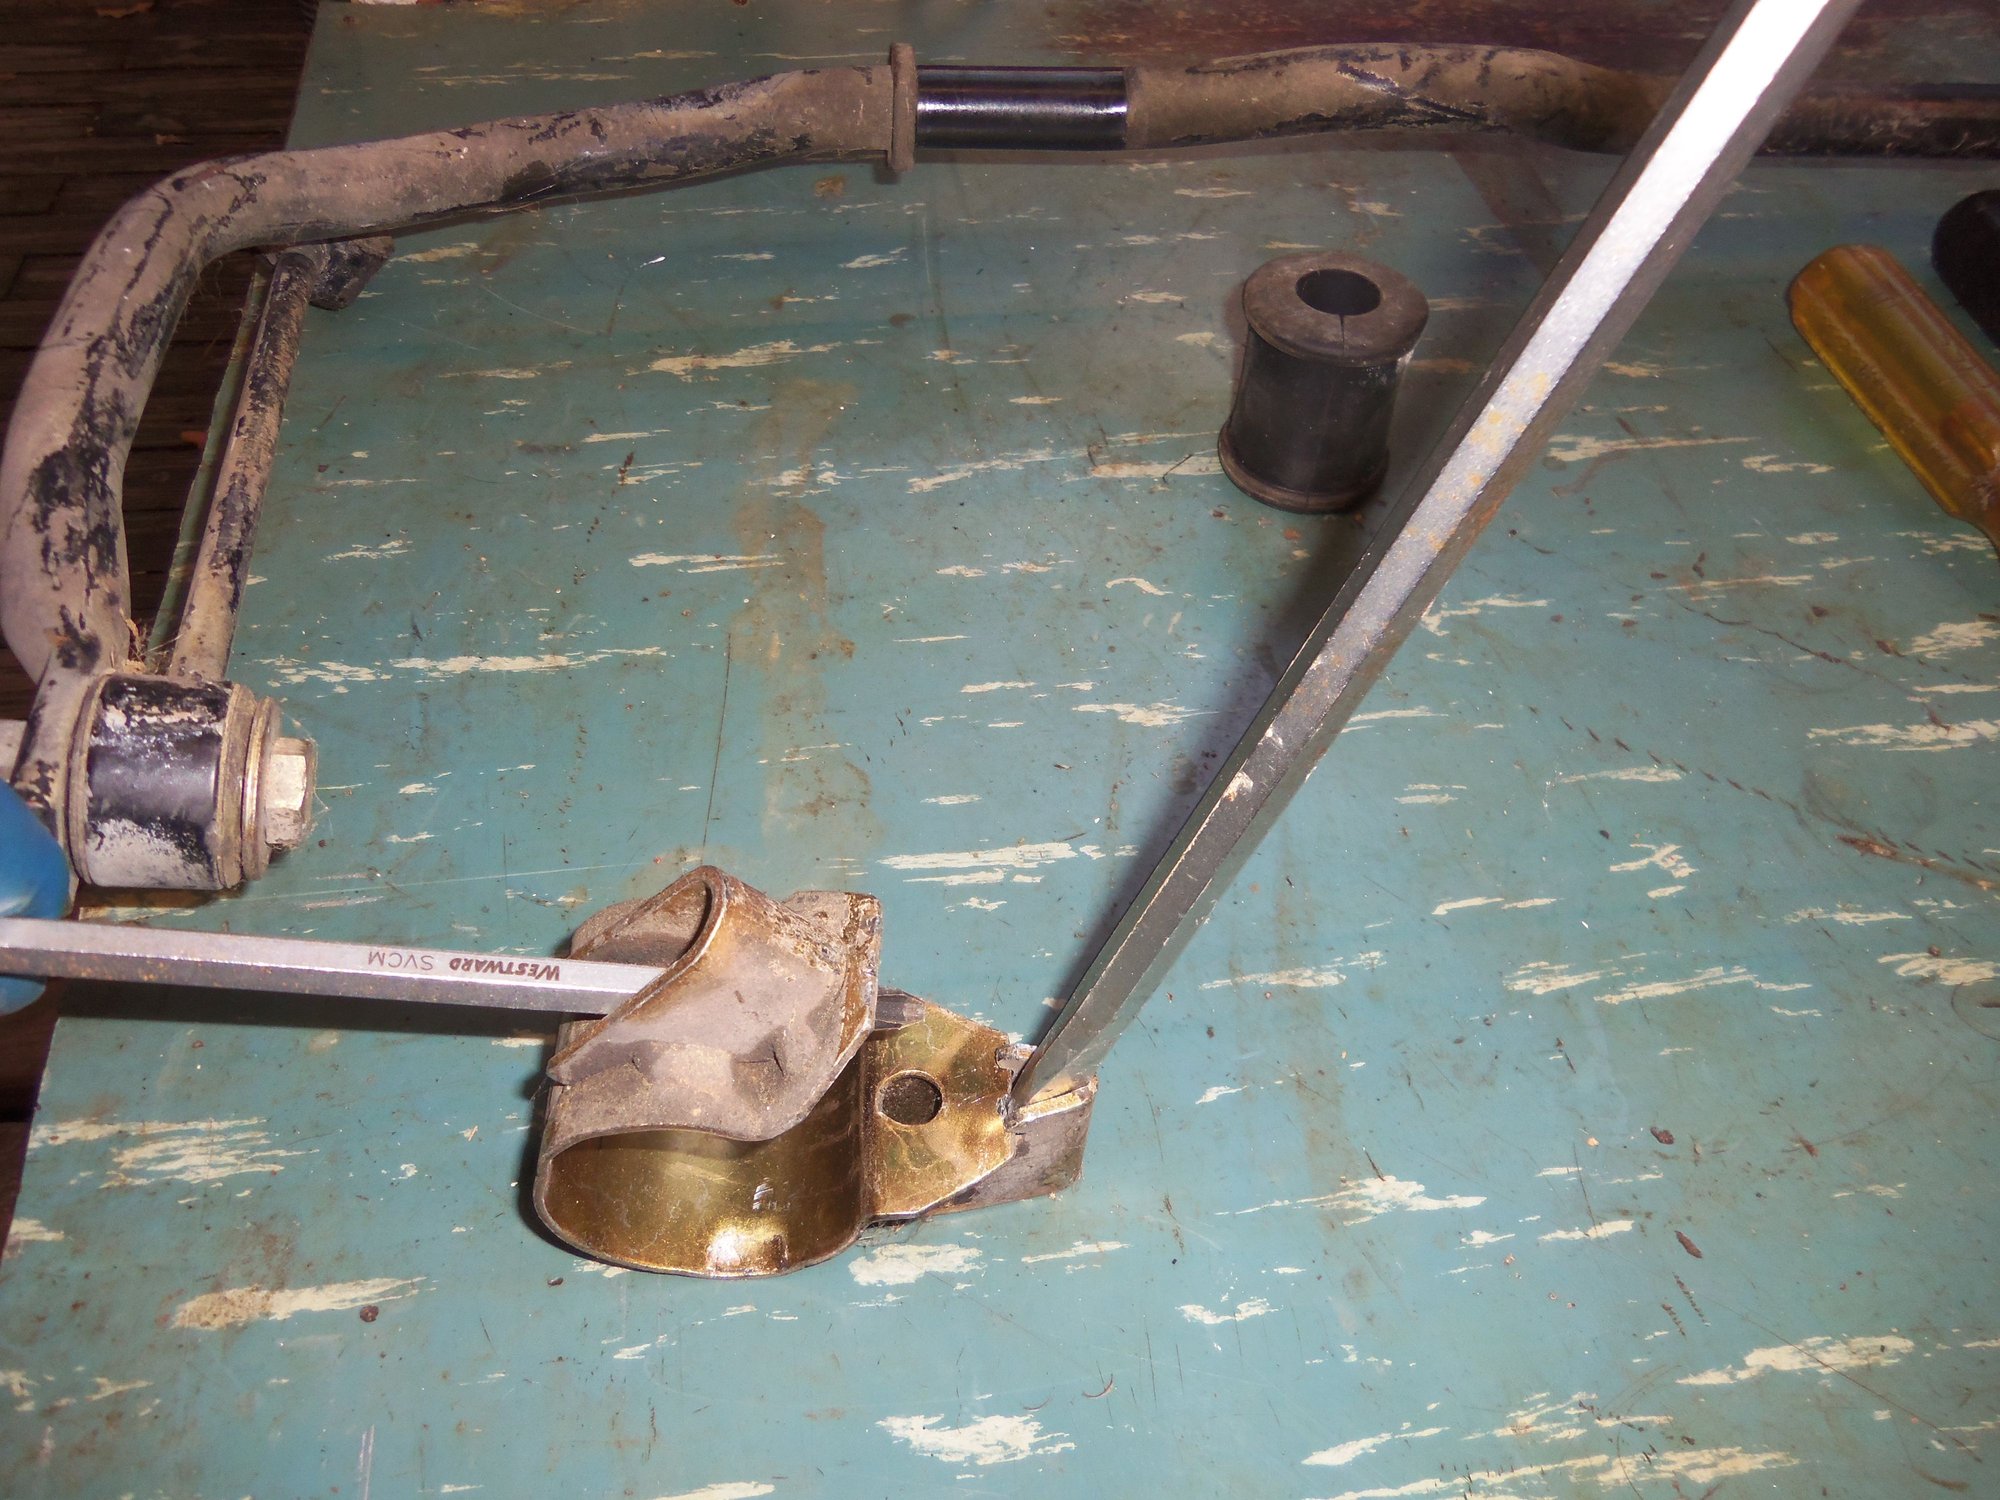
Last night, I took apart the rear anti-sway bar from the donor 1988 S4 rear suspension I have for the purpose of harvesting the bushing clamps. They are in relatively good condition and still plated. As opposed to the corroded mess that are the clamps on the Red Witch. Getting the clamps to release was a bit of a bitch. It took some samurai action with a pair of screw drivers to finally pry the latches apart. Once off, I found the bushings were surprisingly soft and pliable.
This morning, I removed the rear bar from under the Red Witch. Mainly all I needed was the mounting bolts. I cleaned the mounting bolts and the donor clamps with a toothbrush and mineral spirits. Not spotless, but they will do.
I laid out all the parts for the 928 Specialists bar, then put most of them back away. I am only installing the bar right now. I will install the adjustable drop links later when the rear suspension is back together.
I lubricated the inside of the new bushings with Energy Suspension poly bushing grease. I have several tubes onhand from various bushing install jobs I have done over the years. Good, sticky stuff.I put the bushings on the new bar and then started what I thought would be the simple process of relatching the bushing clamps.
Sucker...
The instructions mentioned using a large C-clamp to compress the bushing clamp. Yes, it will do that. Too bad it doesn't get the metal lip to latch under the hook. It took me two hours of fighting, cursing, violencing, and general mayhem to get both clamps to latch. Prybars, screwdrivers, a vise, a C-clamp, a large set of adjustable pliers, a long bolt, and new curse words were involved. And the pretty plating is no longer so pristine on the clamps.
With that fiasco out of the way, it was relatively simple to install the sway bar under the Red Witch. The mounting bolts had pink antiseize on them, so I put gold Optimoly HT back on both the threads and the corroded shanks. I was lucky in that I more or less had the bushings positioned correctly. The mounting holes in the clamps lined up with the body, and the ends of the bar were almost identical on either side. I am not 100% happy with how the bushings 'squished and set' on the passenger's side clamp. I am hoping the bushing will migrate a bit and find a happy point after some miles of driving. I played hell getting the bushings to stay centered while compressing the clamps to latch.
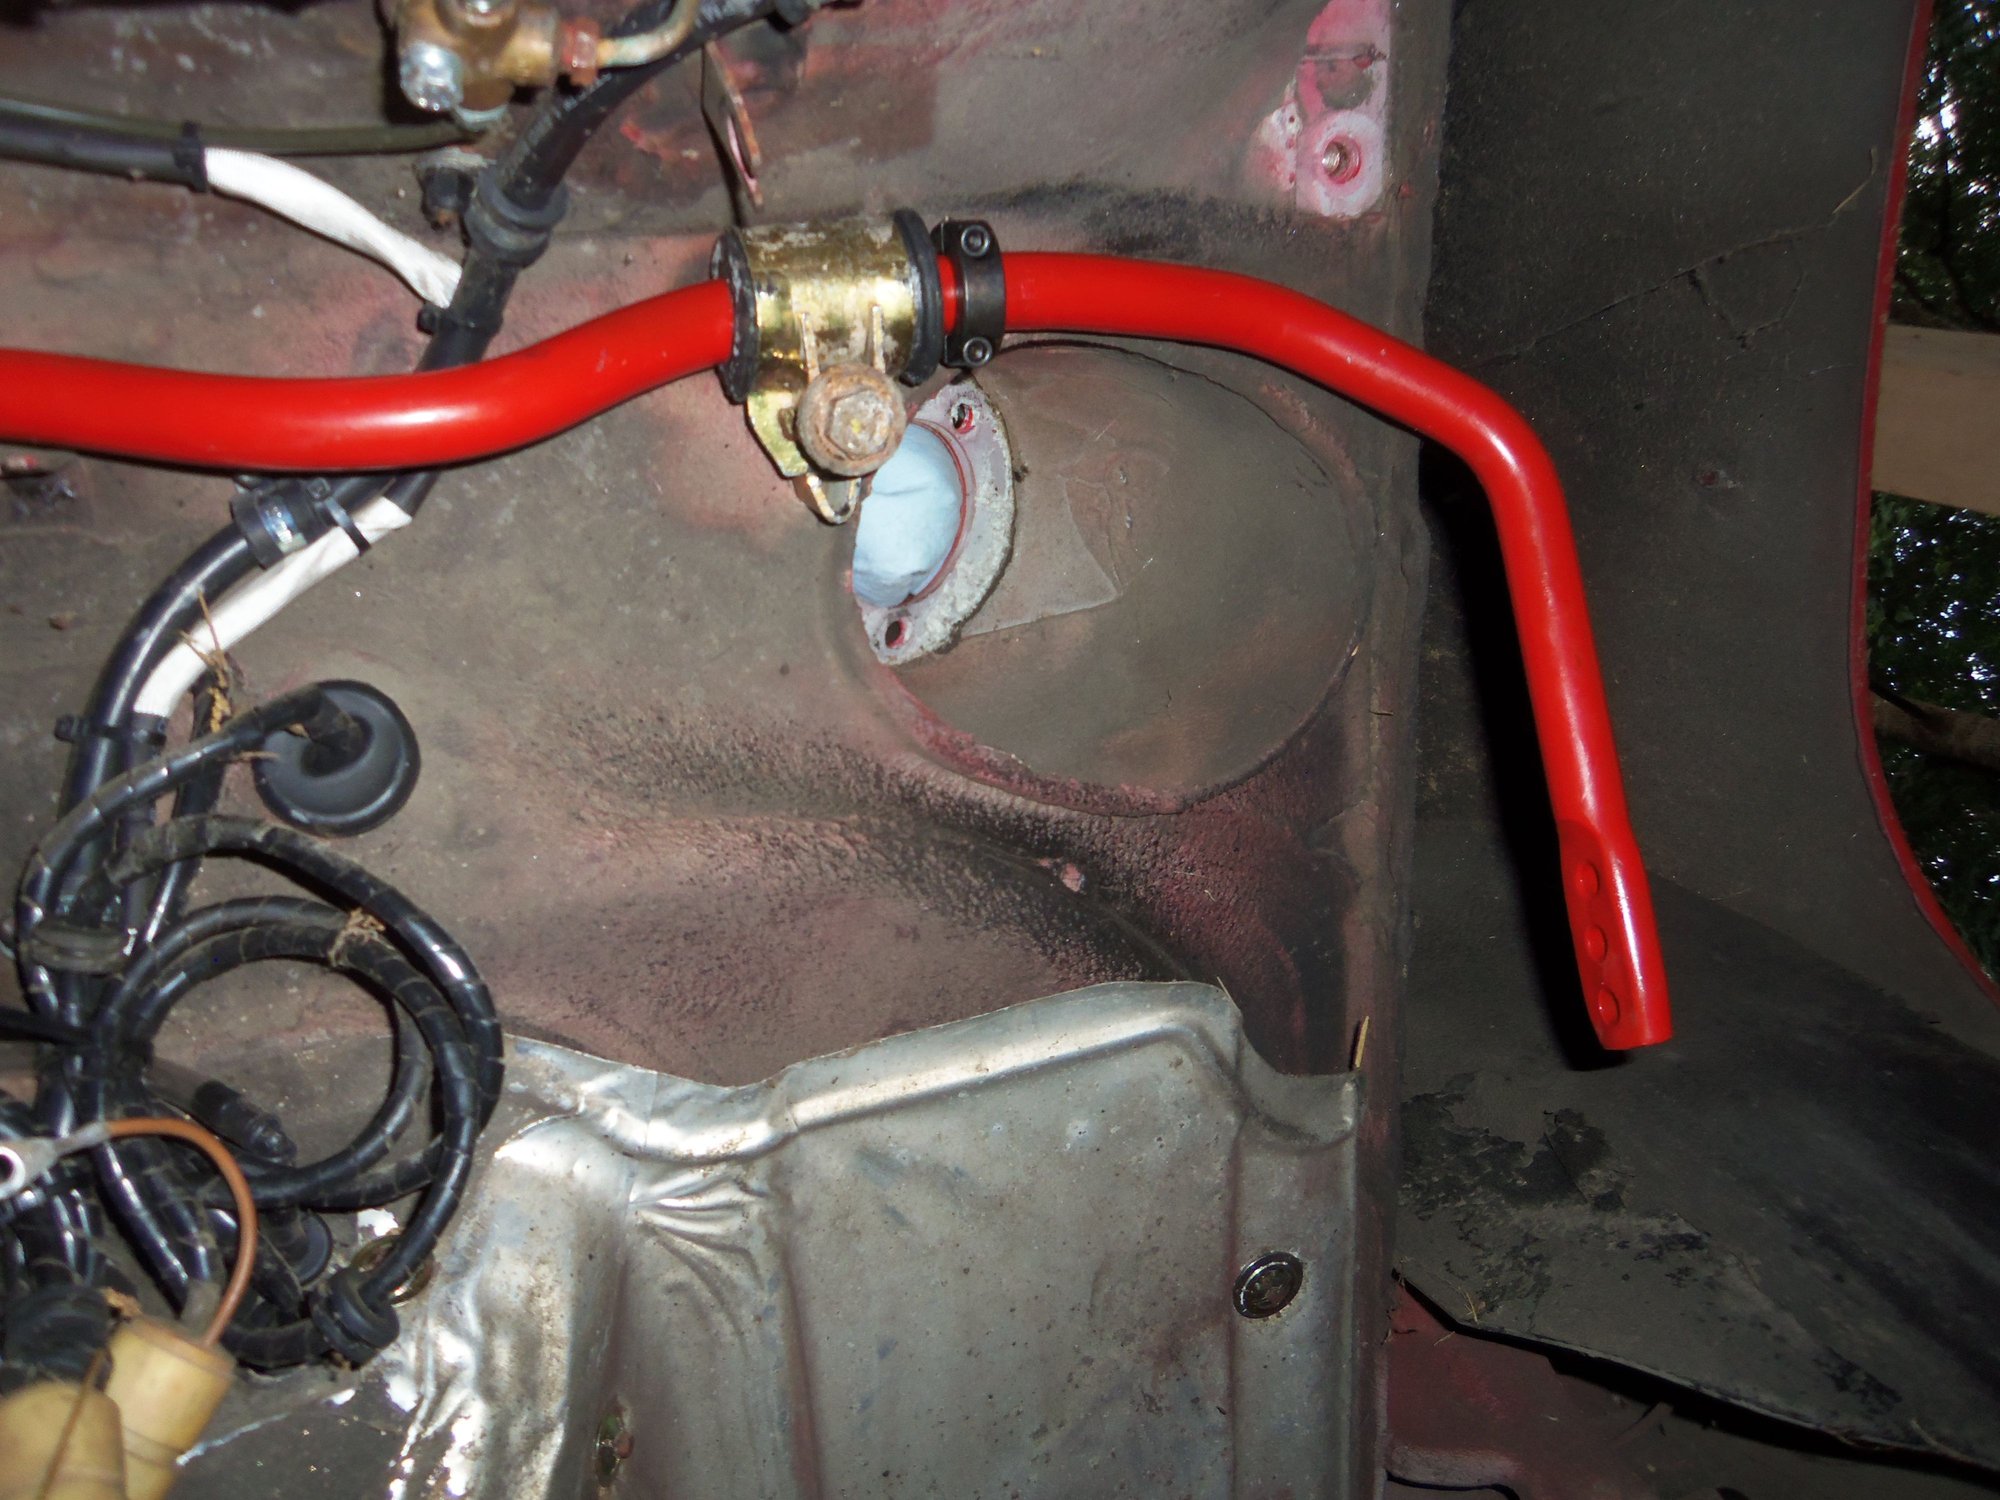
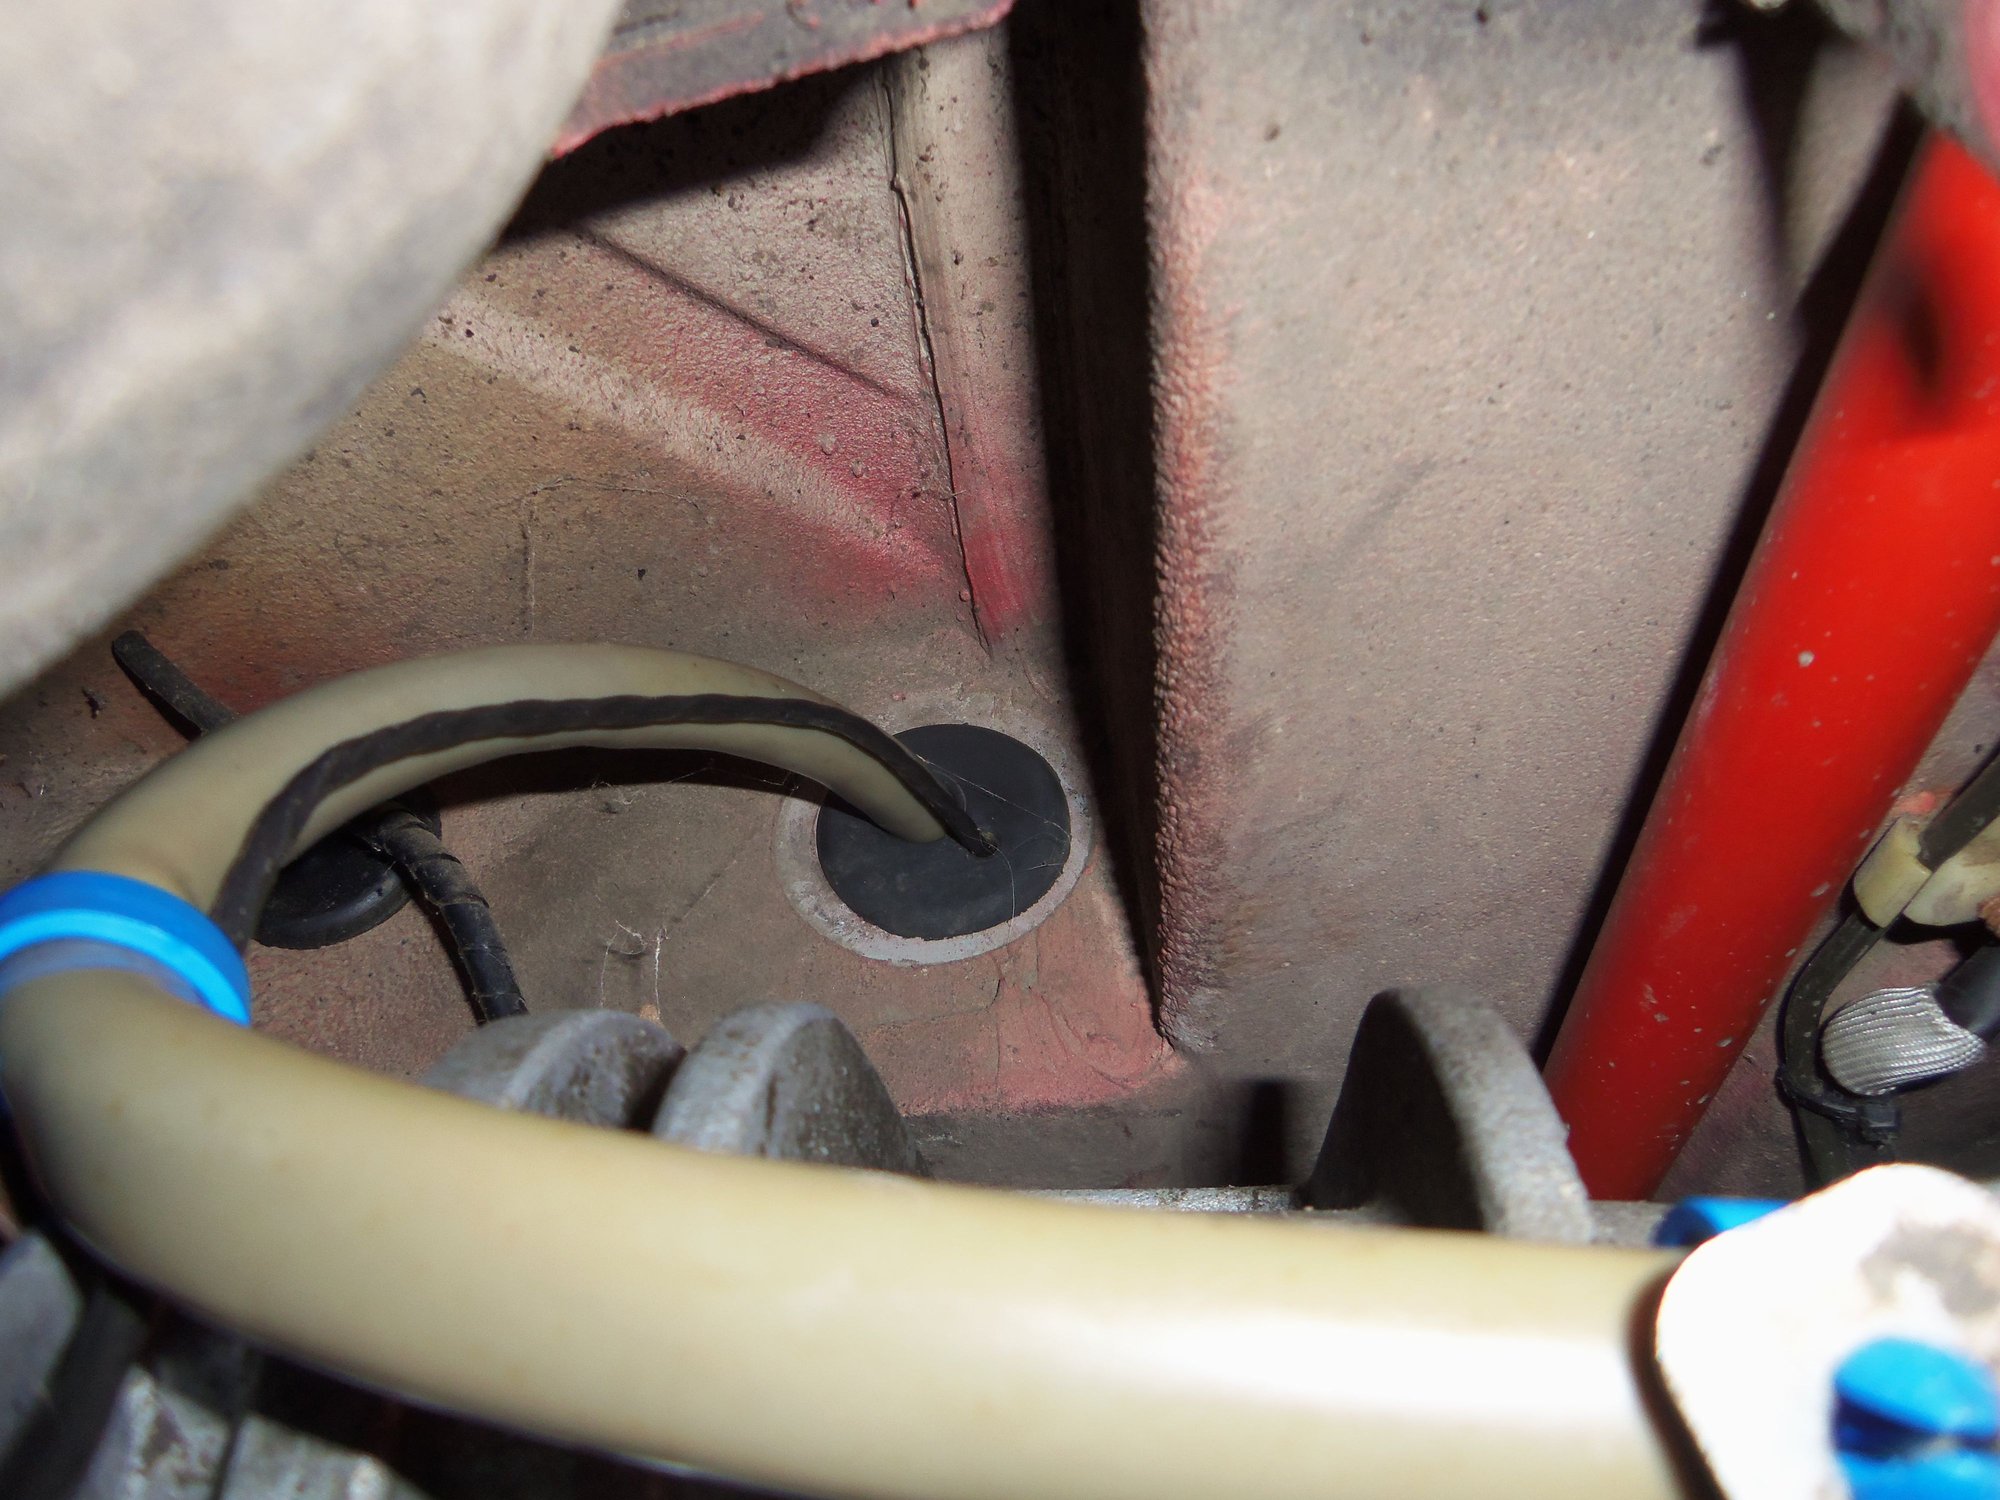
I installed the included locking collars, but left them a bit away from the bushings. I want to have some leeway to move the bar left or right as needed until I am happy with the location. I have been advised by those with experience to beware of interference with the passenger's side fuel tank cradle leg. The drop link hardware likes to rub on the cover for the fuel line and fuel pump wiring.
So, what should have been quick (in my mind) took most of the day. Oh well, its done!
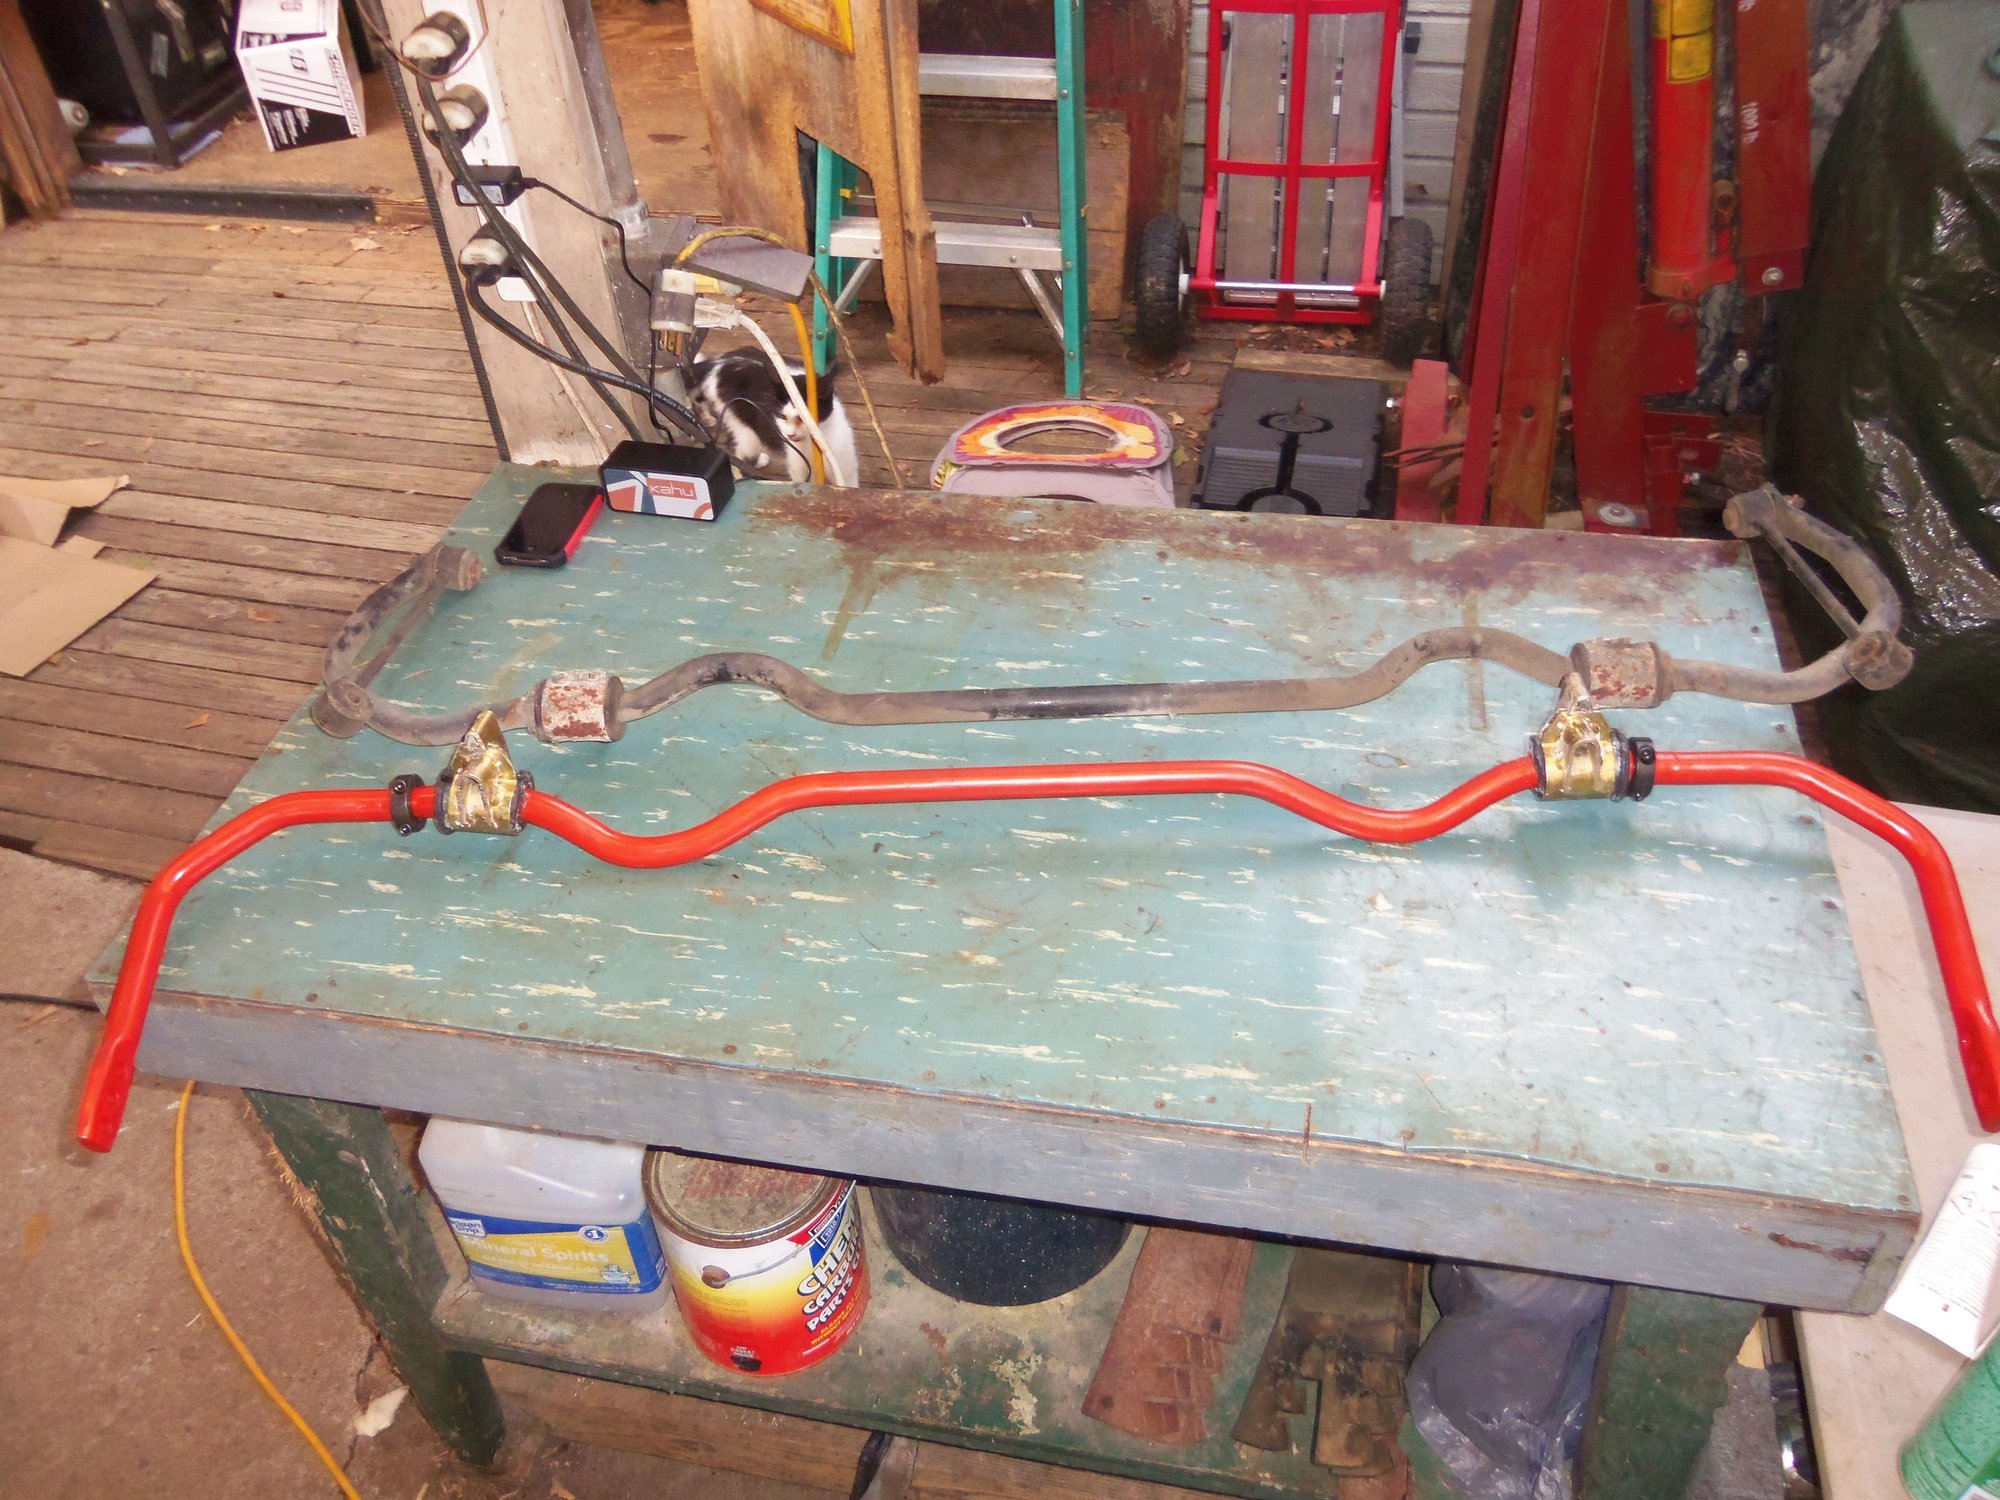
Stock rear anti-sway bar from 1988 S4.
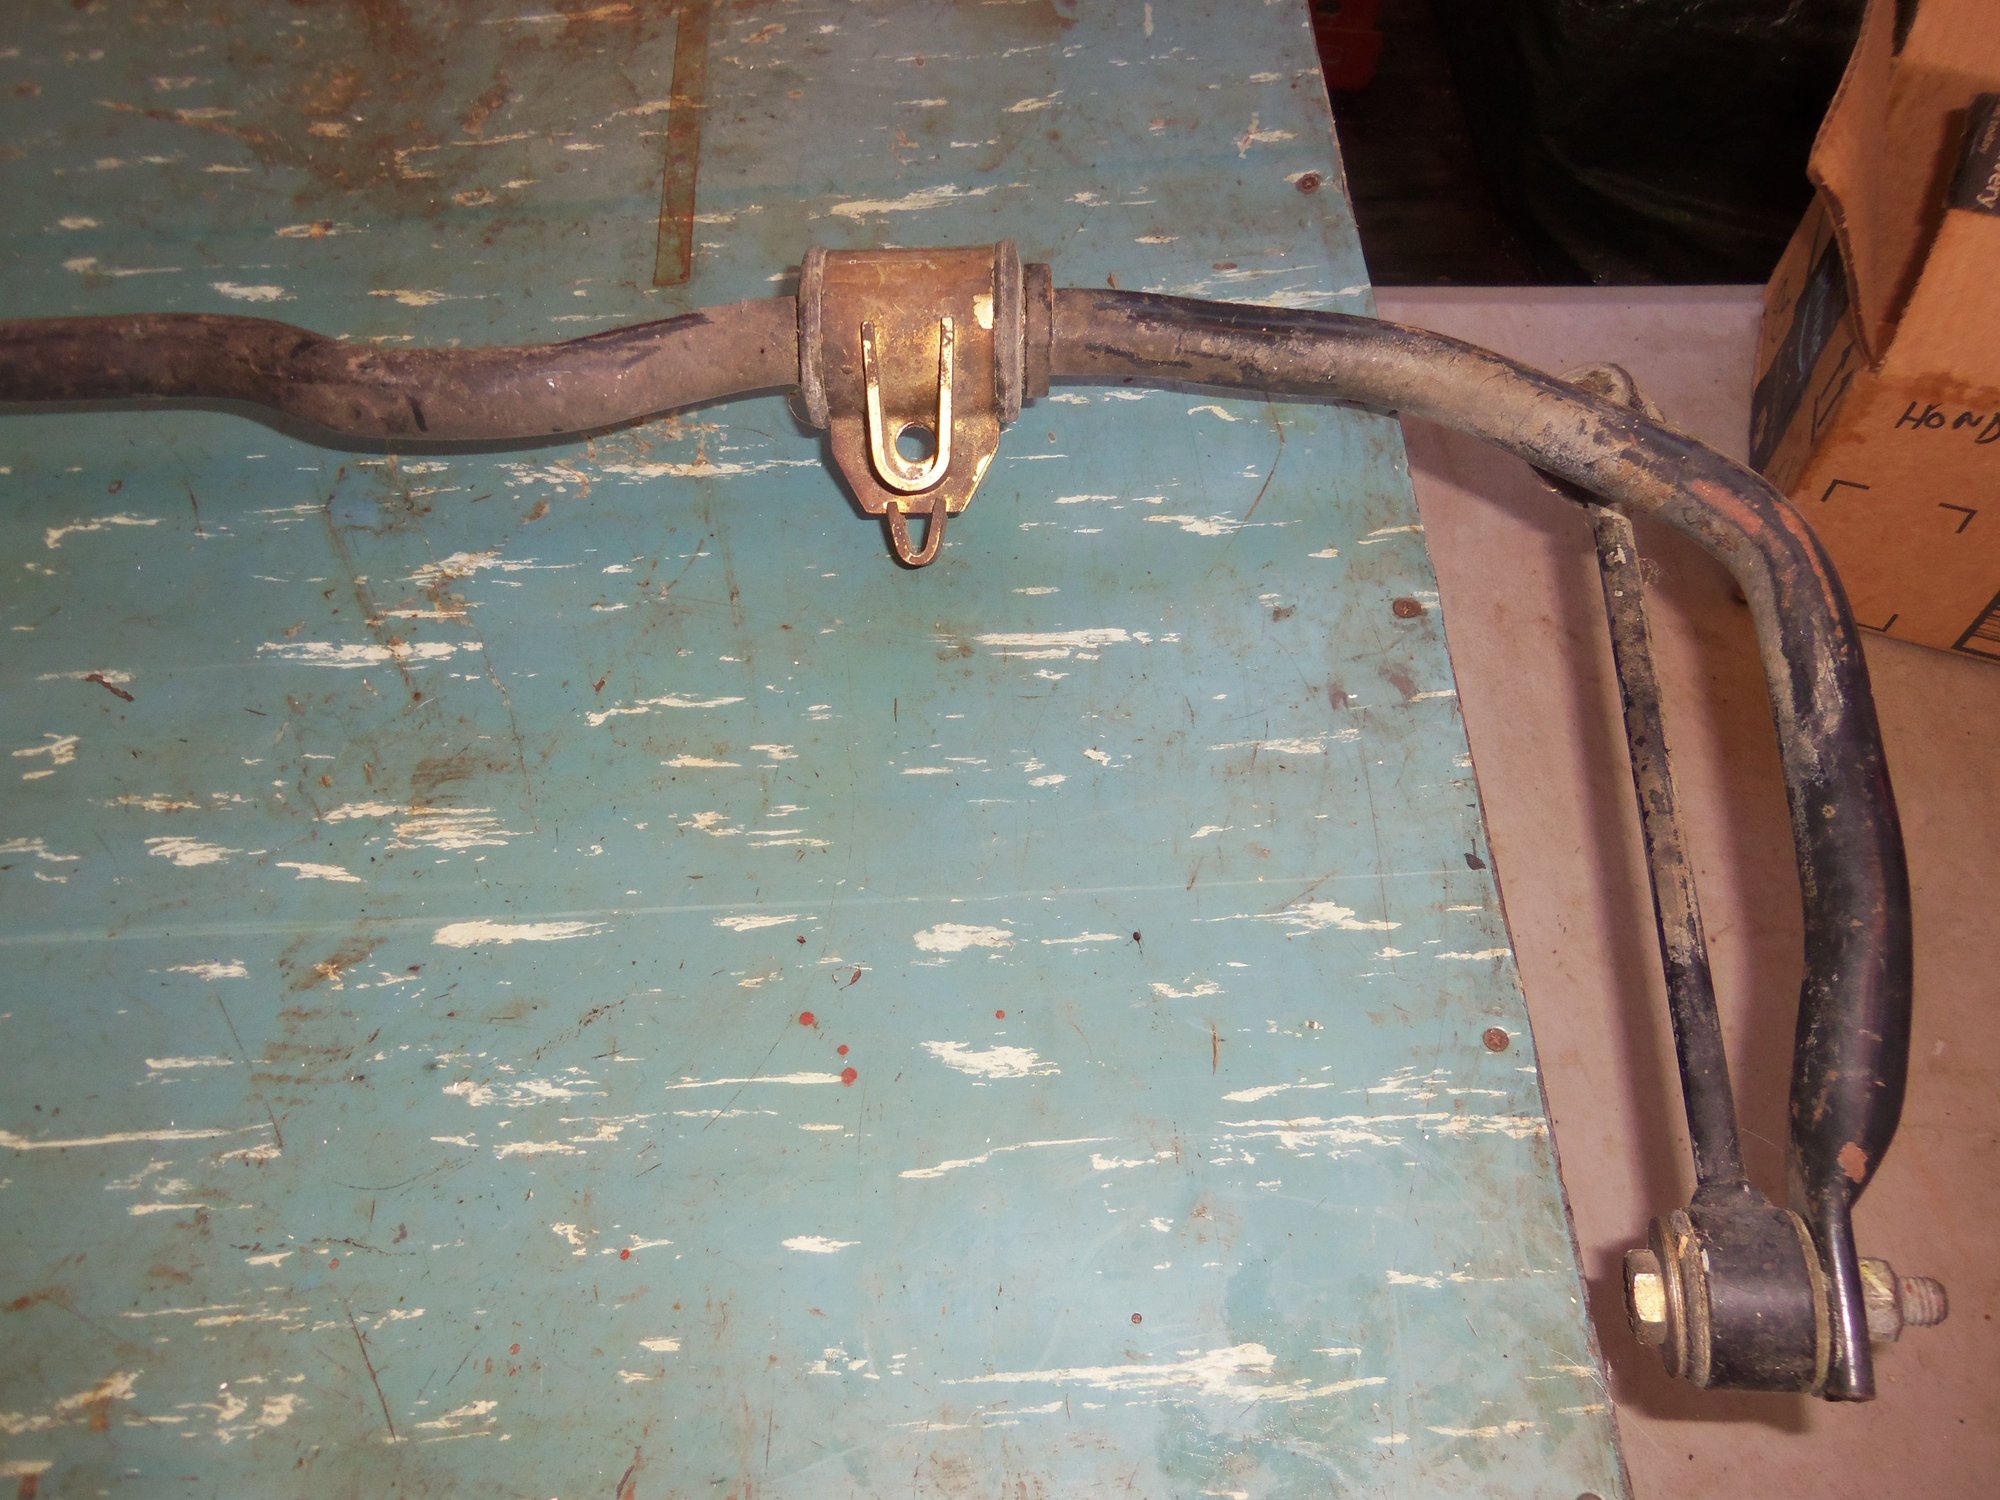
Bushing clamp and mounting bracket. The clamps are identical side to side.
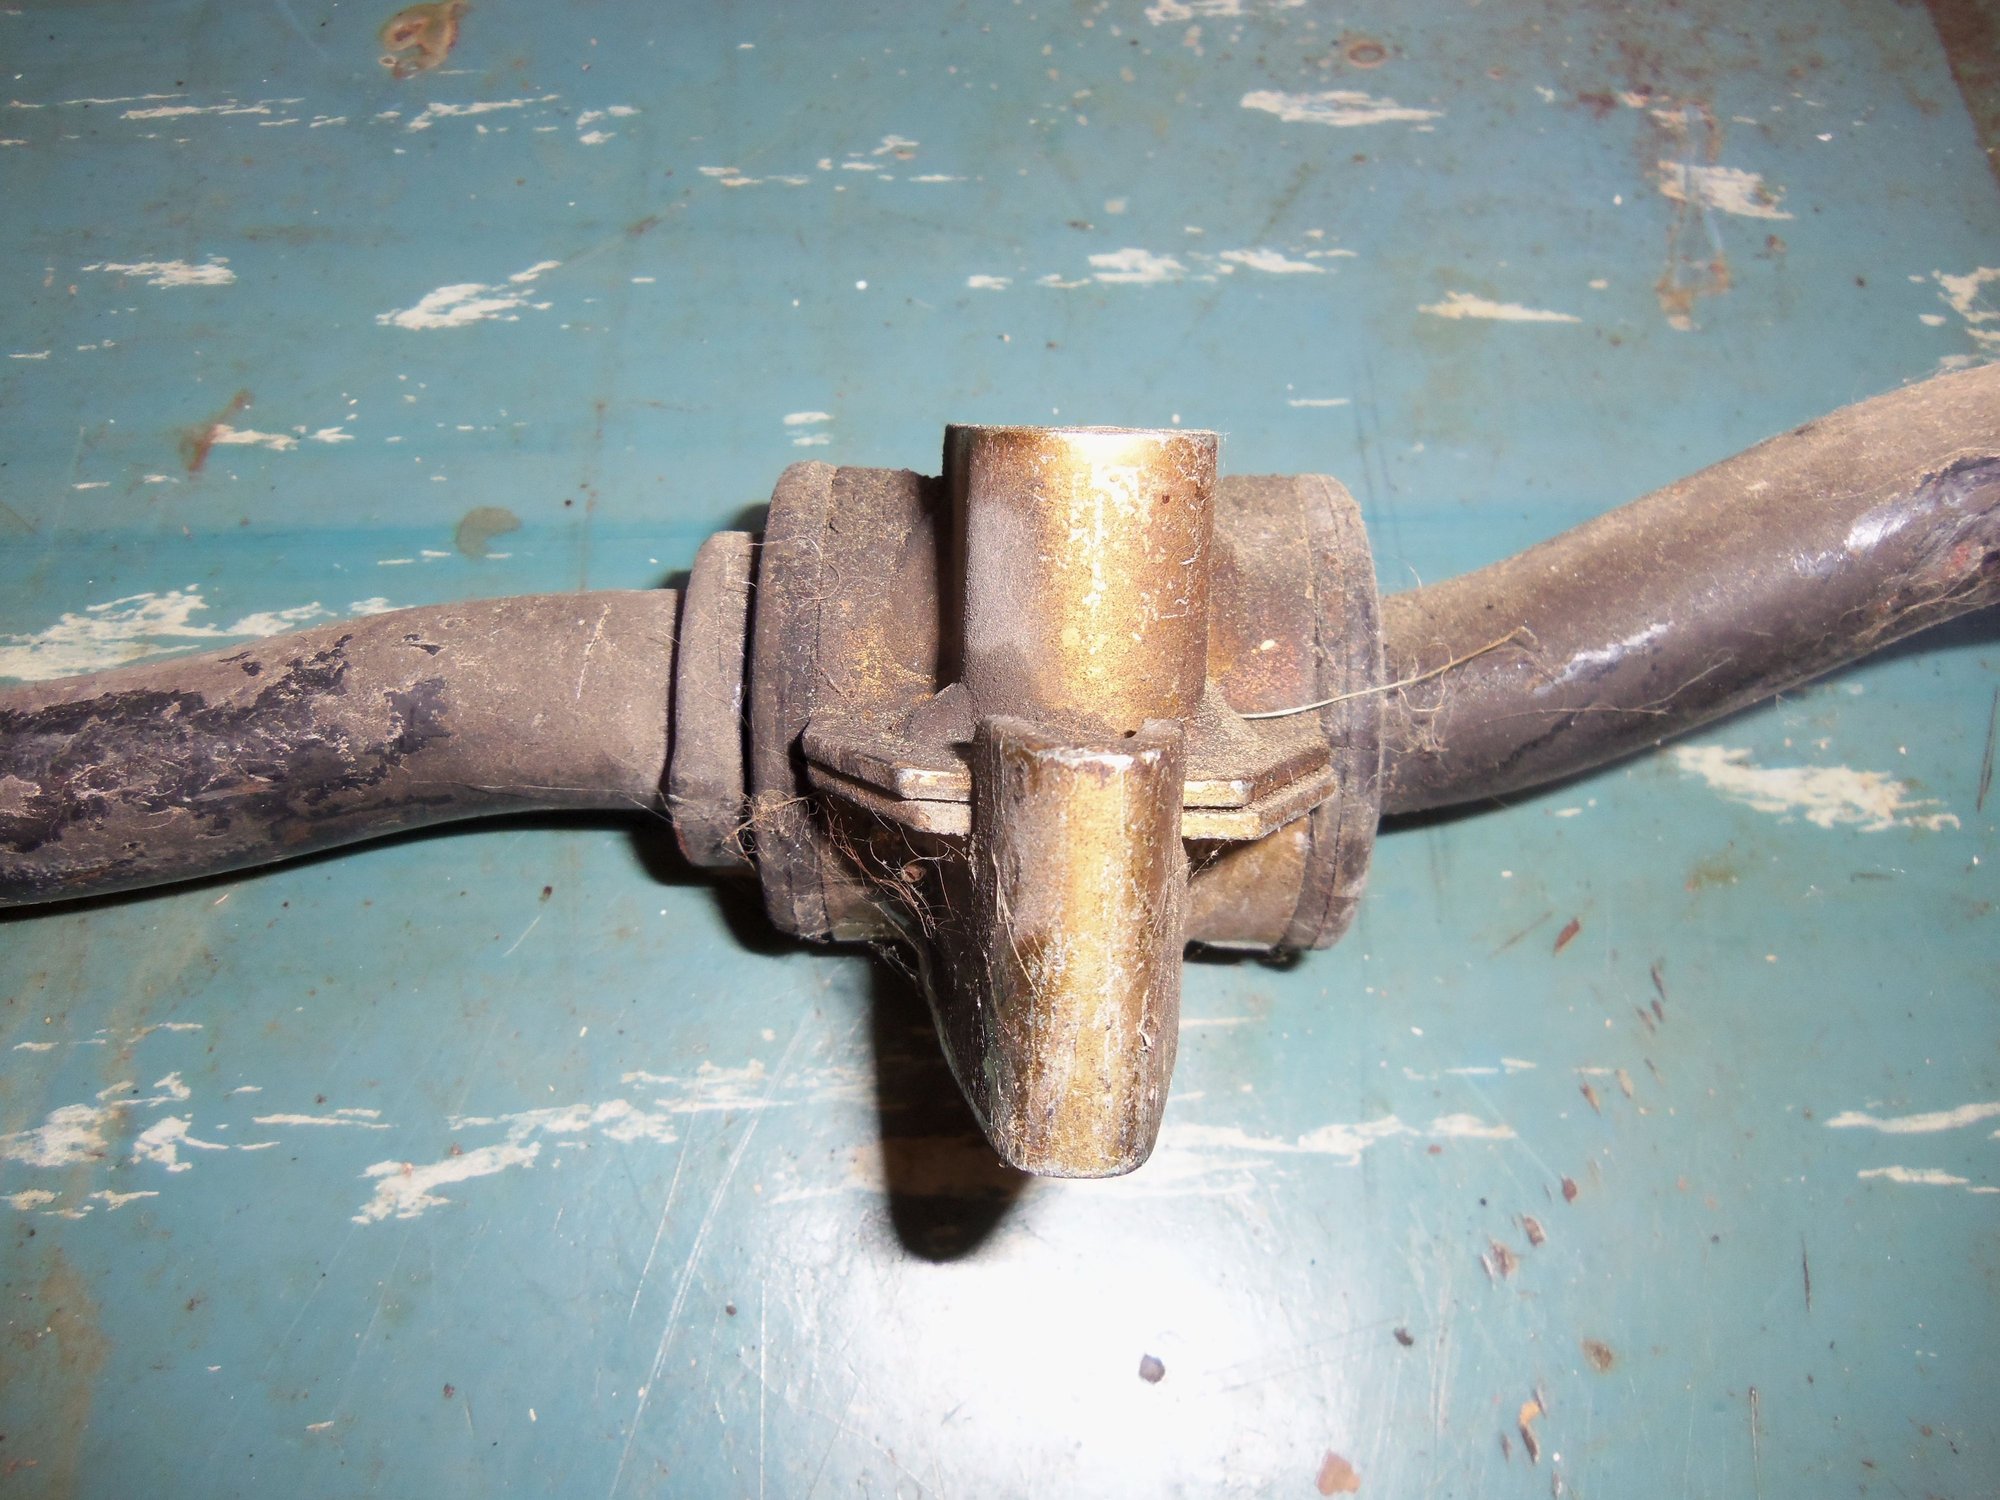
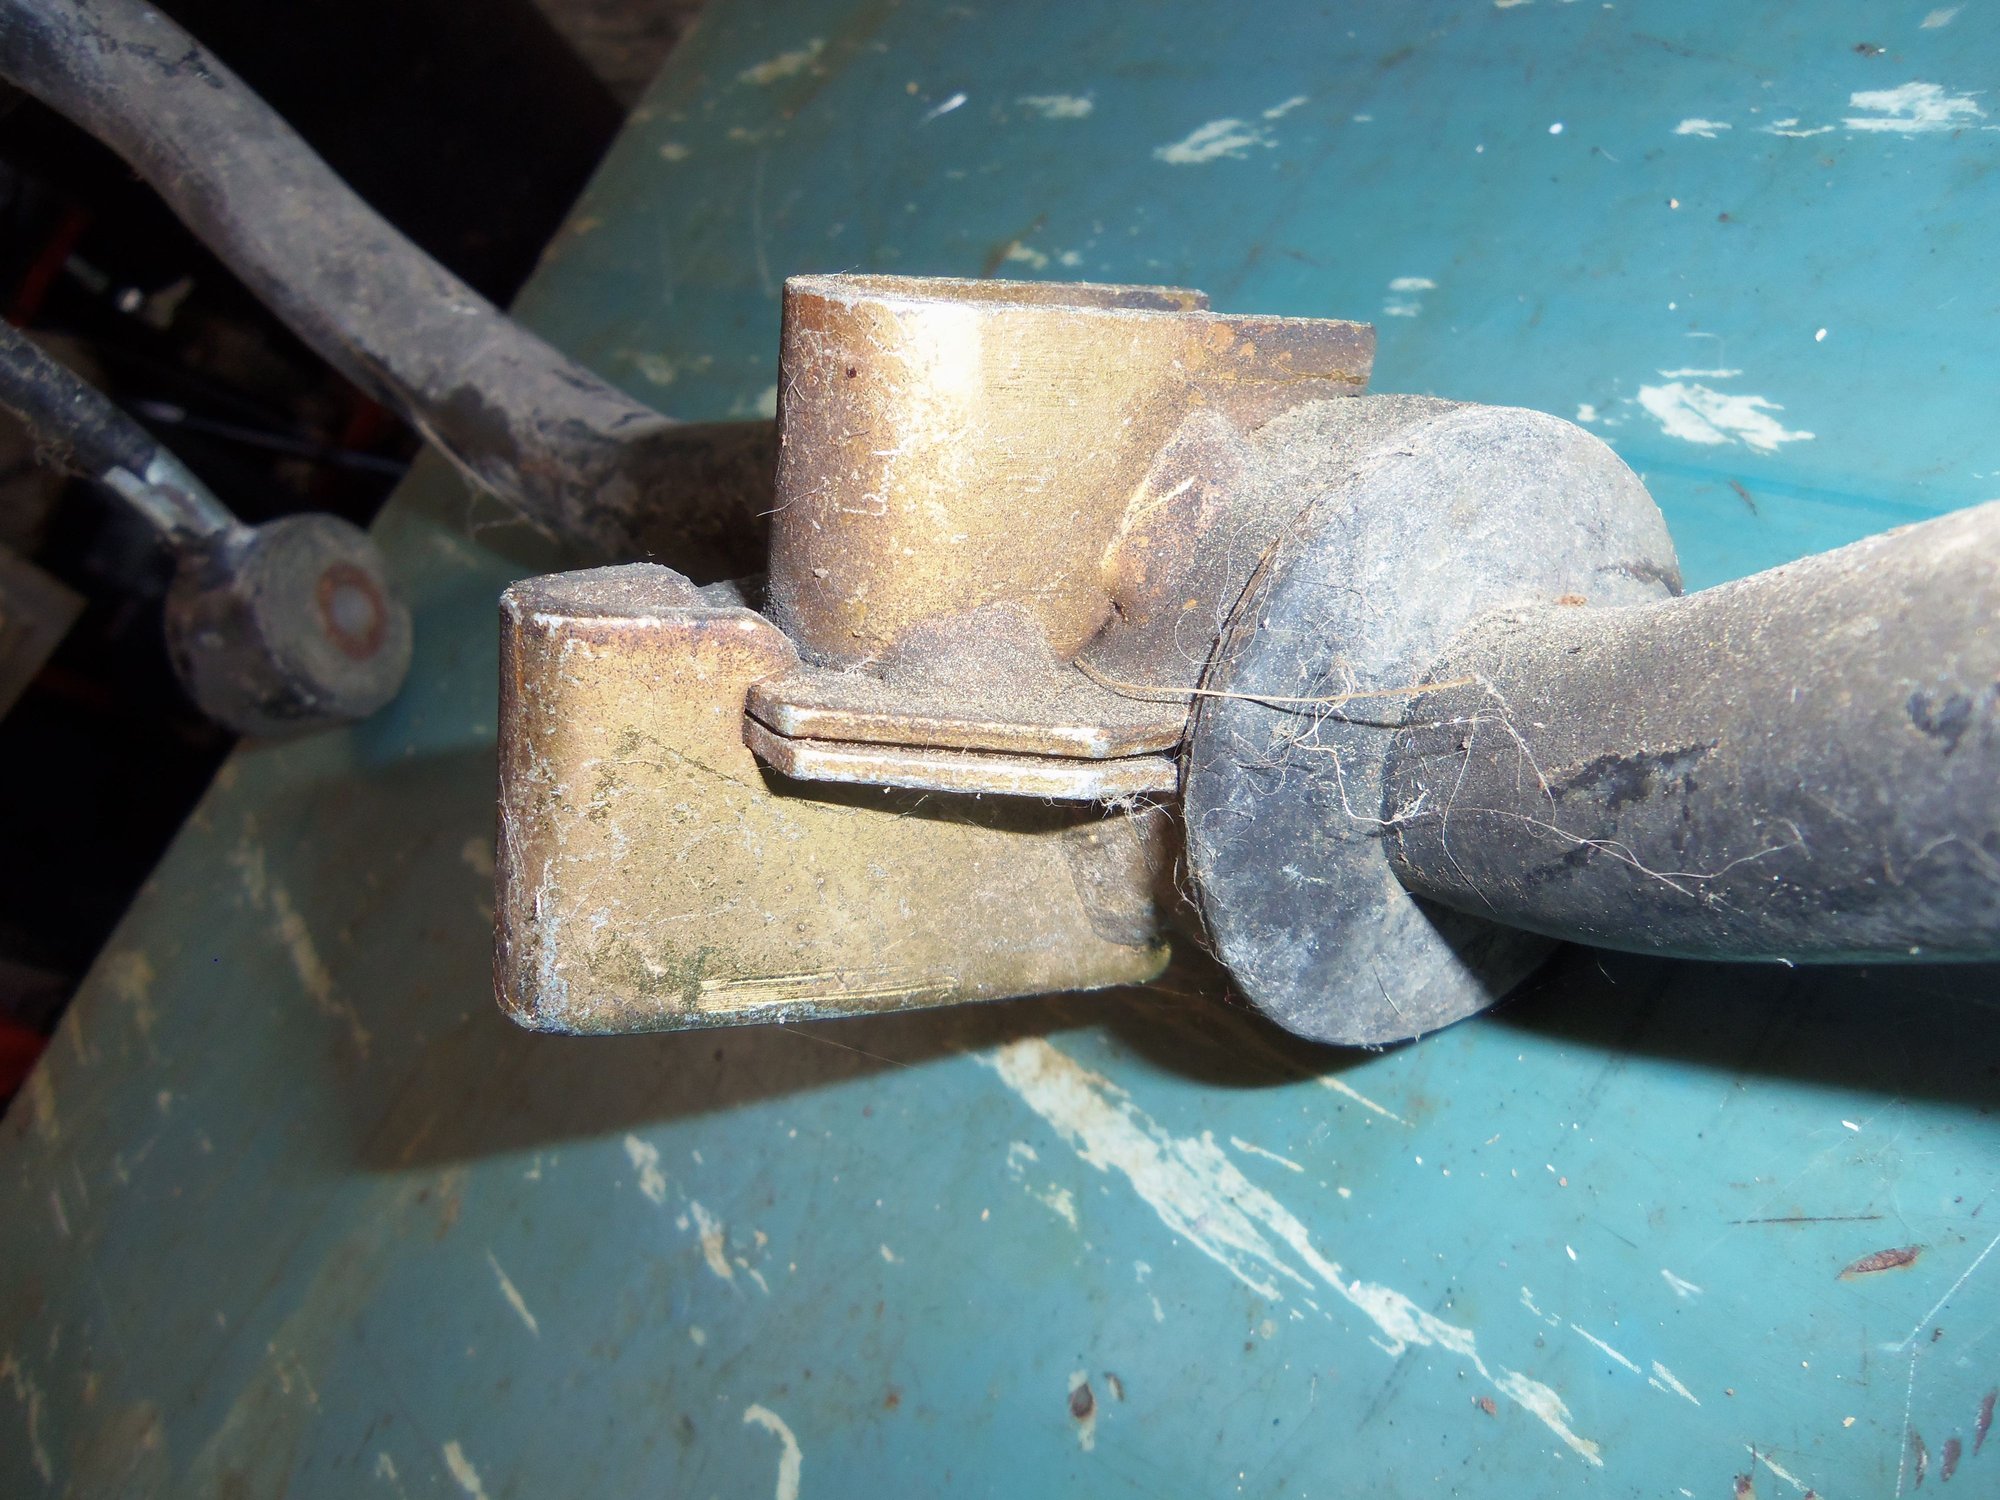
Note two metal lips that are captured under the clamp latch.
Better view. Have to pry it back to get it to separate.
Separated clamp and original bushing.
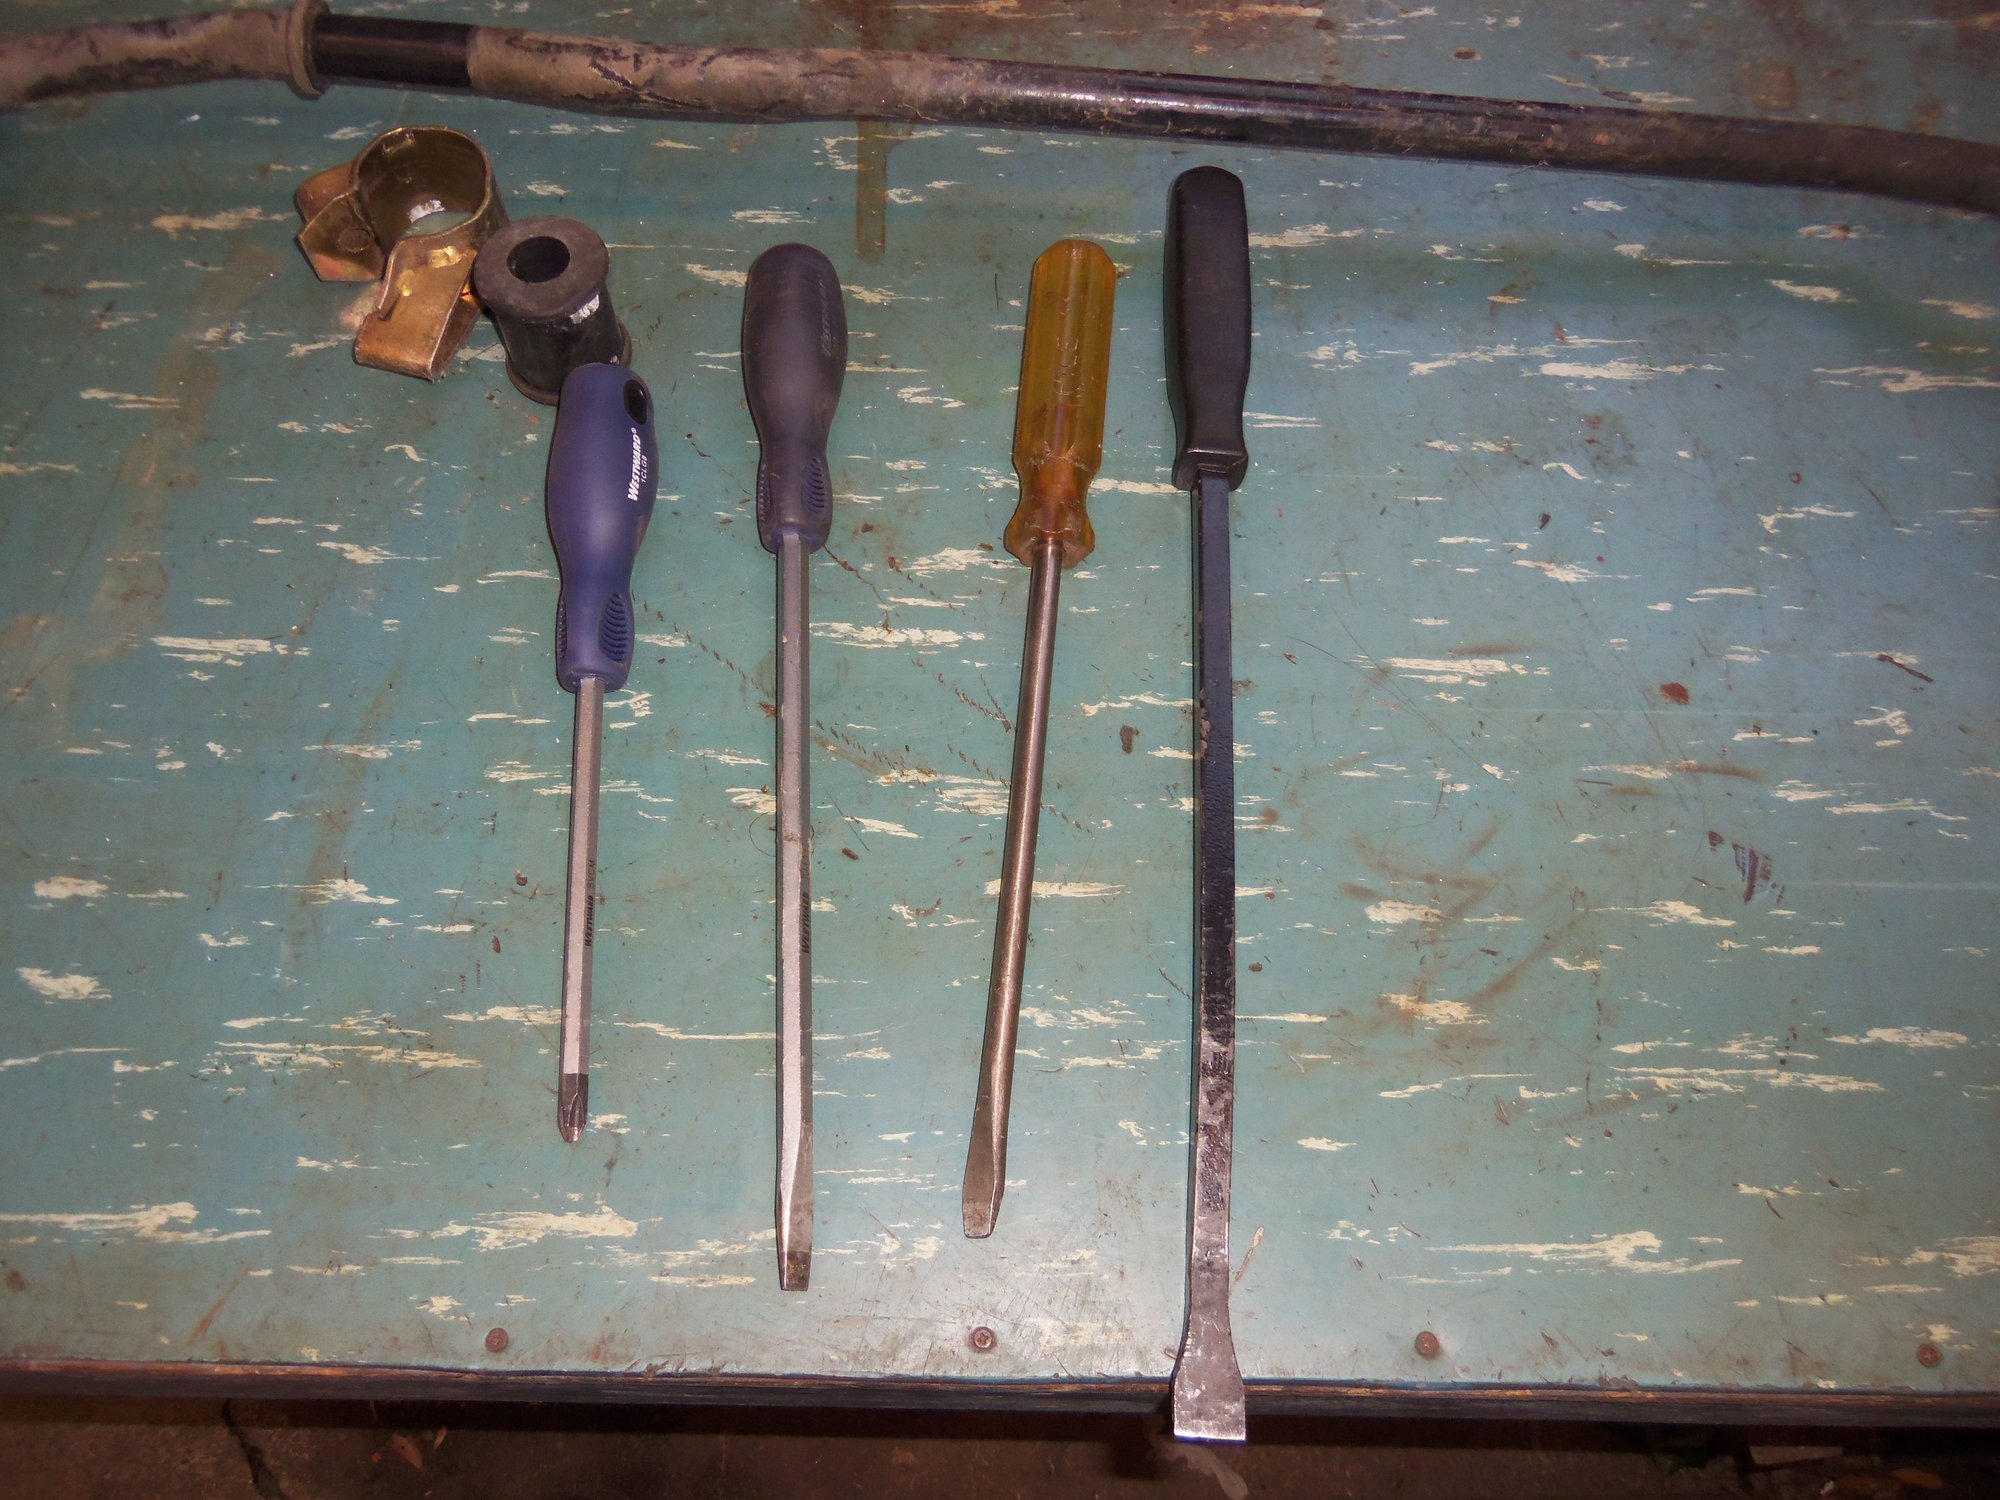
Tools of war.
Samurai action to release the clamp.
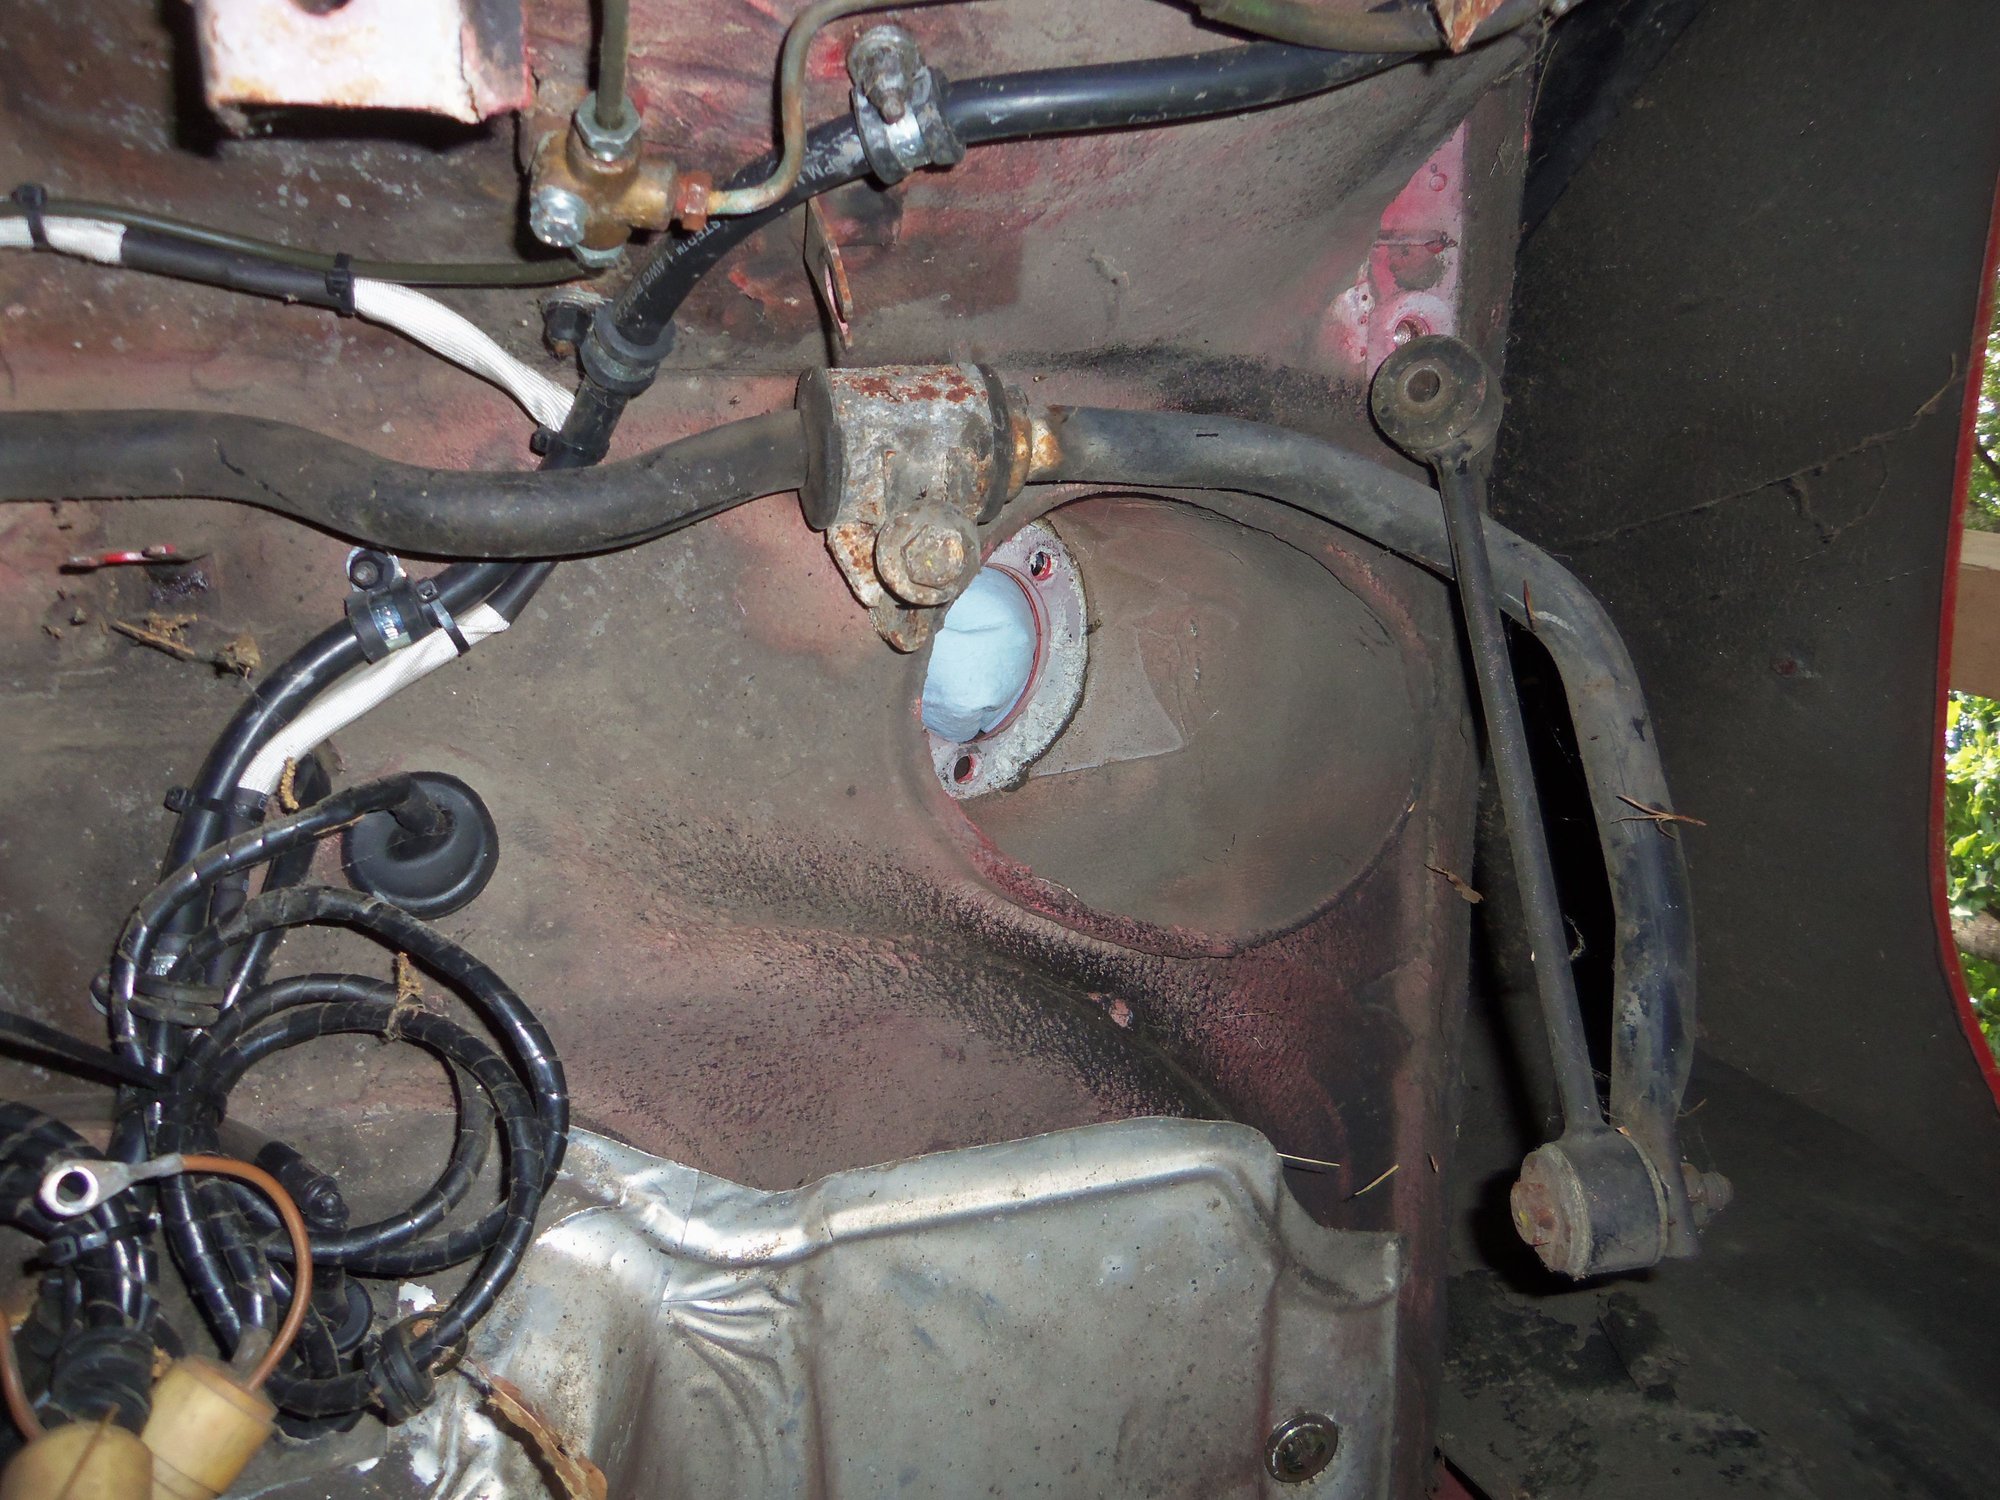
Stock rear anti-sway bar under the Red Witch.
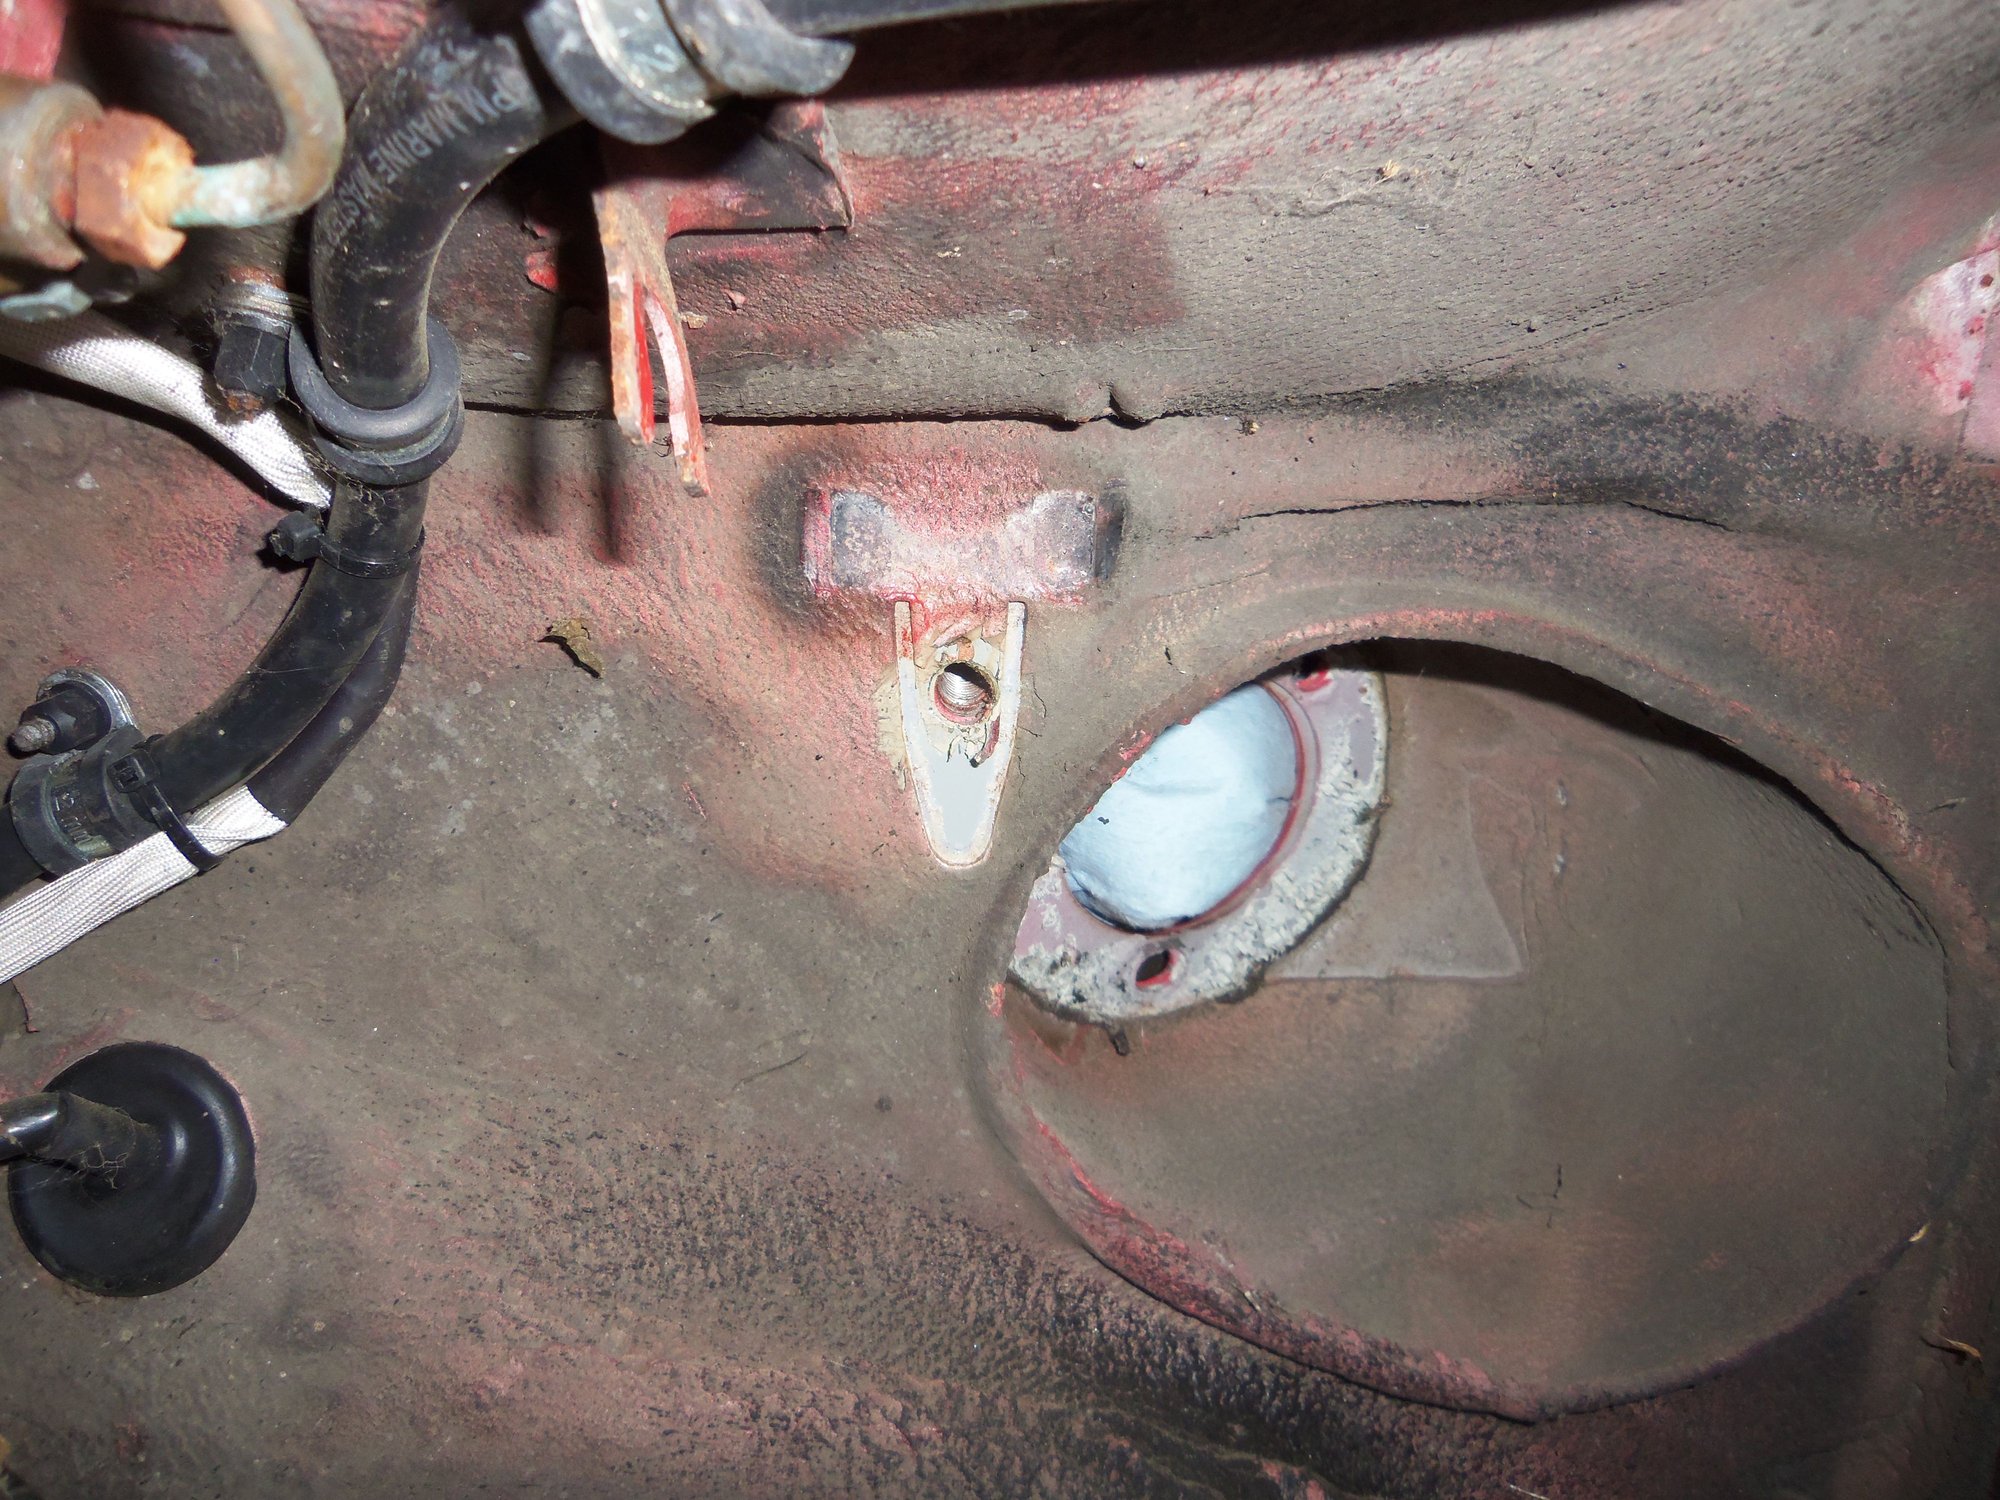
Rear anti-sway bar mounting point on underside of the body.
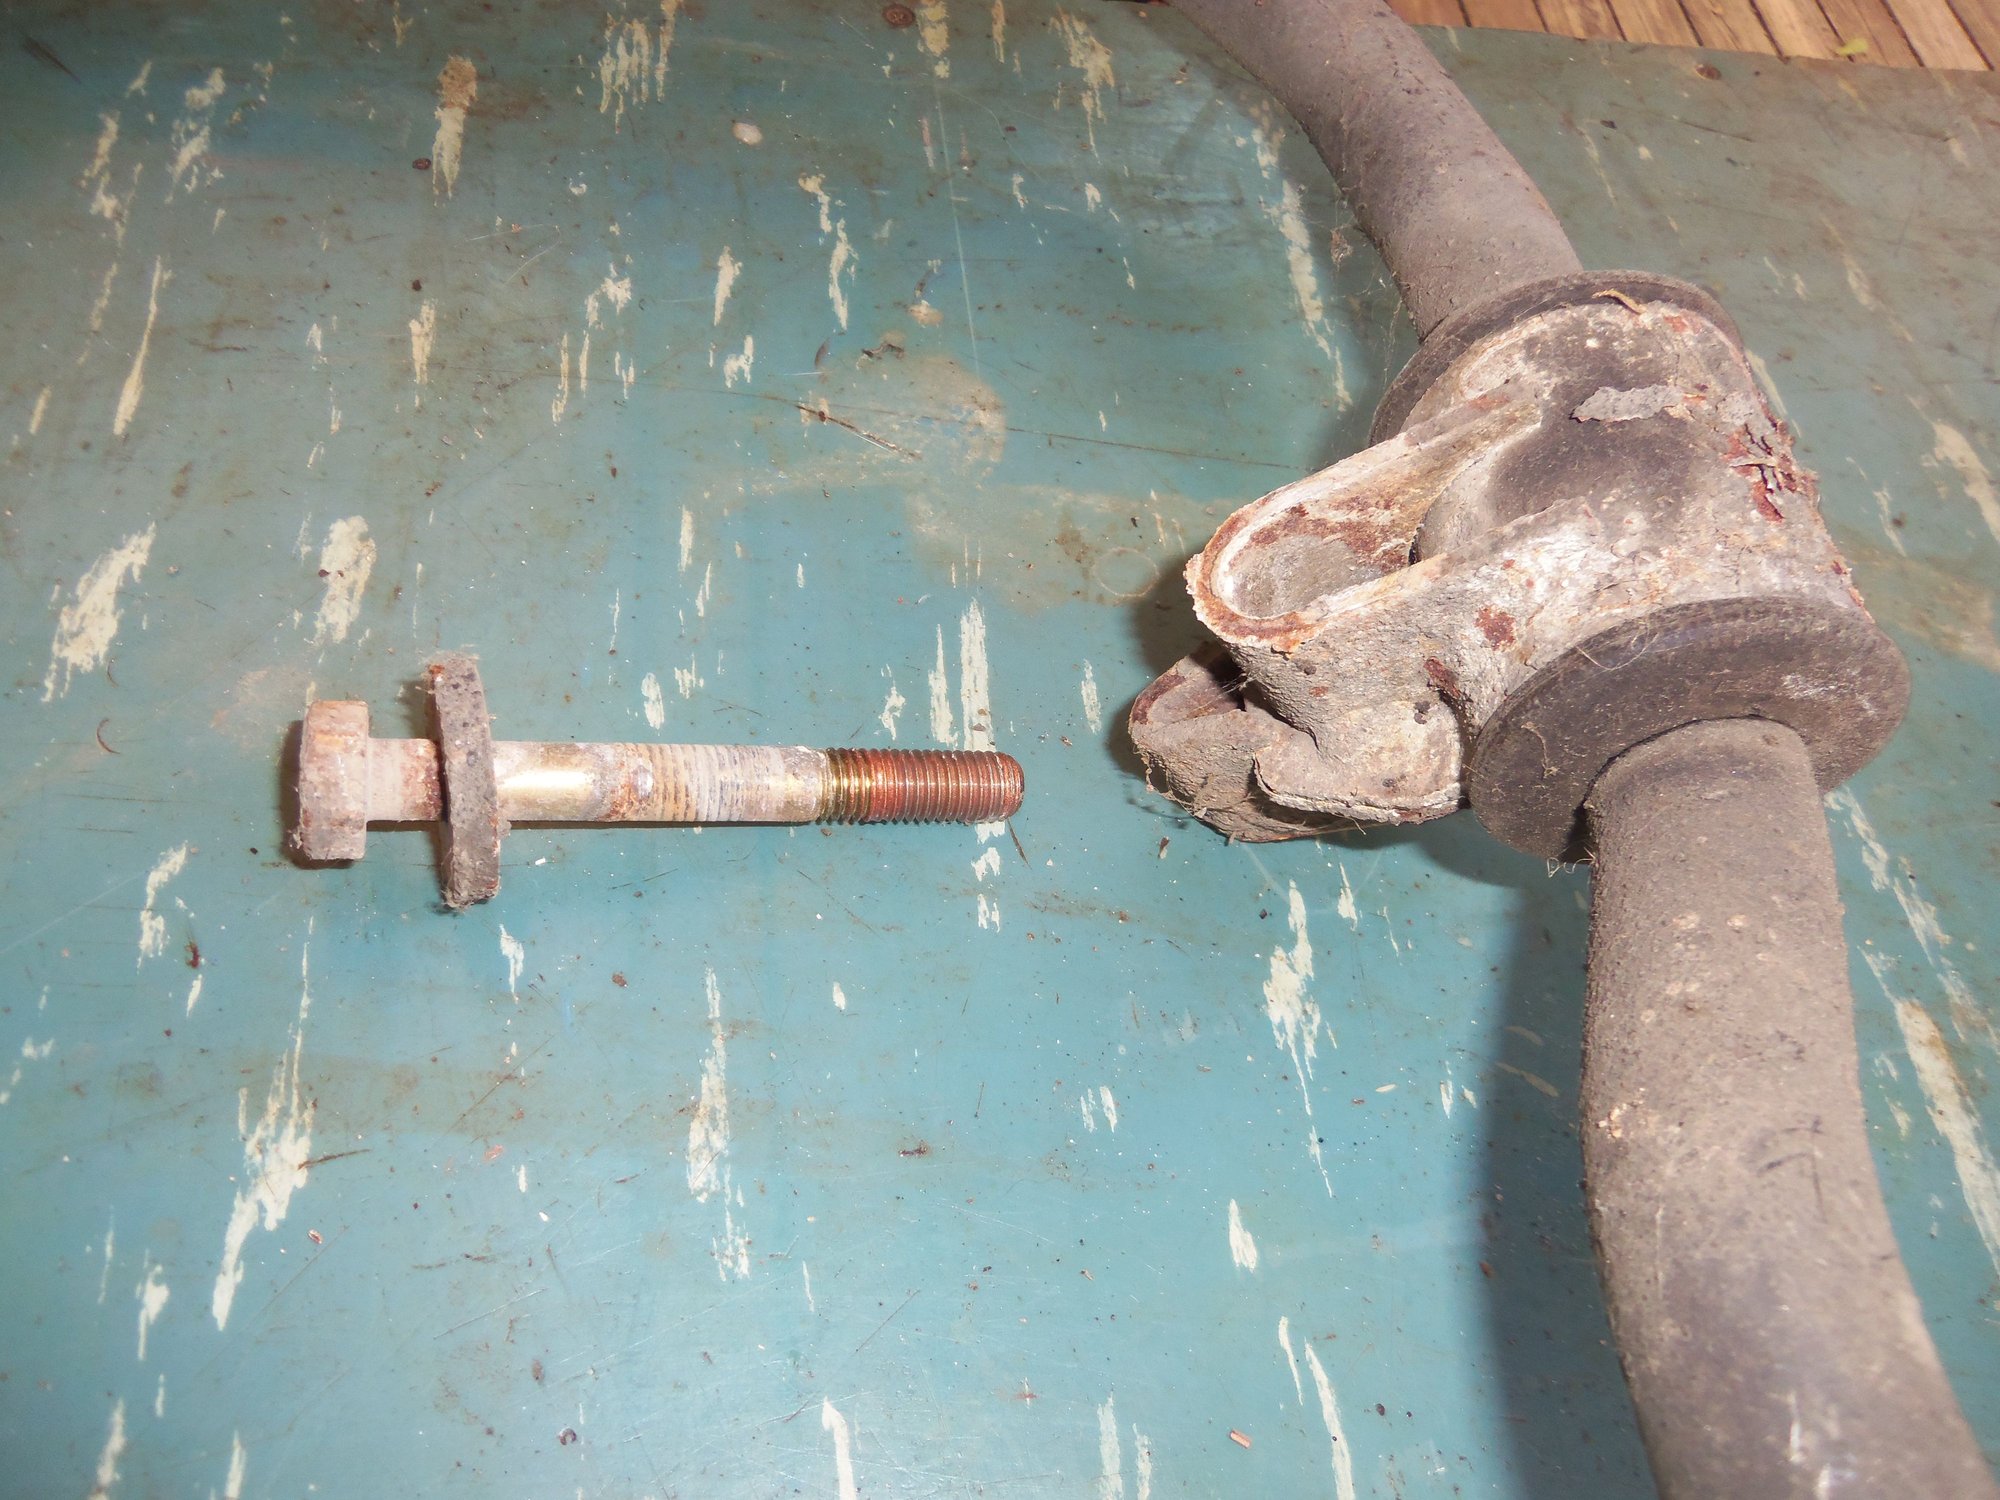
Crunchy bushing clamp and mounting bolt from the Red Witch. Note pink antisieze on the bolt threads.
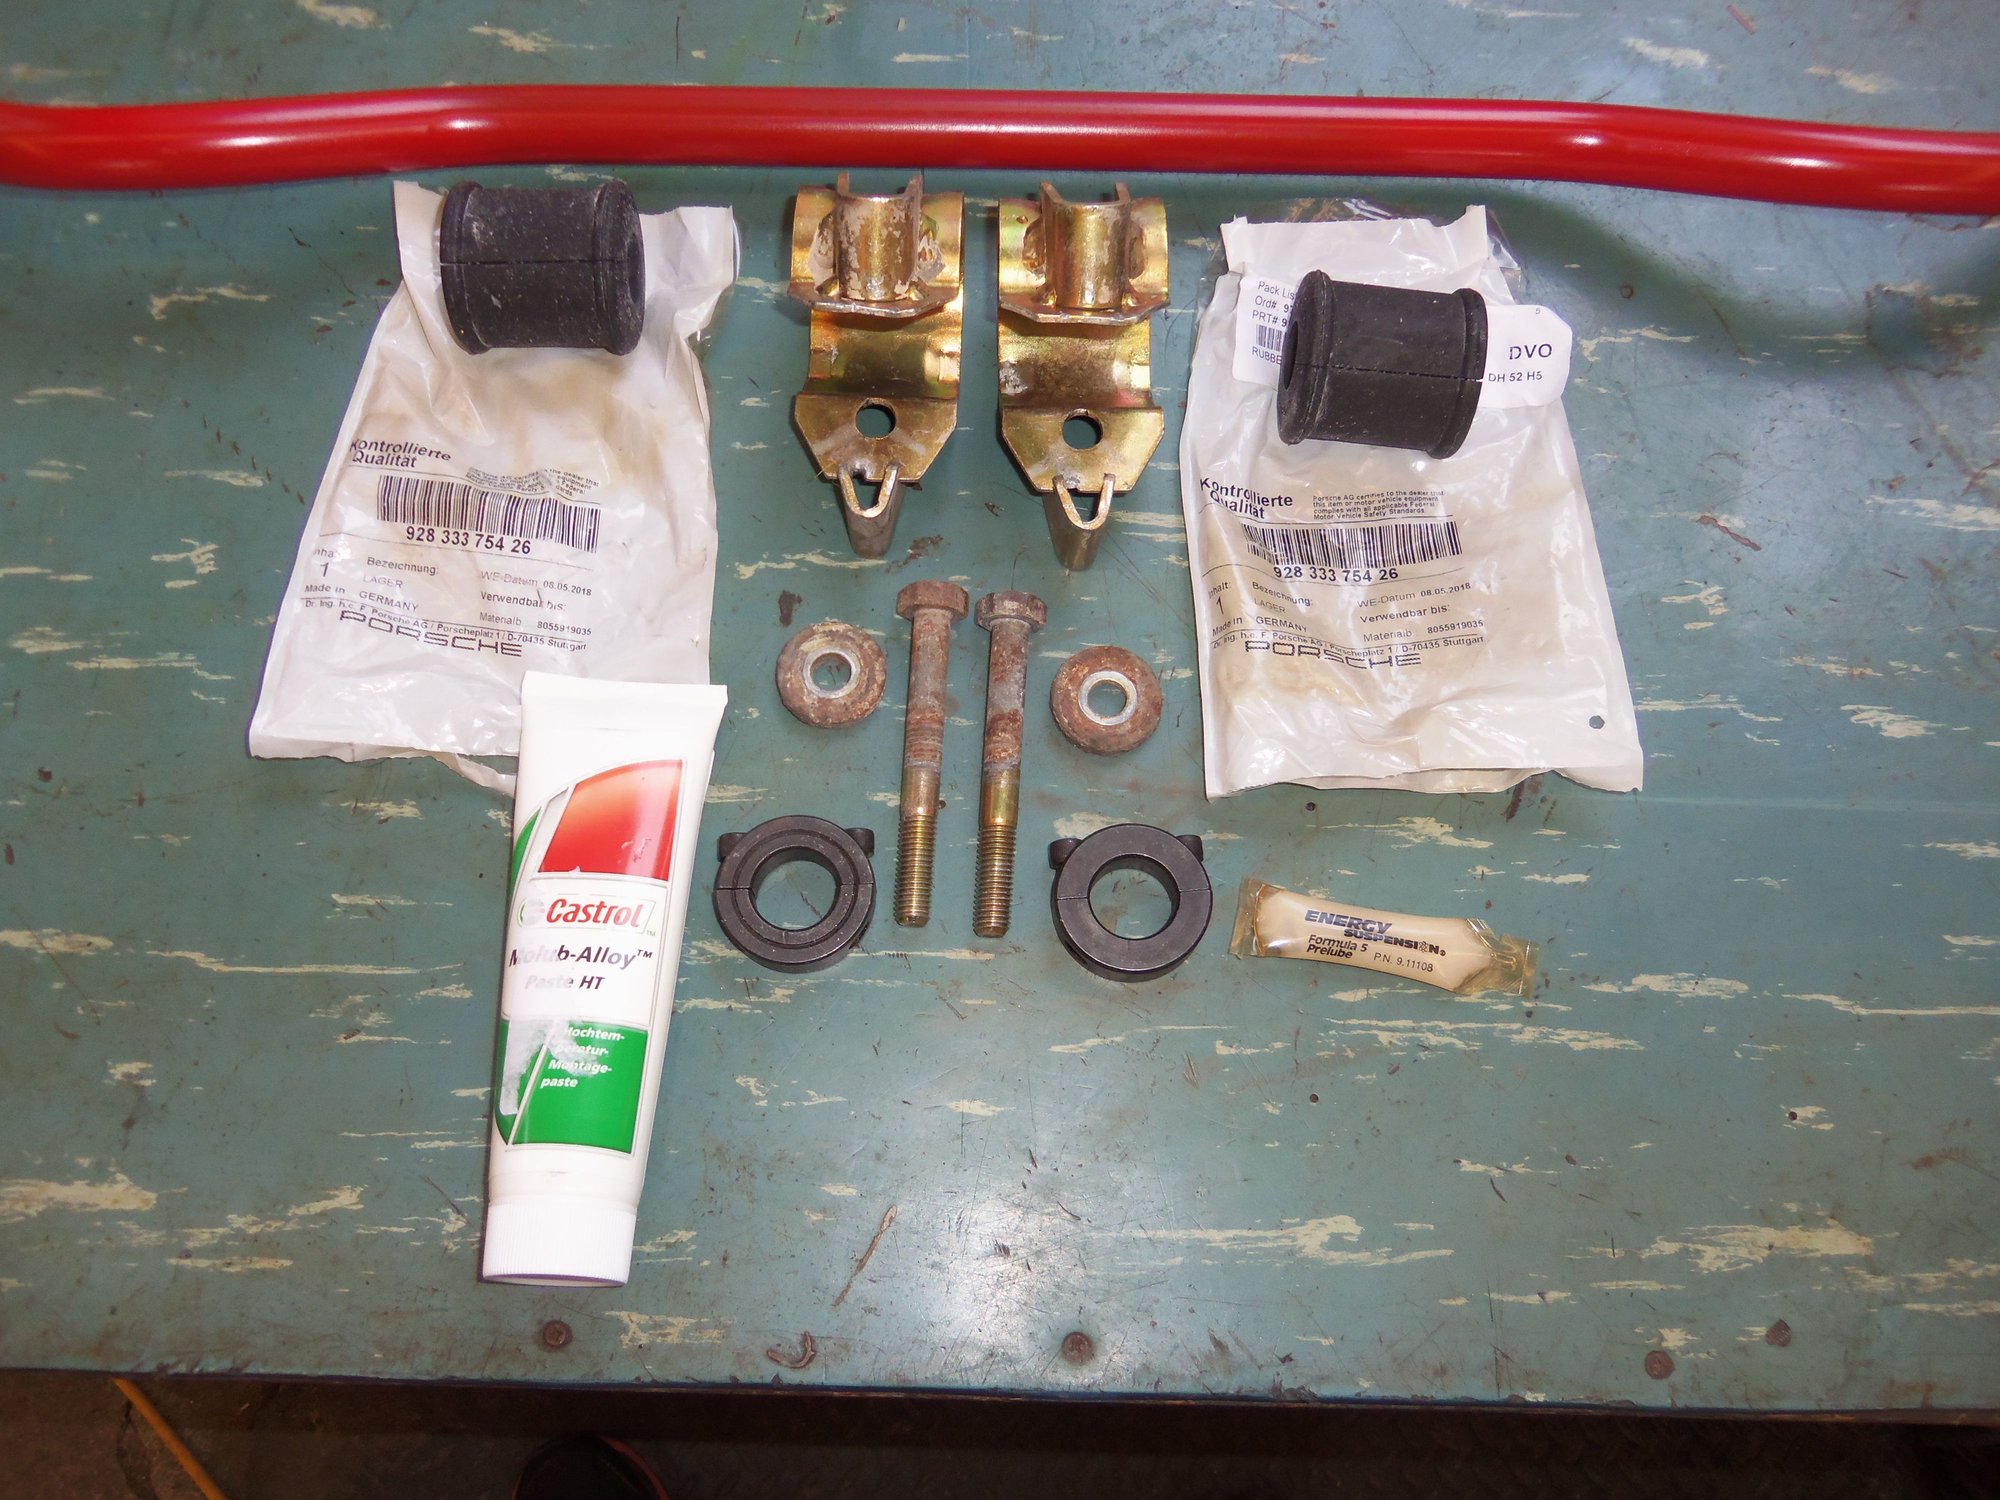
928 Specialists performance rear anti-sway bar and adjustable drop links.
Needed to mount the new bar: cleaned clamps, new bushings, cleaned bolts, locking collars, Optimoly HT, and Energy Suspension poly bushing lubricant.
Completed bar with the godforsaken bushing clamps latched.
Bushing and clamp. Locking collar is loosely installed at this point.
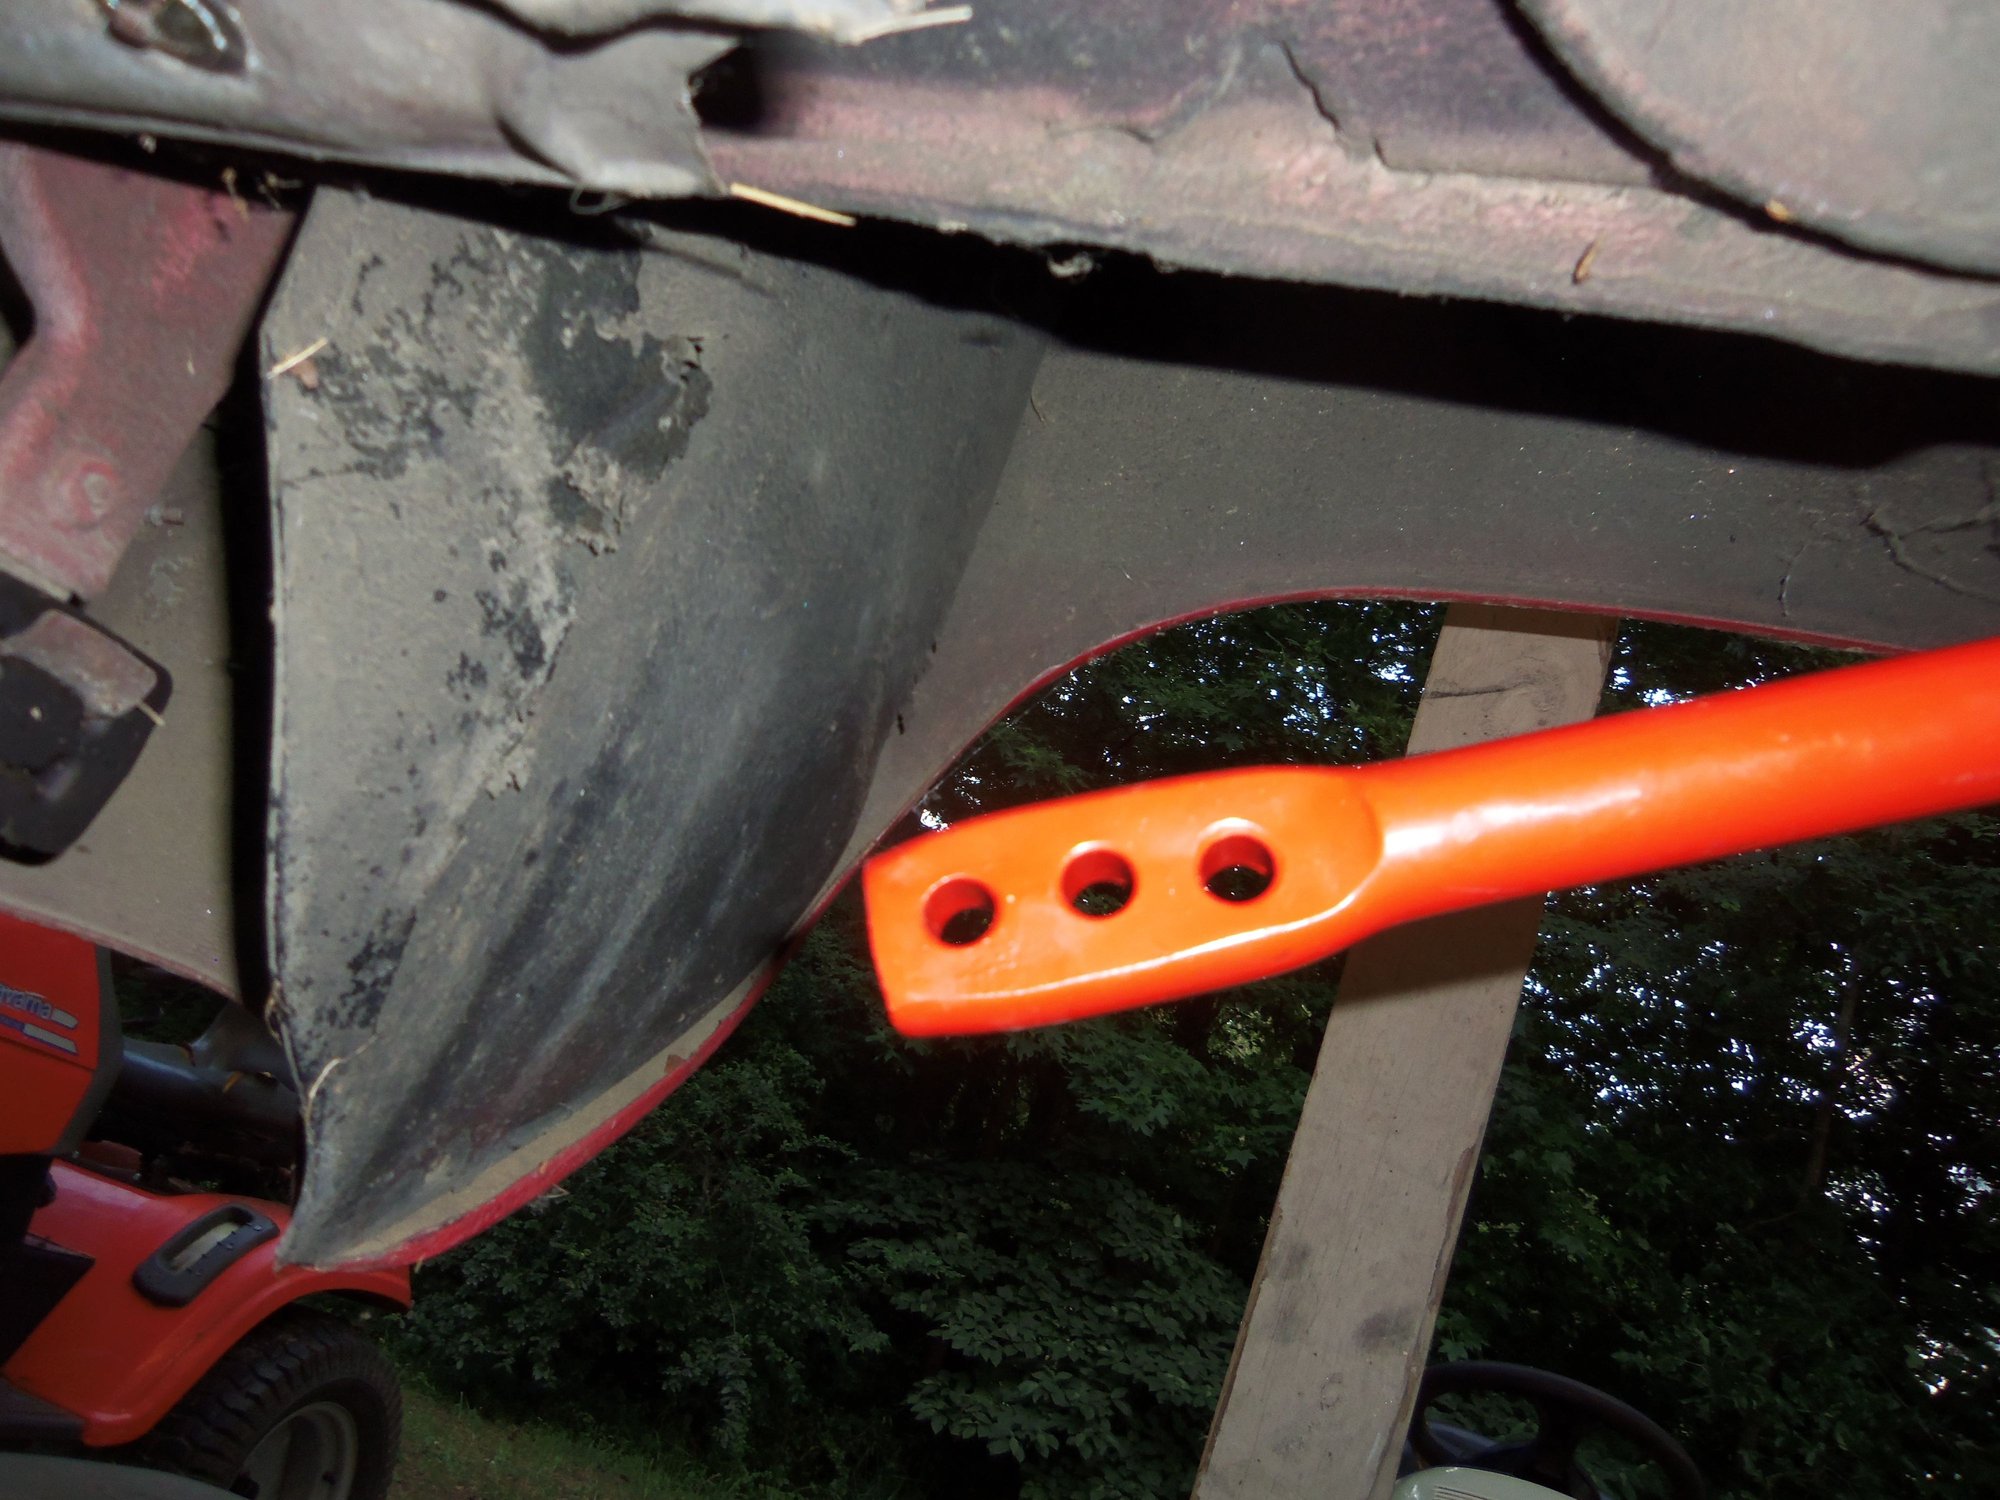
Bar is installed back under the Red Witch. Locking collar is tightened down, but with a little clearance. I plan on moving the bar a bit to the passenger's side.
Later, I will install the adjustable drop links in the middle hole for 'stock'. I will move it to the end hole for 'soft' if need be.
Next step is cleaning and preparing the rear suspension cross member. Then marrying the transmission and torque tube, followed by fitting the lines, cables, and hoses to the torque tube. I am hoping to be able to install the transmission and torque tube back under the Red Witch in a couple of weeks. We shall see...
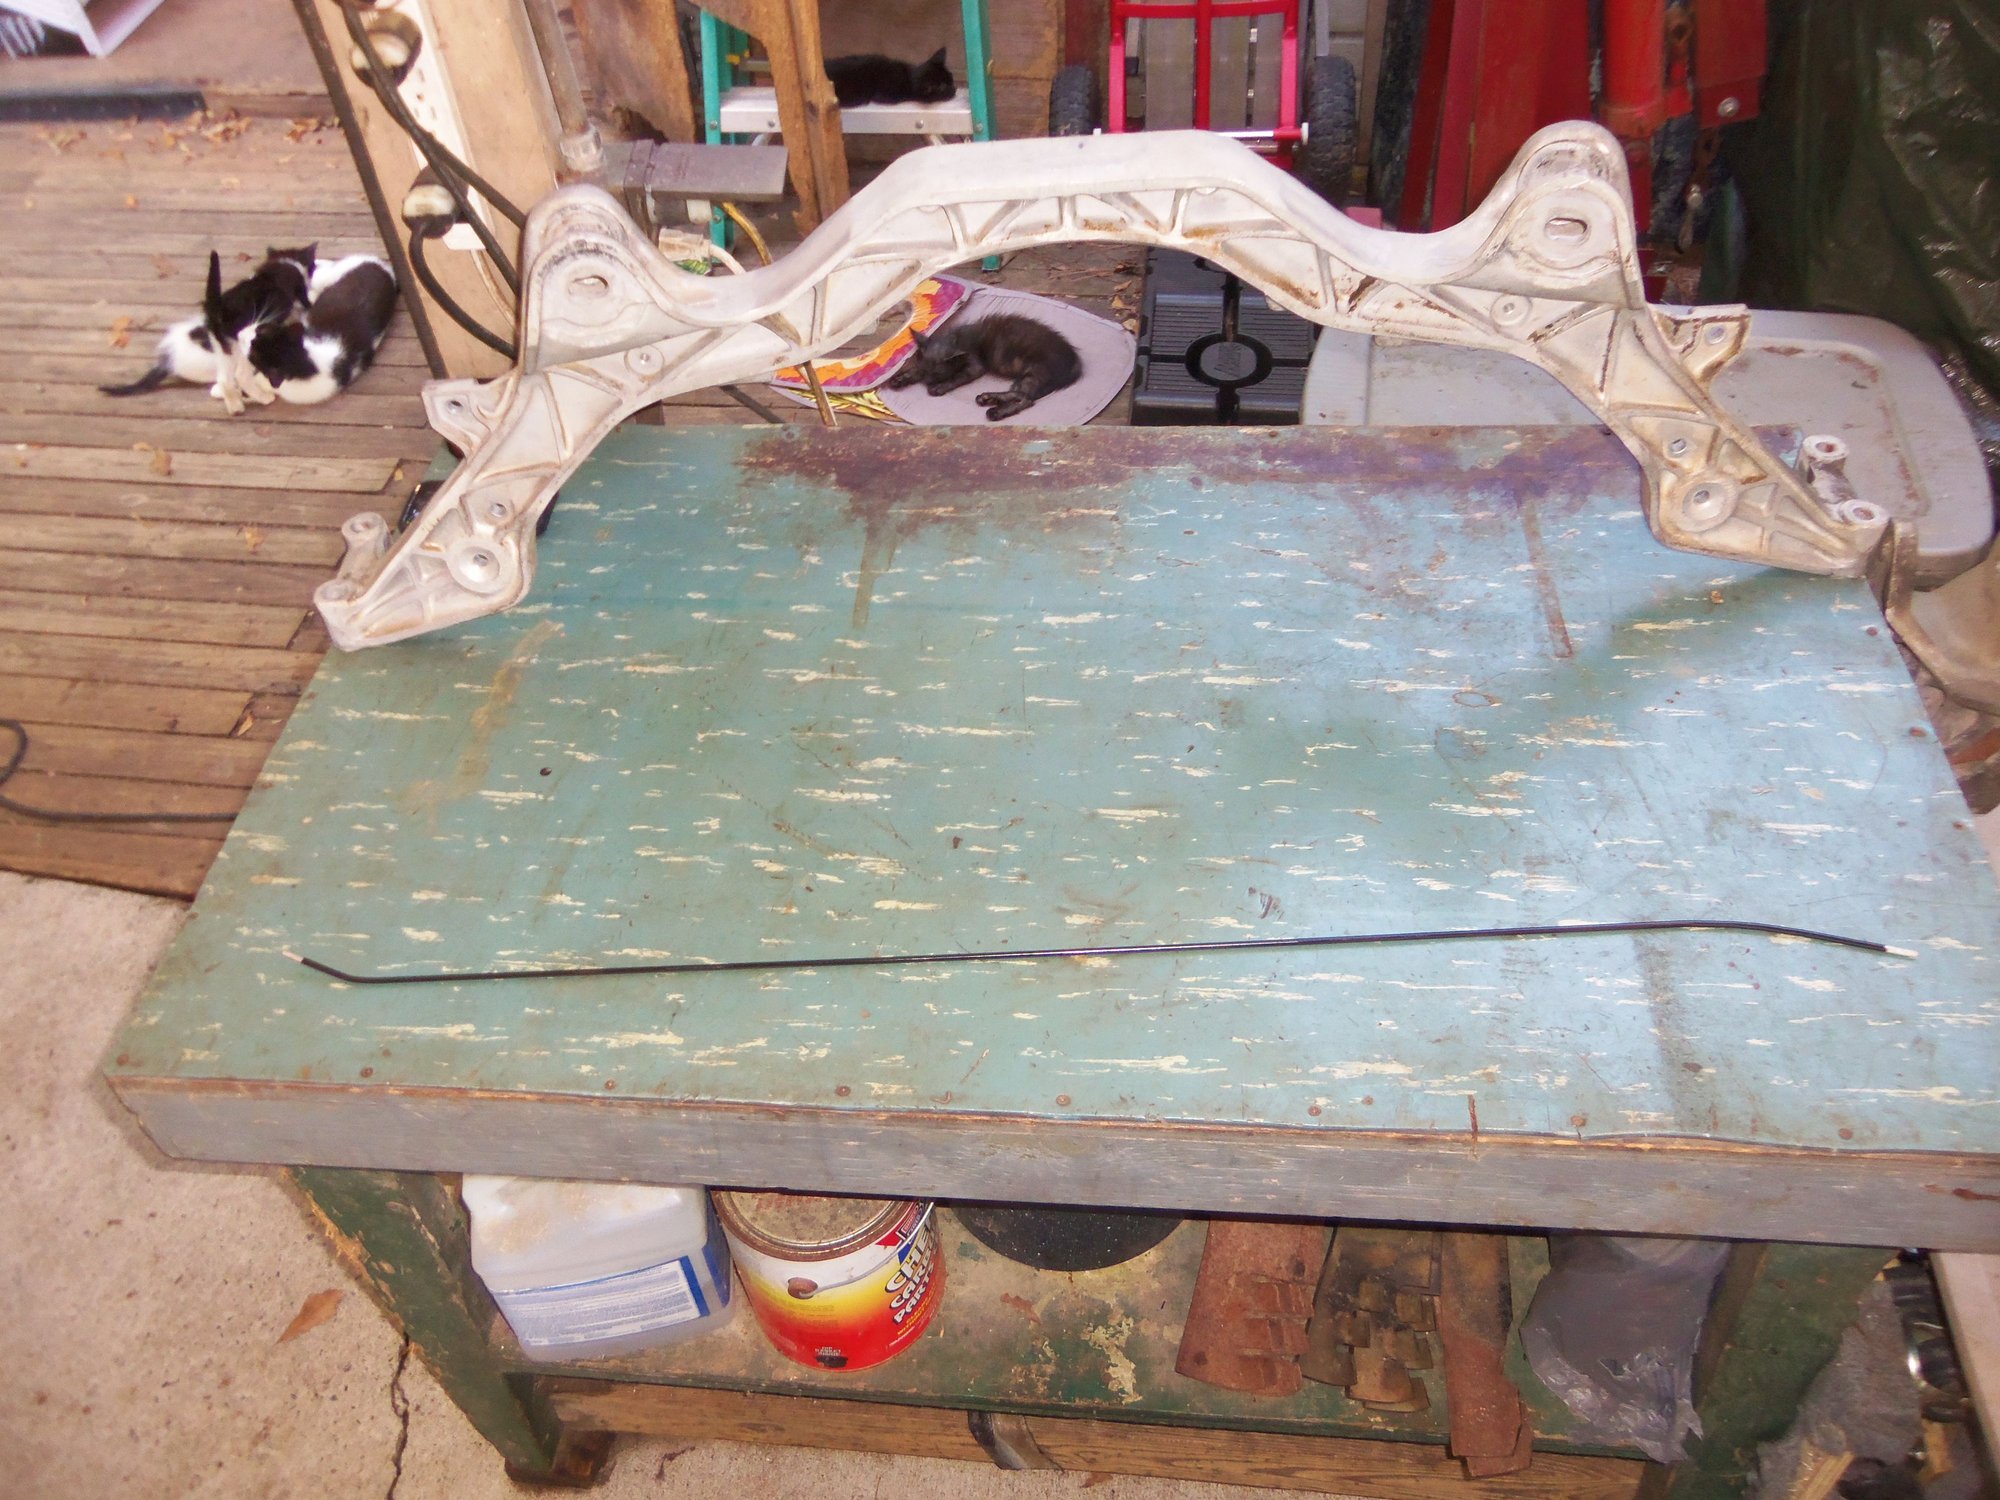
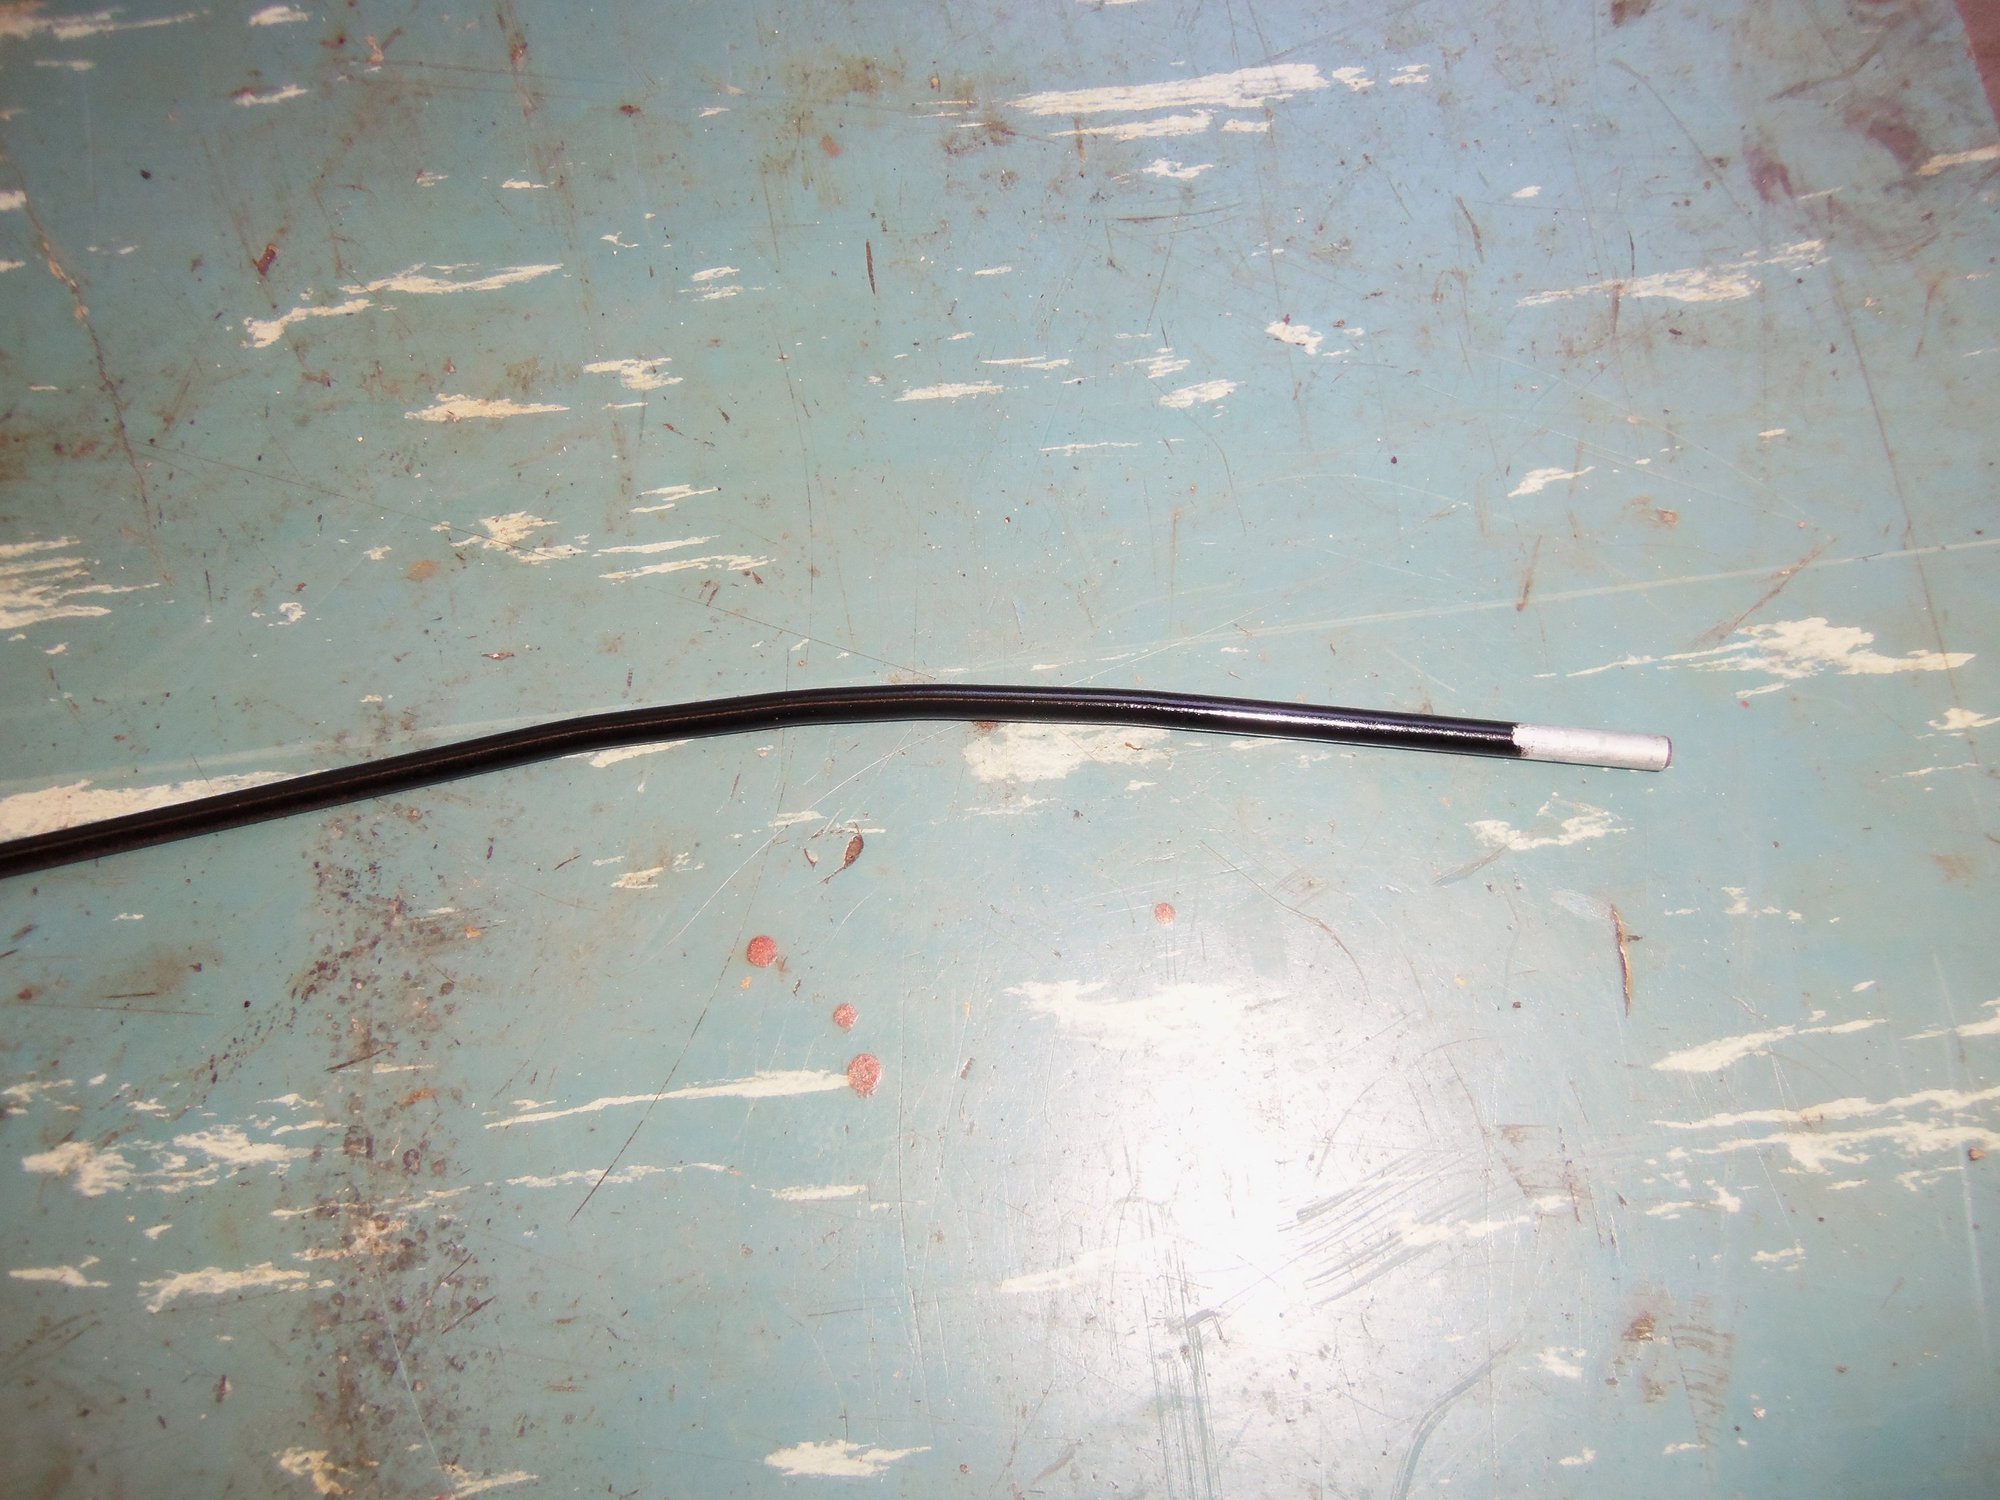
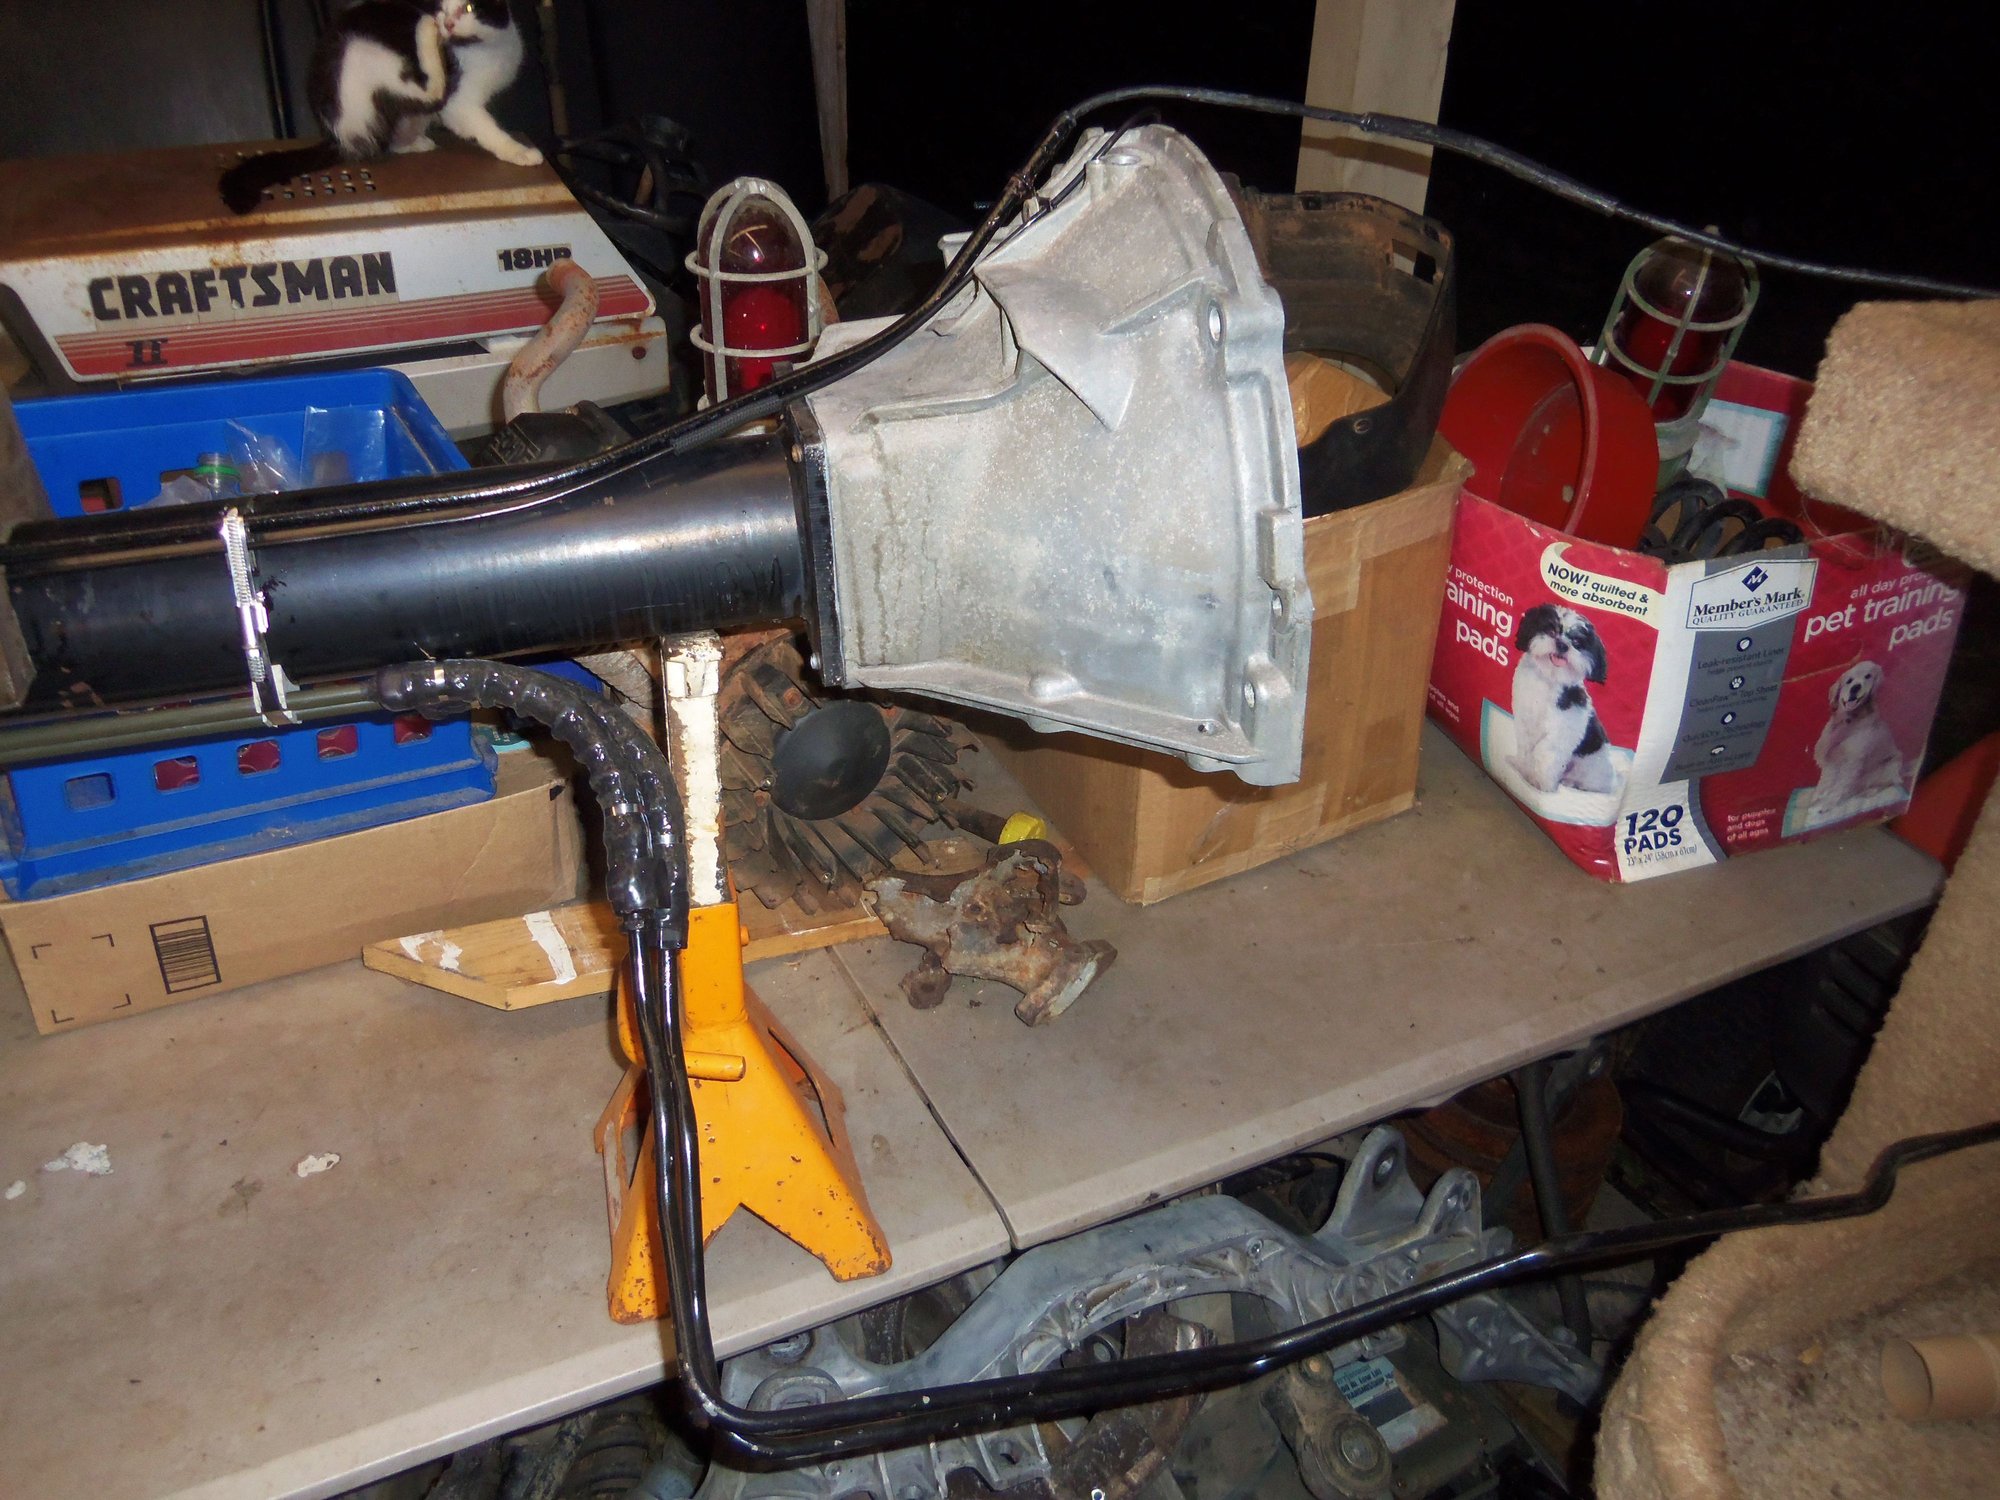
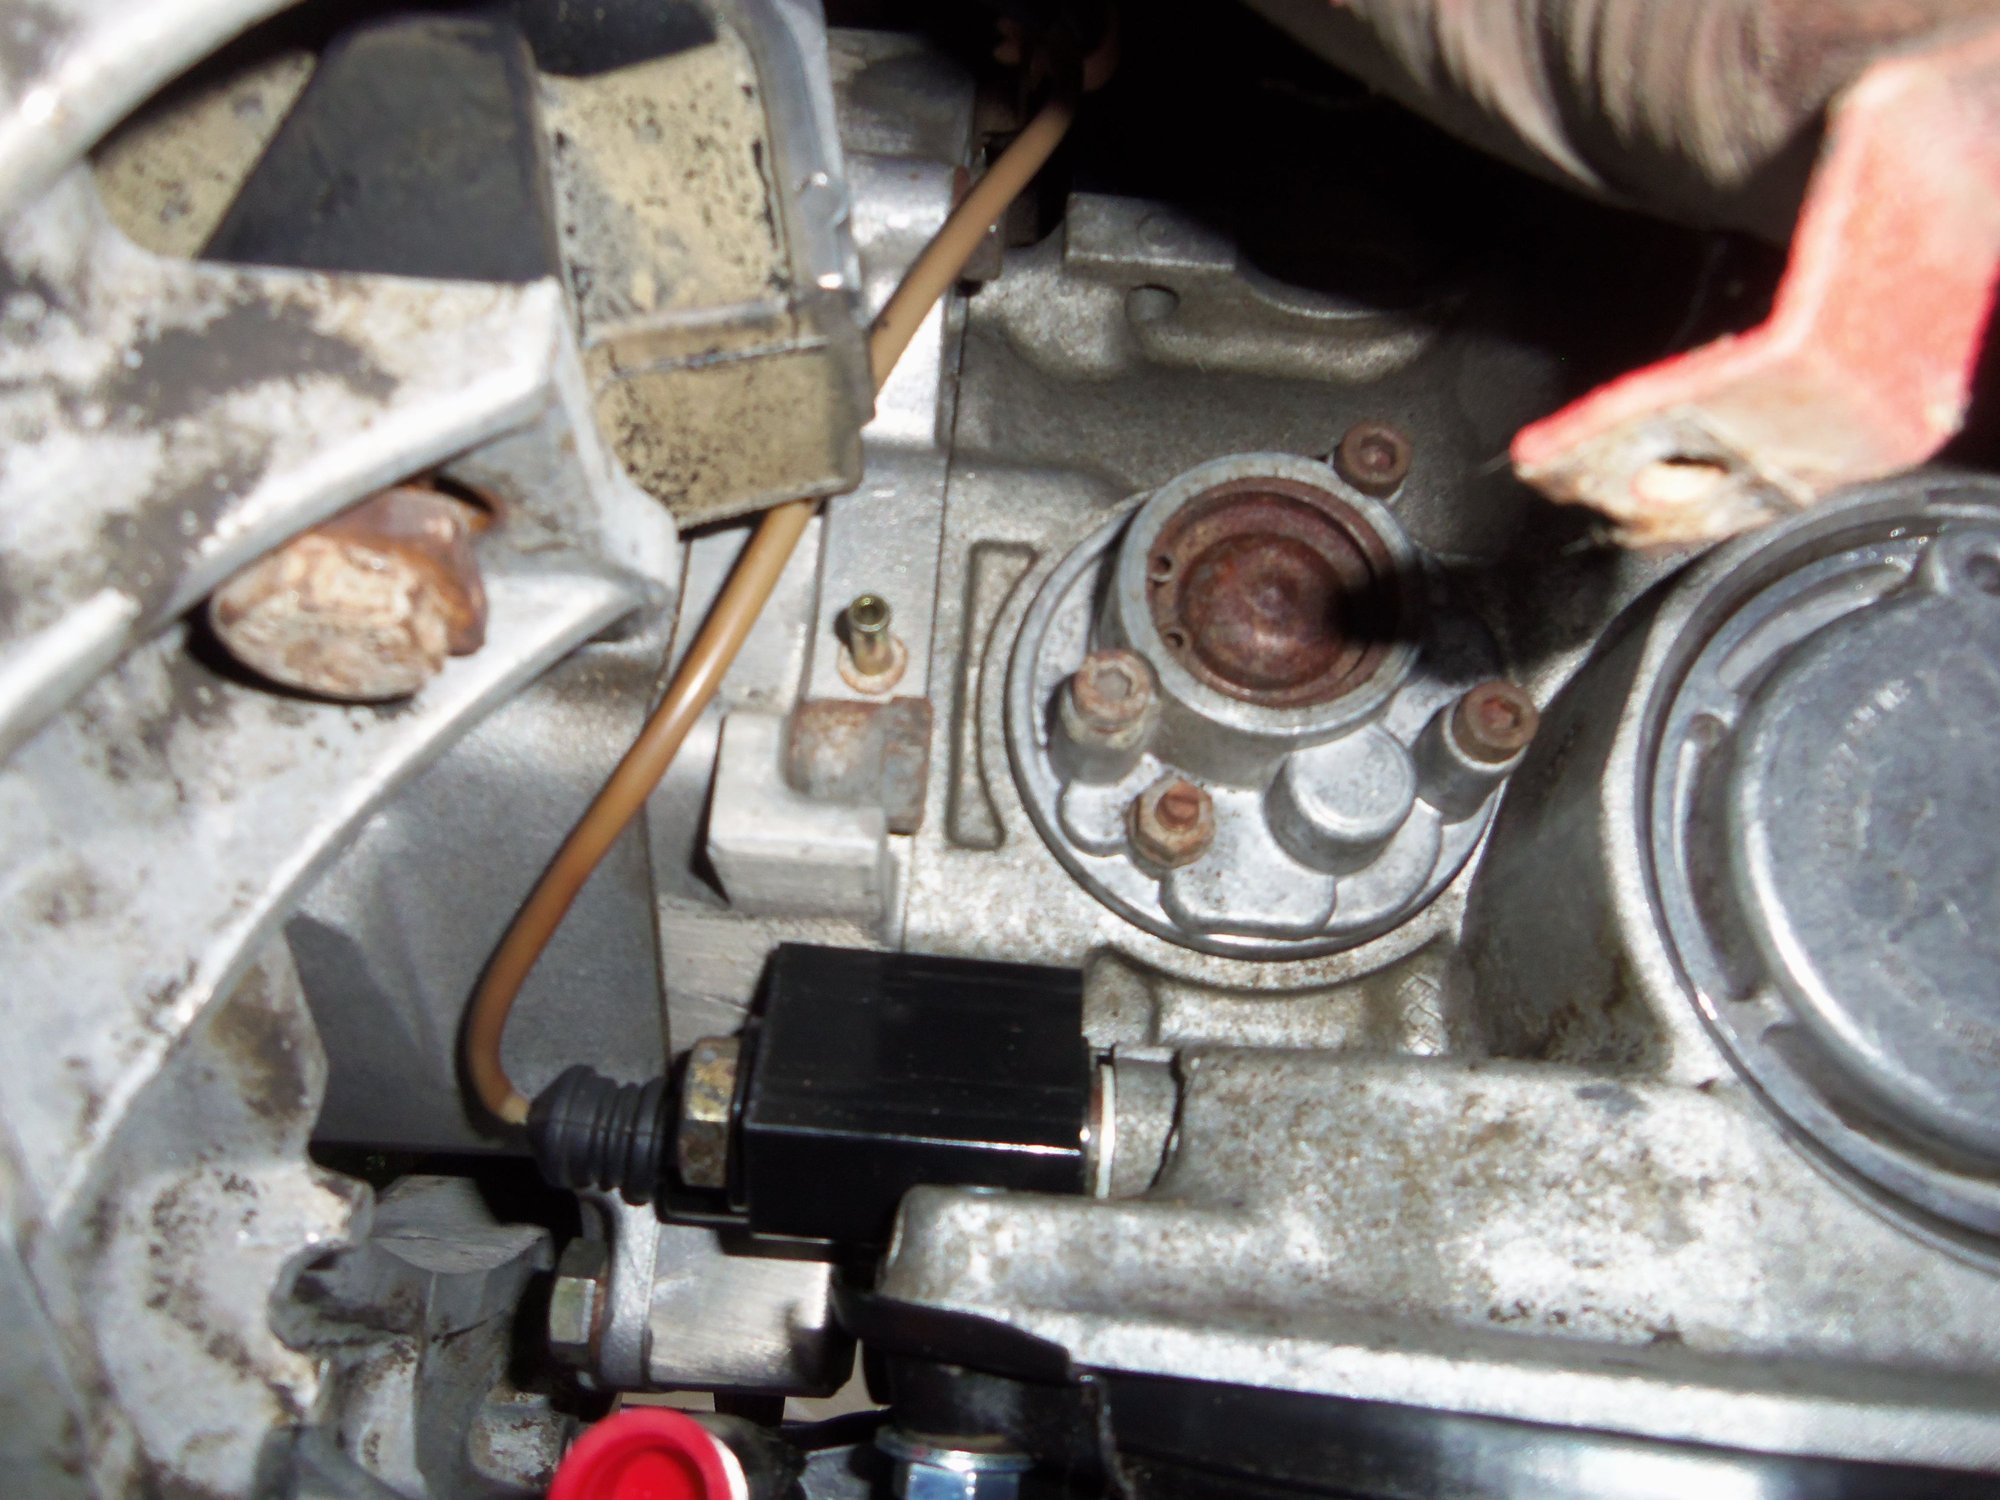
I cleaned and painted the metal vacuum line that runs along the top of the torque tube. The plating had some nasty surface corrosion going on. I wire wheeled the corrosion off then painted the line with Rustoleum Rusty Metal Primer followed by a top coat of satin black Rustoleum. No so much concerned with looks as corrosion protection.
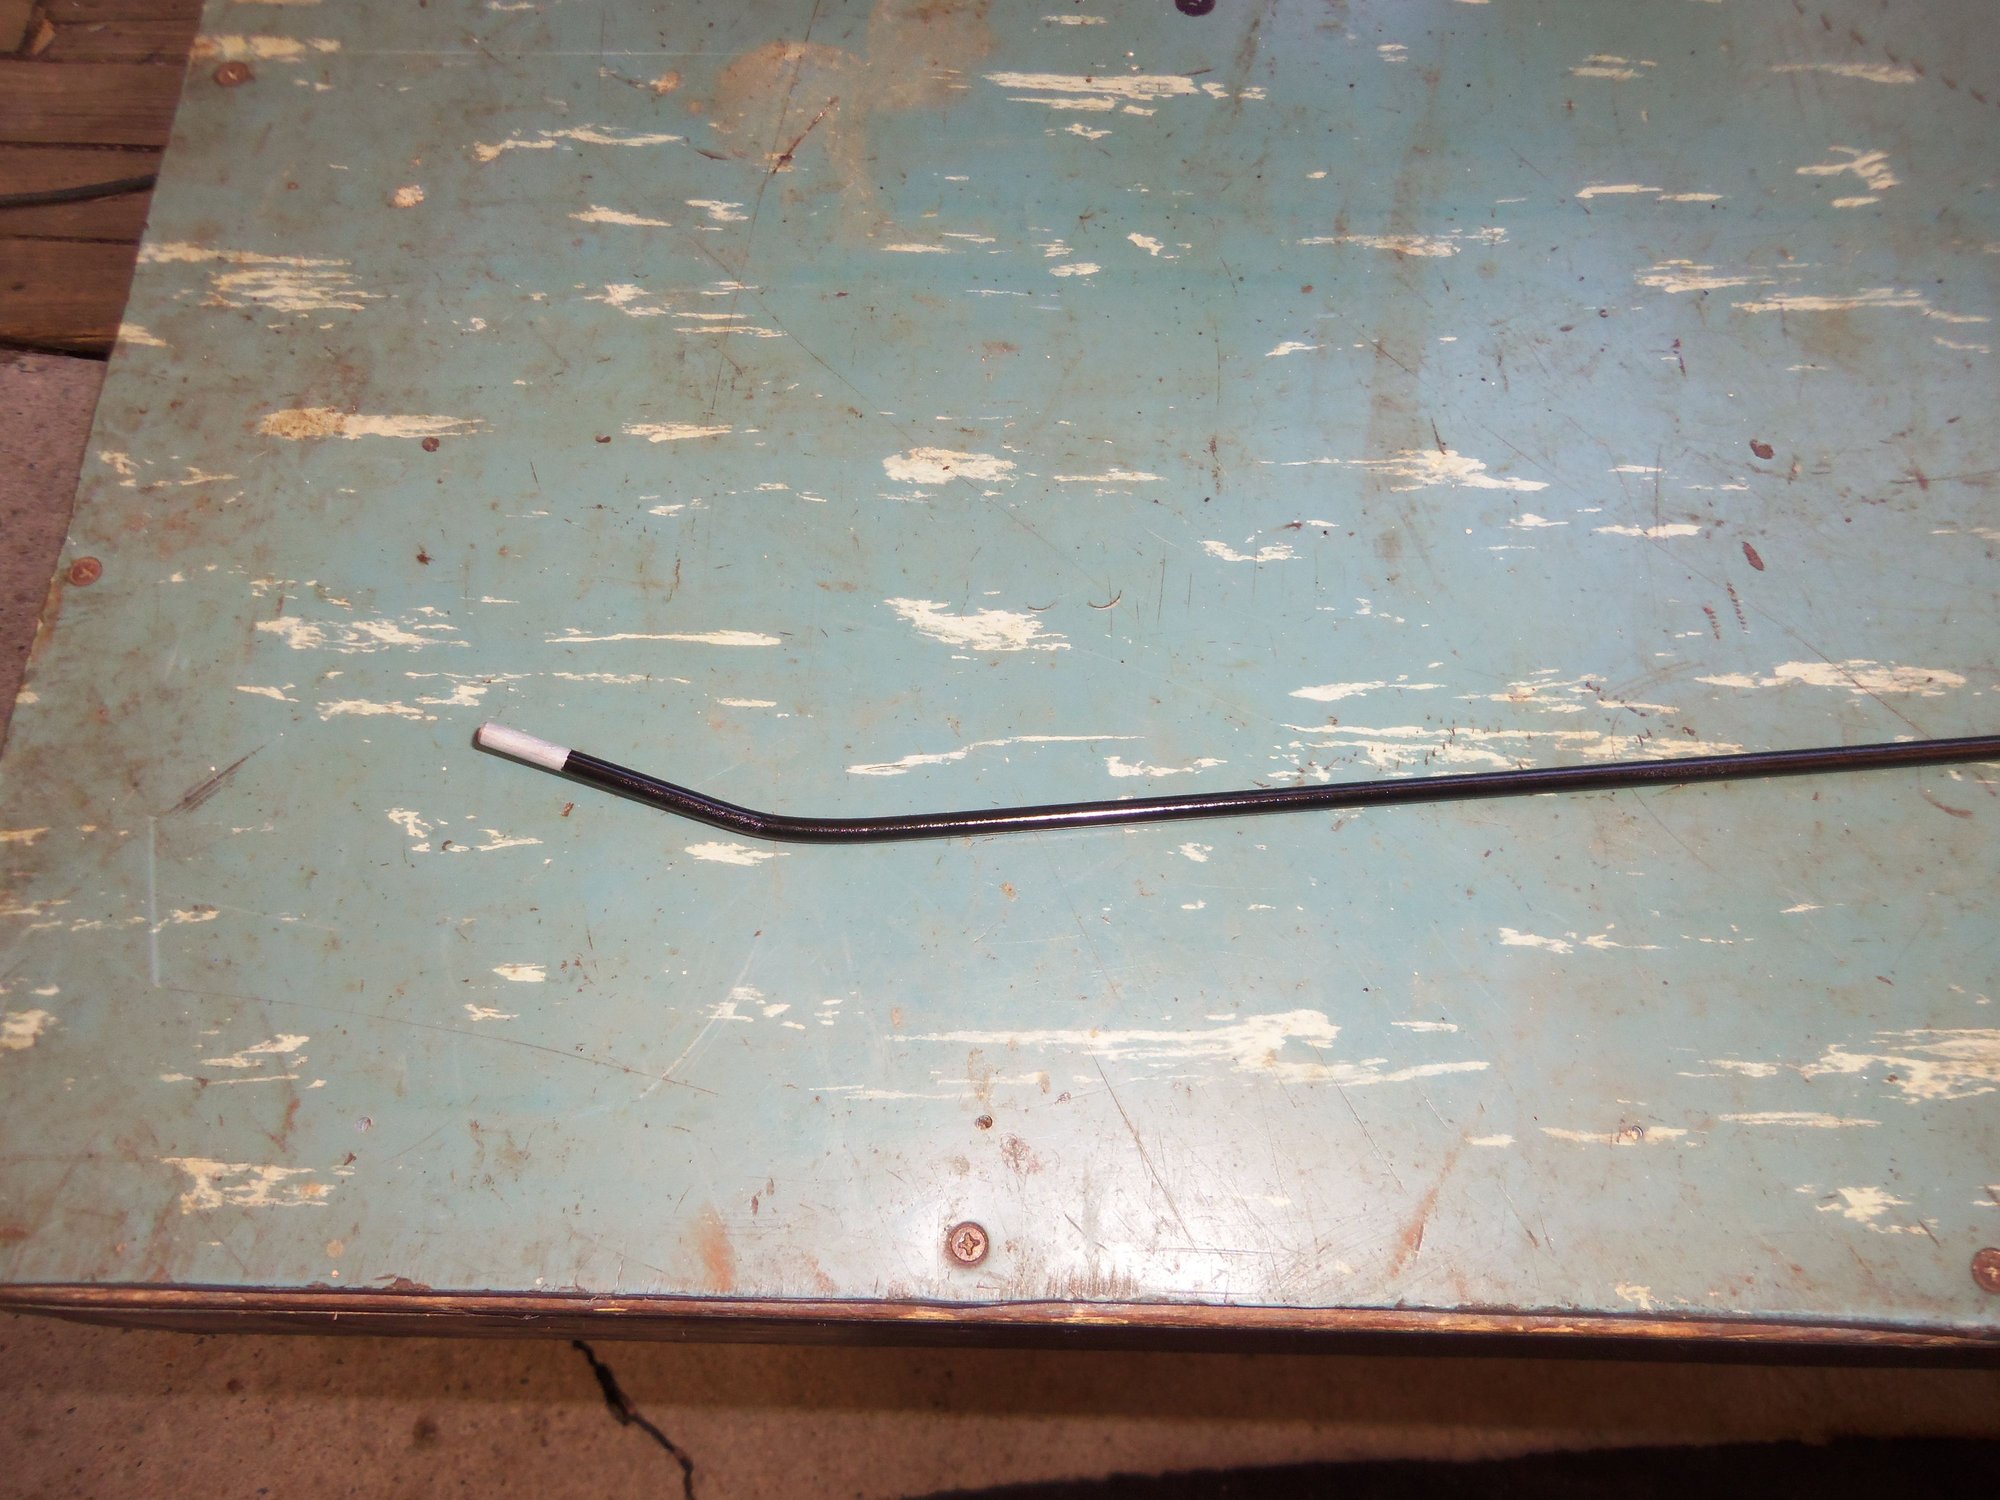
Cleaned and painted metal vacuum line for the transmission vacuum modulator. I left the ends bare of paint for a better seal for the new braided vacuum hose.
Upward end goes to the engine bellhousing.
Downward end goes to the torque converter cover.
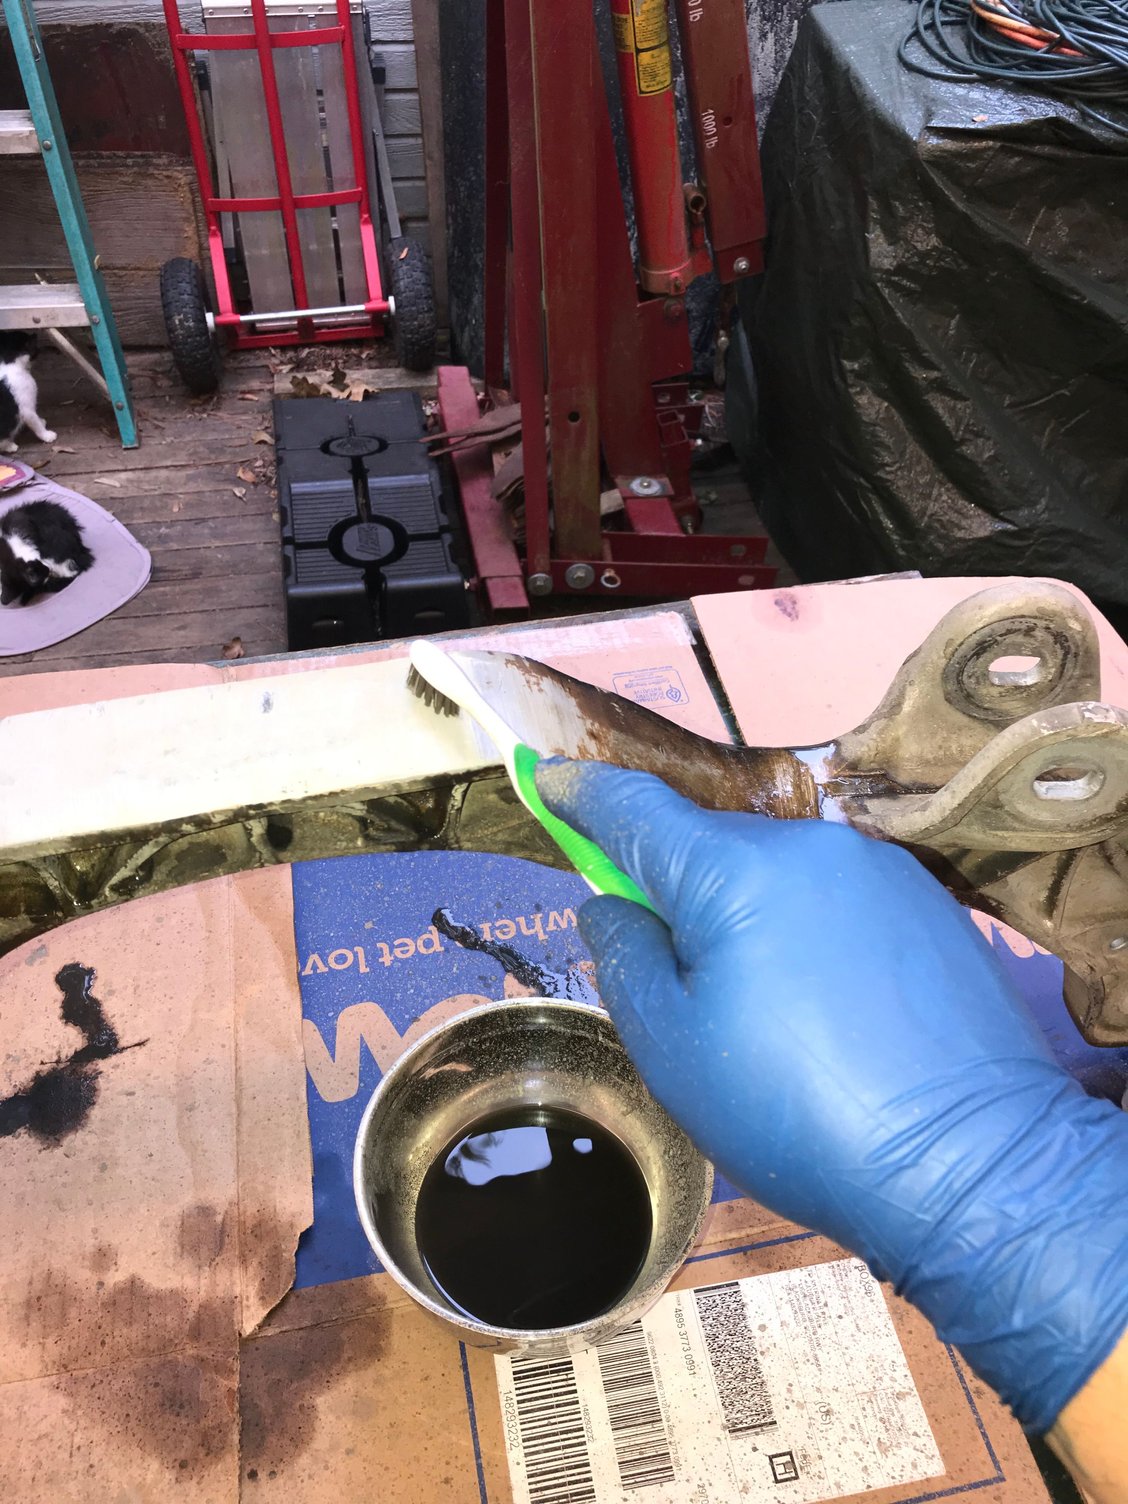
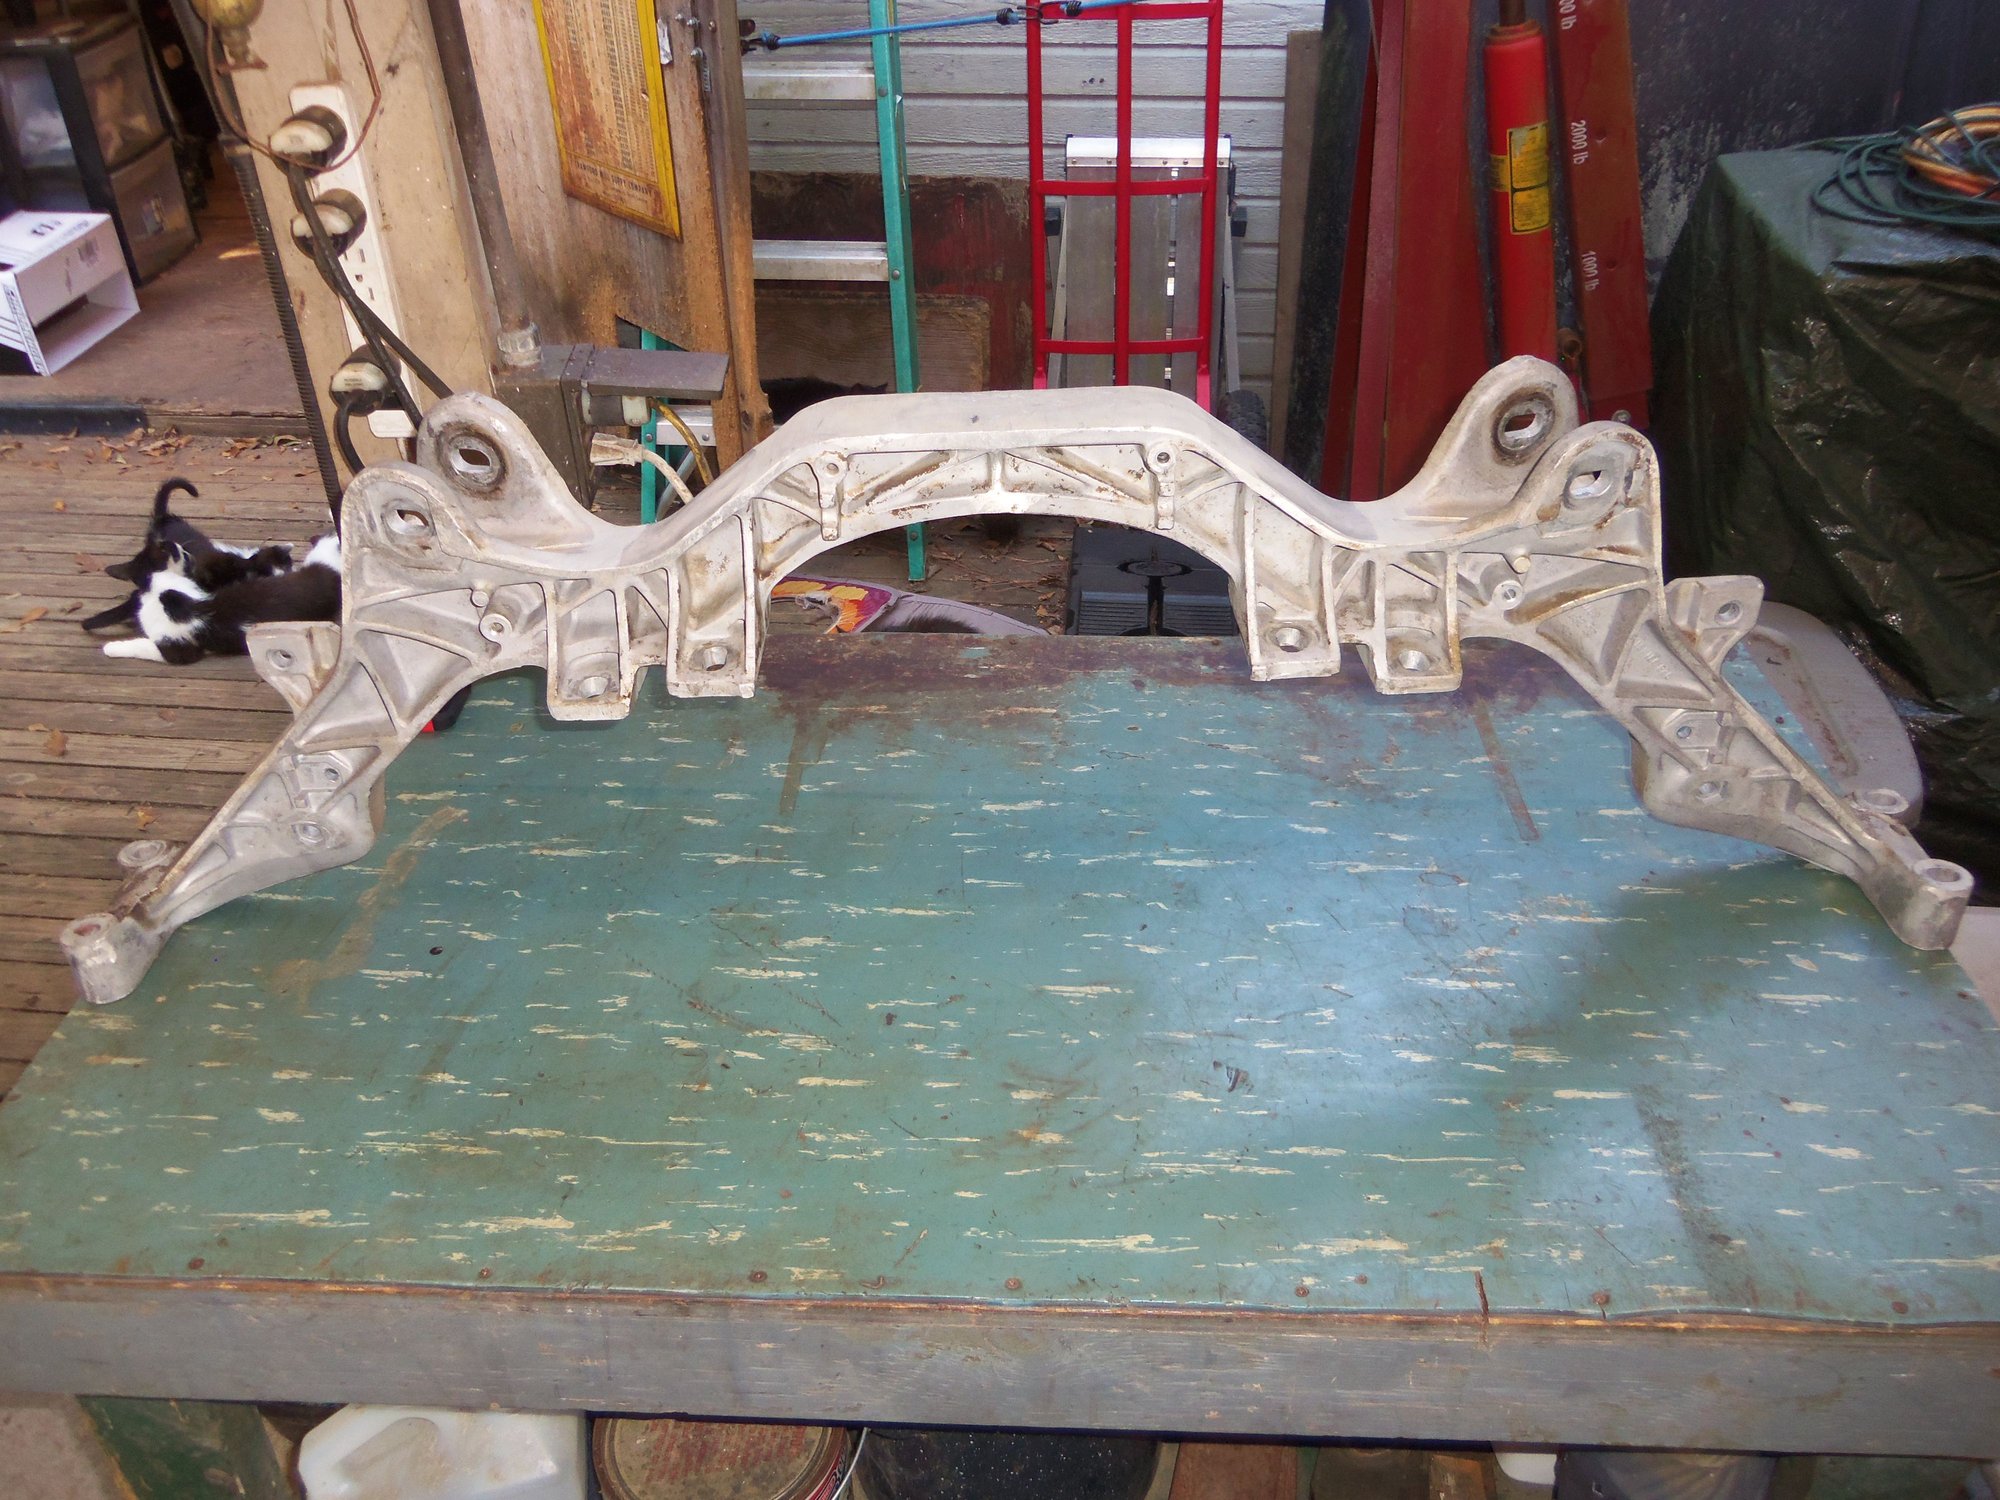
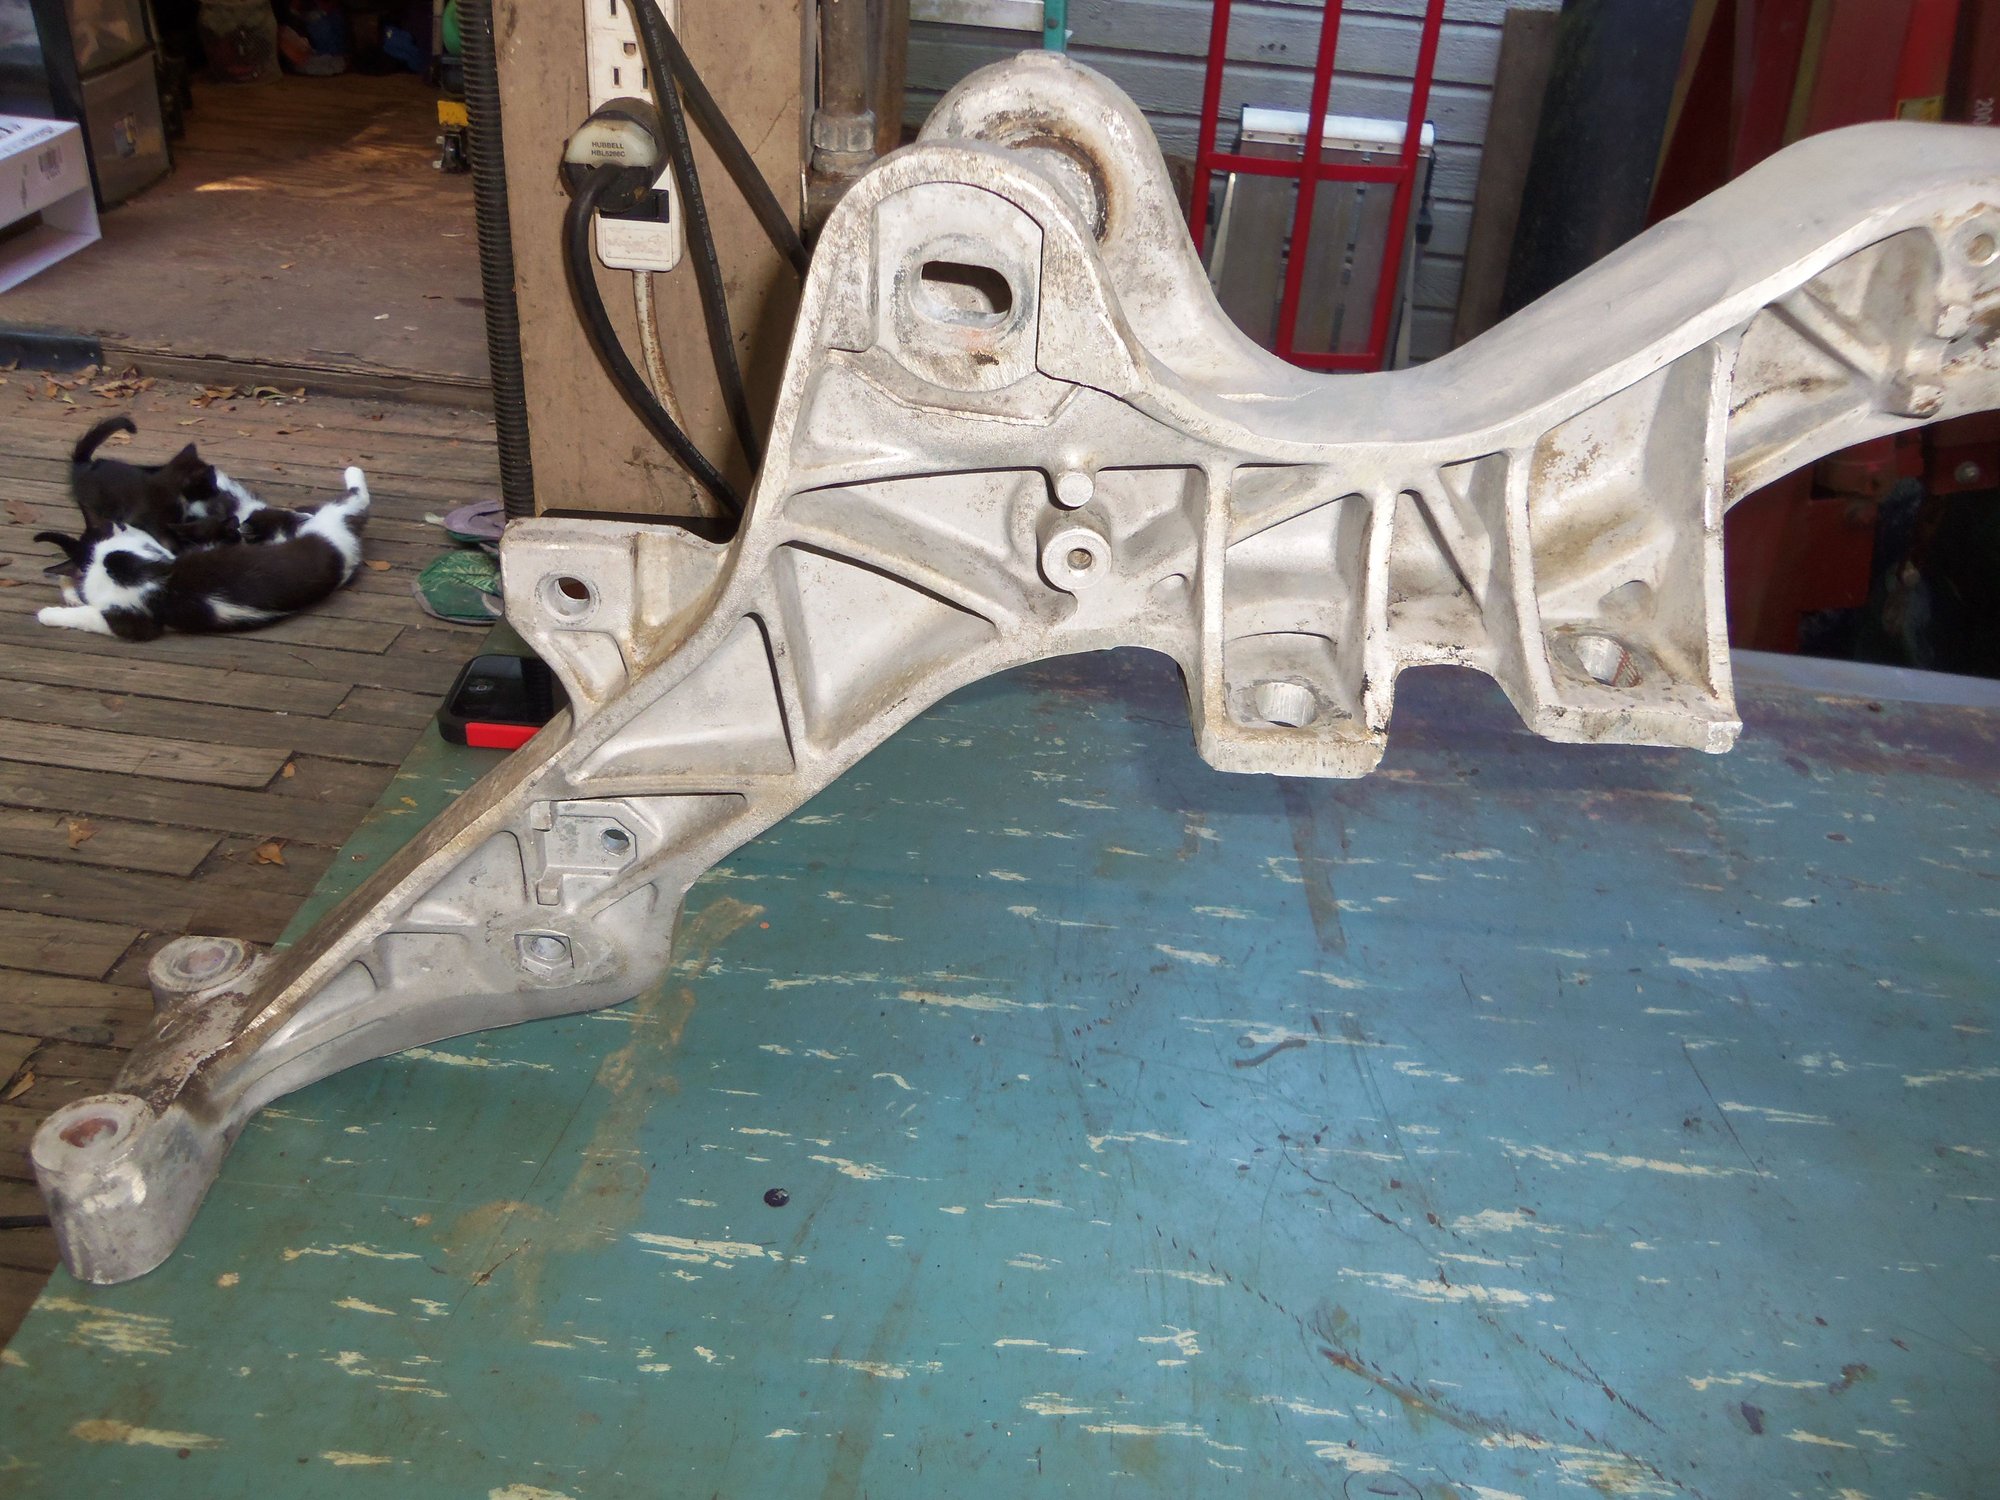
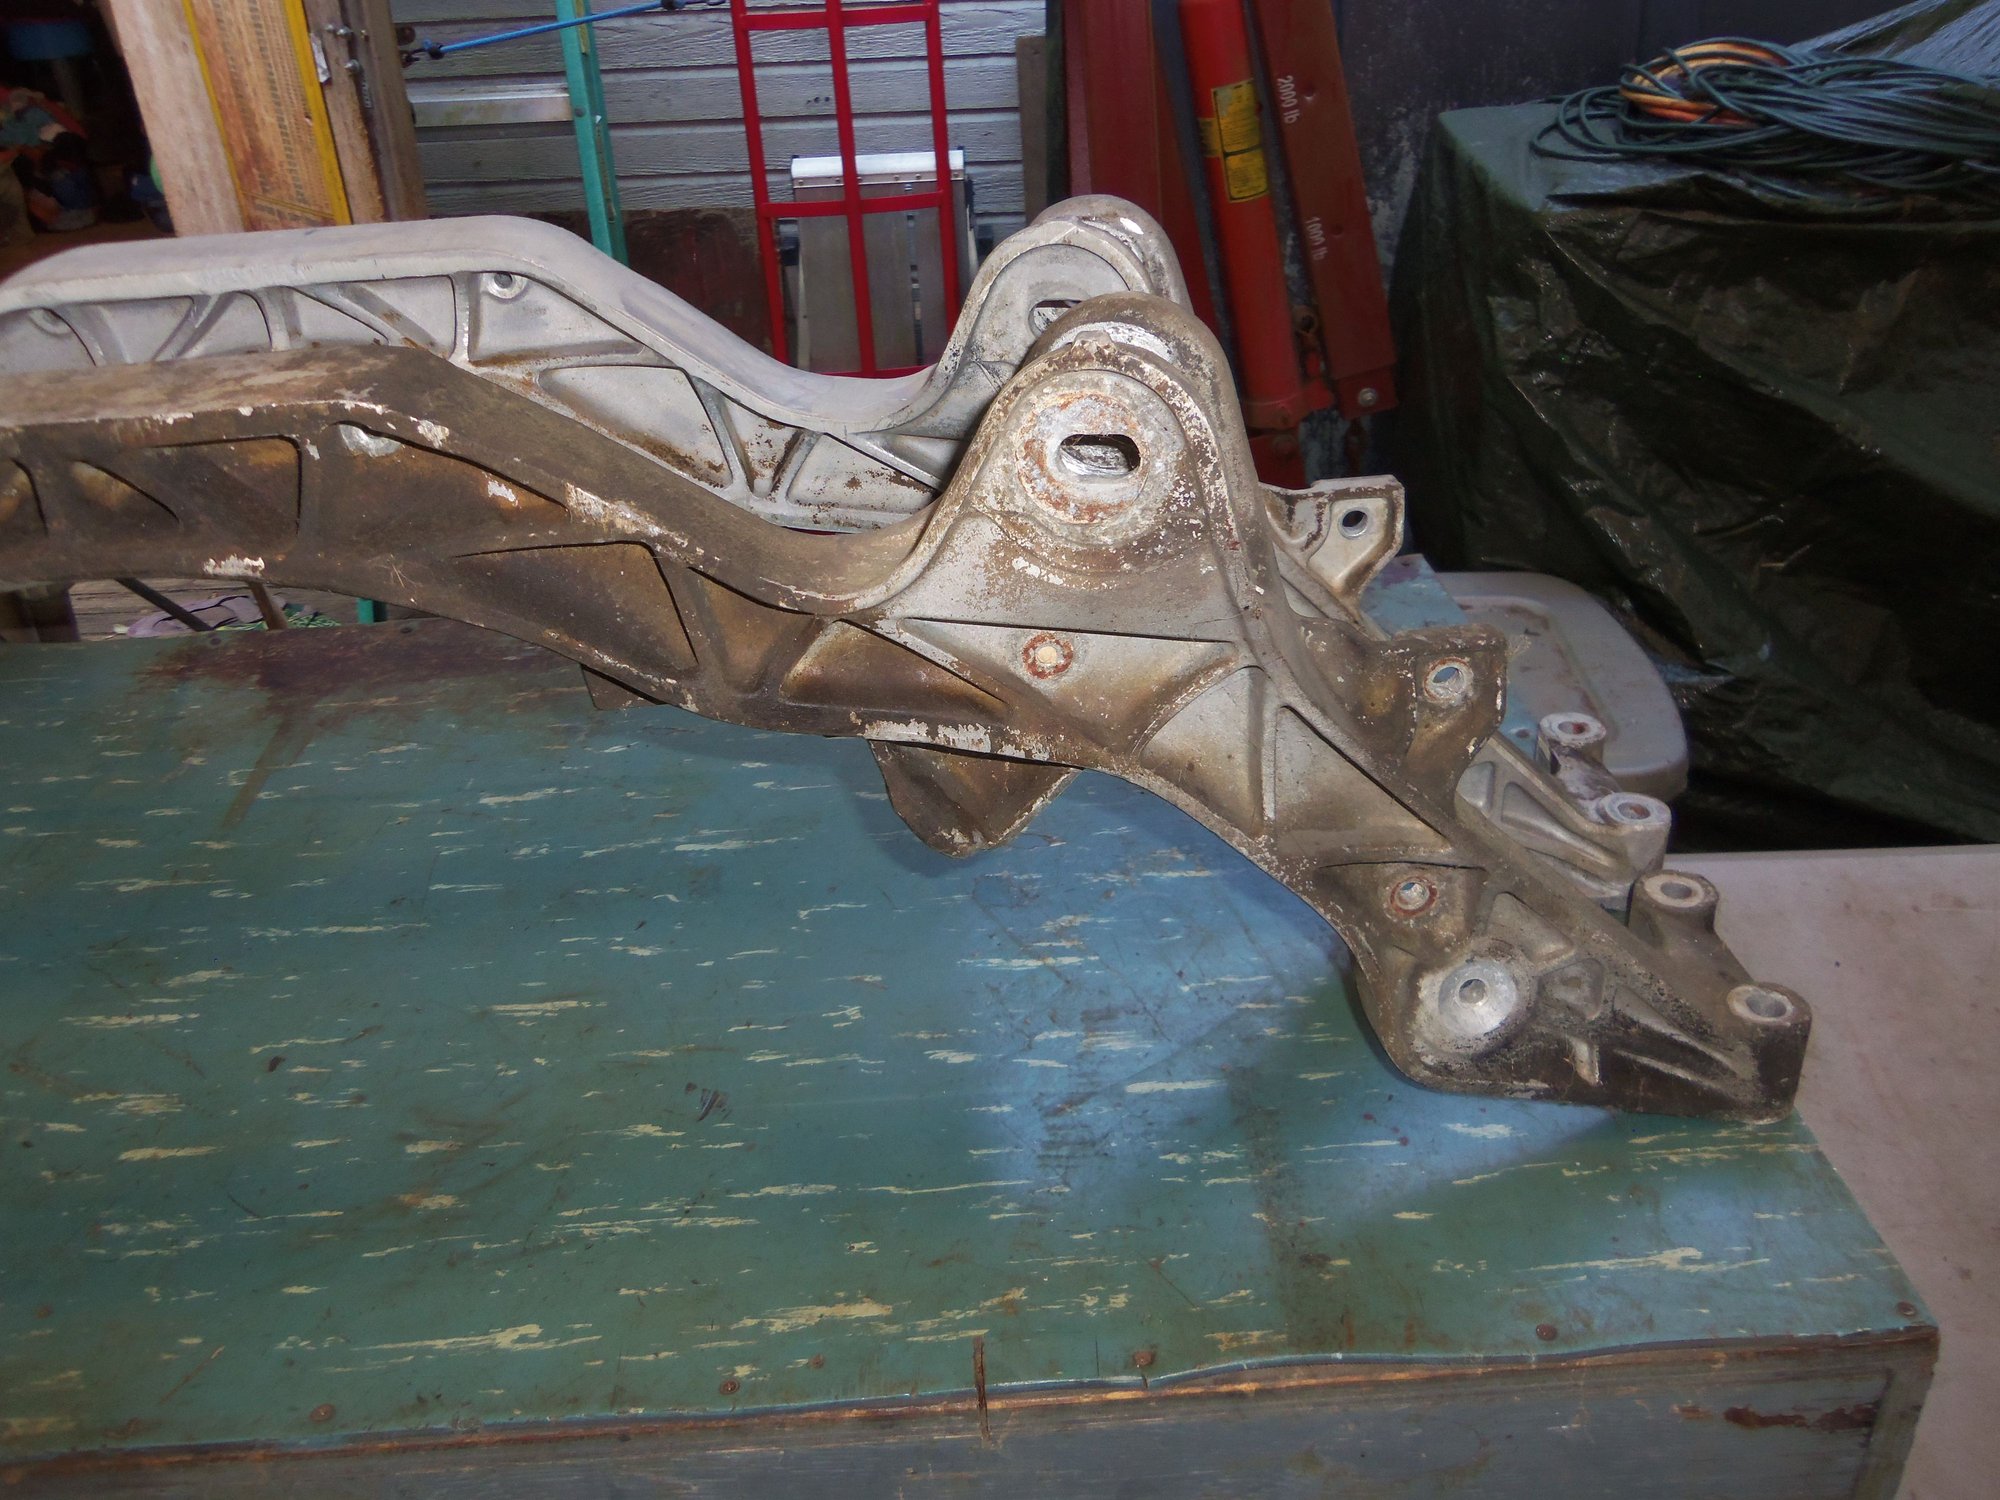
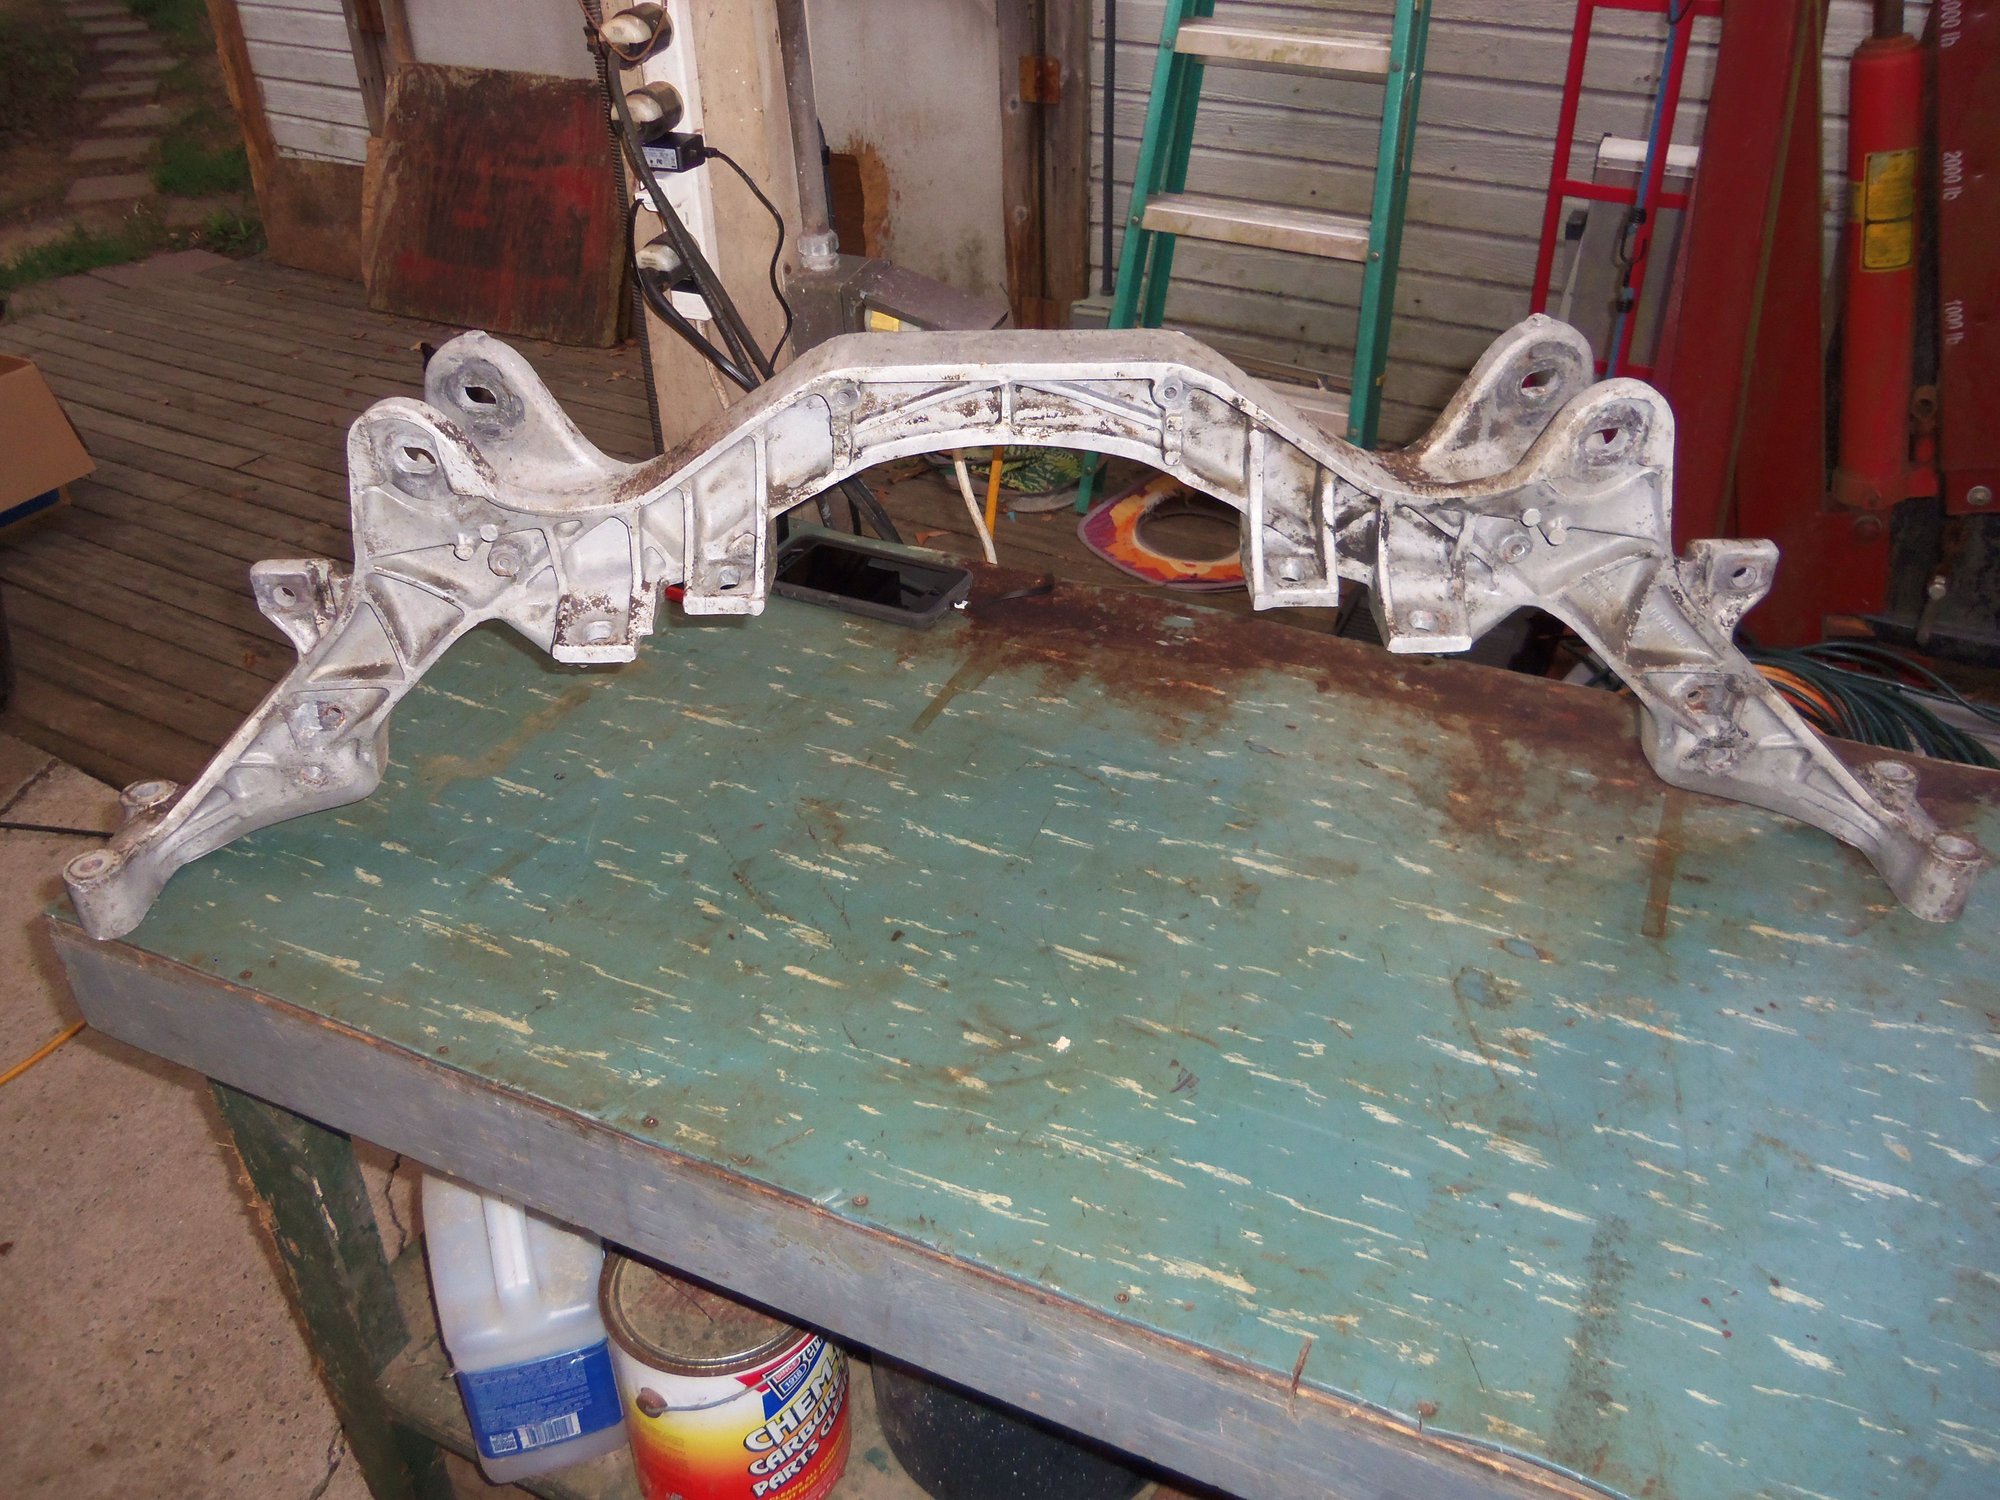
Big push was cleaning the rear suspension crossmember. I am using the nicer crossmember from the donor 1988 S4 suspension I have. I started off by scrubbing the oil/grease/road crud from the bottom with a toothbrush and mineral spirits. Effective, but slowwwwwwww. And my wrists hurt. As usual when cleaning with a toothbrush. Rob Edwards reminded me of the joys of solvents and a pressure washer. So, after playtime with one of my pressure washers, the crossmember is far cleaner. It is not pristine by any stretch. And I do not want it so. The Red Witch is beautiful, but she is not to be a show car. Her life will be one of daily driving. With a smile on my face. So...she will not be beautiful underneath. All I wanted to do was get the dead chickens off the crossmember and prepare it for installation.
In that respect, I have succeeded.
Good times. Scrubbing with a toothbrush.
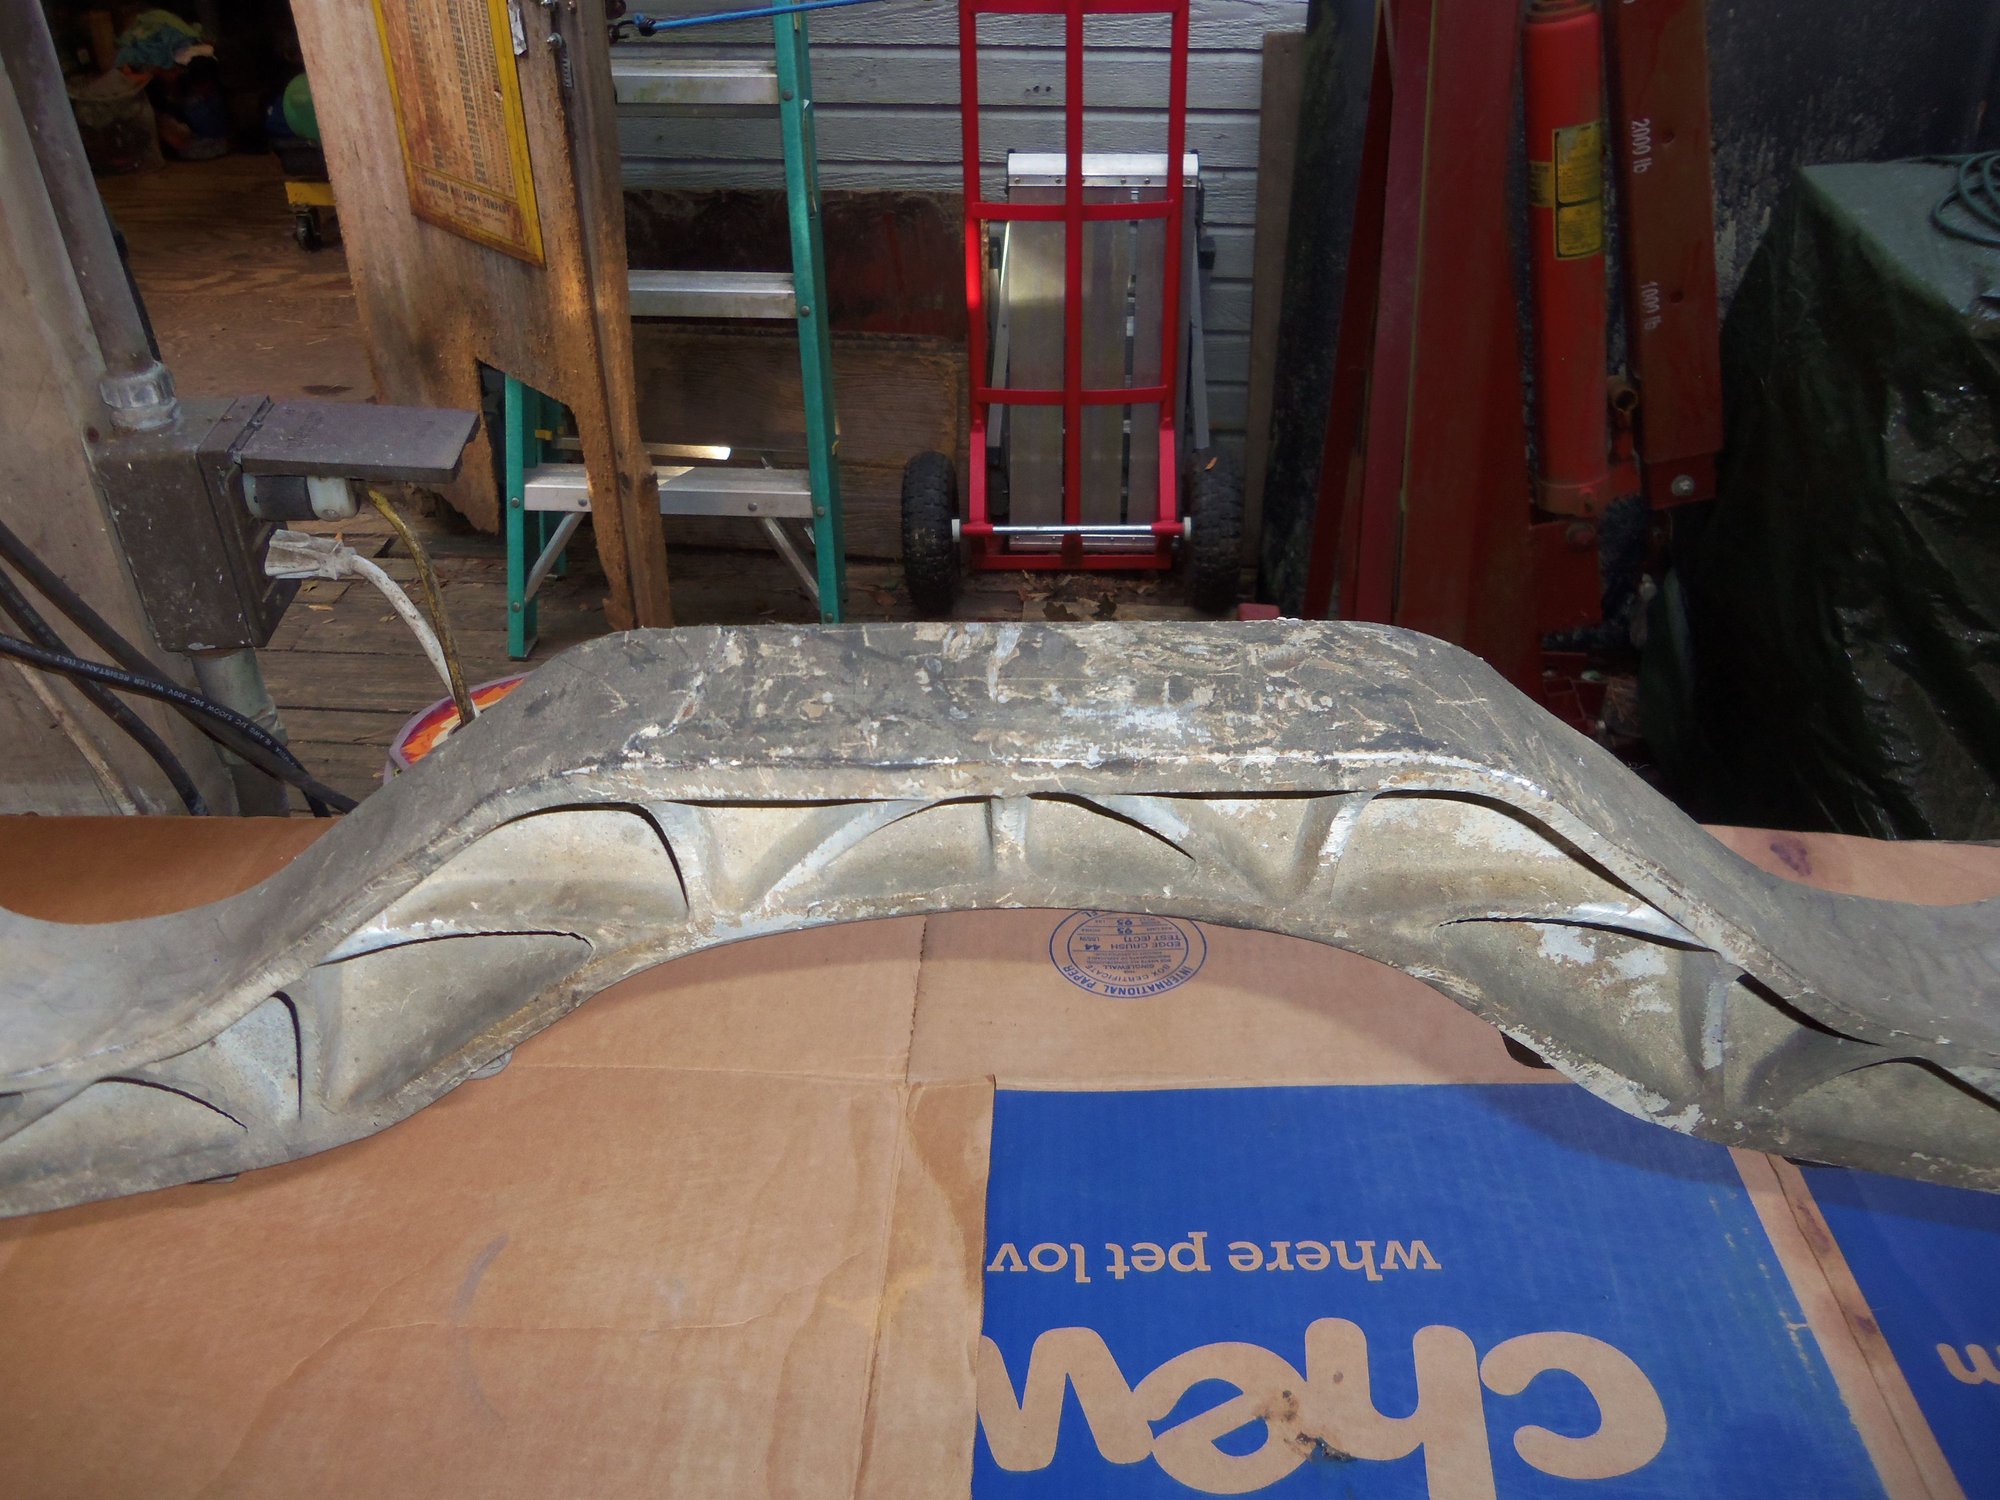
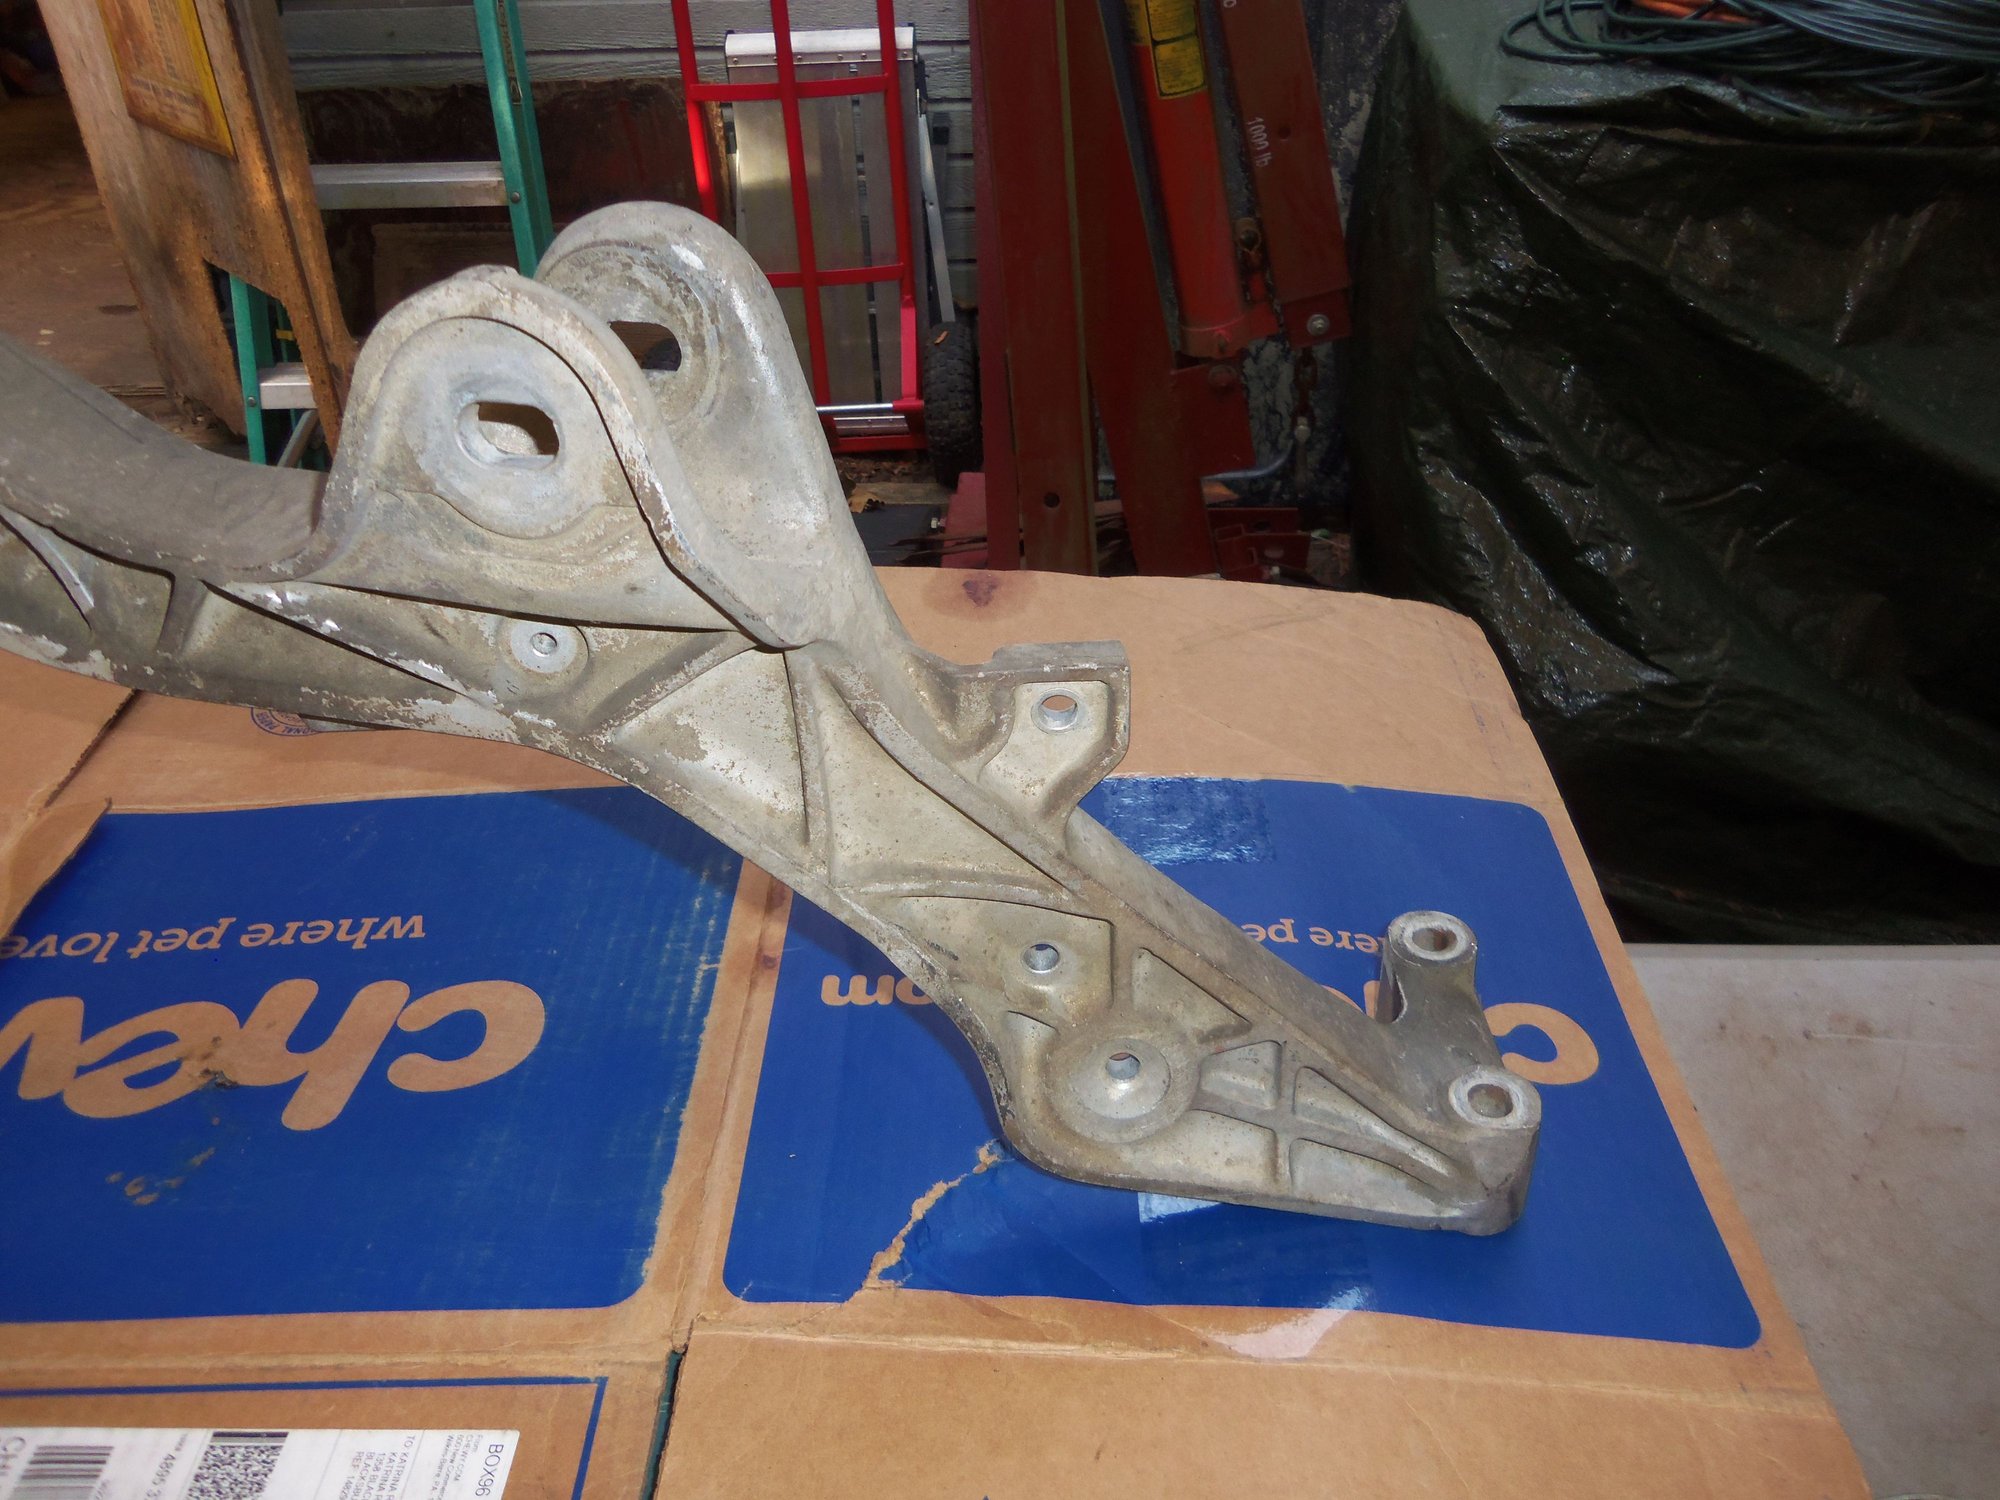
Not terrible, but has years of grime.
I want this part to be clean, if nothing else.
Dirty, but not filthy.
Much cleaner.
This is what I want. Granted, it won't stay that way. But still...
Not perfect, but better.
Cleaner than the crossmember from the Red Witch.
Only other thing I have done worth mention is go through my parts again. I have reorganized so I have two groups of parts out right now. Immediate box of stuff needed to install the transmission/torque tube, rear suspension crossmember, body support crossmembers, and transmission cooling lines. Soon to be box of stuff needed to finish reassembling rear suspension, driveline, and exhaust hangers. I will be going through the various parts to make sure they are clean and ready.
And in my opinion you've succeeded admirably. , but then I'm one of those rare individuals who actually gets excited by suspension and drive train repairs. Go figure.
Finally...it has been a year and a half since I pulled the torque tube and then the transmission from the Red Witch. Now they are ready to go back in.
And, I can see my work bench again.
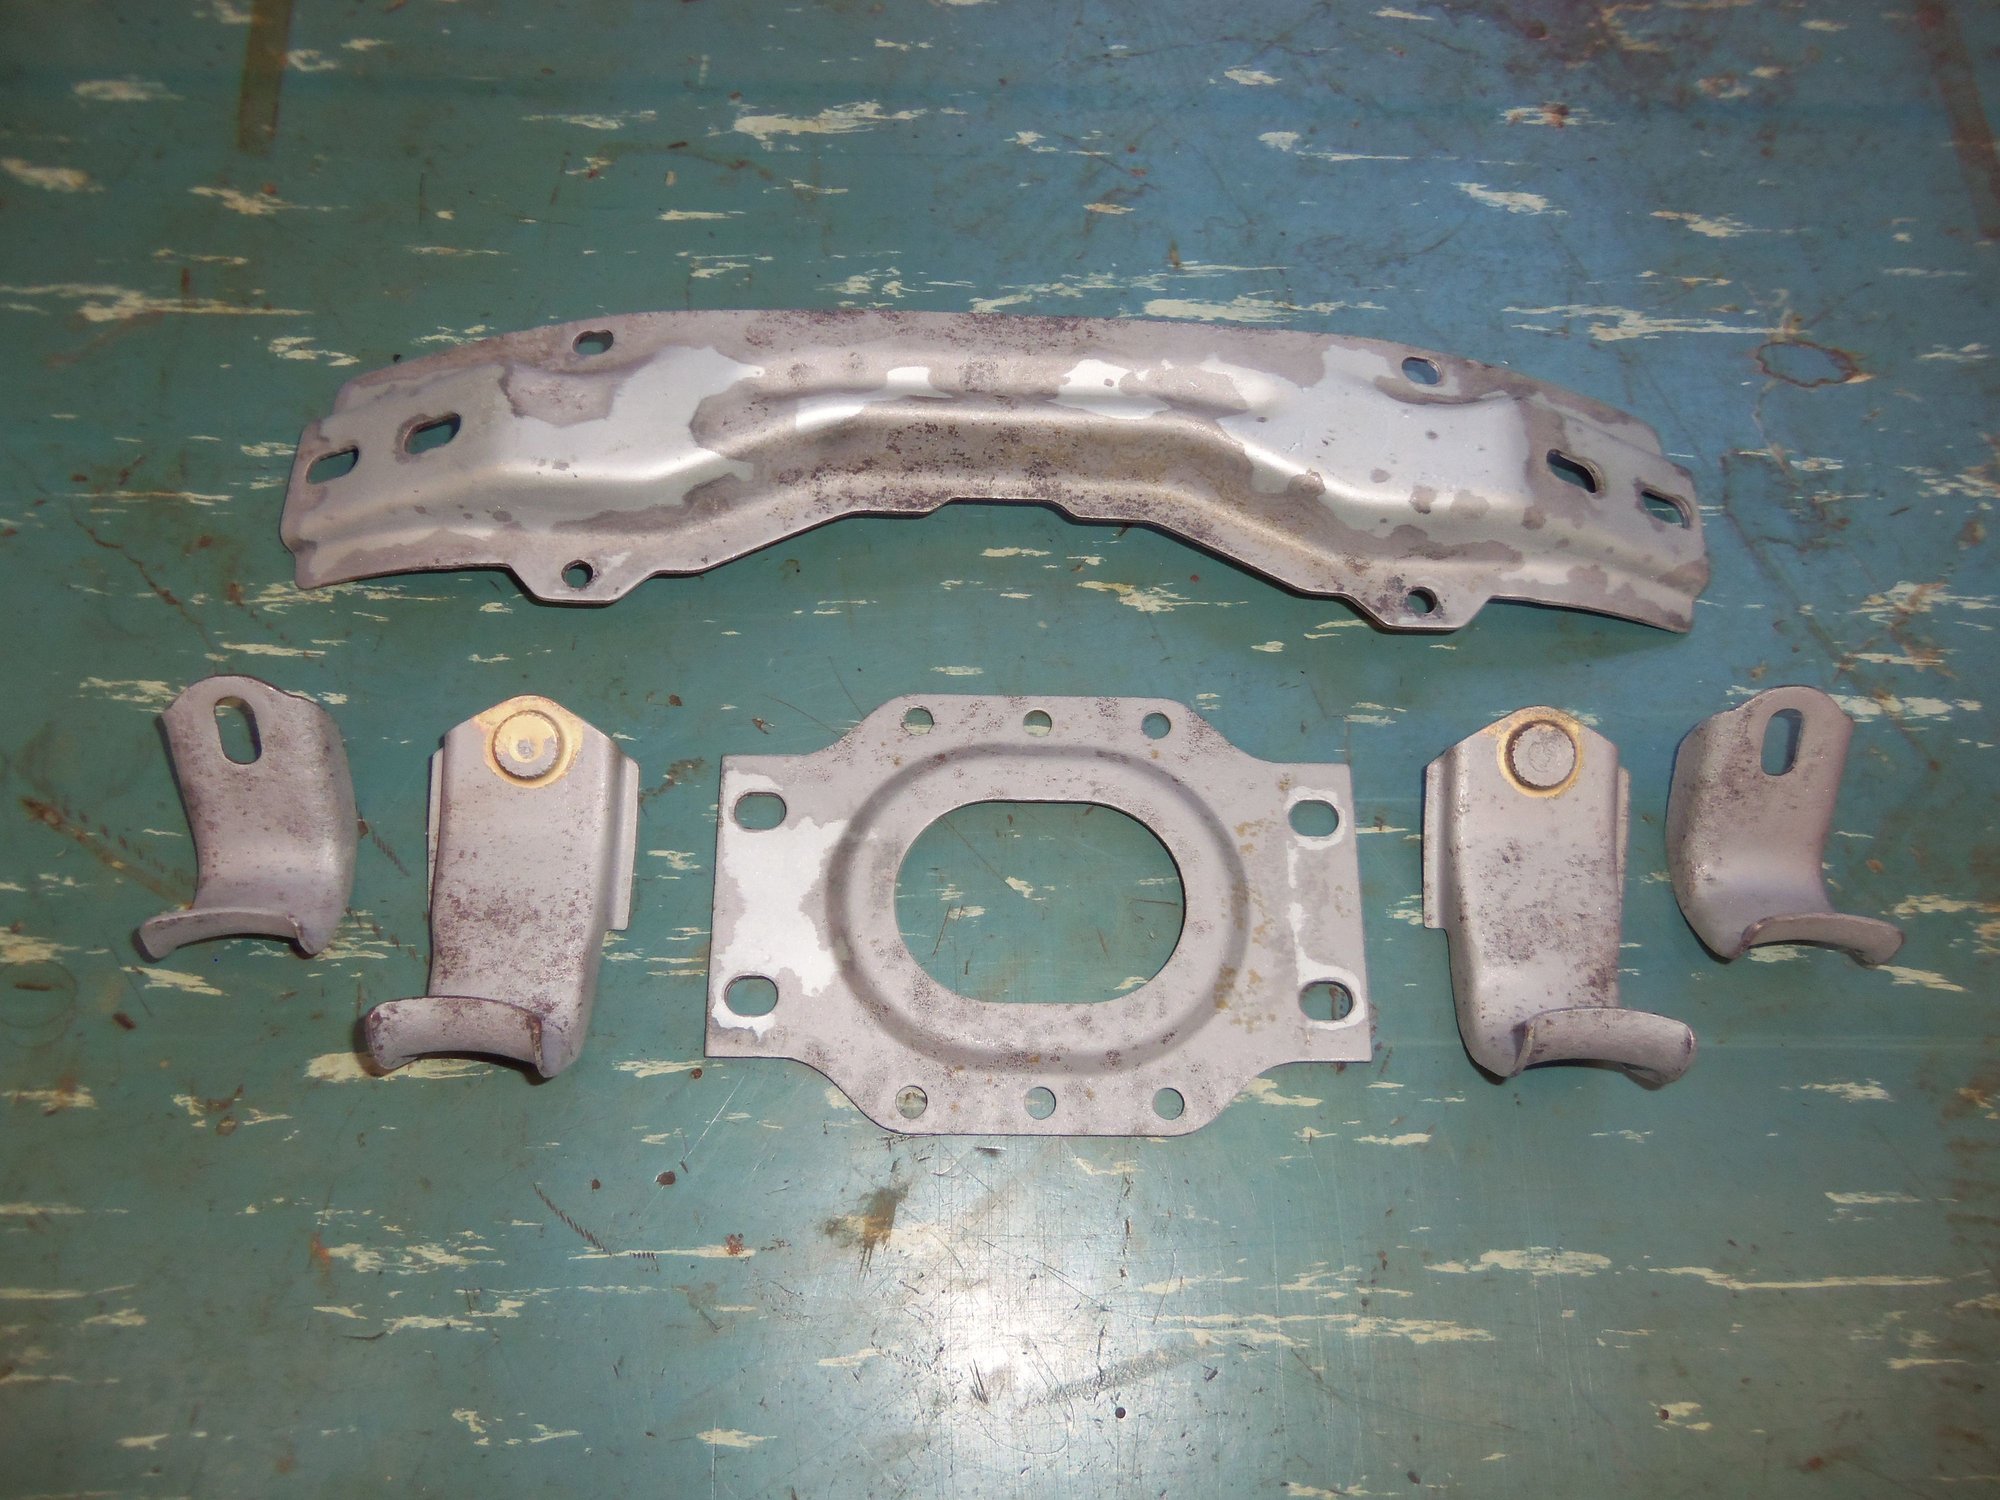
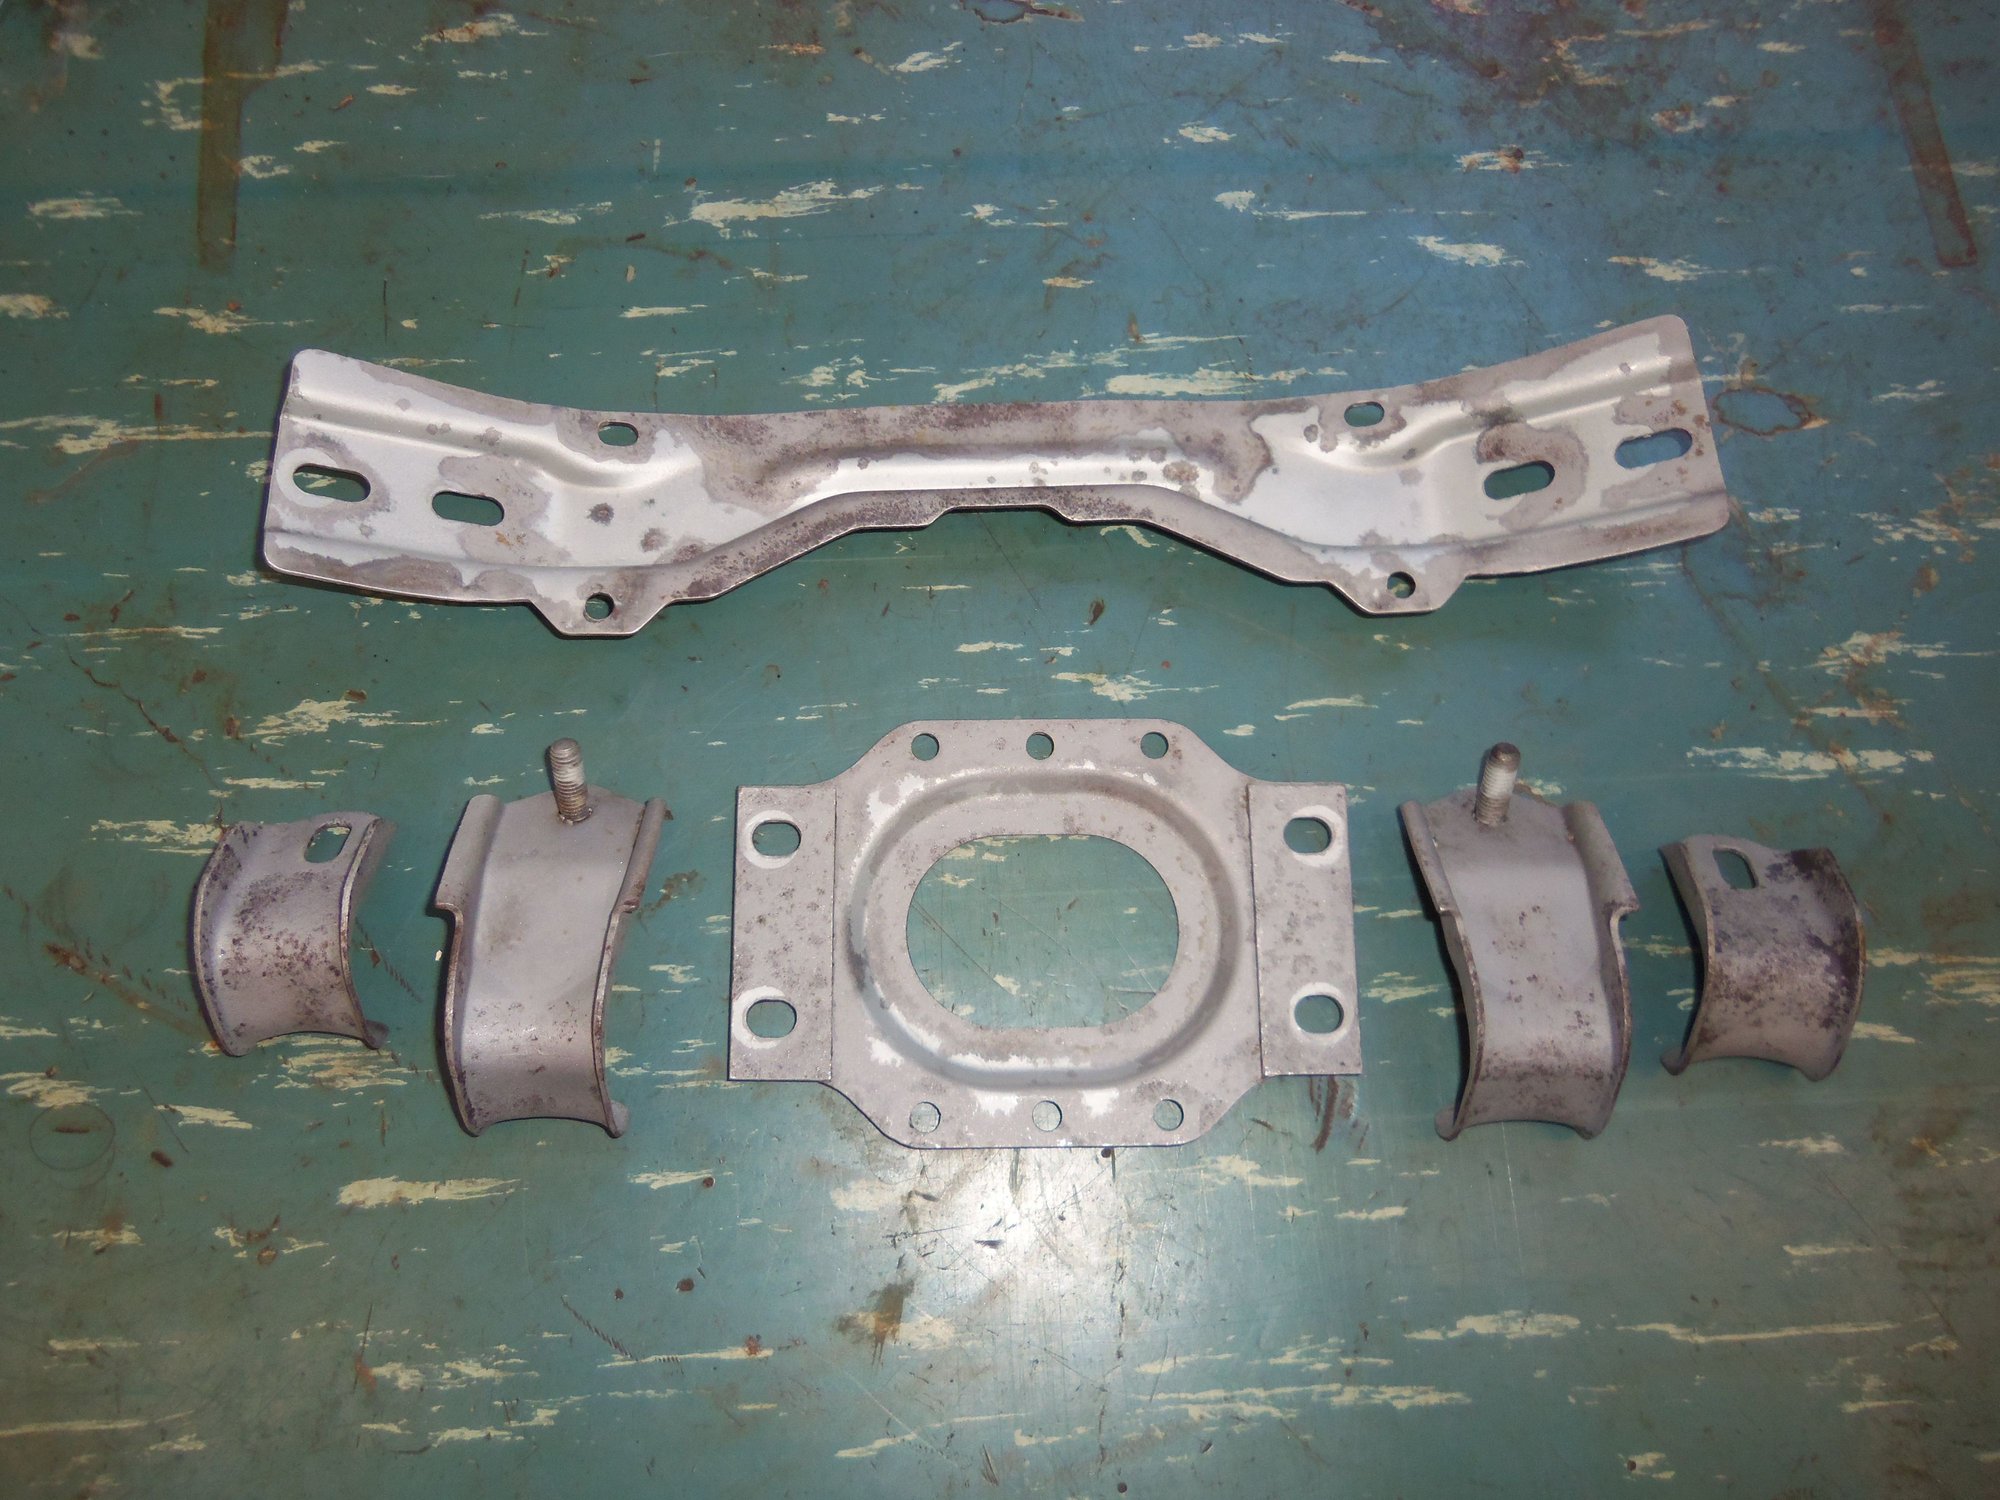
On the way home from work yesterday, I stopped off at my machinist's and used his blasting cabinet on a few parts. After a nap, I spent the evening cleaning and painting last minute parts.
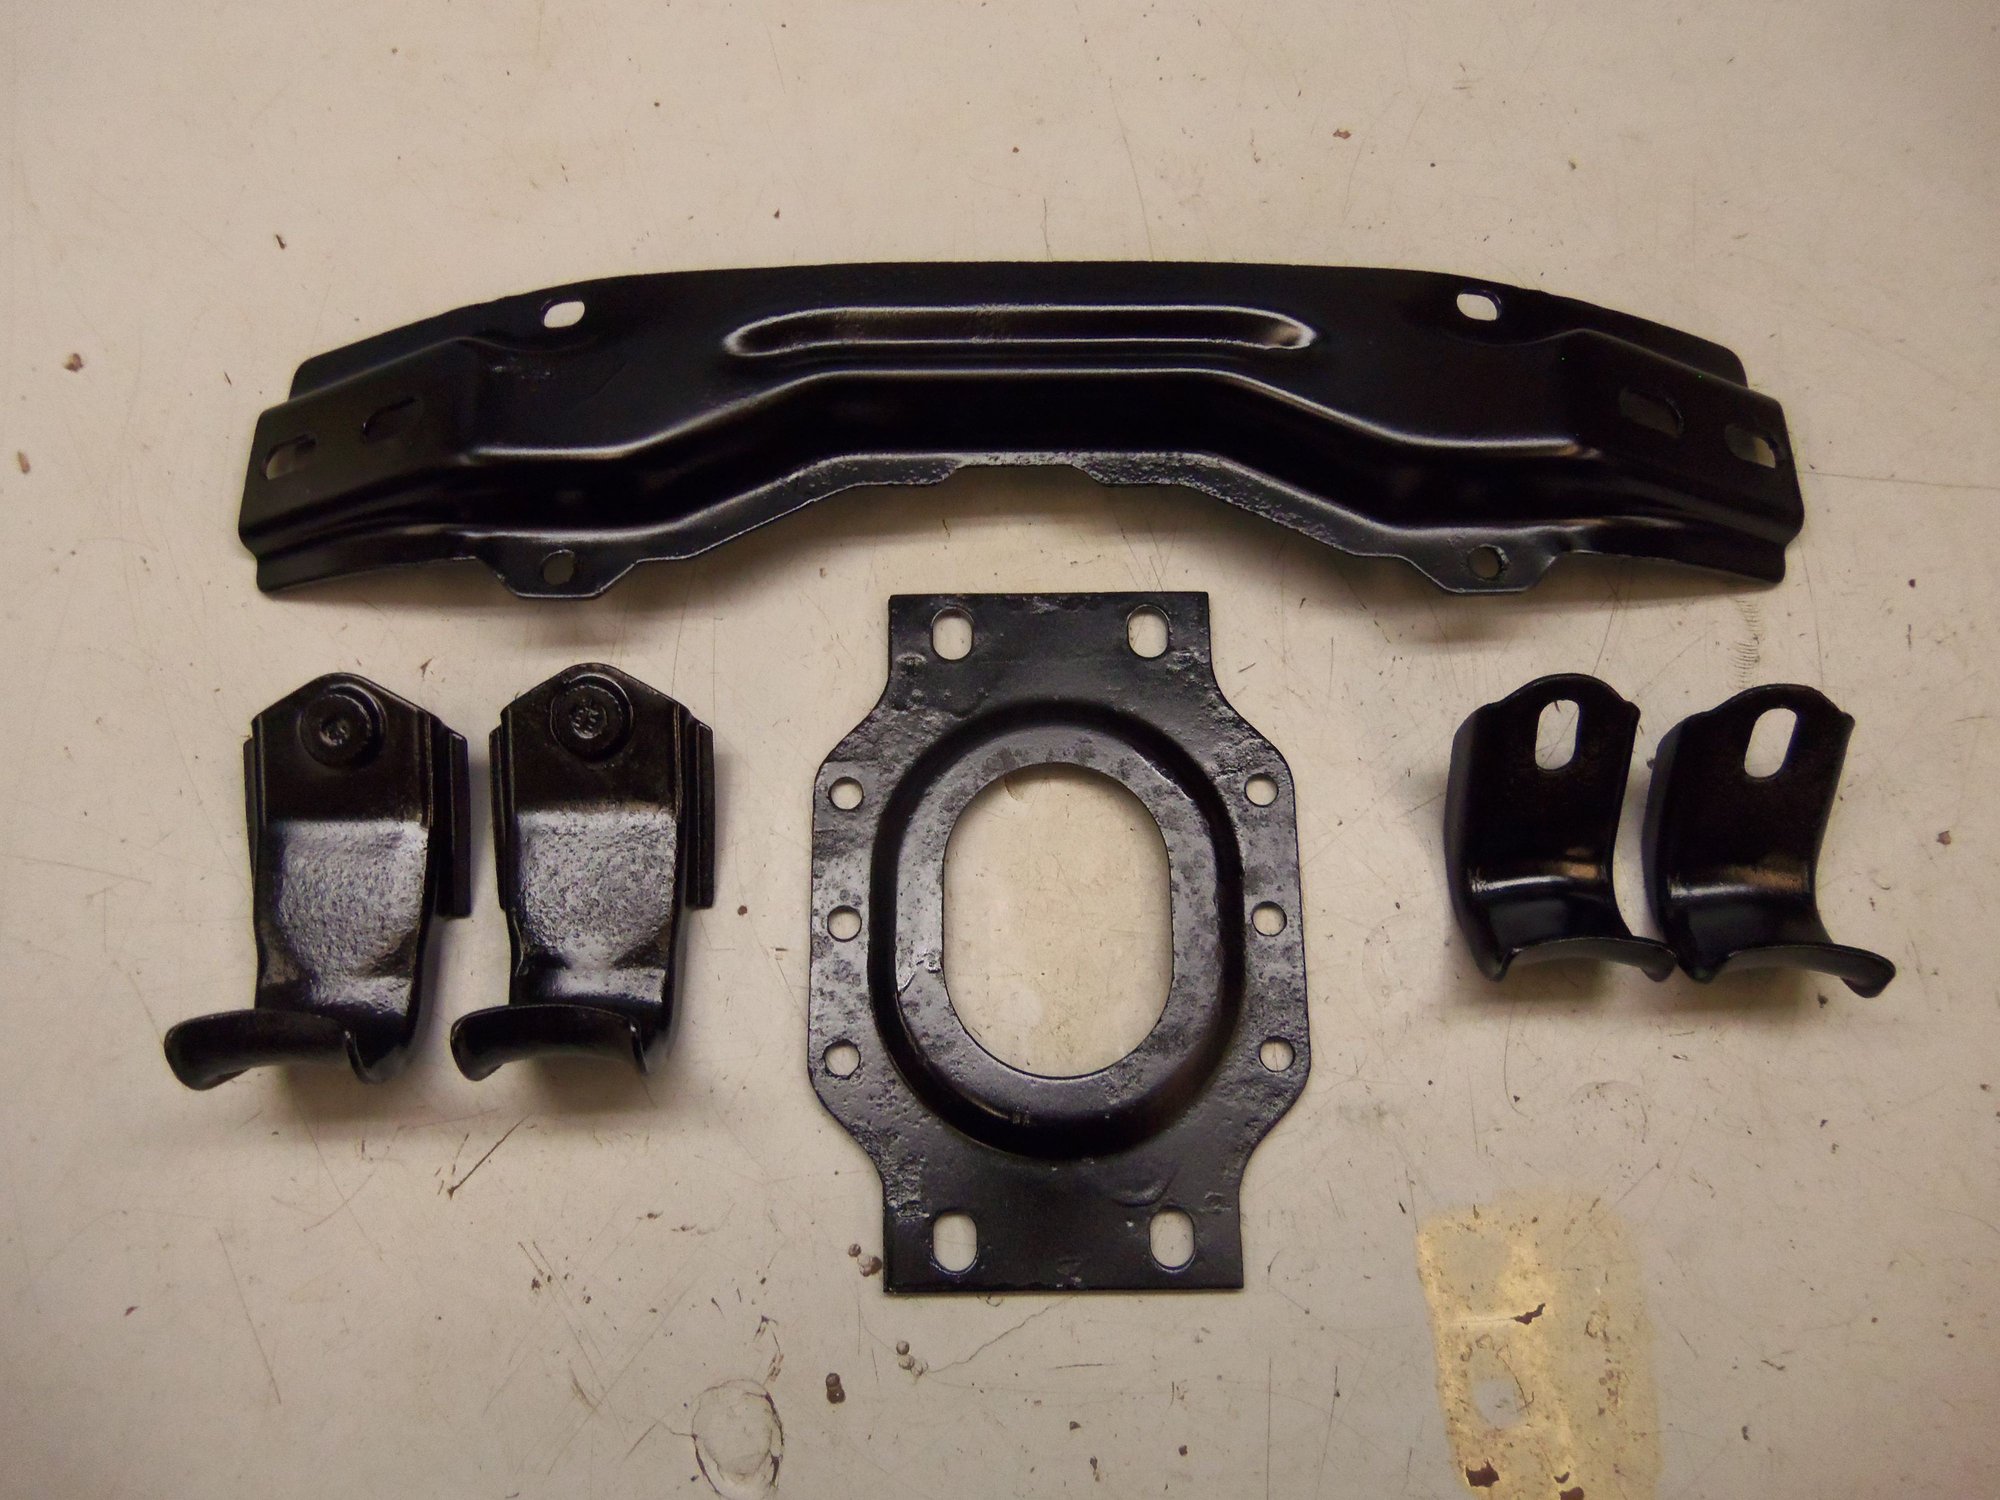
Body stiffeners under the torque tube and the resonator rear hangers. Blasting cabinet removed the ugly.
Not perfect, but will suit my purposes.
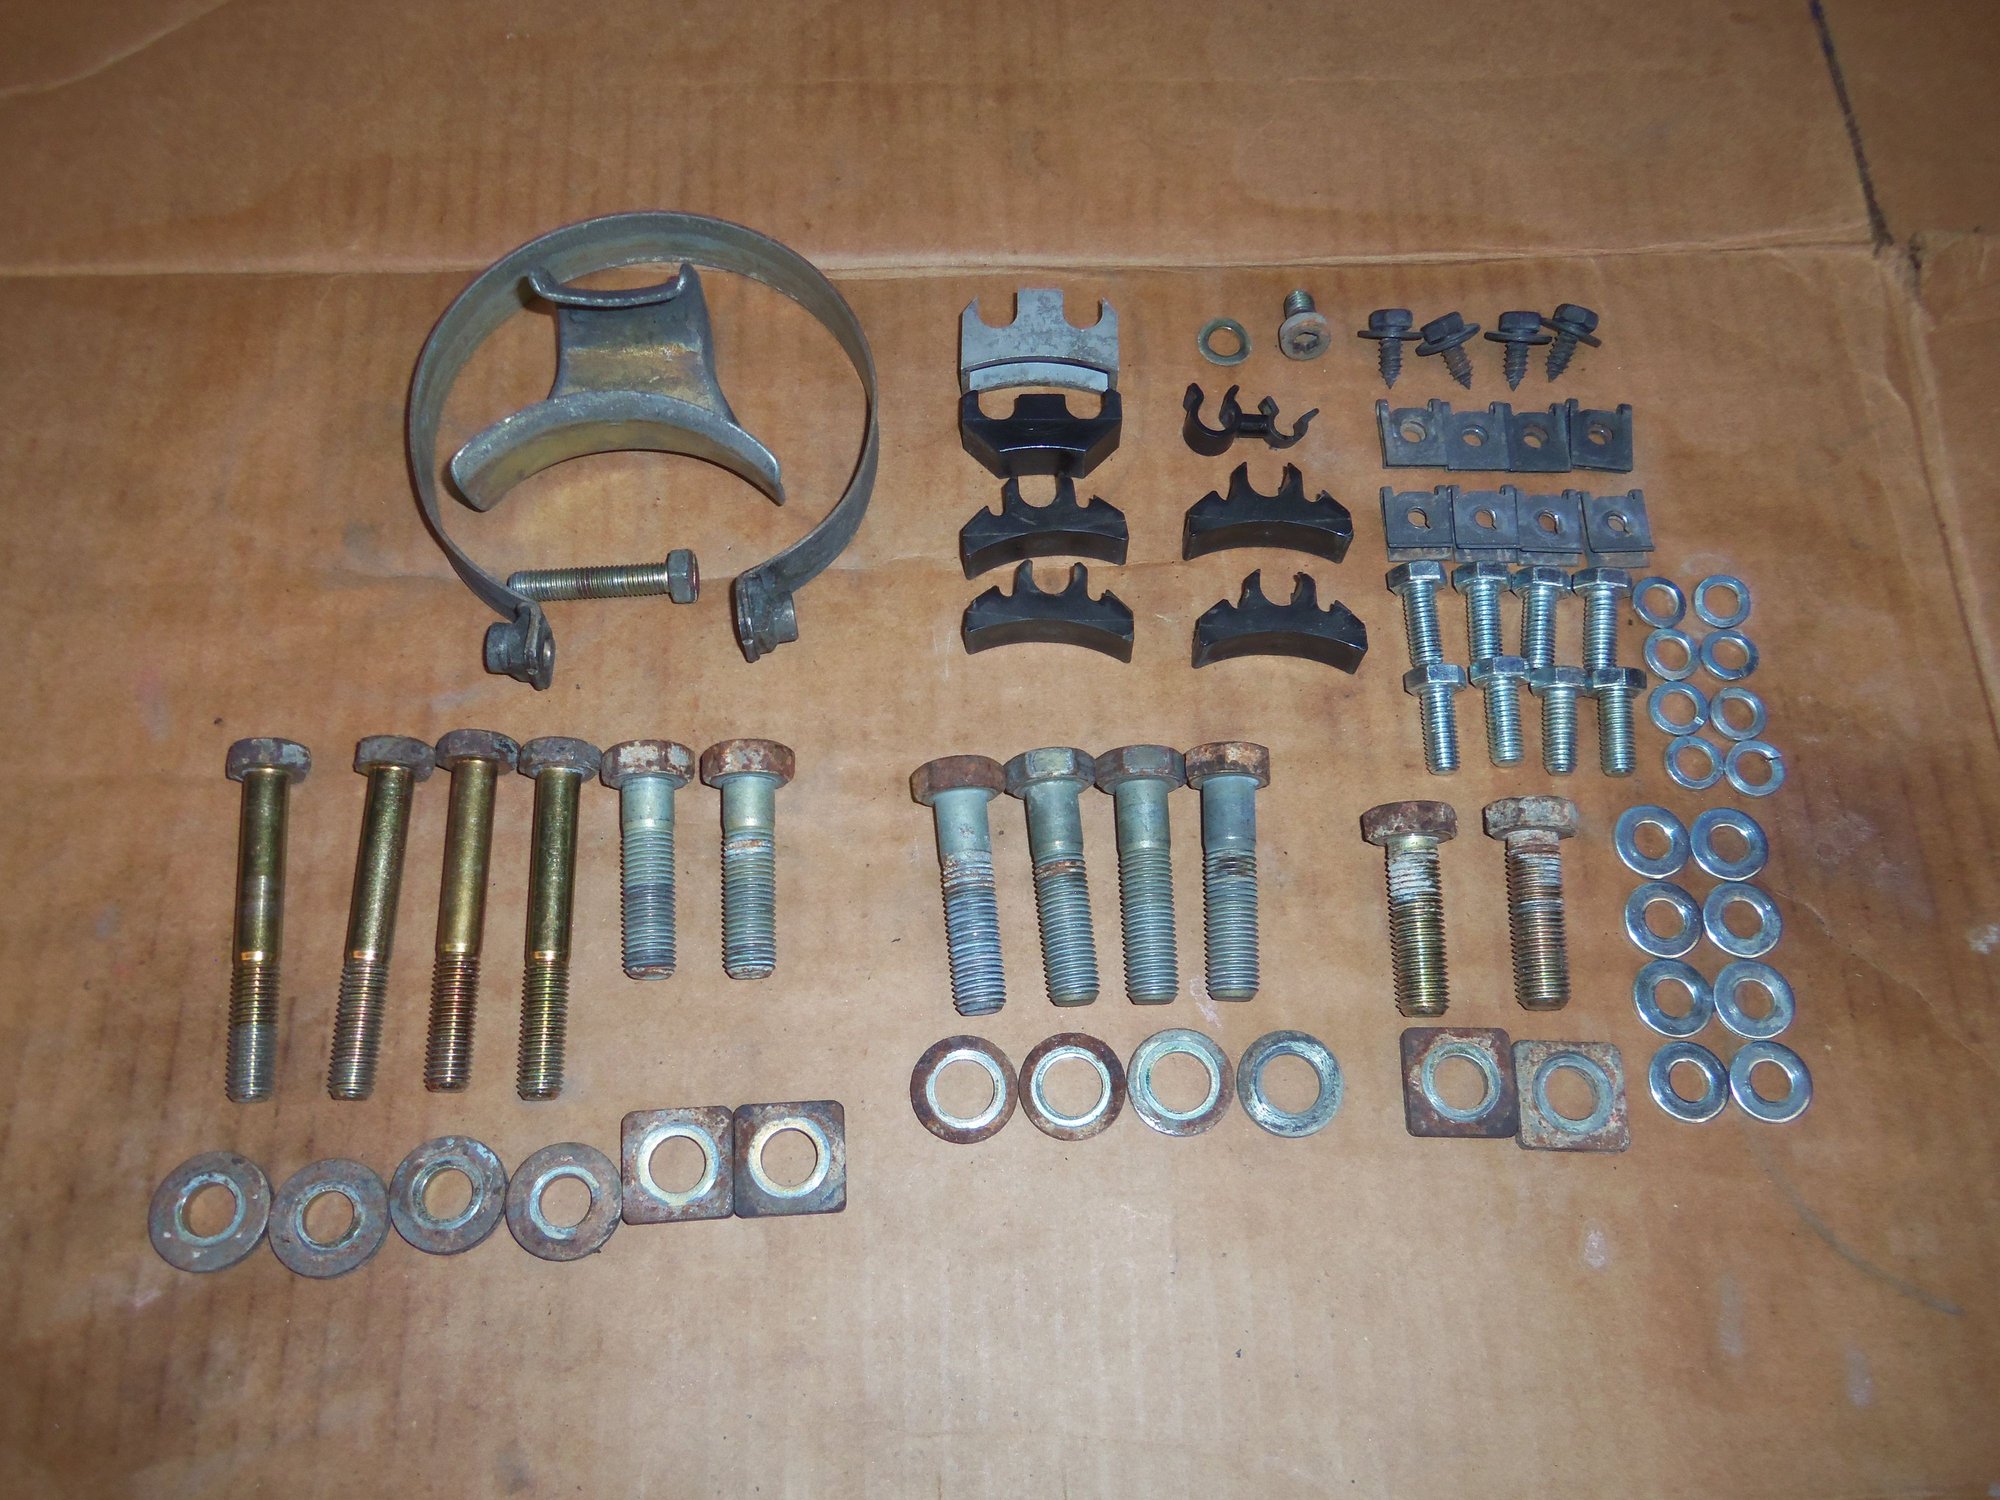
Various hardware for torque tube and rear suspension installation.
Coat of Rustoleum Rusty Metal Primer followed by topcoat of Rustoleum Semi-gloss black. The goal was not pretty, but corrosion protection.
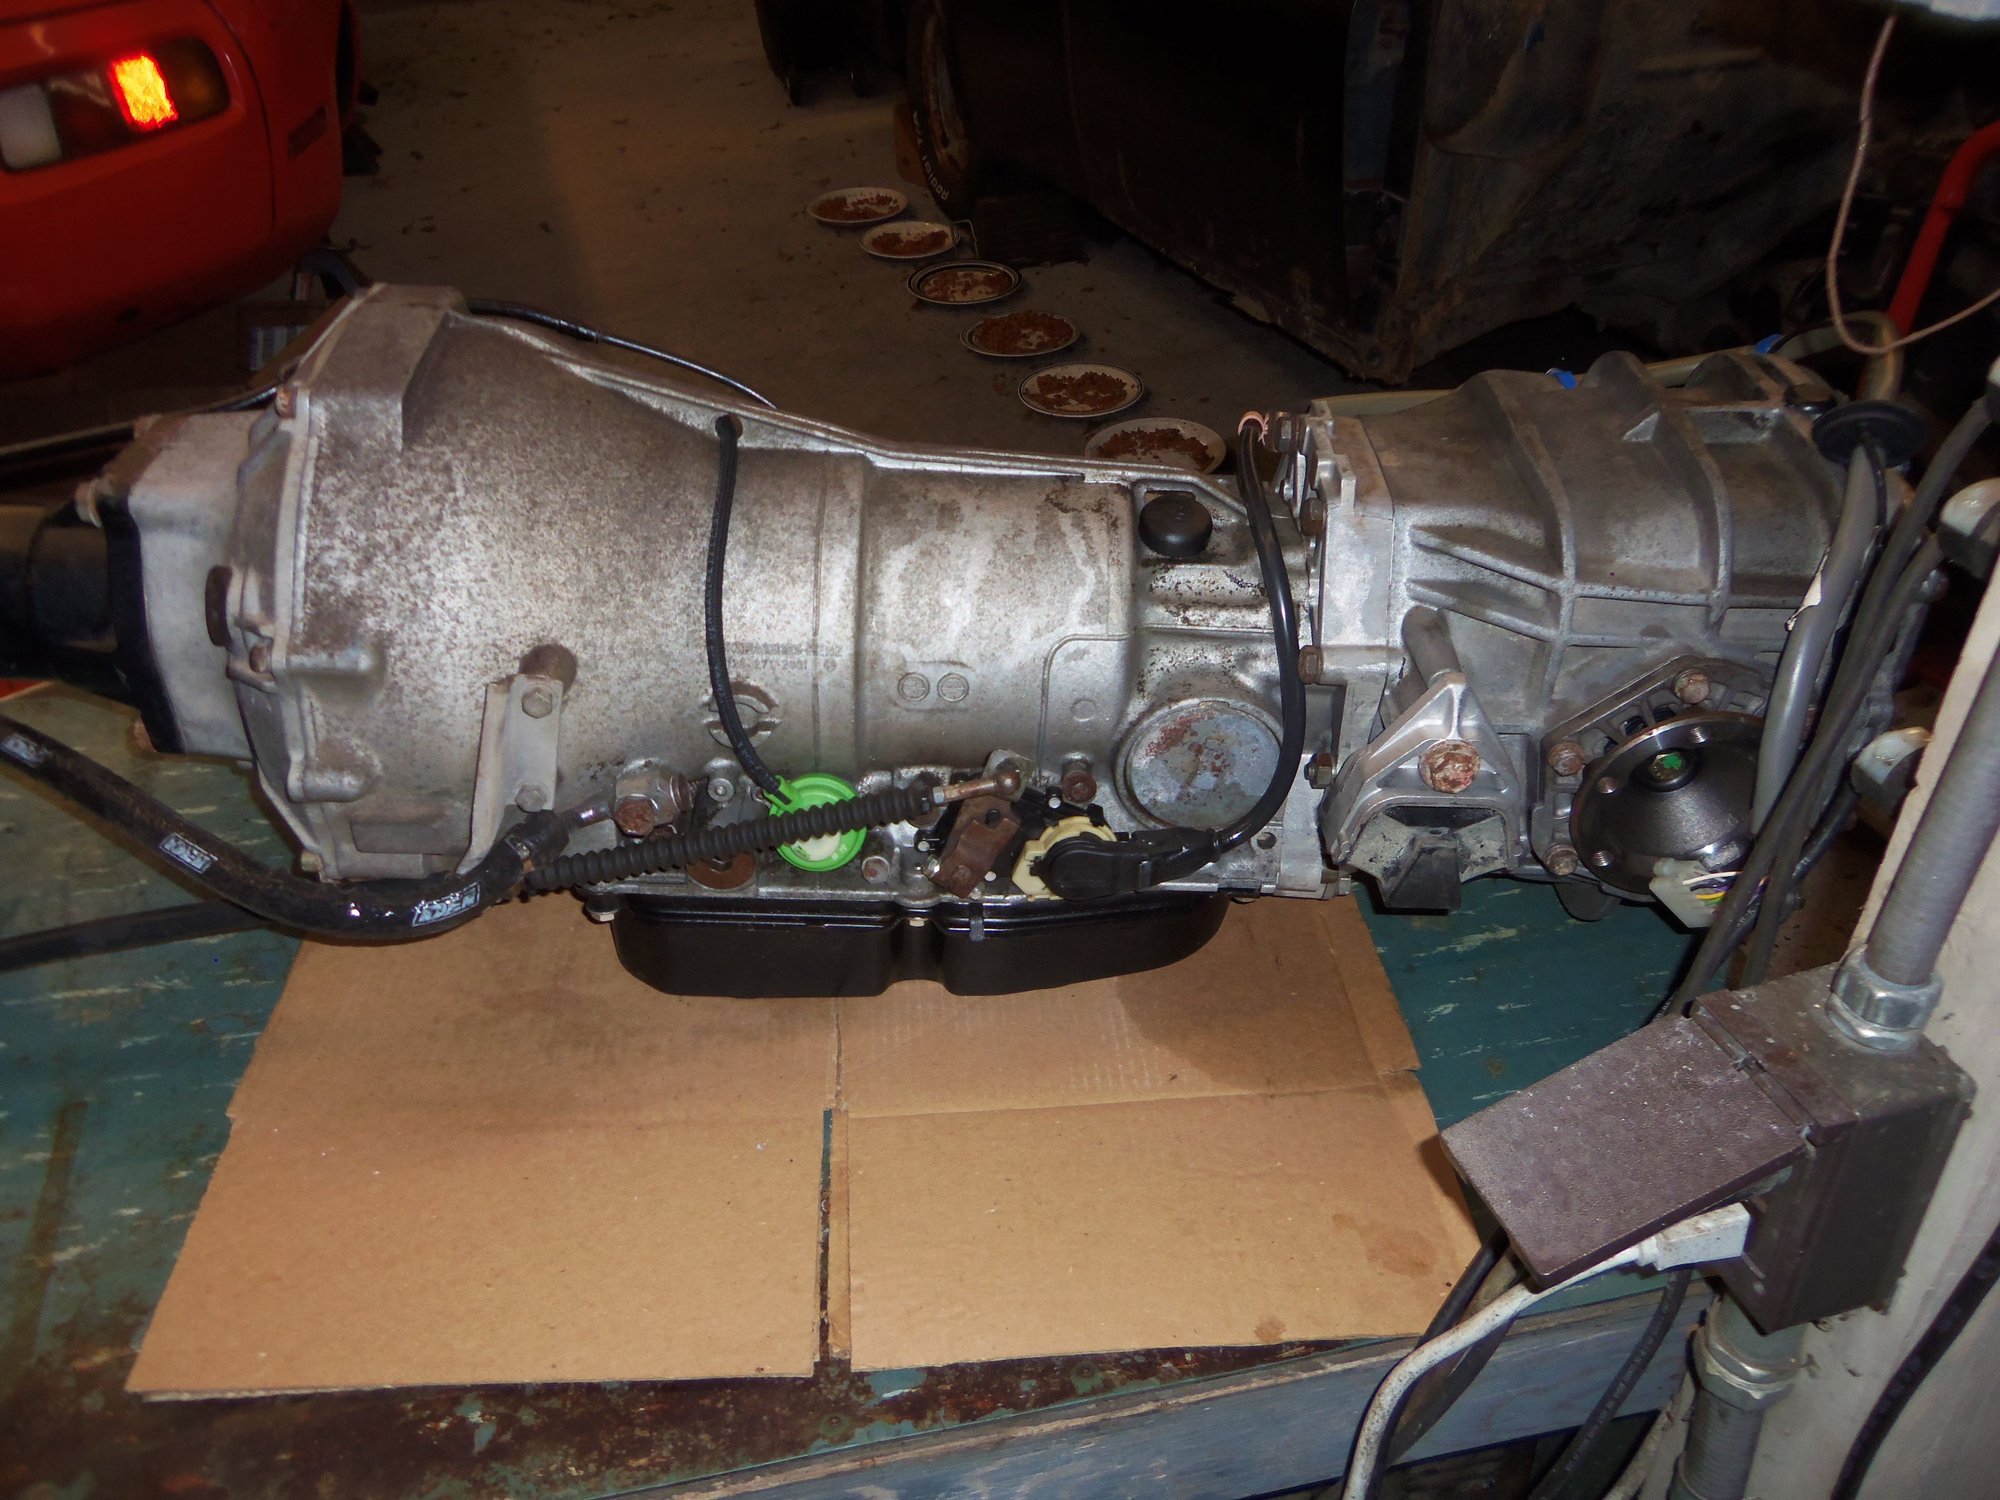
Today was the big day! Marriage of the torque tube and transmission, then fitting out all the hoses and cables.
Because I am stupid, I moved the transmission myself. I was able to heave it off the workbench in the shop down onto the fully raised transmission jack. Call it a controlled fall. Then rolled out to the workbench under the carport. I have more room out there to fit the torque tube. SInce that workbench is a little lower, all it took was a good lift with my legs to get the transmission up onto the bench.
Installation of the torque tube was relatively quick. I supported the engine end on a jack stand on a nearby table. I had already coated the shaft splines with Optimoly HT as per the WSM, so it just slid into place. I did have the forethought (accidentally) to remove the pinch bolt from the rear clamp. That would have sucked...
Coated with Optimoly HT, the torque tube to torque converter bolts were torqued to 120Nm and it was done.
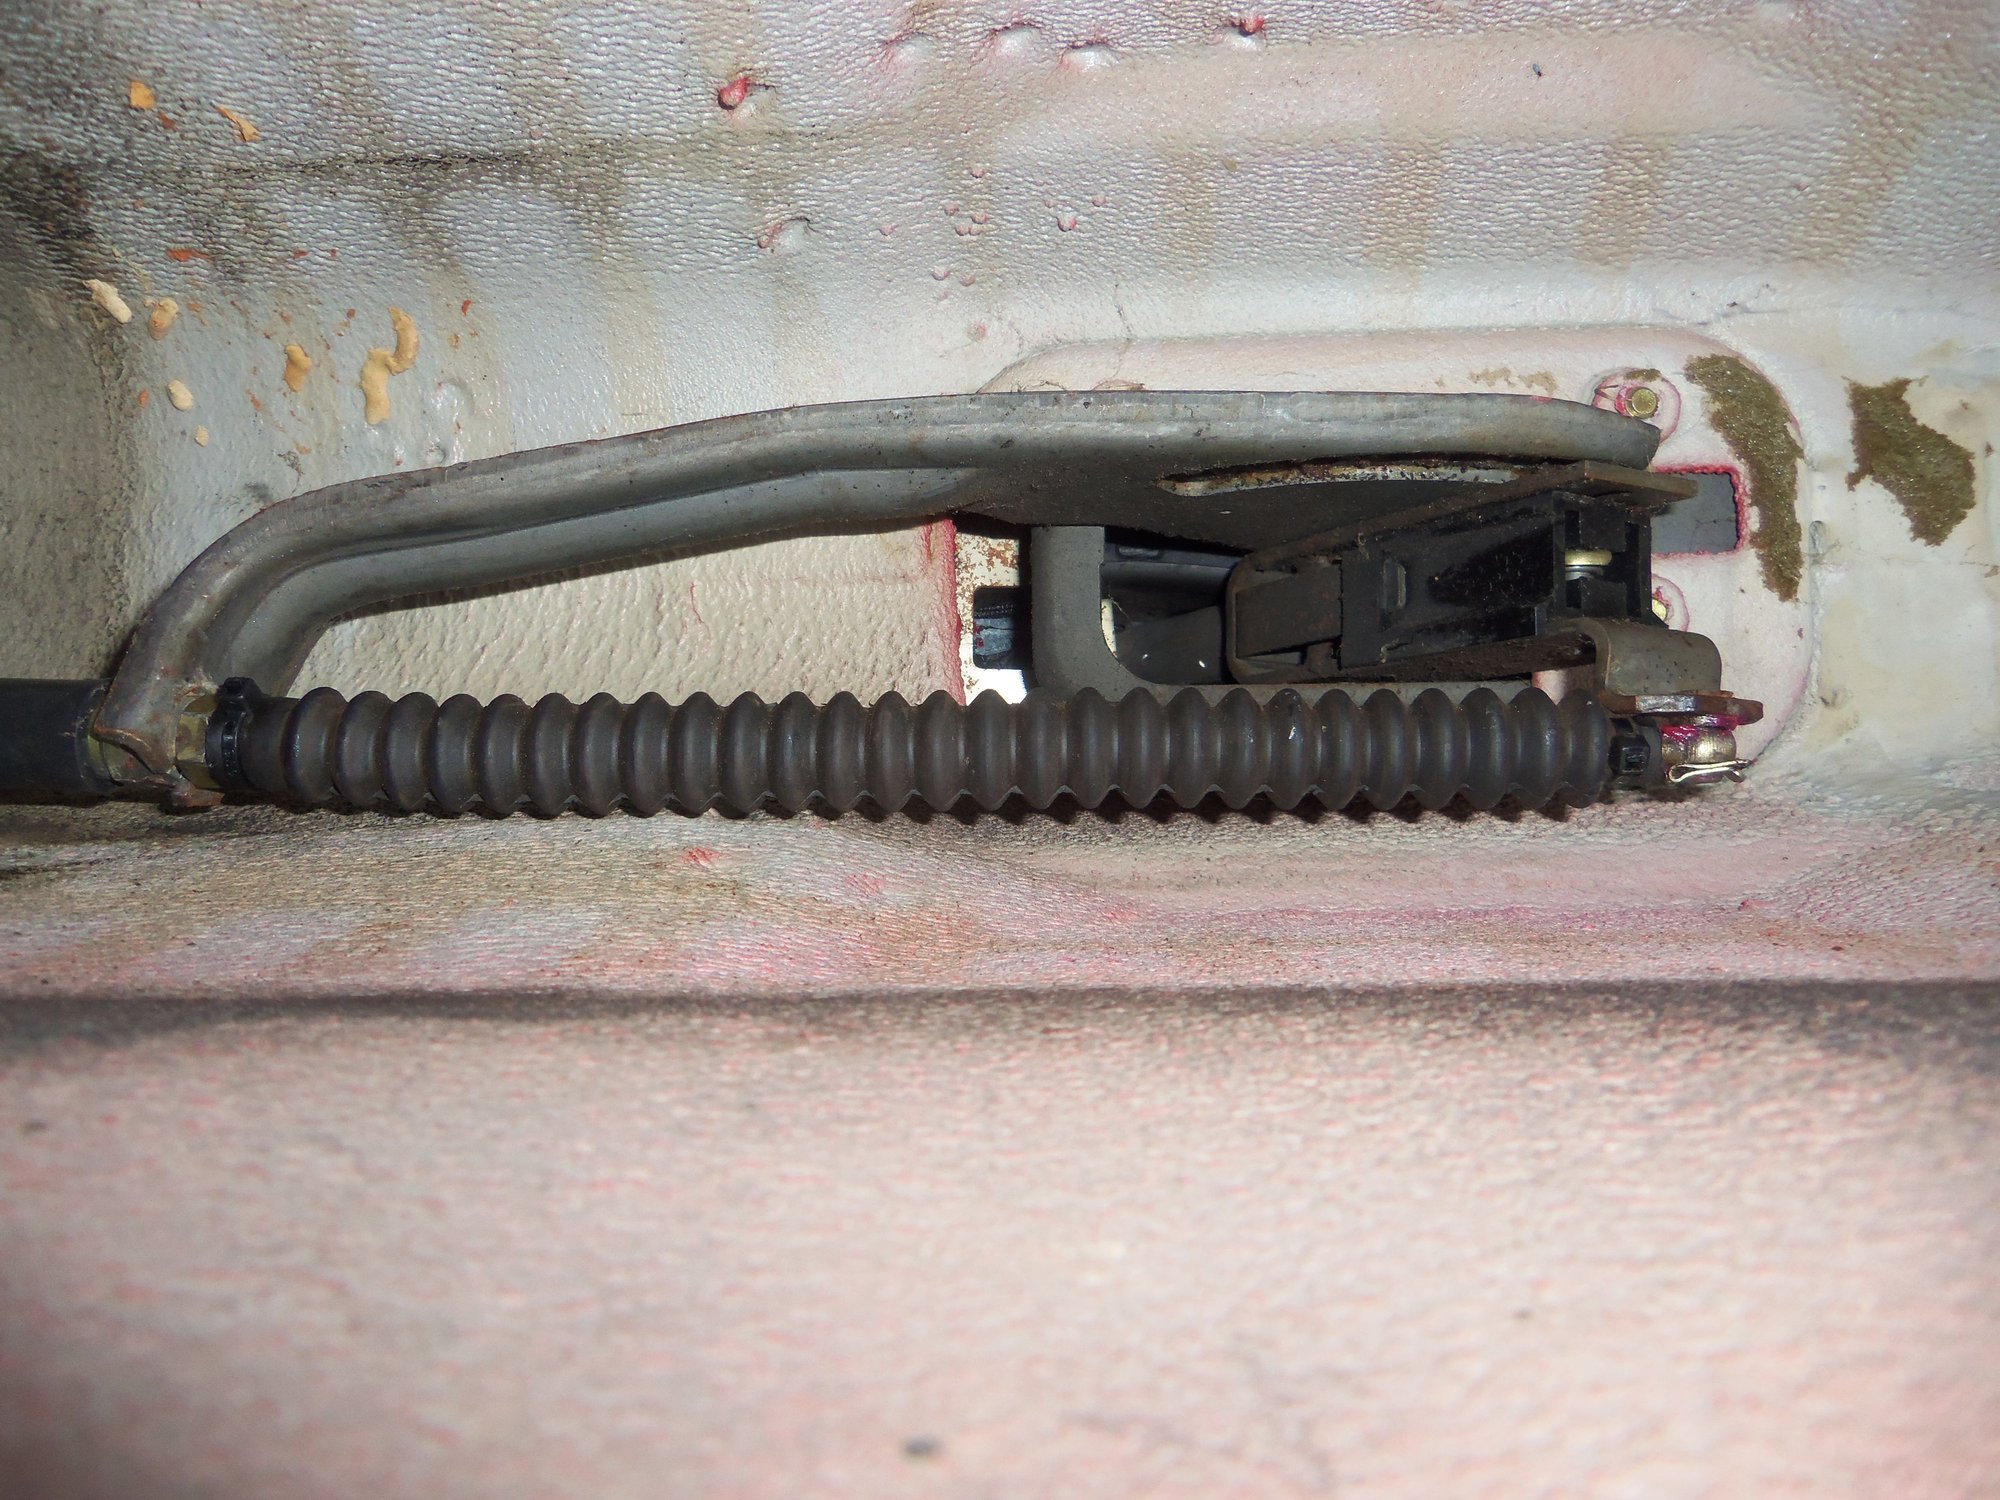
From there it was just a matter of poring over my photos and photos from Dwayne's torque tube job to exactly position the Bowden cable, modulator vacuum line, transmission cooling lines, shift cable, and all the clamps & brackets that hold it all together.
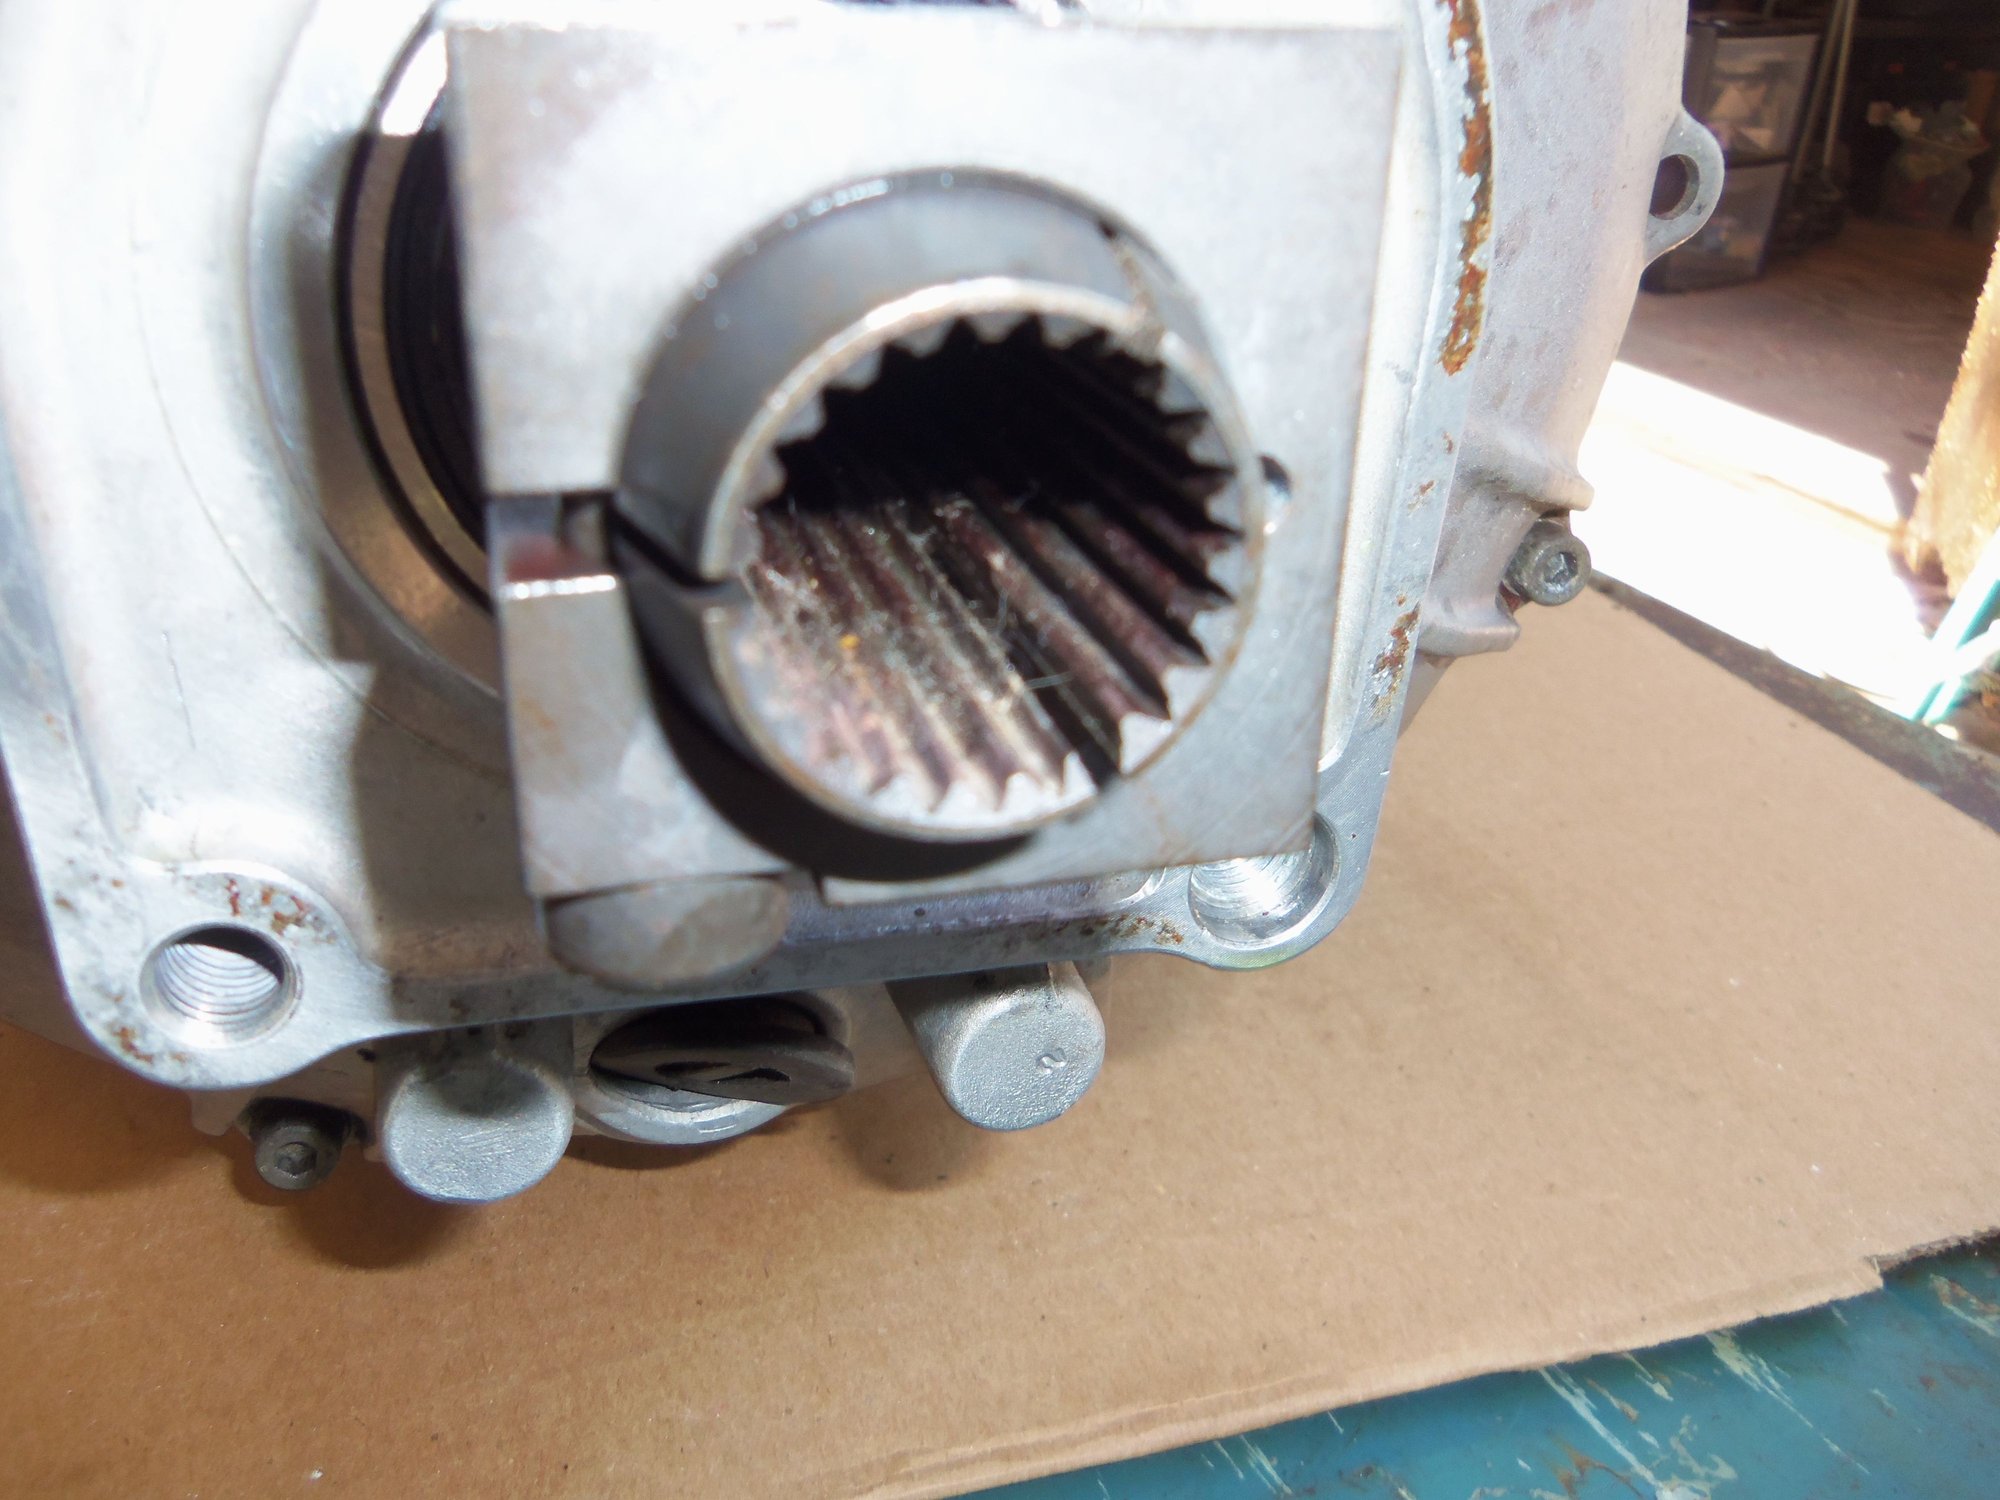
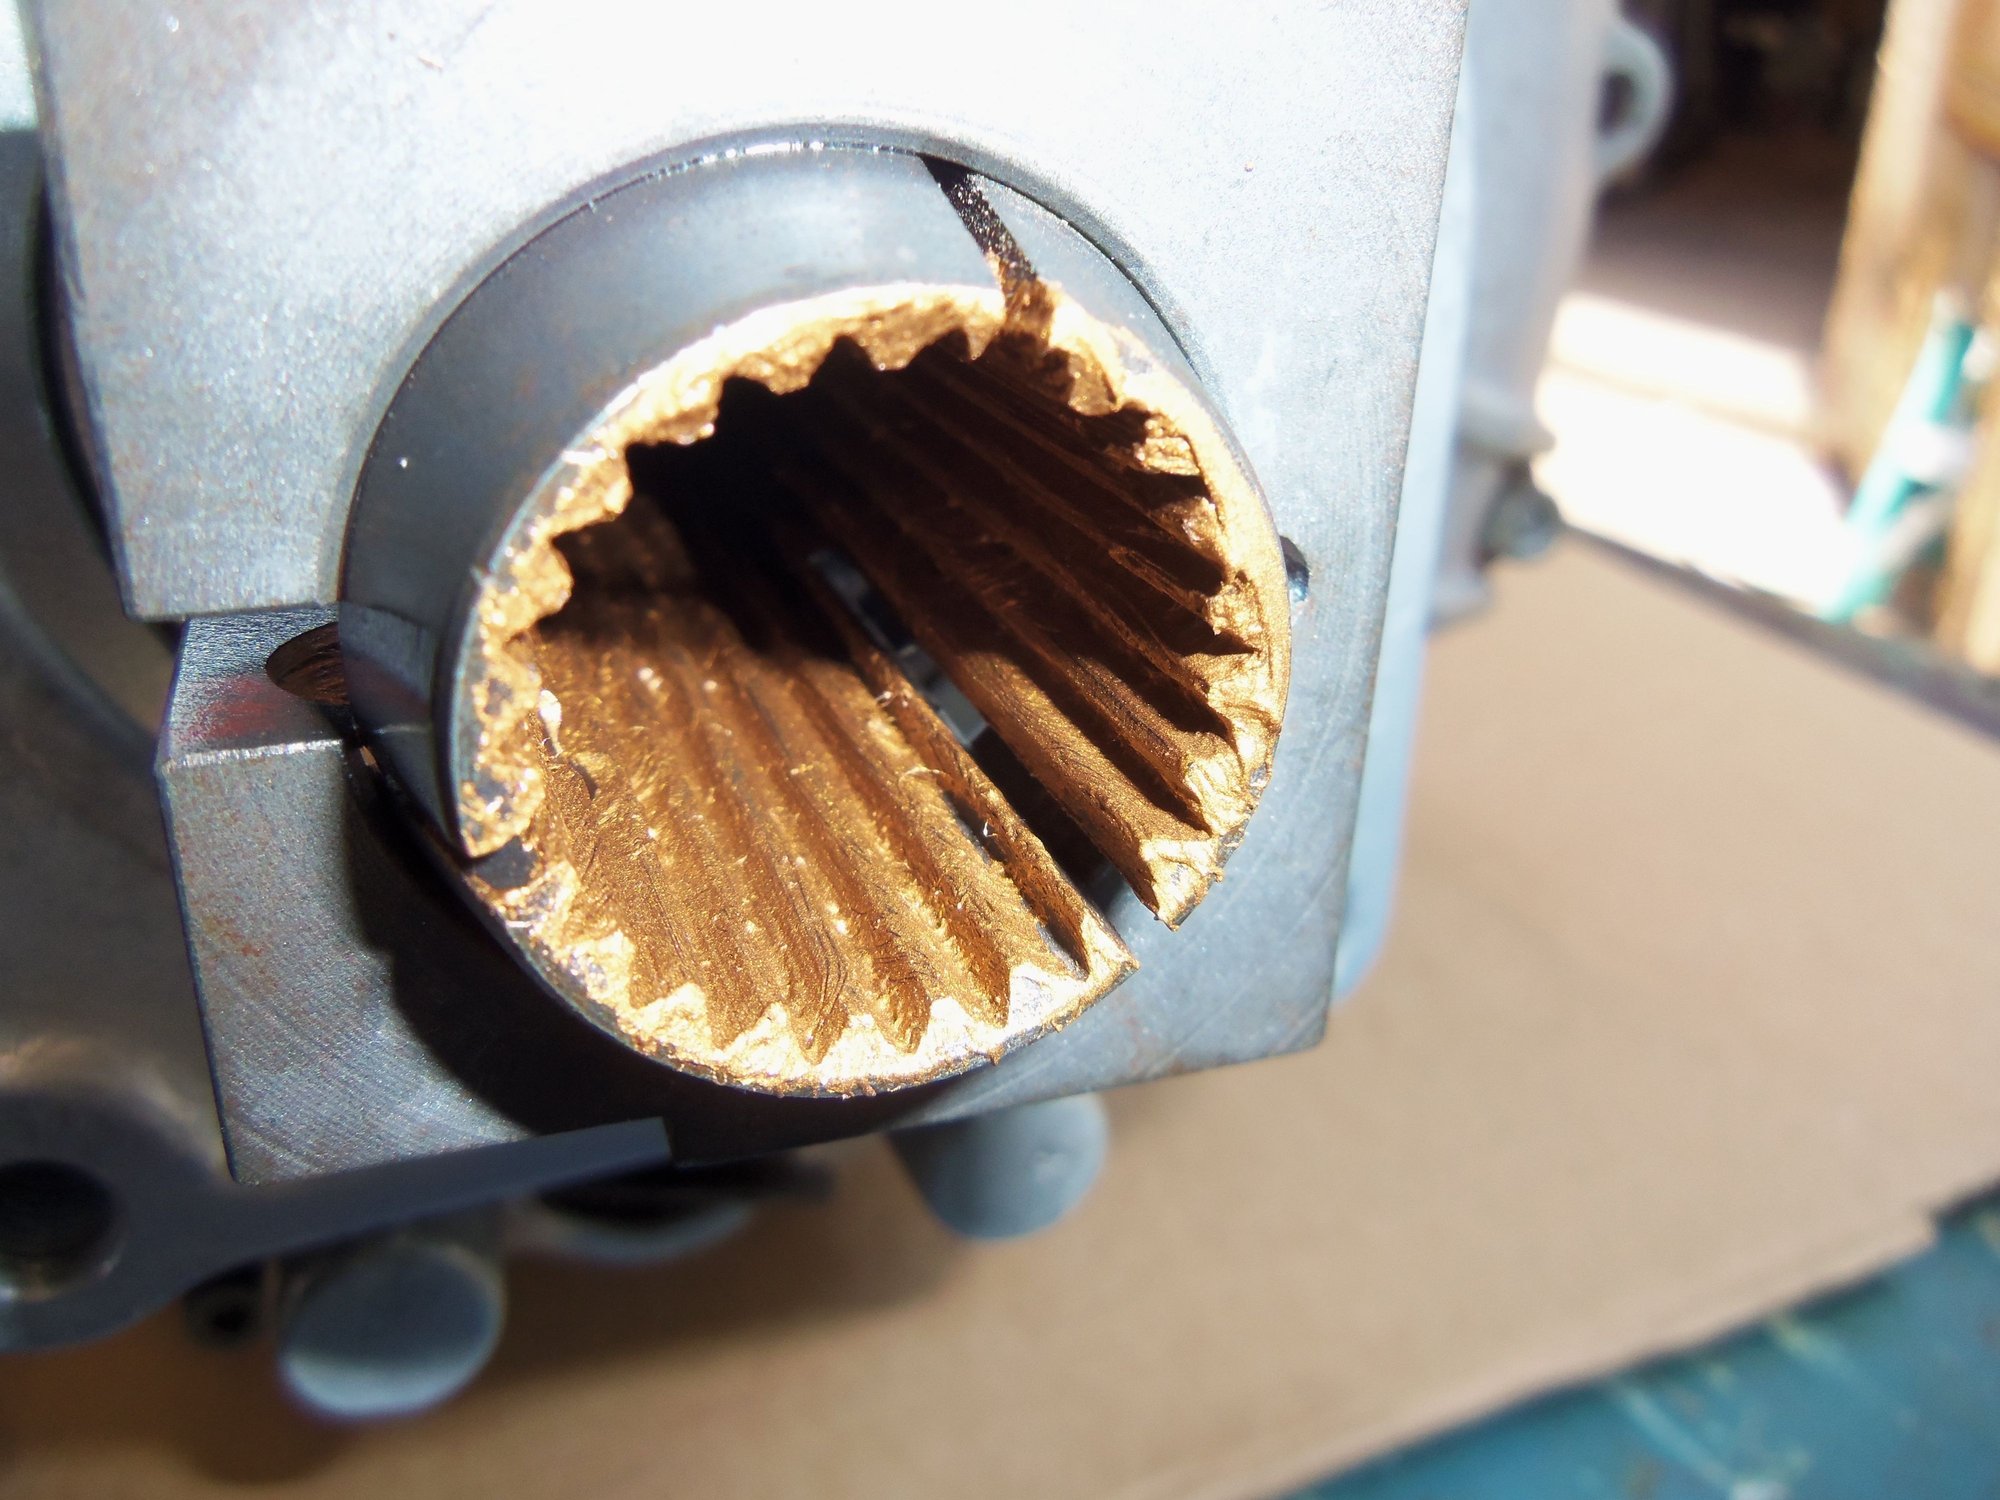
Cleaned splines in rear clamp.
Splines coated in Optimoly HT. Yeah, I know I got it backwards from the WSM. I was supposed to coat the shaft splines...
Light coat of Optimoly TA on the mating surface to prevent corrosion.
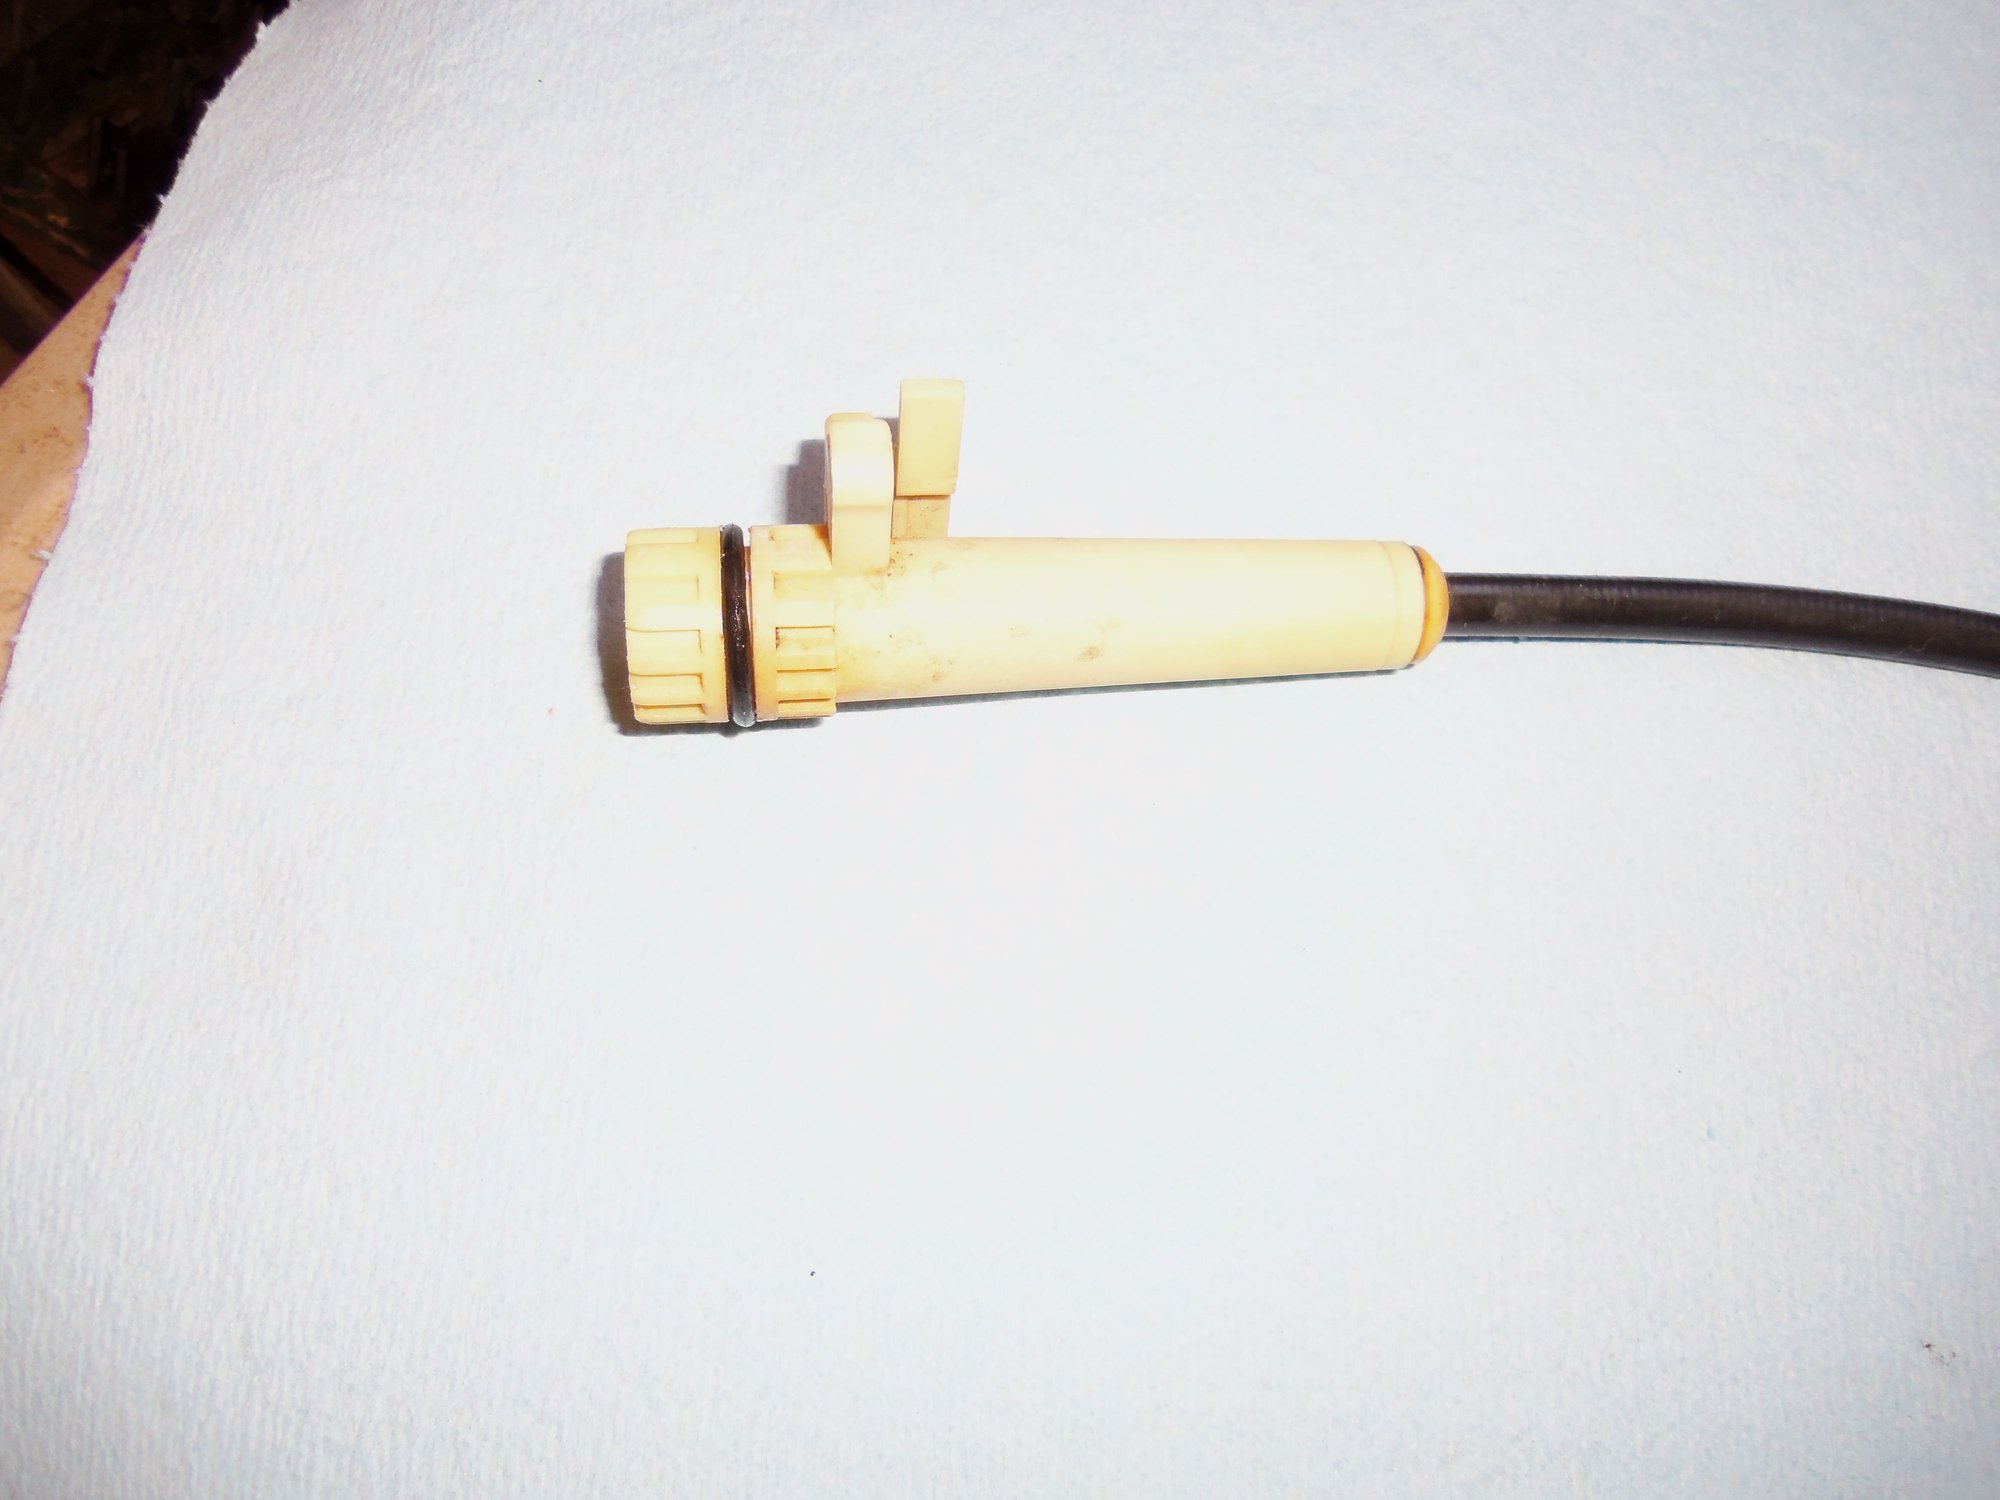
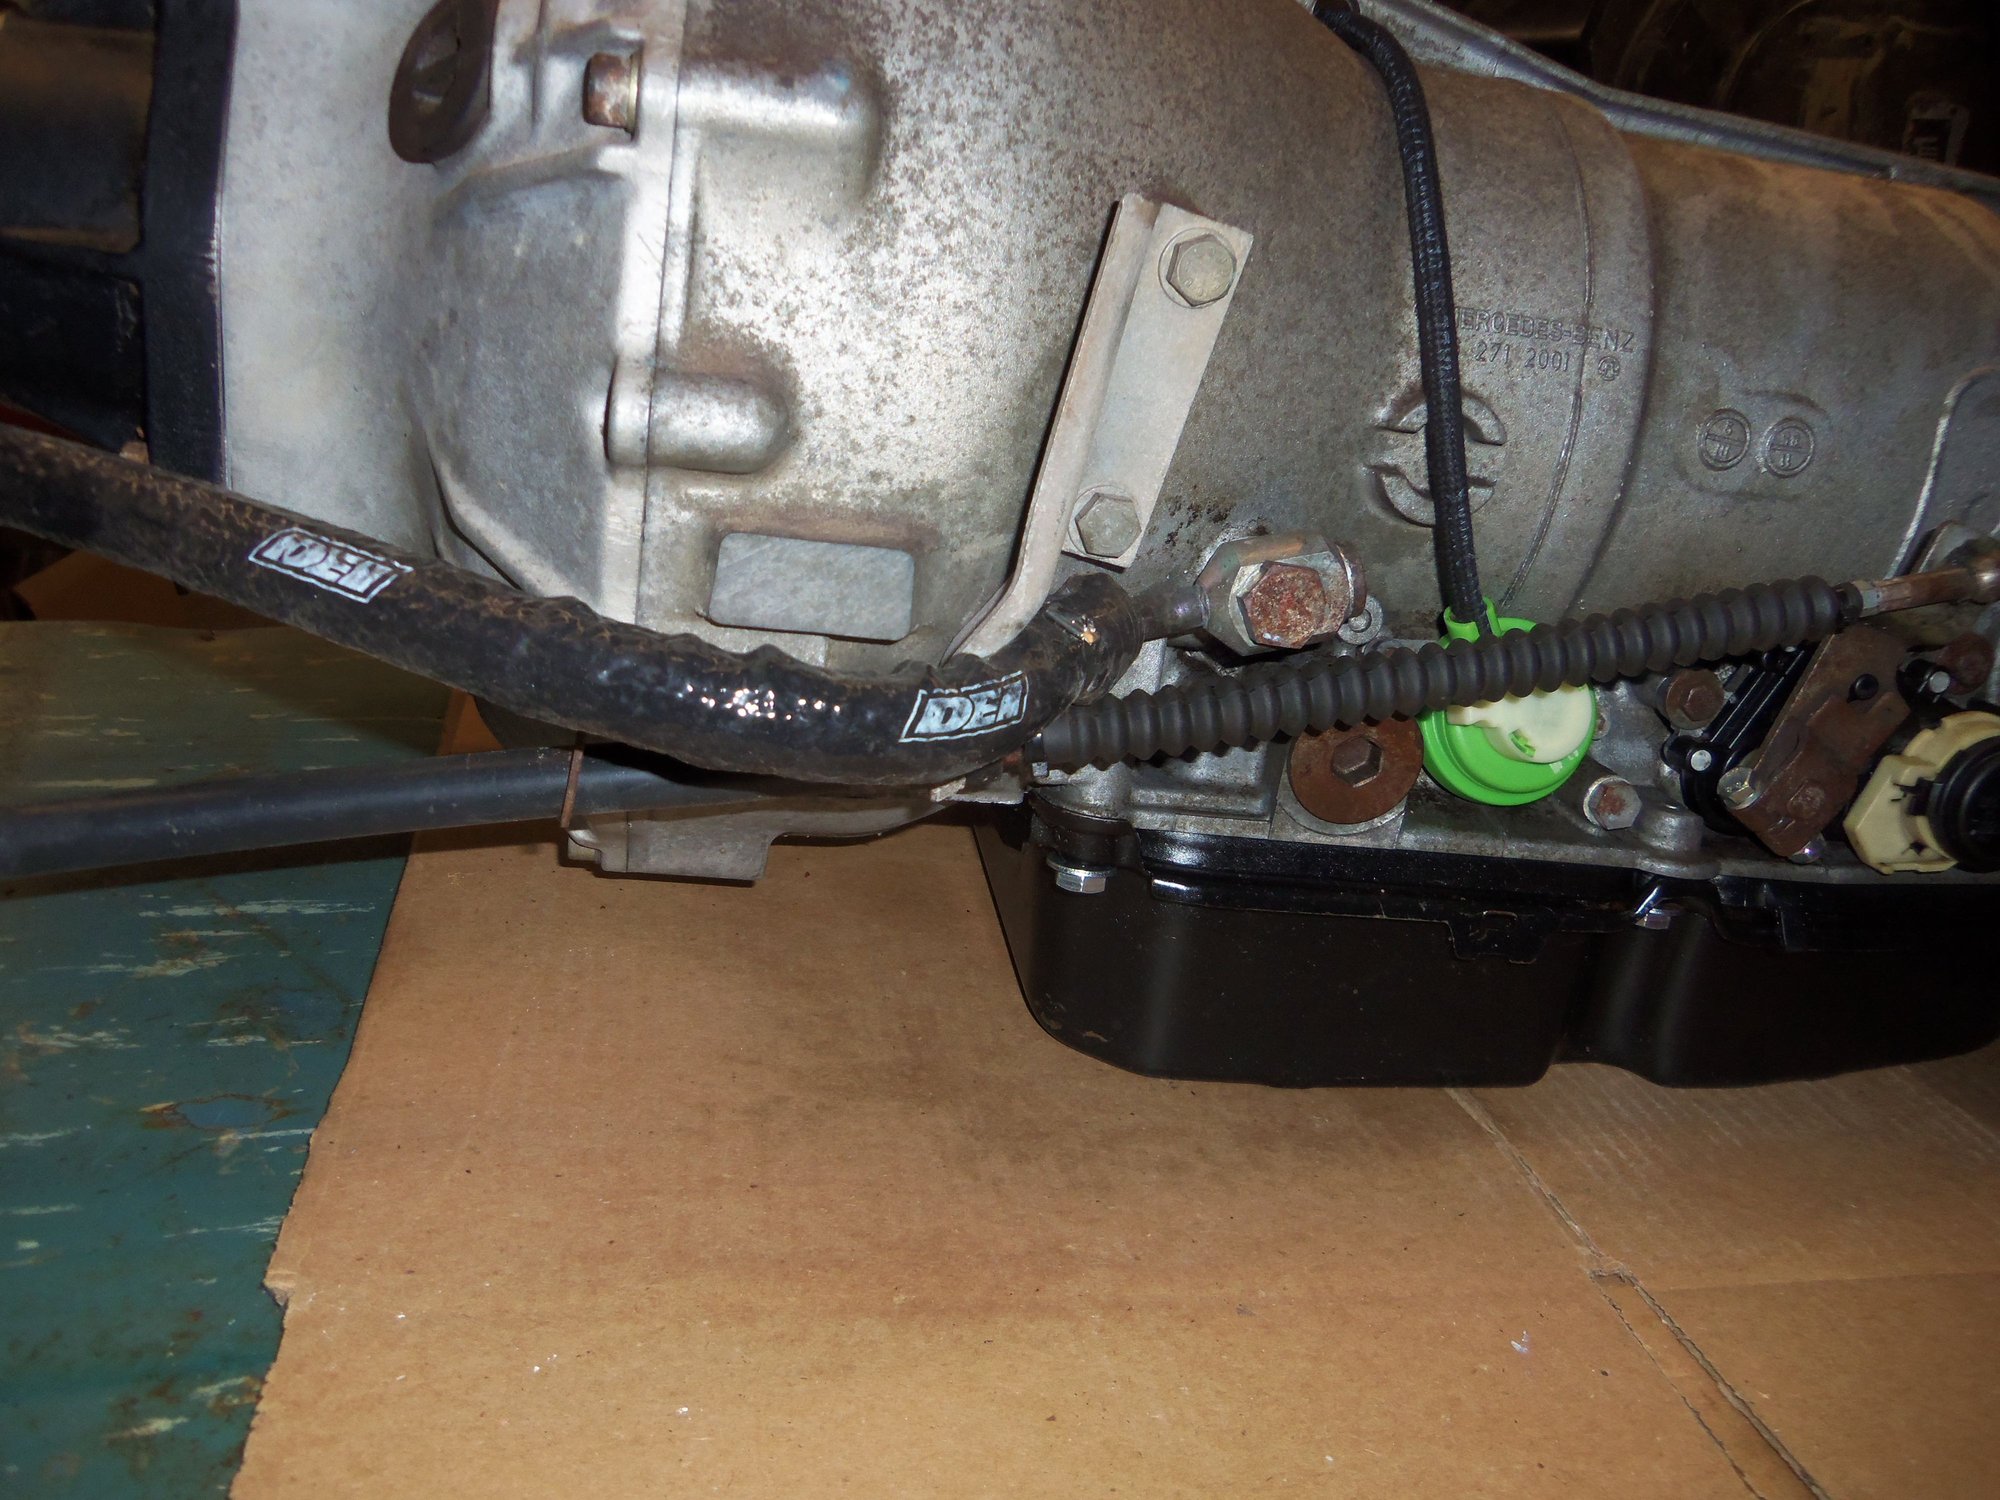
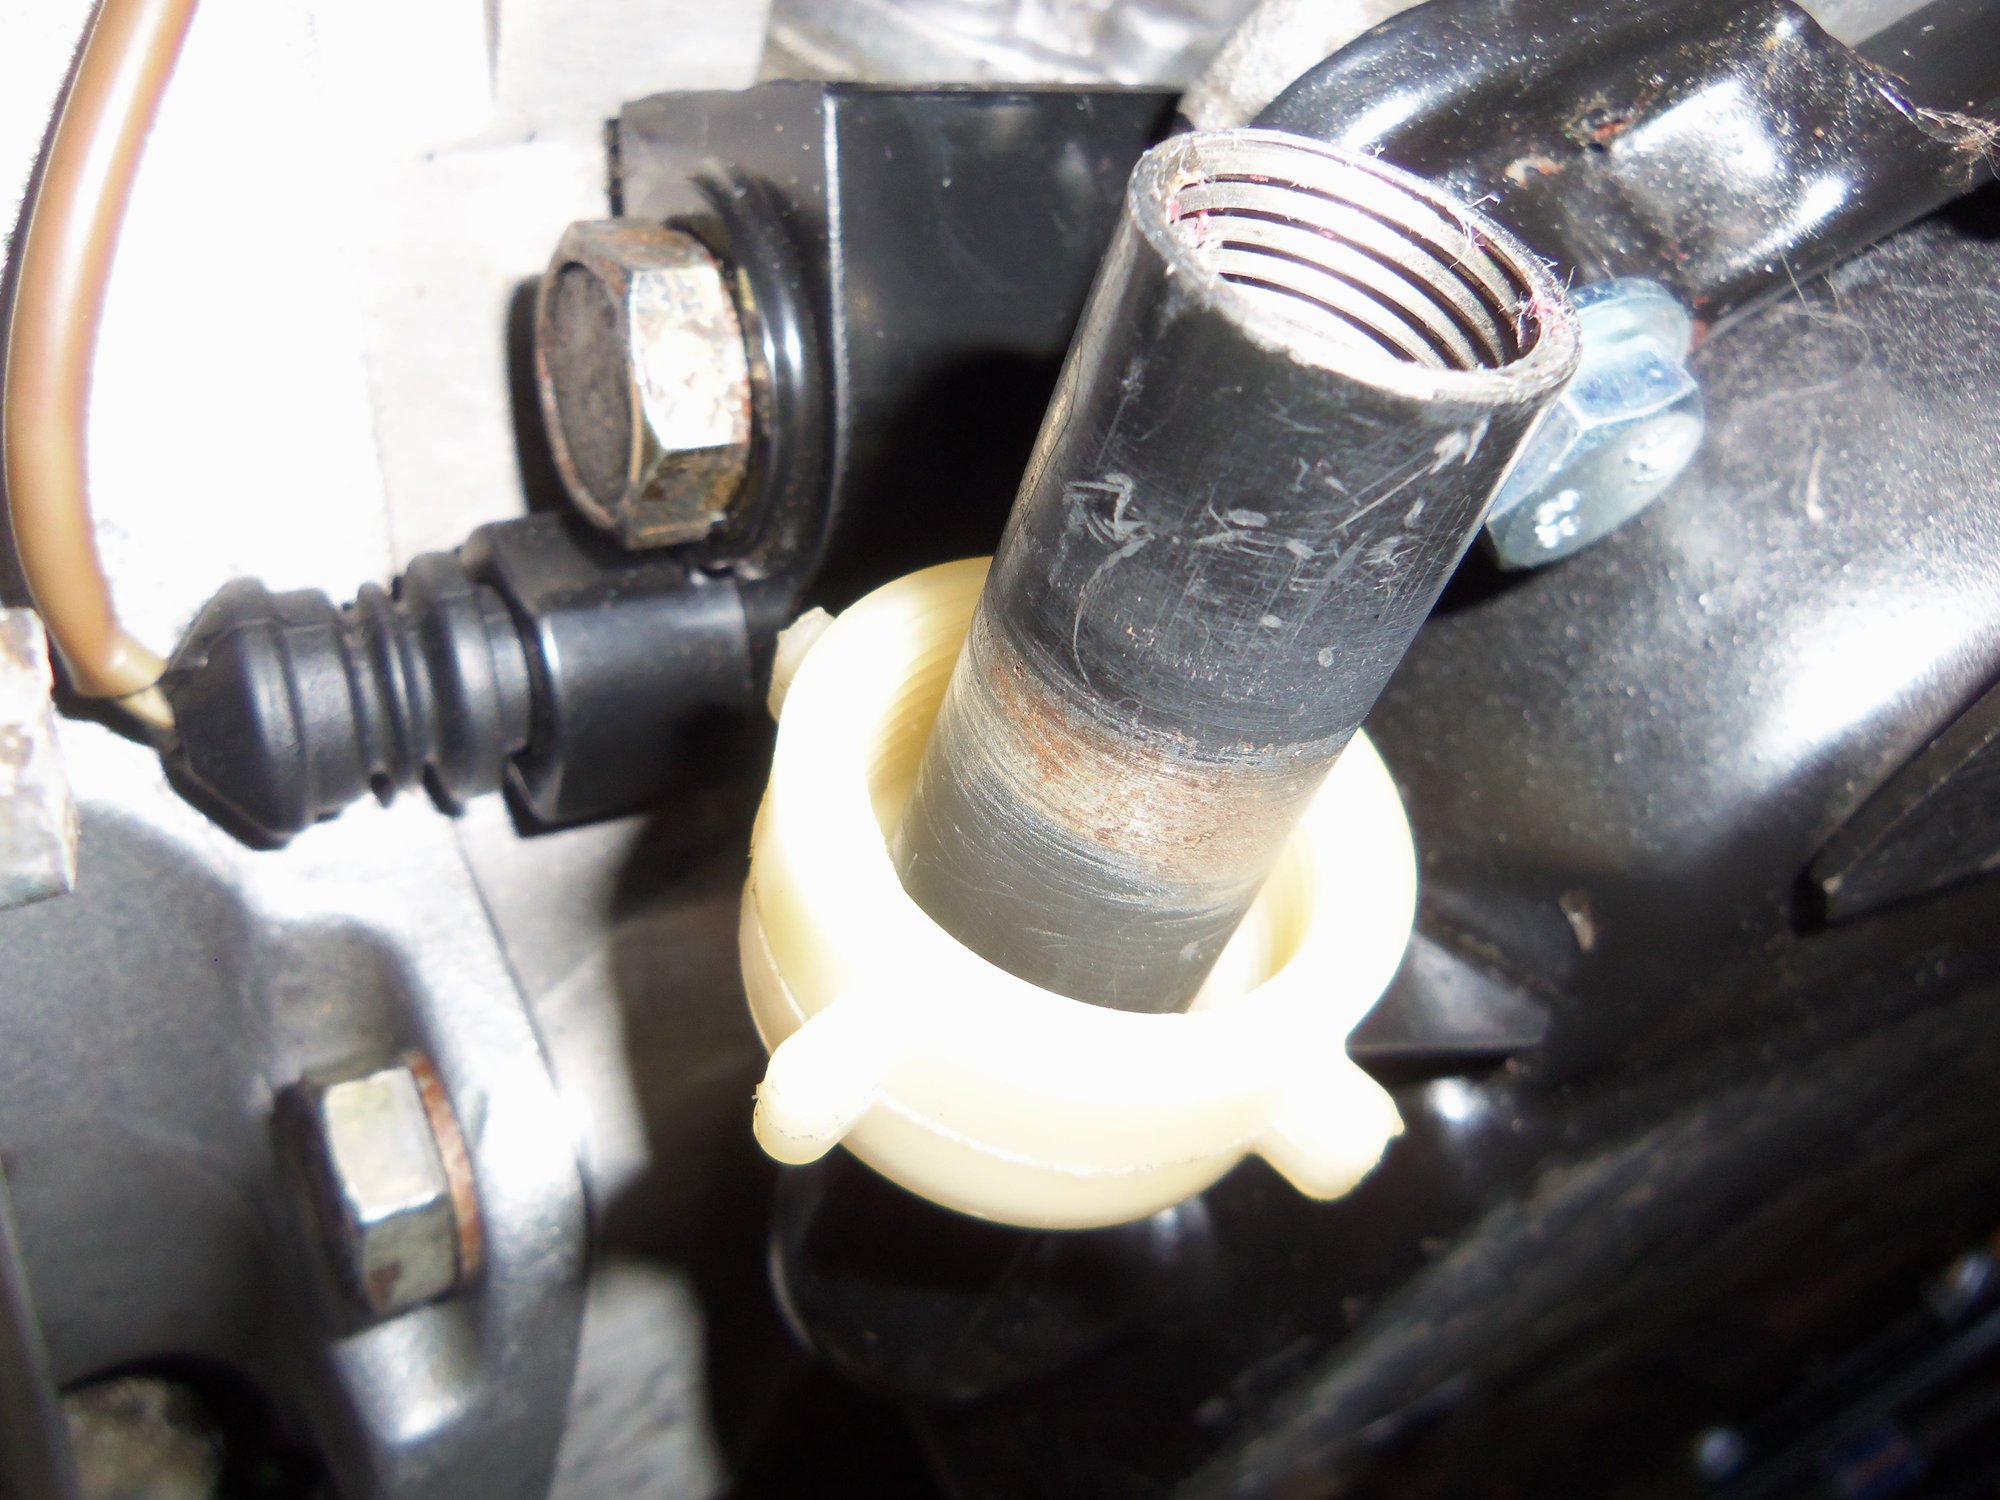
Cleaned the transmission end of the Bowden cable and lubricated the relatively new O-ring with DOW 111.
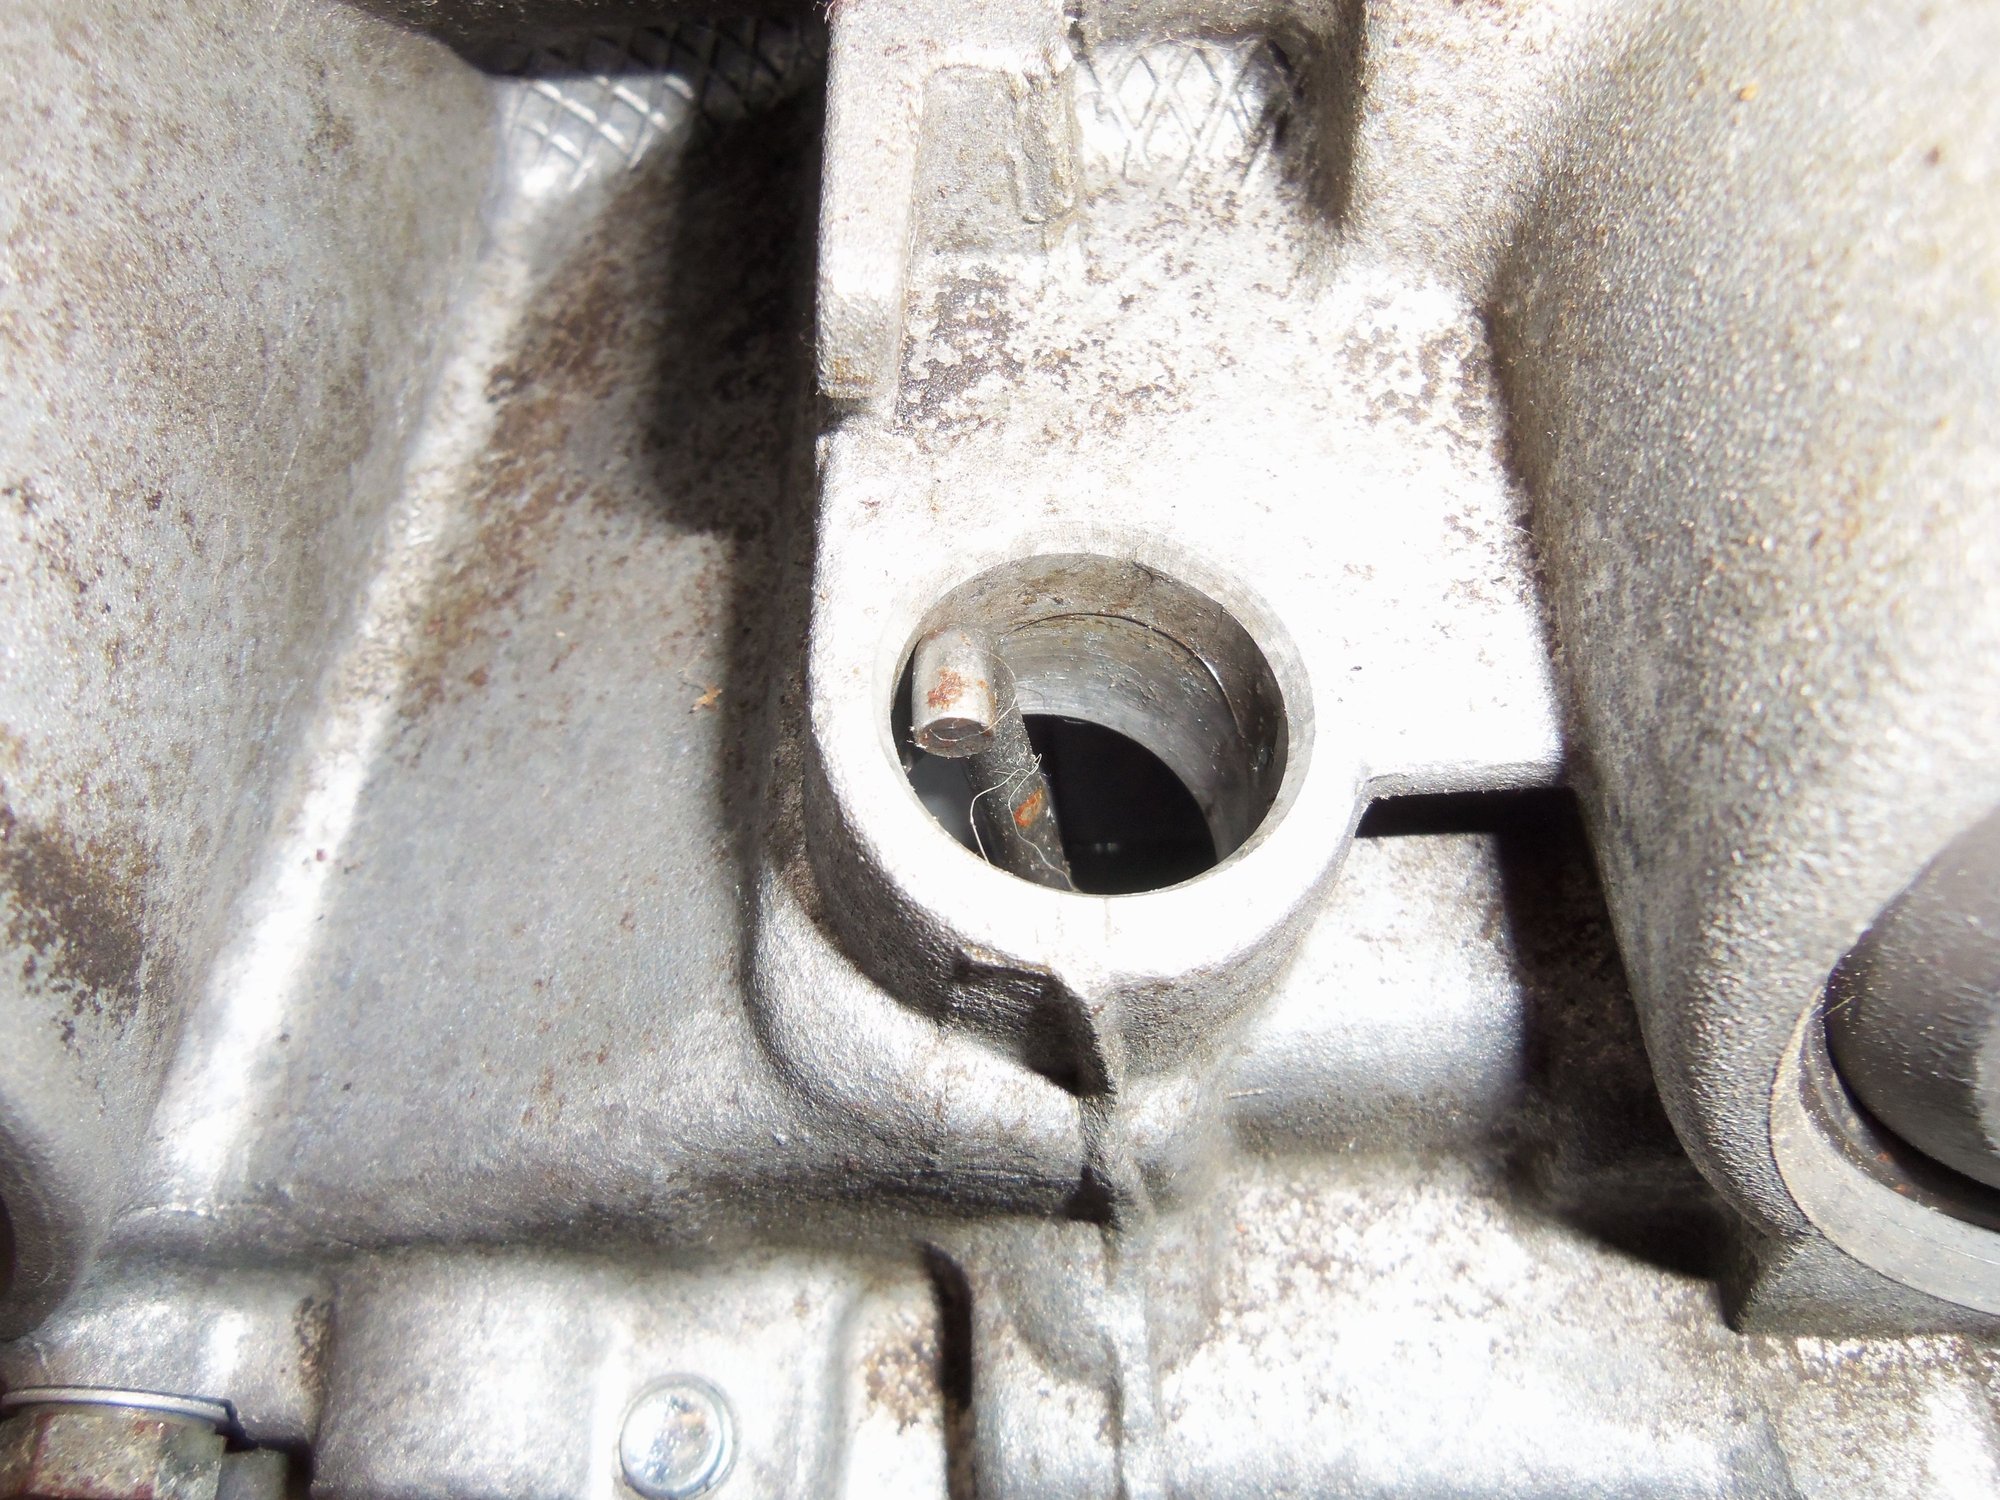
TV link for Bowden cable. That was a little fiddly to get hooked onto the cable end. I DID clean out the hairs and such before installing the cable.
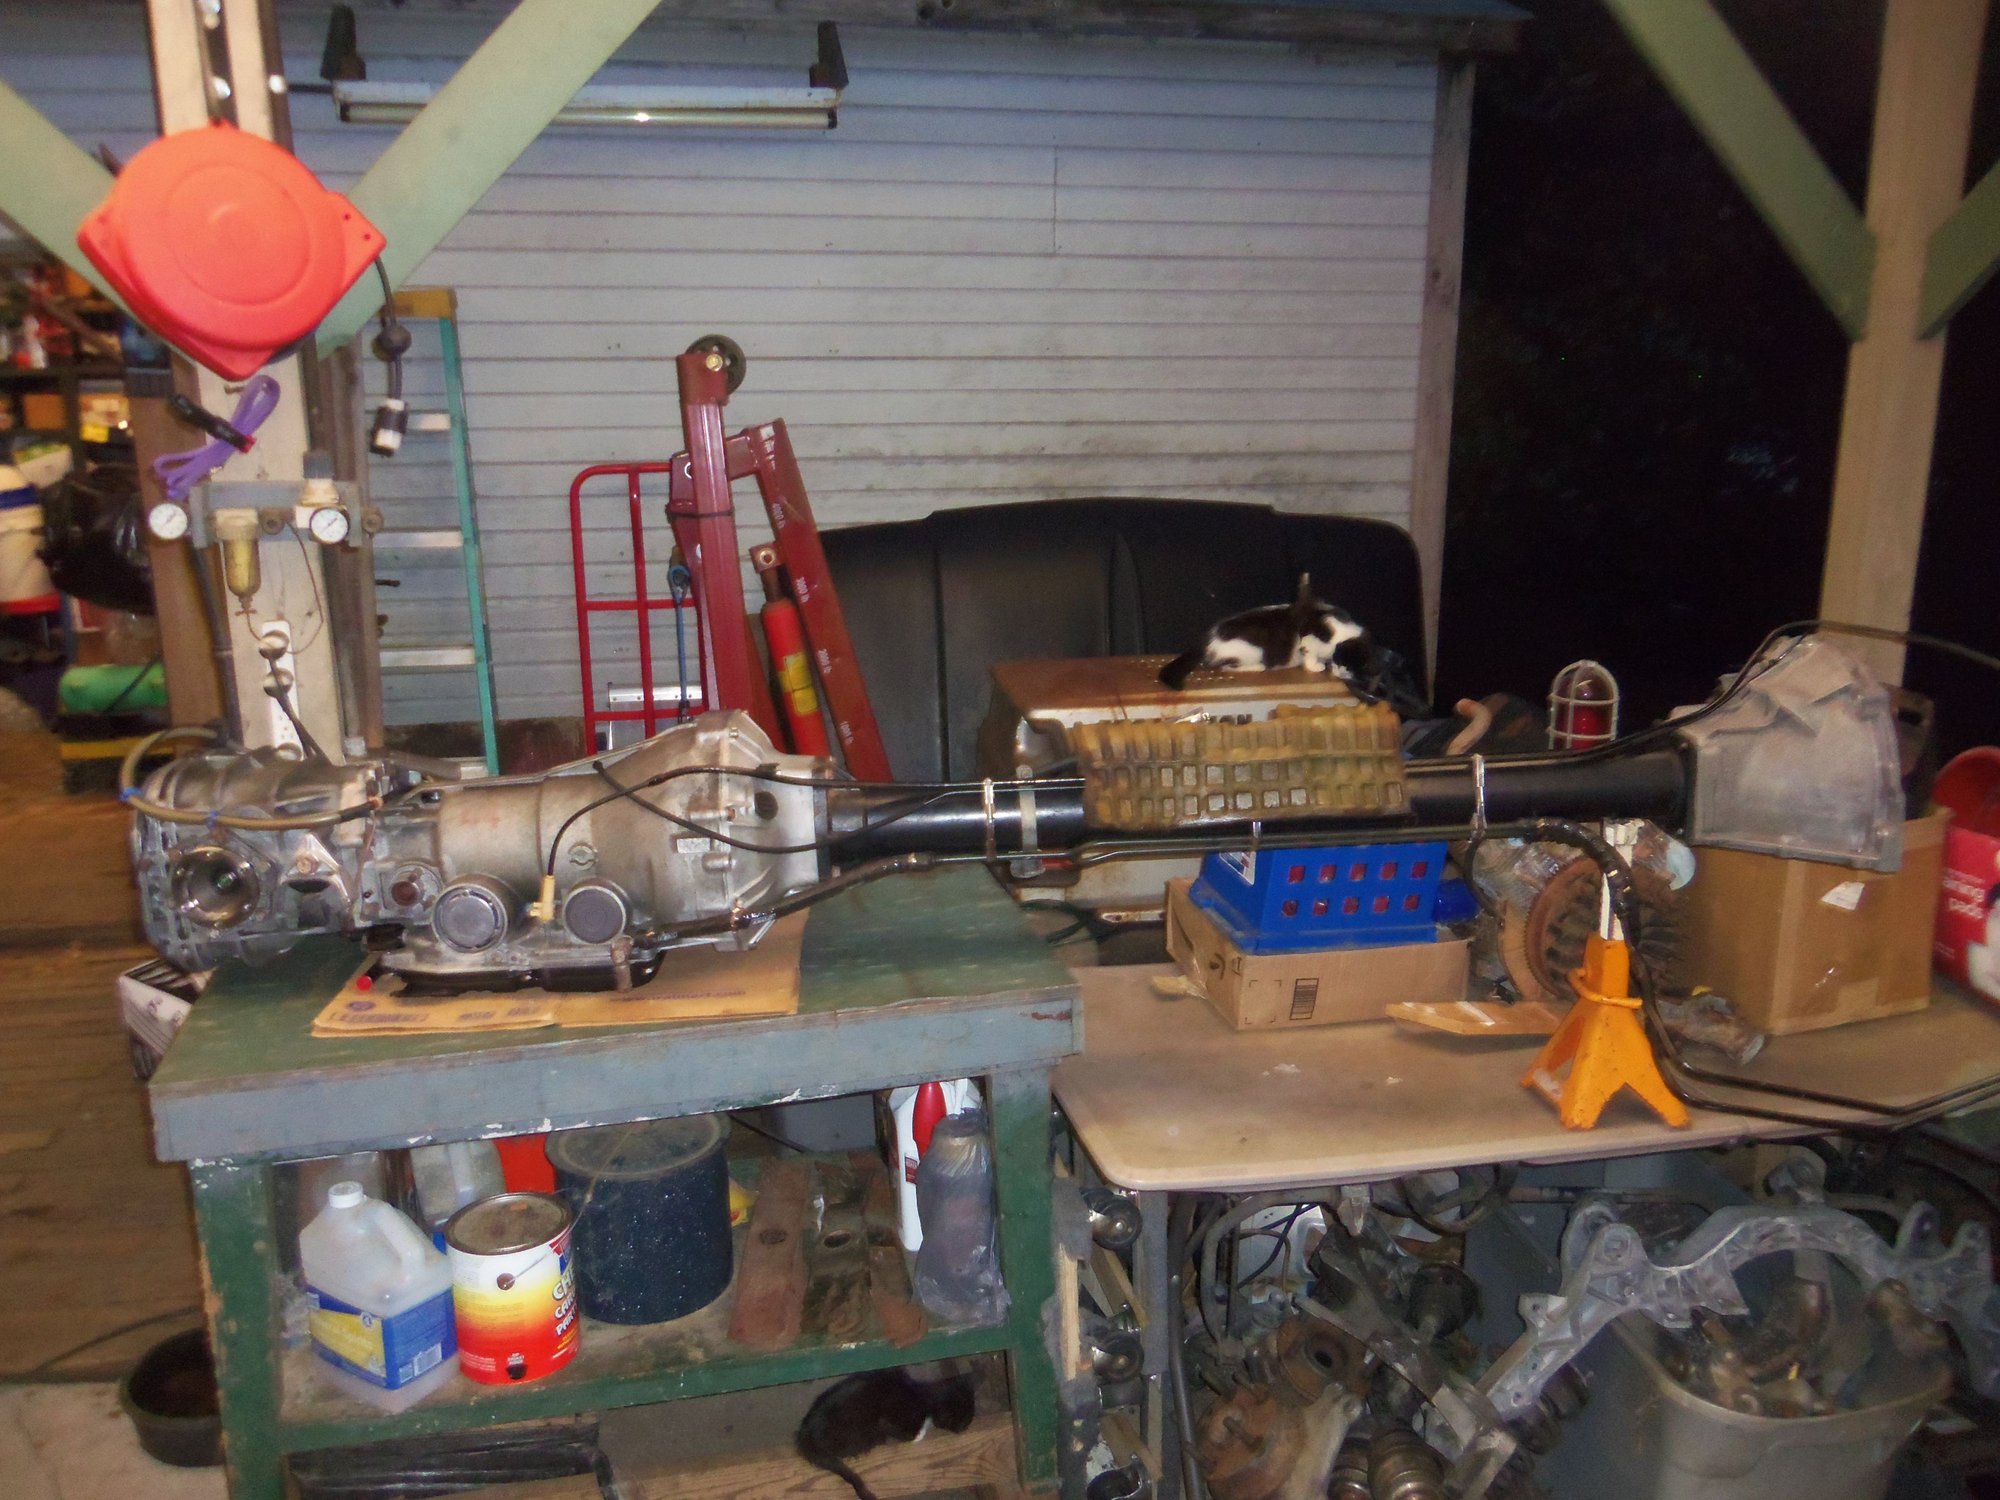
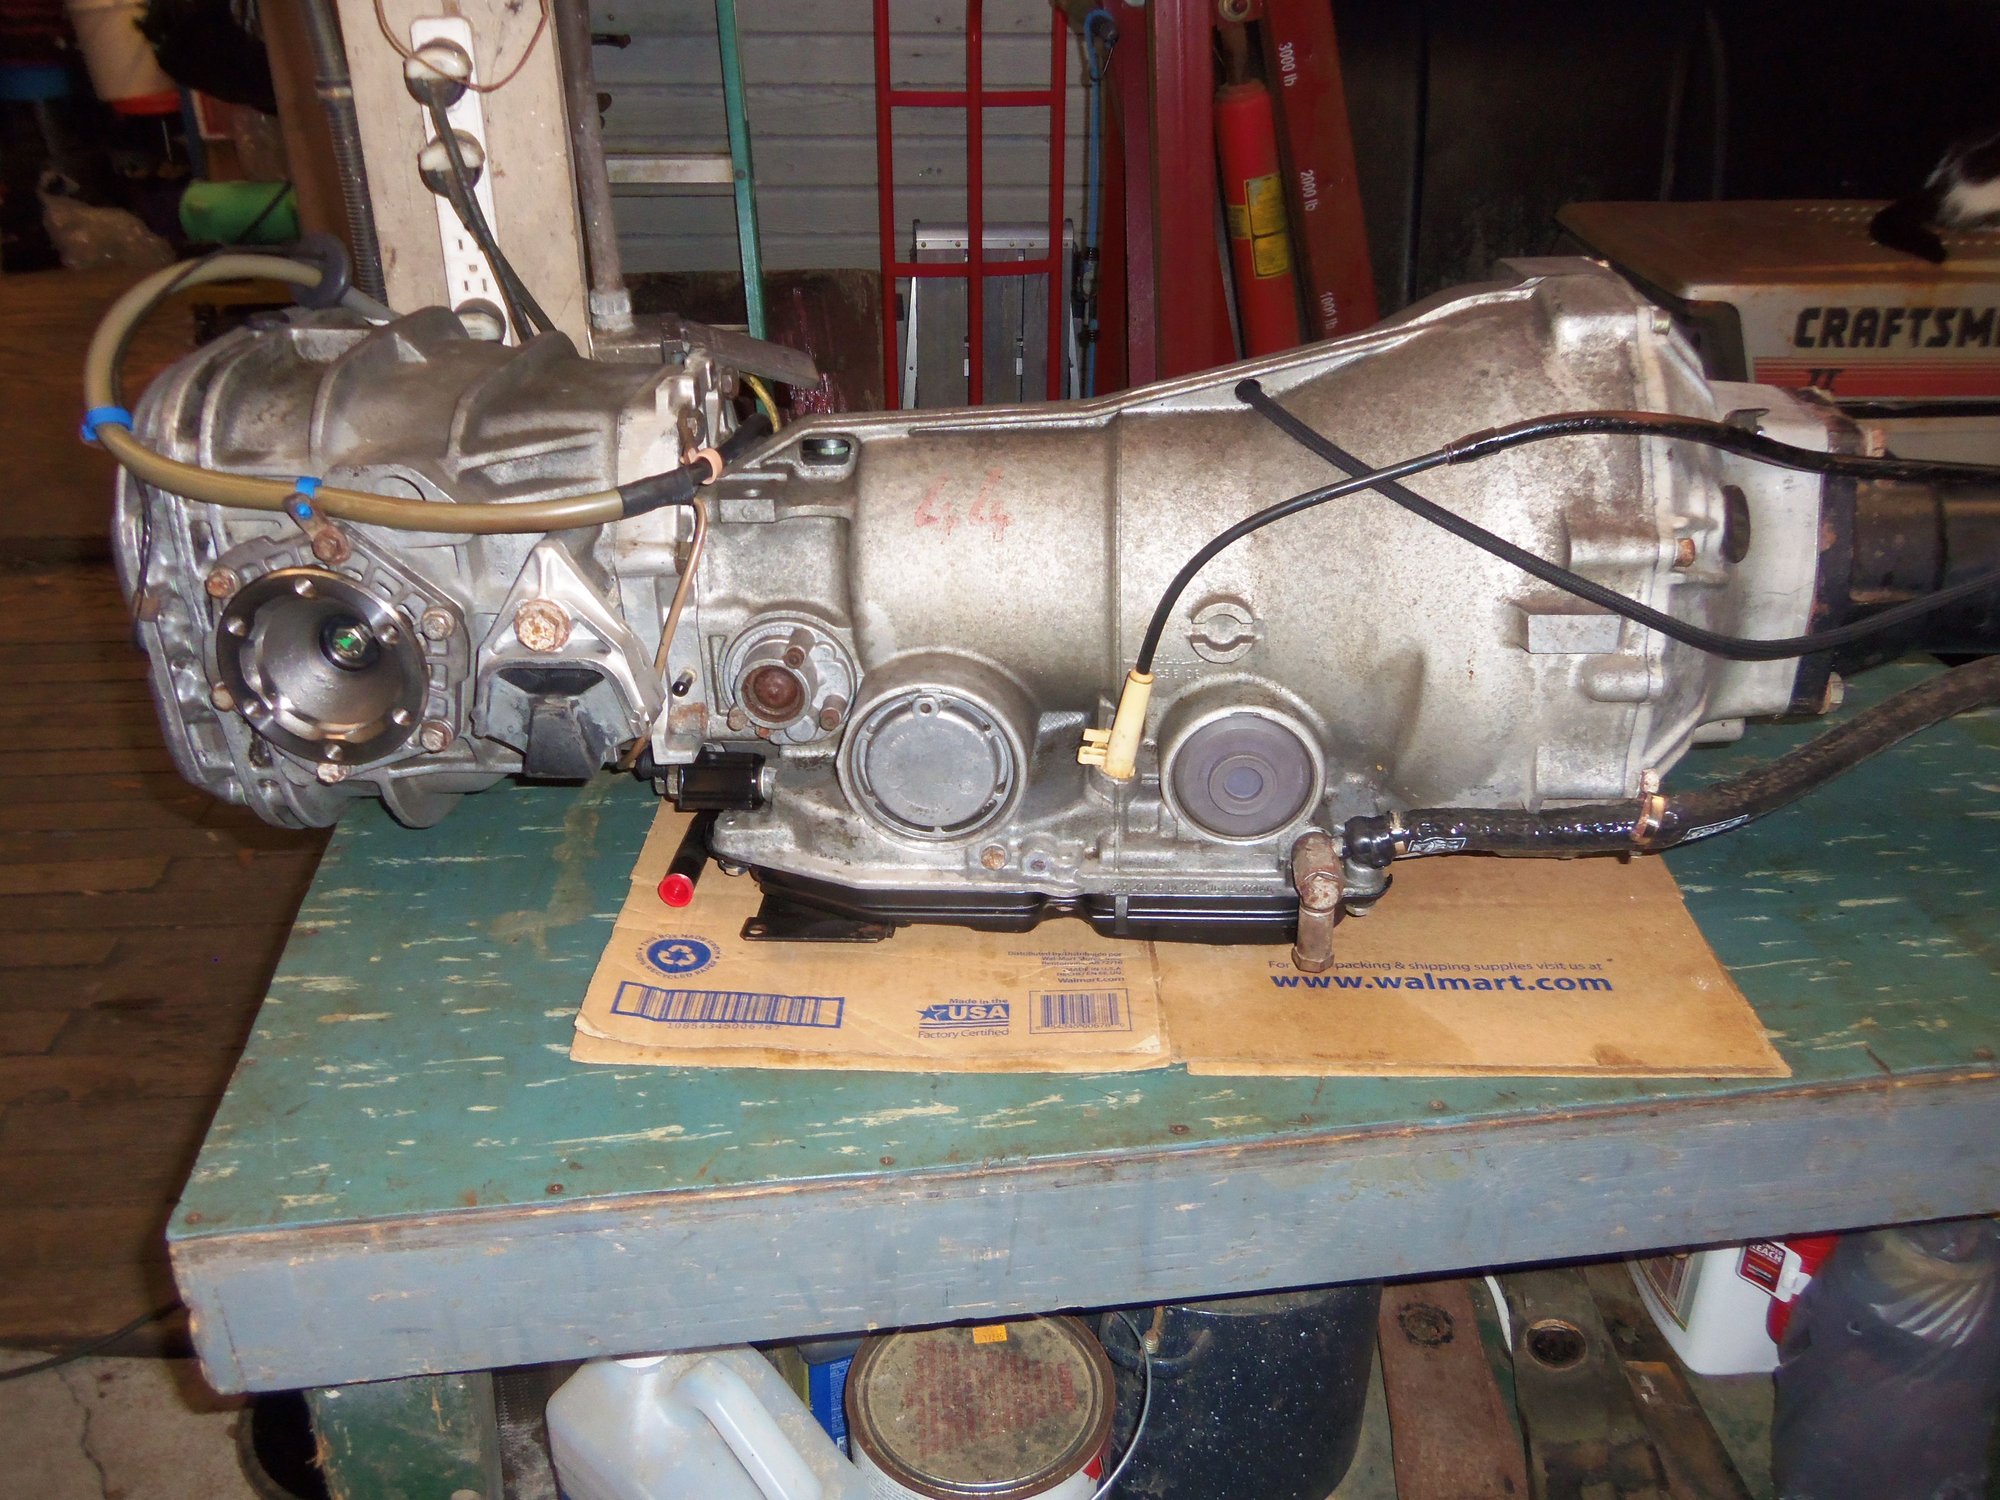
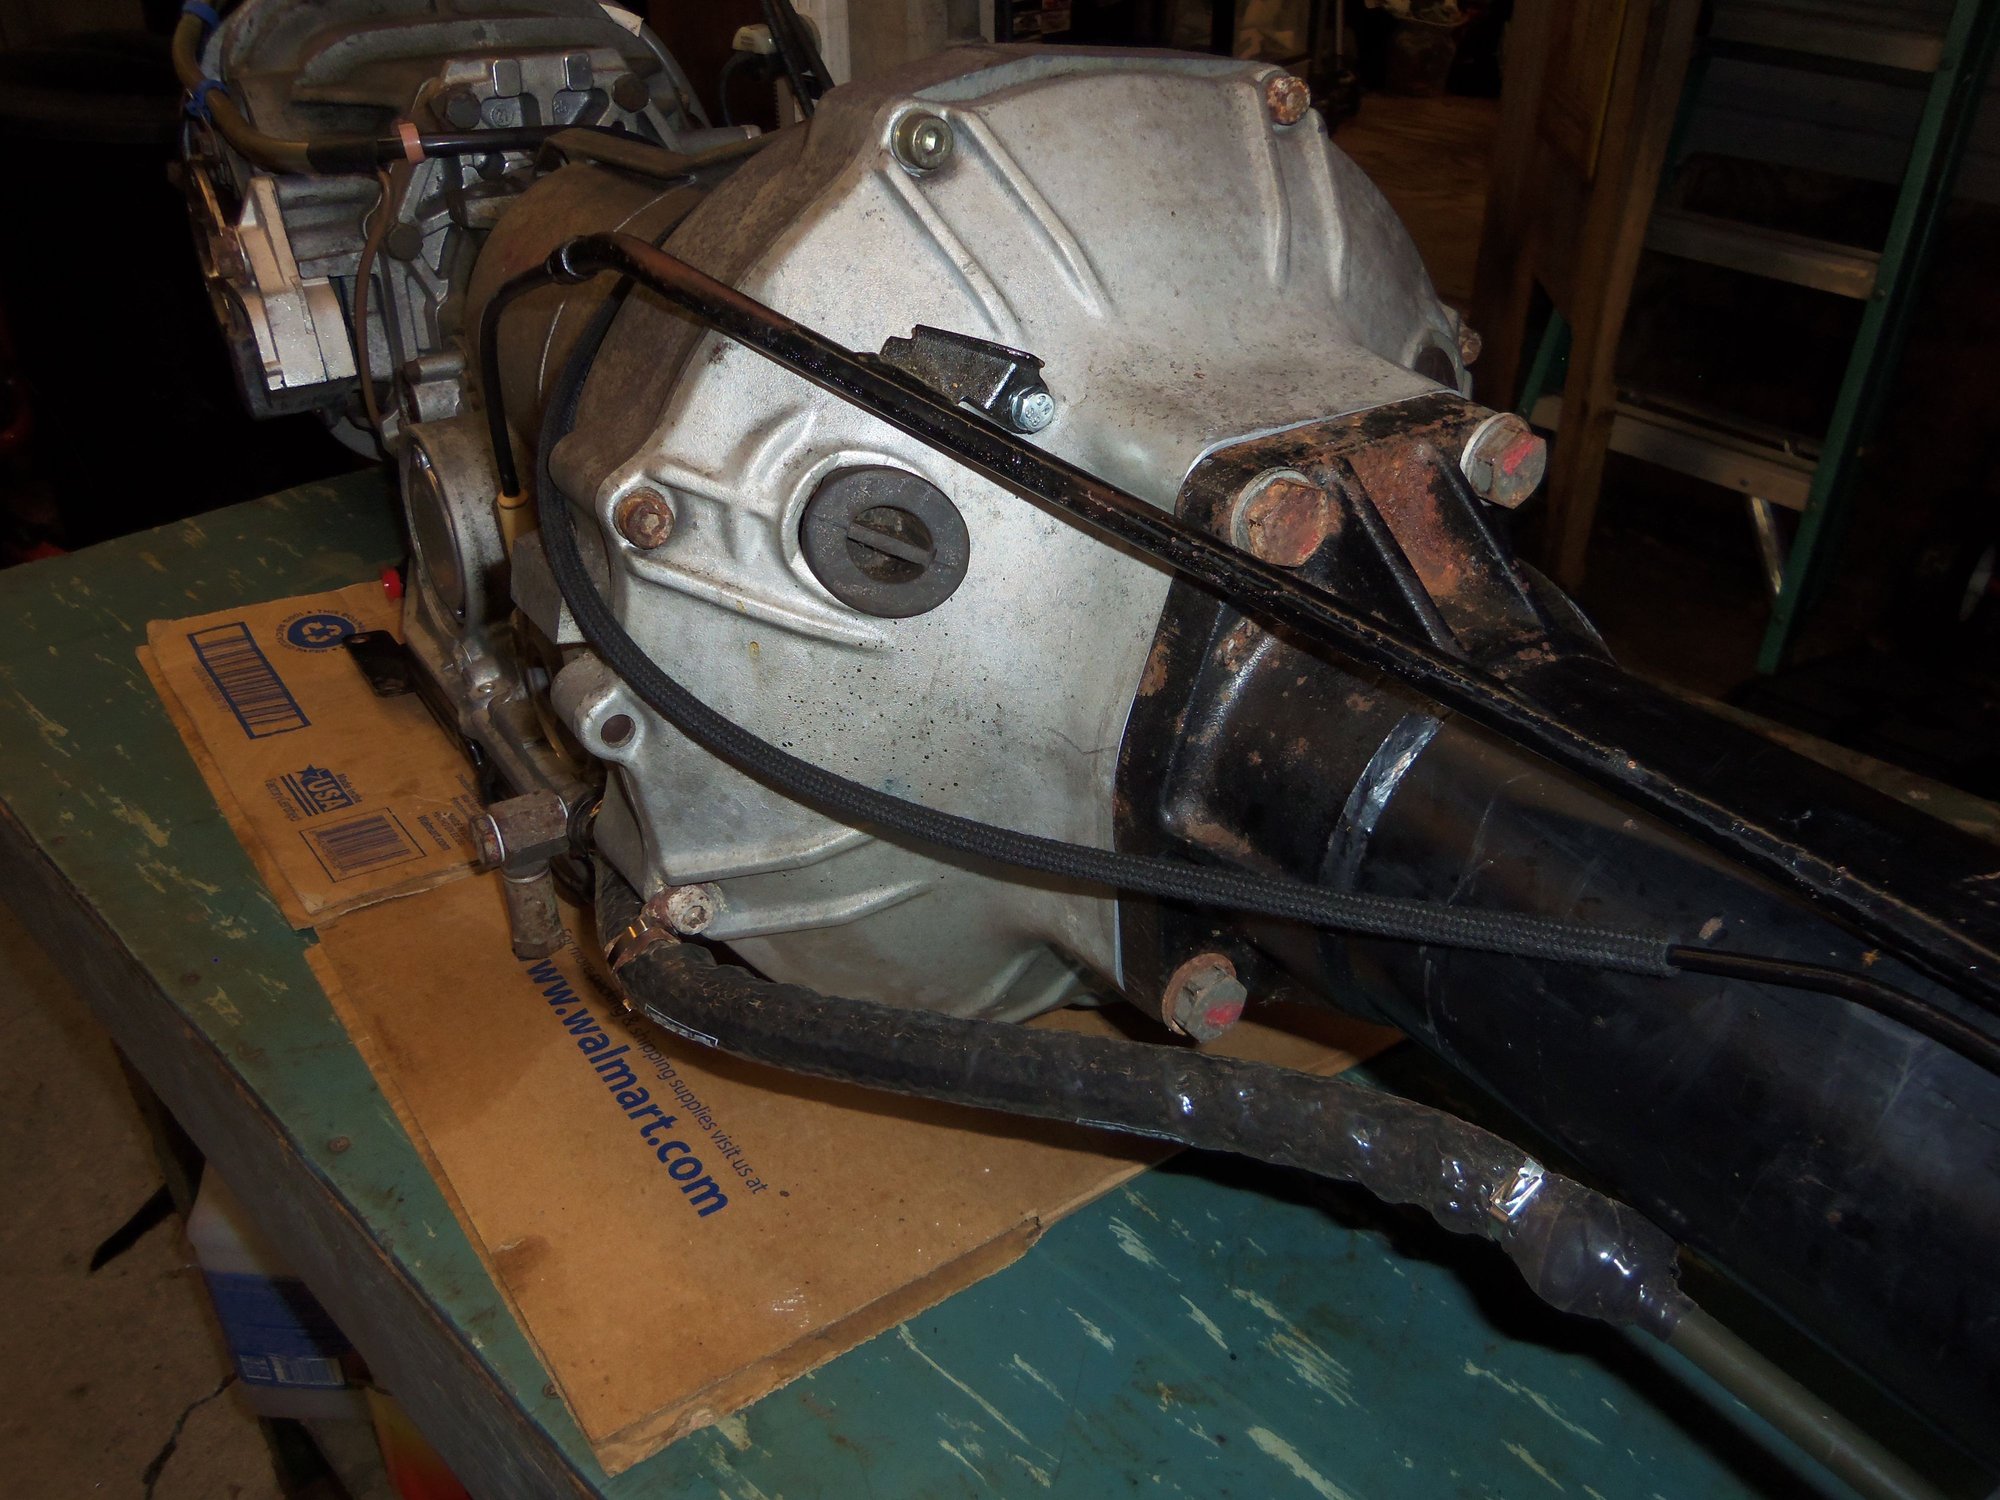
Successful marriage!
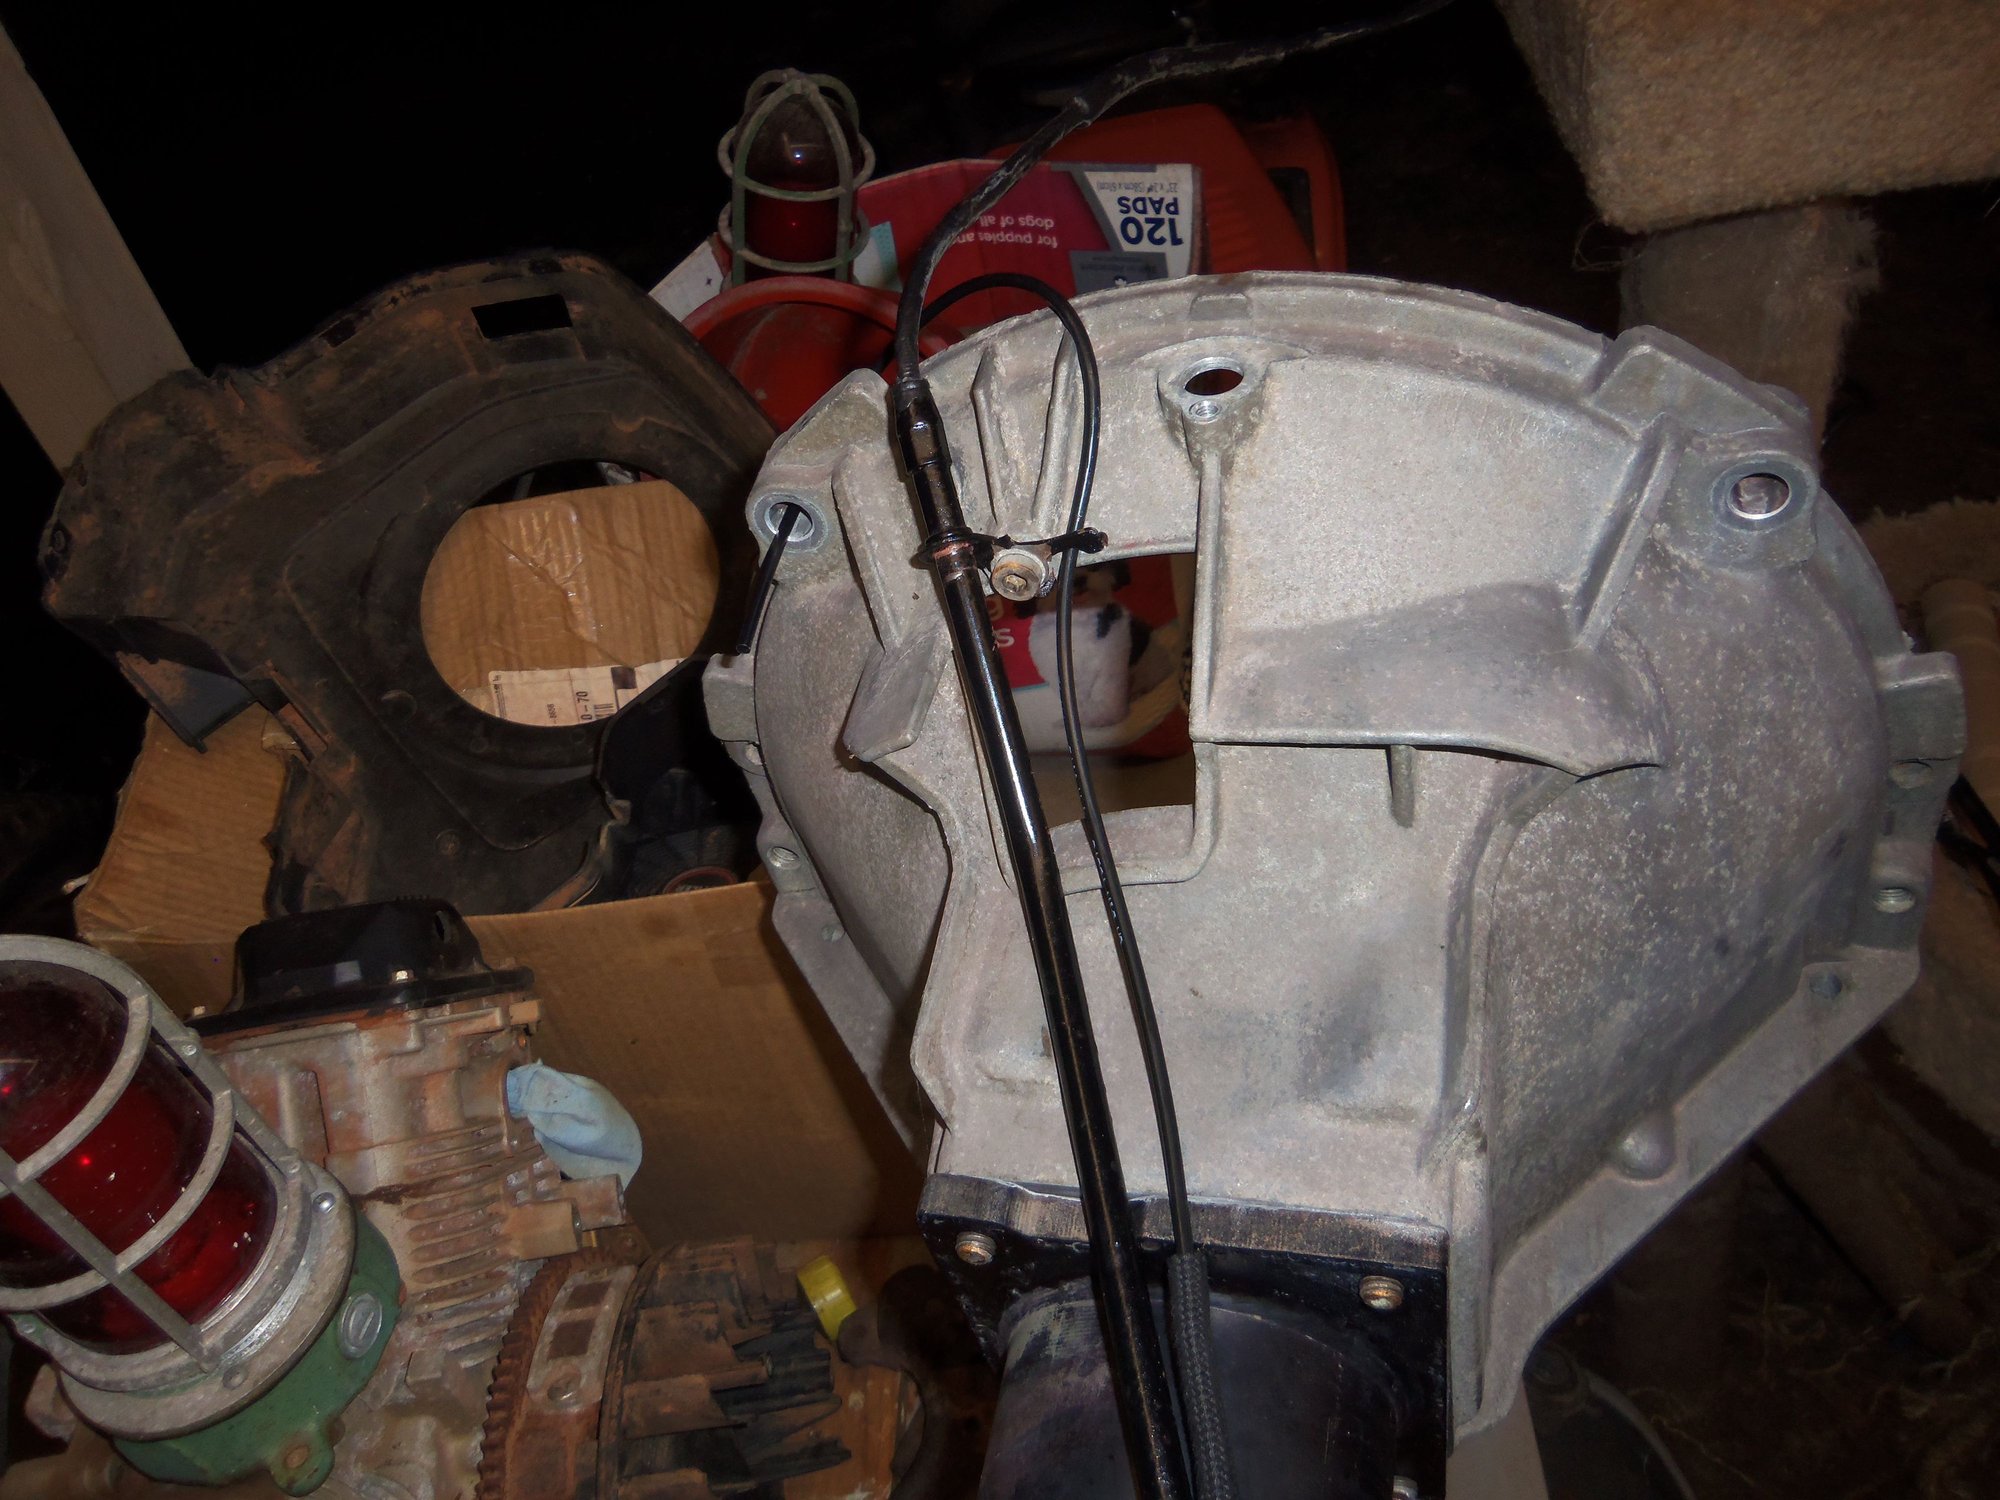
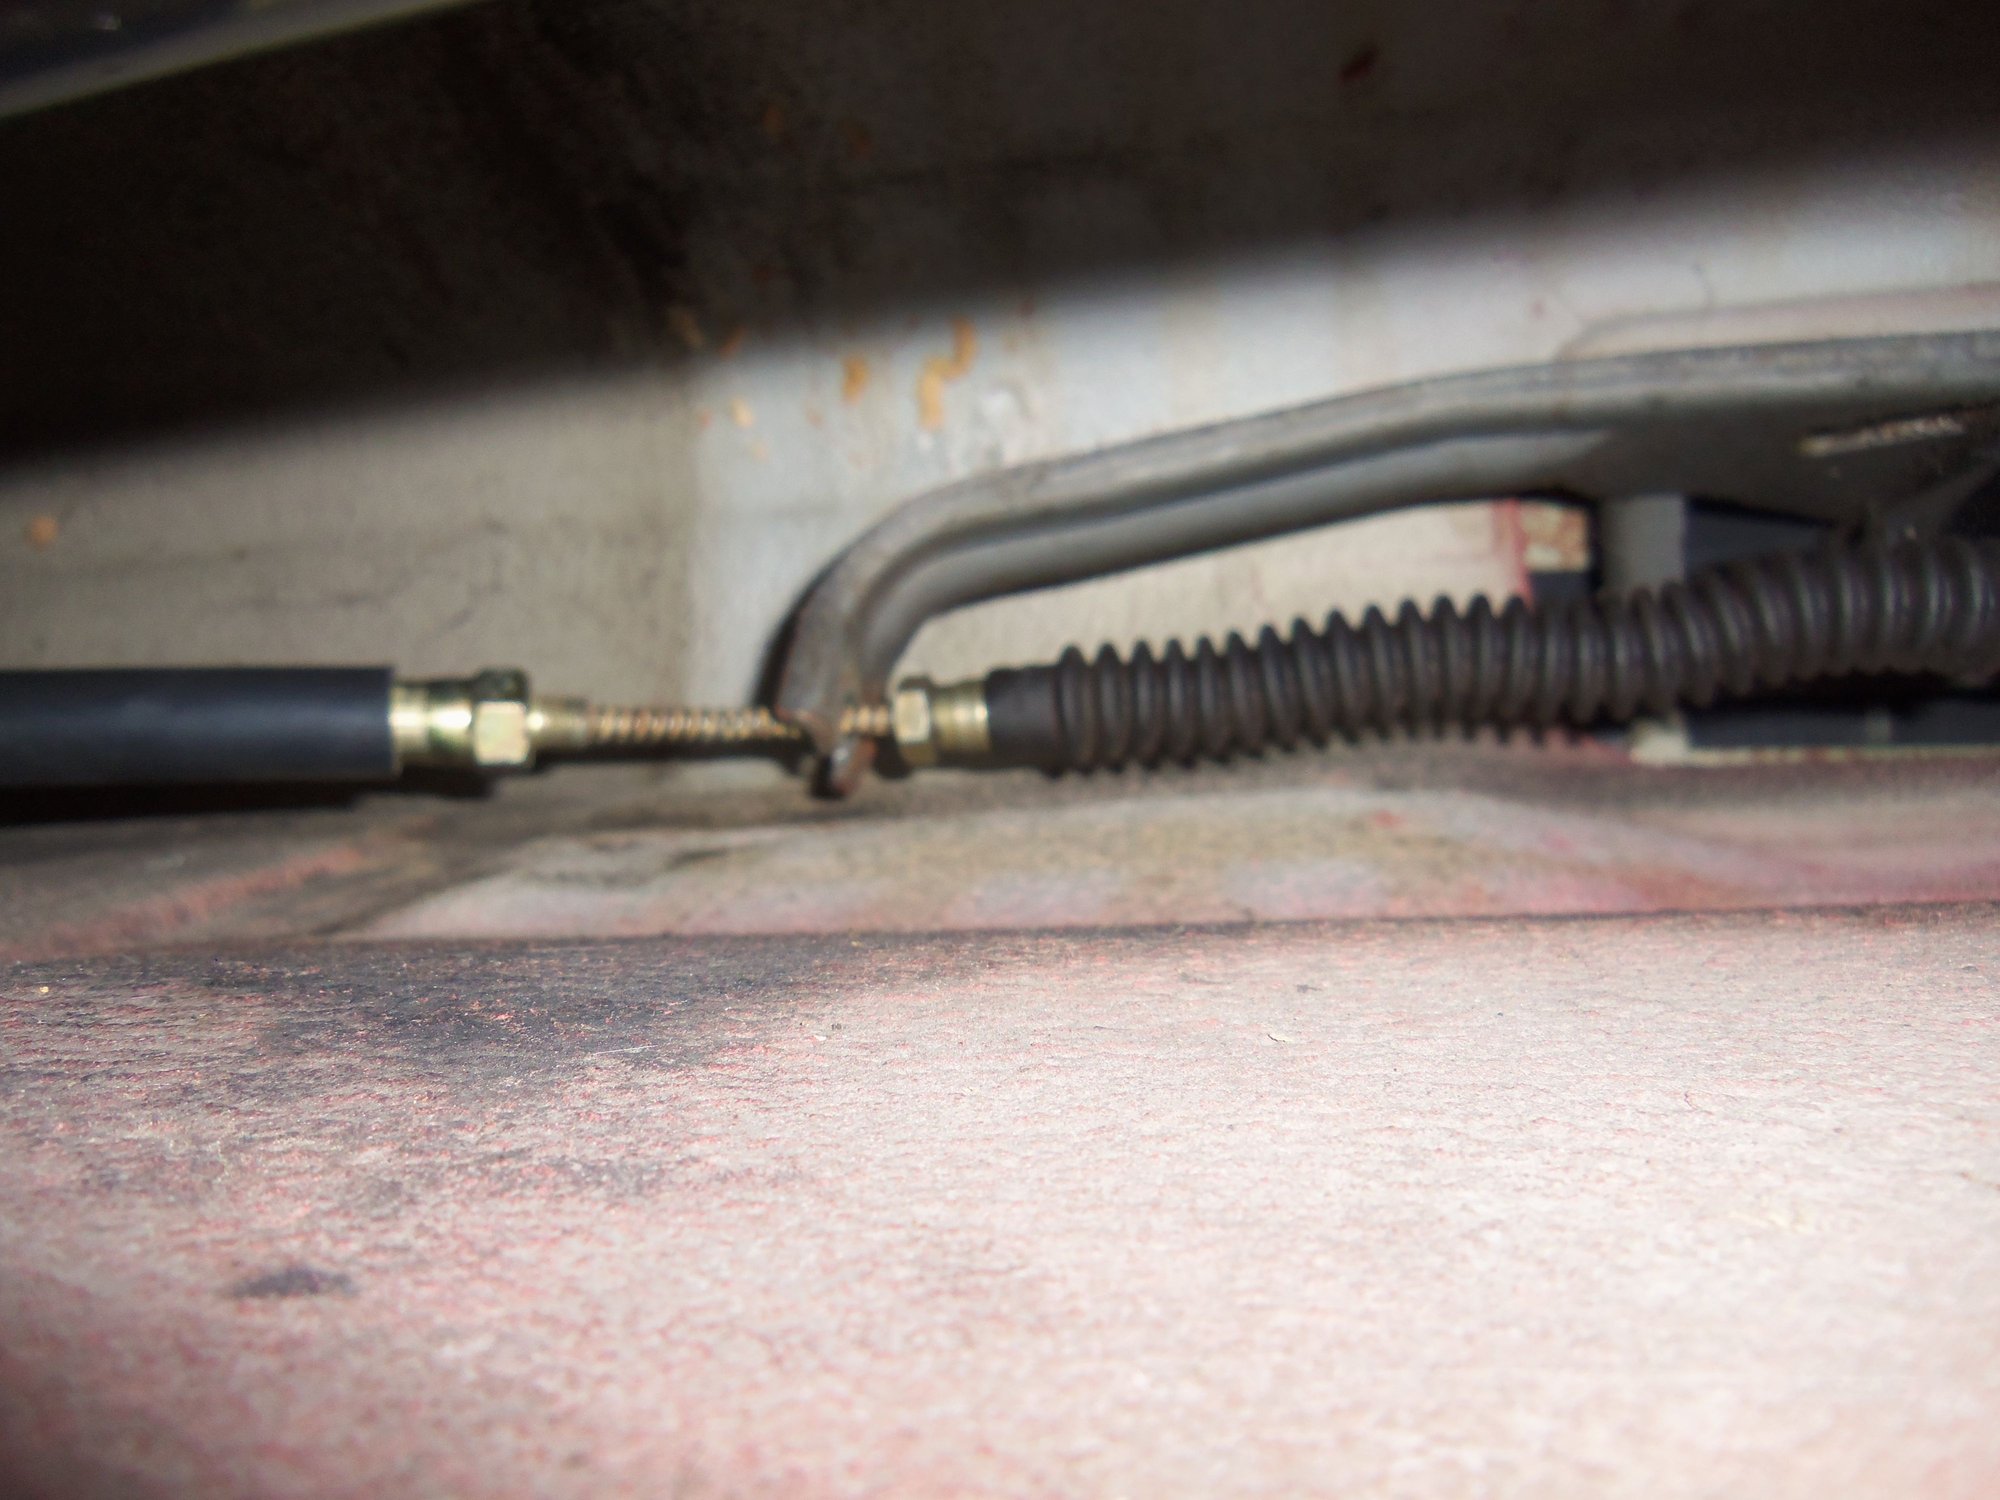
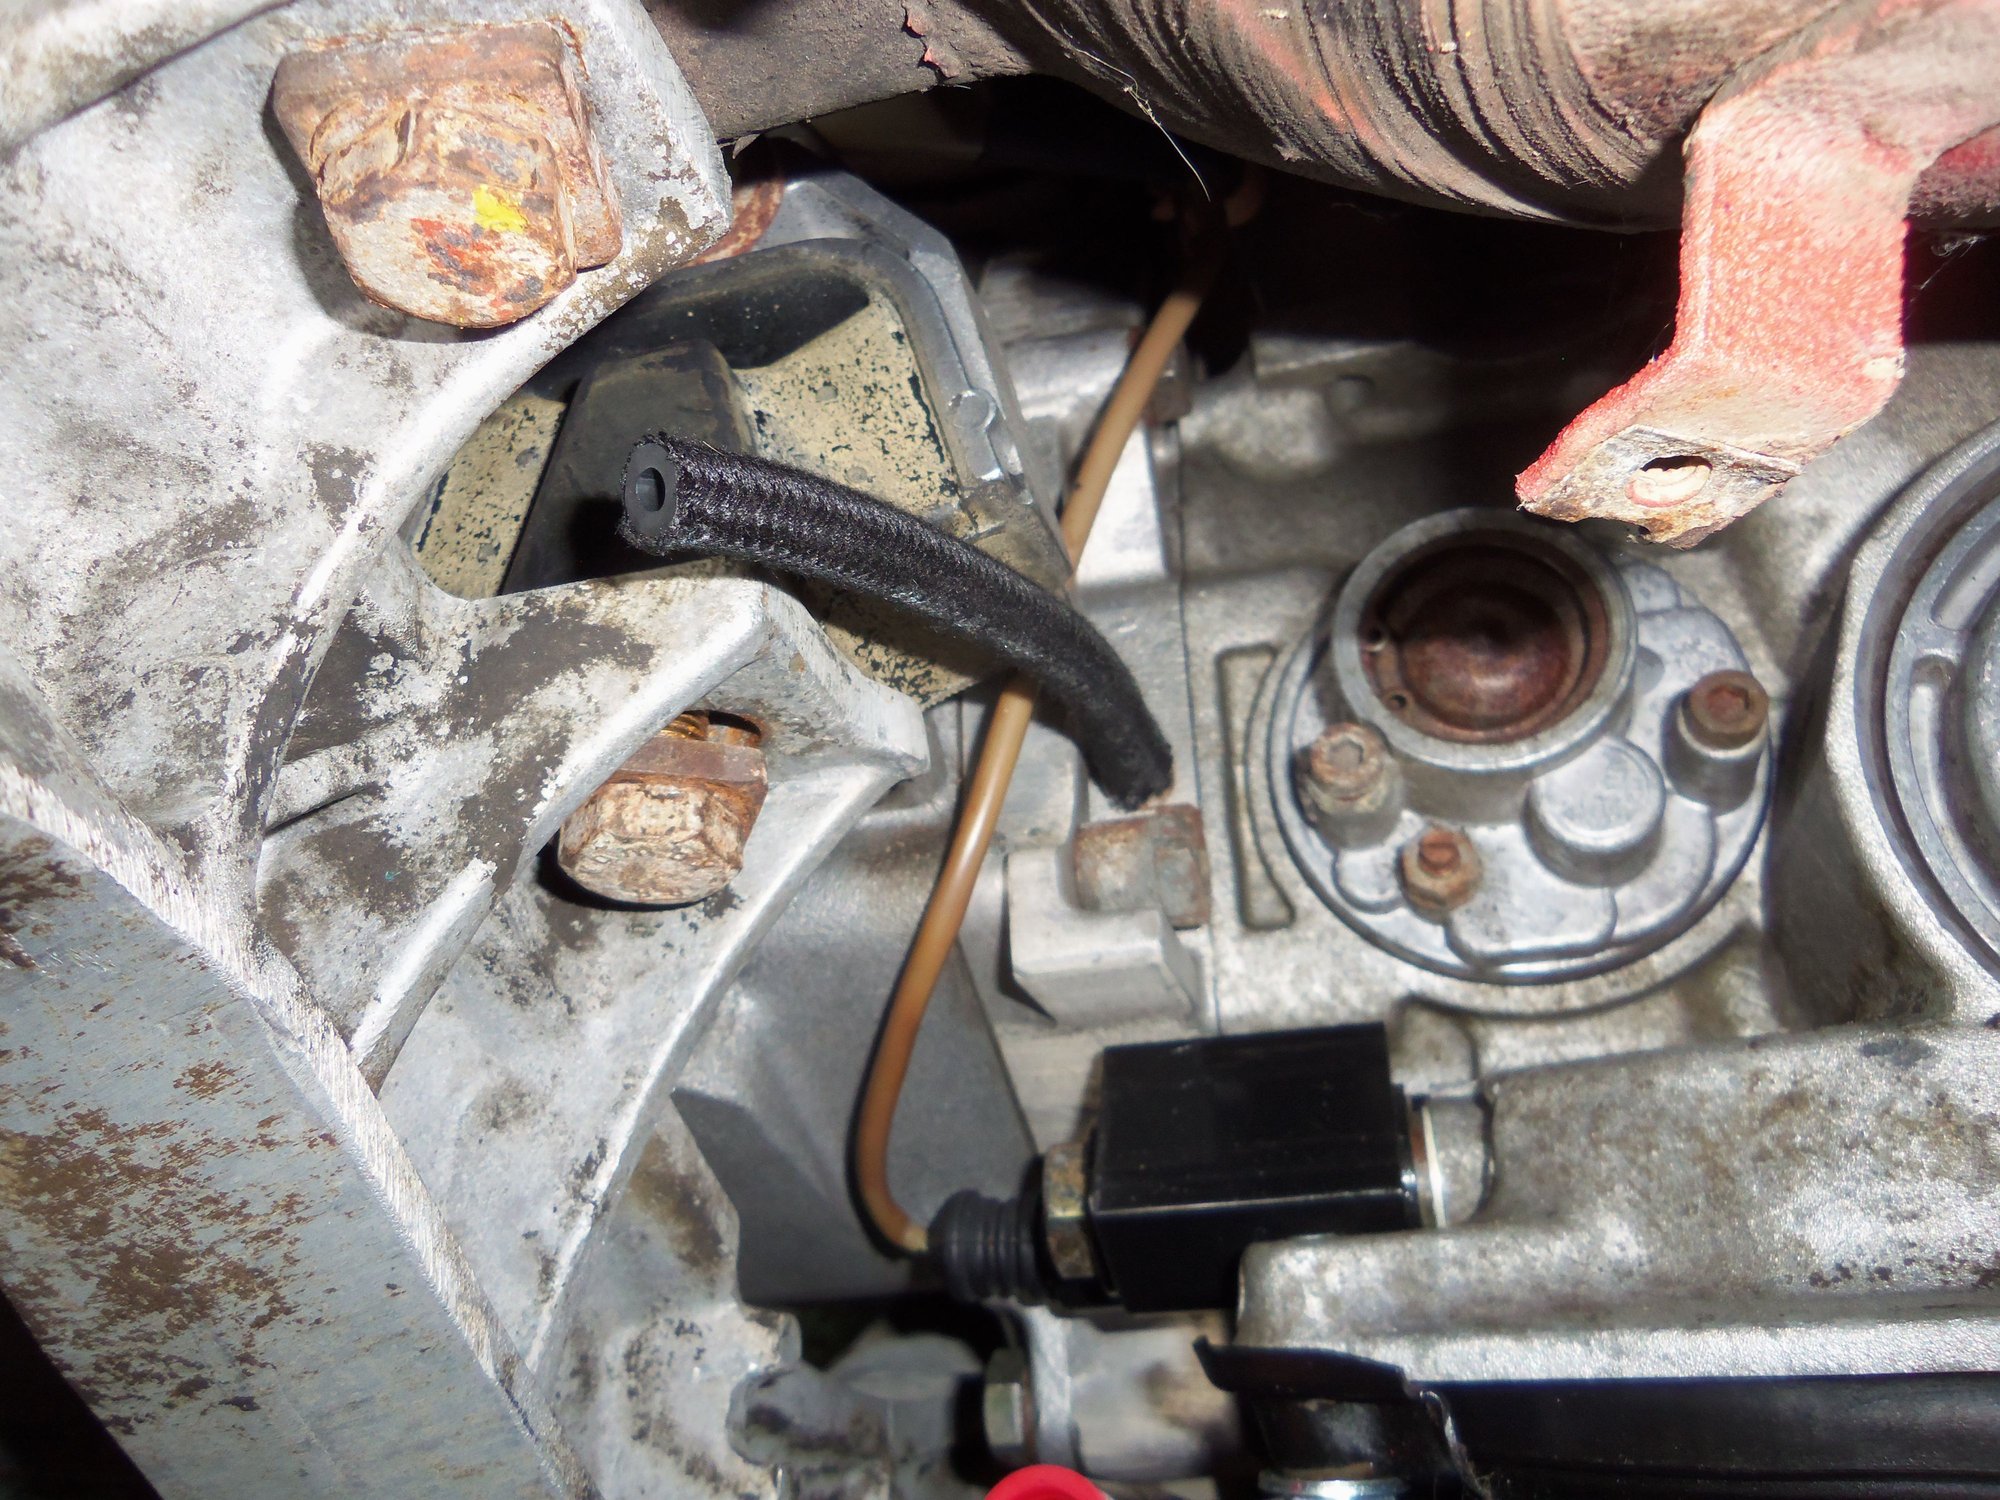
New plastic vacuum line and braided hose to couple it to the metal vacuum line.
Foam will get final positioning when actually installed.
New braided hose from the metal vacuum line to the modulator.
Clamp hiding under the foam.
Mandatory mid exhaust hanger and clamp.
I am planning to reinstall the drivetrain into the Red Witch on Sunday.
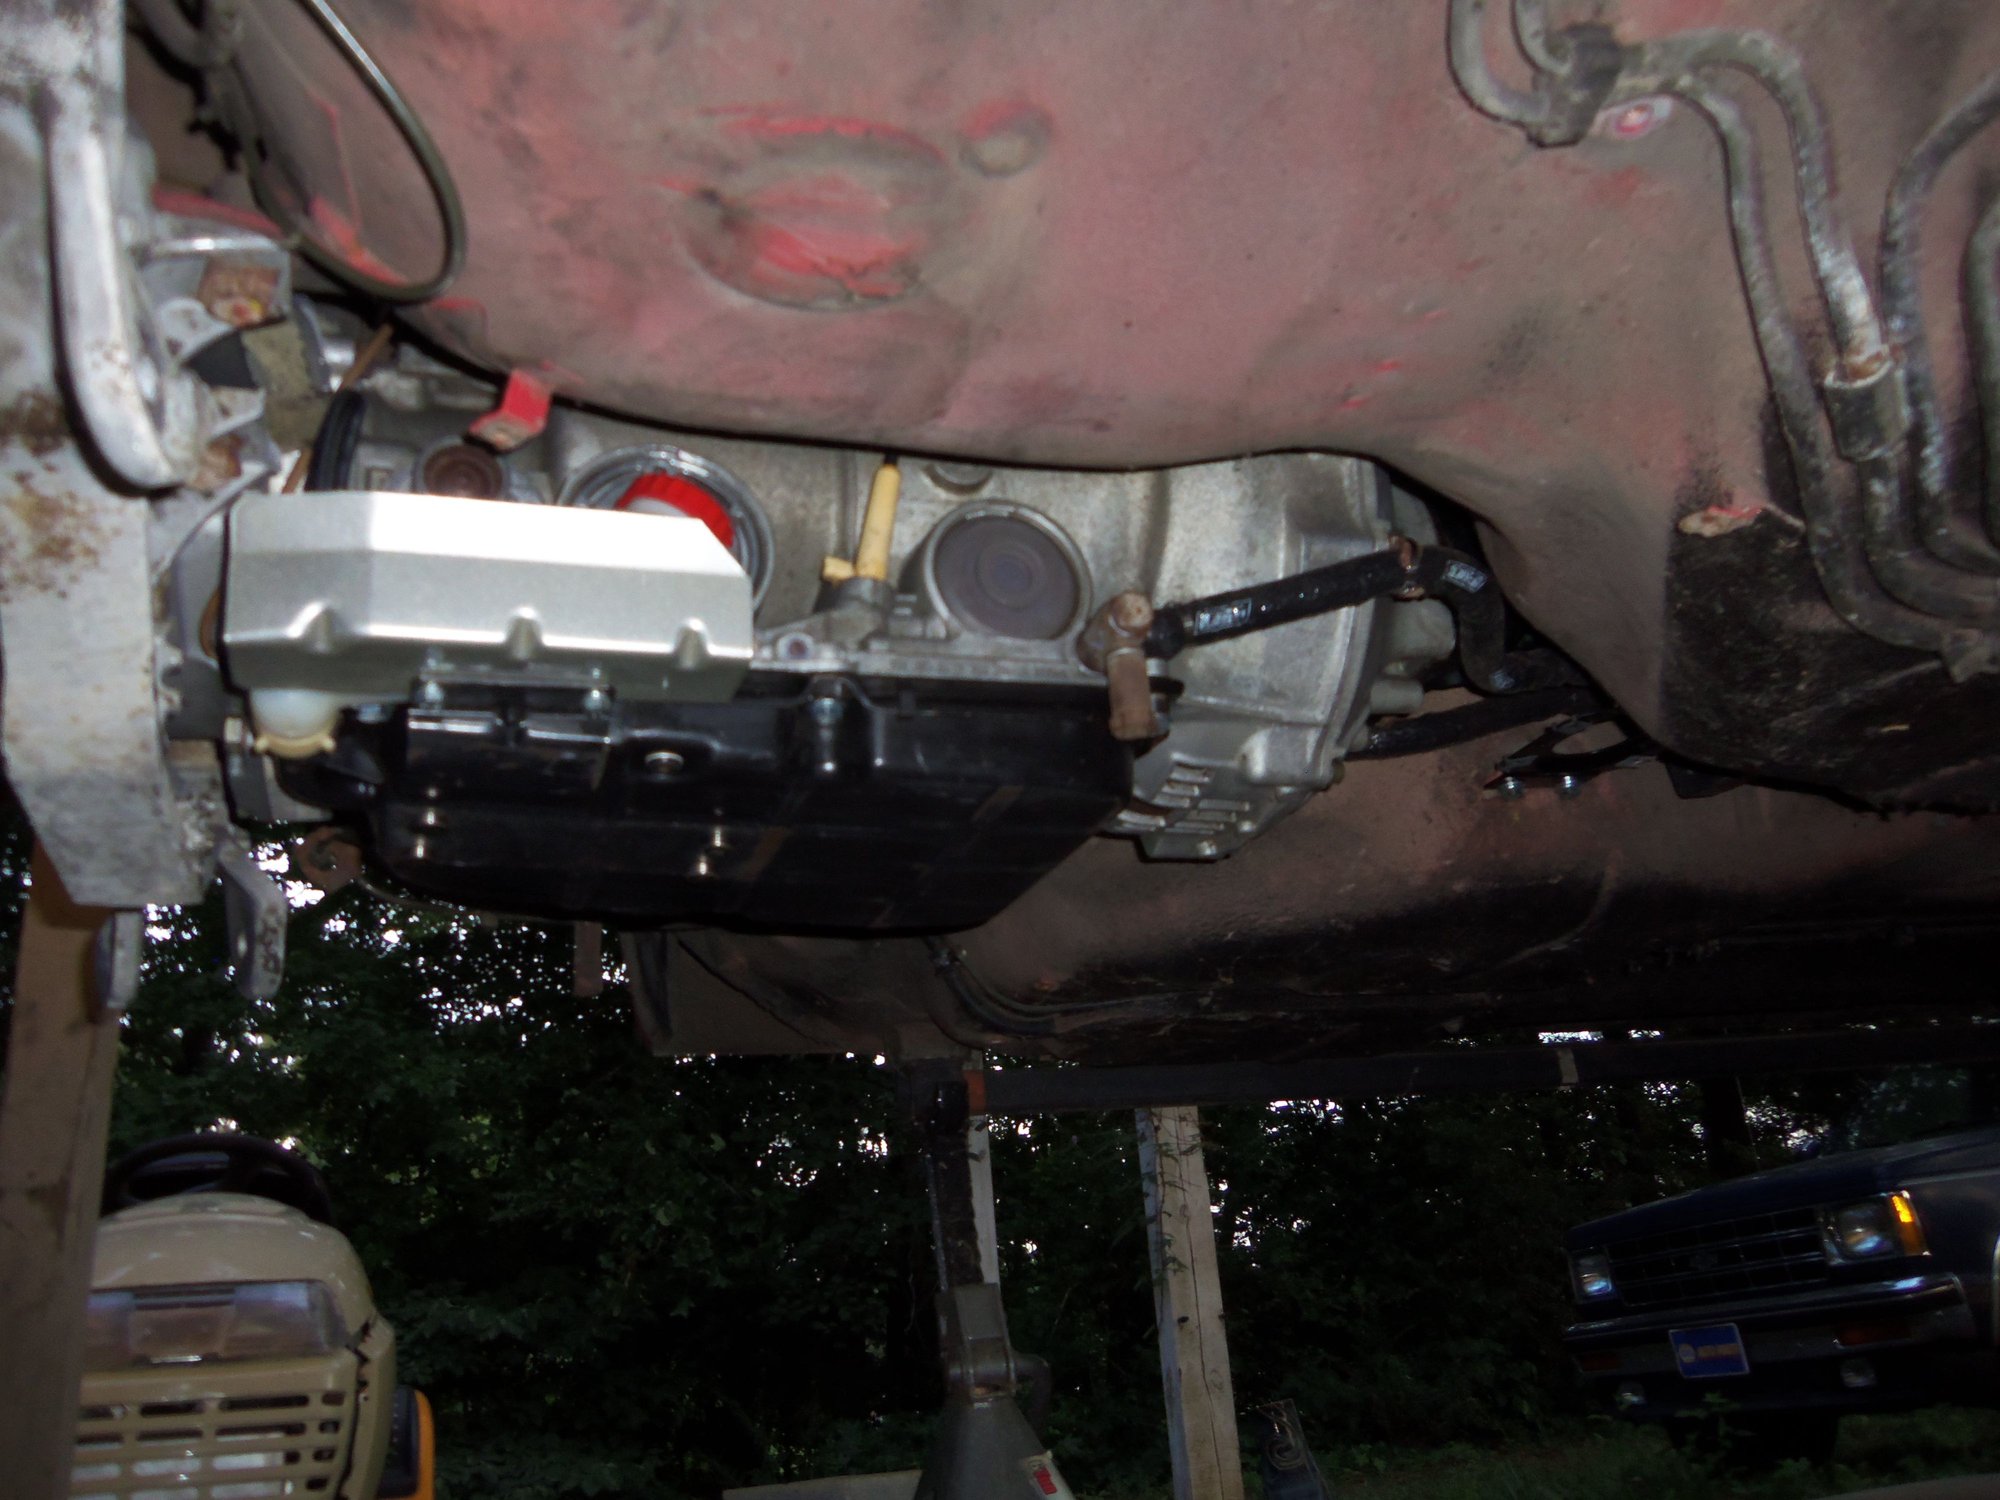
The transmission and torque tube are finally reinstalled into the Red Witch!
After 3 years of taking parts off, I have finally put something back on. And it is a big one!
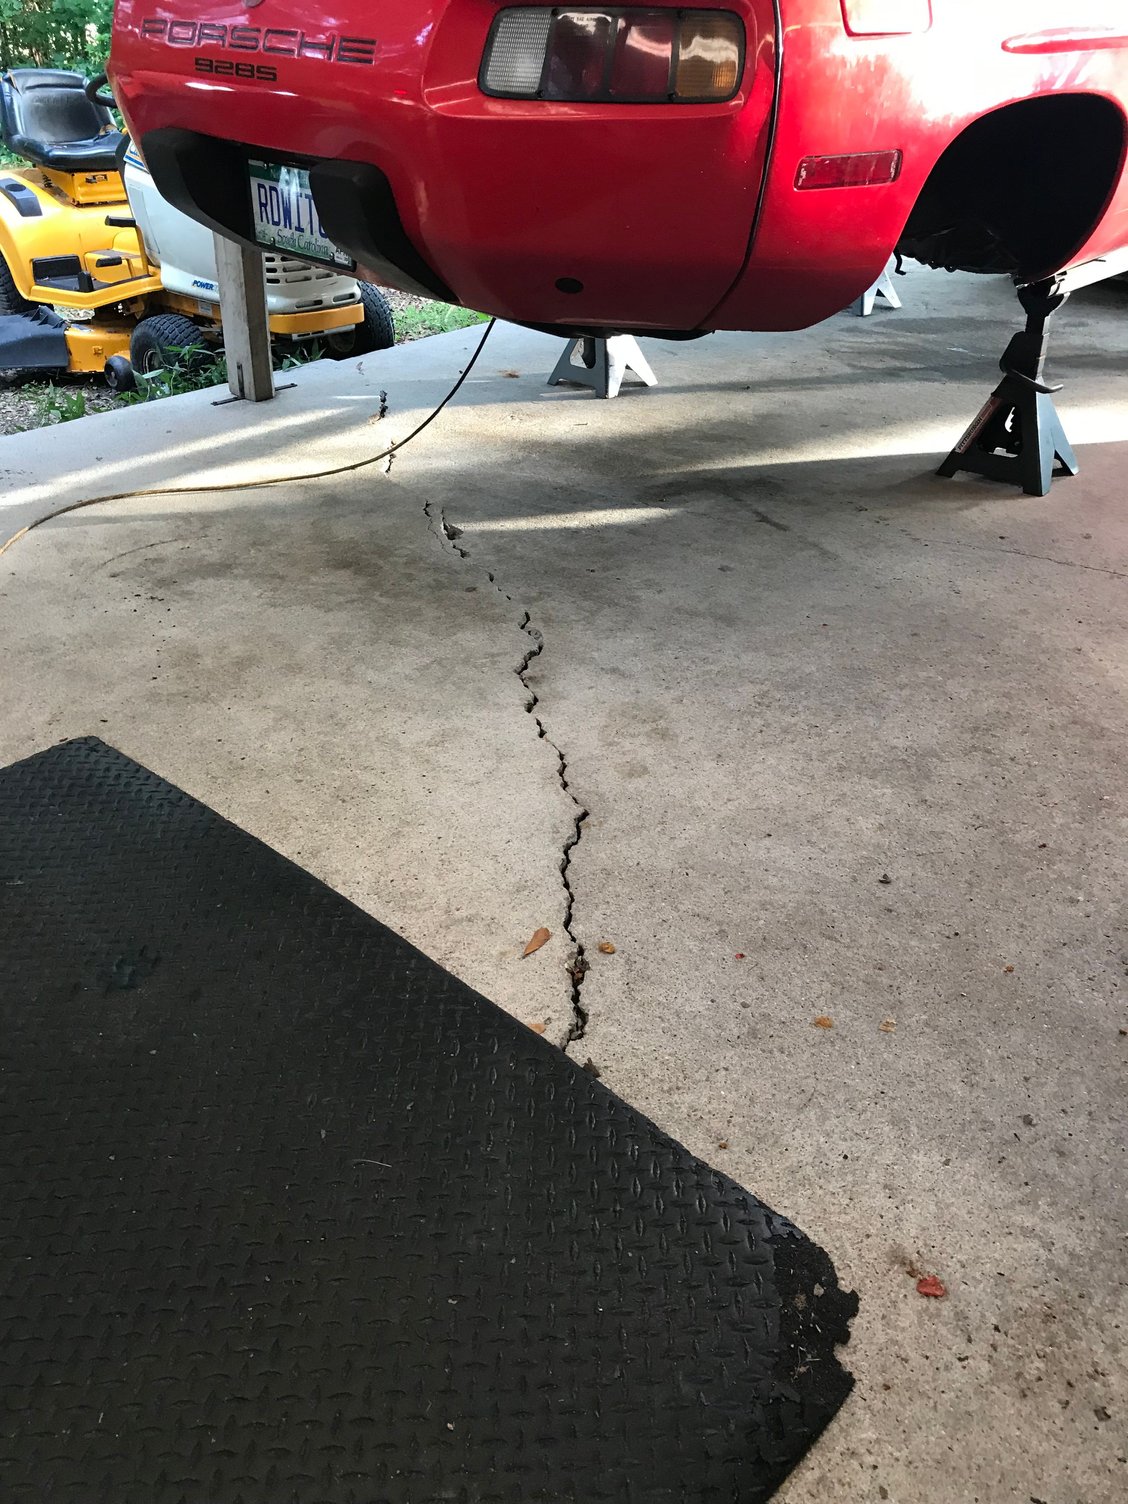
I awoke Friday from my after-work nap to find no rain. So, I got to work prepping for the job. I had already pressure washed the concrete under the car when I cleaned the rear suspension crossmember last week. So, all I had to do now was blow all the leaves and debris away.
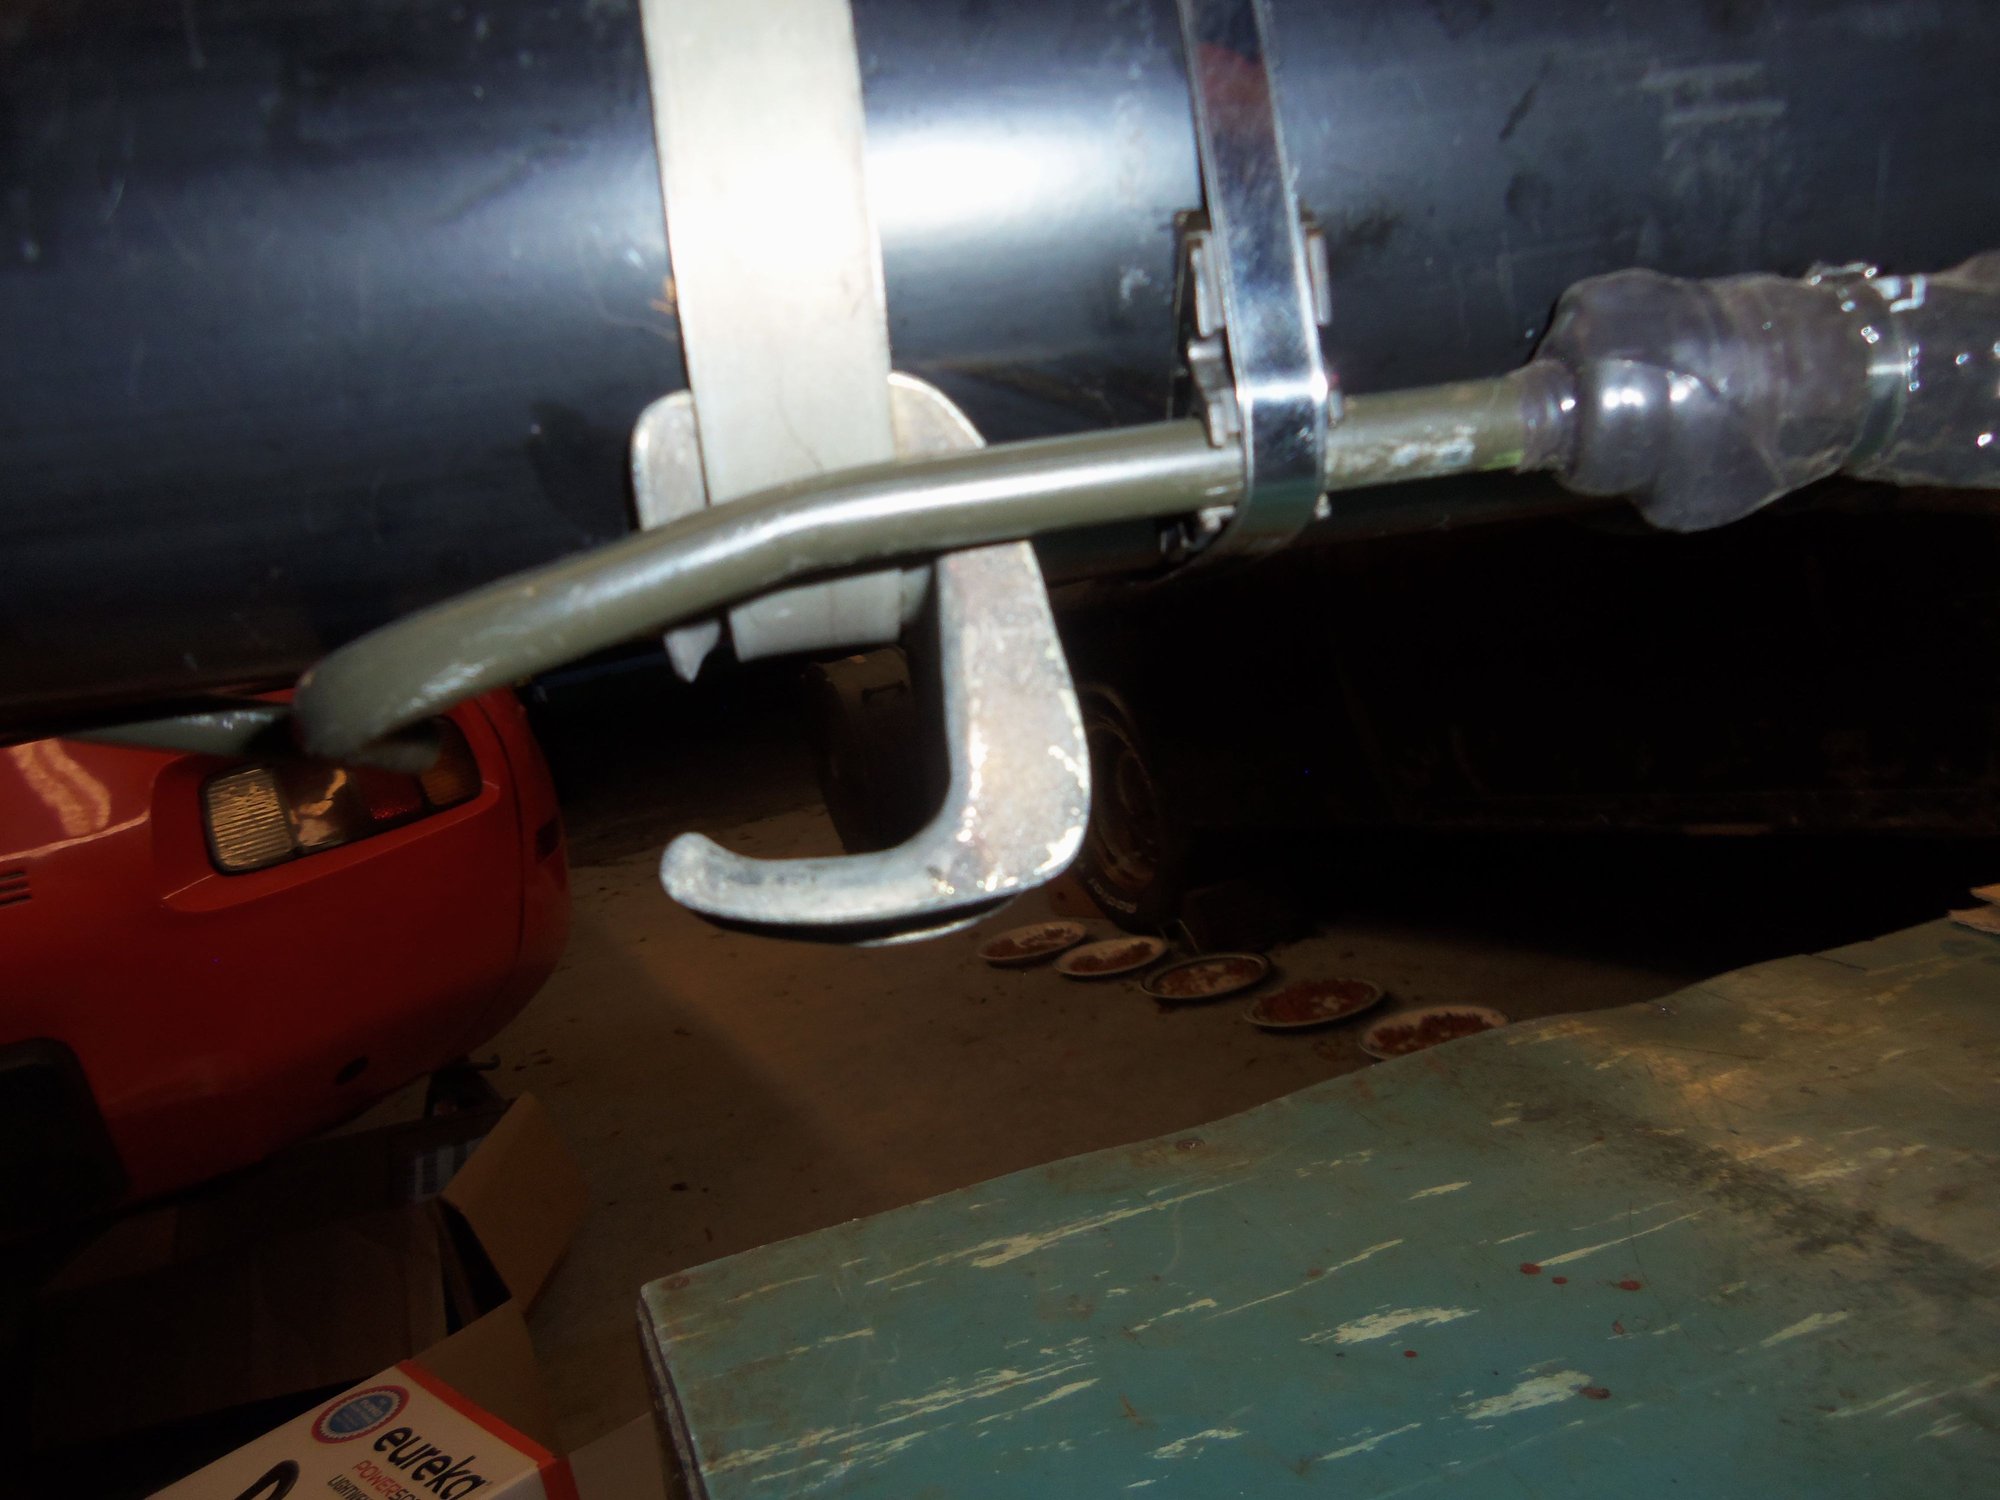
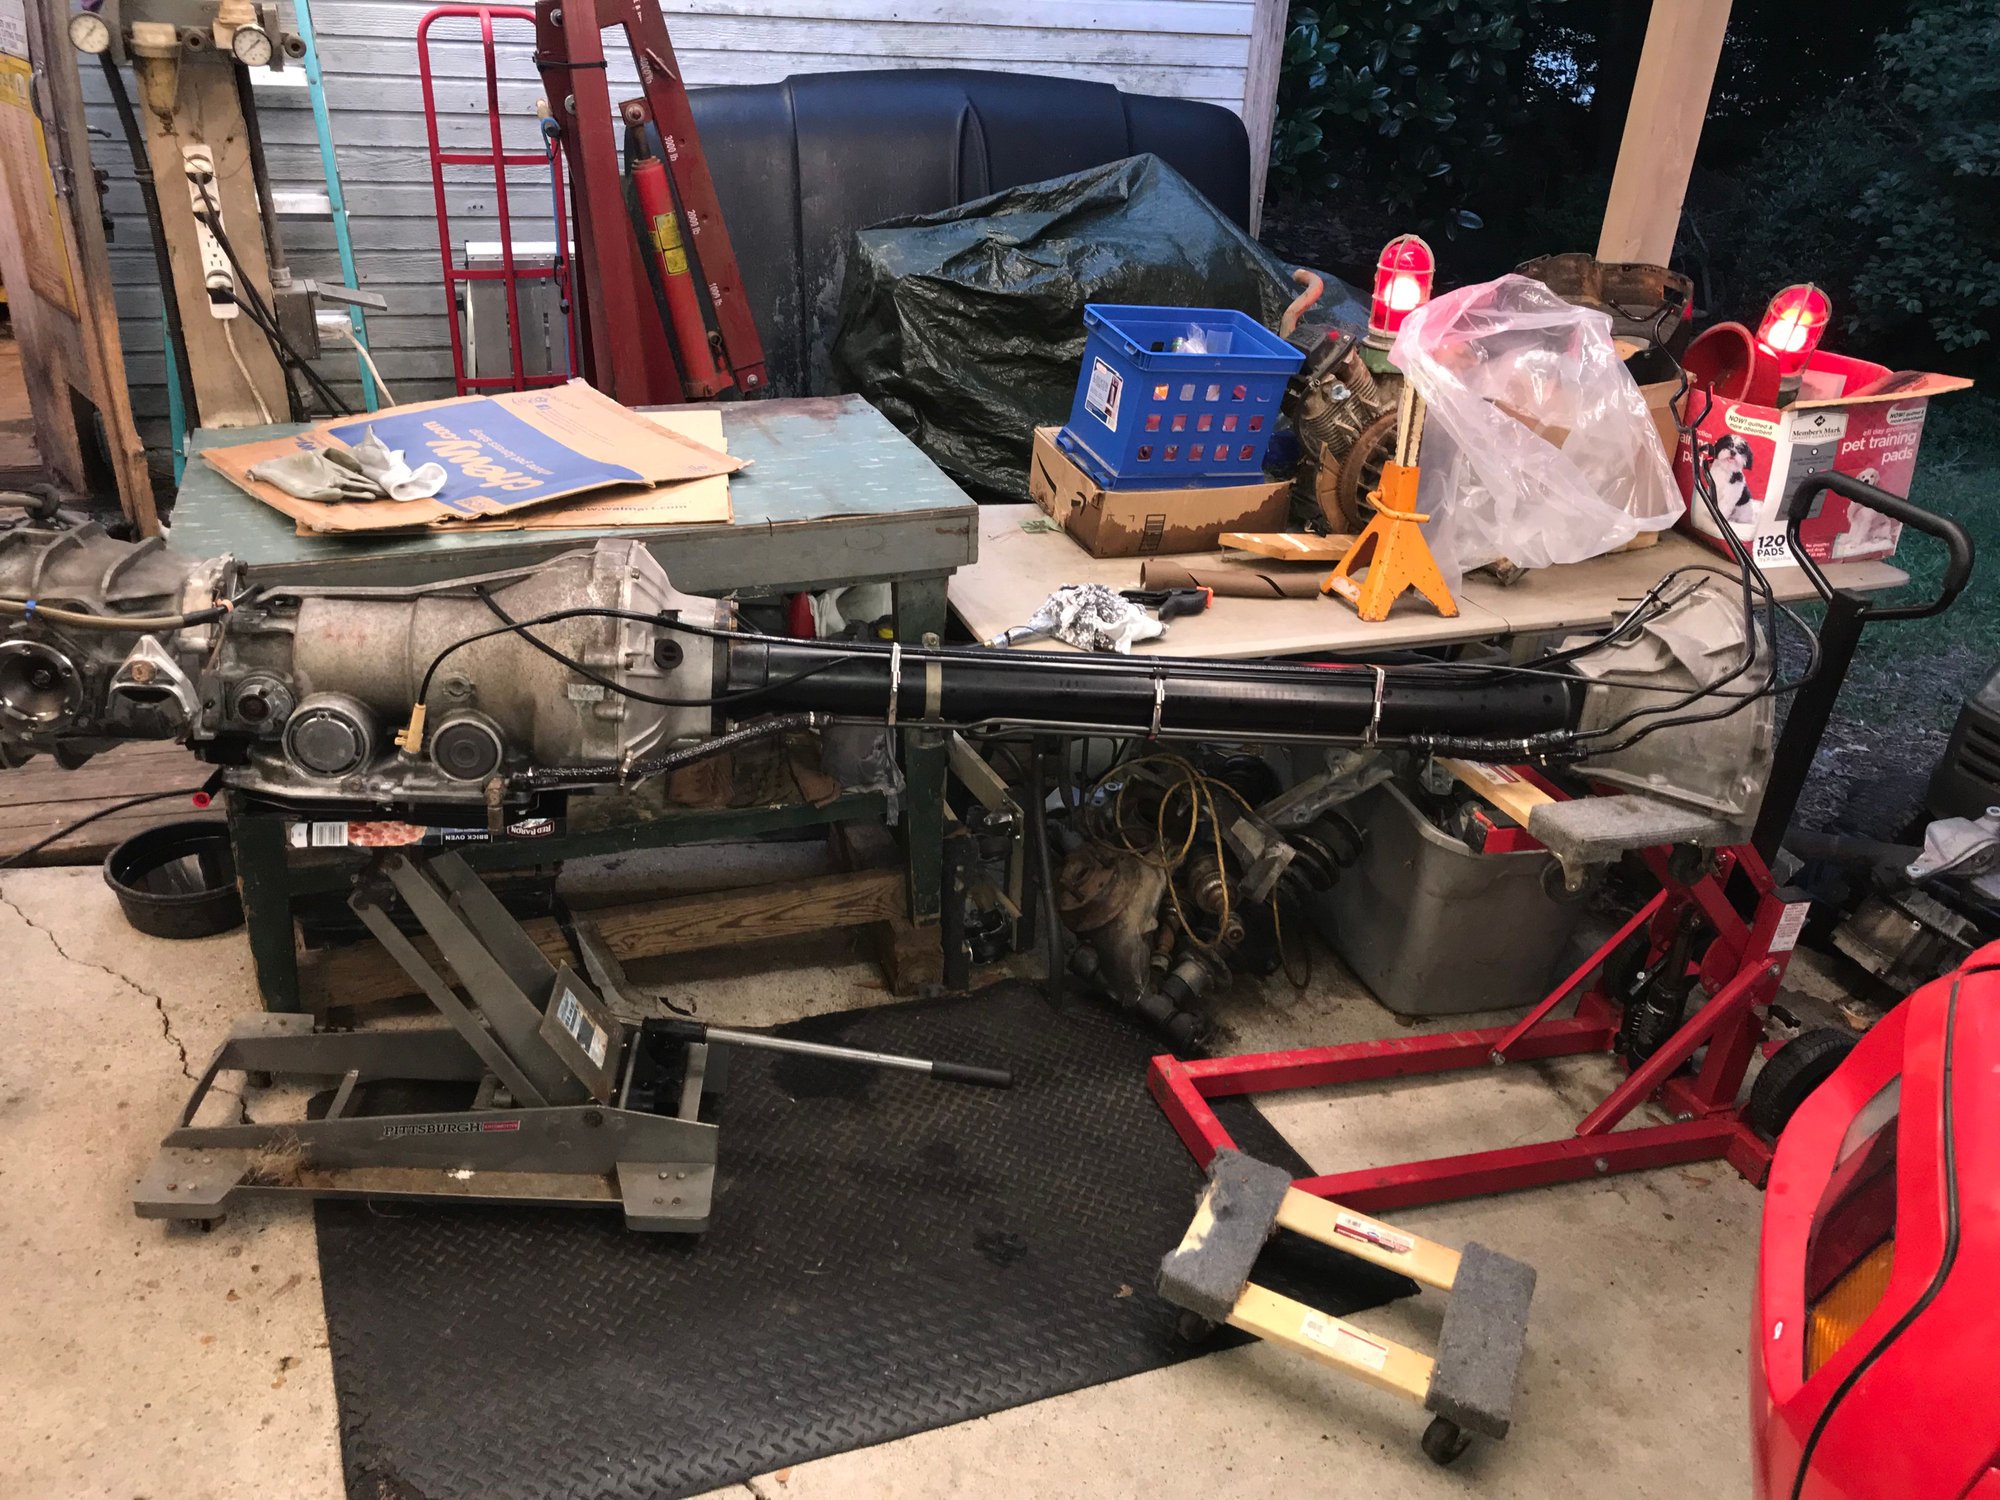
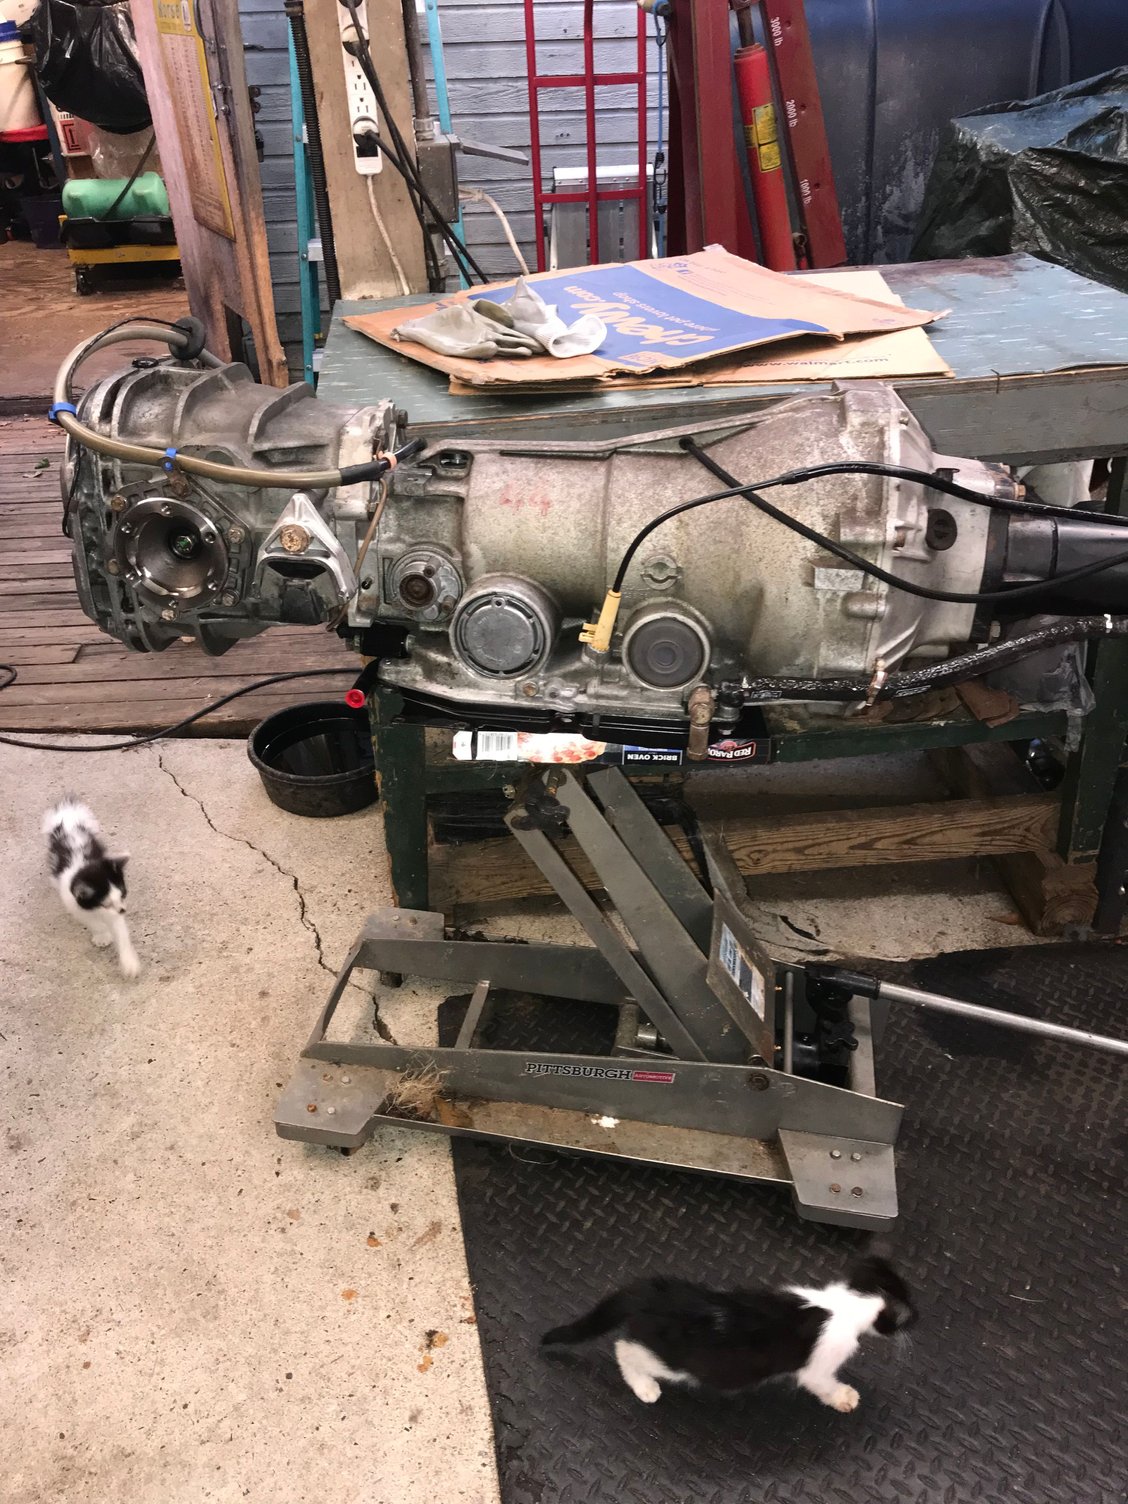
My goal for the night was to just get the transmission and torque tube off the work bench and table and down onto the concrete. I used my transmission jack and mower jack. It was sketchy, but it worked.
Clean spot. Power cable is to the battery maintainer in the back of the car. It was removed for the festivities.
Transmission jack and mower jack to lower the assembly down. It was sketchy, but it worked.
Sketchy, but stable.
More stable than it looks.
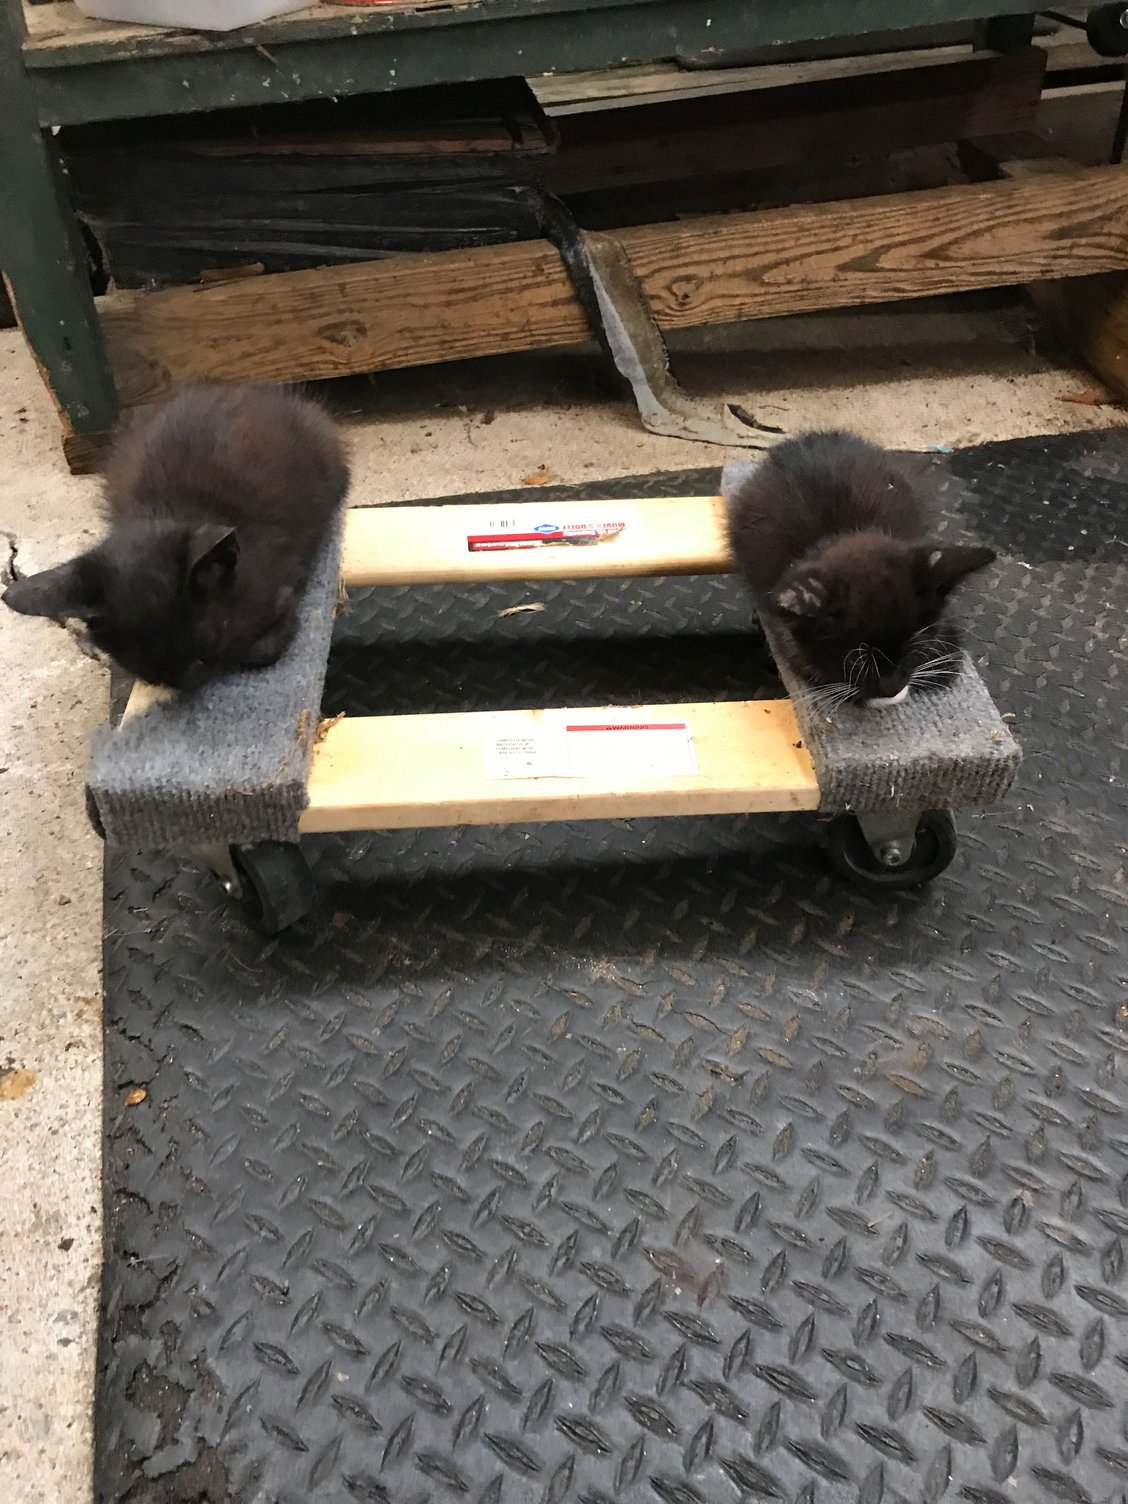
Spare moving dolly got hijacked by two of my kittens.
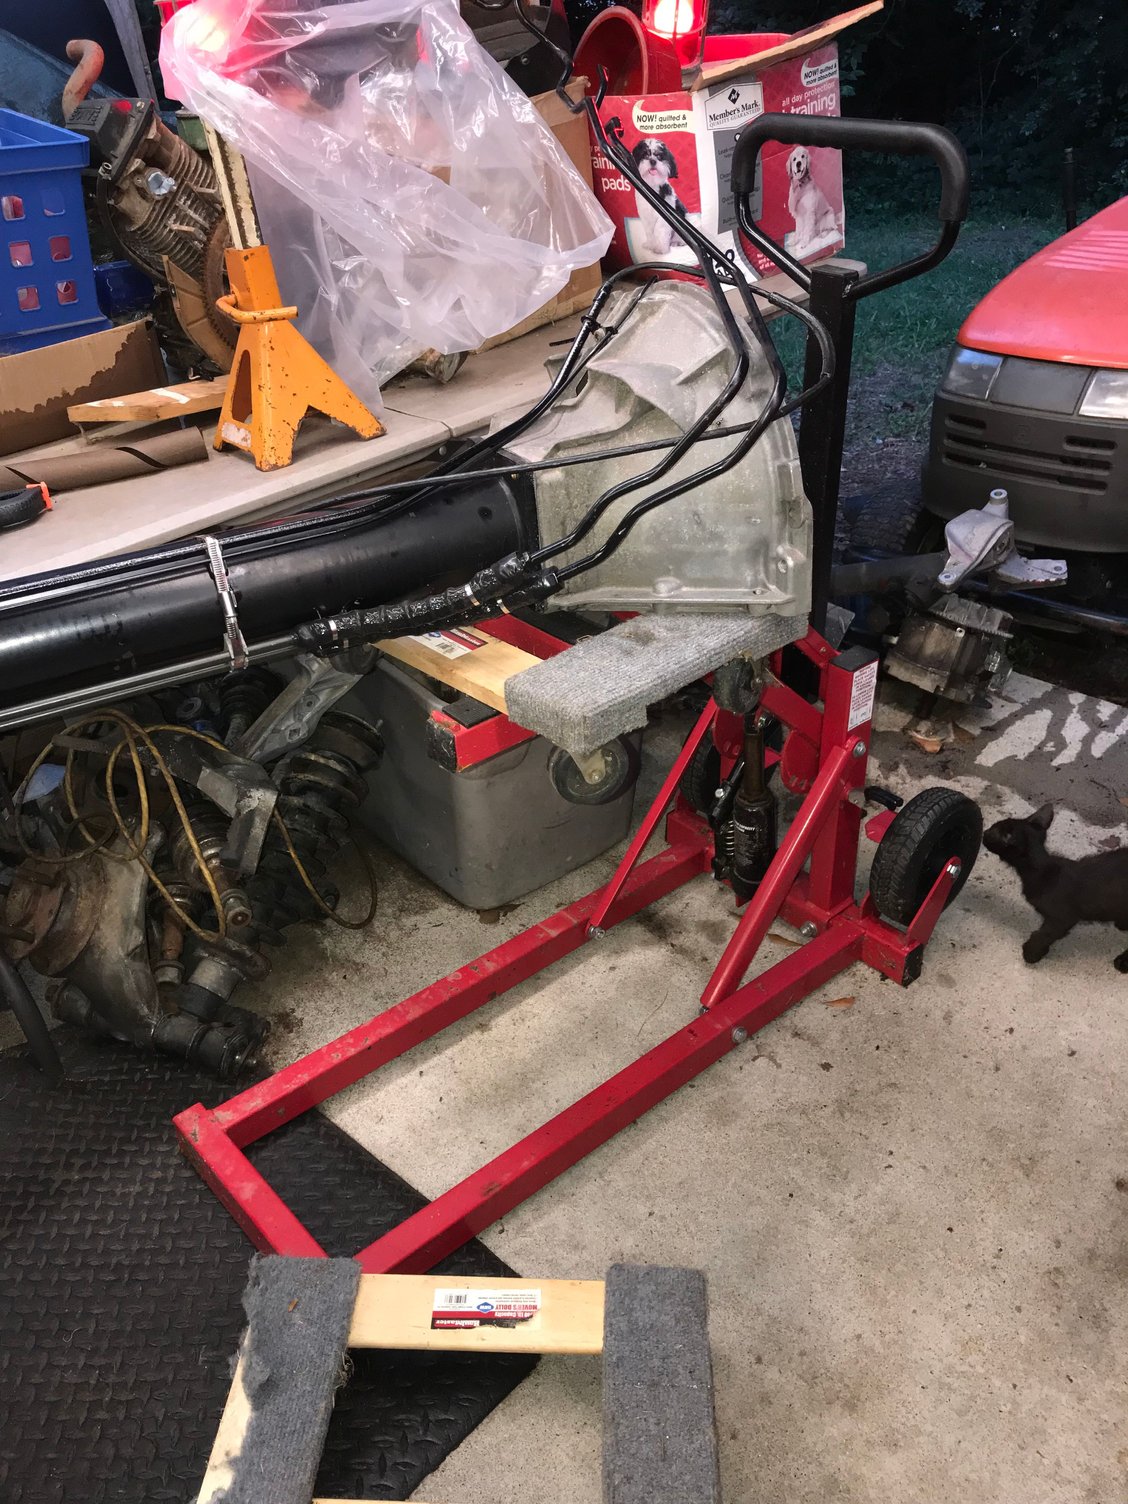
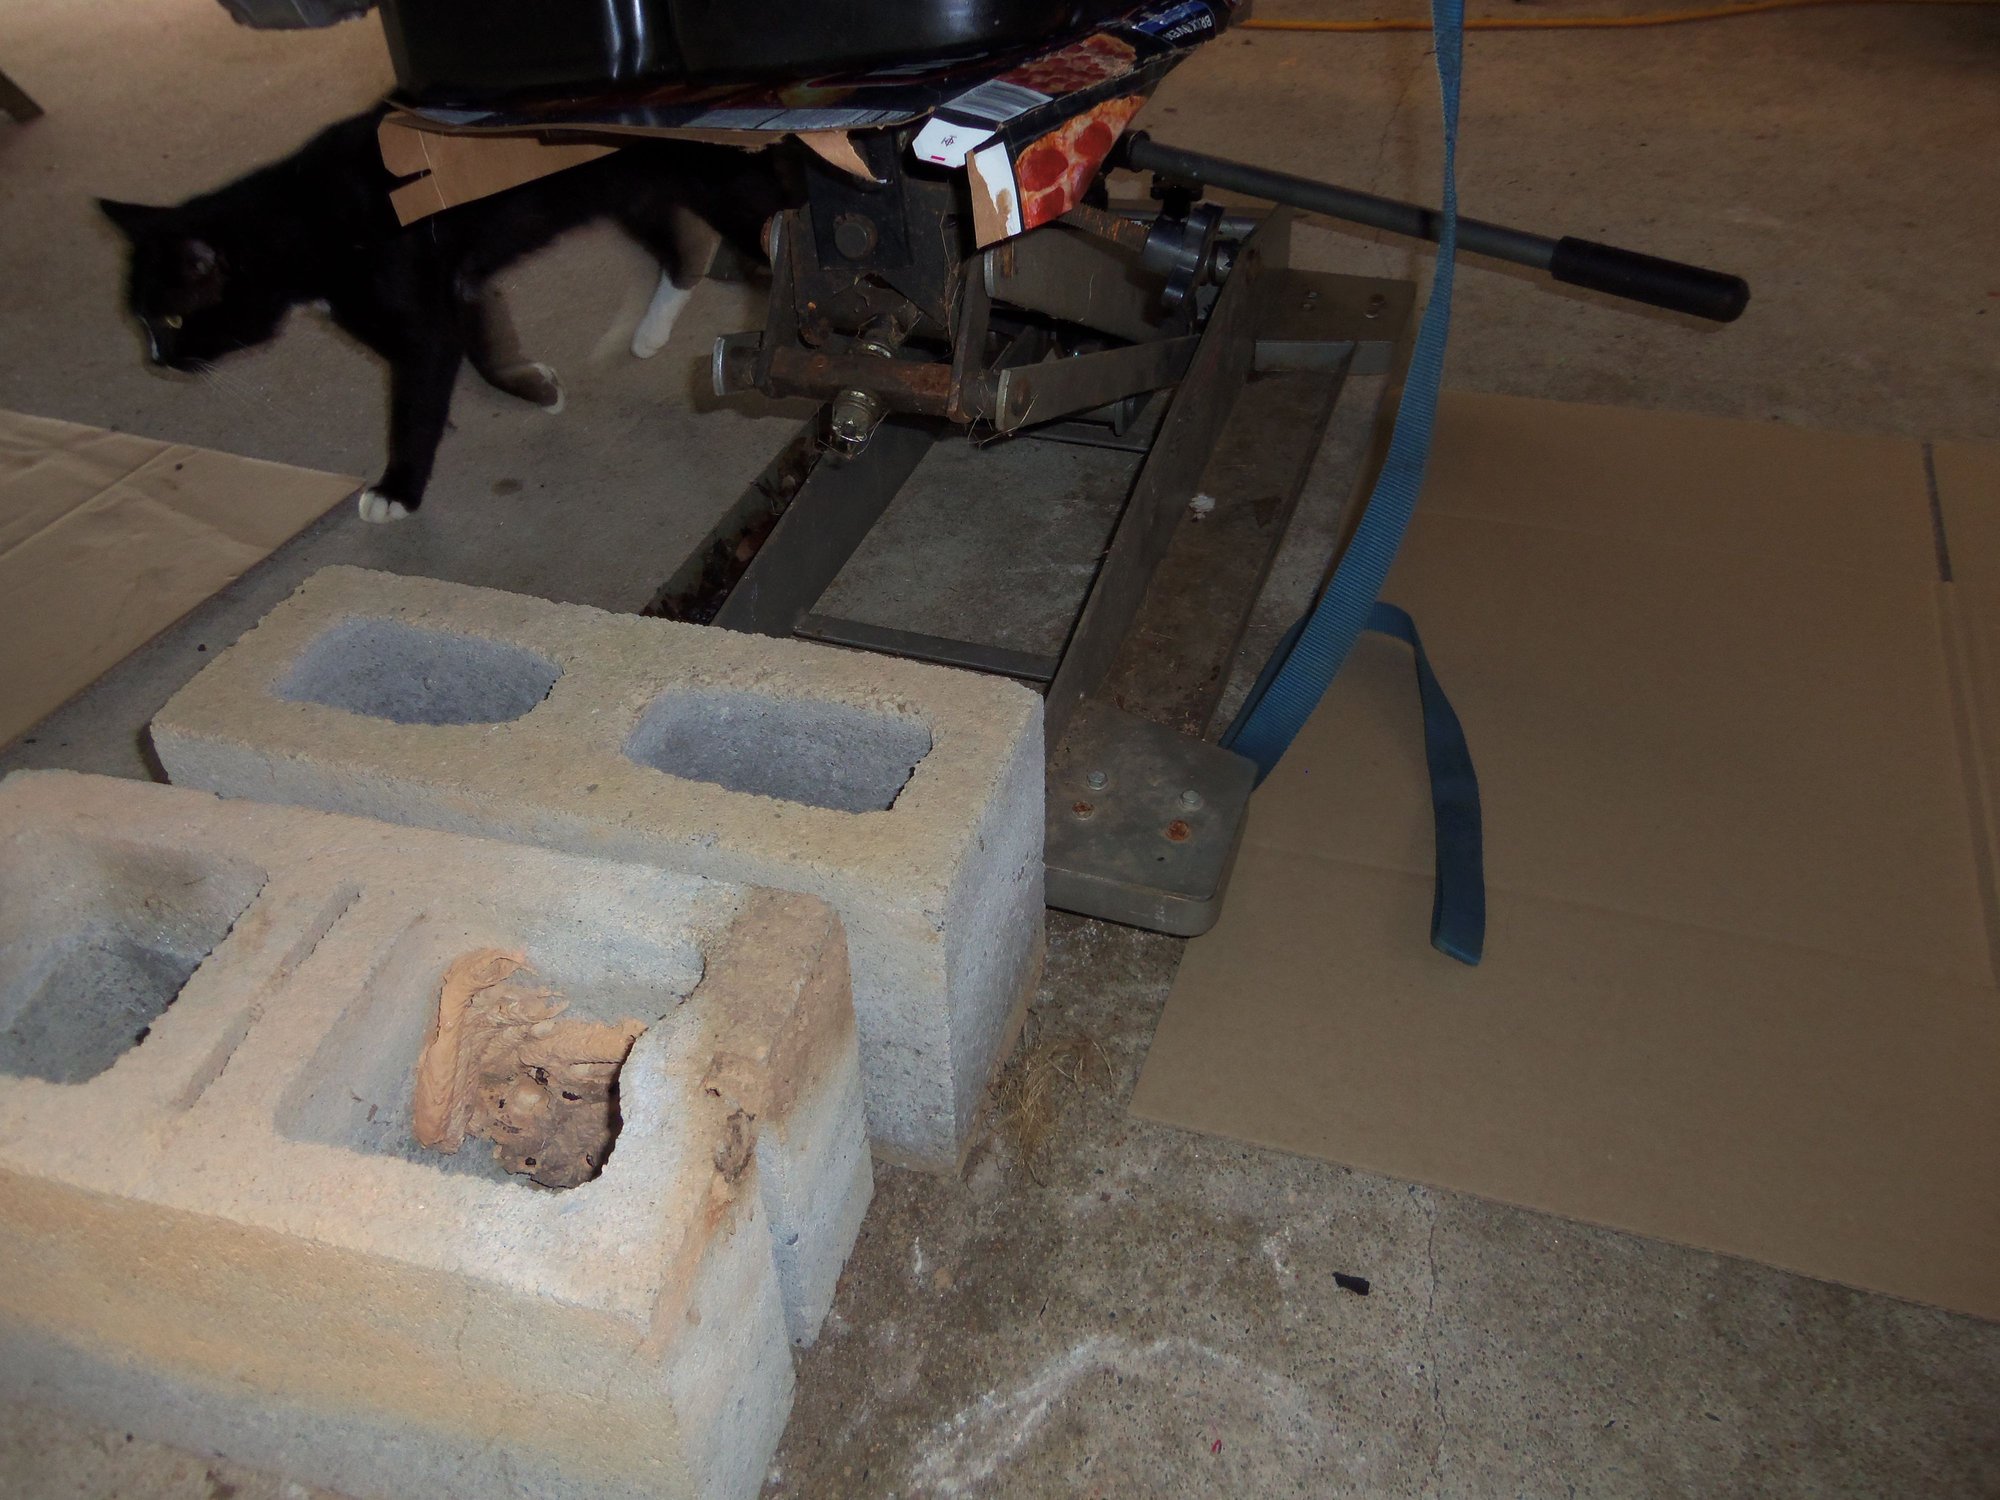
On a roll, I decided the best place to store the transmission and torque tube out of the rain would be under the car.
Let me interrupt. This will be a success story. However, as a zebra is unable to change his stripes, I made mistakes. So learn from me and don't do what I did. I got the results I wanted, but the process could have been done better. Dwayne made a nifty wooden jig to lower his transmission and torque tube as one unit. Because I am stupid, I didn't do that. I used my transmission jack and a moving dolly under the bellhousing. This would have worked fine anywhere but my driveway.
Don't get me wrong, I love having concrete to work on. I spent years working out of apartment parking lots or grass/gravel. I am living like Rockefeller in my current set-up. However, the driveway and carport was poured to follow the land. Meaning not level. Things roll.
I put down a line of cinder blocks and bricks as bump stops. They worked. More or less. It took awhile and required manhandling the transmission on the jack, manhandling the jack, and maneuvering the bellhousing. And curse words. Lots of curse words. Nothing rolled where I wanted it to. Eventually, all was in place.
So, PSA for today: Follow accepted procedures. If I had Dwayne's jig, the transmission and torque tube would have rolled much better. Same if I had waited for help. Pay attention, kids. Stay in school. Don't do drugs. Don't be like me.
Well, since I was already in position, I went ahead and started installing the transmission and torque tube. That was the end goal of this evolution, so time to do it!
I jacked the transmission up and heaved the bellhousing up onto a jackstand in stages so as not to bind anything up.
Cinder blocks as bump stops for the jack.
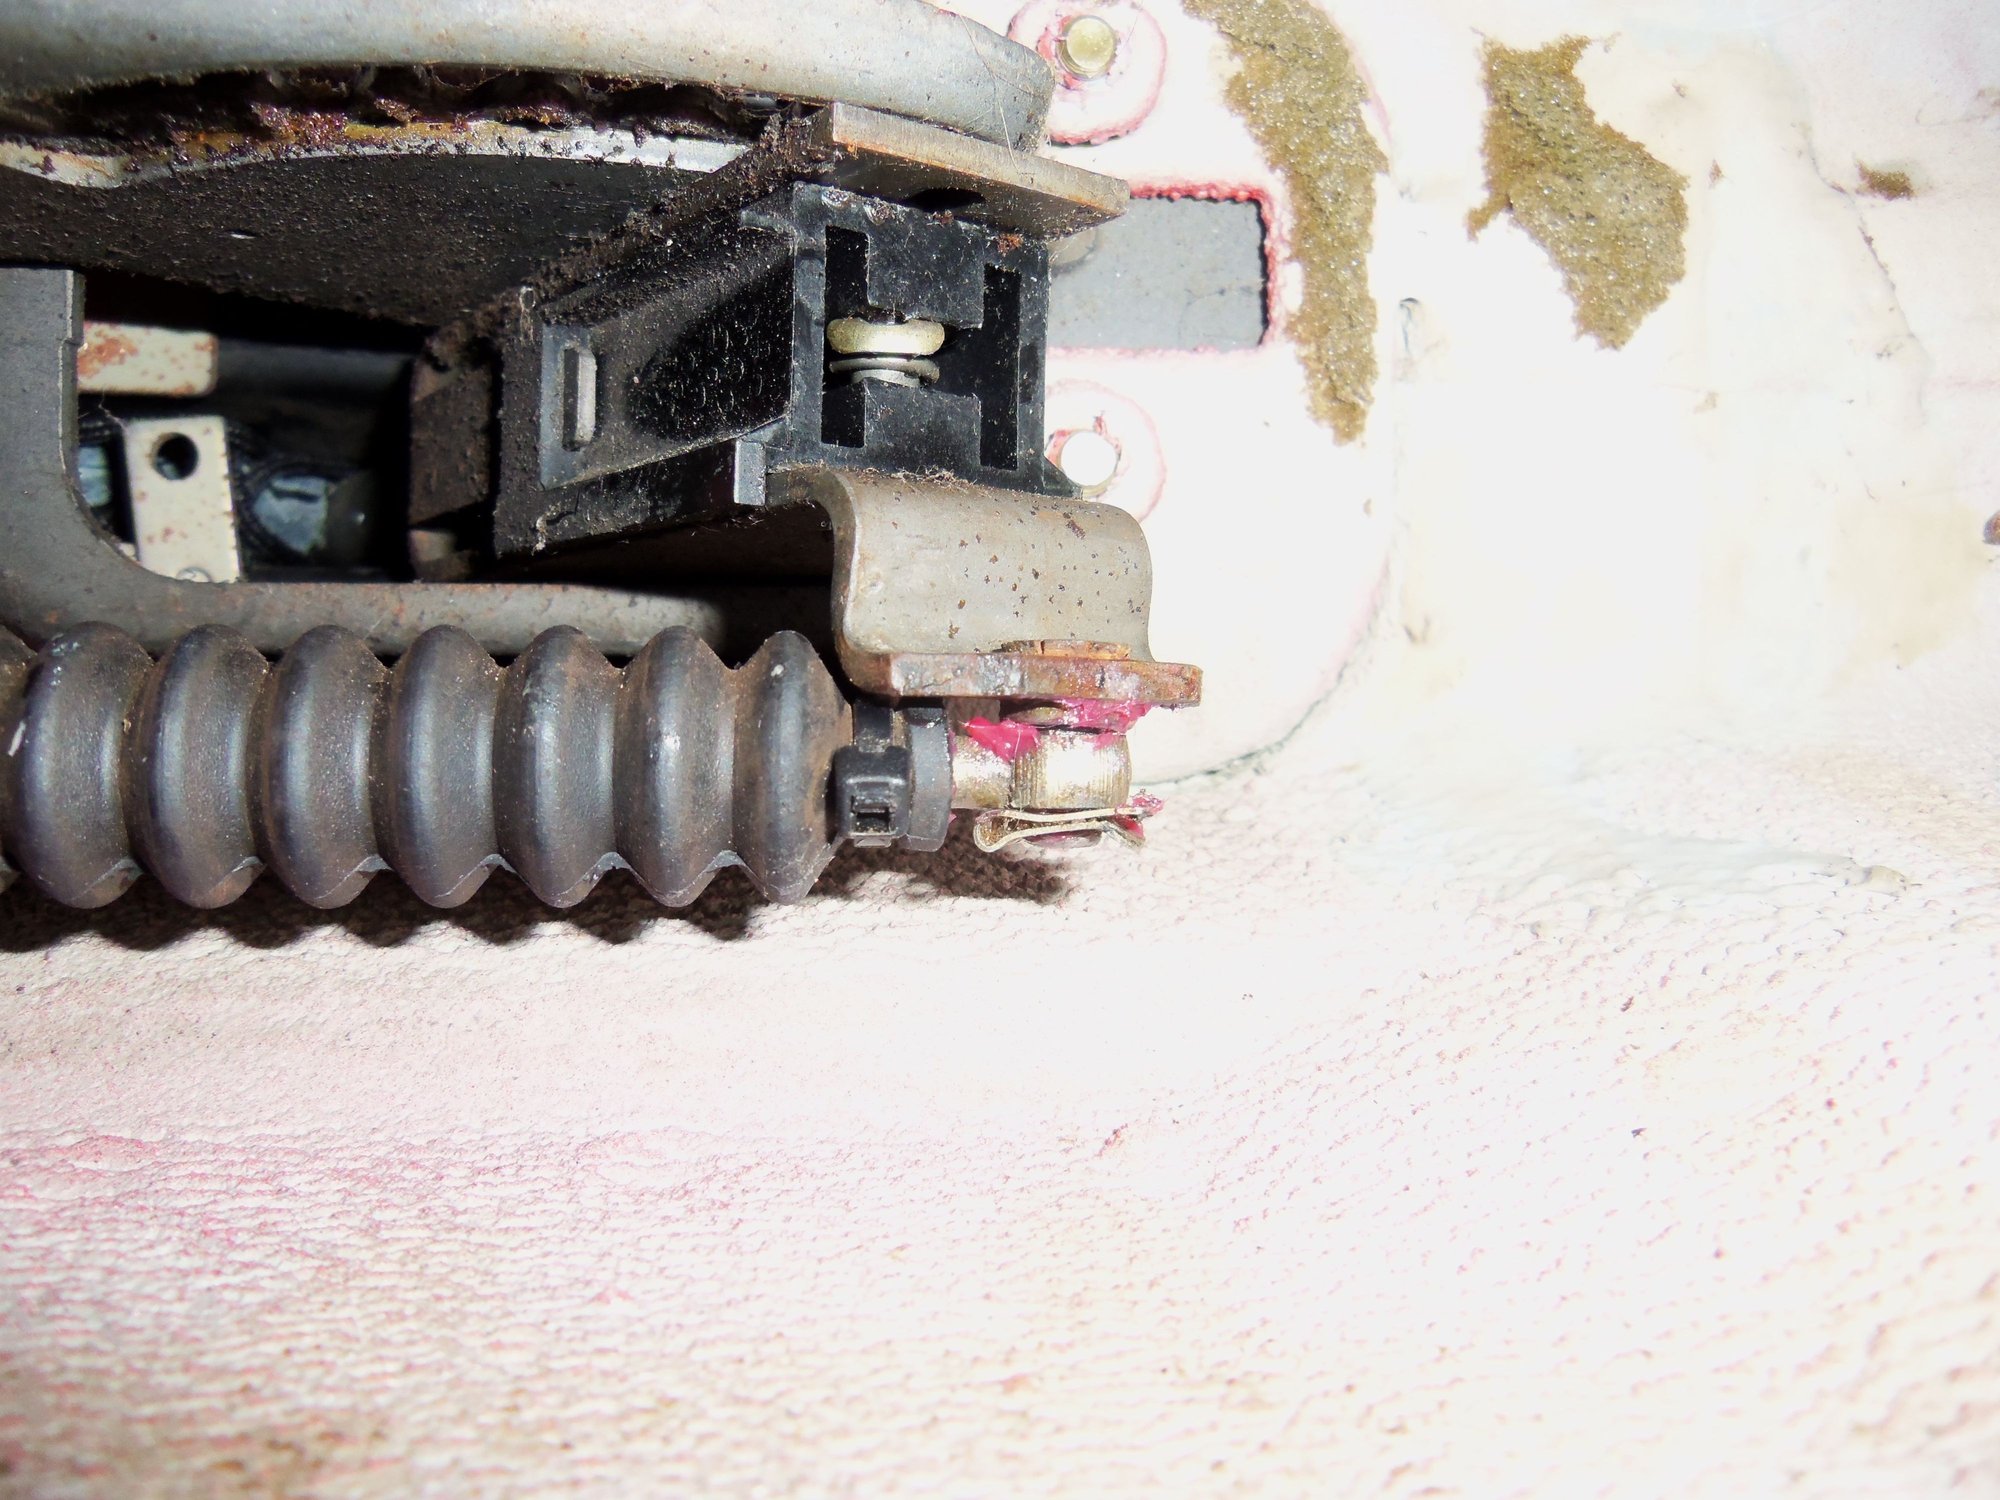
First self-induced problem I ran into was the shift cable. I had attached and connected it to the transmission. Bad idea. The cable only reaches the shifter bracket on the underside of the tunnel with the transmission properly in place. Which means you sure as heck are not getting up there to install the cable. So, I disconnected and removed the cable from the transmission. With the bellhousing sitting low on a transmission jack, I had room to attach the cable to the bracket and the end eyelet to the shifter lever. I put a little grease on the pin just because. After cycling the shifter a couple of times to check for any interference, I secured the accordion boot with tiny zip ties.
Shift cable housing won't reach the shifter bracket.
Shift cable is connected to the transmission. Bad idea for installation.
I removed this cable support bracket from the torque converter cover.
Cable housing and cable installed.
Detail of the eyelet connected to the shift lever.
Detail of the cable housing secured to the bracket.
Cable secured to clip on the body.
I almost shot myself in the foot by forgetting to route the transmission wiring harness back into the body. I lowered the transmission a bit and was able to snake my hand up there to feed the wires through. I got the grommet mostly seated from underneath. I was able to finish seating it with pliers from above in the hatch area.
Transmission wiring harness routed up through body and grommet seated.
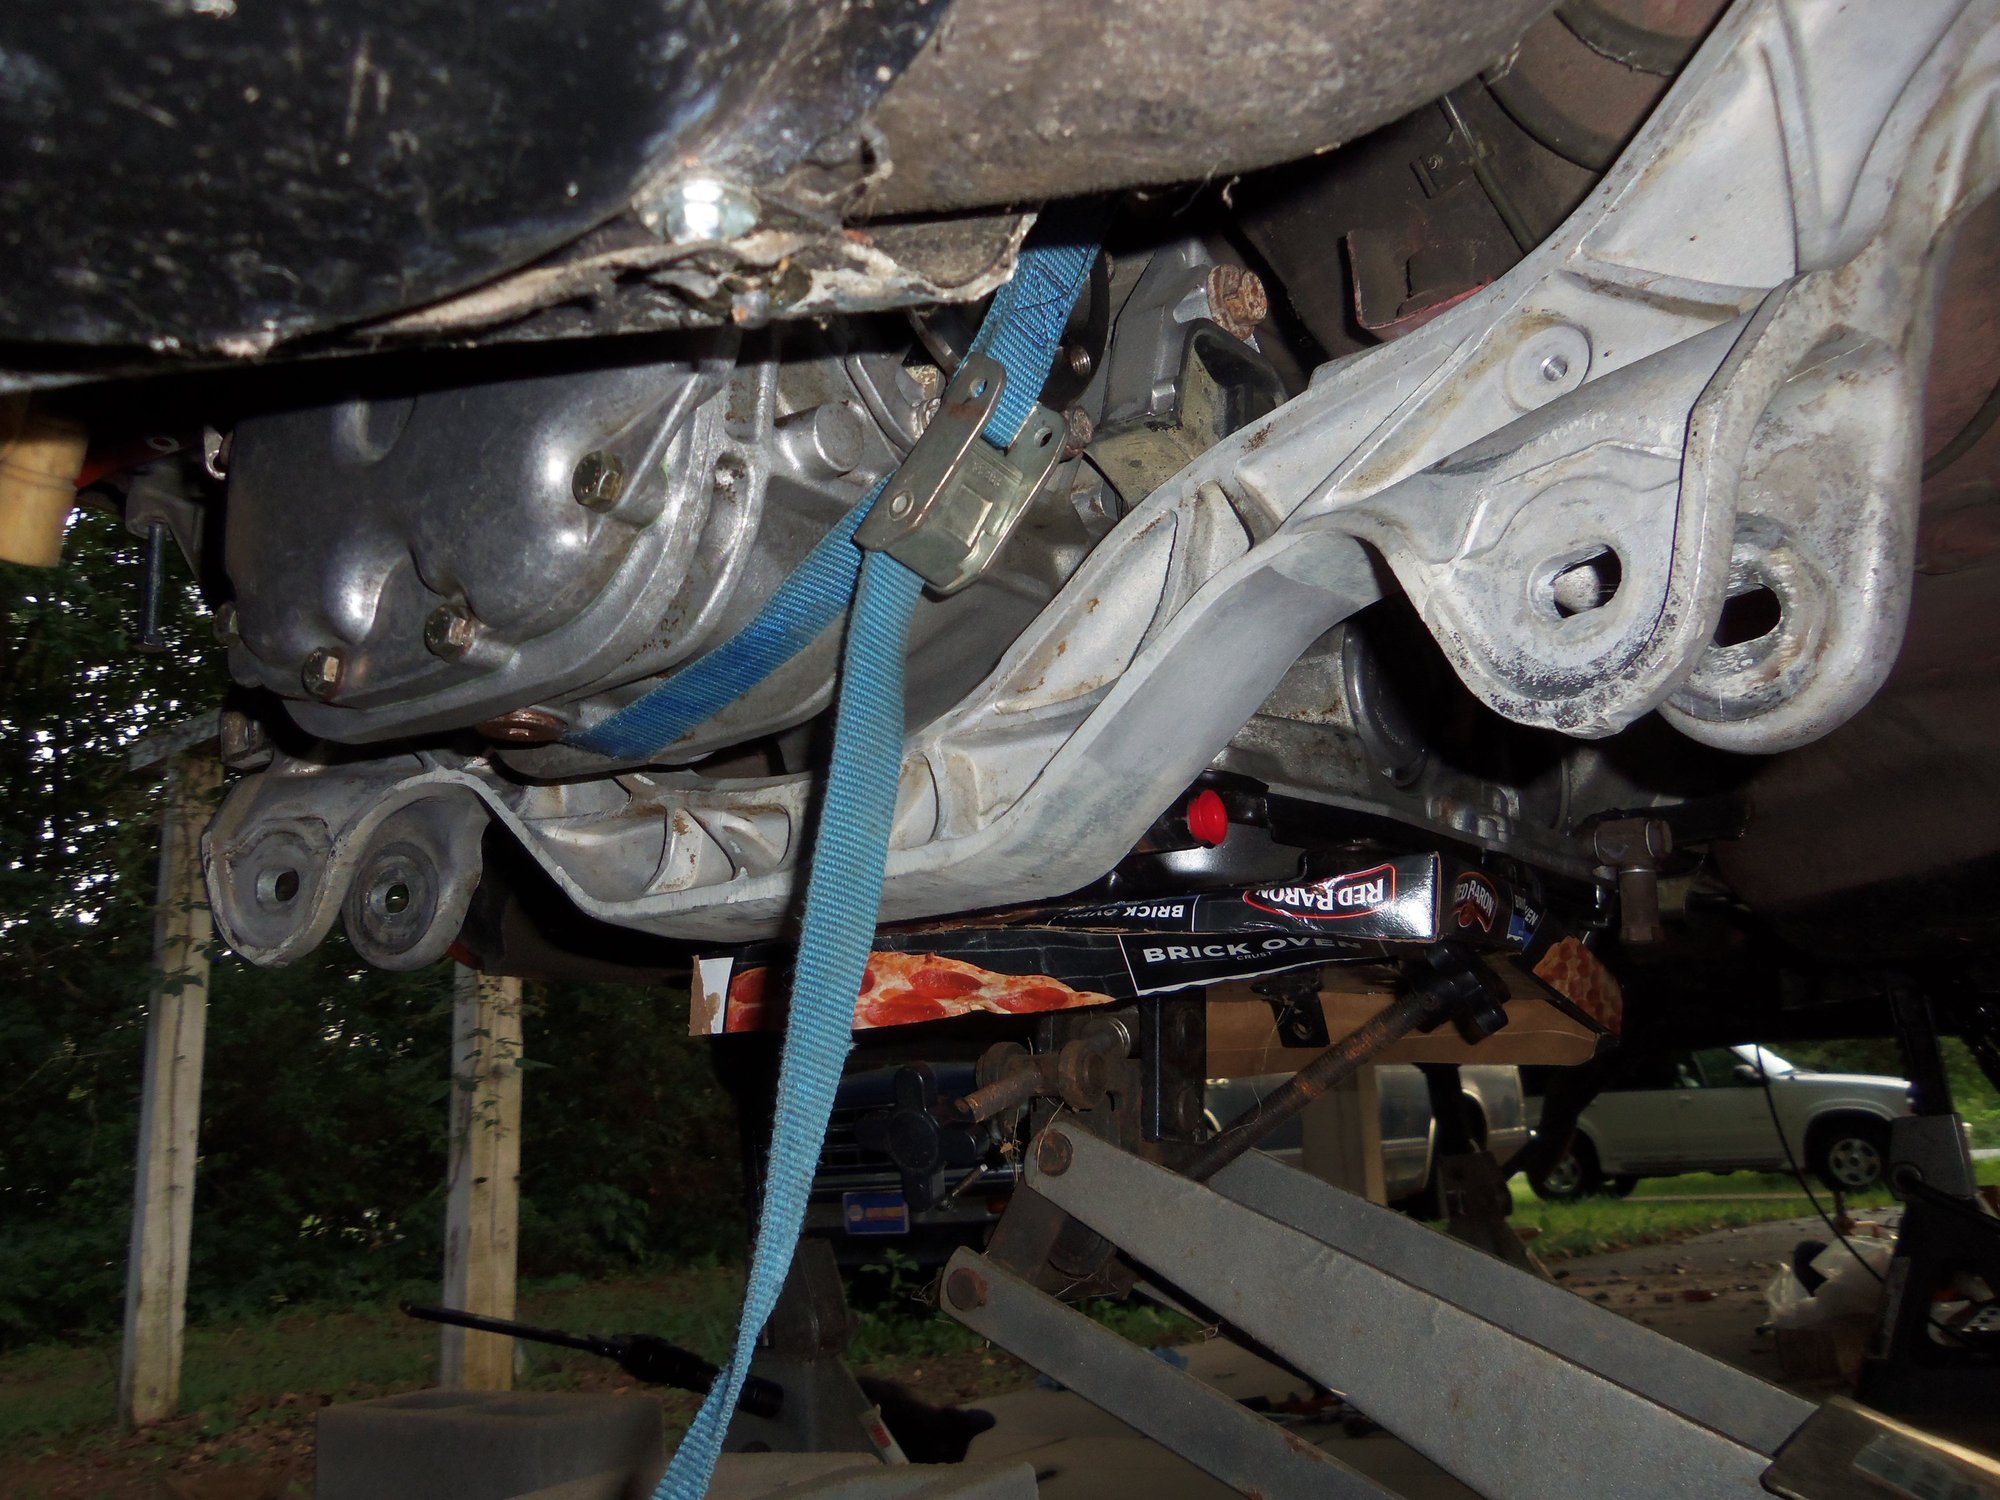
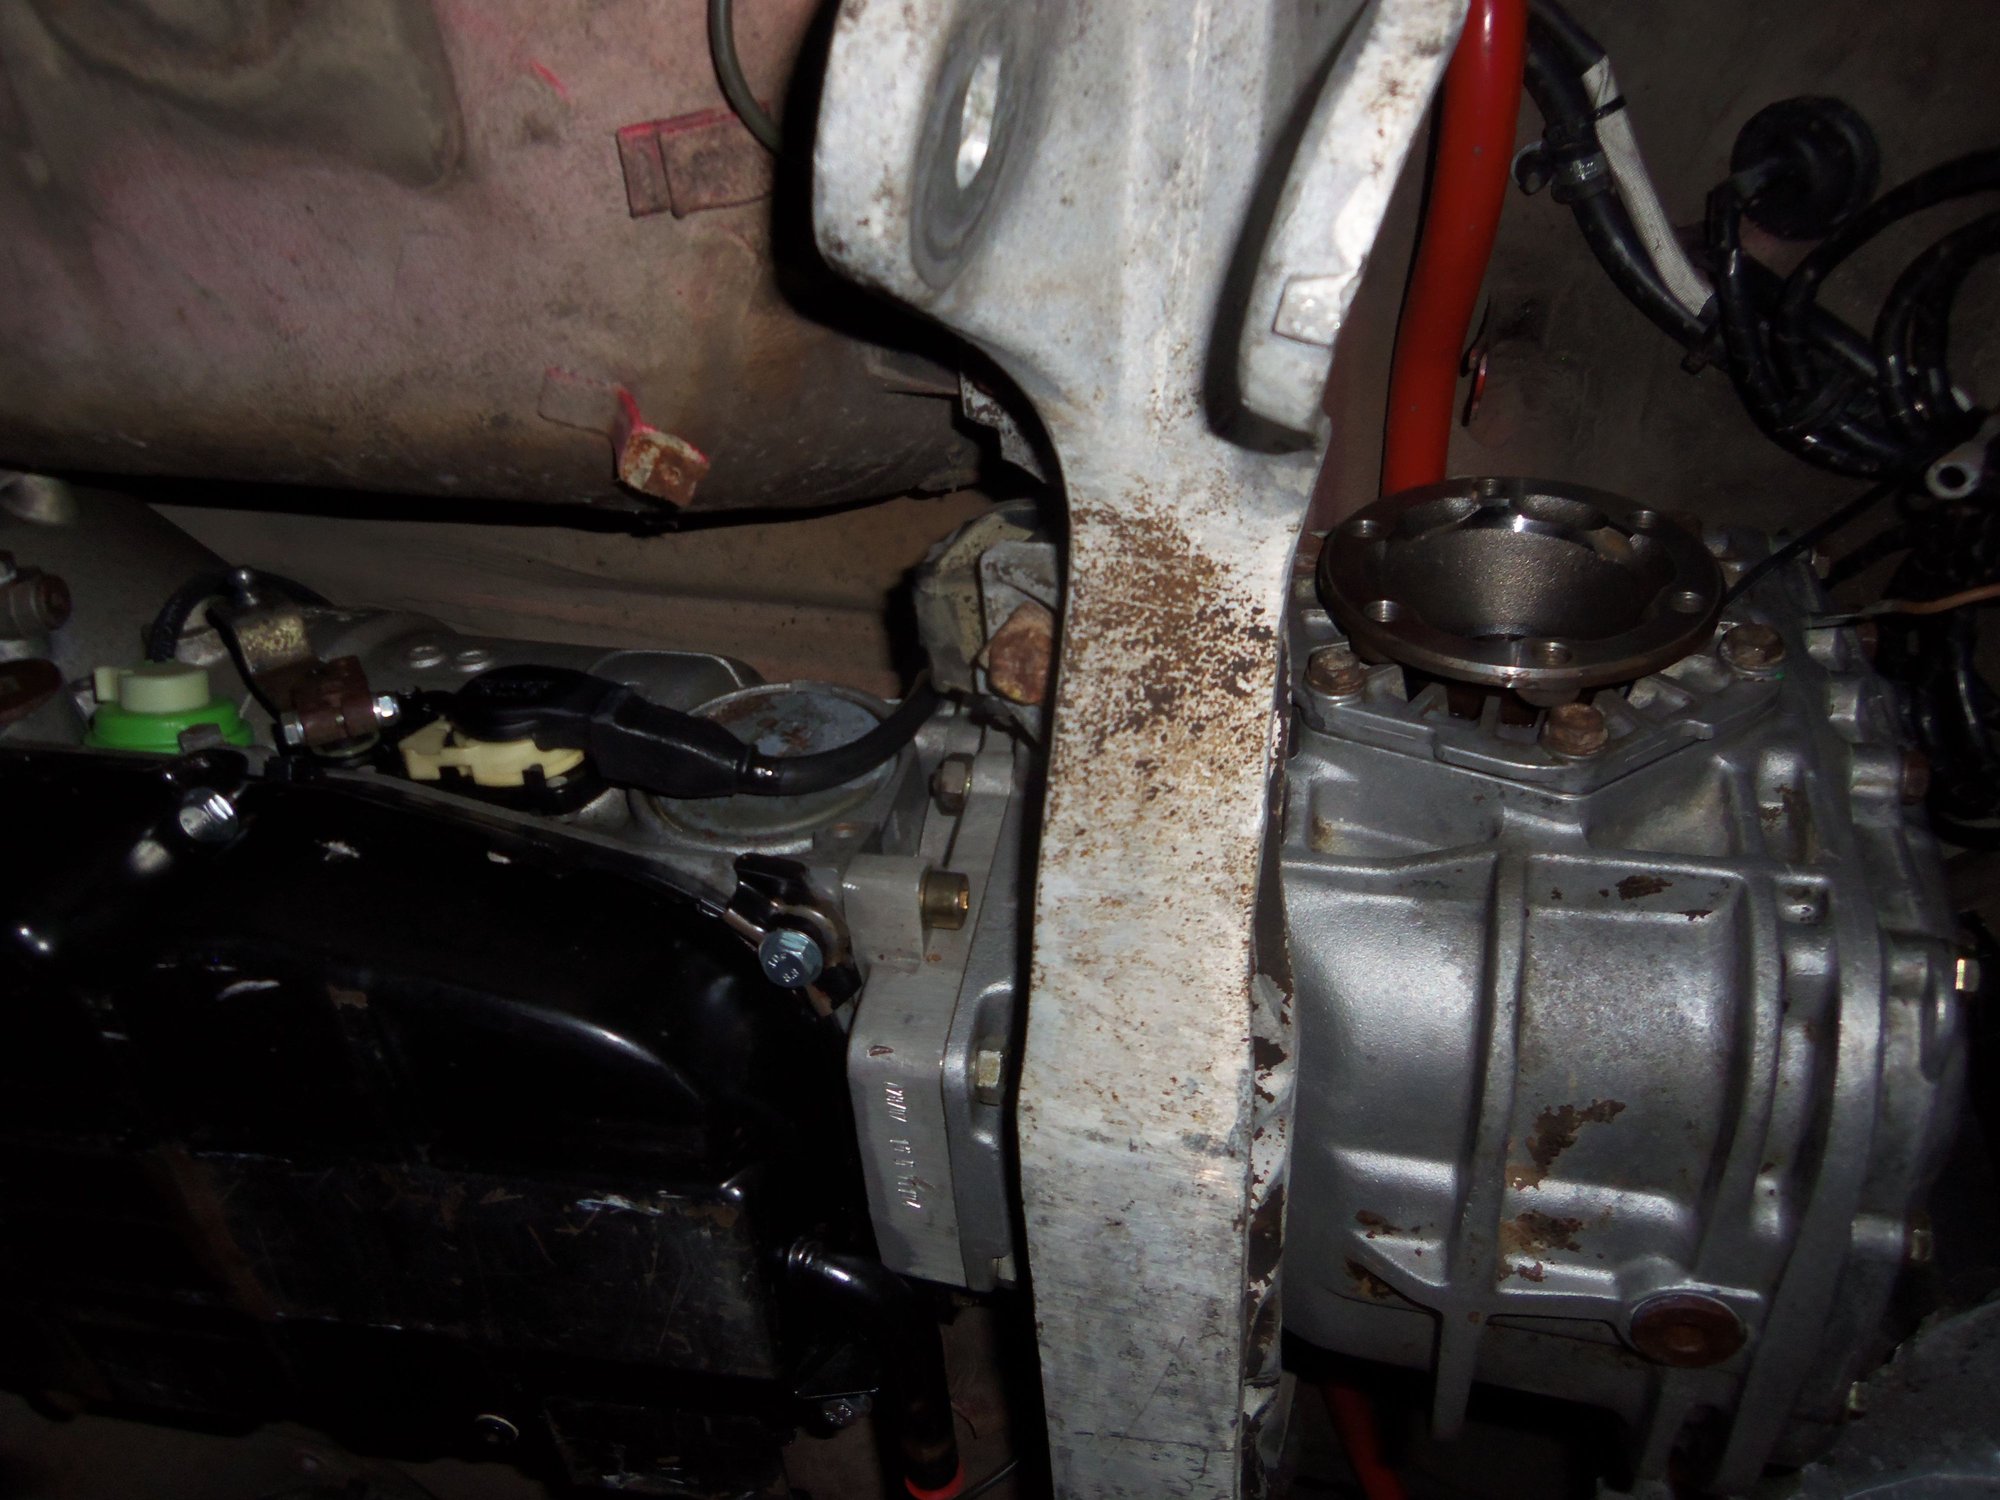
Then back to jacking everything up. I got the transmission and differential as high against the body as they would go. I hung the cleaned rear suspension crossmember from the donor 1988 S4 rear suspension with a pair of long 10mm temporary bolts included for just this purpose with the NOS 928 Specialists rear anti sway bar set. I pushed the crossmember up to start lining up the transmission mounts. And they didn't...
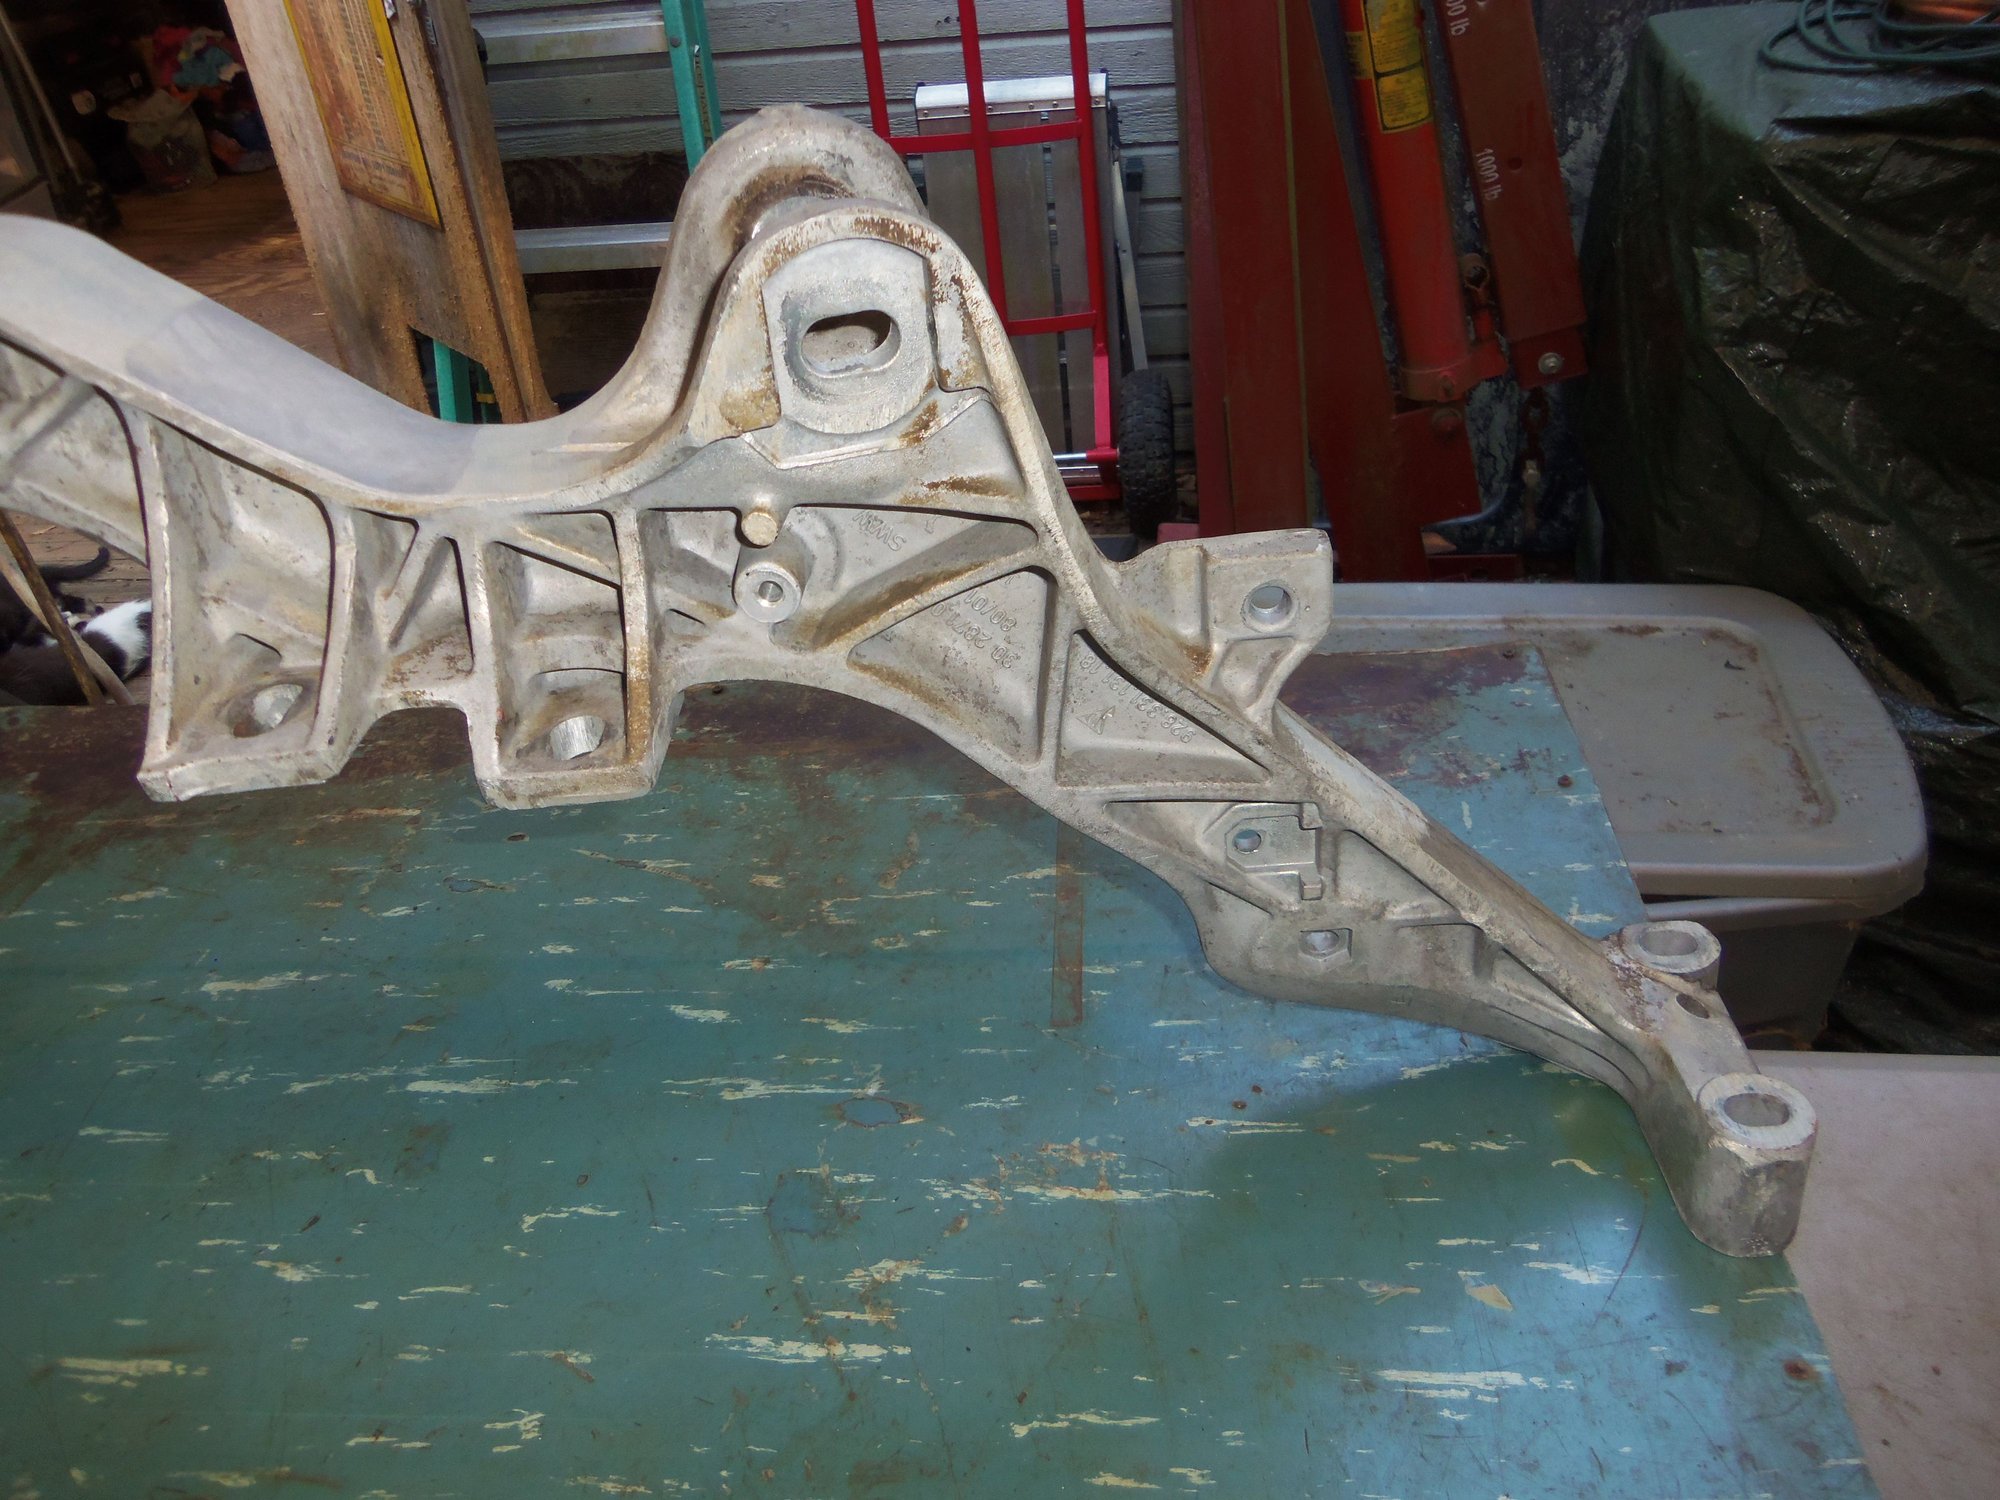
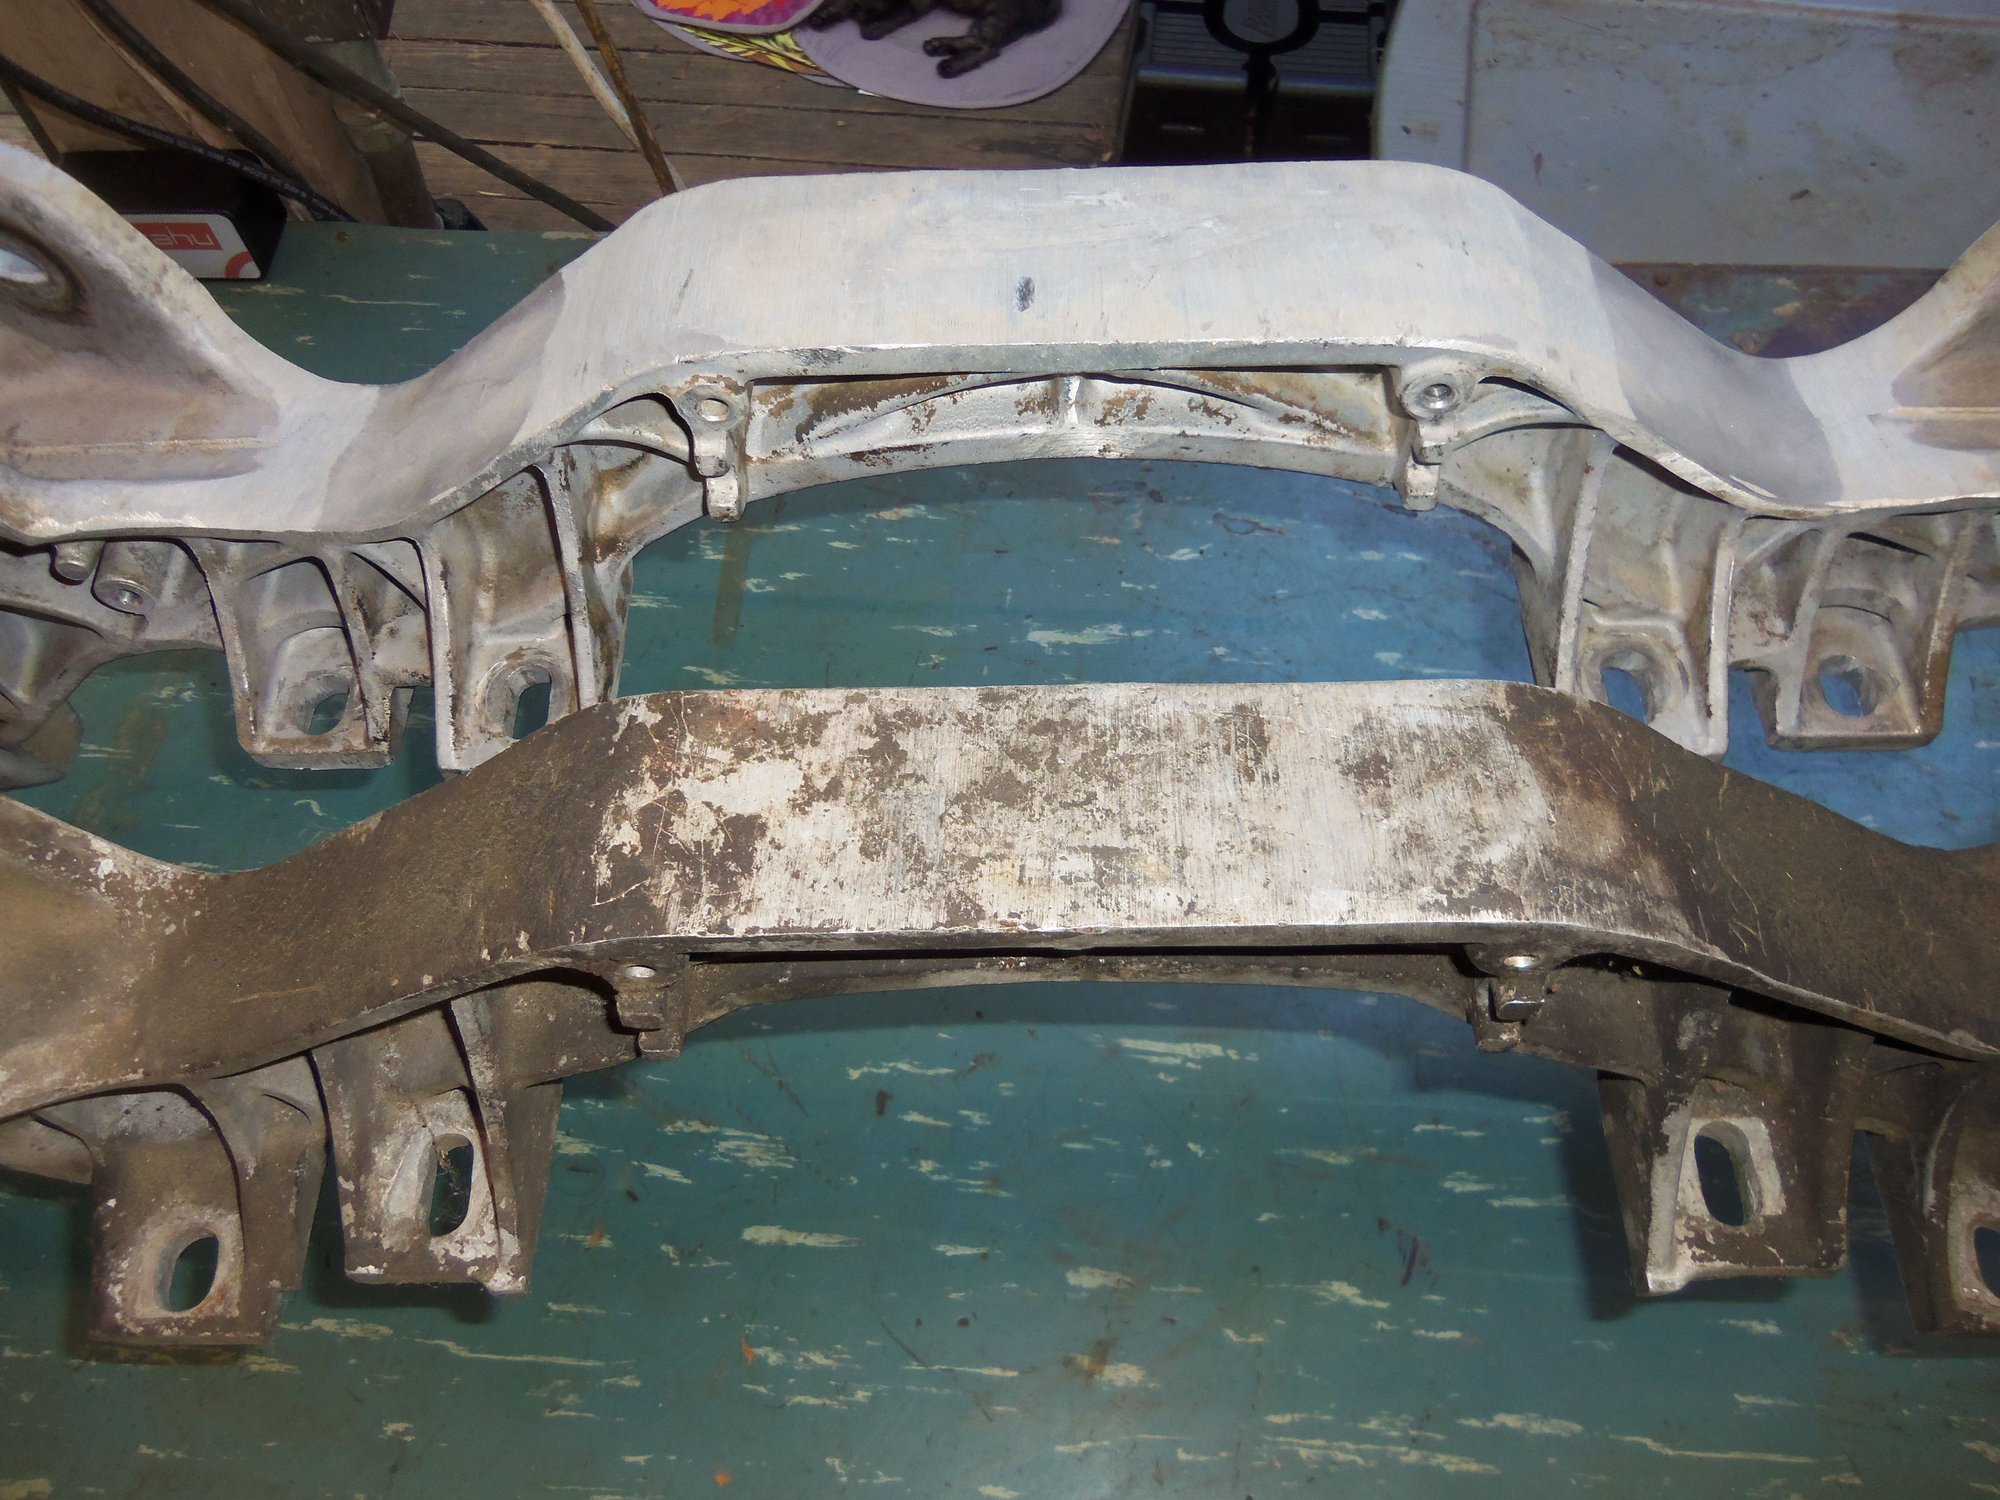
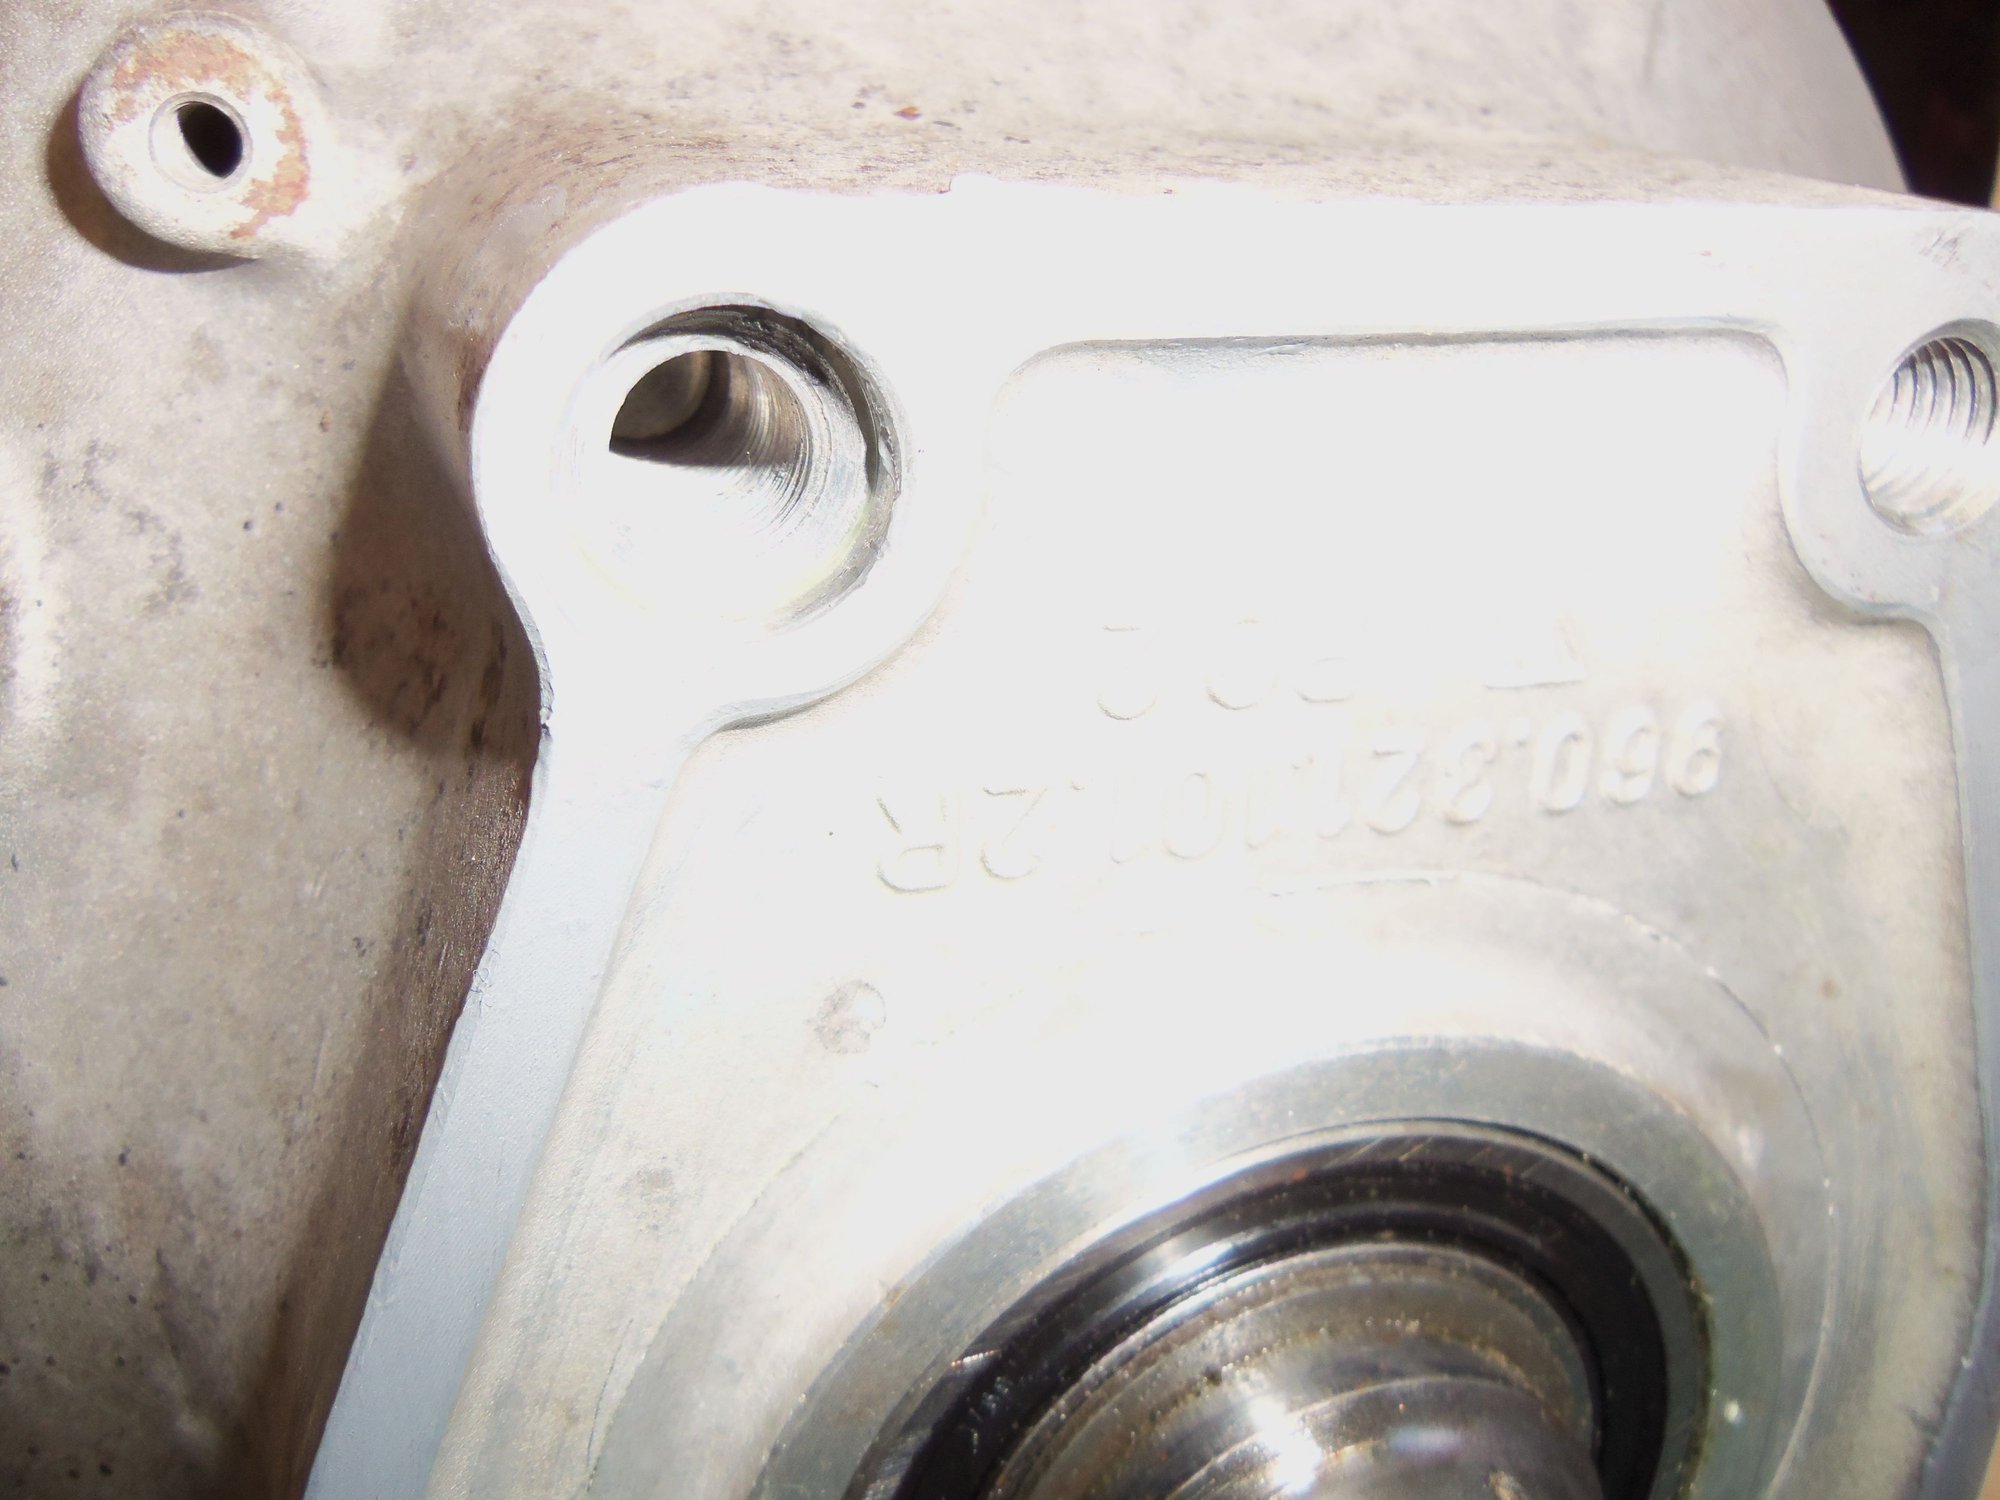
Surely 1986.5 and 1988 S4 have the same rear suspension crossmembers? Yes. Except automatics and manuals have different crossmembers. PET shows 928 331 131 17 for M249 (automatic) and 928 331 131 18 for M481 (manual). Wanna guess which transmission the donor 1988 S4 had...?
I went back and looked at the original ad where I bought the rear suspension. It didn't say which transmission. I finally looked at the part numbers on the crossmembers. I pulled a .17 out of the Red Witch and put a .18 in.
I learned an important 928 lesson...
Incorrect 'new' .18 crossmember. About to come back out.
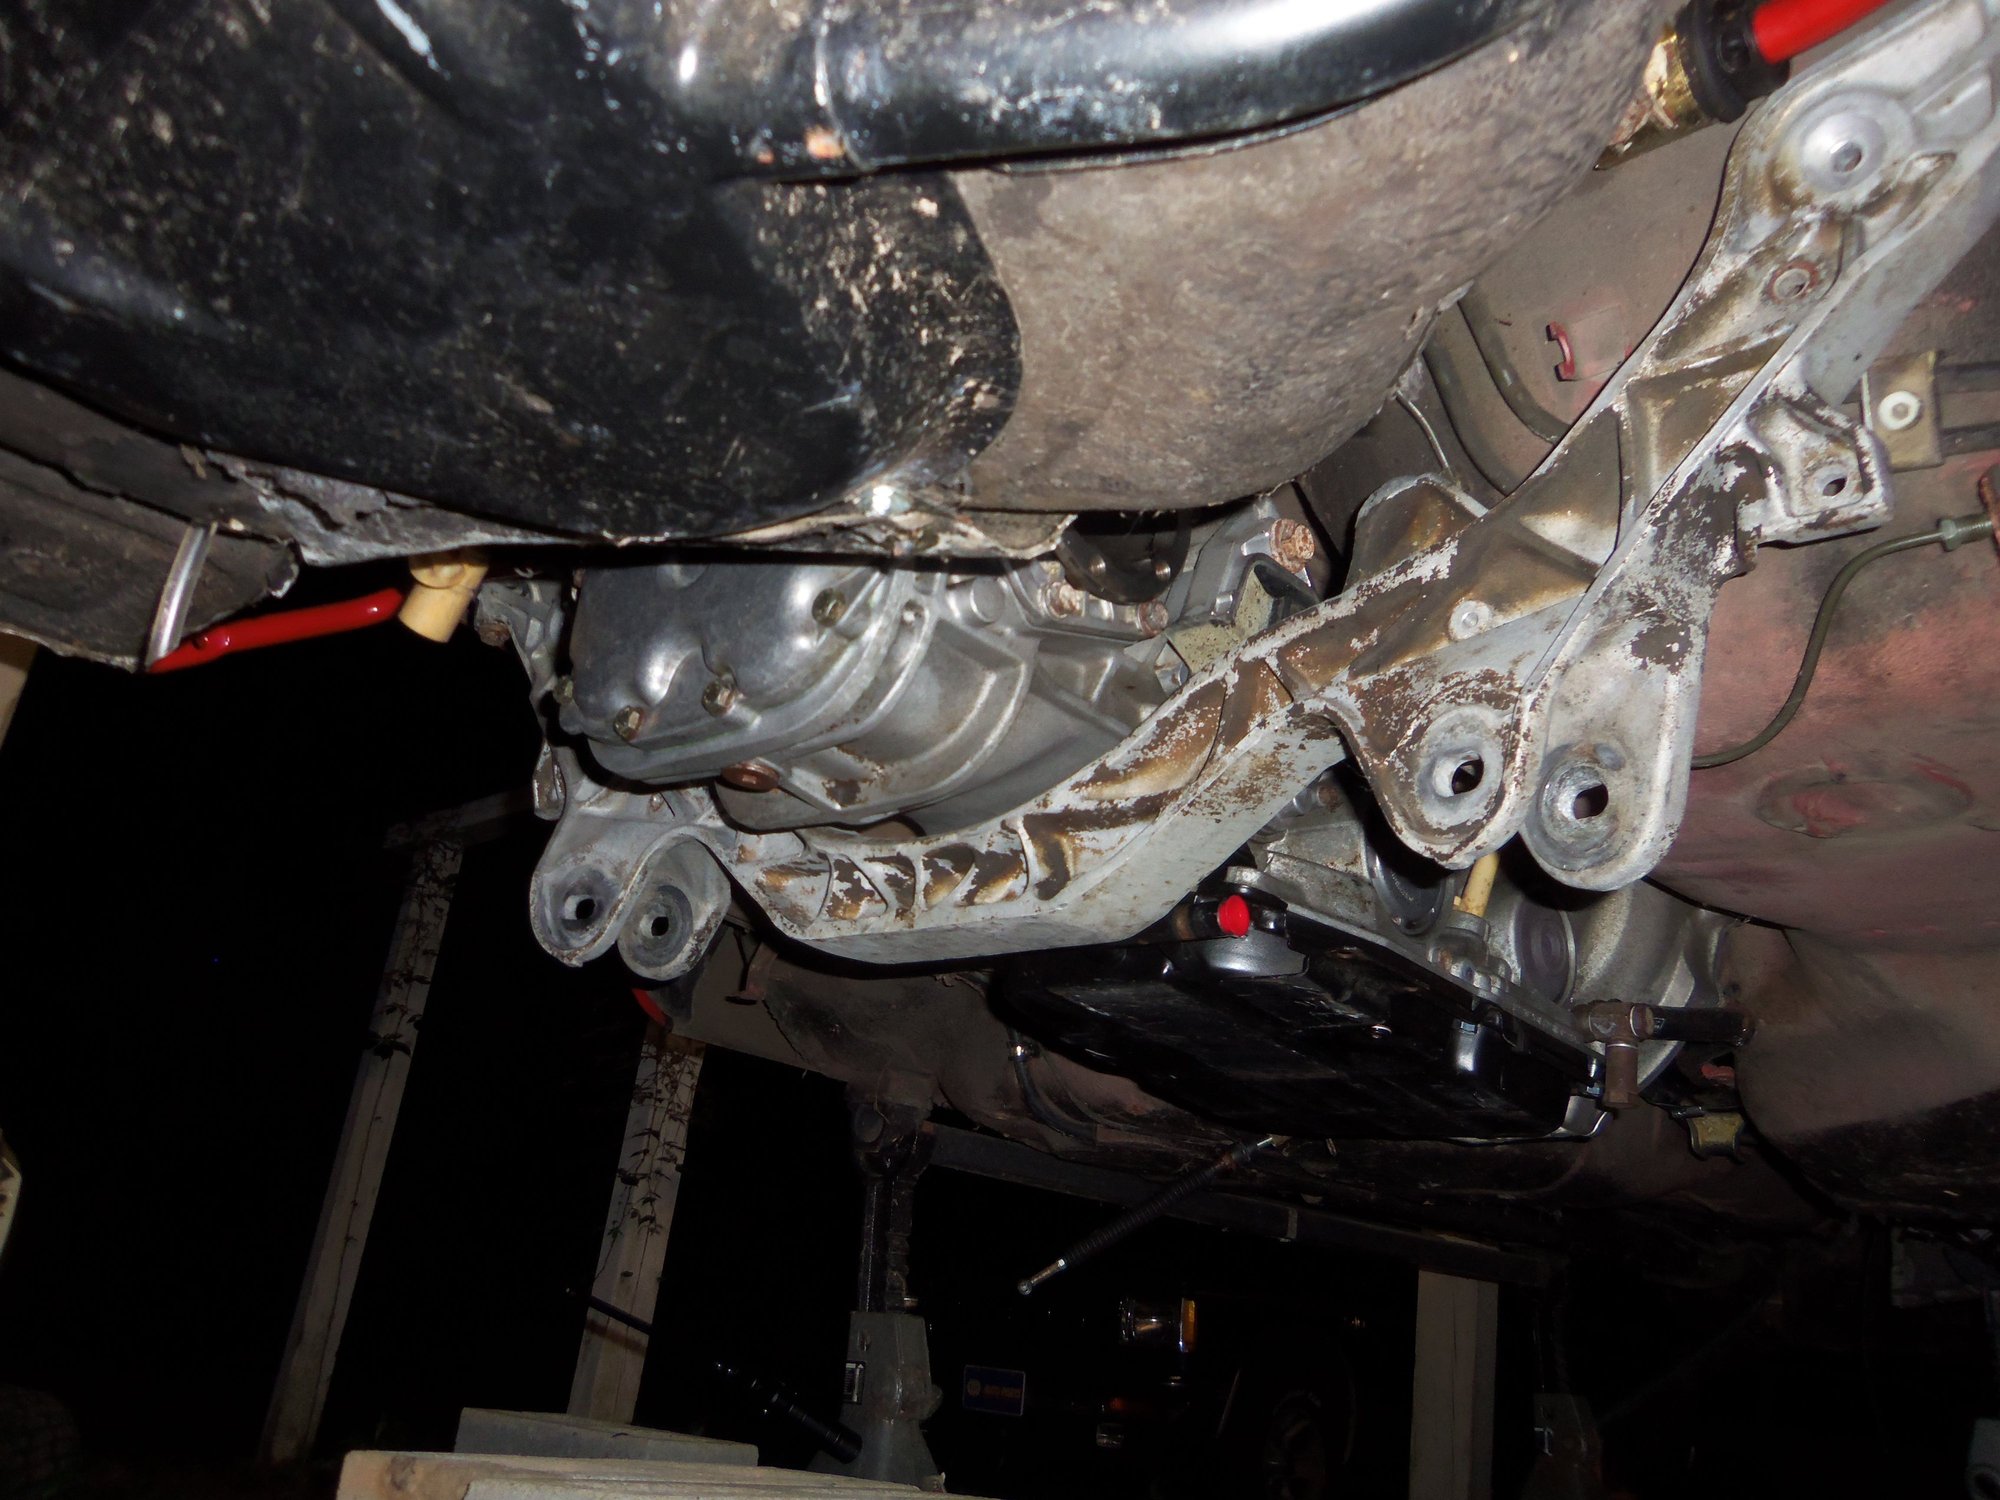
I fired up the pressure washer and got soaked cleaning the original .17 crossmember that came out of the Red Witch. And then installed it. It took a little wiggling, jiggling, and cursing to get the transmission mount holes to line up with the crossmember, but it all worked out. I put Optimoly HT on the threads and shanks of all 6 of the rear crossmember bolts. The outer 10mm bolts were torqued to 33 ft/lbs and the inner 12mm bolts were torqued to 60 ft/lbs. Note, I only threaded the transmission mounts in mostly by hand. I left them out a few threads. I expect having to move the transmission and torque tube around for final positioning and later for engine installation. I will torque the bolts later.
Original .17 crossmember from the Red Witch after pressure washing.
Correct .17 crossmember installed and bolted down.
Yes, I know the crossmember is still ugly. The crud resisted the pressure washer.
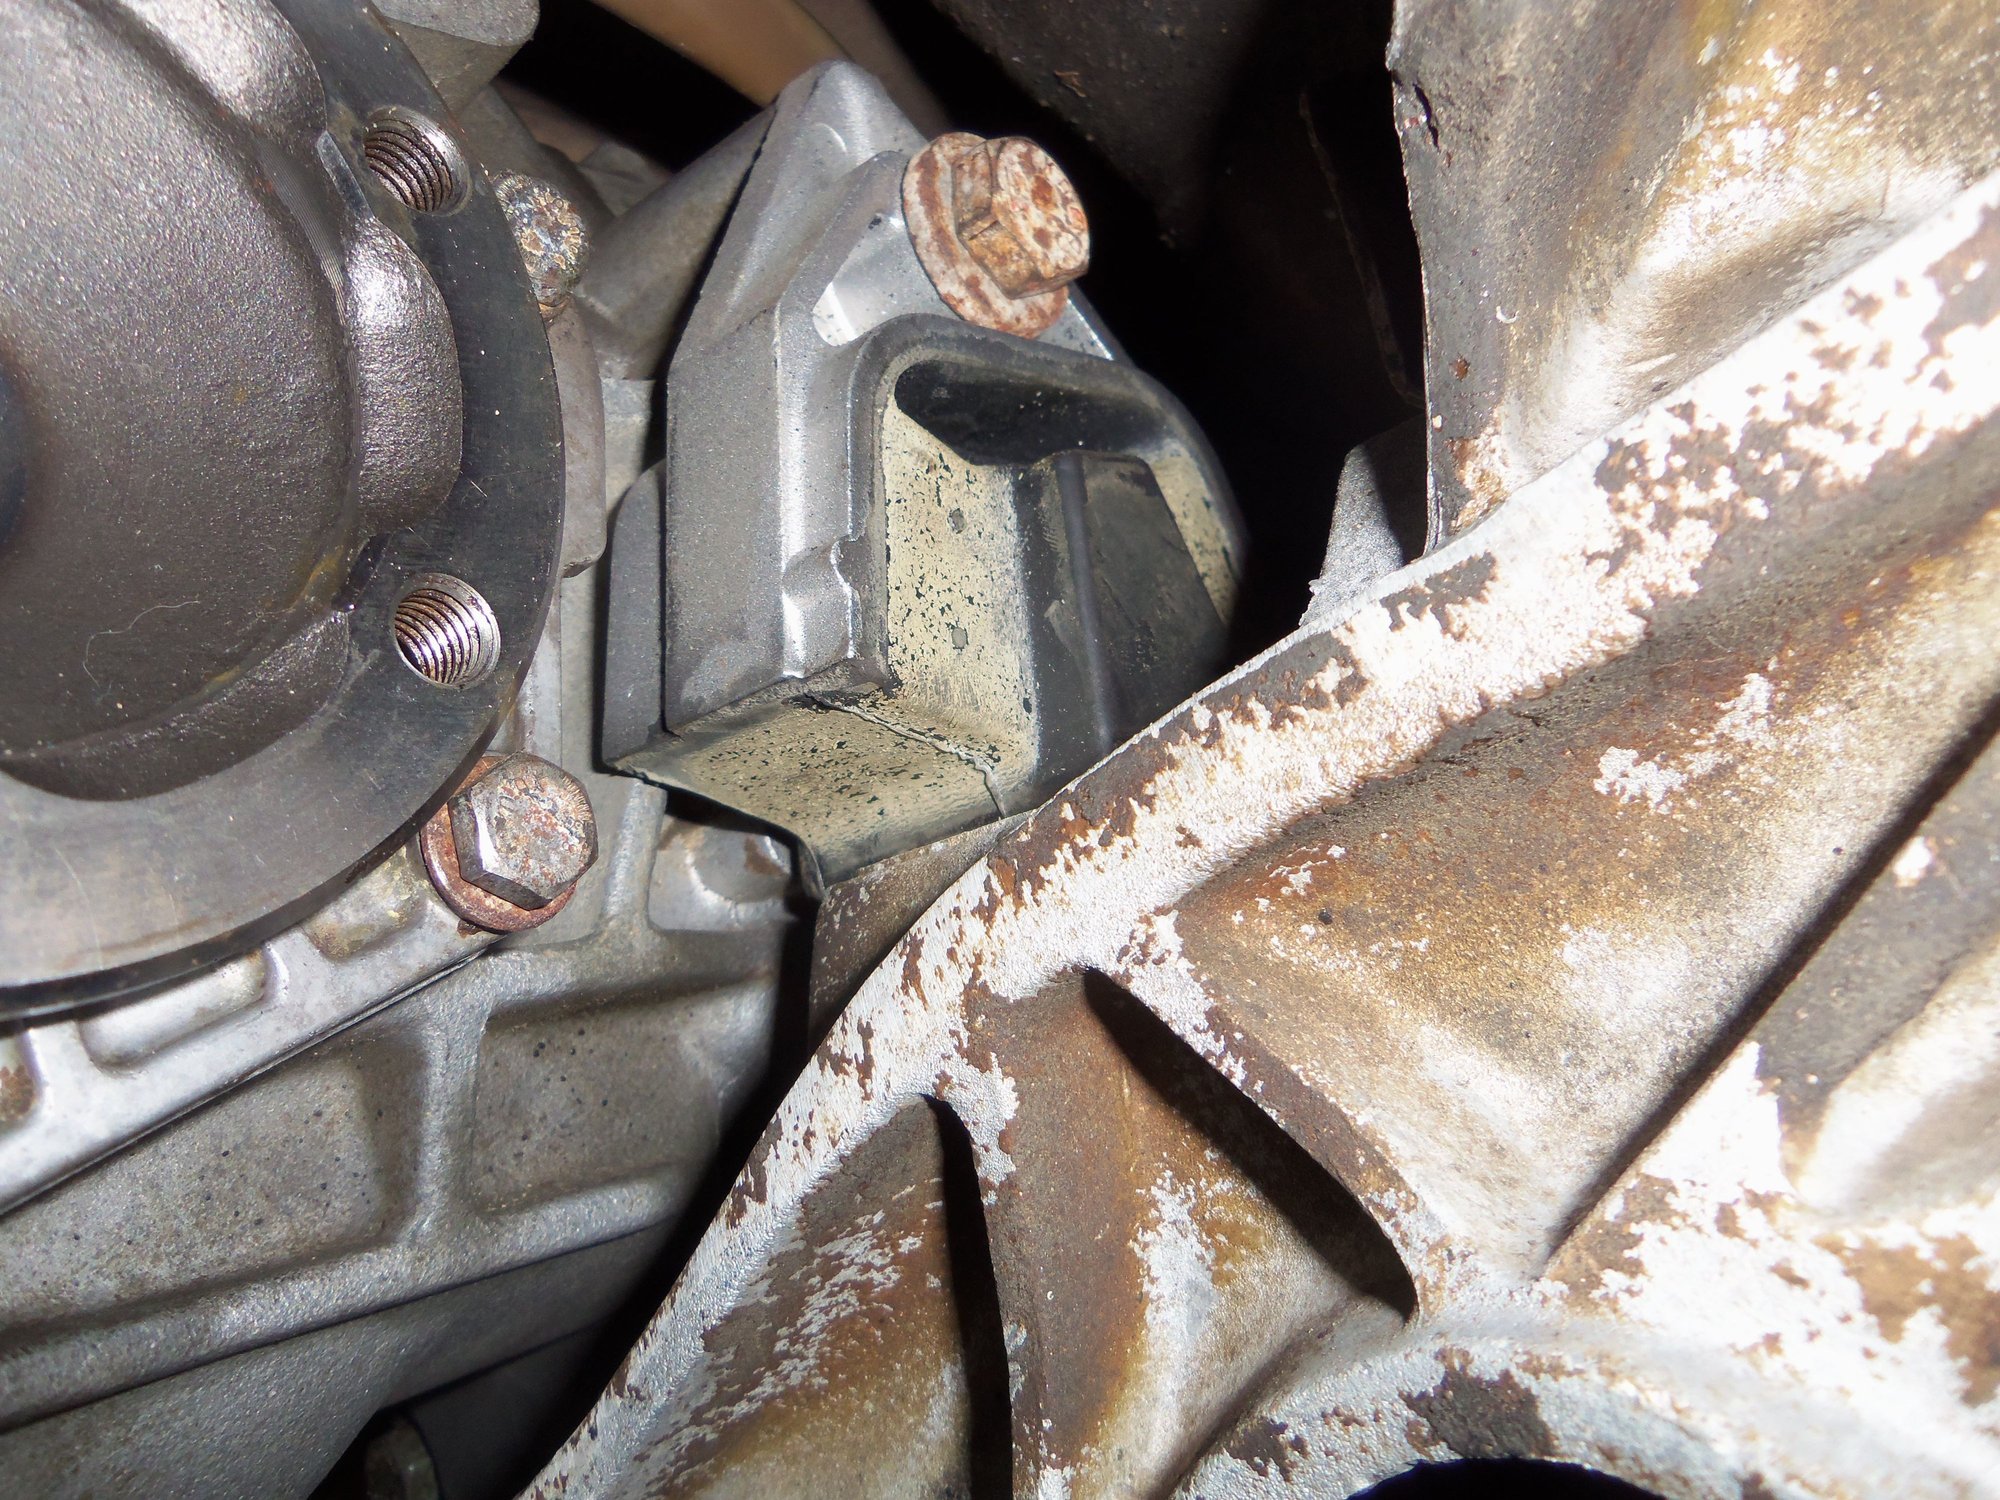
New transmission mount sitting on its pad
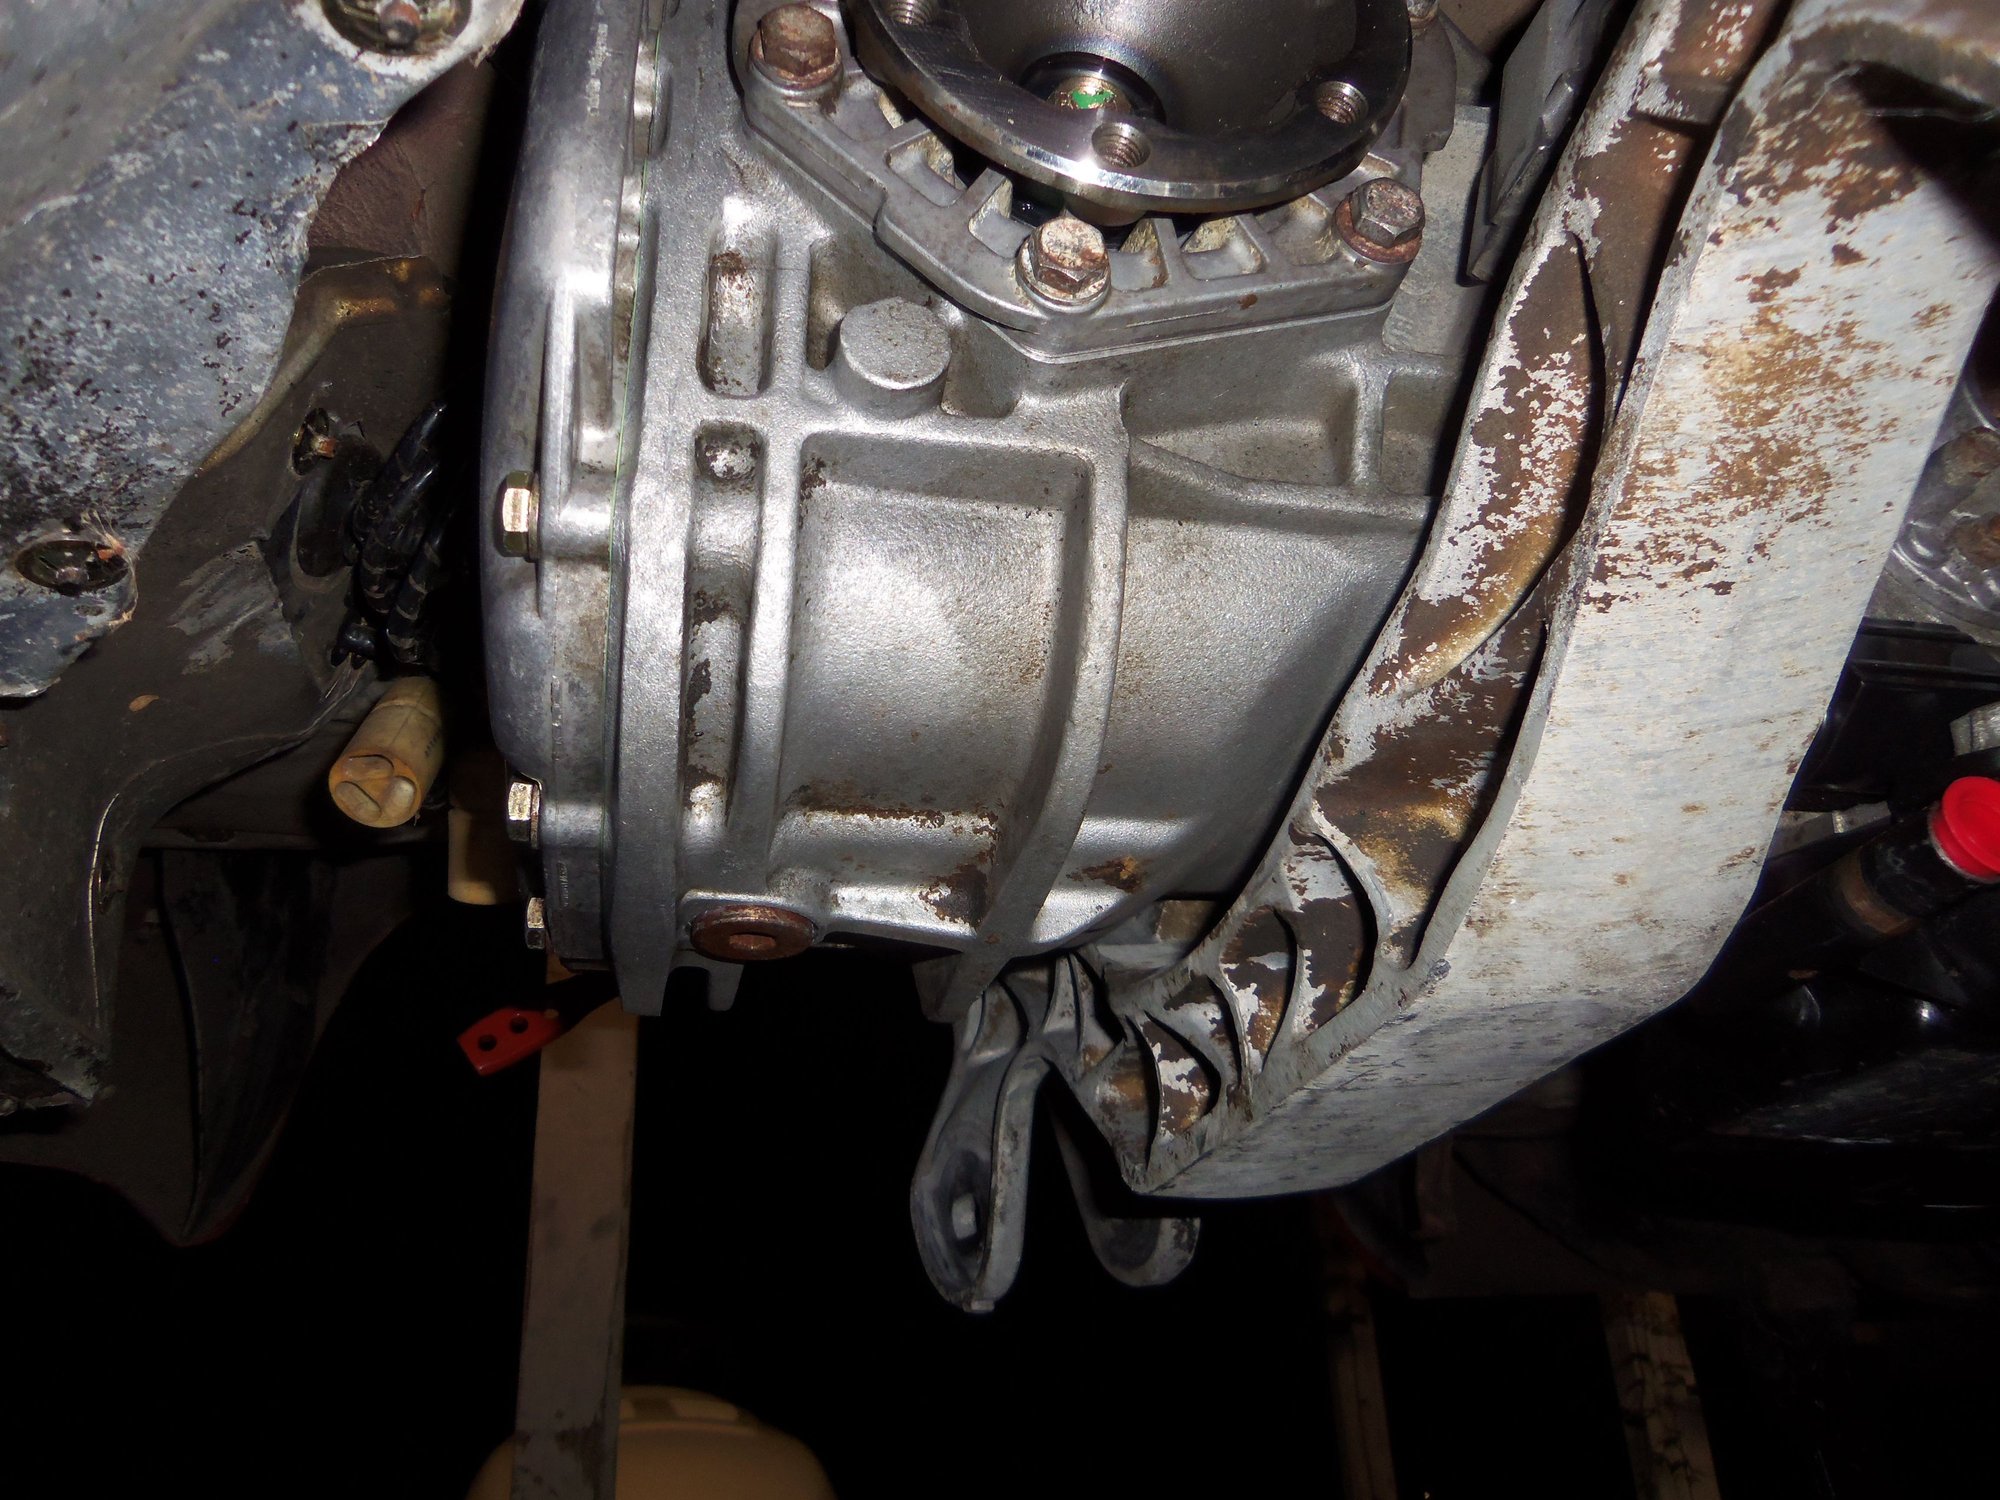
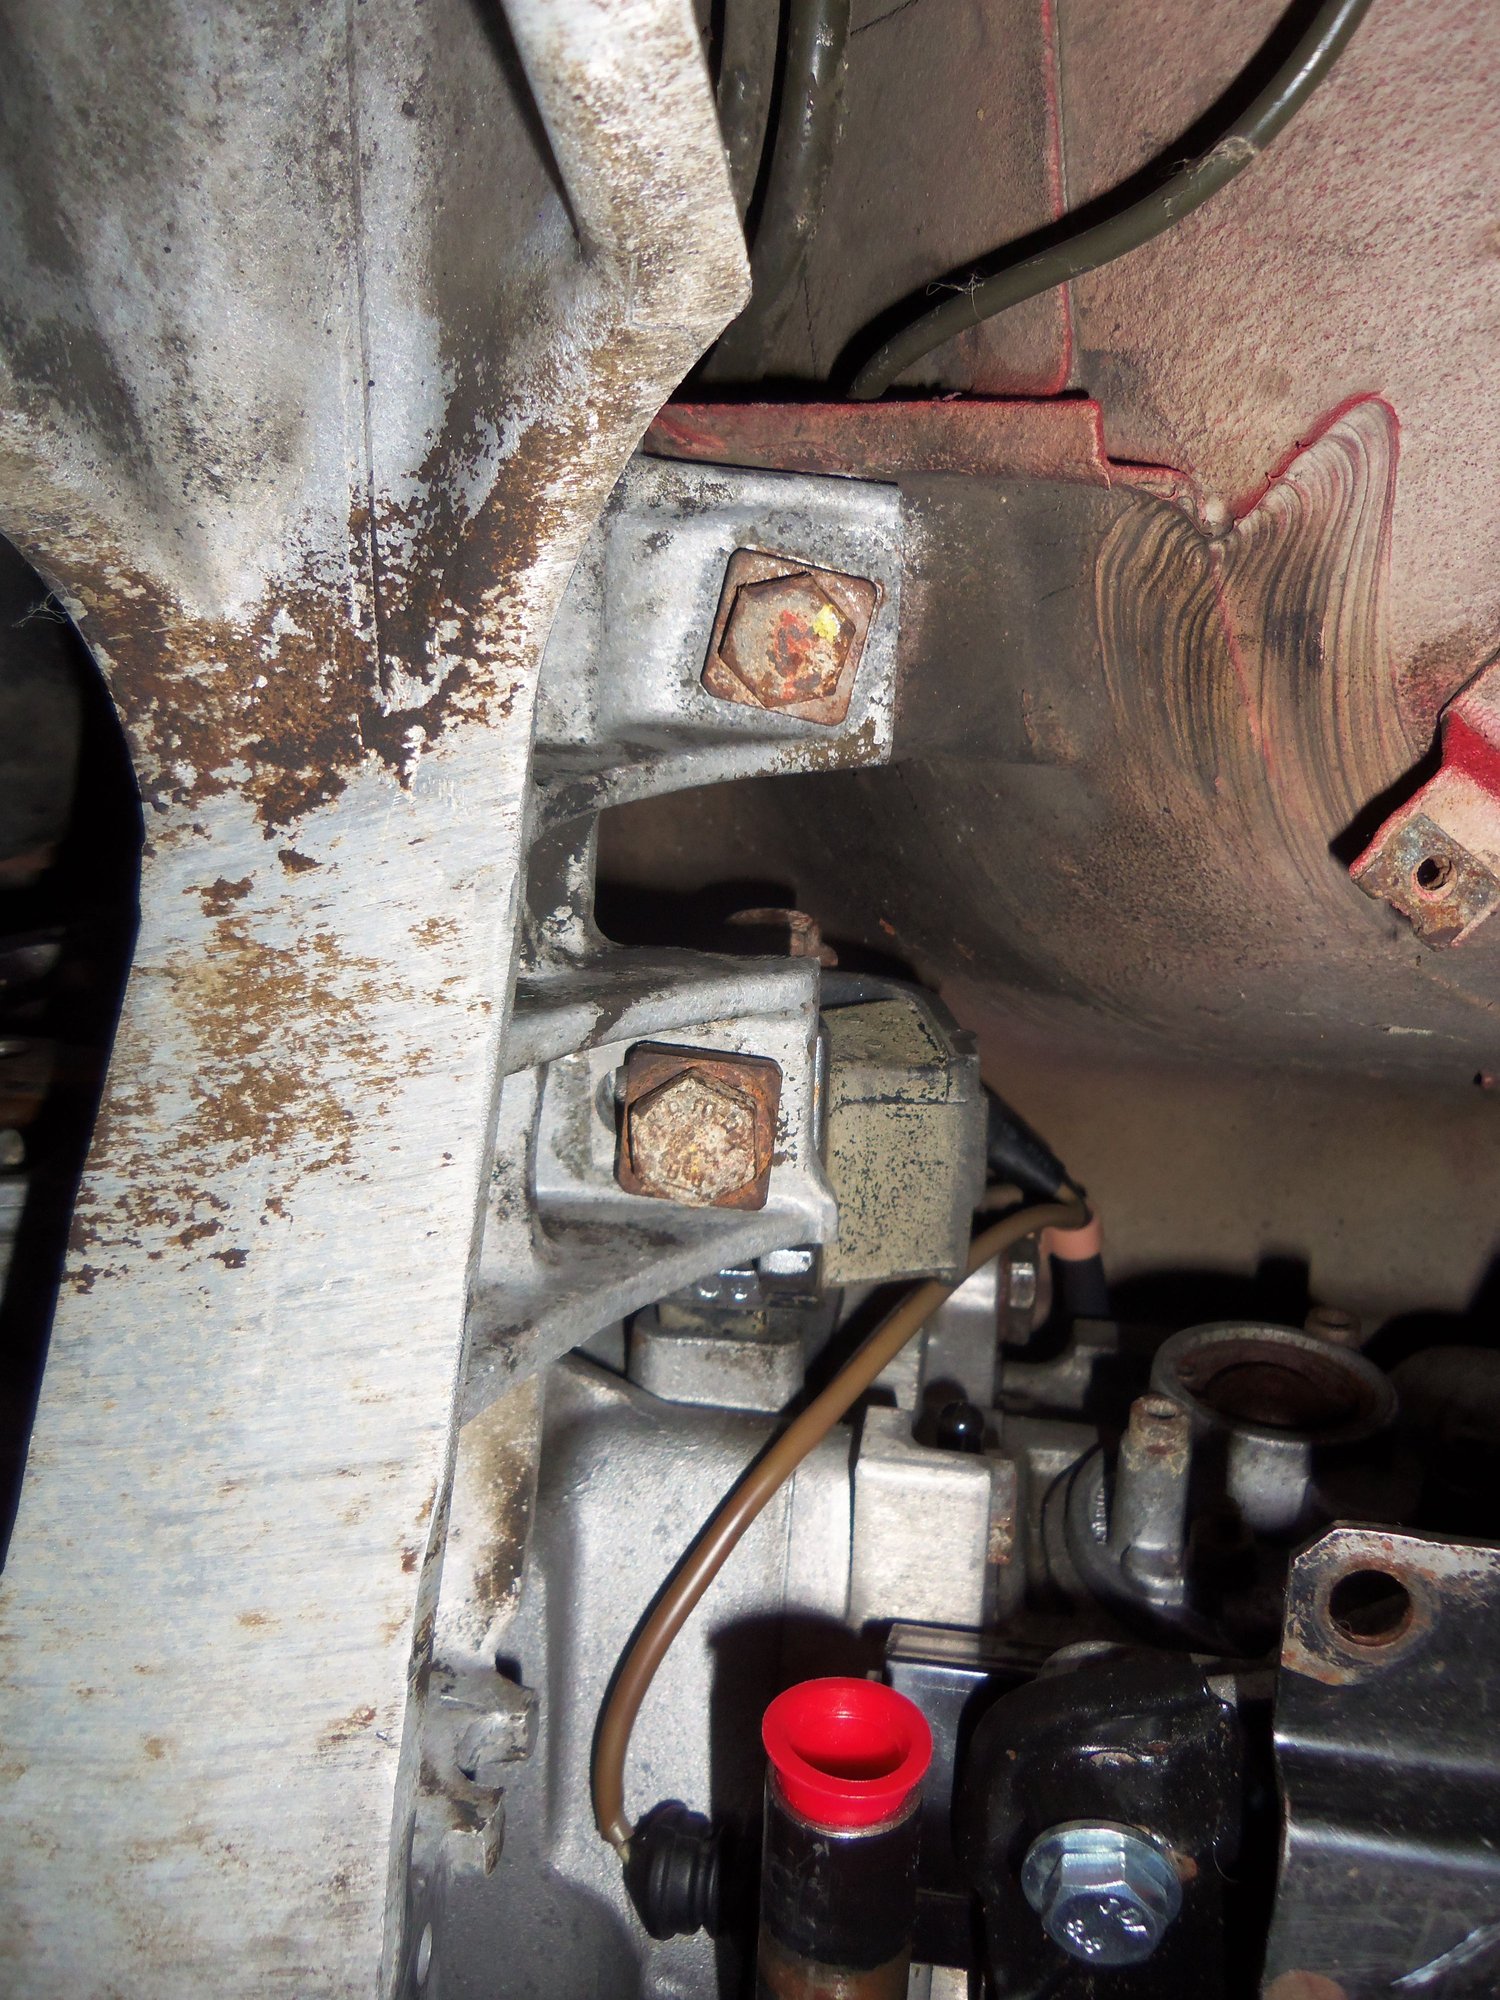
Body mounting bolt at the top, transmission mounting bolt below it.
Right, wrong, or otherwise, its in.
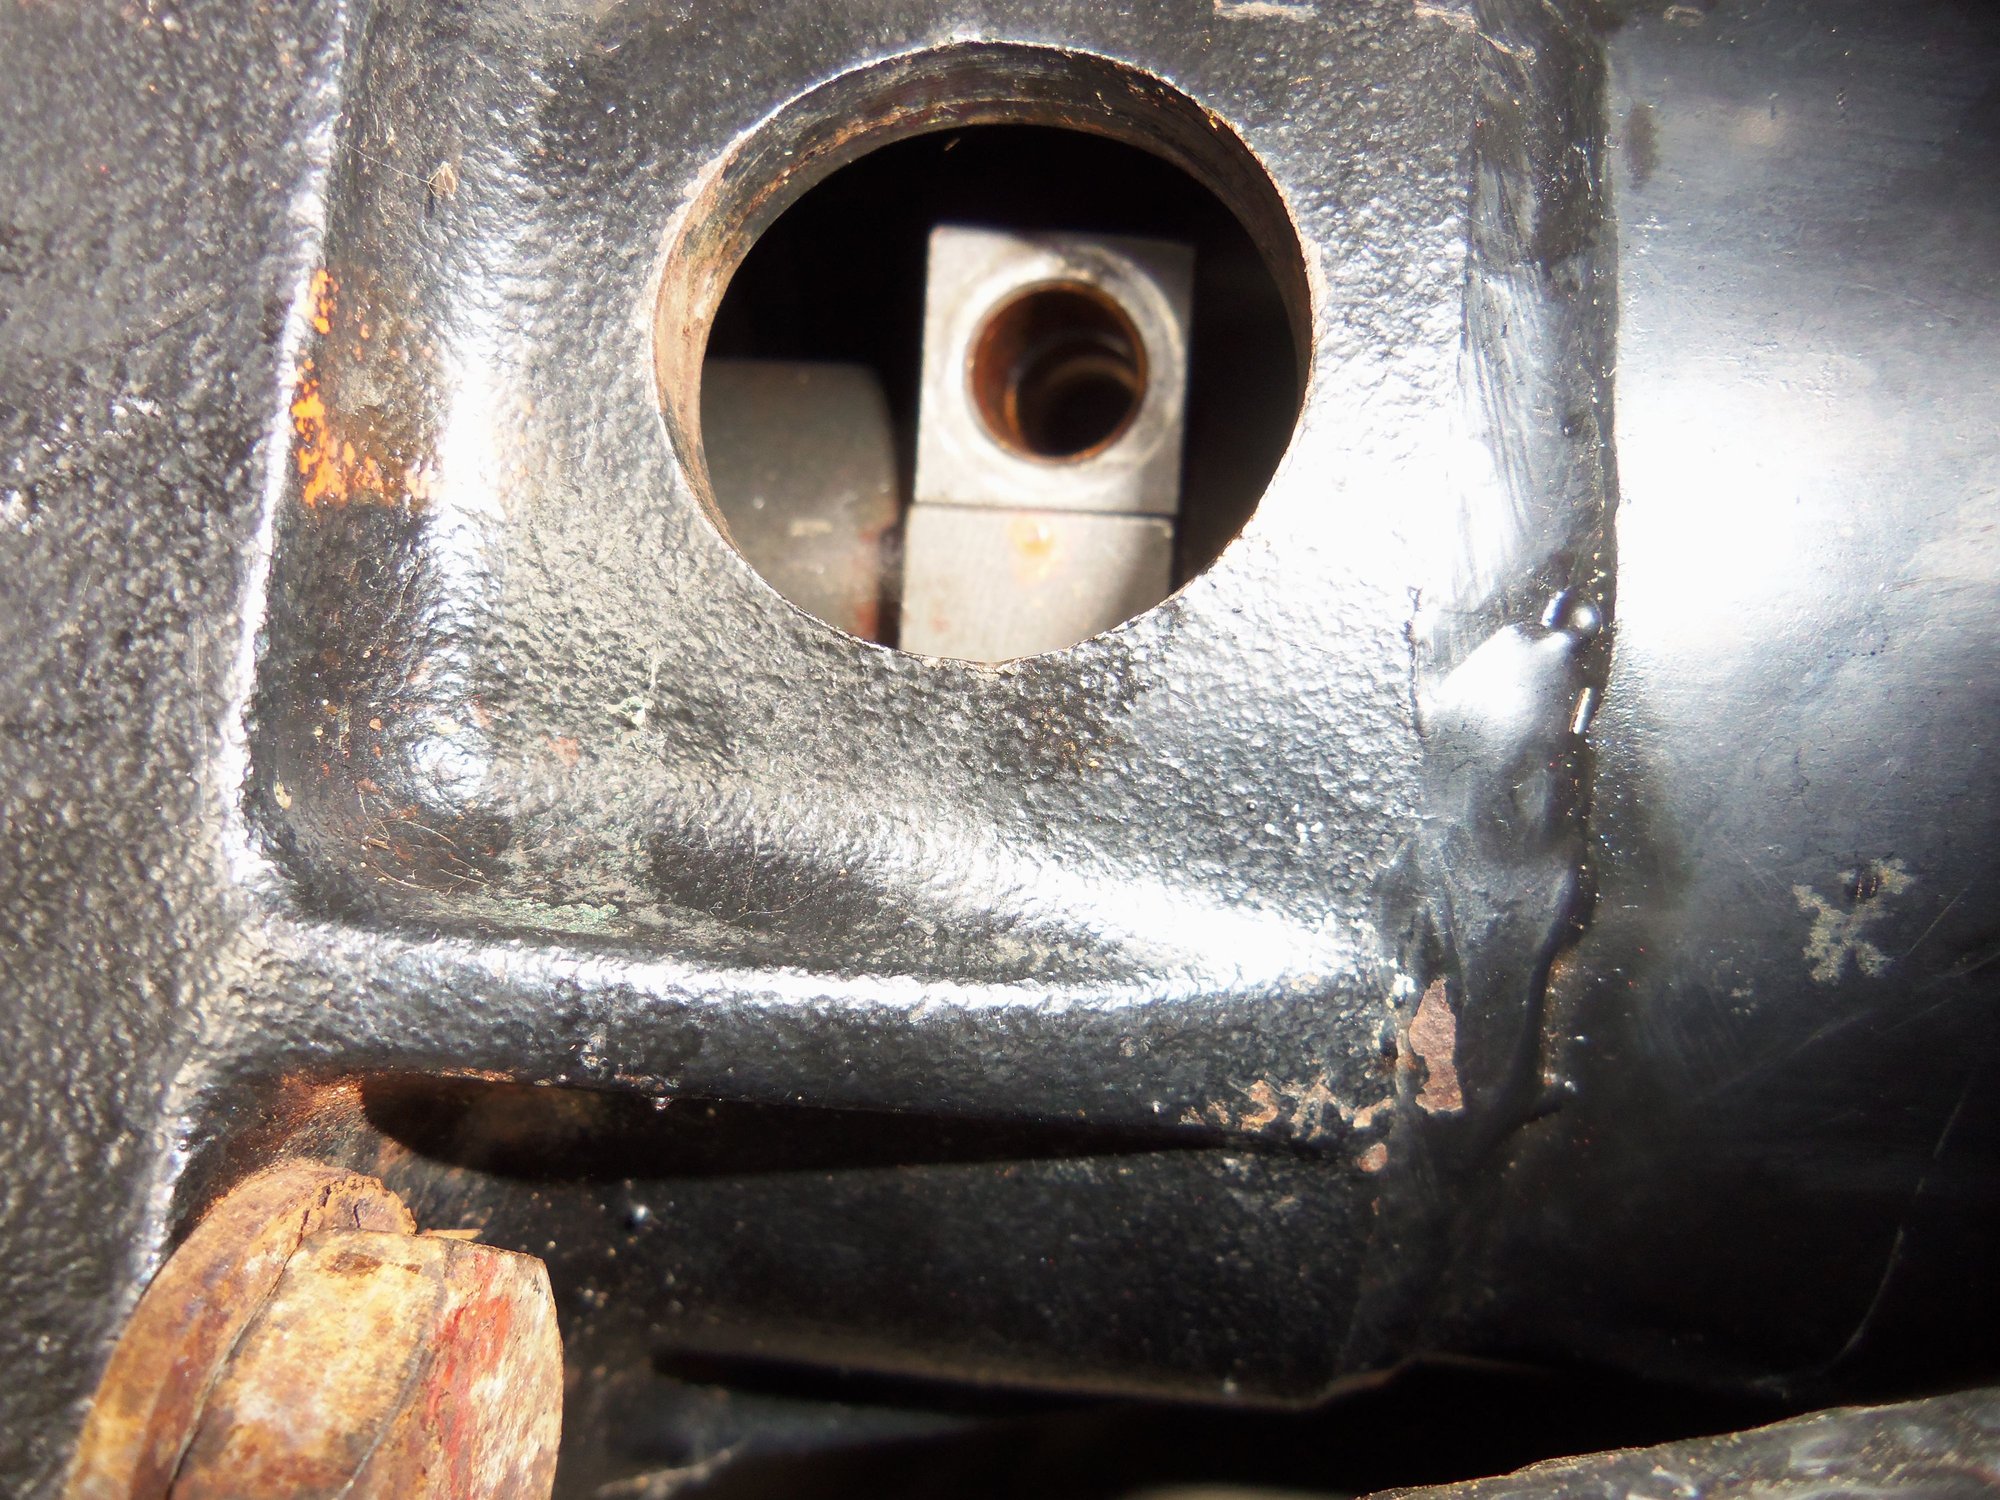
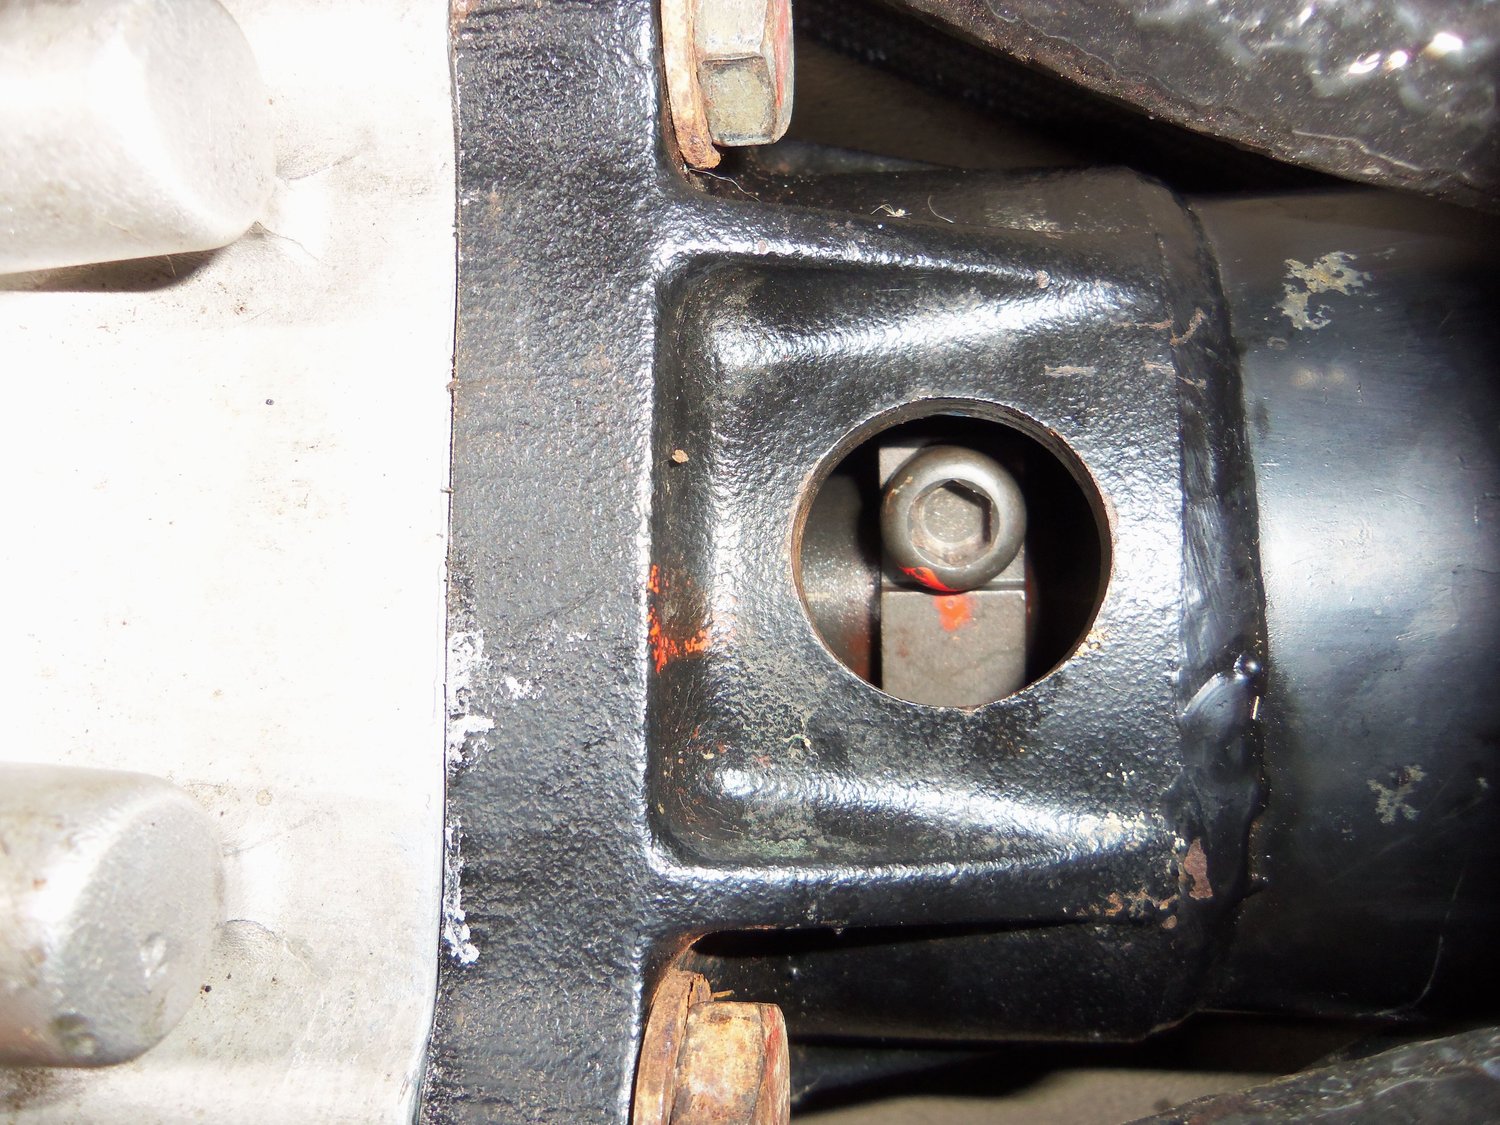
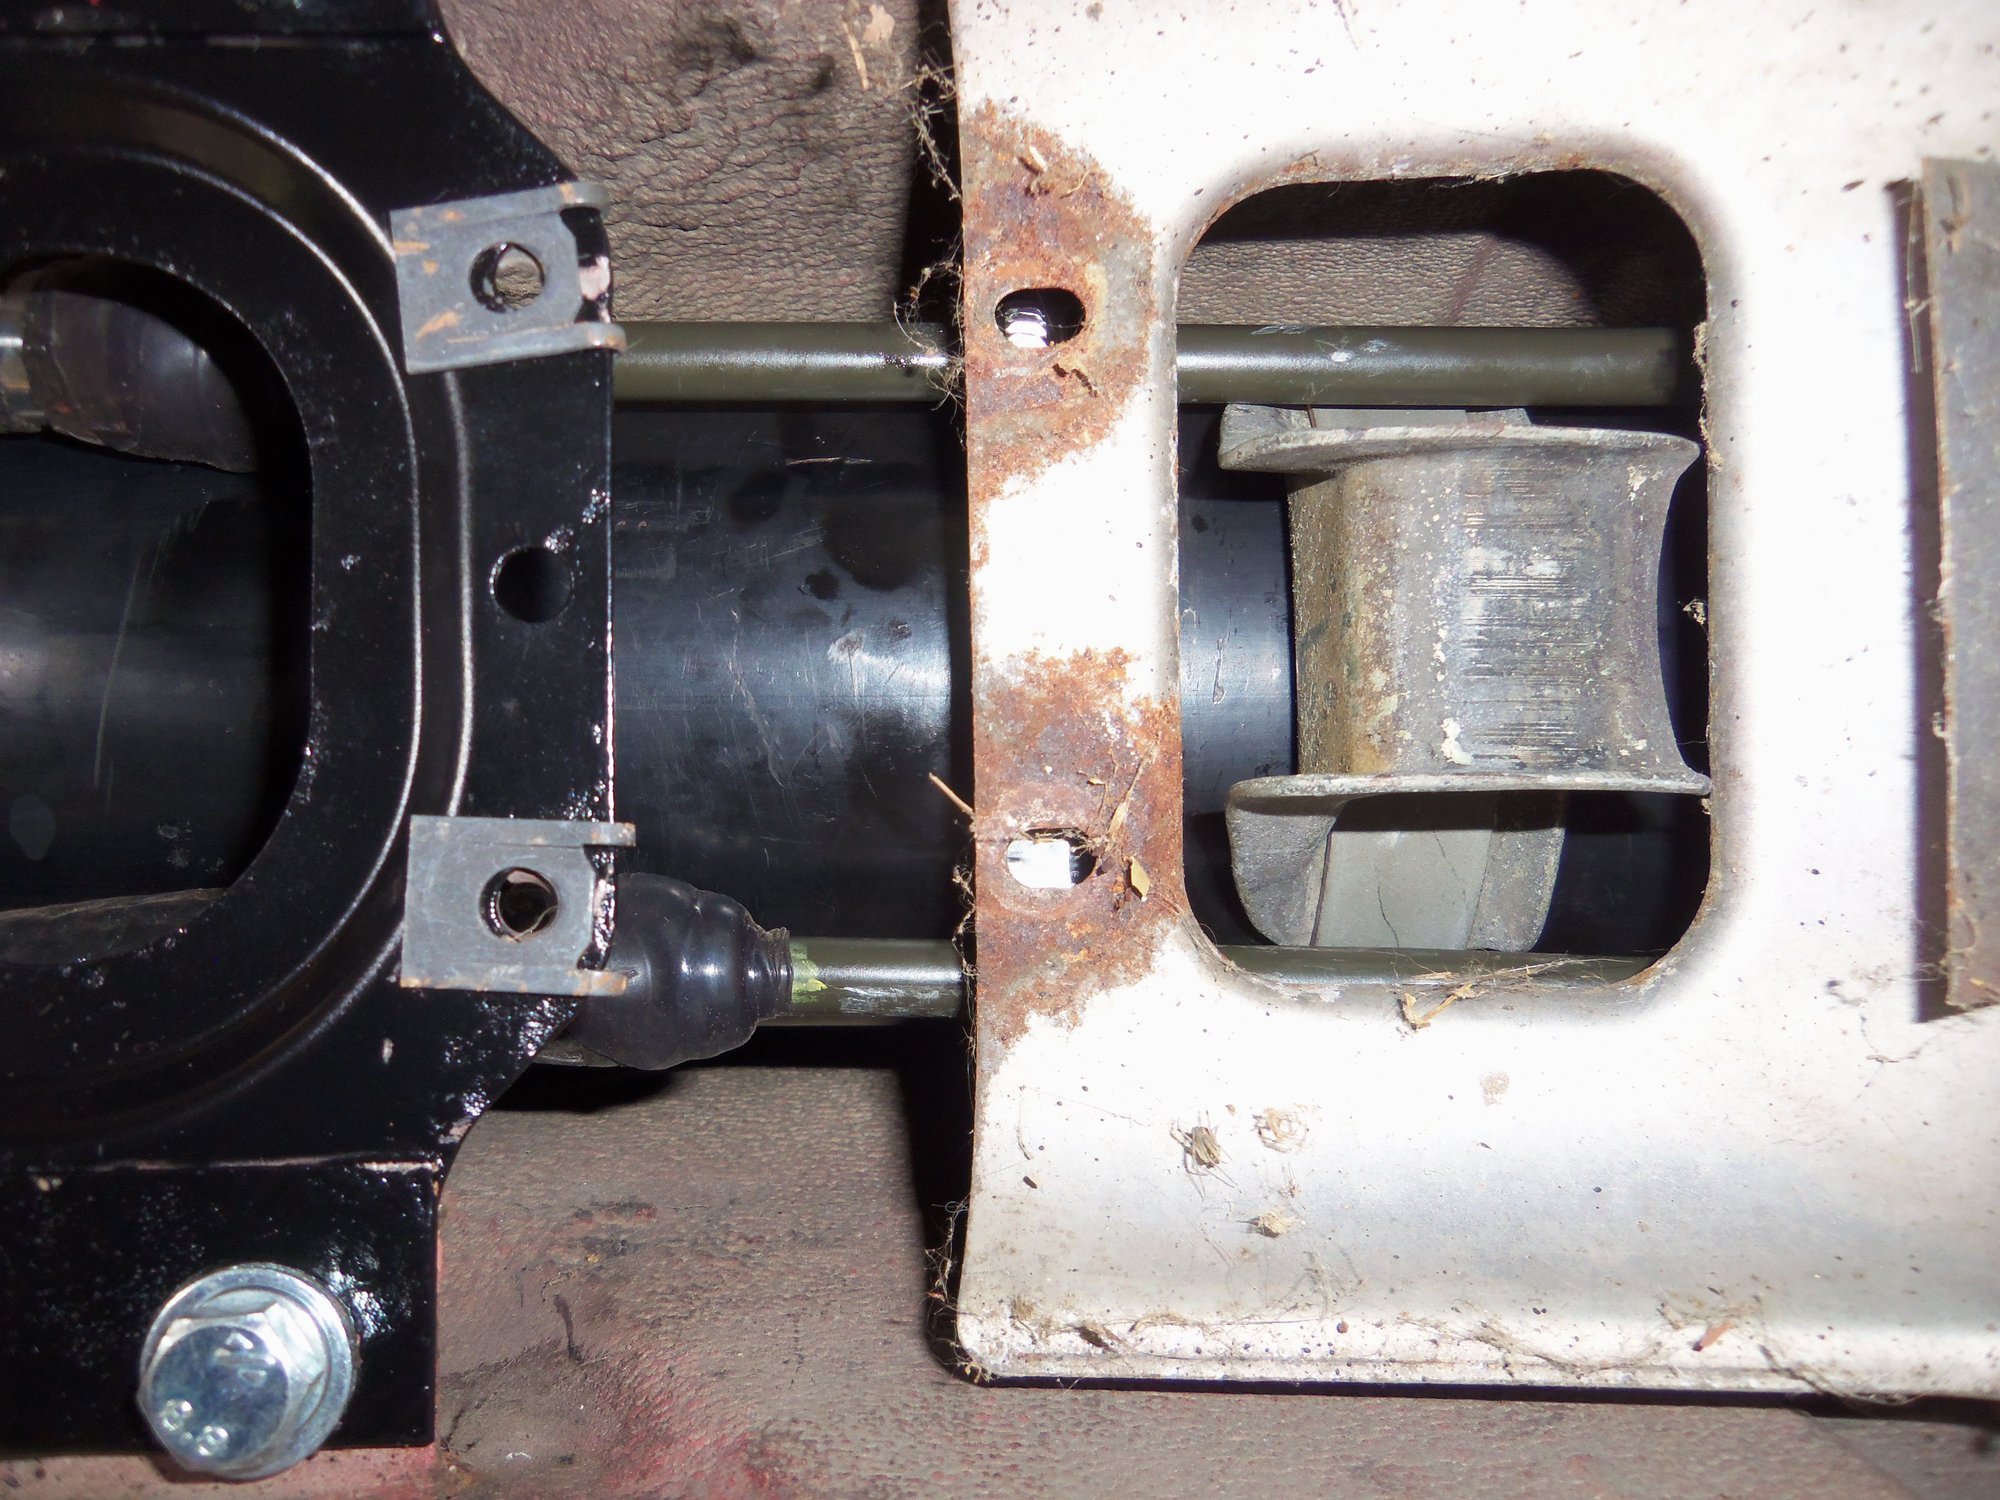
Before I forgot, I checked alignment of the drive shaft cutout and the rear coupler. I got lucky and it was spot on! I did not have to move the drive shaft at all. I ran the pinch bolt in by hand then pulled it back out. I cleaned the residual Optimoly HT off the threads and coated them with blue loctite. I torqued the pinch bolt to the updated spec of 66 ft/lbs. Note, this pinch bolt was replaced a little over three years ago and has been torqued 3 or 4 times now. I read somewhere that this is good and burnishes the threads. So, I am good with this bolt now.
Cutout aligned with relief in driveshaft. (I know you can't see it here, but it is there.)
Pinch bolt in and torqued down.
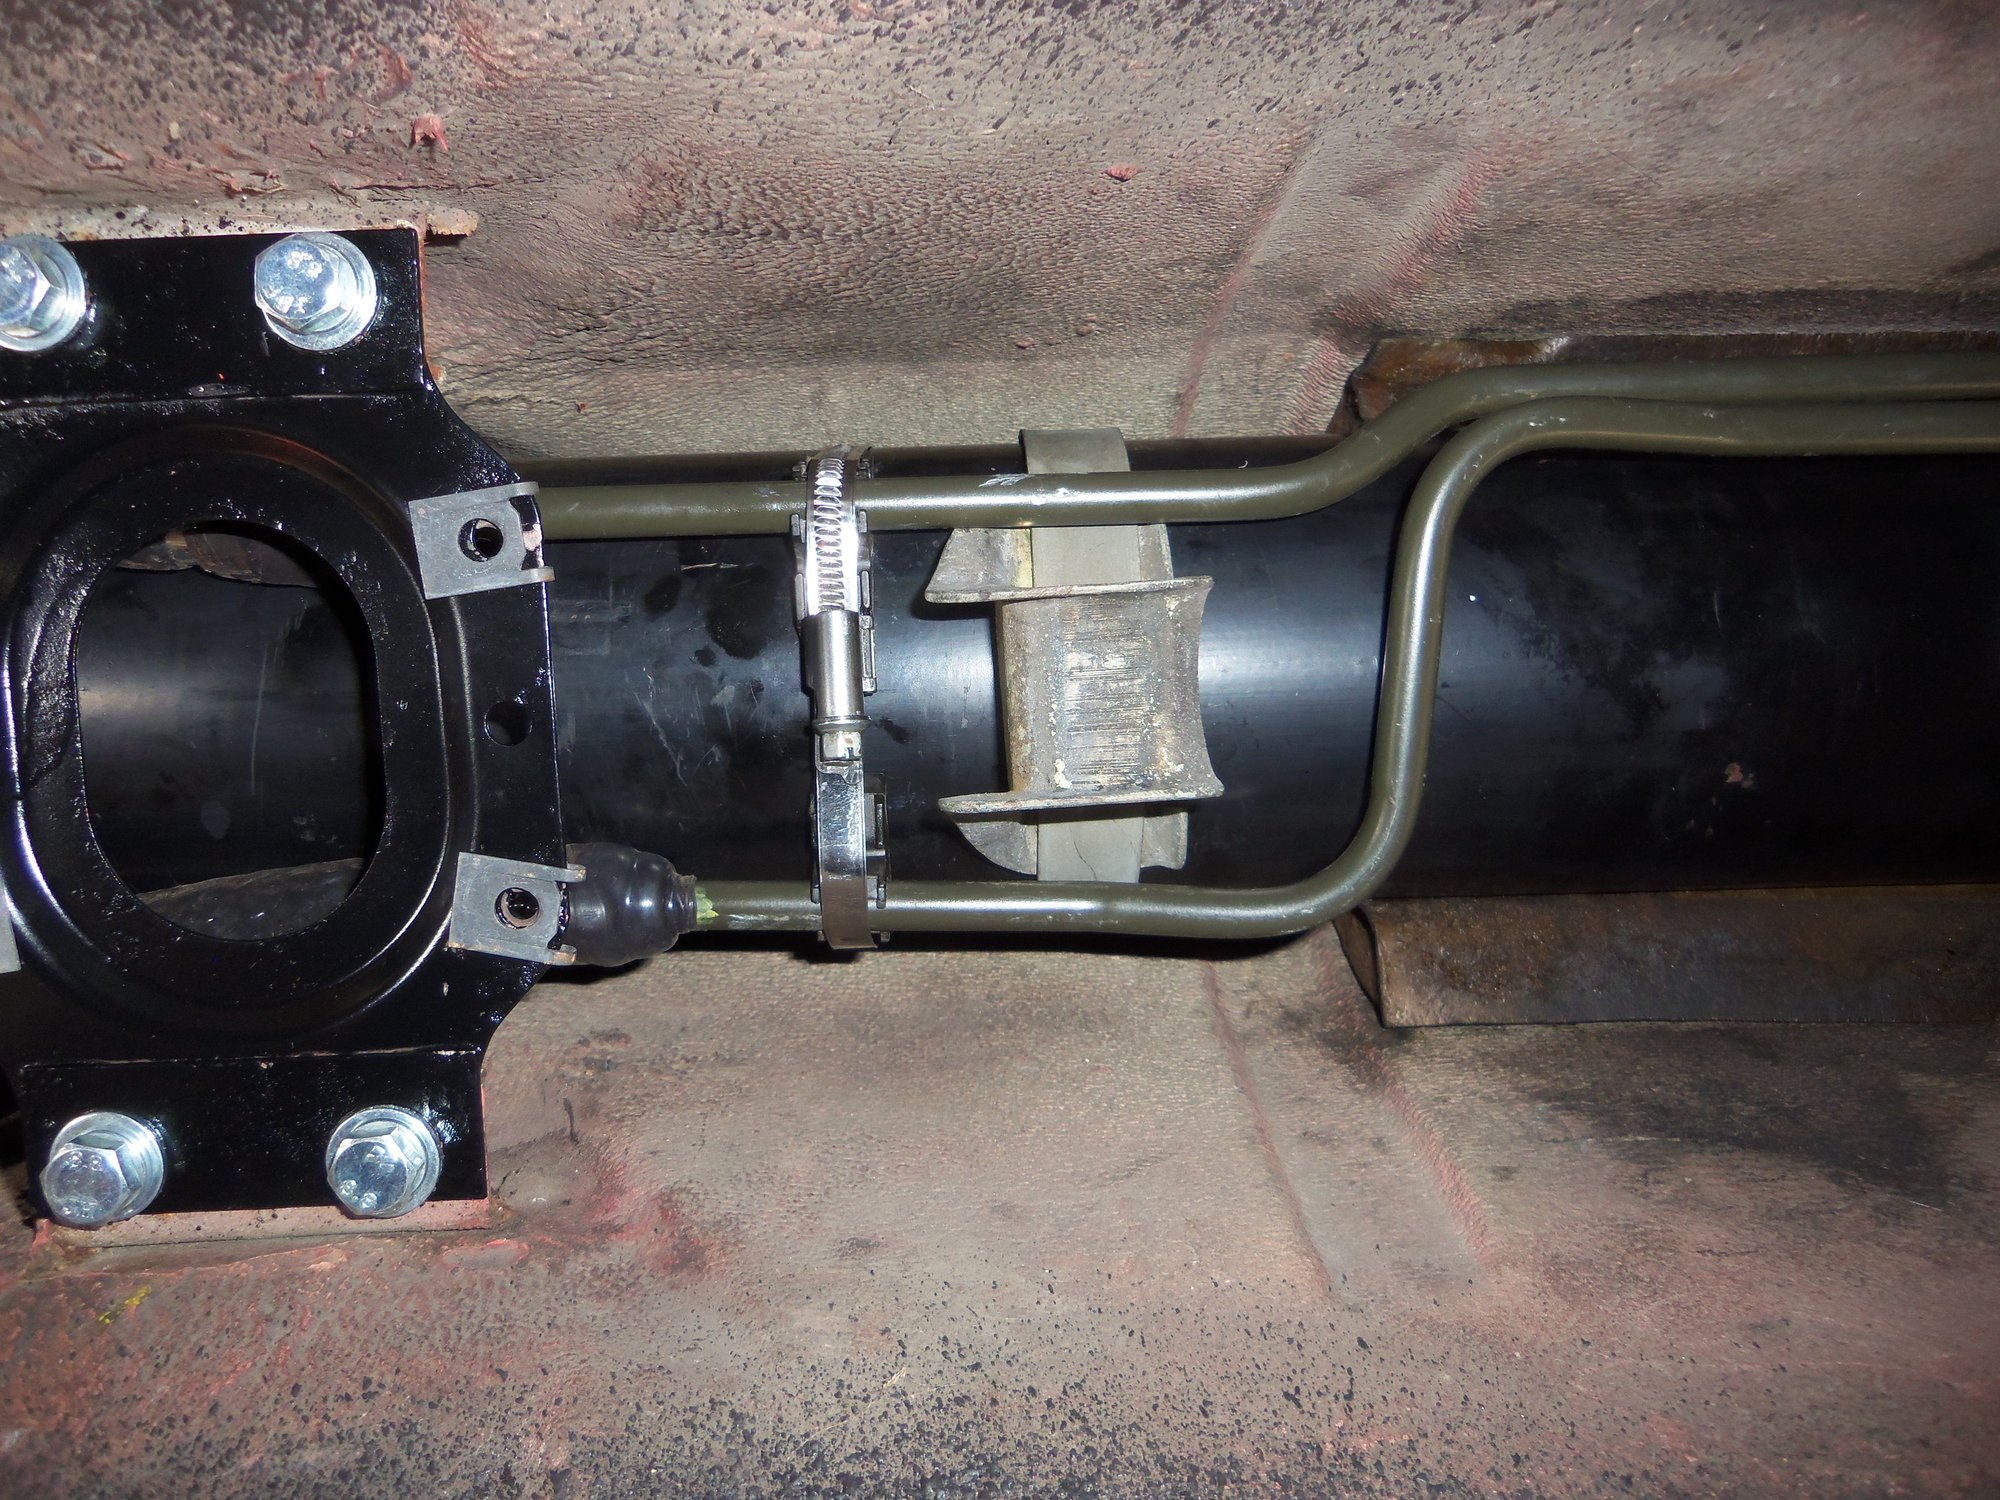
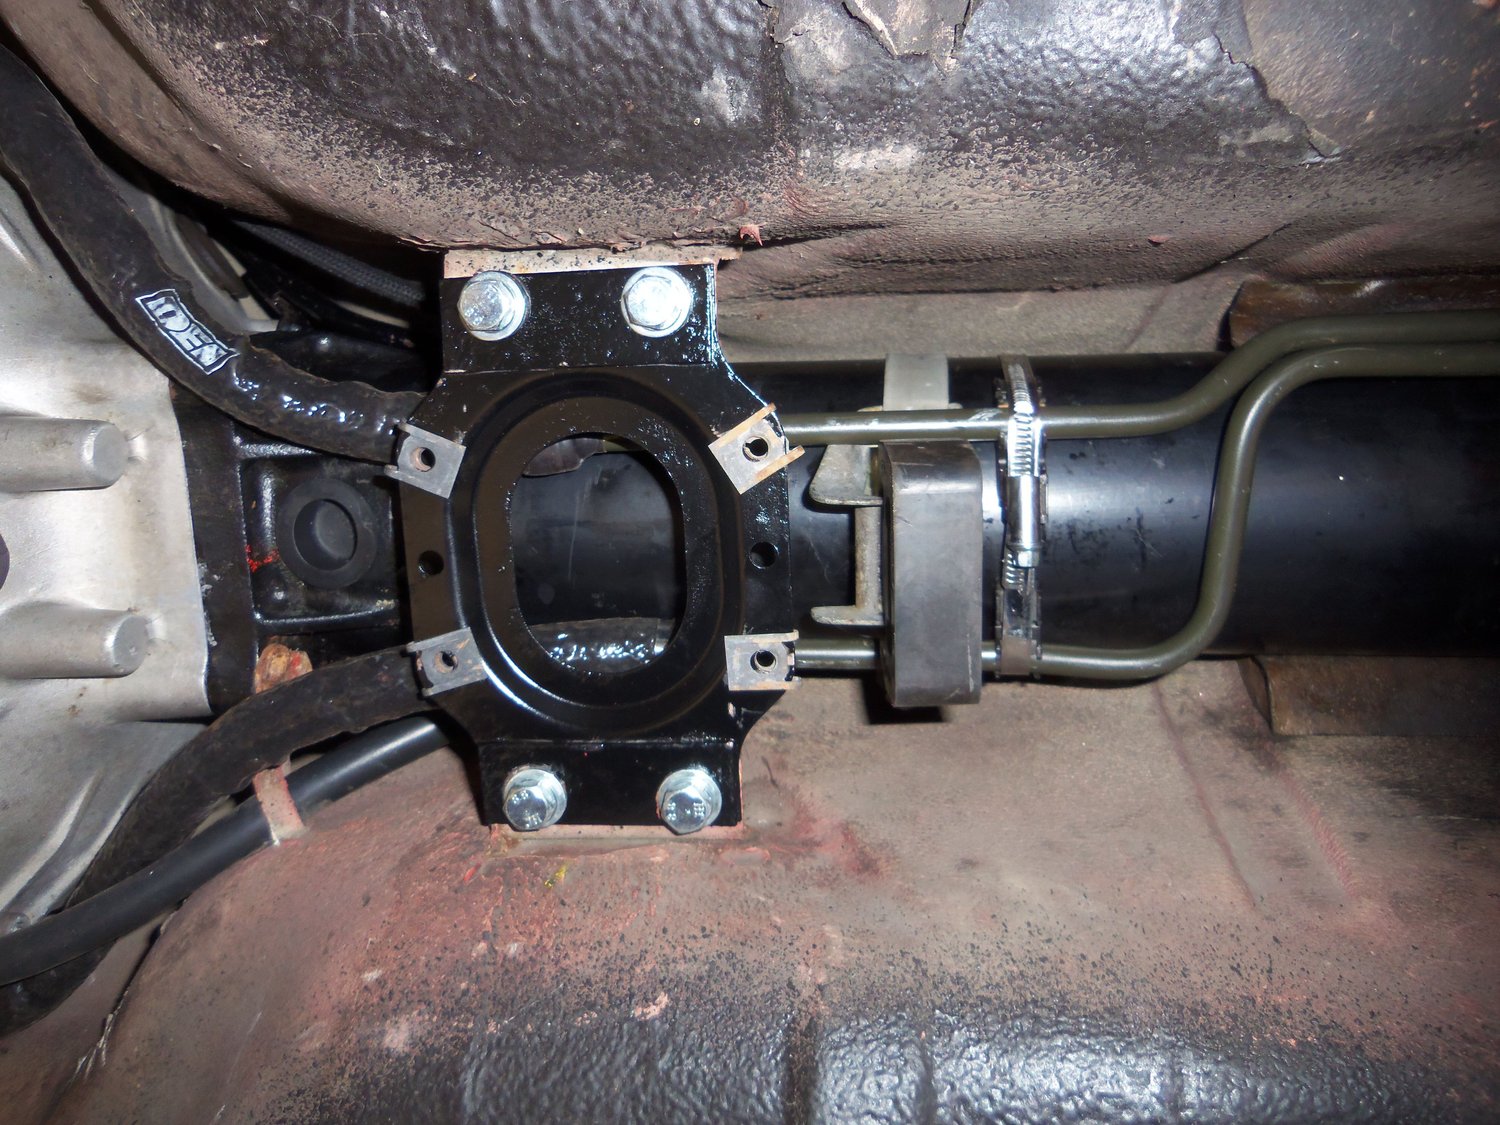
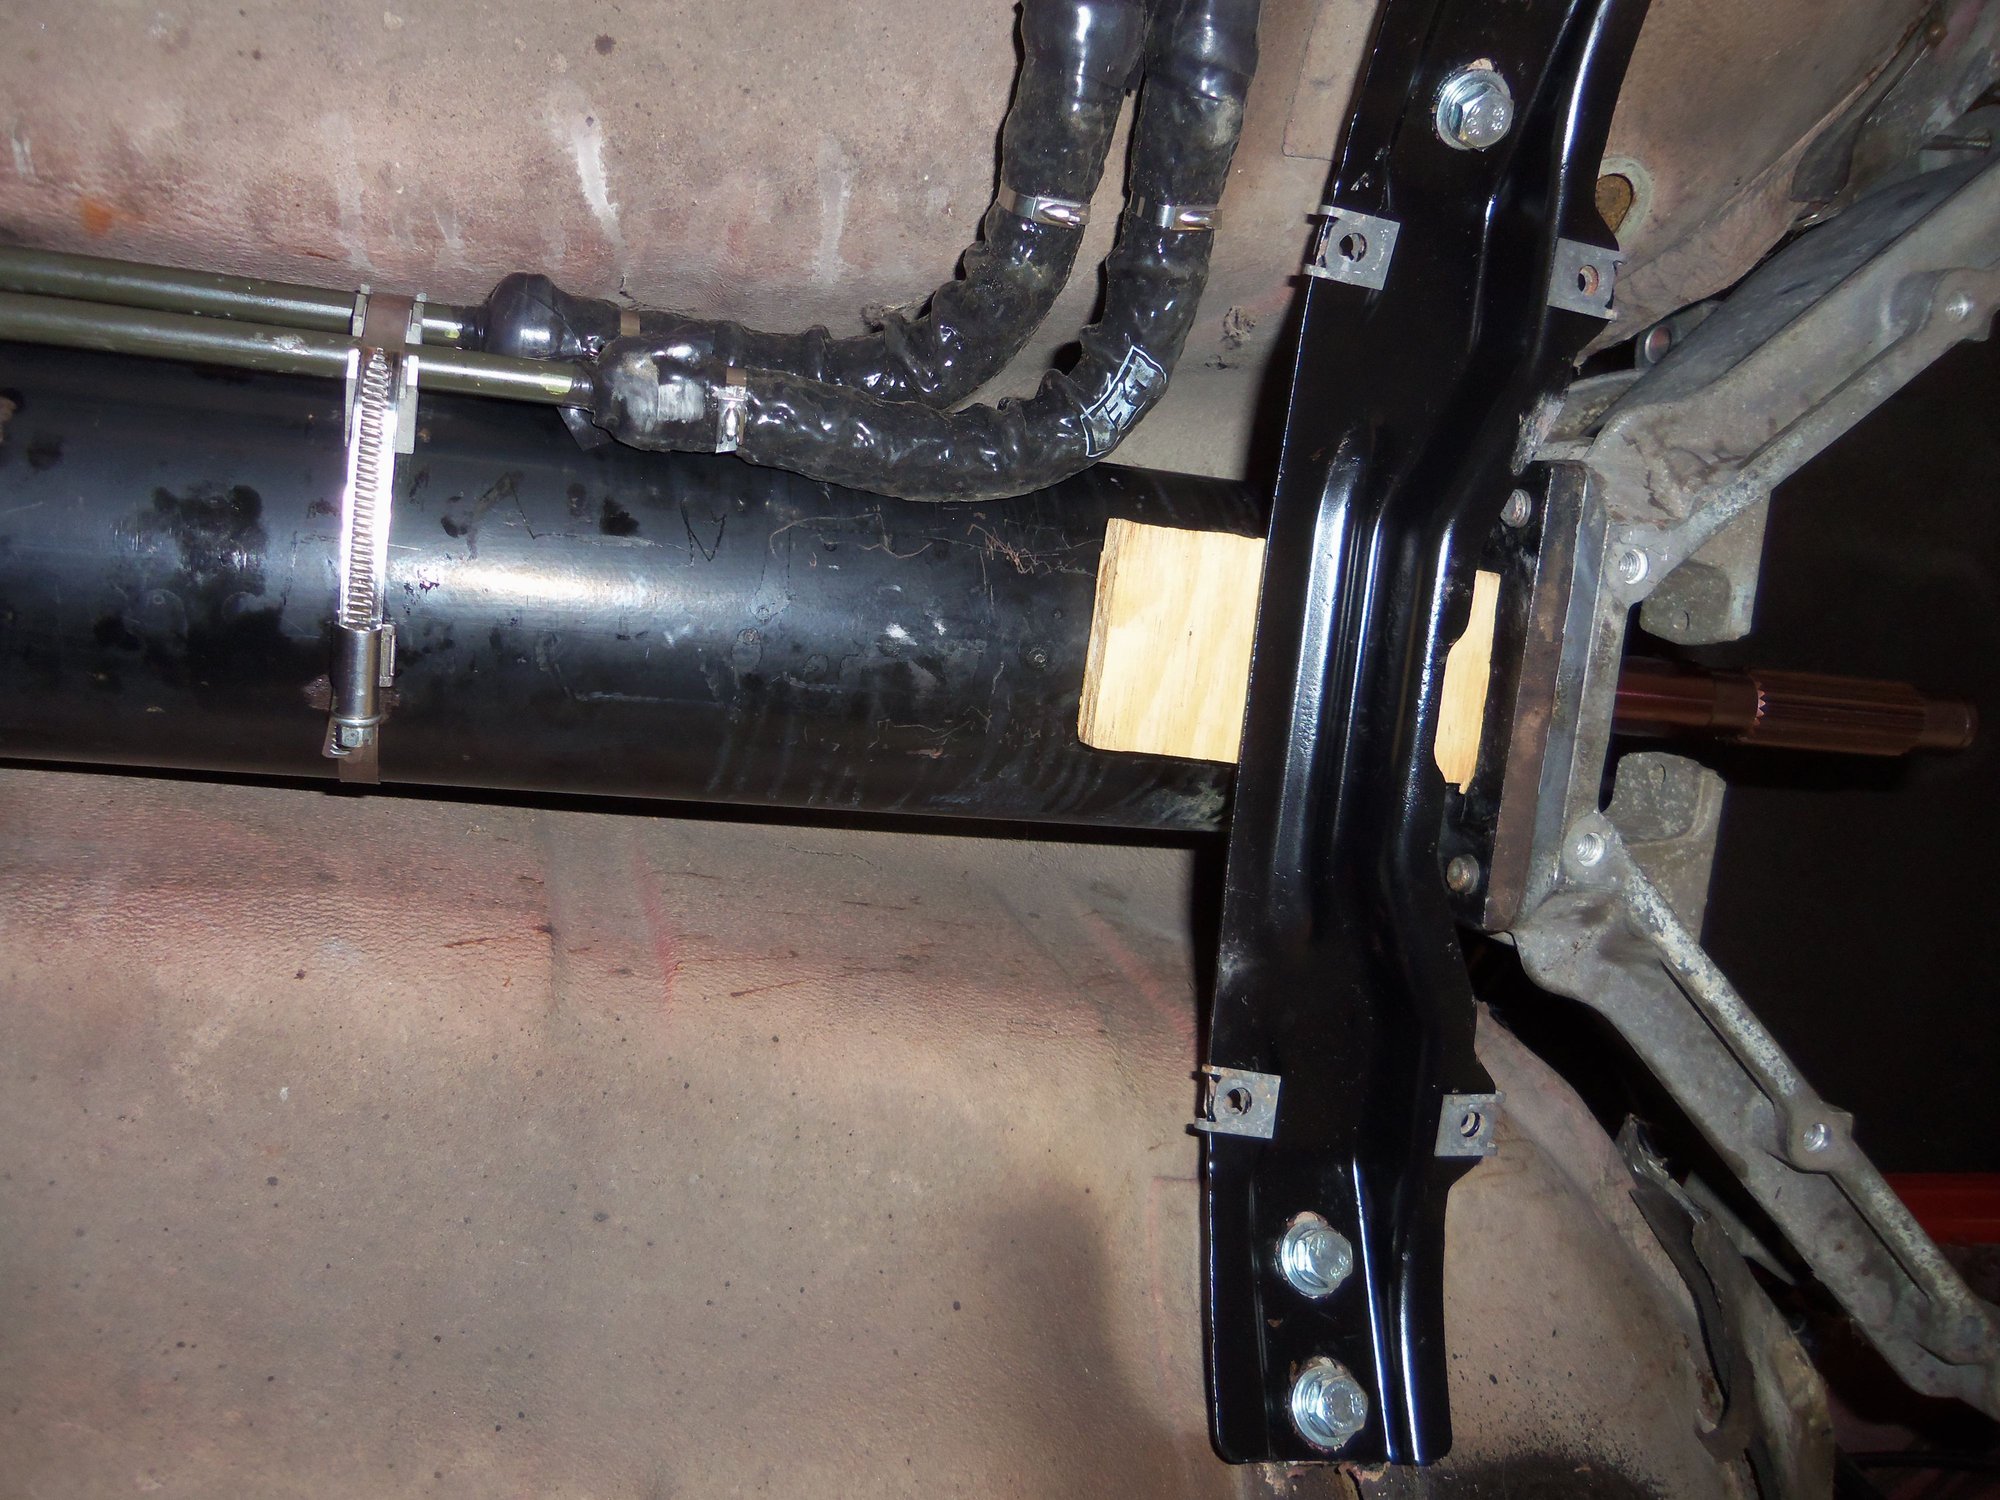
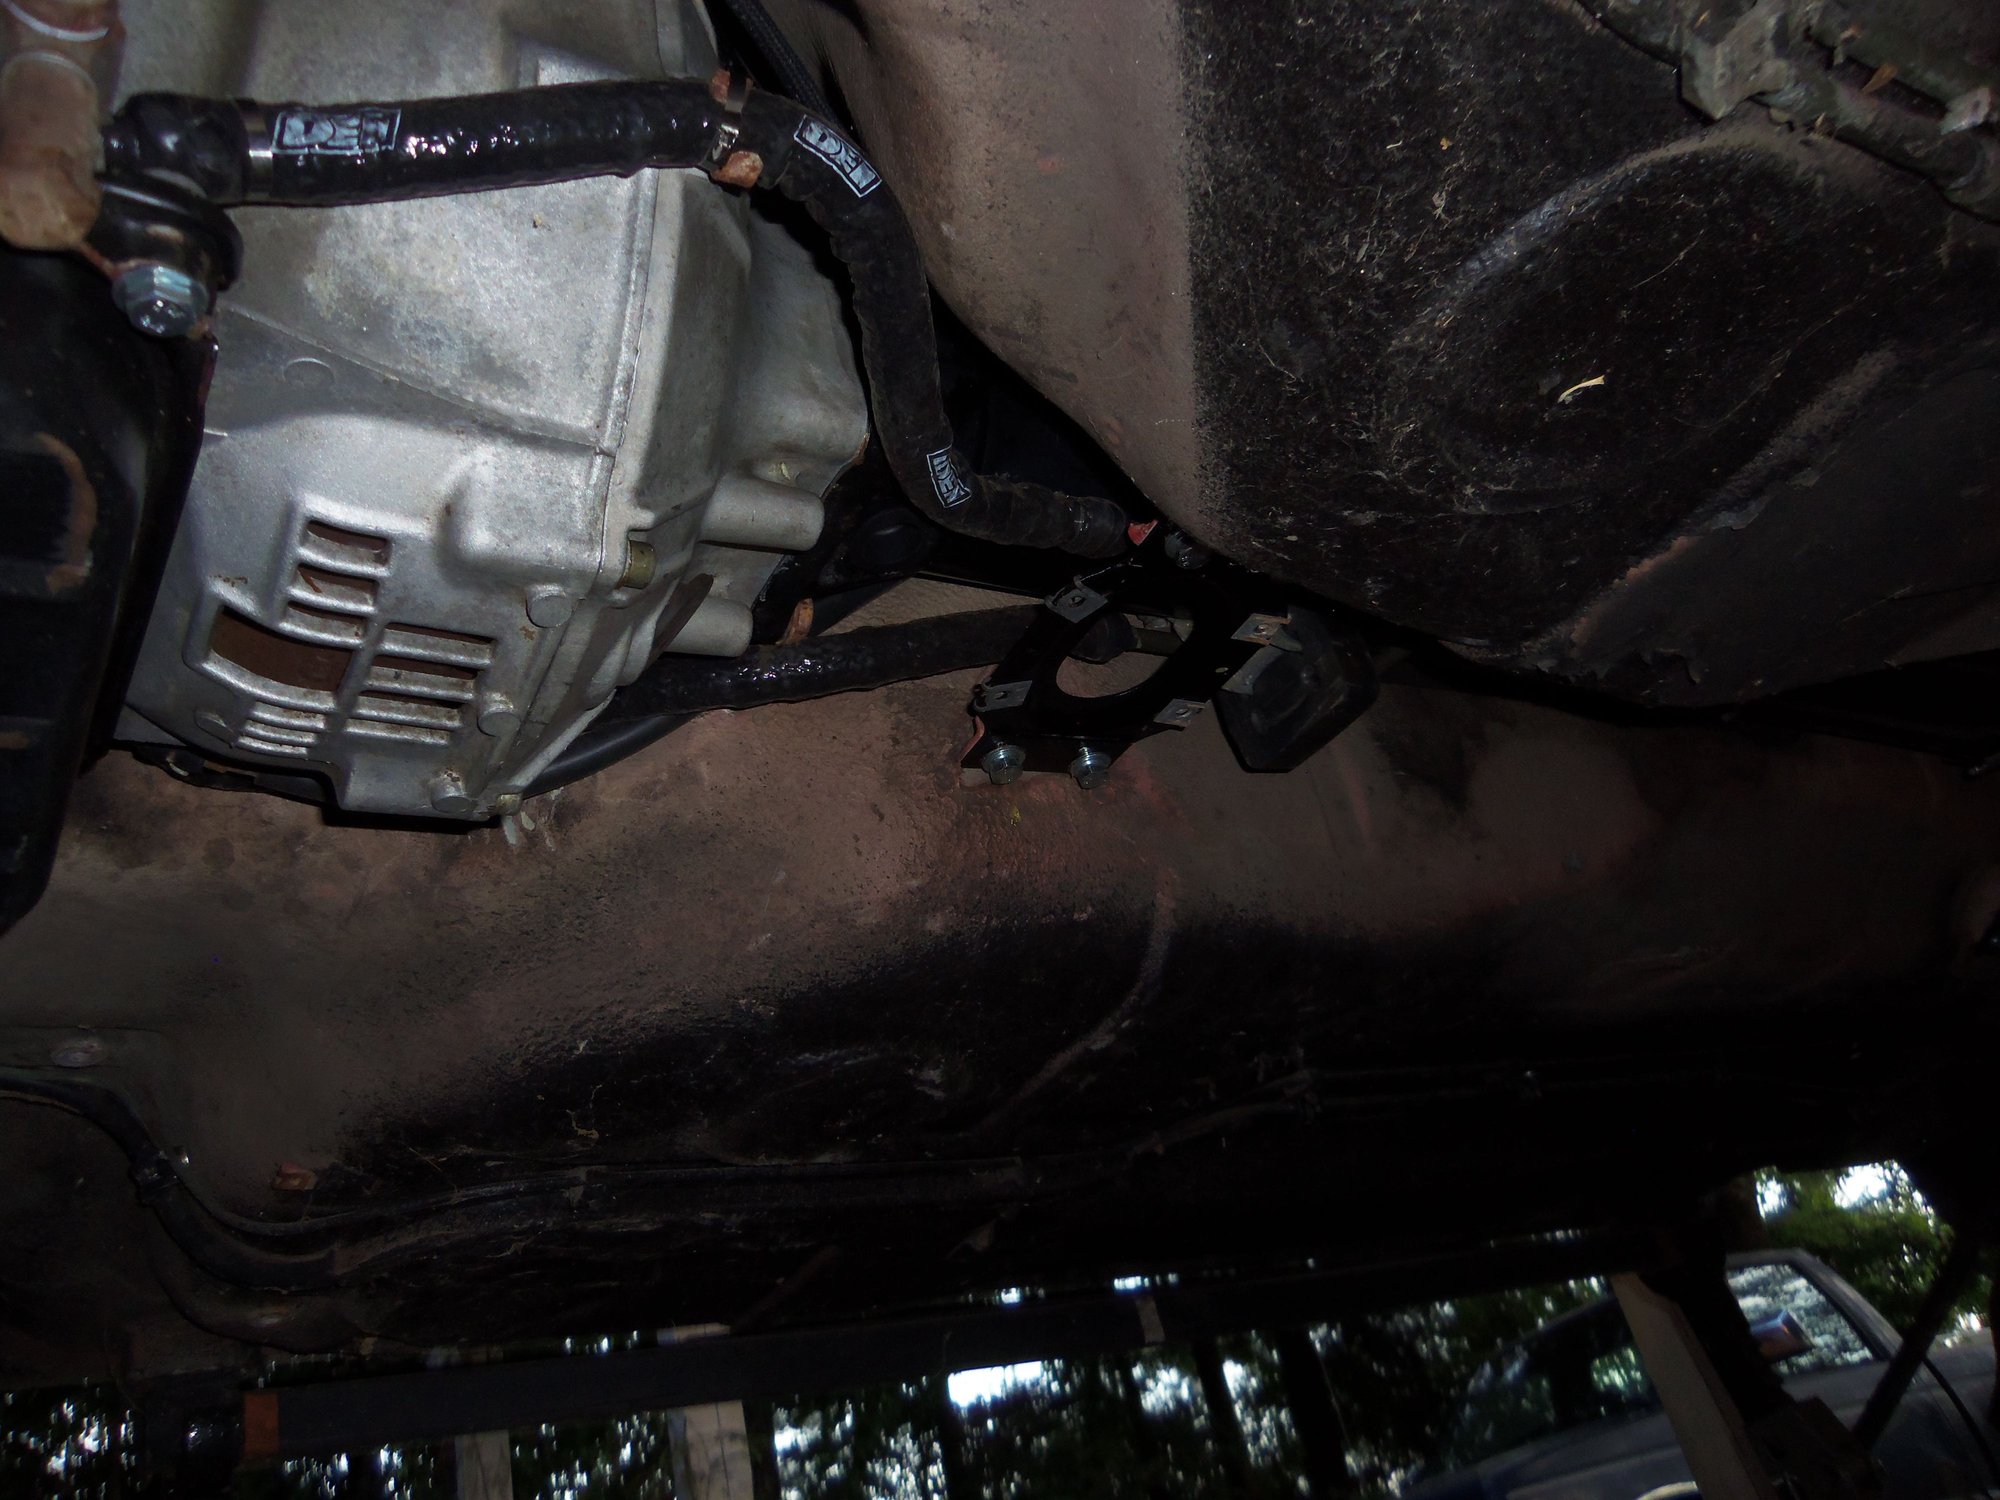
Another misstep, I positioned the rear hose clamp and standoffs for the Bowden cable and transmission cooling lines on the wrong side of the mid exhaust hanger torque tube clamp. The mid exhaust hanger has to line up with the cut out in the mid heat shield. Mine did not. So, I had to lower the front of the torque tube down low enough to get my hands above the torque tube. After loosening all the hose clamps and exhaust clamp, I was able to manipulate everything such that the exhaust clamp was now in the correct place.
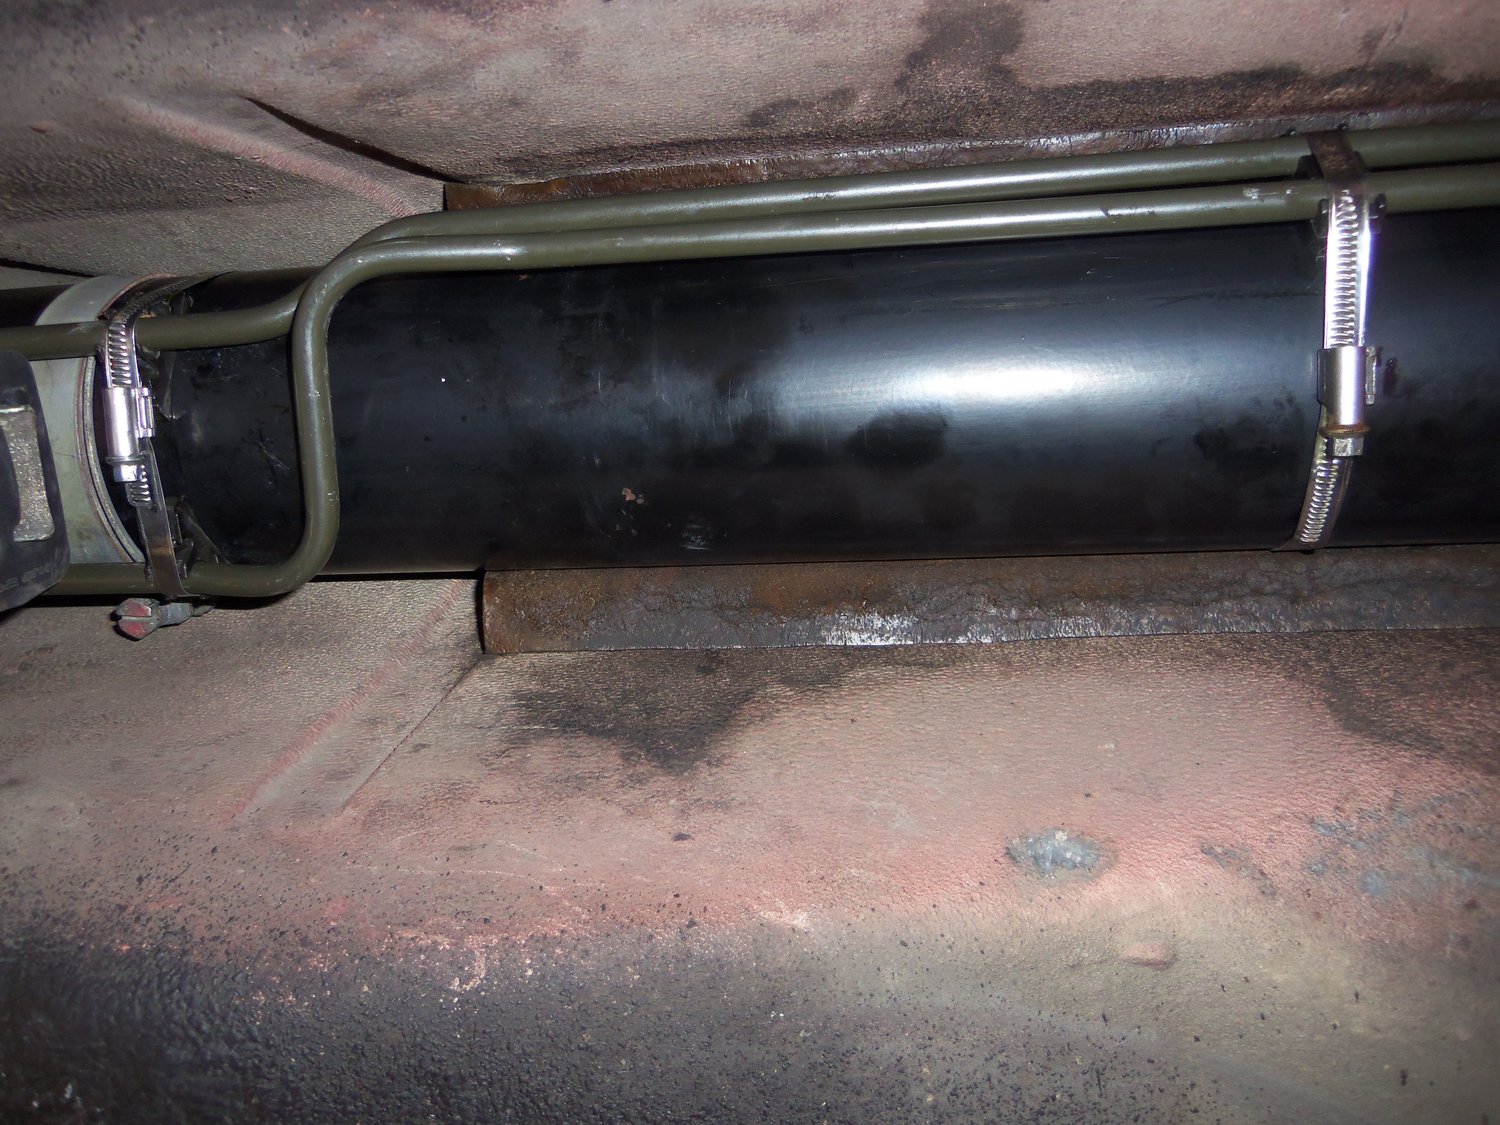
How I originally lined everything up. Wrong...
Wrong thing in the cutout in the heat shield.
Cutout in the wrong place for the right thing.
Repositioned and much better.
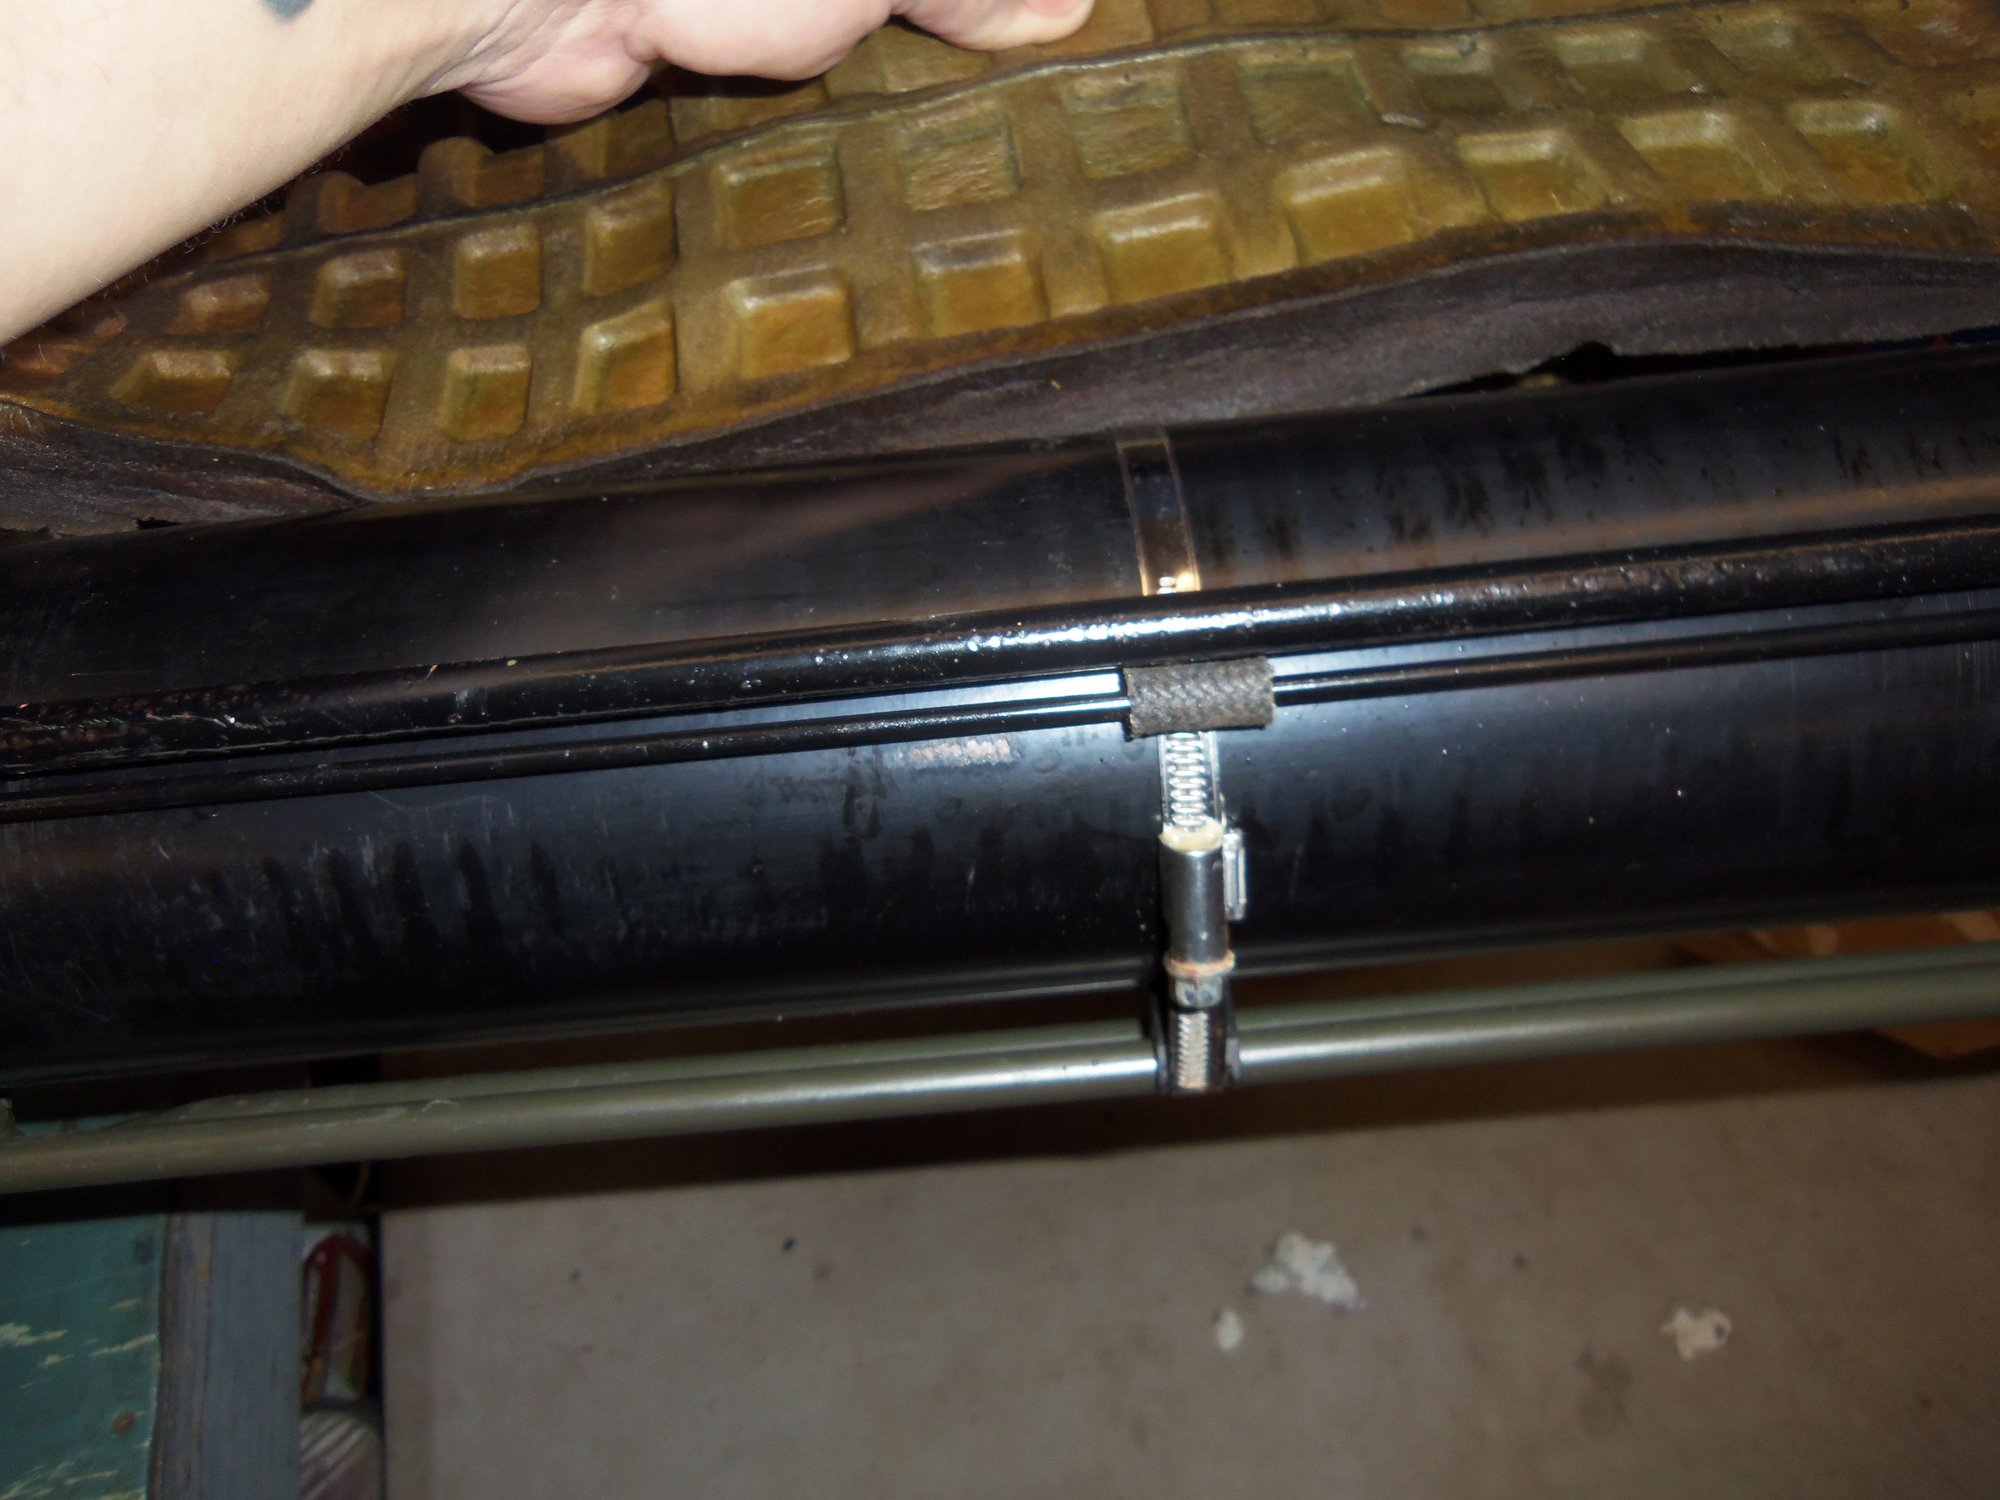
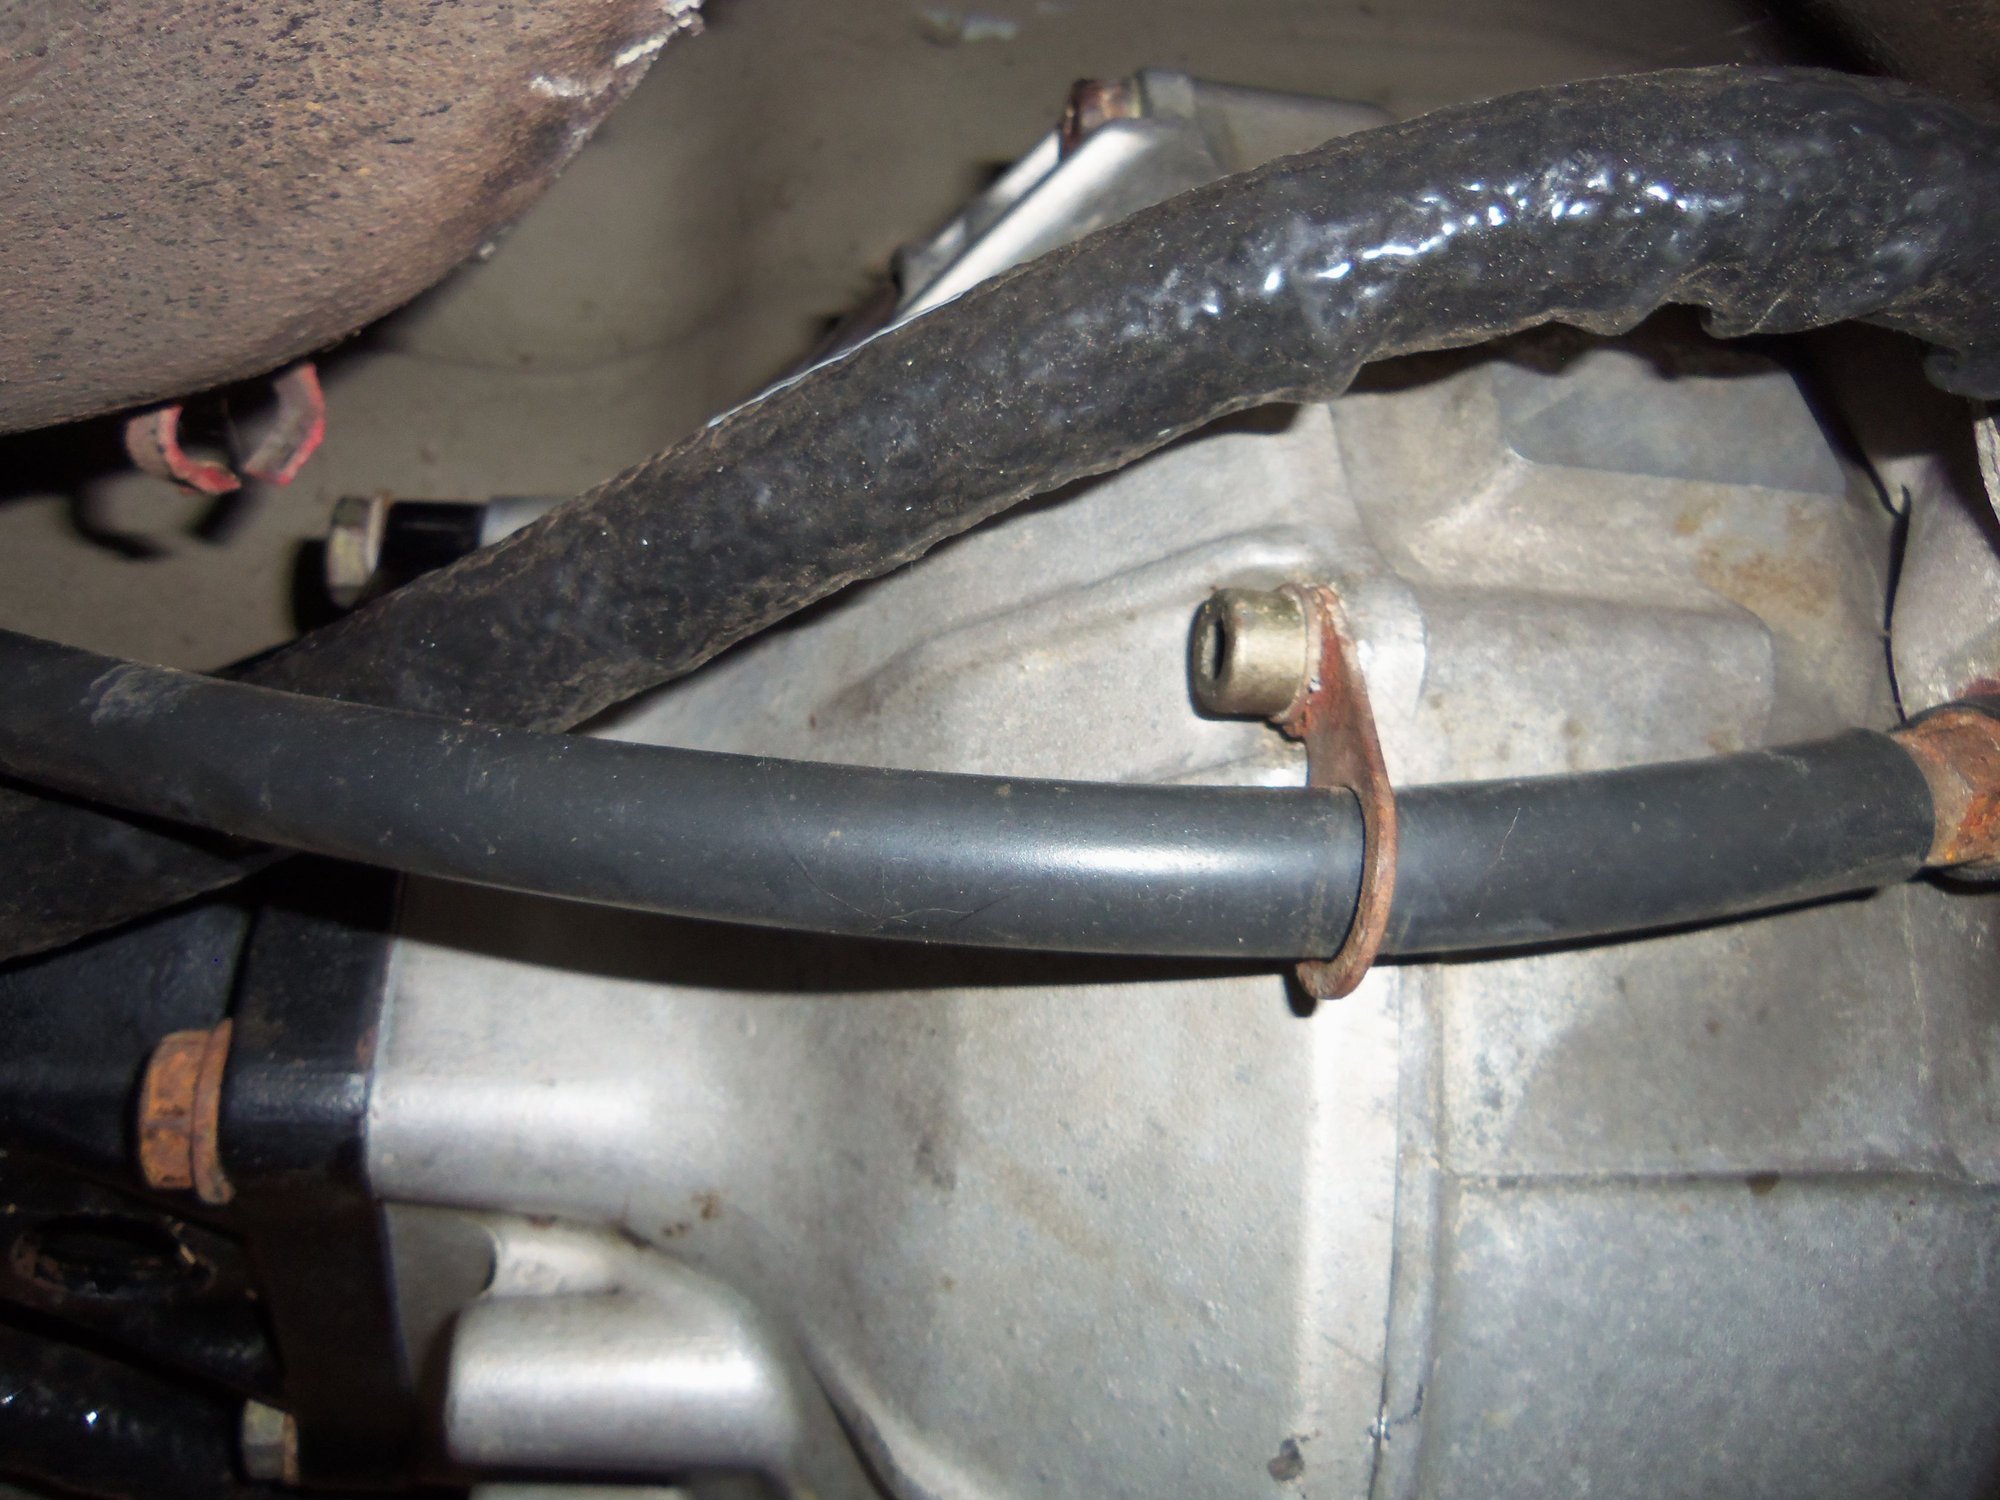
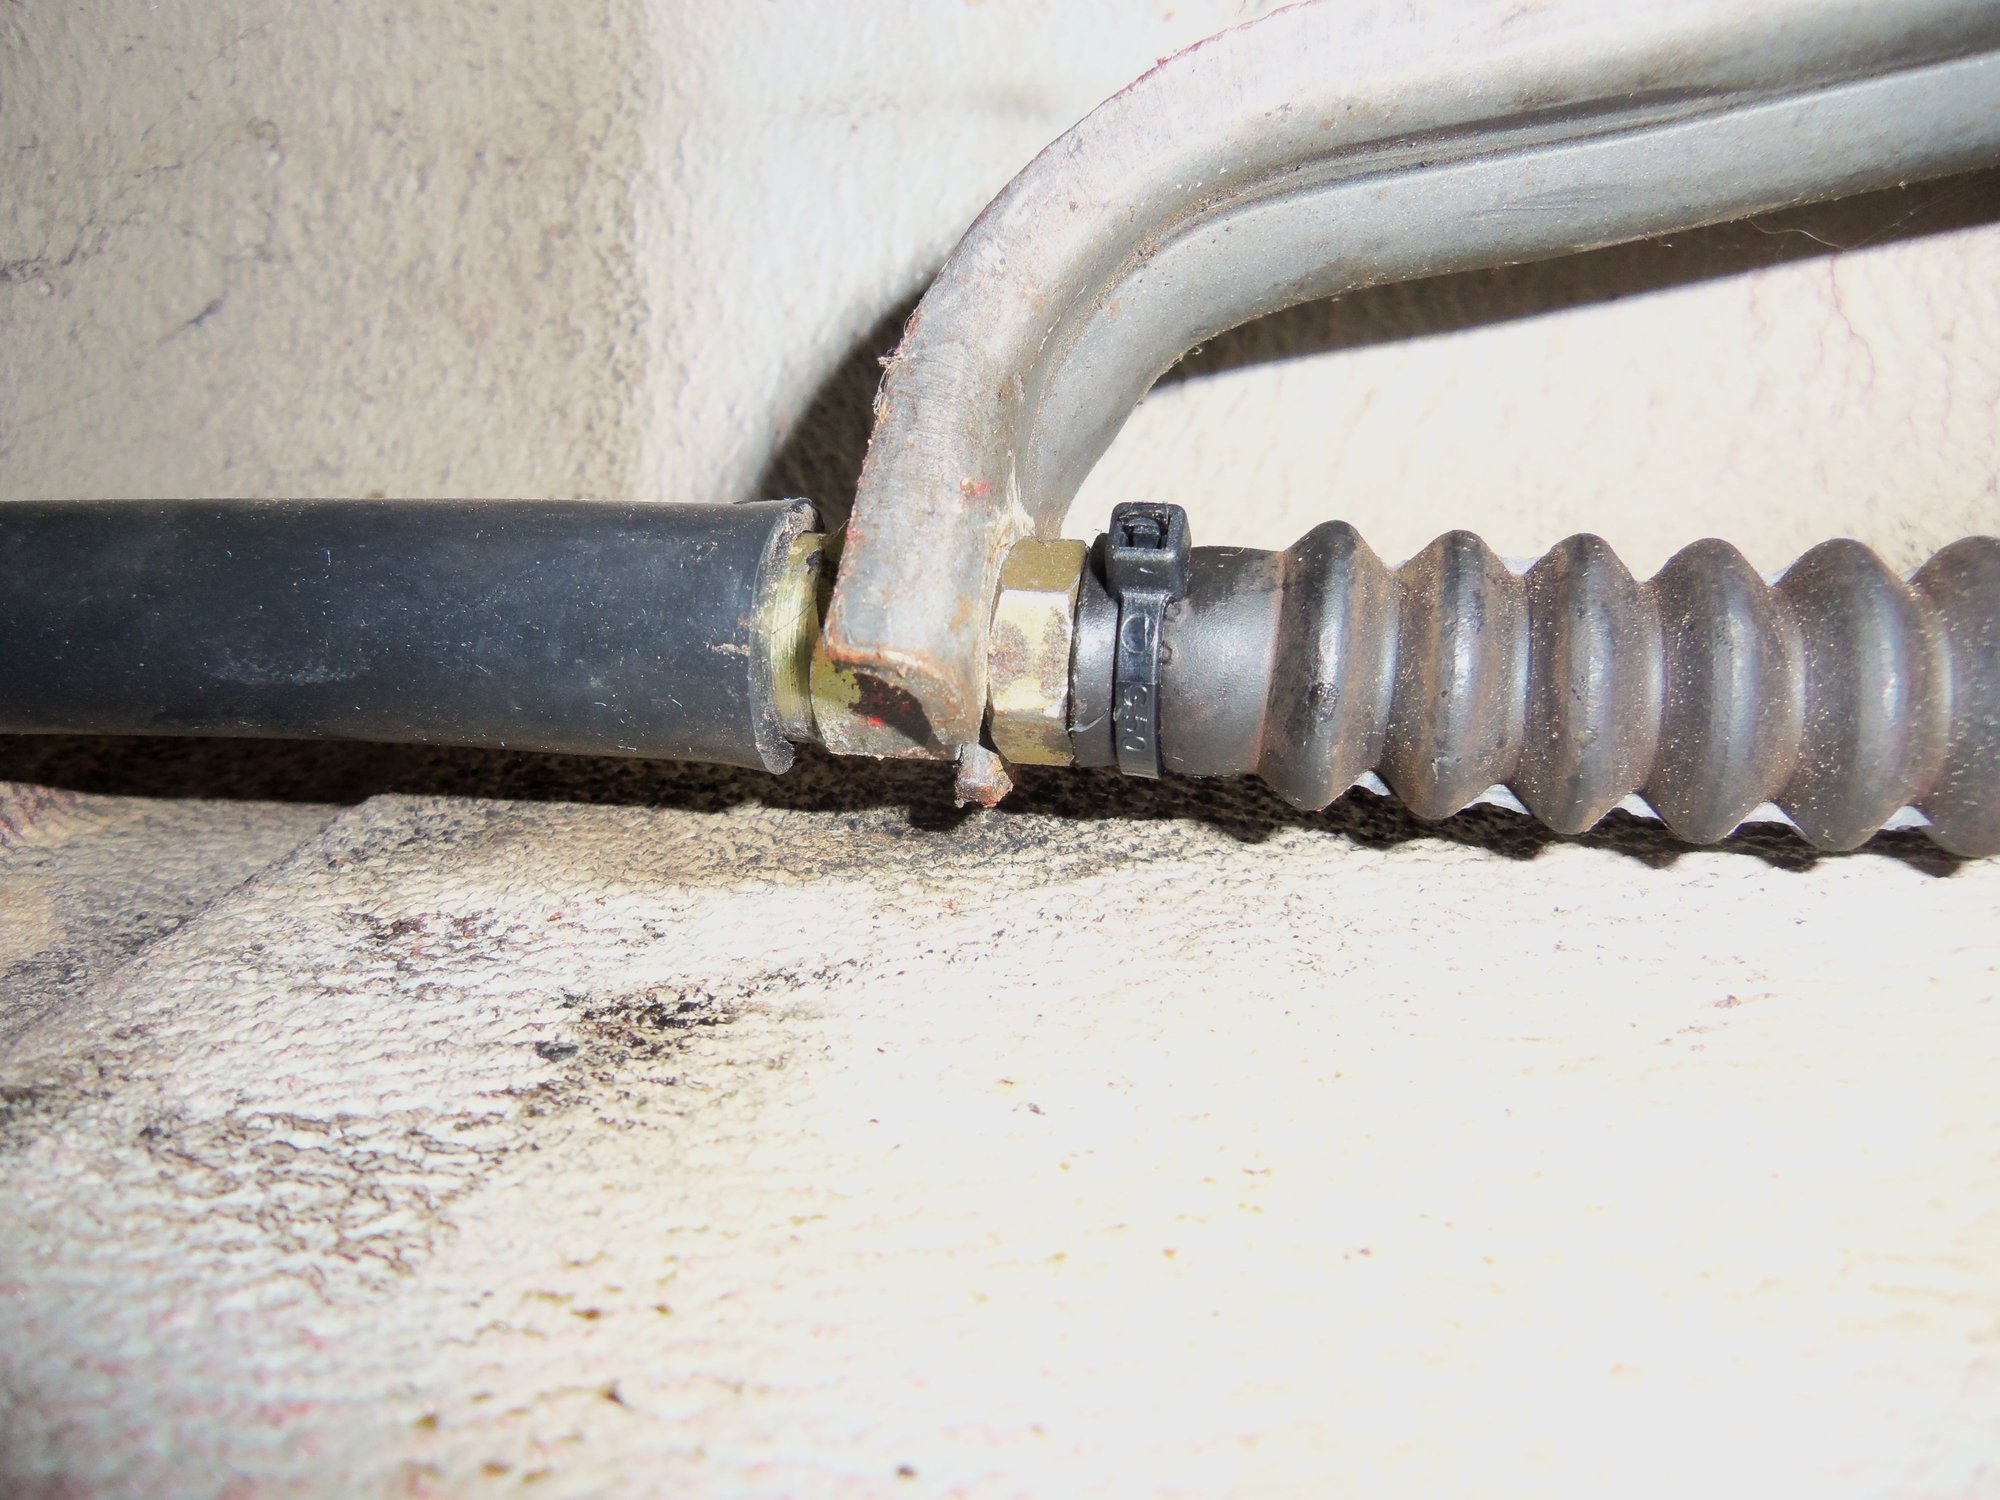
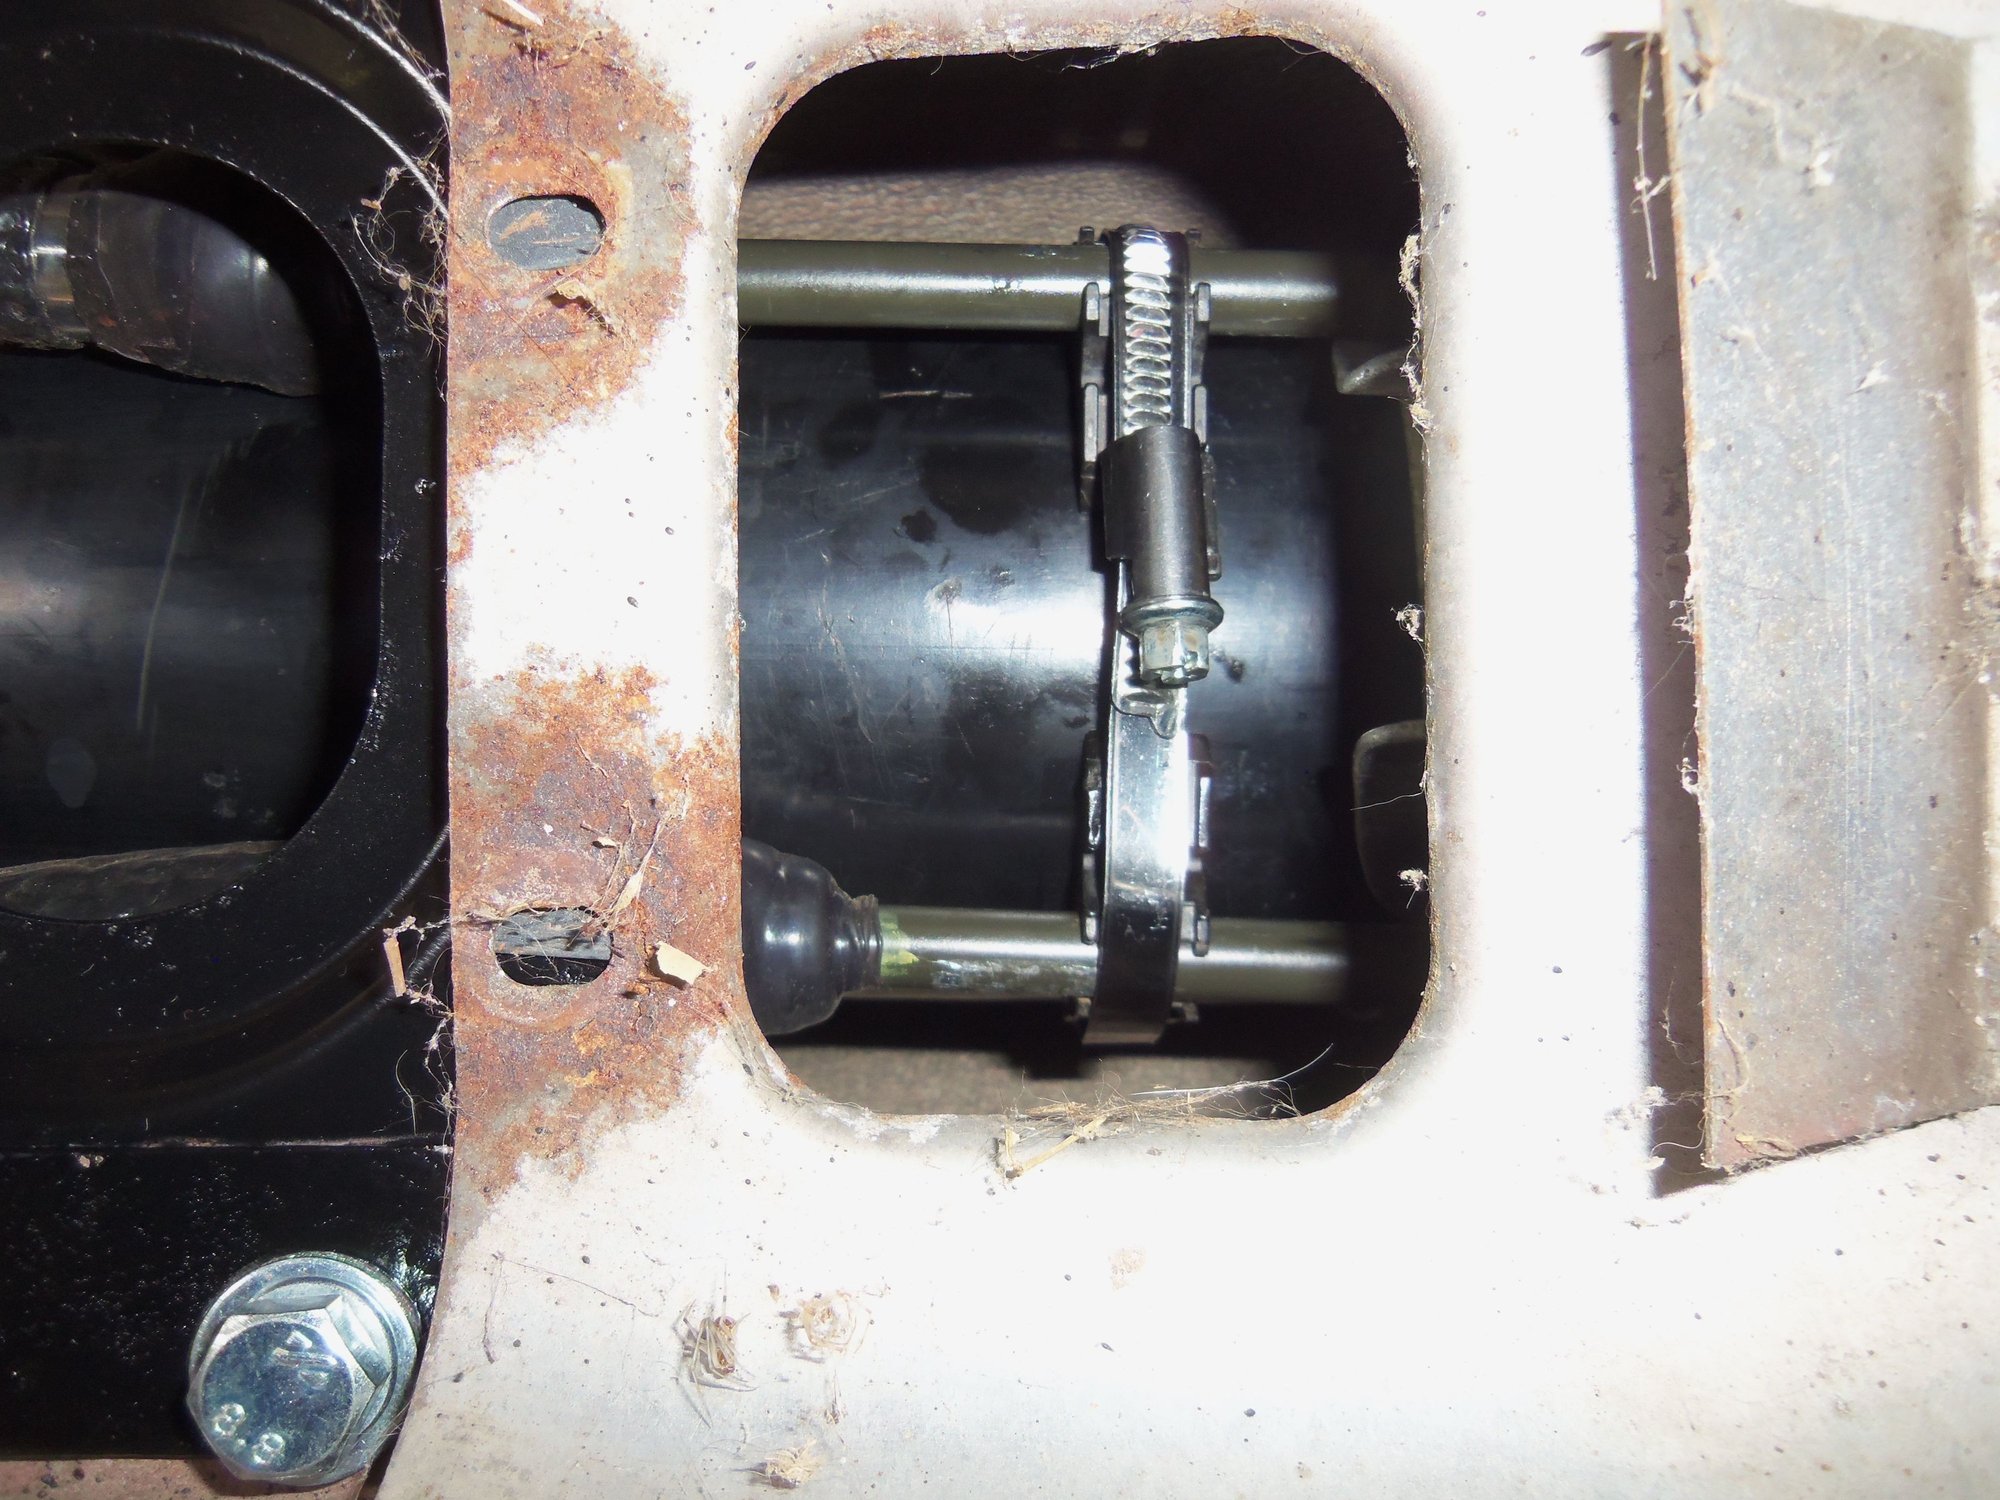
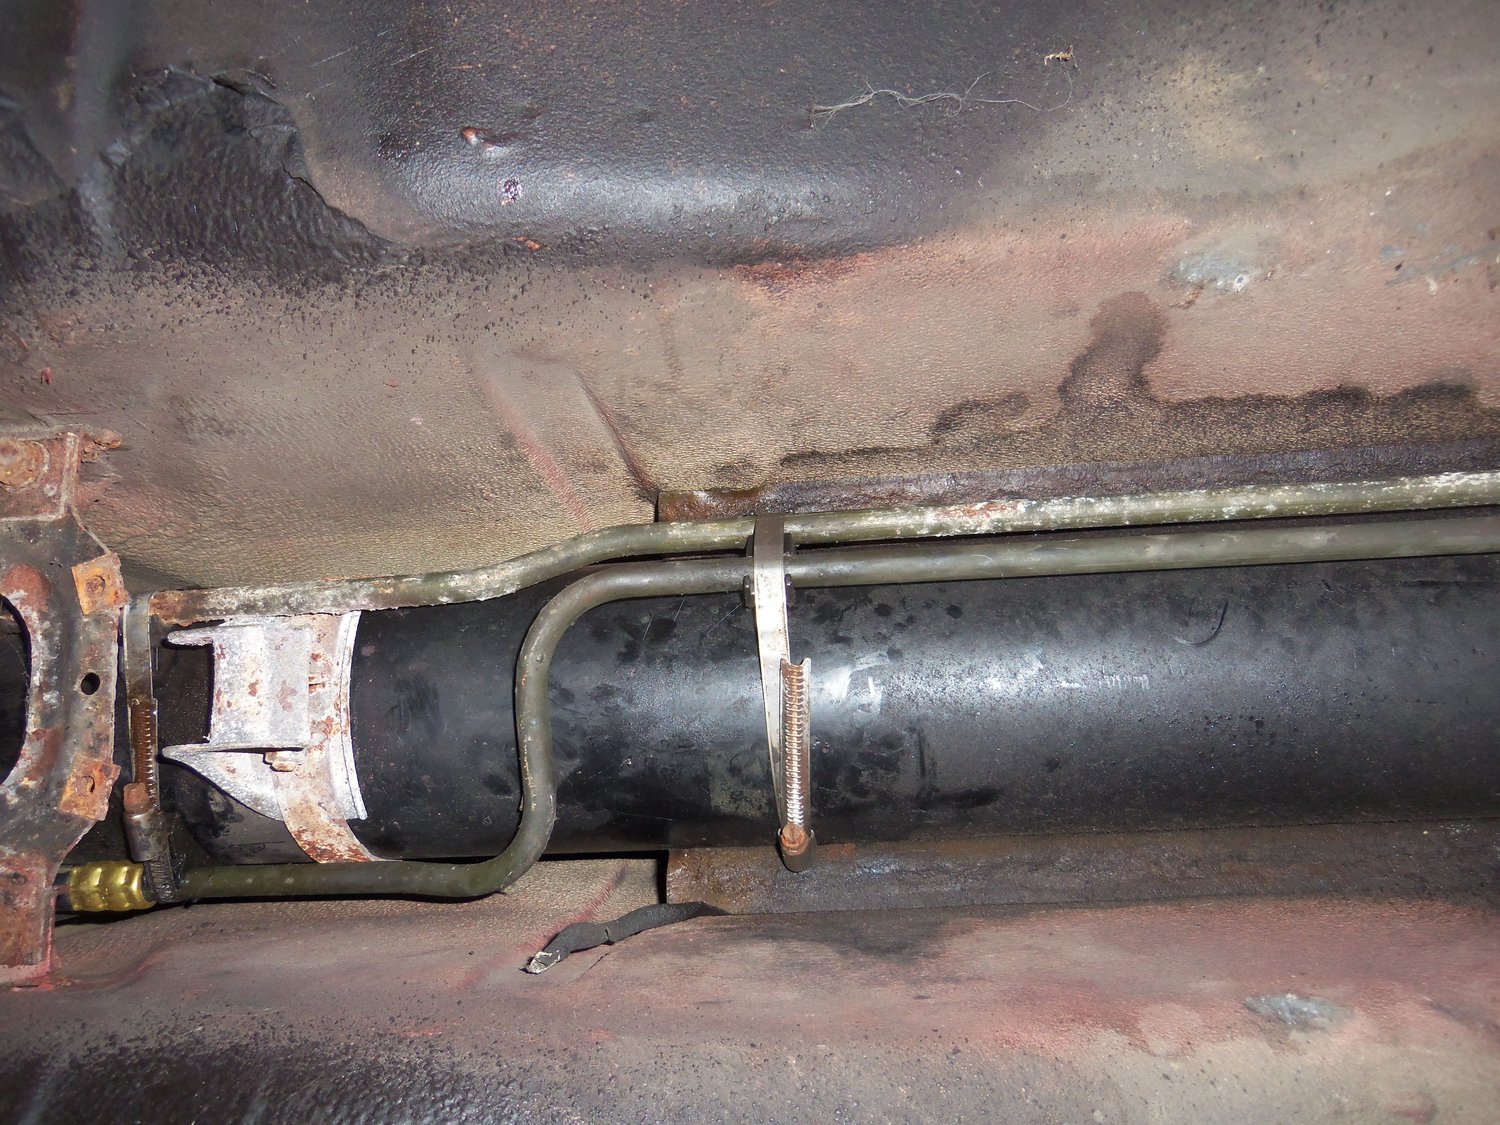
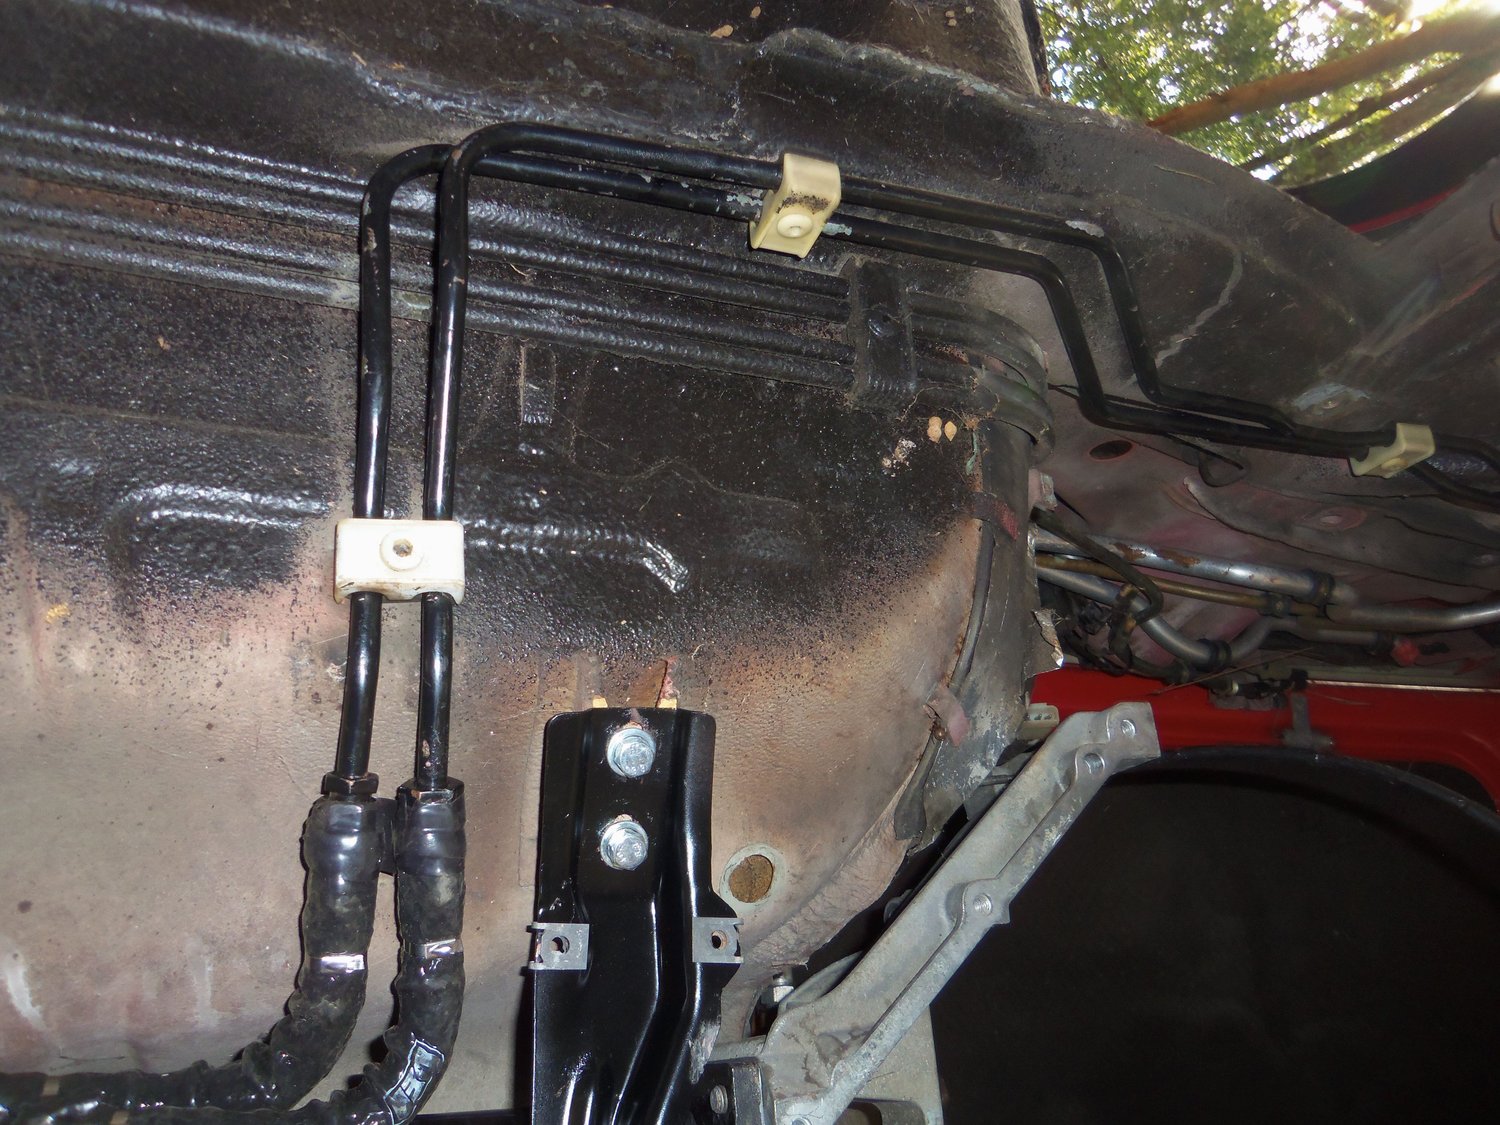
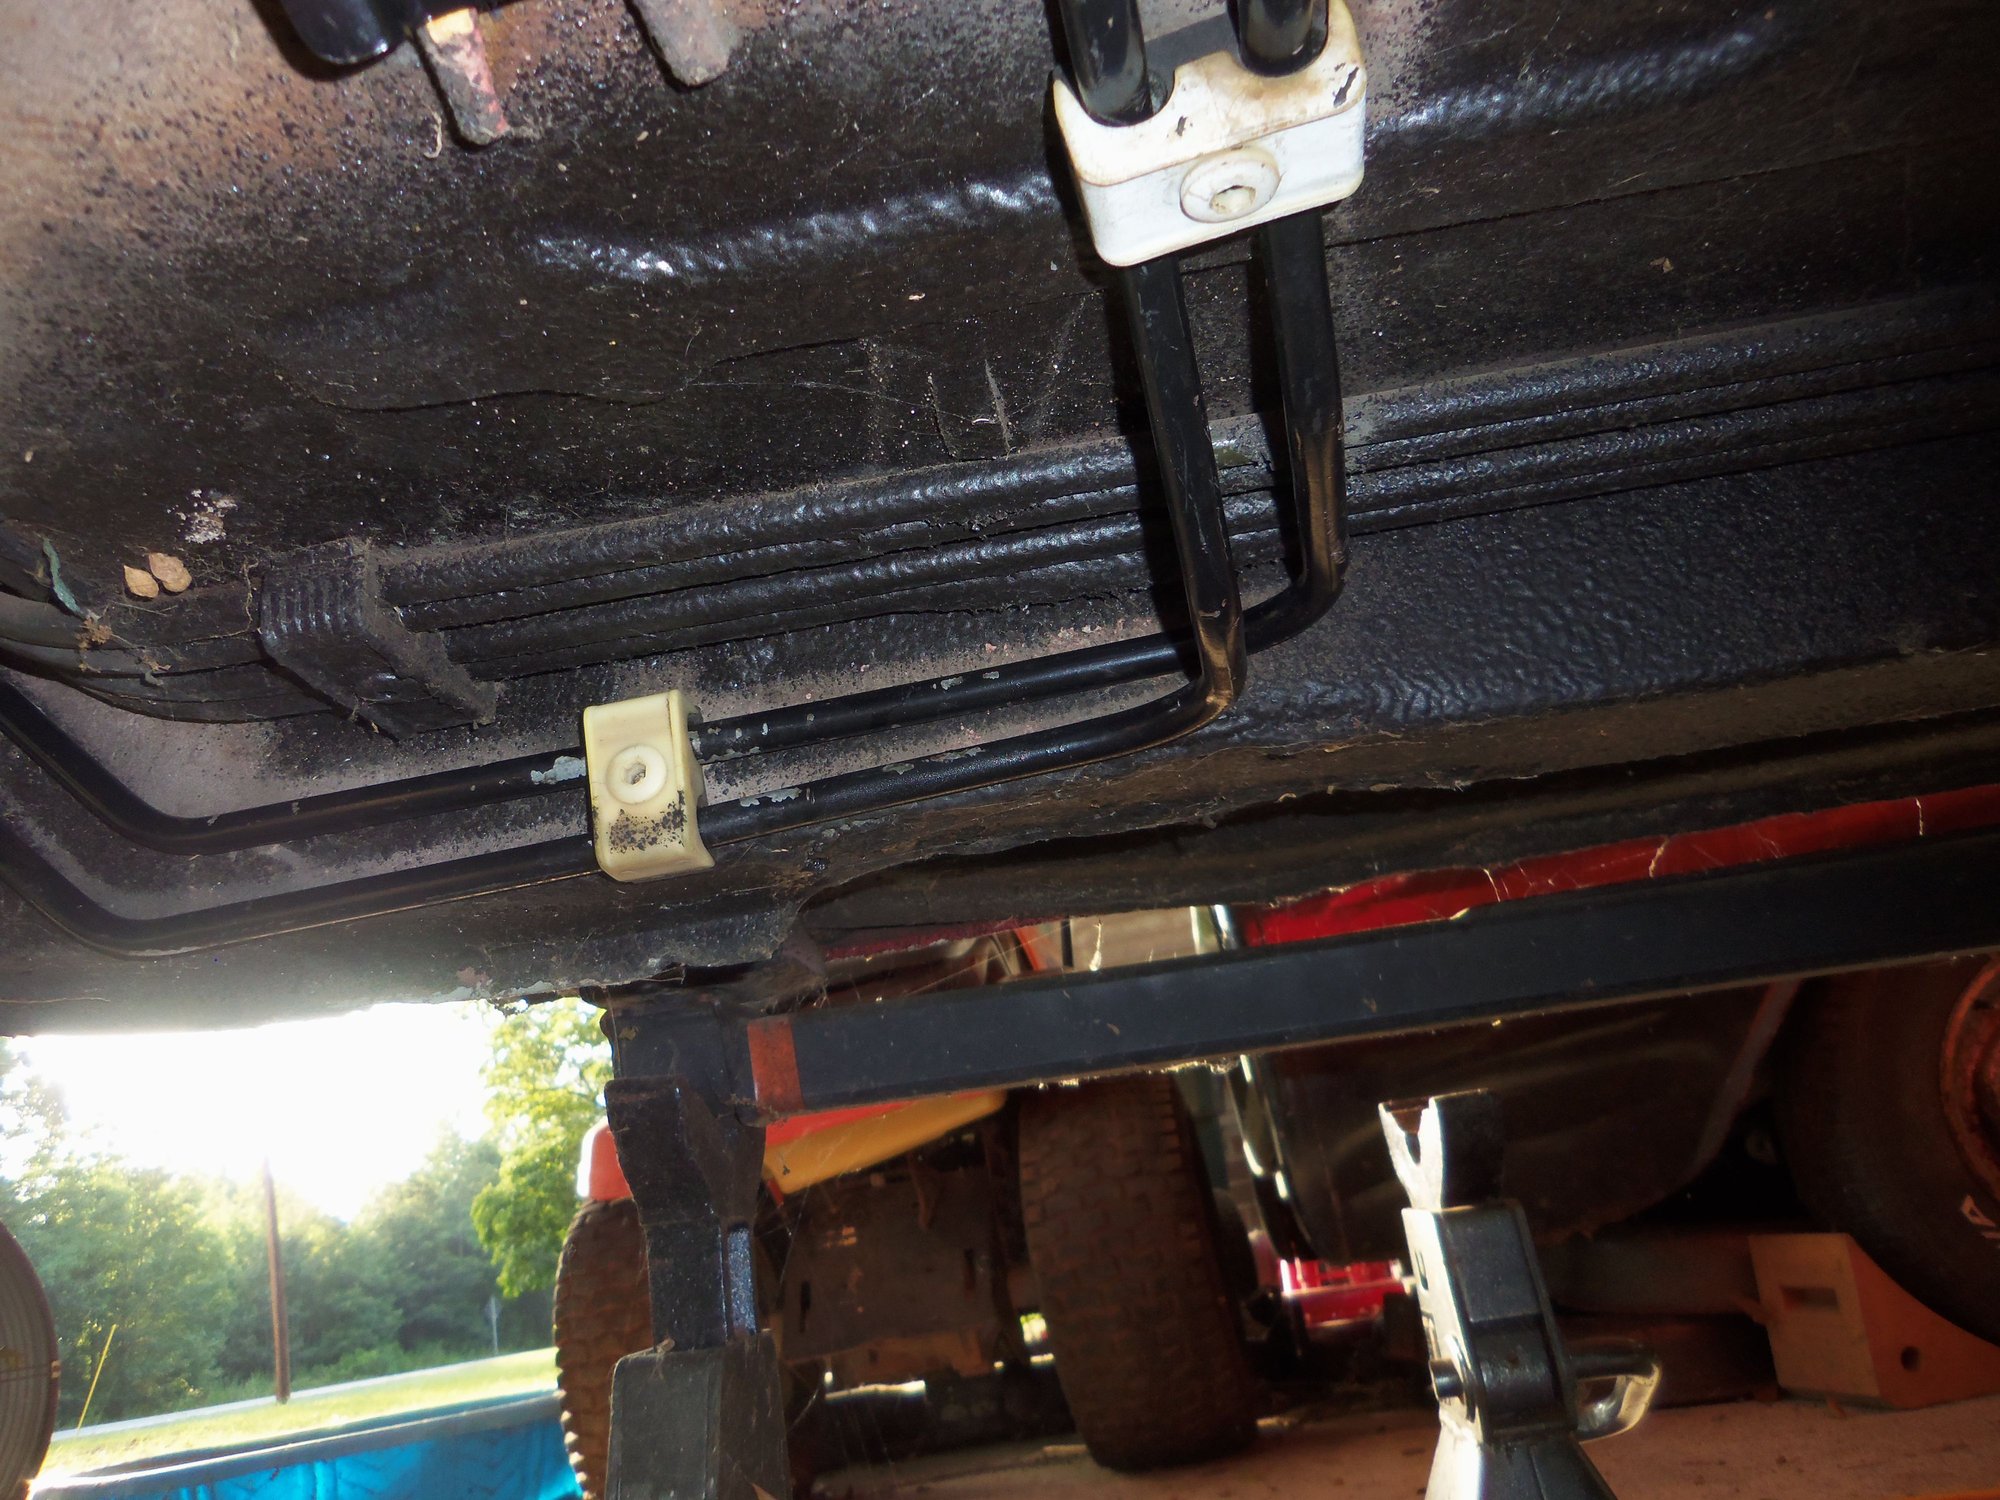
However, looking at it again, I am a bit concerned. The factory position of the hose clamp and support brackets for the transmission cooling lines was between the exhaust clamp and the rear body stiffening plate. I now have the clamp and supports in front of the exhaust clamp. This means there is maybe 6" of metal cooling line that goes back towards the transmission out of the supports. I don't know if I should put two more supports and a hose clamp around the lines and torque tube under the body stiffening plate. Put them right up against the junction of the rubber lines. What do you think...?
How the cooling lines were arranged before I took anything apart. Note the clamp at the junction of the rubber hose and metal line, just under the edge of the rear body stiffener.
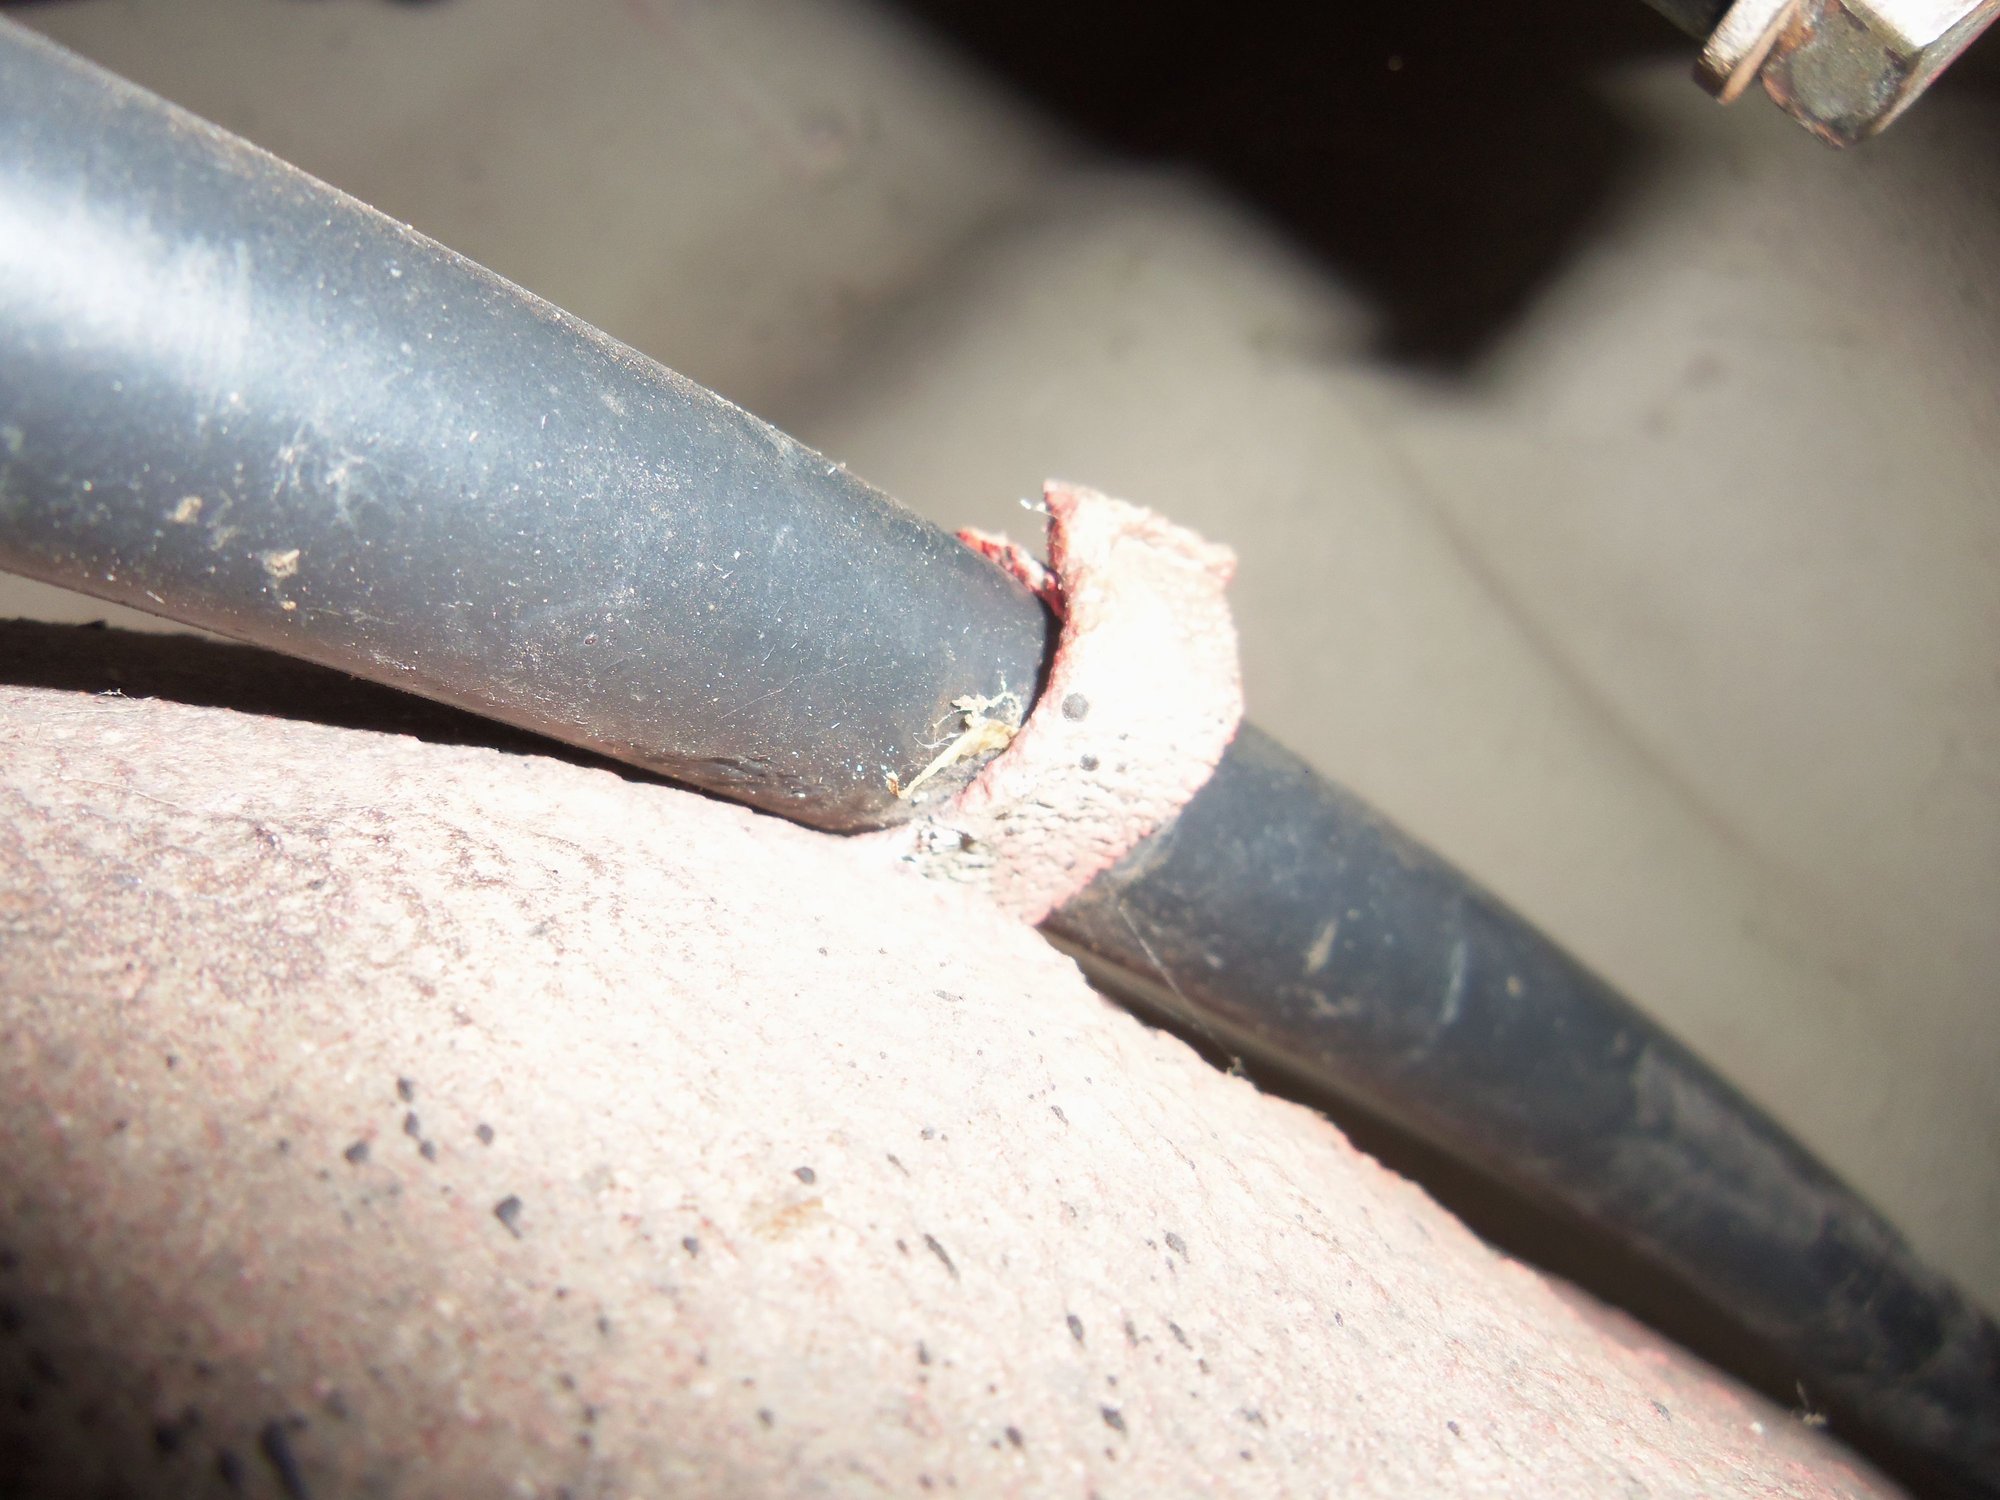
Next, and last misstep. Maybe. The transmission cooling lines would not line up with the clamp mounts on the floor pan and body sides. I had the lines pulled too far forward. Again I loosened the hose clamps on the torque tube and repositioned the lines so that everything fit properly. I did learn an unintended consequence of putting the DEI firesleeve on the rubber hose sections of the fire sleeve. The mid heat shield now presses up against them because of the increased diameter. I adjusted the 'clocking' position of the lines on the torque tube to minimize this. I think it will be OK.
Transmission cooling lines positioned and secured.
Before pushing the torque tube back up into position for the last time, I DID remember to install the foam under the transmission tunnel. It took a time or two to get it positioned where I was happy, but it is good. The foam was in good condition, still soft and pliable. Between the new transmission mounts and new motor mounts, I should have no hot air coming up from under the console anymore.
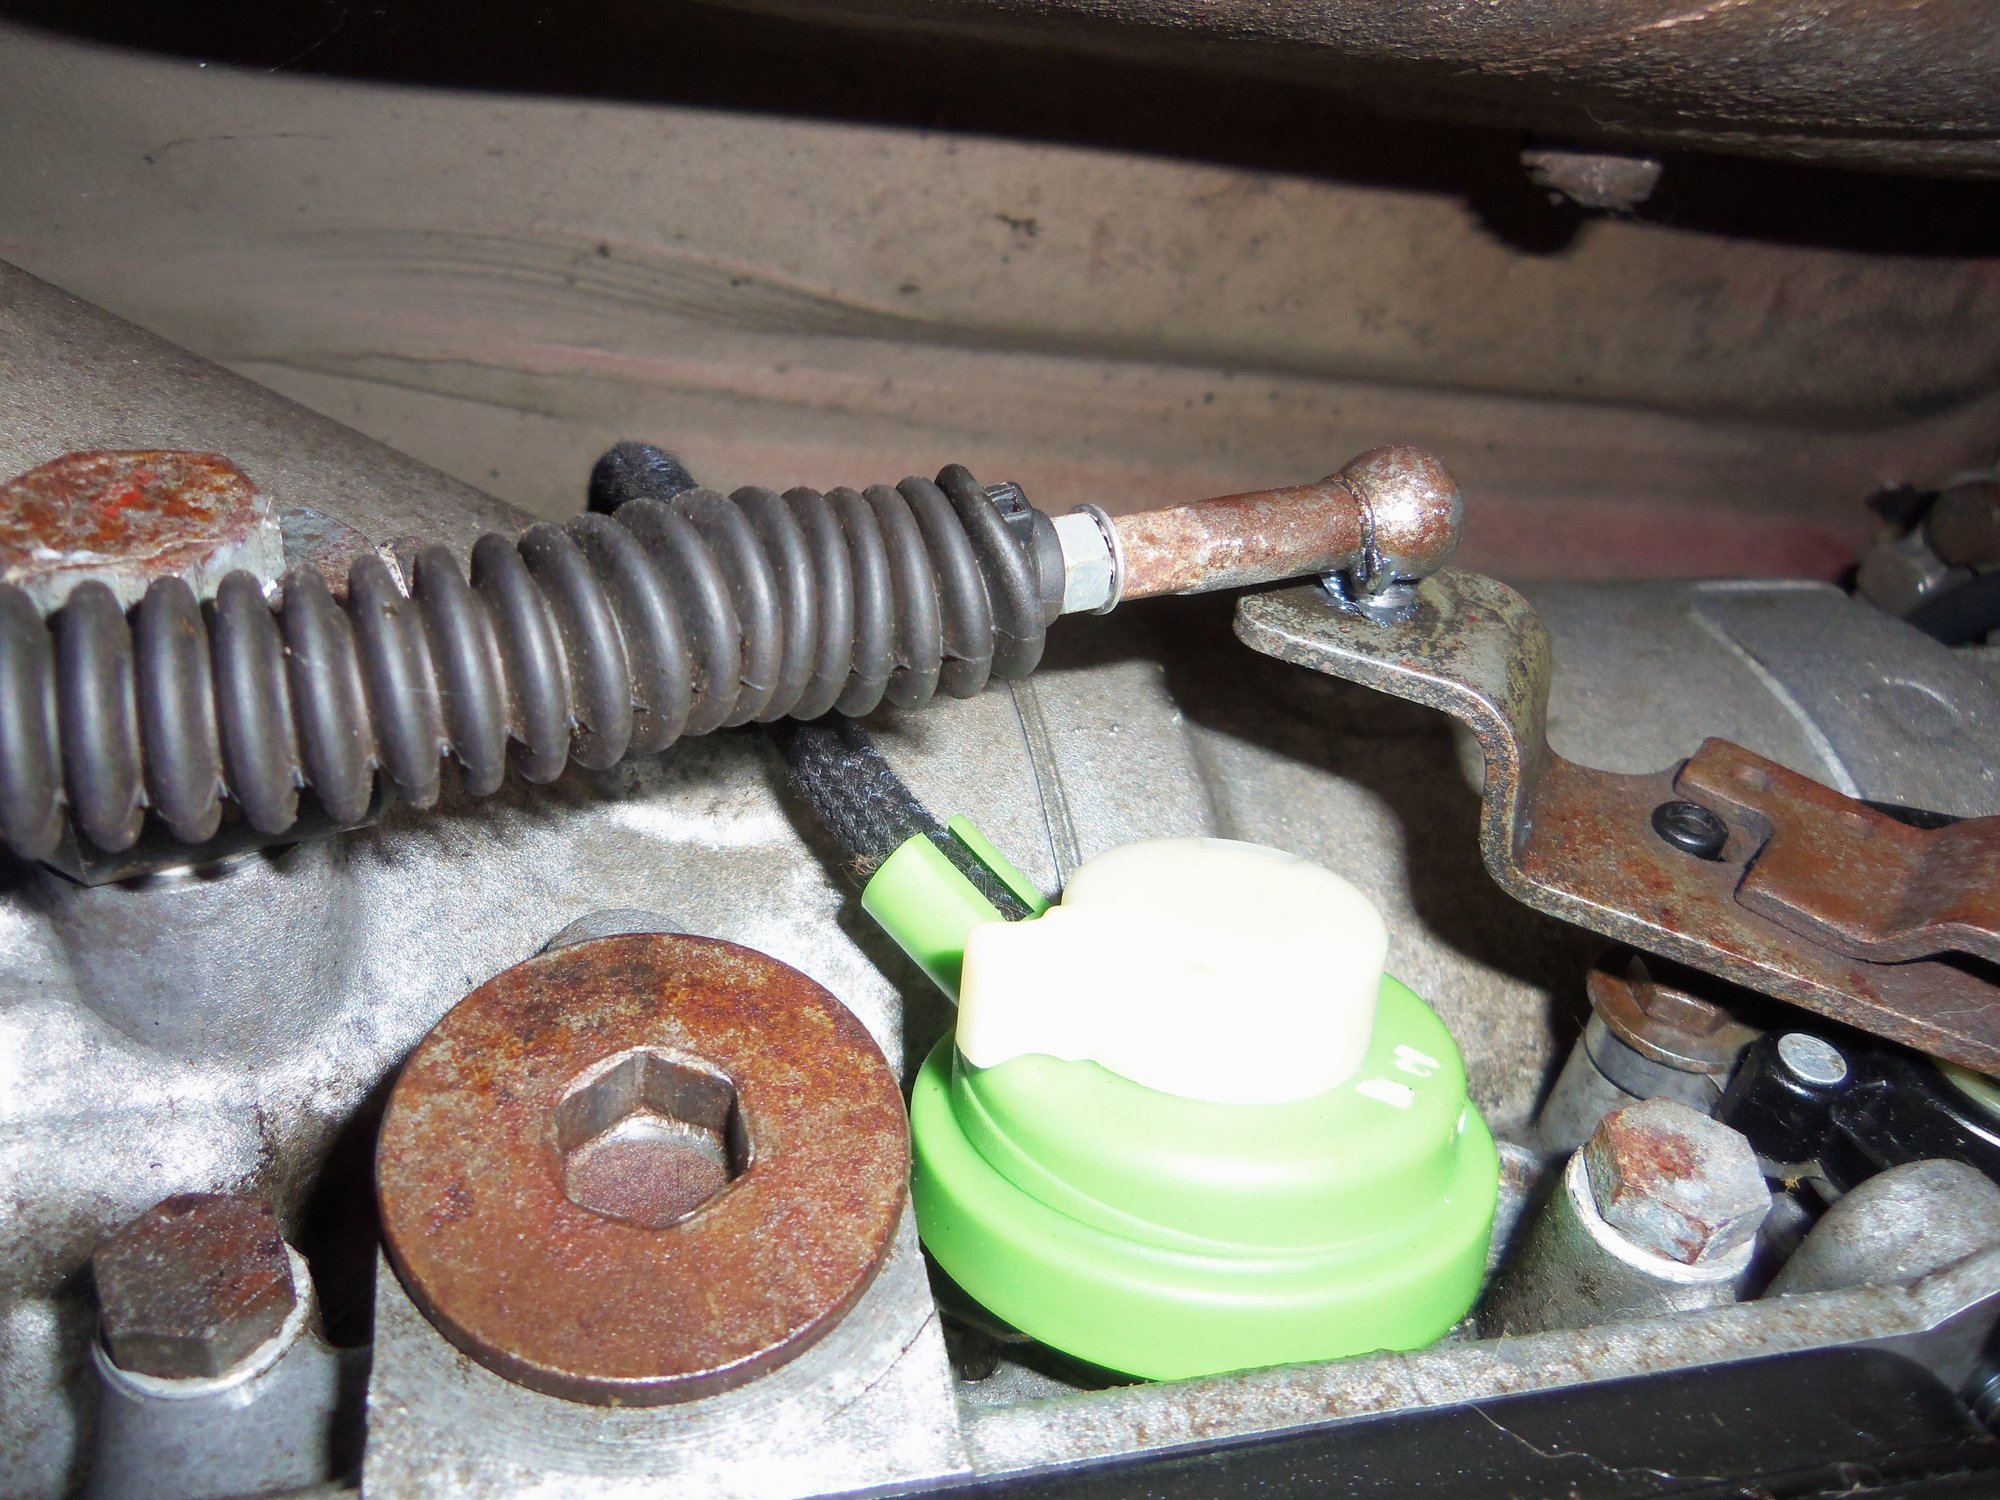
With the torque tube back into place, I reinstalled the support bracket for the shifter cable on the torque converter housing. I then adjusted the transmission end of the cable. With the shifter and transmission range selector lever in 'N', I screwed the end coupler on the threaded end until it fit right onto the ball on the range selector lever. Dwayne was able to feel for the tiny hole for the locking pin clip with the coupler installed. I am not so good. I started the pin in the hole, but held it back so it wouldn't obstruct the open end of the coupler. I put the whole thing on the ball, then locked the clip into place. Now, tightening the coupler lock nut was a pain in the a$$! The lock nut was a little tight on the threads. Every time I tightened the lock nut, it bound the coupling up so the coupling was always biased to one side or another. Meaning the coupling was turning on the ball. I wanted the coupling reasonably centered. In my mind, it would work smoother and wear less. I ended up holding the shaft with pliers and tightening the lock nut some. Then fully tightening the coupler against the lock nut. It worked and the coupling was centered on the ball. Wrapped it up by tightening tiny zip ties on the accordion boot.
Shift cable end coupler was a pain to tighten.
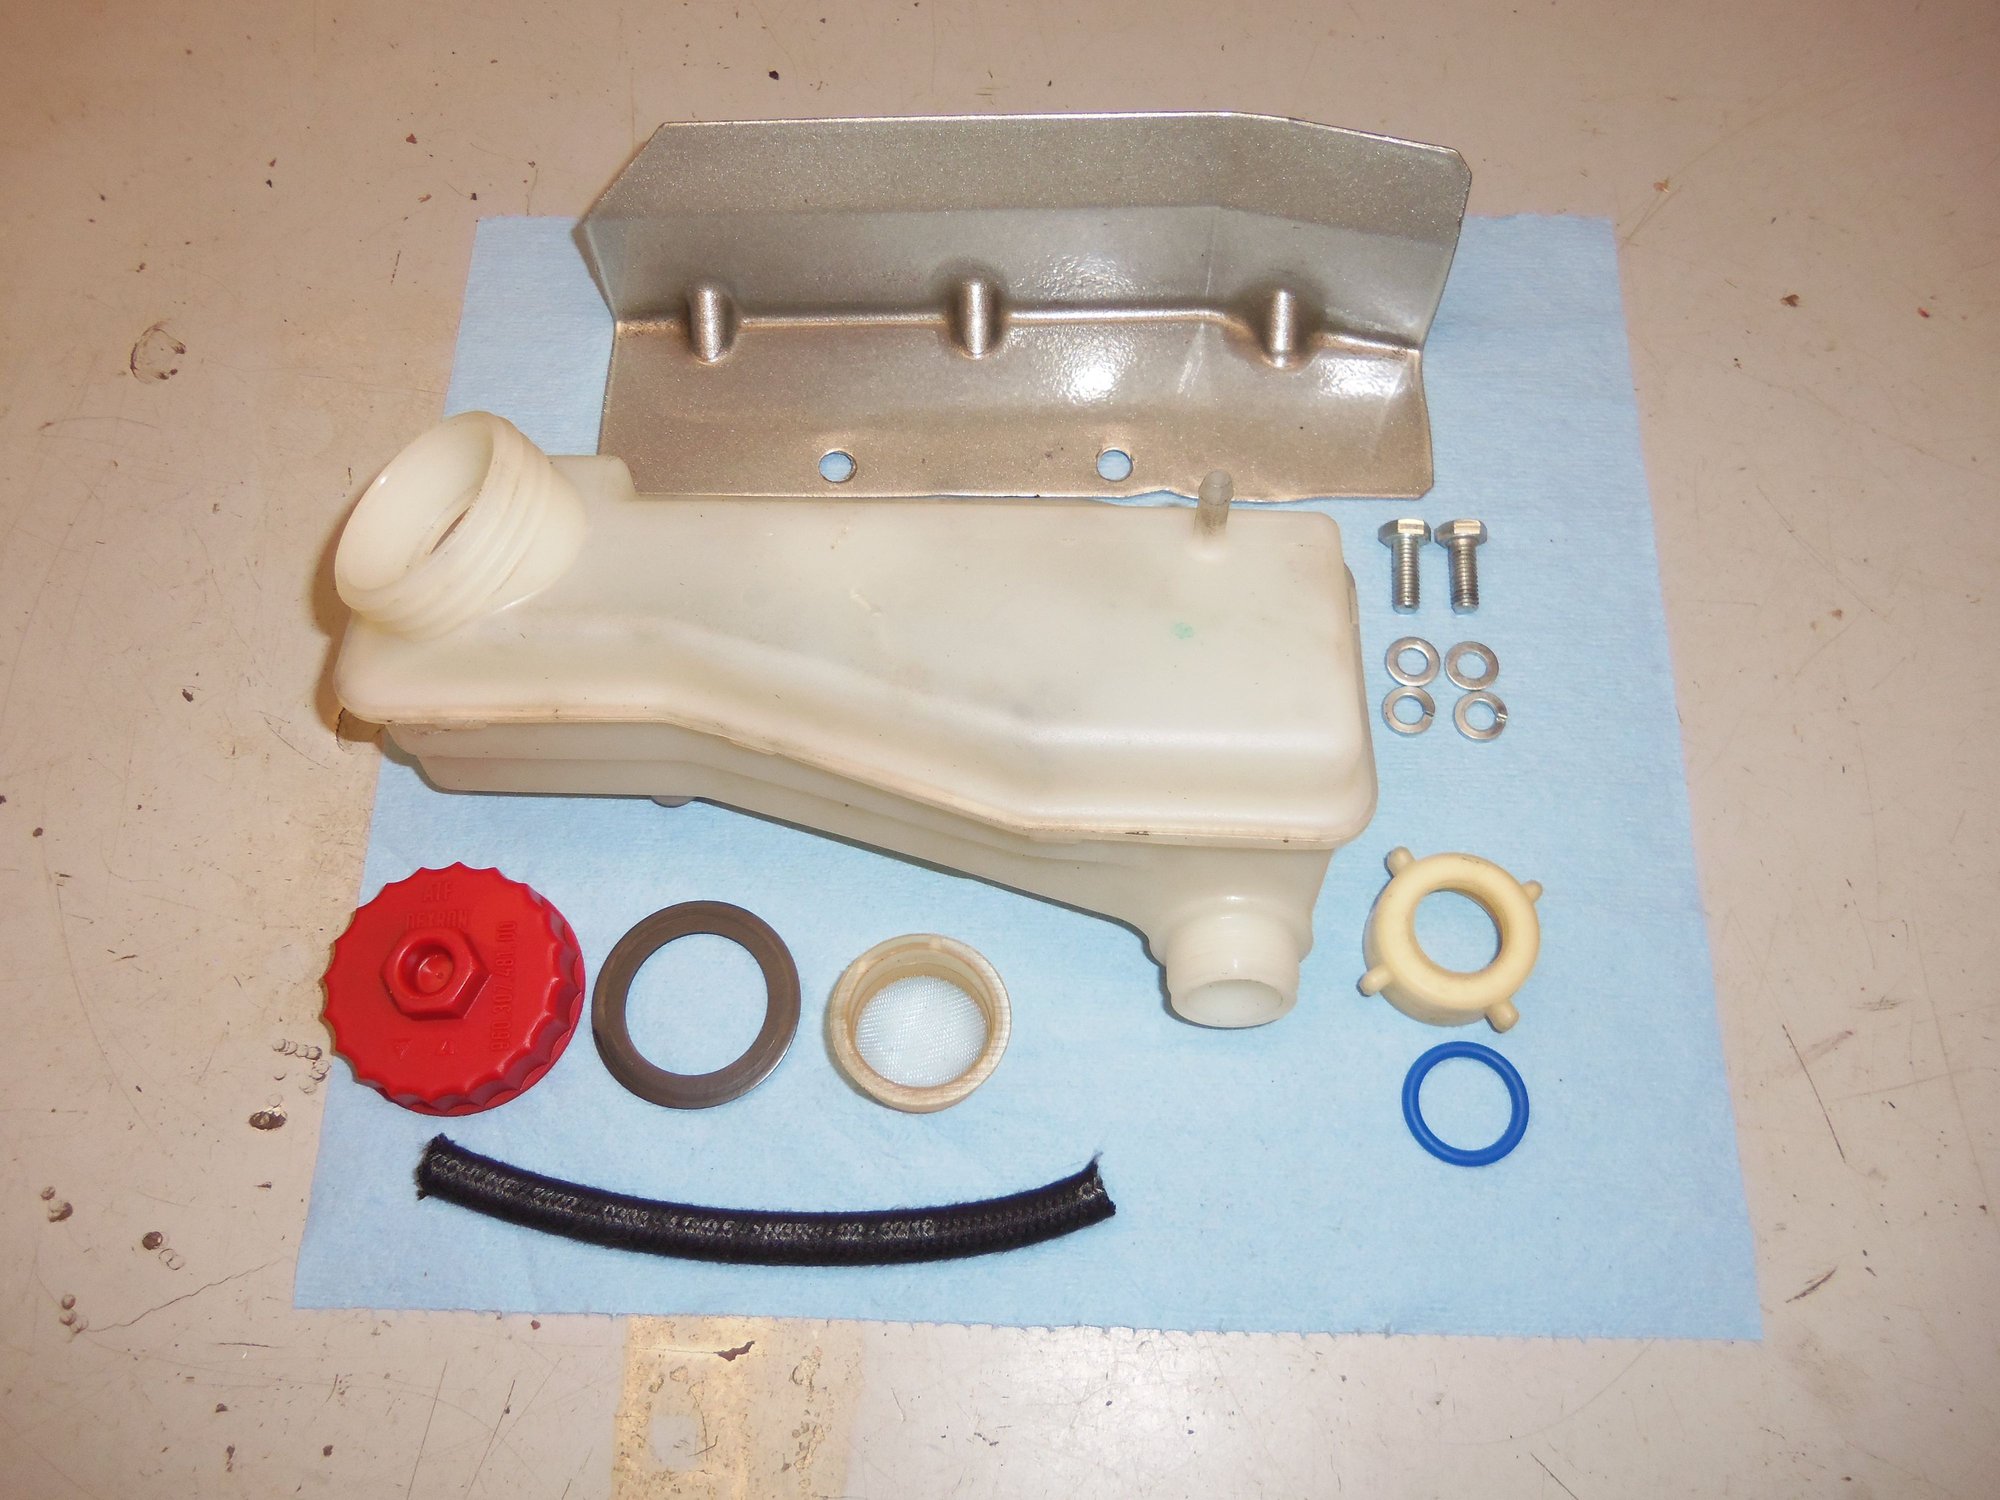
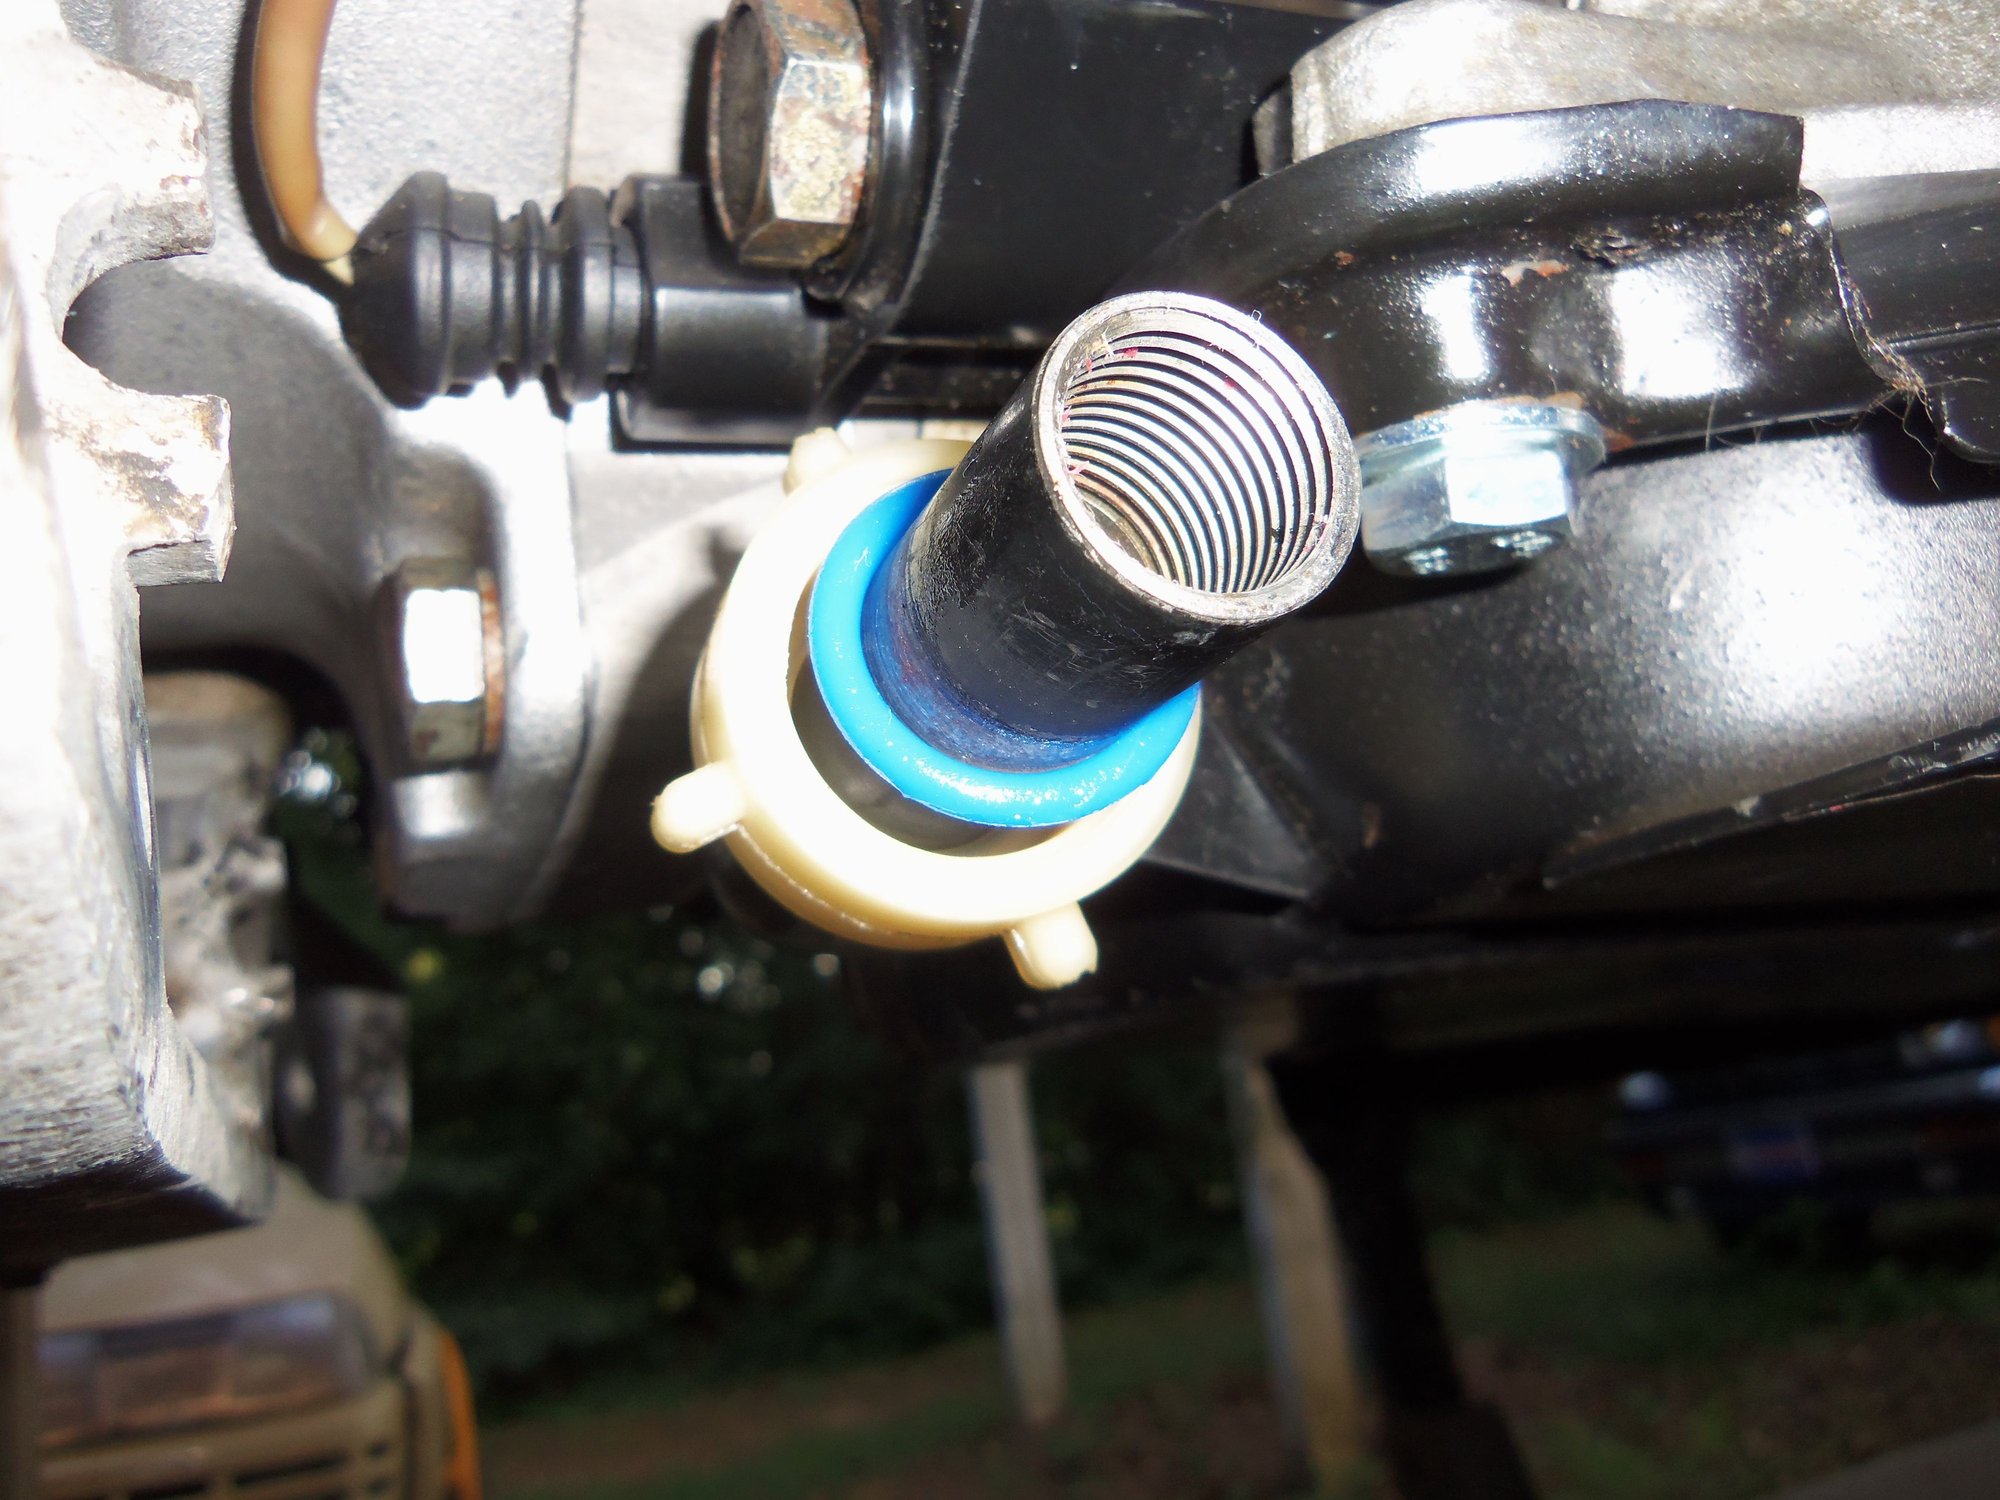
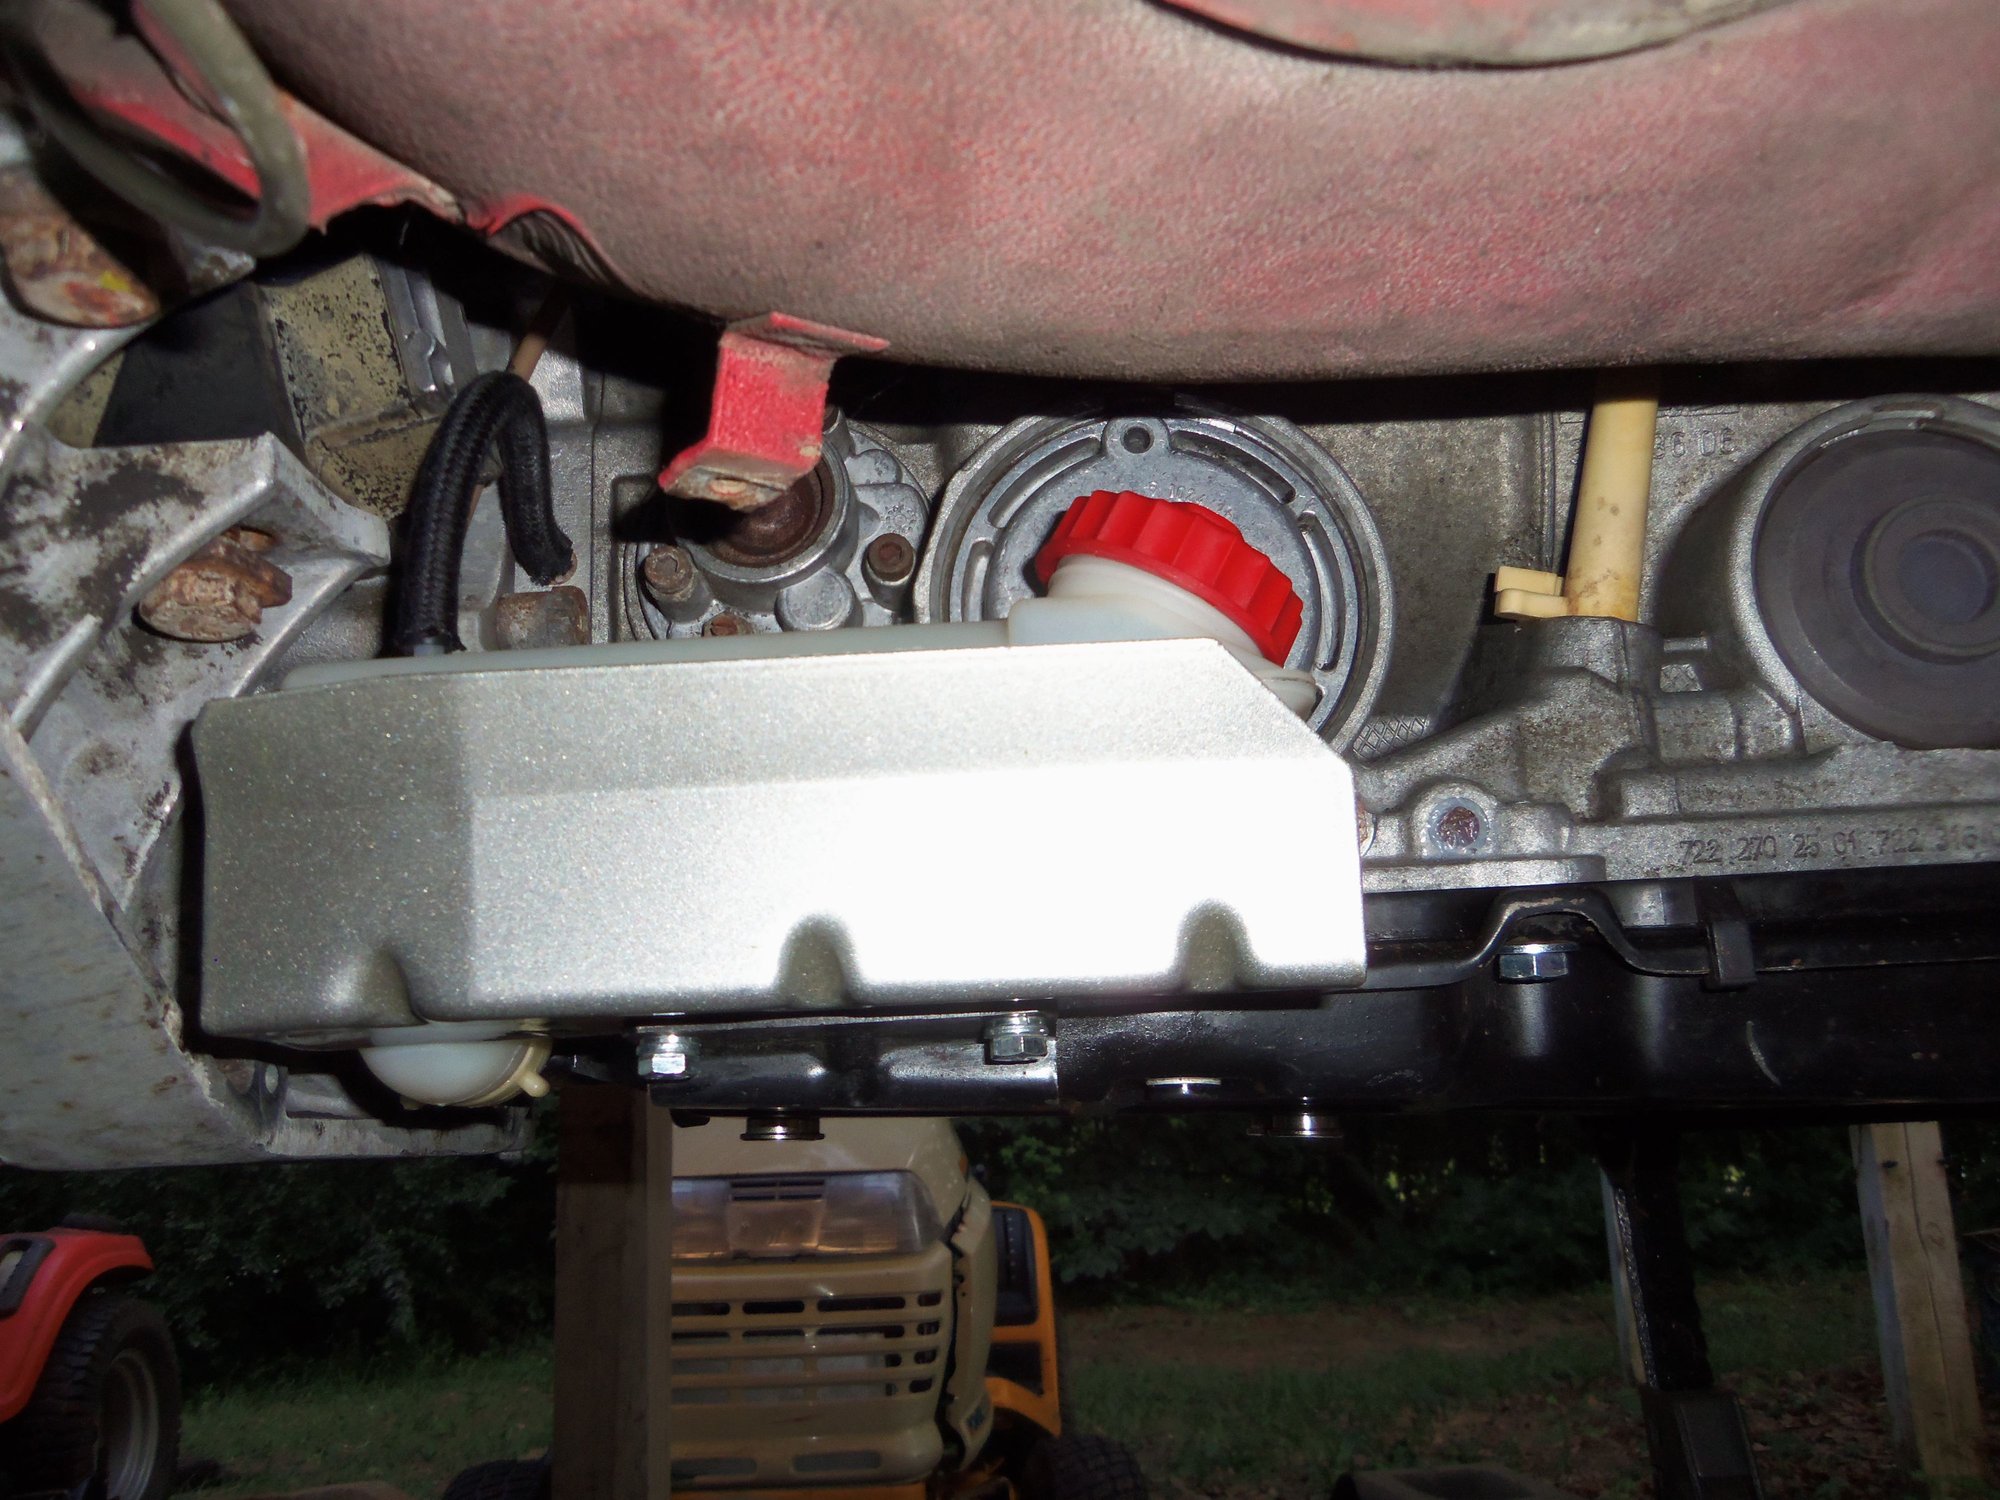
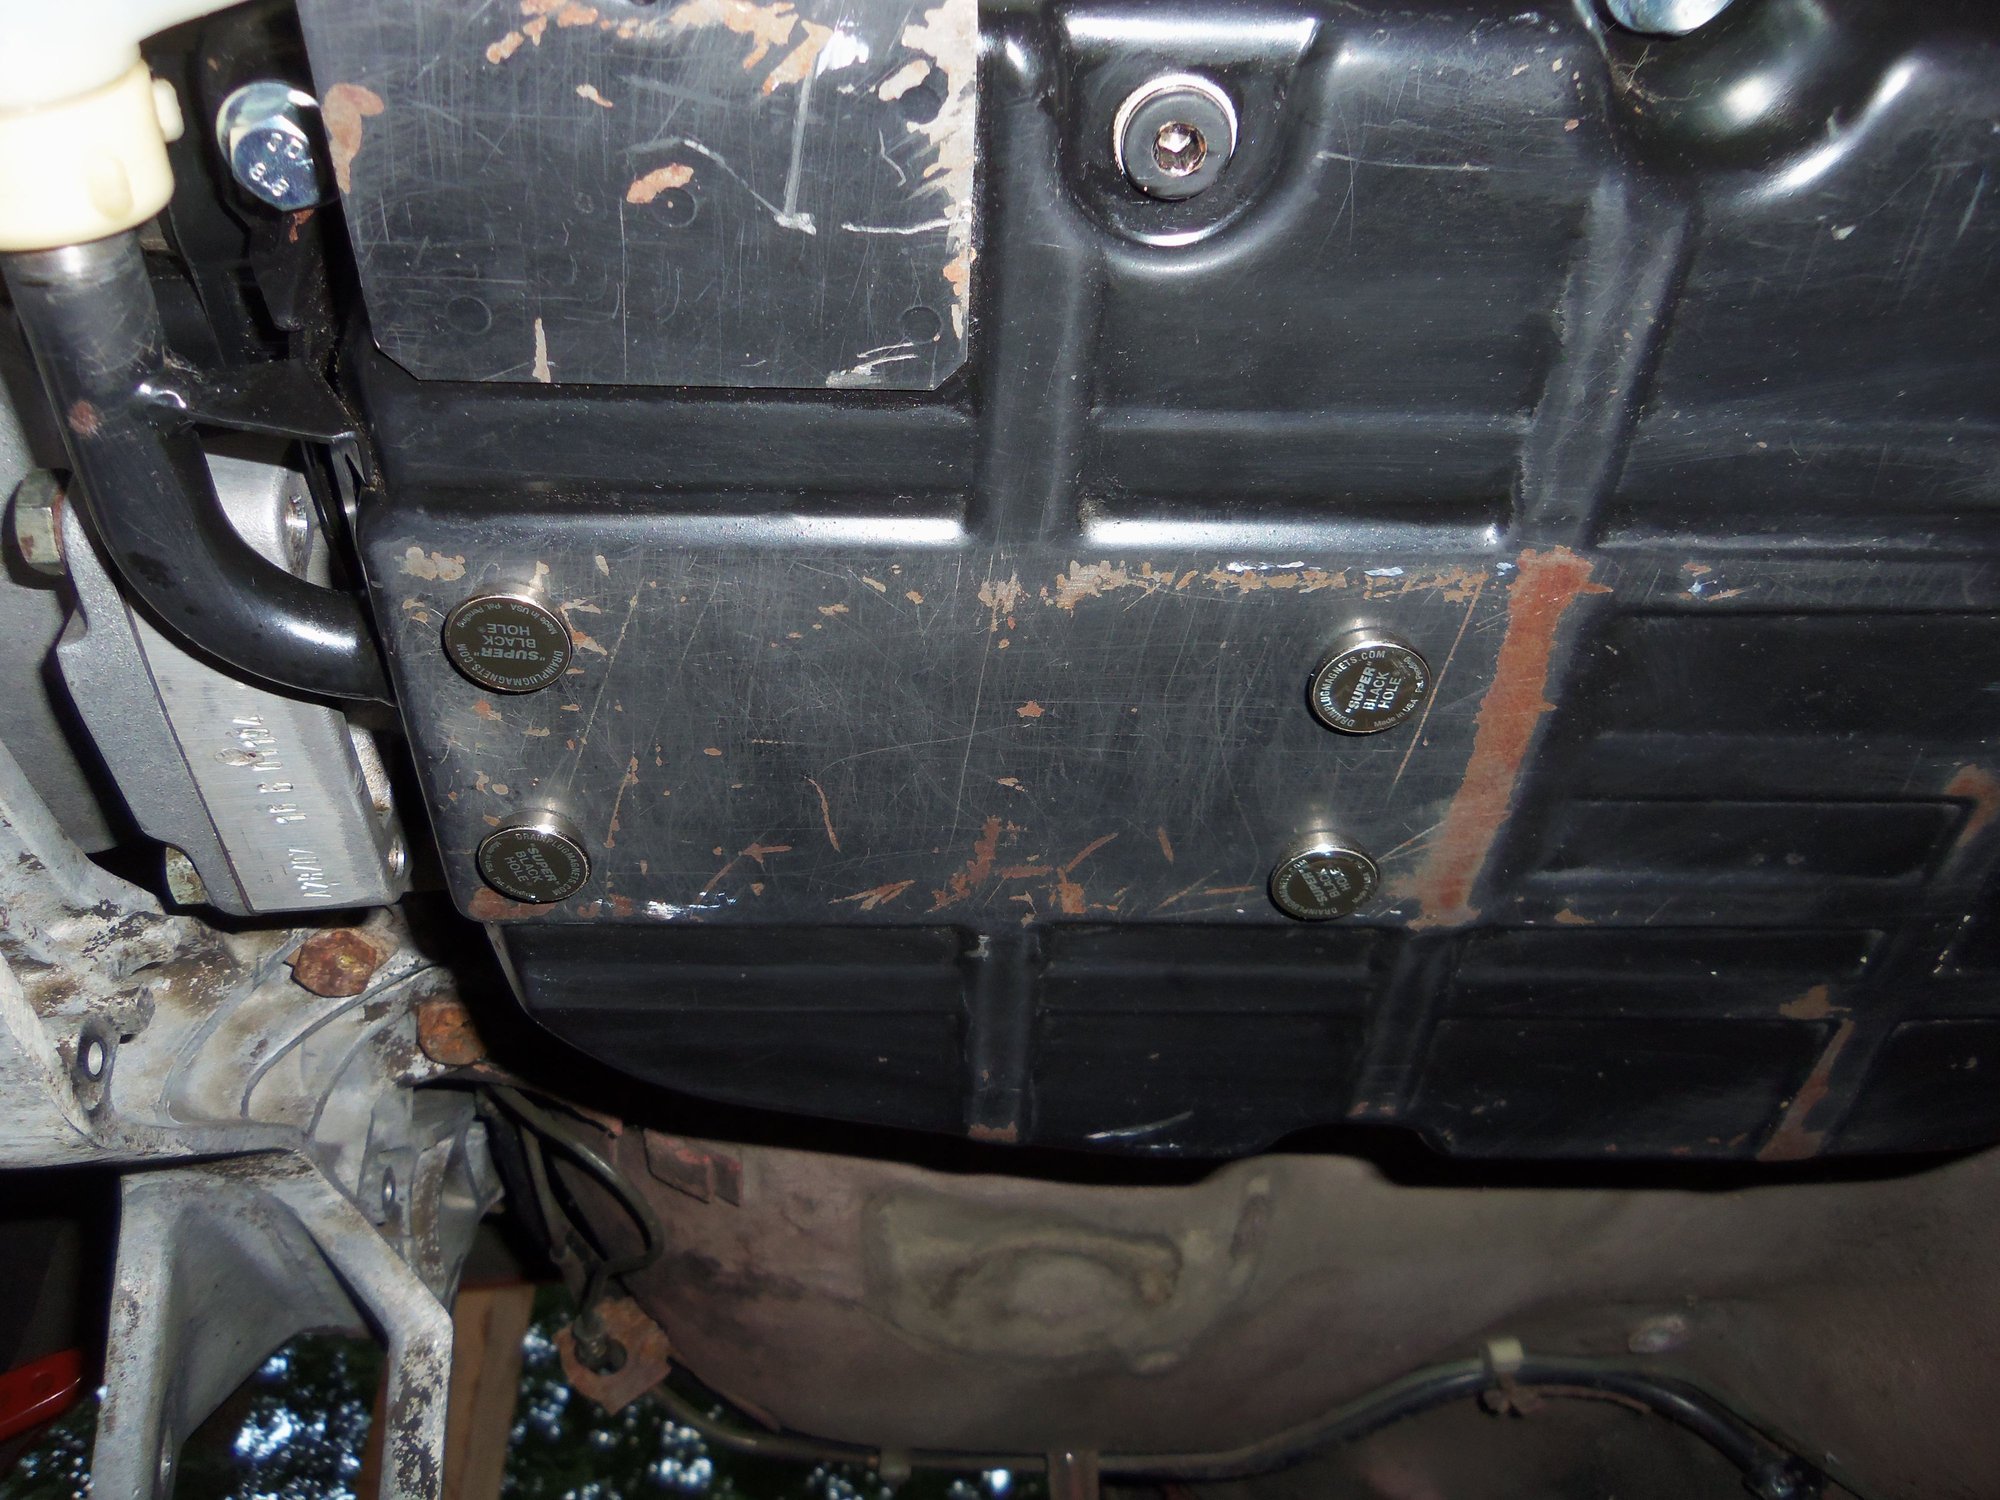
Last step was to install the transmission fluid reservoir. These parts had been cleaned in the past. The reservoir, cap, cap seal, and mounting O-ring were new 3 years ago, so I reused them. I did coat the mounting O-ring with DOW 111. The original vent line from the reservoir to the transmission was in good condition, but I replaced it anyway. I used 4.5mm OD braided line from Belmetric. It fit well. I finished it all off with four super strong magnets on the transmission pan. I got them from Mercedessource.com. Guy has decent stuff for the Mercedes 722.3 transmissions.
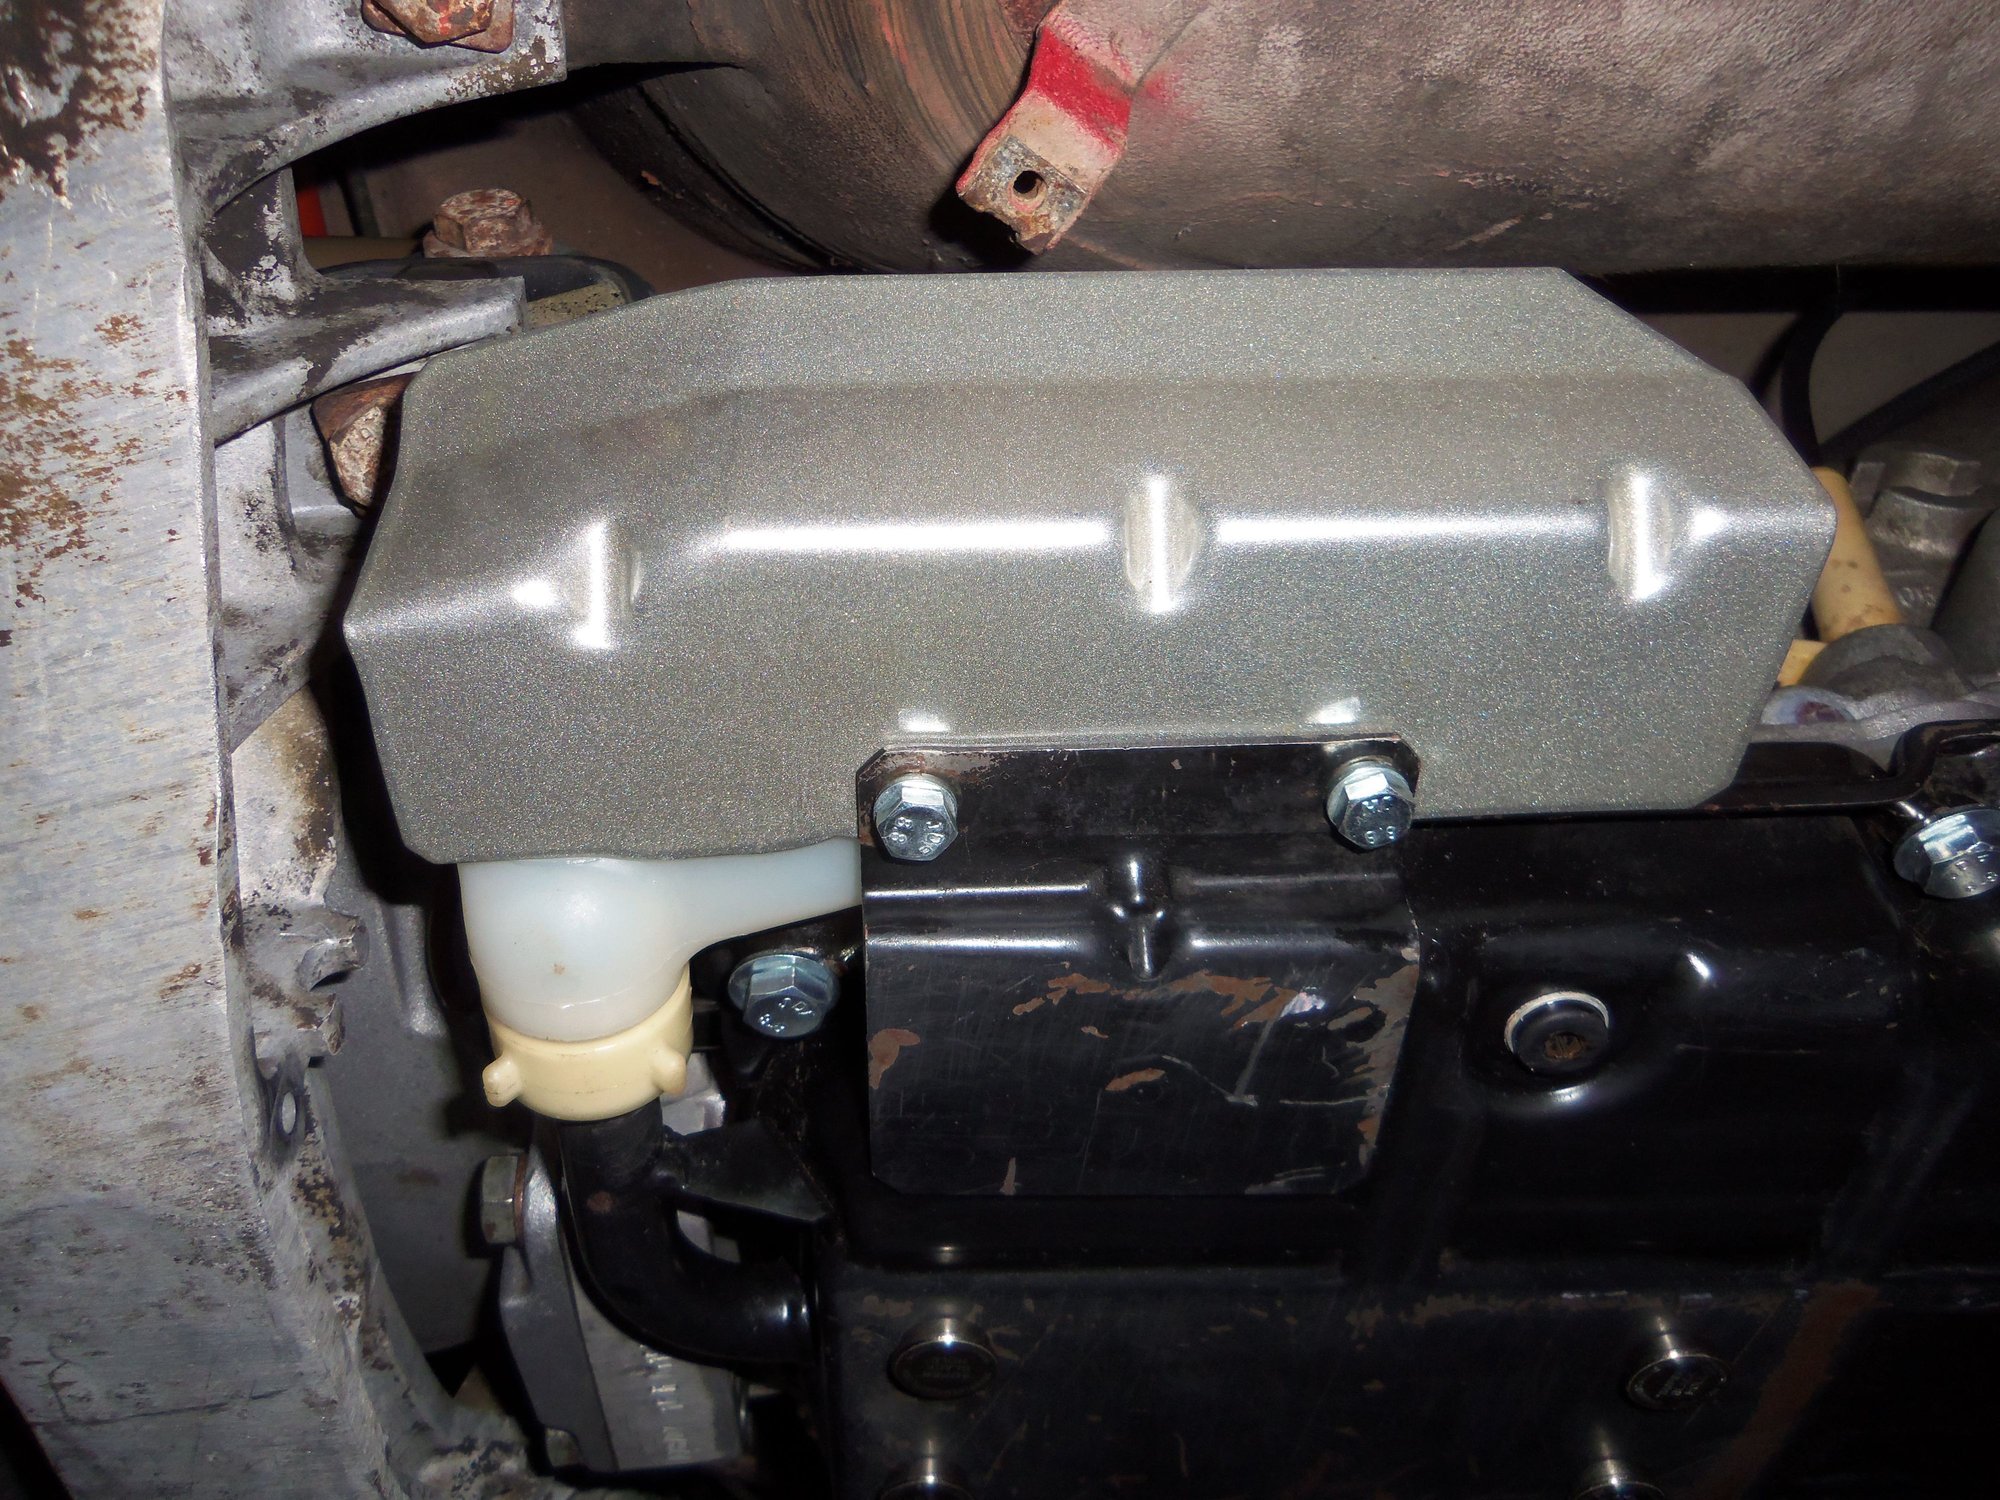
Cleaned transmission fluid reservoir and components. Note the nifty powder coated heat shield I got from 928 International.
In the middle of the photo is the barb for the transmission vent line.
New vent line.
I cleaned the sealing surface on the tube for the O-ring. (I know it doesn't look like it...)
Blue O-ring coated with DOW 111.
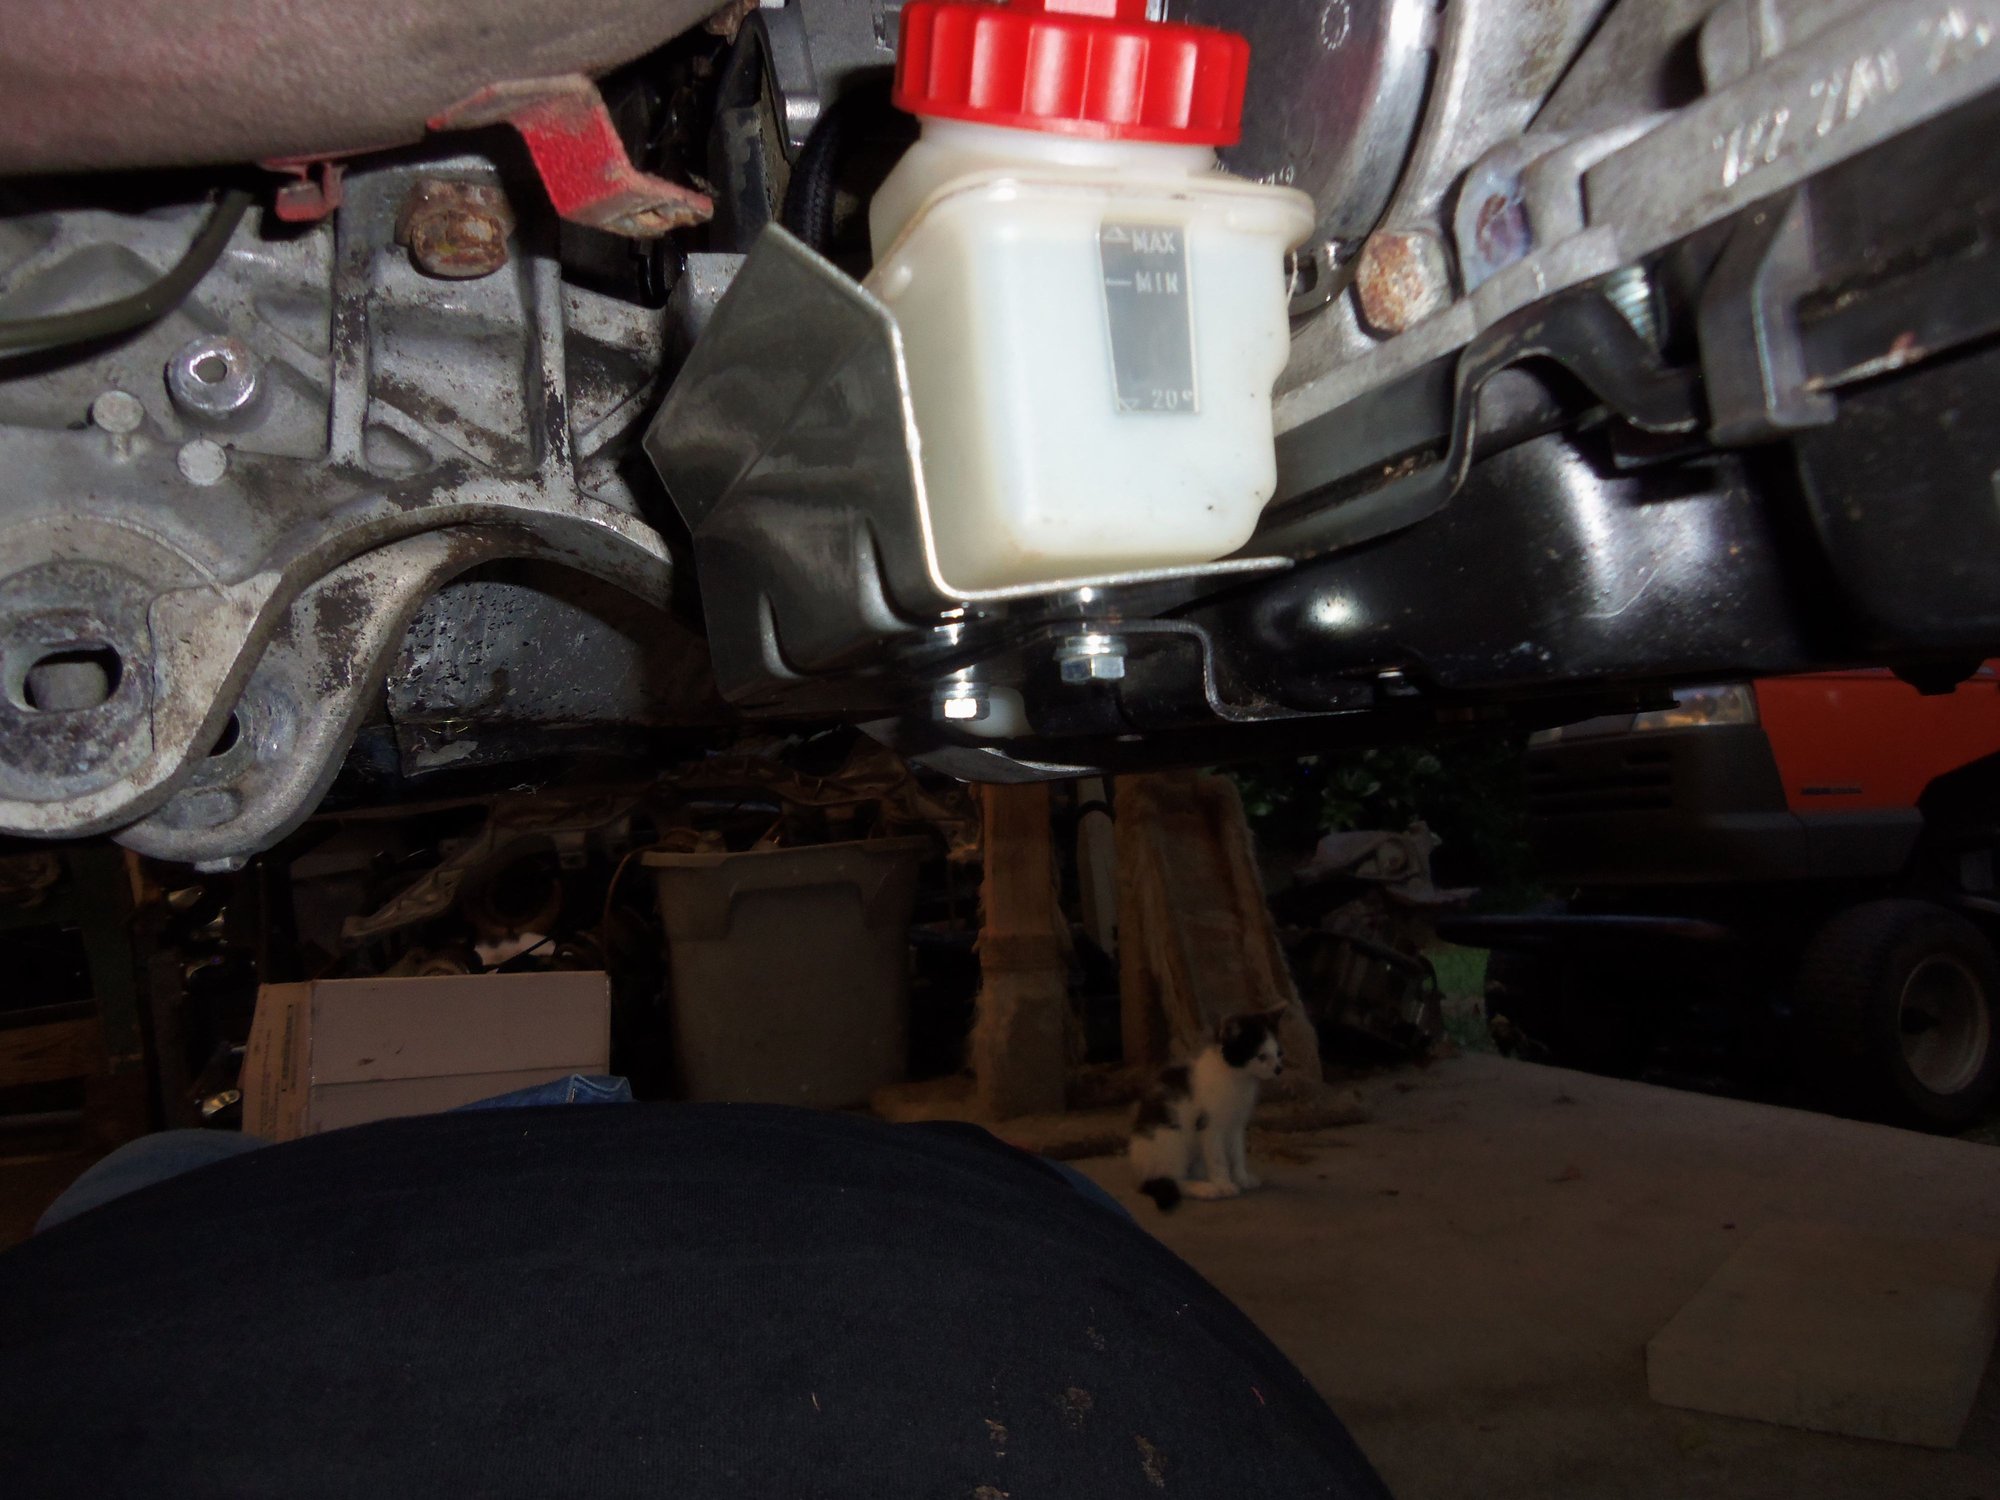
Reservoir installed and ready.
Four super strong magnets on the pan to catch any ferrous particles. Because I am stupid, I forgot to put them IN the pan...
Transmission is installed and done!
Torque tube is installed and done!
So, I am very relieved to have this big step done and over with!
Great stuff, and thanks for including the back-steps and recoveries. 18 Months is too long to expect to remember every little detail on how each bit fits exactly.
Some thoughts for those playing along at home:
-- The transmission end of the shift cable includes a stiffening/guide sleeve inside the bellows. That piece is fragile, critical, and not available as a separate piece. The shift cable tube is not secured to the torque tube at all, so it can go up in the tunnel before the foam and the torque tube. Use some gorilla tape to secure/protect the transmission end up against the tub until the gearbox is in place and secured.
-- The crossmember was a popular target for the cosmoline artists who spot-painted the underpinning on the car. Solvents and toothbrushes are OK but take a long time to get the job done. Use a steel-bristled detailer's toothbrush if you must do this by hand. Since the cavities in the casting are also safe havens for road crud and every drop of oil that was ever spilled from the engine and other cars on the road in front of you... Invest well in having a steam-cleaner do the crossmember clean-up for you. Trust Me, it's money very well spent. If you want it to look pristine, invest a little more in some soft-media blasting, -maybe- sandblasting, then immediately waste a couple cans of satin clear spray paint on it so it stays looking like new.
-- Carefully inspect the slots and cavities in the crossmember where the top dog-bone links sit. These get wallowed out especially if the bolts aren't kept super tight and the cam loads relieved before tightening. When the cavities are damaged, it becomes difficult or impossible to adjust the bolt position to set rear camber. Carl has a repair kit for this damage, a steel insert and cam/bolt kit that makes adjustment possible again.


 06-23-2019, 12:39 AM
 .
.