When you click on links to various merchants on this site and make a purchase, this can result in this site earning a commission. Affiliate programs and affiliations include, but are not limited to, the eBay Partner Network.
Like you, I imagine, whenever someone writes about their "cats" on this forum, I am momentarily confused.
Originally Posted by hlee96
great write-up! thanks so much for the archive-Hoi
You are quite welcome, Hoi!
Originally Posted by Geo55
Nacho average cat!! Way to go Seth, Nice write up. Think I am going to change the boots on my shifting cable. Might have them shipped with my Speedo from Mark @ 928 intl. (Hope they reply soon). Going to go through the same thing over the holidays. Putting super bearings and super clamp in along with converter bearings, and seals in rear end.
Thank you! Doing the boots is a worthwhile task. Maybe not as important as keeping crud out of the CV joints, but good to keep crud out of the cable. IIRC, the boots were not terribly expensive. Good Luck with your work! It is all doable, just takes time. Which seals in the rear end are you replacing?
Originally Posted by Imo000
Looks good!
Thank you, Imo000!
Originally Posted by drscottsmith
Purdy! I love your attention to details, Seth!
I can't wait to have your eyes commenting on my exterior and interior refurb project on Copper.
Hi Nate!
Unfortunately, nothing to update. The past two weeks have been spent at work, some nights mandatory. The rest of the nights were voluntary. Triple time is a tempting mistress.
Off work, now I am dealing with replacing my washer and dryer that has devolved into a fiasco.
New 300M drive shaft was ordered from Greg Brown several days ago. I am awaiting torque converter bearings in the mail. The above mentioned triple time is intended to pay for the Superbearings.
I am hoping to finish disassembling the torque tube this coming weekend.
Seth, just wanted to let you know I used Constantine's Superbearings on my '89 944 S2 last year and they are worth every penny. The car had a teeth jarring vibration when I bought it. After replacing those bearings (along with the clutch, transmission and engine mounts and a new suspension) it's smooth as silk. You can probably tell I can't really attribute everything to those bearings, but they sure as heck didn't hurt.
I expect you'll be very happy with them. When it comes time to rebuild the TT on my '85 928 there's only one person I'll go to.
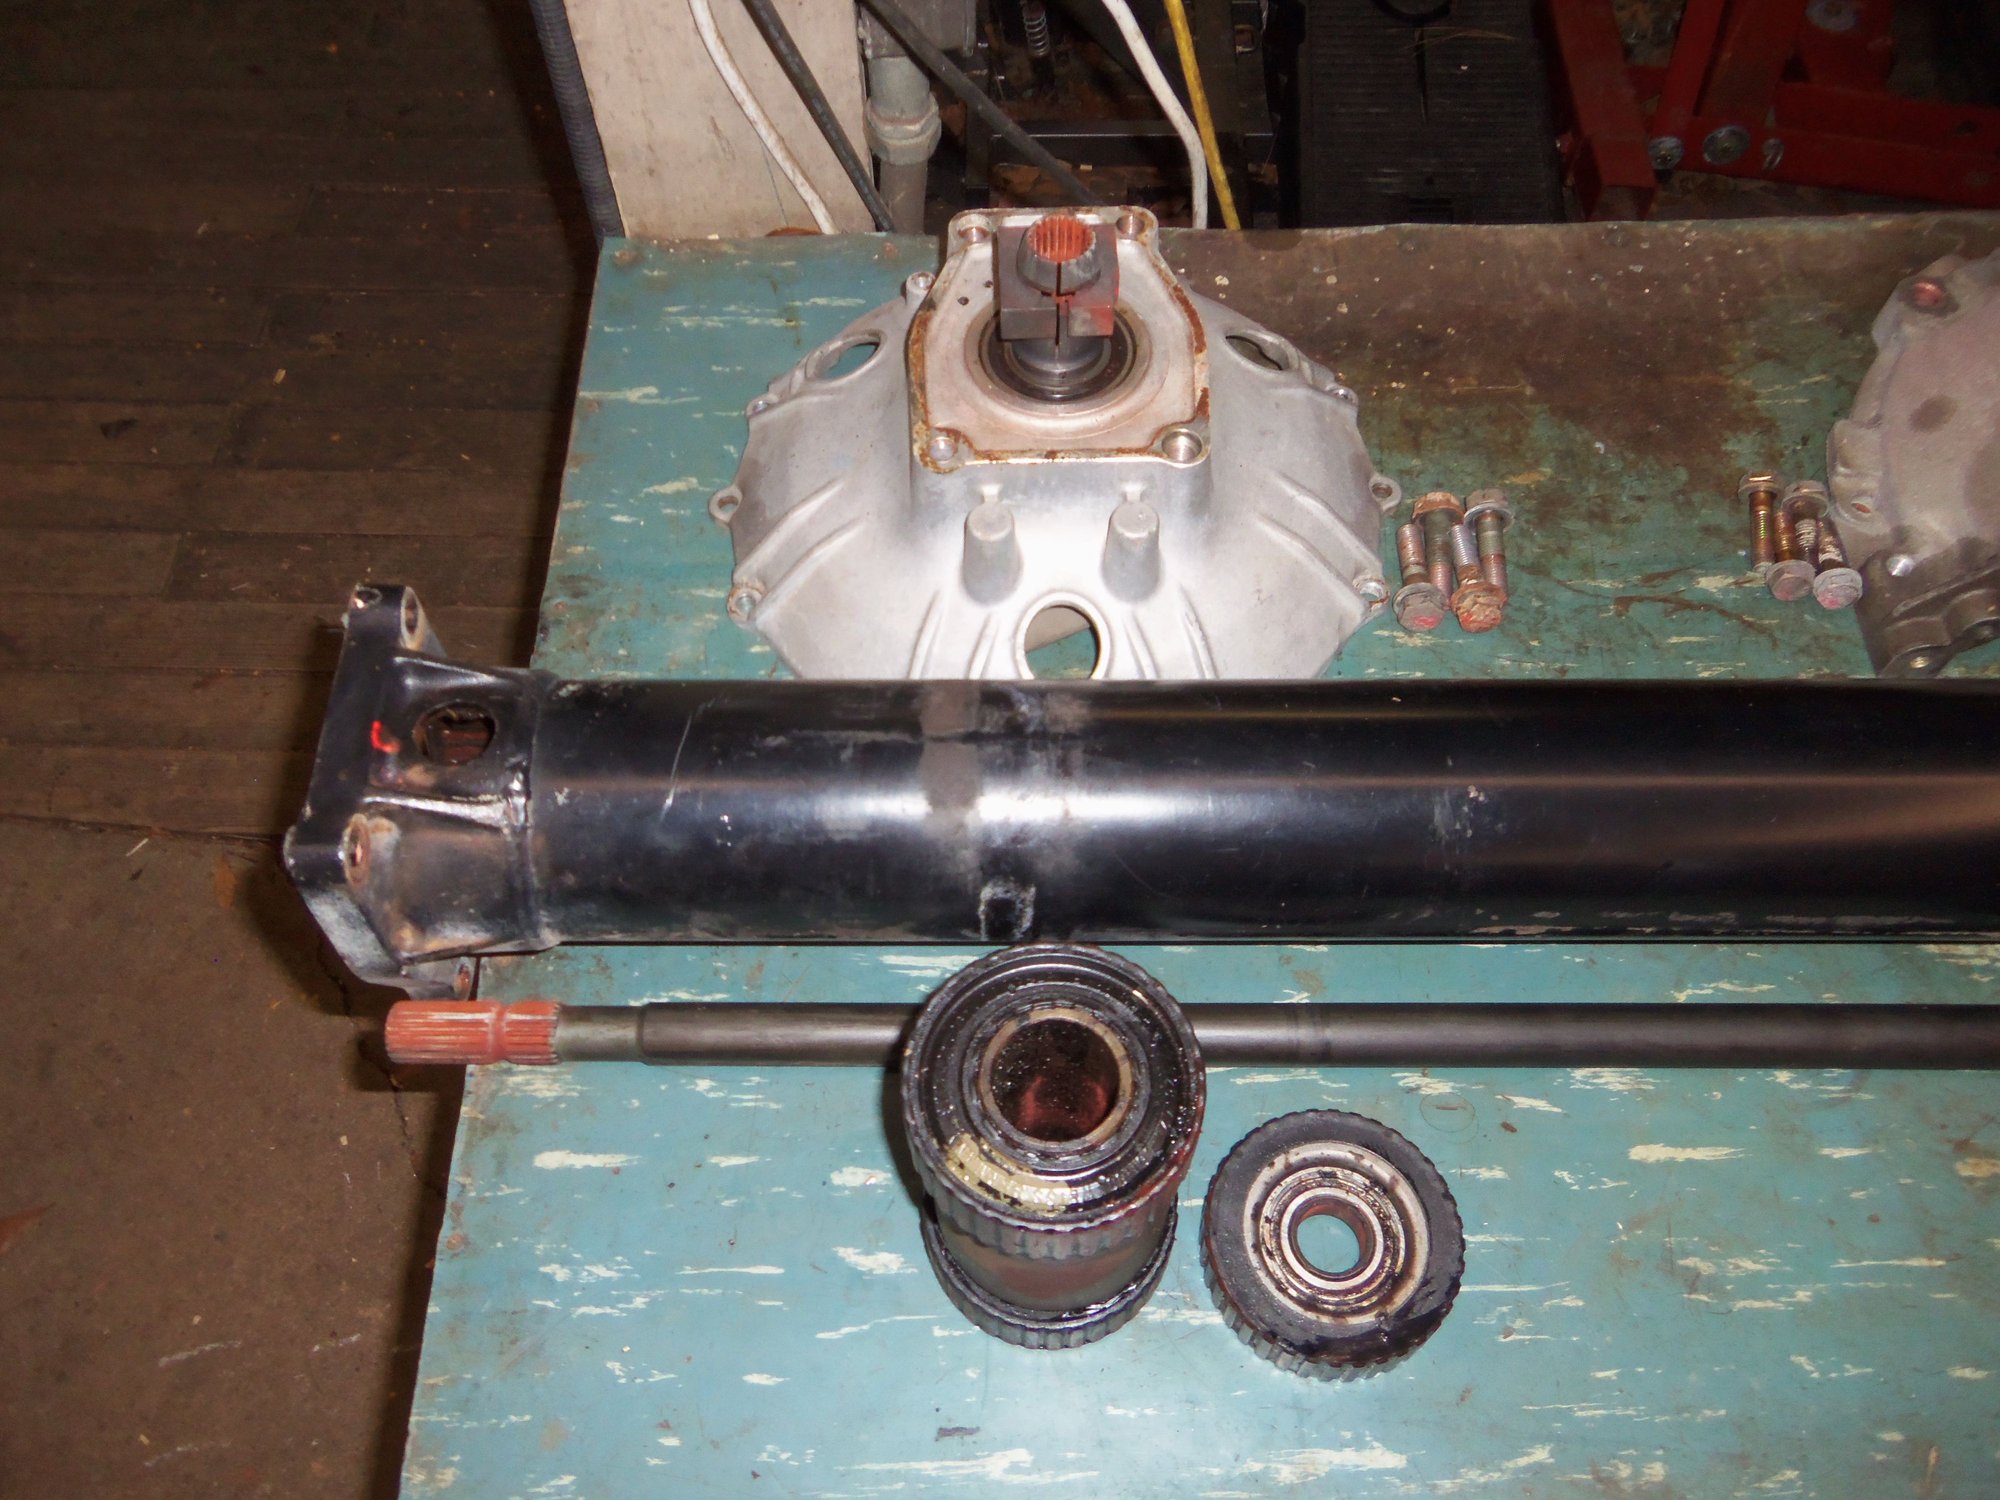
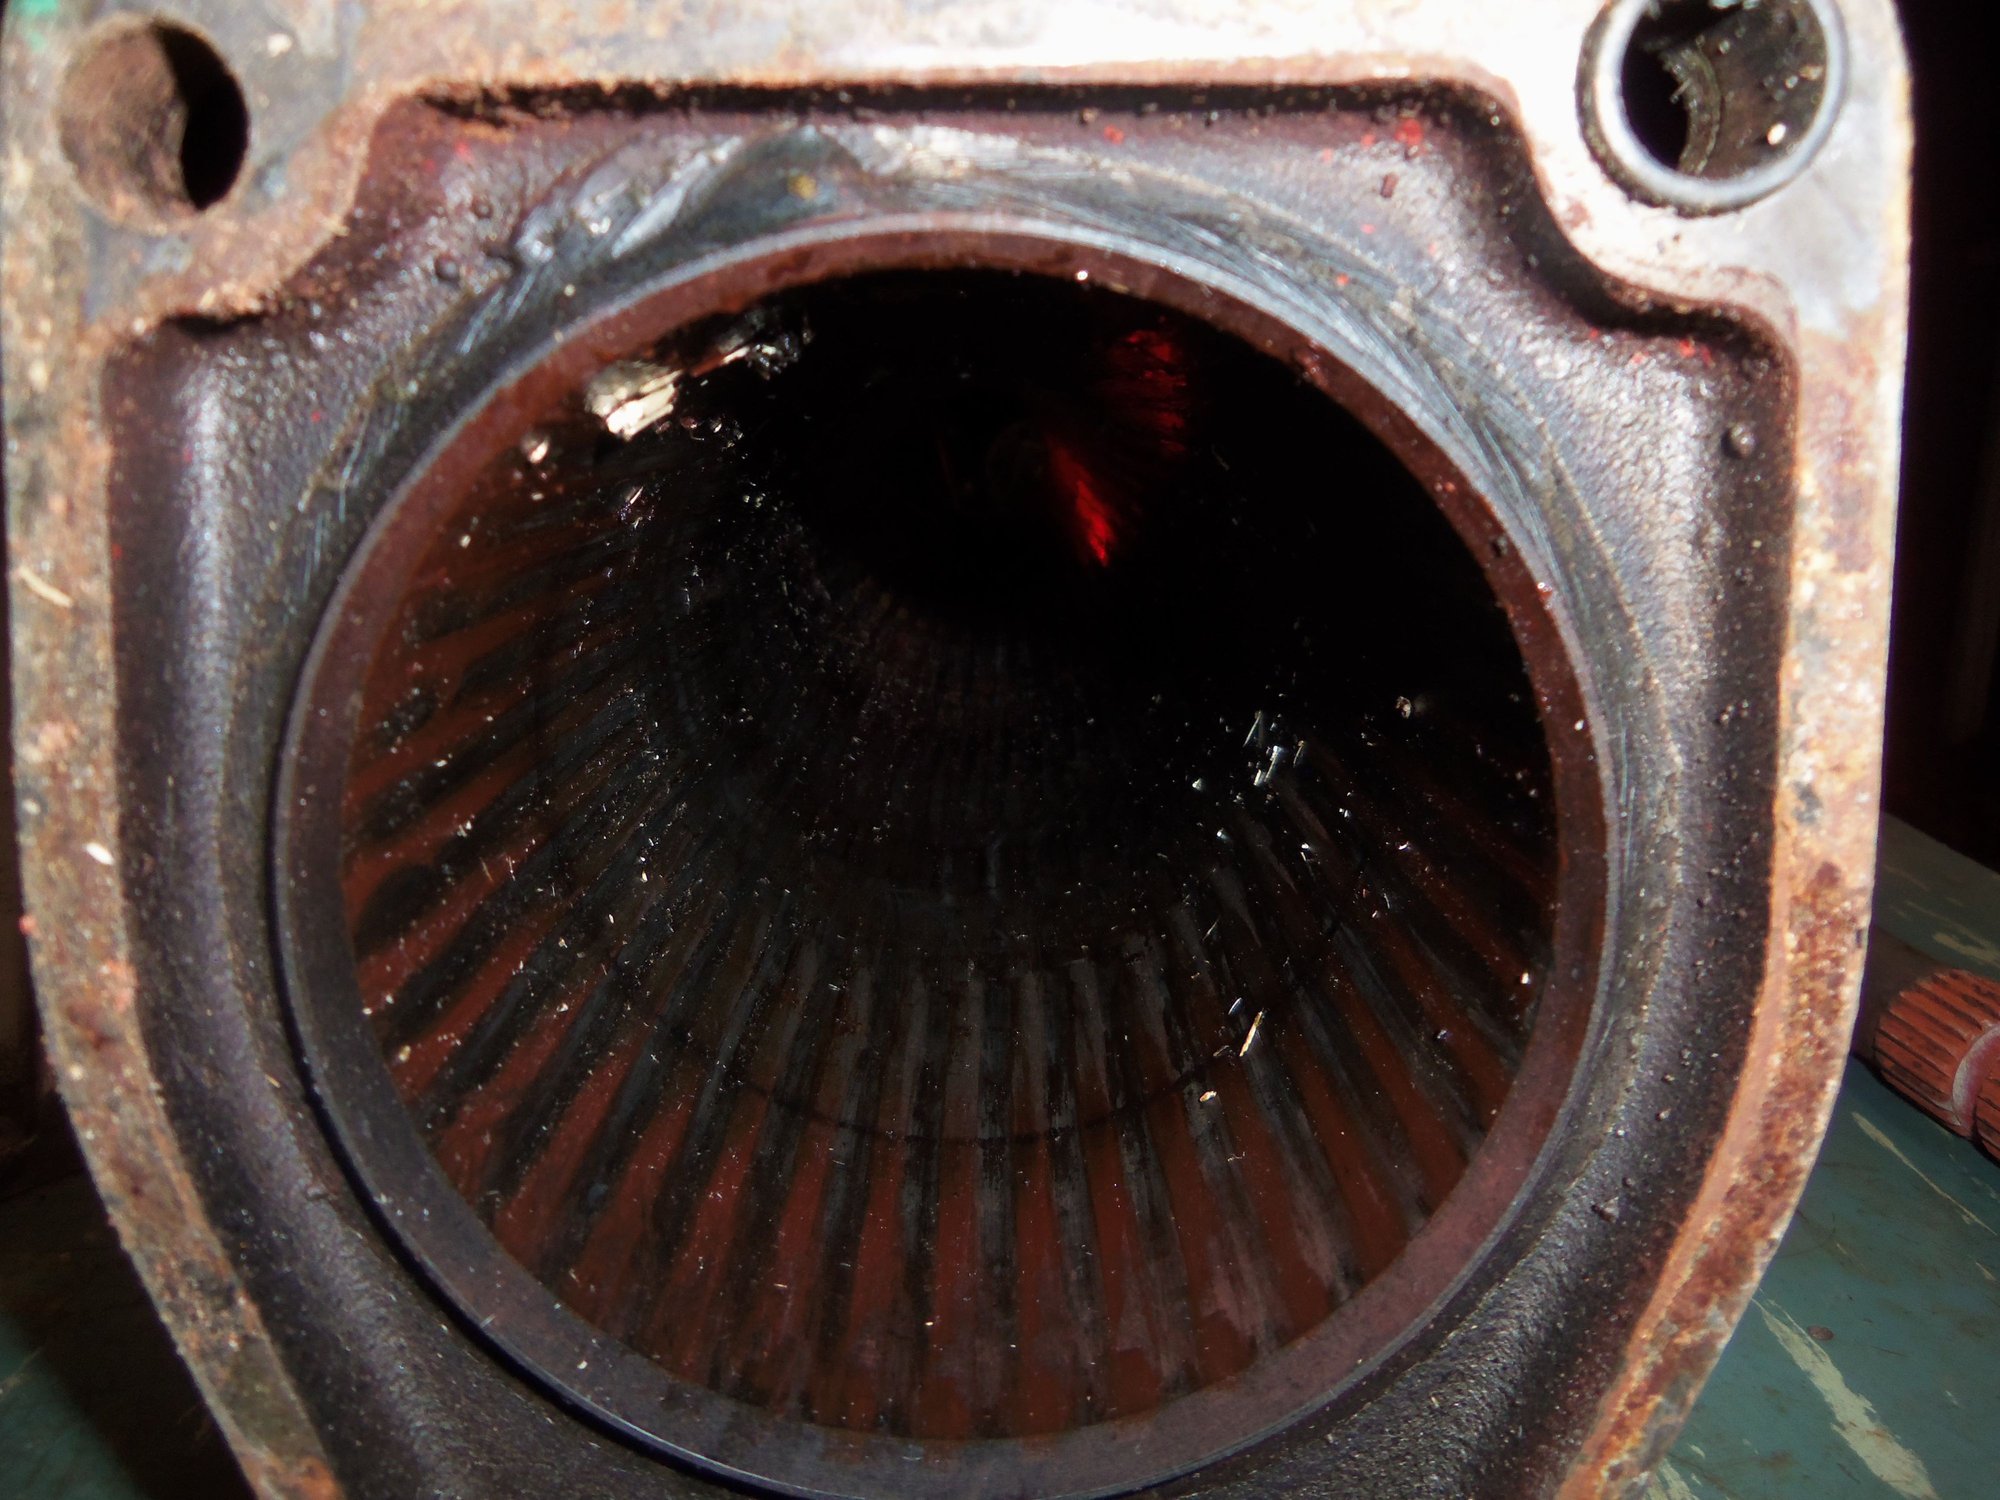
This afternoon, I was finally able to get back on the torque tube.
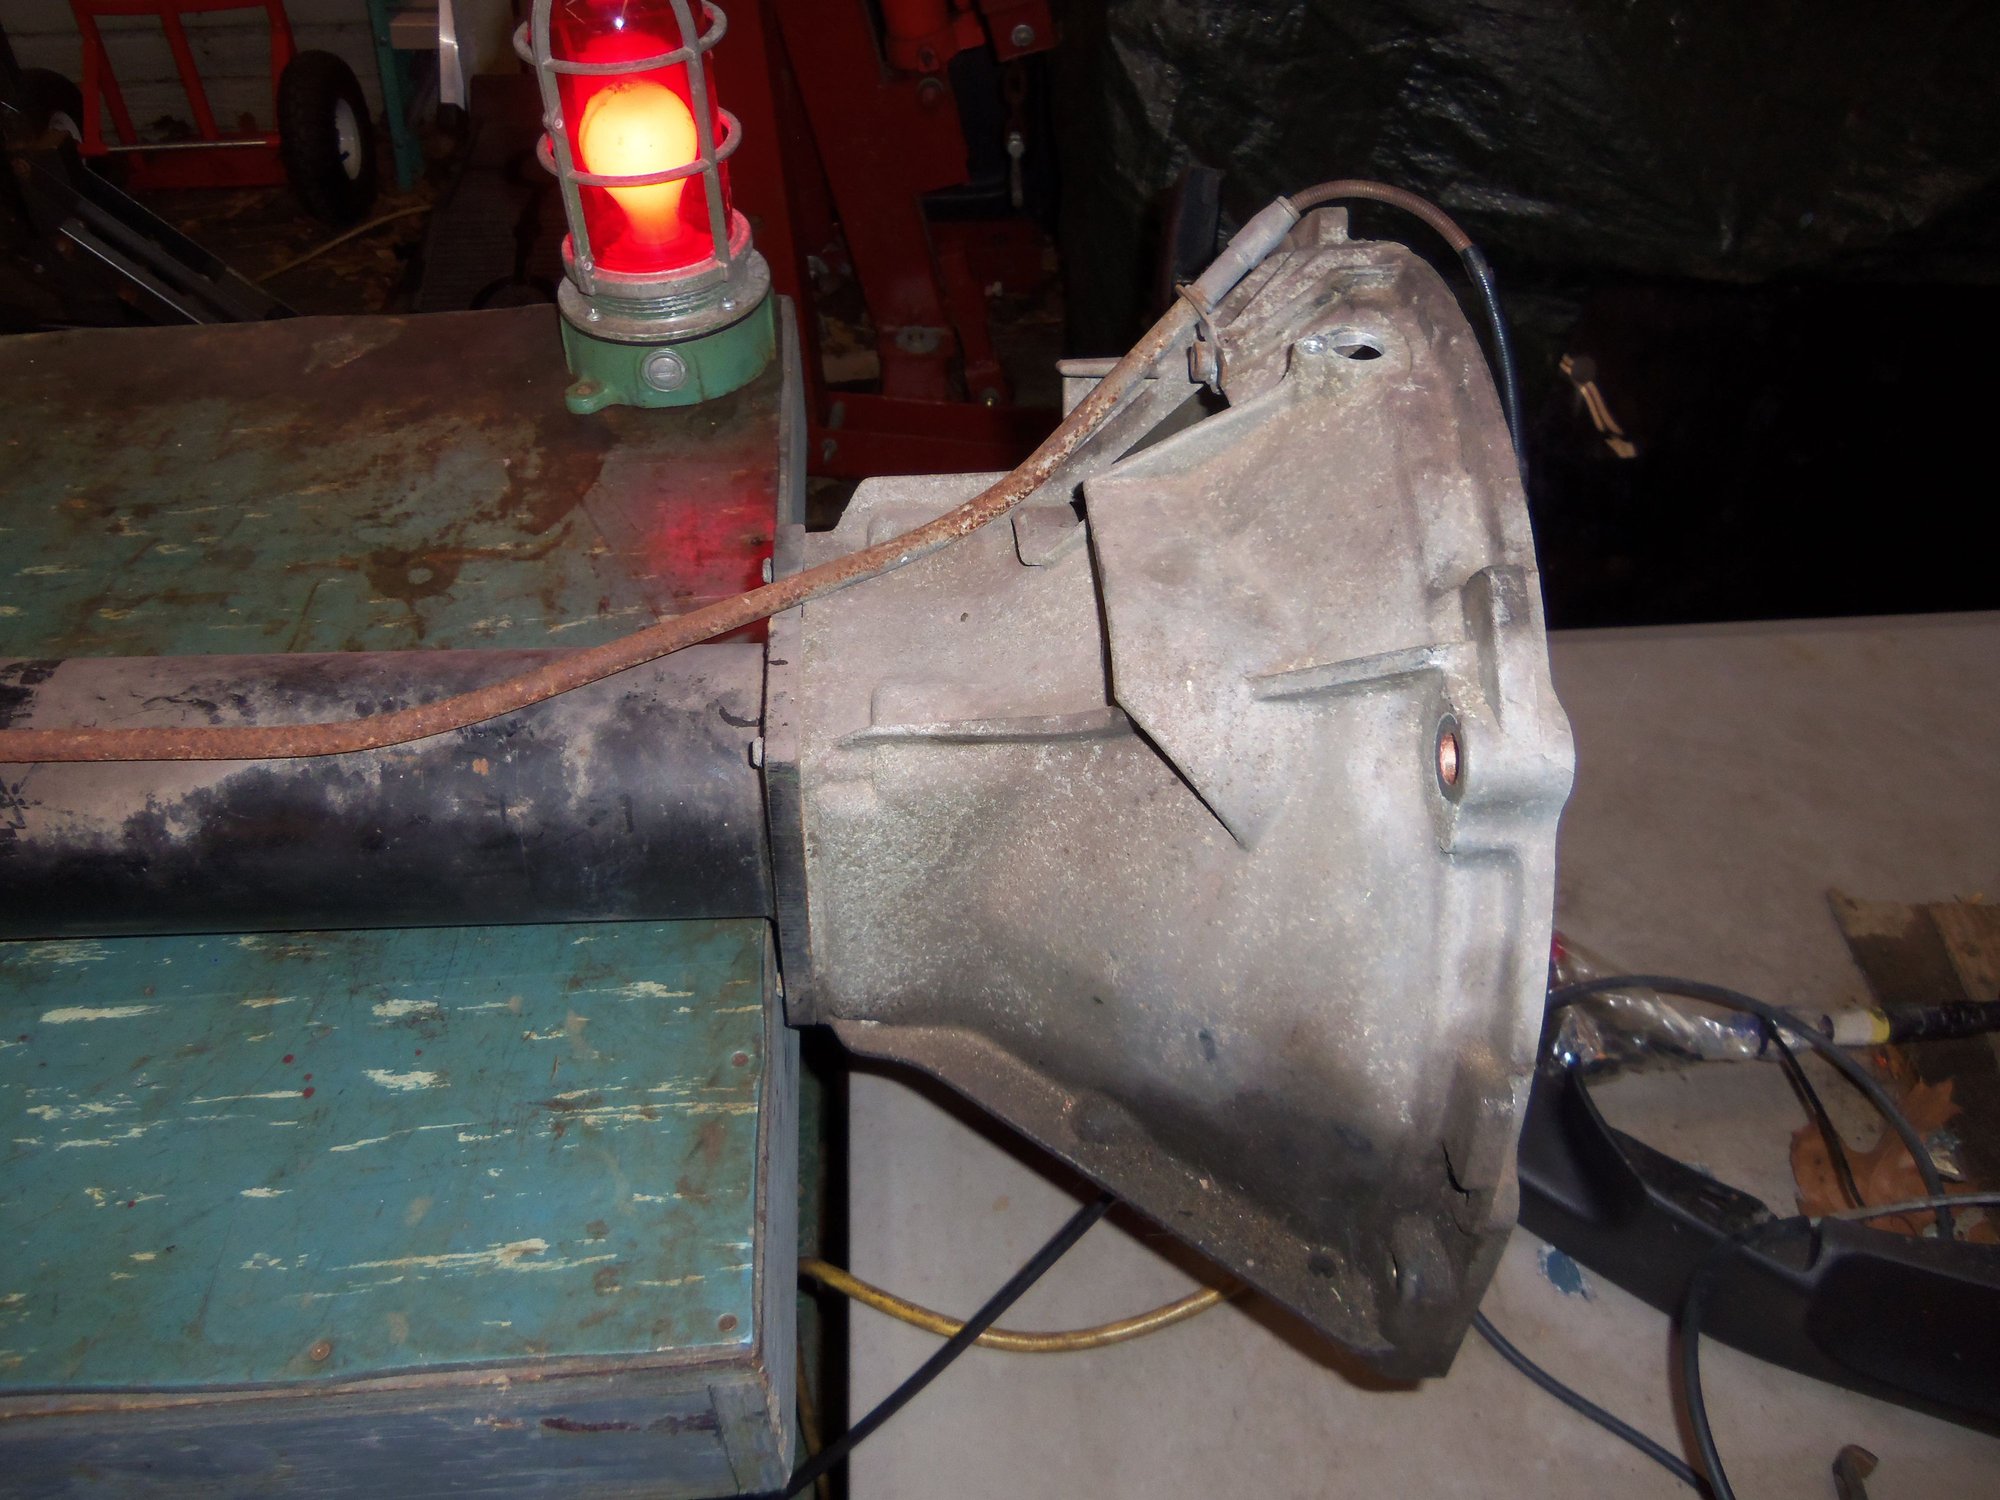
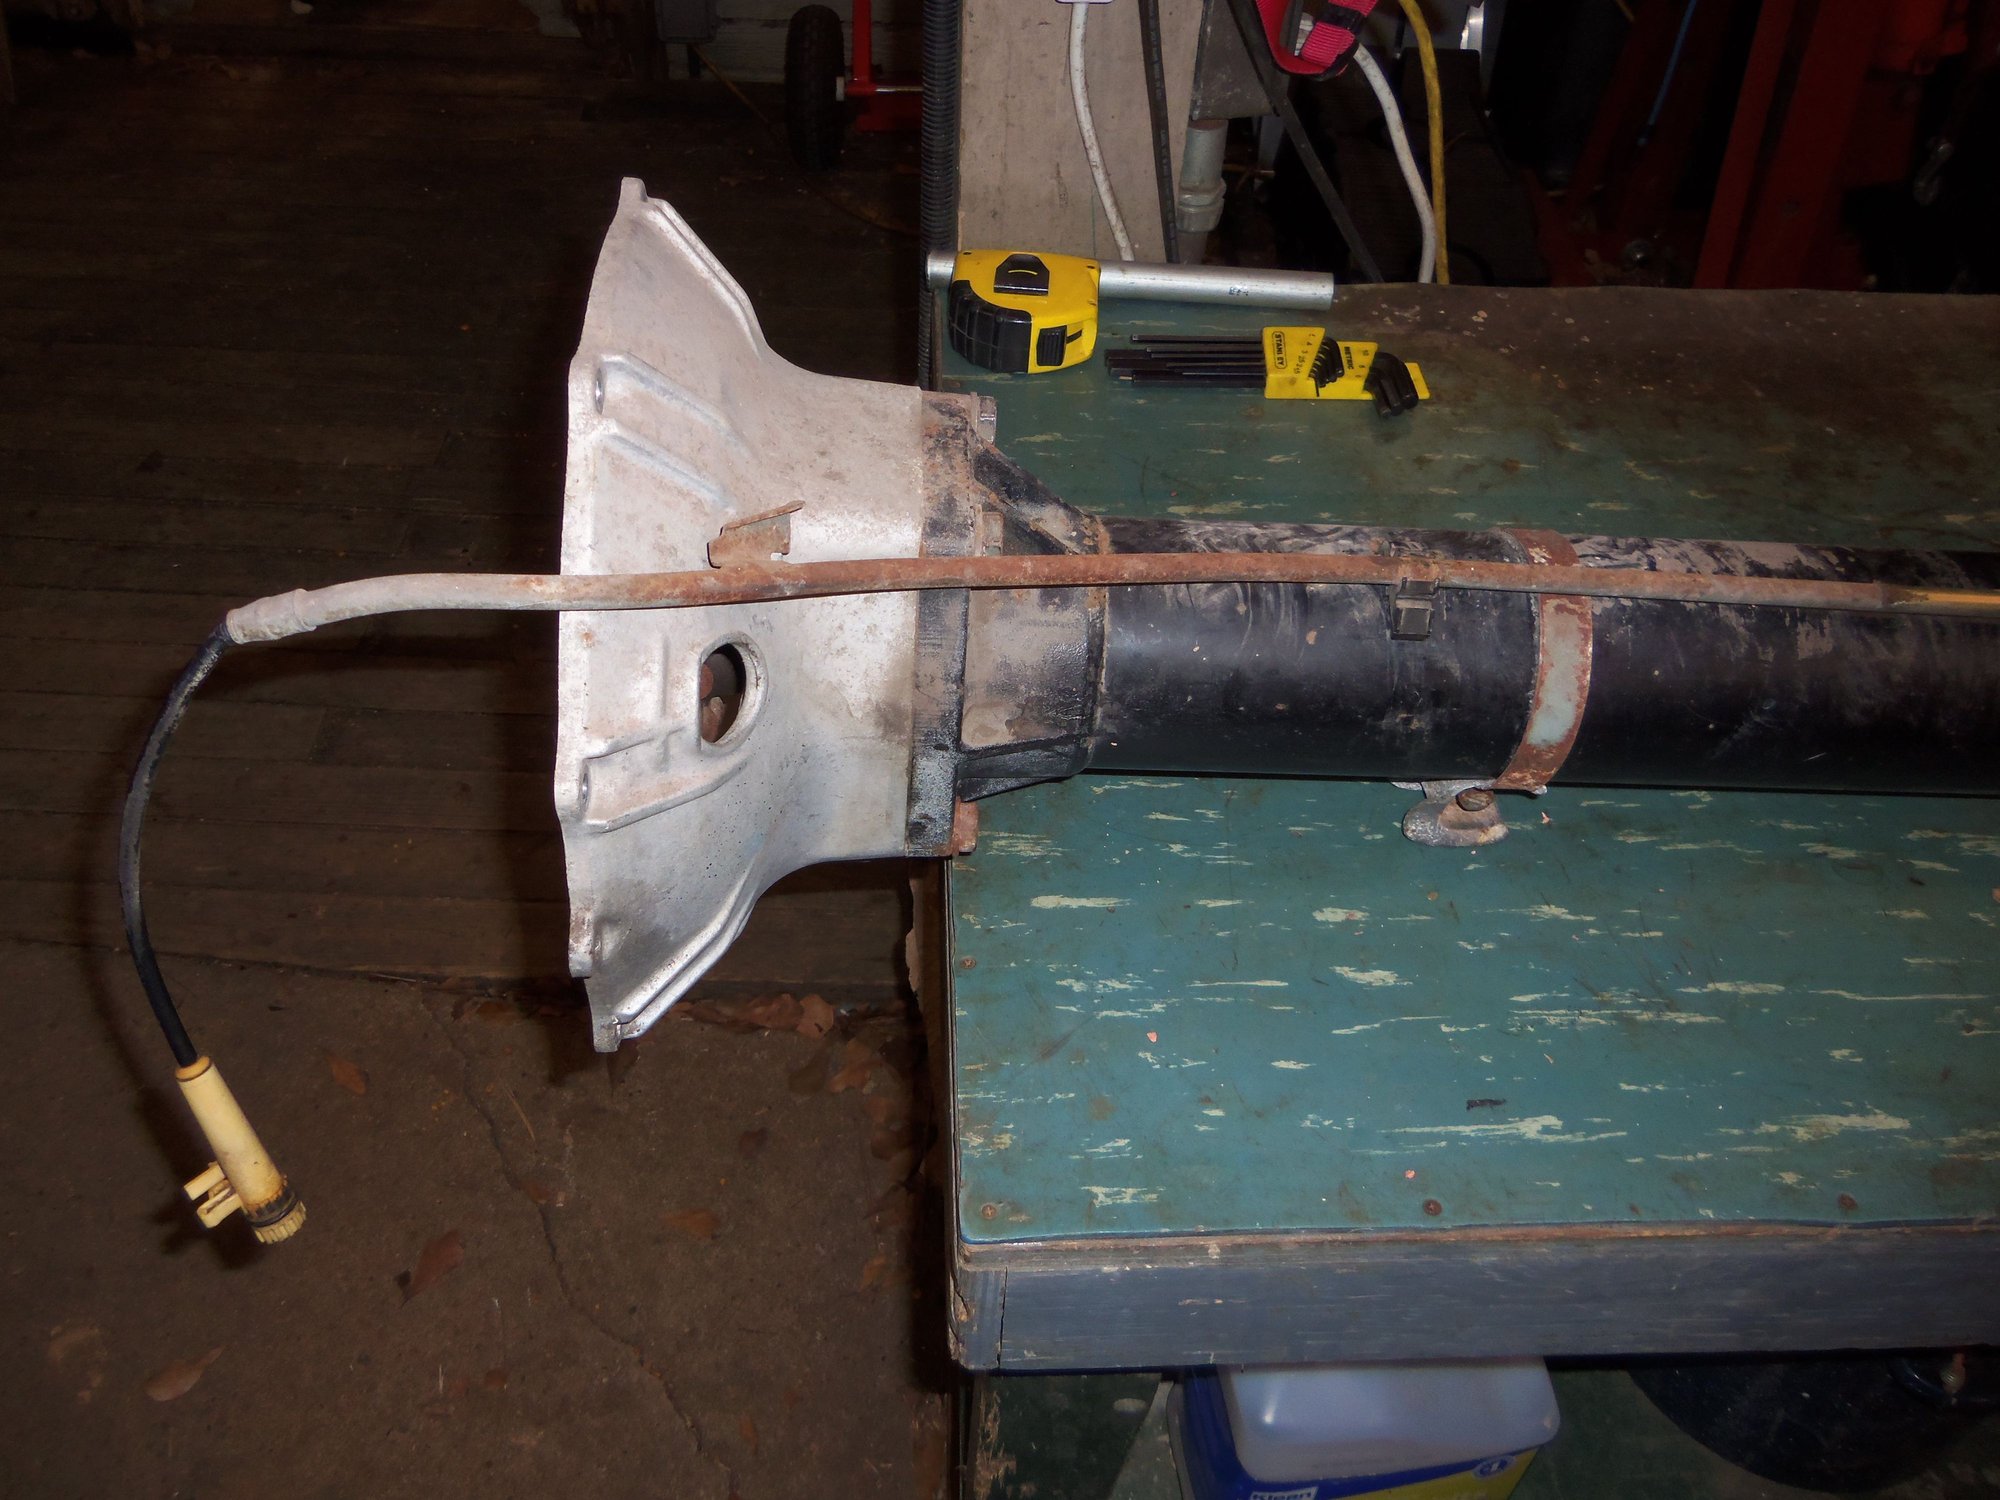
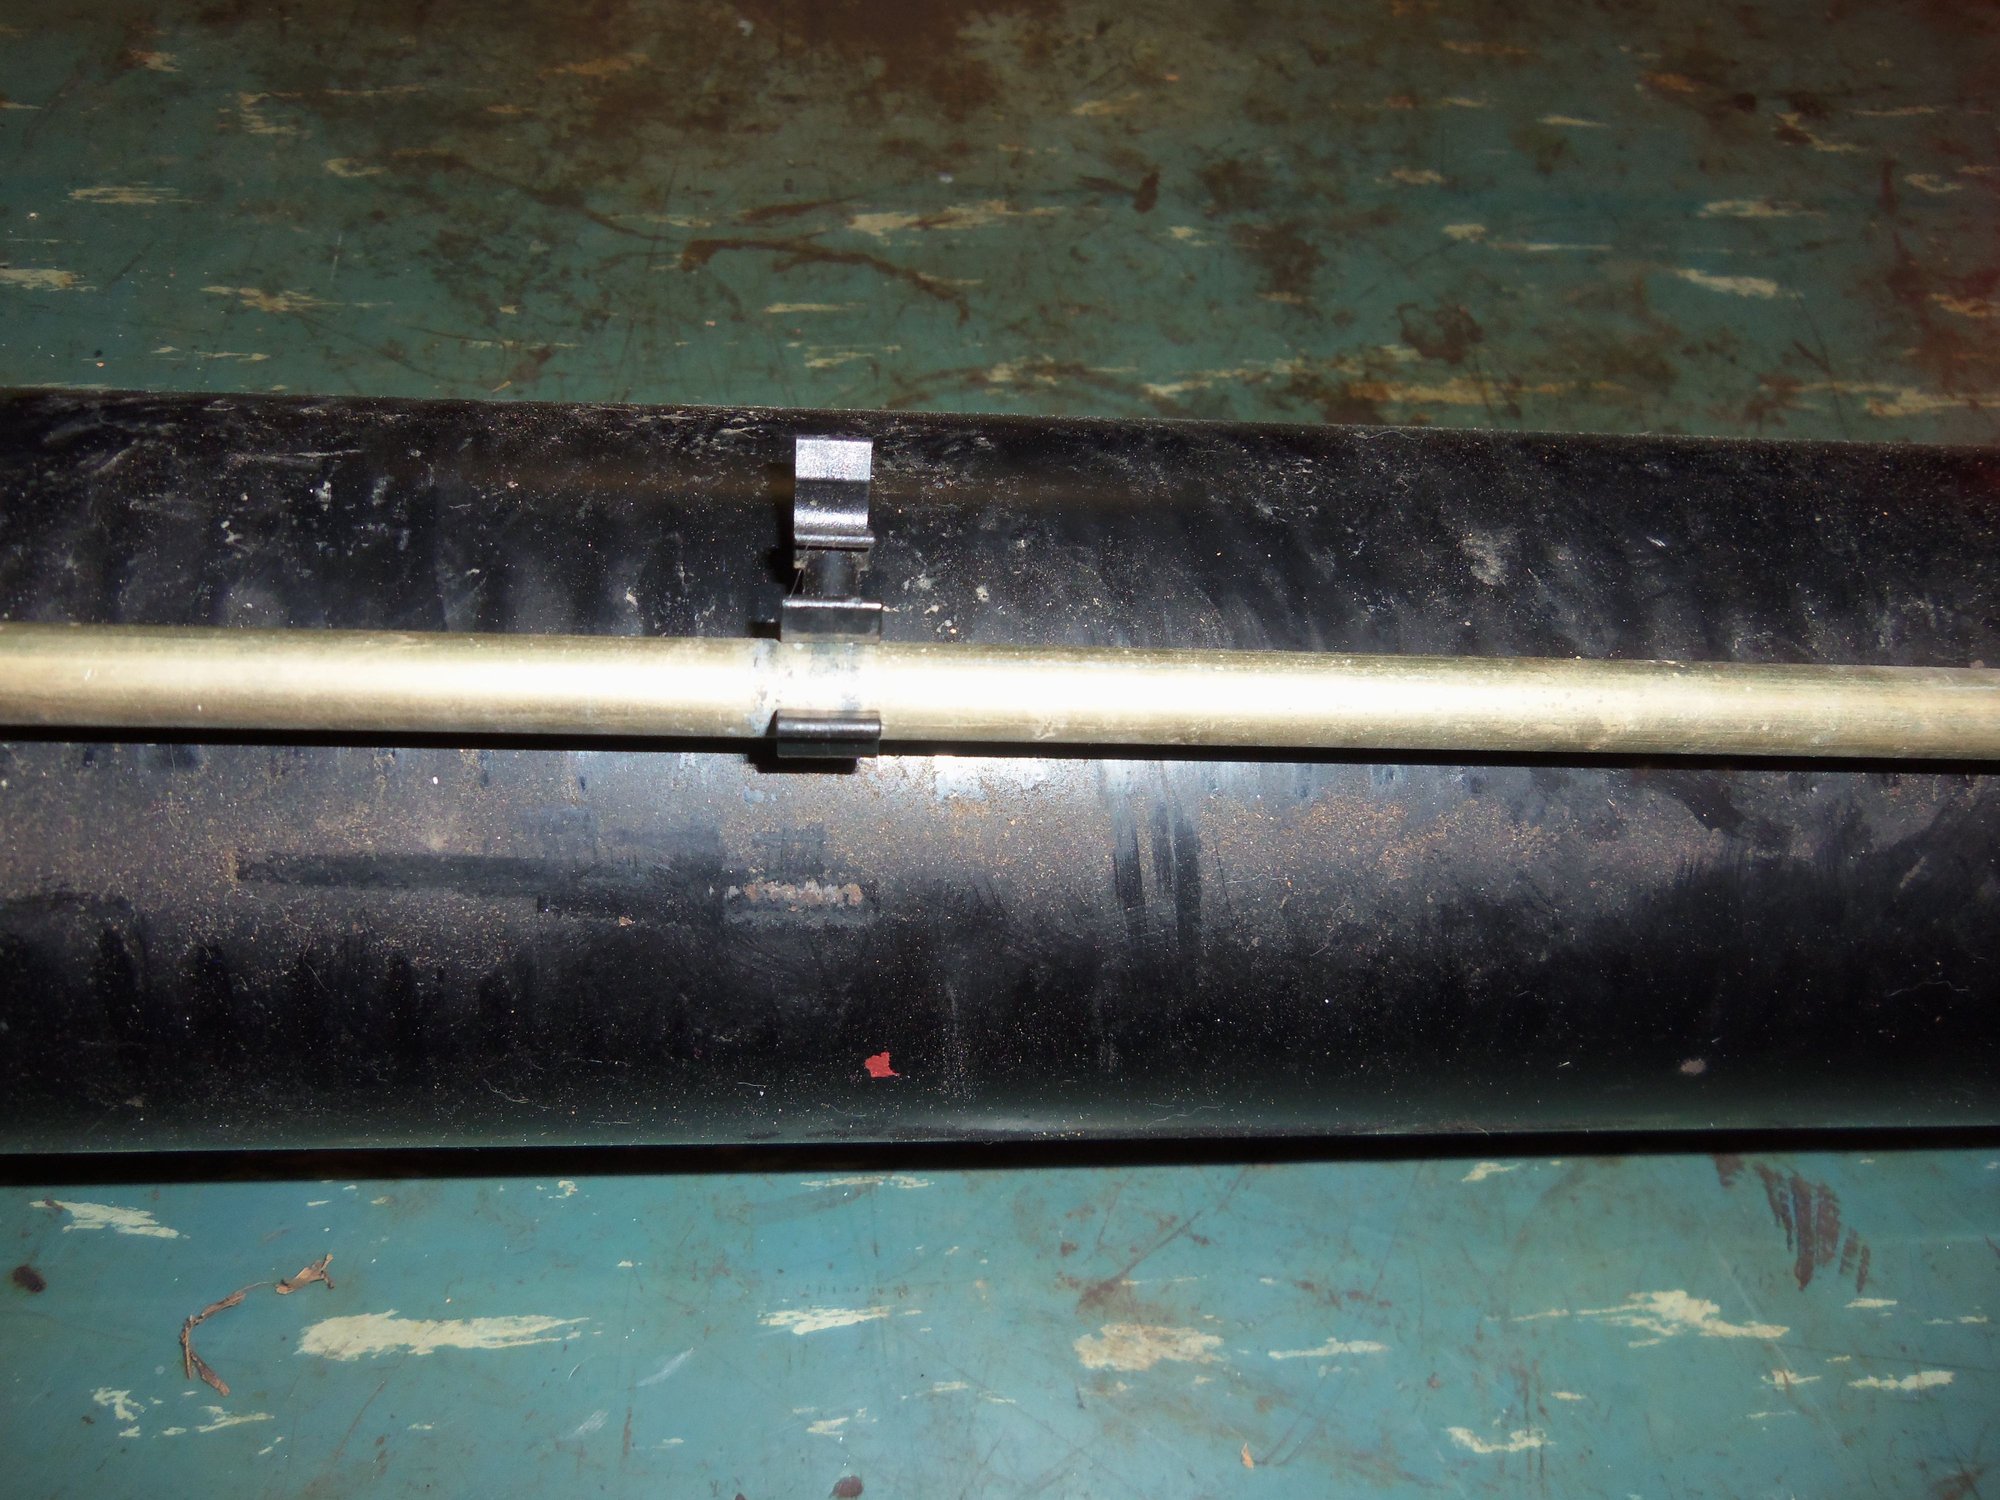
I started off simple, photos, measurements, and such. I wanted to document where the plastic isolators sit for the Bowden cable. Also, I wanted to measure where the foam sat.
Bowden cable tube housing is rusty and must be dealt with.
Relatively clean area is where the foam sat.
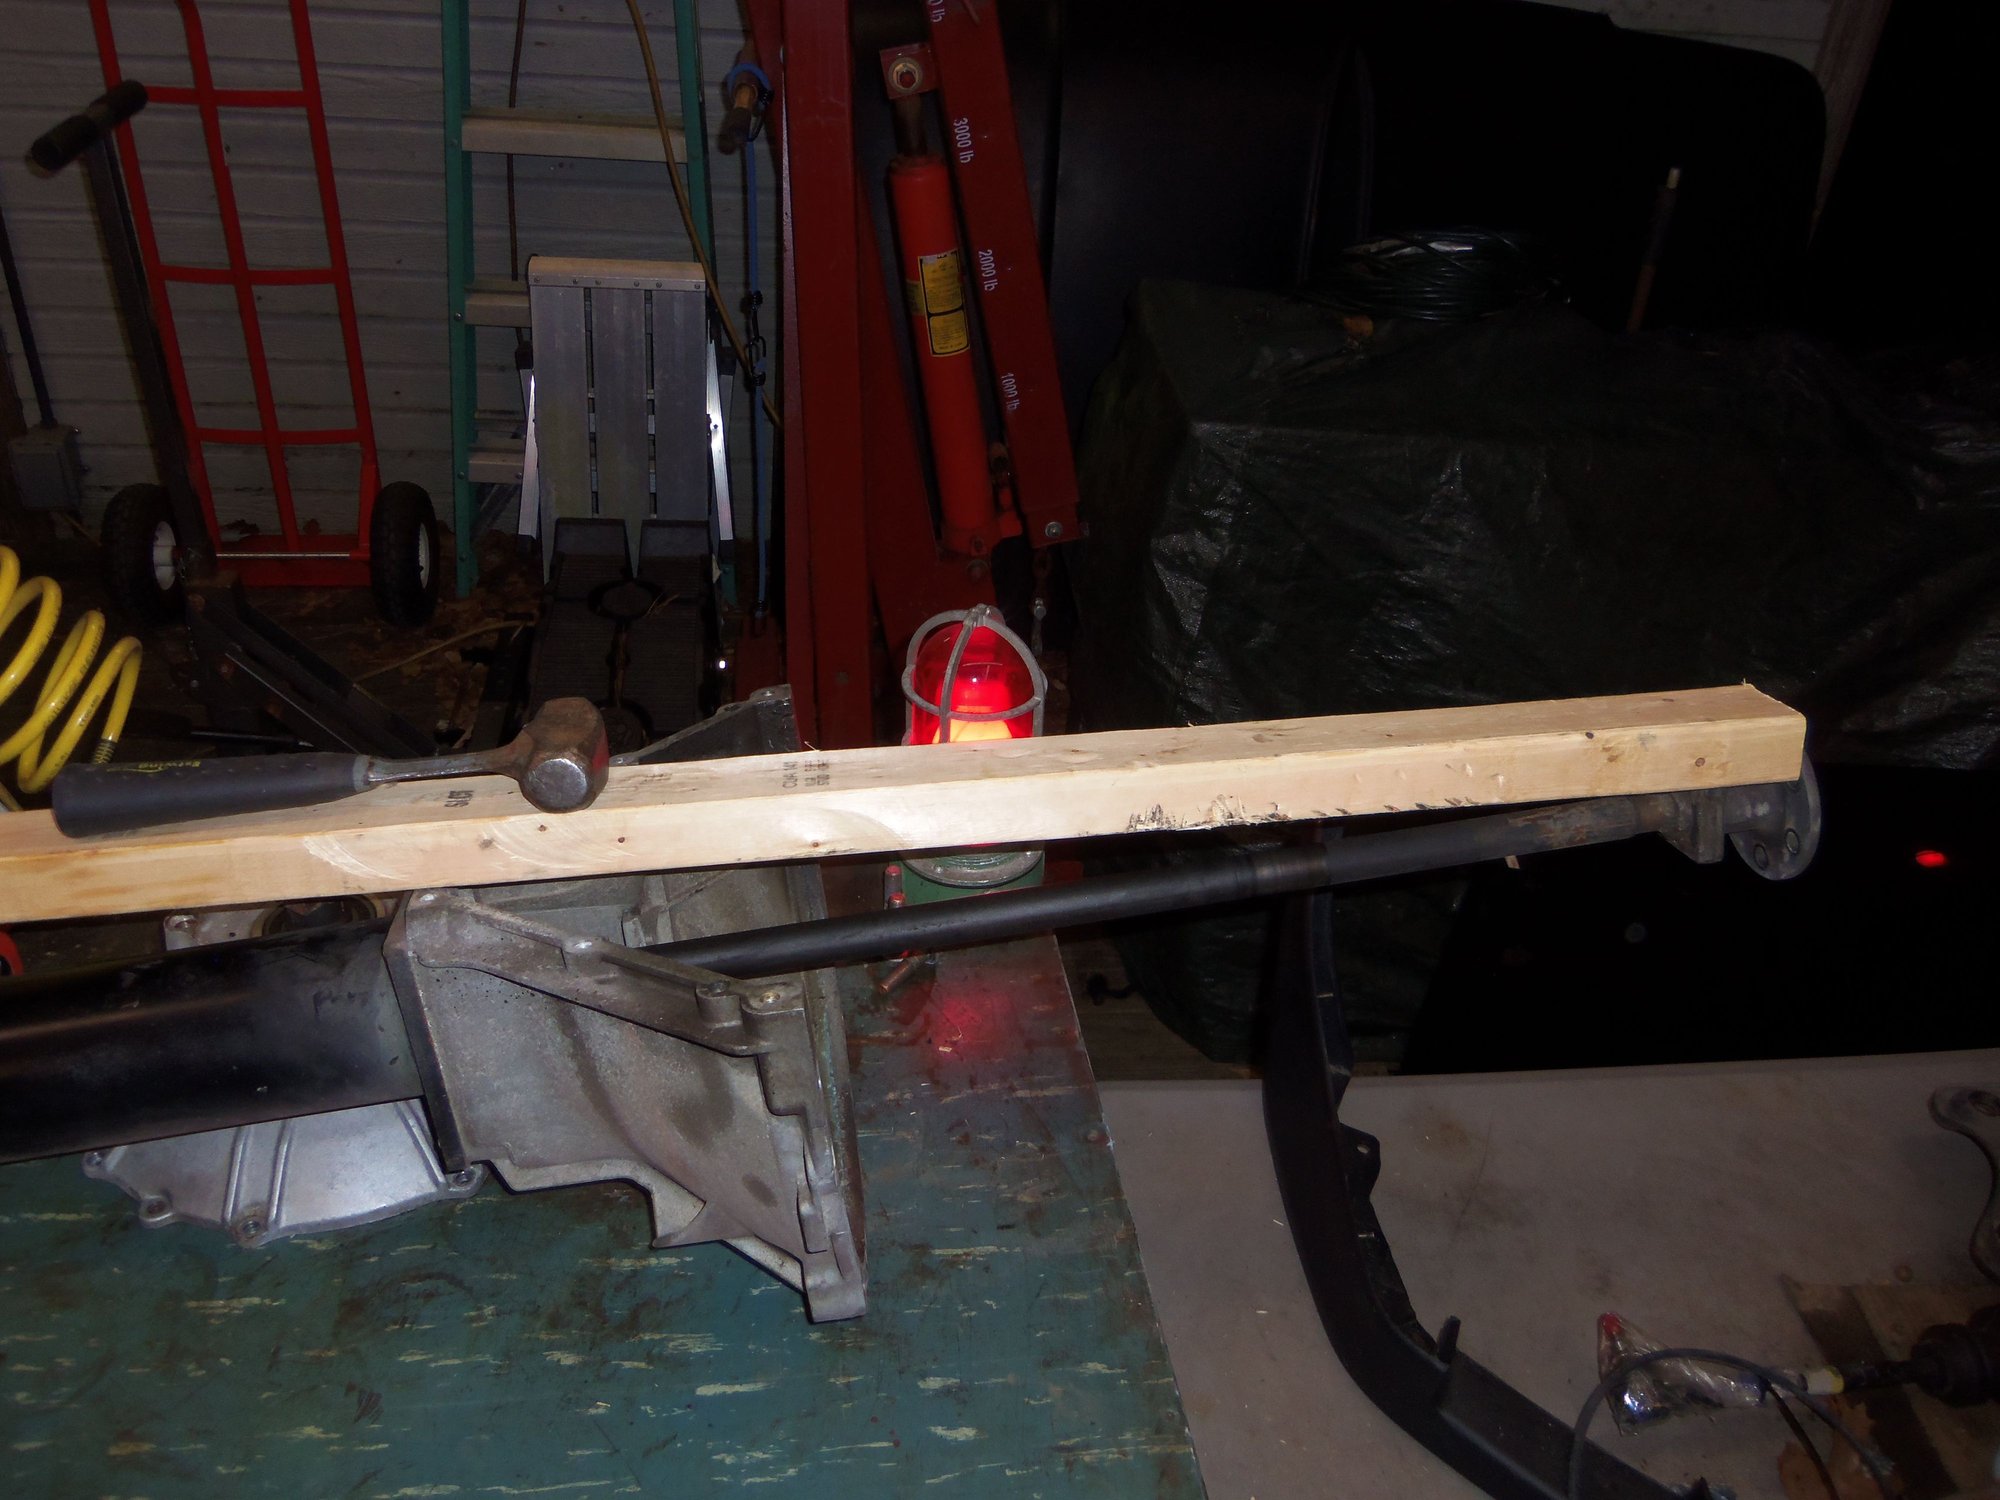
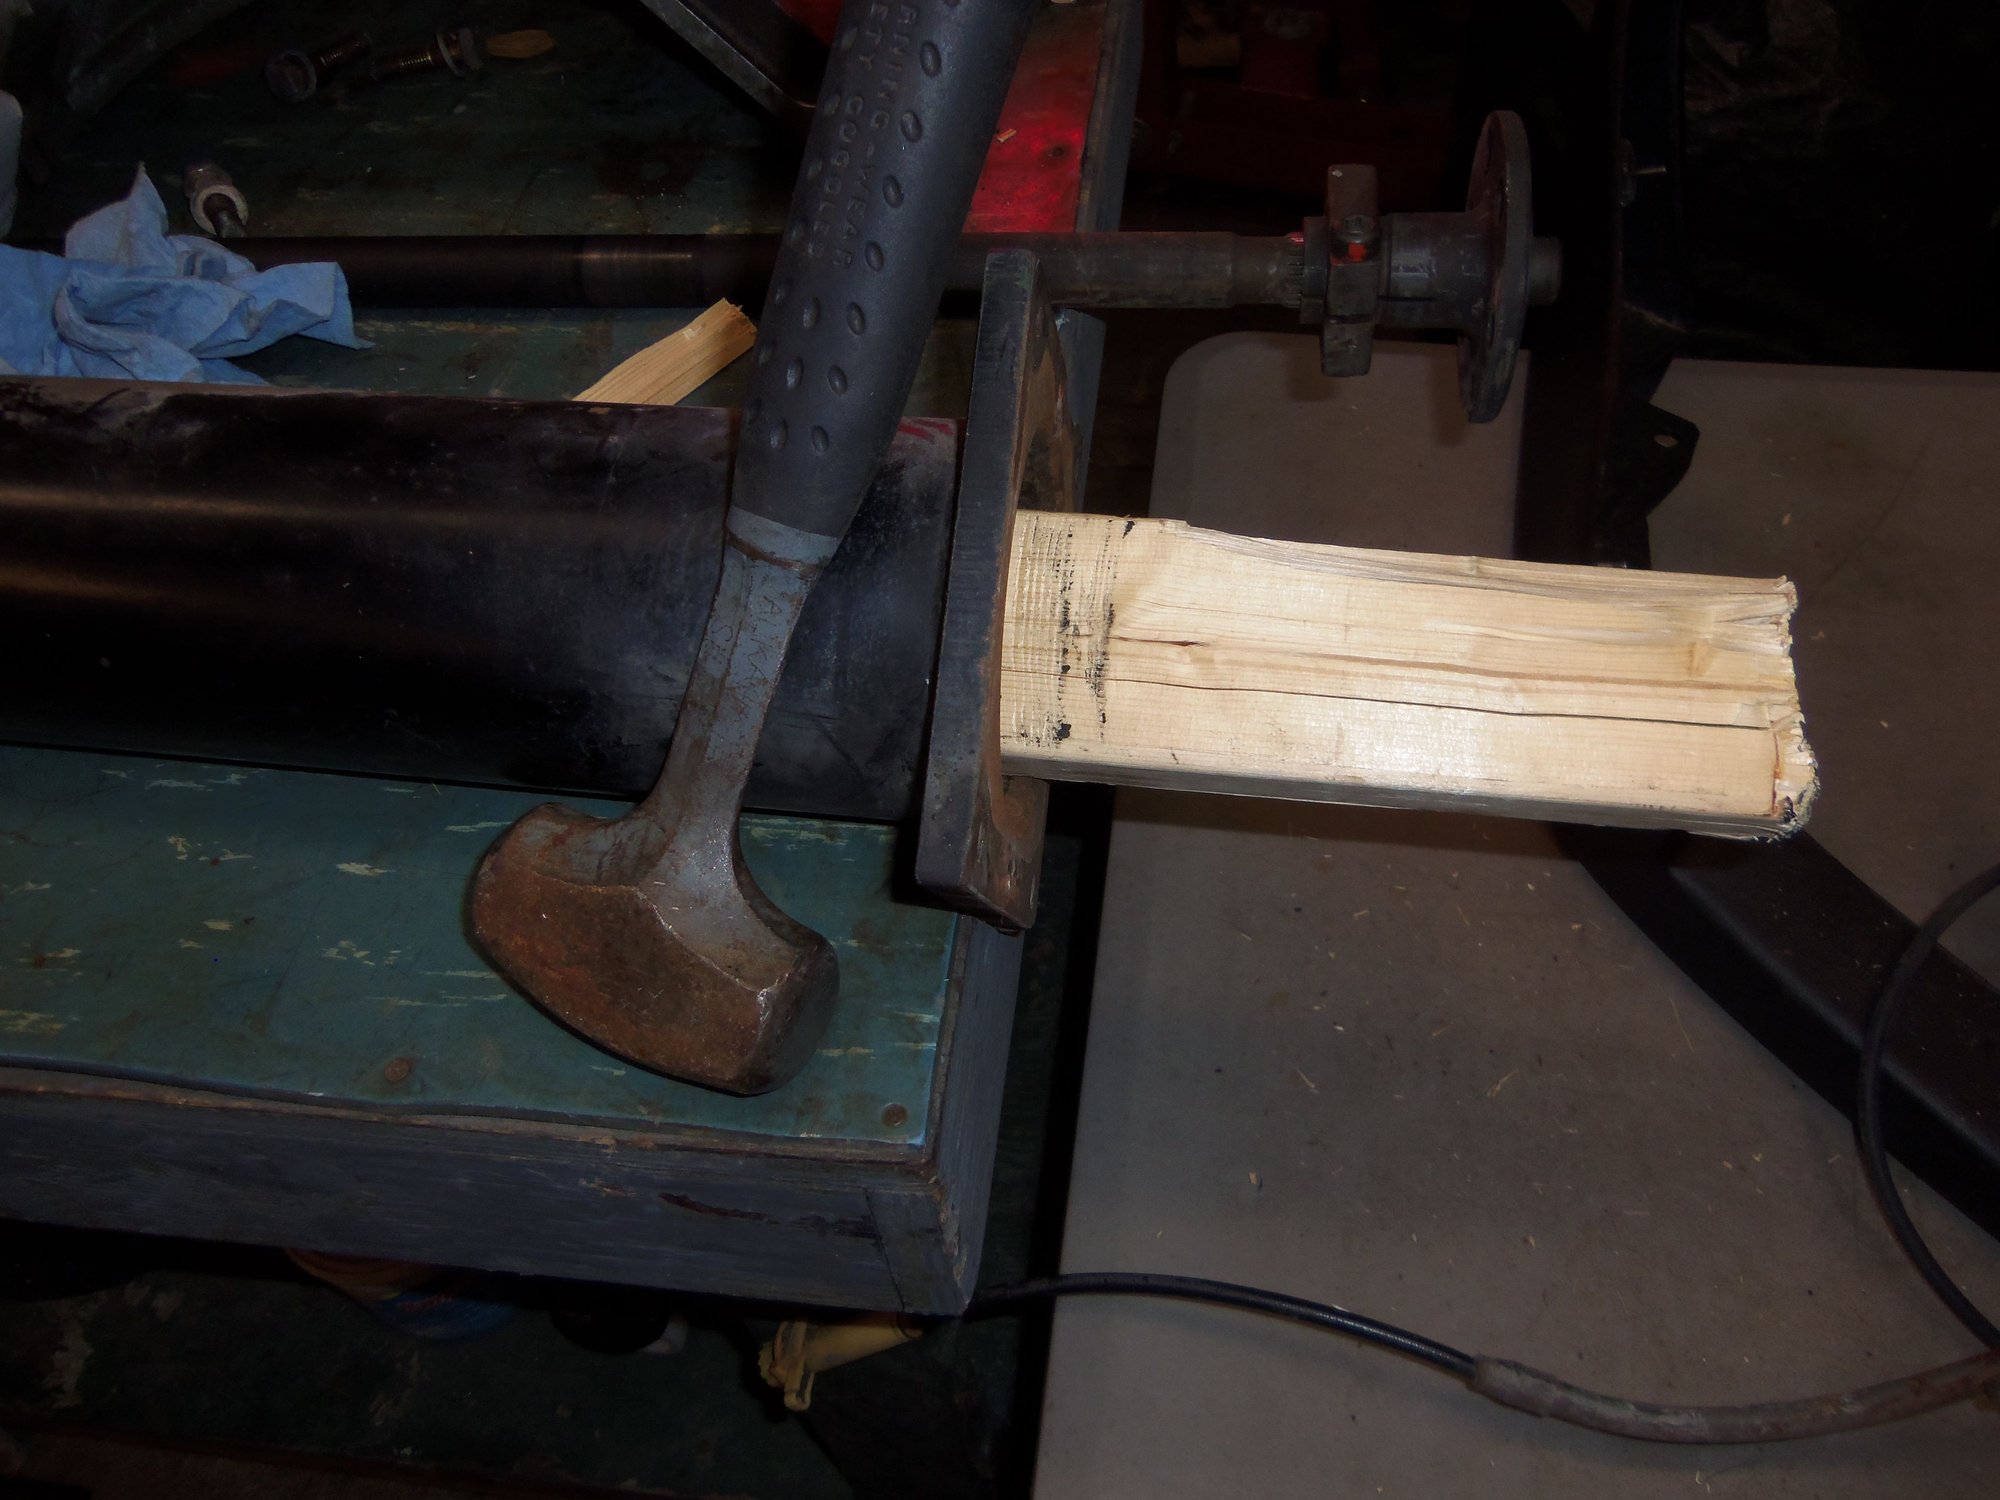
With all of that out of the way, disassembly could begin. I wanted to get the drive shaft out before I remove the bell housing and torque converter cover. Taking a cue from Dwayne, I started to lever the shaft out with a piece of wood. That evolved to tapping the wood with a 2lbs hammer and walking the shaft out. Other than being time consuming, it worked quite well.
A little brute finesse.
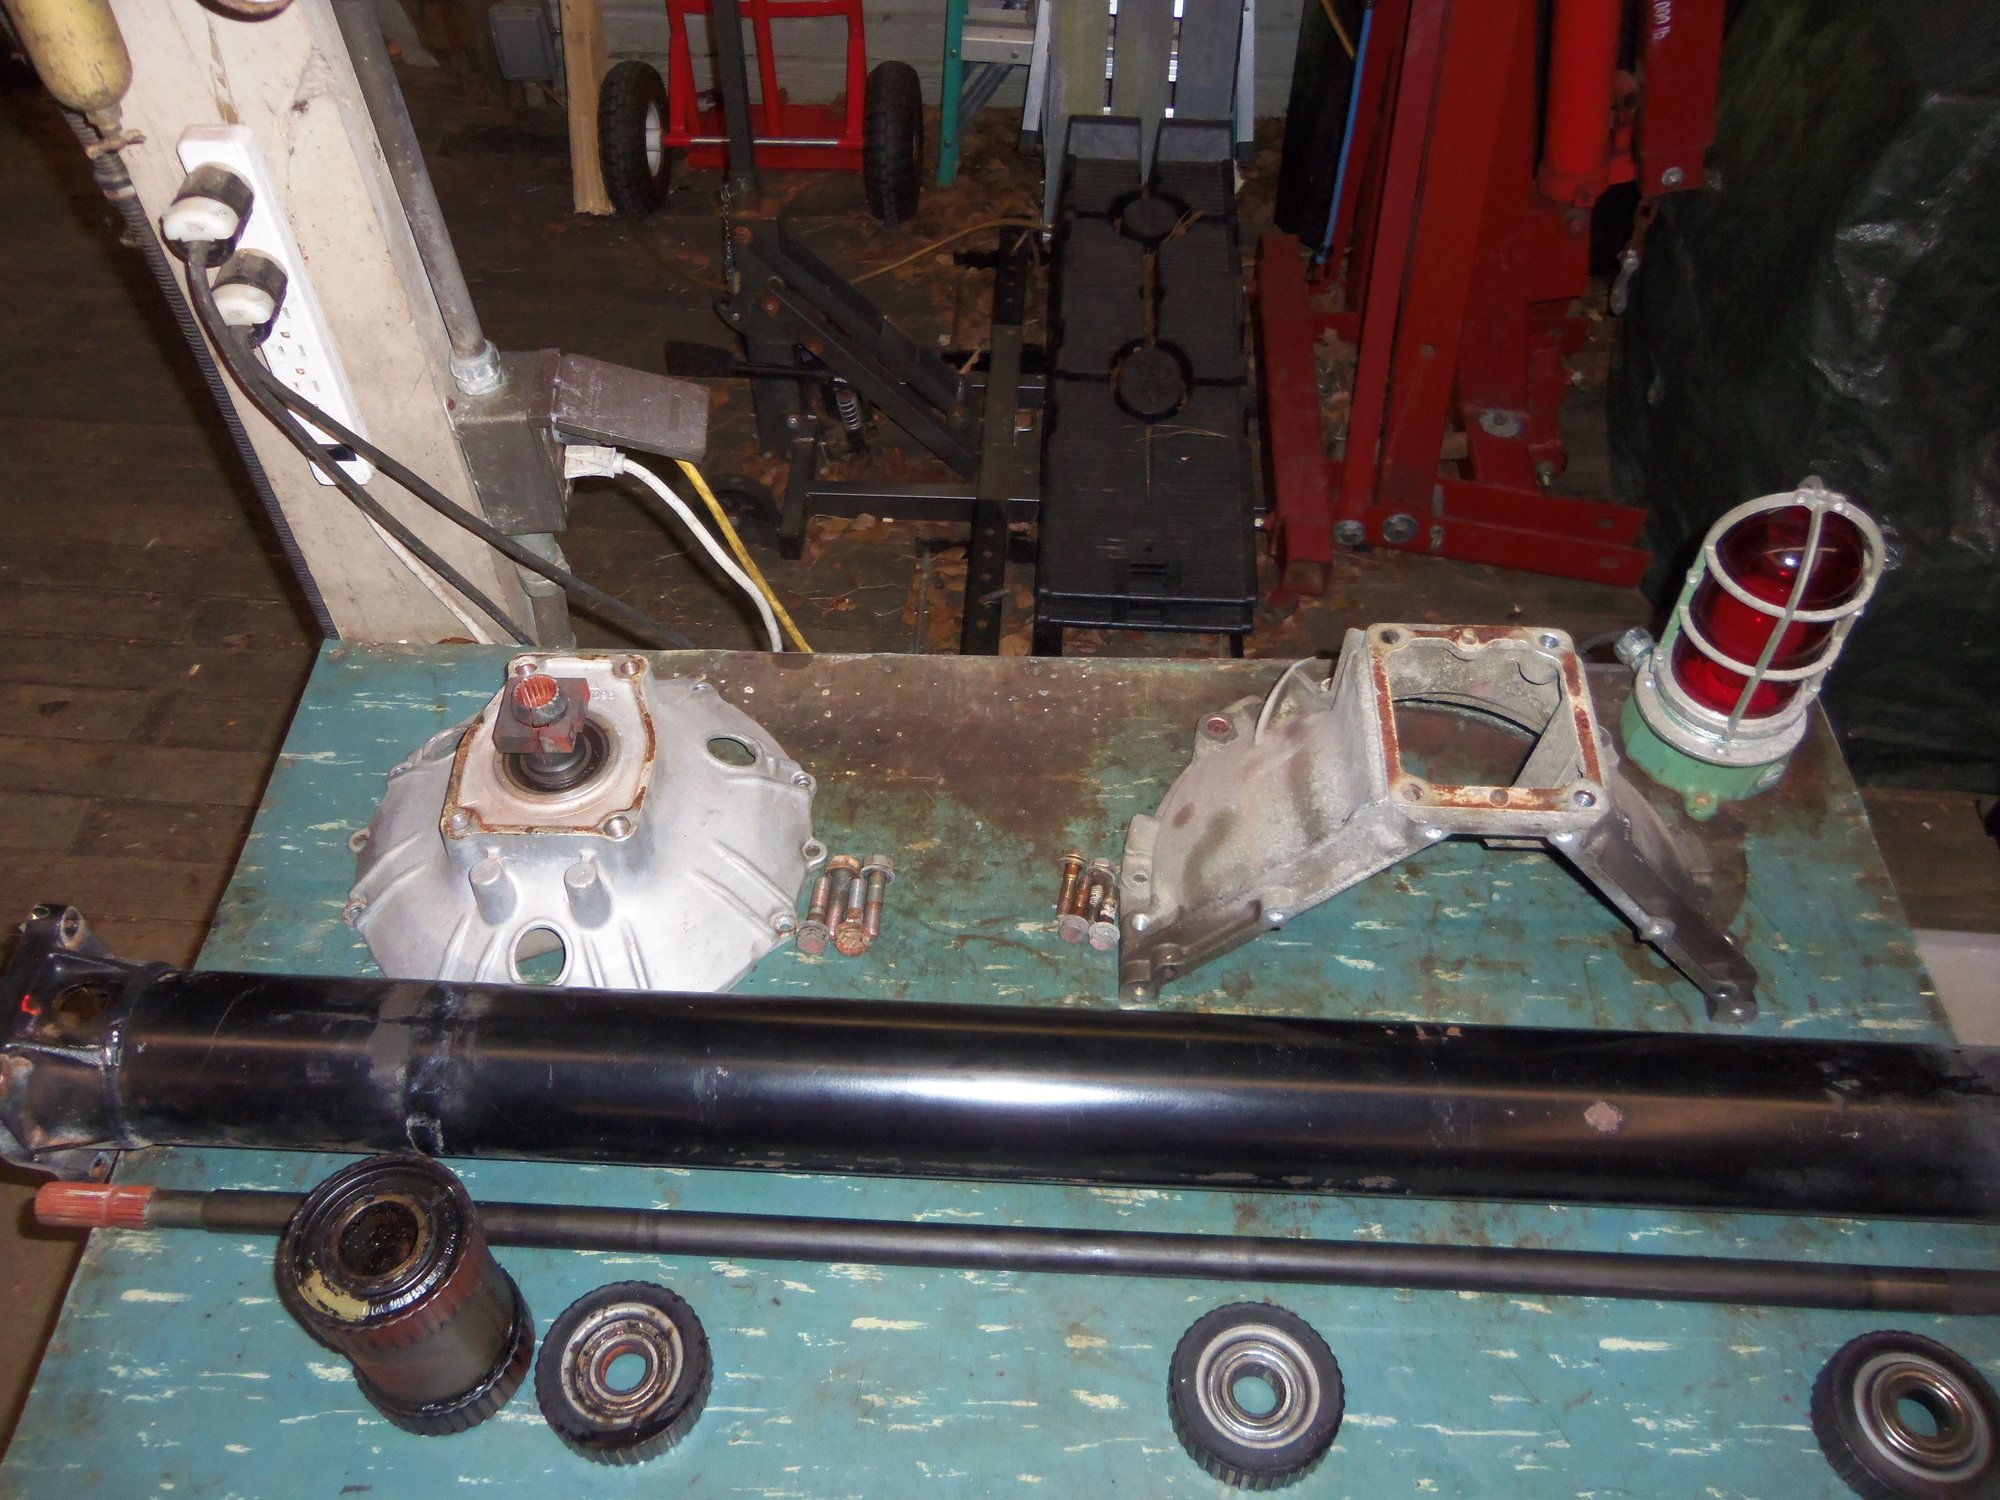
Shaft out, I turned back to removing the bell housing and torque converter cover. While removing the torque tube, the M12 bolts that hold the torque converter cover to the torque tube just laughed at my pneumatic impact gun. This time, girded for war. Full head of air in the tanks, shortest, fattest coil hose I had, and a short 19mm socket, no extension.
It was anticlimactic. All four bolts came out with the first pull of the gun trigger. Same with the M10 bolts holding the bell housing to the torque tube.
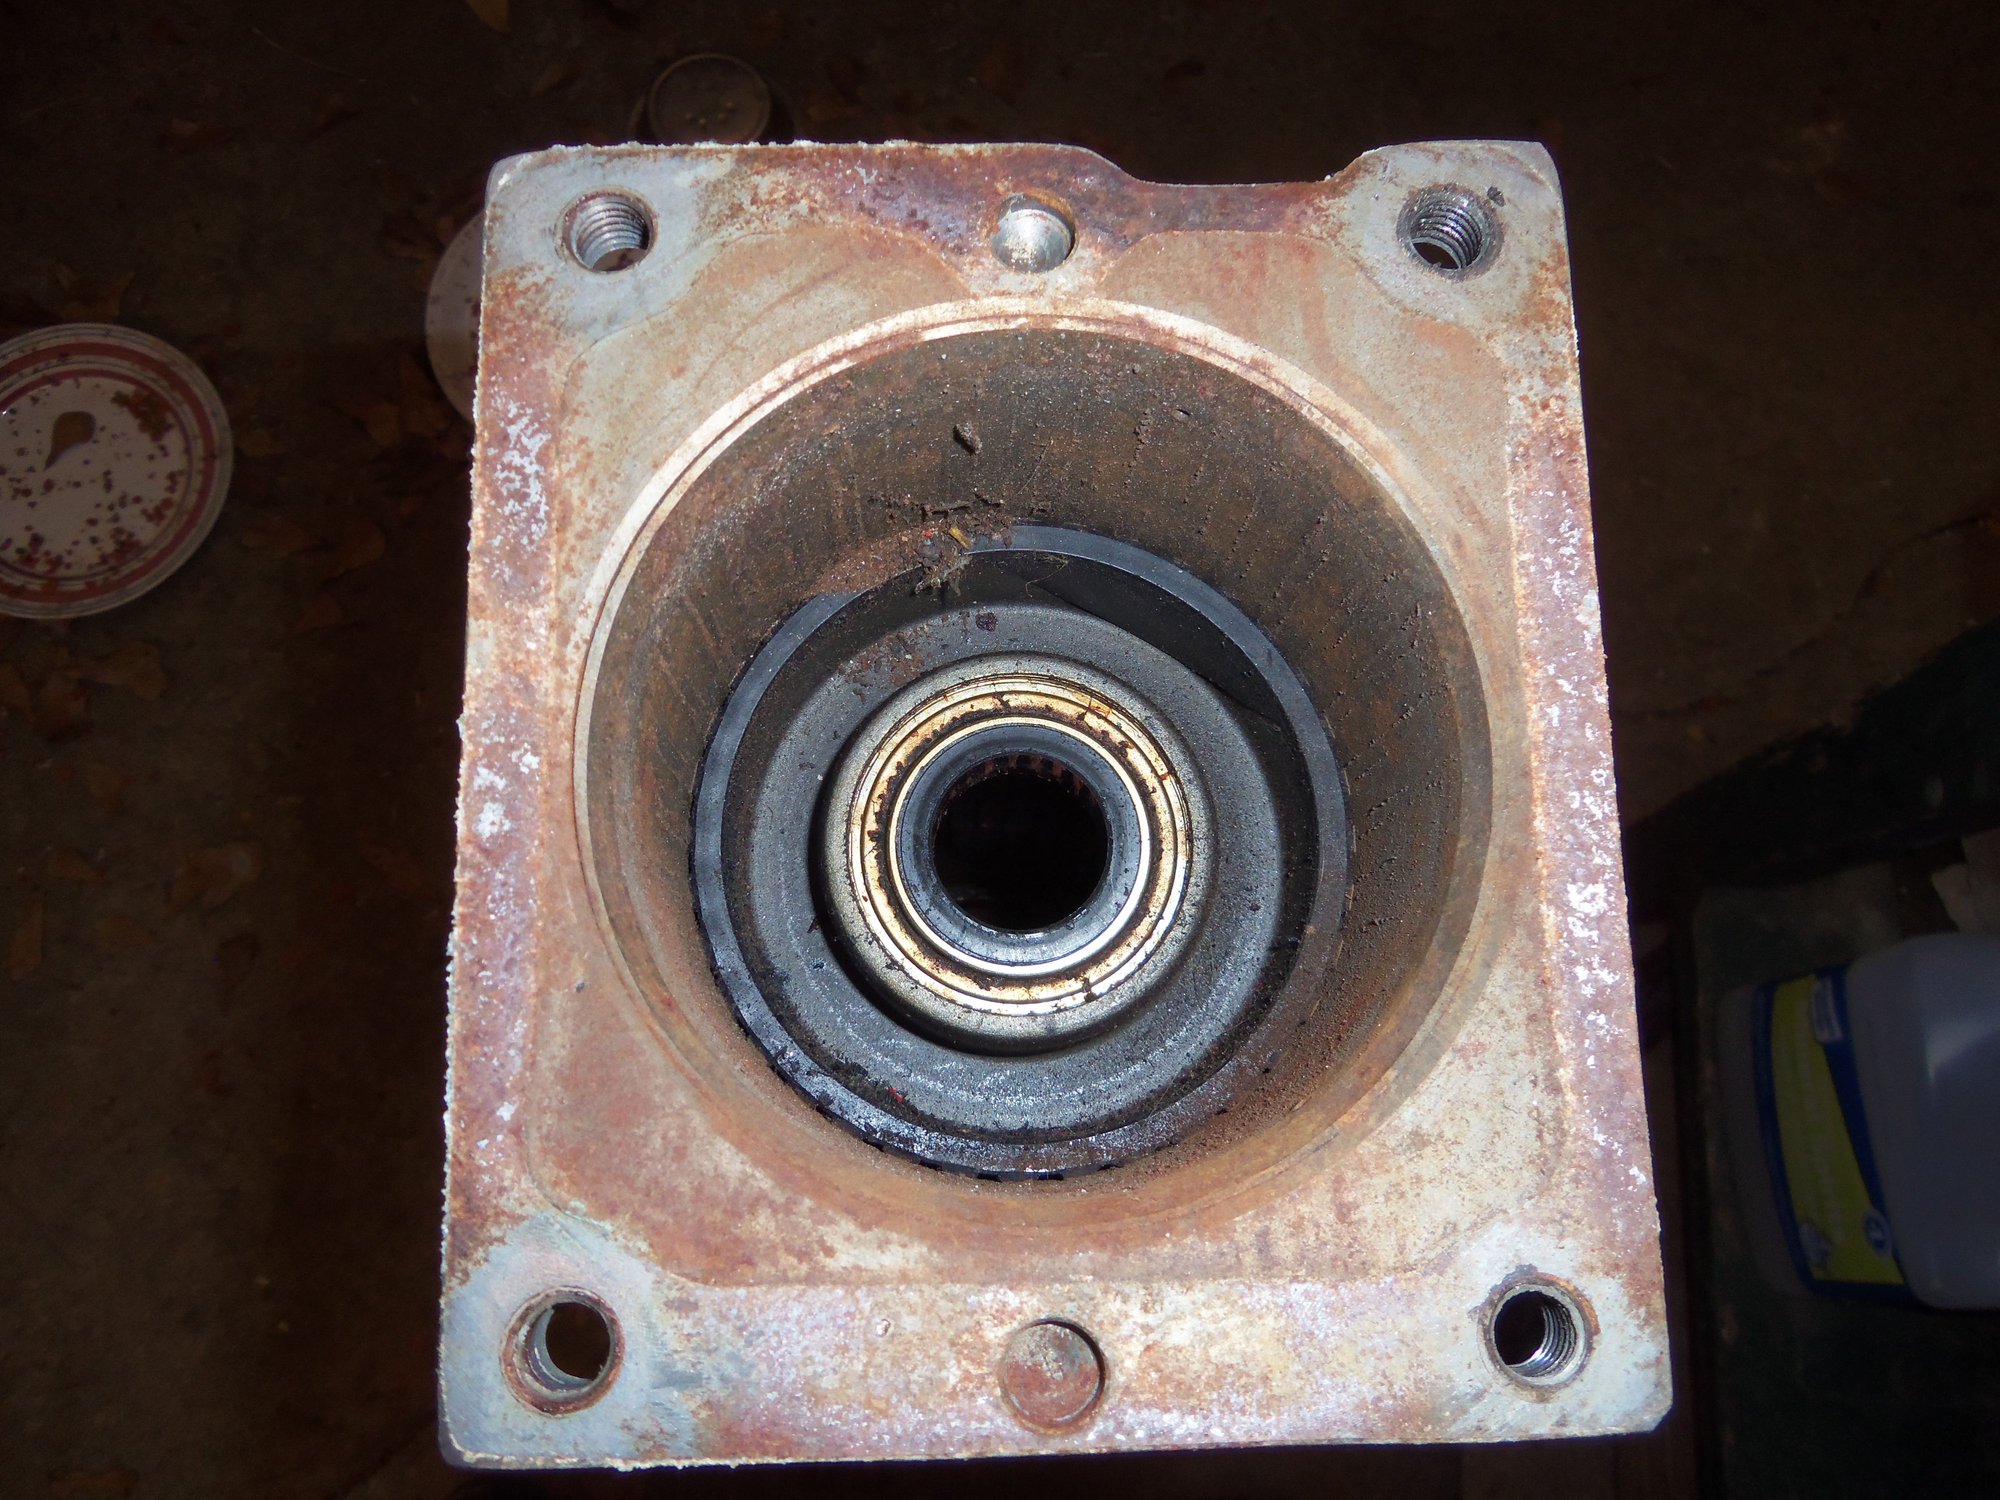
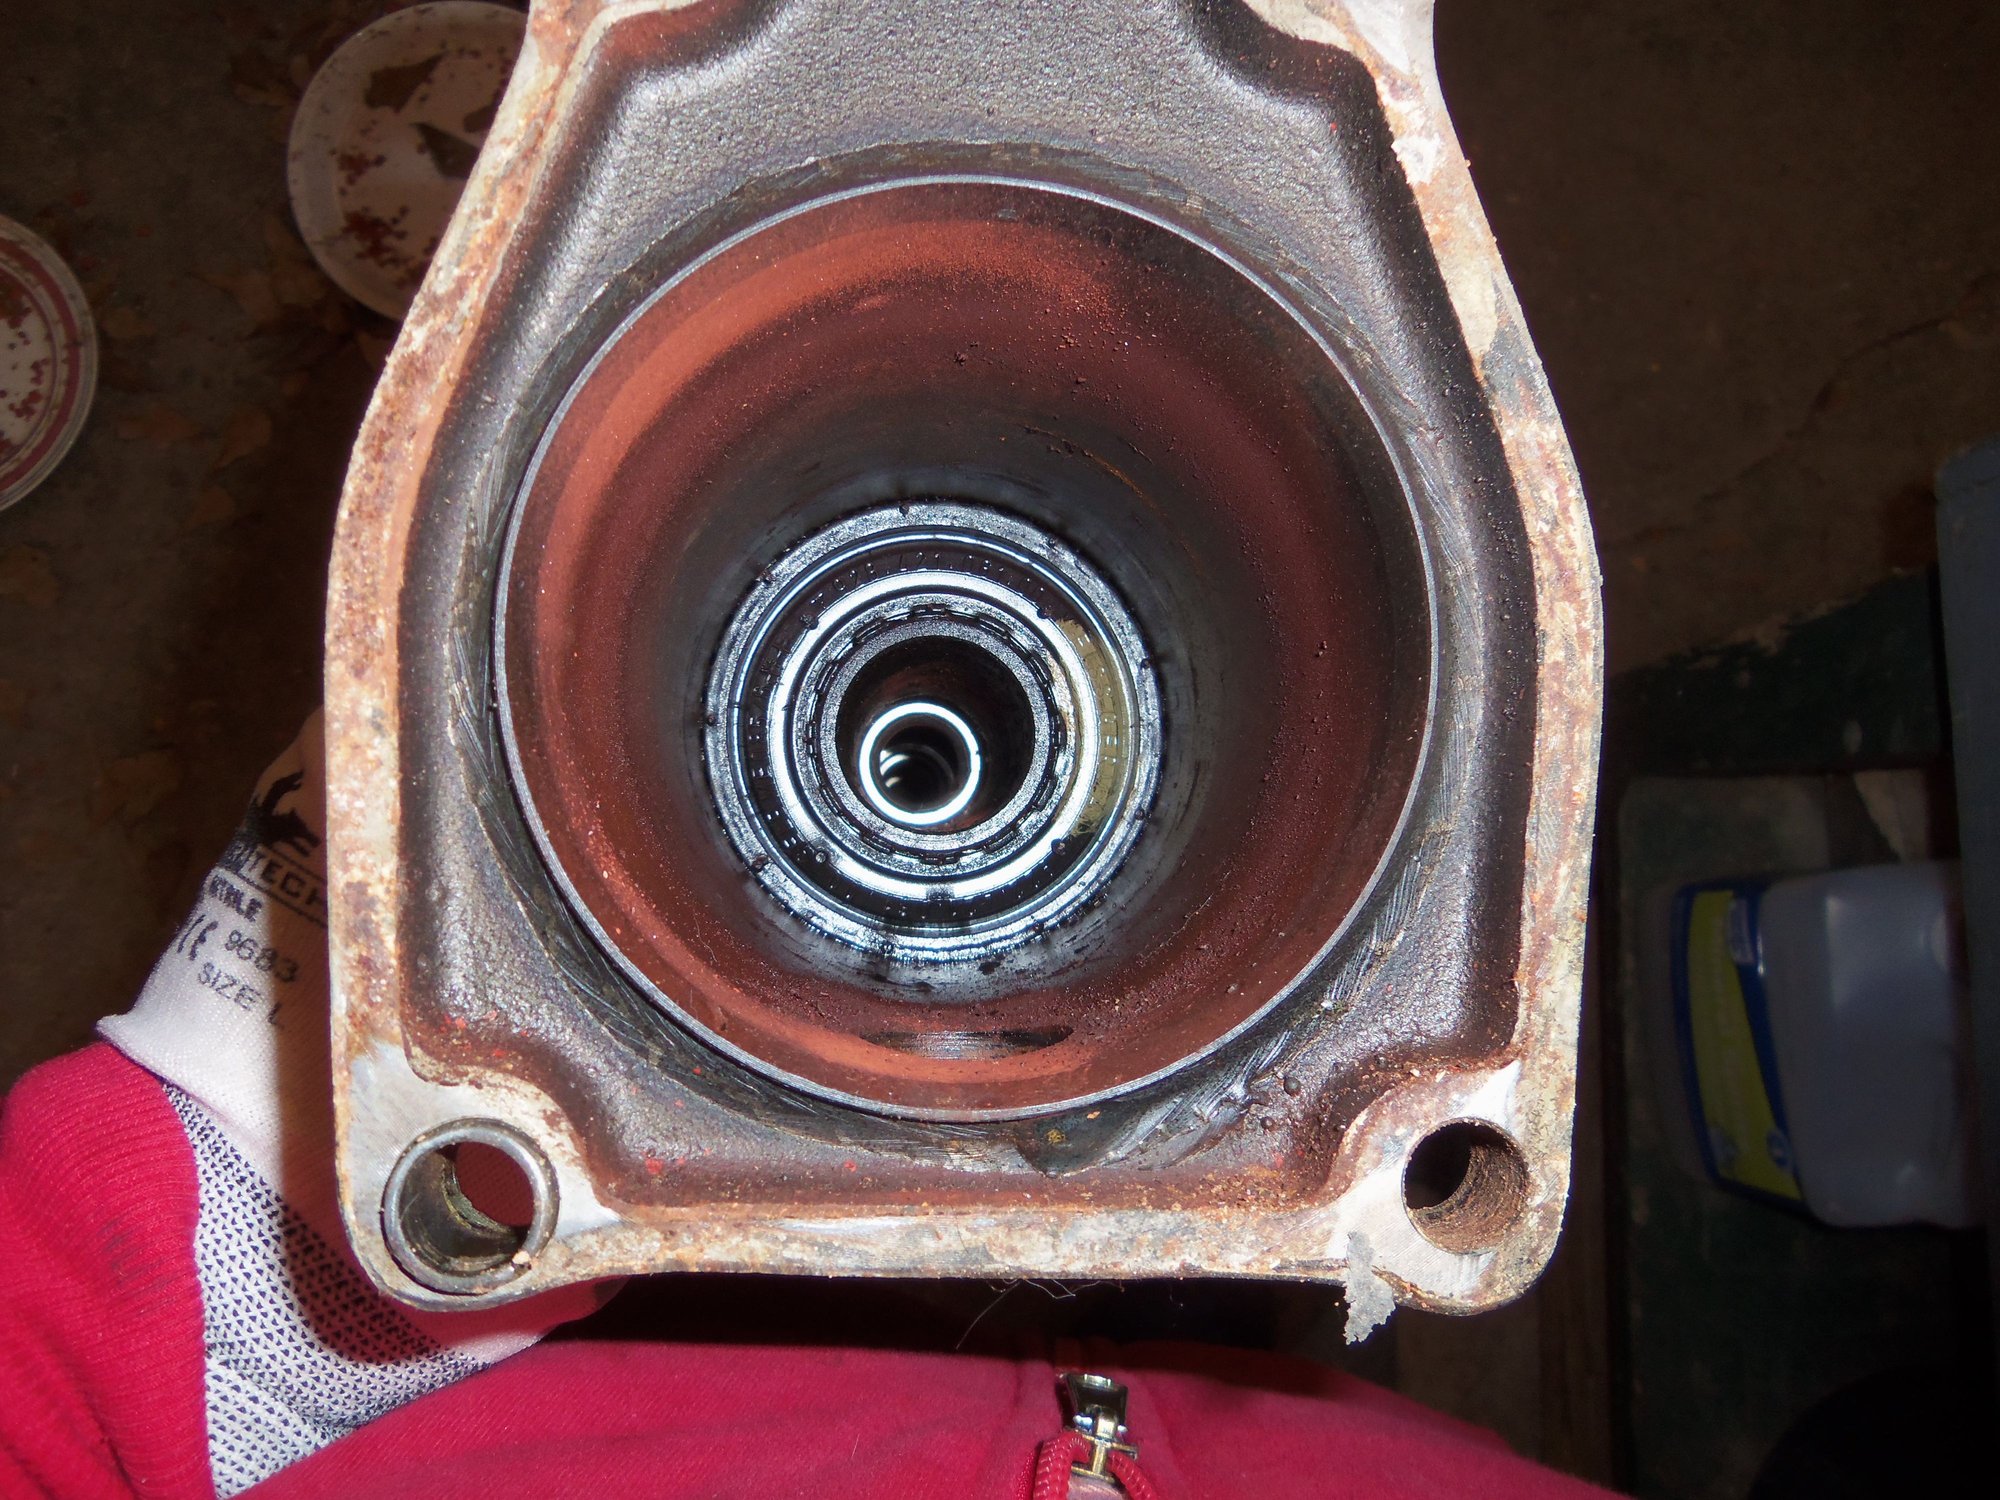
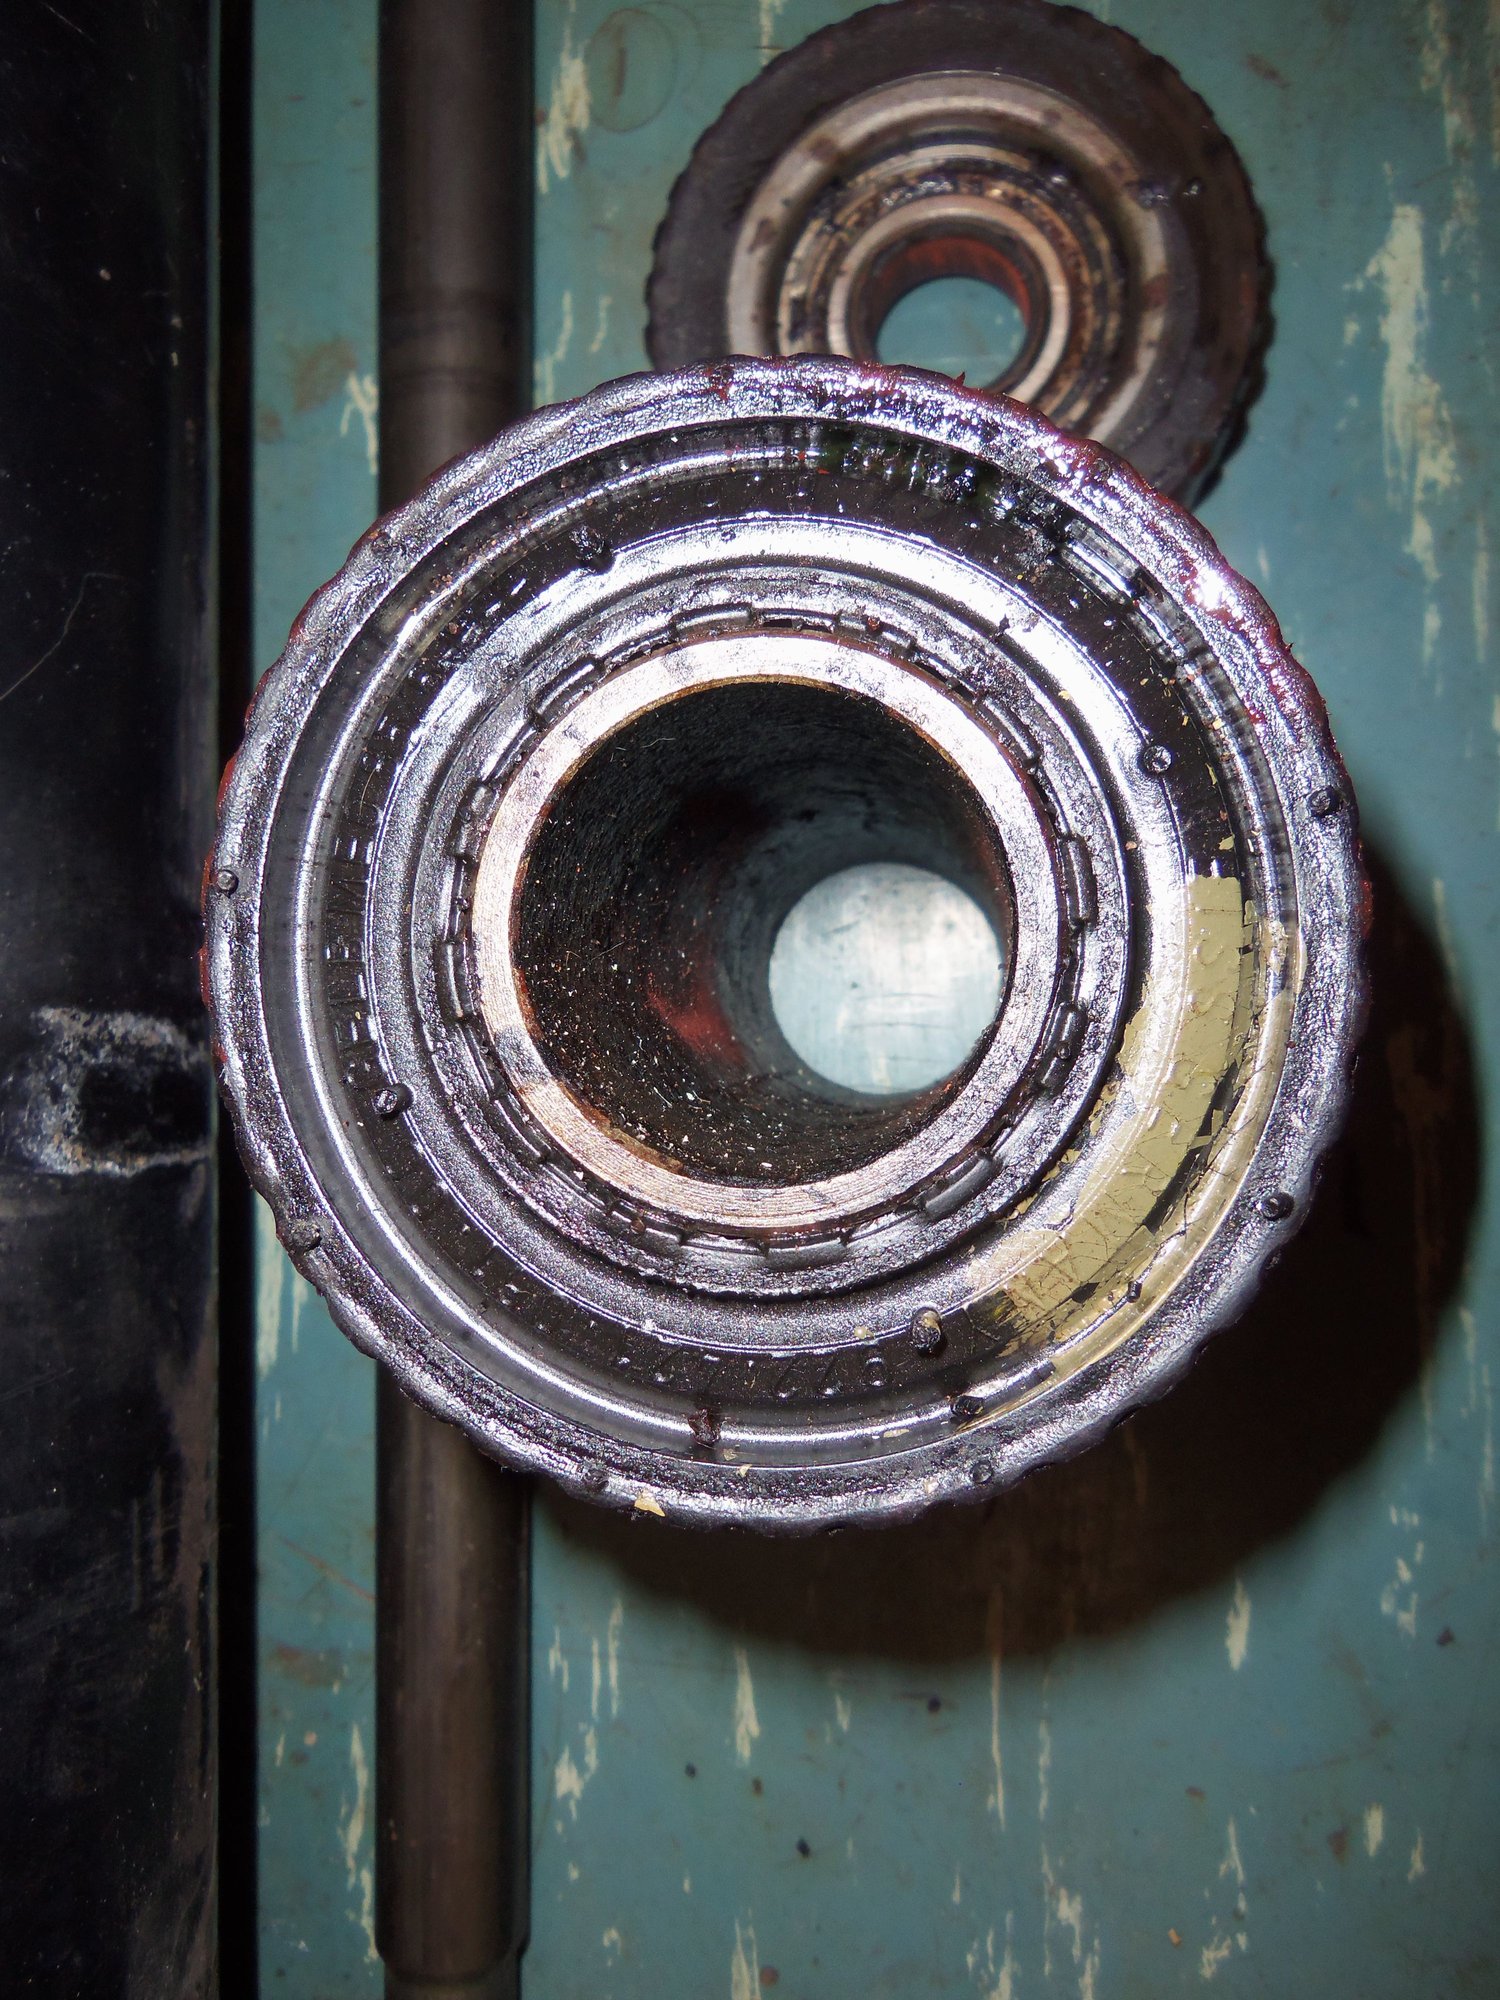
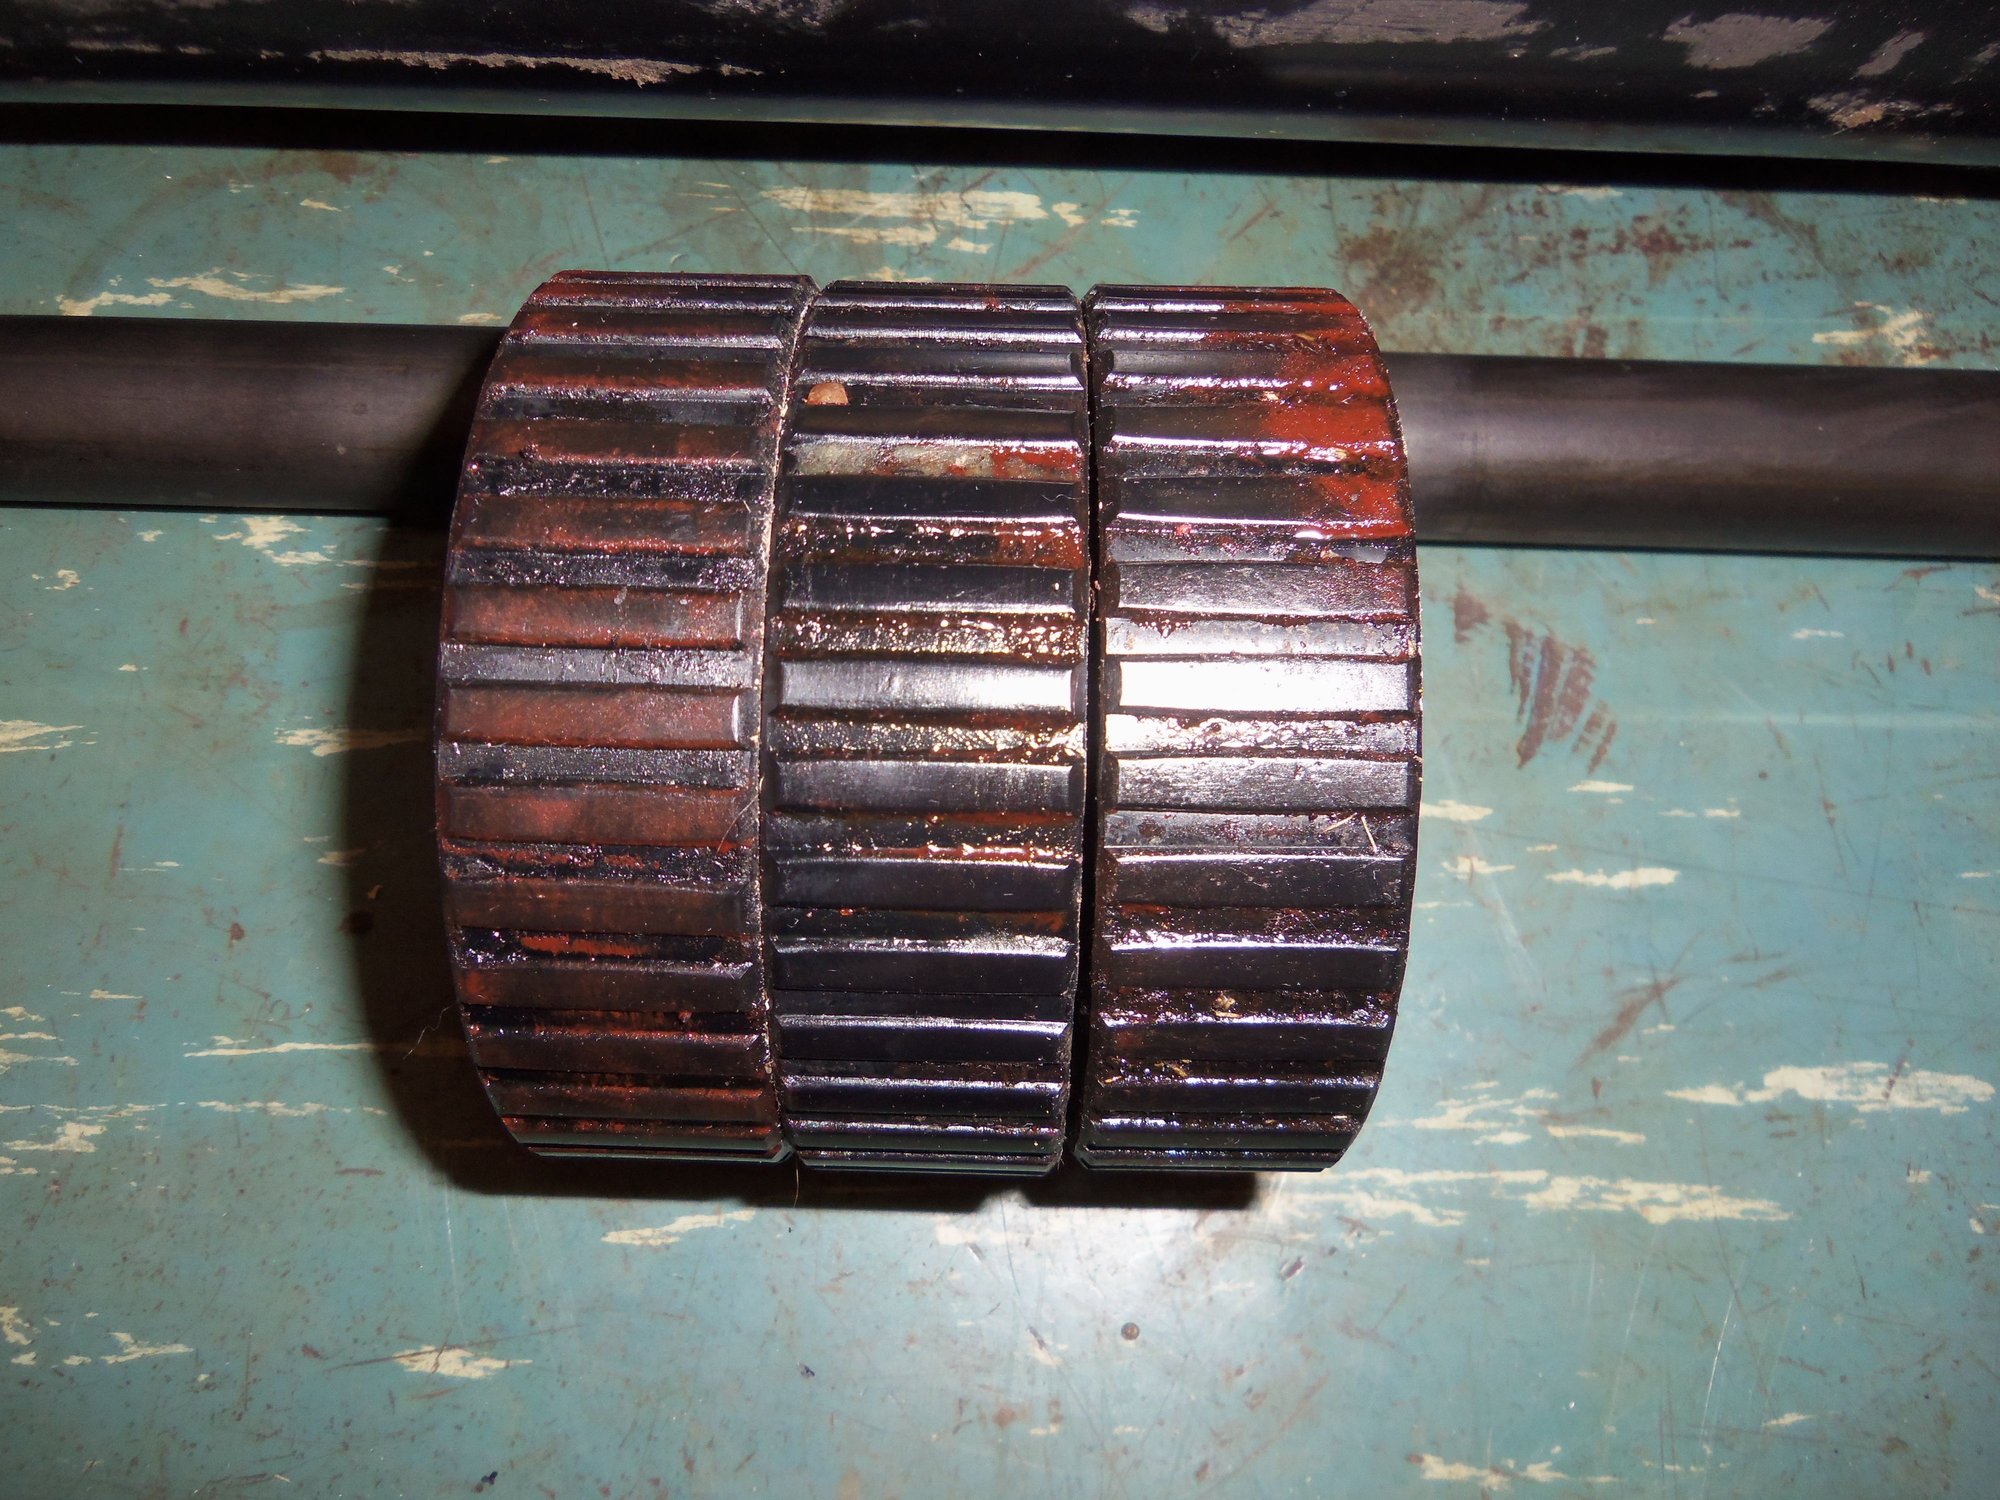
Ends off, I was able to get a good look at the bearings in the torque tube. The front bearing was pulled forward a bit, I am assuming from removing the drive shaft. It was 2 1/2" from the flange. Before disassembly, it was 3 3/4" from the flange. I was surprised to find the vibration damper at the back of the torque tube, around 6 1/2" inches from the flange. I thought it was supposed to be somewhere in the middle.
Front bearing, only 2 1/2" from the flange.
Vibration damper where I was expecting to see a bearing.
View of inside the rear of the torque tube. I believe the rust has been flung off the rear splined coupler over time.
My plan had been to use a long threaded rod and machined 3 1/2" dia wood slug to pull the bearings out of the torque tube, ala' Dwayne. Mind you, I didn't have the rod or plug yet, but that was the plan. Well...
I noticed that the piece of wood I used to tap the drive shaft out of the bearings was quite long. In fact, it was a few inches longer than the torque tube itself. Hmmm...what could it hurt?
Answer: my right arm. After about an hour of swinging the 2lbs hammer and splintering the piece of wood, all three bearings and the vibration damper came out. I was not expecting the third bearing. Somewhere I got it in my head that automatic torque tubes only had two bearings and the vibrating damper.
Alot of brute force. No finesse.
Vibration damper appearing at the back end of the torque tube.
Torque tube, some assembly required.
This is academic, but the rubber looks OK on all the bearings and vibration damper. Academic because I am replacing it all, and because I damaged one of the bearing holders. Turns out I got a little too medieval with the wood and hammer. As the wood splintered, it formed itself into the bearing pocket on the front bearing. The repeated blows pushed the bearing out of the holder and deformed the holder. This would not have happened with Dwayne's method.
Showing position of drive shaft in torque tube, and approximate positions of vibration damper and rear bearing.
Showing approximate positions of middle and front bearings.
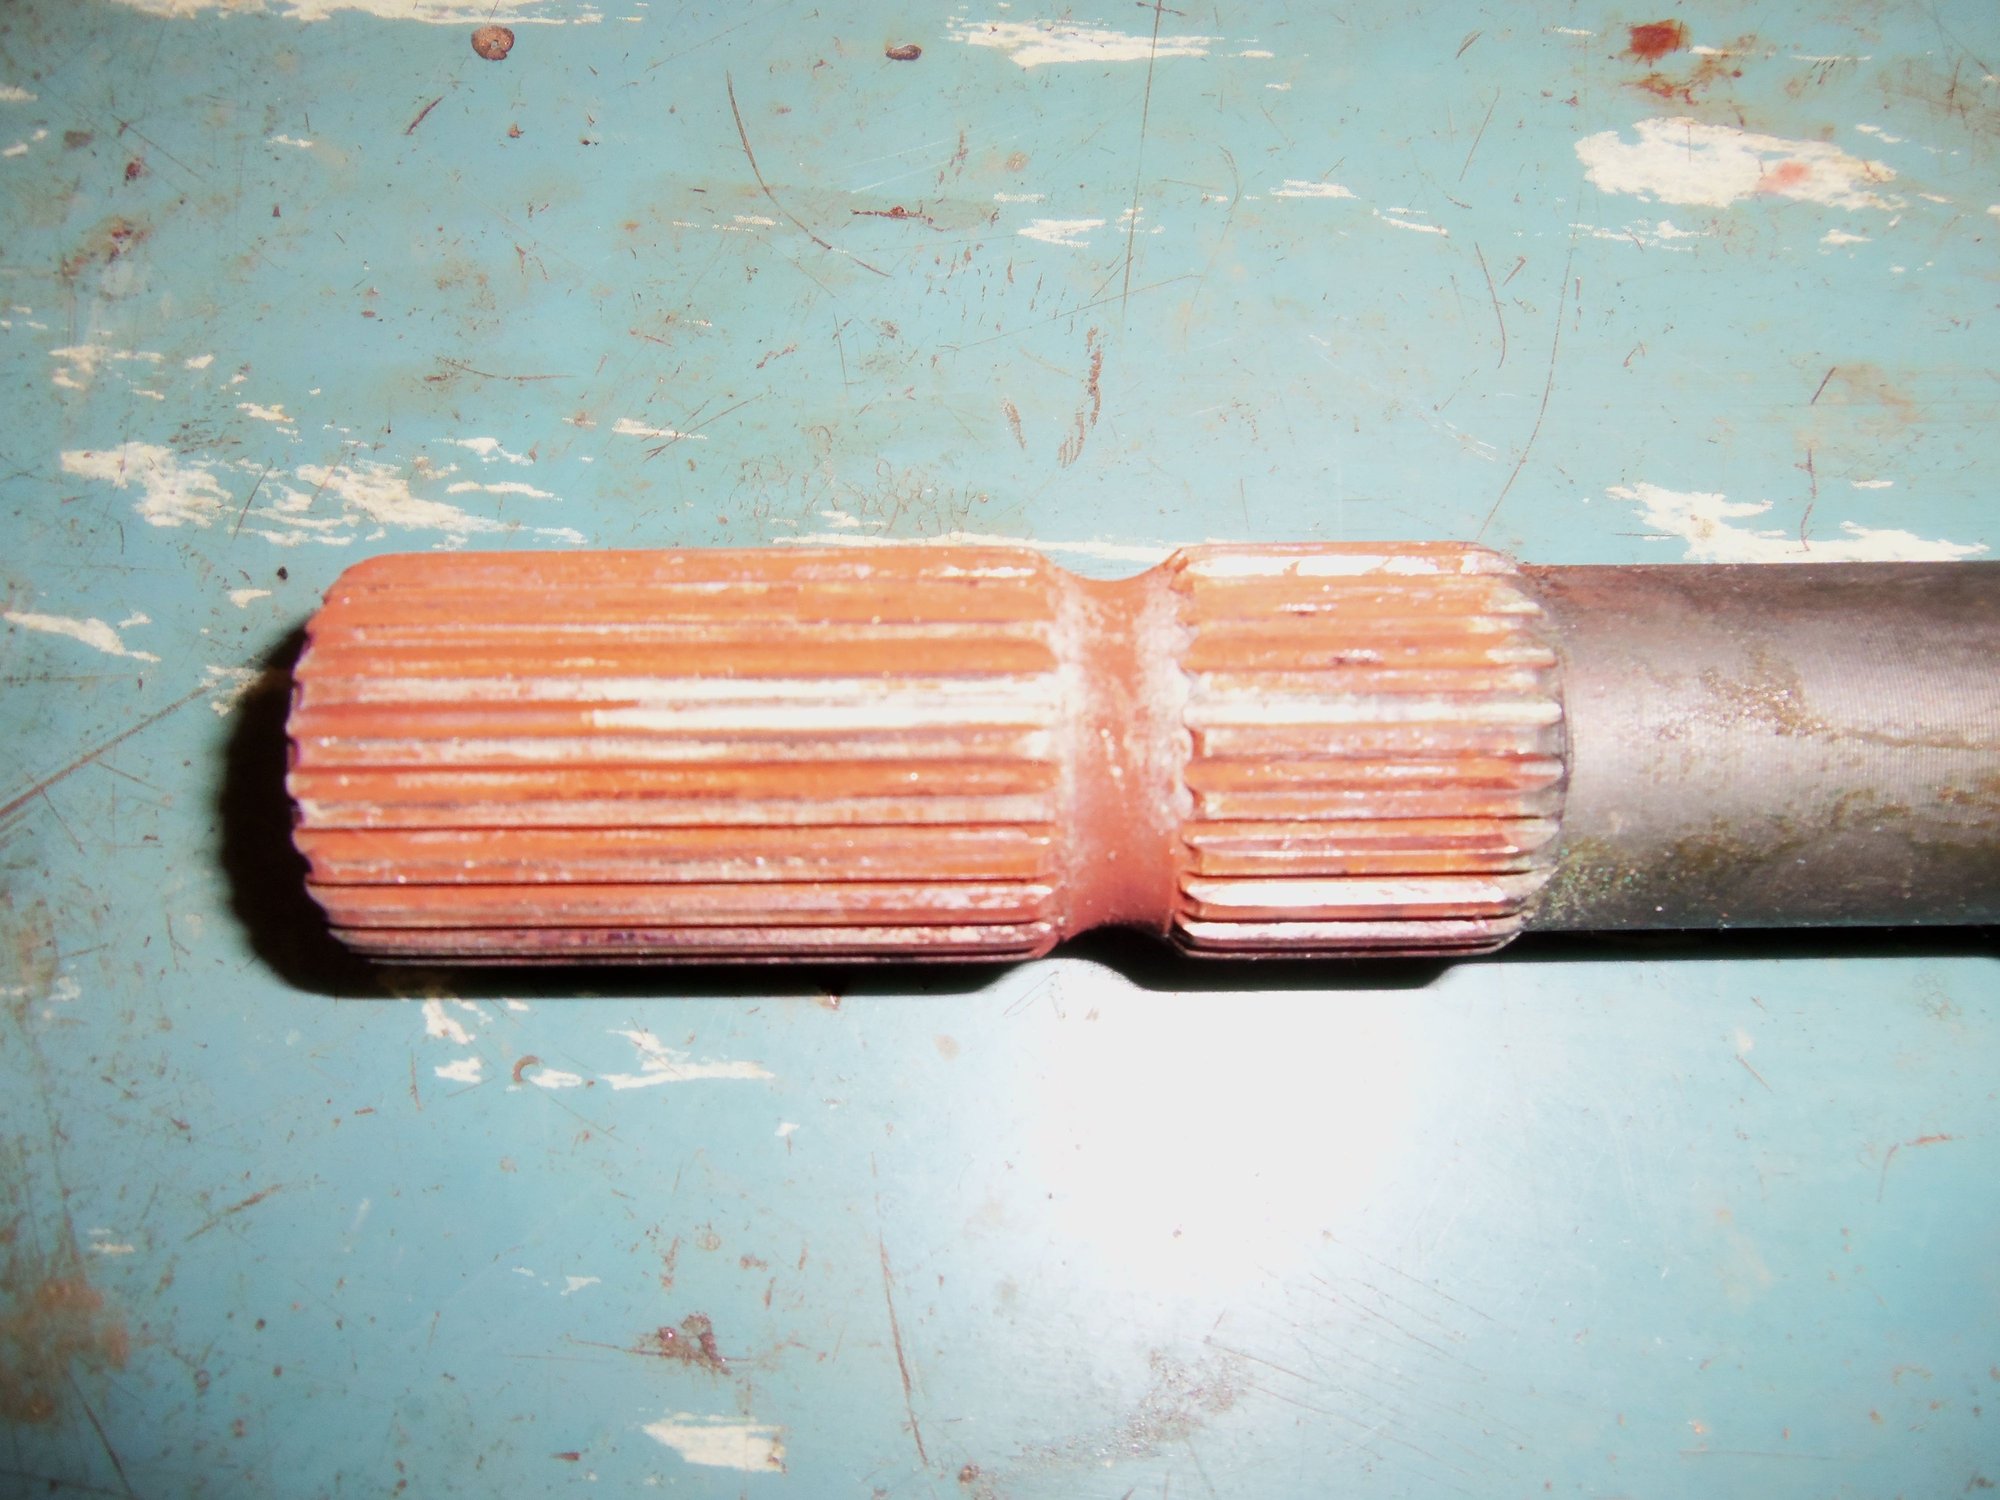
Position of front bearing on shaft. Not sure what to make of the shiny surface.
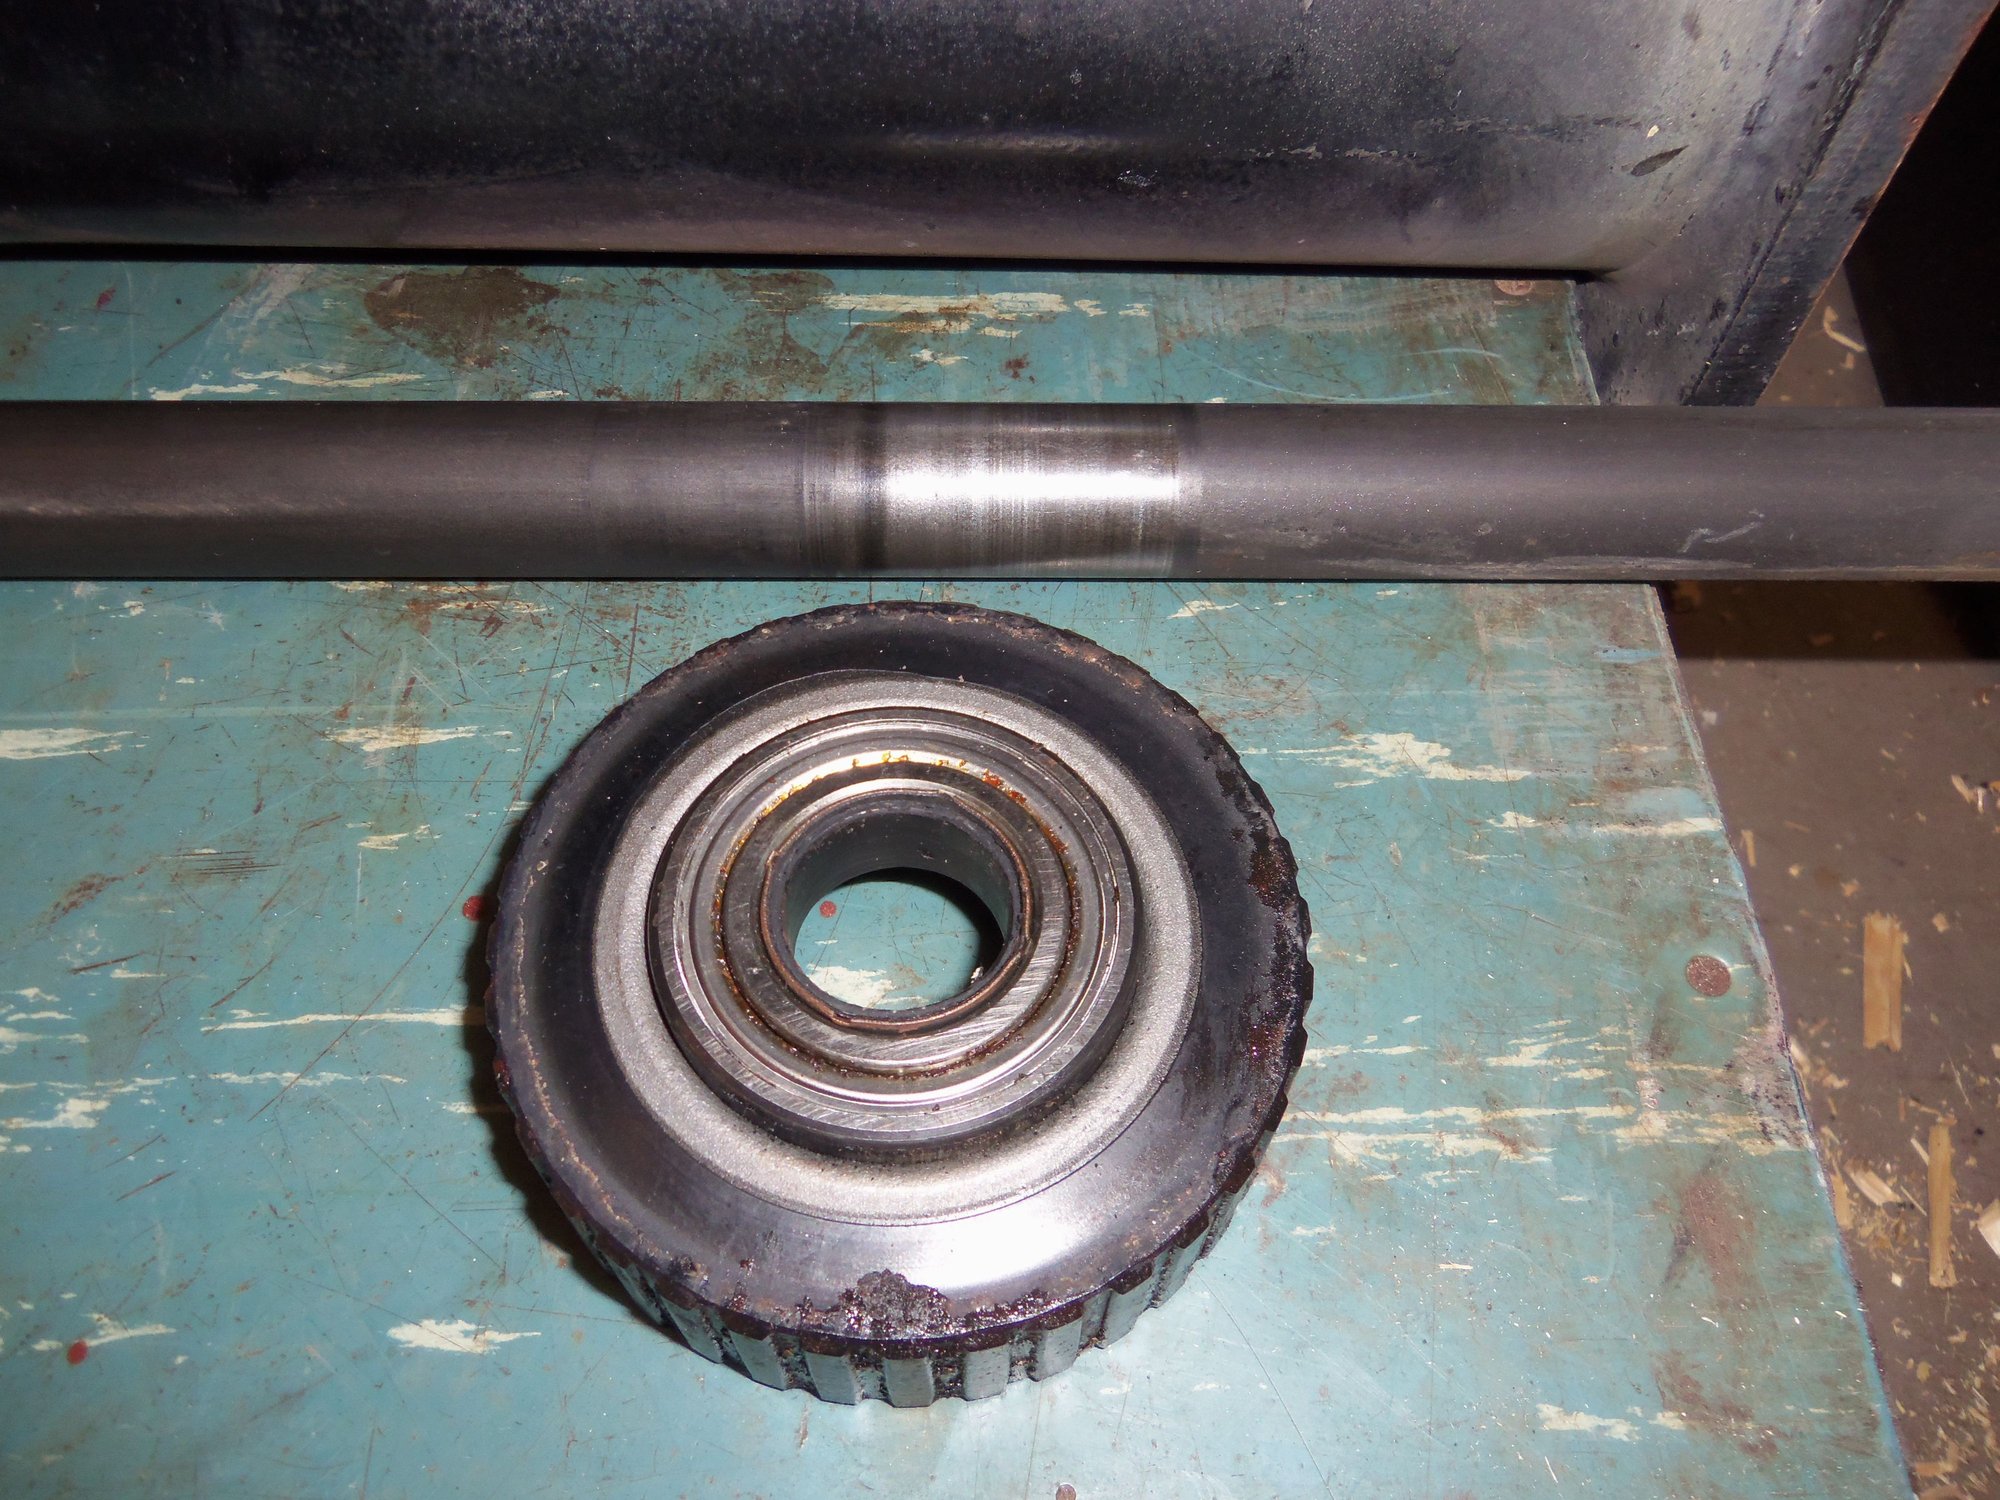
Position of middle bearing on shaft.
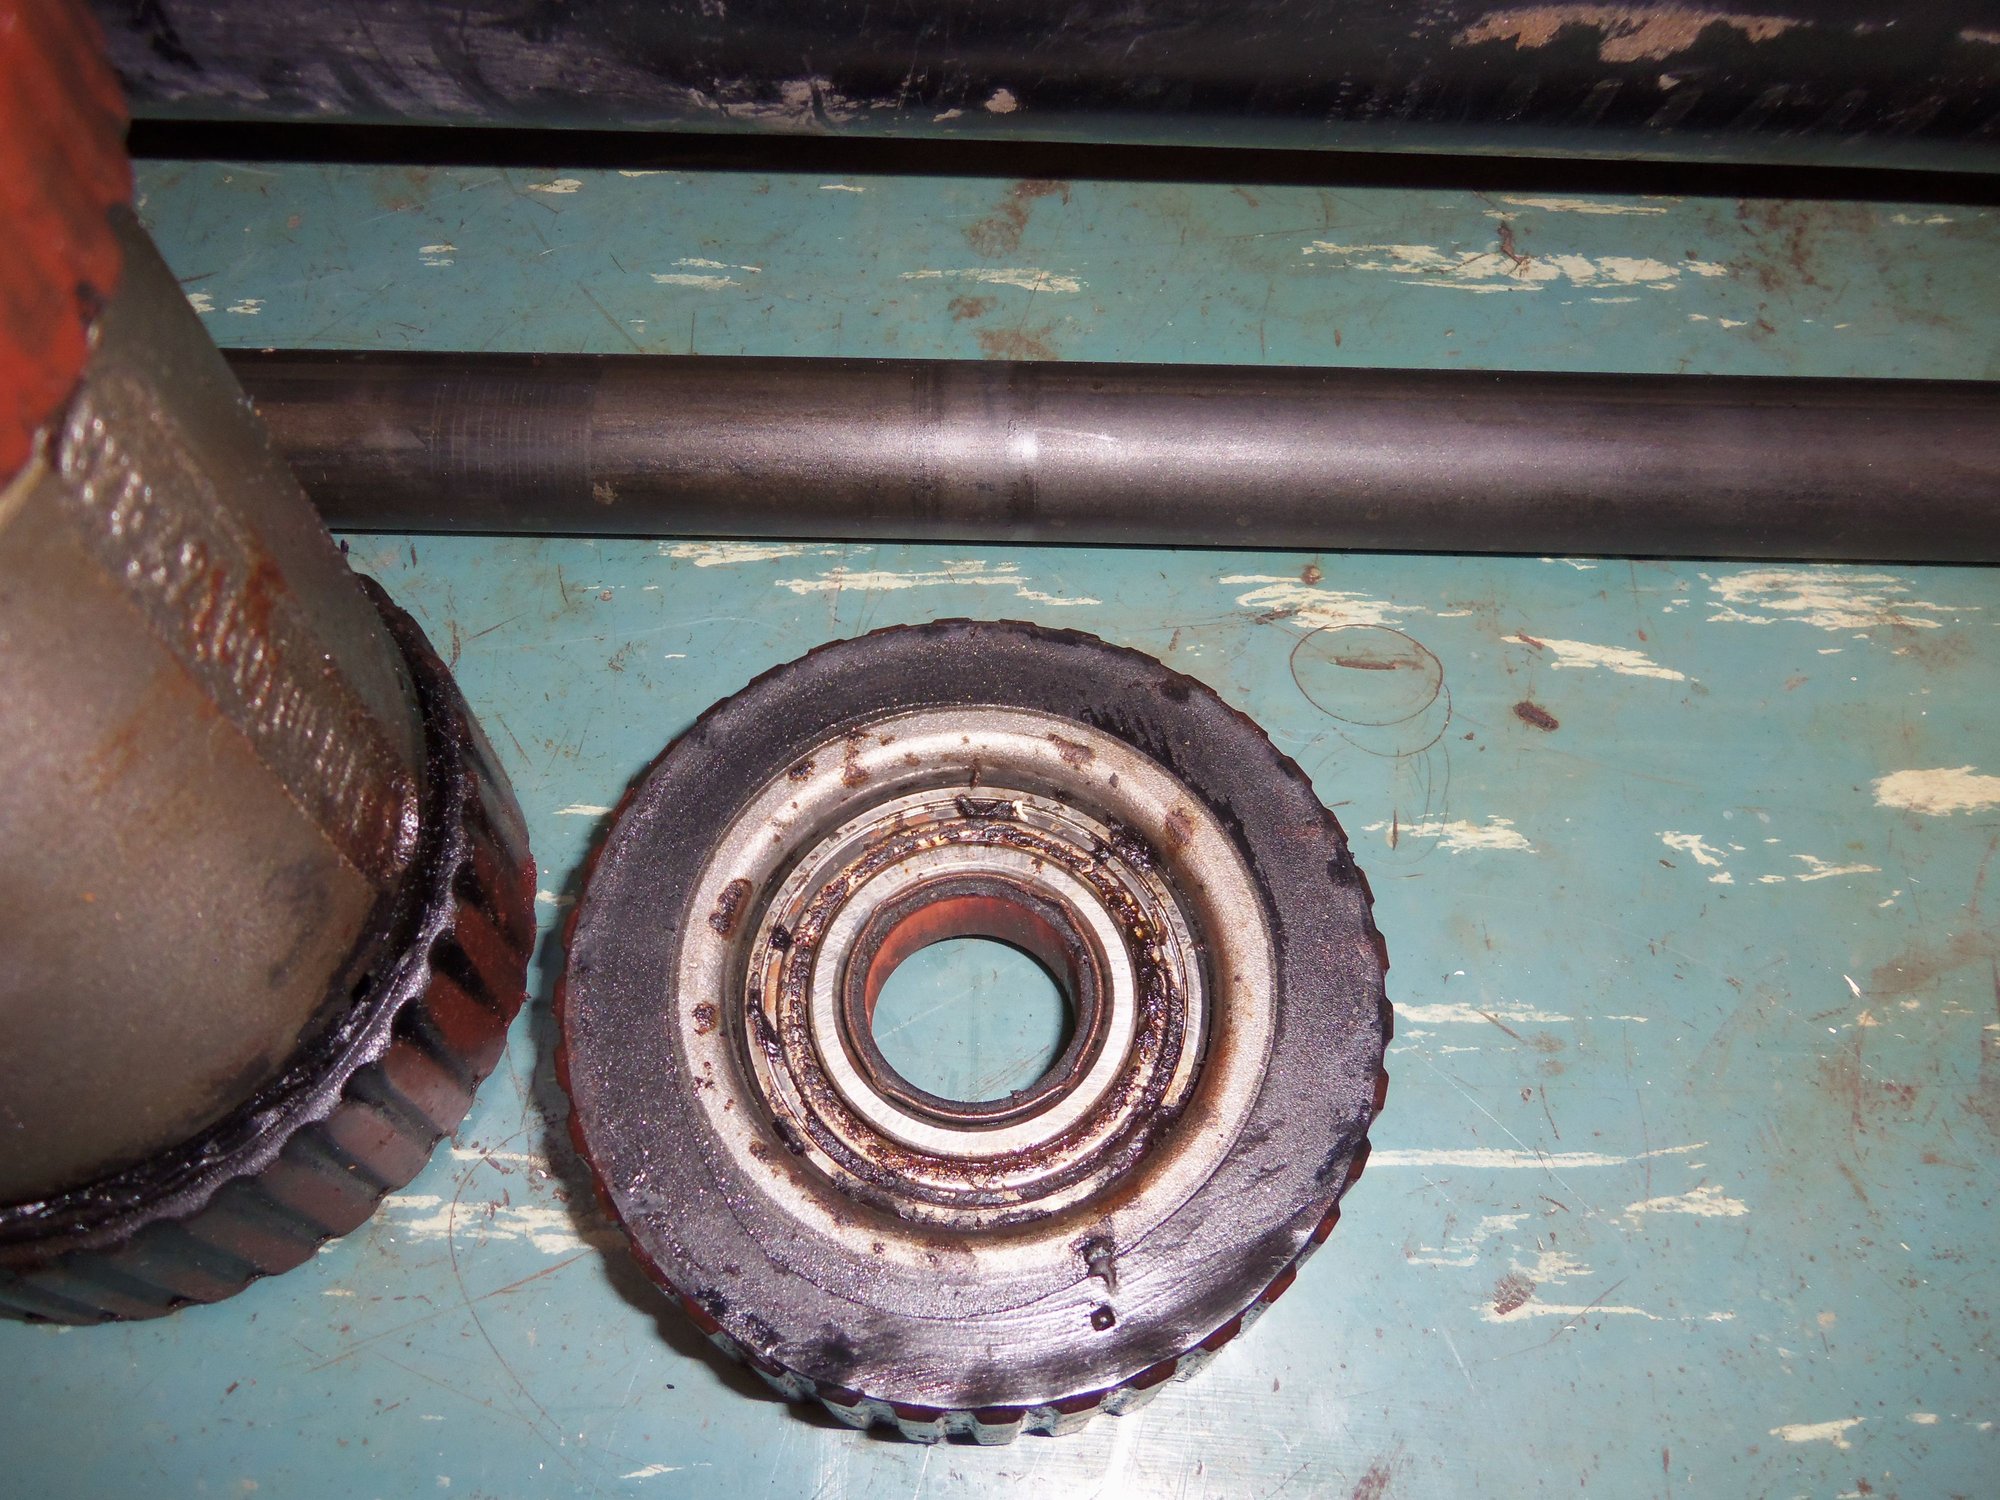
Position of rear bearing on shaft.
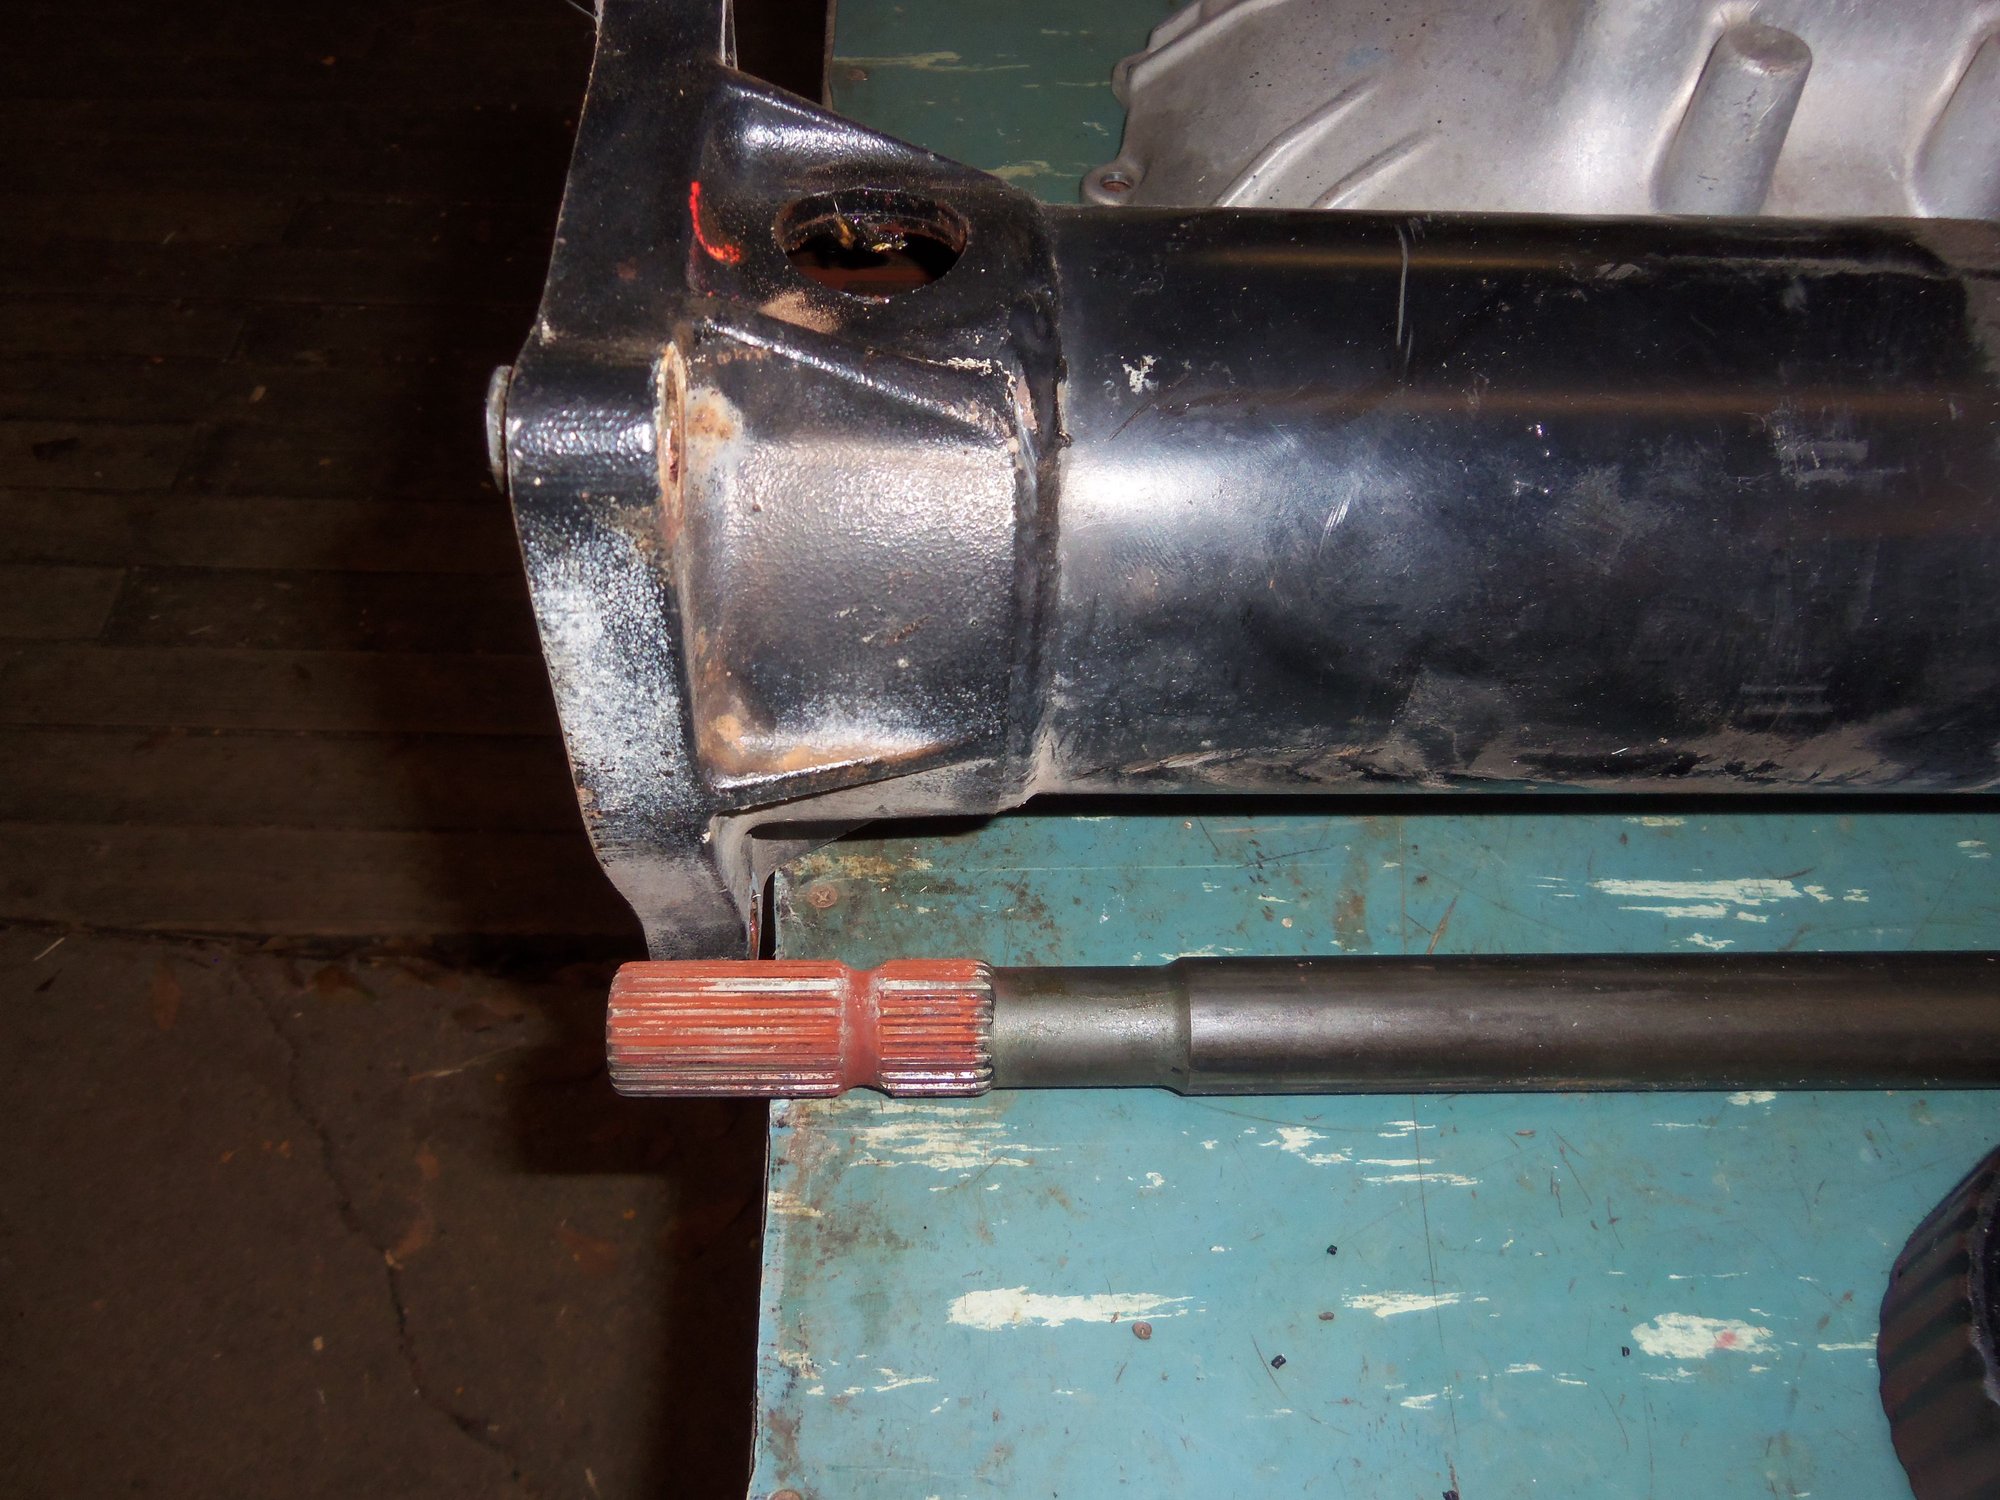
Position of rear splined section of shaft in torque tube.
End piece of vibration damper.
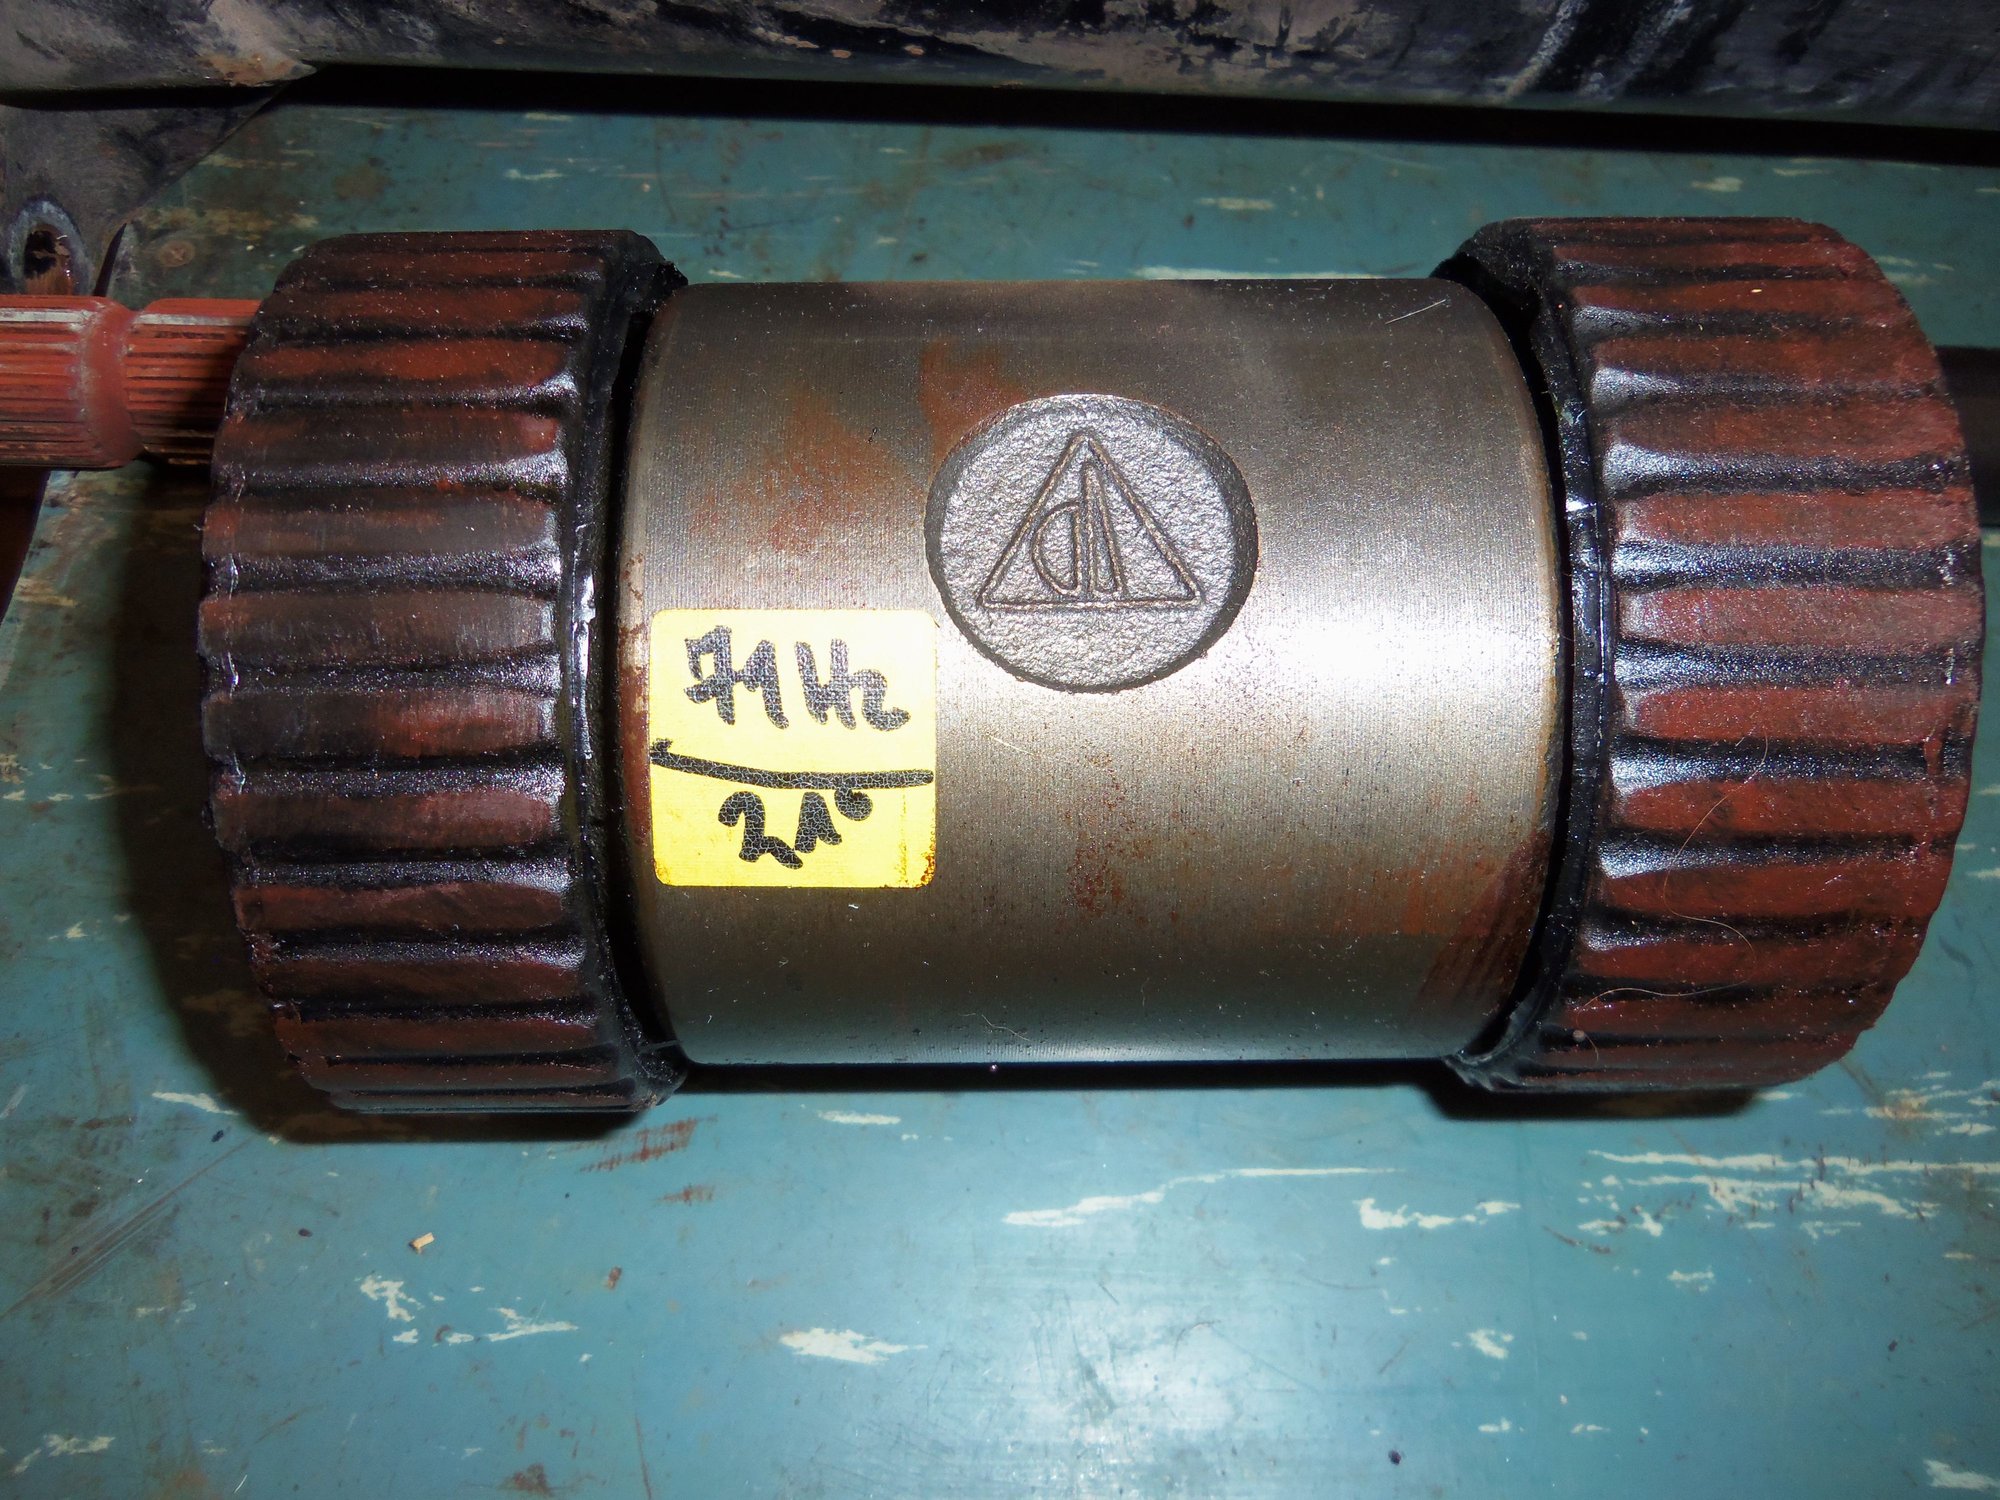
Vibration damper. I am assuming the sticker means the damper is tuned to 79Hz? Rubber grooves look in reasonably good condition.
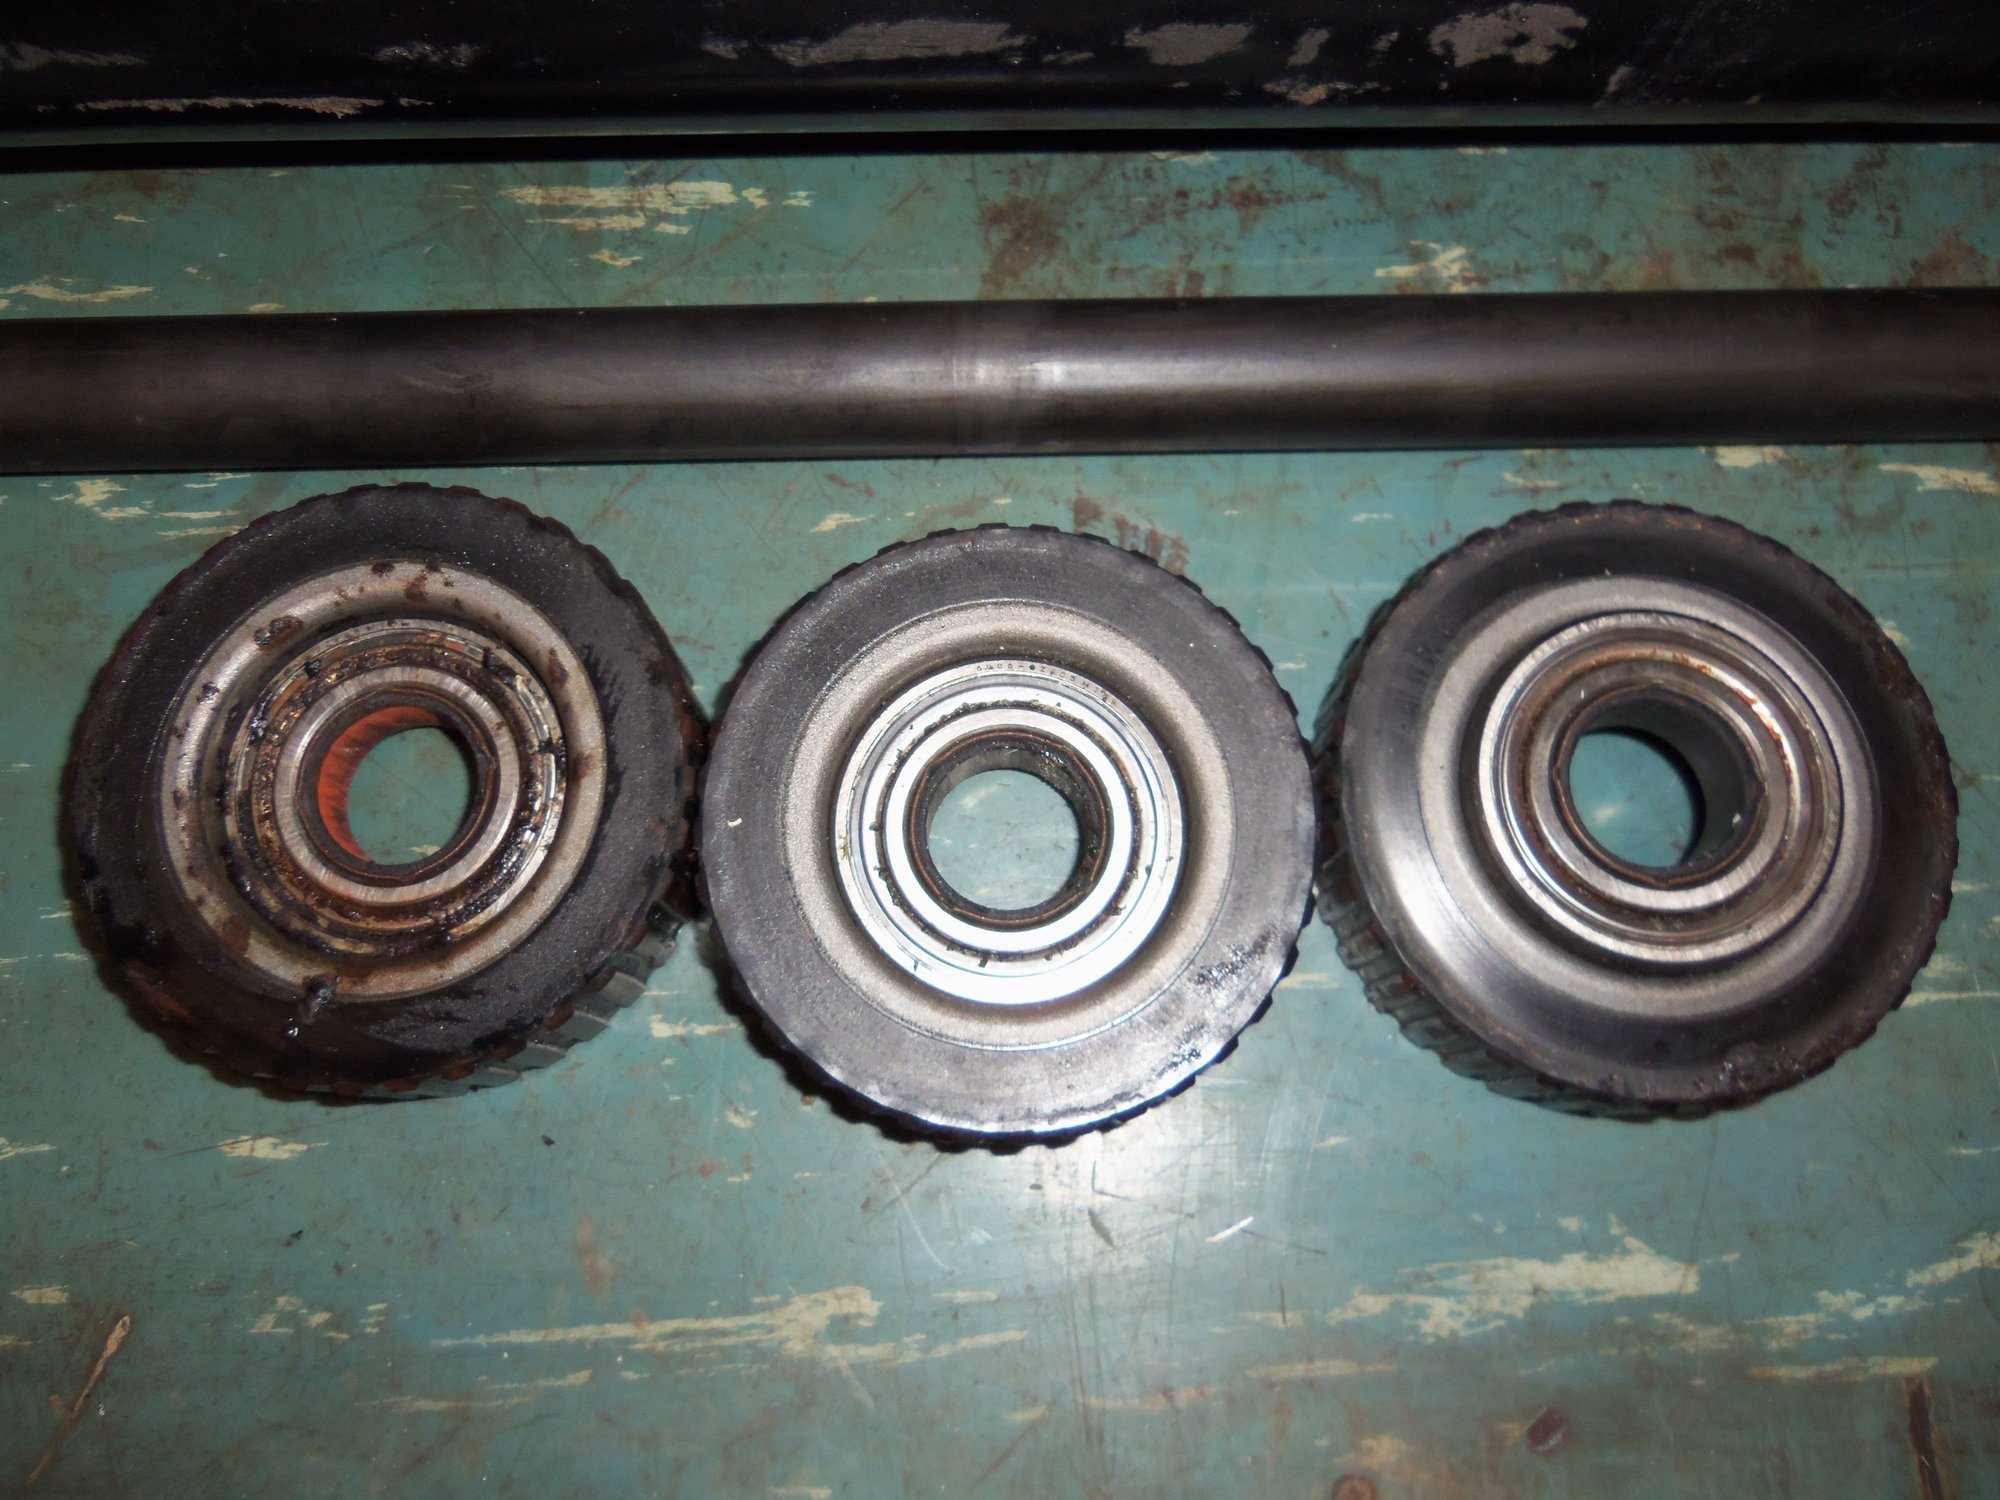
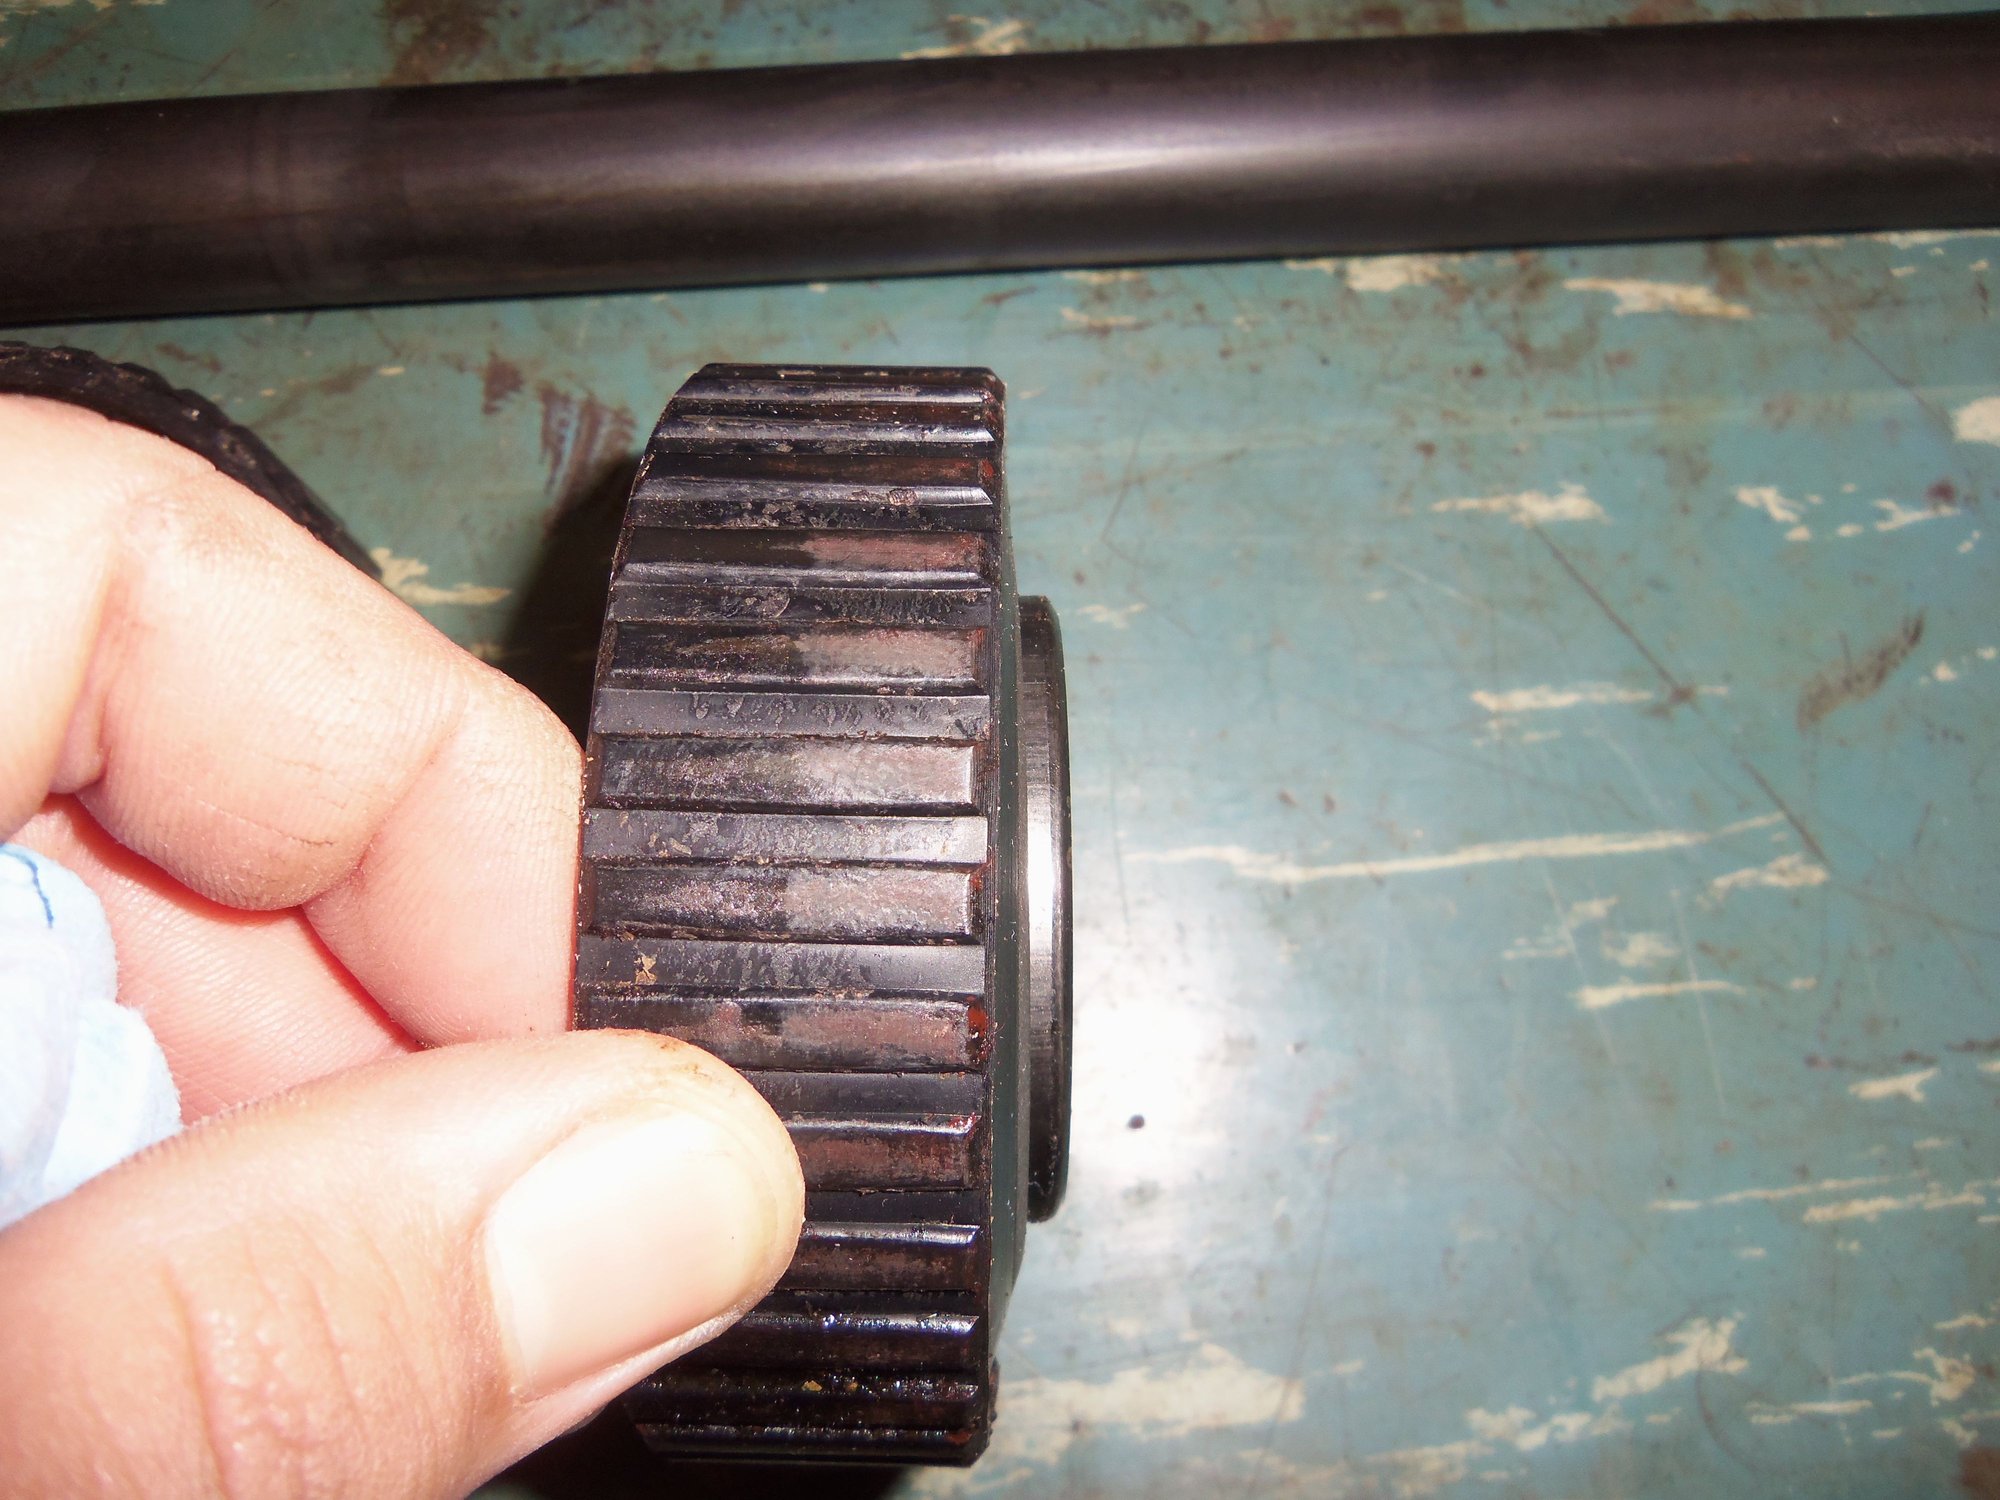
Closed faces of the bearing holders. Look closely, you can see the deformed front bearing holder at the right.
Open faces of the bearing holders. Look closely, you can see the deformed bearing pocket and moved bearing on the front bearing holder at the right.
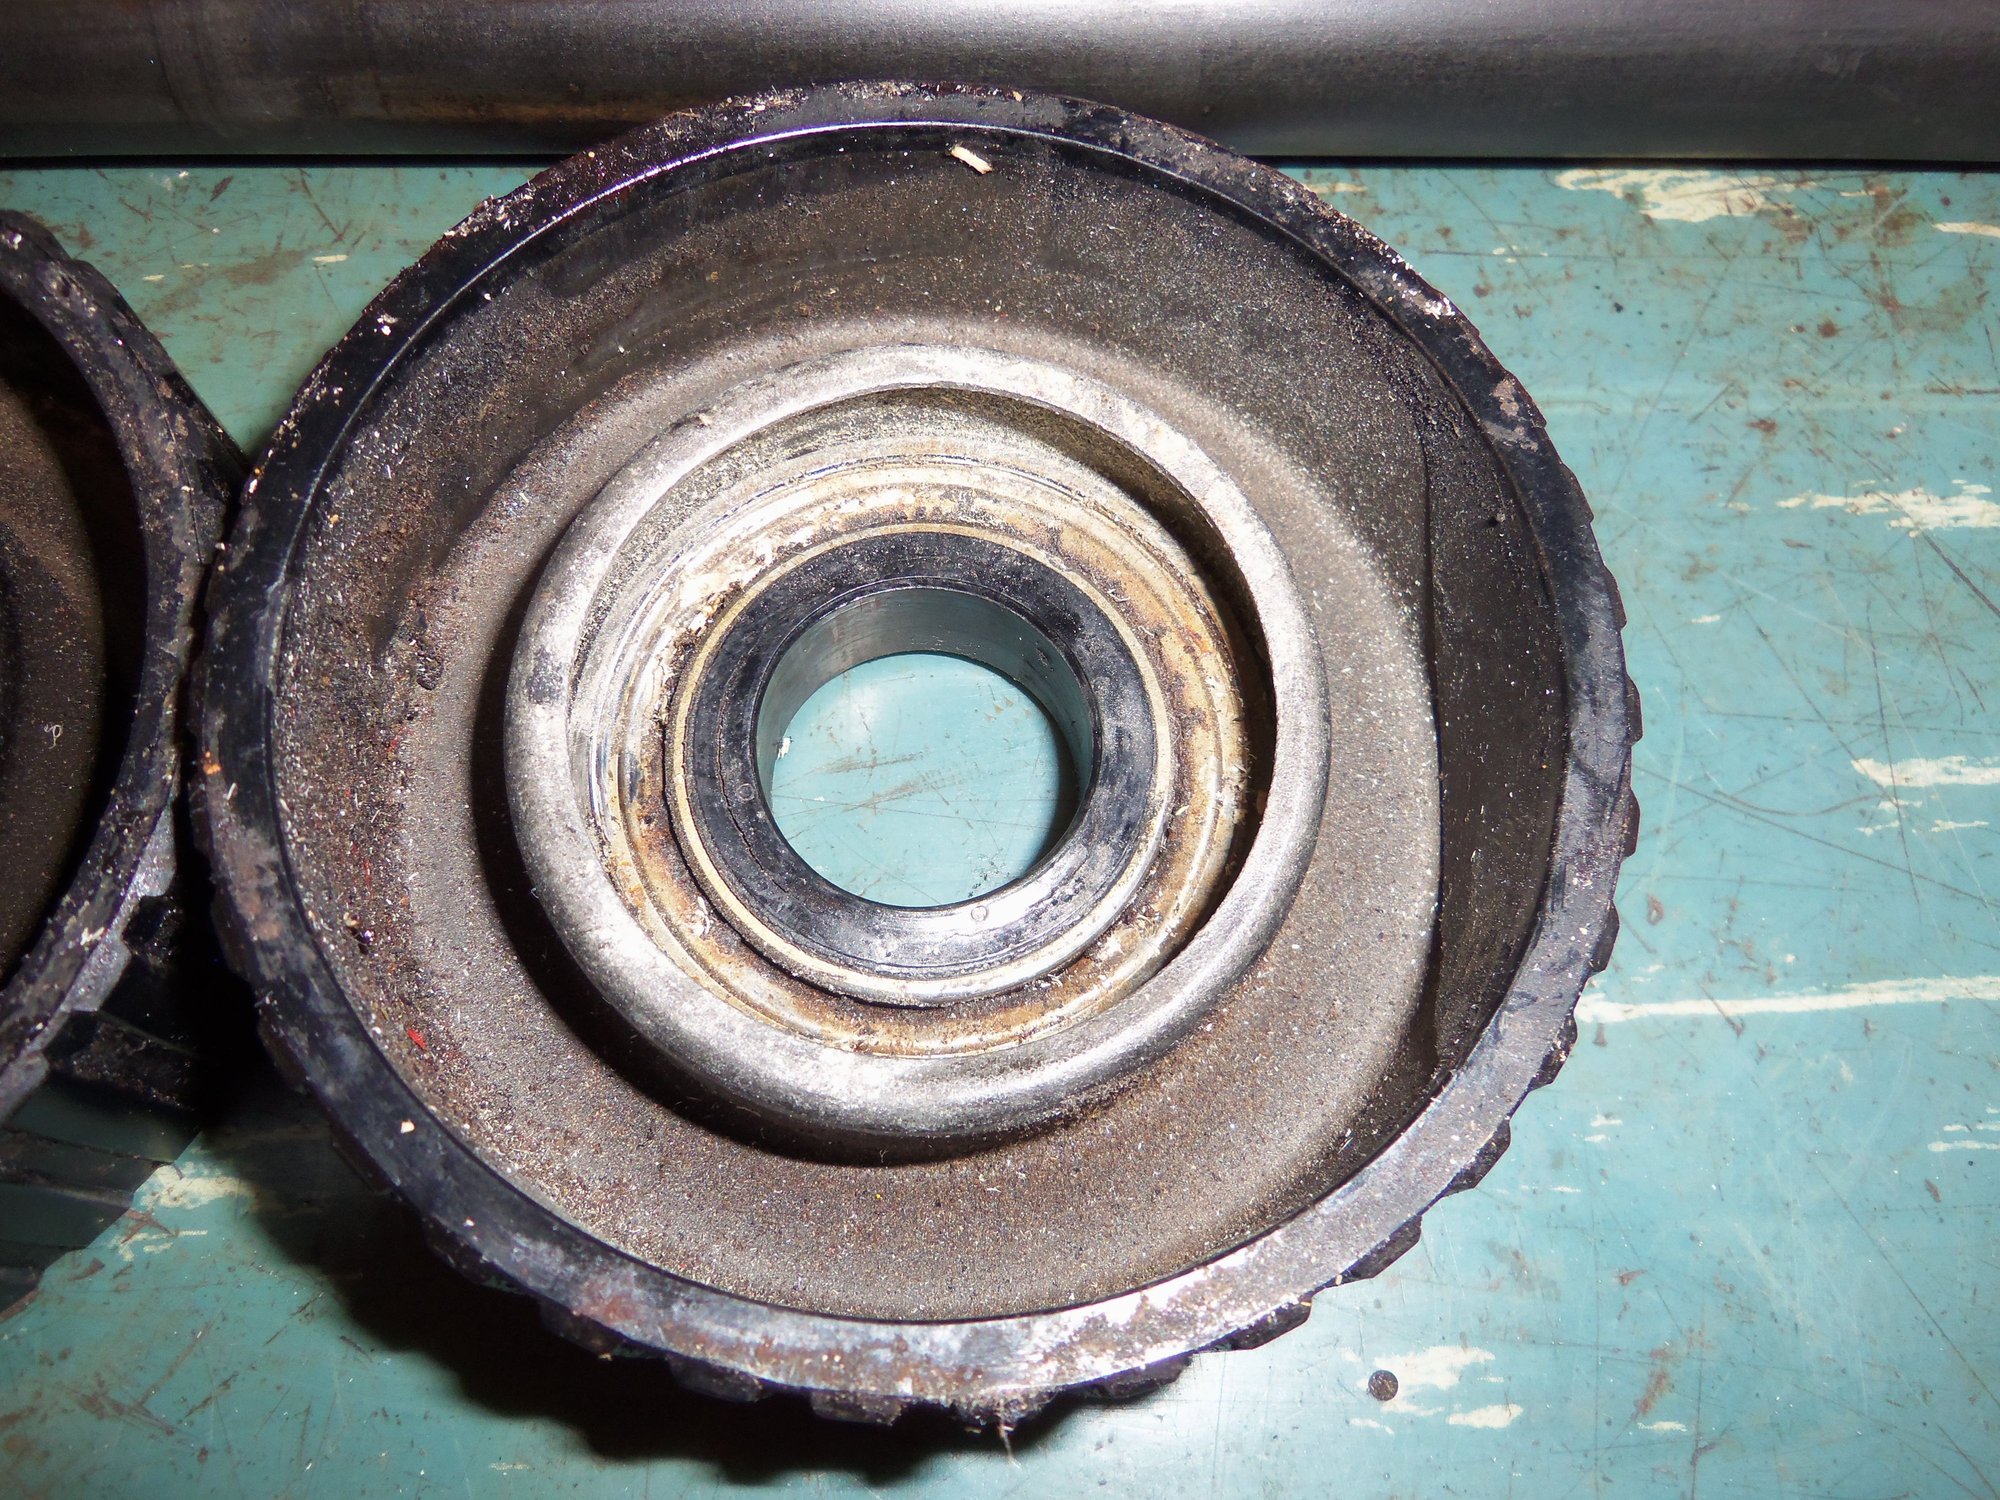
Bearing pushed out of the pocket on the front bearing holder.
Rubber grooves reasonably good condition on all three bearing holders.
Closed face of front bearing holder deformed and pushed out.
Closed face of middle bearing holder on the left, deformed closed face of front bearing holder on the right. Oops...
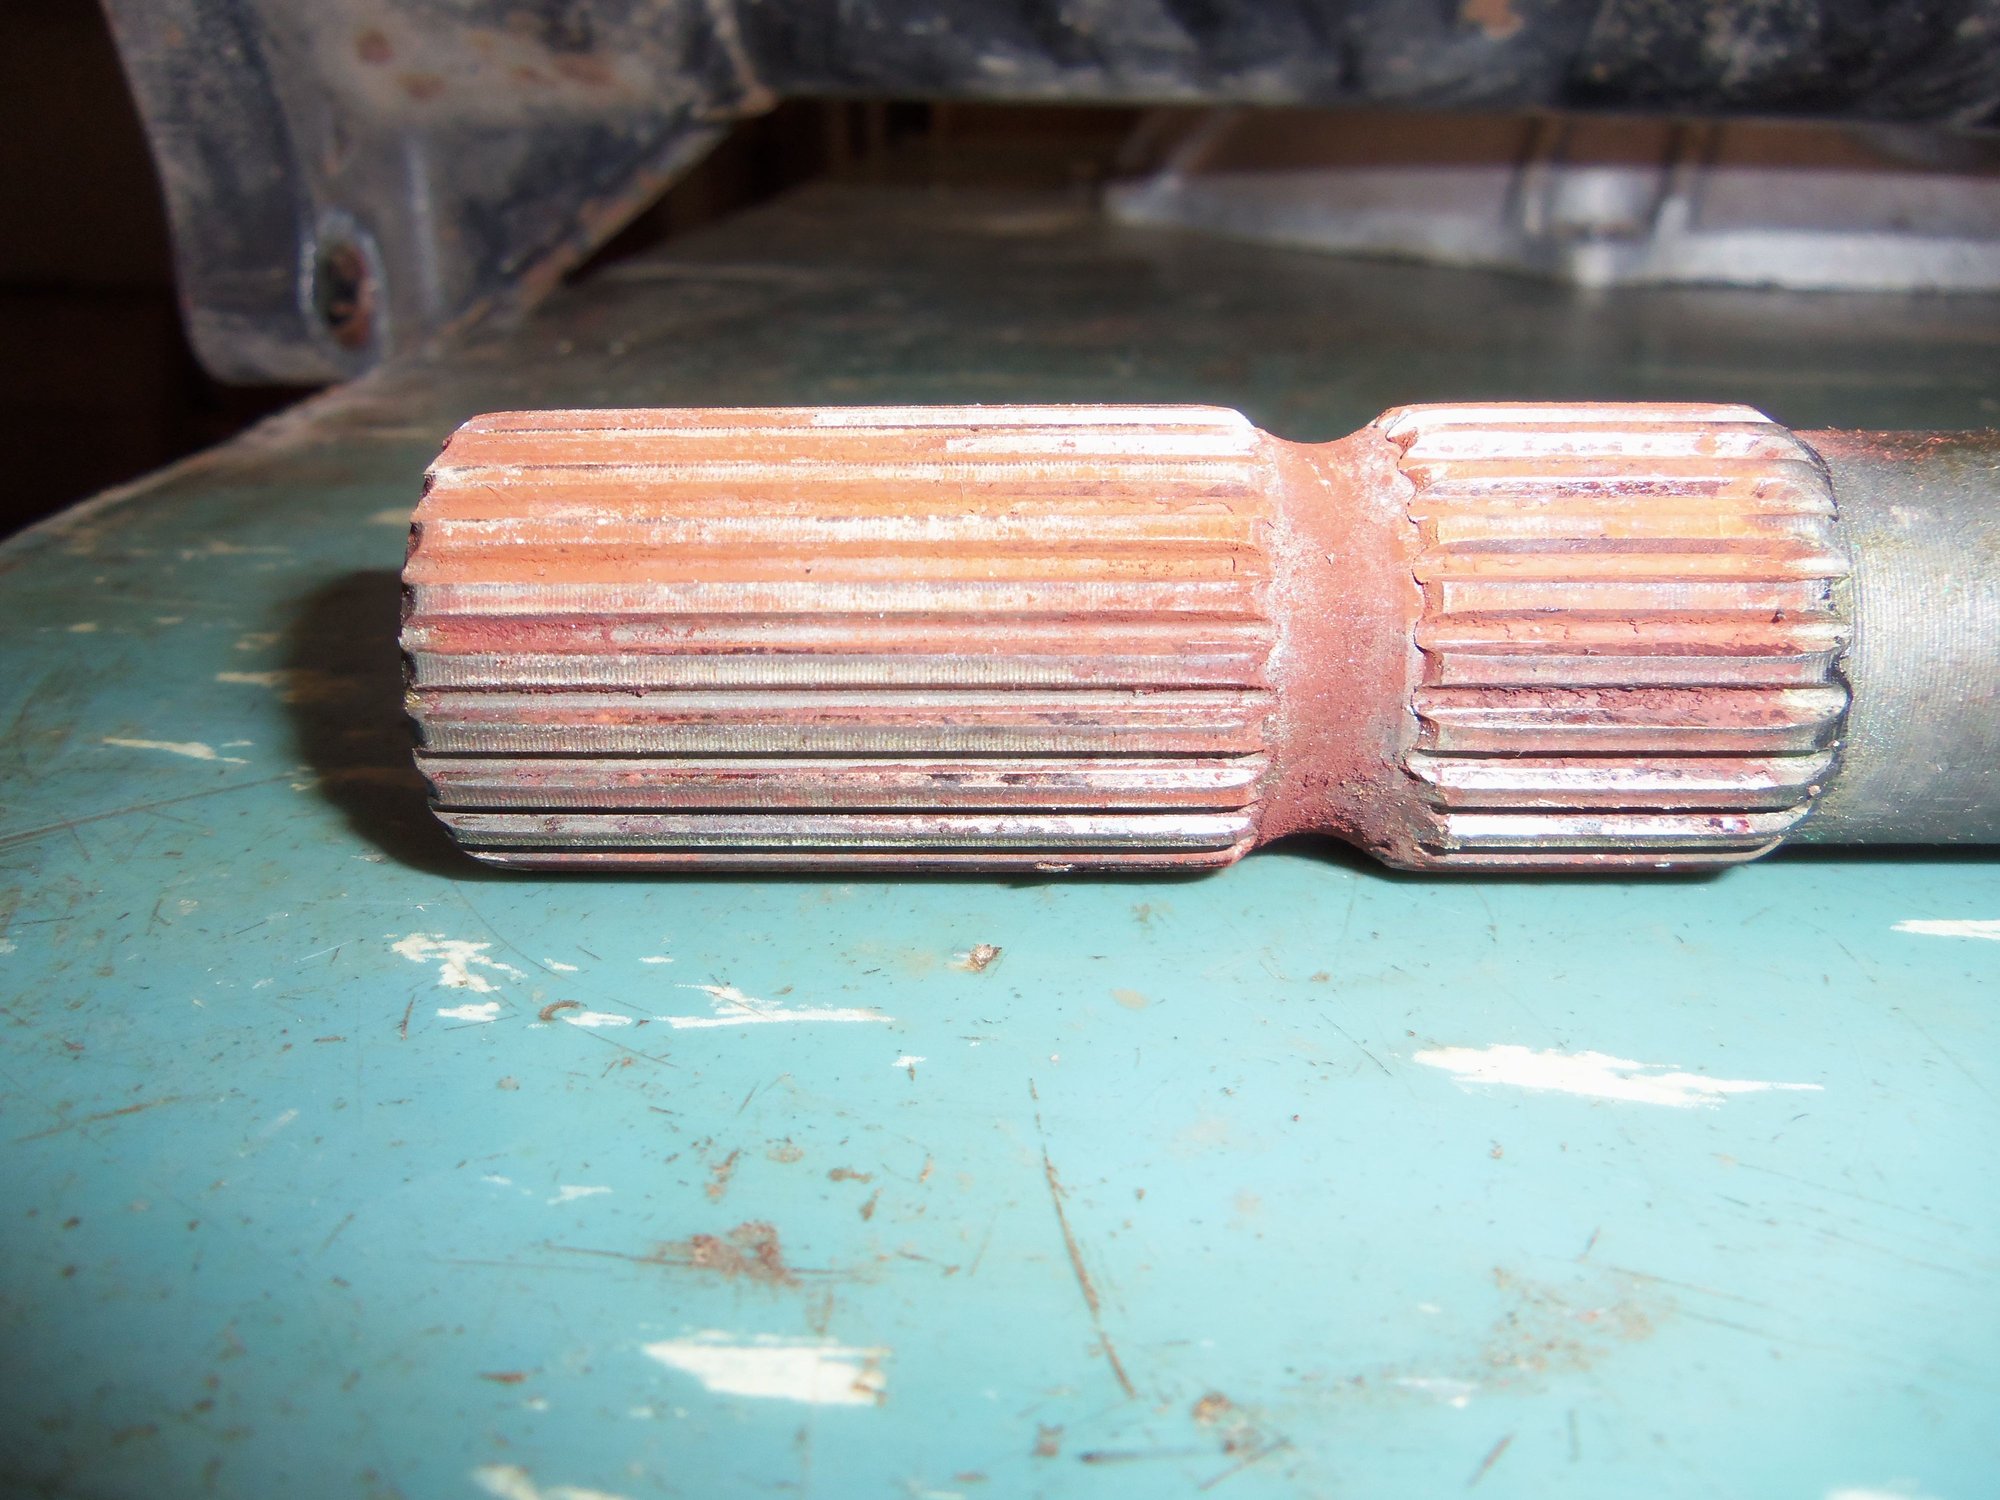
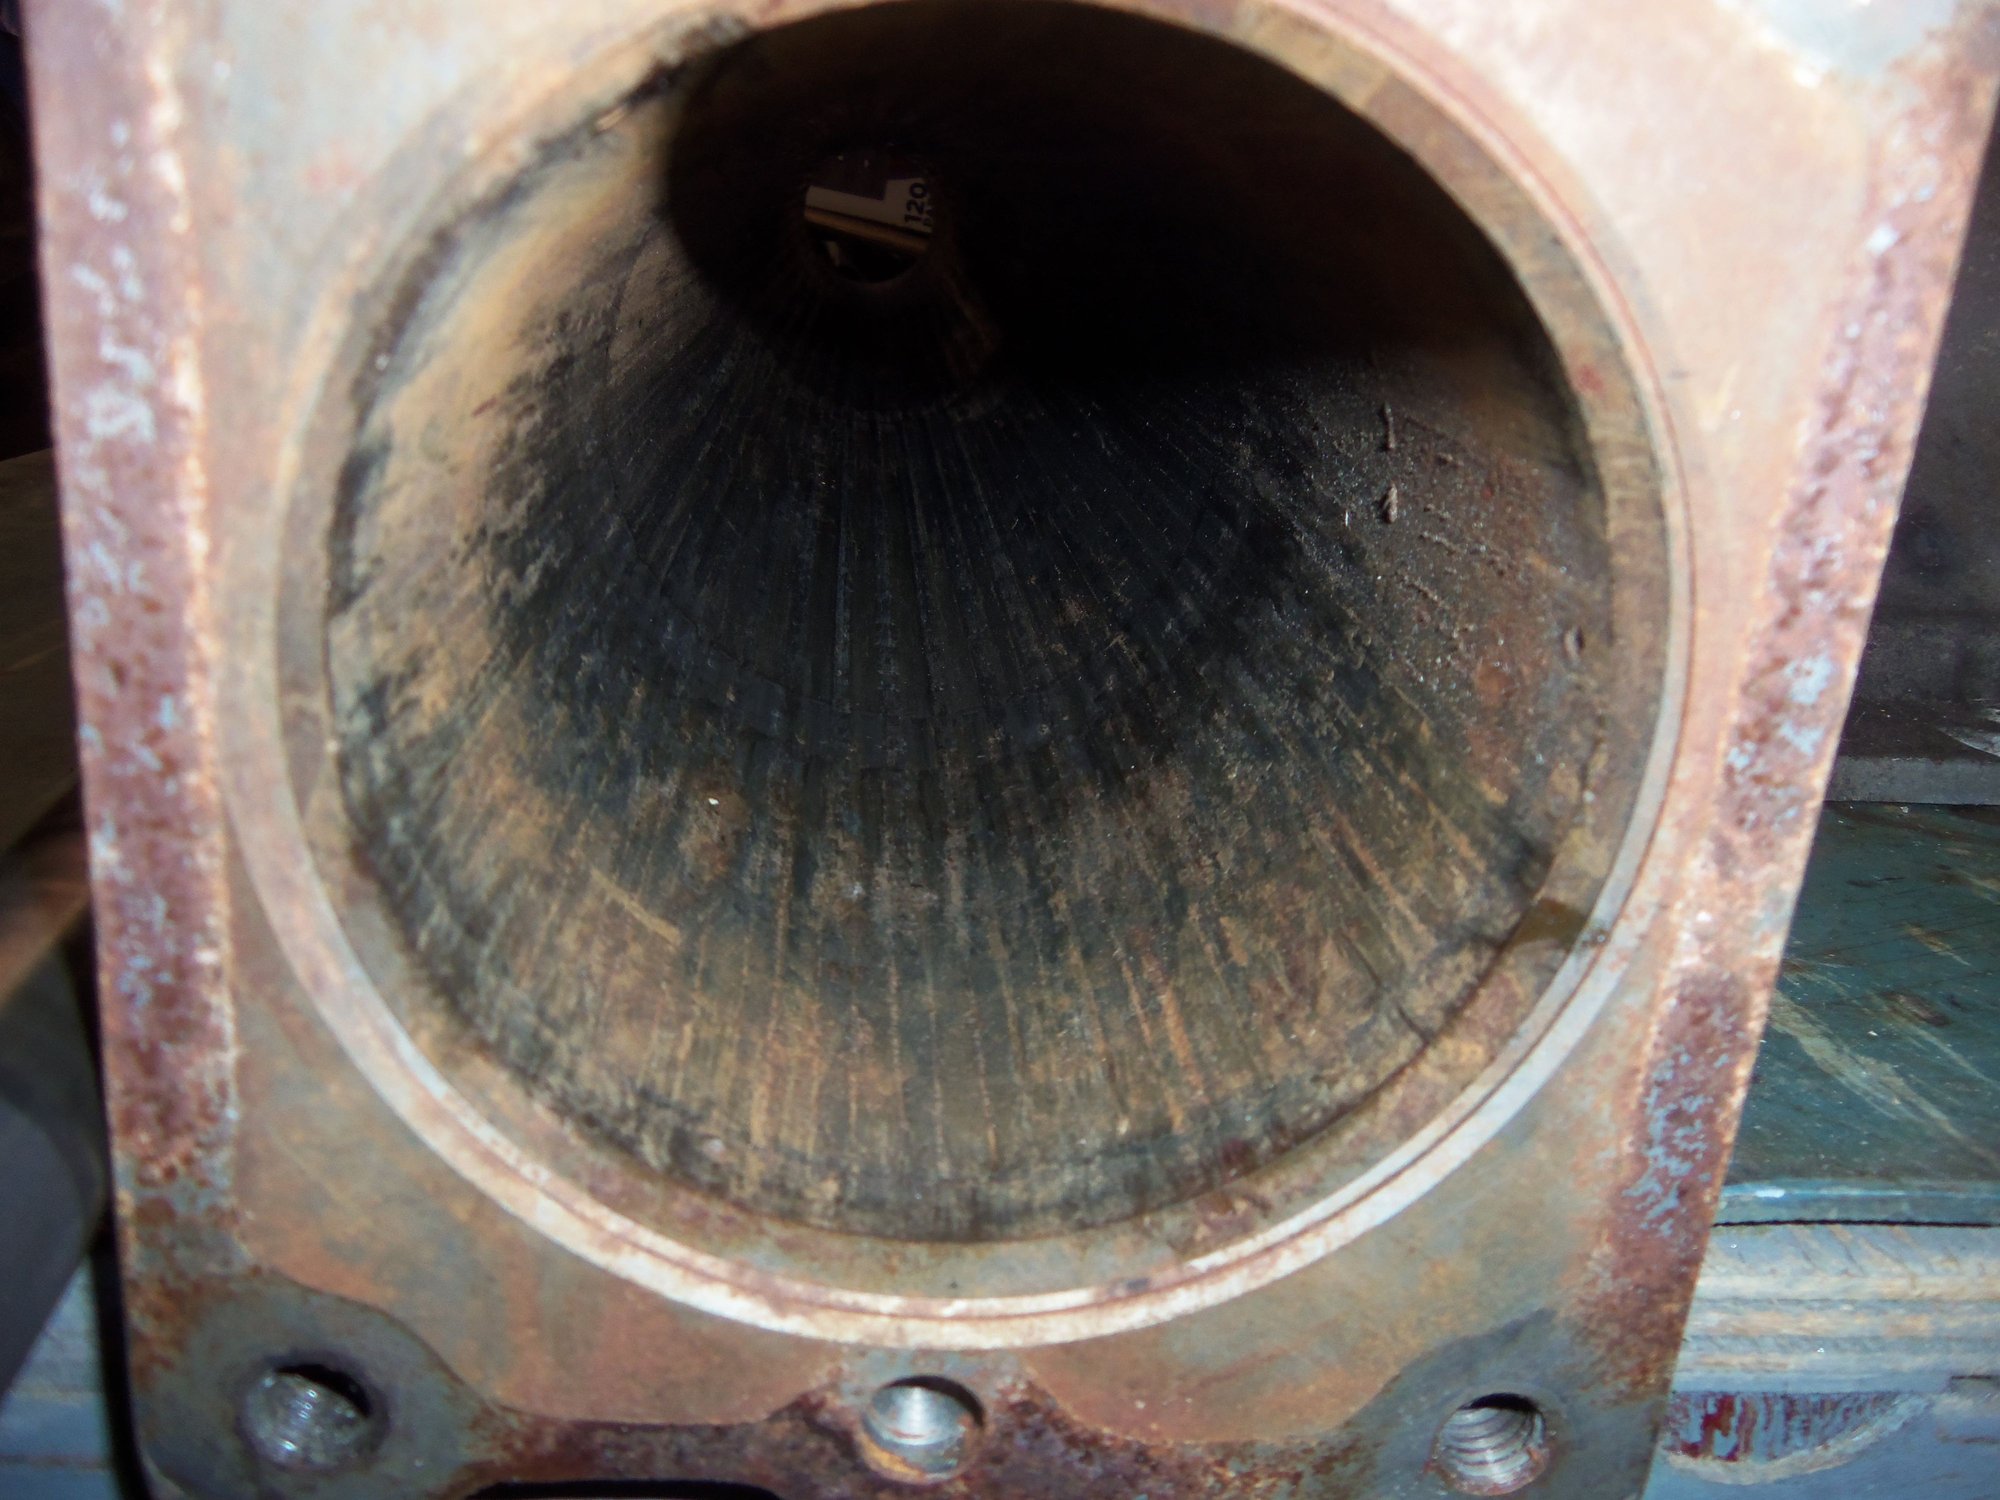
The drive shaft rear splines had surface rust, but didn't seem damaged. Also academic because it is being replaced. I am going to use a fine wire brush to clean the inside of the splined coupler for the torque converter flex plate.
The inside of the torque tube showed no rust or major crud. I believe a good cleaning is all that will be needed.
Surface rust on the splines, but no apparent damage.
Residue is splintered wood from medieval bearing removal.
Tomorrow, my game plan is to disassemble the torque converter cover for cleaning, replacement of the bearings, and replacement of the flexplate rivets with bolts.
As I am aware the auto tube has only two bearings given it is shorter than the manual variant- if so sounds as though the PO might have had a third bearing fitted at some stage. It will be interesting to see what the Brains Trust has to say on this one.
autos have 3 bearings,
the damper is known to hammer the middle and aft bearings out of position when the rubber gets weak.
Based on the rusty dust, the rear pinch bolt has been loose for a while and the car has been parked over damp surfaces
Automatic TTs came with three bearing units until sometime in 1987 when they went to two bearings and also changed the 25mm drive shaft to the 28mm drive shaft.
All 5-speed TTs came with three bearings.
The shiny drive shaft area shown in the picture means the front bearing walked a bit backward from its original position due to the hardening of the outer rubber of the bearing unit as well as the plastic portion of the bearing insert which also burnished off the protective coating of the drive shaft. The migration of the front bearing unit is a common problem with 928 TTs both in automatic and 5-speed versions.
Automatic TTs came with three bearing units until sometime in 1987 when they went to two bearings and also changed the 25mm drive shaft to the 28mm drive shaft.
.
Well that explains that one! I know for a fact my sheared 28mm shaft had two bearings. Presumably someone at Porsche figured that the 28mm shaft being a bit stiffer did not need intermediate support. That snapped shafts predominantly occur on the 28mm model is a fact of life although why they fail seems to be another matter altogether.


 12-20-2017, 12:55 PM