When you click on links to various merchants on this site and make a purchase, this can result in this site earning a commission. Affiliate programs and affiliations include, but are not limited to, the eBay Partner Network.
Alrighty! The heads are off, and are a HELLUVA lot better than I expected.
I do have many questions, though...
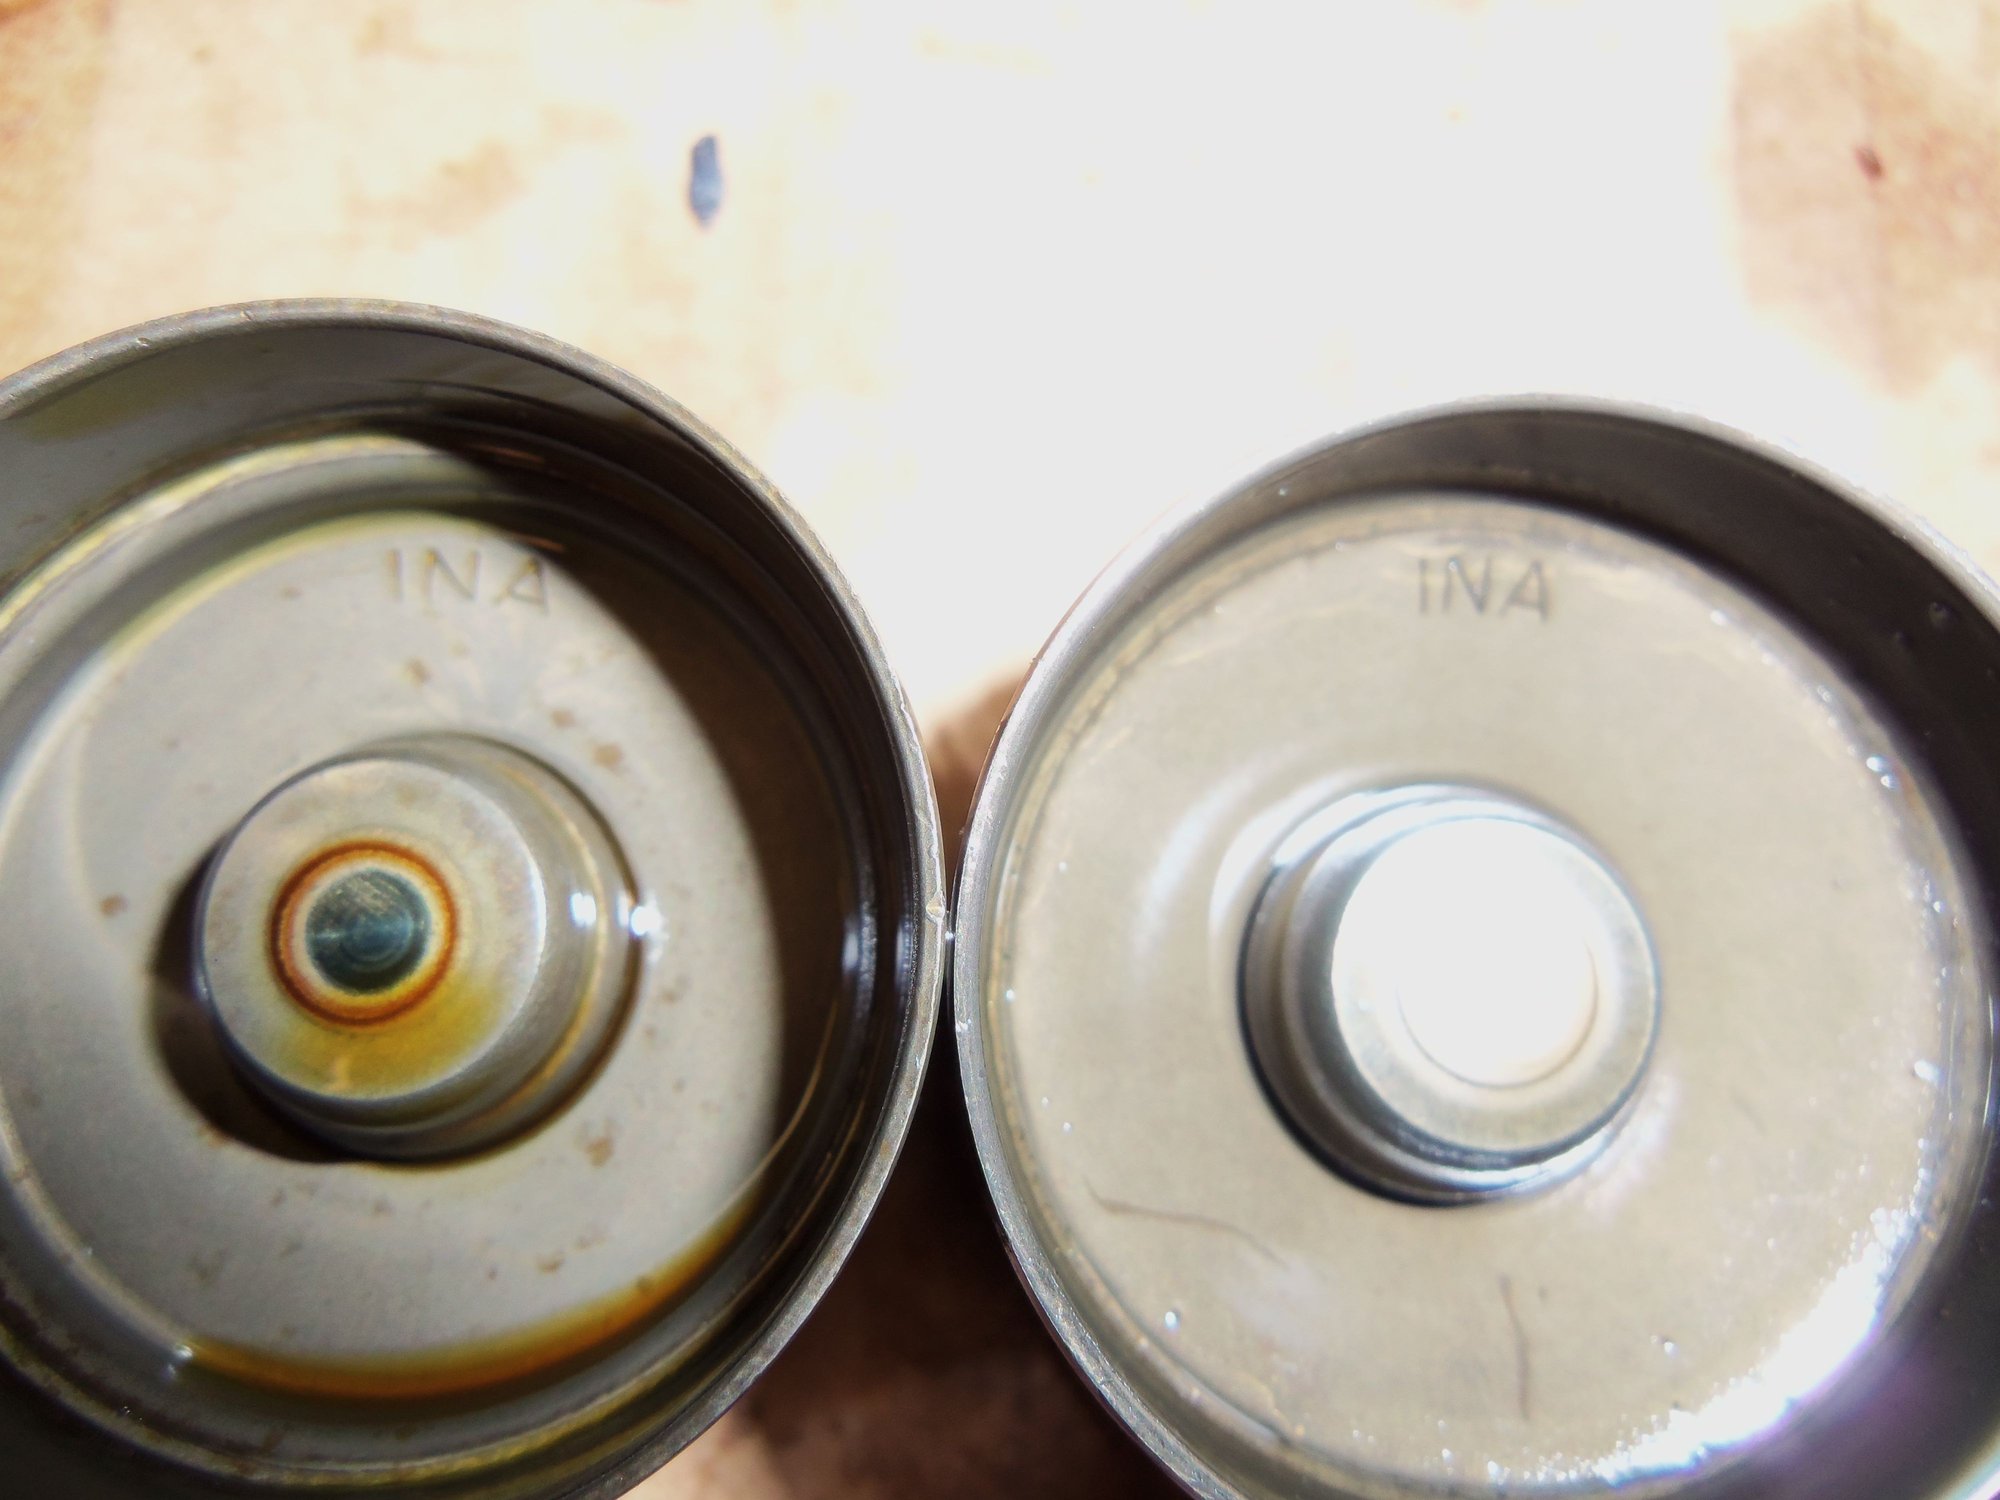
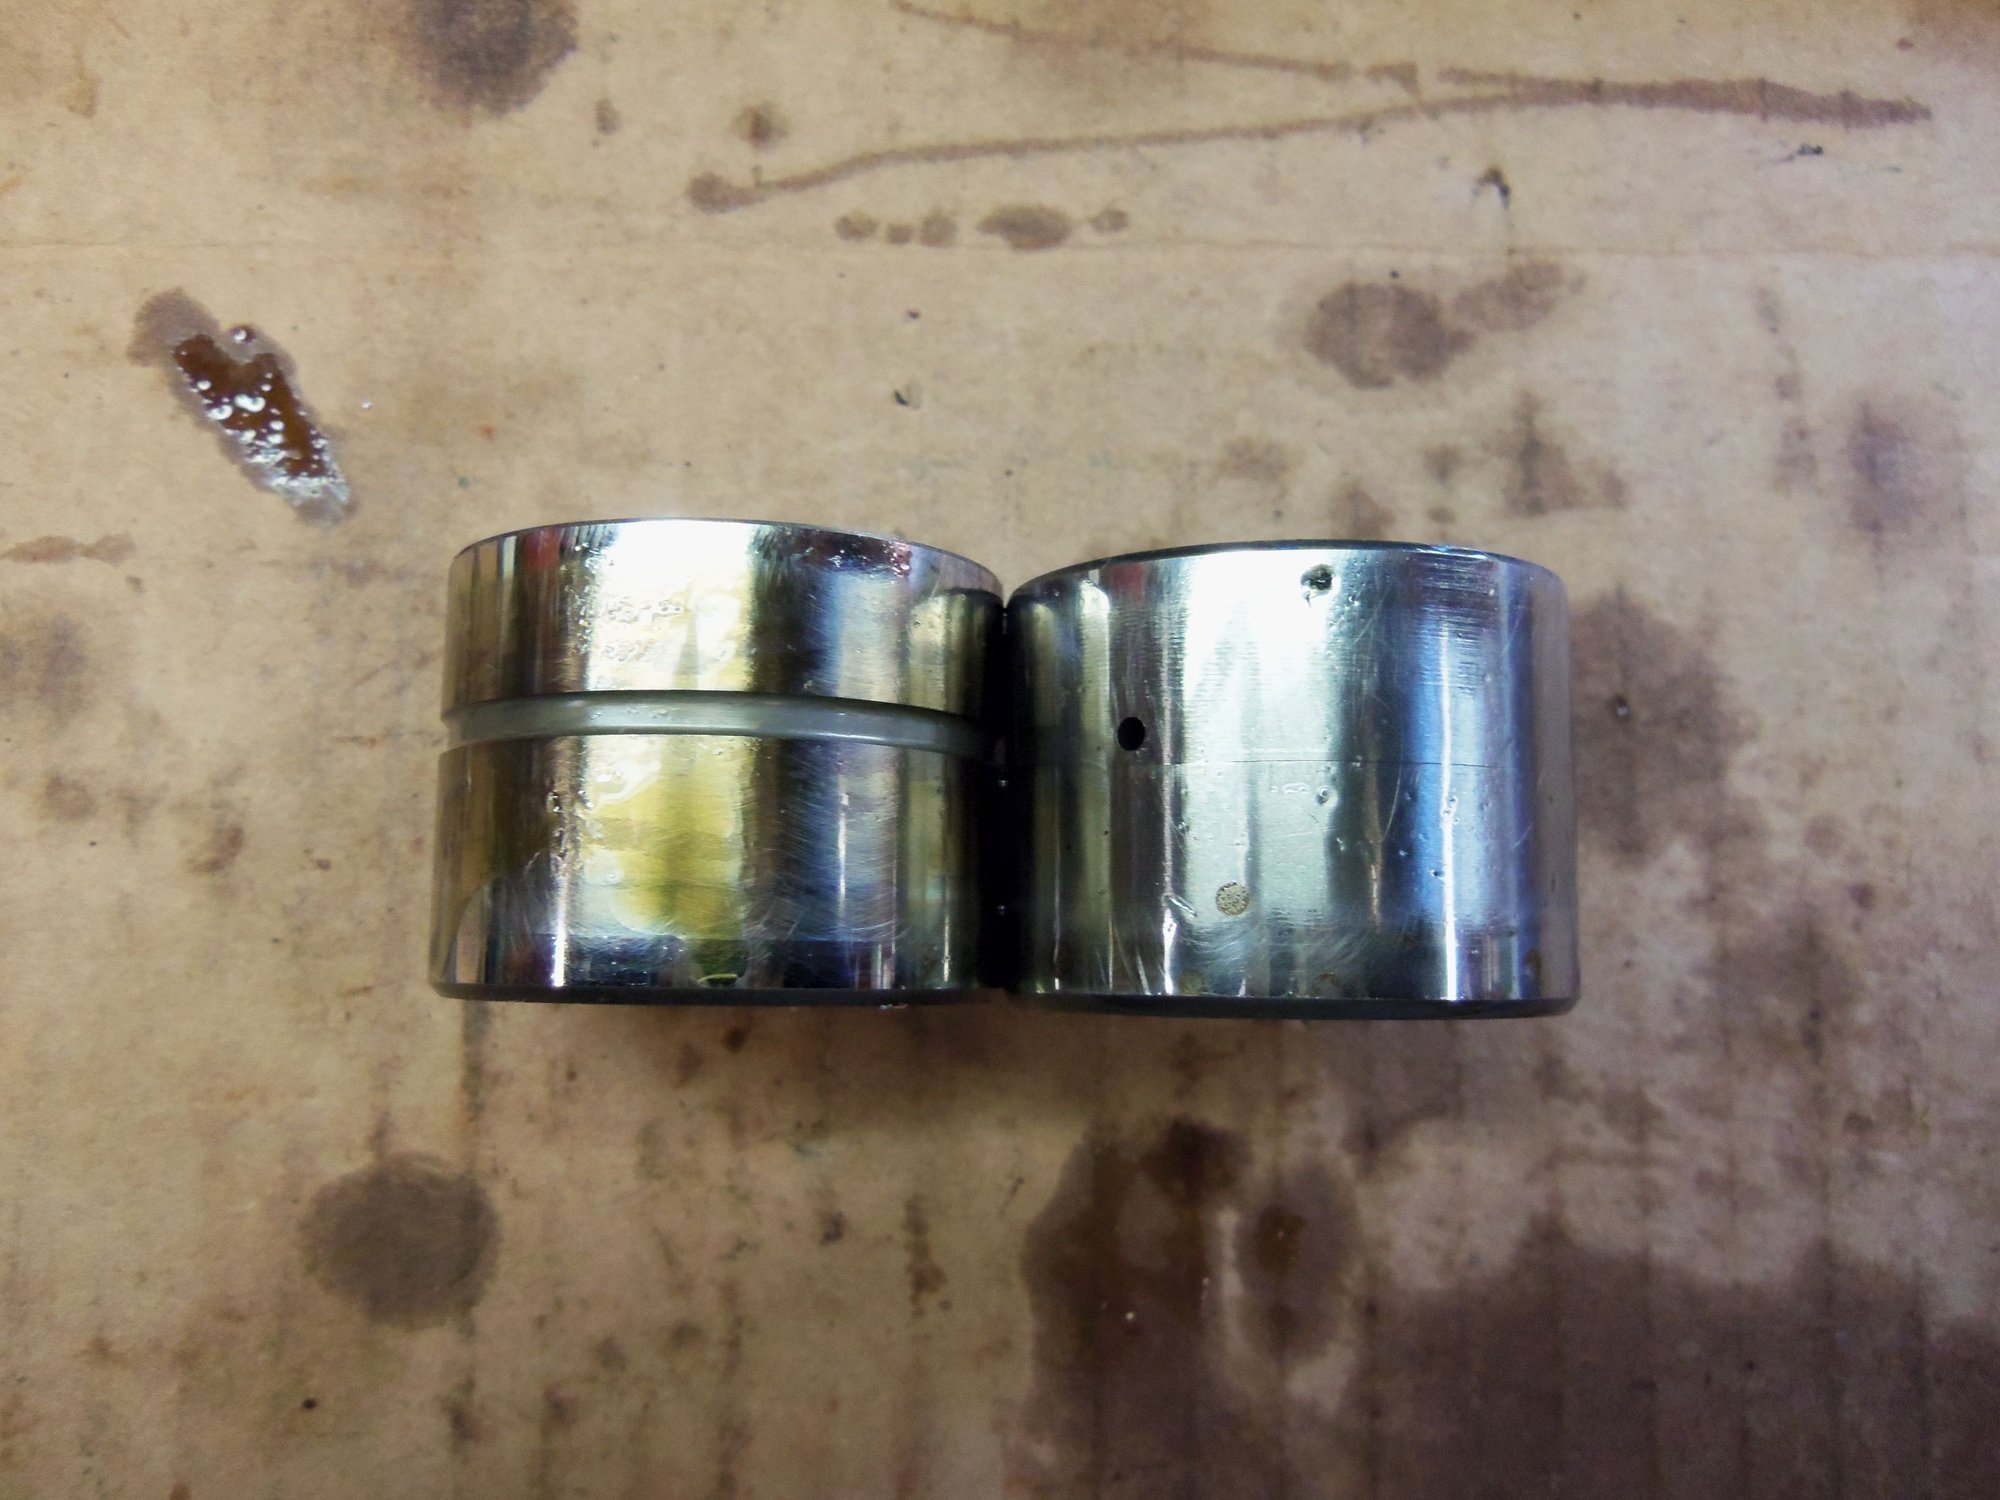
I will start with the lifters: I put them in a pair of segmented plastic boxes, one lifter per segment, well labeled. I had spaces left over, so I put the 16 lifters from the junk heads I bought last week. I noticed a difference in the lifters. The ones from the Red Witch have a lubrication groove around the circumference of the body. The lifters from the junk heads have no groove, and are slightly shorter. Both lifters are INA brand.
My lifters are 1986.5, installed from the factory to my knowledge. The junk heads were supposed to have been 1986. I am going to say early 1986 or 1985 due to the earlier stand offs for the two piece cam cover bolts.
QUESTION: Was there a running change to the lifters over the production run of the S-3 engine?
Lifter from the Red Witch on the left, from the junk heads on the right.
Lifter from the Red Witch on the left, from the junk heads on the right. It is not obvious in this photo, but the lifter on the right is slightly shorter than the lifter on the left.
After removing the exhaust manifolds, set about removing the heads. On that note, I found my Craftsman 19.2V 1/4" hex drive impact gun worked perfectly to remove the lock nuts from the exhaust manifold studs.
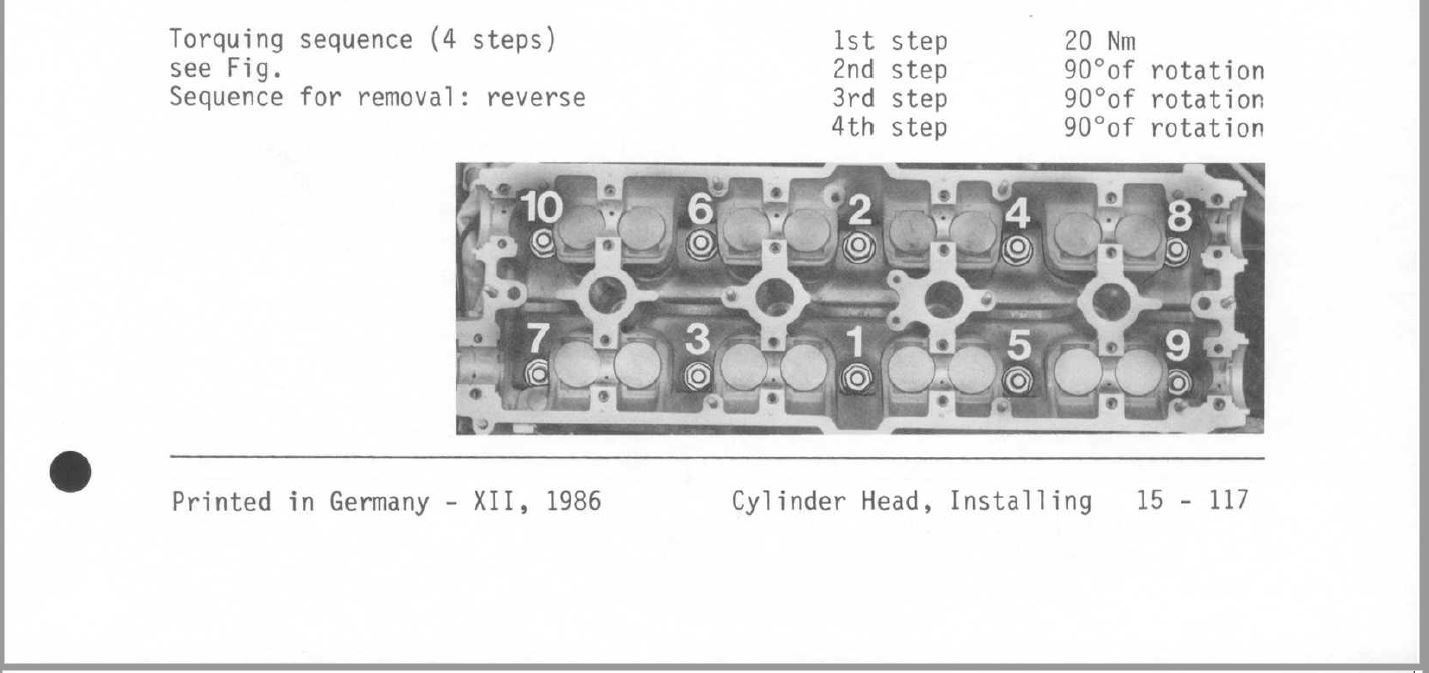
I used the WSM instructions of loosening the head nuts in reverse order of torquing them:
Starting with the driver's side cylinder head, I used a 25" 1/2" drive breaker bar, 6" extension, and 6pt 19mm socket to remove the head nuts. Each one was quite tight, which I took as a good sign.
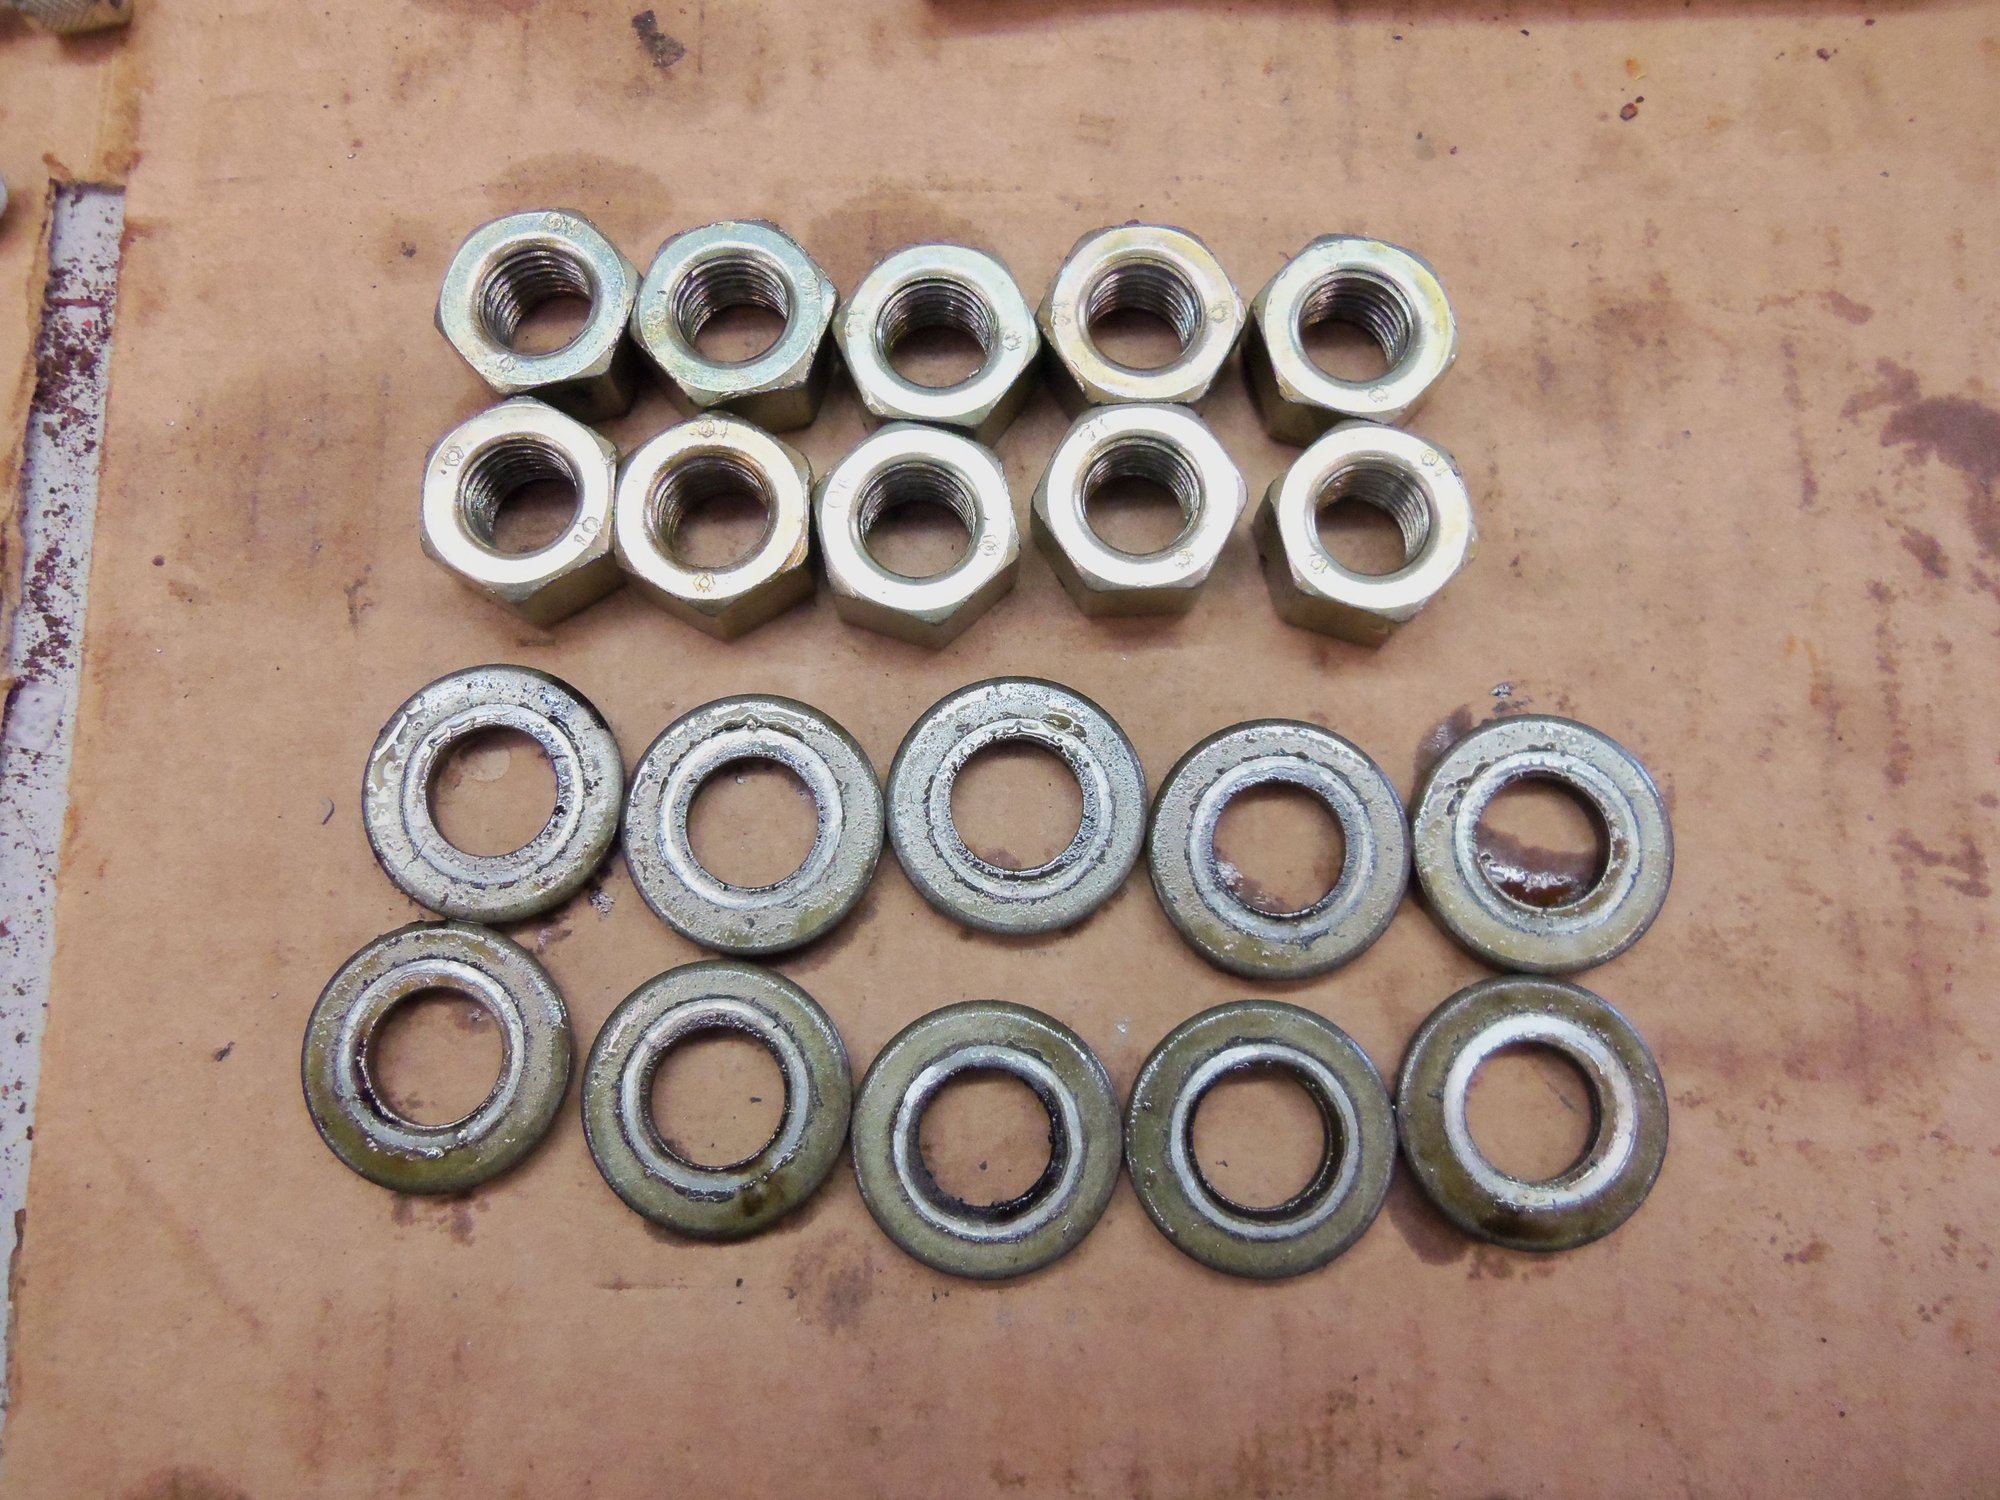
All the nuts and washers looked fine with no damage. Granted, I didn't really expect any. I am making this up as I go, to a point.
I did note that the nuts are the later 12mm thick nuts. I am assuming that is correct for late S-3.
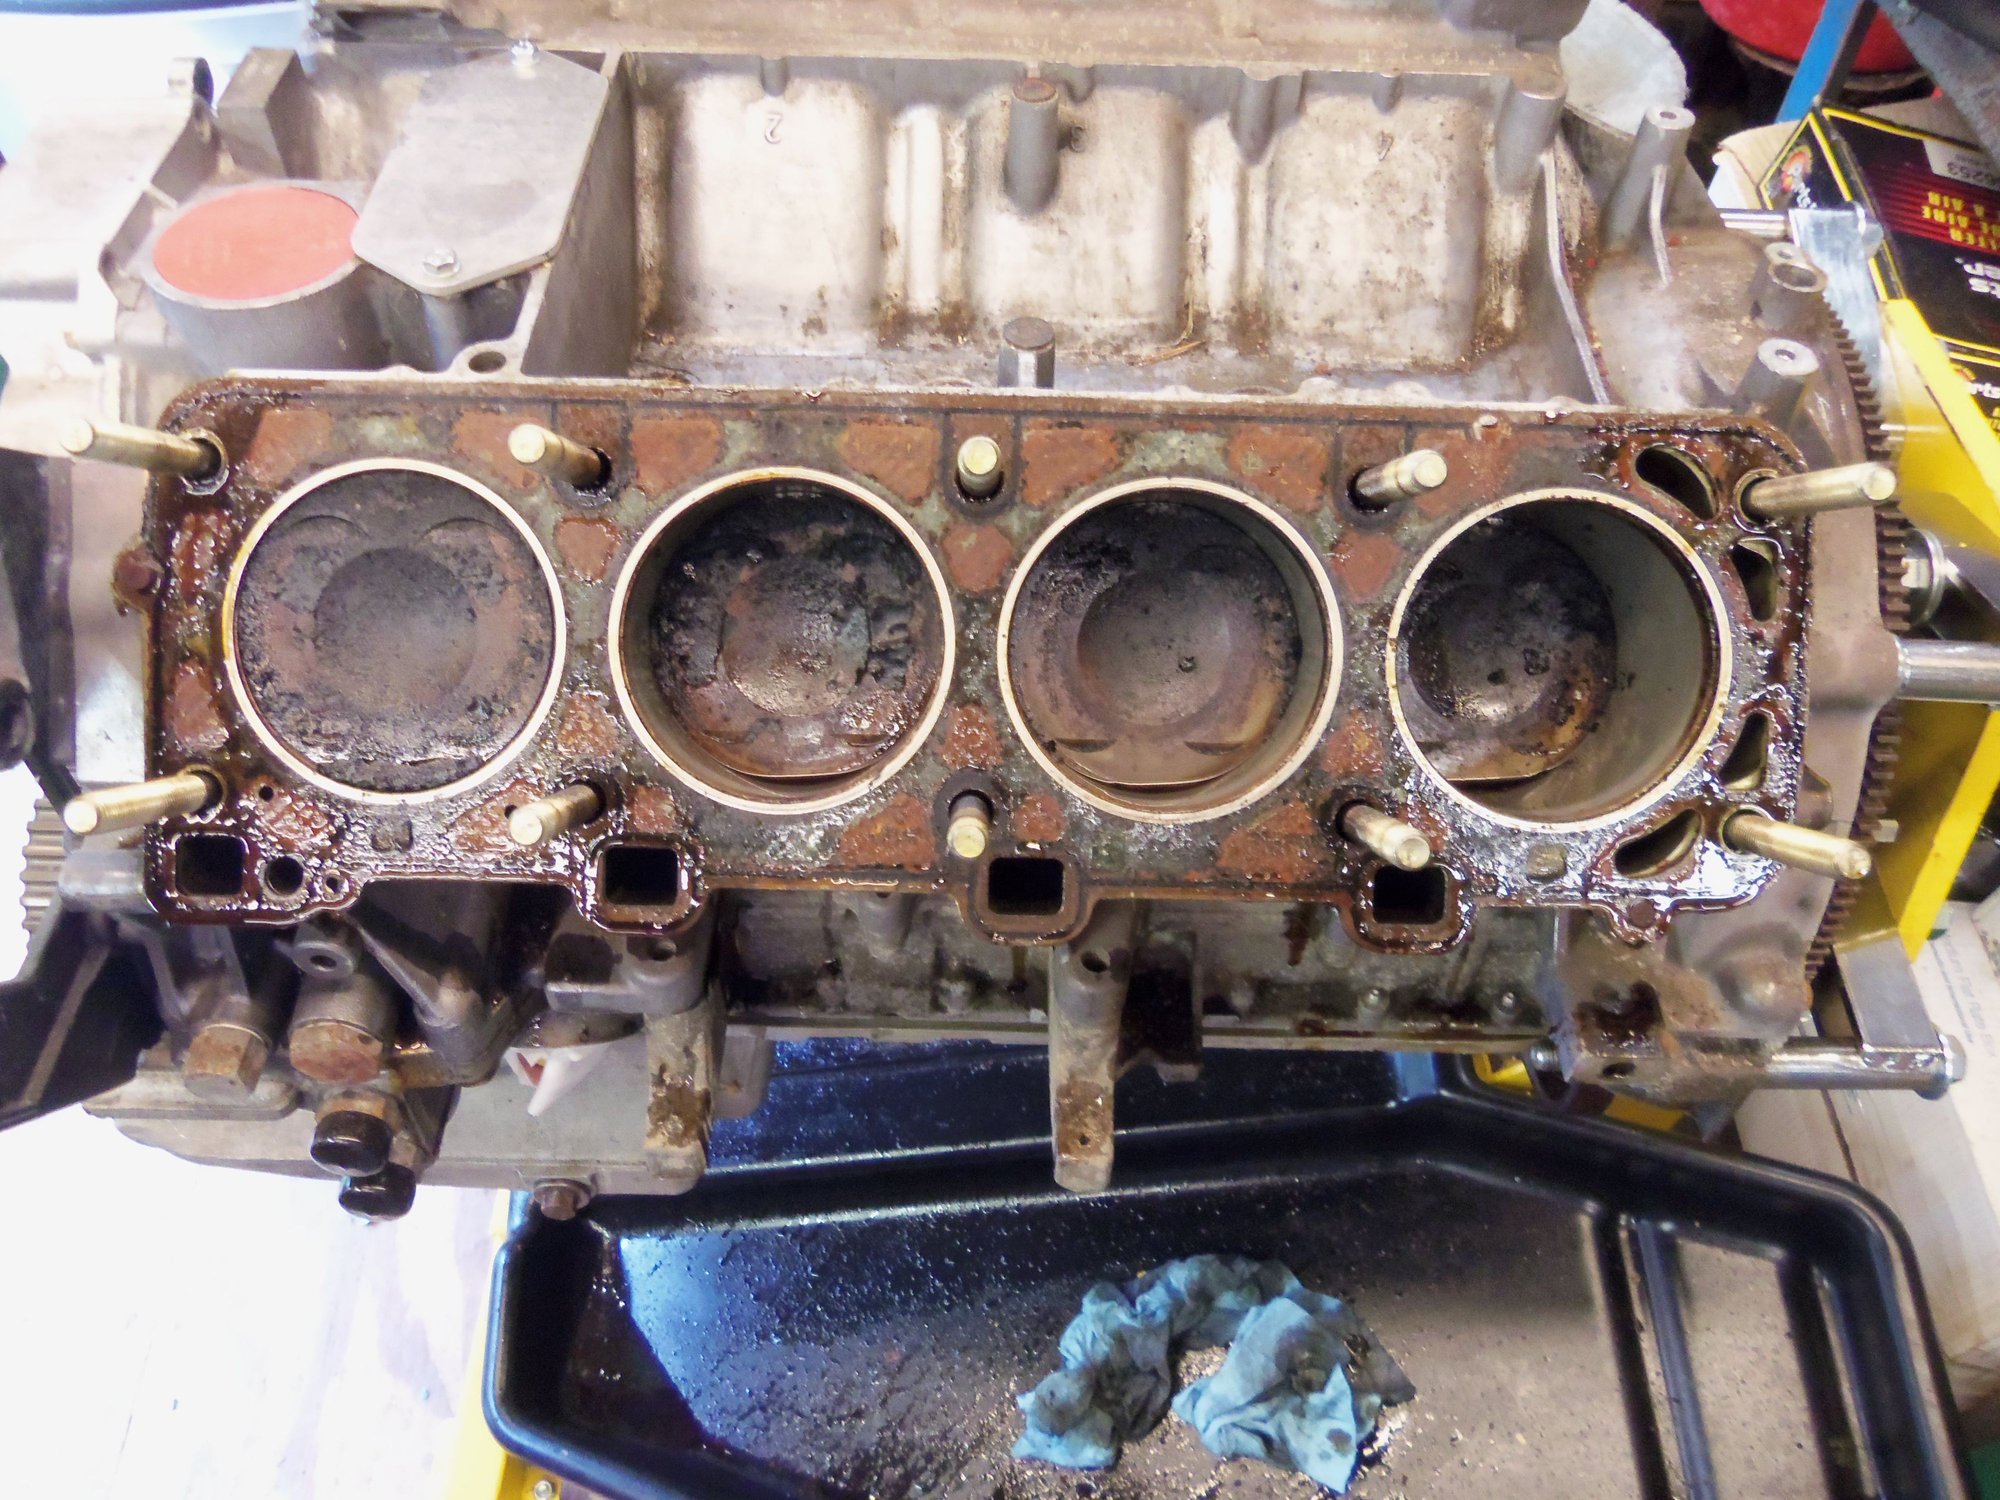
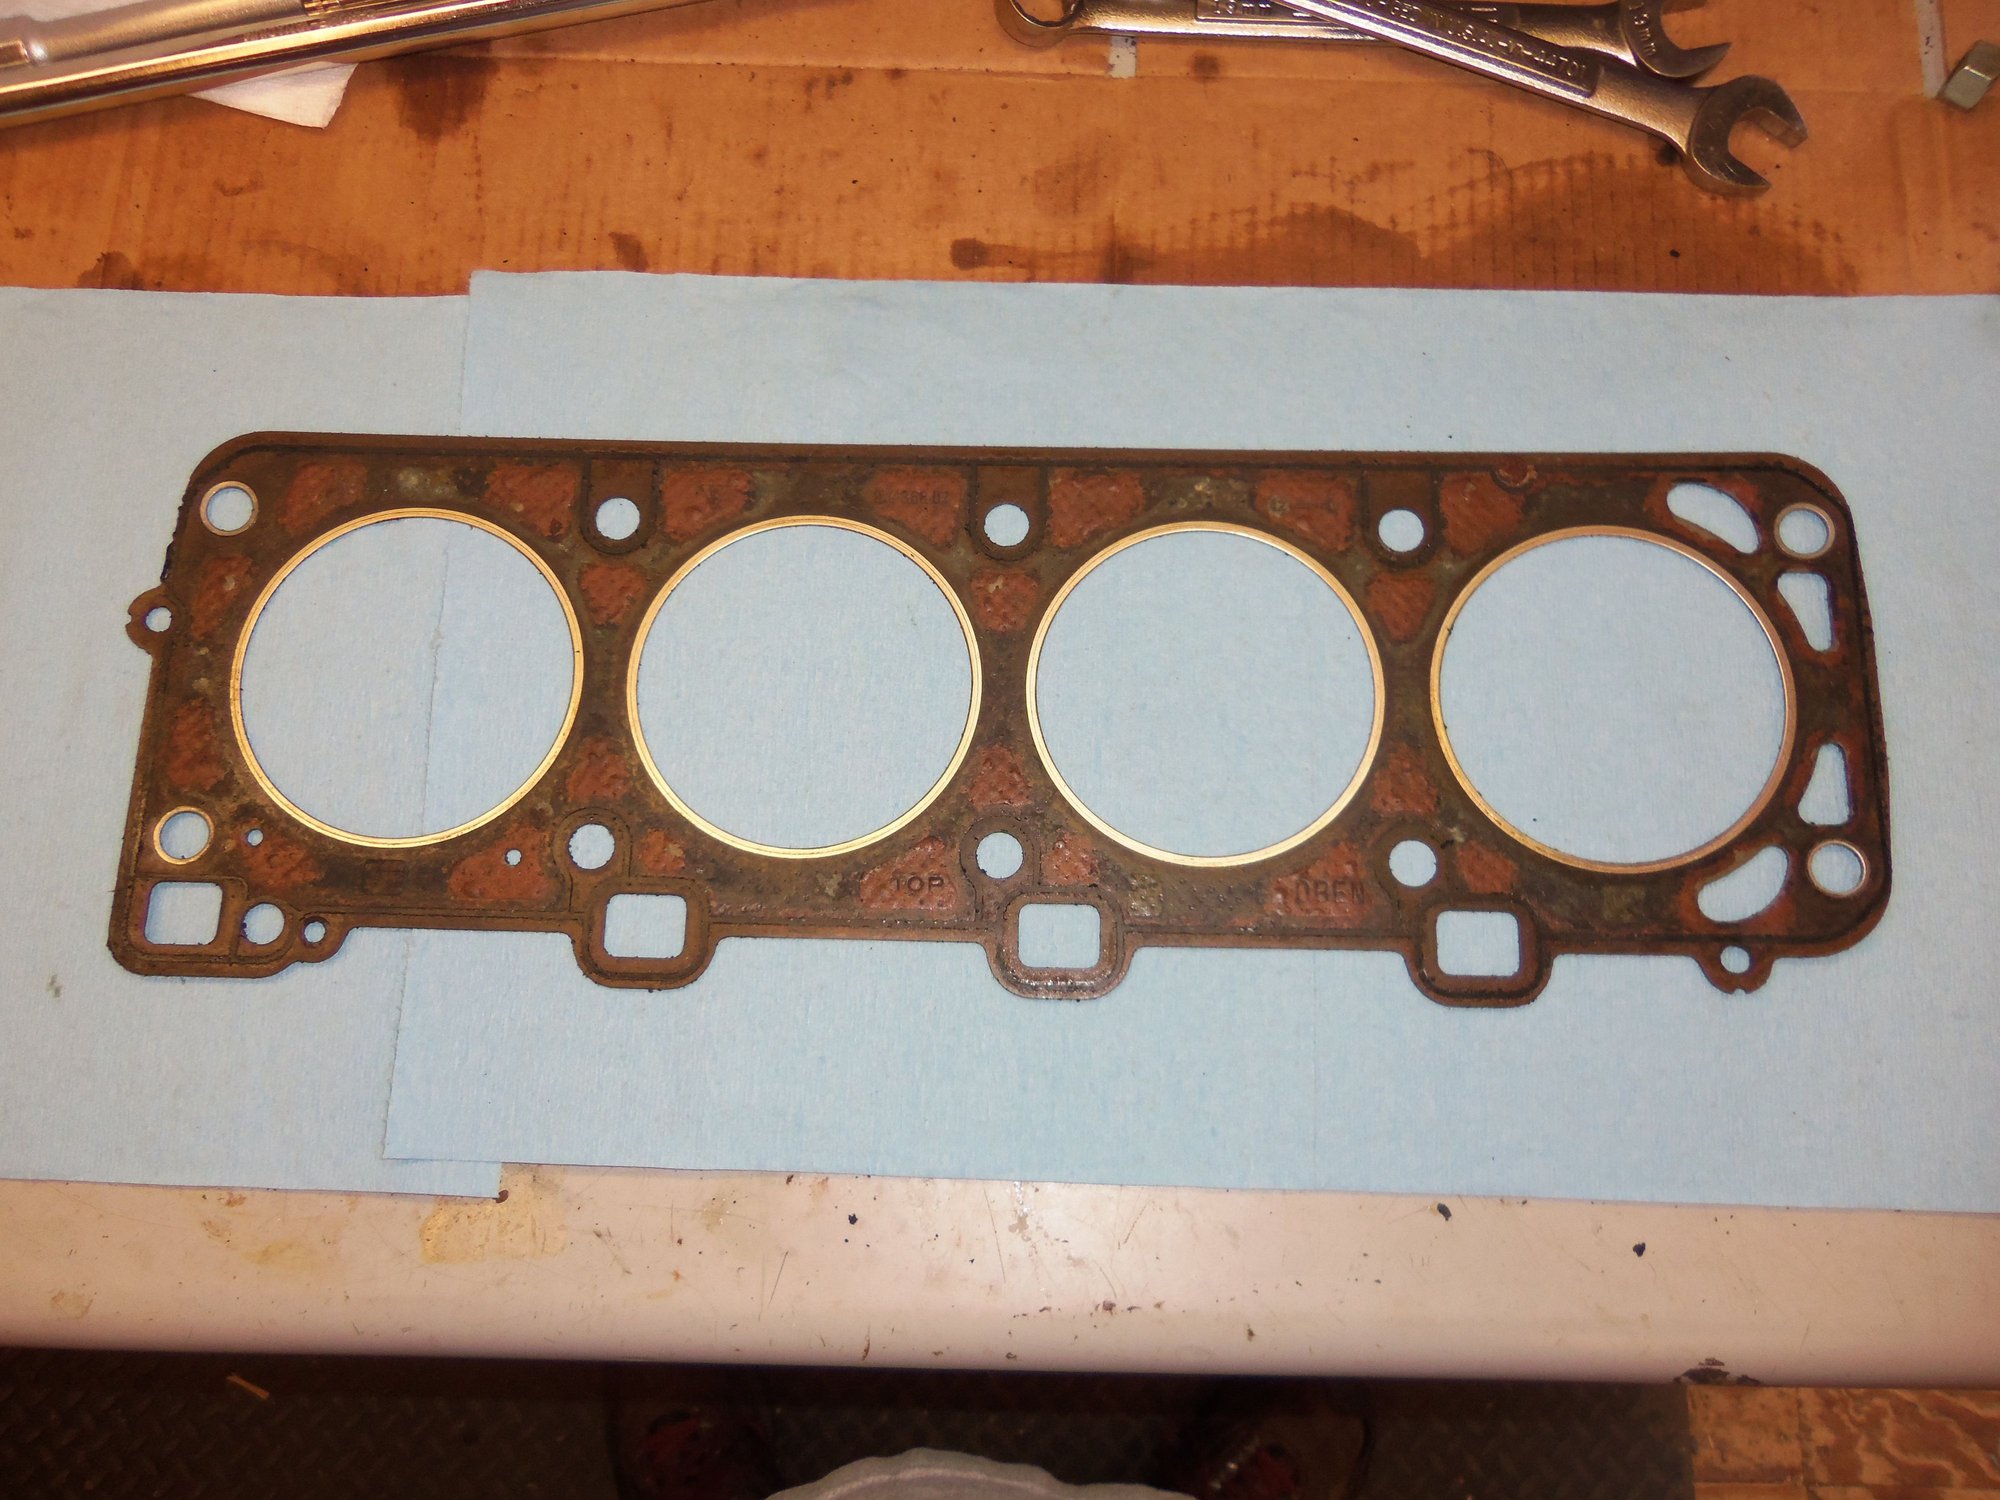
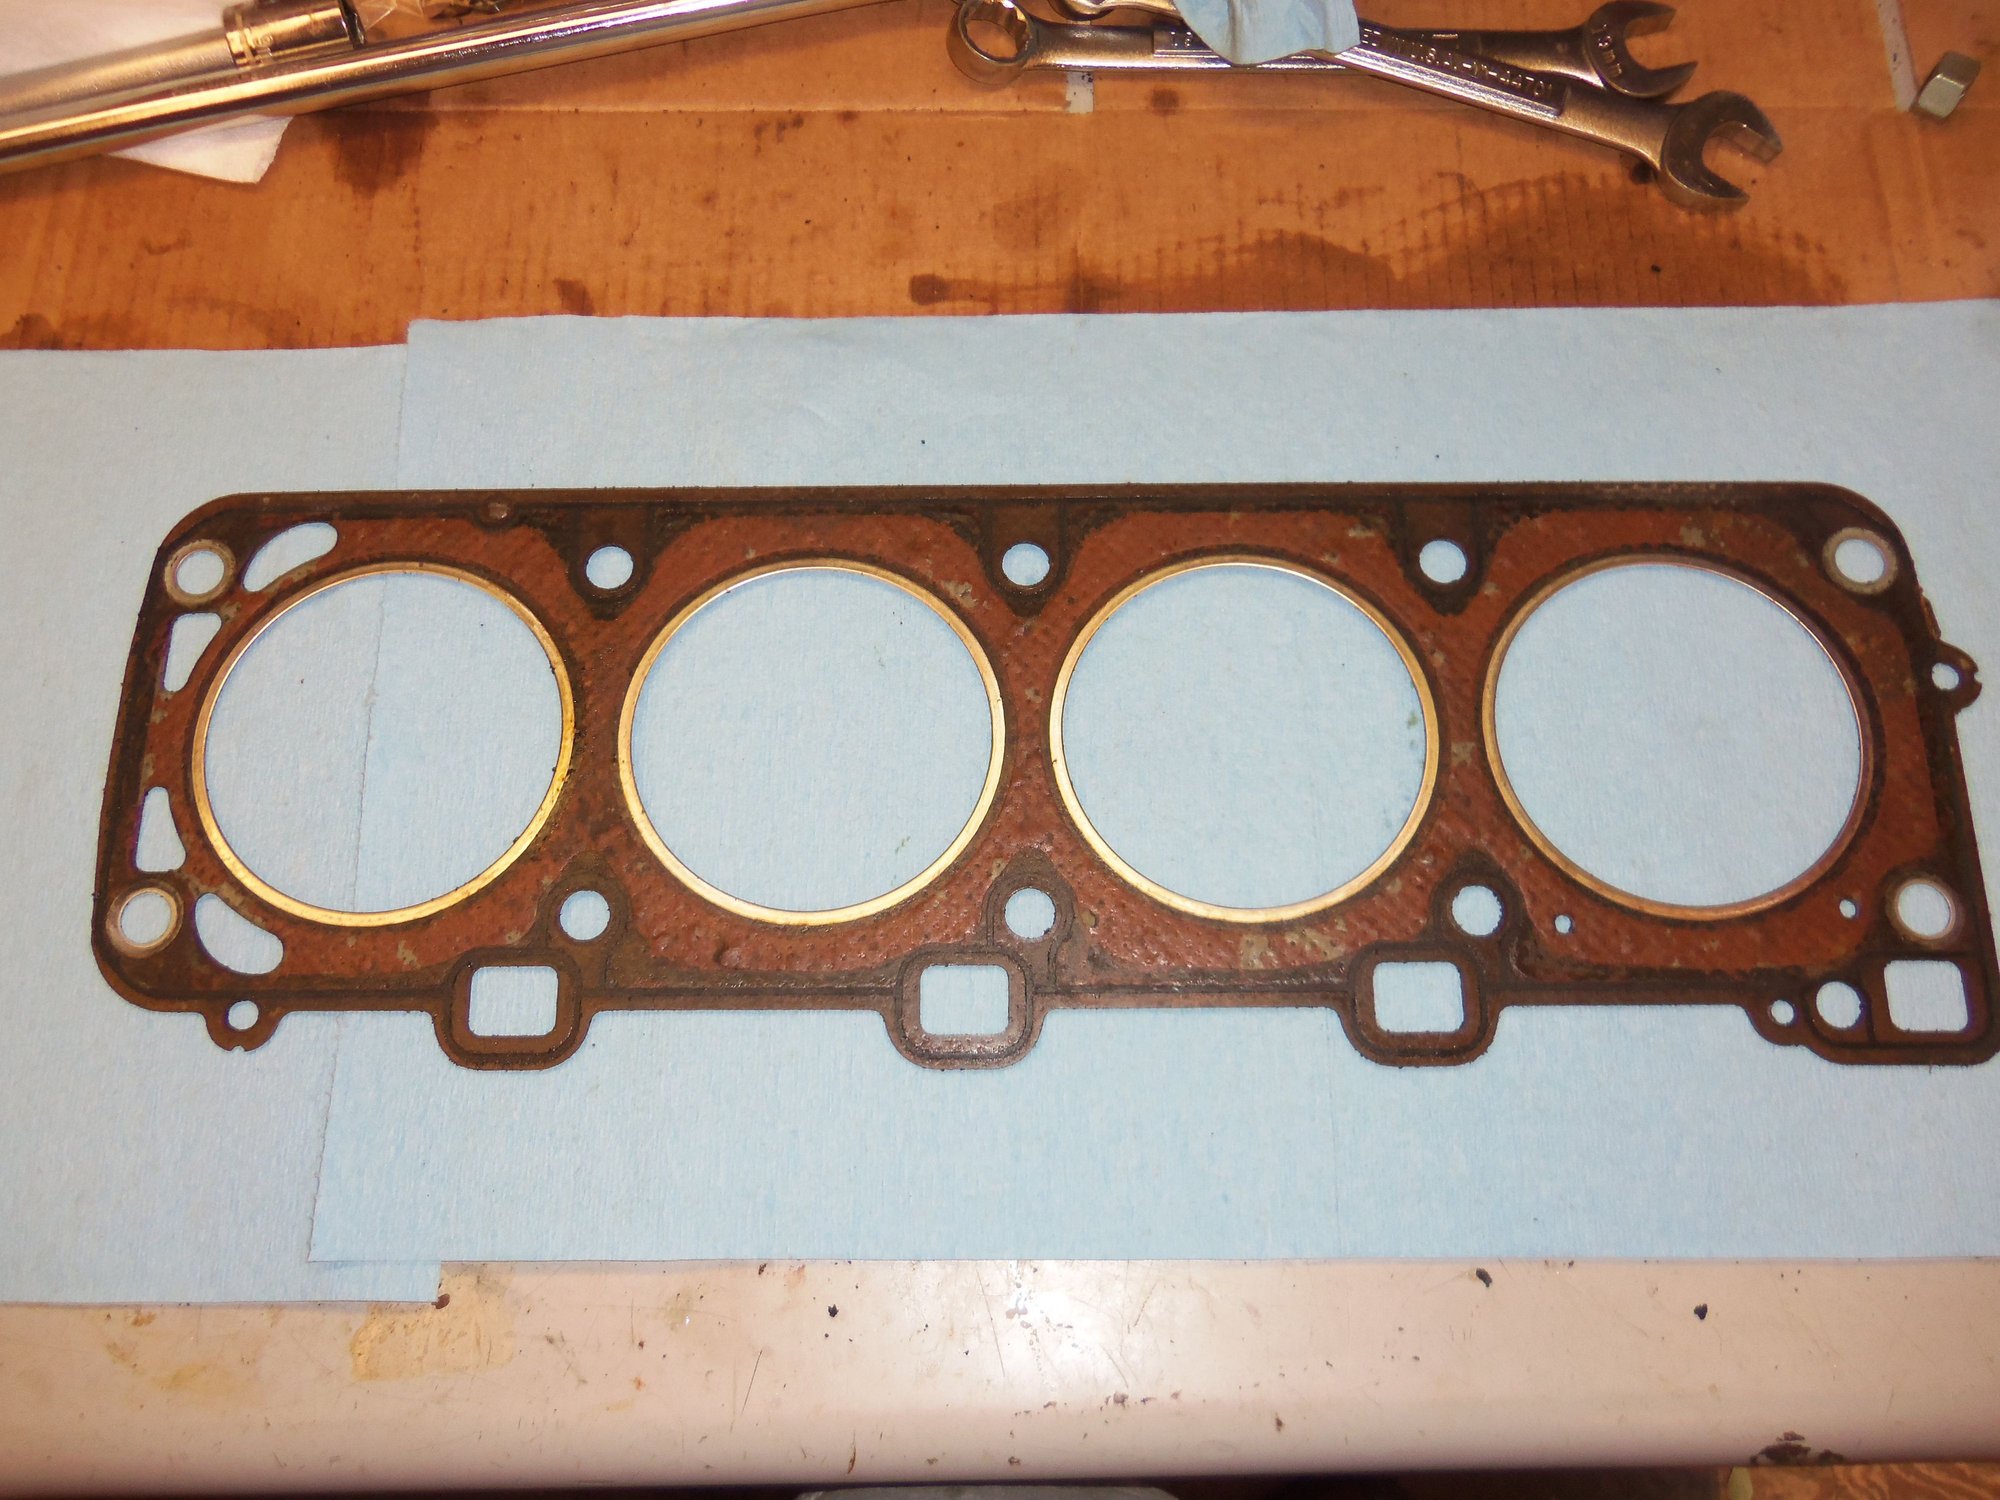
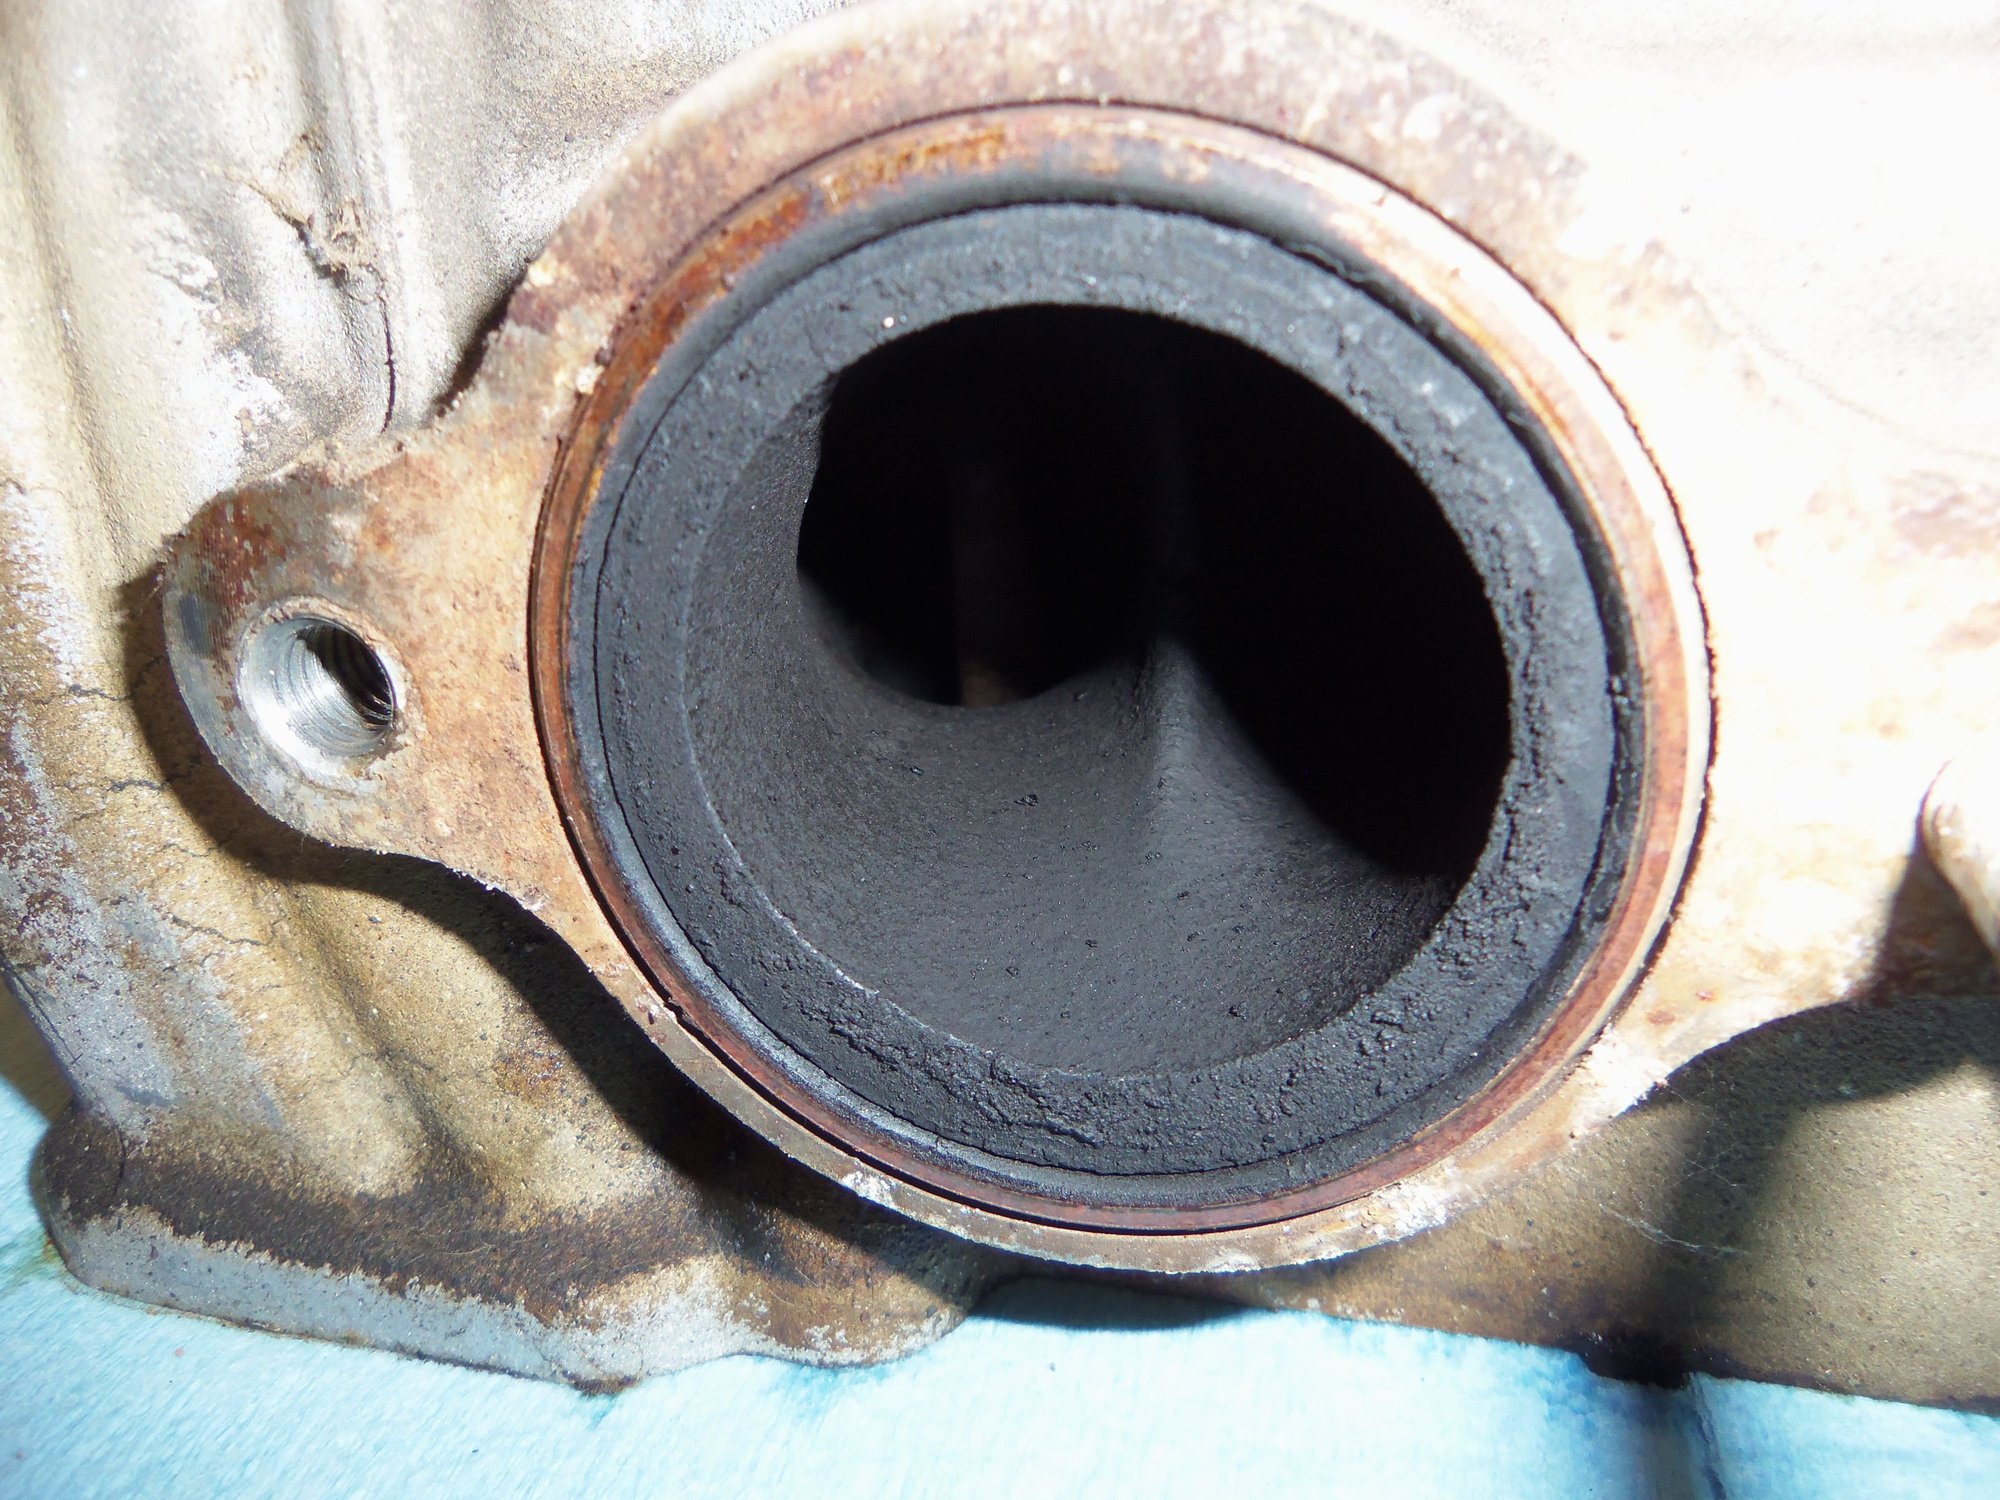
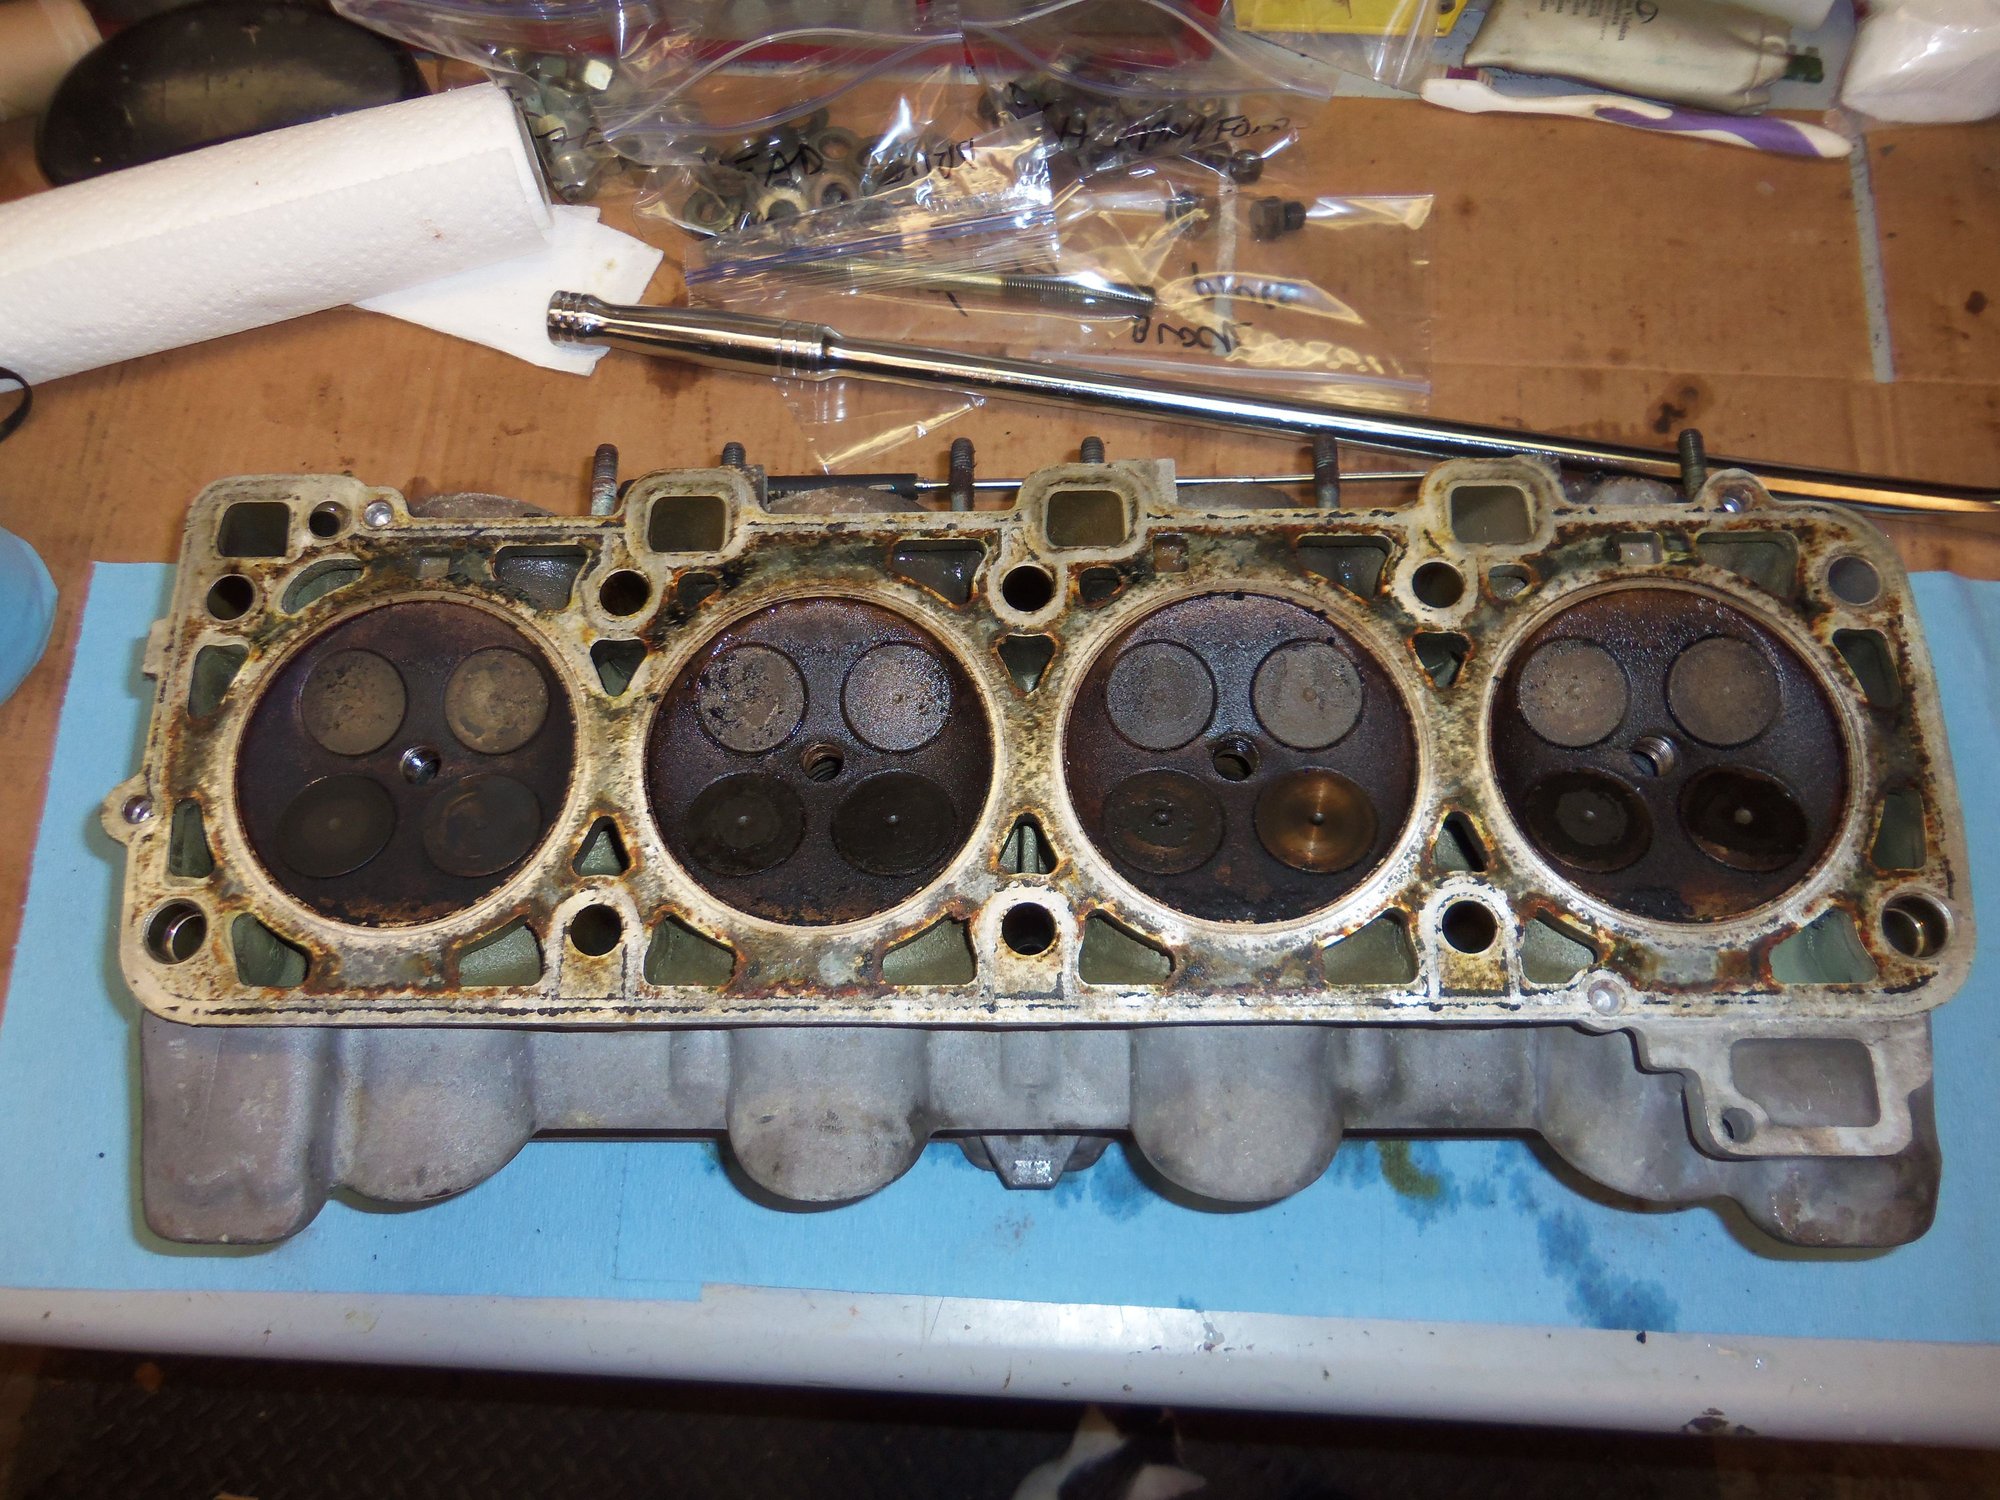
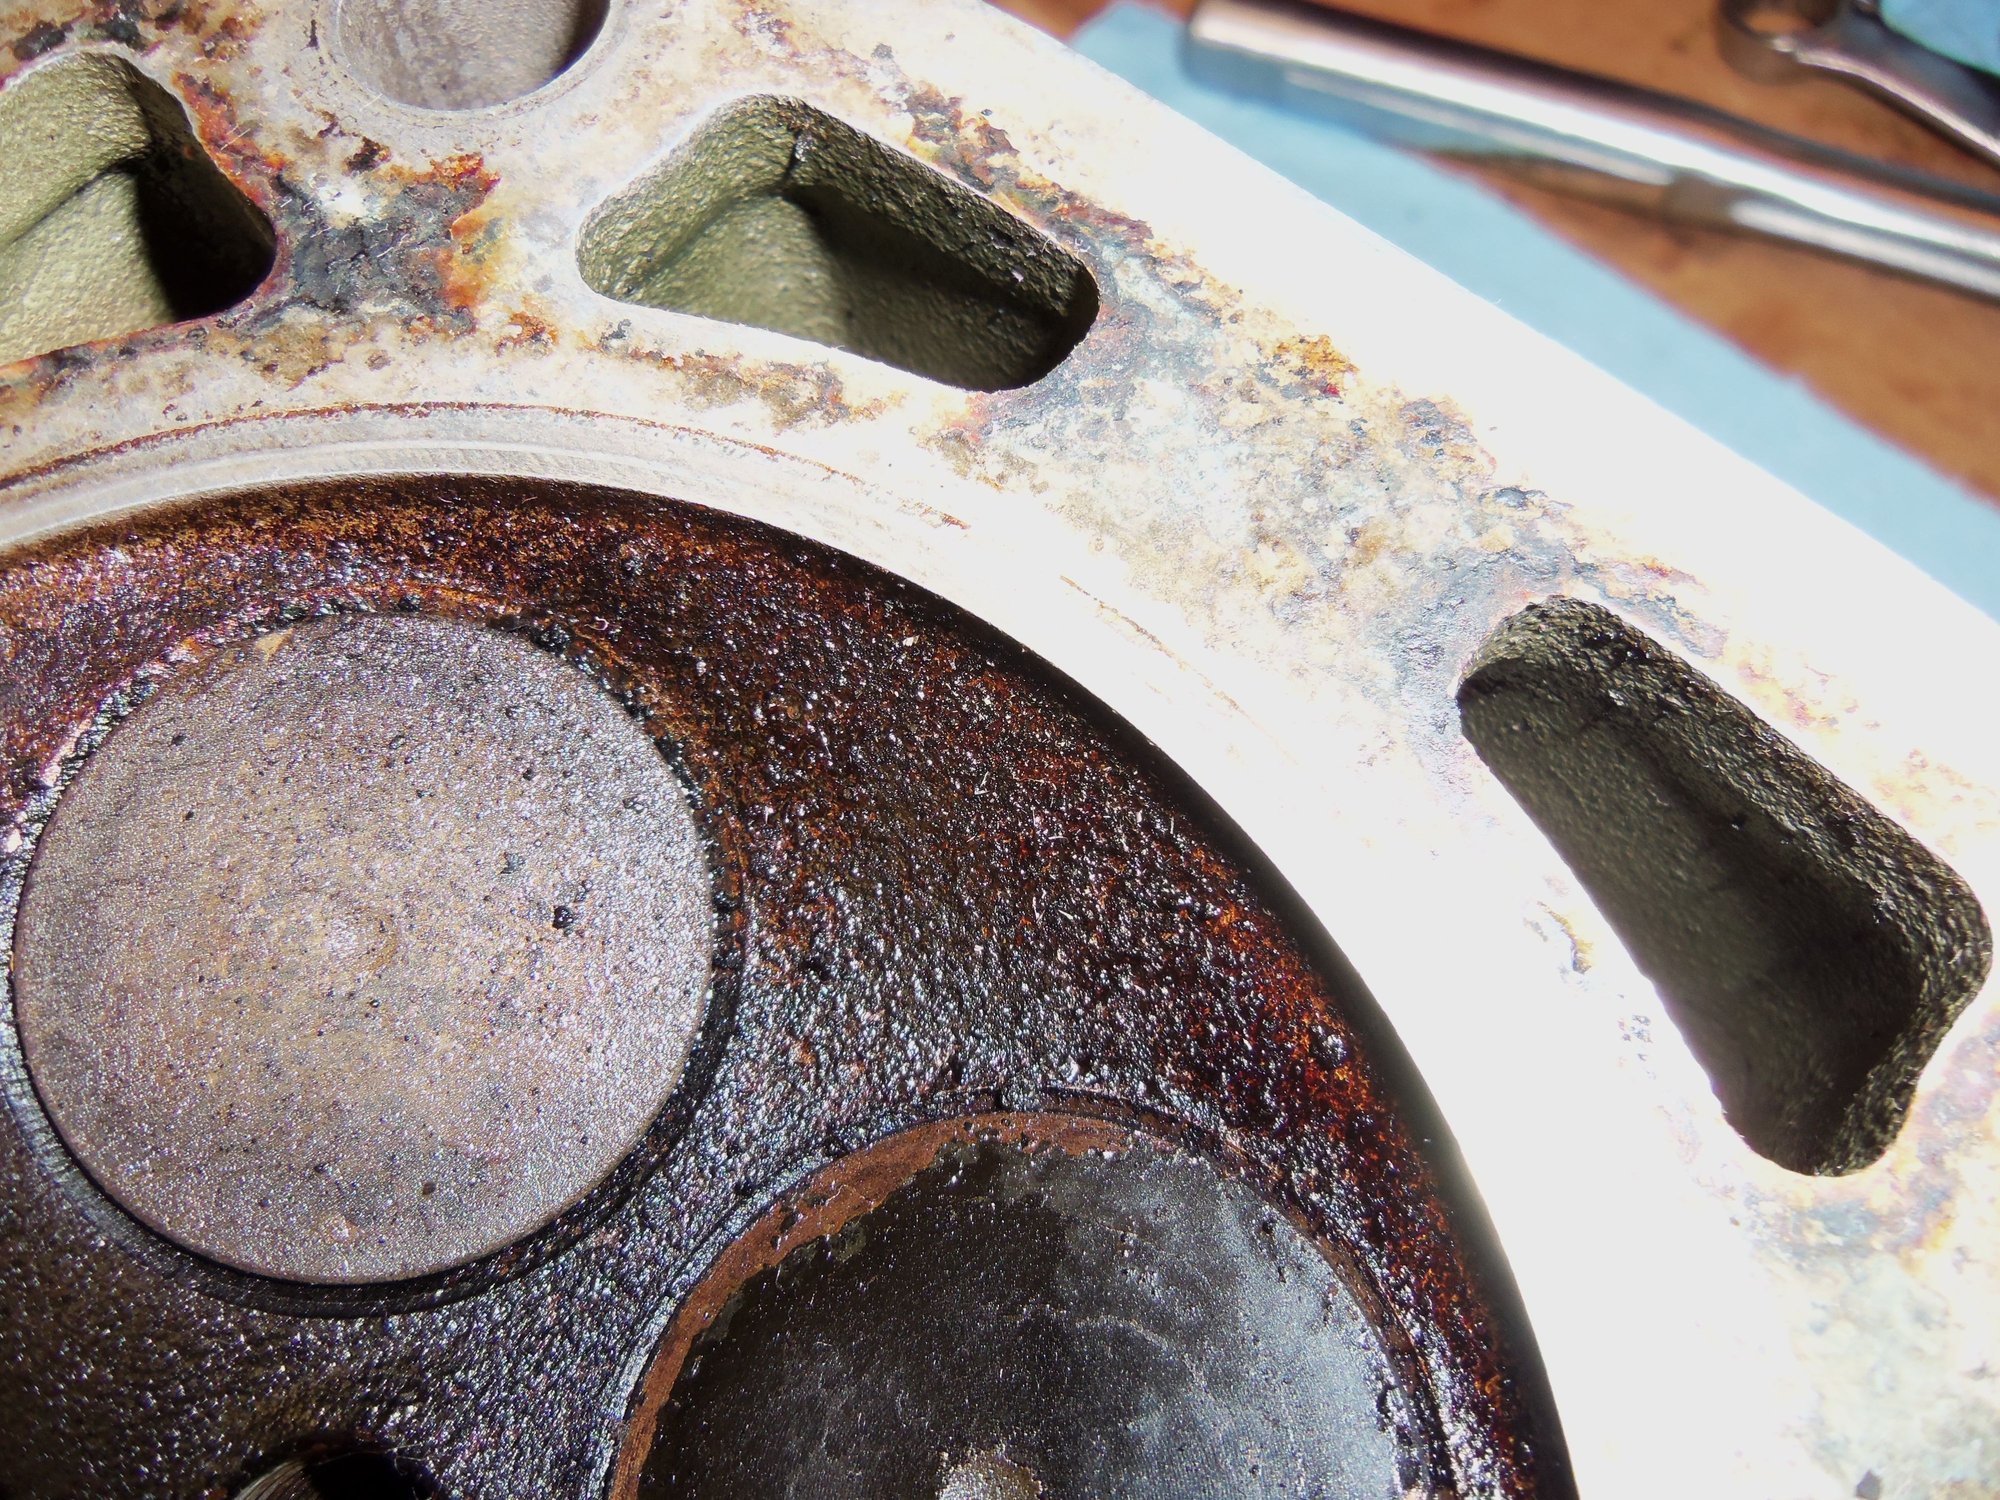
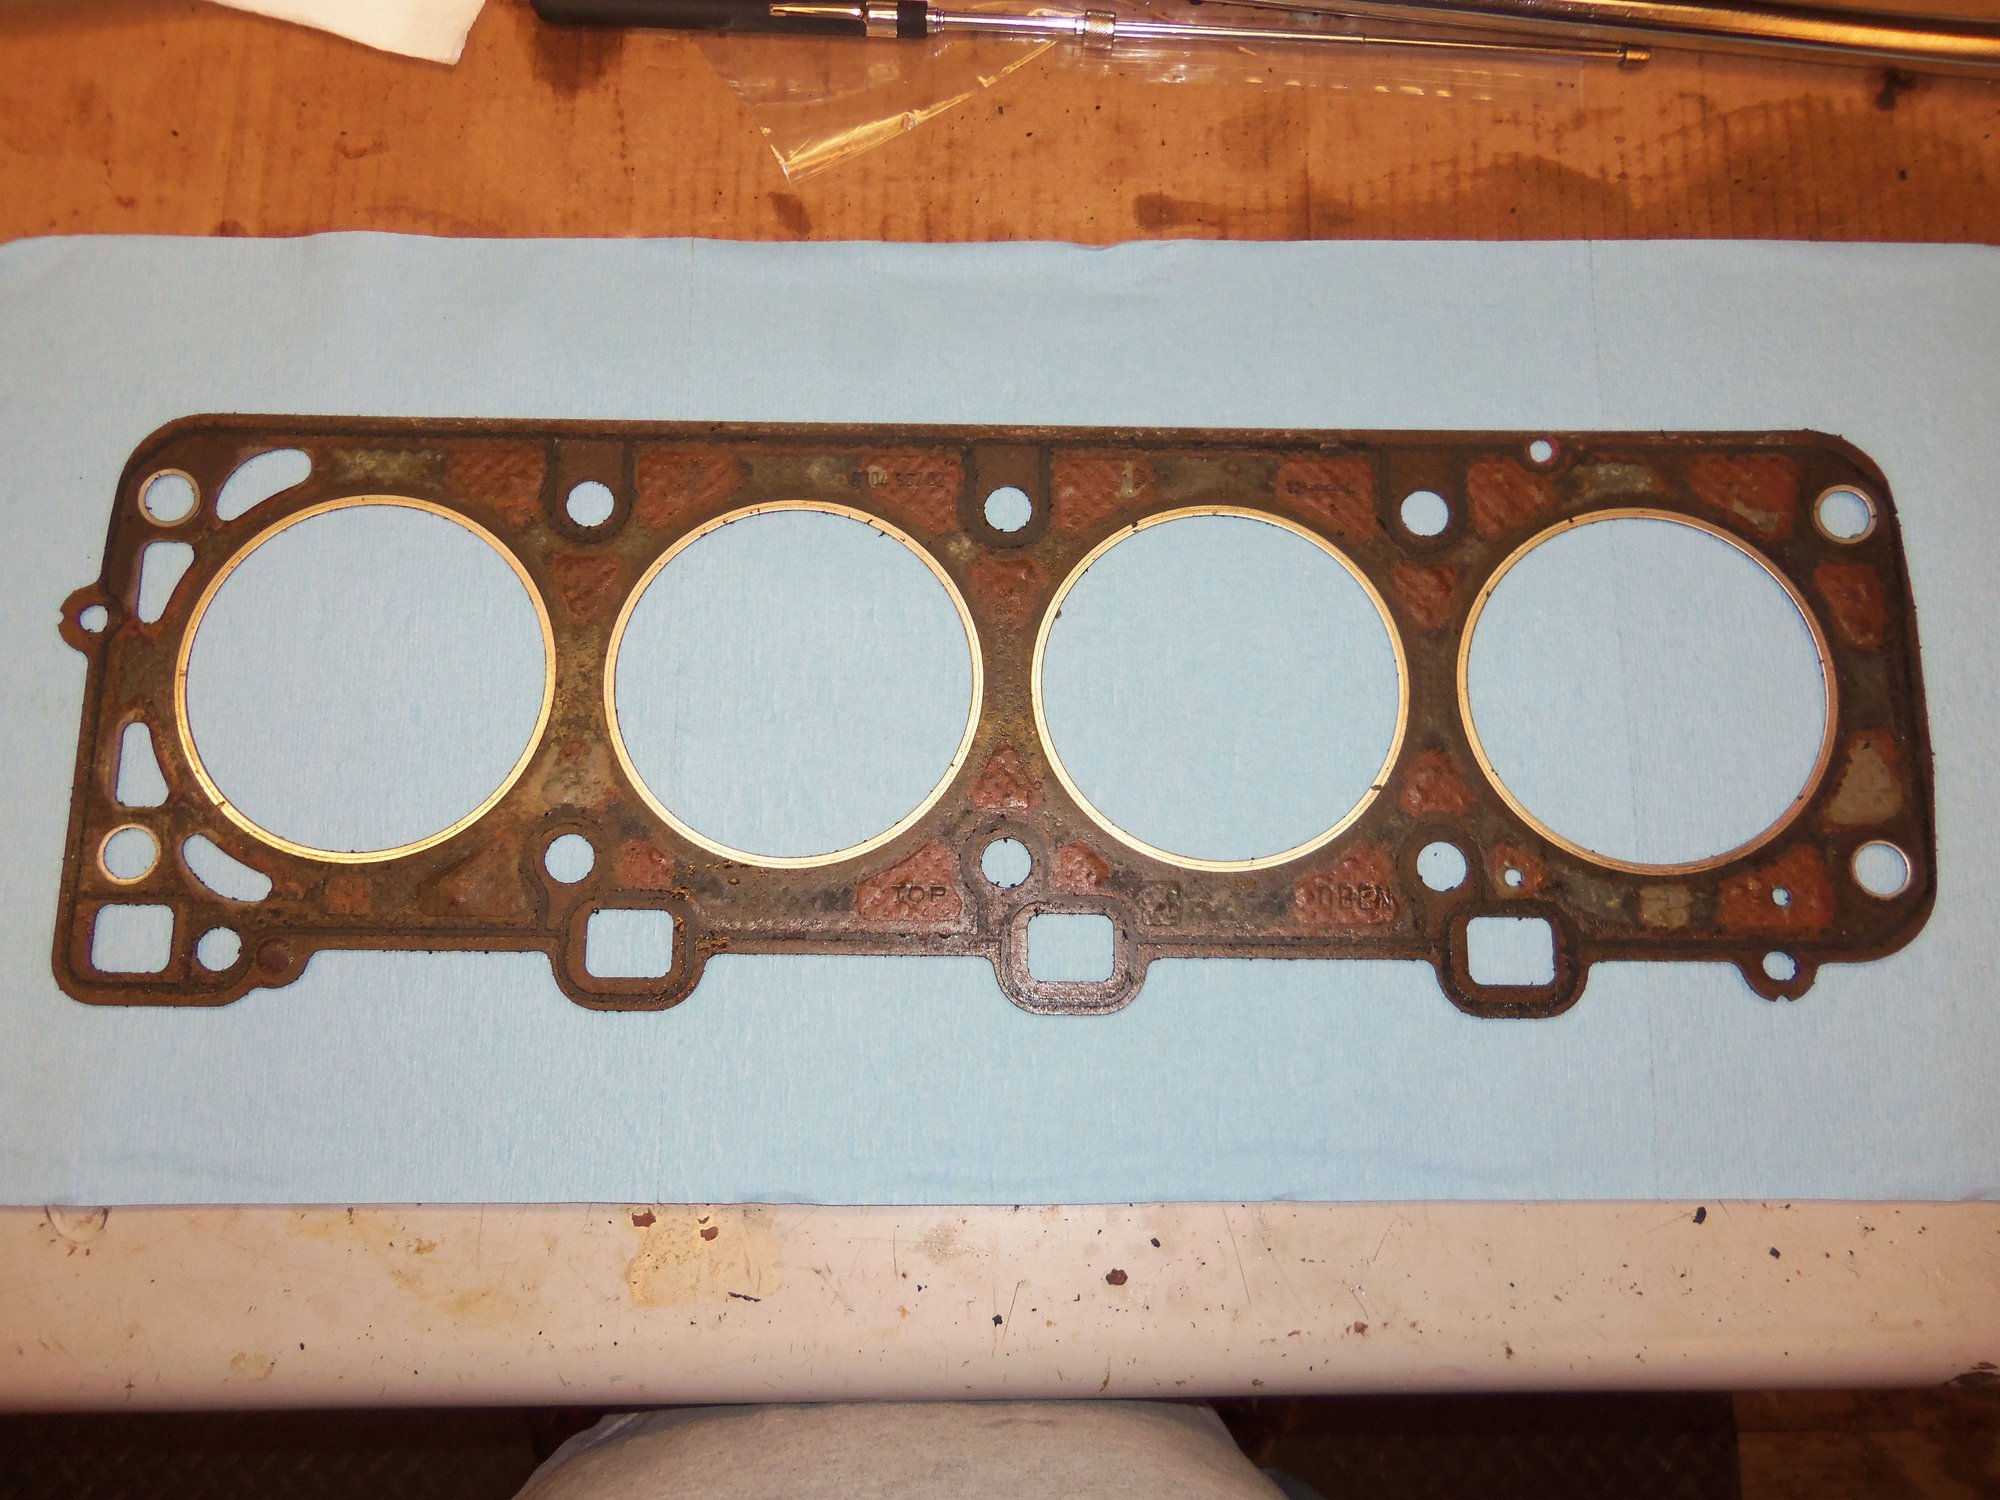
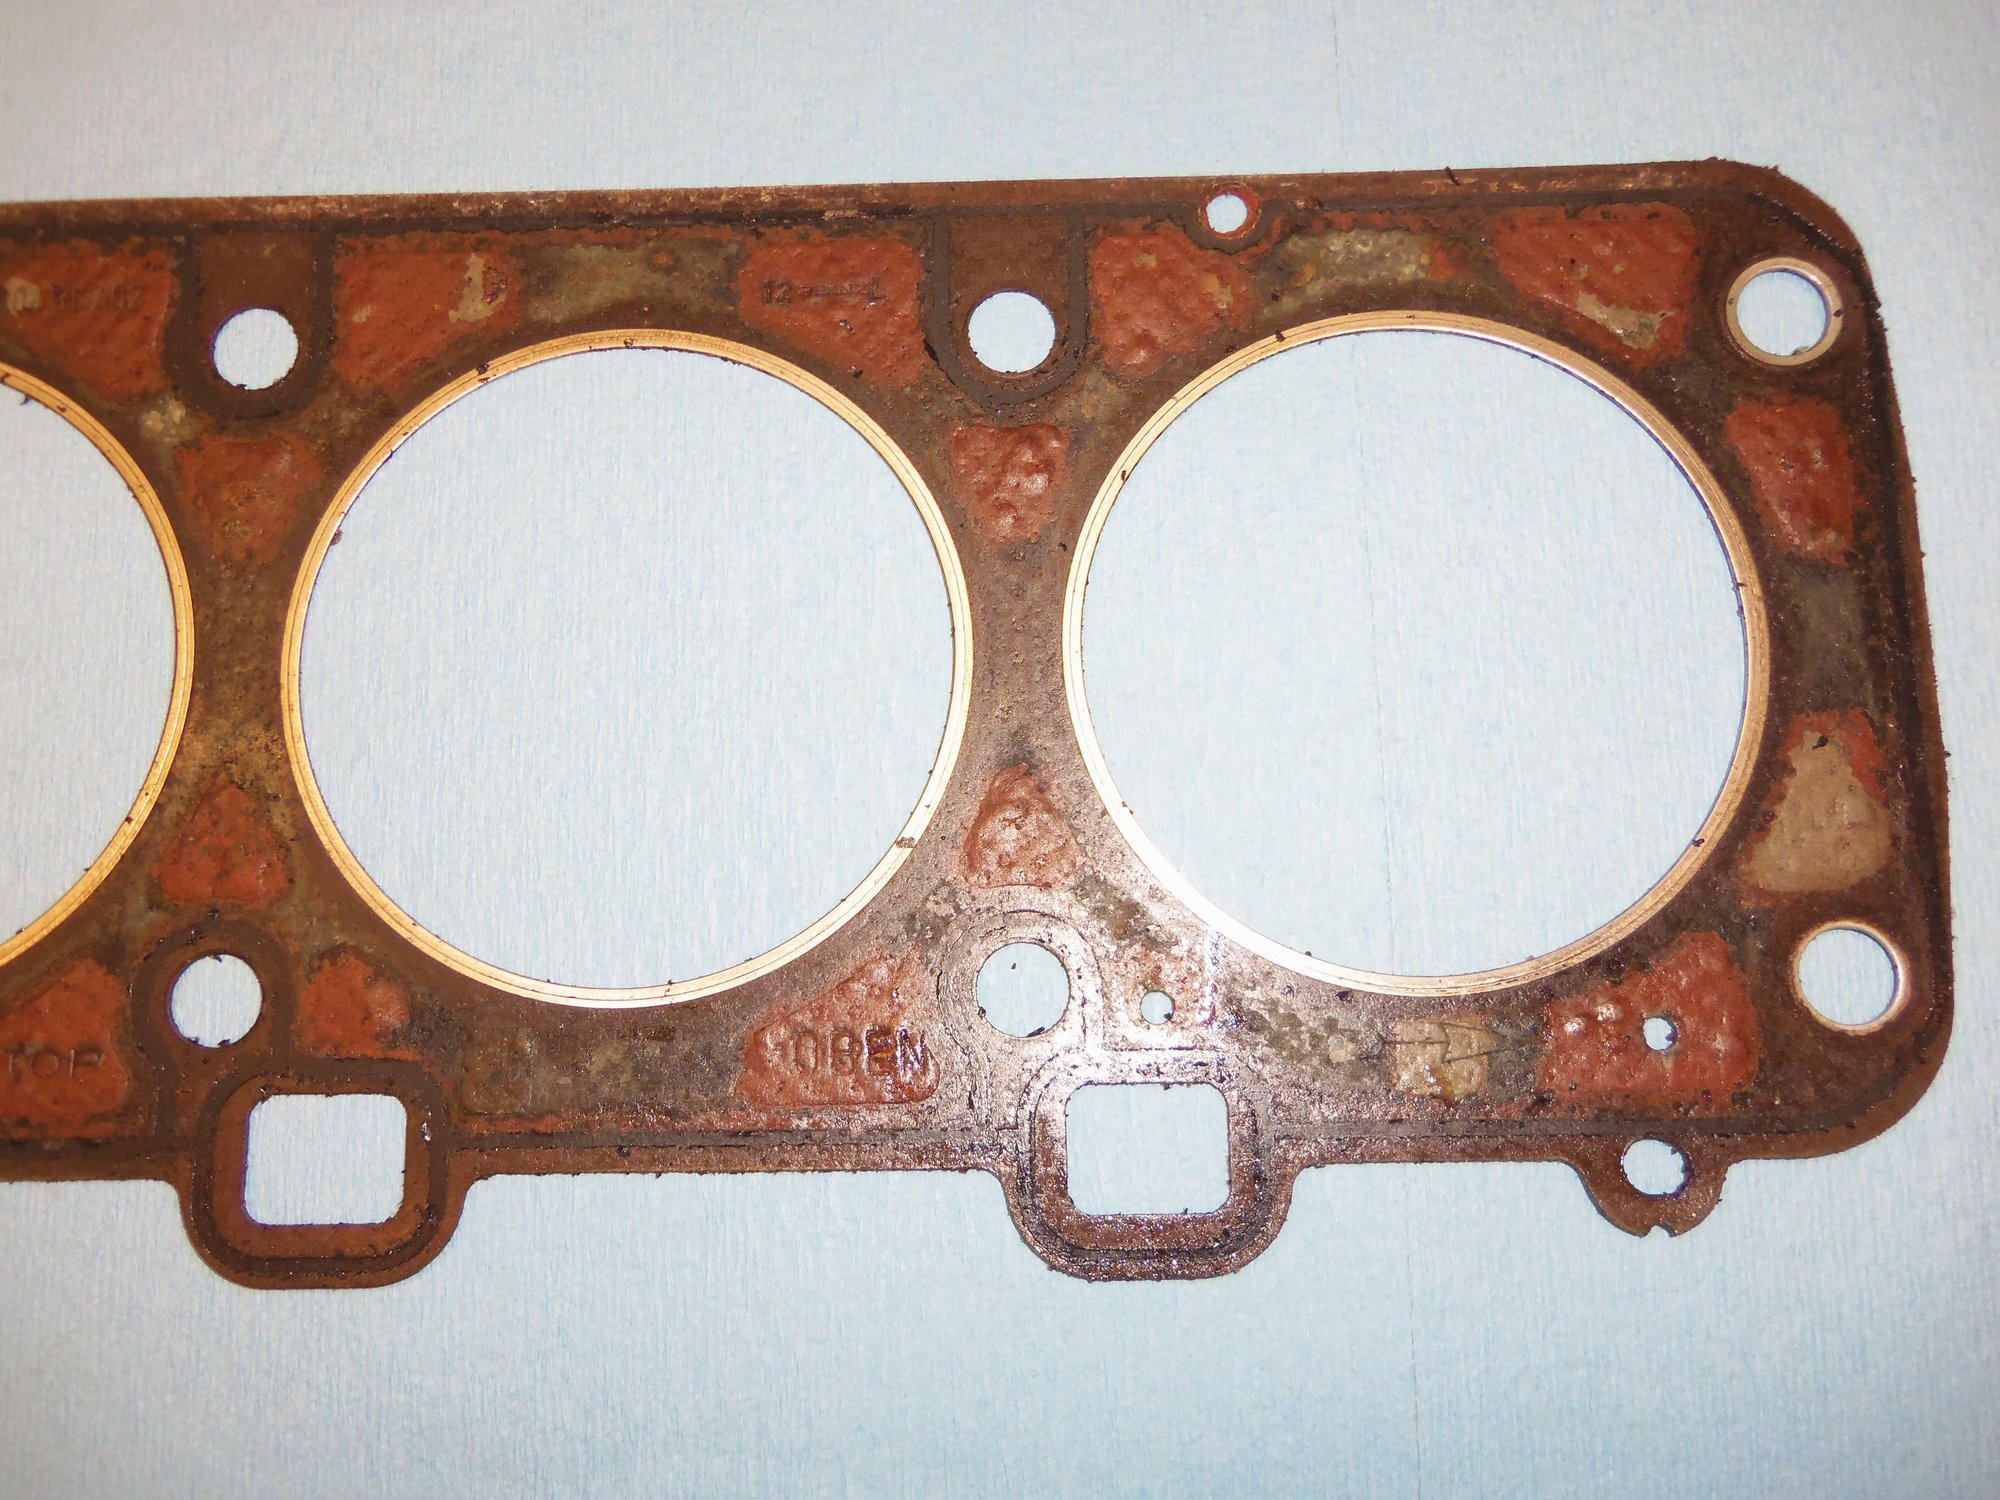
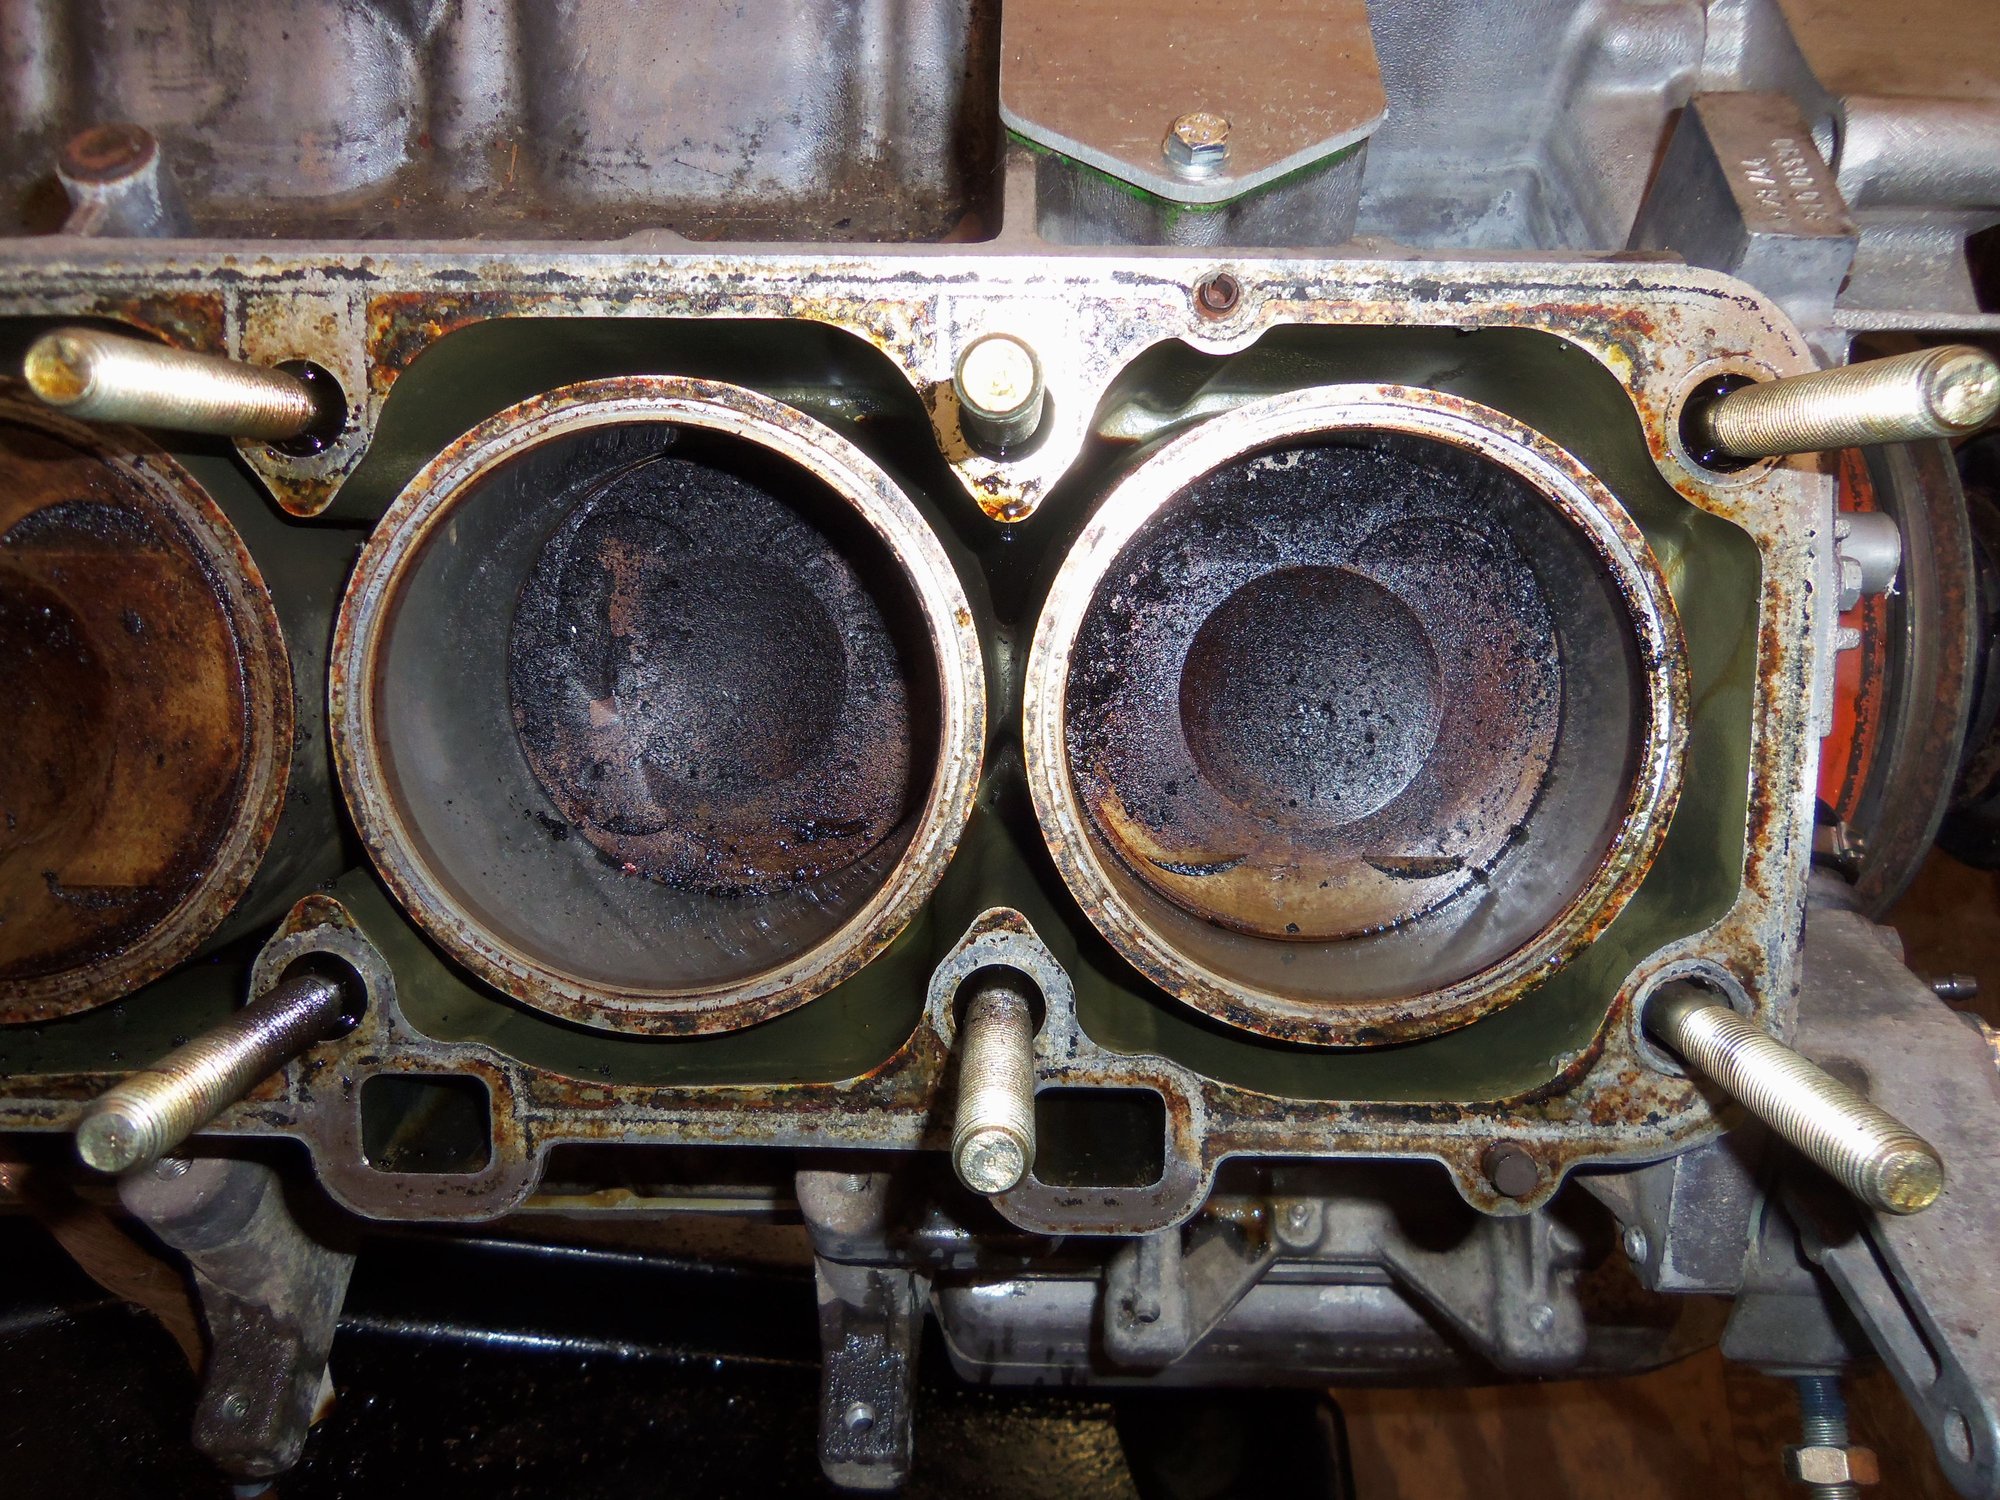
The head was stuck fast to the block, so I gently tapped it with a soft faced dead blow mallet on both ends until it broke loose. I pulled the head straight up and put it on the work bench. At the engine, I was greeted by a complete head gasket! I was expecting it to have dissolved. It actually looked pretty good, all things considered.
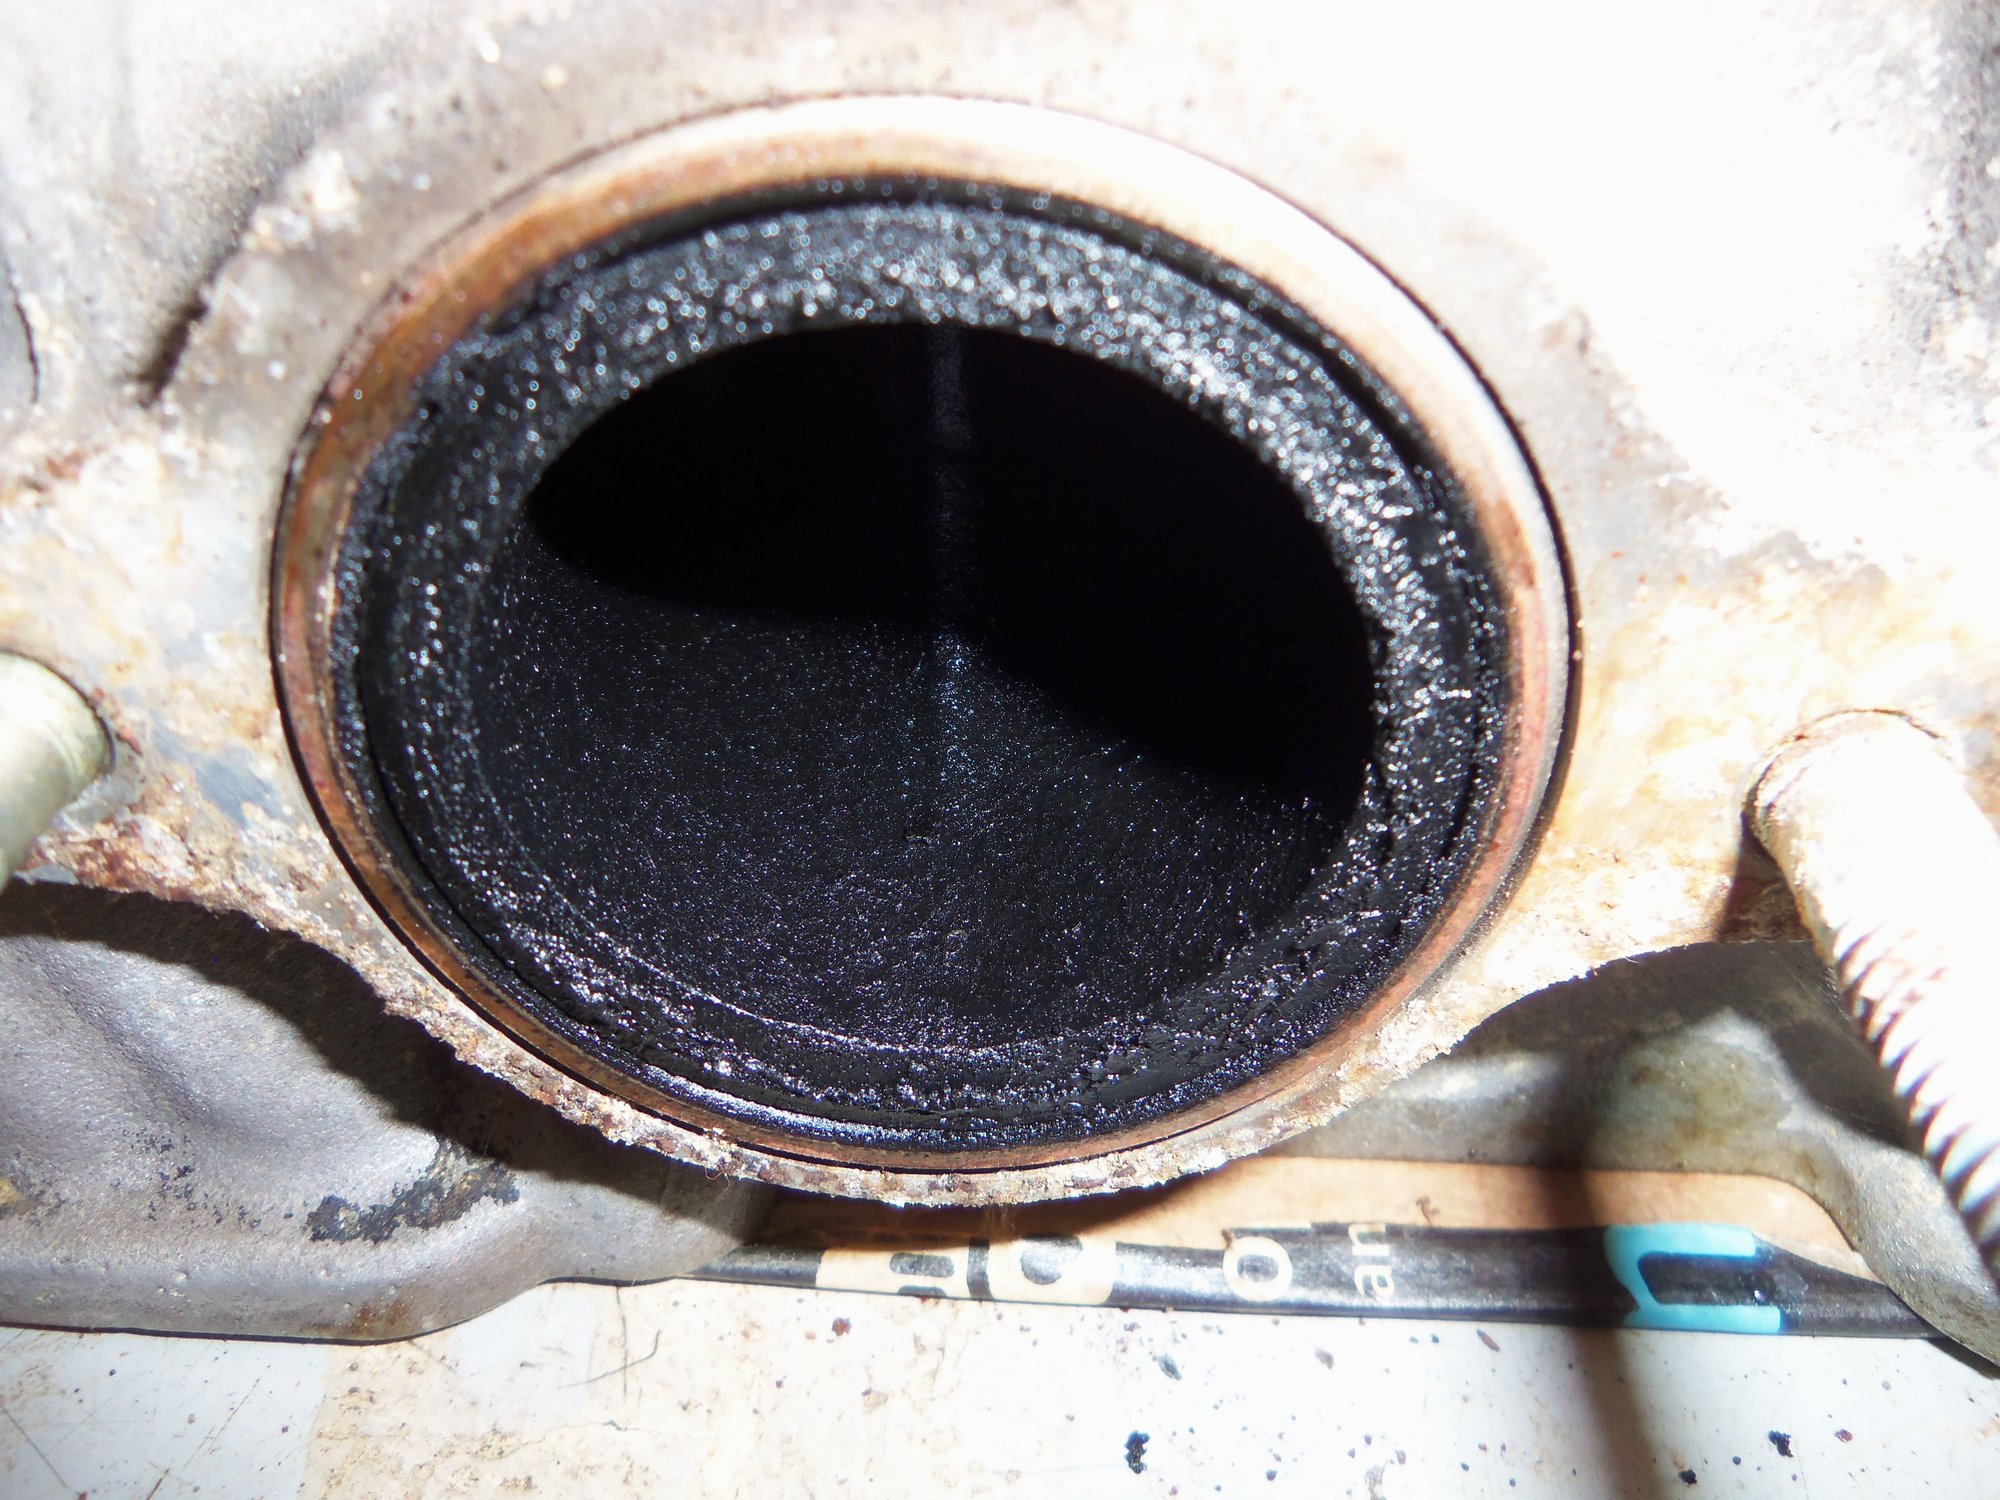
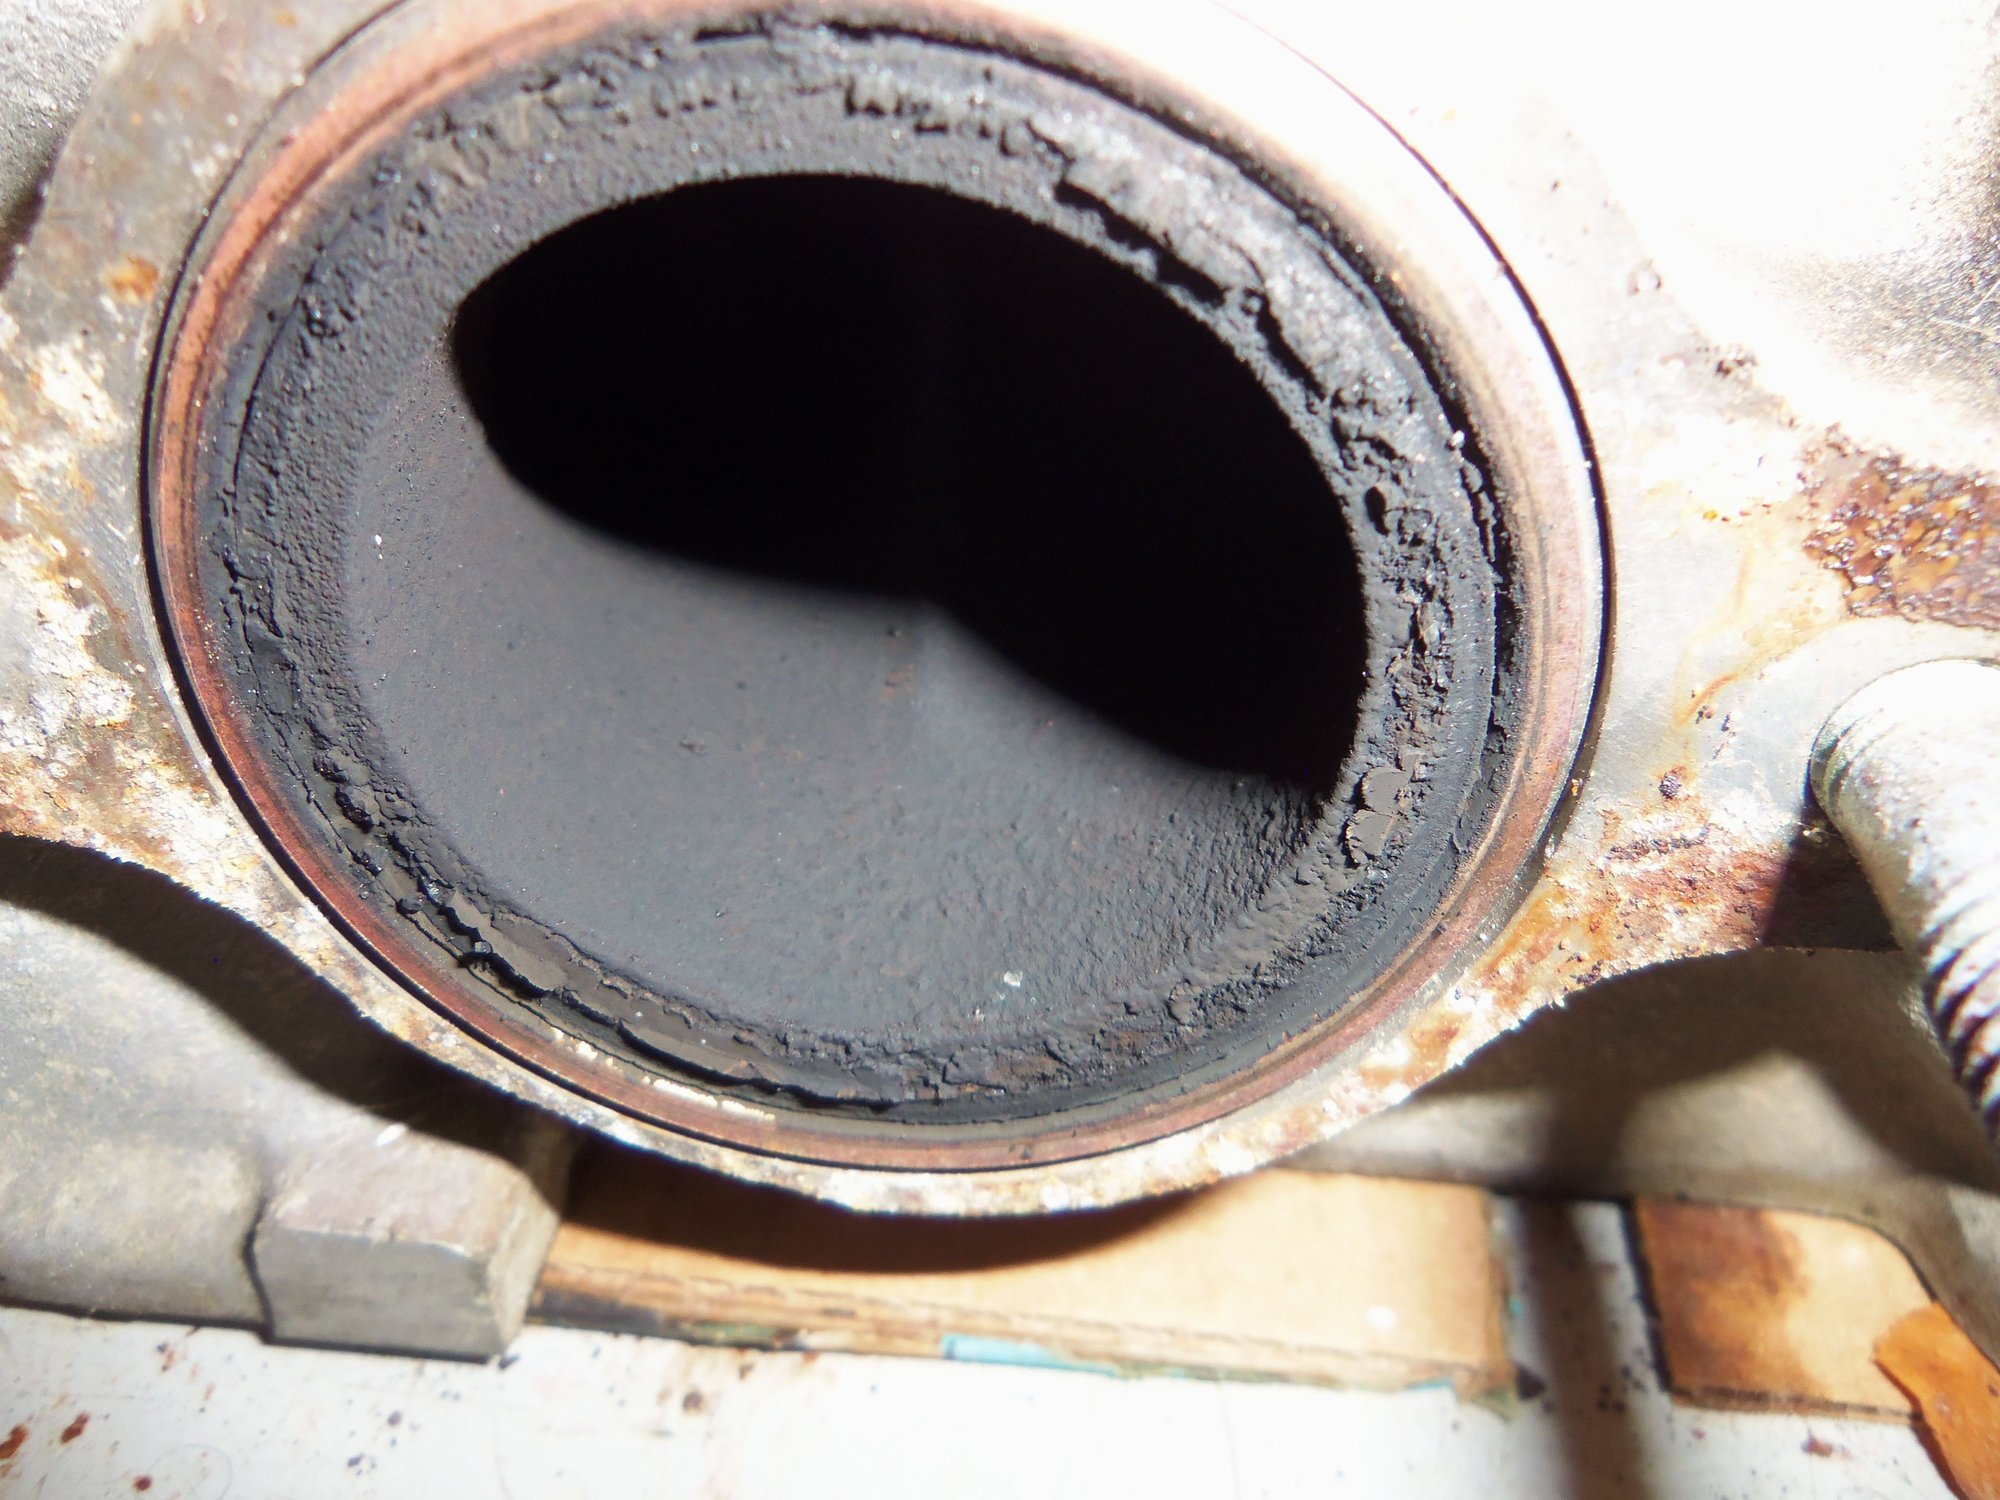
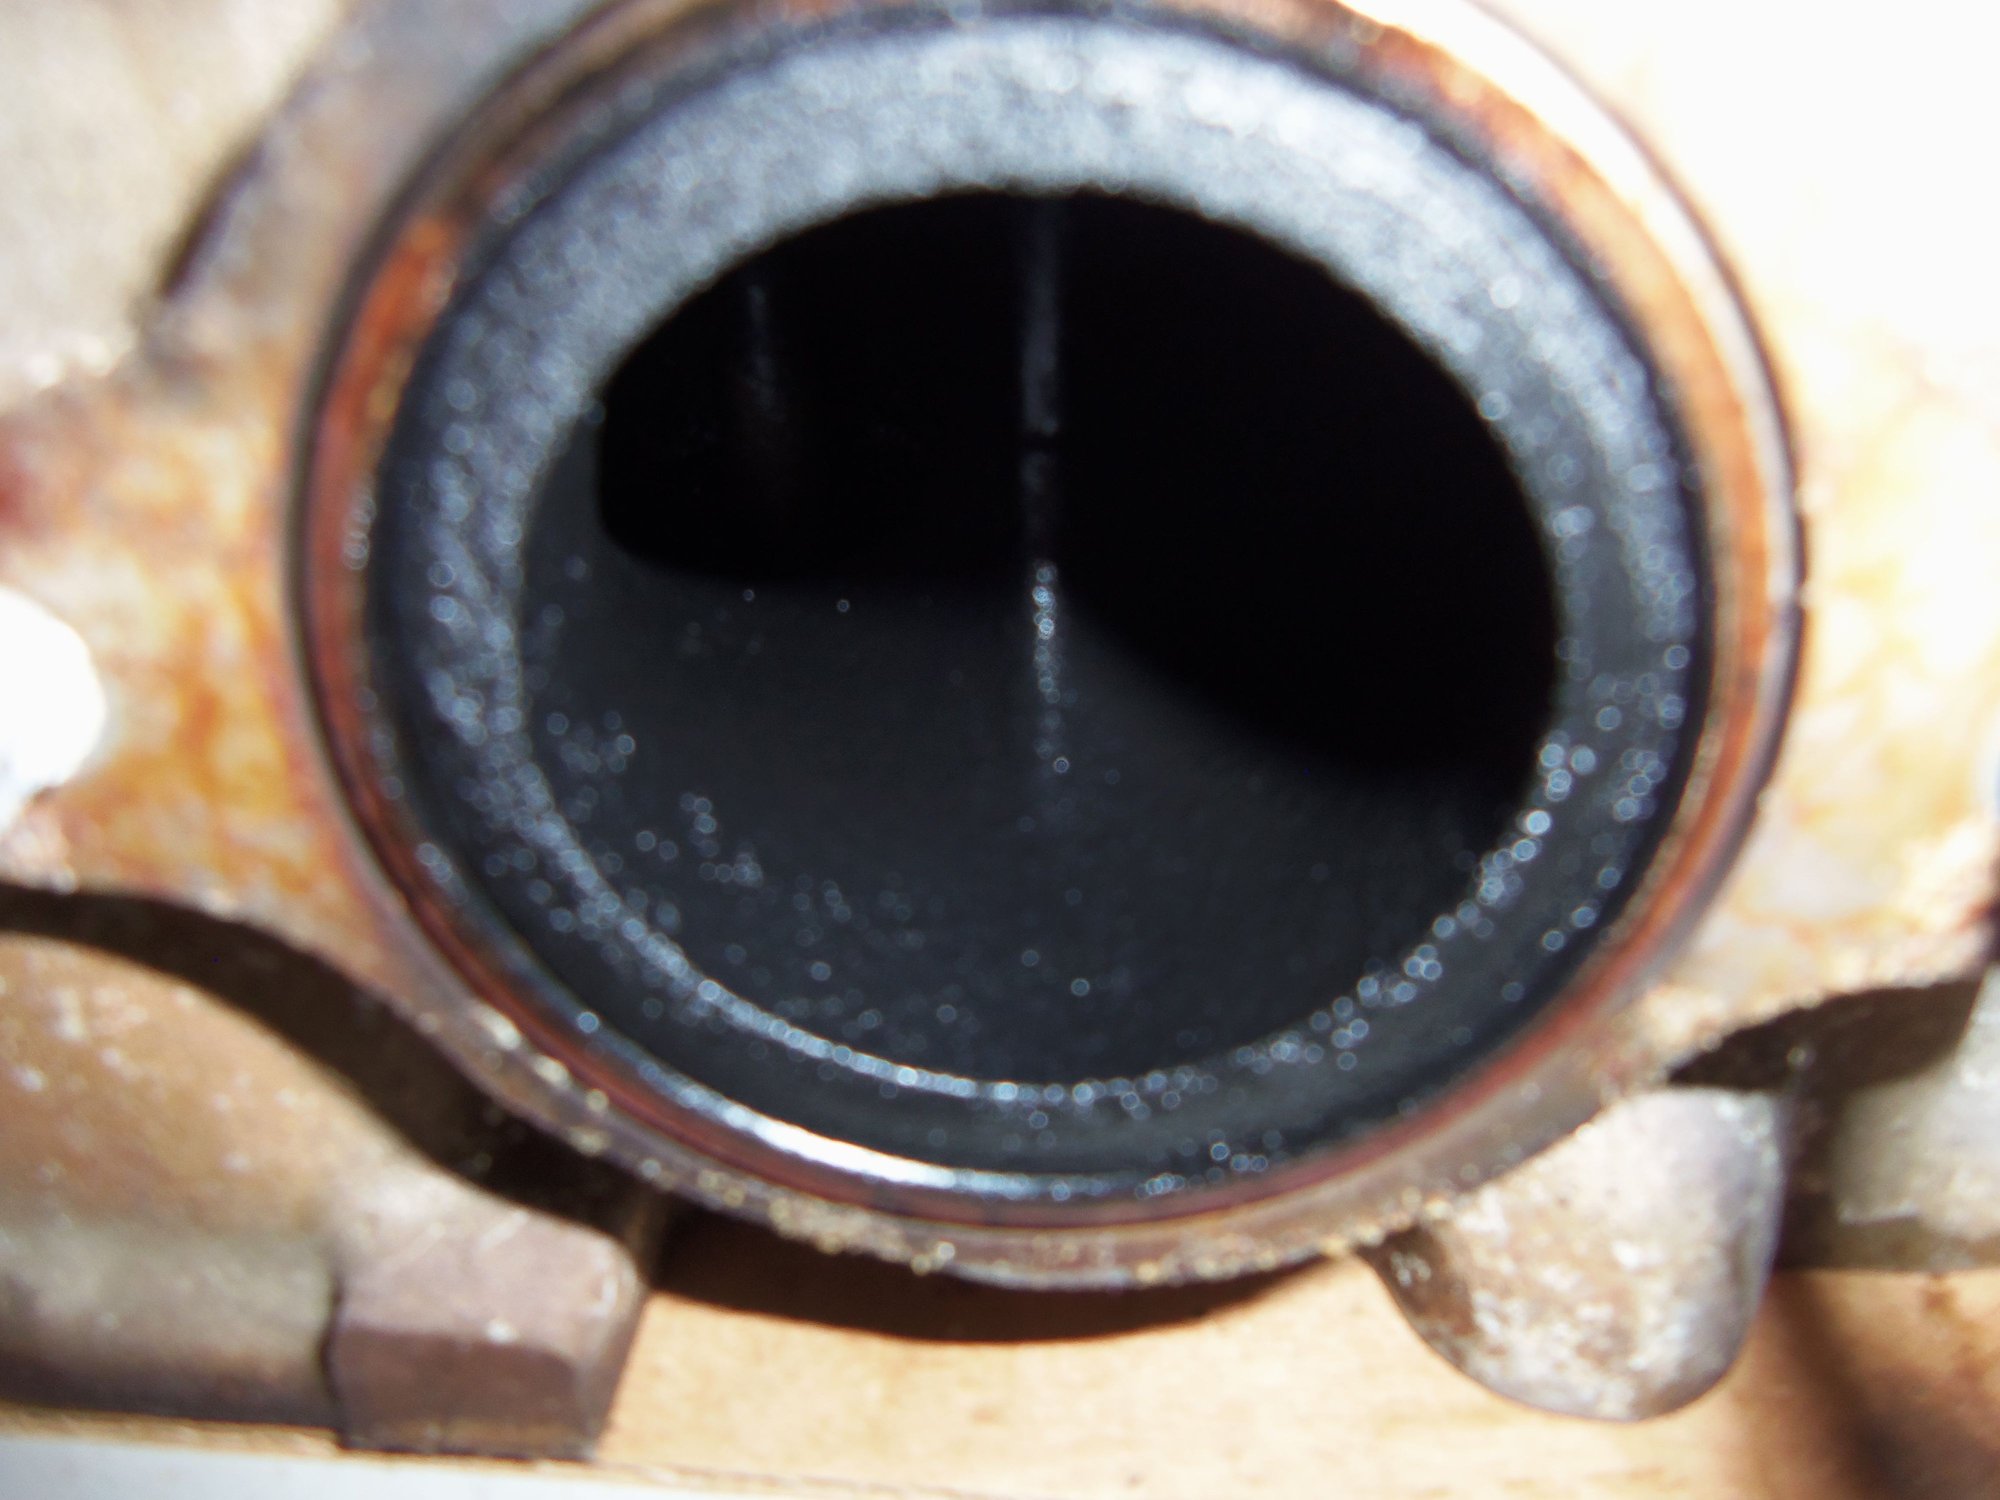
Back at the head, I checked the exhaust ports. 3 were oily, 1 was dry. However, this could be because I poured MMO in the cylinders last month, and then turned the crank several times in removing the engine and while taking leak down readings.
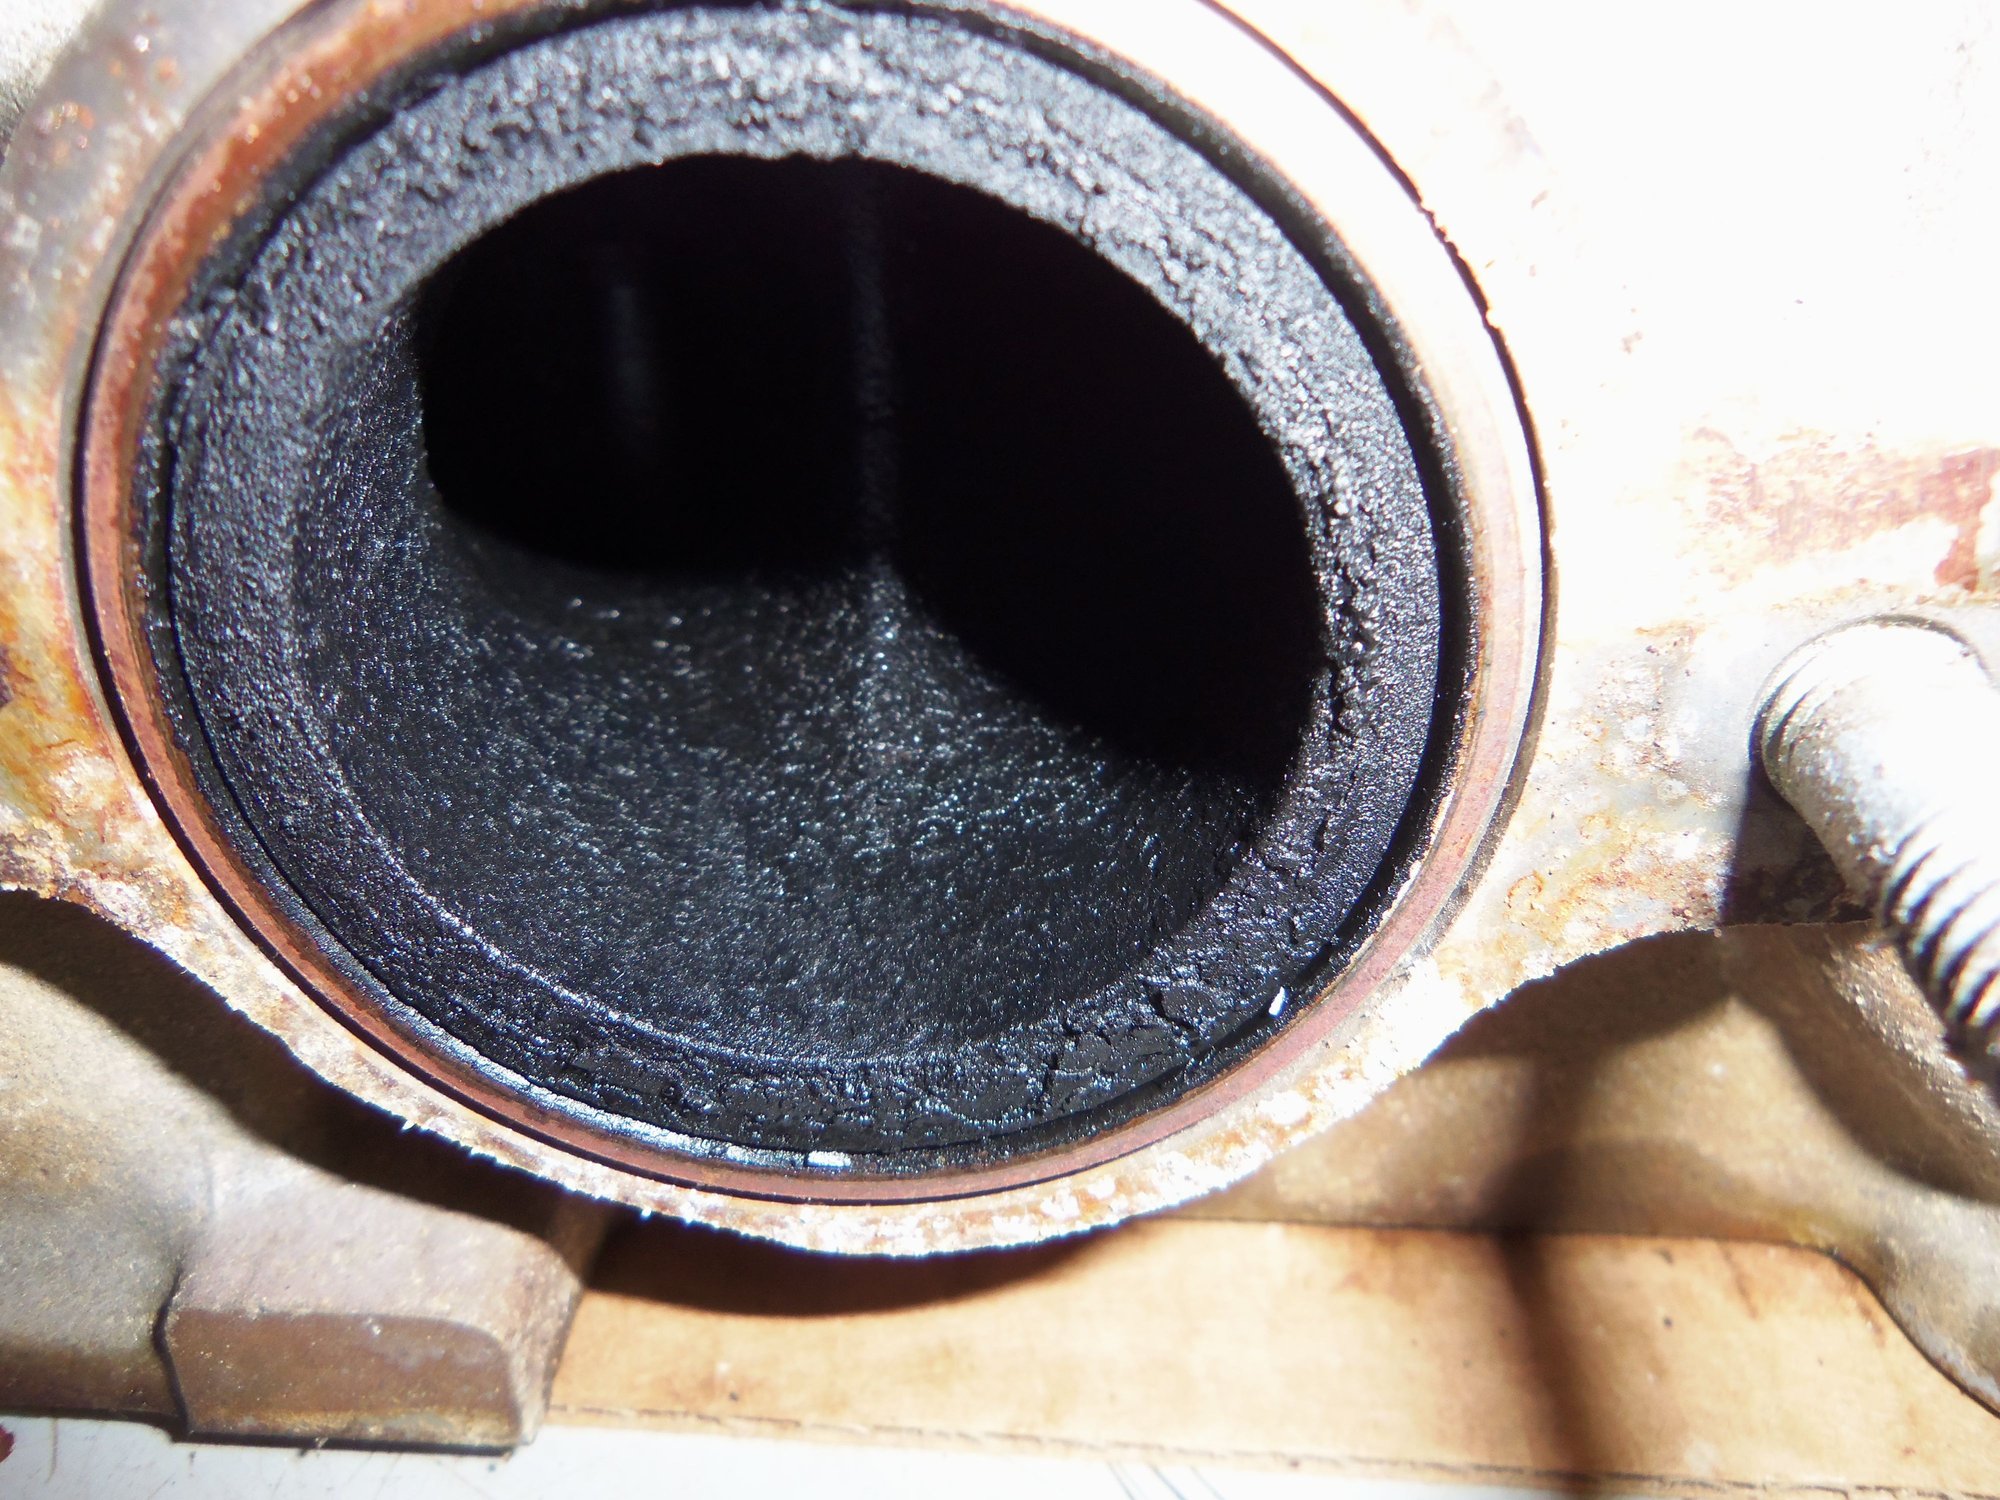
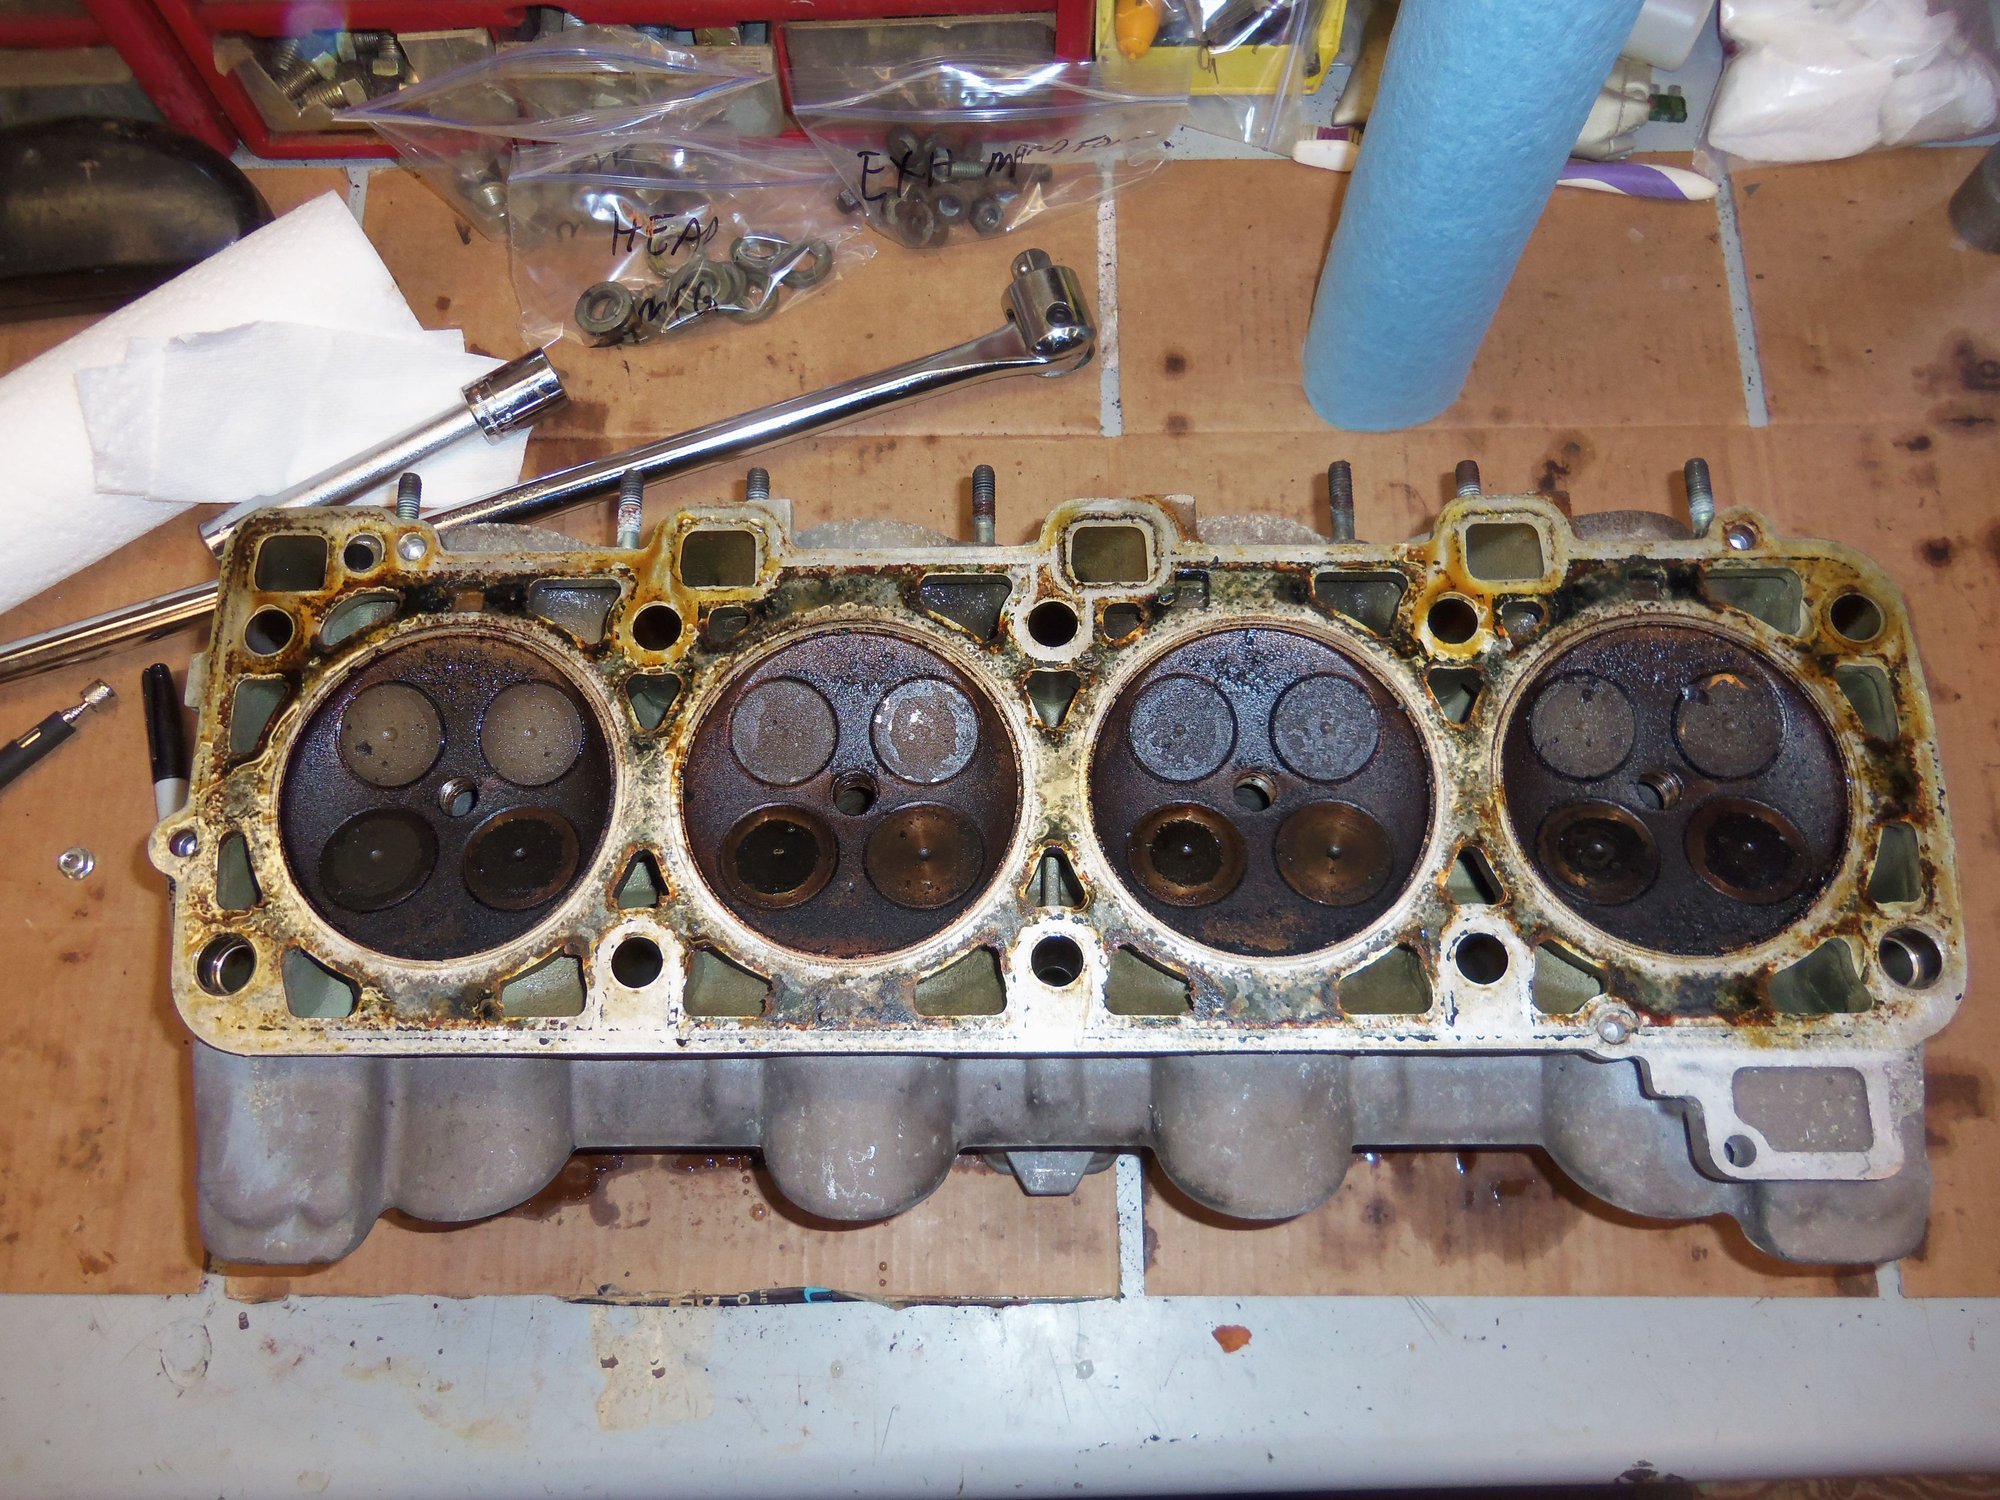
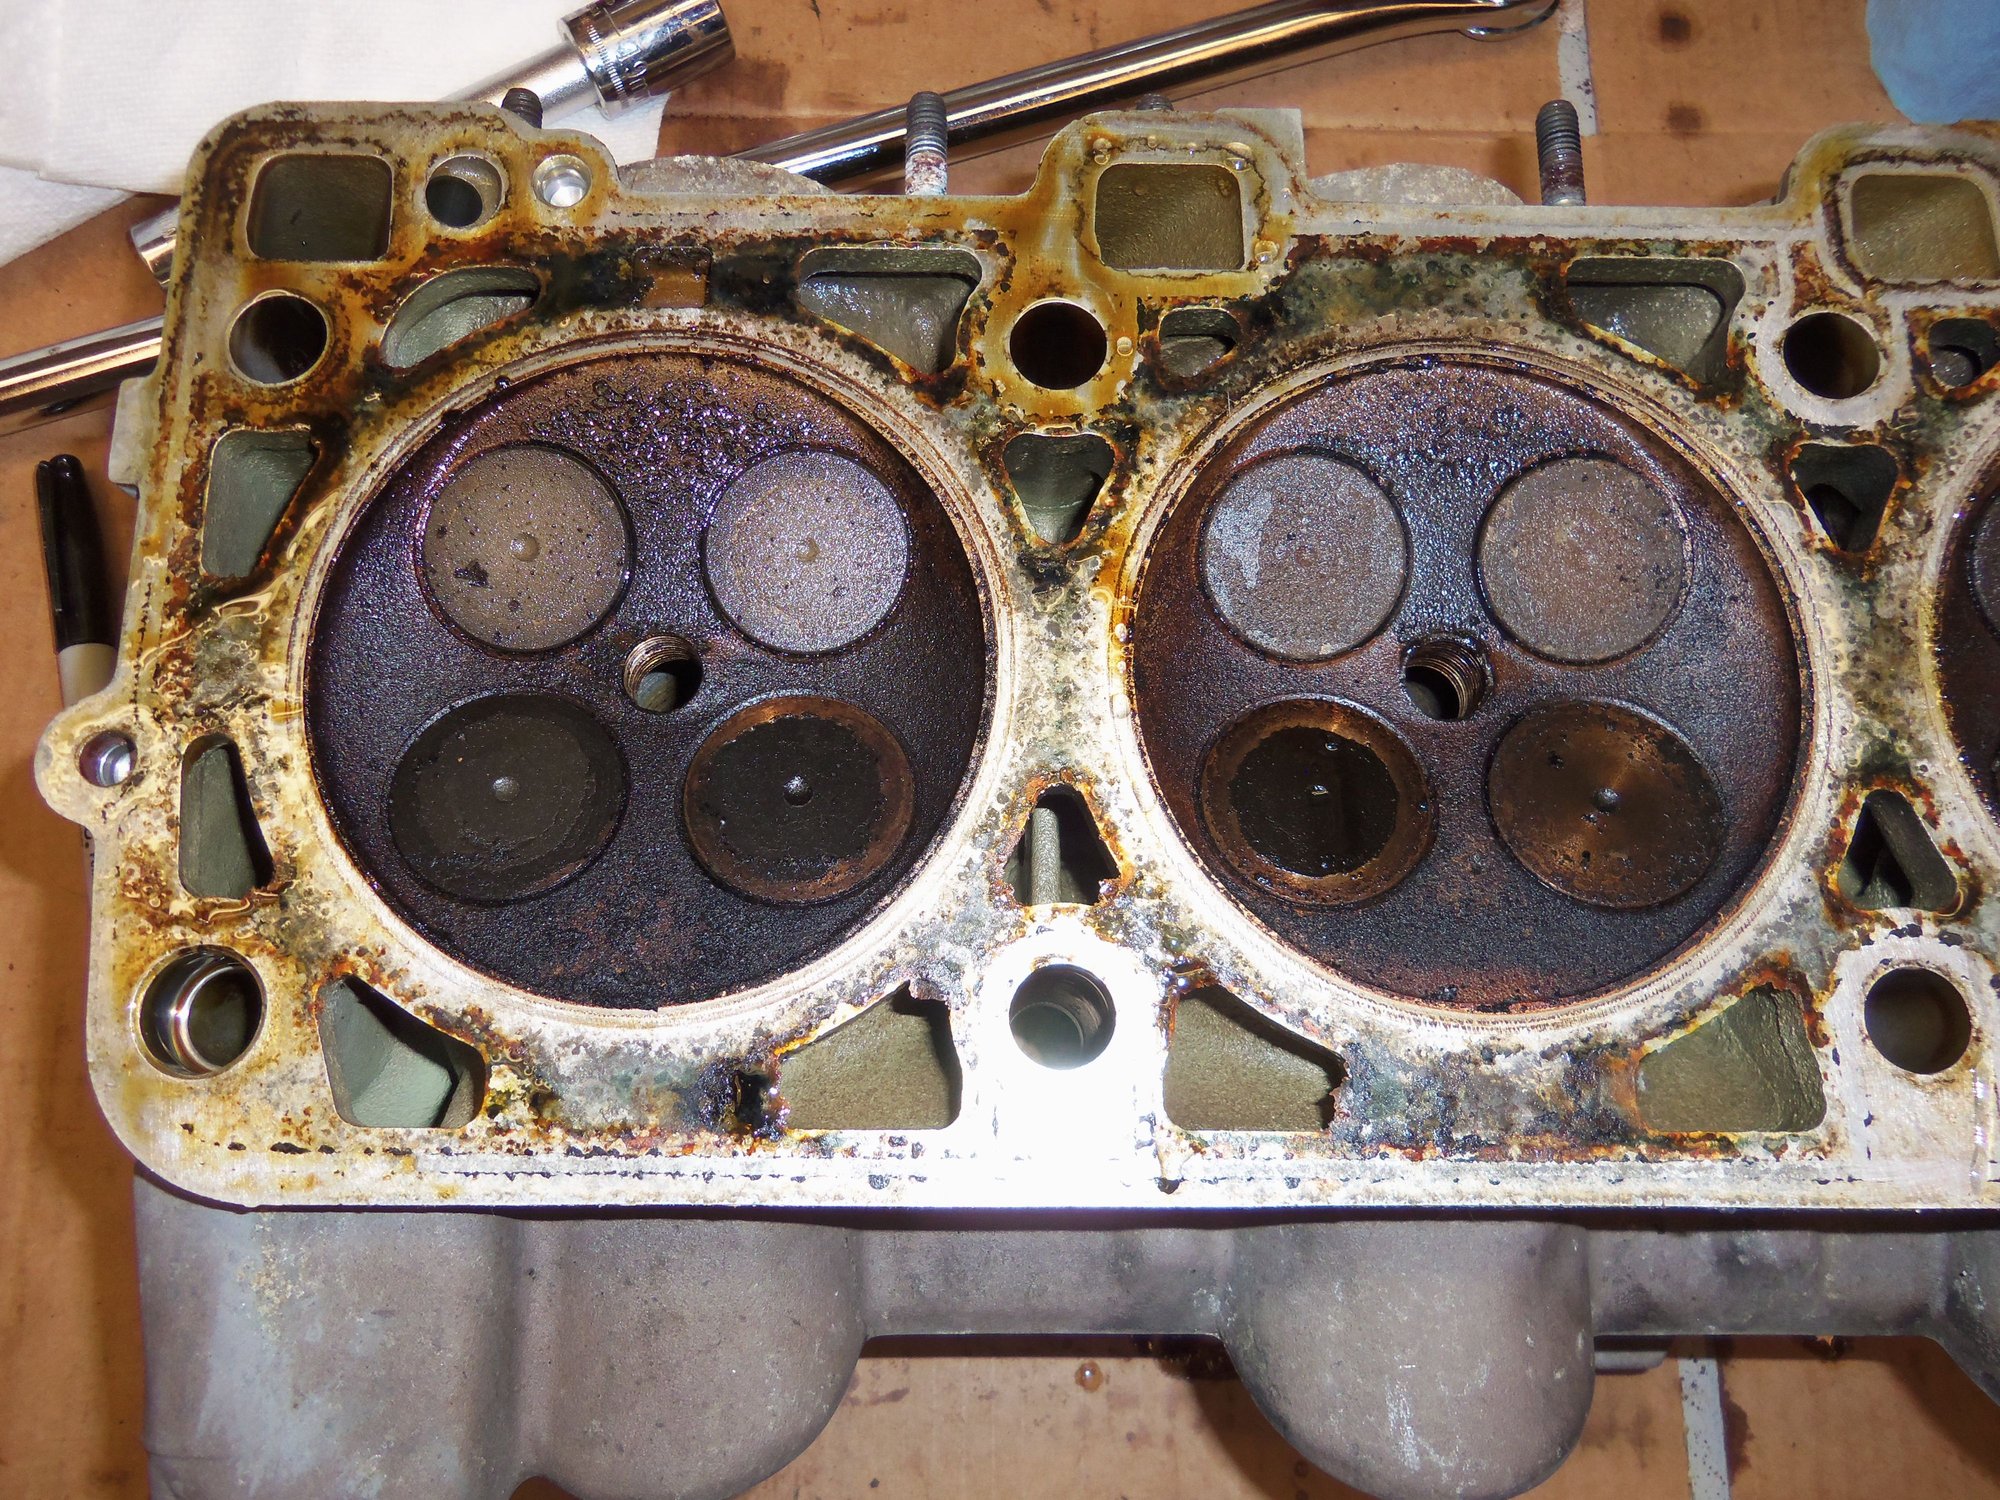
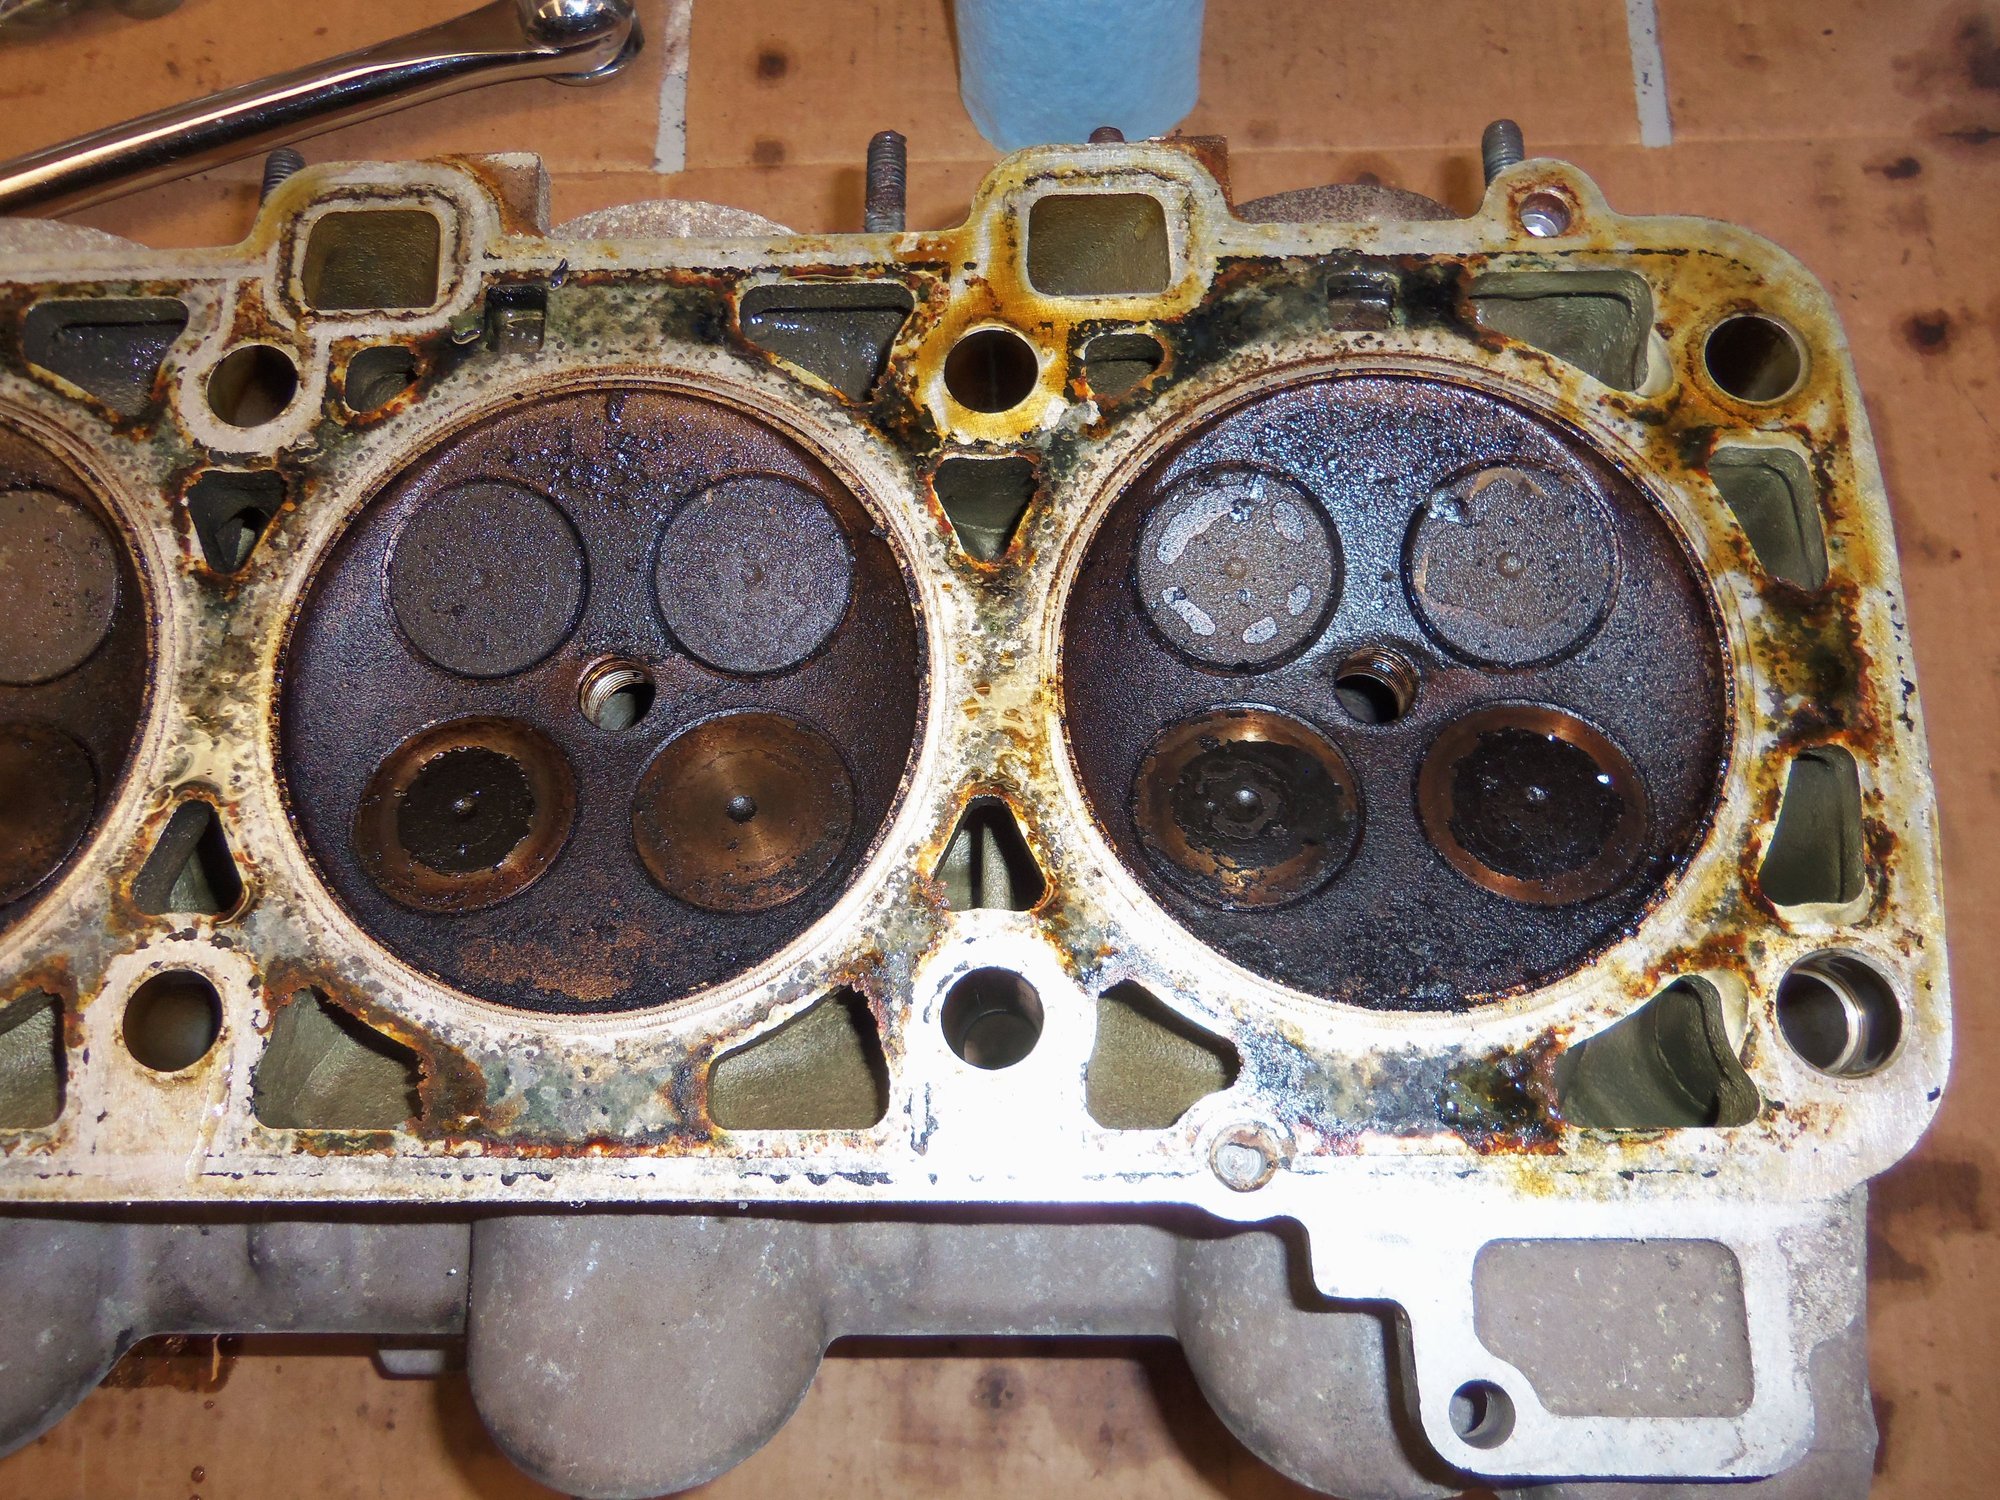
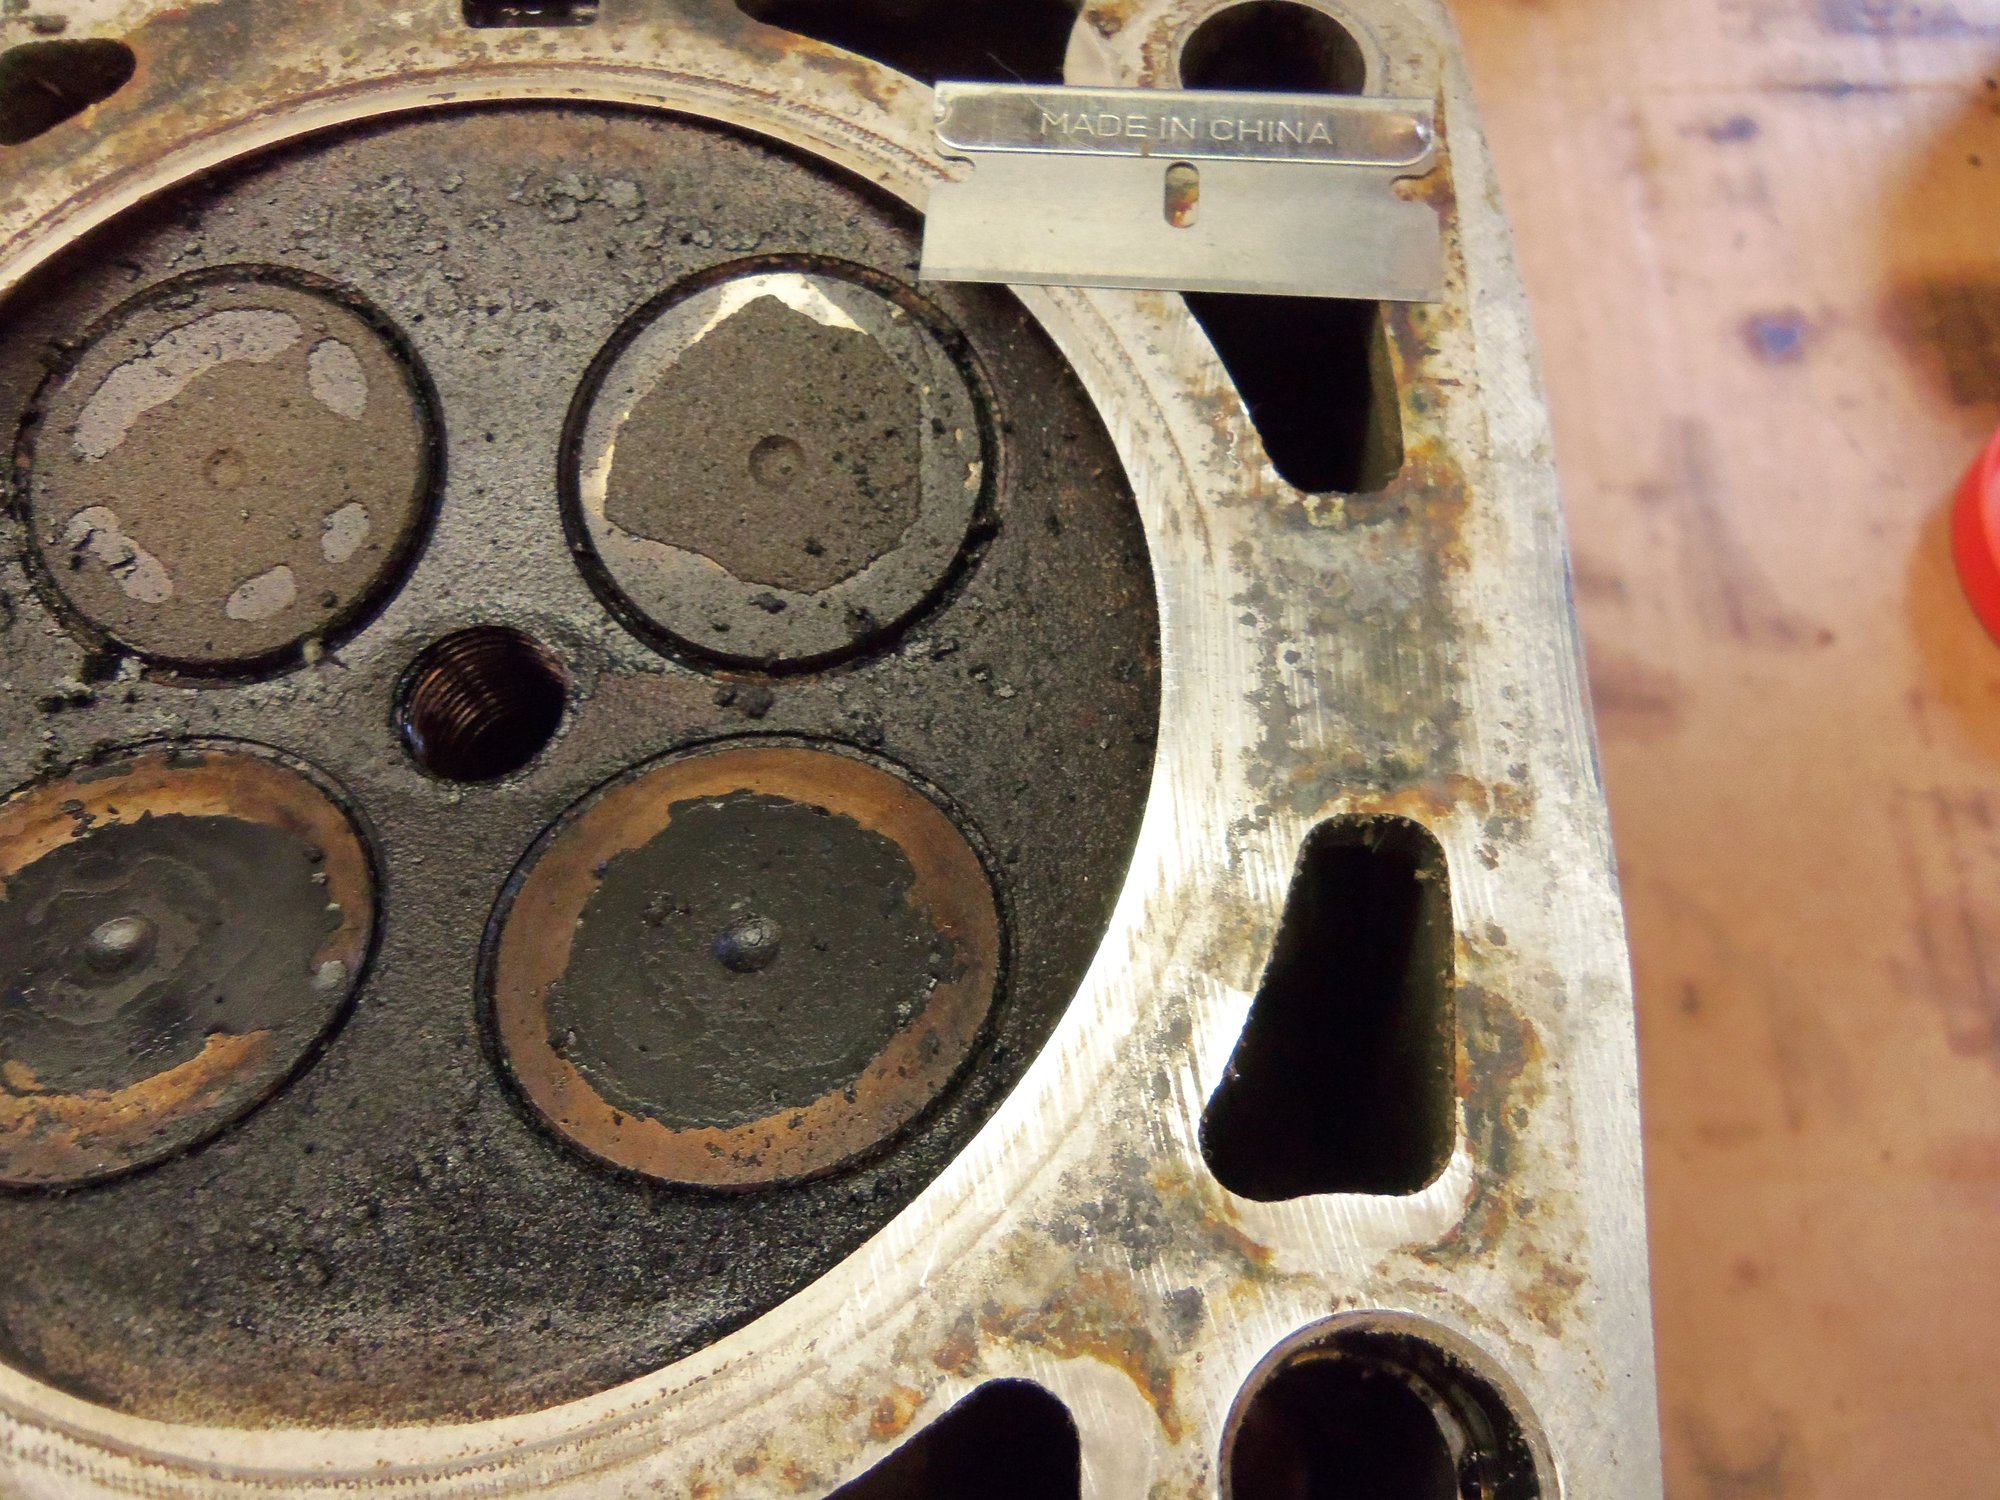
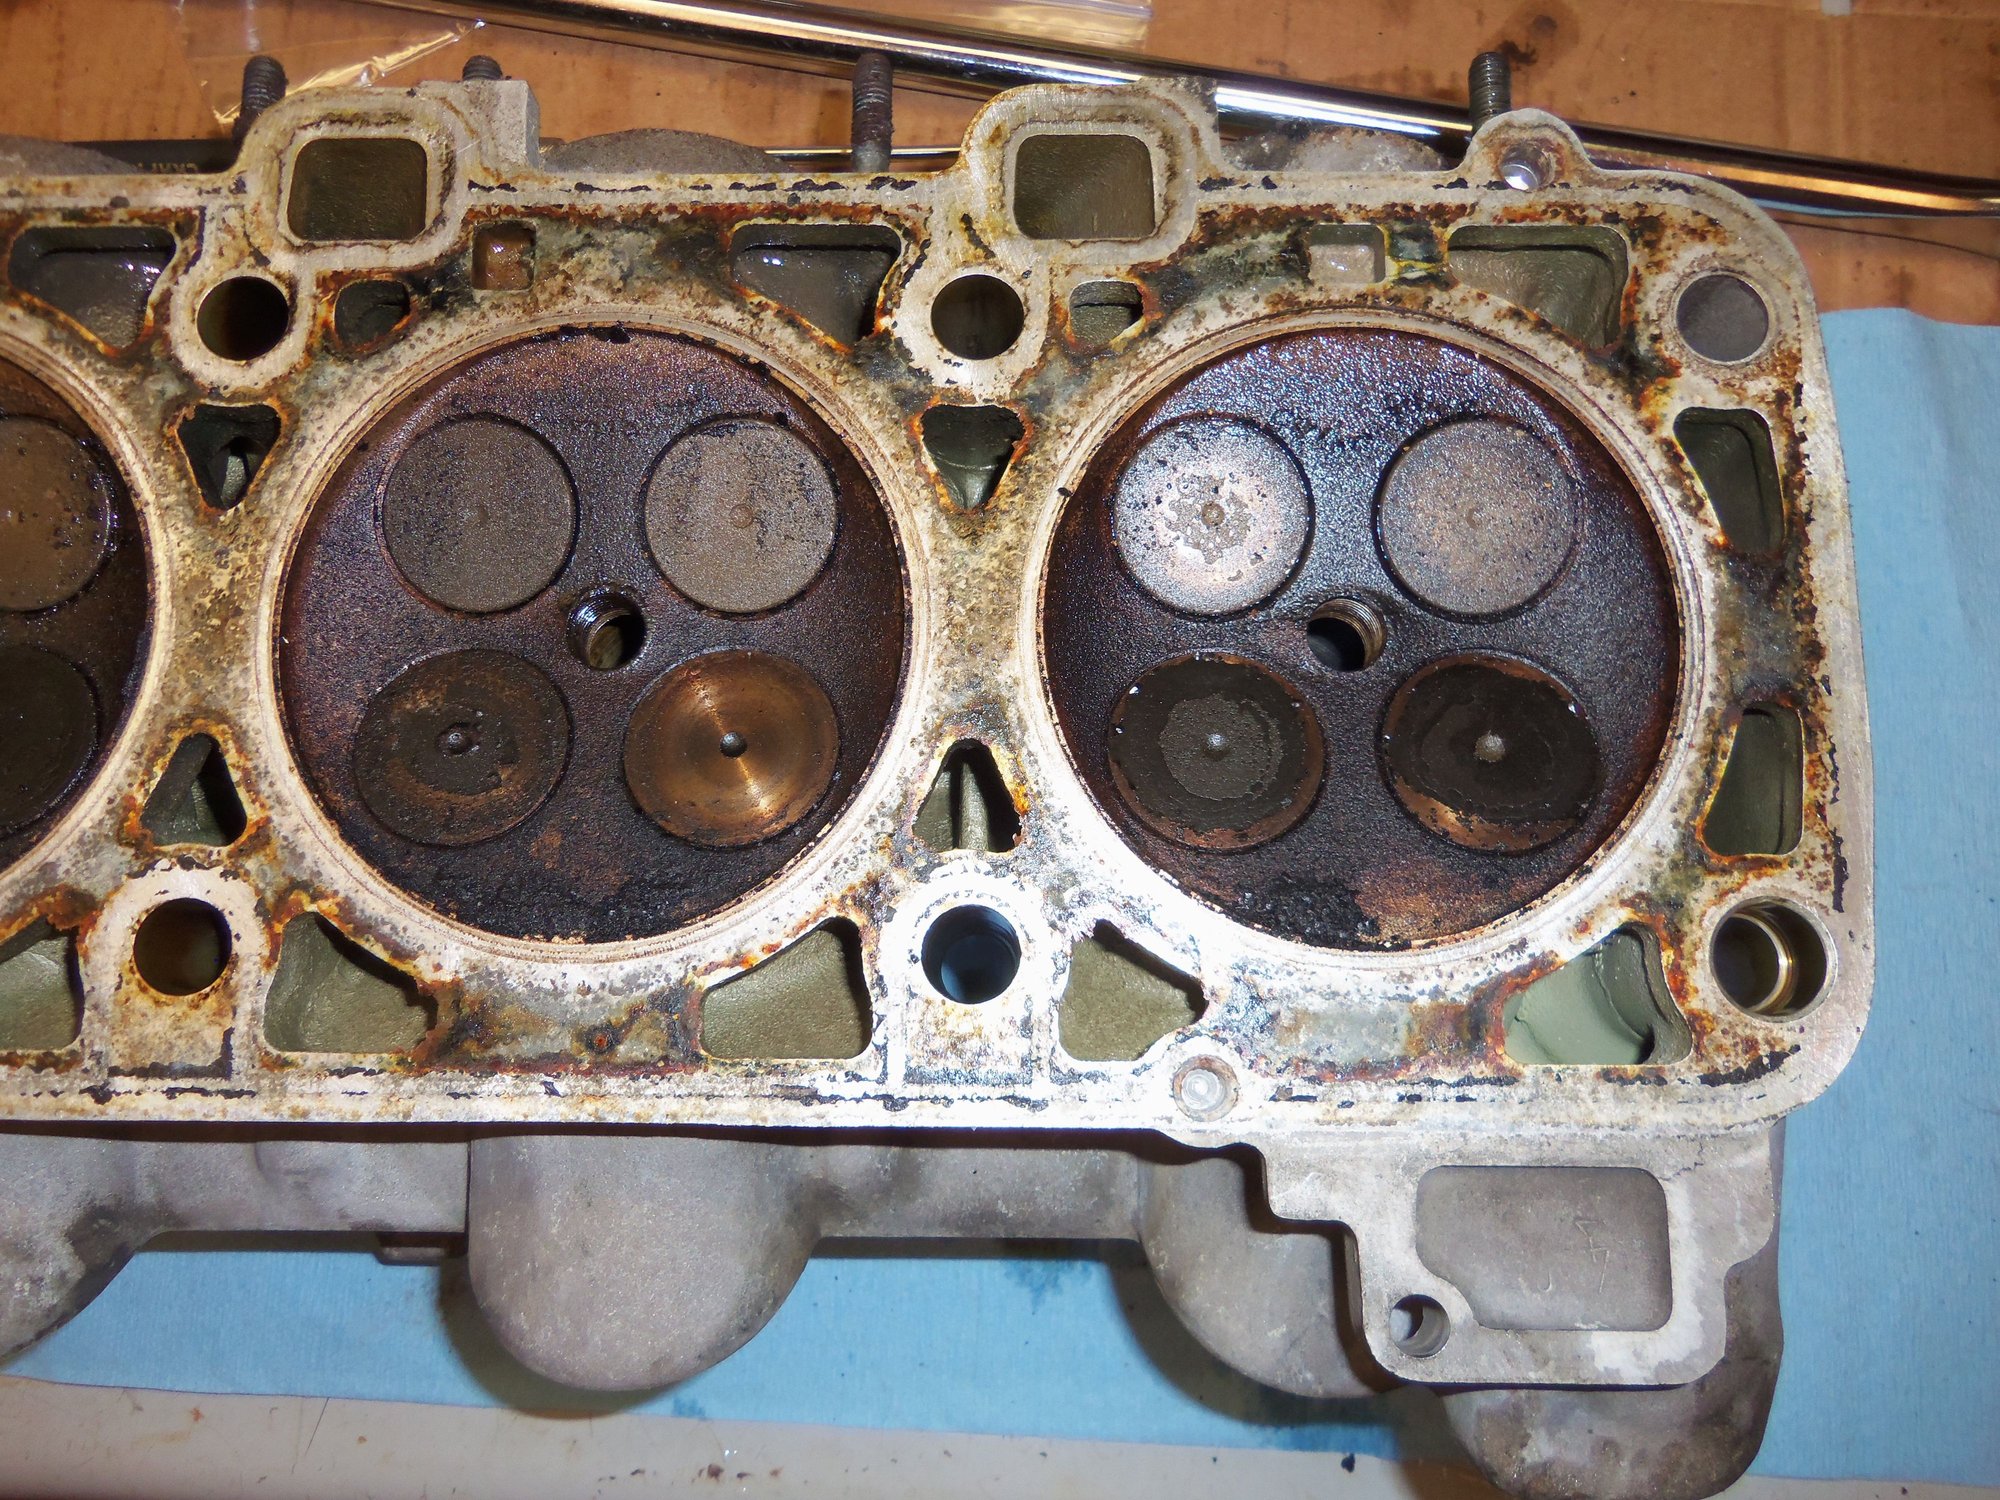
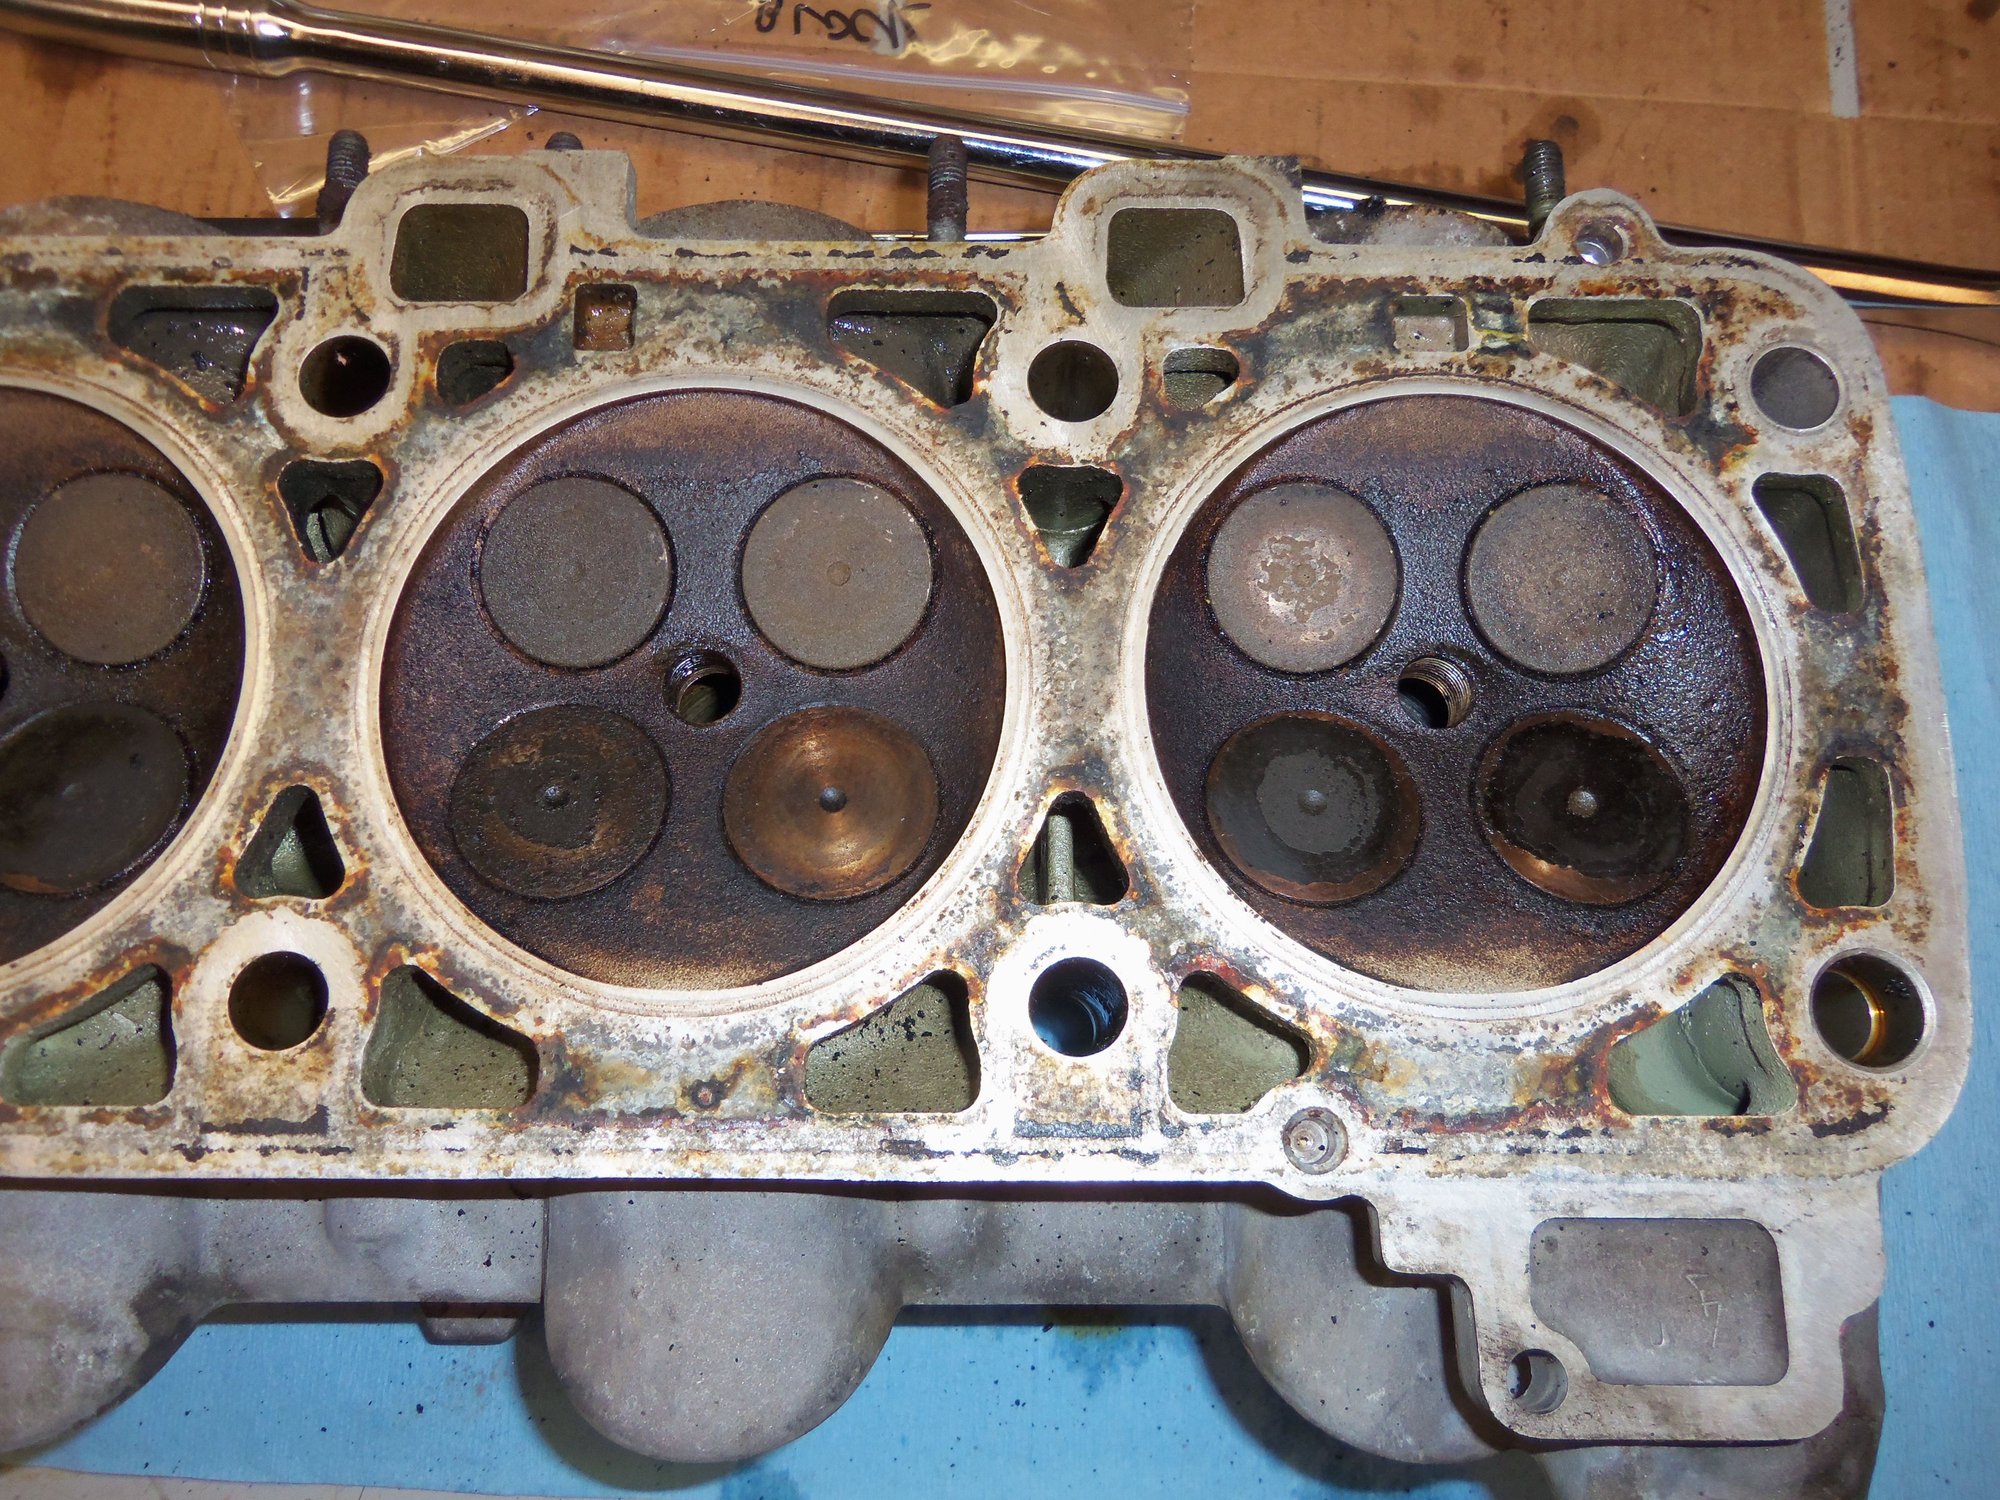
With great trepidation, I flipped the head over...and saw a reasonably clean deck surface. By clean, I mean free of major corrosion. Most of what I was seeing looked like coating from the head gasket. I saw a little brown rusty looking something at a few of the cooling ports.
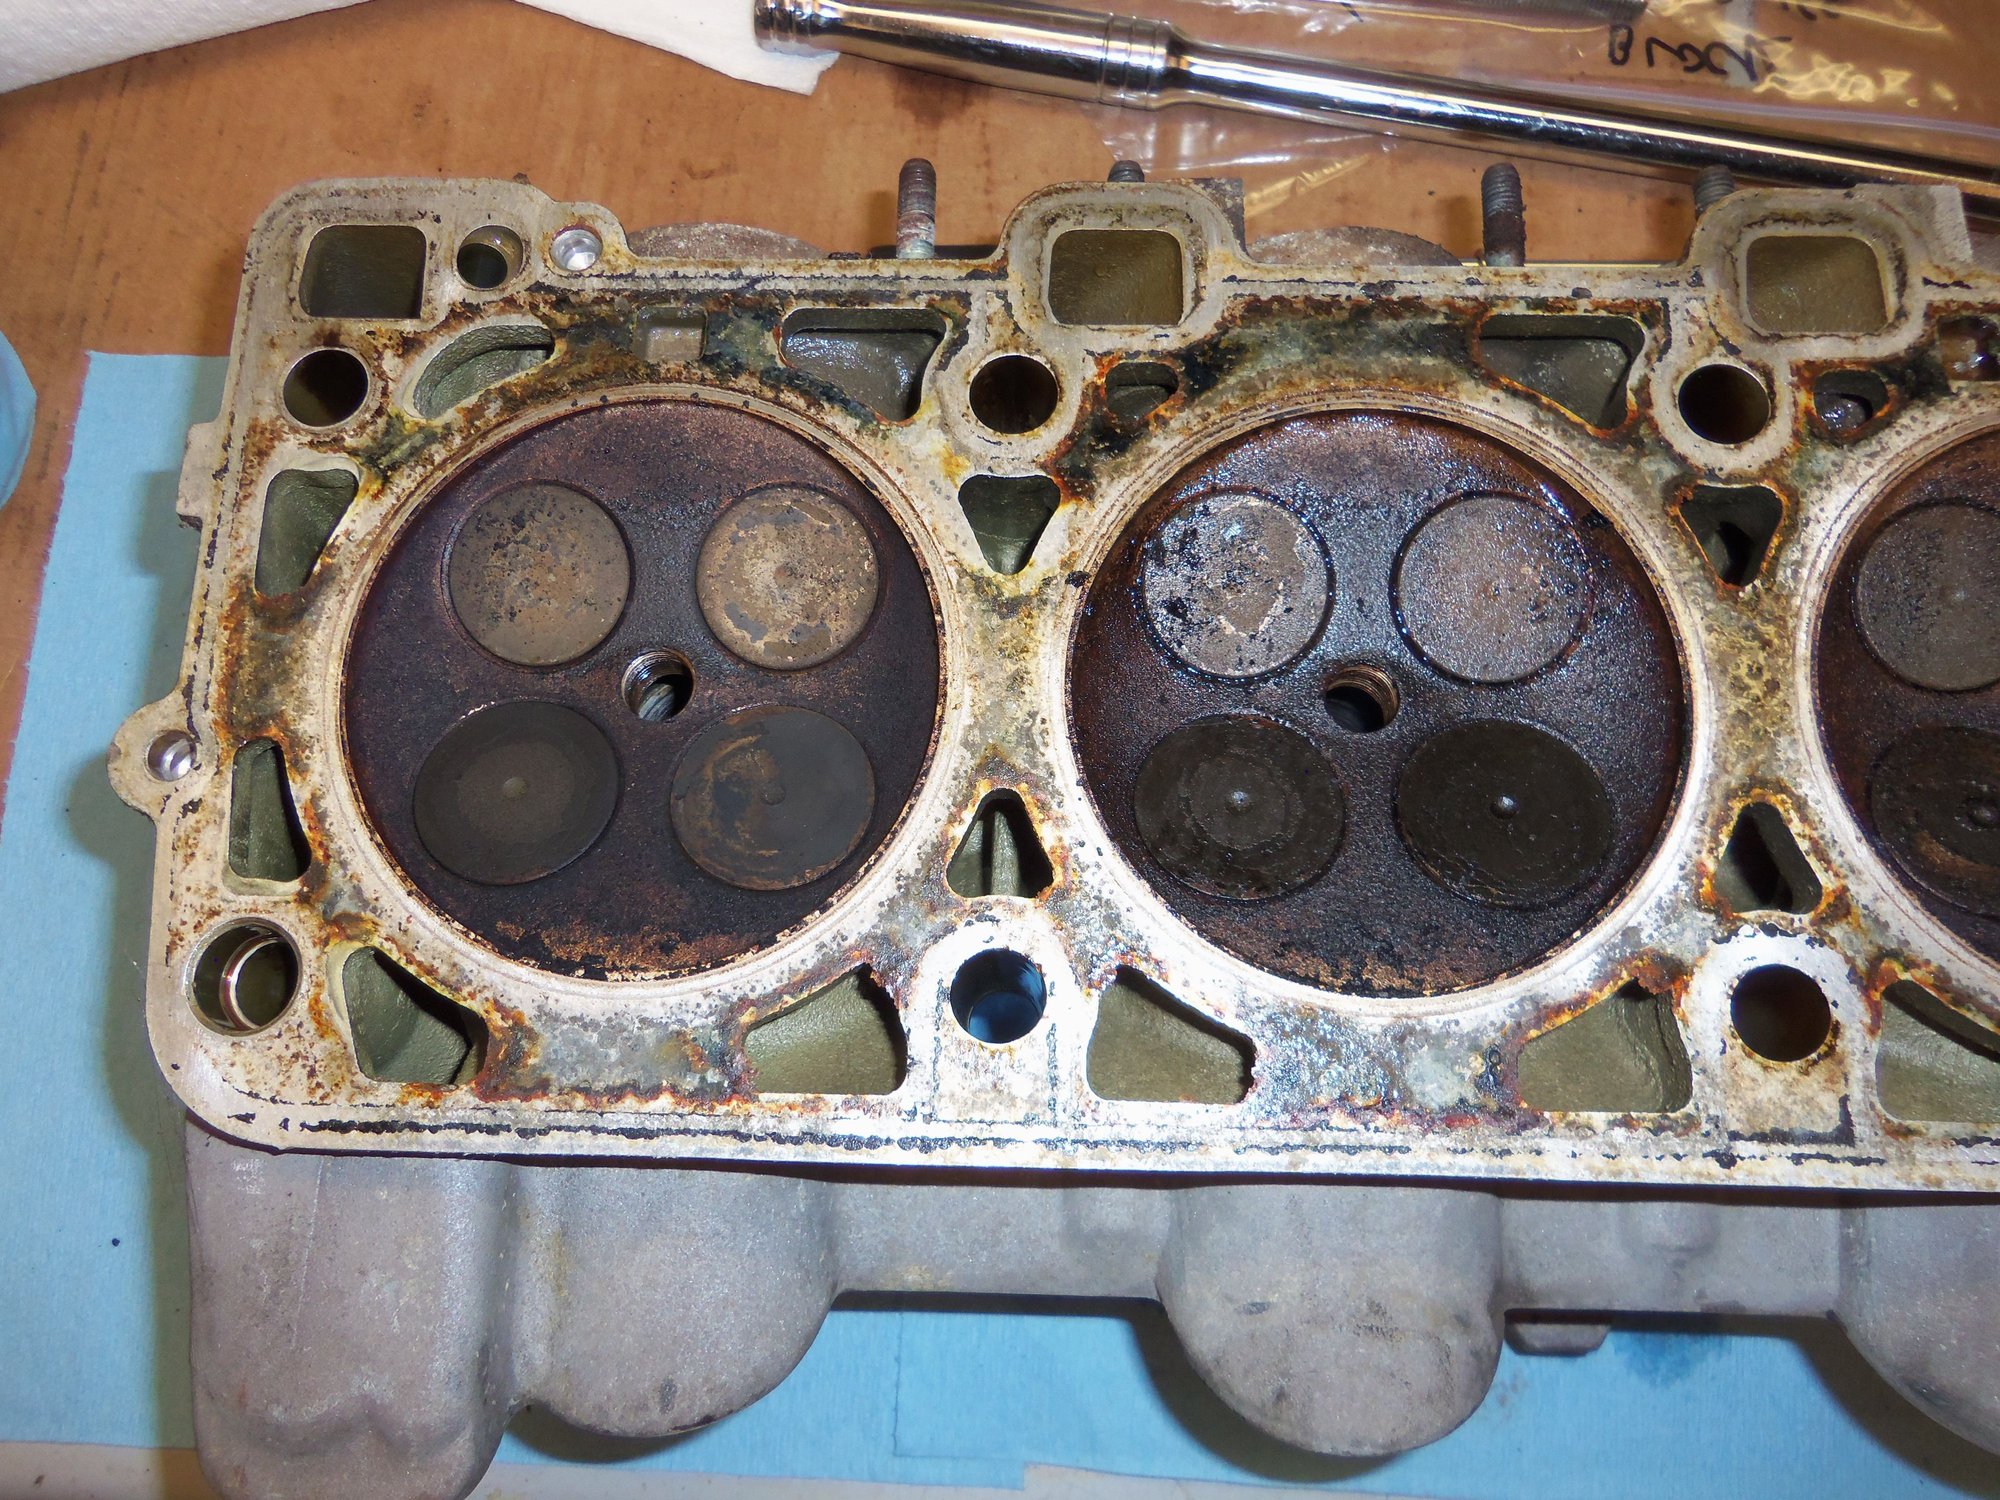
I wiped the head deck surface down with a coarse cloth rag and brake cleaner. I worked part of the right most combustion chamber sealing ring with a straight edged razor blade held perpendicular to the surface. It cleaned up a little.
QUESTION: Do I try to clean the crud and head gasket coating from the head deck surfaces before I take them to the machine shop?
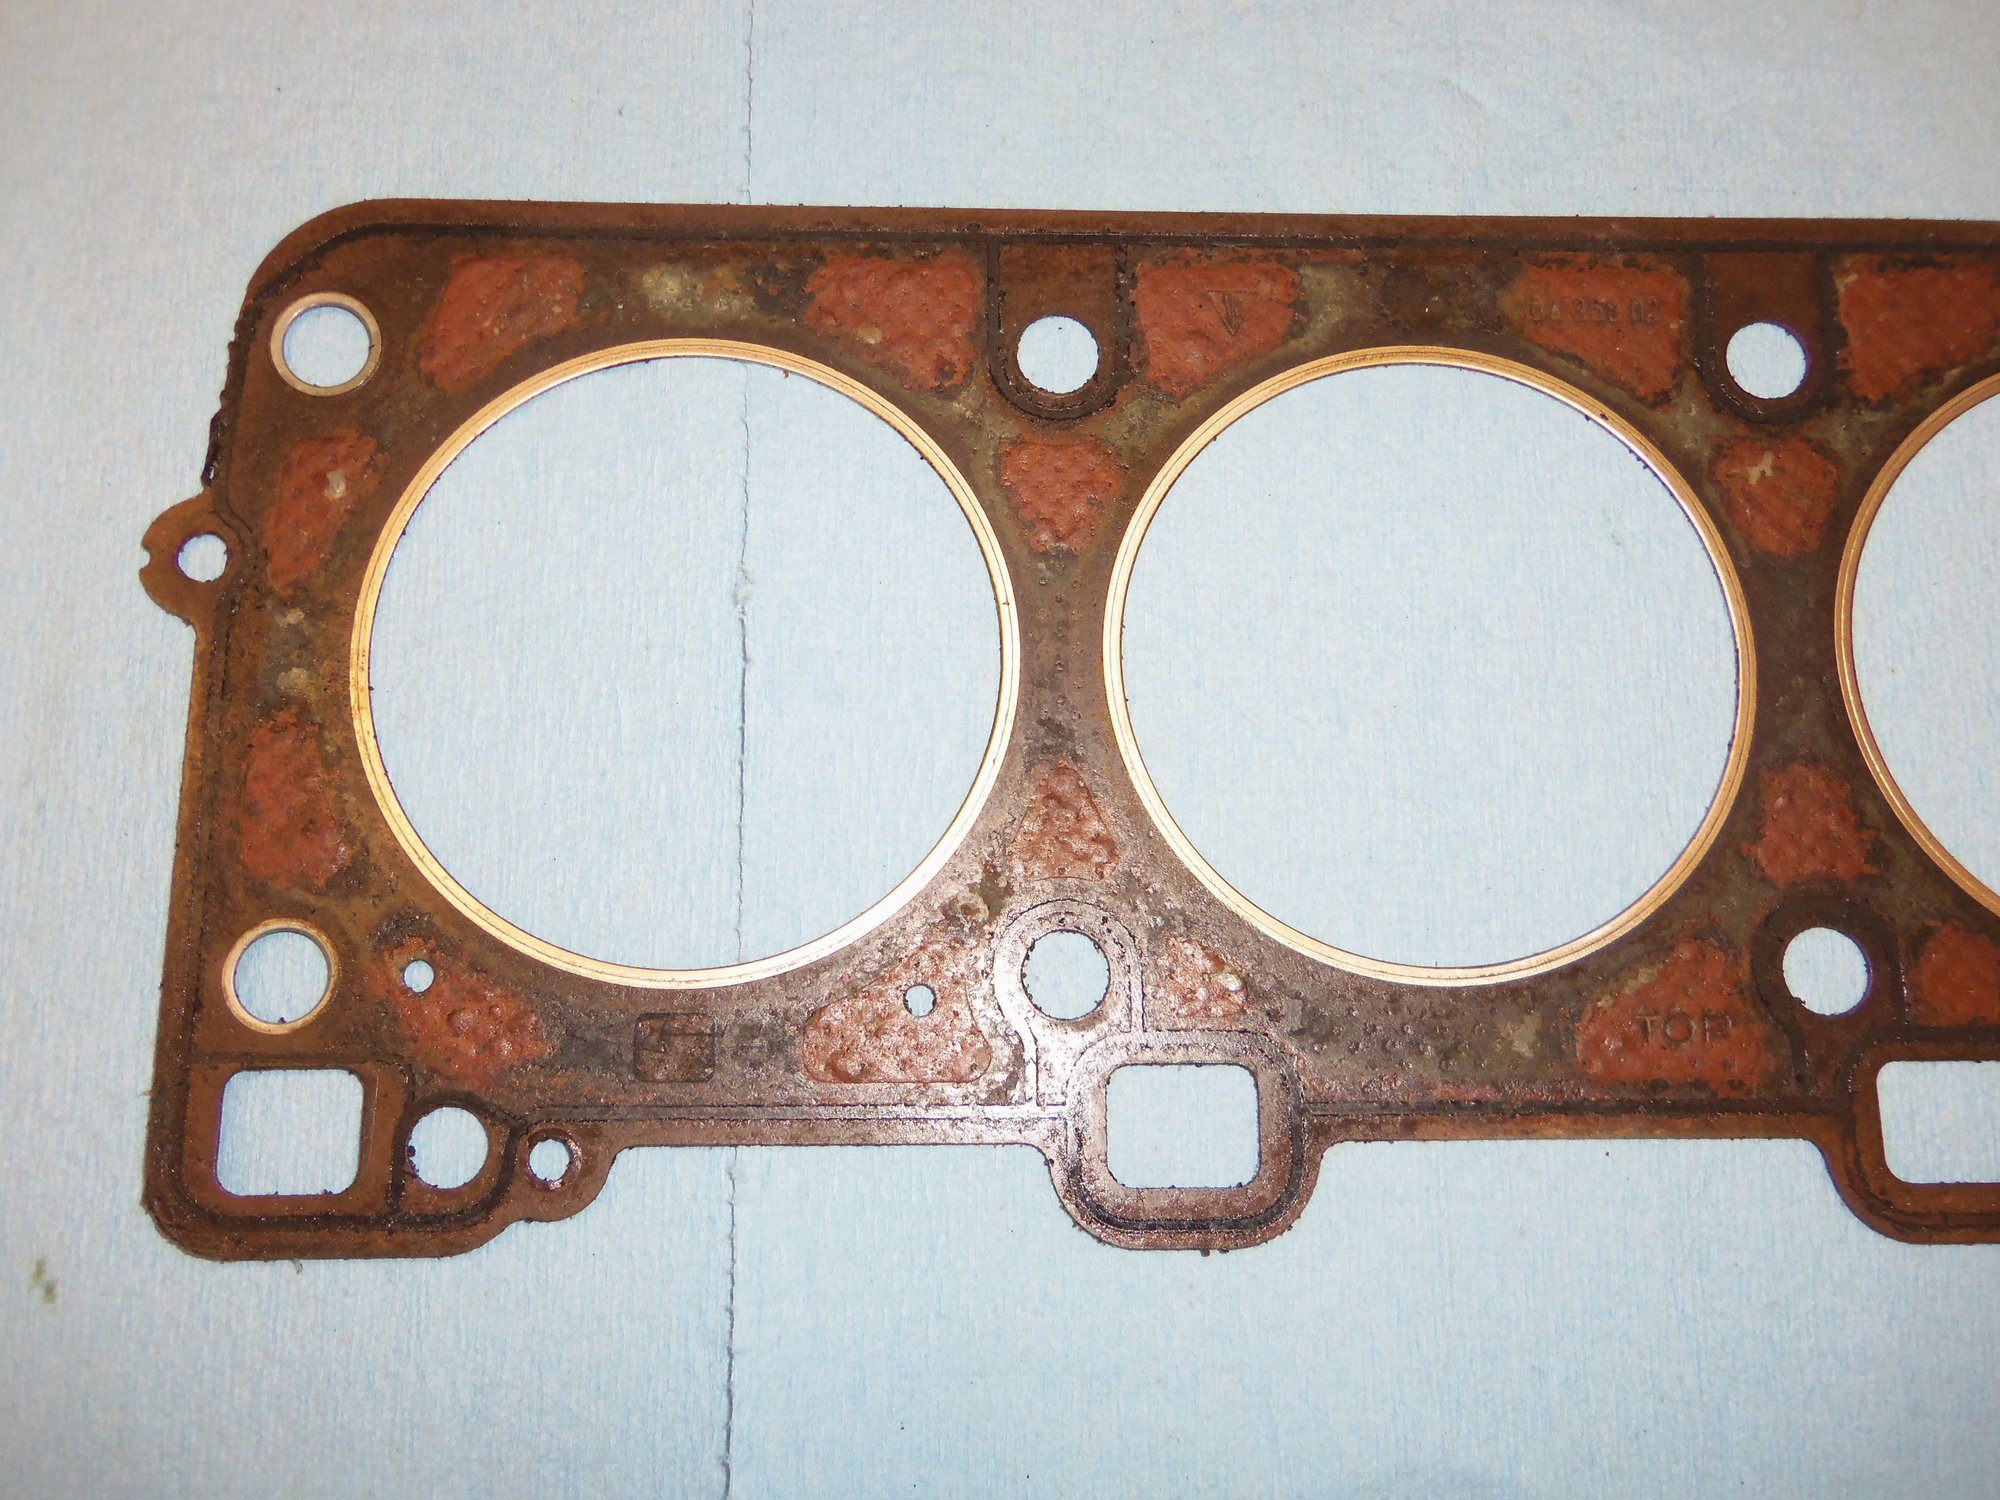
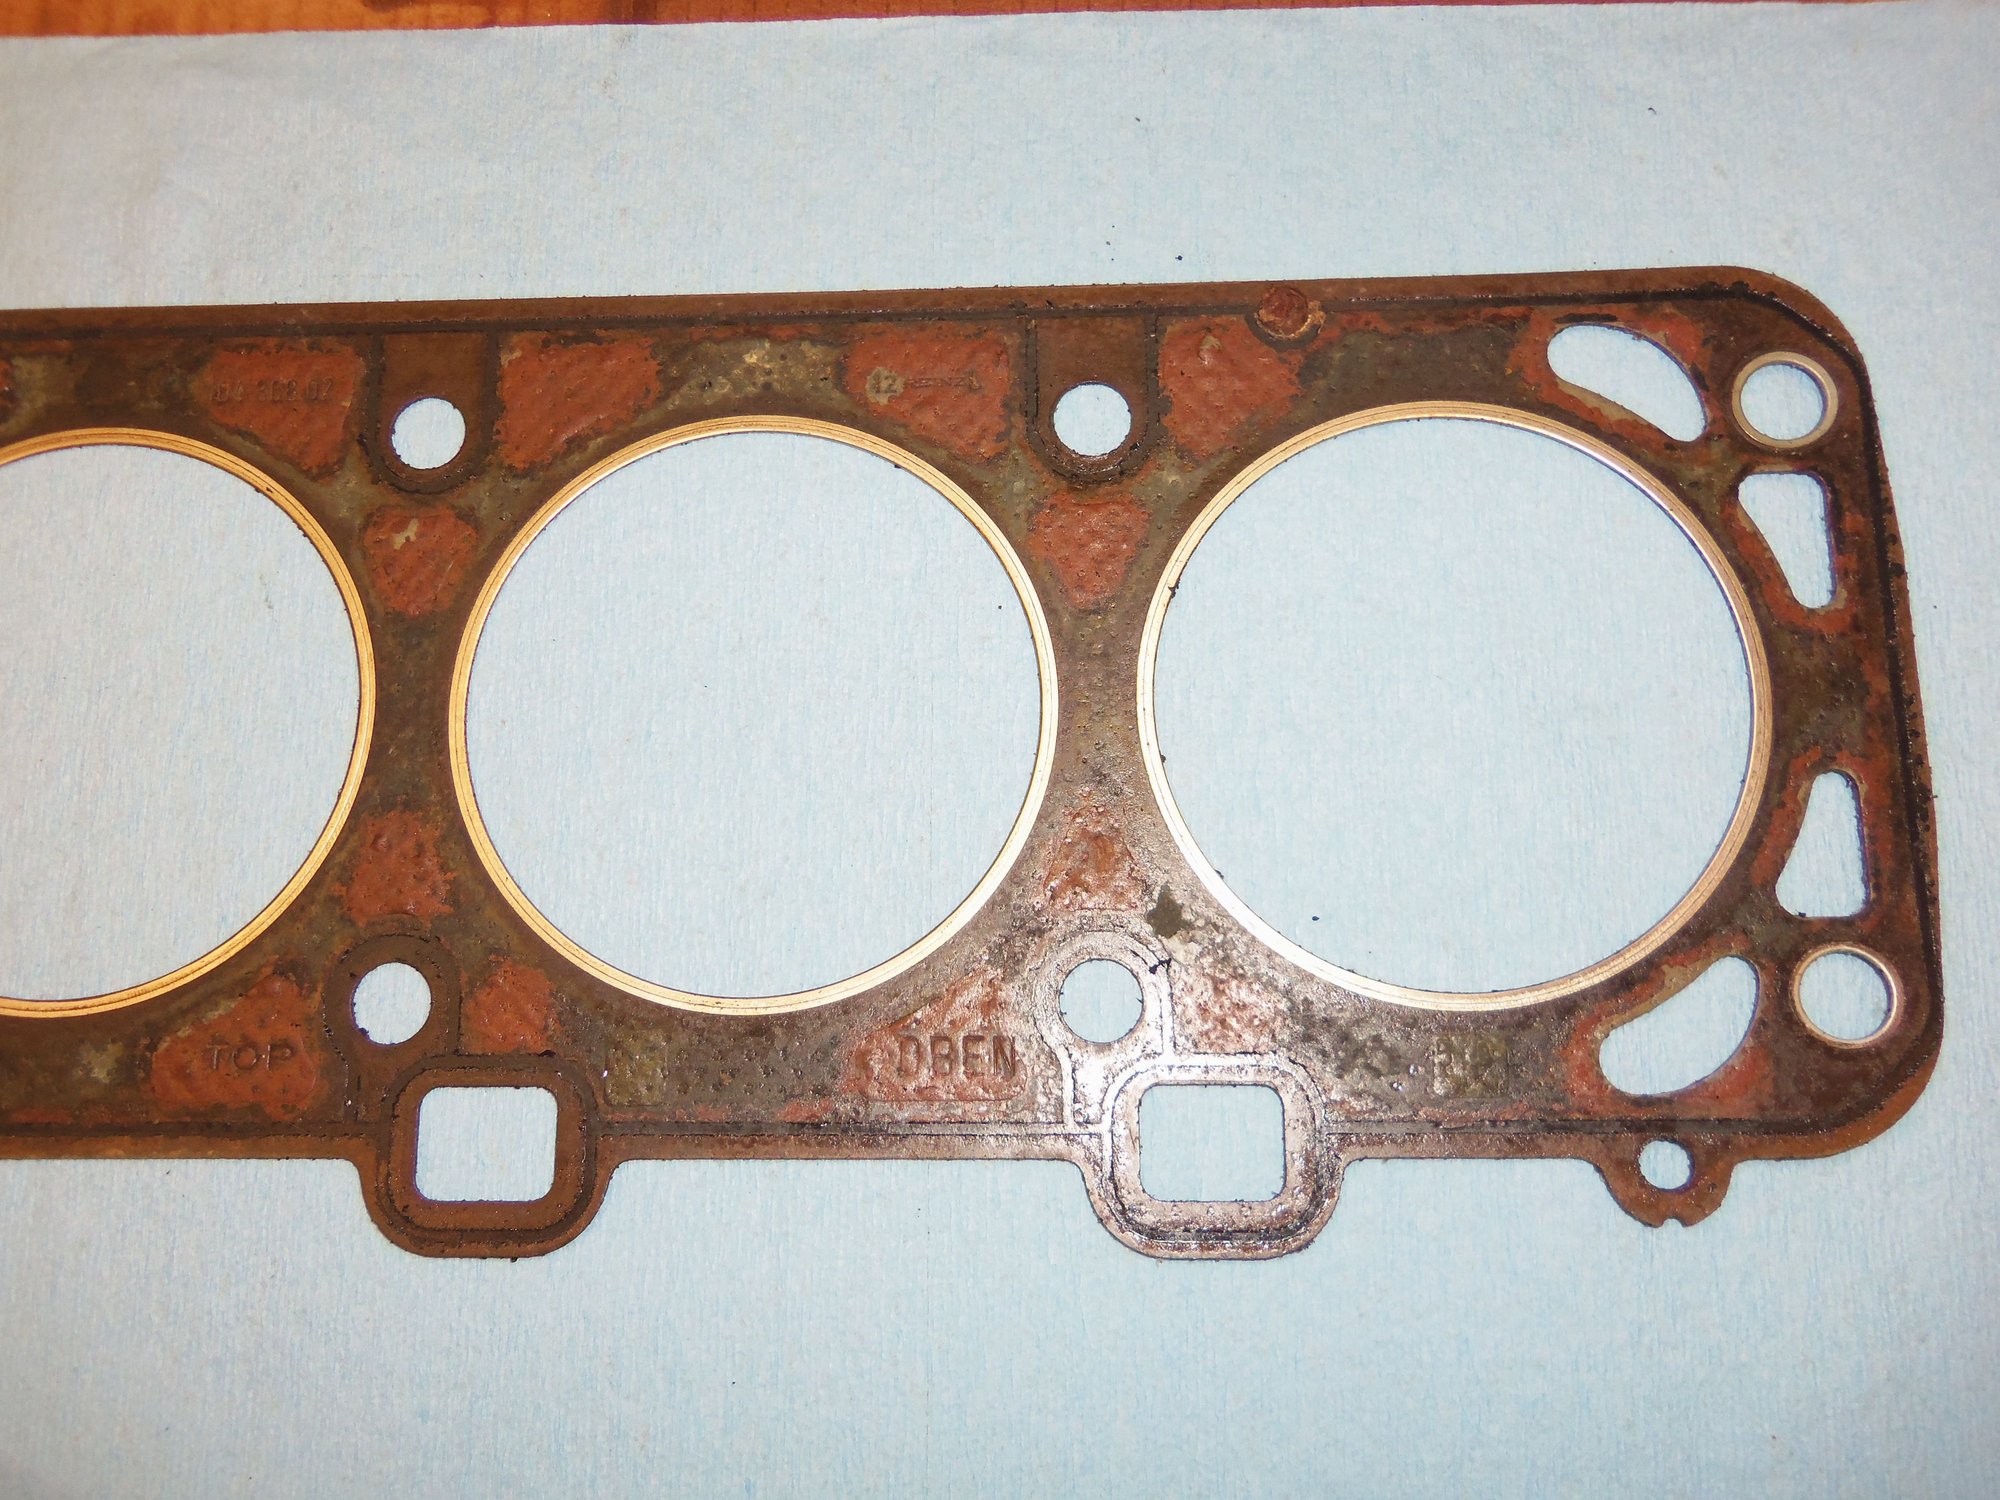
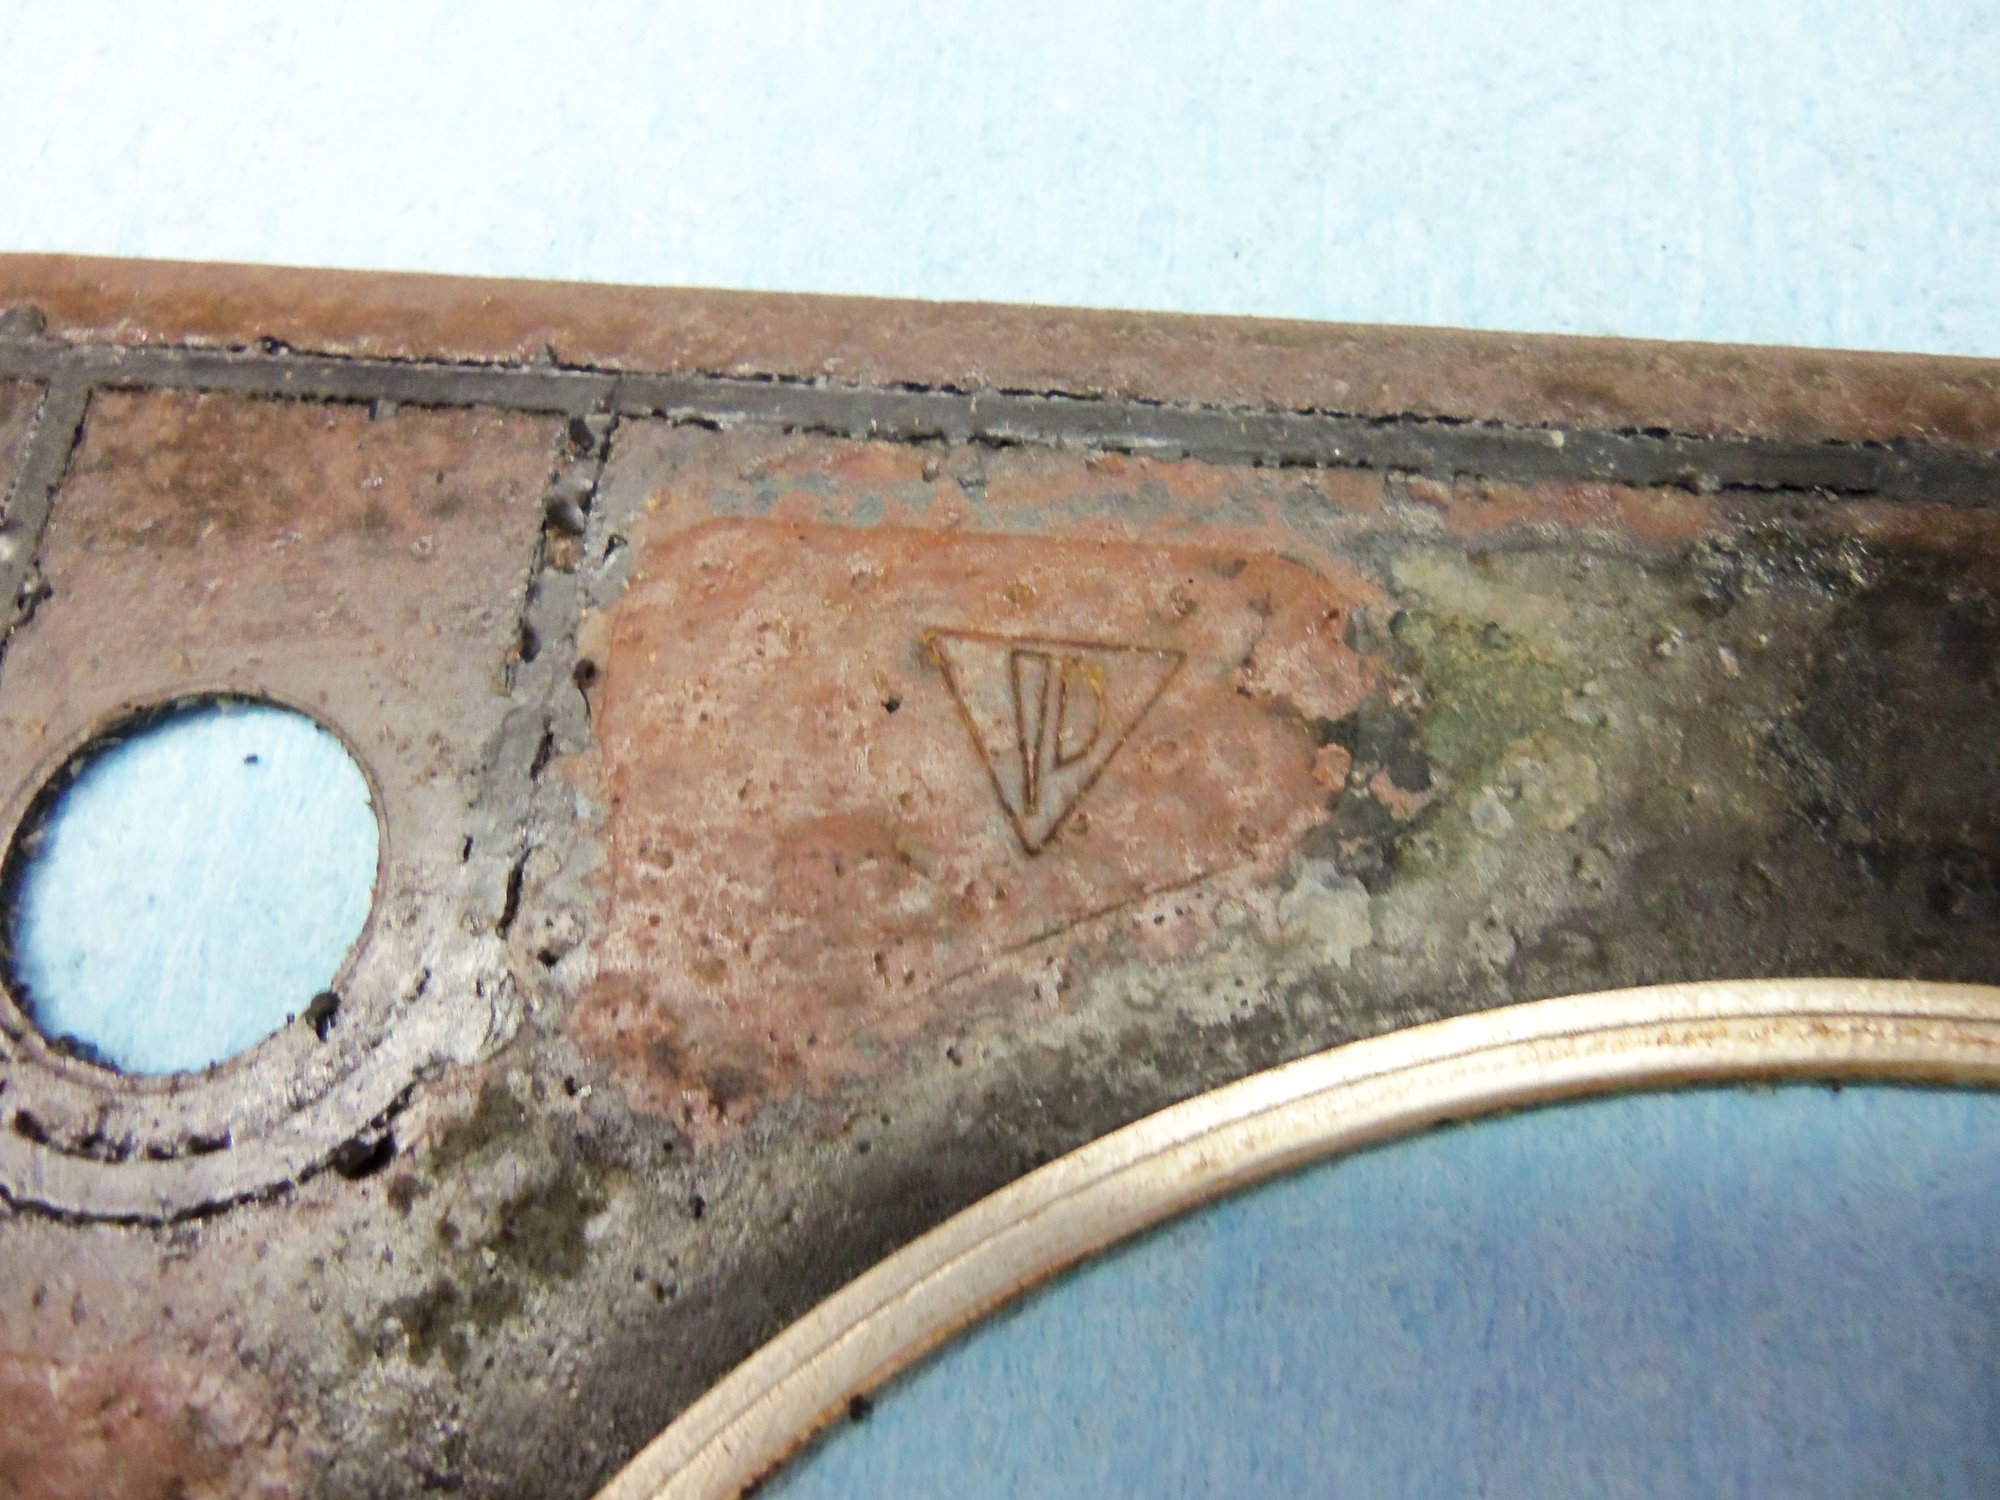
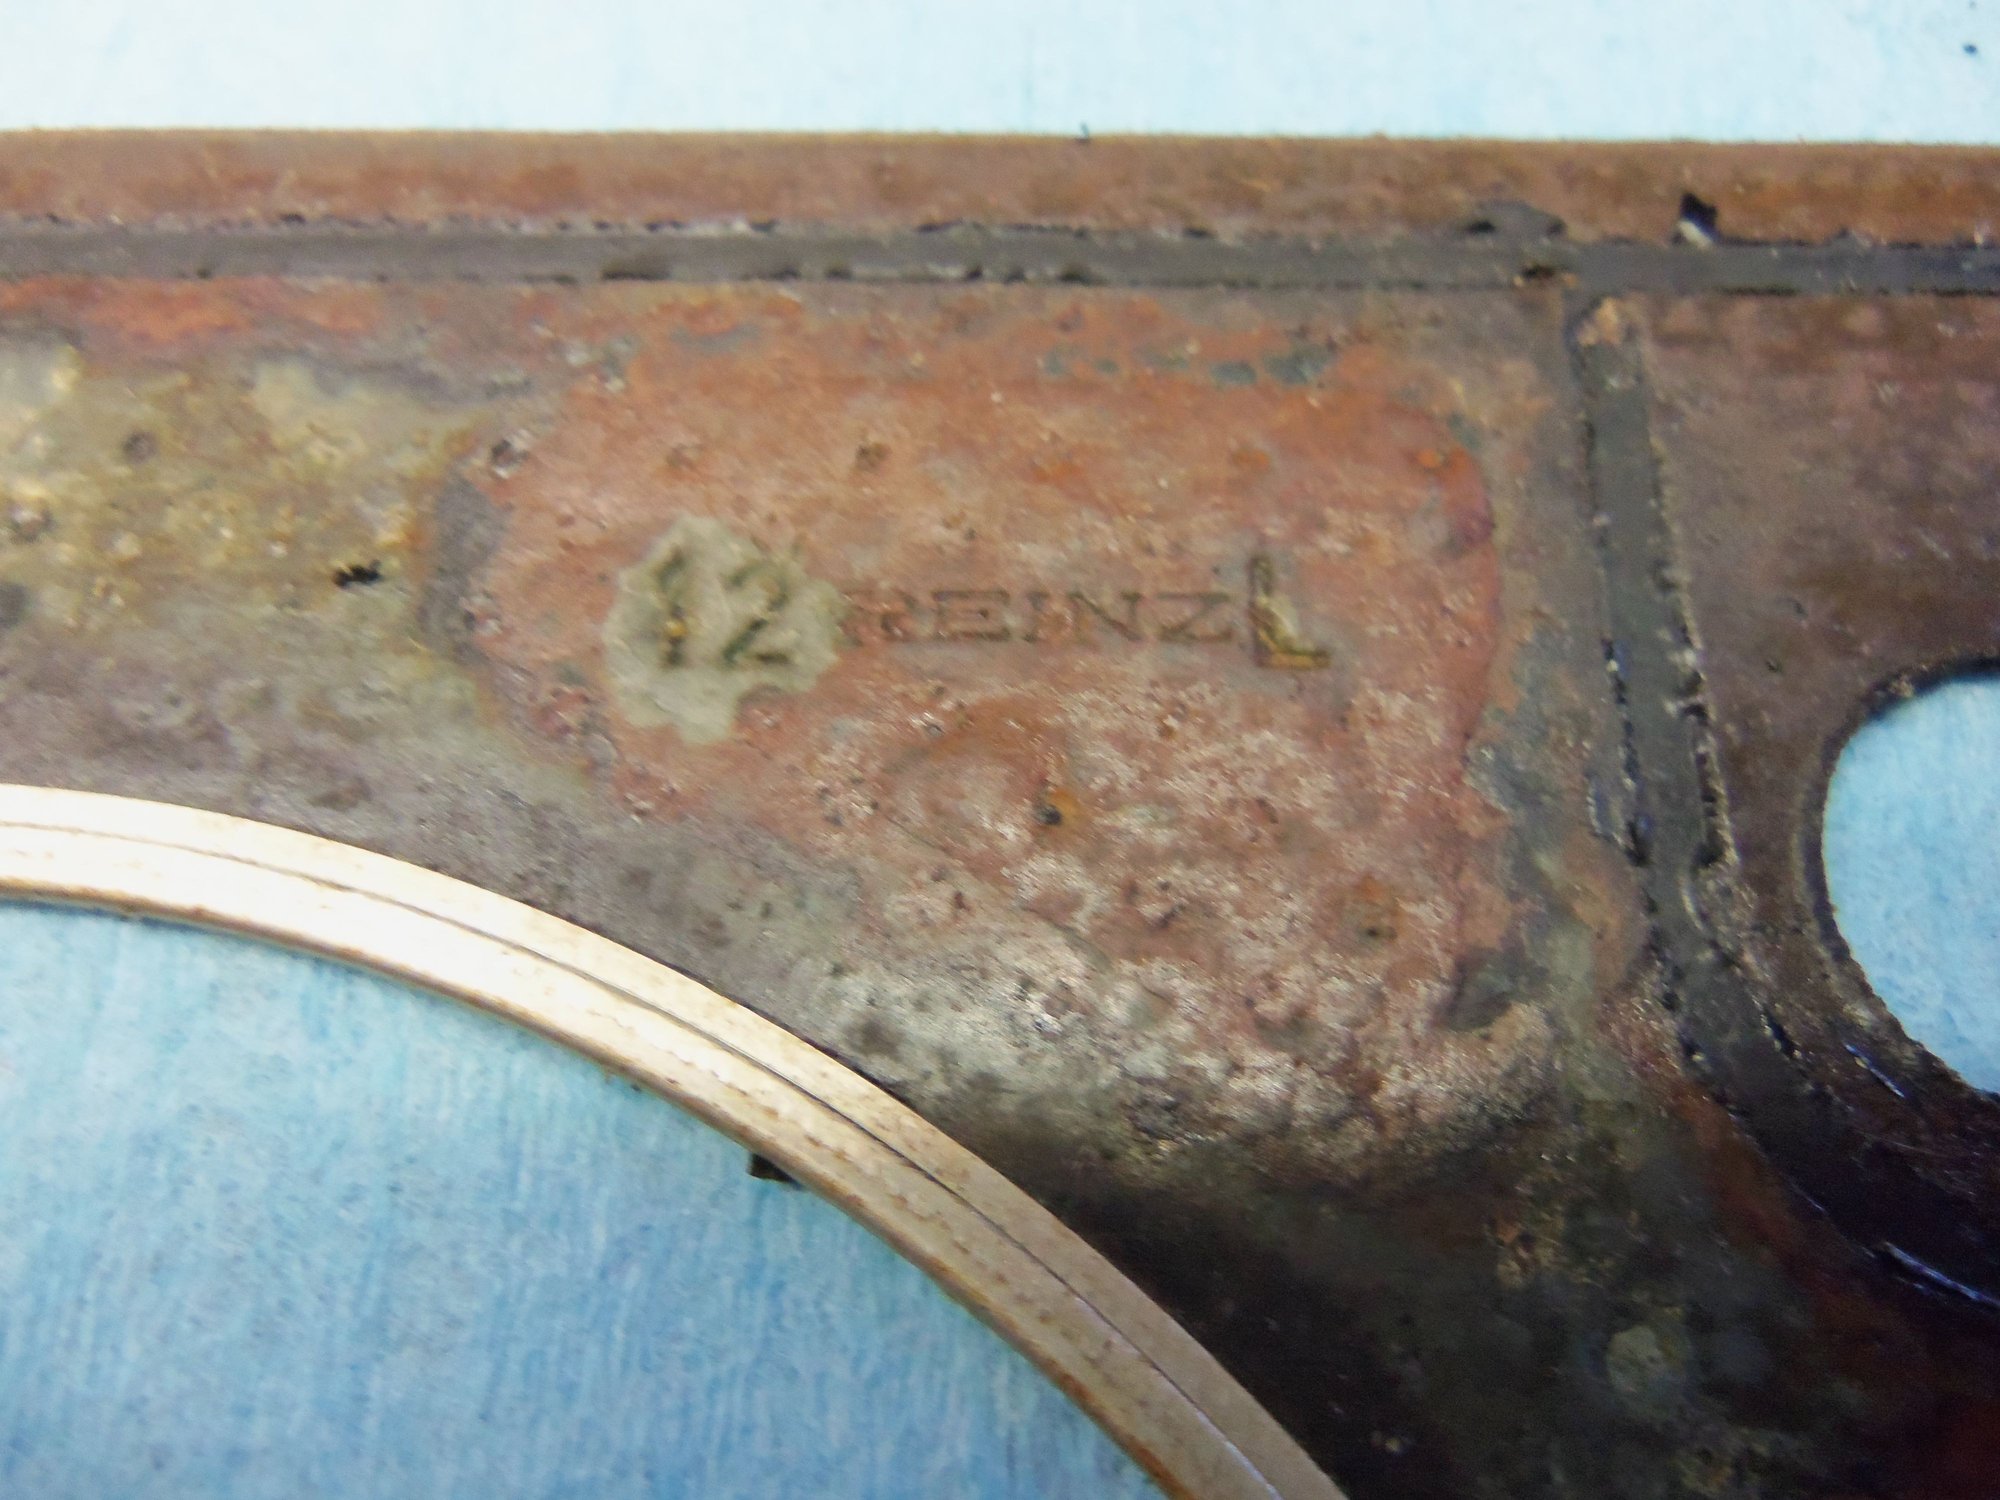
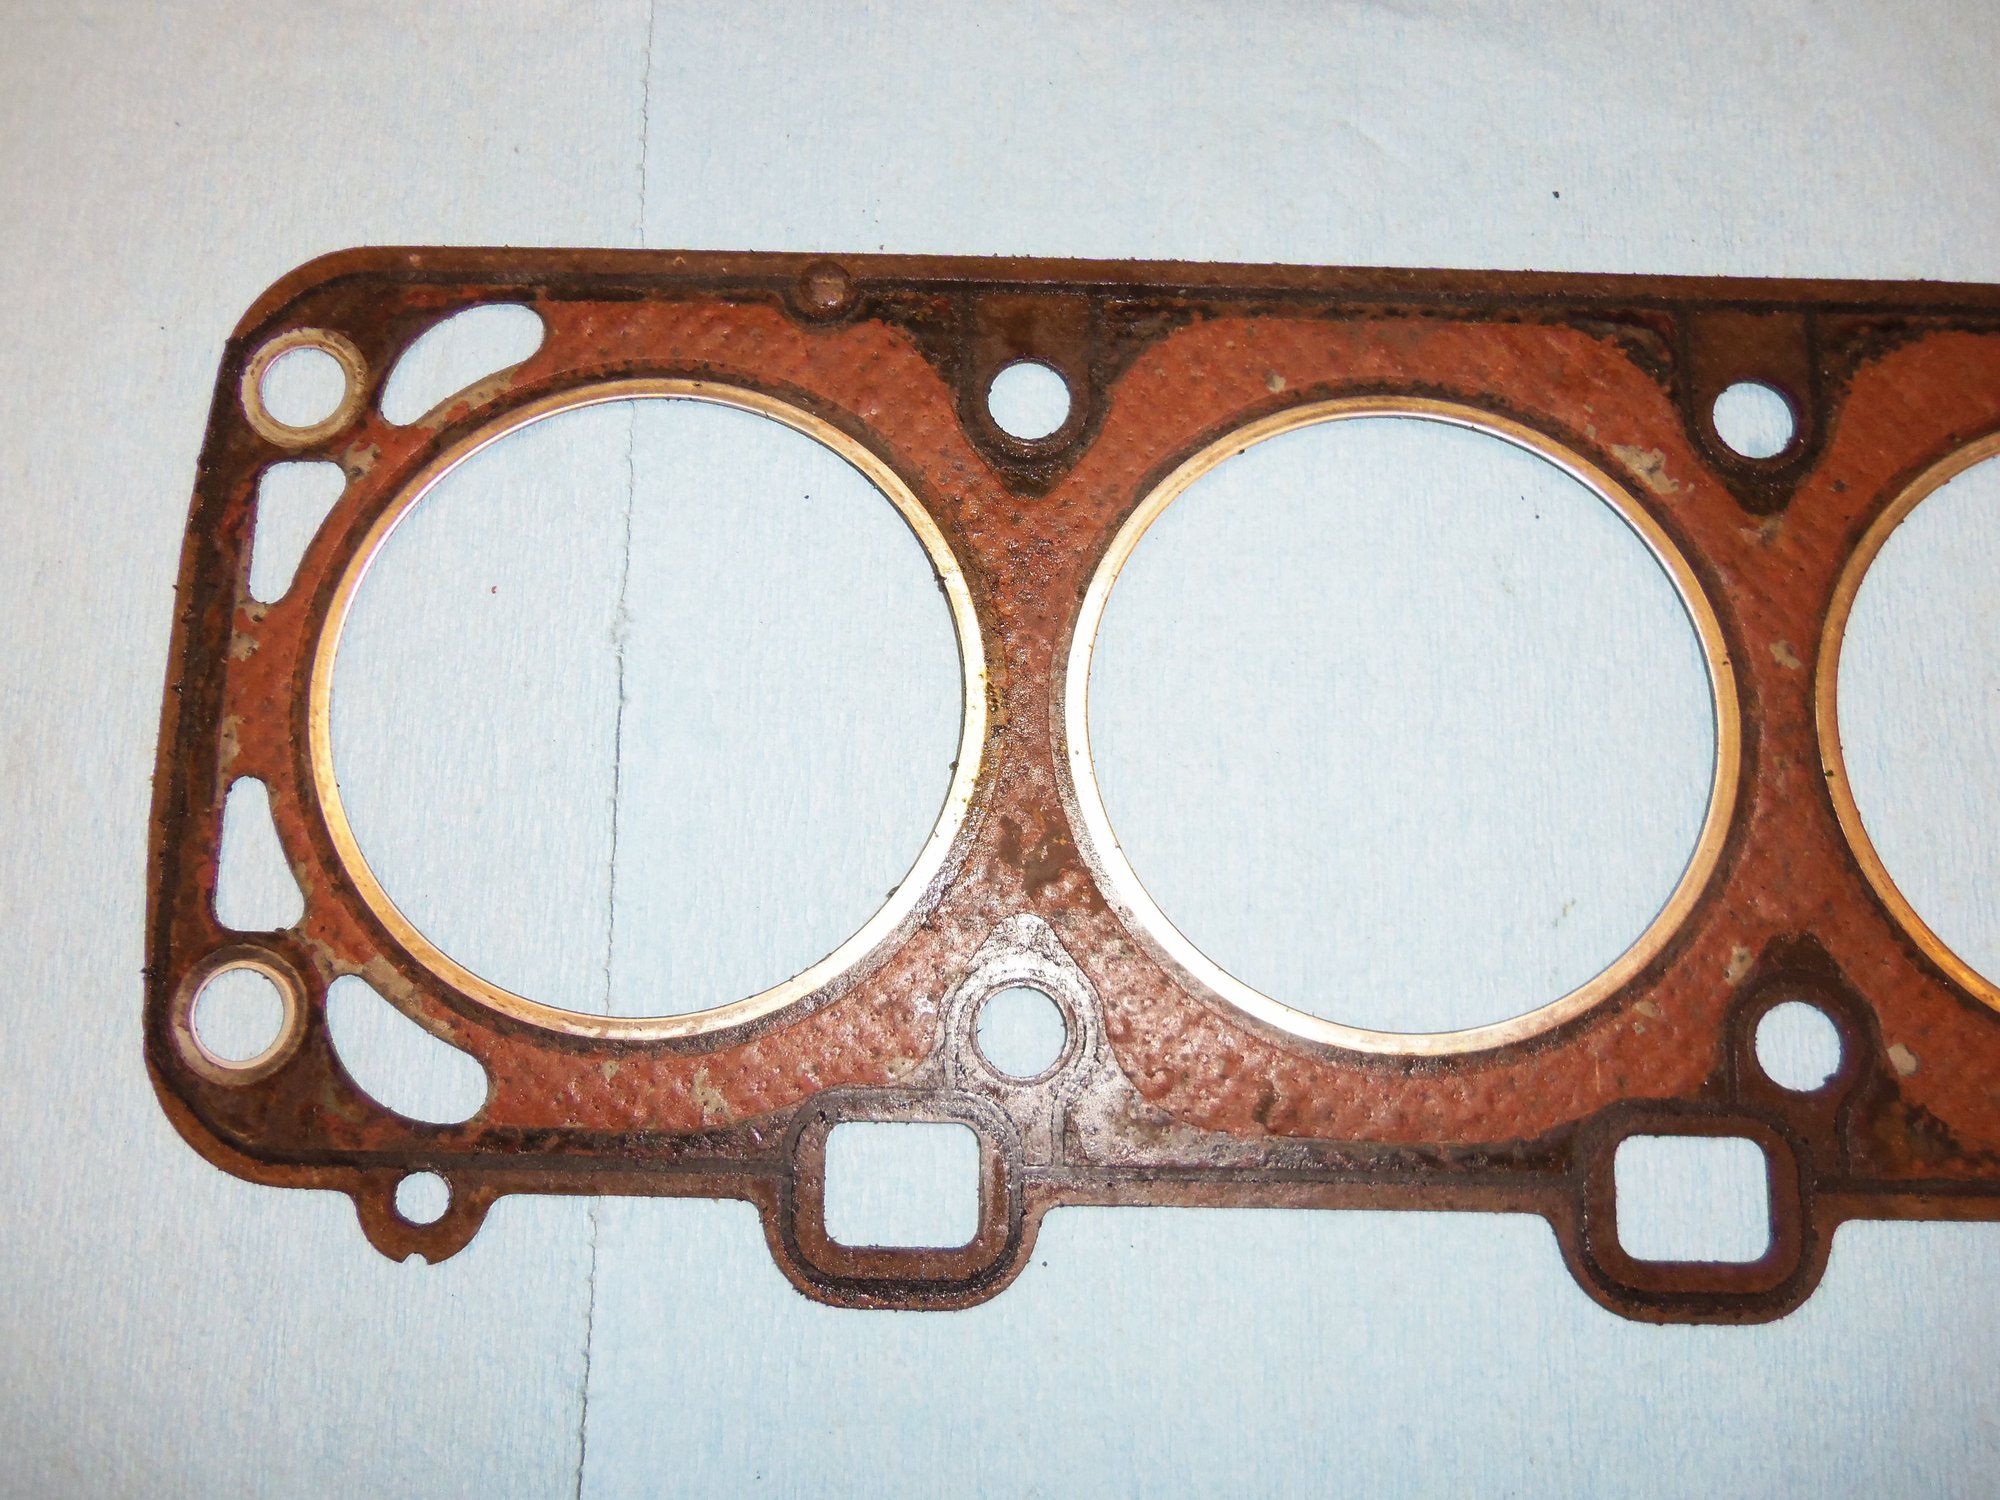
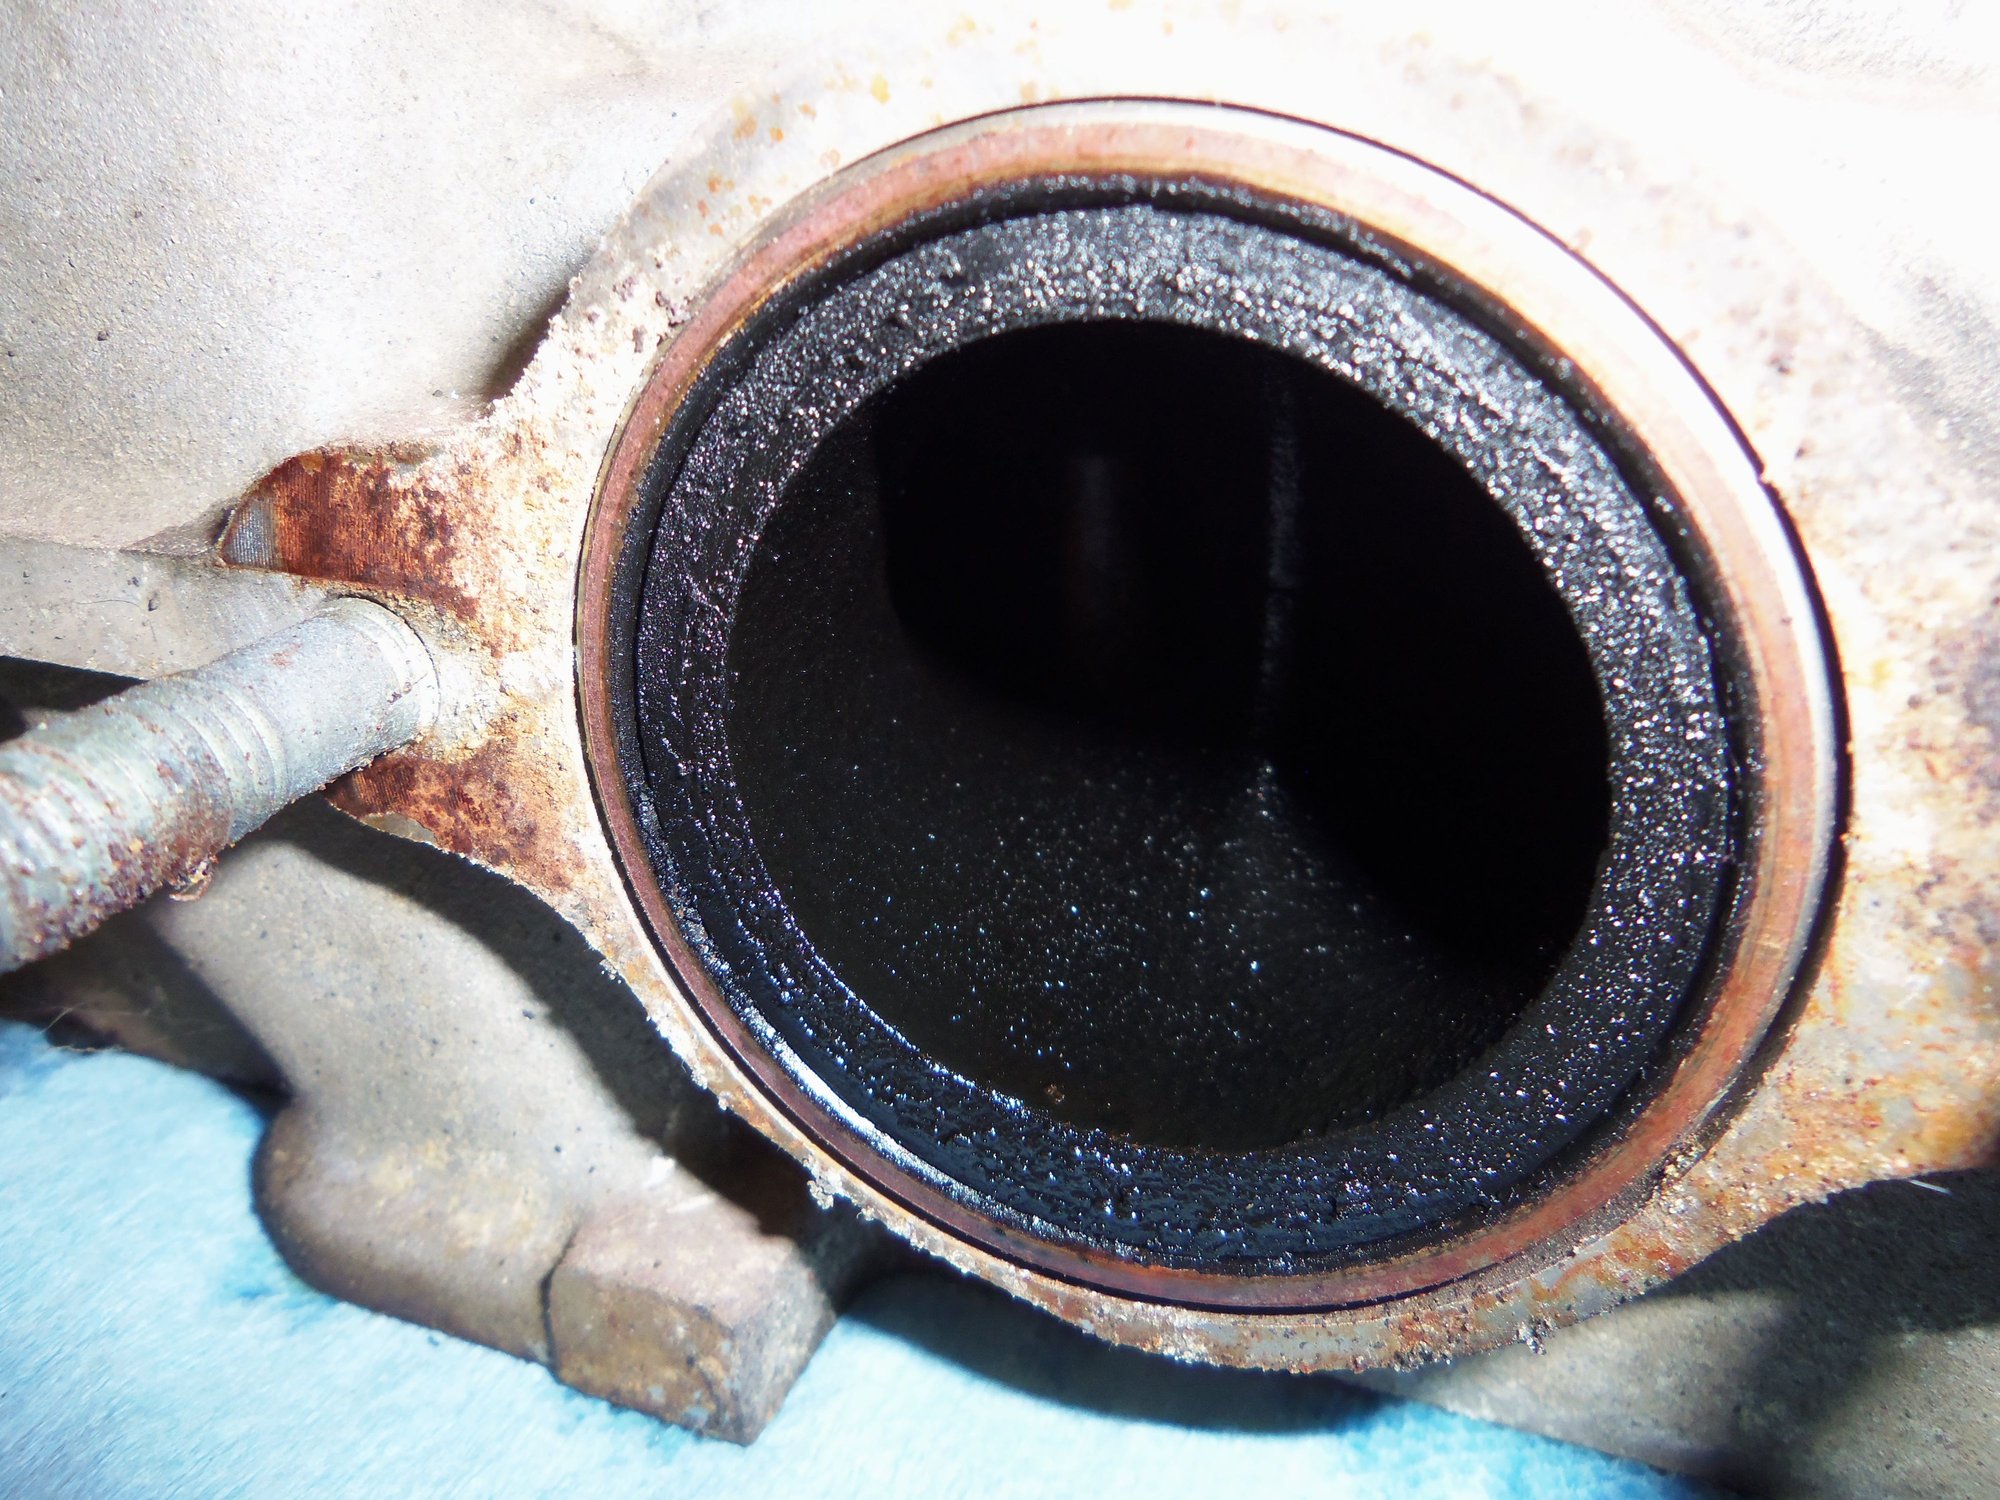
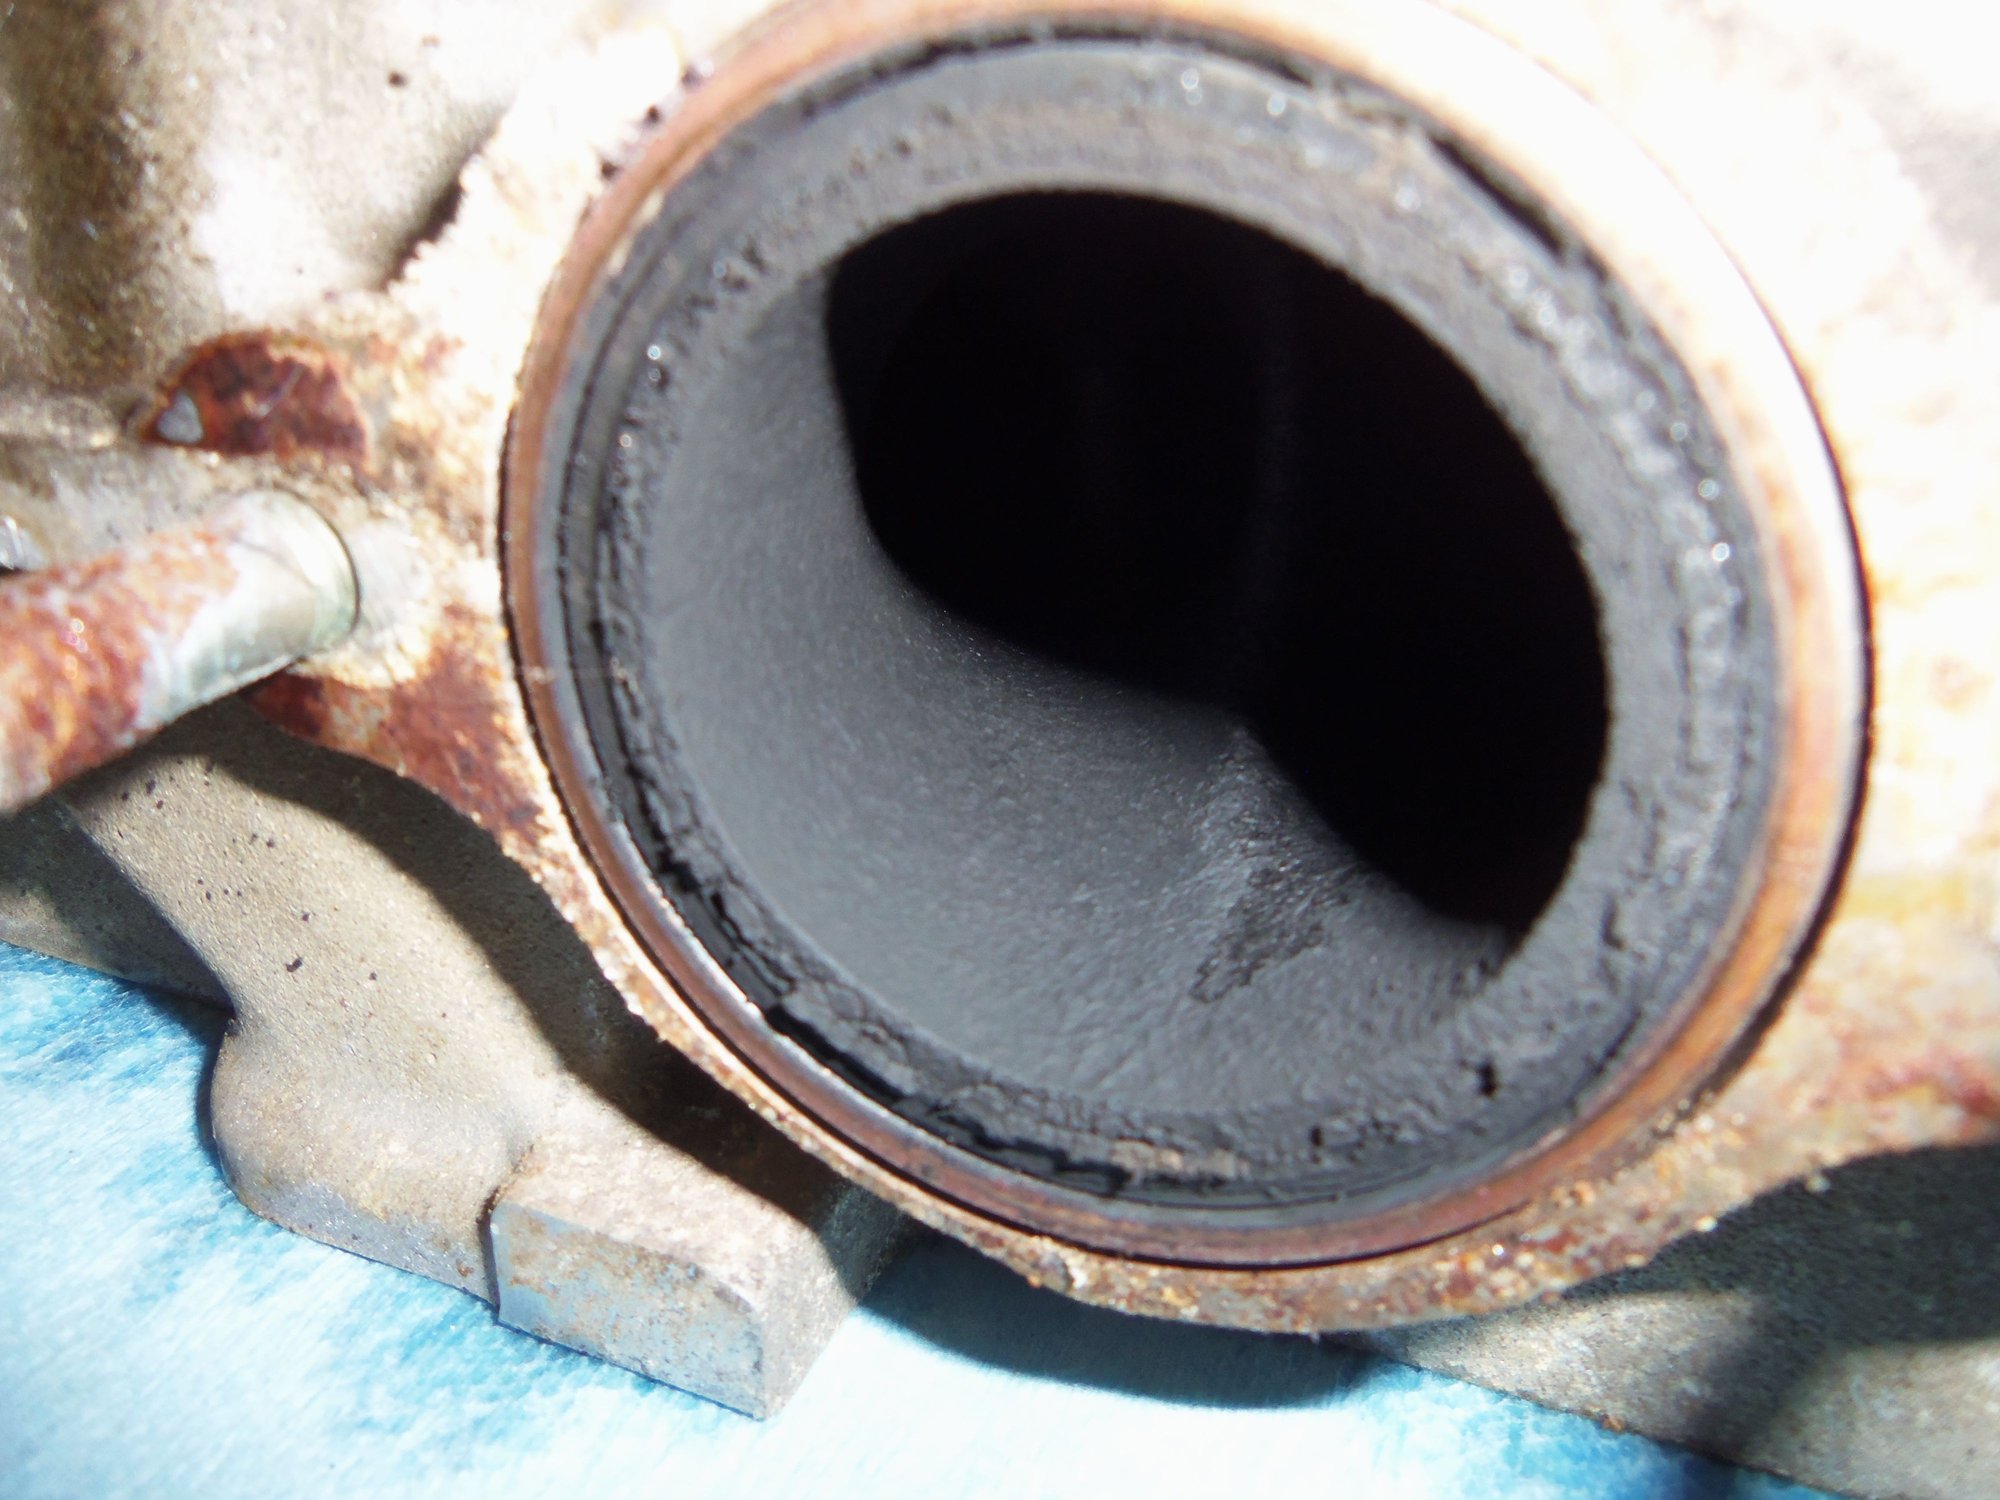
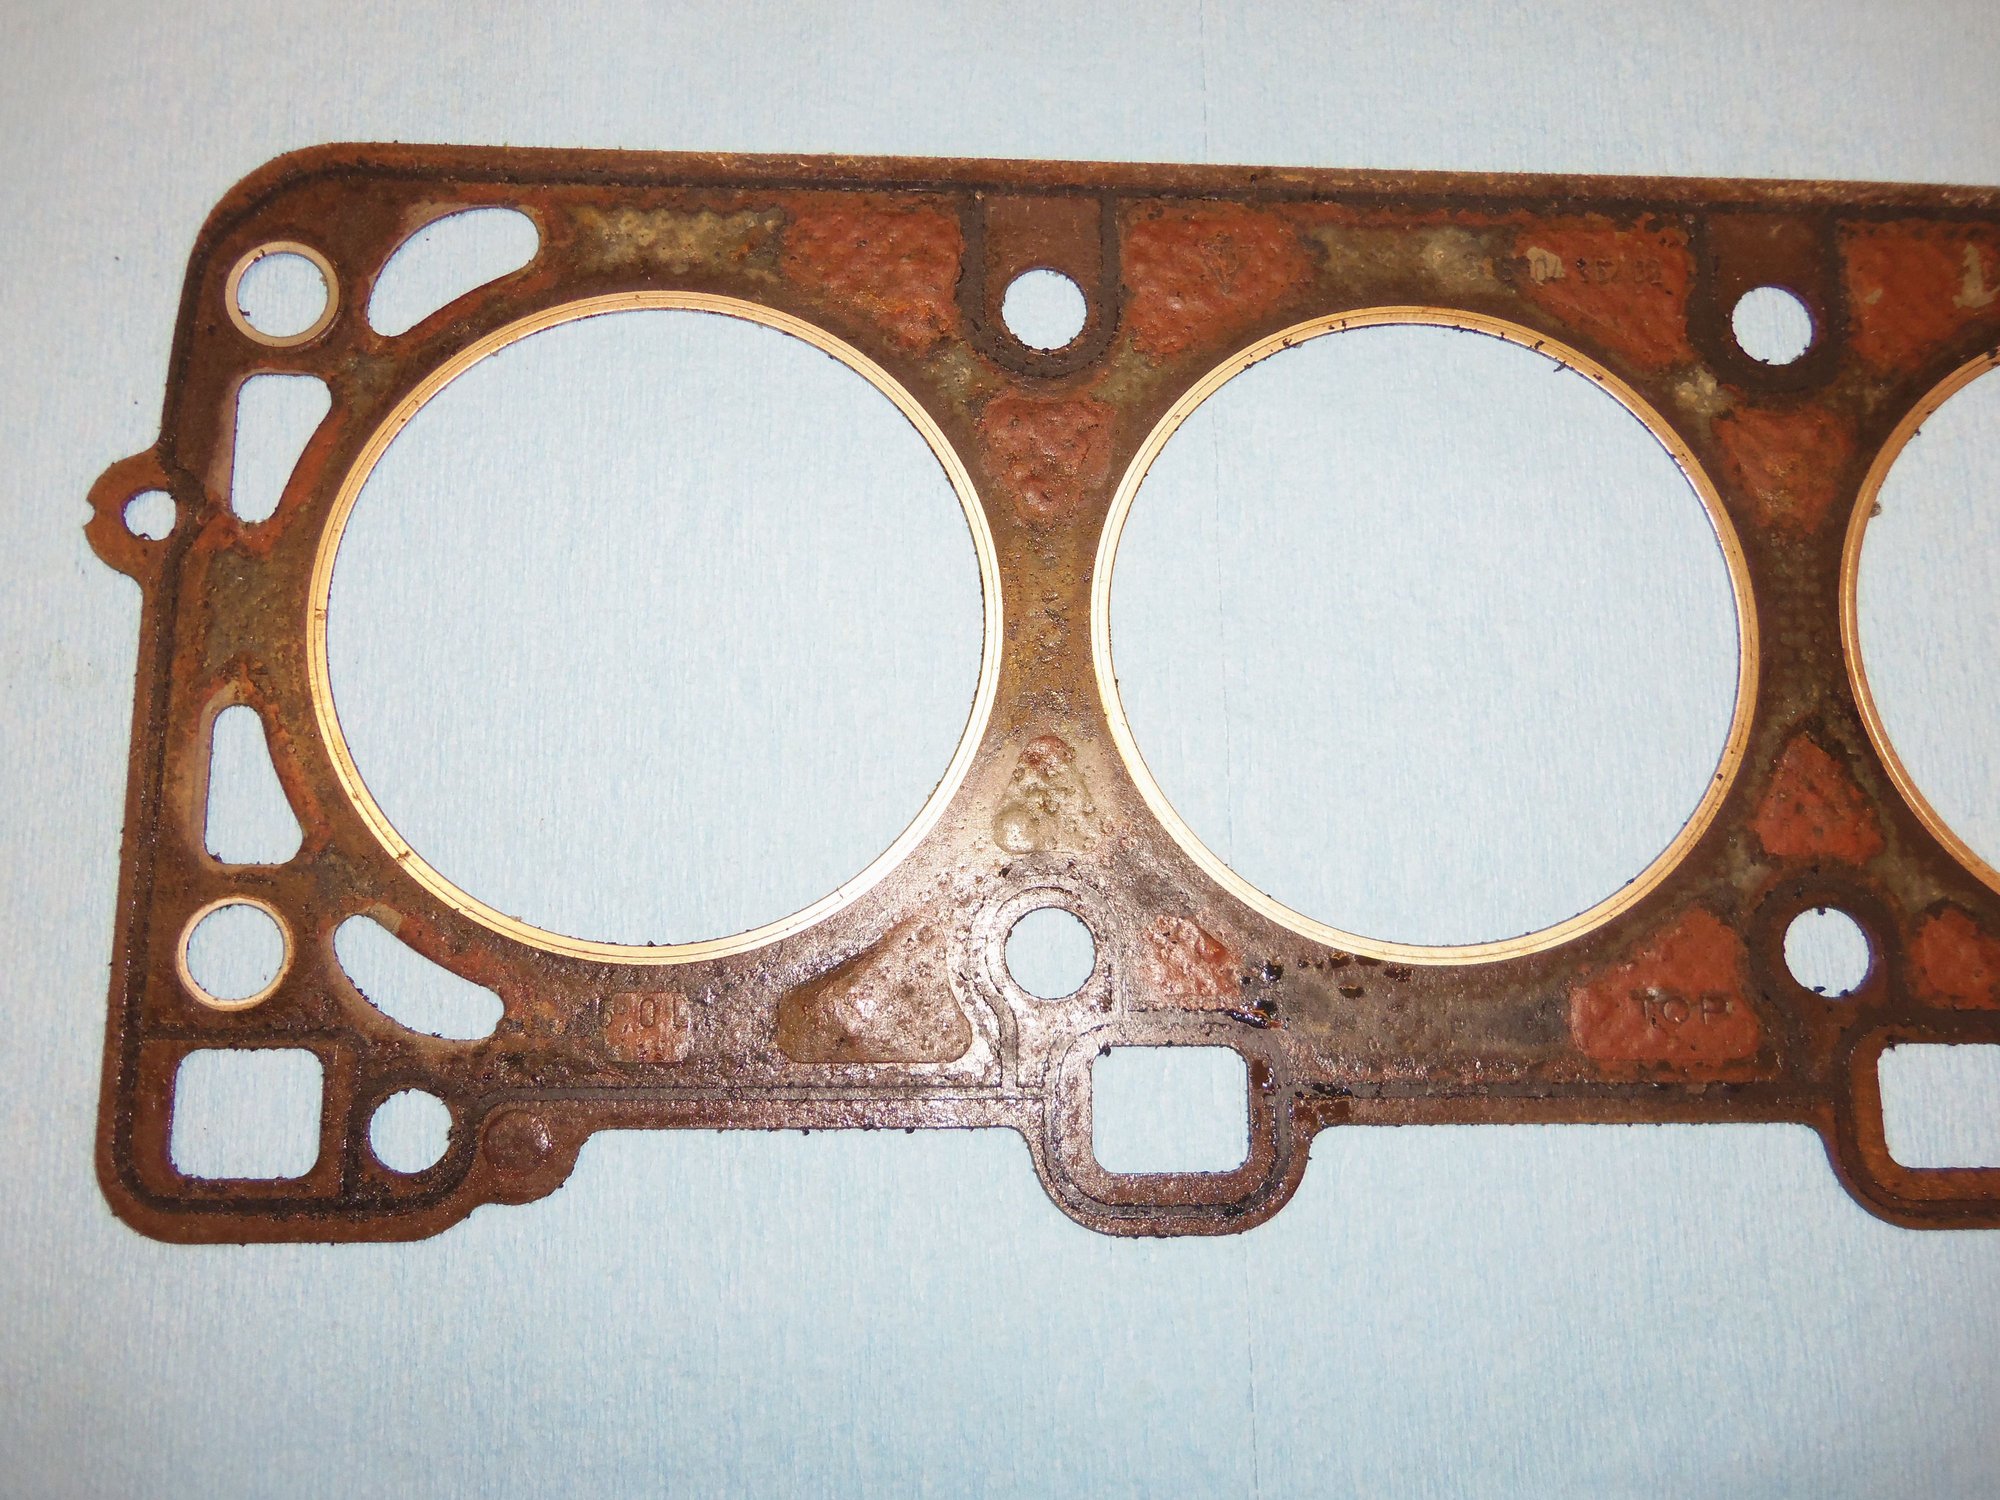
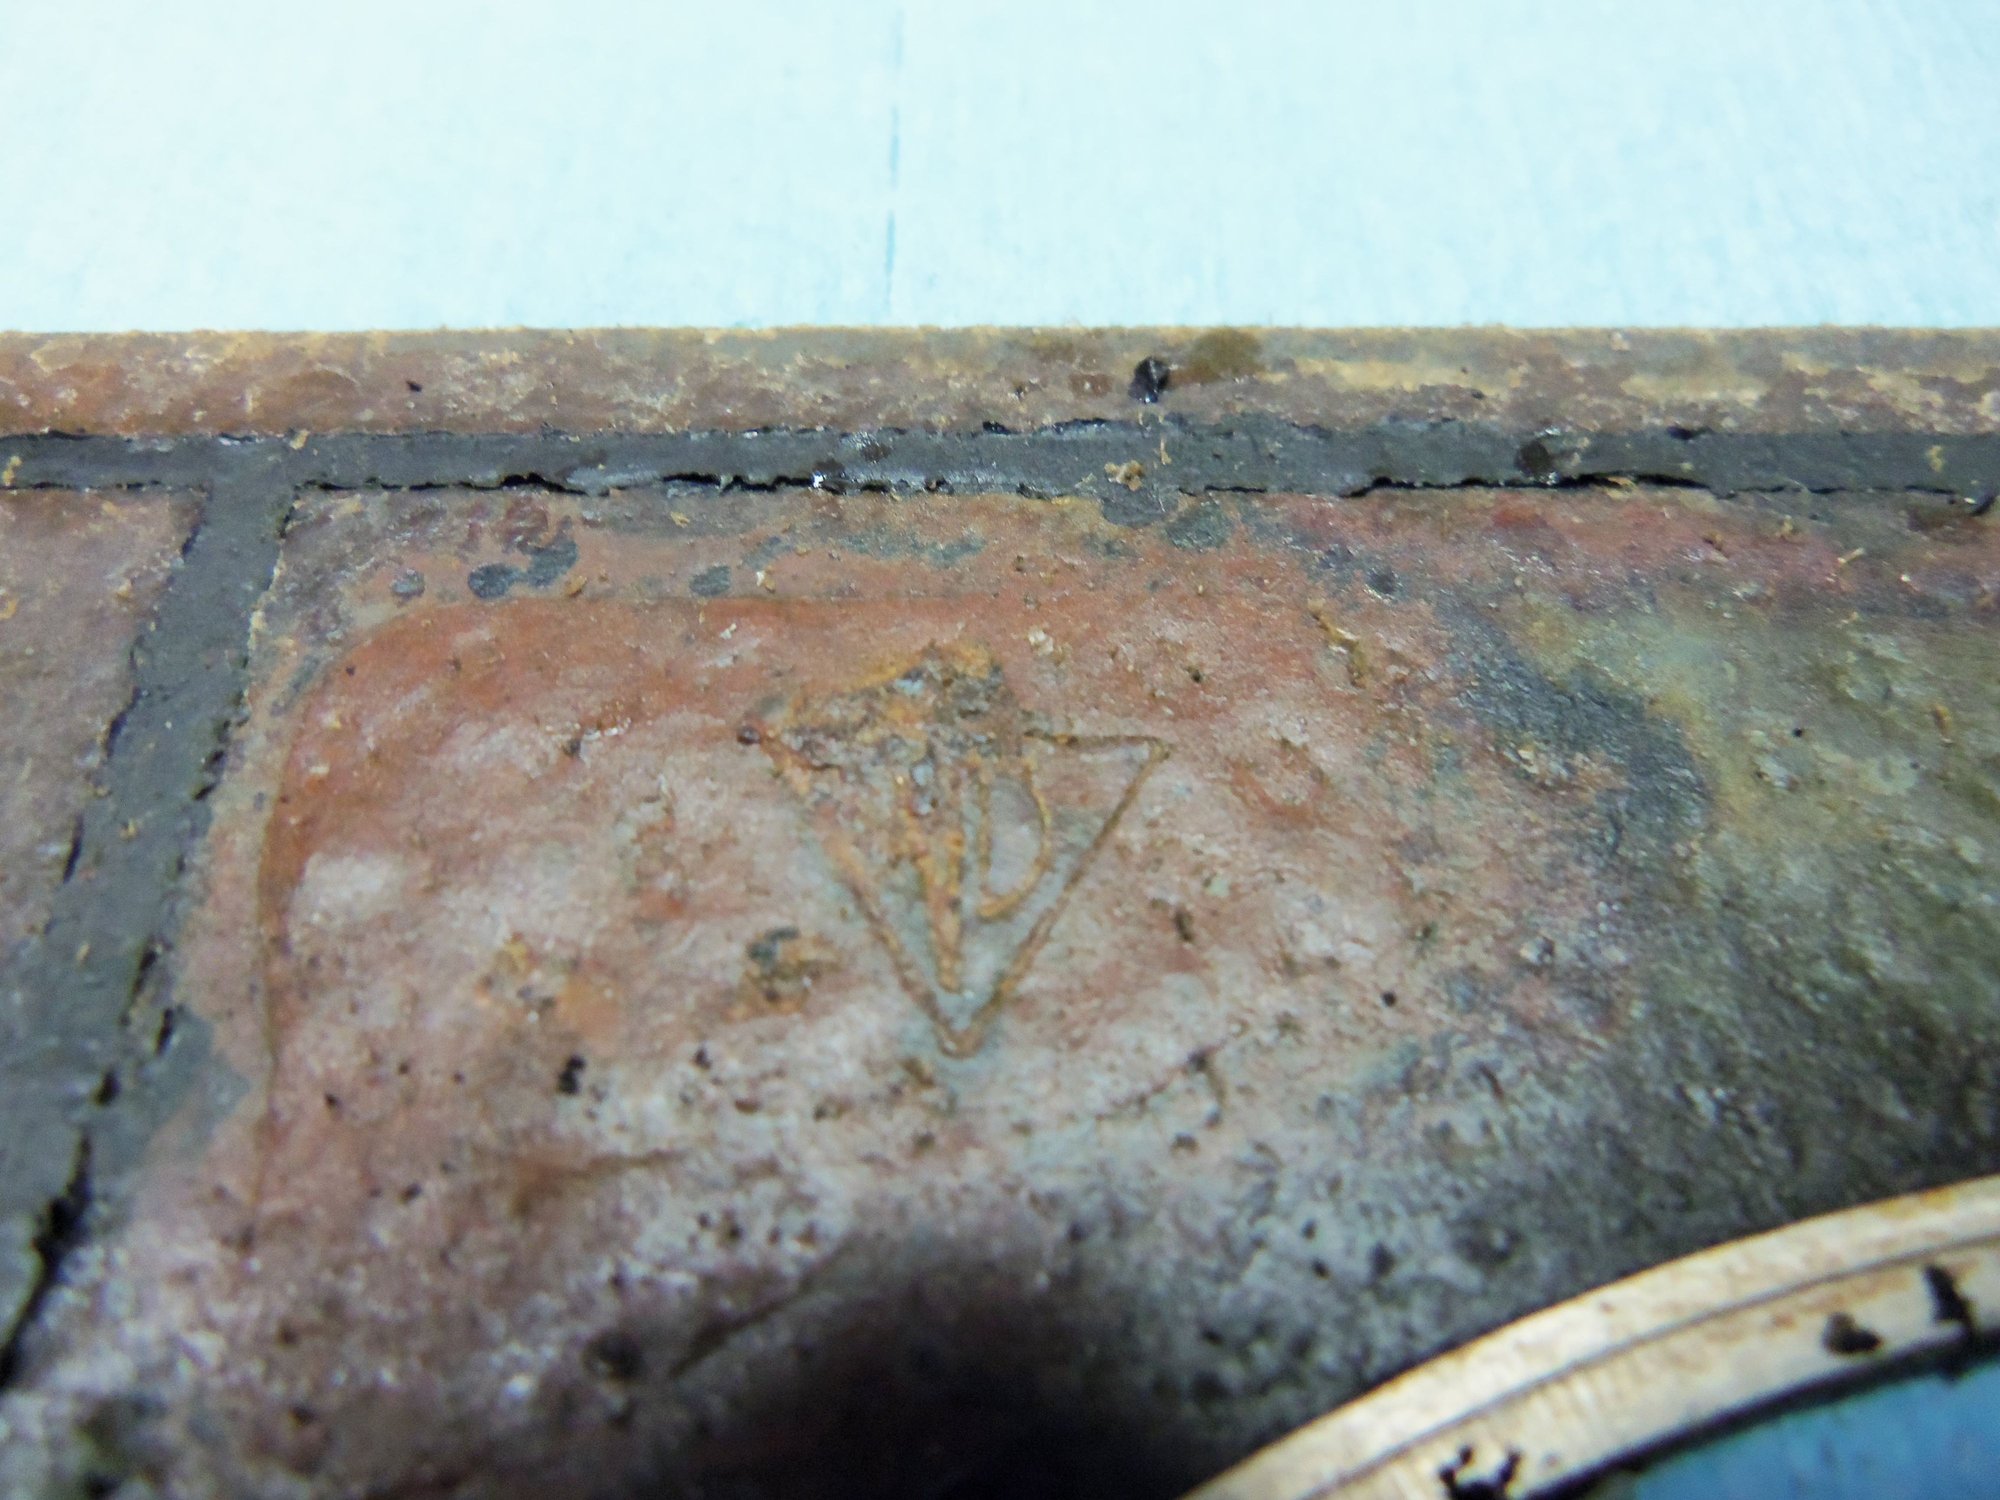
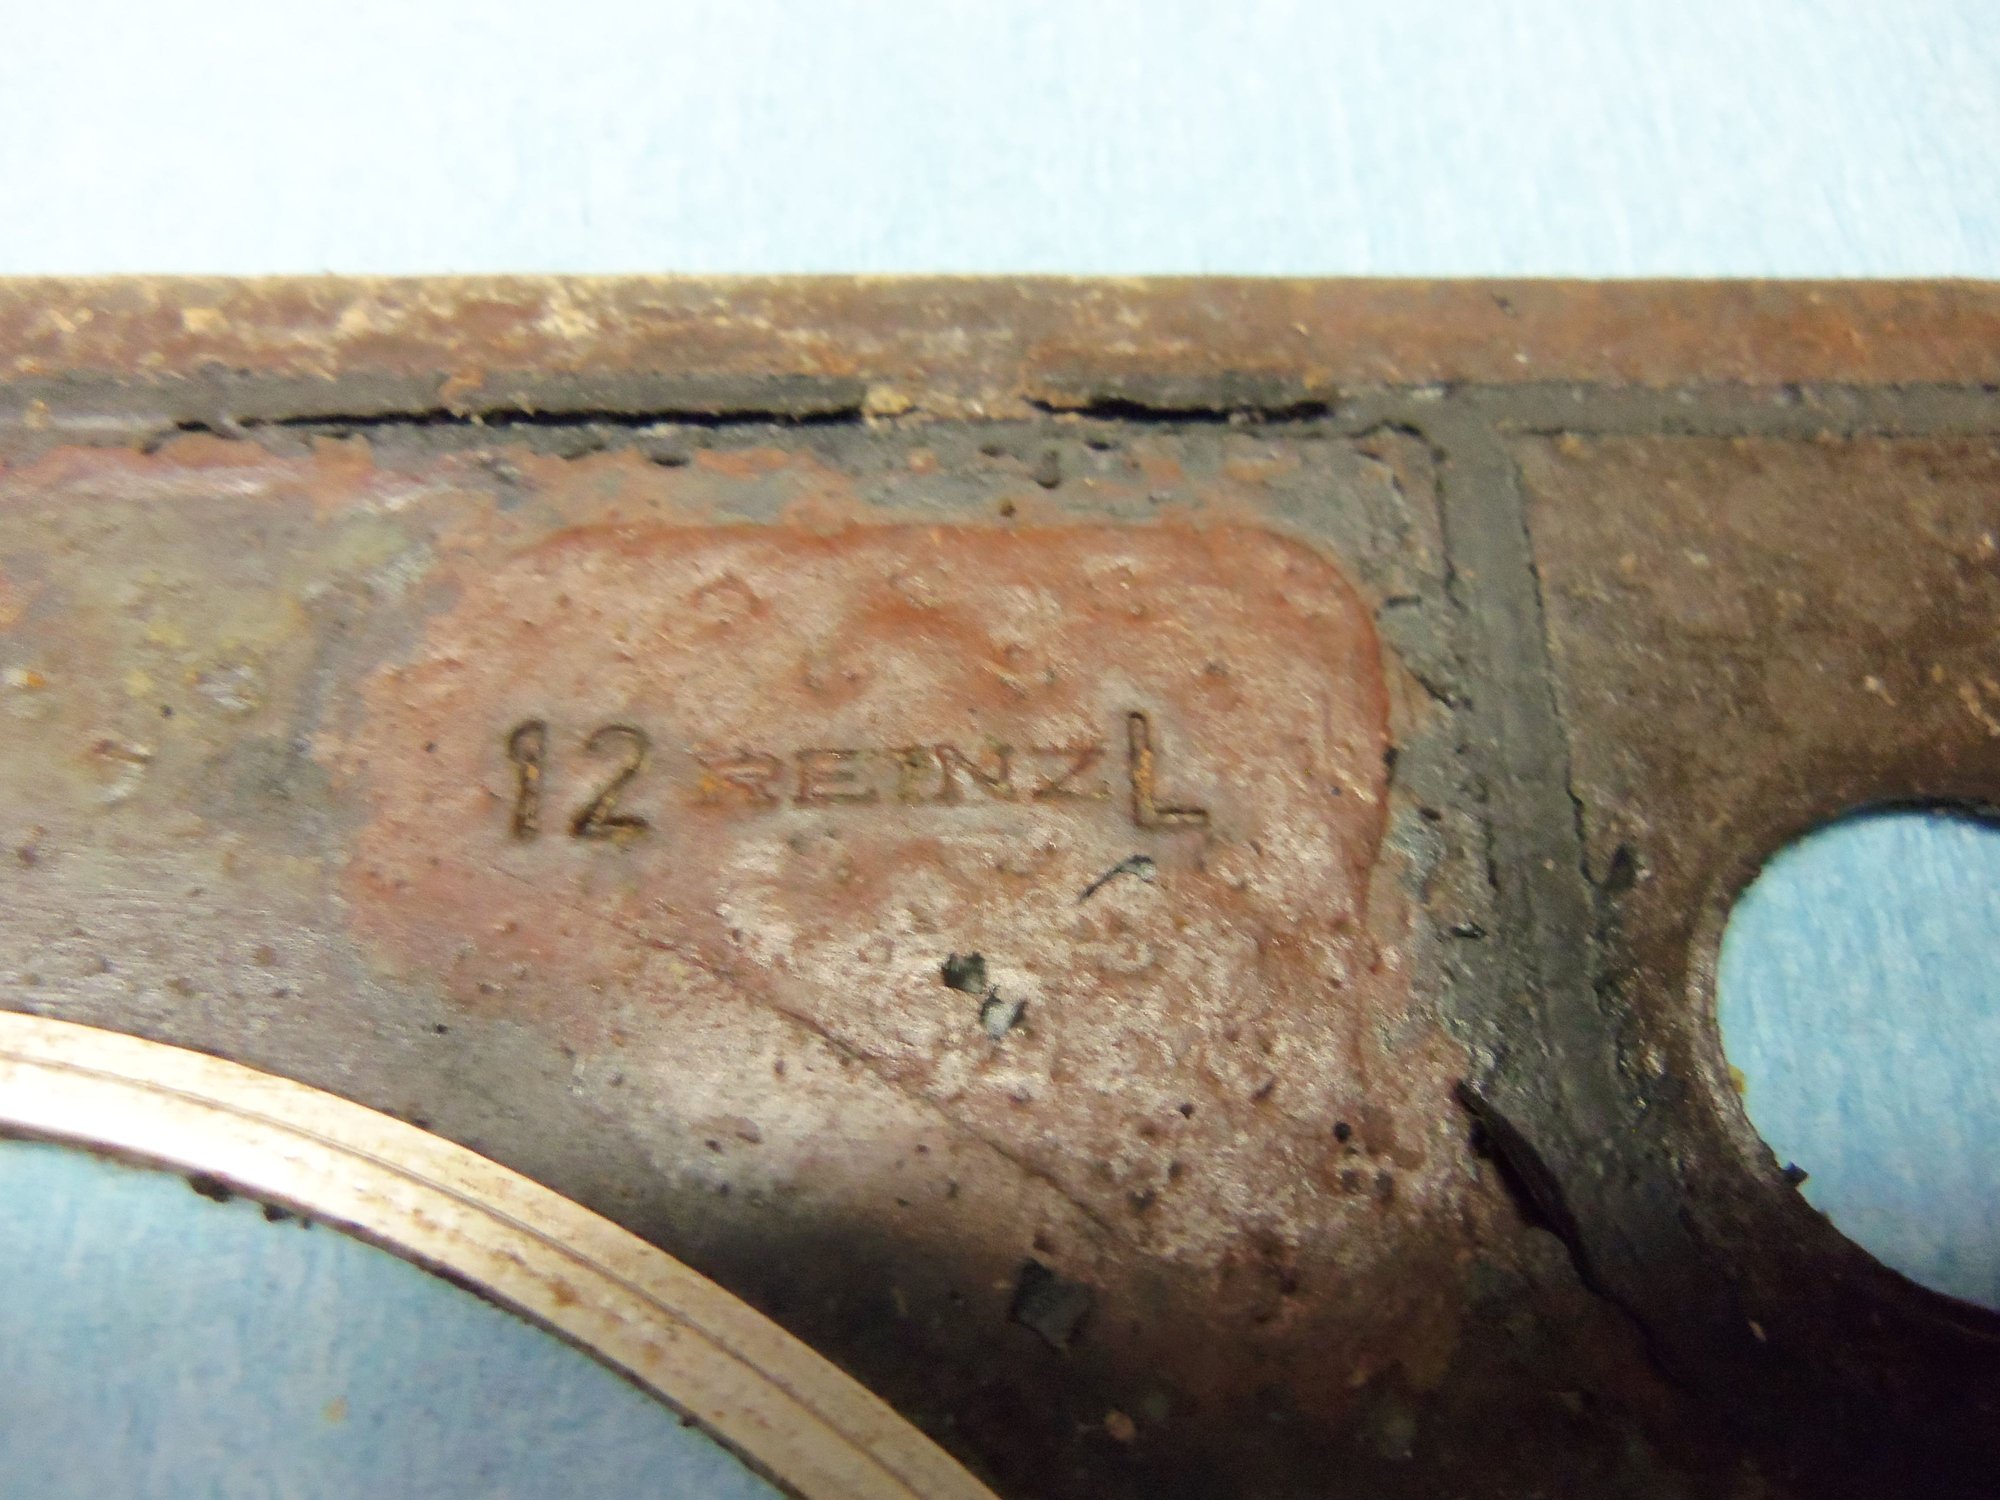
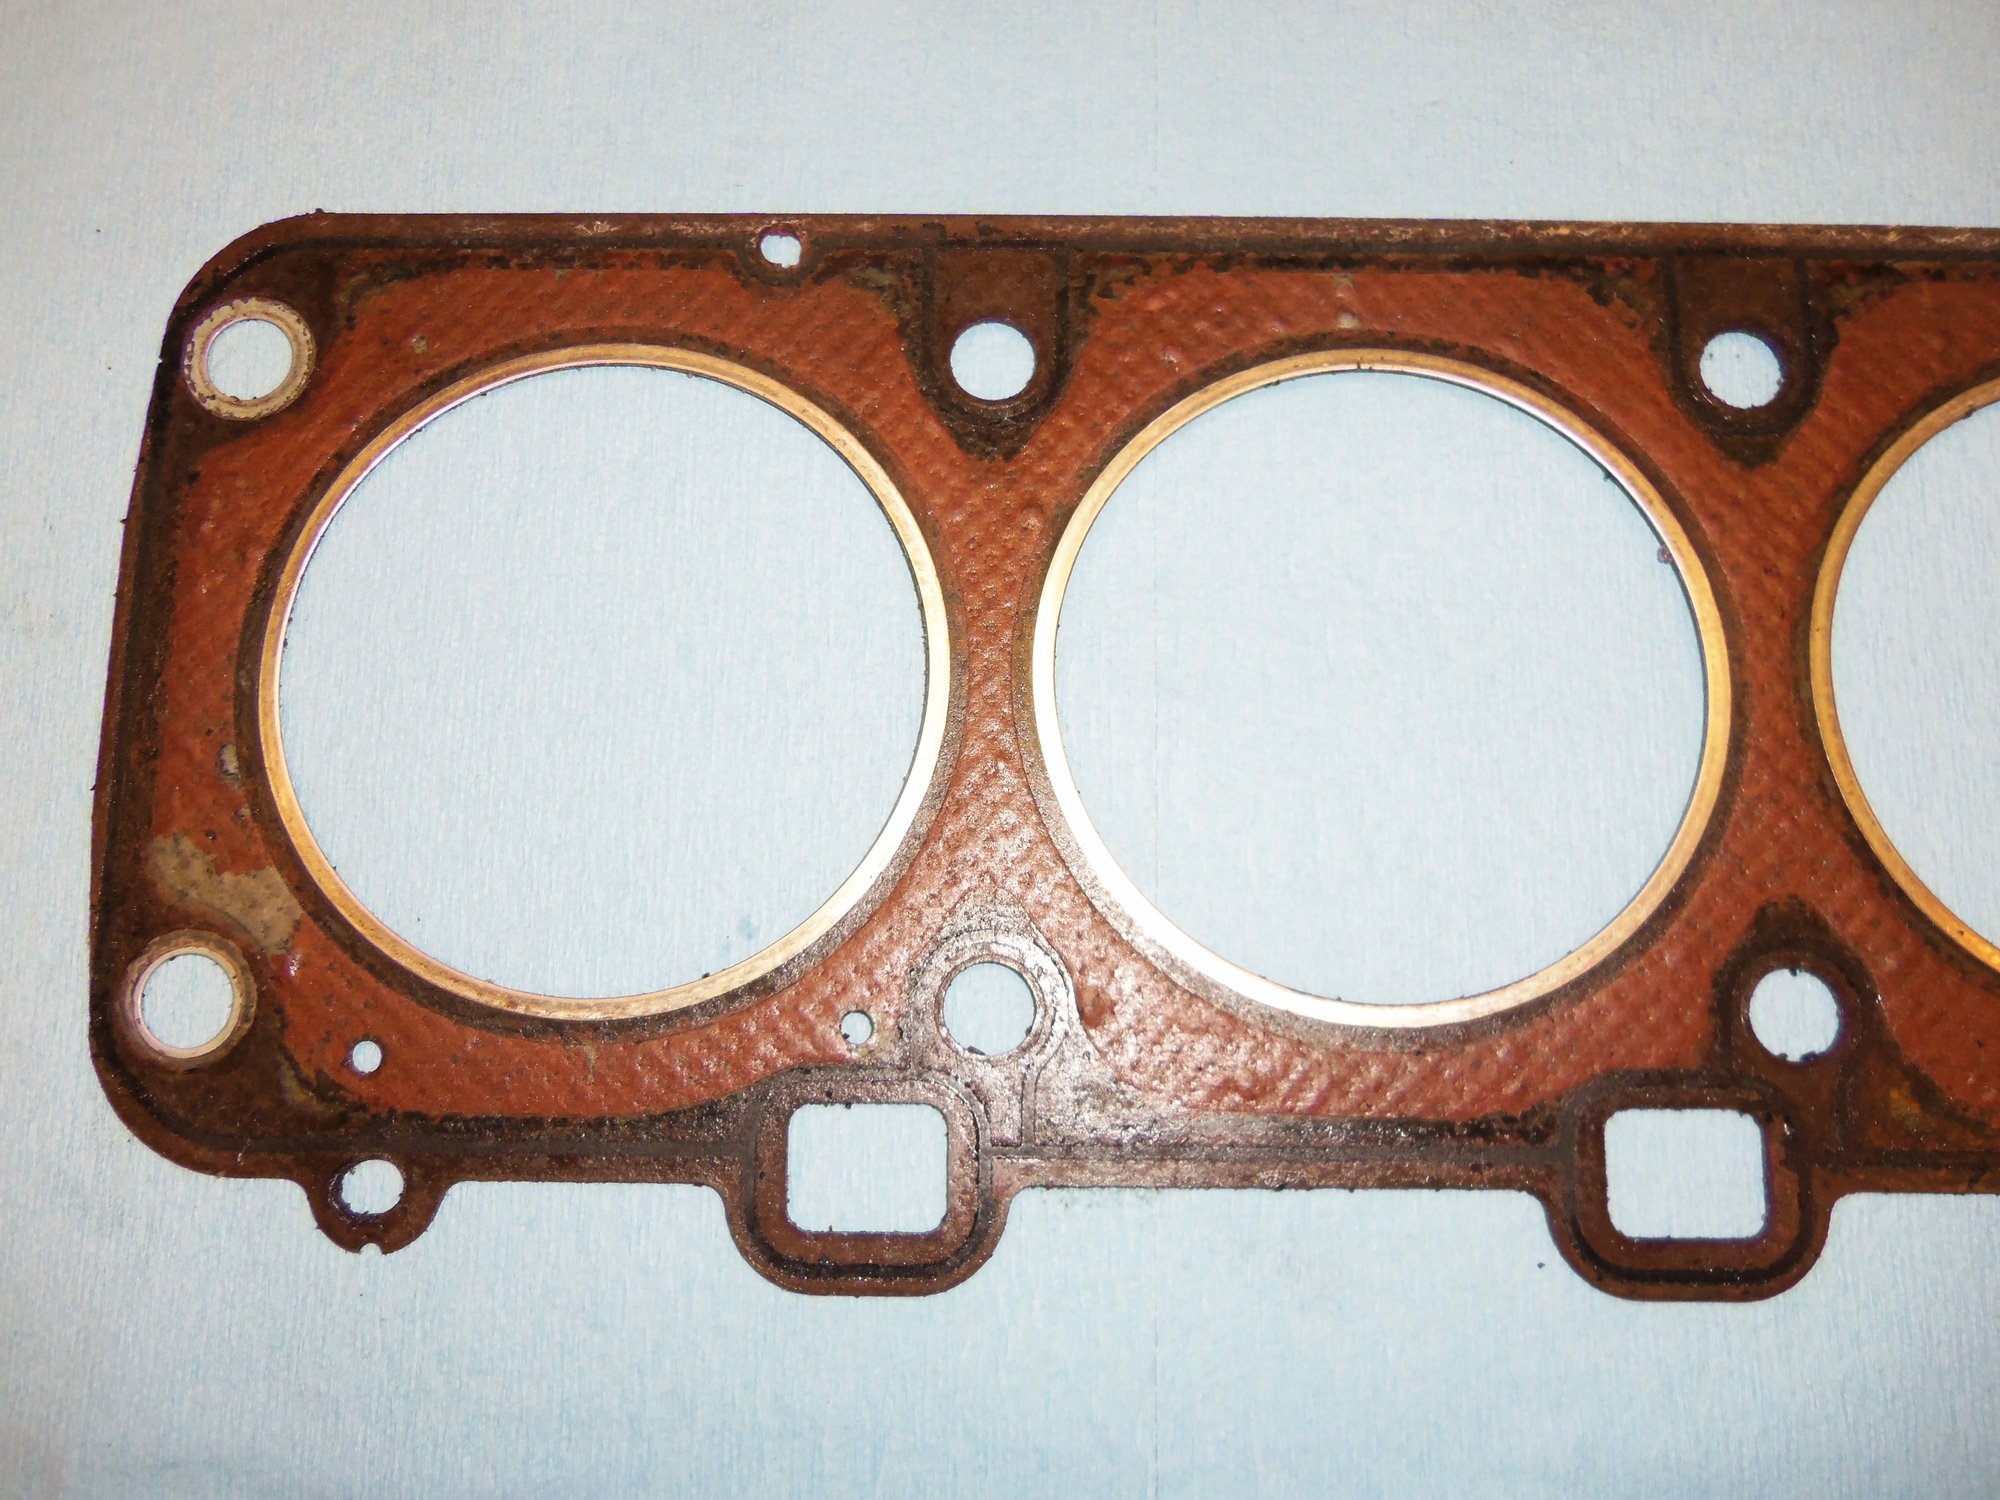
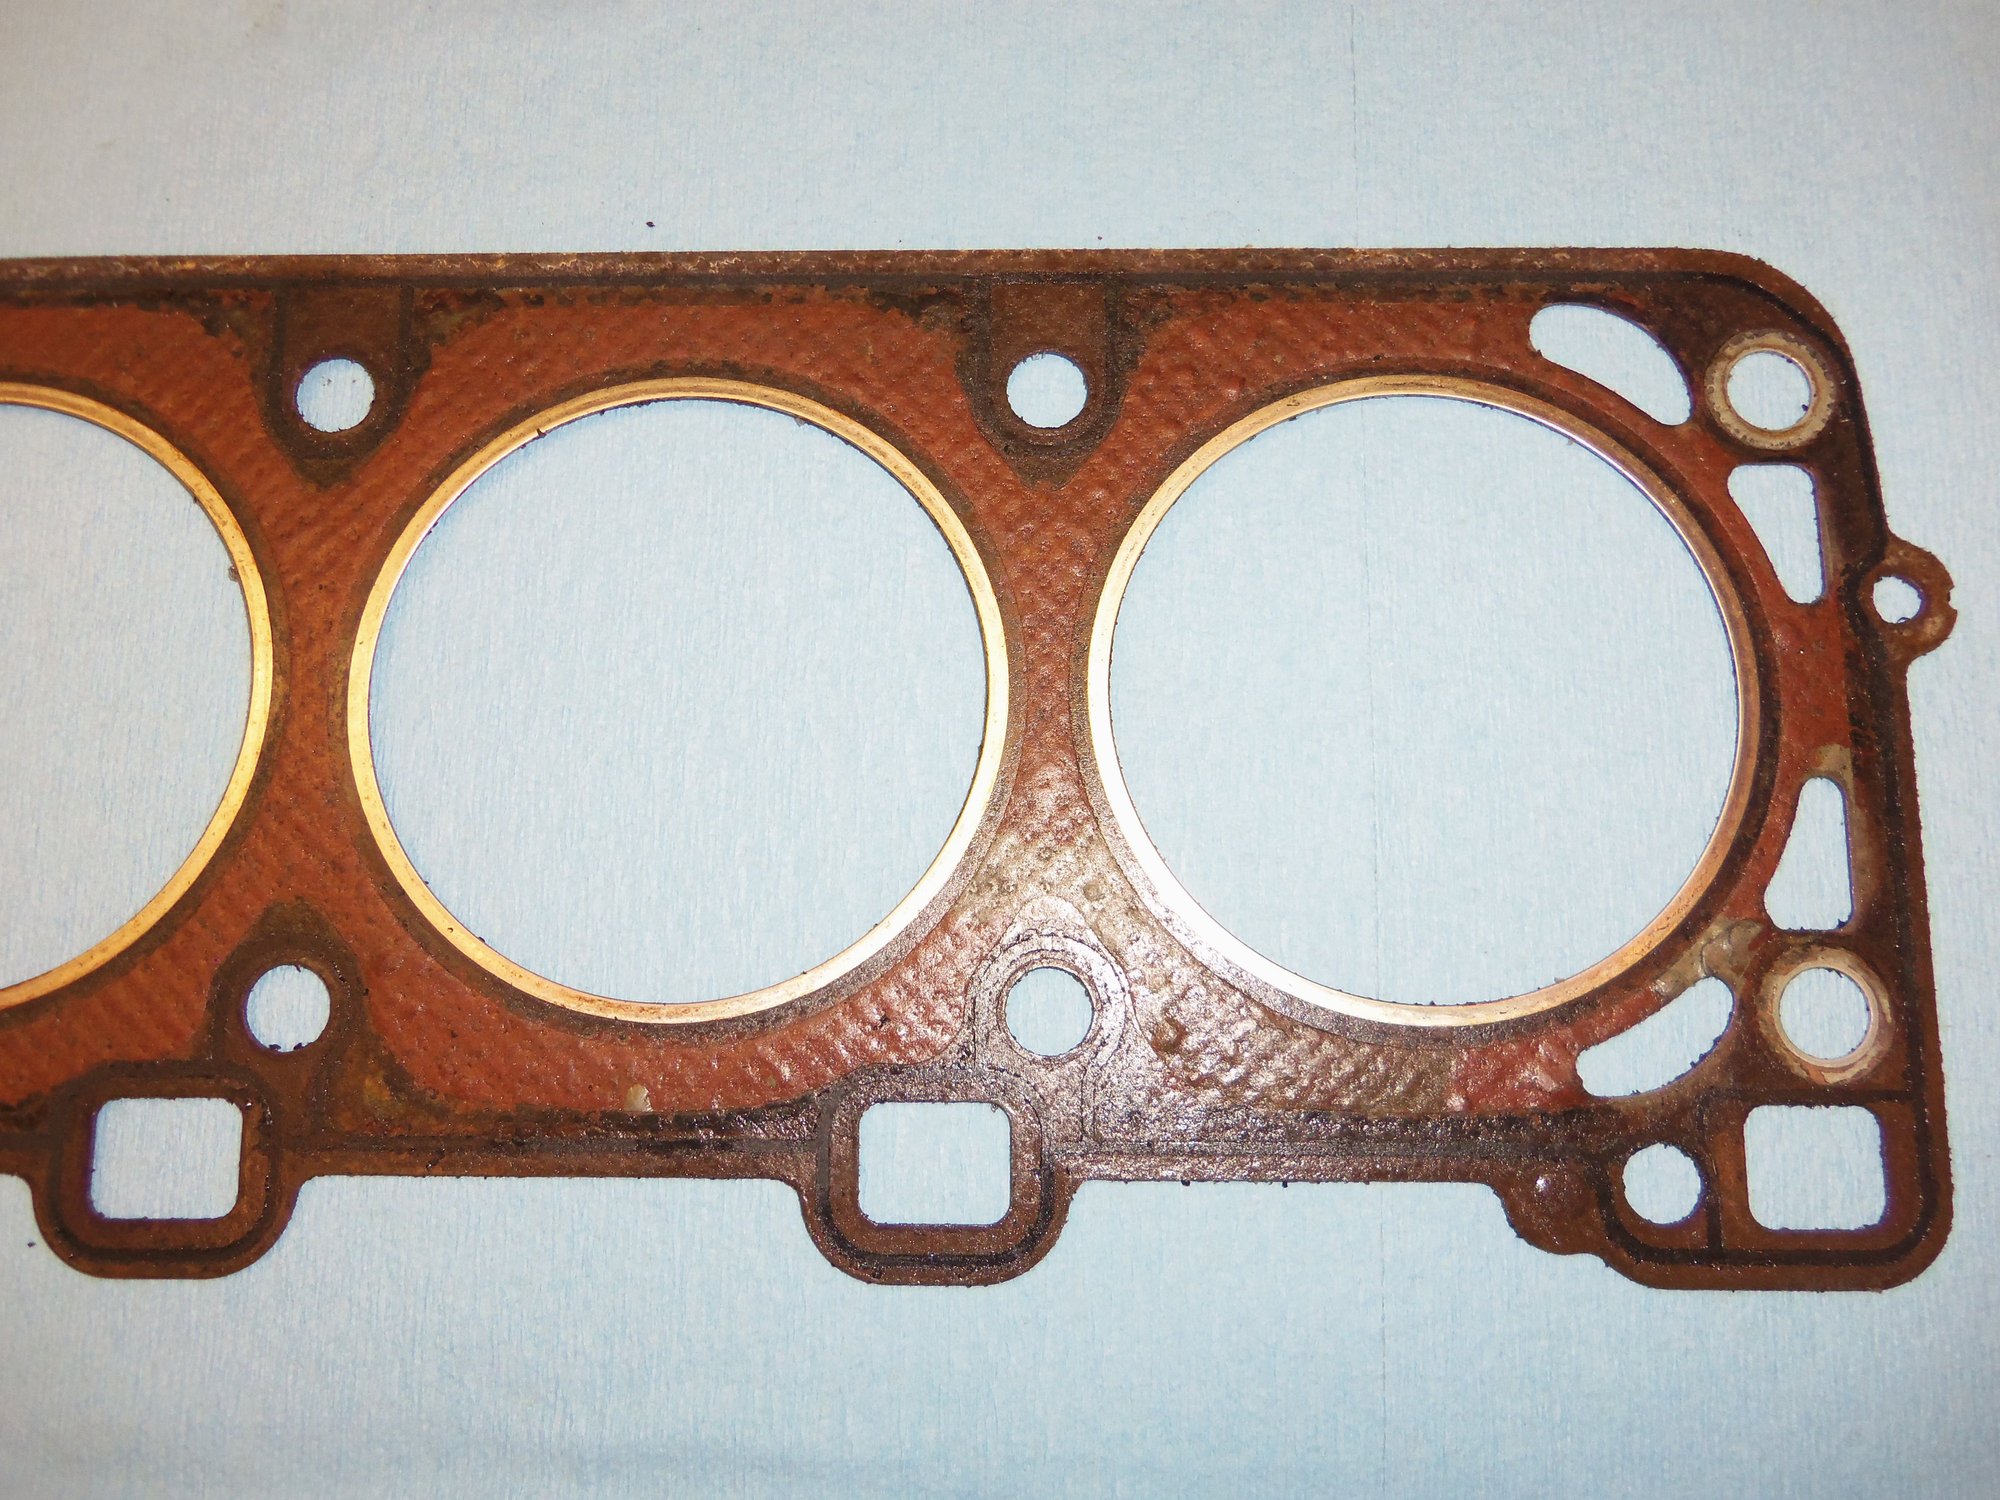
I cleaned both sides of the head gasket with rags. I saw no real deterioration of the fiber material, other than what you would expect from a 30 year old head gasket. I could still read the embossing showing the Porsche emblem and the Reinz name.
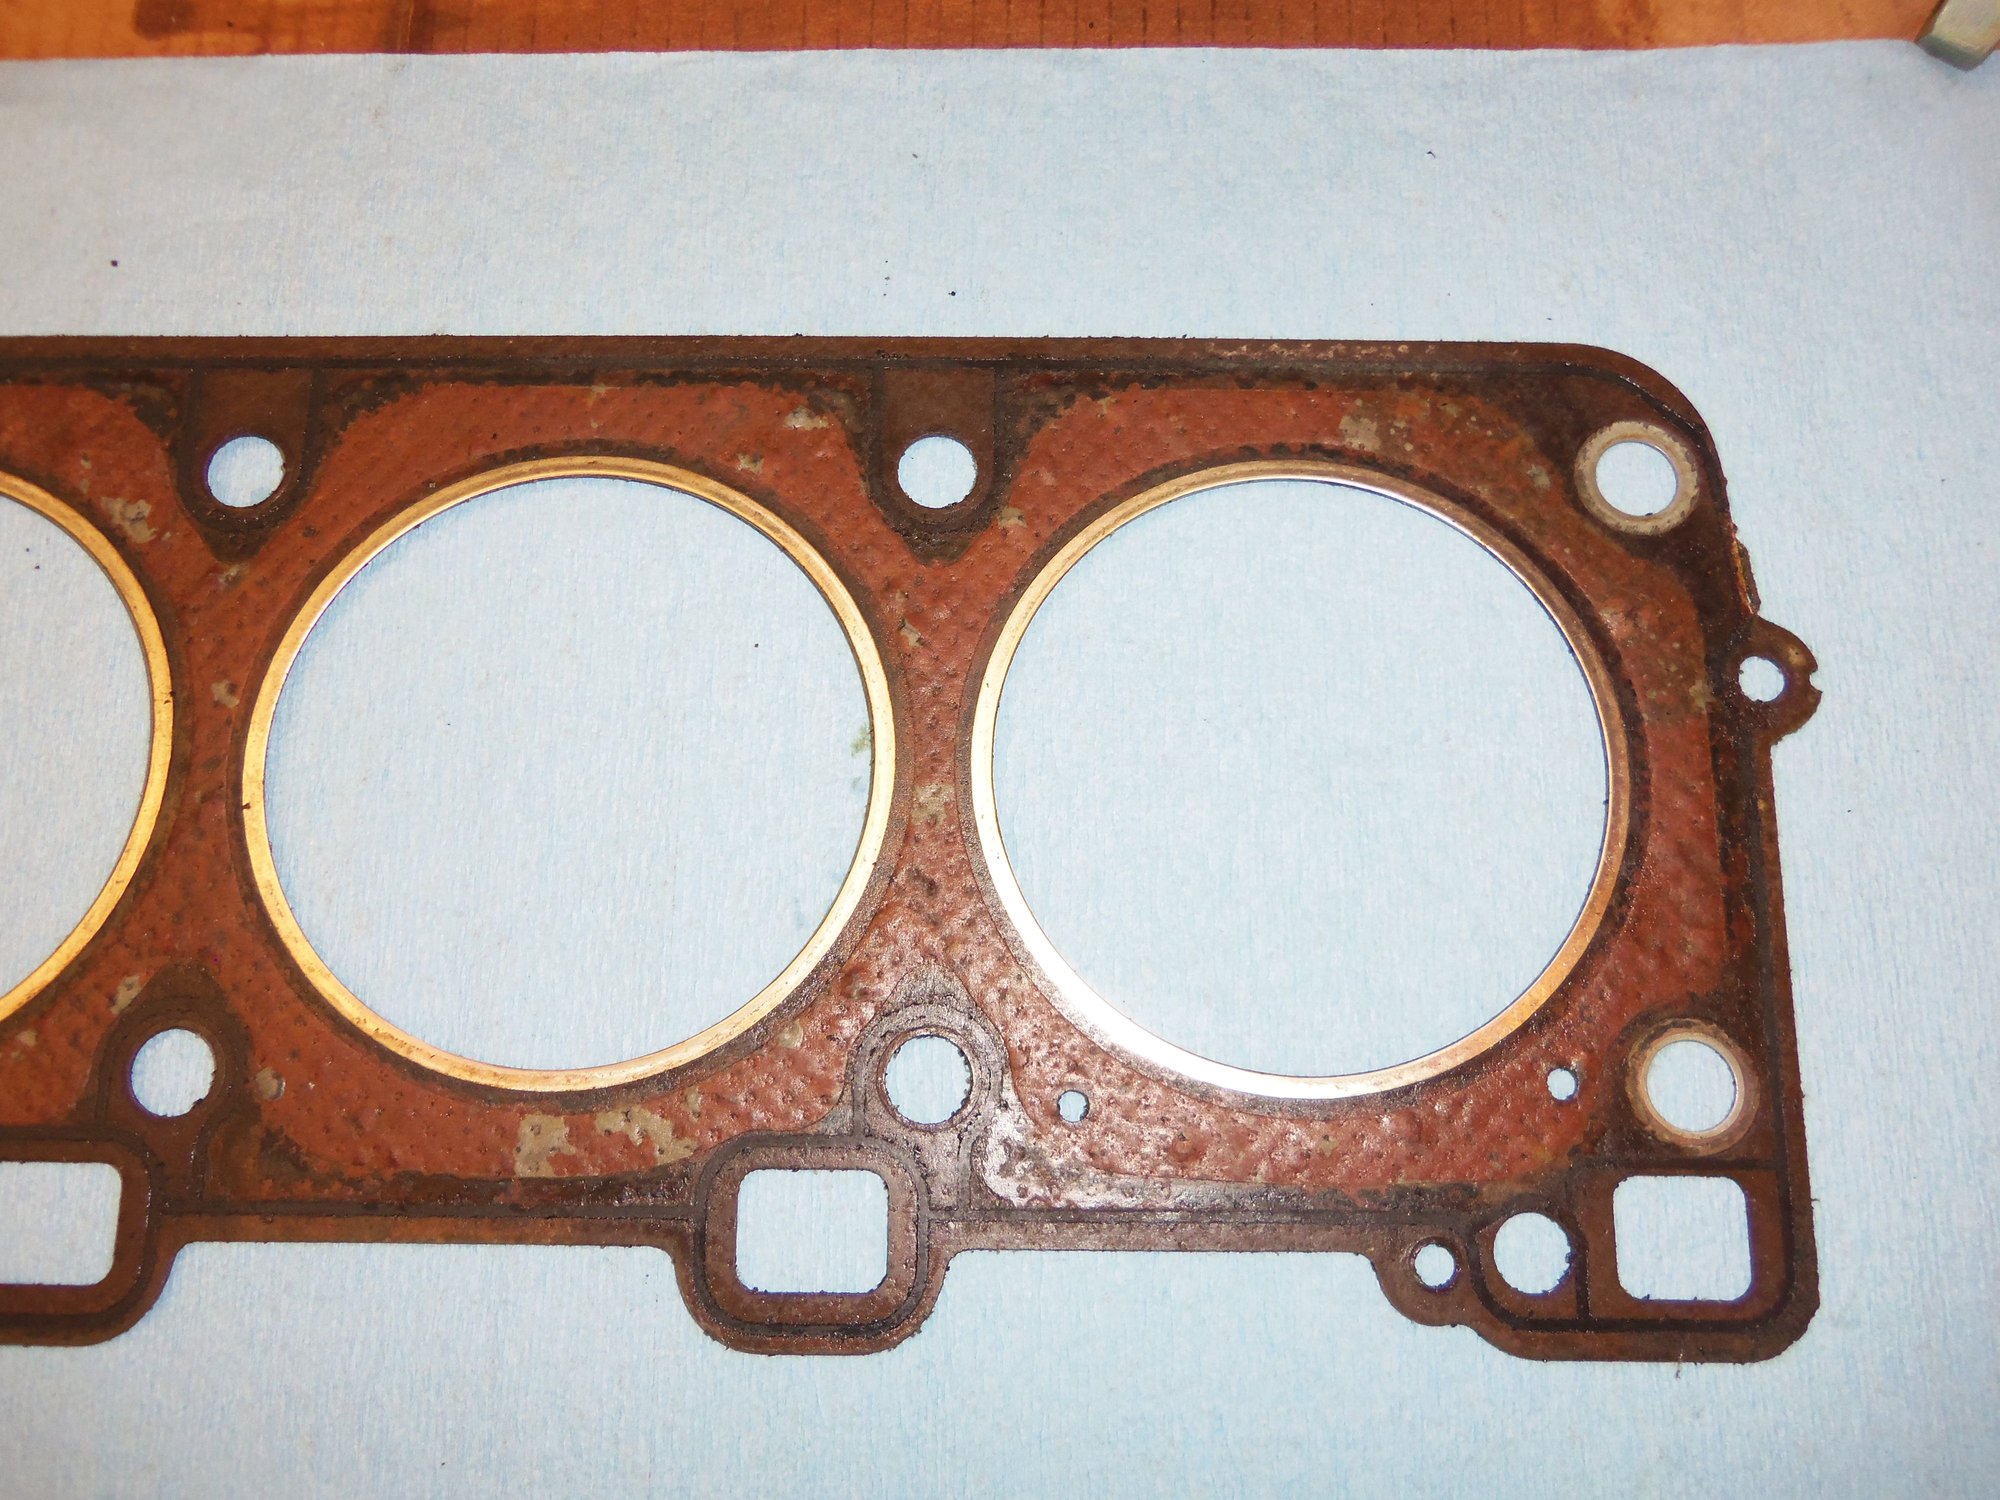
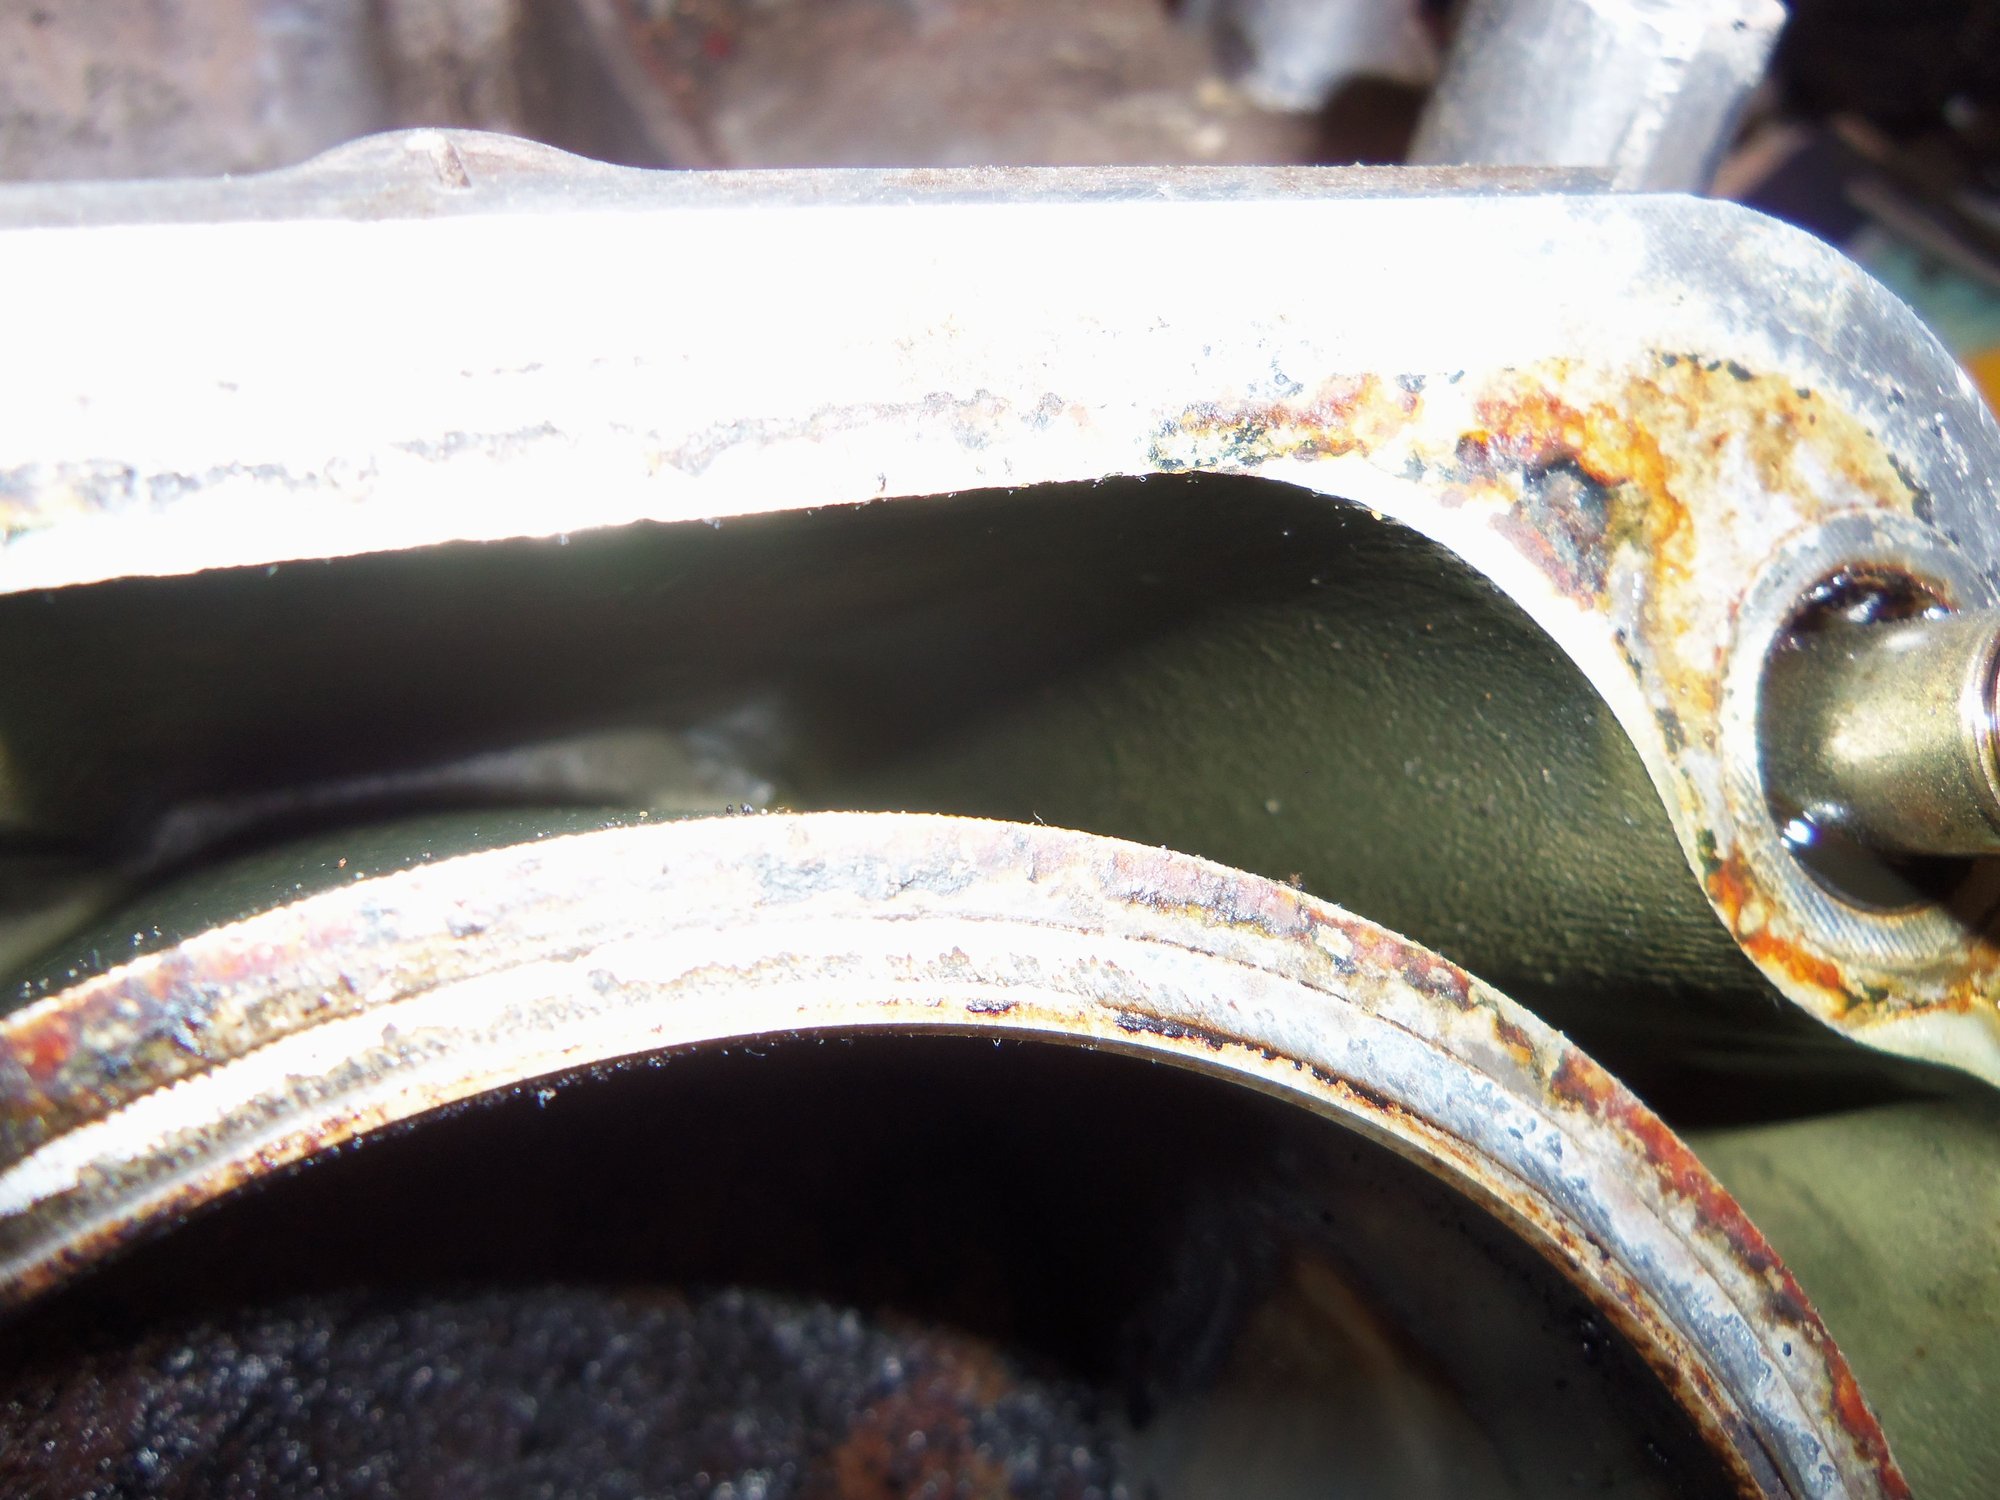
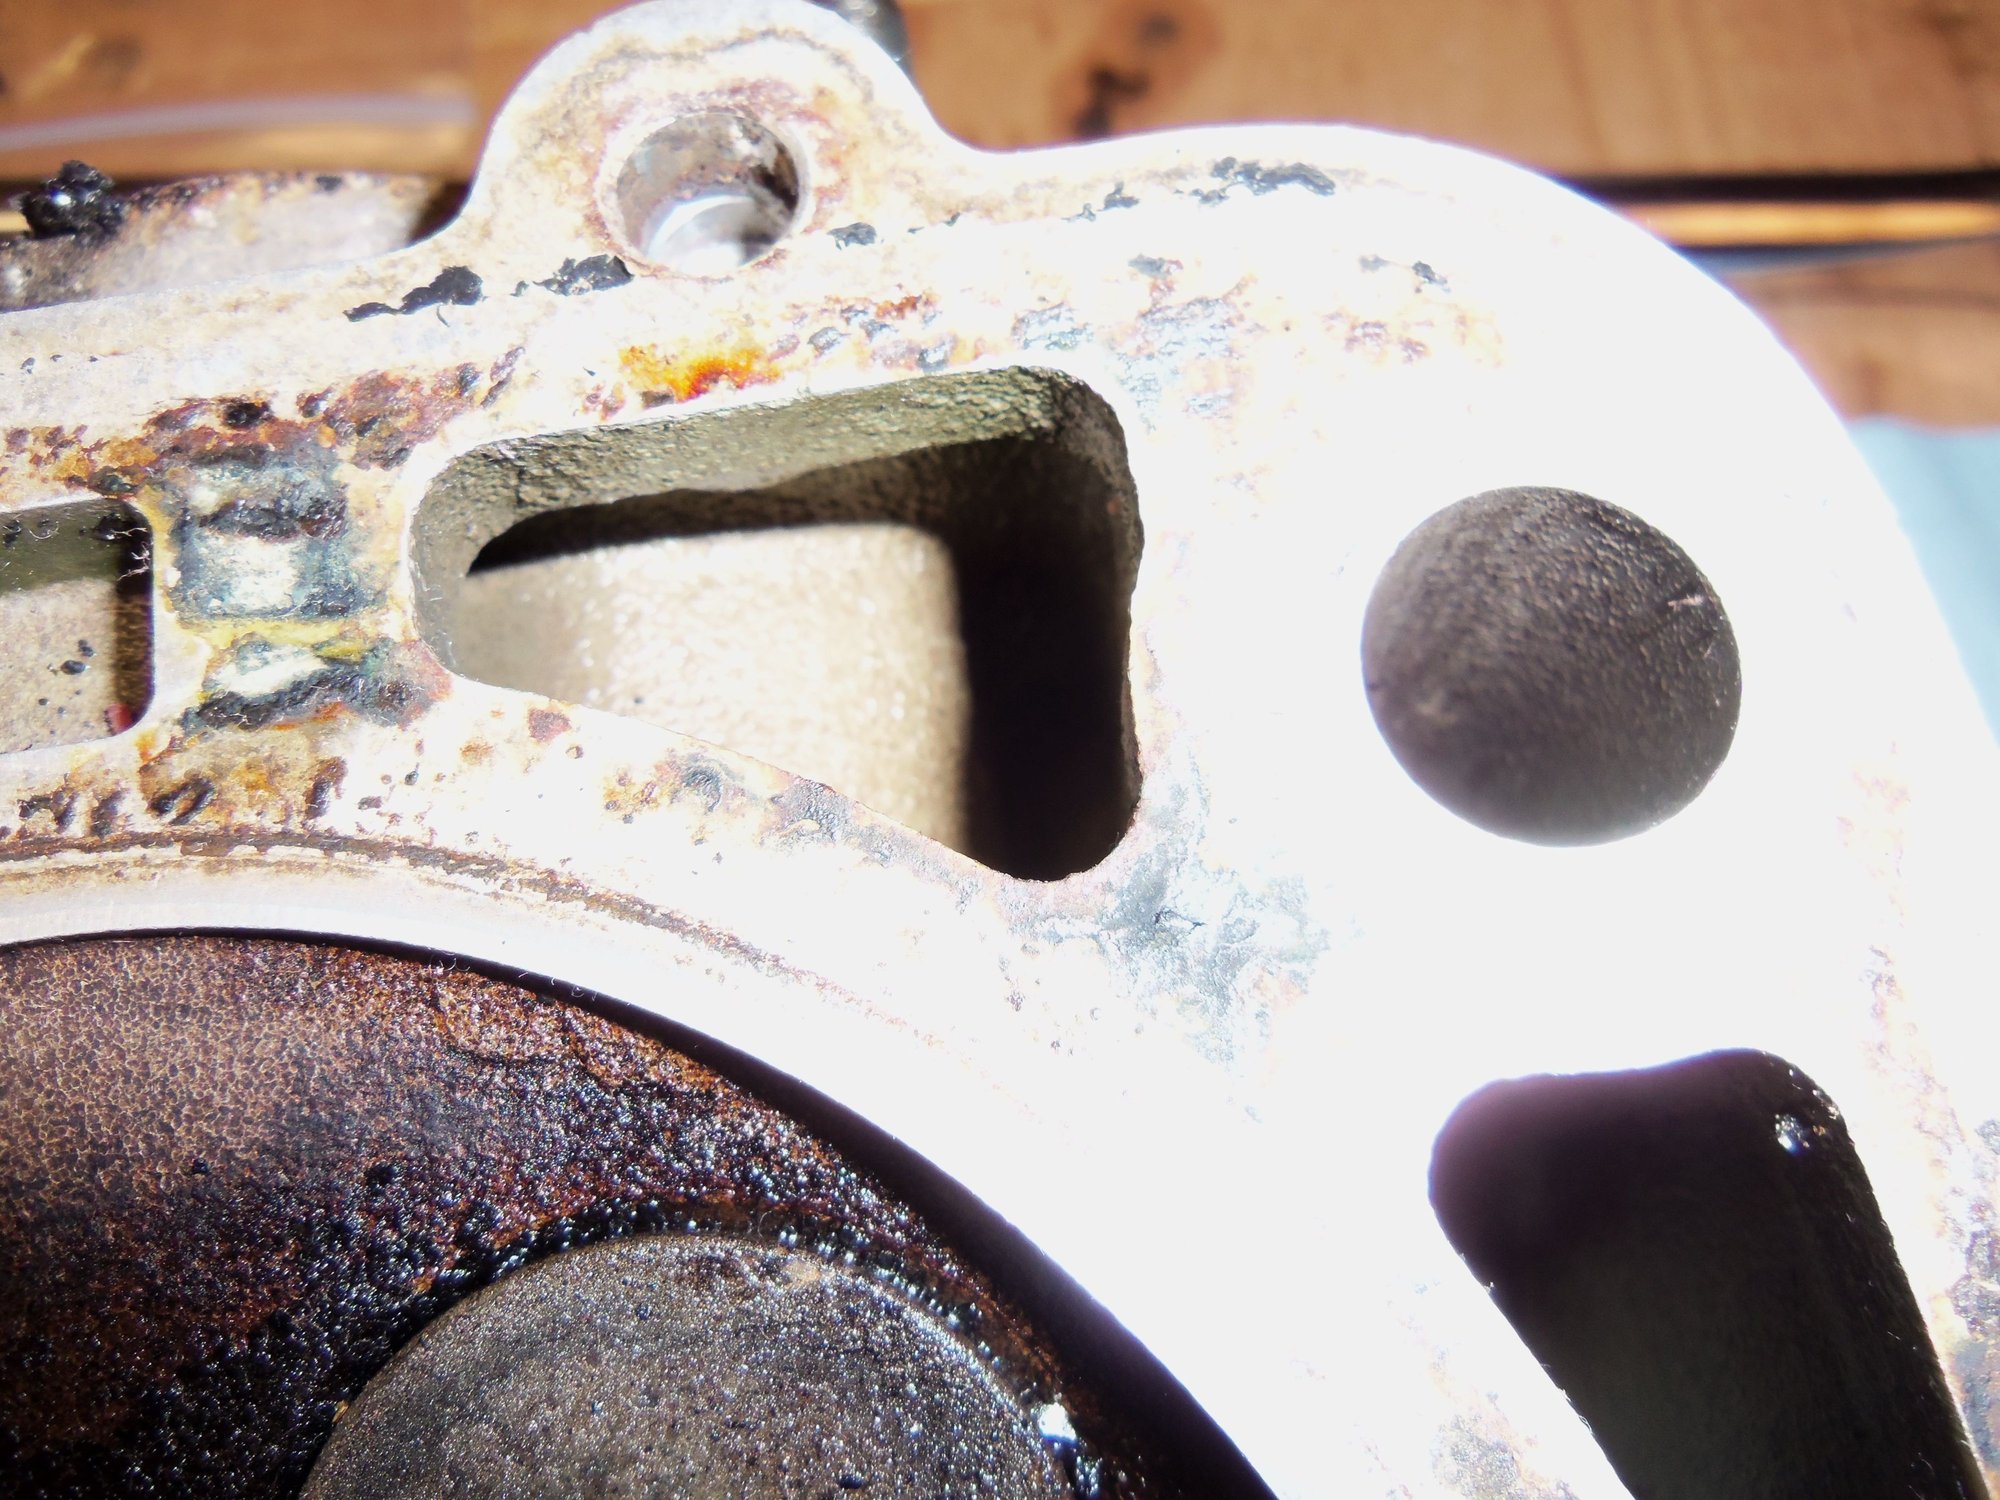
The block sealing surfaces looked reasonably good, as well. I wiped them with a coarse cloth rag and brake cleaner. I found no major corrosion. I will have to spend LOTS of quality time with straight edged razor blades cleaning the deck surfaces...
A very good thing was that none of the head studs were damaged! All looked very good. I saw no corrosion. I did note that all the head stud wells were full of oil. I am going to assume that kept the corrosion at bay.
That has been a serious concern of mine on what to do if I need to replace a stud.
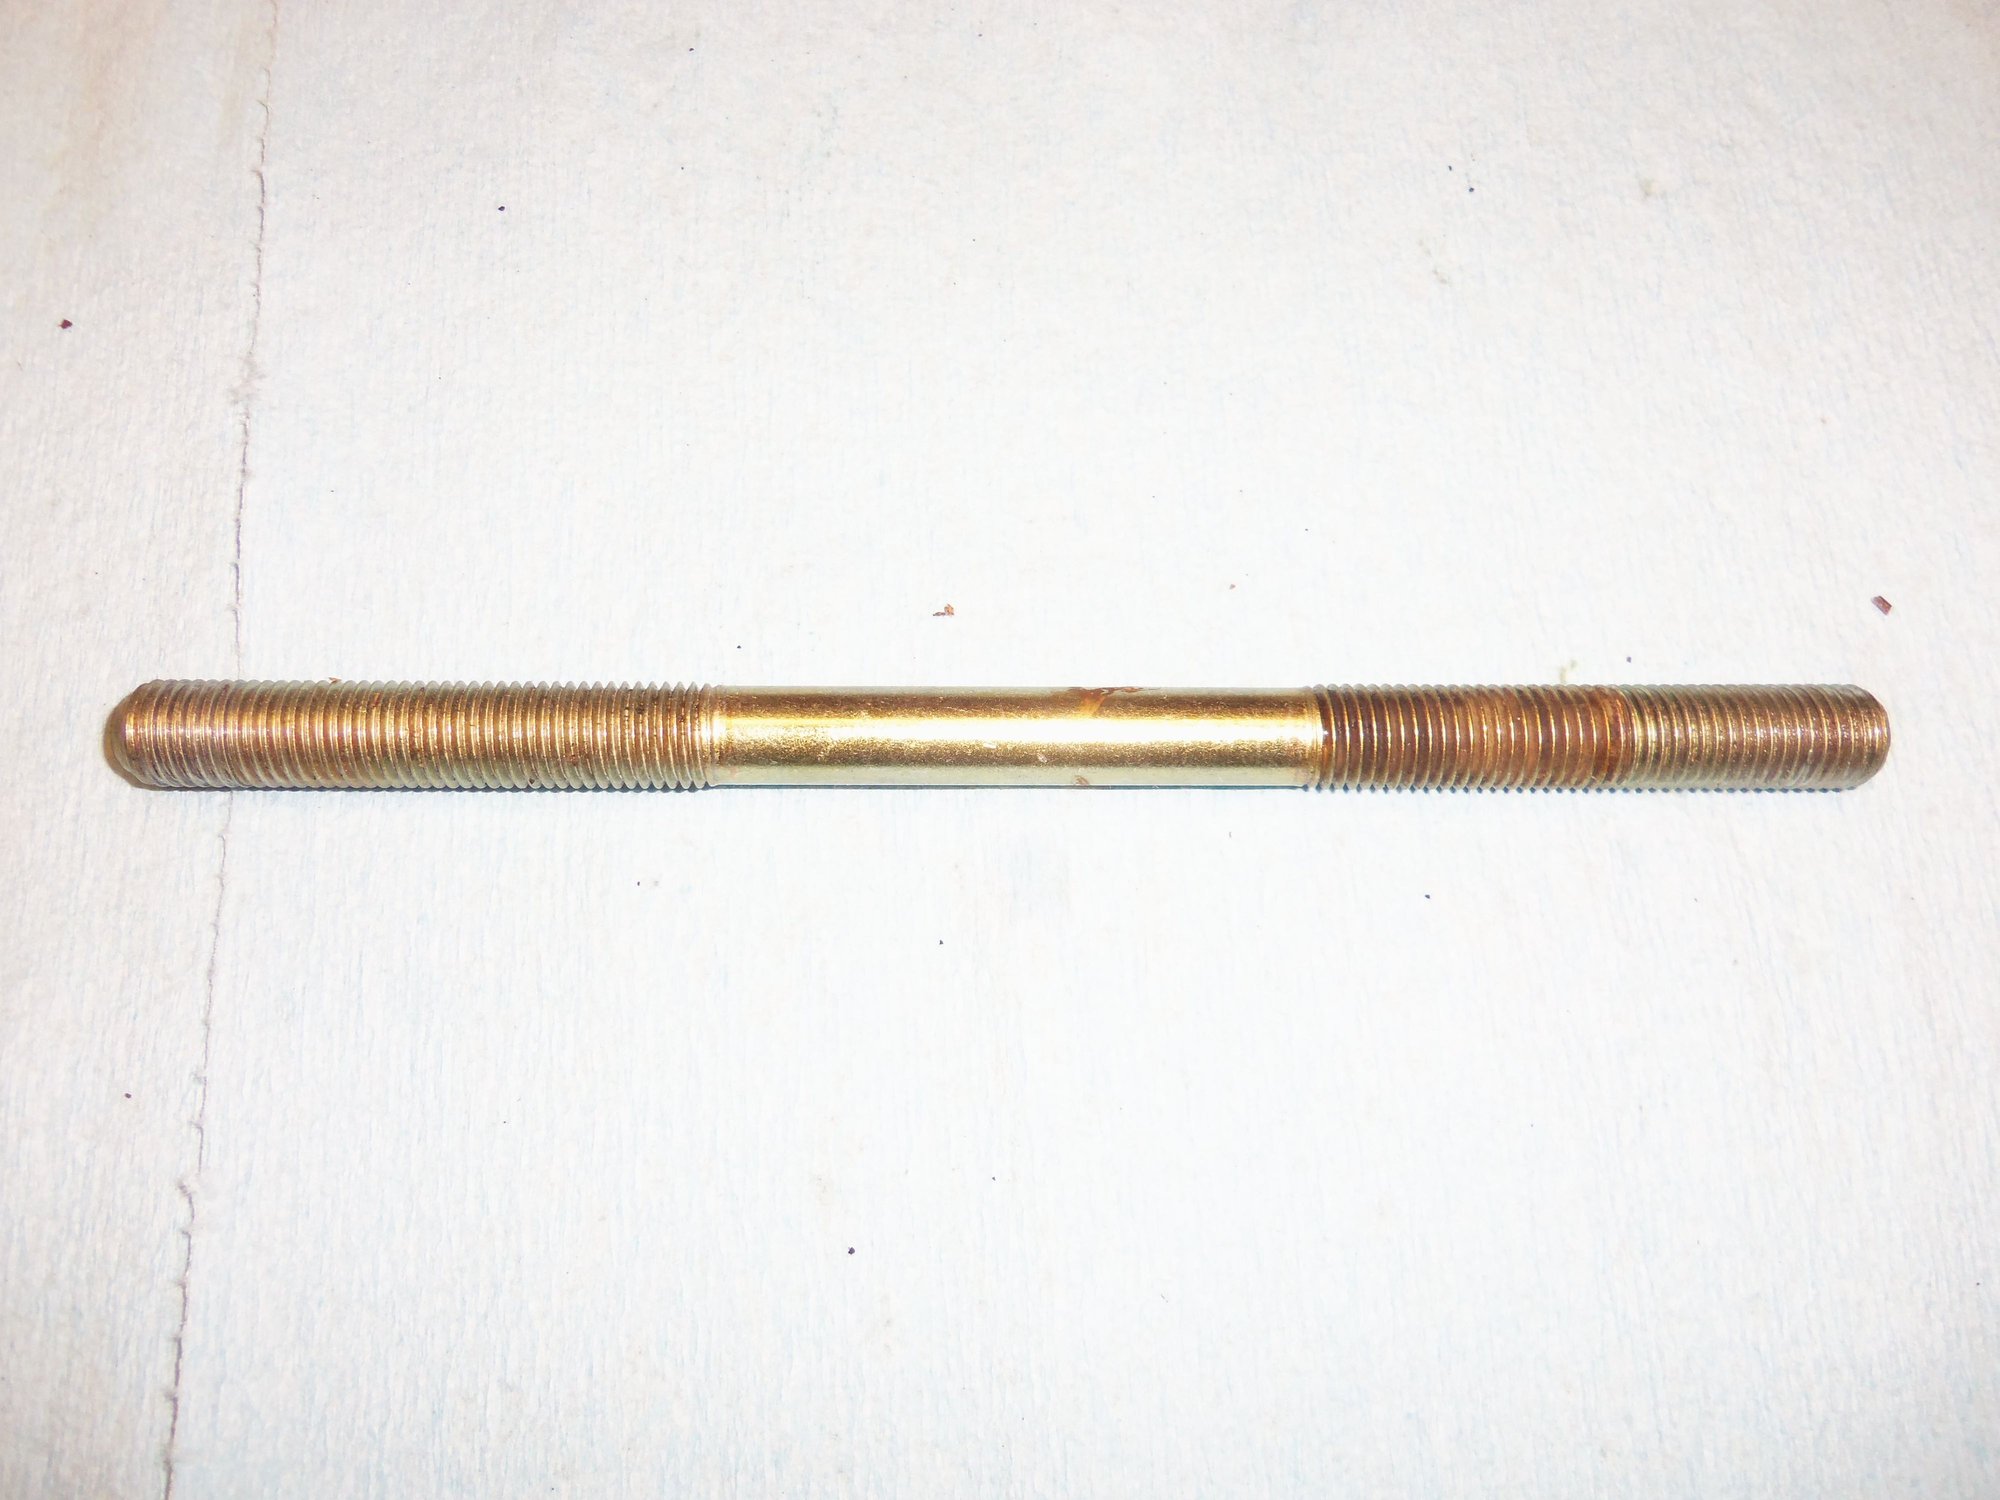
Out of a bit of paranoia, I double nutted each stud with two head nuts. I applied moderate pressure trying to unscrew the stud to see if it was loose. Only hiccup was the bottom left stud started to unscrew.
I measured the height of all the studs at 73mm, then removed the loose stud. It cleaned came out. I will clean its well then reinstall it with loctite. Cleaning the removed stud with brake cleaner showed NO corrosion at all.
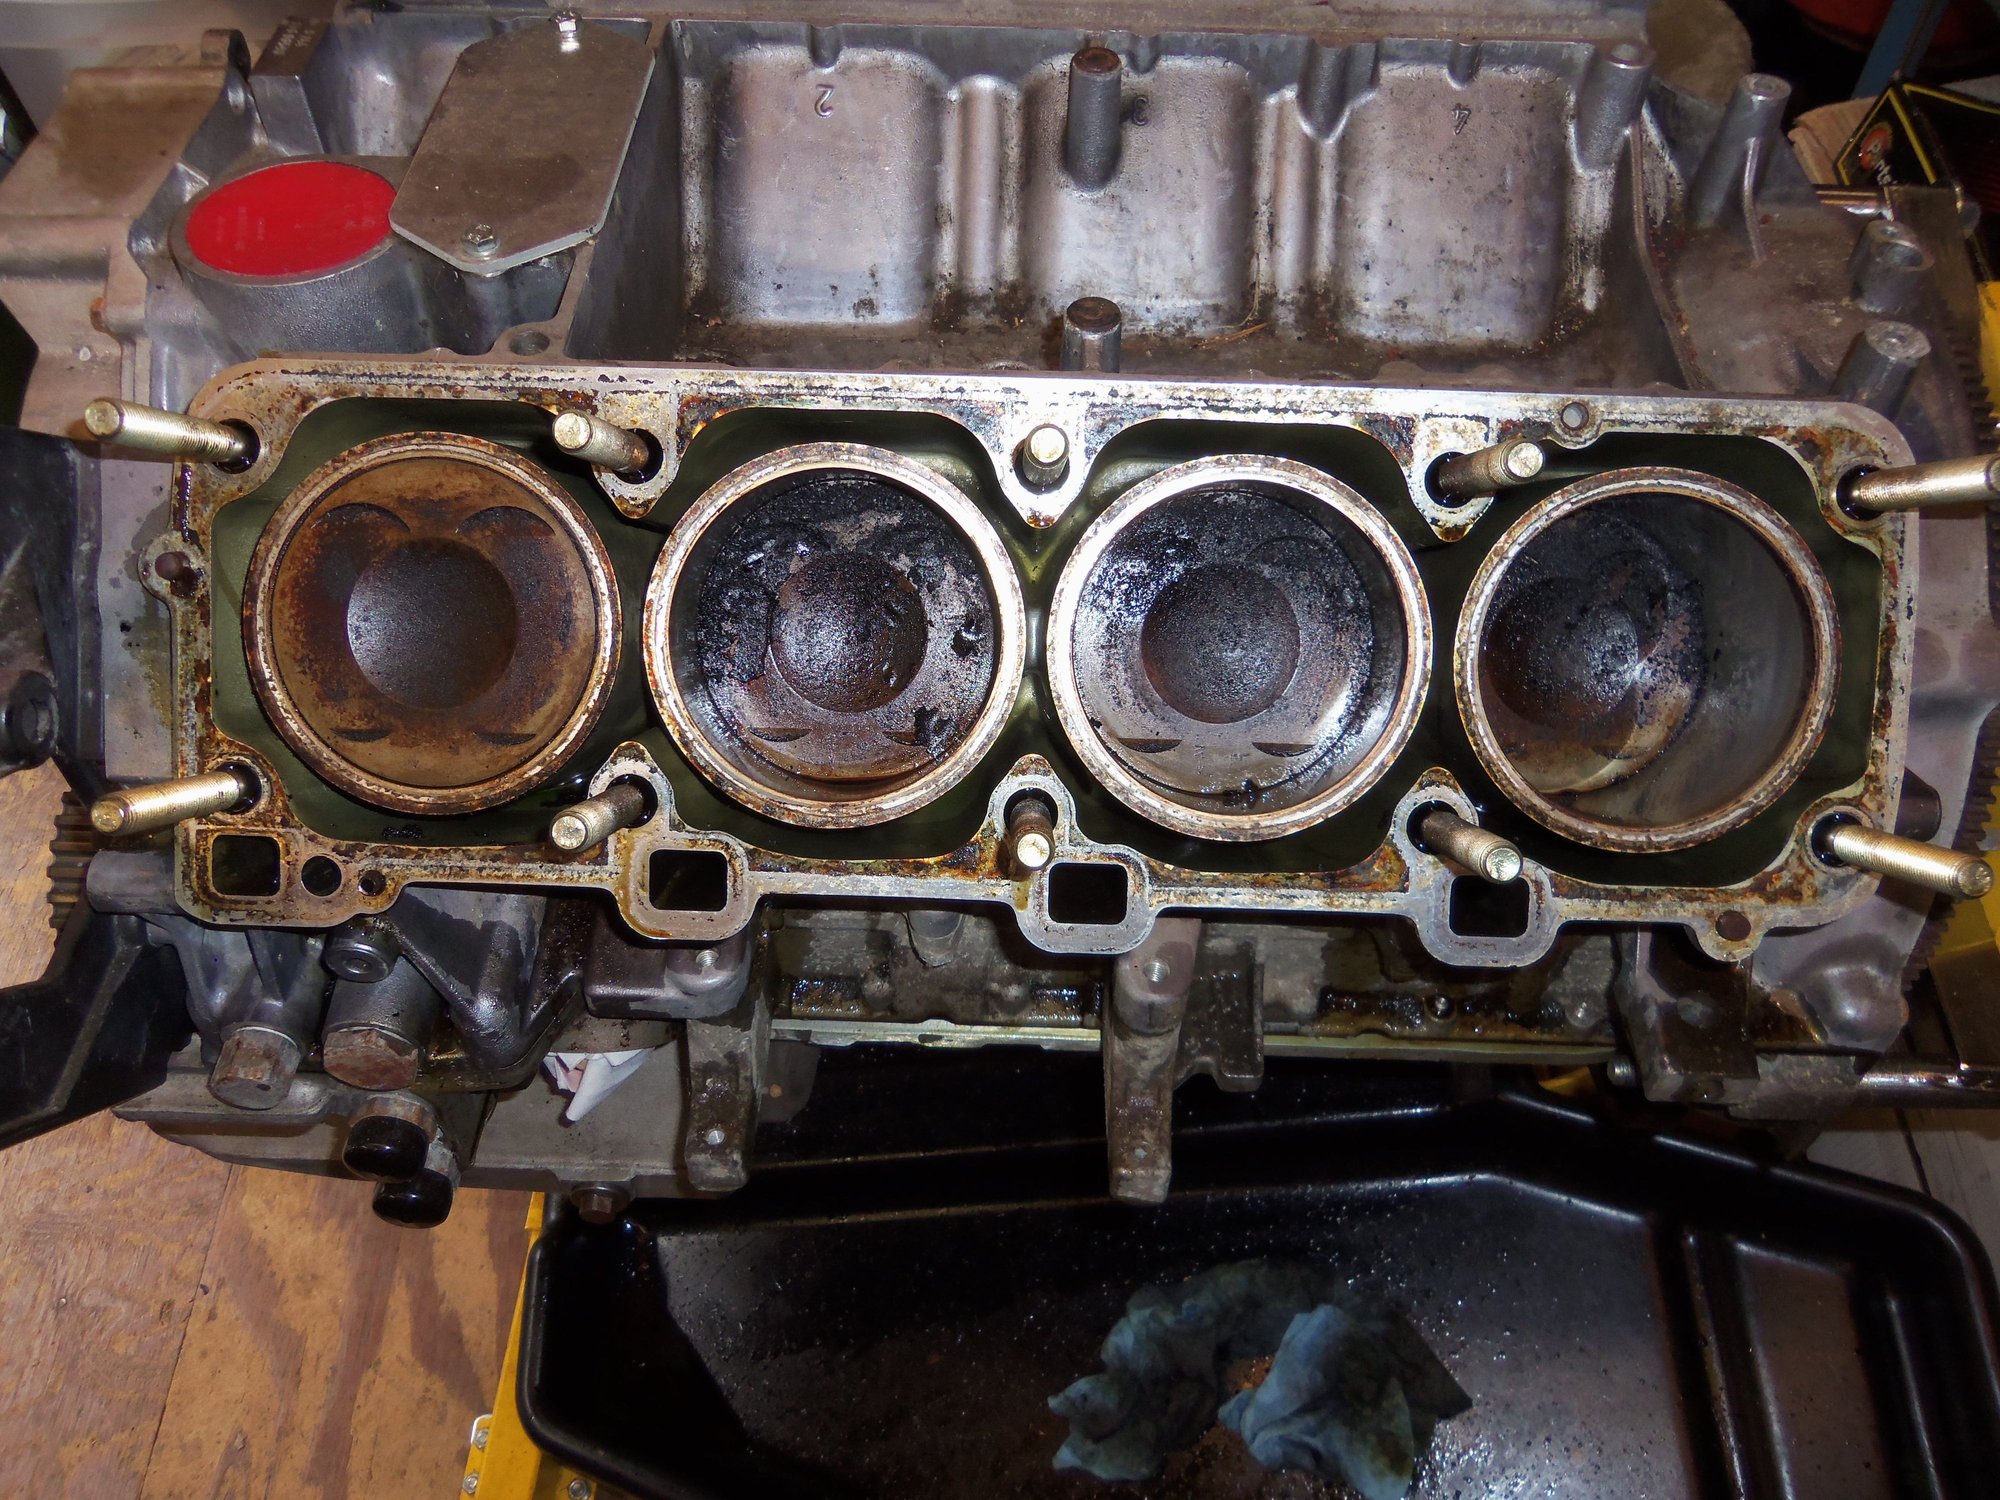
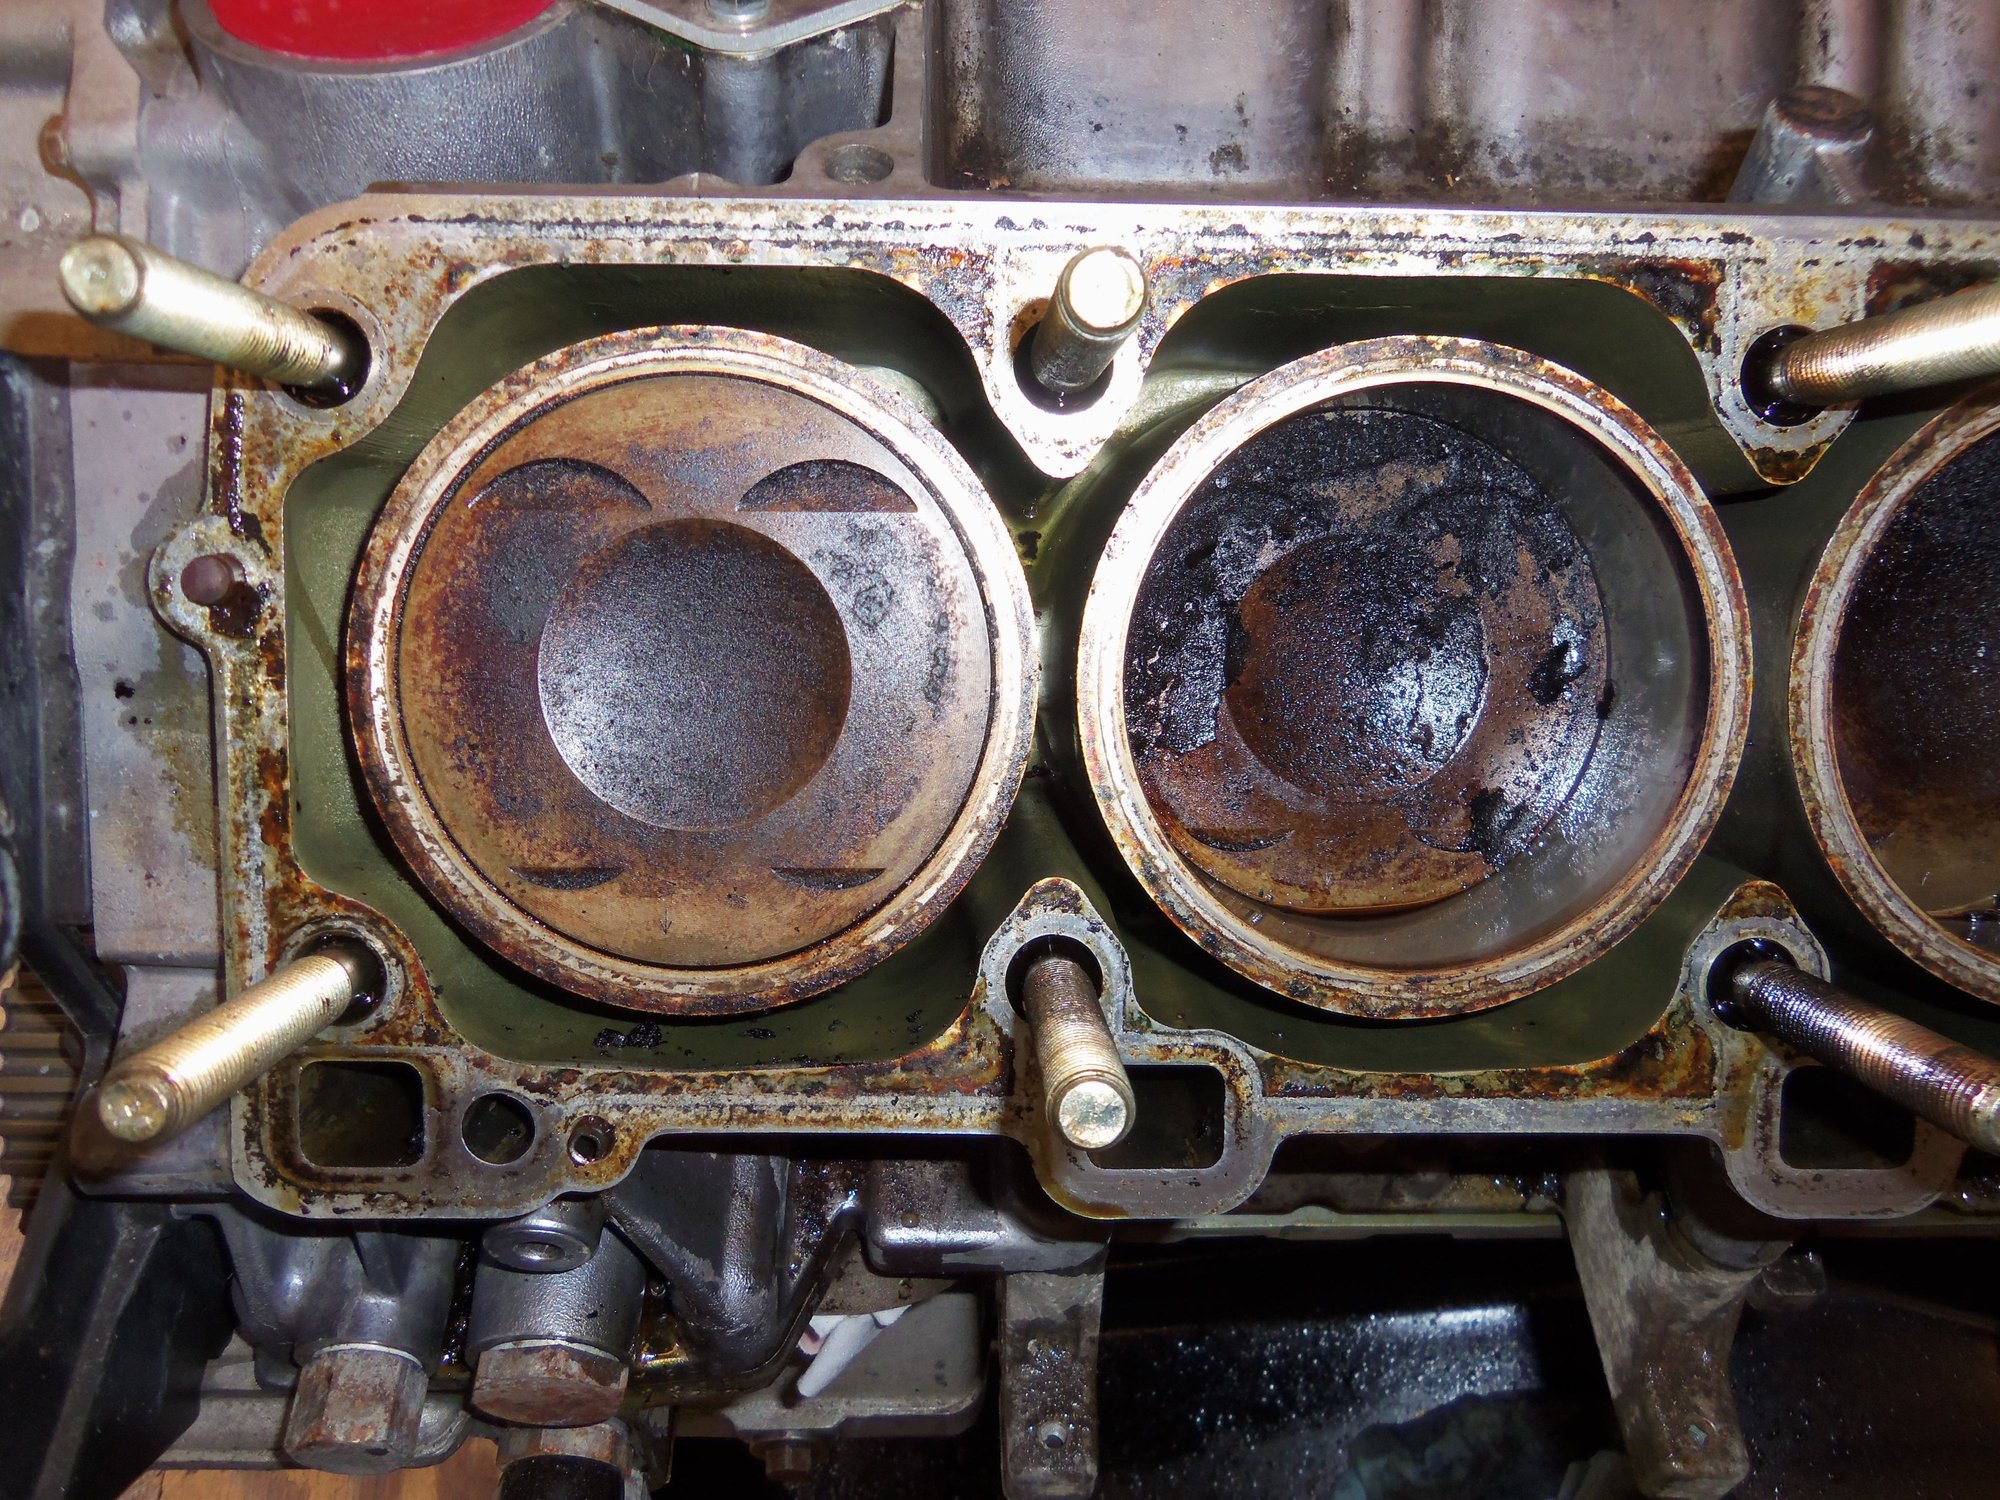
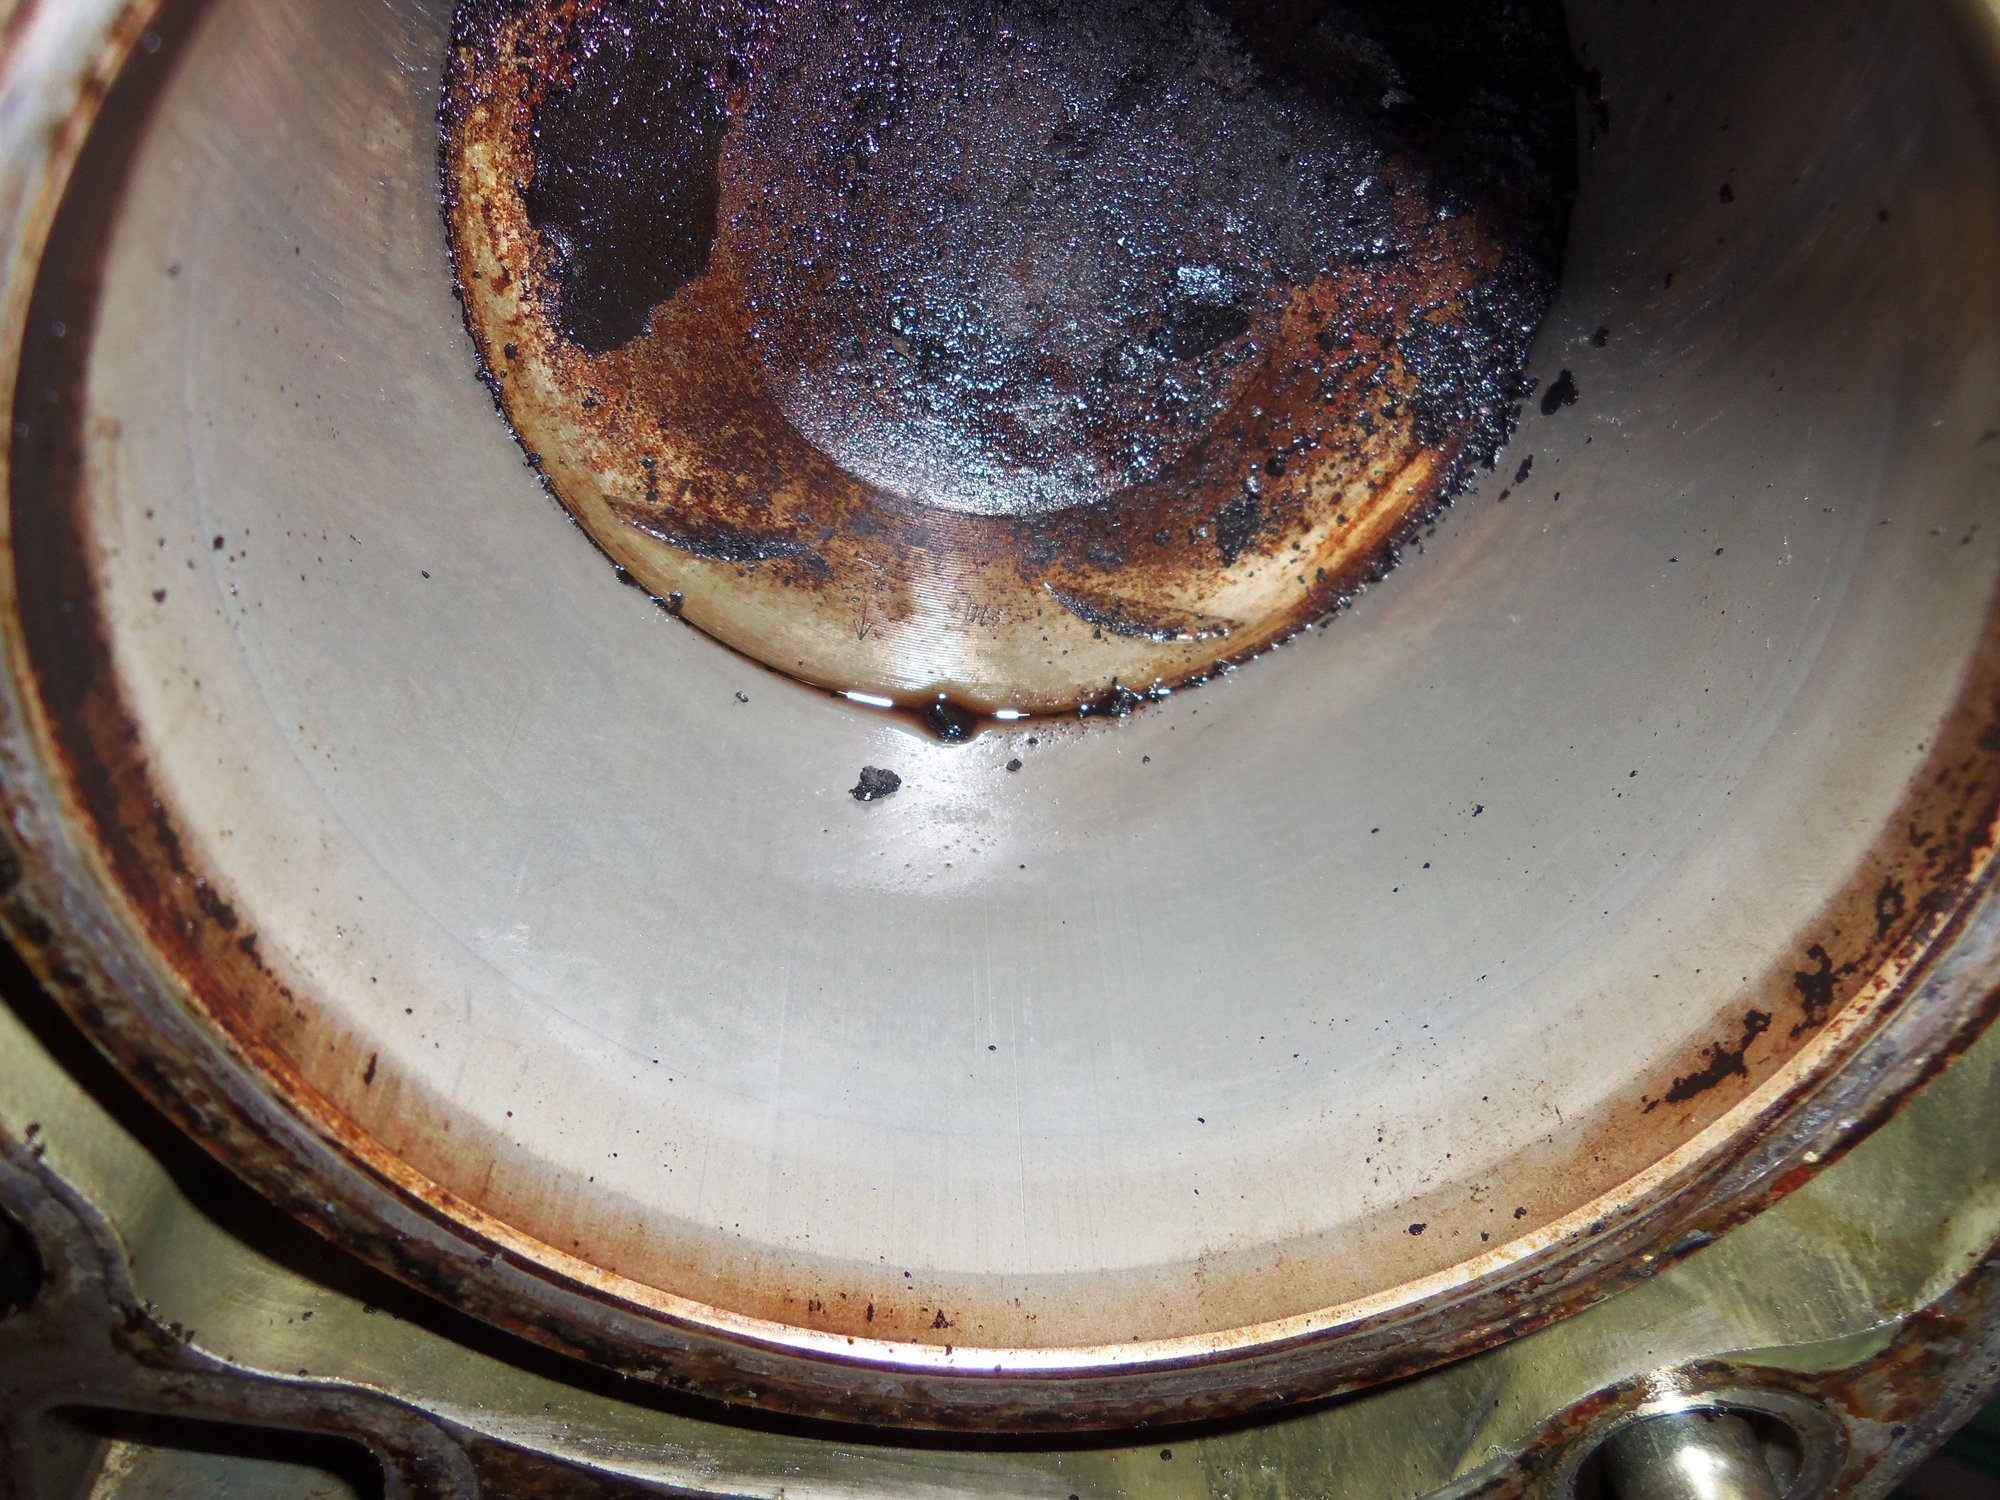
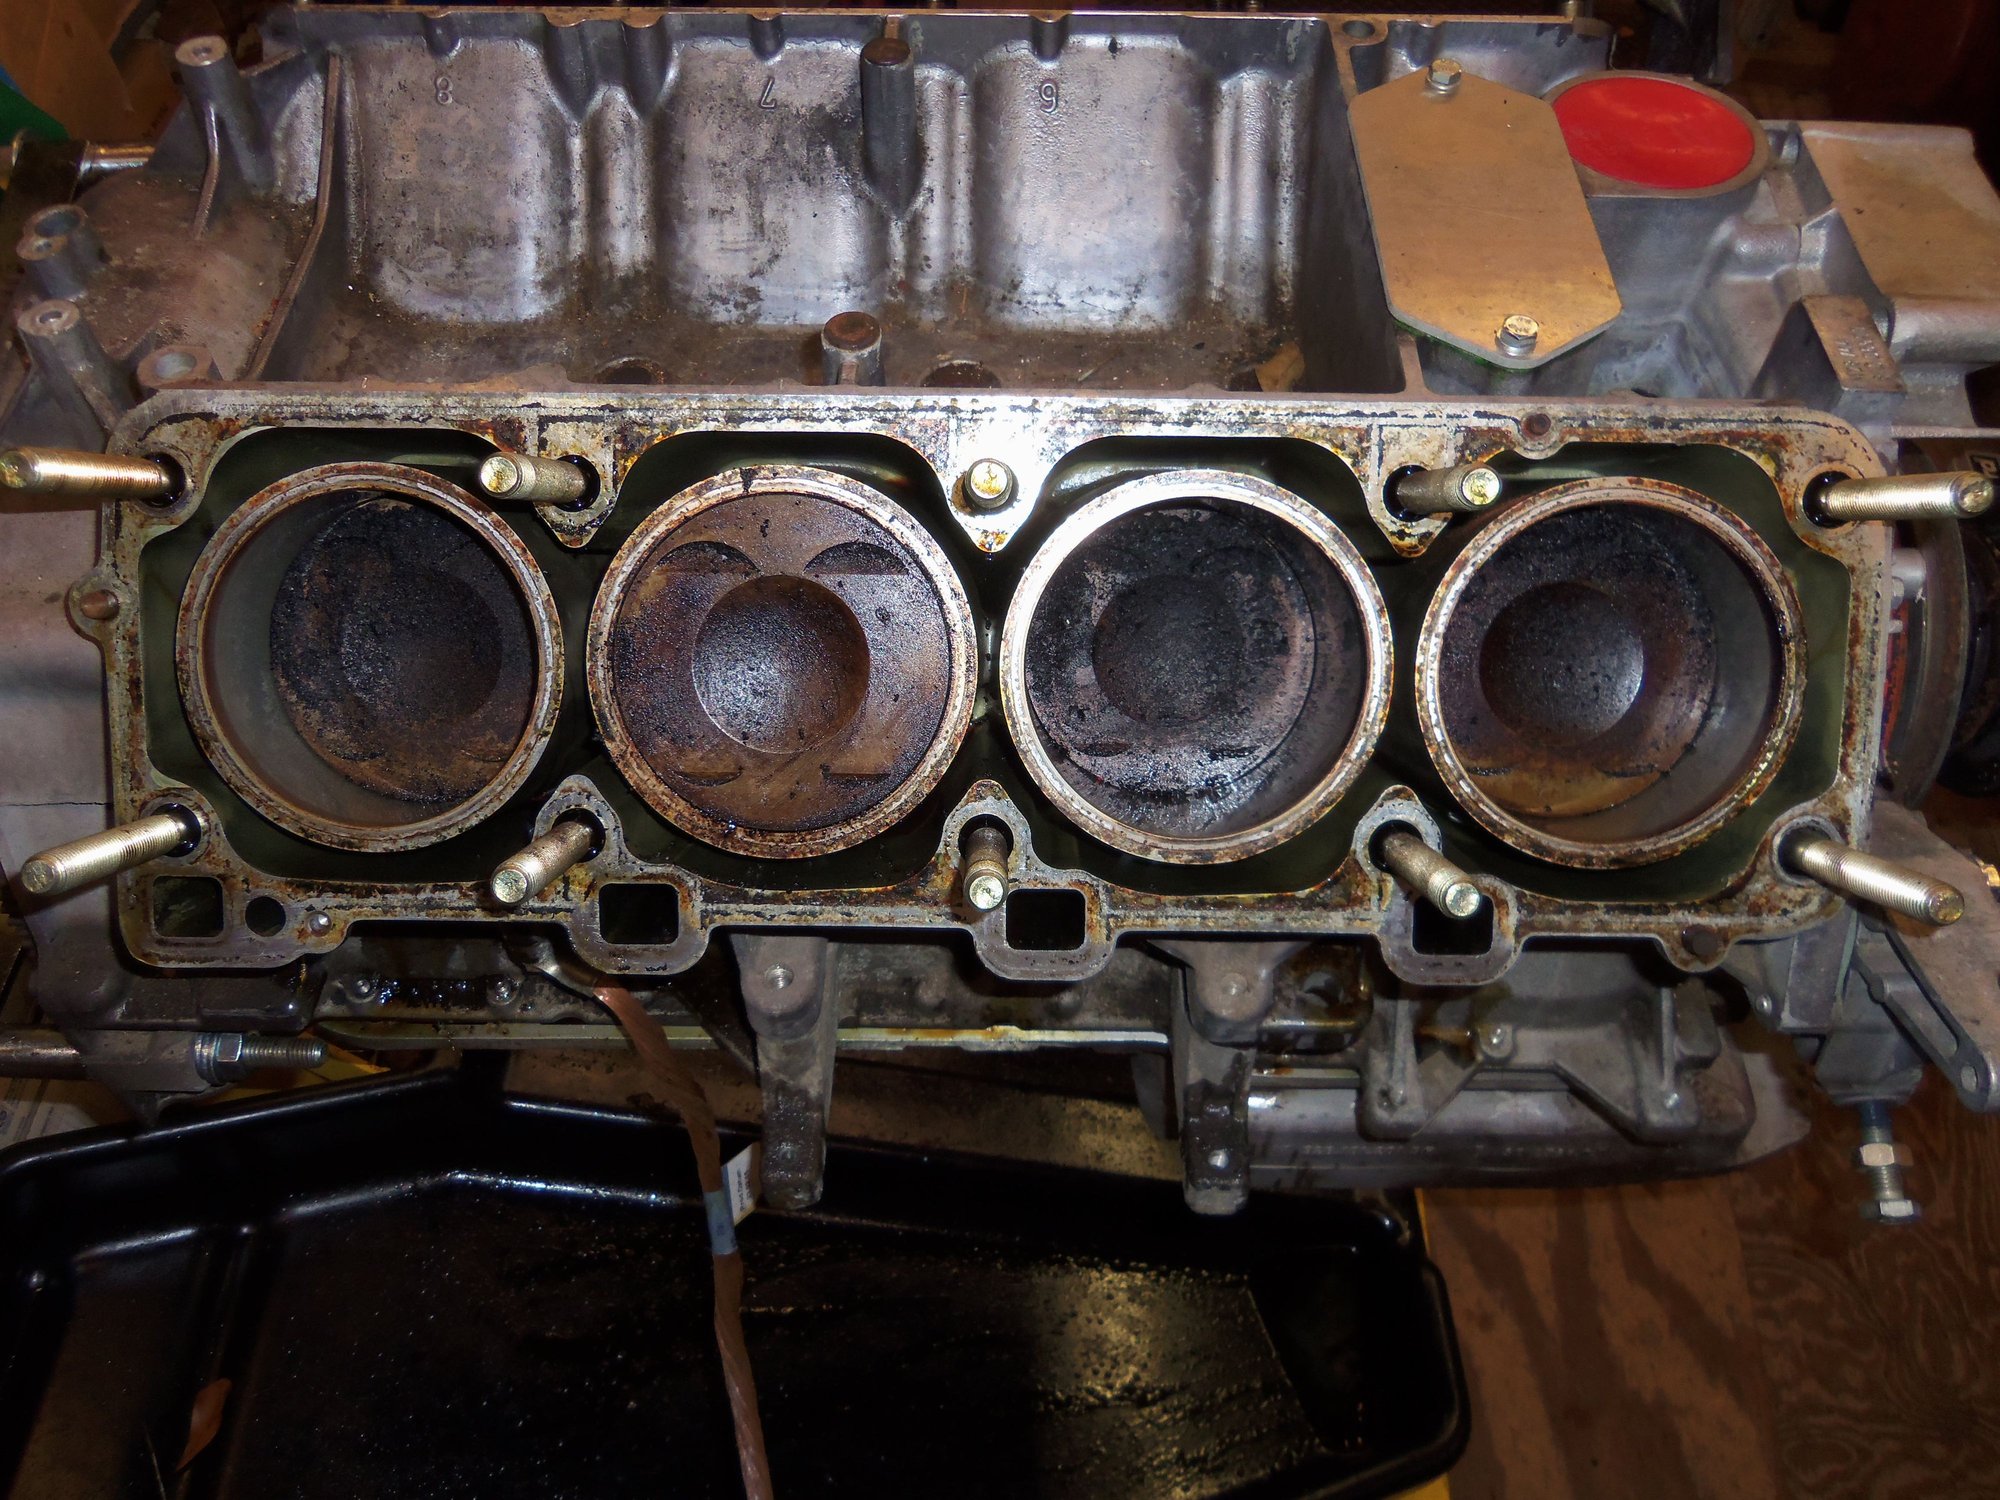
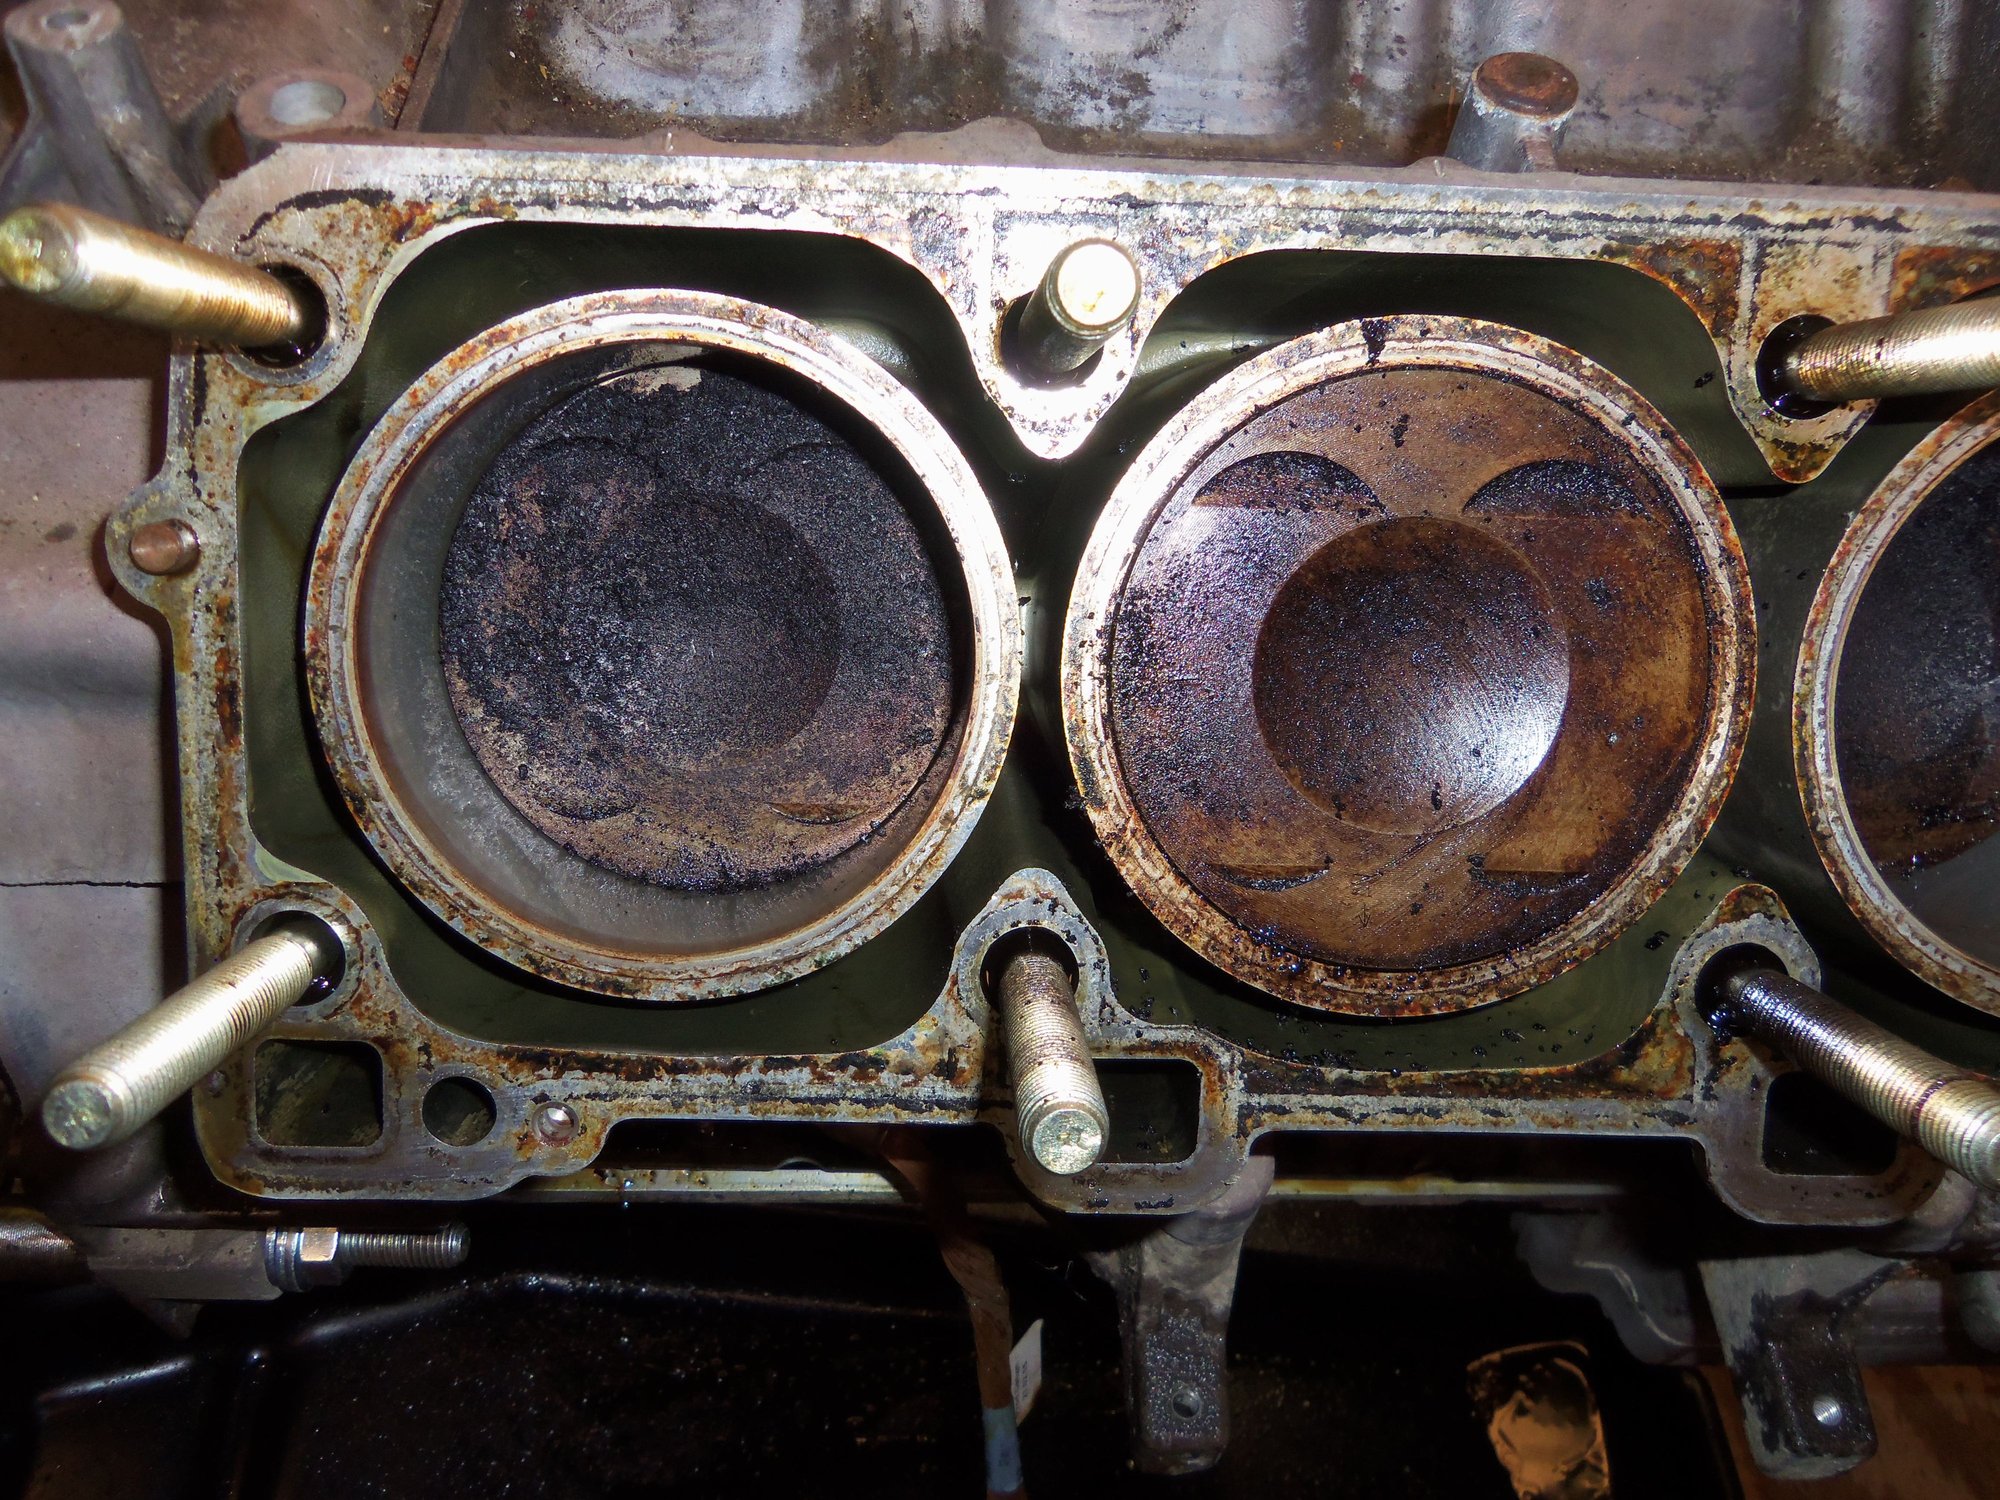
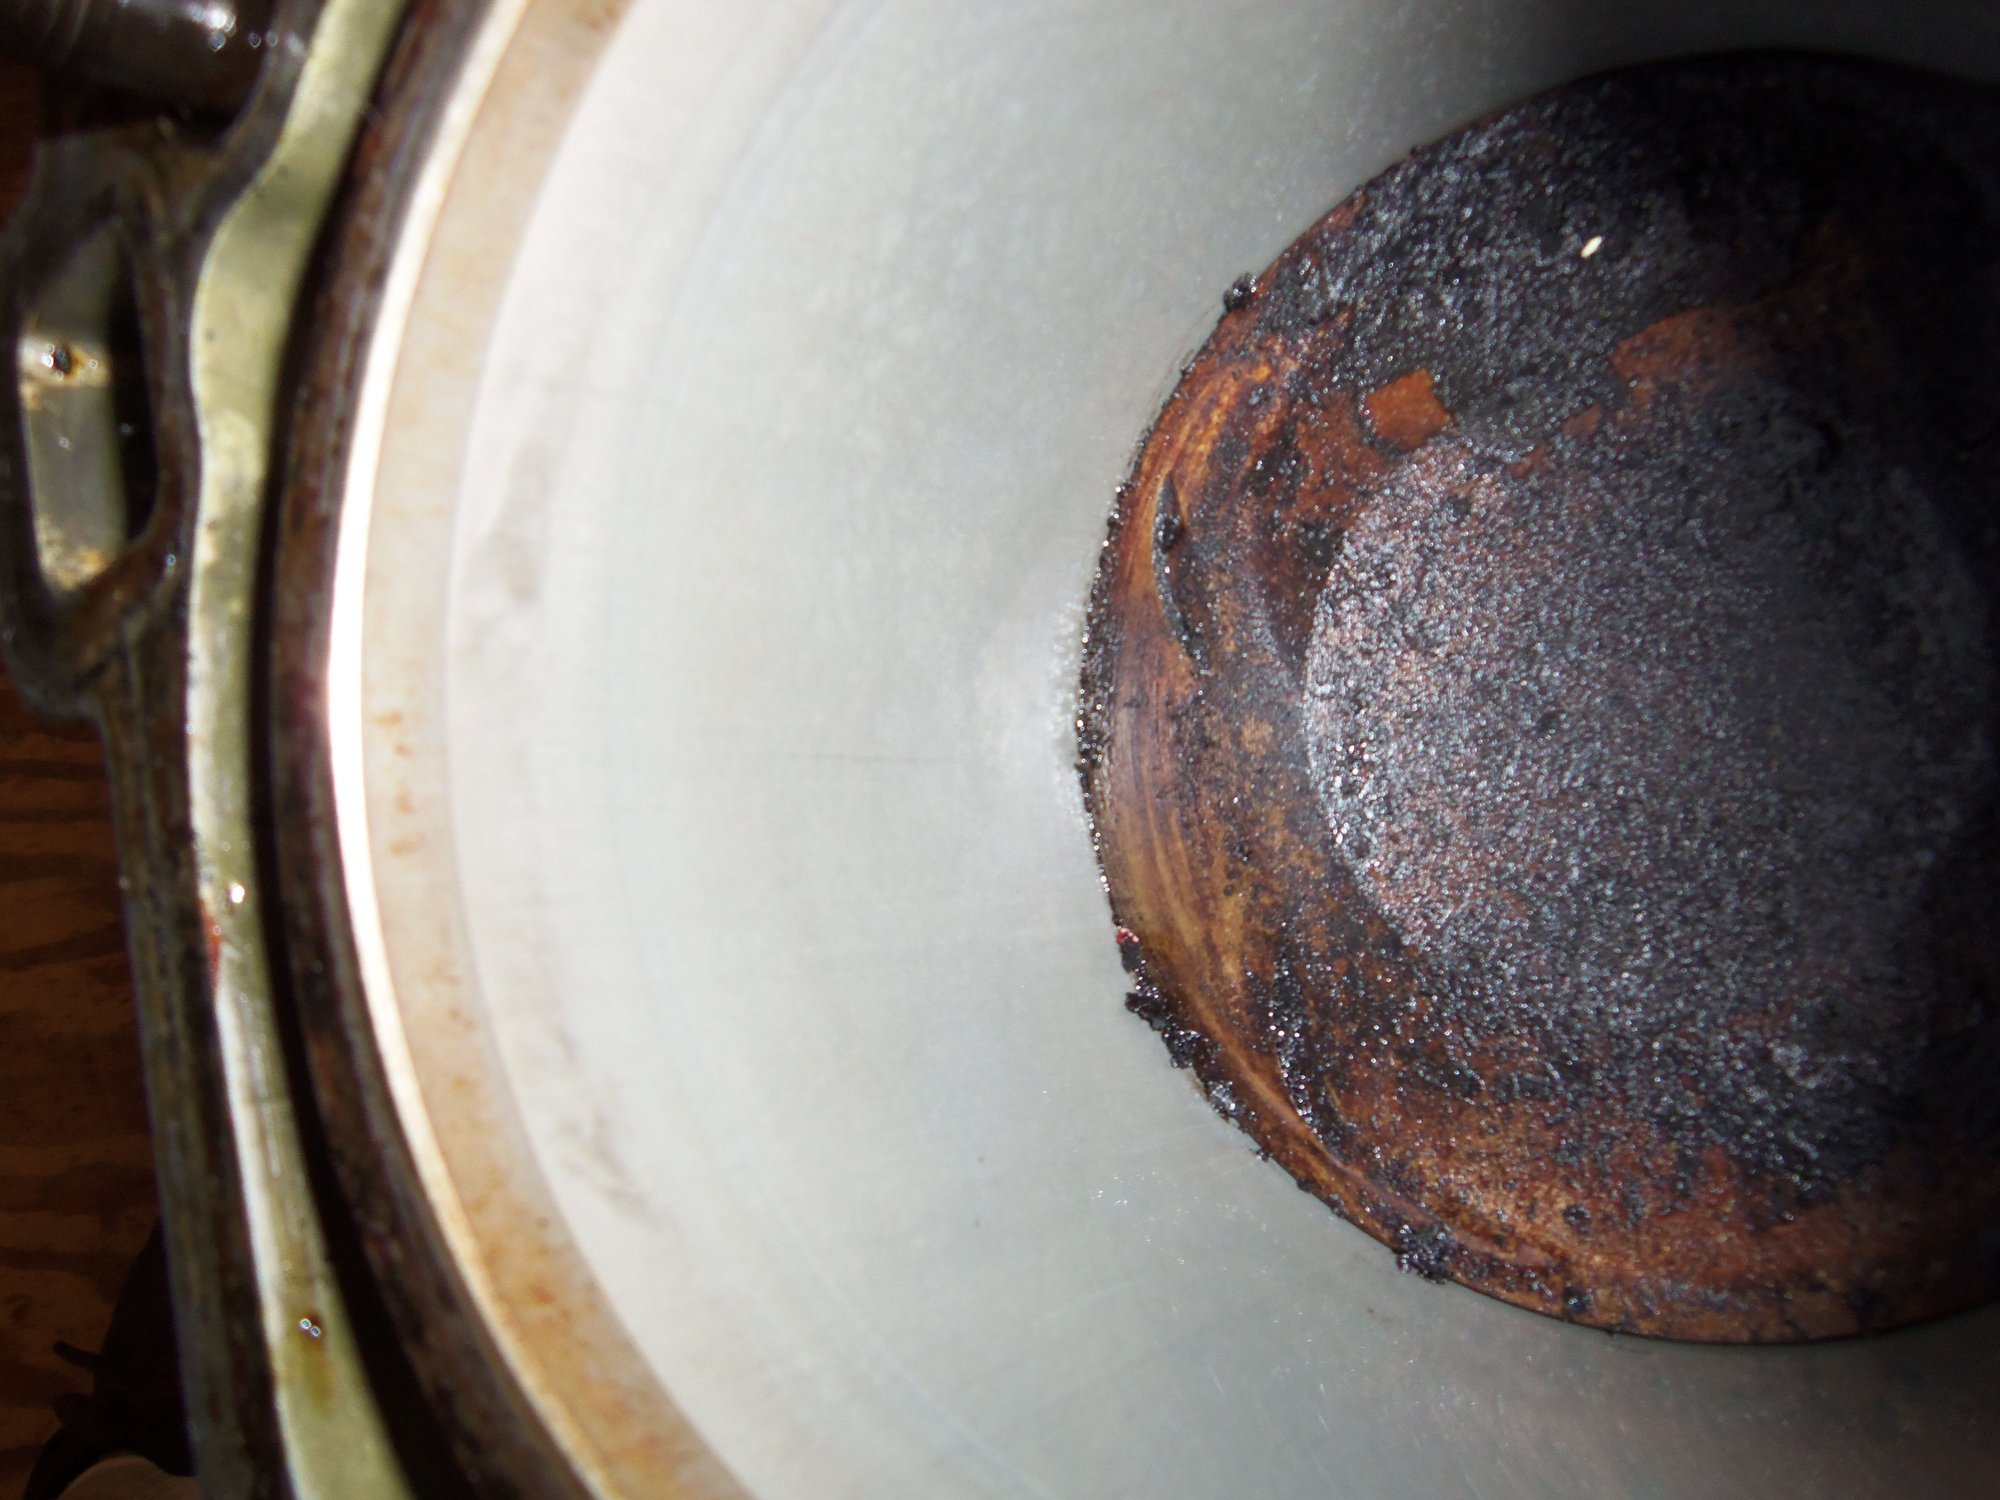
The tops of the pistons looked reasonably clean, for a 30 year old engine. There was some carbon on the crowns, but alot of it just flaked off. That may or may not be due to the MMO from last month.
I will decide how to clean the piston tops after I decide whether I am replacing the rings.
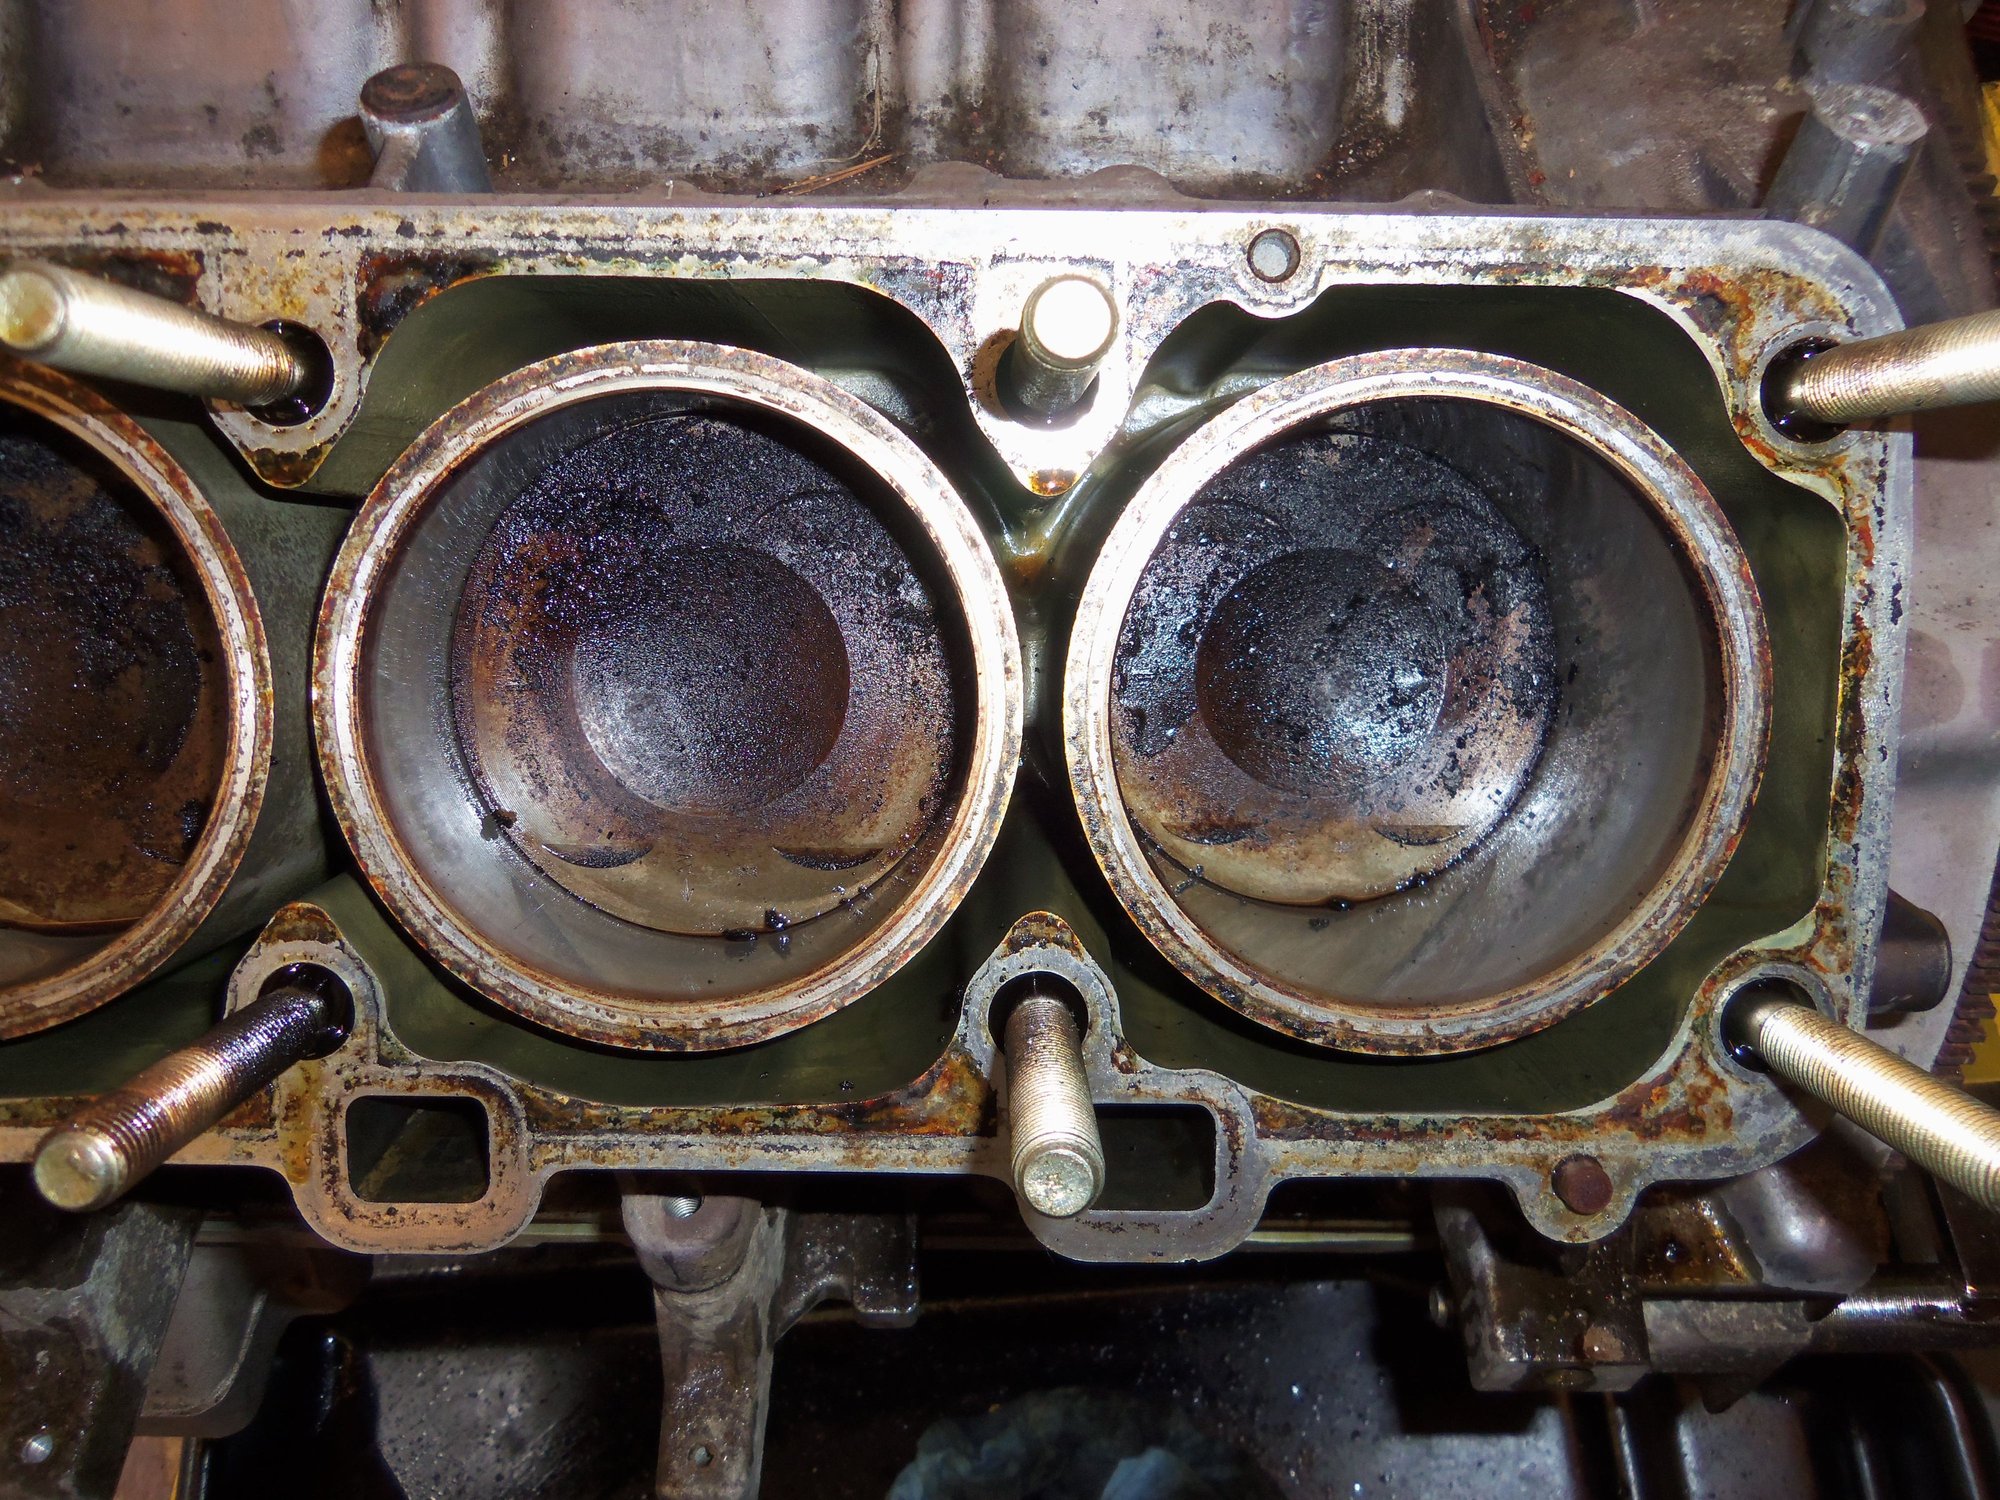
I did not turn the crankshaft during all this, so I did not look at all the cylinder bores. The ones I could see looked OK. I saw no obvious scratches. I will look much closer tomorrow.
QUESTION: When I am looking at the cylinder bores, other than scratches, what should I be looking for to suggest I replace the rings?
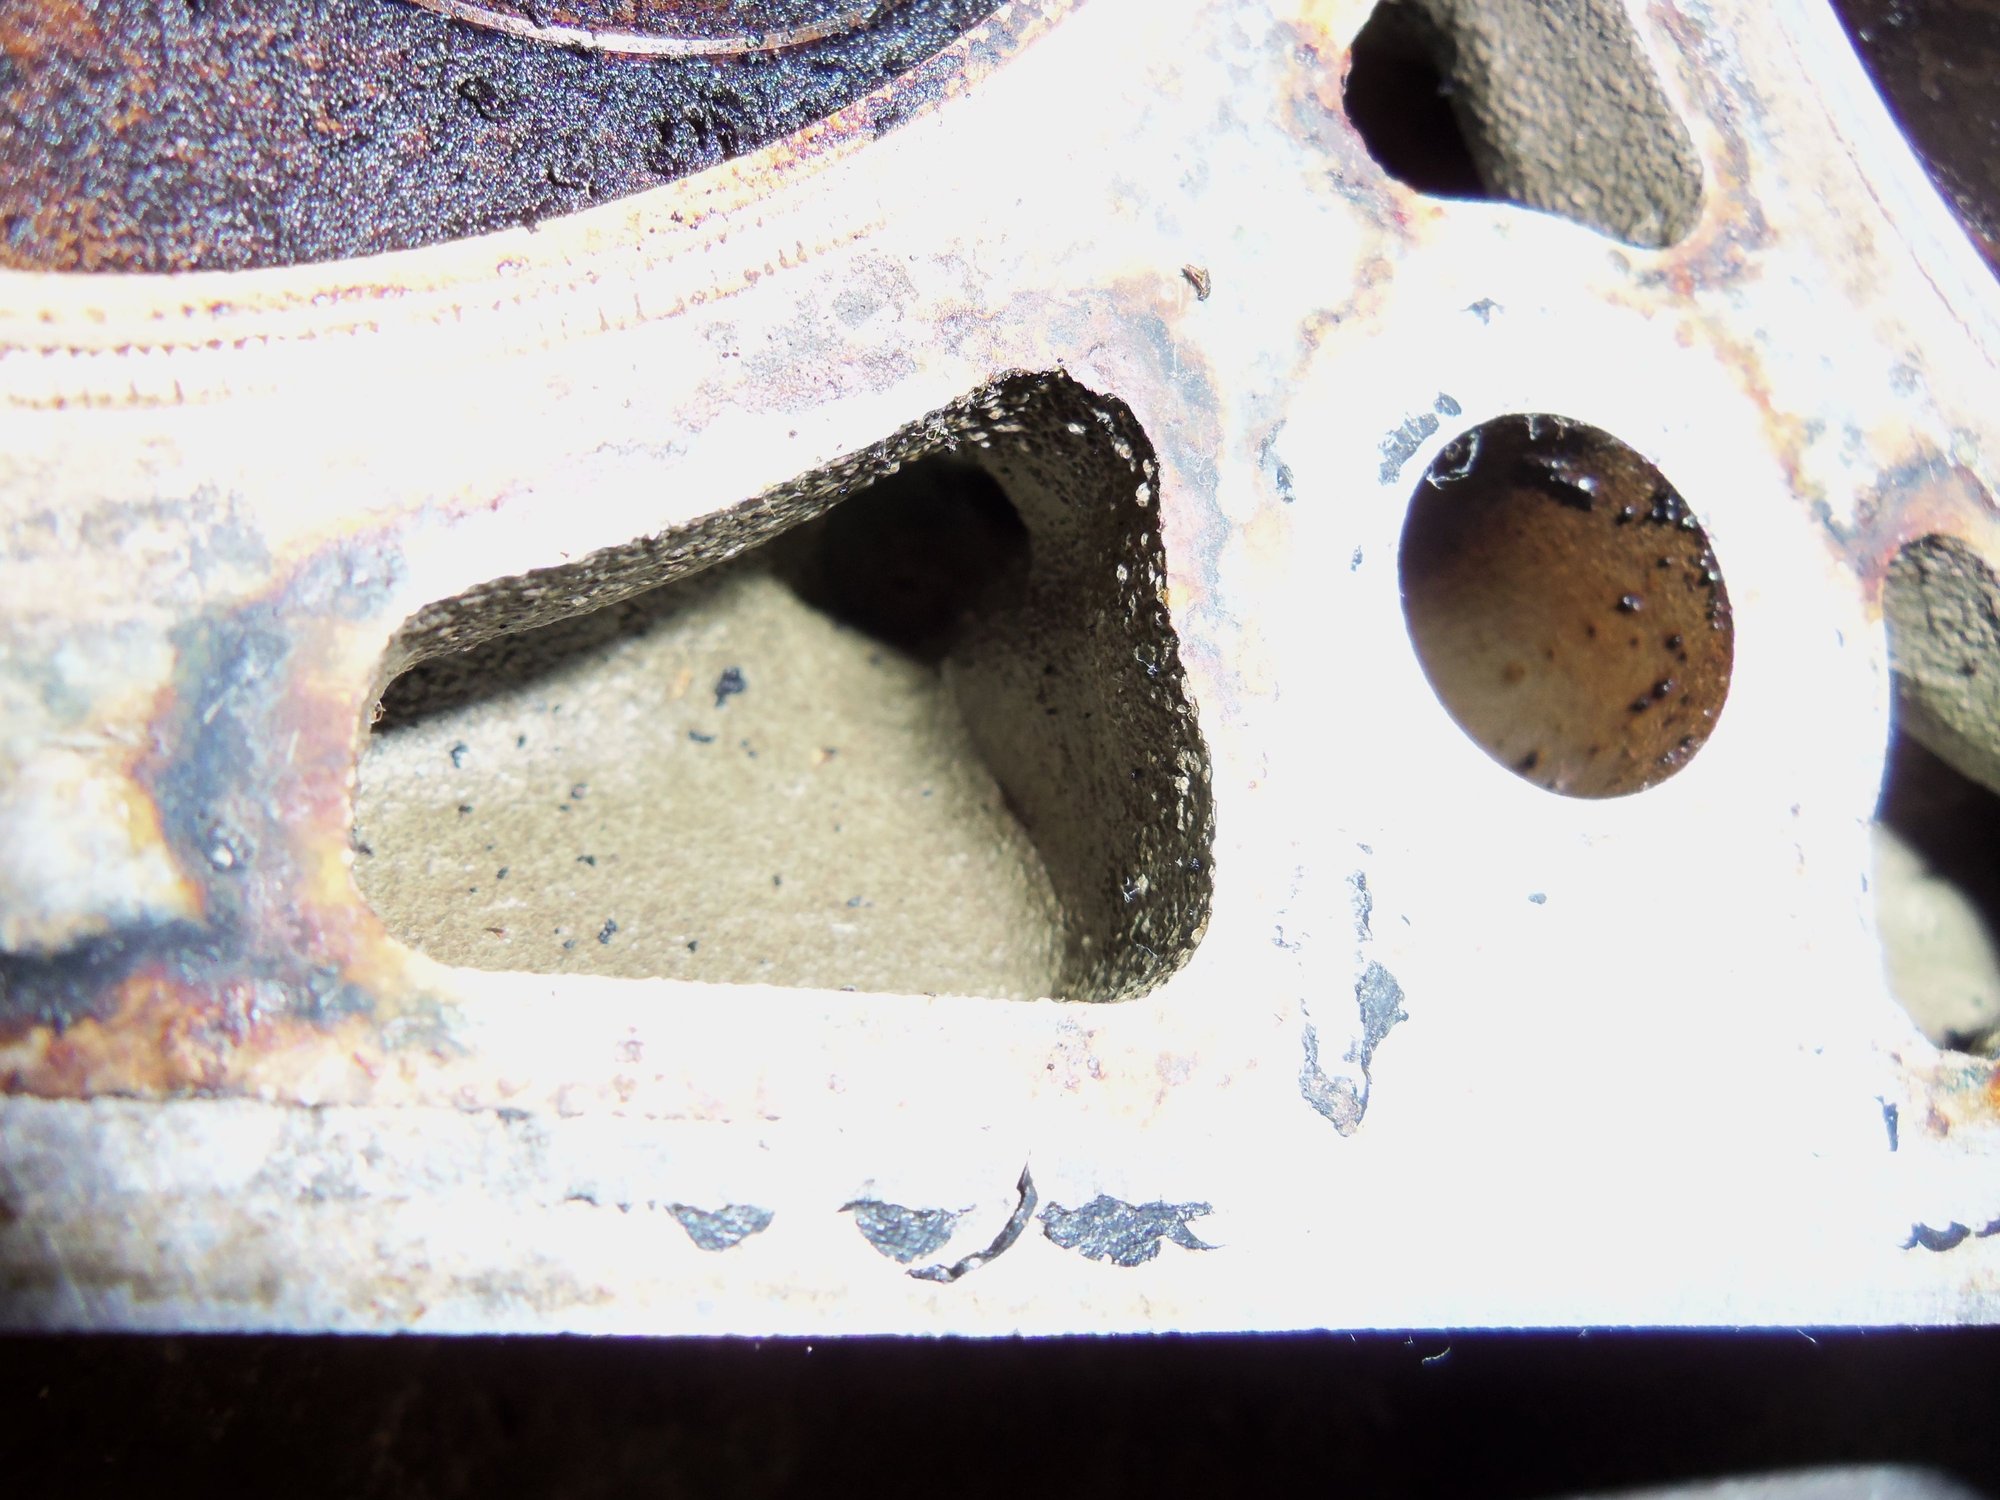
Looking in the cooling passages in the head and block, there is pretty much no corrosion or scale build up. PO did and EXCELLENT job keeping this engine up.
First view of head gasket in 31 years.
First view of cylinder head deck surface. Much better than I expected.
I spend a little time with a razor blade.
Coolant passages are free of corrosion and scale.
Intact head gasket! Unexpected... This is the cylinder head side.
Porsche emblem.
Reinz name.
Engine block side of head gasket.
Block surfaces don't look too bad.
Tops of pistons are not too terrible.
No corrosion or scale in block coolant passages.
Cylinder bore does not show any obvious damage.
Stud started to loosen moderate pressure applied.
No corrosion on the removed cylinder head stud. All the rest look pretty much the same.
I want to clarify something: To me, the deck surfaces on the driver's side(and to be documented in a moment passenger's side head) look good. I don't see any horrible corrosion.
Yes, there may be some corrosion lurking under the head gasket coating material that is stuck to the head, especially in the areas at the tops and bottoms of the combustion chambers.
I expected these heads to need extensive welding and machining. I can certainly live with less welding and machining.
So, don't think I am an idiot, just inexperienced.
Flush with my success on the driver's side cylinder head and gasket, I tore into the passenger's side.
Normally, in my world, that kind of enthusiasm is tempting fate. Mr. Murphy hears your call and comes knocking.
This time, it all went well.
The passenger's side was pretty much the same as the driver's side. Same condition on everything. Only difference, none of the cylinder head studs came loose.
QUESTION: Three of the exhaust manifold studs came out of the heads while removing the manifolds. They unscrewed cleanly, and showed no corrosion. Would it be a good idea to go ahead and remove all the exhaust manifold studs from the heads prior to machining and such? I did note some corrosion at the ends of some of the studs. The junk heads have some exhaust manifold studs that have no corrosion. I could mix and match pieces for a set of studs...
I will let the photos describe the passenger's side cylinder head and gasket:
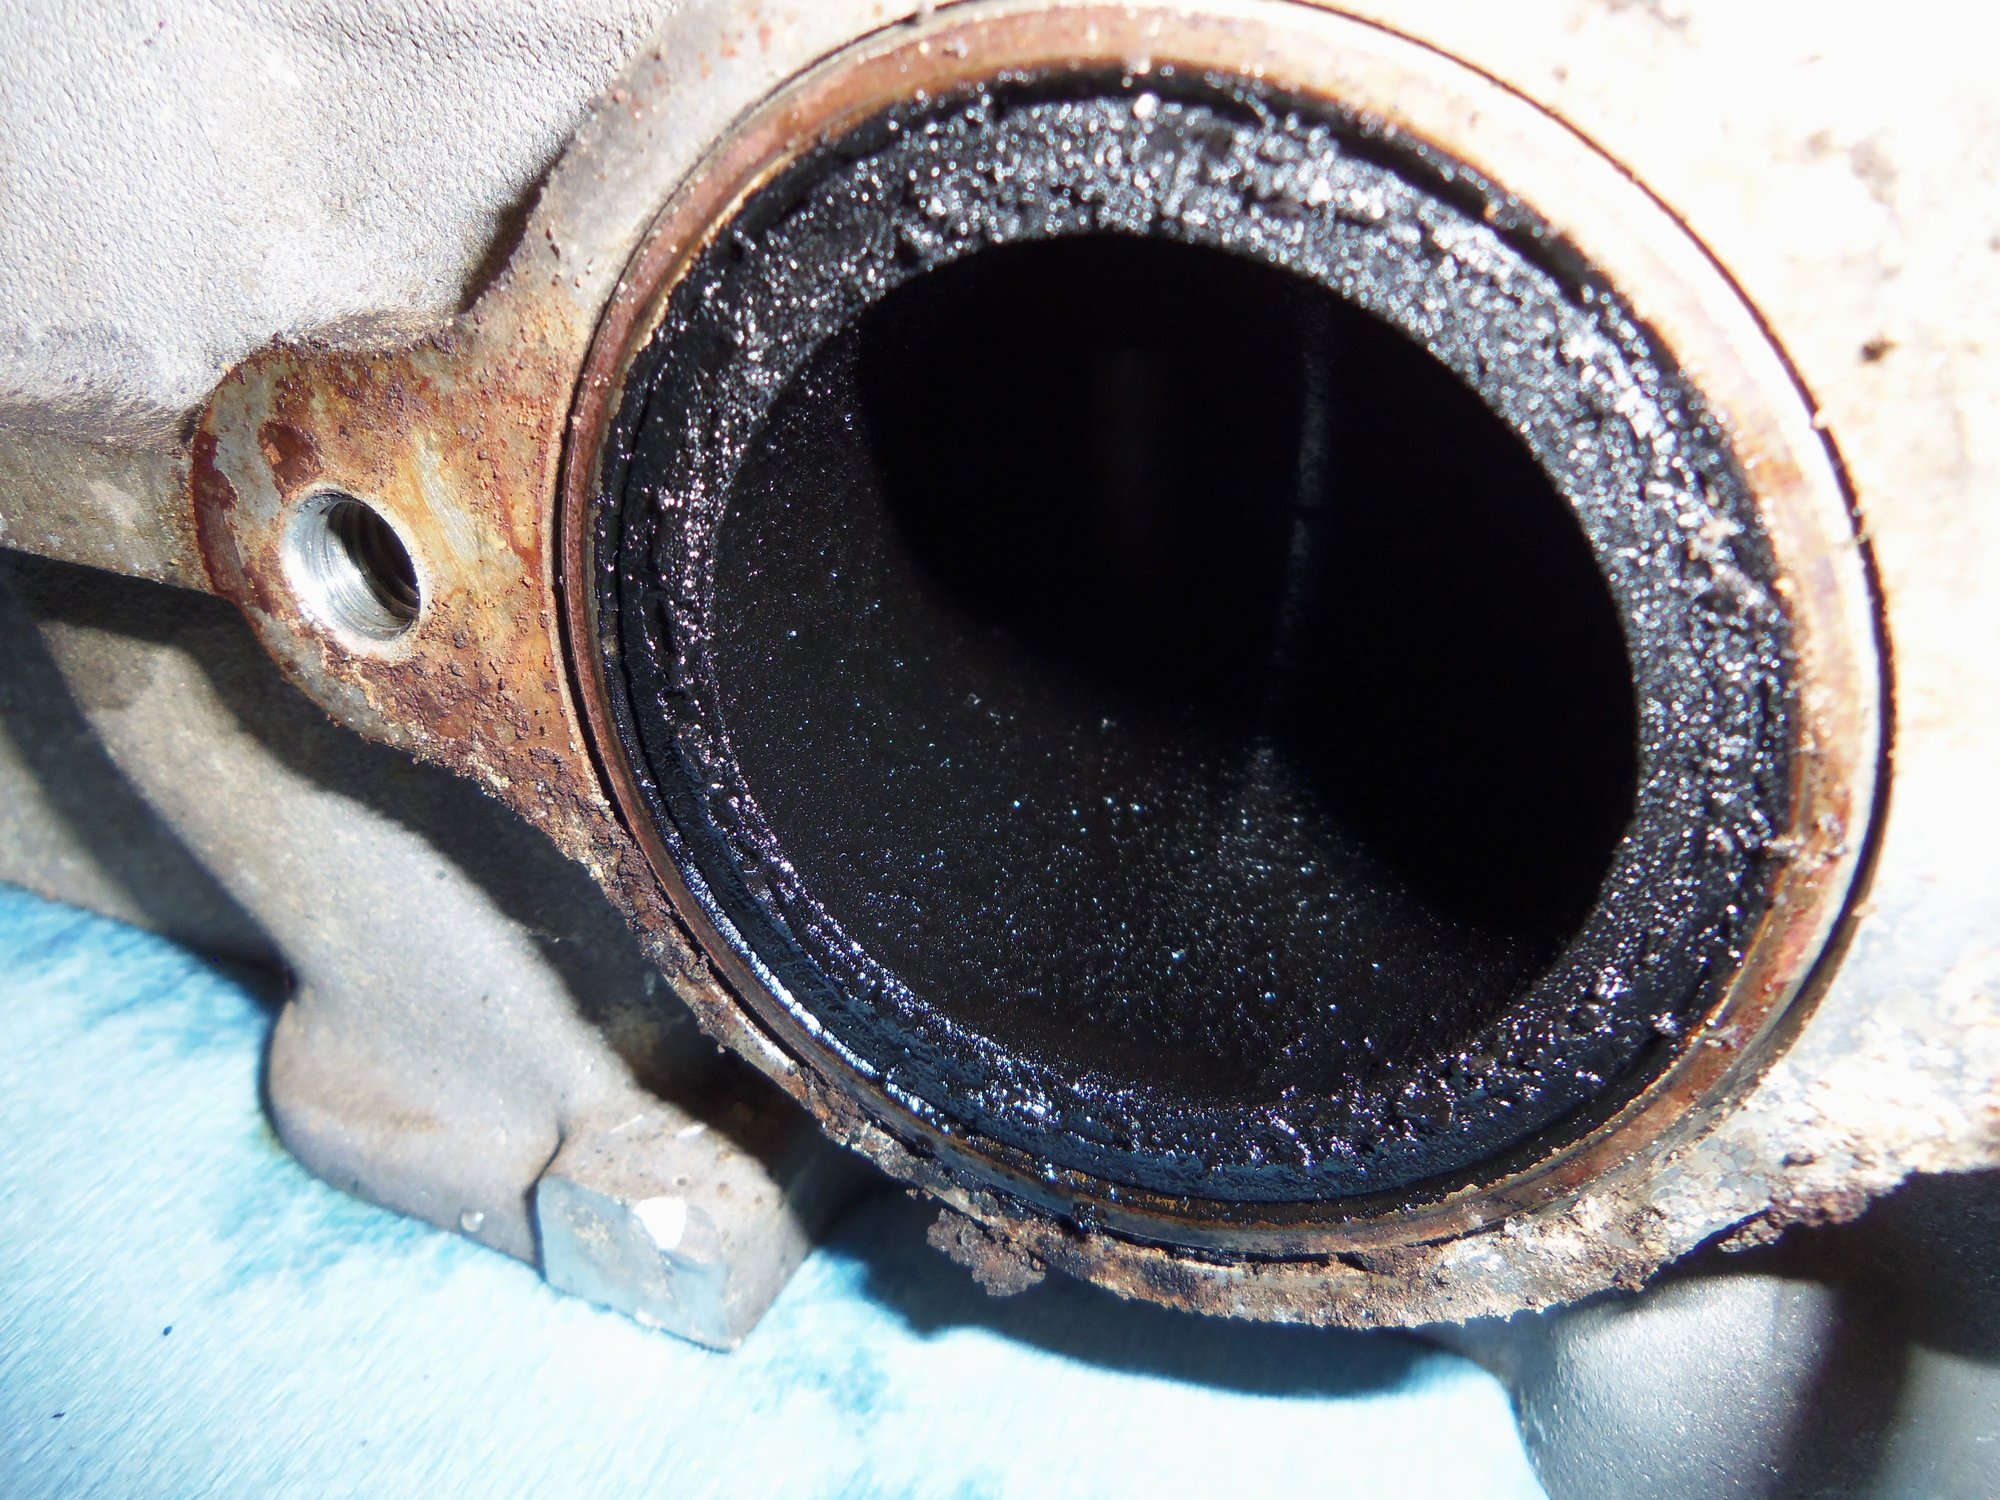
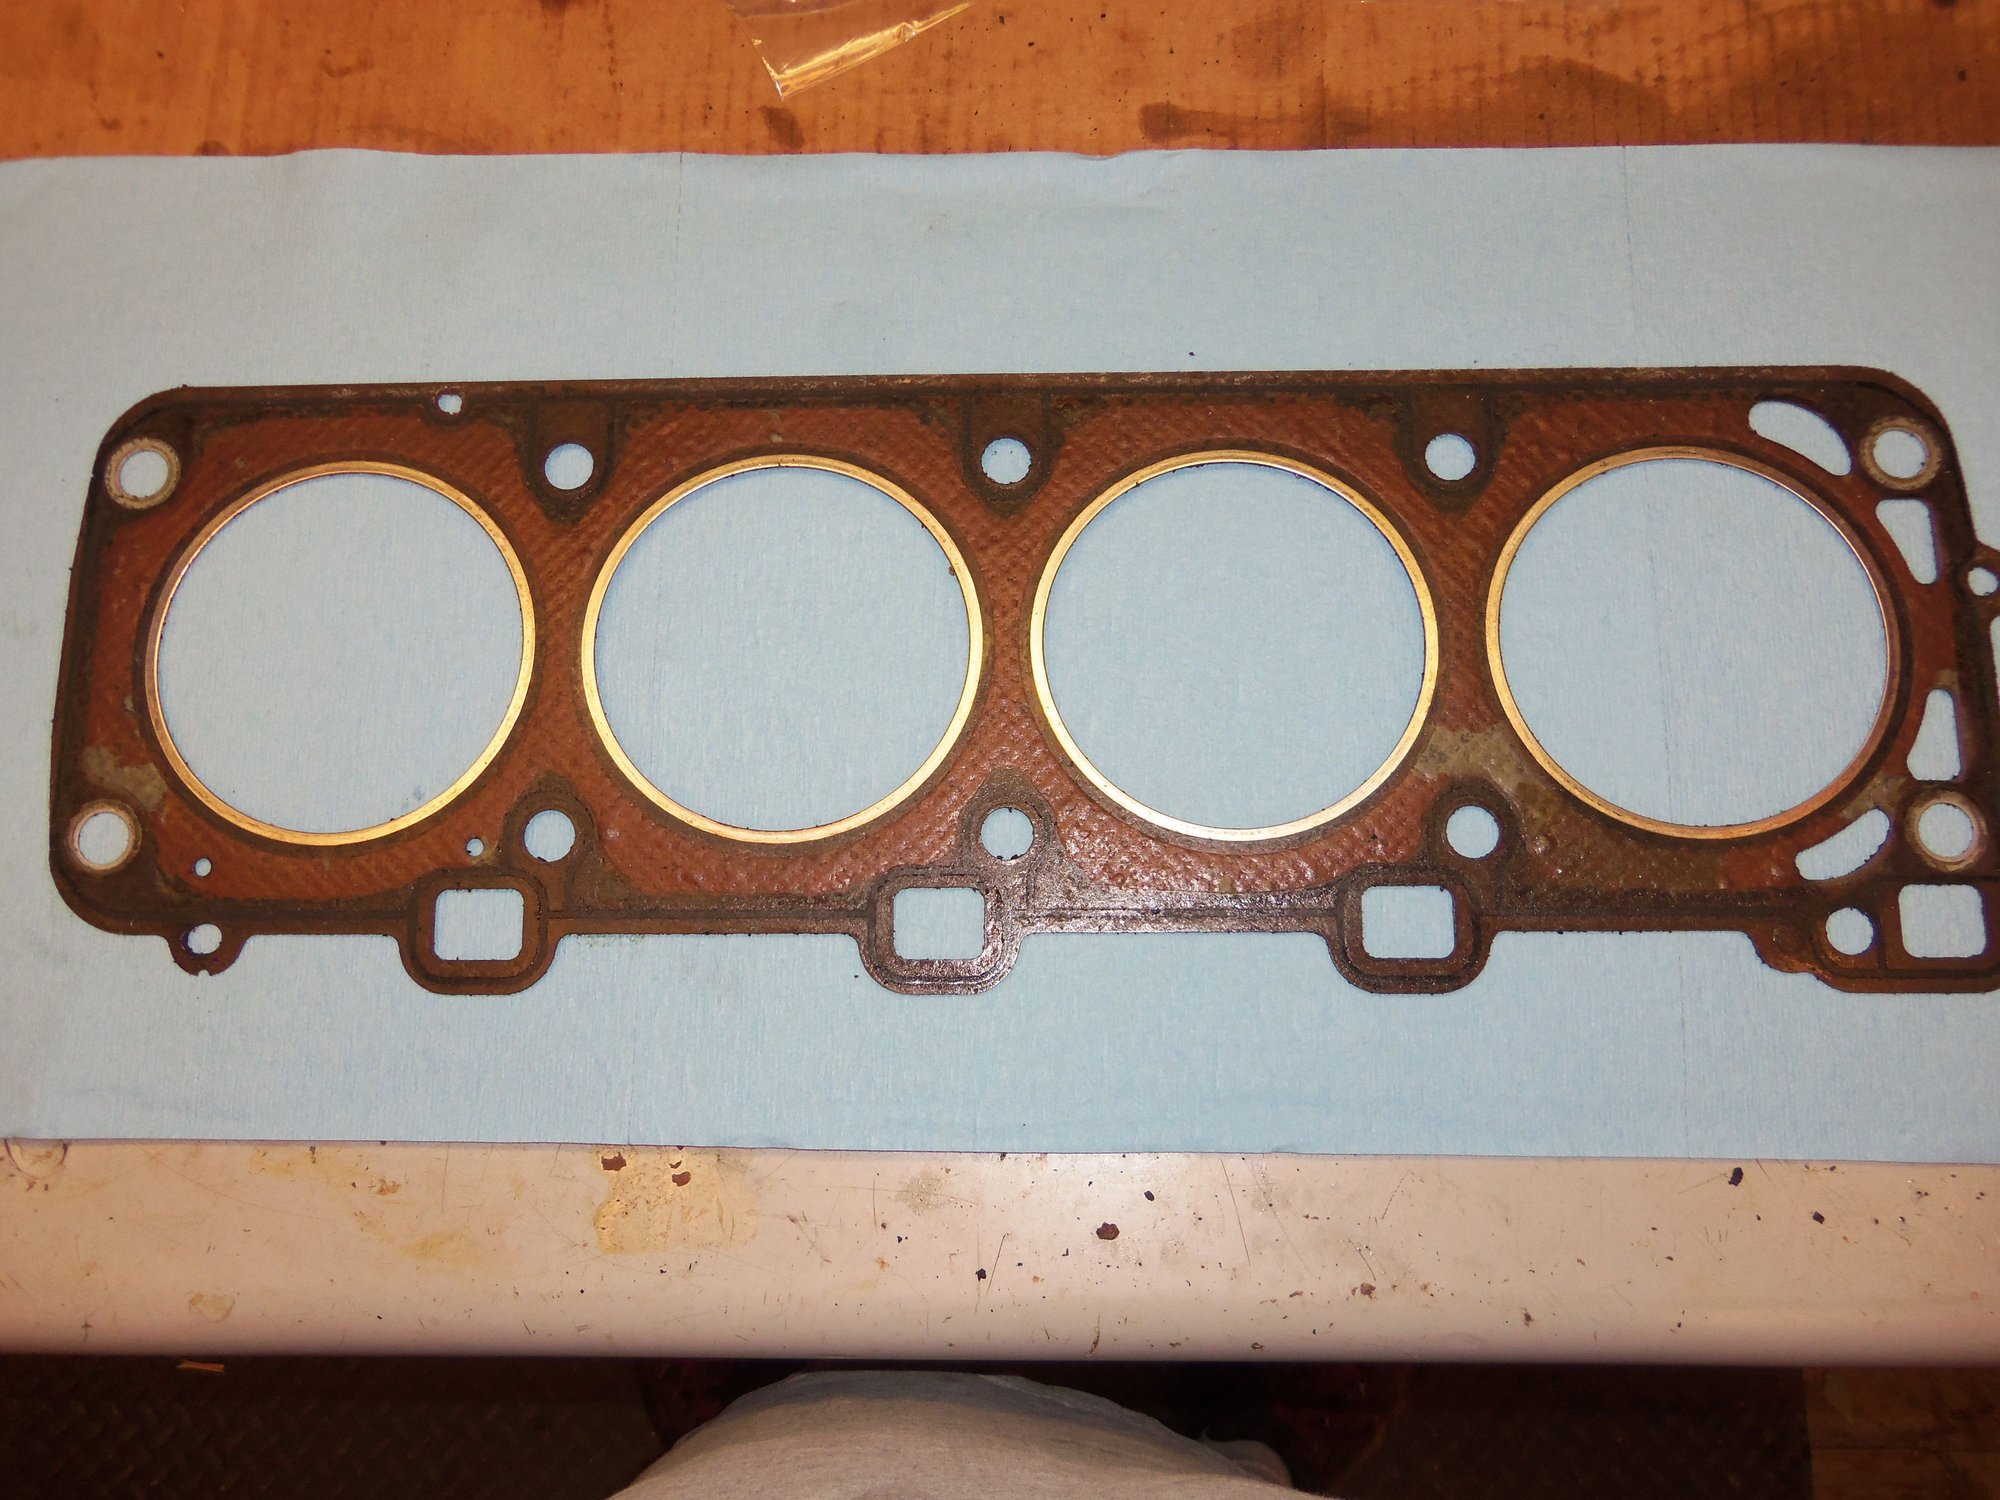
Cylinder head gasket is intact.
Cylinder head deck surface does not look too hateful.
Coolant passages are corrosion and scale free.
Head side of gasket.
Porsche emblem. To my understanding, this means the gasket is OEM installed at time of assembly.
Reinz name.
Engine block side of gasket.
Block deck surfaces don't look too bad.
Piston tops look OK.
No major flaws in this cylinder bore.
I understand these past couple of posts are heavy on pictures that may be repetitive. However, I want those pictures to be seen by people who have a clue. I want you guys to look them over and tell me if and what I have missed.
So...as it sits now, the heads are off and everything is ready for scrubbing. I have many long hours of razor blading sealing surfaces and toothbrush & mineral spirits srubbing surfaces that are not.
Progress...
Tomorrow, I will turn the crank and closely inspect all 8 cylinder bores.
And start cleaning...
Those gaskets are not original. When I took mine apart, one side had the original and the other a replacement gasket. The original gasket has Porsche scrips on covering the entire gasket like they do on the Porsche scrip seats.
no metal should touch the pistons, or bores,
clean off the carbon with carb cleaner and a micro fiber towel,
no scotchbrite pads or metal tools.
pour in some ATF, it will let the rings get unstuck
otherwise clean the HG surfaces,
check the deck height for flatness and put it together ,
no further disassembly is needed for the block.
Since it looks like the heads may have been off this block
Service the heads and verify that they are still in servicable condition.
IE they have not been cut to min spec,
do a minimum cut on them.
See the WSM to determine head thickness measurement.
You may need thicker HGs if the heads are cut to min spec.
Get a spray can of Permatex gasket remover and use it where you want to remove carbon. Spray it on for 5 minuted and you will able to just wipe off the carbon. Came across this by accident when working on my 996 engine 5 years ago.
Hmmm...head gaskets not original and possibility the heads have been off before. Sheeyat.
I will find a flat surface to set the heads on and measure their height as per the WSM.
Thanks, Chris! Just doing what others have done before me...
Stan, are you saying I should NOT use single edged razor blades to scrape the block deck surface? I understand about no wire brushes, scotchbrite, etc...
I have plenty of sacrificial microfiber cloths.
I have had some MMO soaking in the cylinders, but will put some ATF in as well over the next couple of months.
Roger has quoted me a set of the thicker head gaskets, just in case.
QUESTION: At 168,*** miles, should I be replacing the rings?
Regardless of whether the heads have been off before, they are going to the machine shop to be inspect/refurbished as necessary.
Imo000: I remember reading of your experiences with Permatex gasket remover in your 996 thread. I have kept that in mind, and will do so.
Also, to clarify, you are saying that Porsche OEM installed head gaskets have the Porsche emblem all over the gasket?
Mine look like Porsche replacements?
use a best quality flat razor blade held perpendicular to the surface for cleaning the head gasket surfaces,
no scothcbrite pads, on the these surfaces.
Dont go near the pistons with any metal tools or pads.
Some may disagree with this BUT, leave the rings alone.
The bores look good thus the rings are good,
this engine will run for a long time just the way it is.
before you know it you will be buying a new crankshaft

 10-31-2017, 12:31 PM